


popeye the sailor
-
Posts
15,981 -
Joined
-
Last visited
Content Type
Profiles
Forums
Gallery
Events
Posts posted by popeye the sailor
-
-
it is interesting Mark........old glory is in reference to ships........or the captain of a ship. this is a plane, but it can be, and has been referred to, as a ship.
there is no actual plane { that I'm aware of} that was called Old Glory, it was the catchy phrase that came to me with the idea for the paint scheme. I can't with good conscience take away from this gent, because of his affiliation in the Military..........he came up with it.........Betsy Ross didn't even coin the phrase when she sewed the first flag { she should have}. his story is an interesting one.........think of it.........he had the flag....the confederates went to his house to take it from him..........he said he didn't have it {he sewed it in a quilt}........they searched his house and couldn't find it. the man must have been laughing his a$$ off! what he told his daughter before he died was touching.....a real sense of importance.
but it's OK though.......it wasn't hard at all to come up with a new angle. when I expanded Wenzel's Wharf on Word Press, I named a page that I posted all of my aircraft models......Popeye Squadron. at the moment, I'm stuck because I haven't finished the Guillow's Fokker Dr 1....{I really should}. I have some catching up to do when I finally finish it.......I have several models done since then........I'll likely do a recap, especially the string of captured planes.
I also found an image that best suits the page, though it is hardly shown anywhere.......but I kept it in the event that I ever do.

she will be renamed " all American". I had also sized it down to use as an avatar at one time......... the only other model that has anything to do with Popeye, is none other than the Nordkap. in the helm room, there is a picture of Popeye and Olive dancing, and a picture of Poopdeck Pappy, Popeye's father. I did it as a funny joke for Tom Richardson, as I was sending him built logs to post on his website BB USA {my god........this seems so long ago}. if I were to used it on the model, it would be downsized so much, it would be illegible.........might look better on a 1:48 or even a 1:32 scale model. this paint scheme is VERY tempting....but without the mistakes I made with this one. I'll see what it looks like. I got a notification on the decals I ordered......they initially said Saturday, but the one I got this morning says today.........I hope! I'll explain more when I get them.
to be frank.......many folks call the flag 'old Glory', but they have no idea of the phrase origin....some don't even care to find out. research give one a better understanding of things.....and to be honest, I'd rather not shadow anything anyone has done......there is more satisfaction in one's own creation. even though Popeye is naval in appearance, his bulging muscle has shown many facets of military hardware.......be it a Battleship, a tank, or an artillery piece......even an electric generator!

-
....as I've always said....."there's a masterpiece in the box somewhere......rest assured I'll find it!"
")
- Edwardkenway, mtaylor, lmagna and 2 others
-
 5
5
-
it wasn't hard to find.........
How the Flag Came to be Called Old Glory | History | Smithsonian Magazine
- Canute, Old Collingwood and mtaylor
-
3
-
I ordered some decals last evening............and I also found out that I can't use the subject 'old Glory'. I'm going to have to decide on another premise. I neglected to book mark the info I found.......I'll tell yas why when I find it again.
-
train models are always a pleaser
- Old Collingwood, mtaylor, Egilman and 1 other
-
4
-
sometimes low expectations produces the best looking models
- Edwardkenway, Egilman, mtaylor and 3 others
-
6
-
-
thanks gents........I never knew that there were so many.........then again, that they even existed. I saw them........but the wild paint made me thing that it was someone's idea.......it wasn't real. I'm not into building models that don't exist, although I have built a few because of the novelty aspect they possessed. you buy a model and look up the subject, only to find not a shred of evidence that there was an actual plane or vessel. I did that with the Nordkap........I found squat on her. but I was told here on the site, that there was such a vessel....a person who is quite knowledgeable.......I had no cause to disbelieve him
after looking up the Buffalo Bill........I quickly found that it was nothing more than B.S.
the assembly ship is interesting.....there is a creative value to it. the planes themselves aren't from military blueprint........they are painted by the squadrons they represent........'field paint'. the planes are older planes that through repeated repairs and age, are given an entirely new use instead of scrapped or cannibalized. strange to hear that after a war's end, the military would destroy pieces that they don't intend to bring home. from what I've read about PT boats, very few were actually brought home....the rest were scuttled or burned. these planes were stripped of armament and other equipment {which I may have stated earlier}, but a few of them possessed just enough to get home on. there are times that the mission took them close to the action {I'll have a few guns on mine}. I'm almost ready to get some of these parts assembled.......just a bit more to go
")
thanks again all........thanks to Lou for pointing them out
-
these wooden kits are interesting though.........although sheeting hulls takes some getting used to
I have the Hasegawa kit of the Missouri in 1:450 scale. plastic, but likely not as much fun, as your having I subbed wood sheeting for the plastic stuff Dumas supplies in their PT boat........I found it a lot more malleable. perhaps pictures online may help you form a more perfect keesta. {stern looks from the audience} 
-
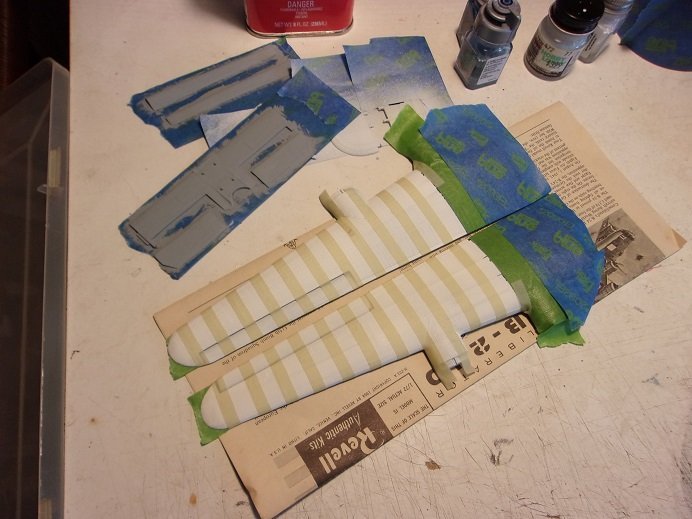
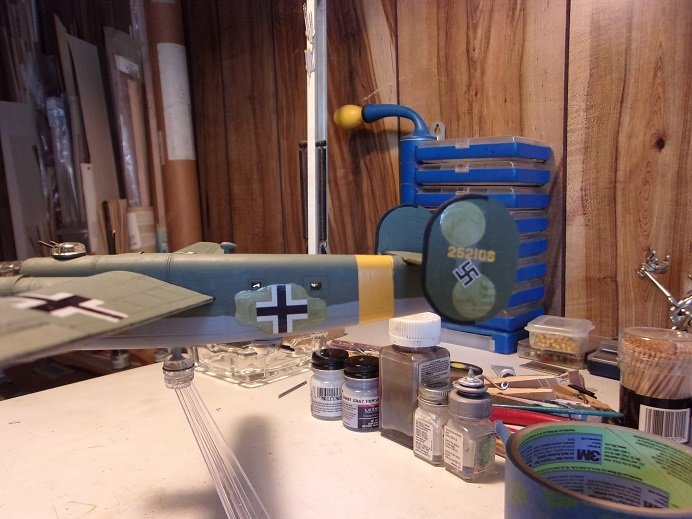
after a bit of 'do this and do that', I finally got to remove the masking. I can say that covering over some of the imperfections with these colors is a bit on the hard side, especially if they are darker than the paint covering them. I need to wait anyway.......all this needs to fully dry before trying anything. I did in a couple of areas and the paint became active........ if I can't touch it up with a brush, I'll need to remask and spray. where I masked over the gray on the fuselage, there were a few spots that showed the base plastic.....I've already touched these areas up.
the main thought was how the stripes will run.........either differently on the fuselage and wings, or all in the same direction. I think the latter will look better. when I was removing the rudder parts from the masking, a tip on one of the rudders almost broke off........I patched it with cement and will let it dry. I also painted the gray areas on the inner rudder parts.
....and here are the rest of the parts to complete the color scheme
still a lot more painting to go
- mtaylor, lmagna, marktiedens and 7 others
-
10
-
glad you mad it through OK........I've been seeing the news and it don't look good down there. we got a lot of rain up here from her, but it wasn't nothing compared to what you folks endured! now lets hope that help comes as fast as the storm did
-
not so much a stranger this time...........catching up was a lot quicker
really nice job with the dio.........the pool looks great and your small set up shows how good it's gonna look! I got back into airbrushing when I started to build wood ships........too much surface area for a brush alone! yup...practice will make all the difference. the more you do, the better your gonna get! fantastic job so far my friend.......keep up the good work!
- Egilman, Edwardkenway, Canute and 1 other
-
4
-
I've seen those solid wood model kits........scared to pull the trigger
 but then again, I was daunted with wooden boats....and that was silly. the person who I got the Nordkap from also gave me a PT boat kit by Marine Model Co.......solid wood hull. I haven't started it yet, but the hull is already precarved.
love to see the 1:28 B 17....bet she is a monster! looking forward in seeing your next project...the A 10 sounds cool
- Edwardkenway, Jack12477, Egilman and 4 others
-
7
-
thanks Phil for the kind comment and thanks to all for the likes
more has been done in the paint dept. I had a though to paint the top surface in front of the cockpit.........I was going to do flat black for this, but I decided to do it in the bomber green.
then I moved on to the rudders and stabilizer. I was reminded that I only painted one side of the rudder flaps.....so I still gotta do that. the stabilizer is now masked for painting.
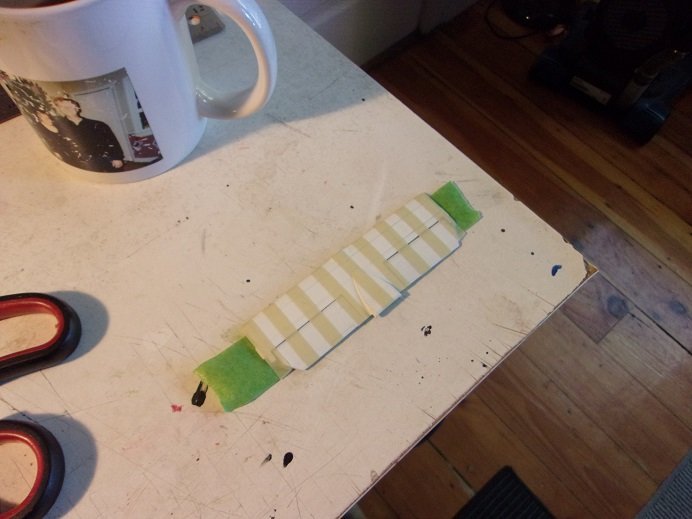
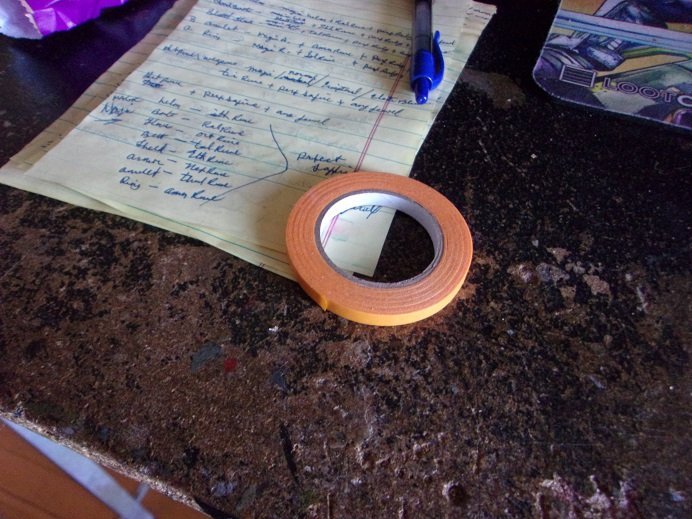
this tape that I'm using is Testor's pin striping tape........comes in three different widths. it is a trustworthy tape for me
the outside surfaces of the rudders will not be striped, since they are now flat blue....just the inside surfaces. the bottom sections under the stabilizer, will be done in light gray, like the underbelly of the fuselage and wings. the fuselage halves were next to get the masking job.
the cowls will be done in flat white, later to get their decoration, yet to be see
...and then it came to the paint
by this time, I had to leave to take the admiral to her doctor's appointment. now that I'm back, I can remove all the masking and see what it all looks like. more on the process soon........reminds me of the scene where the doctor remove the bandages from Joker's face, in the first Batman

- Landlubber Mike, marktiedens, Canute and 4 others
-
5
-
 2
2
-
it's been a busy couple of weeks.........work has been a bear.........celebrated my birthday on the 31st.......replaced the right front axle and lower control arm in my son's car, as well as all the lug studs on the left front. he took it to a dealer to have the transmission replaced {a month ago} and they over torqued the wheel lugs, ruining the left front rim. he bought a replacement rim the other day, per my suggestion. I went to take it off and two of them were loose again, as well as one of them being seized. I got the tire off by snapping the lug with a breaker bar and length of pipe, for more leverage
it's bad when you can look at the lug holes and actually see the damage! the right front was over torqued as well, but he hasn't had to retighten them {he stopped by the house one day complaining of a noise in the left front........that is what we found}. it's a long story.........sigh  all the rain we've had.......I also got to mow the lawns finally........the jungle had returned.
one issue I've run into with this project, is that when I repainted the bottom pan, I removed the masking, only to find that the adhesive had stuck to the part and not on the tape . true, I left it on for a couple of days, but the other masking tapes I have hasn't done this. I'm not sure, but I think this is Tamiya tape.
so now I want to remove the adhesive so I can repaint the undercarriage. once I get it off, the black can be touched up and I can move on with it. I am in the process of testing the tape. I stuck some on a wing and will leave it a couple of days, to see if it is just a time thing.........but I think the introduction of paint and paint thinner may have caused it. we'll see.
- Egilman, Edwardkenway, thibaultron and 8 others
-
8
-
 3
3
-
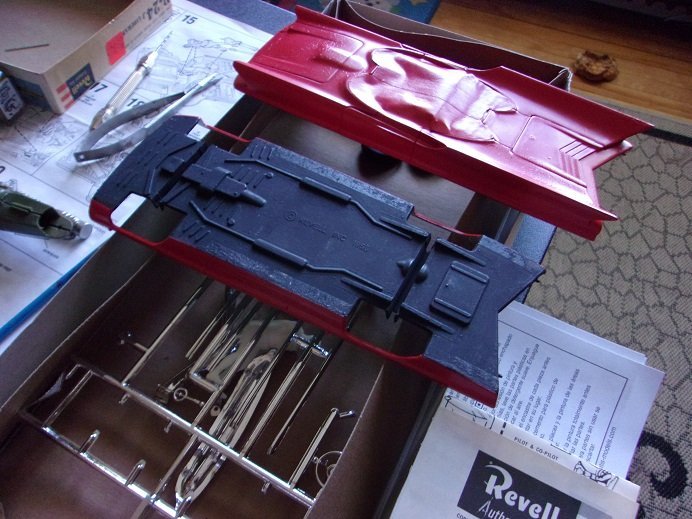
WOW! you've made some really good progress ! very nice indeed !
a couple of comments I'd like to add is that the fuel tank is where it is for a good reason. fuel systems relied on suction for mechanical fuel pumps.......pressure for today's cars. the early systems likely relied on gravity feed for fuel delivery.....putting the tank over the engine would certainly accomplish that. ....and yes.....most batteries were located under the driver's seat of floor board. the master cylinder is probably there as well. my brother knew a guy that had an old American staff car, and that was how it was set up.....except it had a mechanical fuel pump...the tank was located in the rear undercarriage.
good you held off on some of the rust and dirt....now that the body is in place, you can go mental
but it does matter though on how long it's been out in the 'wild' ....could have been a new addition to the pool. great job......looking spectacular!
- Old Collingwood, Jack12477, Baker and 6 others
-
9
-
great idea with the spoons.........never though to use such things
love the sheen factor of the paint........the metallic colors especially .
- Old Collingwood, mtaylor, gjdale and 2 others
-
5
-
awesome job! has the look of burnished aluminum
looks good on the stand too! got any others?
- mtaylor, Old Collingwood, Canute and 3 others
-
6
-
 ohhhhh, I dunno, I'm just a wingman something about those big birds.........
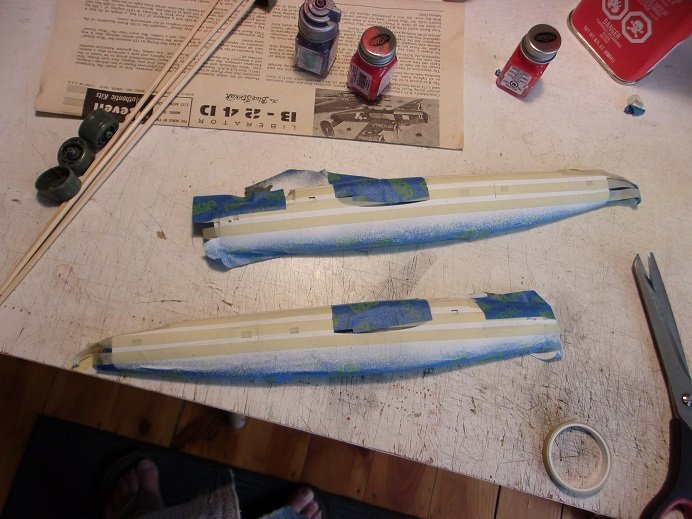
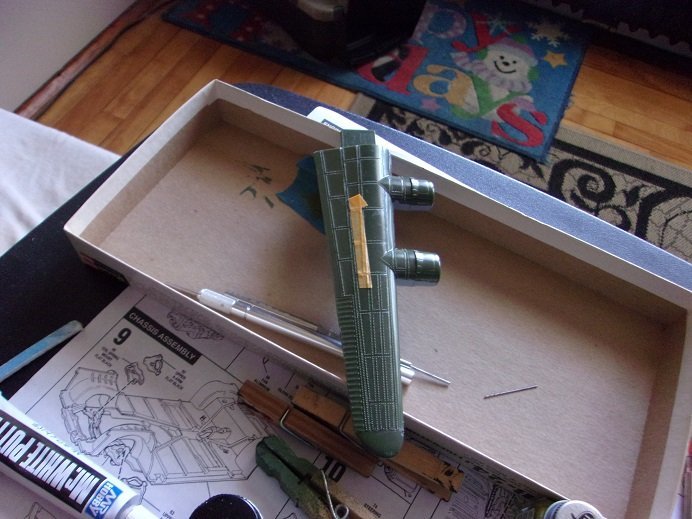
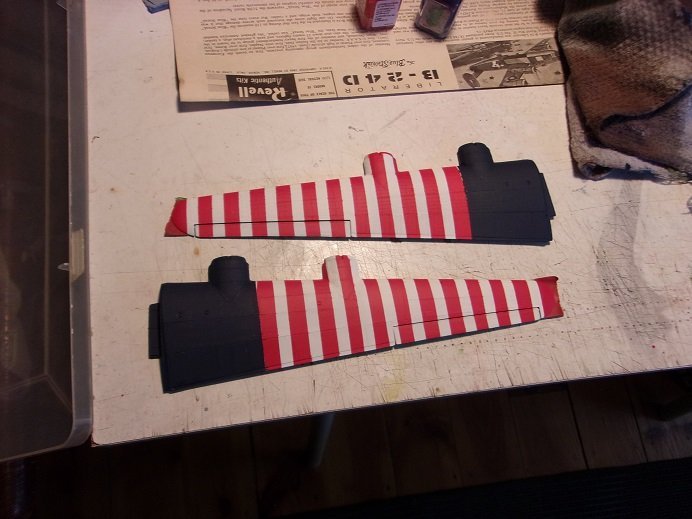
hey.........whilst I'm here, I may as well post a few update pictures. I went a bit further on the paint work. first I masked and painted the blue areas on the wings, fuselage and rudders. one thing I noticed is that the wings don't possess the same panel texture and rivet detail. odd given the fact that the Atlantis and the other Revell kit are identical....then again, they come from the same molds. there are some minor flaws with the paint, but I will go over them once all the colors are on.
after I gave the blue some time to dry, I began masking the wings. I just followed the panel lines as a guide. the ailerons were taped in place, so they could get their portion of the striping.

I did the other wing by eye, keeping with the spacing of the above wing. I didn't do too badly.......I think
this is some pretty good tape.......comes in three different widths. the tape I wanted to use.....I can't. I used it on the Futura....and I guess the thinner is the culprit.......but it left the adhesive on the part I masked up. it's been a task to remove it.....still more to go. once I made sure that the tape was firmly pressed down, it was off to the paint booth.

the admiral wanted to go to the store.........so I had to hold off on further work. when we got back, I removed the tape to see how much {if any} crept underneath {I get mixed results}. I was happy to see that only a few visible imperfections occurred. real tiny ones I'm not concerned with....but there are some I will touch up. the rudders and stabilizer will be next.
more soon
-
thanks!
I still have the Atlantis B 25........ hoping that it comes out as well......surprising cutting out the side windows was good too.....adds more to the model. the window maker worked well in that respect.
thanks again everyone.......glad you enjoyed the log, given the confusion
- mtaylor, Egilman, Old Collingwood and 2 others
-
5
-
no different than automotive........I've got tool that I've only used a couple of times. stuff I'll probably never use again. learned plumbing from my dad.....
..came in handy when we owned our own home. ....and if our landlord keeps dragging his feet, I may have to do something here {pipes down cellar are look'in scary
} congratz on 44 years!
- Egilman, thibaultron, Canute and 4 others
-
7
-
thank you all.......it is an interesting rabbit hole. surprising that the kit built into as nice a model as it did, considering. I still wouldn't put the 'dinty' on it though...........unless your looking for a good challenge, or you just want something to practice paint methods. I think it would have looked better if the glass frames were painted, but I didn't care for the raised framing being on the inside of the glass. on the outside, it makes it easier to mask off. when you see how the landing gear is set up on the Warbirds kit, you will see the reason why I modeled them like this. the way I have them on this model is perfect in showing the gear in the up position......gear doors are closed and all you can see are the wheels.
I'll have to look around and see if I can find another book on the subject. having such an obscure timeline shows just how secret the KG 200 was. the book has more information on B 17's.........the majority of the captured planes didn't survive. a few did get retaken. I did look into the Atlantis site, at the Pacific Raiders kit.........they had only the decal sheet to offer. to me, the Buffalo Bill decals sheet didn't look that good......chances are the Pacific Raiders decal sheet would look equally as bad.......cartoonish like
I should have something on that model soon.....thanks for the kind comments and glad that you found this interesting to follow I'll see what I can come up with for #3.
- Old Collingwood, mtaylor, Canute and 4 others
-
7
-
it would be easy to come up with a sheet of dot decals
the paint work would be enormous though.........not to say that what I have planned isn't. I'm giving the white a chance to dry more, before I go to the other colors. there are quite a few to choose from, but finding decal sets for some of them might be tough. there is.....still the MPC kit, cheap enough to toy around with.............I might still be able to get one
glad your looking in
-
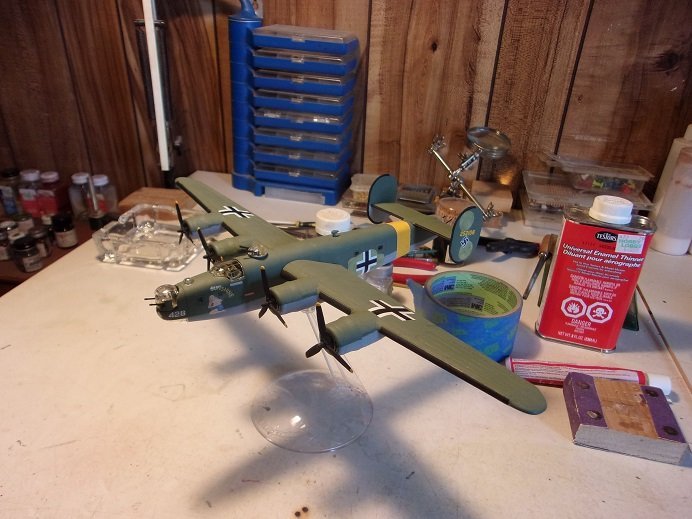
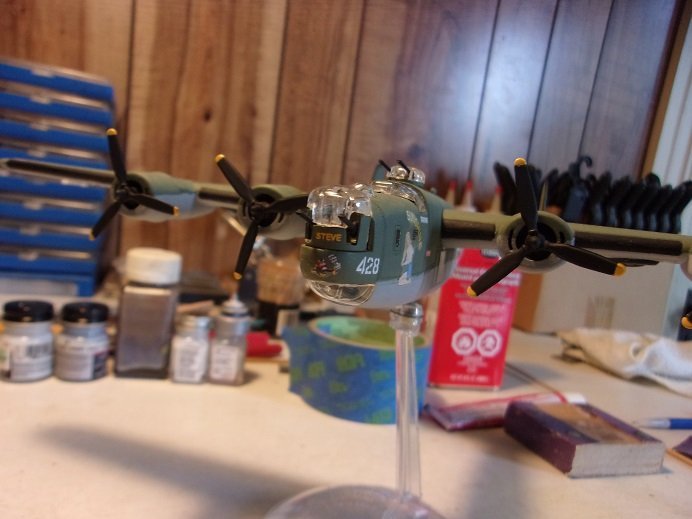
after the props were touched up, they were added to the model. this was the last thing to be done......the model is finished. as mentioned, I had to make a couple of things to accommodate the decals to a smaller scale, but I'm happy with the way it looks. I'm even happy with the wheels and how they are tucked into the wells........if I do this with the Pacific Raiders model, I will need to make a stand for her. the pictures do speak for themselves, so here they are.

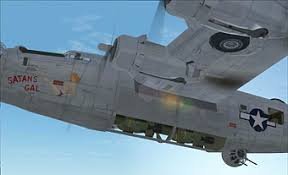
here's where I noticed the decal error......
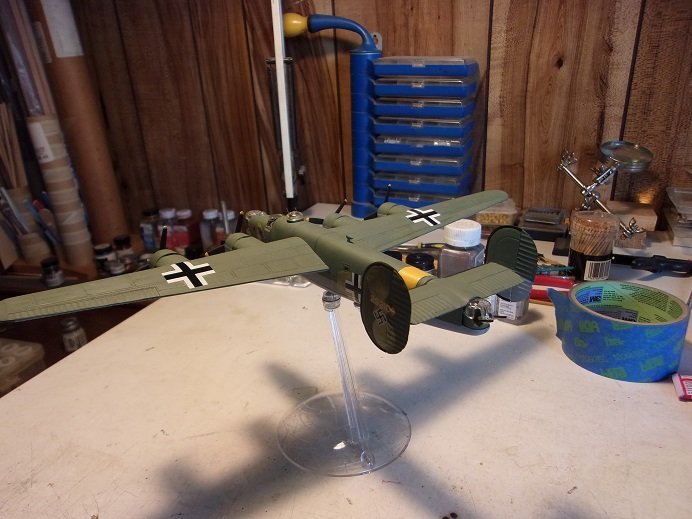
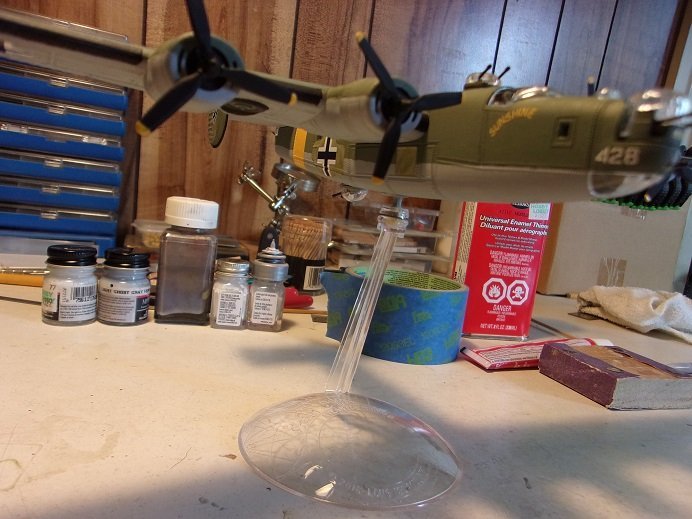
I saw pictures where the area under the wing root was painted out........they supplied the decal, but didn't show it in their diagrams.
the fate of Sunshine is not really known. she lost two engines and landed in Venegono in 1944, only to be detained by the Italians. the plane and crew were later handed over to the Germans. the crew was sent to Stalag Luft I, and the plane received two new engines and was flown to Germany for testing. it was then delivered to the KG 200 and possibly given the code numbers A3+FK. the plane would latter be used to infiltrate and monitor RAF nocturnal bomber chatter. at some paint the marking did change a little, but the nose art was kept intact. the plane seemed to disappear, until Jan of 1945, when a plane with the numbers A3+FK was shown to have logged in at Wiener-Neustadt air base. no further information was found until the end of the war, when forces stumbled on the wreckage of a B 24. there were no discernable markings on the plane to say either way, if it was Sunshine, but the fact that she was never recovered, would suggest that she didn't survive the war. Sunshine was the second B 24 to fall into German hands....the B 24, Blonde Bomber II was the first. information points that she never entered service with the KG 200.
thanks to all for sitting through the debacle for my second installment....I'm sure you folks were confused. the KG 200 book lists many planes that were used by the Germans. from Mustangs and P 38's {only two were known of}, to aircraft of the British and French air forces.........one never can rule out that there may be another installment.......#3
thanks again for your interest and support


Revell B 24D Liberator 1:72 scale by Popeye the Sailor
in Non-ship/categorised builds
Posted
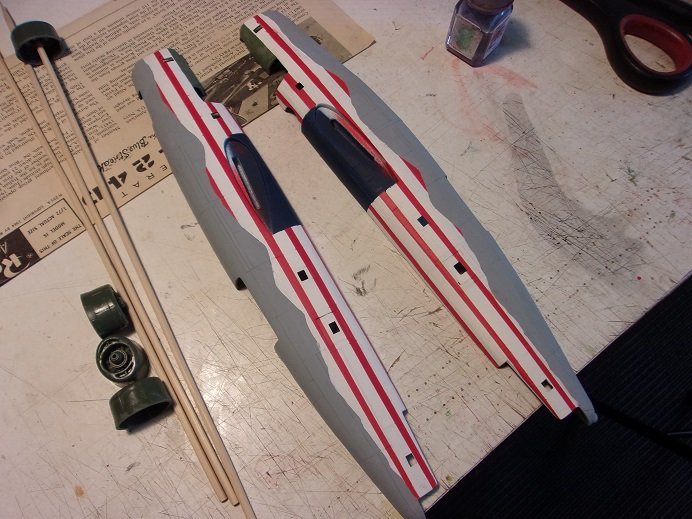
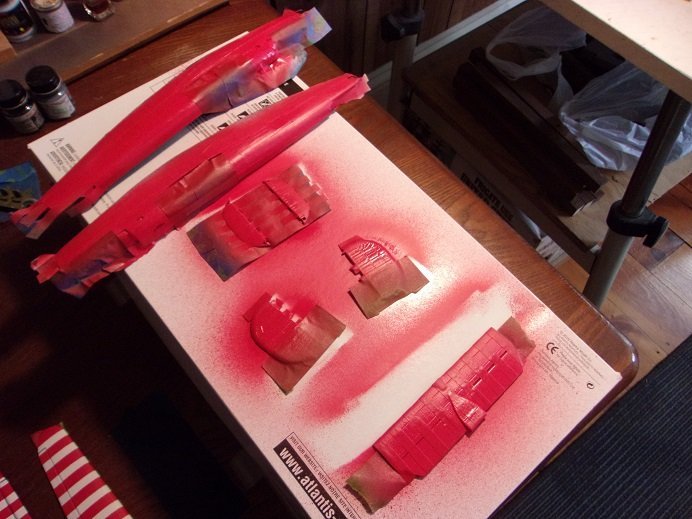
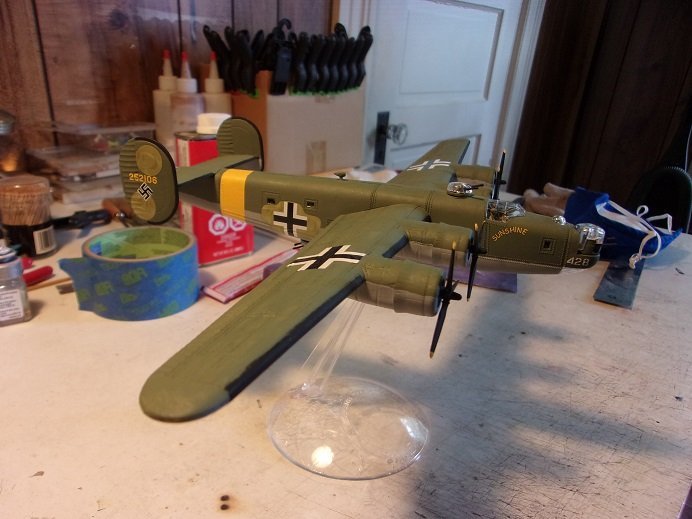
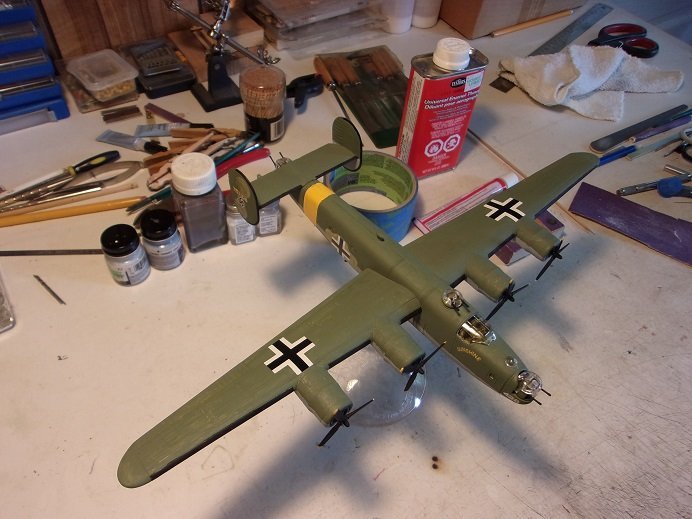
so hey.........whilst I'm here......I may as well lay some more pictures on you! there were a couple of "awww nutz" moments, but they were fairly easy to overcome and proceed. the nacelles are being painted at the moment, and the other sides of the rudder ailerons have been given the coat of white...now I just have to stripe them. the wing ailerons have been assembled......I didn't continue the striping where they mate the wings......I hope this doesn't bite me later, but that's how they painted, so I stuck with it. the landing gear have also been painted.
there are quite a few 'bleeds' as well.......I will try to touch them up as best I can. I likely will have to let a near empty bottle of white sit and separate, siphon off the liquid, and use the pigment to do the touchups. fresh paint.....and this color combination in particular, is prone for becoming active and mixing........last thing I want is a pink plane the wings themselves are kinda complex........the flaps, ailerons and landing gear must be assembled all together. the flaps were a bit of a let down.......they are very thin and bowed enough to make them look sloppy if left in the down position. so I'll be showing them in the closed position. it would have been good if the ribbing inside helped to align the flap, but they don't even touch them.
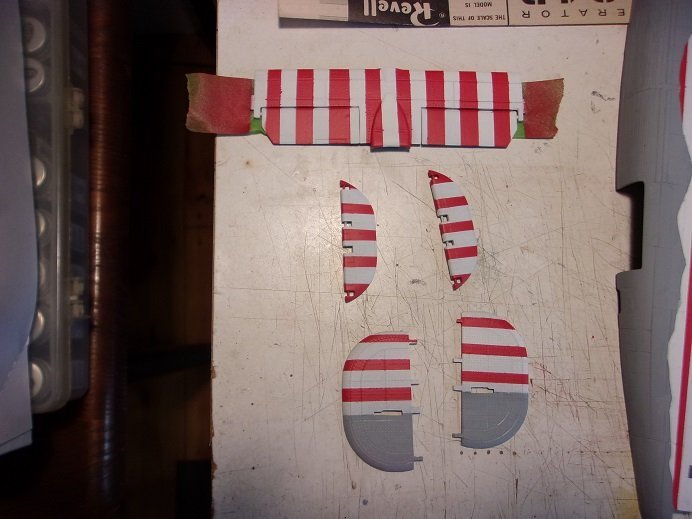
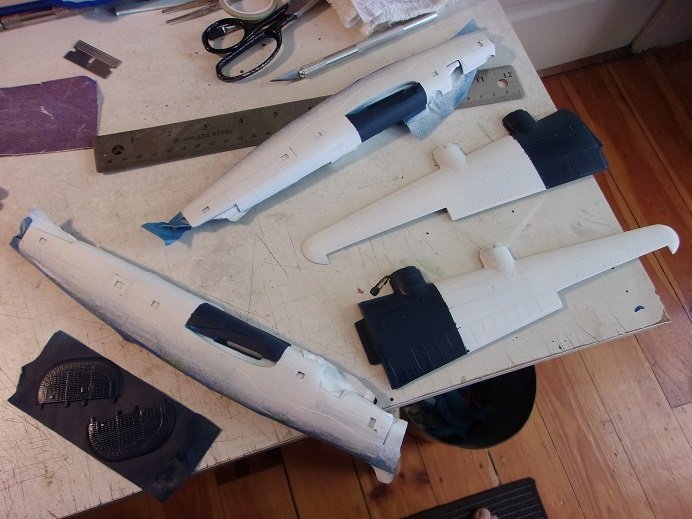
I didn't notice this till after the fact, but I have them on the wrong side. the pins for the pivots should be inward and not showing on the outer surface of the wing....they appear more inset than they should. looking at the assembled wing, it doesn't look too bad though......the hinge parts look sunken in a bit more, but it add to the detail that these parts are movable, just like the ailerons {they don't have that 'molded' appearance}. the stabilizer was assembled......other than a few 'bleeds', it looks really good. the misgiving of the fuselage stripes shows up badly here......I'm not going to even try to fix it........thoughts of pink come to mind.
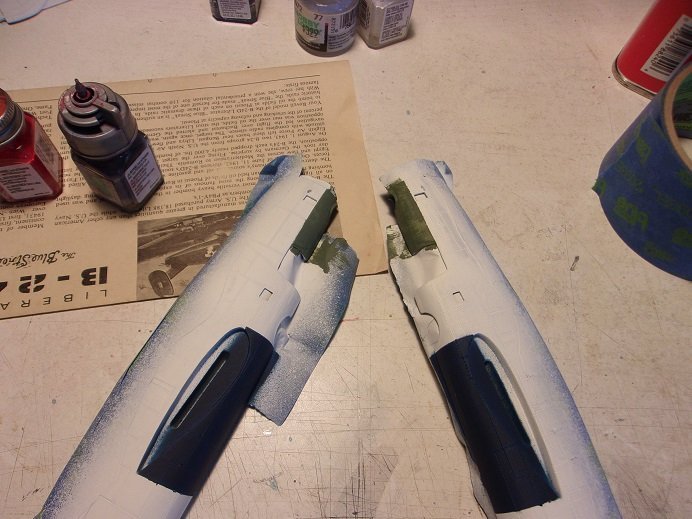
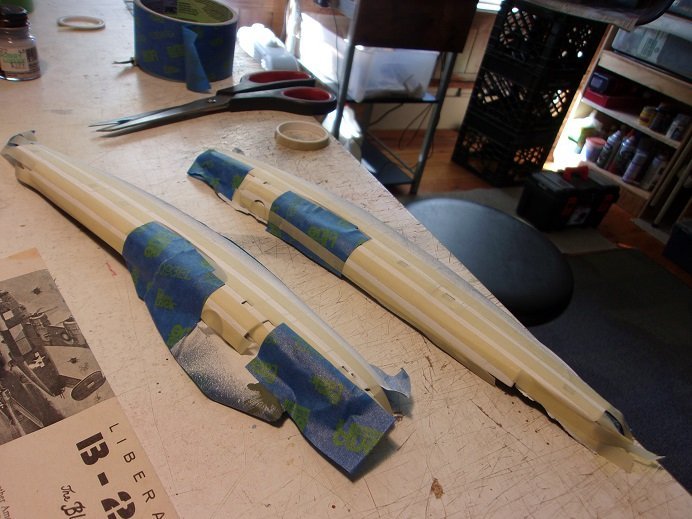
in this somewhat dim picture, you can see what happens when the fuselage halves were poorly matched when I masked off for the blue. I will have to repair this.
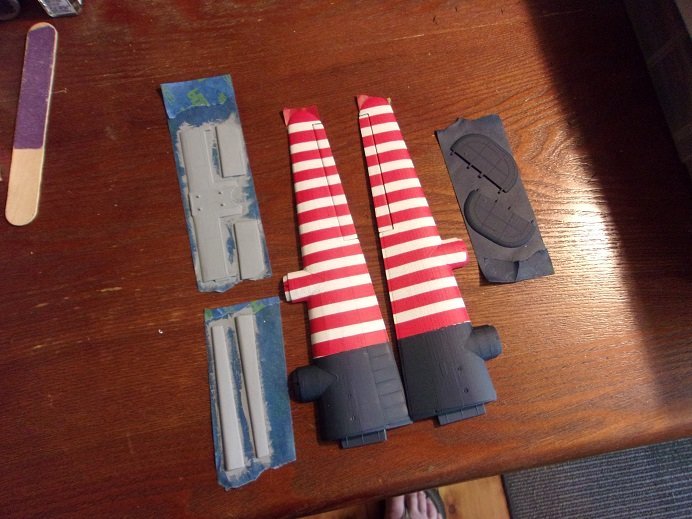
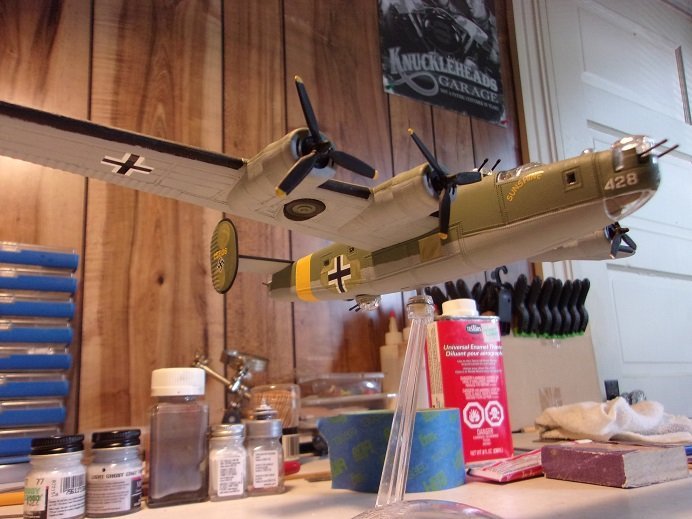
the cockpit was cemented in place on only one side of the fuselage........still more to add before this can happen. the landing gear will be cemented in place too. the kit features landing gear that can be retracted or in the down position. I have very little need for movable gears, so I had to arrest the gear in the wing as it dries. once they are set, I can assemble the wings. it can be seen how much of a gap there is on the flaps........this will be less when the wings are assembled and clamped in these areas.
the starboard wing is assembled........don't know why I always start with the starboard side.........habit I guess I fixed the stripe with the blue.
the port side is clamped up..........
the blue on the fuselage has also been repaired......
as mentioned......I should see the decals today, then I can elaborate on that further. I'm gonna look in the other decal packs I have to see if I can use any of those too.......I should have enough")