


popeye the sailor
-
Posts
15,981 -
Joined
-
Last visited
Content Type
Profiles
Forums
Gallery
Events
Posts posted by popeye the sailor
-
-
great start on the coach Kev......did you have to think about the chassis color, or is that the color choice in the kit? that's what I'm pondering over, since I'm going for a New England coach. again, your making me wish I bought a wood kit
")
- Egilman, Old Collingwood, lmagna and 4 others
-
 7
7
-
nice job with the weathering and the markings...........superb looking model
")
- lmagna, mtaylor, FriedClams and 3 others
-
6
-
sweet looking model........ very nicely done!
-
she looks fantastic........great idea on the display. does this mean your not going to add the props and rudders.......in a display, they won't be seen or needed
- Old Collingwood, lmagna, Canute and 2 others
-
5
-
in relation to the scale of this model Lou, I'm not to sure about that........but I welcome all extra parts
thanks Mike
-
thanks to you both. it's a good question........I seem to have hit a brick wall with the easy built model company. it's apparent that they didn't understand that I had no instructions at all on this model. I guess I should have specified that I didn't have the diagrams either. my last email to them was answered yesterday........the model has been updated and the old plans and such were put into storage, and they refuse to take them out to send me a copy. nor are they in the habit od sending out instructions separate from the kit. in not so many words.......they refuse to help me.
I haven't done further research during my correspondence with the company, so it was very helpful for you to jump in Egilman. you've given me a head start
do I plan on building it..........sure! this hasn't deterred me.......hell, I may even put some of my artistic license to it  I have a source for sheet and wood.......so why not. I will look through the PDF and jot down all the wood sizes........and then off to Hobby Lobby I go
another thing that has my curiosity at an all time high, is that Brandon also mentioned that he has a ship kit. he wouldn't disclose much, but said that he wanted to find out it's value. I don't knock the lad for wanting to make money.......but I'll press him further.......maybe even make an offer for it depending what it is
keep yas posted
- Canute, Edwardkenway, mtaylor and 5 others
-
8
-
thanks Egilman.........I have been doing the virtual cha-cha with these ya-hoos
 they sent me the PDF....but it doesn't give me the specifics that the diagrams show. thanks for posting them. I'm almost to the point of giving up on them.........I'm not asking them to send me parts. I did find out that I'm missing quite a few parts........I only have two sheets of parts, what I should have four sheets. I'm probably missing wood strips as well. not a big deal, since I can get them at Hobby Lobby. if I showed you the email exchanges, you'd understand, but I seem to be getting the run around. the last email came from a fellow named Dave {I think he's the owner}........and he seems to think I have these diagrams. I told them from the beginning that I have nothing, no instructions.....nadda. I'm getting more help here..........and I appreciate it! I sent one more request for the diagrams.......if they won't help me, then I will go other routes. but these will be neat to study....I'll see if I need to adjust their sizing. I copied them.......I'll see what I can do.
I pulled the trigger on another kit this evening.......I could have gotten the earlier release of this kit, but it will do just as well. I'm talking about the 1955 Lincoln Futura. the car was seen in a couple of movies, as well as the 1966 Batman series, as the Batmobile. I failed to grab this model earlier, but I finally have it........show ya when I get it
- Canute, mtaylor, FriedClams and 5 others
-
8
-
hey there Phil.........this is pretty much the same kit I built my PBJ from.....I think they have at least 3 kits built from the same molds. good that you didn't lose an engine........like I did
 I still have a bunch of parts for this particular model...love to do another one. I see your well on your way with her.......and looking really good at that! your going with the closed nose.........quite a bit of firepower in that nose
-
I found that out this afternoon Egilman....they sent me a reply with the link to the PDF. gonna be a bit tougher without the plans...I'll have to modify a build board to assemble the wings. I've bookmarked their site as well. I'll look around.......see what I can find. the kit goes for around $40.00.
I have the Walther's site, Model train stuff site, among a few others in my bookmarks.......I'll look around. there is a chock molded onto the flatbed for the tank. it comes with a cargo dock. I did find a couple of sites that talked about AHM.....I found this one earlier this evening:
AHM - Associated Hobby Manufacturers - HO-Scale Trains Resource
it doesn't mention this train piece or any of it's others, but does show a train set from back in the 60's with a military theme......search the site and juggle through the articles. the catalog page is particularly interesting.......pricing and such back in the day.
- mtaylor, Egilman, Edwardkenway and 4 others
-
7
-
got some time to work on the tail section.......basically painting the deicing panels. it was then added to the model. next will be the glass and the turrets.
it was our grand son Tripp's birthday today........the boys are getting big......the oldest is almost as tall as me. whole lot of trouble going on there though........the house flooded due to a broken pipe! they had some off the wall company come in and they trashed the place....tore everything up. he showed all the damage to a mediator that he heard about, and now the guy is holding their butts to the flame! {evil laugh}. so for now they're roughing it......with no hopes of getting anyone in there to reno the place till November {that's how bad the it is out there}. before we left, Brandon showed me what he got from his last real estate job.......a whole trunkful of HO trains and accessories! I saw this one and he gave it to me.
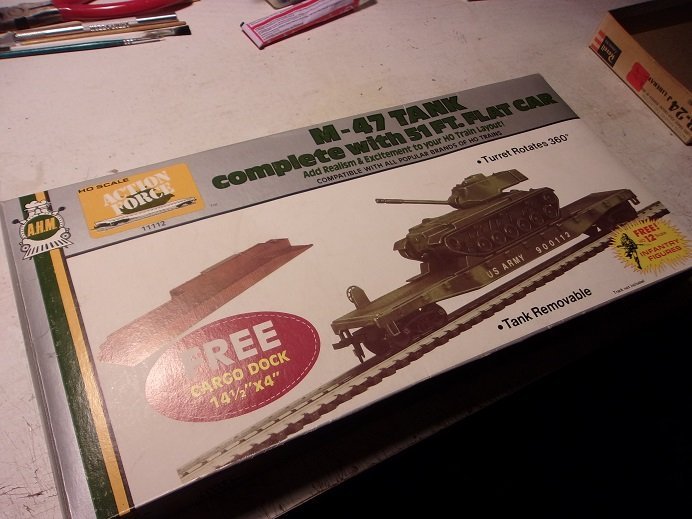
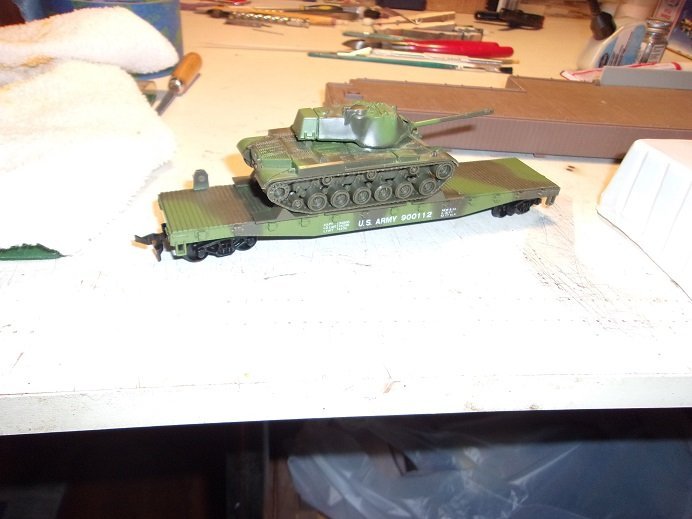
I don't have a train setup.......but it looks really neat
the hand wheel toward the front is broken off.....just the post is left...it's the only thing wrong with it. the company is gone.........I read that they were based in Italy........70's or 80's stuff. I told Bran to get them appraised before doing anything with them. he also gave me this:
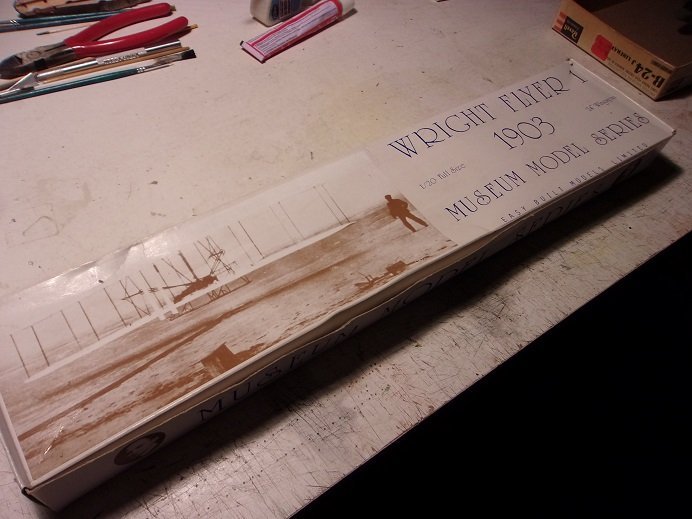
this company is still in business........I contacted them to see if I can get a copy of the instructions. looks like it might be all there, but I can't be sure. the newer ones are laser cut........this one is not. if I find out more, I'll let ya know
- mtaylor, GrandpaPhil, FriedClams and 4 others
-
7
-
-
thanks Gary........but I still feel guilty. me.....a fellow whose up to his neck in projects
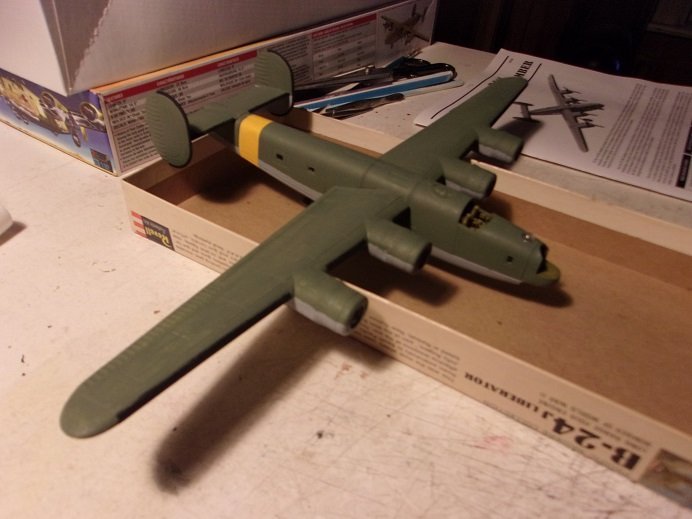
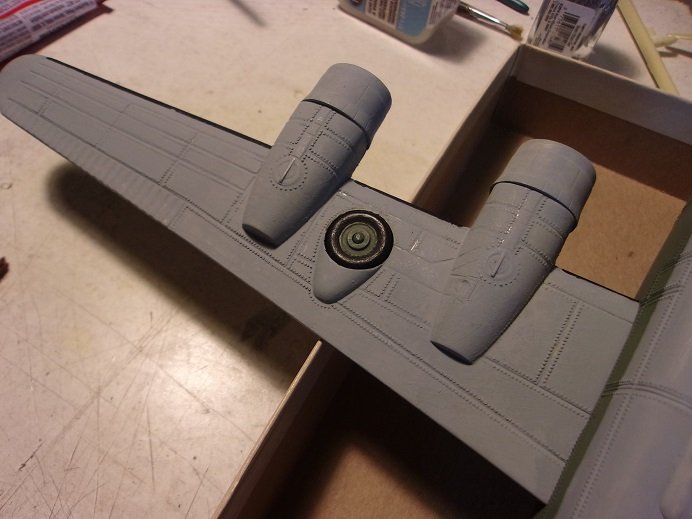
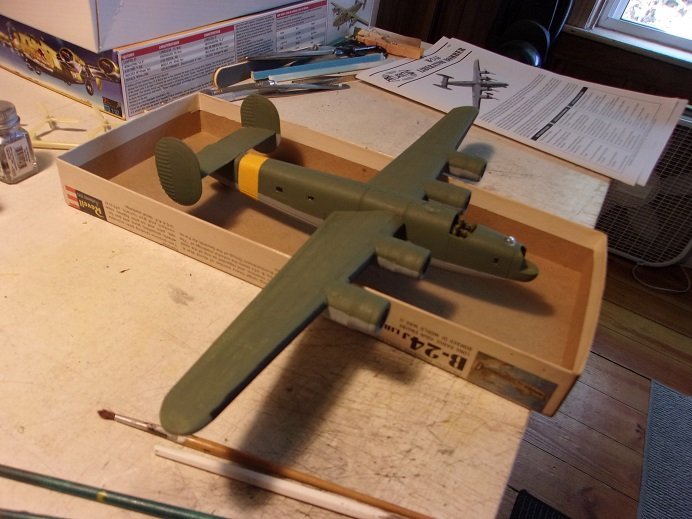
 so I did a little last night. it's not much, but it added so much to the model. the fitting issue with the wings has been rendered quite minor by this time........I did adjustments along the way. with the wings almost fully painted, I saw no reason why I shouldn't add them to the model.
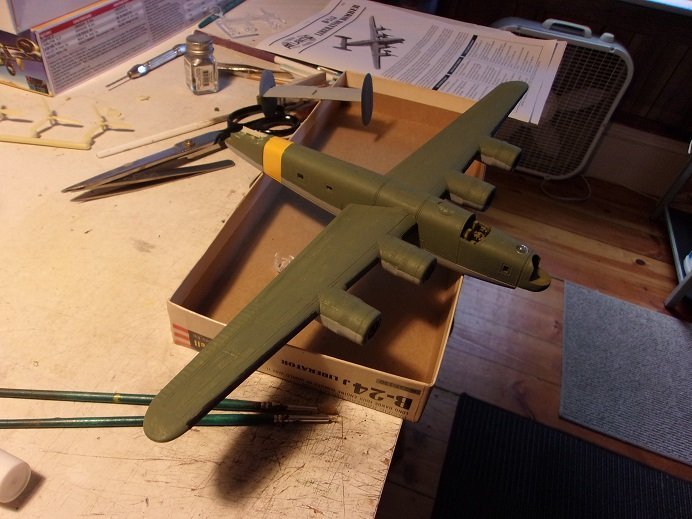
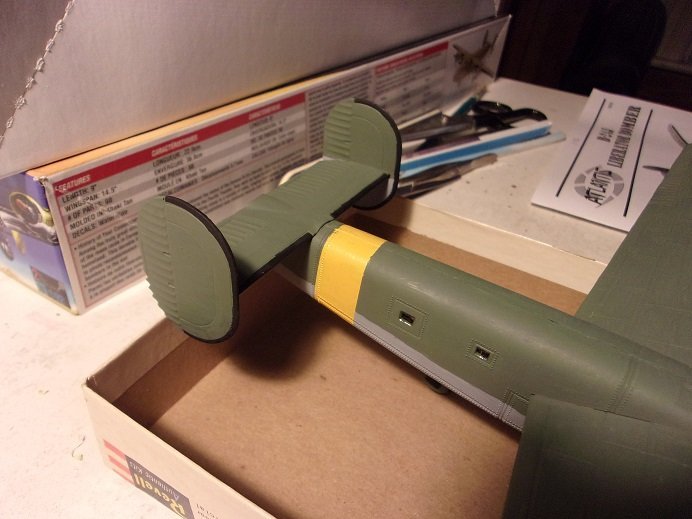
the version I want to do has a yellow band around the tail section, so I painted it on as well. it came out pretty good, but I almost messed it up. I had decanted some yellow paint from an old spray can.......didn't want to toss it out, since the sprayer was clogged........I got three small bottles out of it. the one I chose to do the band was almost empty, but not using it since the Wulfe Hound had a detrimental effect on what was left. I stirred it and proceeded to lay it on with a brush..........YECH! I thought I was going to have to strip it.......icky clumps and looked like diluted spackle
 I wasn't too worried about the Green becoming active again......it had long since cured. the other two bottles were dead.......so I opened a fresh bottle of flat yellow.
it did a good job of smoothing out the old paint......I kept doing light strokes until it did......then I painted the rest.
I still had a few touch ups to do anyway, so I did some of them as I went along.
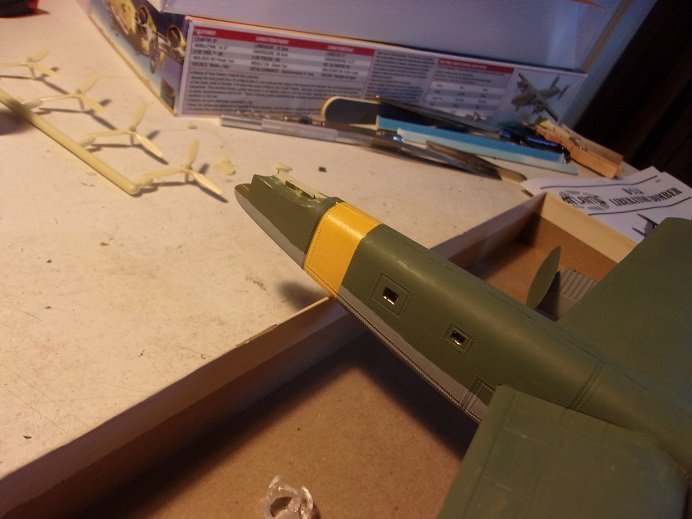
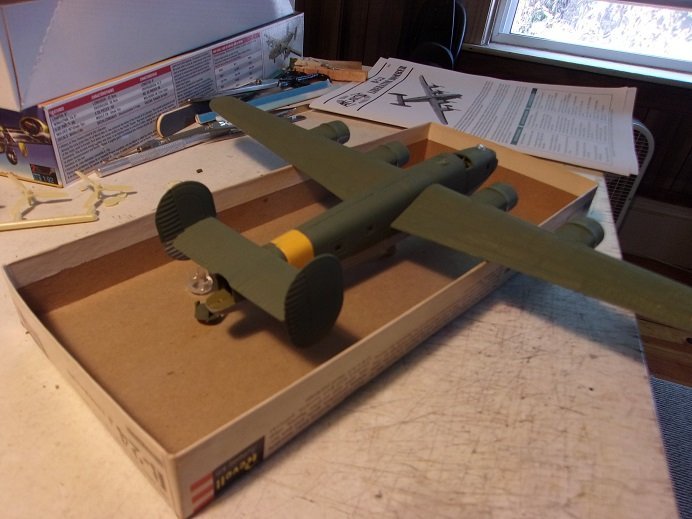
you can see how fresh the paint is.......good shot of the windows. that window maker is great! I was going to cut some cello for them, but didn't care for how 'sunk in' they'd look. another point I made earlier was the main wheels. the nose gear is closed......two doors provided......but the tooling of the main gear doors, doesn't do the model any justice. as mentioned, it would look silly with the gears down and the doors closed. the Revell B 24D kit proved to me that the doors are part of the landing gear, and are not attached to the wing anywhere {much like P 51's and Spitfires...etc}. since the model will be on a stand, it made sense to assemble the wheels in the up position. to look more aesthetic, I was going to sand the wheels so they would look deeper in the wells........I didn't. I just squirted on some glue and popped 'em in place...........EWWWWWWW. you'd swear I gave the plane breasts! they stuck out like the sorest of thumbs!
 of course, I spent time deciding what to do......bad move where glue is concerned. luckily, I was able to pop them back out without much damage to the wells. after cutting off the glue part of the wheels, they got a bit of a rubbie on a fresh sheet of sandpaper....brought them down to half their thickness. then it was time to scrape out the glue goo from inside the wells, and re-touch them up.
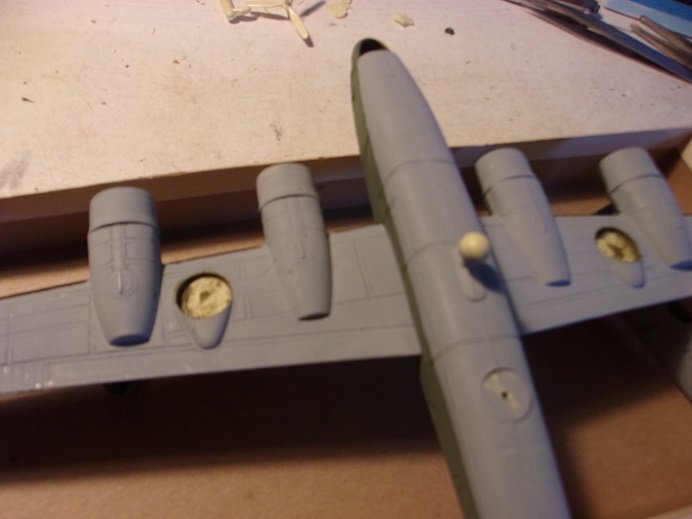
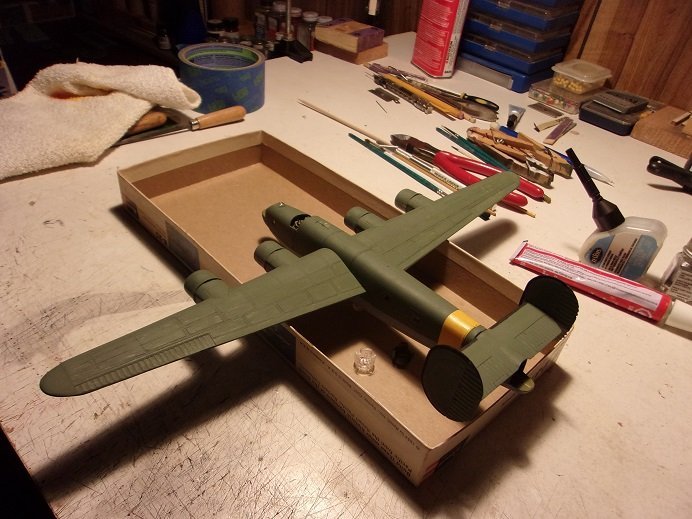
after all was touched up and back on track, the wheels were glued into place.
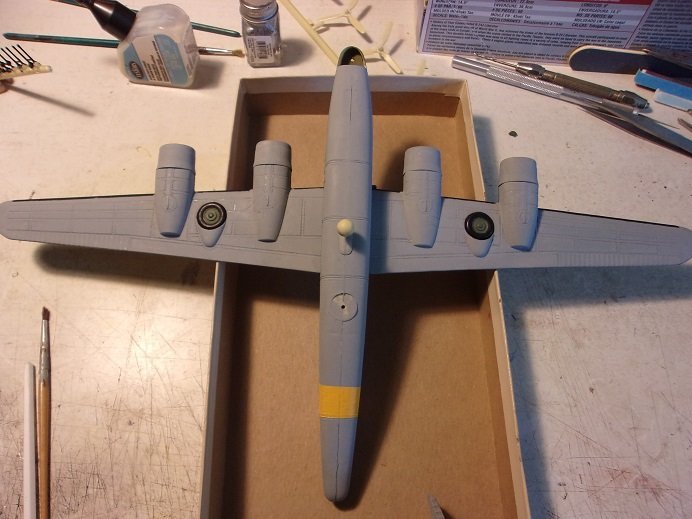
now they don't protrude so much.........
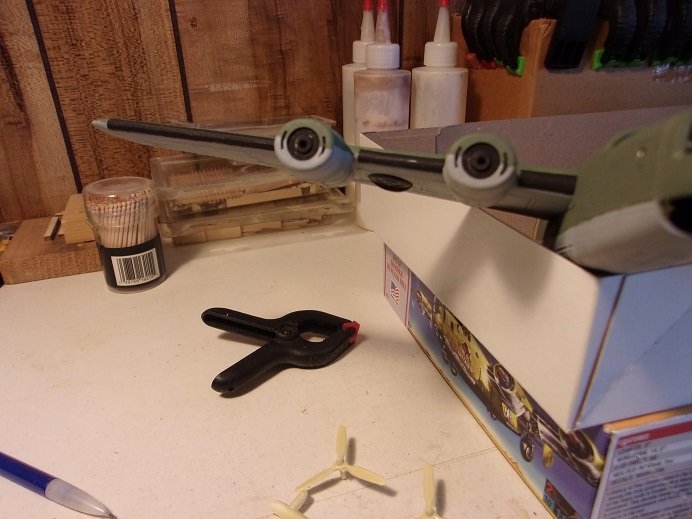
I painted the props too, so they are drying, awaiting the next paint step. the tail section is next on the roster to get added paint. the yellow band just screams Luftwaffe.....doesn't it?!?!?!?
-
hey there folks
wish I had something to report on this project, but I'm not quite there yet to continue. it'll be sanding the deck and paint......that will be a big jump, then I can get the main structures on the hull. I do have a bit of a funny for you though. a few weeks ago, I was browsing through the old model kits website.......I don't usually go all the way to the end of his list, but this time I did. I couldn't believe what I saw.......a hardware kit for the Dumas PT 109.........a 3 pack! the price was an even bigger eye opener........$19.00! I showed it to the admiral and she agreed that I'd be a fool not to get it. so I did, and received it in a very timely manner {they are pretty good about things, but they do have their hiccups}. now bear in mind, that the hardware kits I got for the 109 cost me around $40 bucks a whack....so I spent #80. what I got was a package about half the length of the ones I originally bought {around 5 inches long}.......the plastic bag cloudy from handling. the label on the package too looked to be rather old.
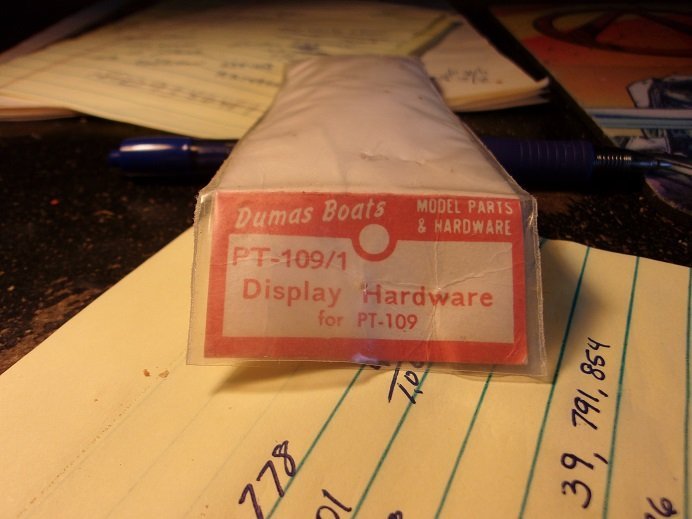
it suggests to me that Dumas offered a smaller scale PT Boat at one time.........my research has uncovered nothing so far. the parts inside further suggests this as well.
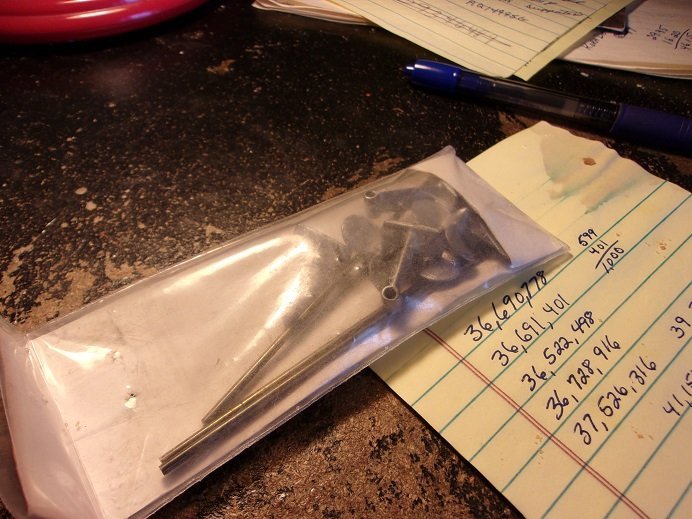
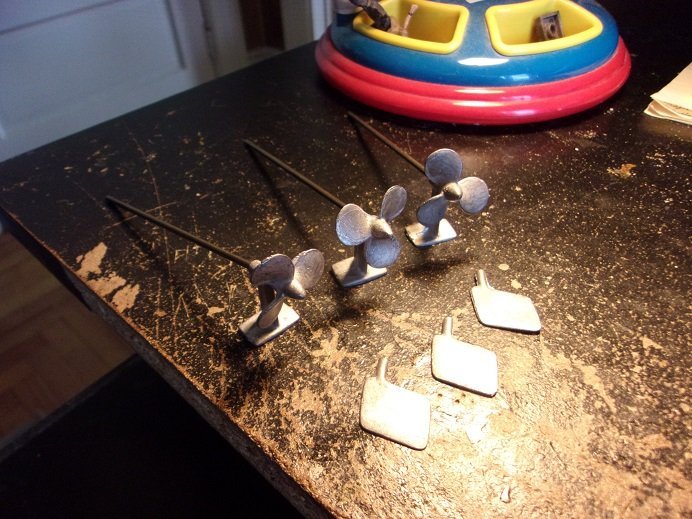
this is what I got.........there are no shafts for the rudders. I'm sure they could be used for R/C, but unless the hull is a thin skin, I doubt that the rudders could be made functional..........tough at best. it's not a bad sale or total loss........I'm sure that they will come in handy at some point. keen to note as well, that there are two left handed and one right handed prop. so they will go into my inventory until needed.
-
-
would be a superb display
the engine looks too good to be hidden.
- FriedClams, Edwardkenway, Ryland Craze and 6 others
-
8
-
 1
1
-
a splendid model indeed Kevin......very well done! the added touches really stand out
- mtaylor, Old Collingwood, Kevin and 6 others
-
9
-
so good to see your progress Chris.......they are looking really good!
I recall the site James used to have.....it was a sister site to MSW.
-
I read that about Jimmy Stewart........loved him as an actor
mentioned that to the admiral Lou.......should have seen the look on her face
thanks all for the good word........sadly, no new update at the moment. I hope to get more done.
-
nice look'in model and interesting display
- Egilman, mtaylor, Old Collingwood and 2 others
-
5
-
thanks Dan..........although advice I would give anyone who wants to dabble in the old kit arena.......remember the kit your dealing with. I wish there was a way to shrink the decal sheet a bit more. my printer is ka-putt at the time being, and even if it was running, it won't do white. sure, I could use white decal paper, but that'll mean I'd have to trim along the edges of the images. I don't consider it fun
I did see another Revell kit........it's of a PBJ, but it's also a B 24D. I haven't gotten too much further with this one........I'll need to order decals for it. actually, it's not so much the model, but the subject. if you should even see a copy of the KG 200 .....grab it.........it's a great read
-
I believe there is a kit of a Japanese plane on a catapult.........don't recall the maker though.
-
-
-
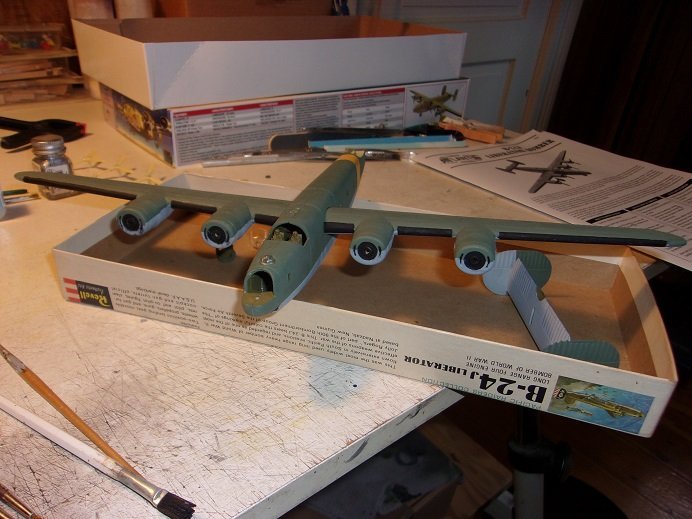
I cleaned up quite a few of the parts .......so far the kit is very nice to work with. I've started to paint the fuselage interior and under belly . I made a slight change to the title........when I build the other 1:92 kit, I'll continue the Atlantis log with it. it won't be too hard to make the distinction
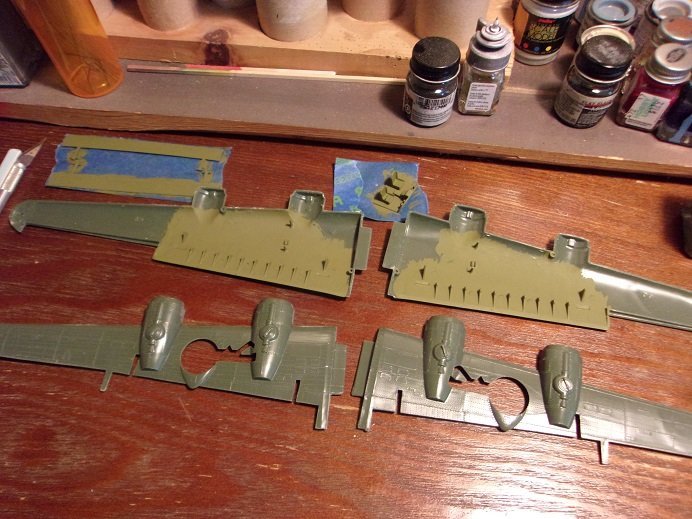
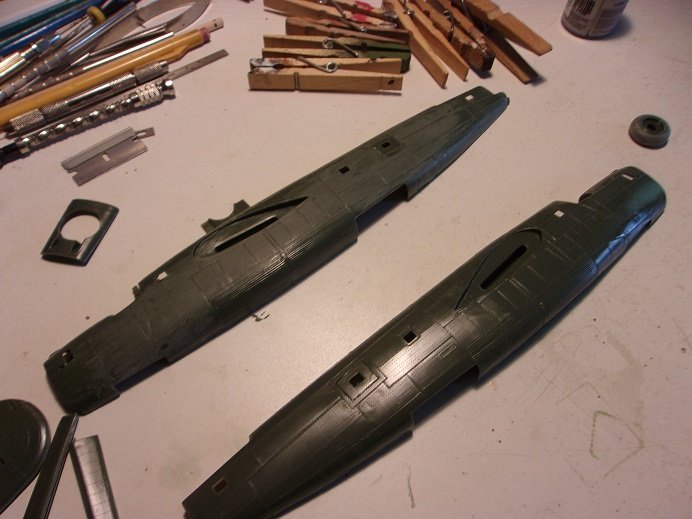
....just the Chromate green on the wing interior that will be seen. the window panels have been added to the fuselage halves.......I have the clear parts to fill them. note the open area in the underbelly for the installation of the belly turret.
more painting was done yesterday........more chromate green and the wing under surfaces.
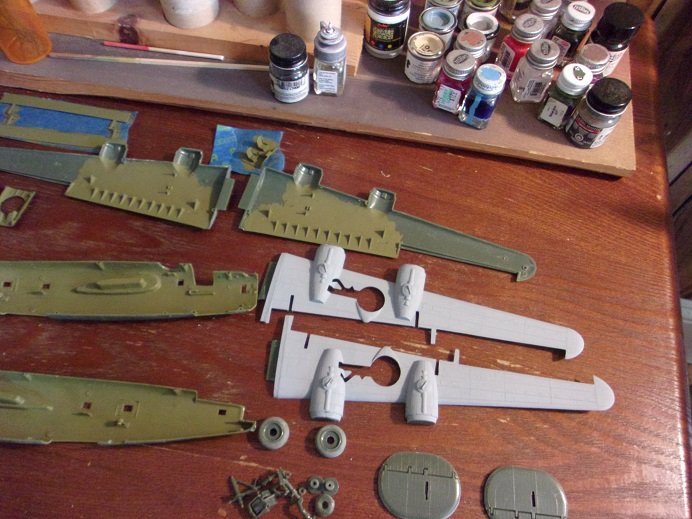
this kit is a lot more detailed than the other two. it's a very nice kit, should one chose to build it
- Egilman, mtaylor, GrandpaPhil and 6 others
-
9

Atlantis B 24 Liberator - 1:92 scale by Popeye the Sailor
in Non-ship/categorised builds
Posted
I'll look into it........the prints Egilman posted will work, but the build templates would be better. without them, I would have to transpose the lines onto the build board in which to gauge the rib placement. the PDF does give most of the numbers I'd need.......it can be done.
I agree with that......and I don't. there is a difference between someone who is asking for help, and those who harbor evil deeds. I even supplied pictures of the kit, as to insure honesty. believe me....I do understand........but it does put a bit of a dent in the P.R. aspects. I would have been just as happy, to have gotten just the template to build the model. you win some, ya lose some.......
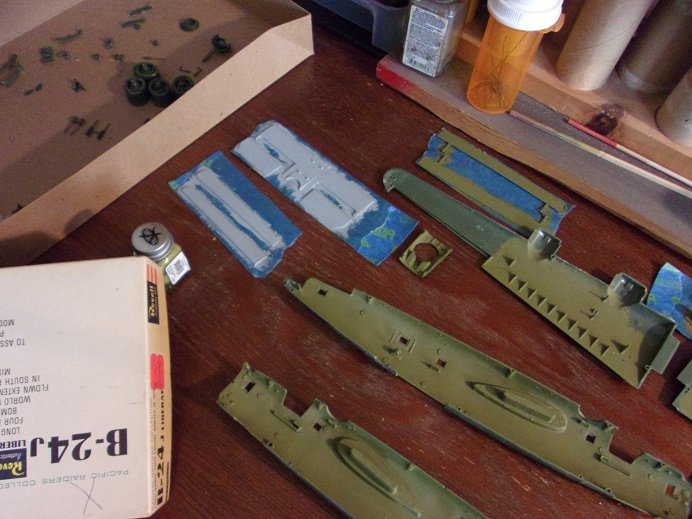
on a build note: I was looking at the Pacific raiders kit, and I noticed that the window framing is on the inside of the parts, and not on the outside. this doesn't sound like a big deal, but I prefer them outside so I can better mask them off. hoping they come out alright.