


popeye the sailor
-
Posts
15,981 -
Joined
-
Last visited
Content Type
Profiles
Forums
Gallery
Events
Posts posted by popeye the sailor
-
-
jeeze........hope you were able to get that Flyhawk kit back in the box! that's a lot of stuff!
 great finish for your model..........you've done an out standing job on the log and the model as well! very....very nice!
 ")
- Old Collingwood, CDW, Canute and 1 other
-
 4
4
-
your going to shoot them .........after you paint them
 oh dear..........the life expectancy of an infantryman was rather short 'round here . ...'an to think, the poor chickens had to see this.............
- FriedClams, Edwardkenway, mtaylor and 2 others
-
3
-
 2
2
-
good to see your able to get back to the table
hope to see the assembled hull soon!
- Halvor and Keith Black
-
2
-
-
I'm building one that that was made with 1956 molds...reissue of a very early Revell kit. we both seem to find enjoyment from older kits
")
- mtaylor, lmagna, modeller_masa and 3 others
-
6
-
just catching up OC..........I was amazed to find how many pages I was behind!
 your not letting any of that 'grass' grow under your feet....I must say
seen as a whole looks fantastic! I hope the floor is removable, so you can position riflemen in the lower floor of the farm house. not much of an accident buddy.......gotta do better than that
do it like I did one time........shake a bottle of paint with the cap loose! ....didn't get it on anything, but I didn't like the color of my hand  way too much to comment on........but as a whole, you've done an extraordinary job...as others have said, it's going to be a work of art any chickens?
- Egilman, Edwardkenway, Canute and 2 others
-
5
-
-
this is the same kit you have. early models didn't have rivets or much in the way of panel lines........the retooling you speak of, they must have added them then.
- lmagna, Egilman, modeller_masa and 2 others
-
5
-
I might be concerned about the decals, even though they're transfers. I've never dealt with transfers, but I would think that age and other factors could render them useless. micro cracking is the most common.......some can be seen and some can't........not until you go to use them.
-
 they couldn't even get Hans right.........I looked at the link.......reminds me of a quote by Monty Python {he never said that}...BTW
"I've listened to a lot of people, and I'm convinced that a lot of the wrong thinking people are right"
clearly a ploy to sell Tee shirts....and a poor one at that
-
not a problem.......I've had my share experiencing what paints can do. I love it when you lay the second coat and the under coat decides to become active again, causing it to wrinkle {or crepe, as I call it}. I was out and about the other day, and I ran across a cement that I hope you may have where you live.
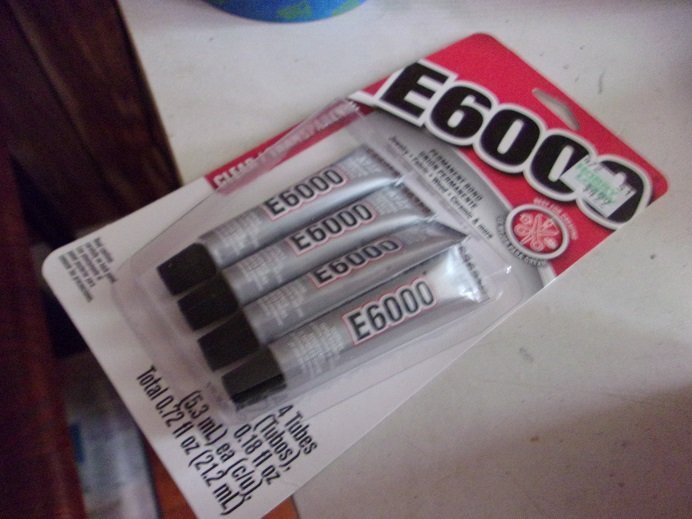
this stuff bonds just about anything. I haven't tried it yet.......I think it's been mentioned here in the forums. but I saw it and bought the smallest package to try out.
- mtaylor, Egilman, thibaultron and 3 others
-
6
-
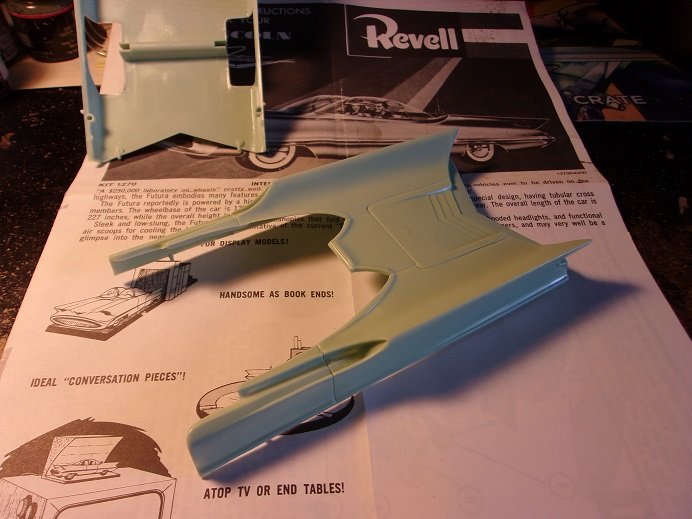
the body dried overnight........removed from the bottom and more sanding and trimming. the headlights are based the same as the tail lights.....they are sunken in......a hooded cavity. I tried to fit them while the body was still taped together, but that was futile. I tried again later with better success and saw how they were to align with the hood front edges and the side body corners. the headlight panels are chrome as well......I will likely paint them too.
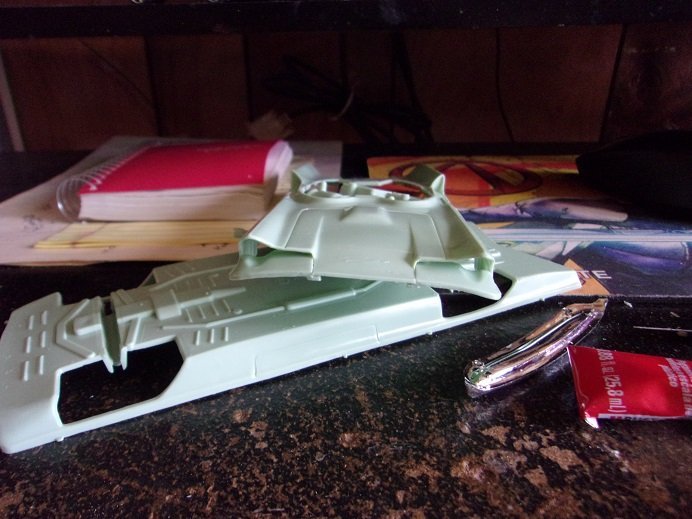
there the first initial splash of paint.......
then dry fit to see to check for the front bumper alignment.
I tried to do a little sanding, but it needs more time to dry.
- GrandpaPhil, marktiedens, Canute and 11 others
-
14
-
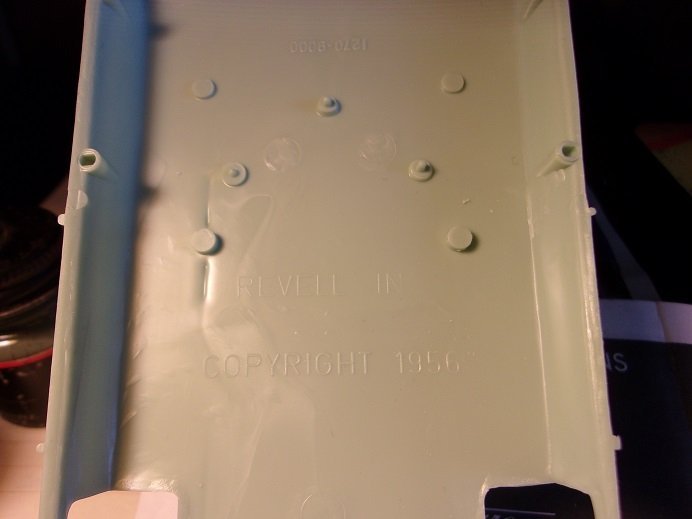
thanks OC.........as well as all looking in. I figured I'd do some tinkering to see what I'm up against. as seen here, most model kits of this time period, didn't even have engines.......basically, the bottom chassis was just a cover pan. they engineered holes for the metal shafts to go through, and that was pretty much it for suspension. some kits went a bit further and had hollow differentials for the rear axle shafts to go through, which could be considered an early attempt to add detail to the model. it would be some time before all model kits supplied engine detail. as this detail emerged, problems were encountered and solved, by running the metal shaft through the engine block, or in front or behind the sump bump. later model introduced the spindle and A frame suspension parts and negated the use of the metal axle. but.......this was later in their evolution.
the bottom pan was stamped on both sides with the production date.

the axle shafts will snap into place via the two slots......the date stamp can be seen running down where the drive shaft should be.
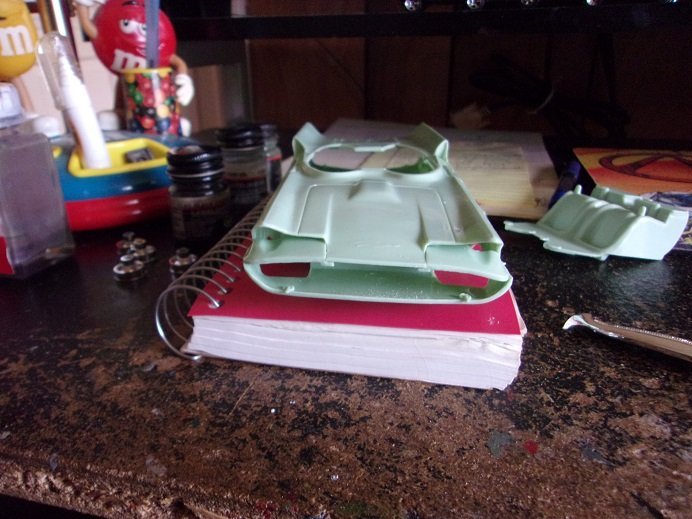
the three parts that make up the rear section of the top half of the body were assembled
oh........here is a glimpse of the lower part of the first page..........suggestions for how to display the model. the suggestion covered up with the body, has it perched on the edge of a ash tray {for those who were thinking of something for dad on Father's day). check out the TV........if that ain't a black n white TV....I'll eat my shirt!
my aunt had one like that.....her cat would always lay on top. if you tried to change the channel, it would take a swipe at you {did it to me once..........only once  }. the curved surface at the tips are the door front edges....there are some nuances with the plastic thickness.
I did some trimming here.......sanding down the door edge to be flatter, so the door gap would be there. it needs to be there. the tail light lenses are chrome.......I should remove the chrome, but I think I will just paint them once fitted in place.
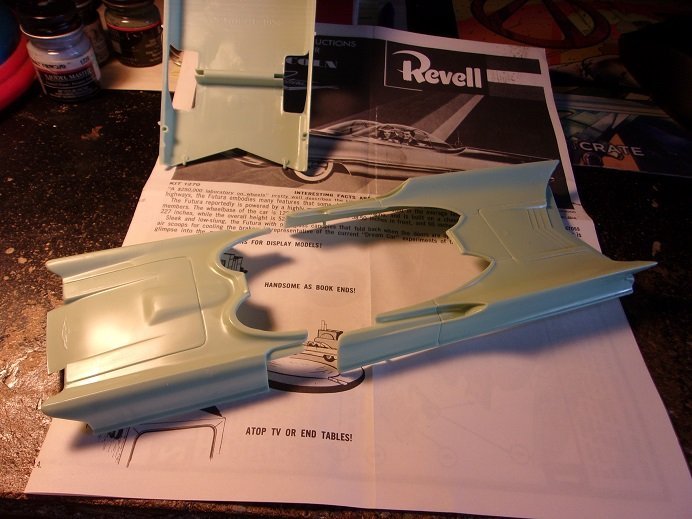
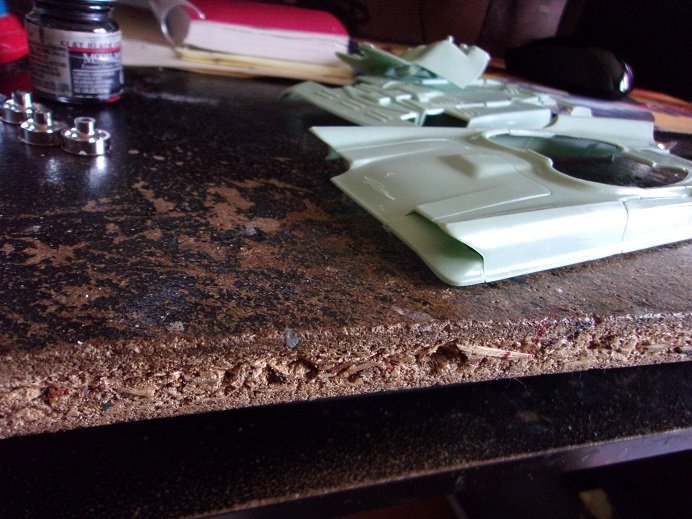
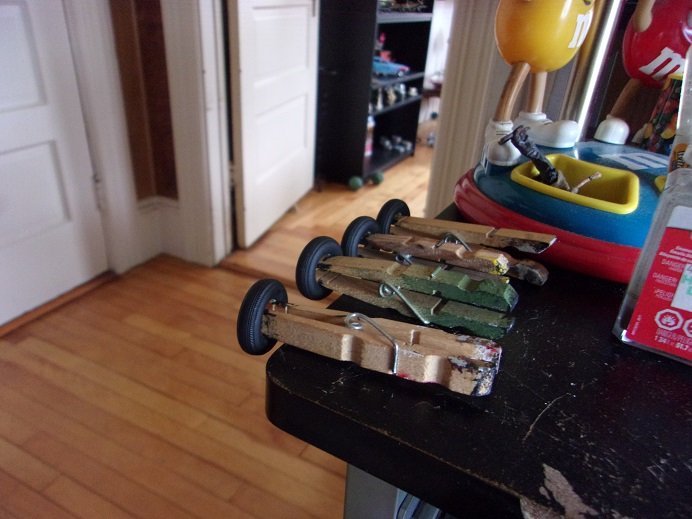
flash is all around........trimming is surely going to result in gaps. the front part of the upper body was taped to the bottom pan. the rear section was cemented to the front section and also taped into place. to help align the upper doors to the body {cemented to those two tabs}, clothes pins were used. to think.........I might have used them as a kid
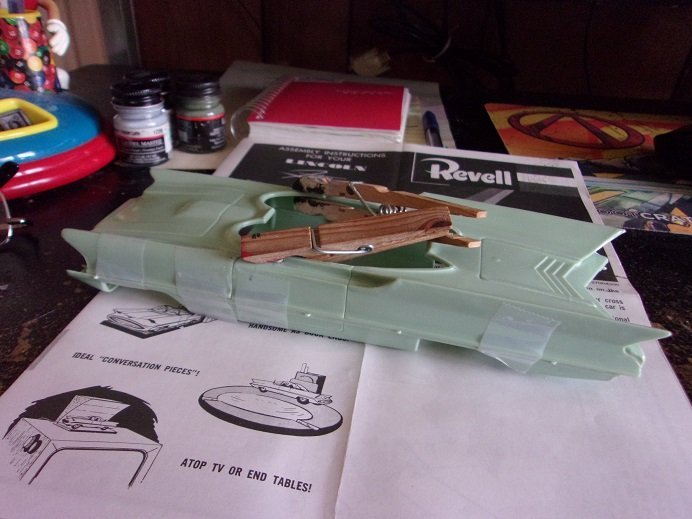
it can be seen where the rear bumper will be, that some work will need to be done to clean up the body contour back there. I bought a tube of white body filler to do it......brand: Mr. Hobby.
-
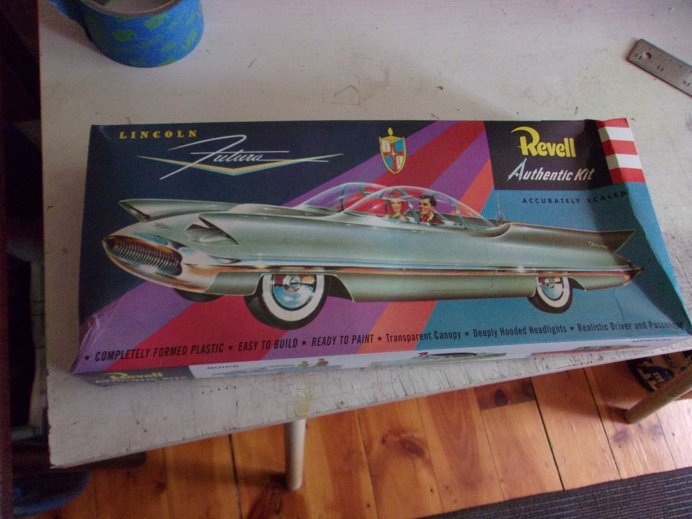
I saw this model while I was building the Adam West Batmobile........thought it would be cool to have it next to the concept car that kicked it off. korny to most now, it wasn't to young lads who tuned in back in the mid 60's. the one I saw was likely the first production of the model........sadly I was slow in pull'in the trigger and soon it was gone. it would be a while before I'd see another one. this one is a reissue of the original Revell kit back in 1956. Revell reissued a slew of old kits in the mid 90's...this series was one of them. not wanting to see it slip through my fingers again, I bought it. for a guy that looks for the nostalgia in things........I think I got it in spades
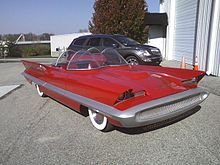
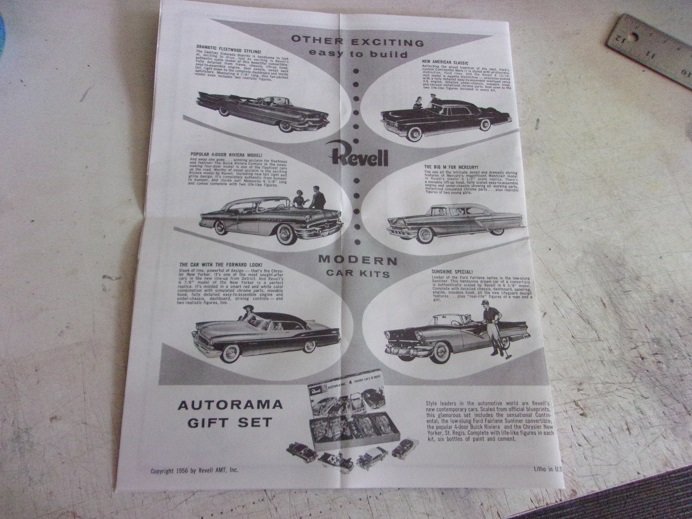
as a concept car, it was a hit in the car show circuits.......from 1955 on to around 1963, fins were 'in'. Cadillac adopted them with their Fleetwood line, Chevy adopted them in their Impala line, as well a Lincoln's own cars, the Premiere and Capri. other aspects were also later seen molded in ford cars. only one proto type was built.........built in Turin Italy at a cost of $250,000. the car sat around after that, seen in two movies......"it started with a kiss", and "The secret door" which was a Ford promo film. since the car wasn't titled, it couldn't be registered or insured.........a quarter of a Million dollars....just wasting away. it was later sold to George Barris for $1.00 {and other valuable considerations}, and it sat behind his shop for a few more years. in 1966, he was approached and asked to build the theme car for the Batman TV series. another fellow, Dean Jefferies was given the task, but could not deliver in time. the Futura was modified using some of Dean's concept plans, and the Adam West Batmobile was born. George also built two other cars with fiberglass bodies to help fill in the filming gaps and appeared in a few shows featuring the caped crusader. DC comics followed the TV antics, but readers weren't impressed with the show, but managed to hold on to the ardent followers. by the show's end in 1968, DC had lost quite a few followers.......Batgirl, the cheekiness was killing the character! Batman almost died, but was revived in 1969, and regained popularity in 1970. as for the car.........Barris housed it in a couple of car museums until it was sold to Rick Champlain in 2013 for $4.62 million dollars!
in 1990, a fellow named Bob Butts created a copy of the Lincoln Futura, later to be seen in the NBC TV series " Viper", in the episode 'wheels of fire'. here is the car in 2009.......
on the outside of the box, it was dated 1995......it was still plastic sealed. it had shrunk to the point where it was beginning to wrinkle one end of the box. now, a lot of folks quest for the more updated kits.......the improvements in detail and molding. I, on the other hand, like to look back on the roots of the model kit...how they looked back then. back to the days of the simplistic kit.......the age of kit and instruction. well, I really got my wish on this one

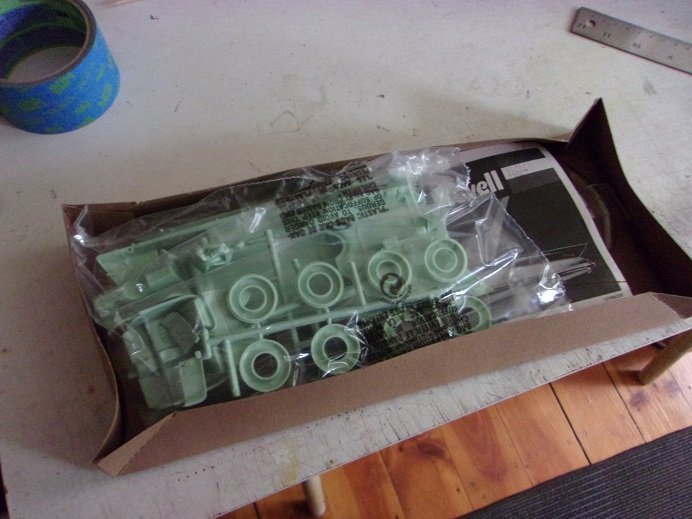
the first thing I saw, in opening the box, was the plastic tires. I believe rubber tires.......or something close to it, was featured in kits by the mid 60's. I recall my older brother having HP Hood milk delivery truck....and it too had the plastic tires. spreading the parts out, one can see how simple the kit is......depending how one looks at it. there was no engine..........and the body was in multiple parts.
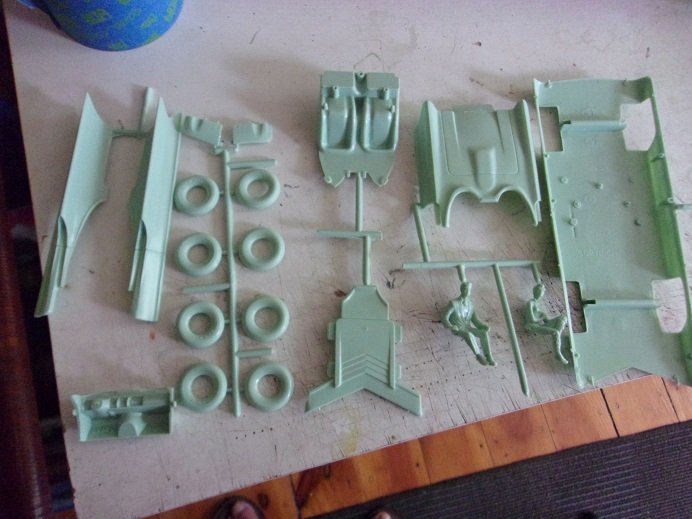
the top section sectioned off in four pieces, to be built on the lower section, that resembles what can be described as a 'pan'. the clear parts only consists of the bubbled canopy
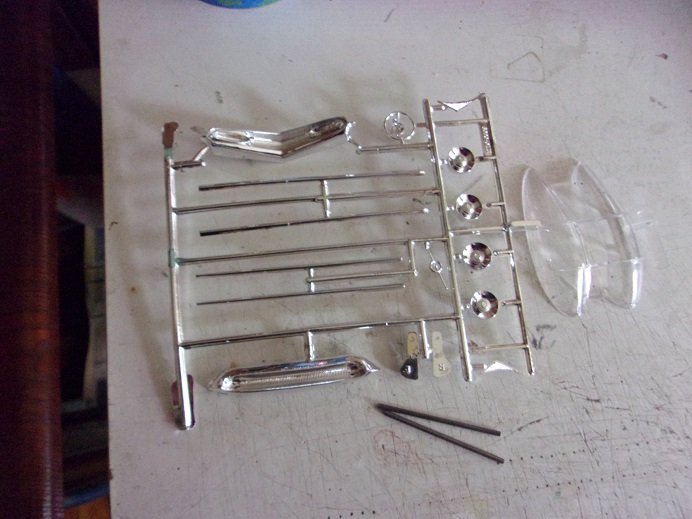
there's not a lot of chrome.......and two metal axles fill out the drivetrain {at least it will roll}. the instructions filled out the rest of my wishes, dated in 1956, the year I was born

this kit does include figures....not sure if I will used them. I should have shown you the lower portion of the first page........it has some zany ways to display the model once it is finished. are you ready to see the assembly sequence? OK..........I want you to cup your hands like a pair of binoculars and hold them up to your eyes...........'cuz here they are!
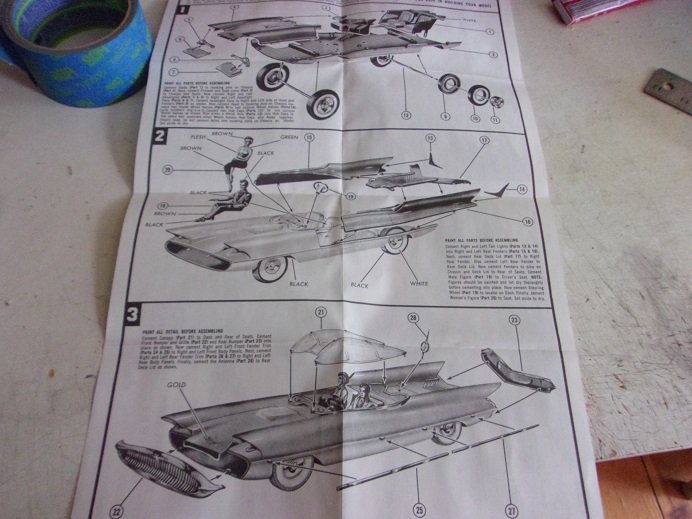
primitive or what?!?!?!?!?!
this might be a nightmare to paint......... I do believe I've hit the mother lode in the nostalgia dept! where in the heck did I put that stone axe? with the description the instructions give, I would love to see this model redesigned in todays expectations. Metric wasn't even used back then, everything is in inches, in the description. there is going to be some body work that needs to get done........the top section needs to be assembled and joints will definitely need putty. there is some degree of flash and deformity.......getting it right will be interesting
-
R2D2 was in Star Wars..........Star trek only had probes........the episode with the probe 'Nomad' comes to mind
-
this is always the hardest part........trying to pick out the perfect paint. I've always liked the lacquer paints, but you need to paint with low humidity. the Billing's paints I used to have {they are mostly gone now} were good.........great shine and hard finish. but yes......the smell would knock a buzzard off a sh_t wagon! primers have come a long way.........remember when there were only two or three colors........now there is one for every color
the use of primers for lighter colors can vary, depending what hue your looking for. for the darker colors, it doesn't have as much effect.....but for the lighter colors, it makes a big difference. one thing I've found, being a confirmed enamel guy, is if your thinner says it for airbrush, don't use it to mix paint. it kills the shine properties, and worse for flats.........turns gloss to a semi gloss and dead pans the flats {looks good for tires though }. I have a friend in Canada who swears by Alclad.
- Kevin, mtaylor, Old Collingwood and 4 others
-
7
-
Interesting........don't know how you painted it with the glass installed, but it came out looking super
I do believe there was a squadron that flew planes that were painted black.......they did mostly night missions. with plastic.......fit is everything........usually done before assembly. you've done an awesome job on her so far.........I like the idea for your stand. it's simple..........I tend to over complicate things
-
they came out fantastic Chris! I see you added the control linkages.........nice touch
very fine models indeed!
-
-
they are doing the same with the Osprey.........
- Egilman, lmagna, Old Collingwood and 3 others
-
6
-
-
thanks.......I've lightened up on the research for now........bigger fish to fry
BTW........hope your fishing trip was fun.......haven't been out on open waters for quite a while now. haven't held a rod for some time either........I can remember when it was all I lived for I did go out and buy the balsa strips for it though........I may need an extra sheet or two for the wing ribs {I'll see when I get started on it}.
I'm not liking how the glass is looking frame-wise.......I may elect to do just the cockpit. I've done a little work with the Pacific Raiders model, since it is the same kit. as per the Buffalo kit, the windows were all cut out and I will do the same treatment to them. I've been distracted though due to problems with the admiral....nothing serious, but a cause for concern. more soon
-
popped in to see how you've progressed, and I must say.......you've done a fantastic job! the detail is amazing.......jaw droppingly awesome
I have my first wooden deck planned for a future project, and from what I've read, OC is correct concerning punching out all those areas on the deck. although, in seeing you not punch out yours, kinda makes me wonder if it really matters. she photographed better in the white shadow box....very impressive!
the flyhawk model looks insanely good.........
-


USS Langley by RGL - FINISHED - Trumpeter - 1/350 - PLASTIC
in - Kit build logs for subjects built from 1901 - Present Day
Posted · Edited by popeye the sailor
looks like it might be a nail biter to get the deck fastened down.......always nerve wracking to get it lined up.......especially since you'll be using Ca. your paint and weathering is top notch as always.......amazing model")