popeye the sailor
-
Posts
16,007 -
Joined
-
Last visited
Content Type
Profiles
Forums
Gallery
Events
Everything posted by popeye the sailor
-
 hi there Wim.........it still is a nice ship..........it right here beside me, I can play with it and everything........LOL! yea, it's going slow, my friend, but I'll get there. that'll teach me for having so many builds in the wings.......thanks for the good word!
 -
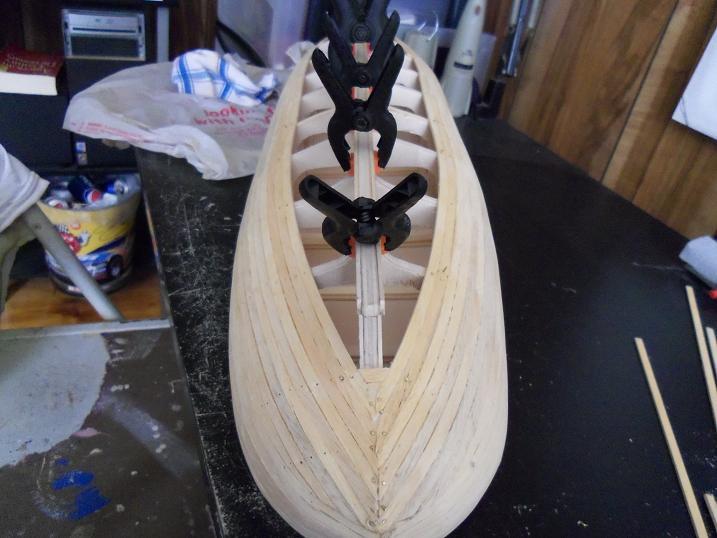
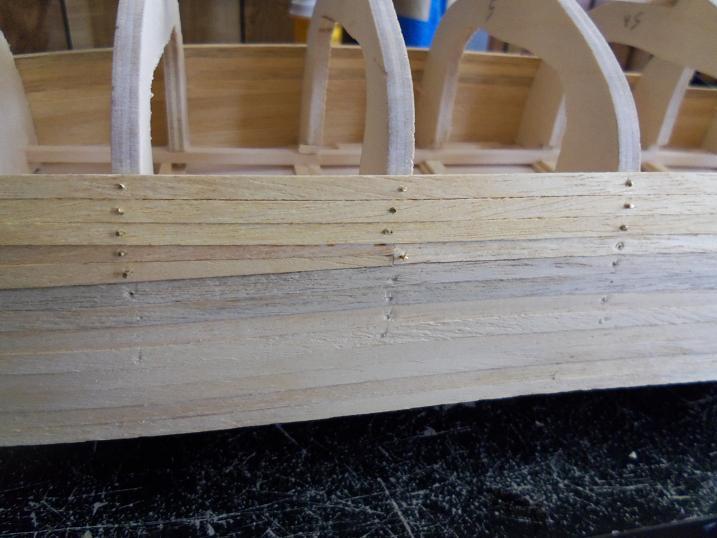
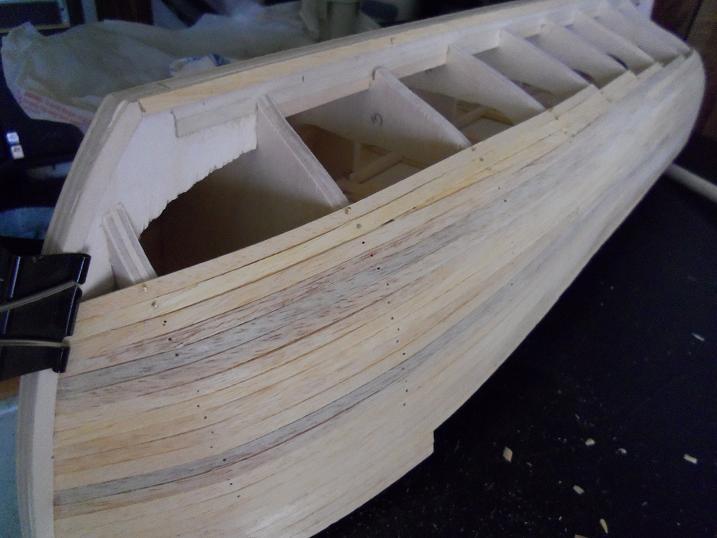
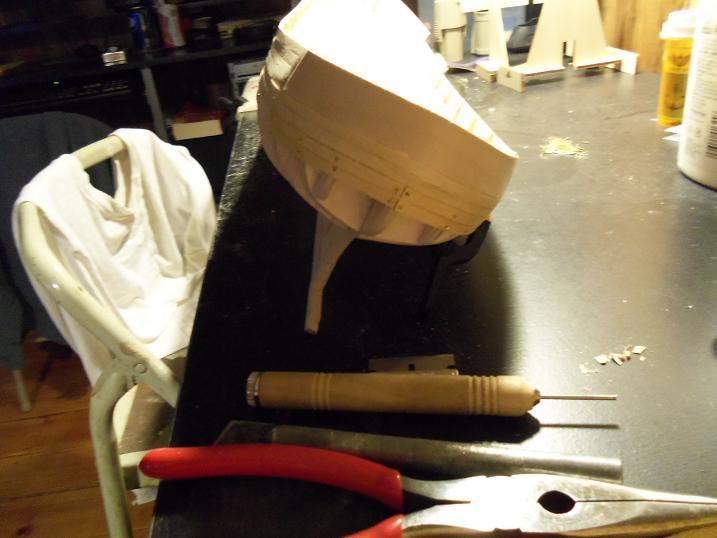
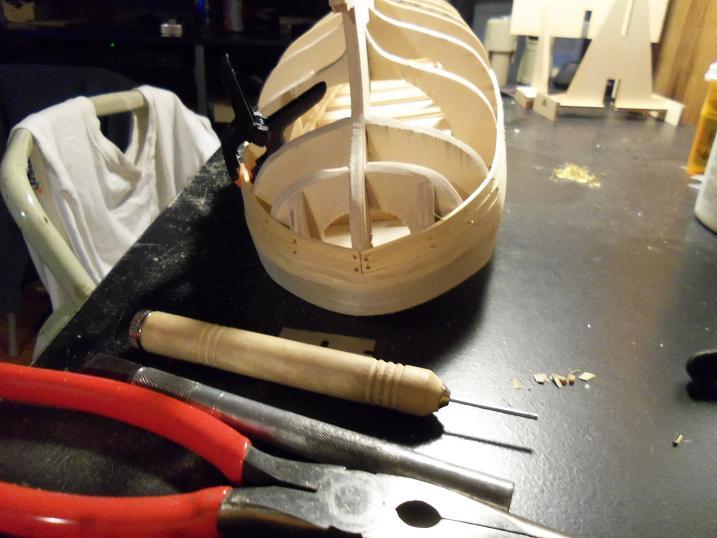
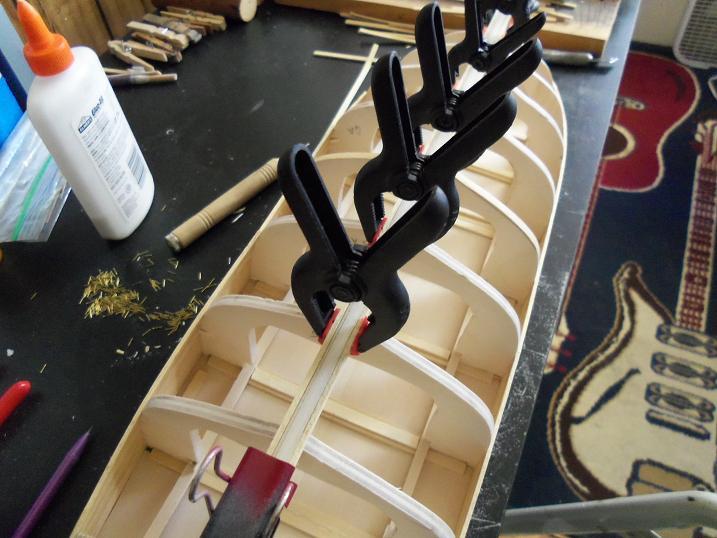
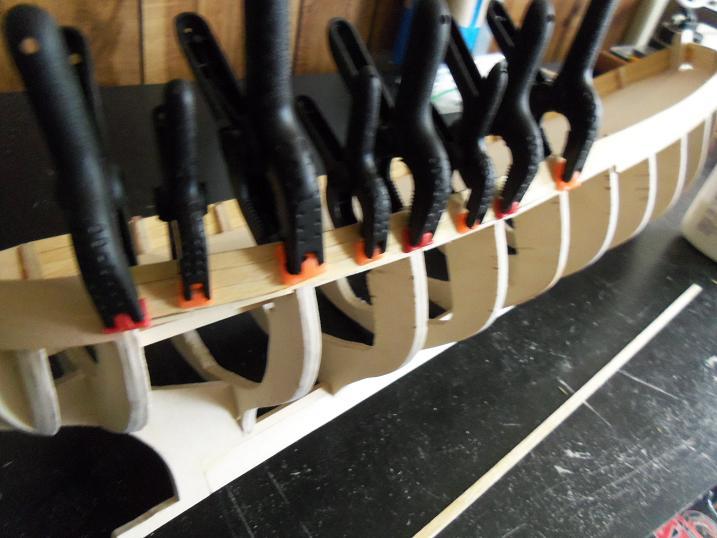
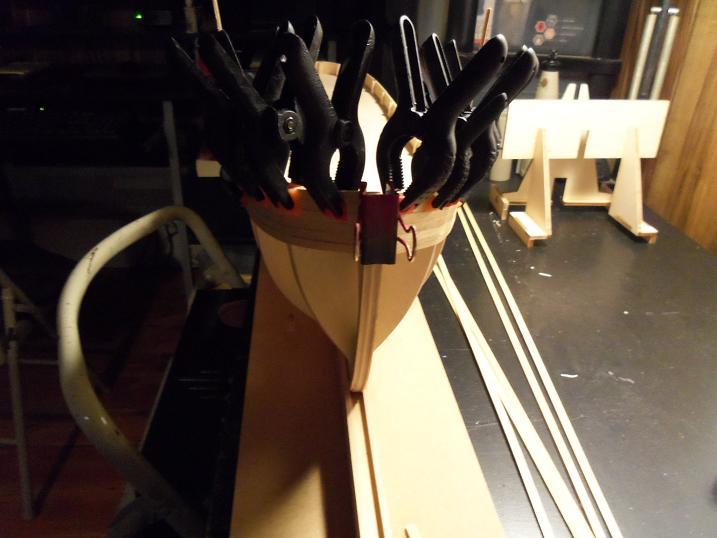
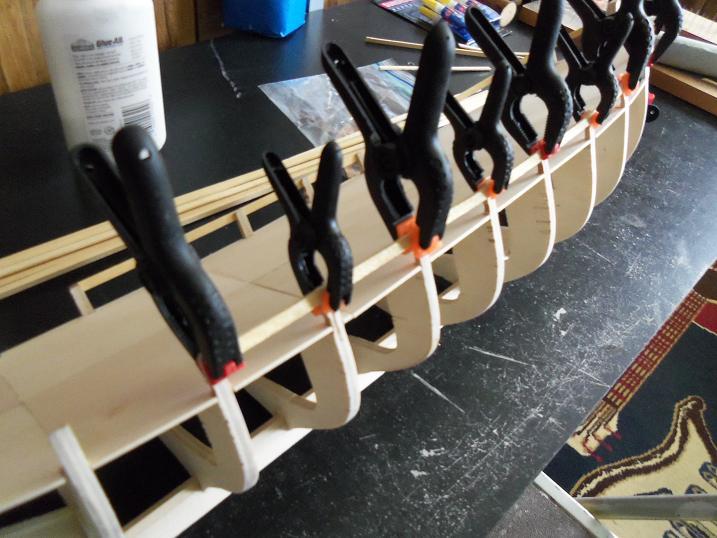
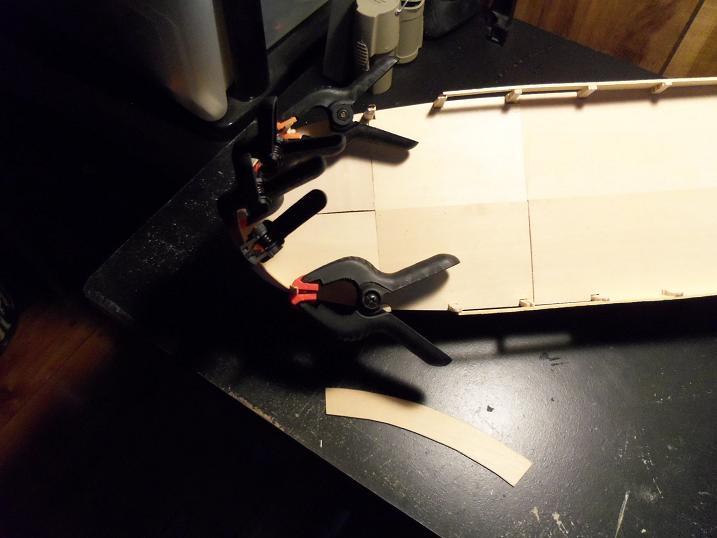
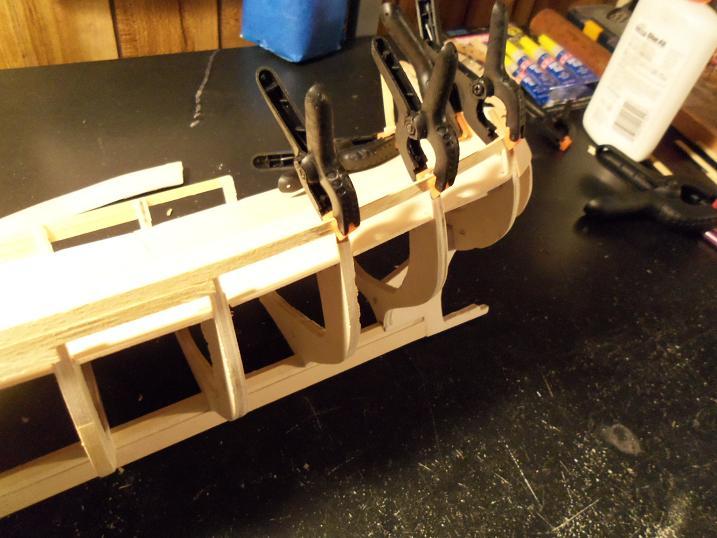
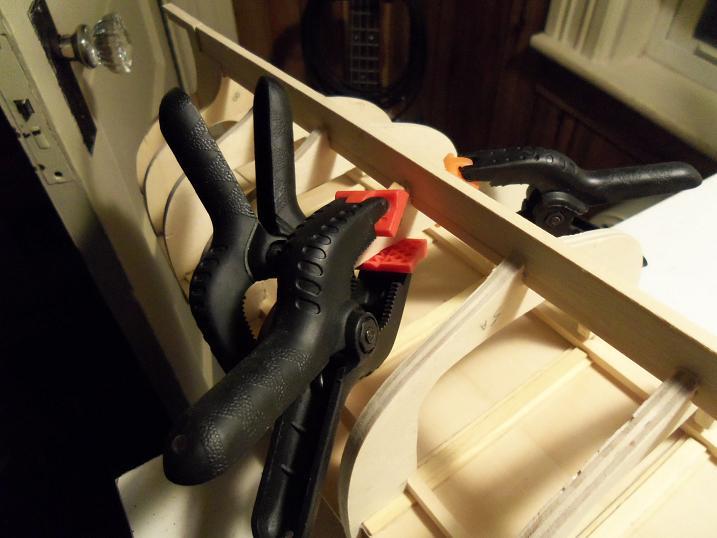
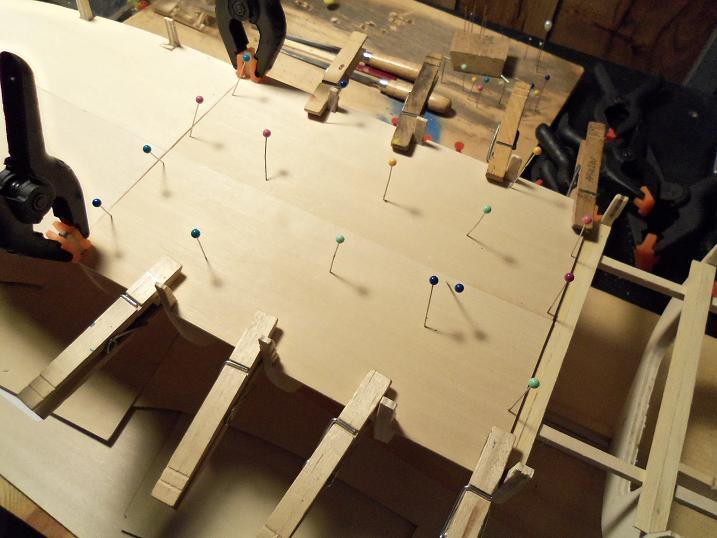
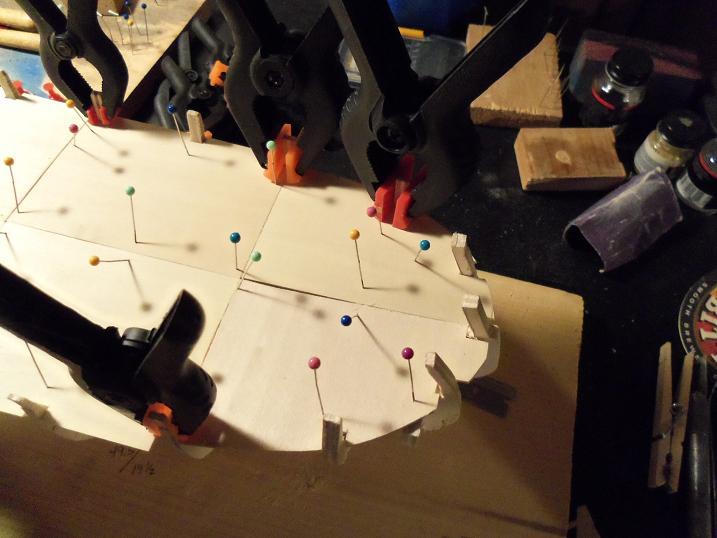
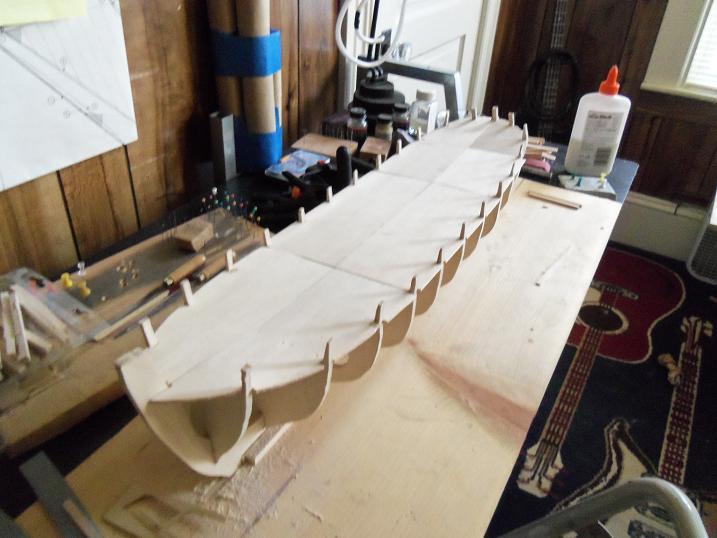
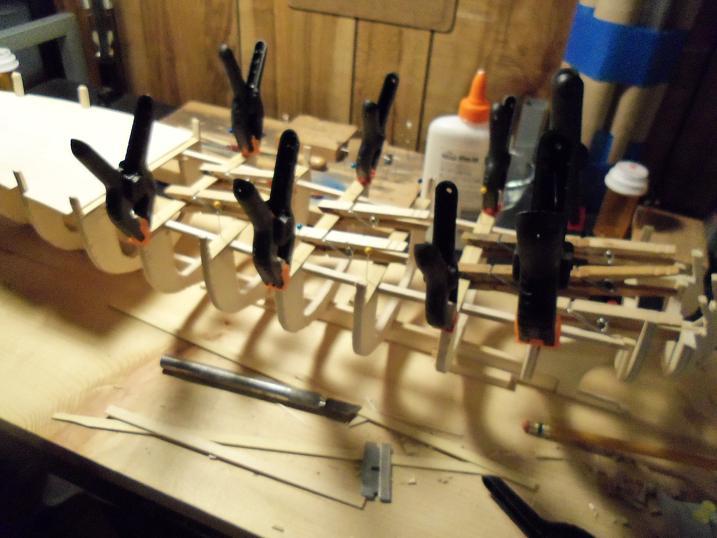
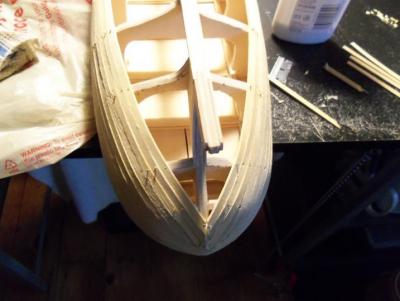
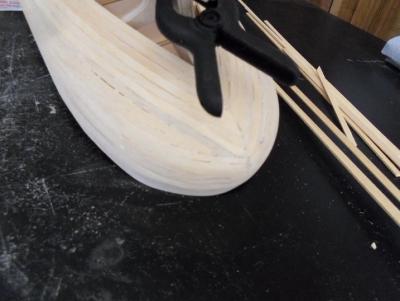
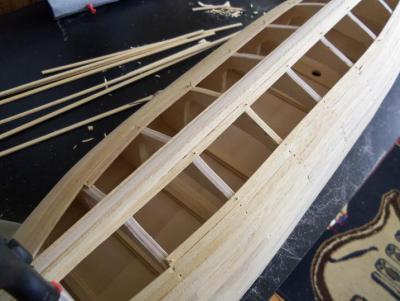
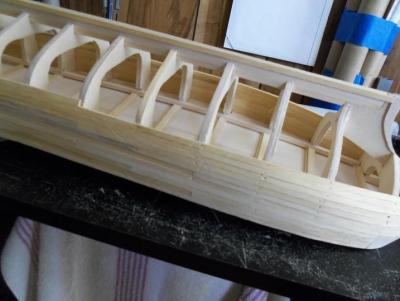
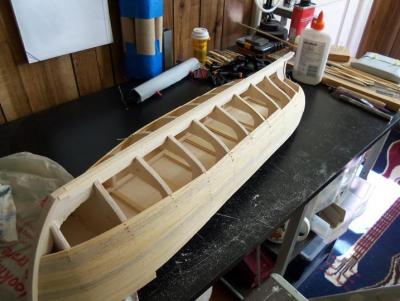
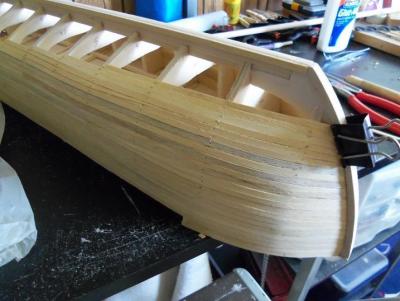
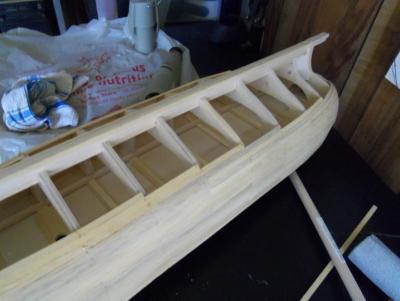
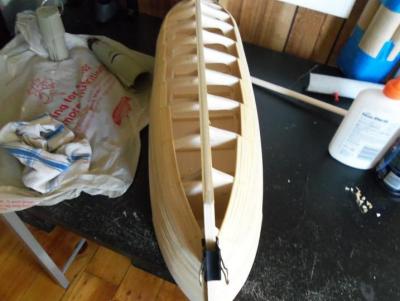
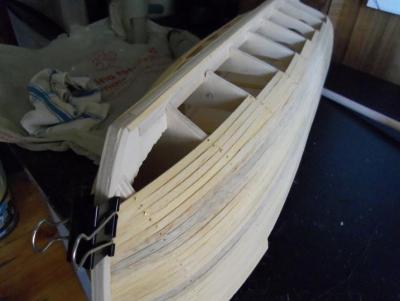
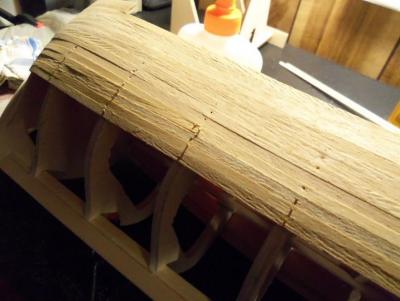
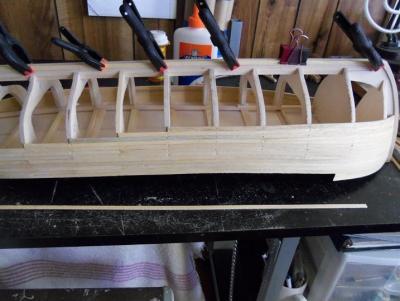
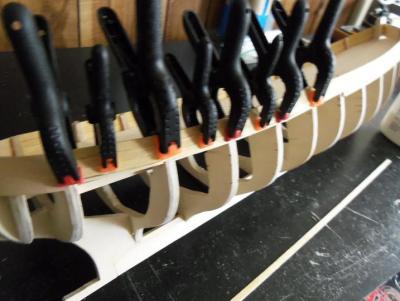
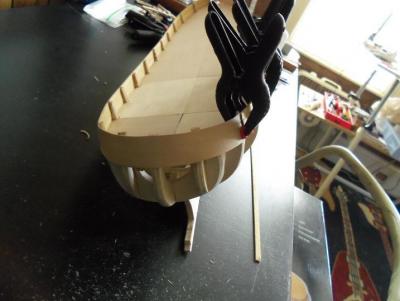
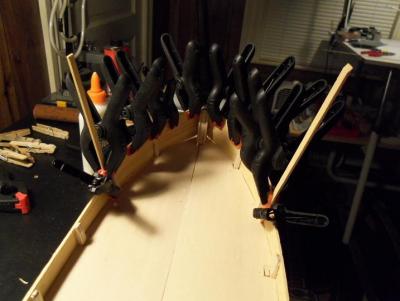
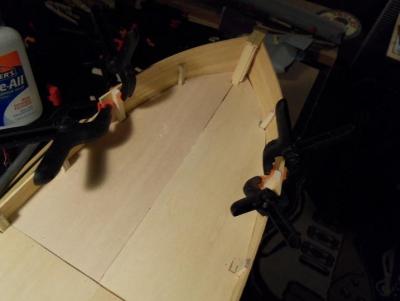
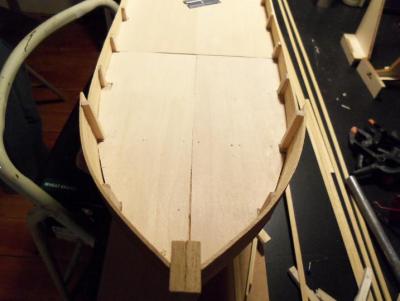
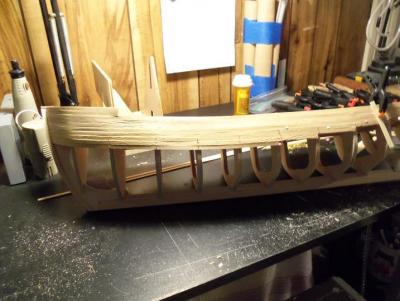
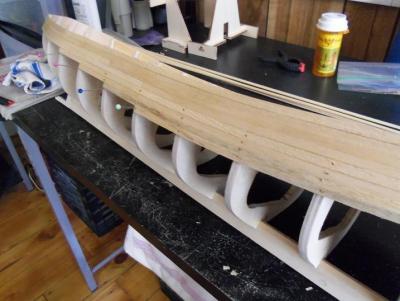
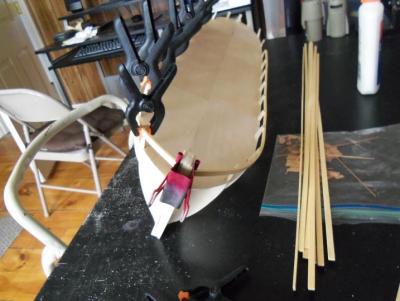
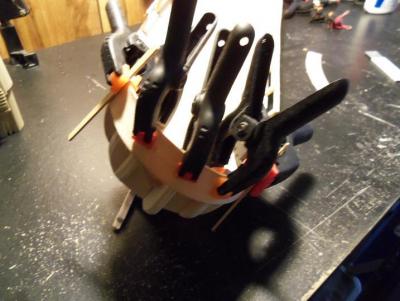
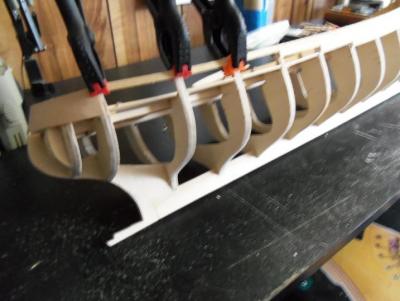
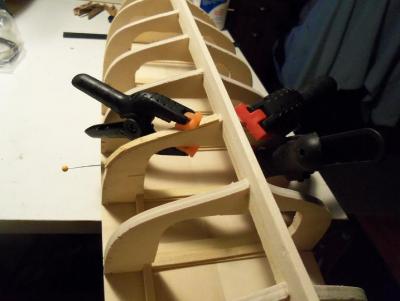
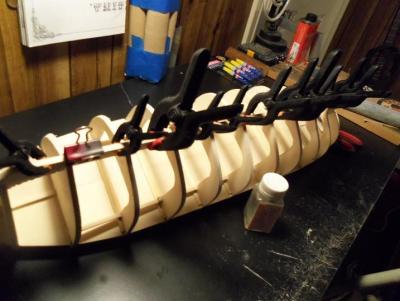
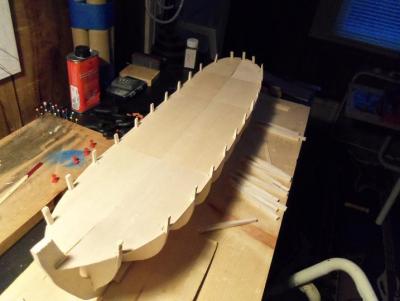
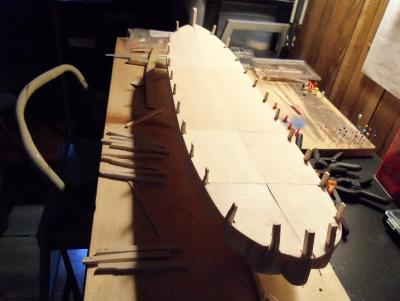
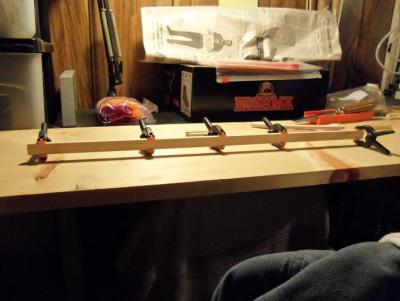
3 - 26 - 2012 the planking continues.........it's getting there though. Towards the end of this session, I laid the garboard planks and began to merge the plankings together. The stern buttoned up to the turn of the keel, where it was terminated with a border plank. Sanded and painted, this will not be seen.


-
you two are such wonderful folk!
-
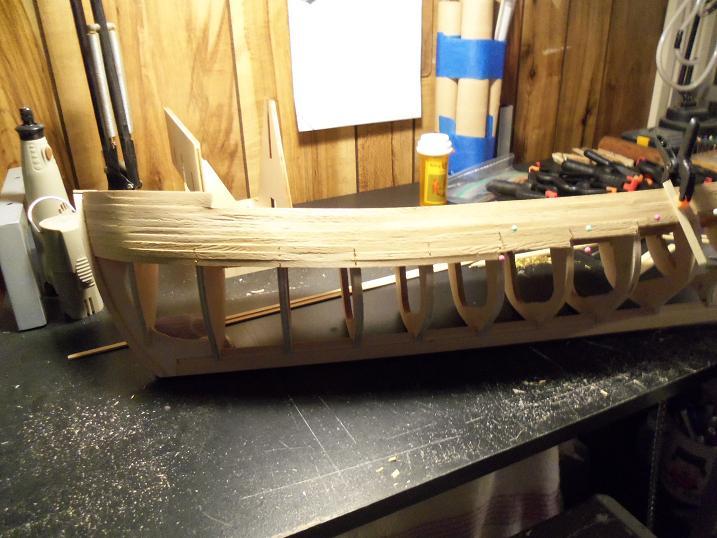
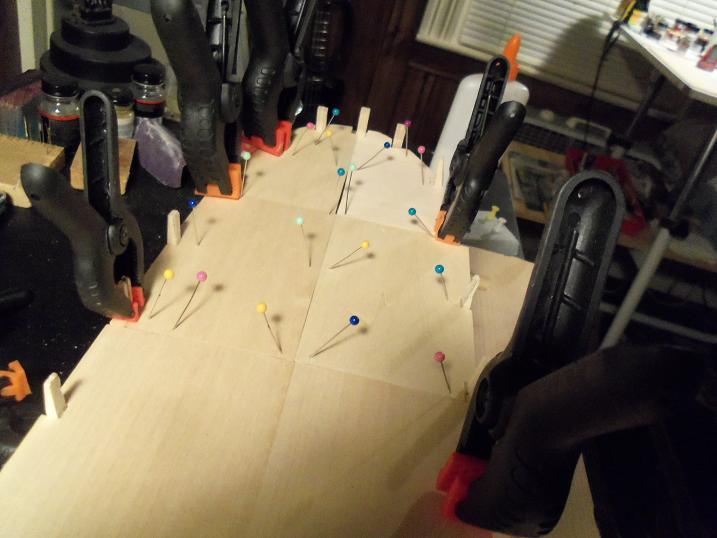
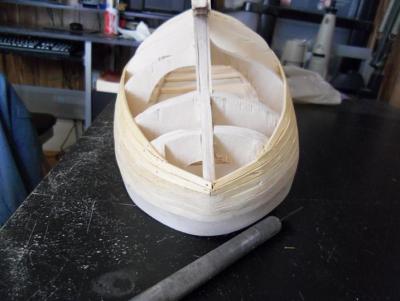
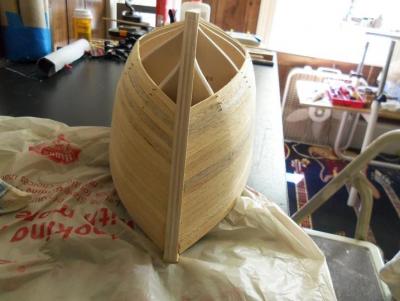
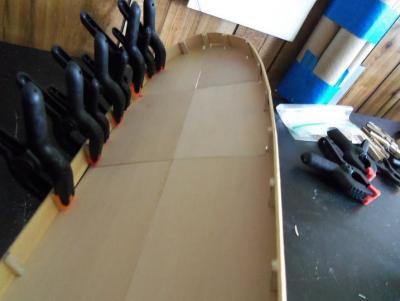
3 - 23 - 2012 The planking was going along great! Sanding as I went along, it shows the progress, without looking so scary....LOL! As I was closing in on the keel, I thought that I had better drill the mast hole, before I totally lose track of the center to the rib and keel.


-
thanks Anja......I'm well on my way to get everything back in. I dread the Gothenborg the most.......there is so much in there! thanks for the good word and for looking in!
-
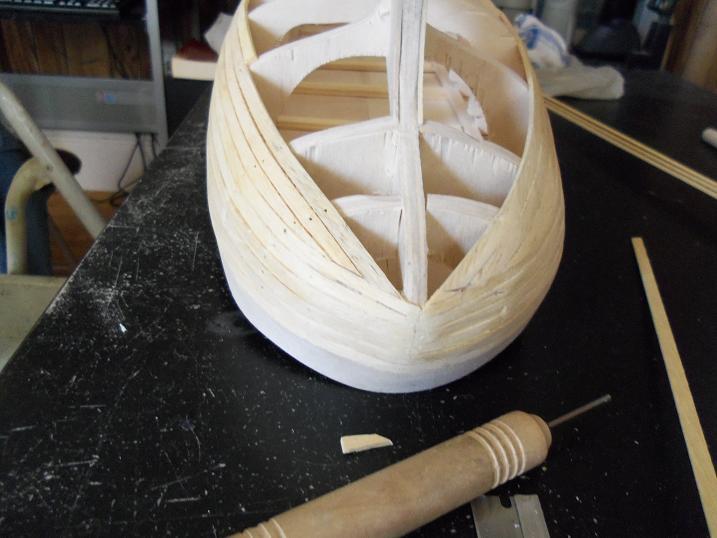
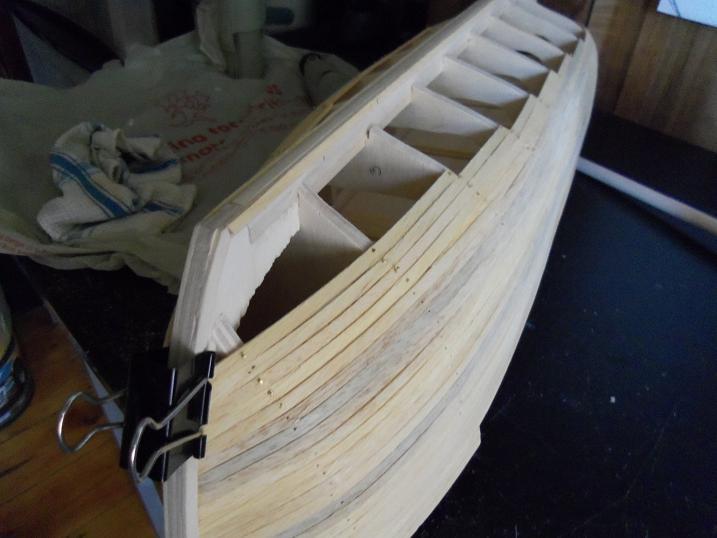
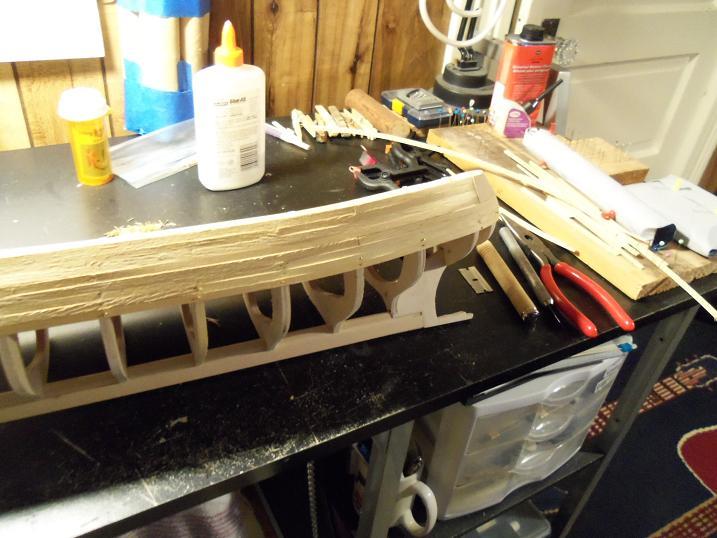
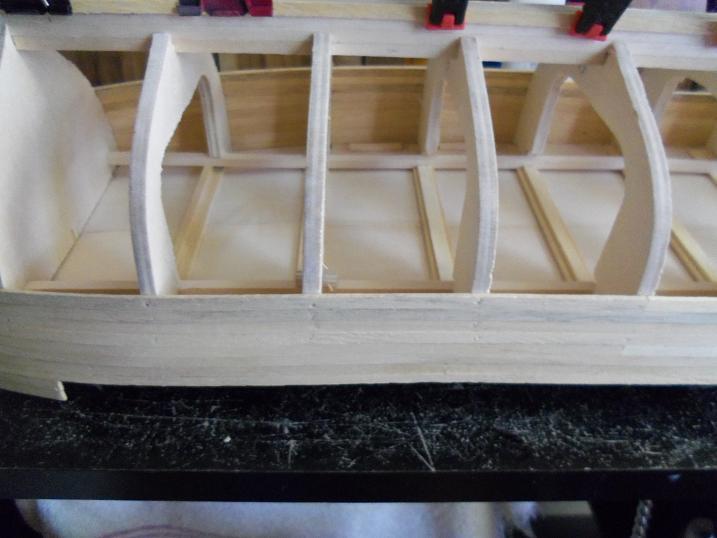
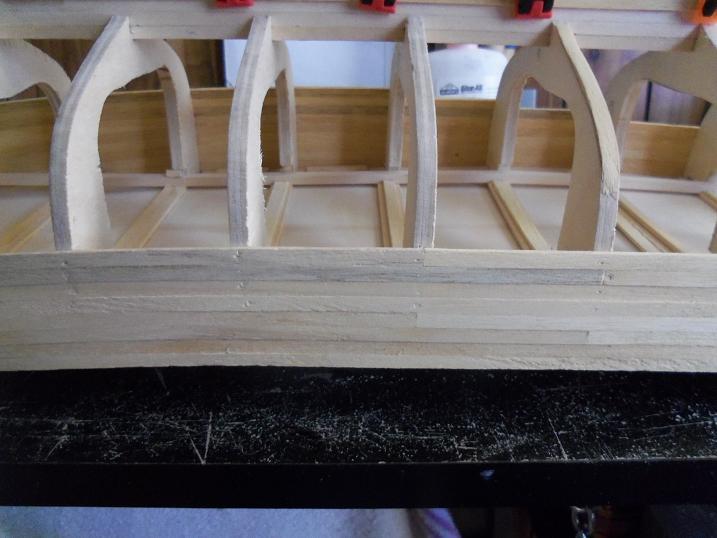
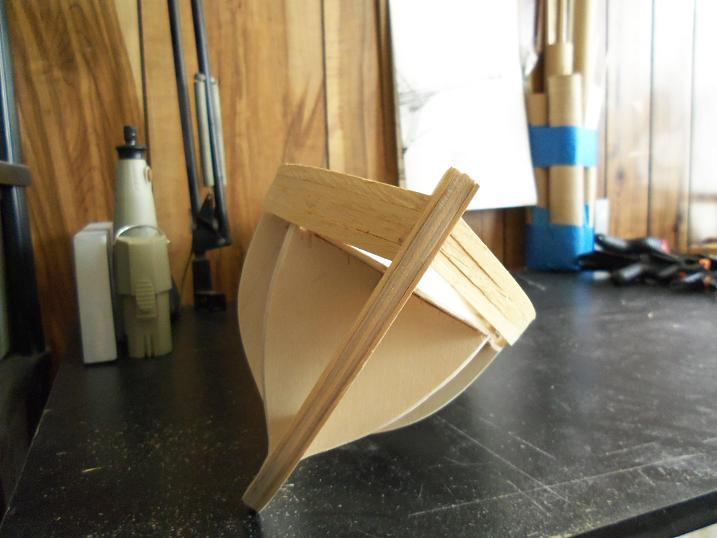
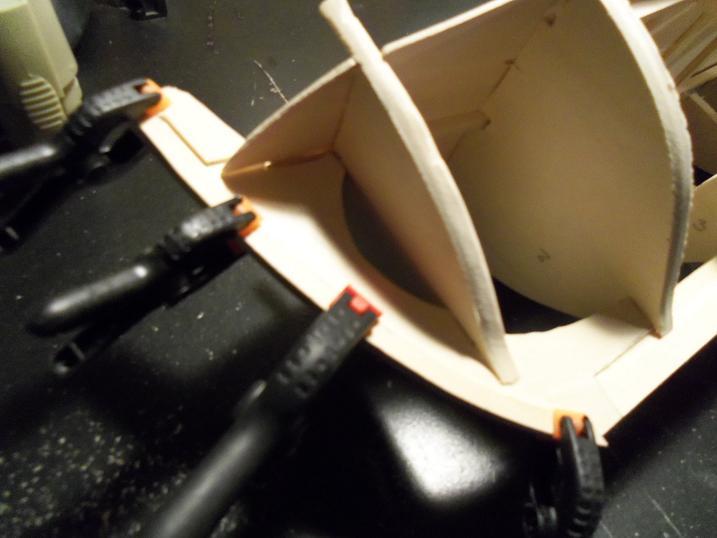
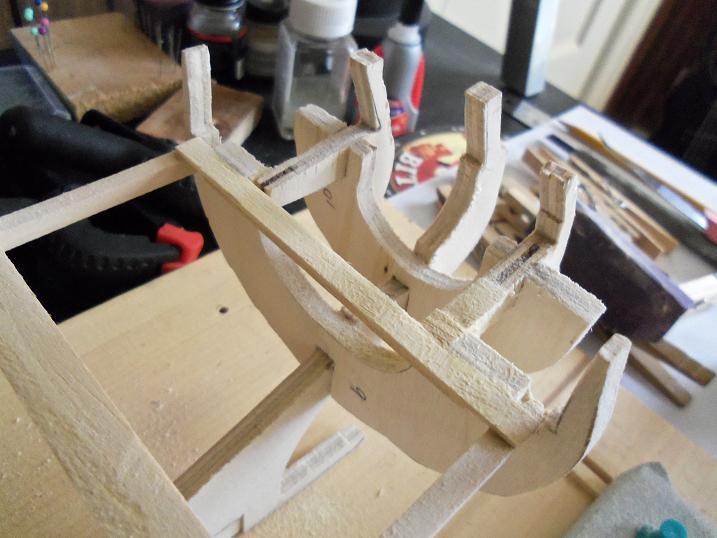
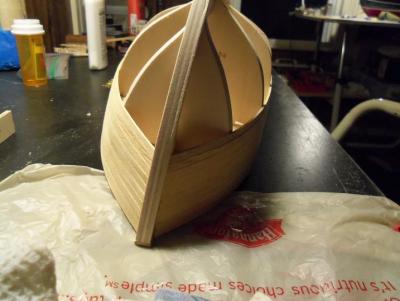
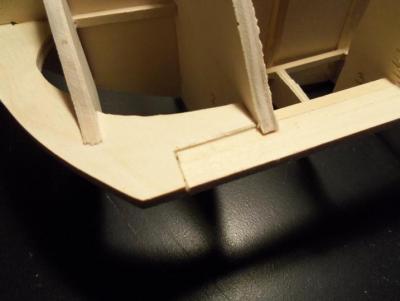
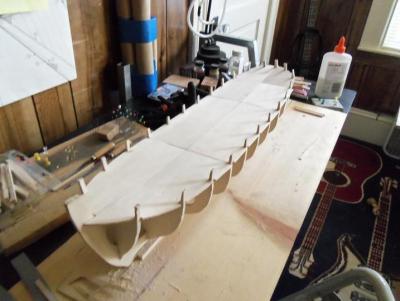
3 - 21 - 2012 The planking continued.........the stern and keel rabbits were installed at this point, not having much need for them until now.


-
thanks Wayne and Sjors.......I had started this build before the M&M ship, although I did make the frame for it. then I got roped into it, so I let this one sit. I will be picking up on it soon, after the Lobsie twins are finished. I have all of the finsihed builds up......if you want to see the M&M Fun Ship Sjors.......it's there
-
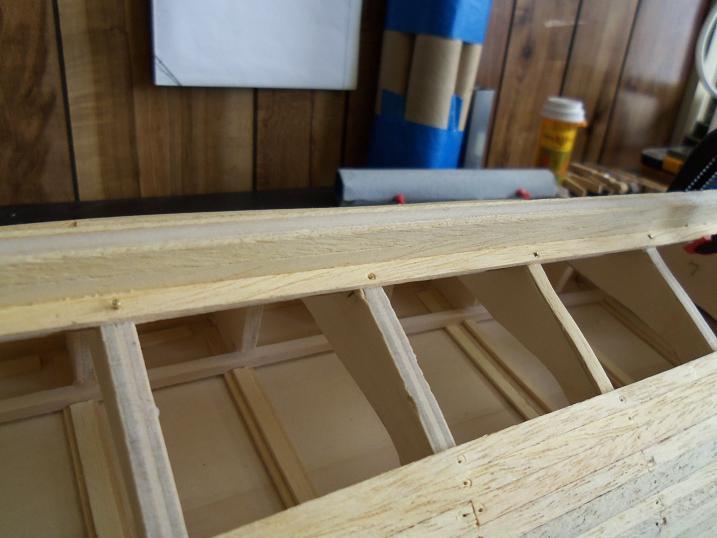
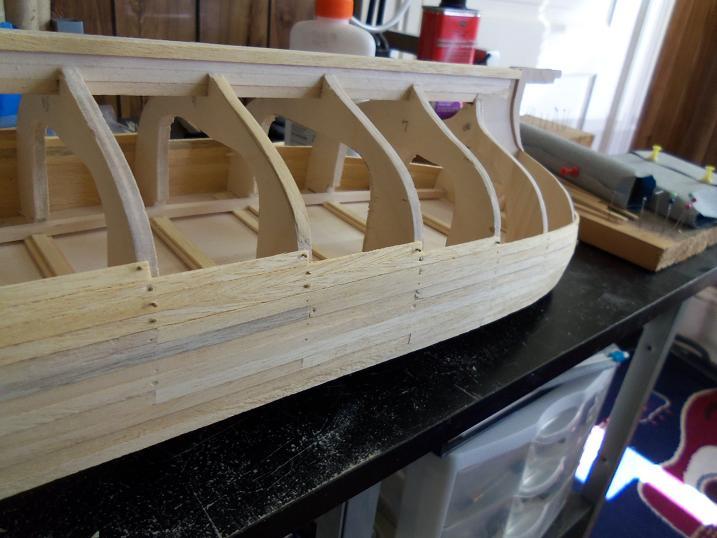
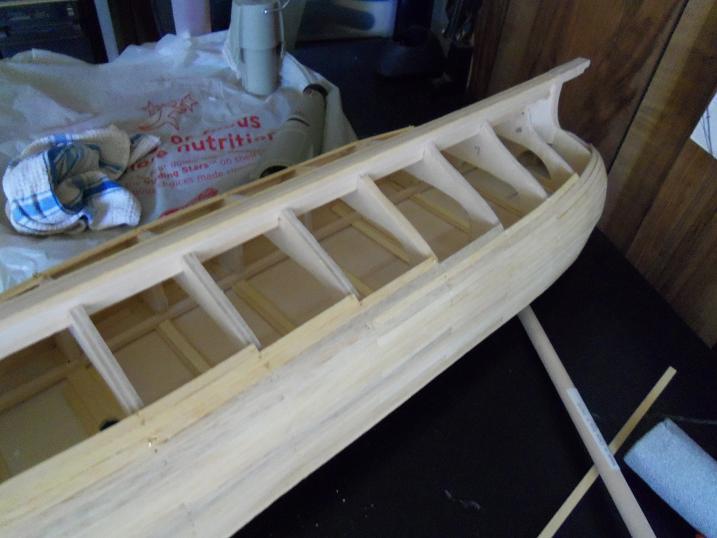
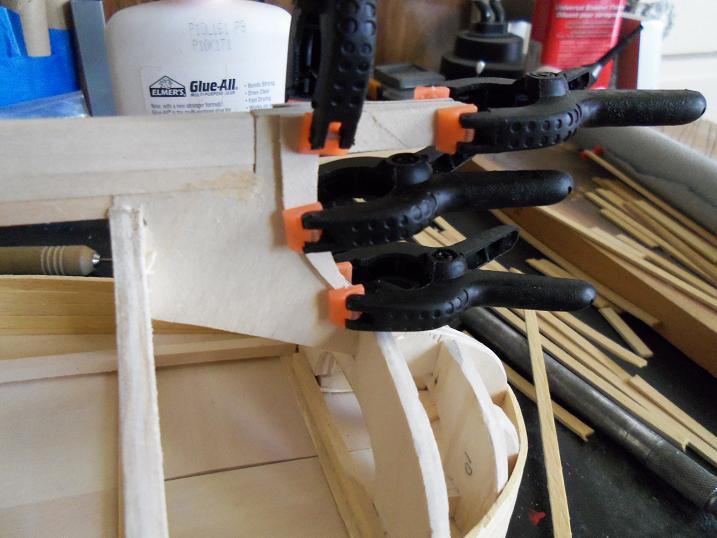
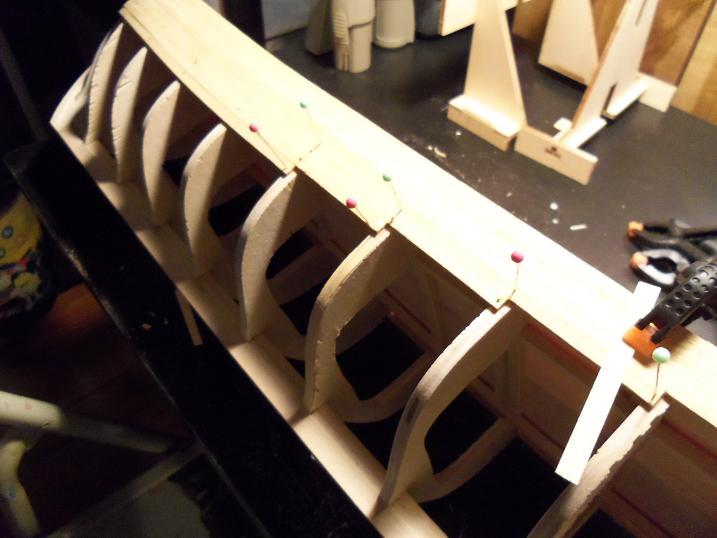
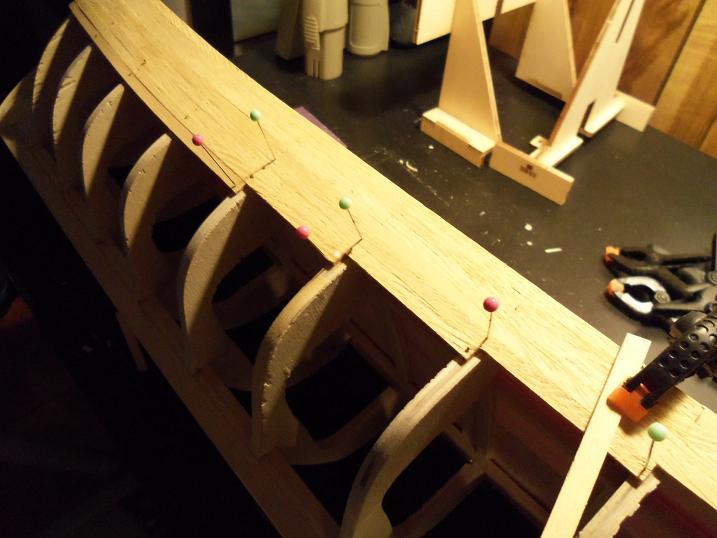
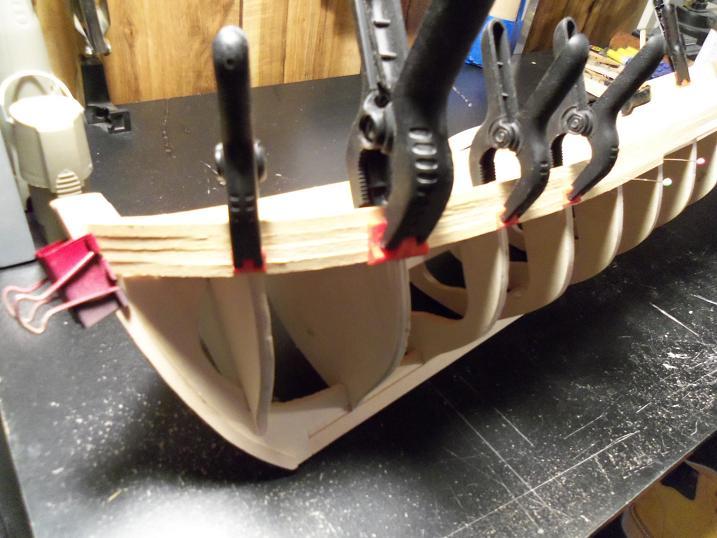
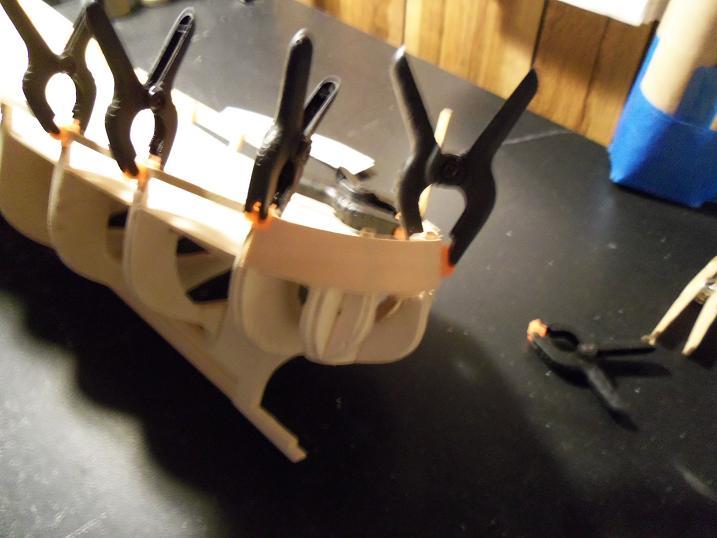
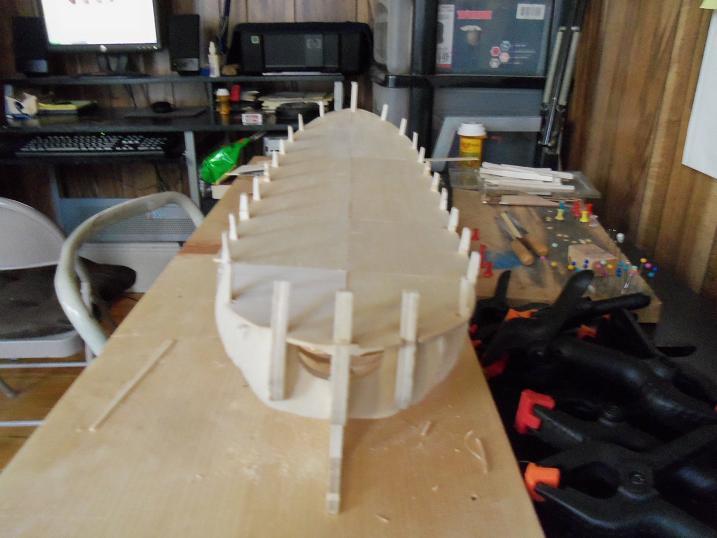
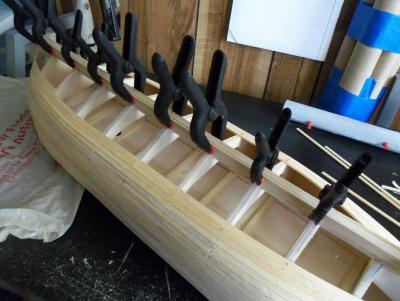
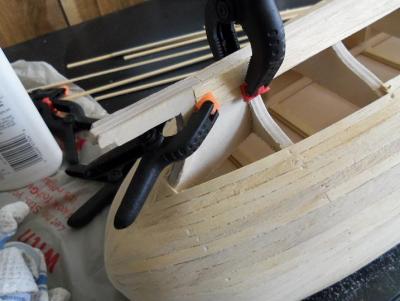
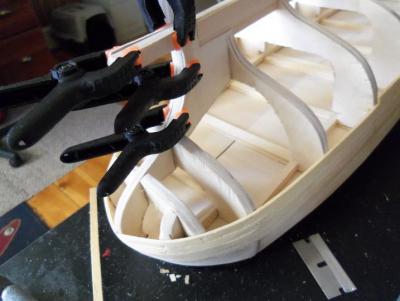
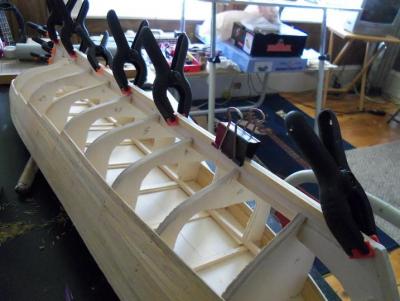
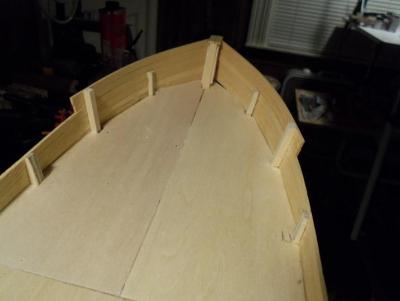
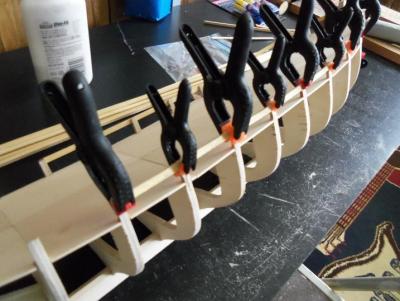
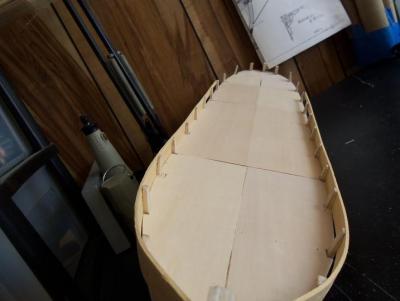
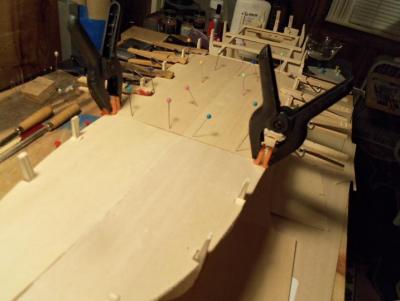
3 - 19 - 2012 I had to double up on the stern bulwark cap to bring it to the thickness to the planking. The planking continued. I added a few more rows to the bow bulwarks. I wanted to give it a fore castle deck. I do apologize for not narrating some of the progress.......one....I can't remember.....two......I really can't see how the pictures are progressing. the bow planking......and all the planking so far, is being sanded and checked, as I went along. This gives me an idea towards any changes i'd have to make.


-
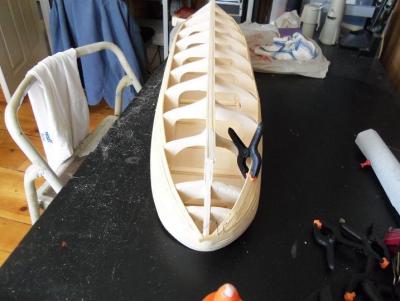
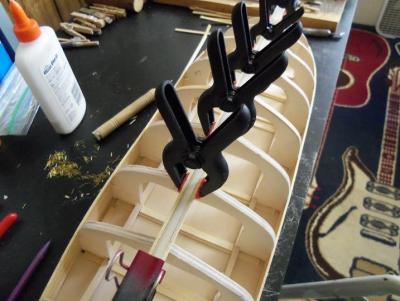
More rabbit work to be done yet..... but......I couldn't help but do the bulwark planking! 3 - 16 - 2012 The kit supplied a part that wrapped around the stern bulwark.......I thought to do the same, since it worked out great for the kit. .....and just as the kit results were, the bulwark planking laid even with the deck platform.


-
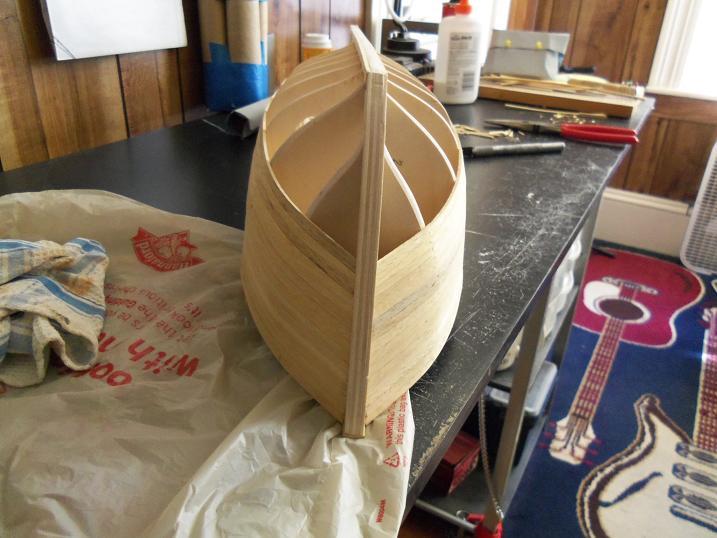
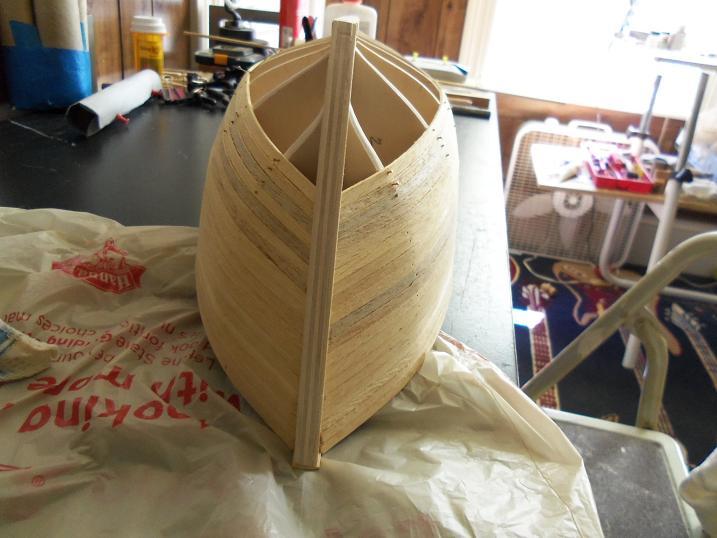
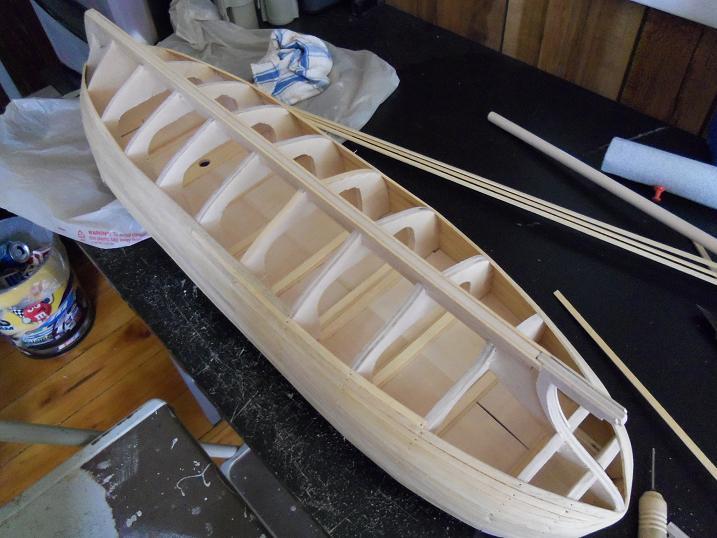
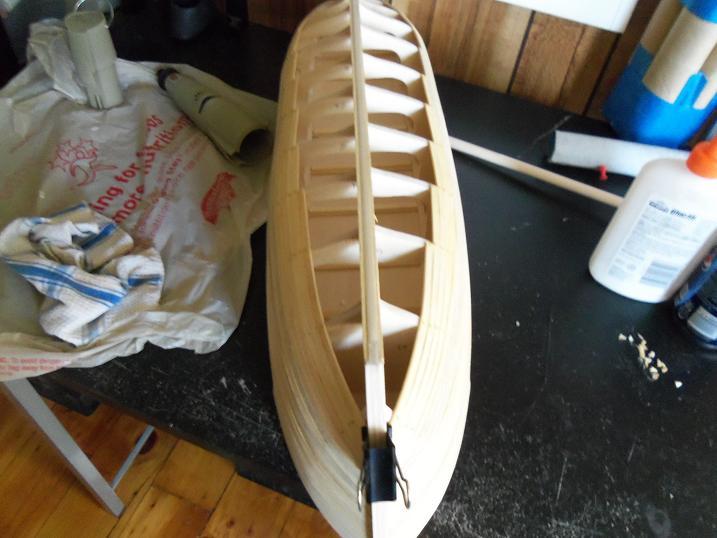
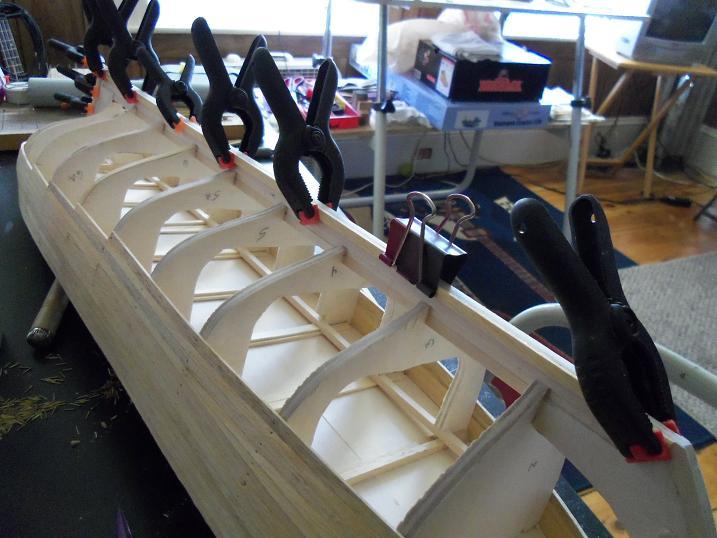
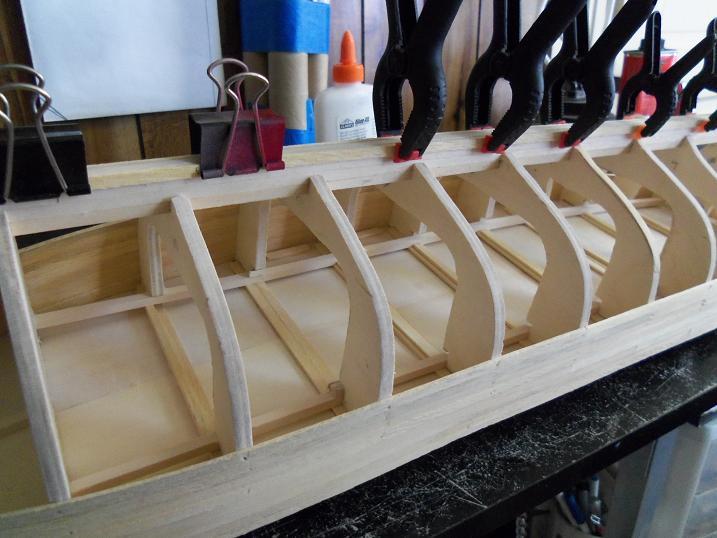
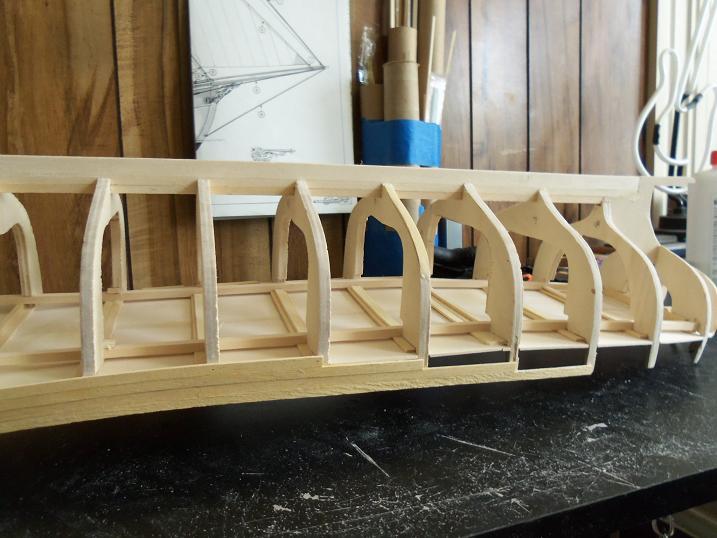
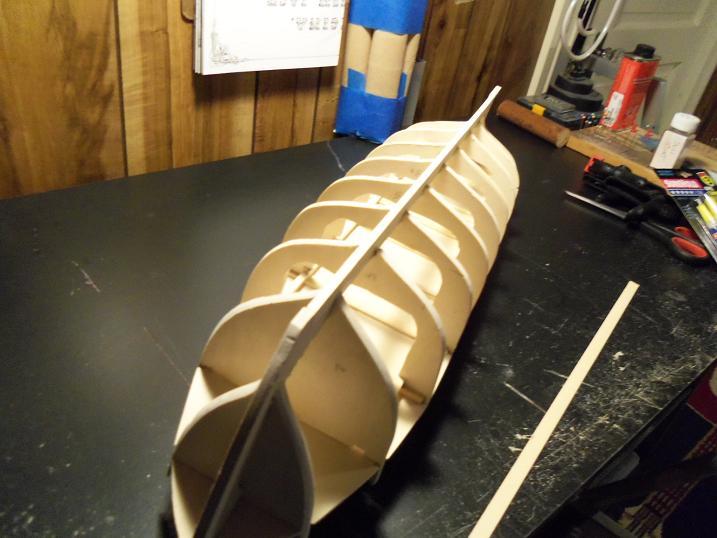
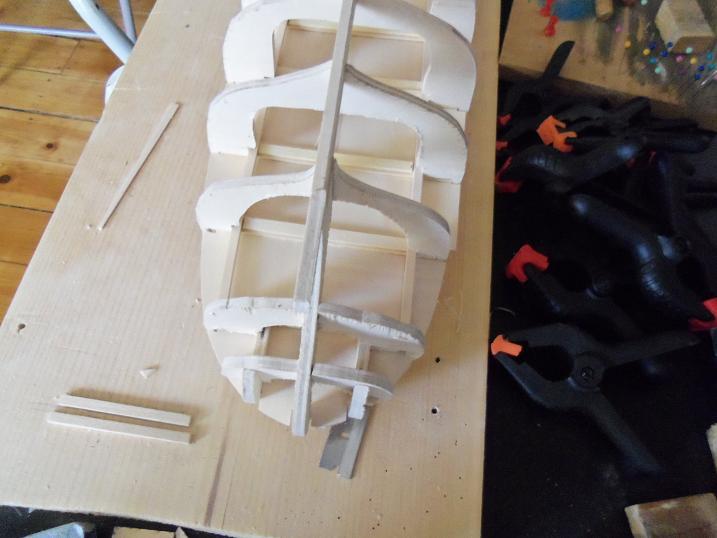
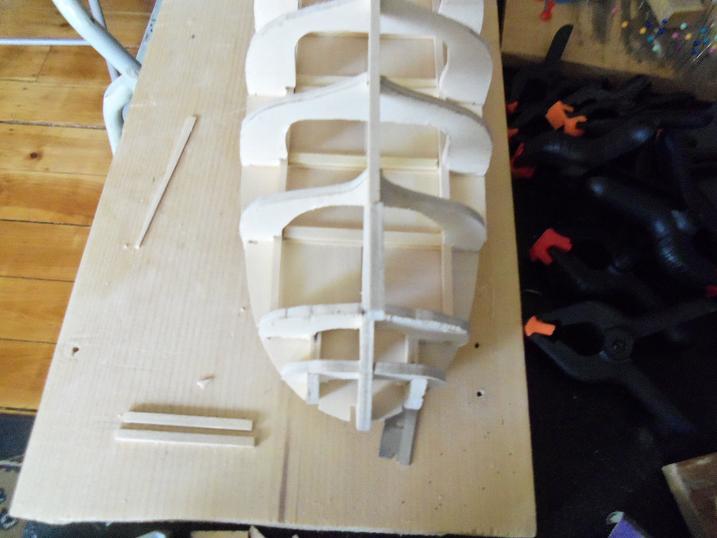
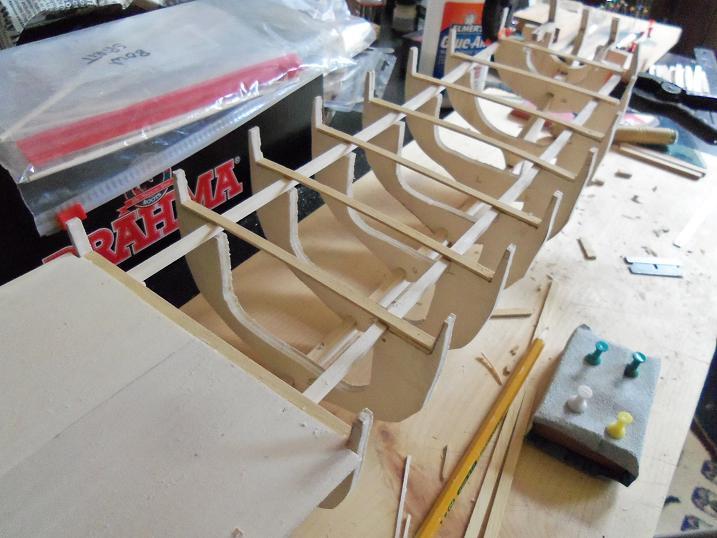
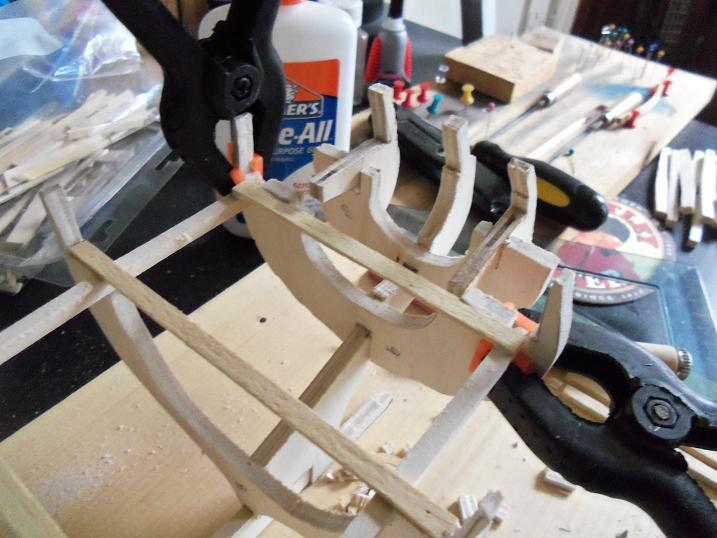
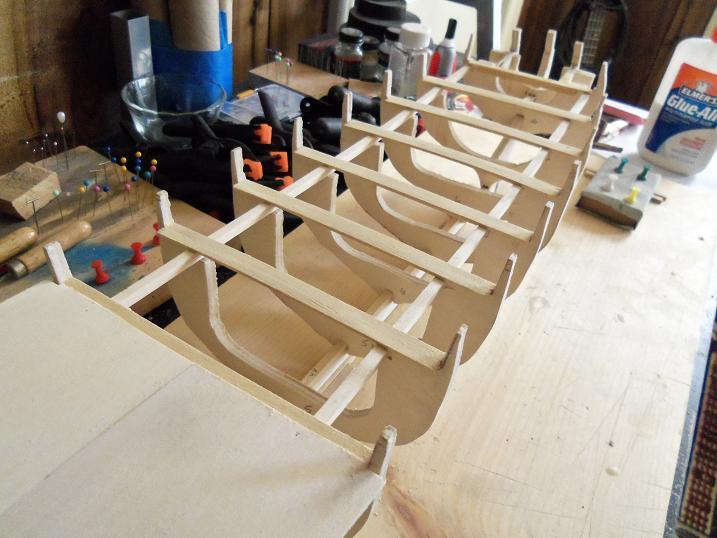
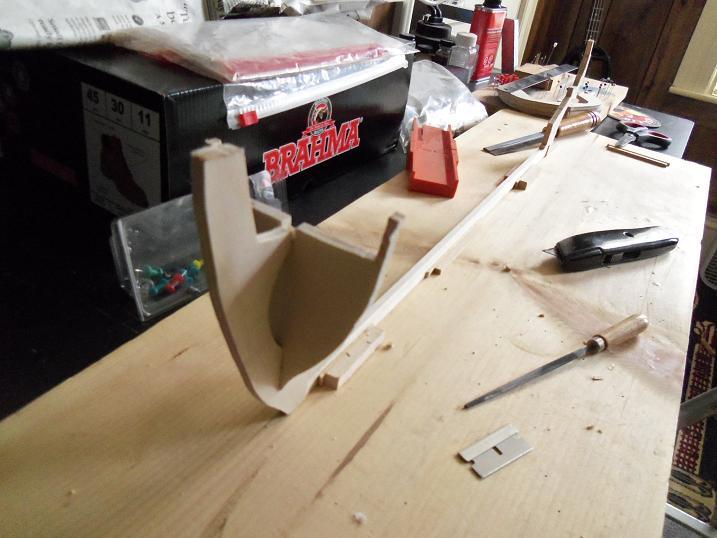
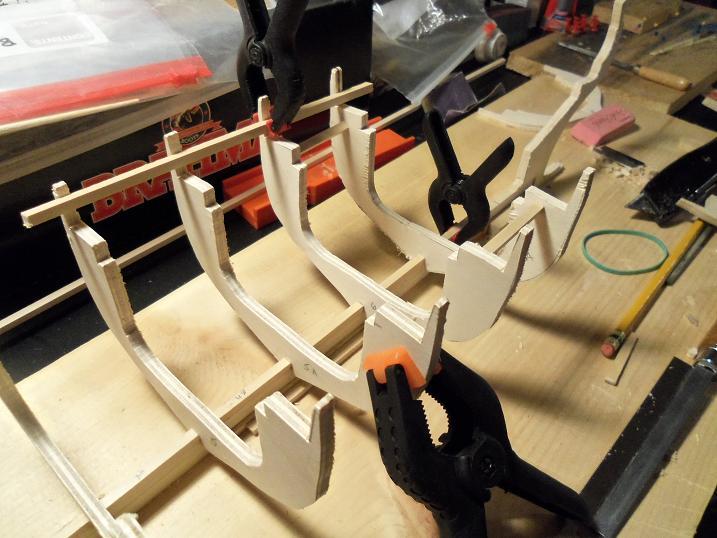
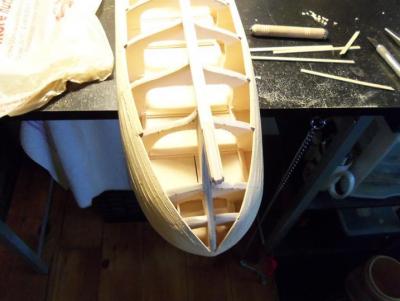
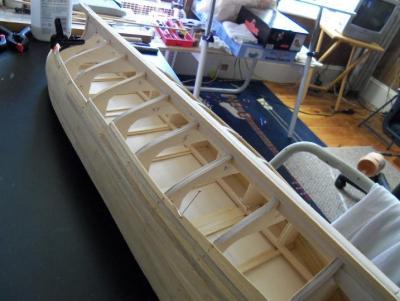
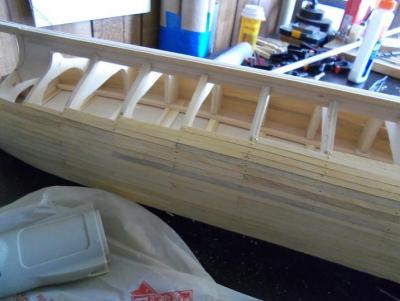
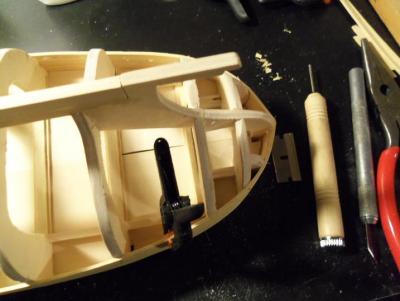
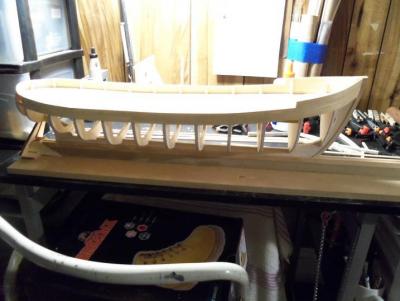
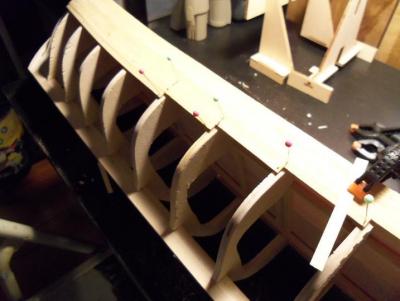
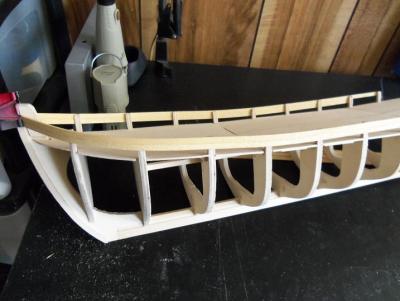
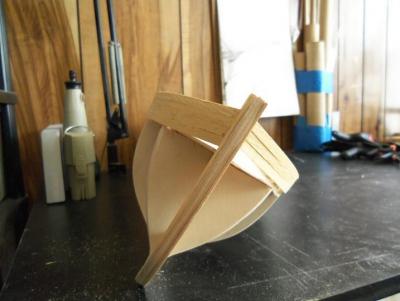
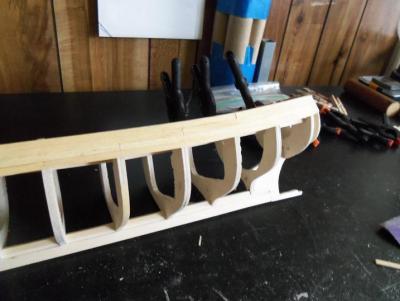
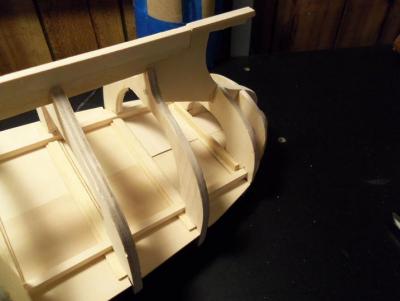
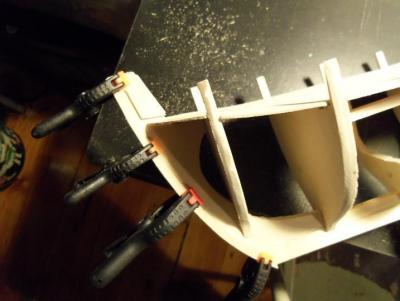
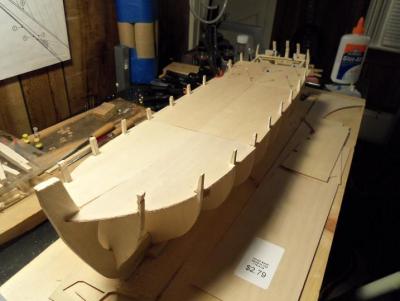
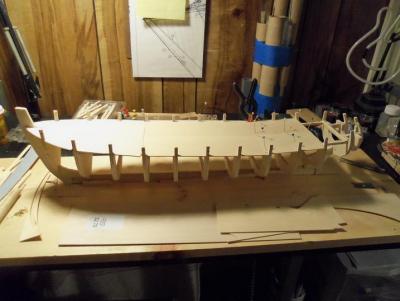
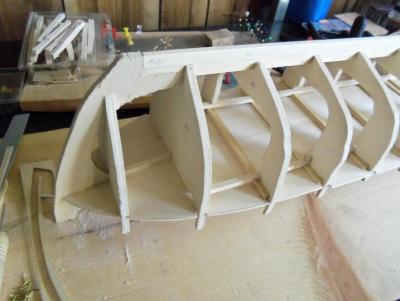
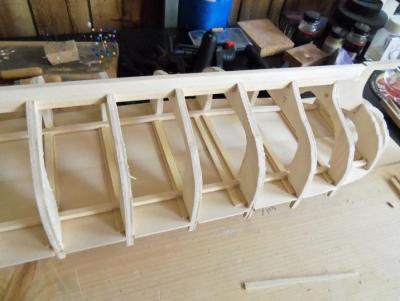
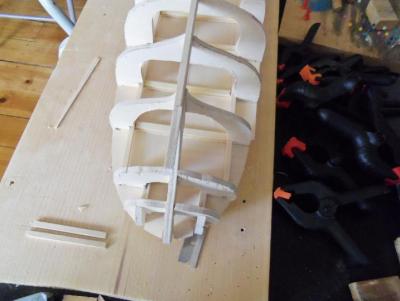
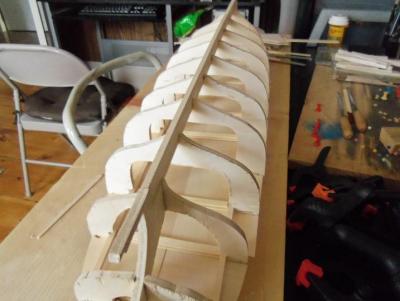
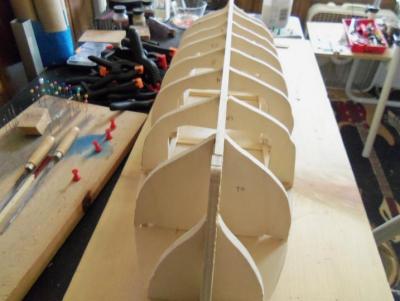
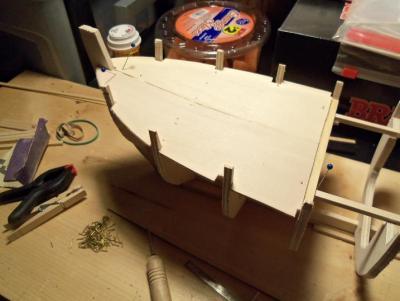
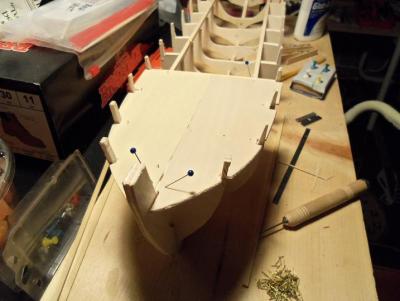
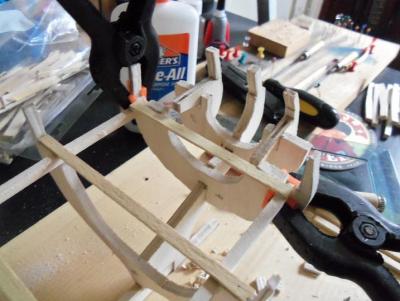
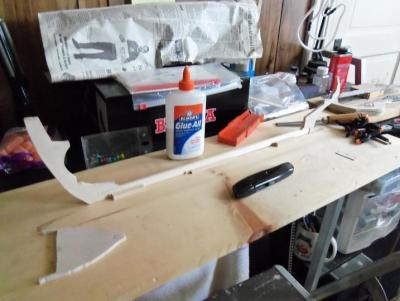
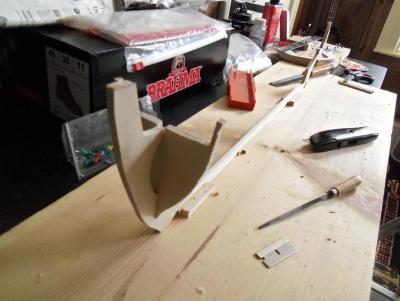
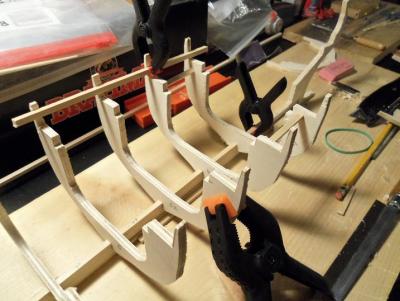
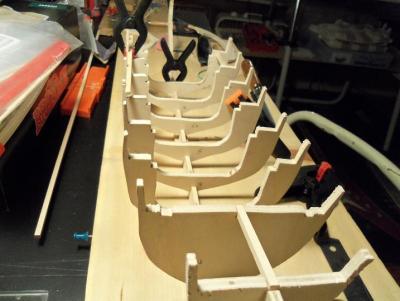
3 - 12 - 2012 I spent a lot of time faring the hull.........I had to add wood in a couple of places on the ribs. The hull frame was pretty good though......it came out with a very nice contour, especially at the stern. I couldn't wait to plank this bad girl! The rabbits for the bow and stern need to be made first and cemented in place. This one rib gave me a bit of trouble......I think it was the only one....just a bad cut. I had made two pairs of rabbits......I hadn't made the frame that would later become the M&M ship yet.


-
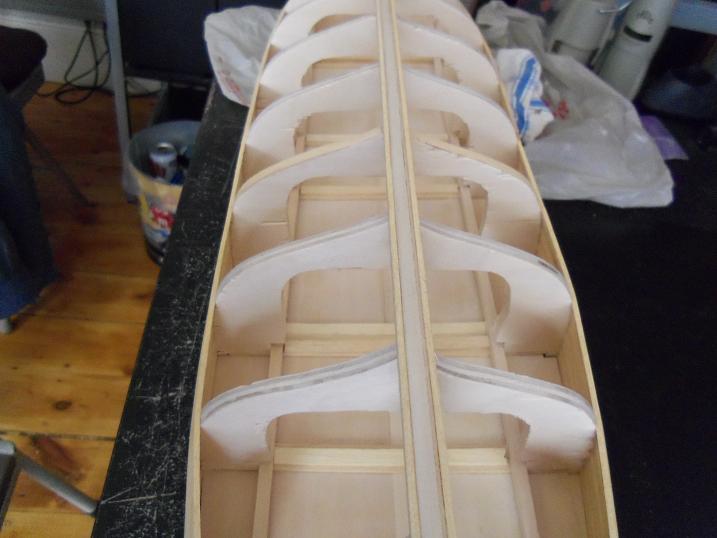
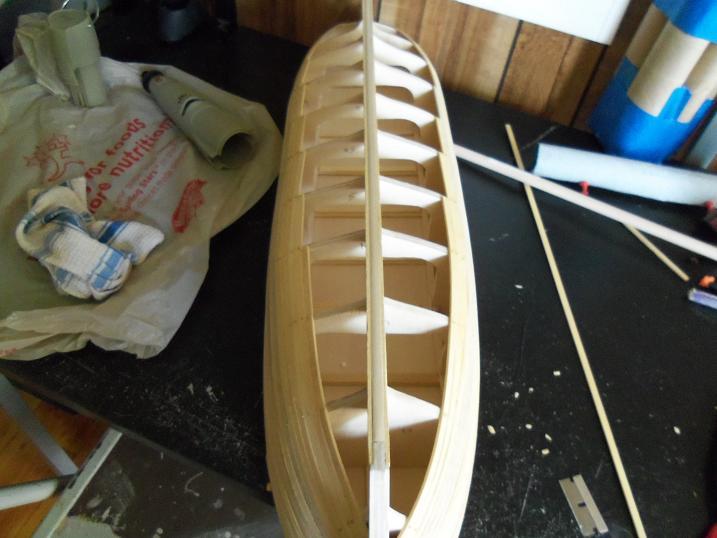
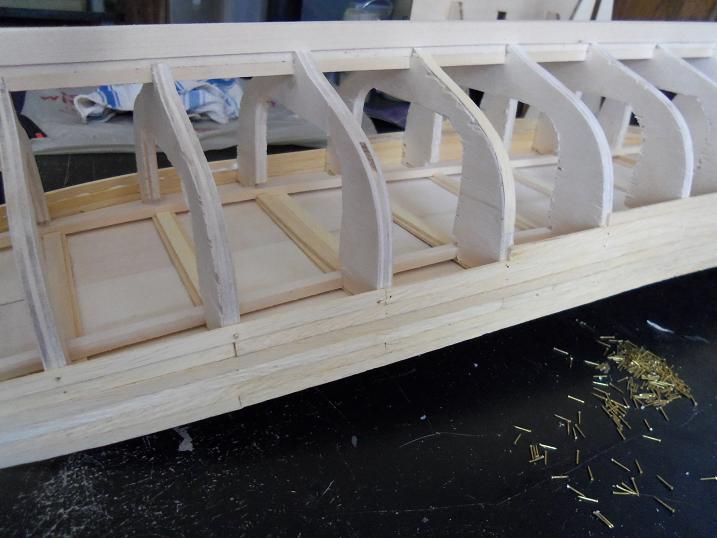
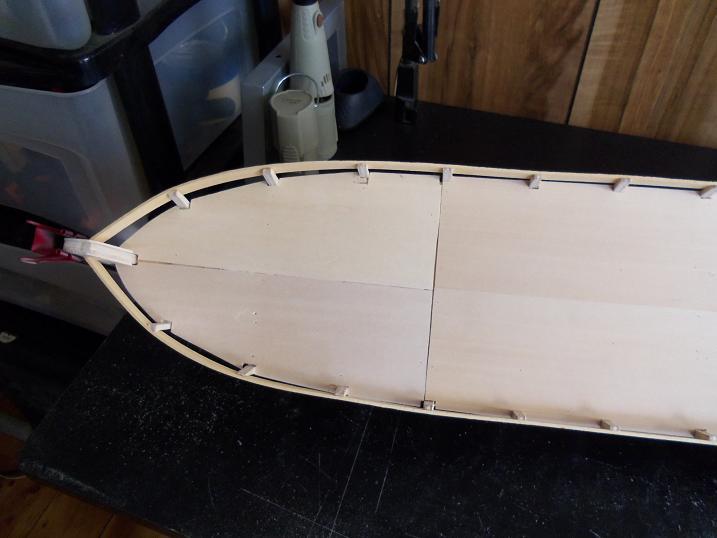
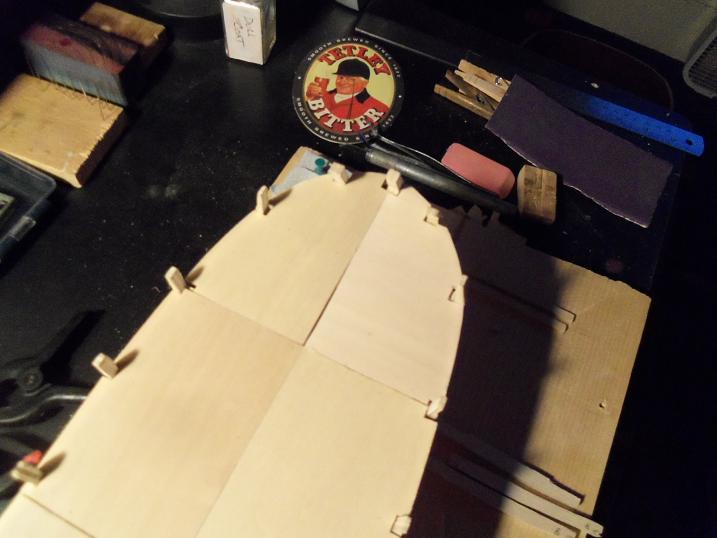
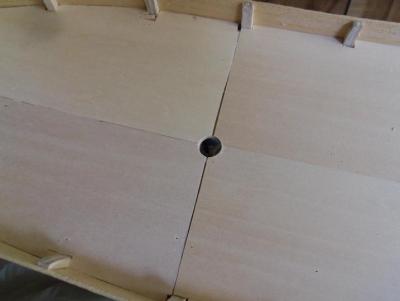
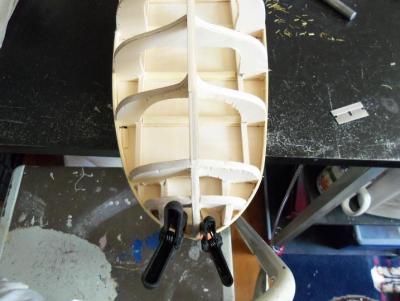
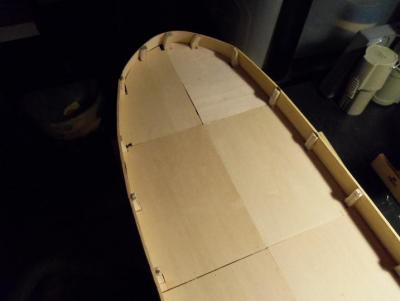
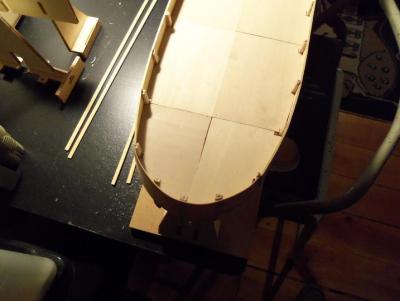
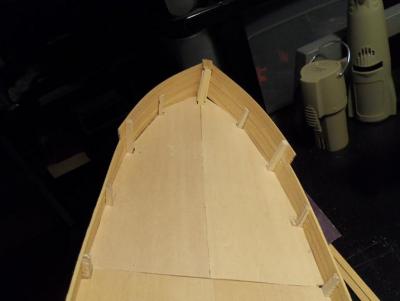
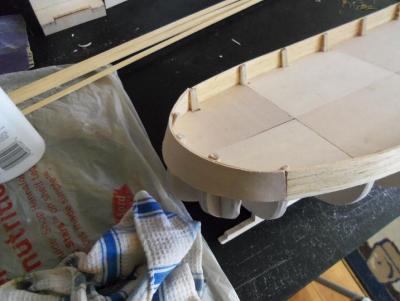
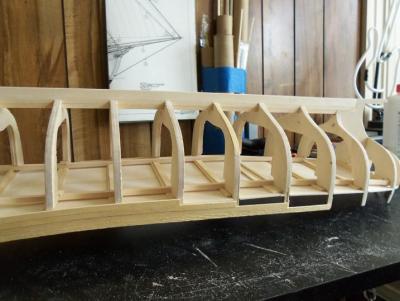
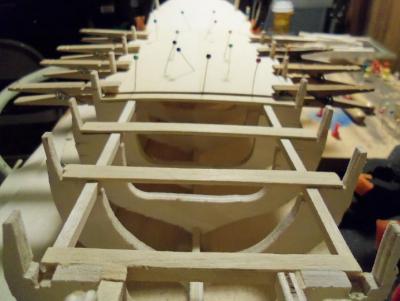
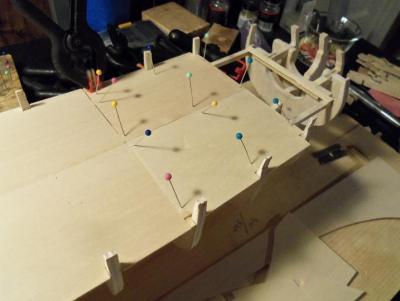
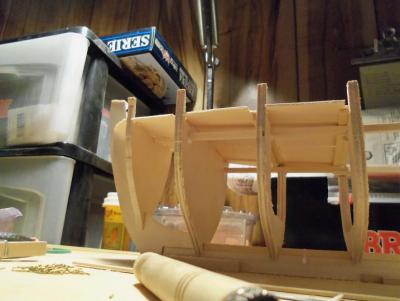
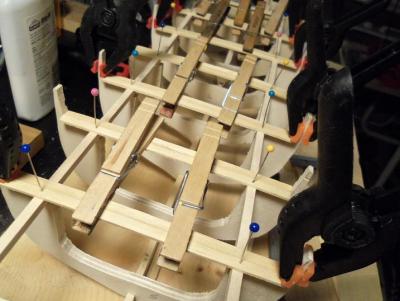
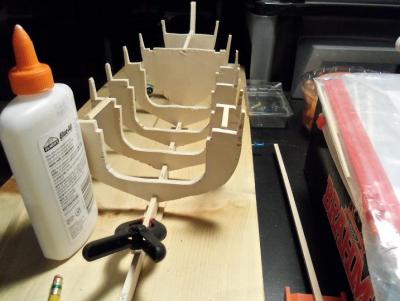
2 - 27 - 2012 Insuring the the beams gave the platform the correct curvature {I hoped}, the platforms were laid down. 2 - 28 - 2012 I did a little sanding at this point. I wasn't too worried about gaps that were in the deck platform....it was going to be planked anyway........but I did fill some of the larger gaps in with small pieces of wood.


-
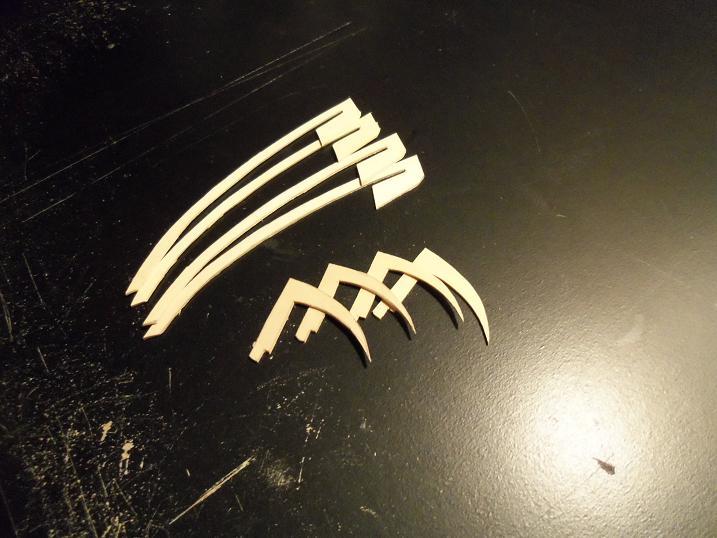
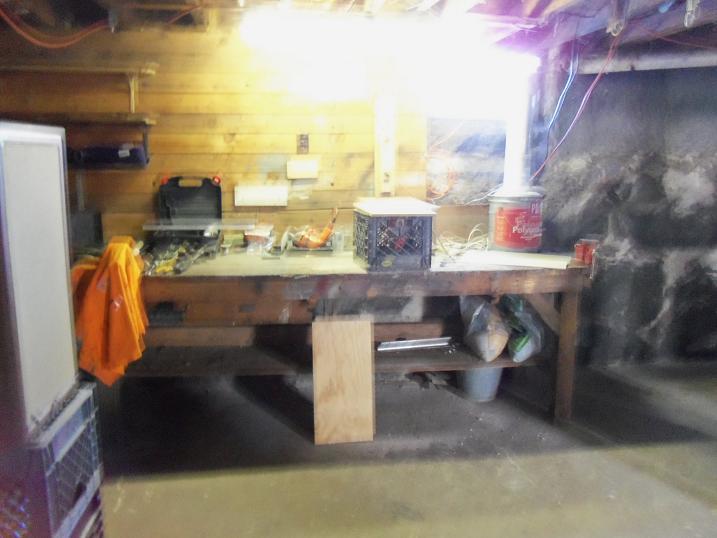
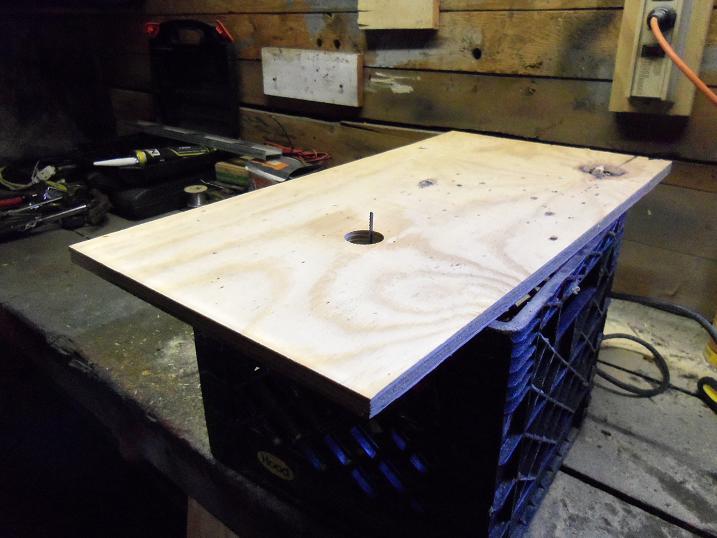
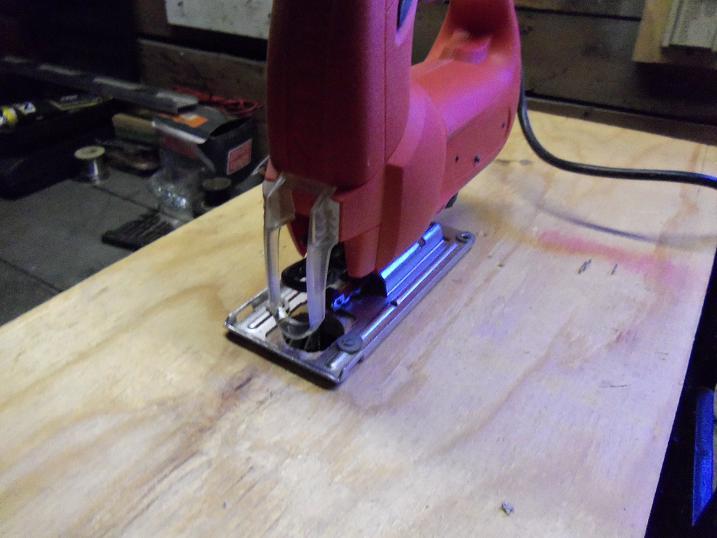
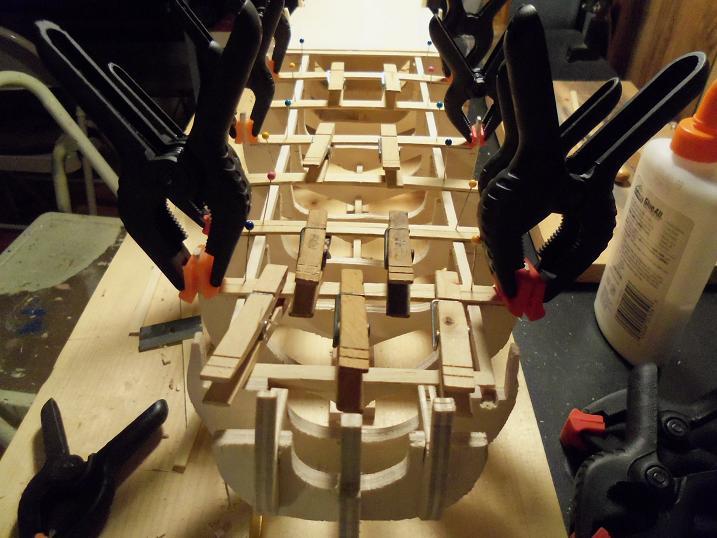
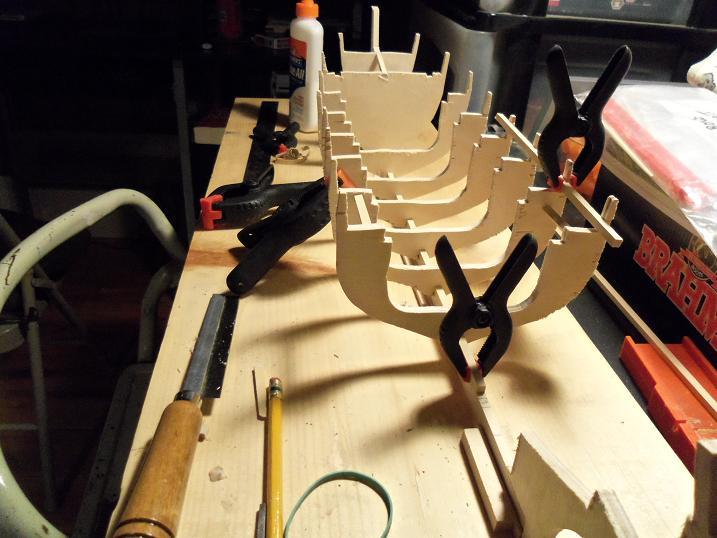
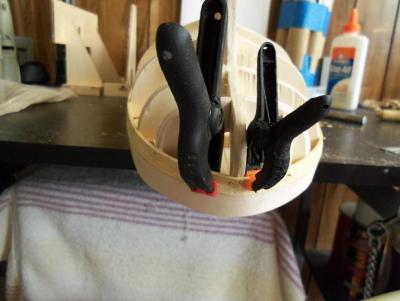
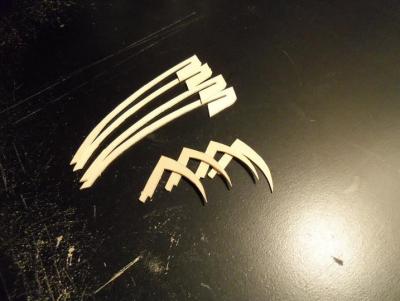
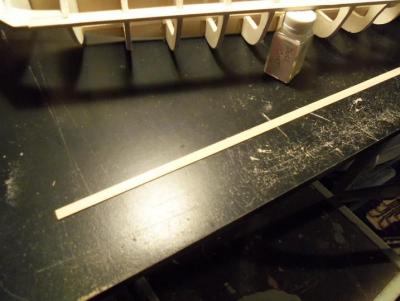
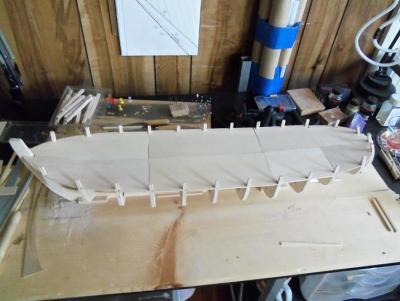
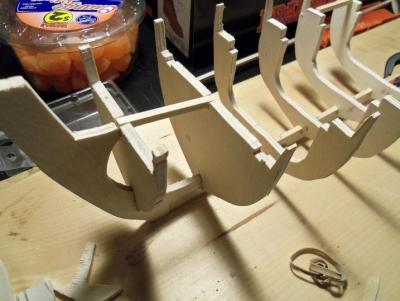
2 - 20 - 2012 The base of the keel where the ribs are cemented was reinforced with 1/4 square stock to lock them all in place. I feel I have to show you this........I have no real power tools, just my trusty jig saw. I was hoping I could get a scroll saw......or even a band saw, before I got around to doing this. the pull was too strong, so I improvised, and converted the jig saw to a scroll saw. here is a blurry look at the laboritory.........and here is the monster. The deck template is not going to do the job........but this is how I got the shape of the bow and stern. 2 - 22 - 2012 To duplicate the deck beams was a total bust.......they looked like freaking french fries! So.......after running the deck joices, I used planking to create the deck beams.


-
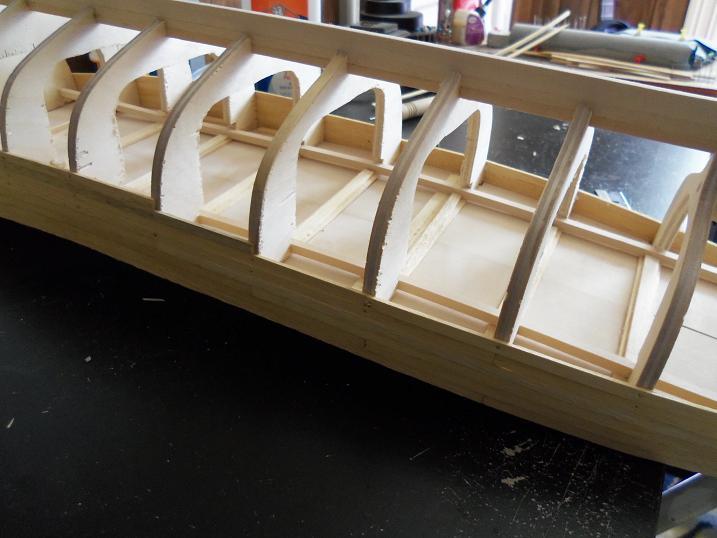
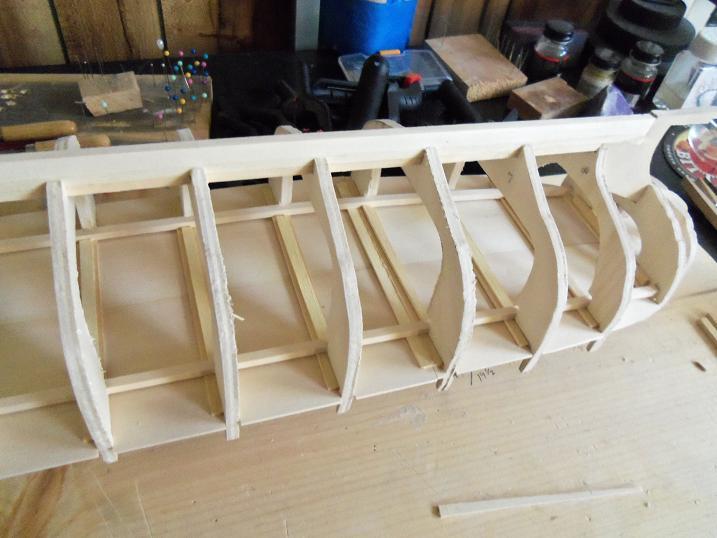
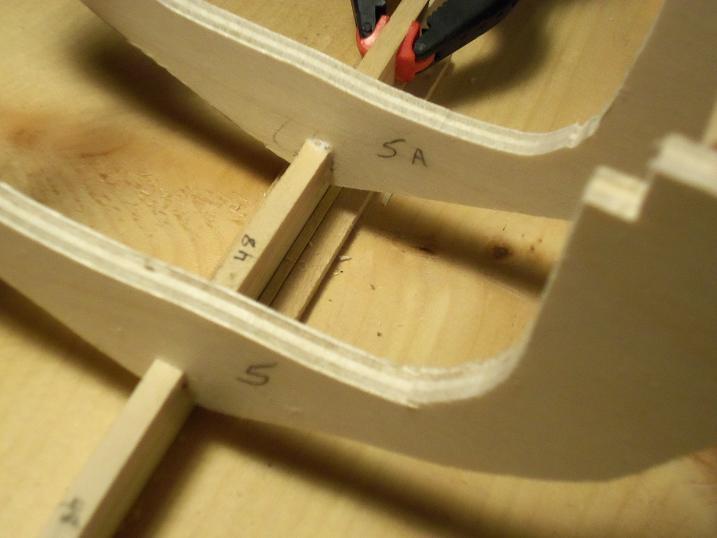
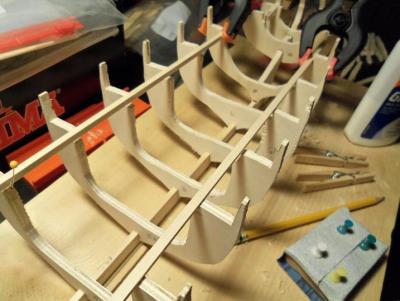
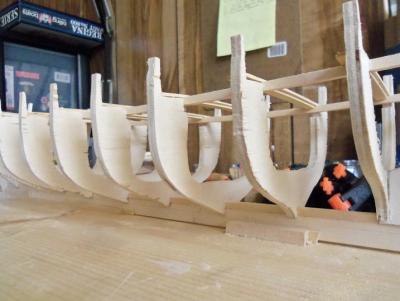
2 - 16 - 2012 The keel had to be remeasured to allow for the extra ribs. I also had to adjust the spacing for them as well. As the ribs were cemented in place, I found alternate means to insure that they were straight. I don't have a build slip......just my trusty pine board. everything went well, but I wasn't too happy with the bulwark posts.......I can always fix them later.


-
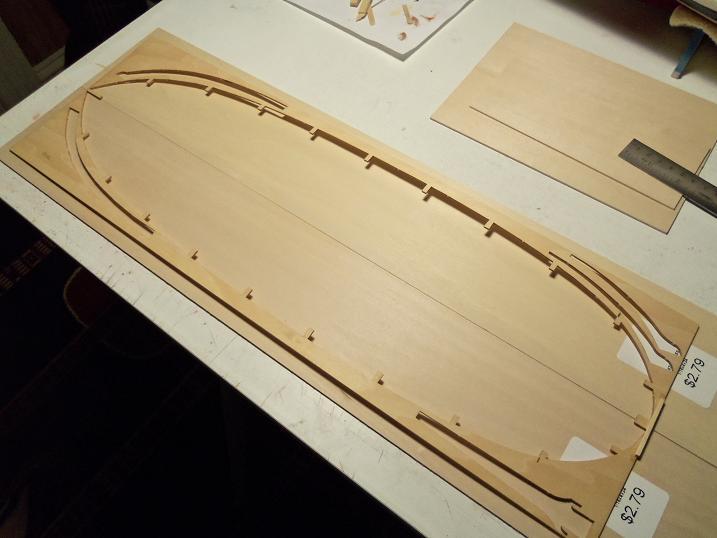
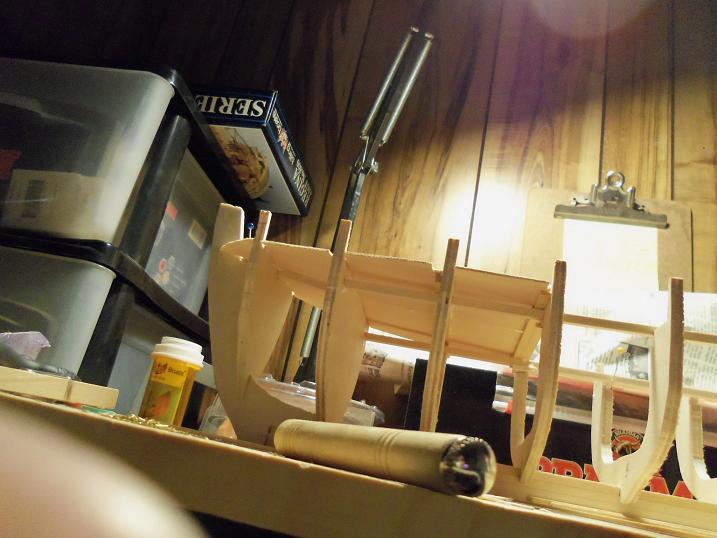
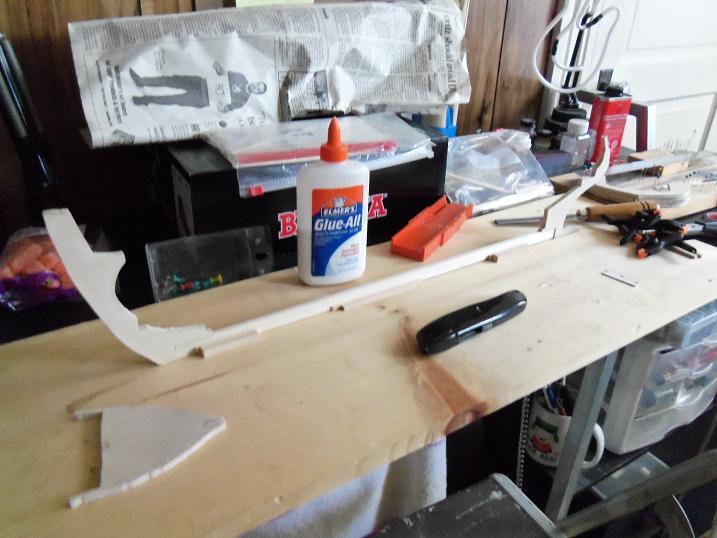
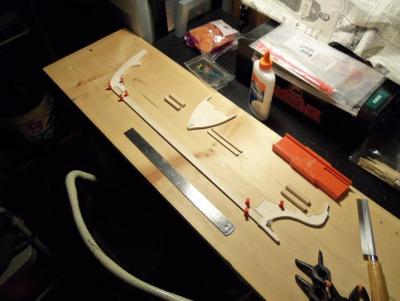
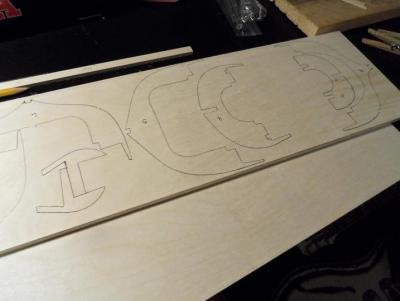
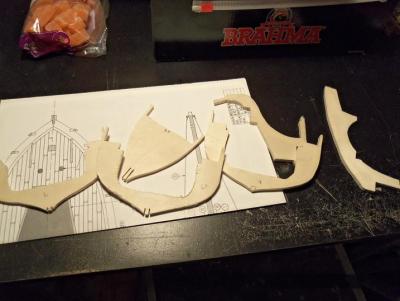
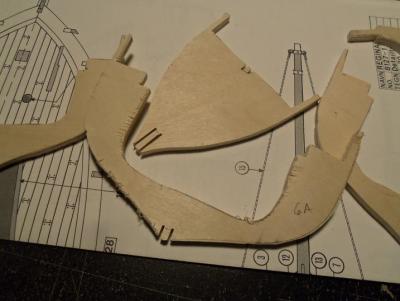
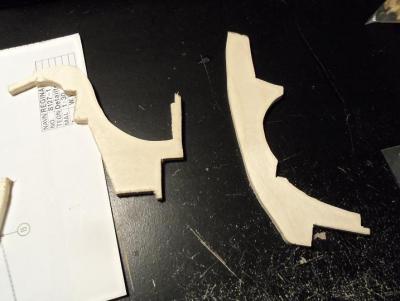
I was contemplating which build to put back next........I kinda wish I could put the M&M Fun Ship back, but it's finished, and would be silly to do that. I figured that this build wouldn't take too long.....I guess I'm probably in the middle of it at the moment. The Syborn build is part of an experiment I was doing, taking the part's panels from other builds, tracing out the parts, to see if other hulls can be created from them. there are many hull configurations that a multitude of ship evolved from......and I got the idea from Billings. The Cux, The Mary Ann, and a couple of other kits that they carry, have the same basic hull shape. I'm going to try and expand on this. then by simply altering the bow and {or} the stern, other hulls can be created. I can fit them out as I see fit. I had cut out the hull parts for two complete frames.......I am just doing the hull parts, that's all I want. I see so many ships in my searches, that I'll get a good idea as to what subject I want to model. One of them, I had left with the normal rib count. I was going to do another fishing vessel, but the admiral talked me into doing the M&M build. this one definitely proved my theory. The second frame, I had duplicated the 5th and 6th ribs, making the hull longer. the length of the hull from the kit was 21 inches long. to duplicate just two of these ribs, increased the length of the hull to 25 inches.......that's quite a bit. Bassically, the only logical ribs that can be duplicated are the centermost ribs........any other ribs would interfere with the tapering of the bow and stern. faring the hull, will contour the frame to the shape that the hull will be after planking. I started this build in February of 2012 2 - 10 - 2012 It all started with 1/4 inch plywood...... I had saved the parts panels from the Mary Ann build. selecting the hull parts, they were traced onto the plywood. the parts were then cut out. They do look rough.........but I'm not worried. faring the frame afterwards, will take care of all that.


-
looks as though it will be soon.........looking great!
-
it's really great to see your build back up Sjors.......I've been so busy, that I haven't been around to get all the builds I've been watching back together.......I'm working on it though. you've done such superb work!.......I'll be watching, even though there's only standing room left. that's what I get for being slow. look forward in seeing more, my friend!
-
it is good John, that you put the pictures back up.......no matter the order. It was the content of this build, that made her so special. now there will be no more questions, as to how she became so beautiful.......superb work, my friend!
-
hello Andy, followed your log before the crash.......must say, you've done a great job on her. I can sympathise with the problems with the decks. I did this kit a long time ago, and I've built the Cutty Sark twice. I also did the C.S.S. Alabama and the U.S.S. United States. I have the United States kit......I'm going to do it with wood decks....and anything else I can replicate. I hope to defeat the deck dilemma, especially after I plank it...LOL! I look forward in seeing more of what you did through the build process.
-
hi larry........I'm not too late for the party.........you haven't finished the ship yet.....Good, I haven't missed it! your frame looks very good, but I'm afraid that I can't help you much on your dilemma........guess you'll have to ask the tokie tokie bird
-
just as beautiful as when I last saw her.............superb work Paul!
-
oh well John...........but at least it's nice to hear you got to work on her........I'll look forward in seeing some pictures soon.
-
great Sjors...........you can boink folks to death........LOL!!! I'll look forward in seeing your progress! thanks for the good word! Sorry I didn't see one of your posts Carl........the crane is just a holder for the trap line. the line is put into the pulley, ans the winch does the rest.
-
nice to see an update Augie........I just came up for air from the Lobsie twins.......DONE!!! figured I'd better wander around to catch some air. the rigging looks great......you do excellent work! such a superb looking ship! I do most of my work standing up........no 'cushion butt' here, Frank!
-
thank you gentlemen........it's my pleasure. this has turned into a fun project. I can't wait until I tear into the Boulogne Etaples...another multiple build I'm planning on. but there's bigger fish at the moment.......the AmericA build and this one are the only two I am active with at the moment........I will get others in at leasure. I also have all my finished builds up as well......but that was a 'no sweat'........we will perservere! thanks again folks for the good word and looking in.
-
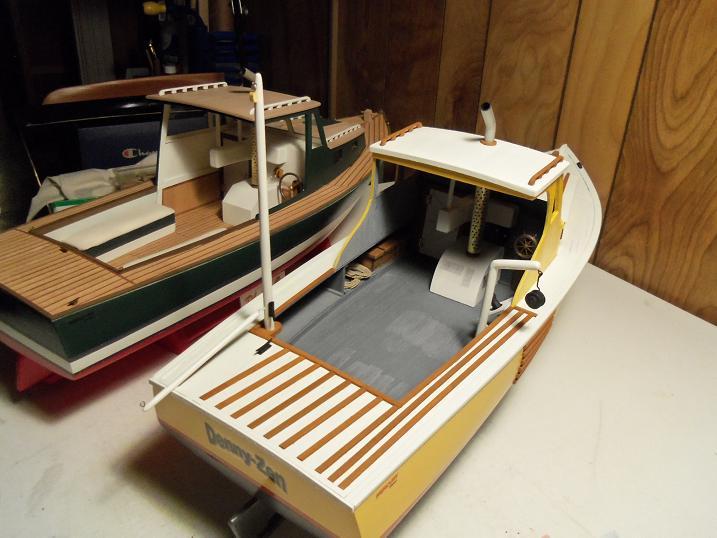
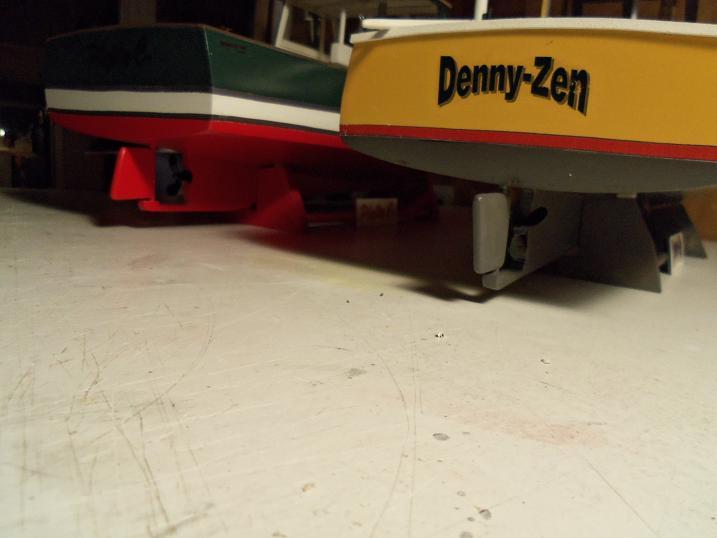
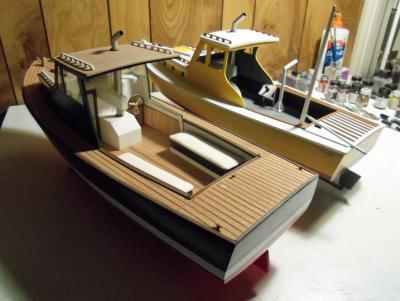
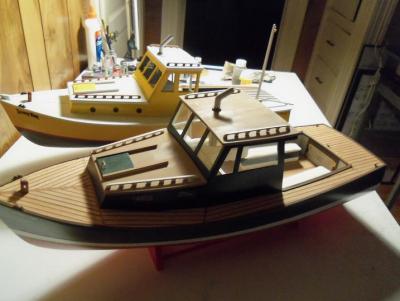
here is is........the end of the journey! except for the little bit update that I haven't logged yet, this will catch these two up to the day when the lights went out. thanks for your paitience. what you'll see from here on out, will be fresh and new. no more will either one of these two, have to hide, like a secretive lover... to look on to each other as upgrades are added. they are close to their conclusion.....but you won't miss it.......will you?


- 552 replies
-
- 2
-

-
- maine lobster boat
- Midwest Products
- (and 1 more)