HOLIDAY DONATION DRIVE - SUPPORT MSW - DO YOUR PART TO KEEP THIS GREAT FORUM GOING! (Only 24 donations so far out of 49,000 members - C'mon guys!)
×


popeye the sailor
-
Posts
16,007 -
Joined
-
Last visited
Content Type
Profiles
Forums
Gallery
Events
Everything posted by popeye the sailor
-
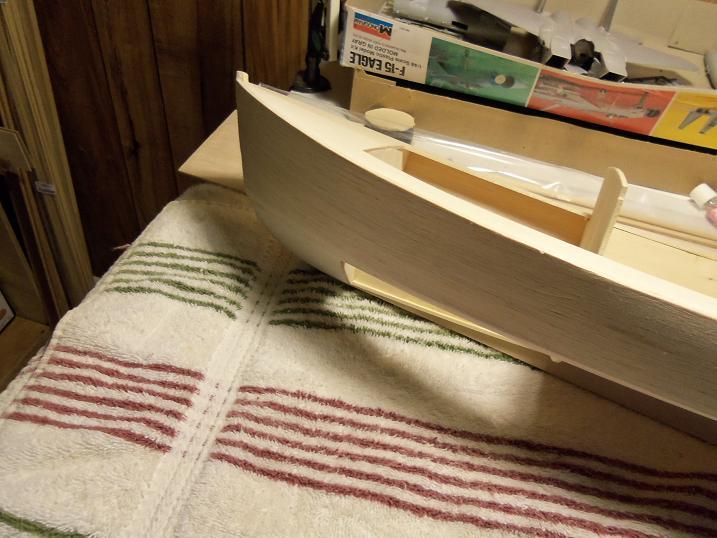
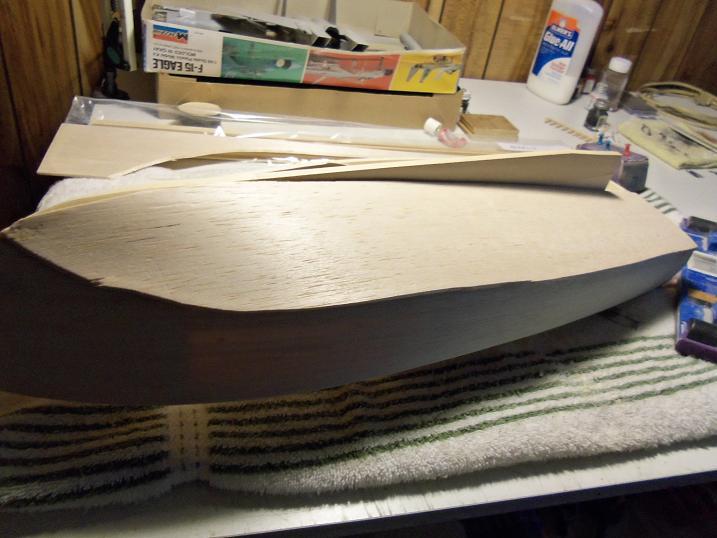
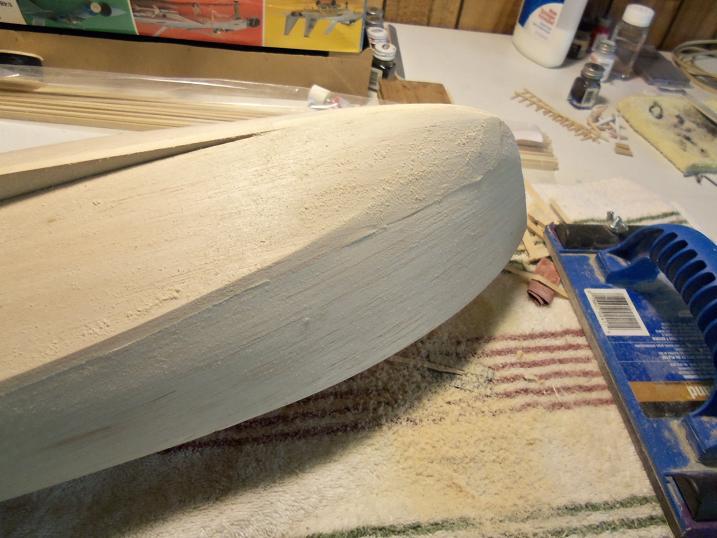
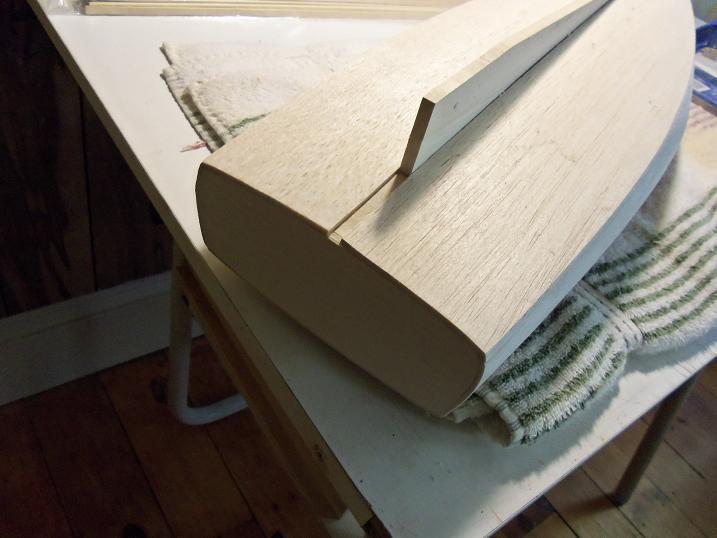
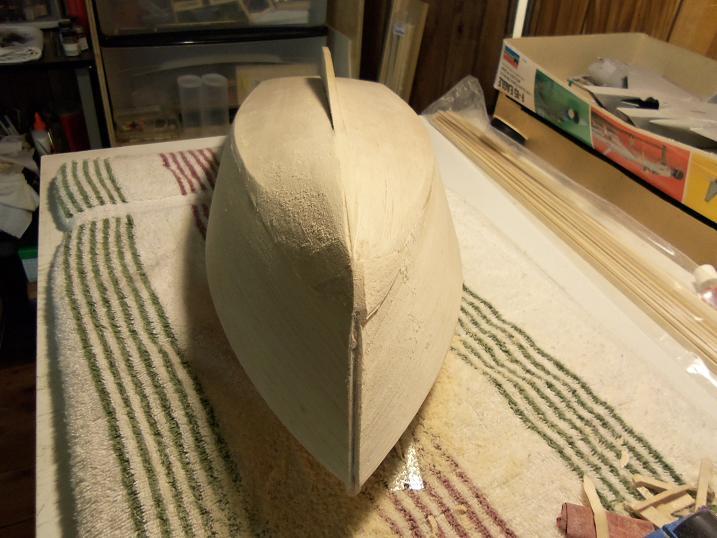
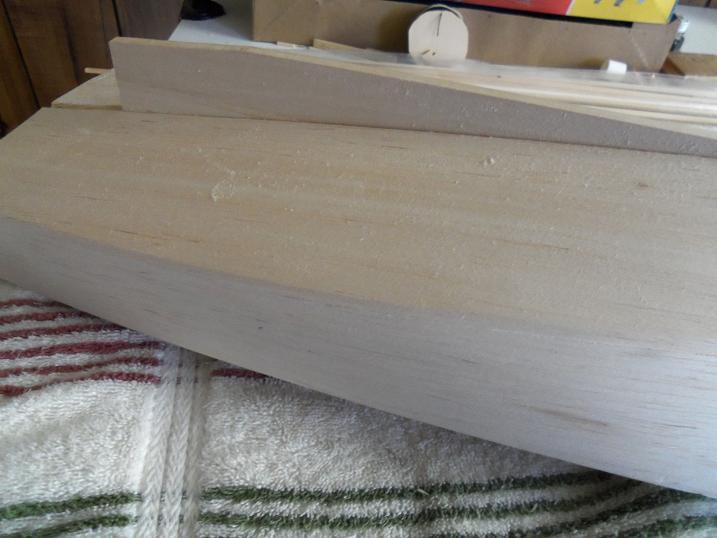
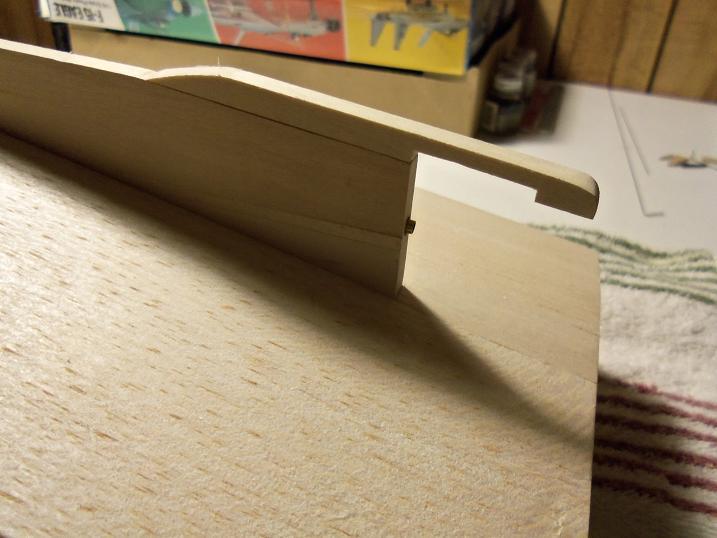
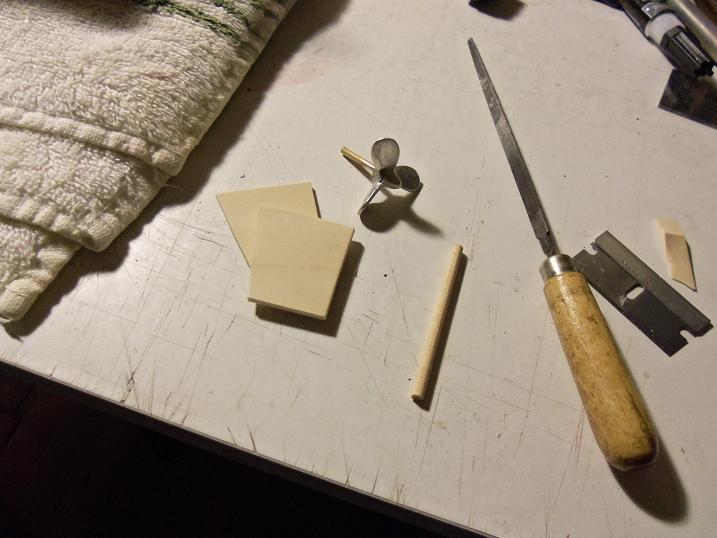
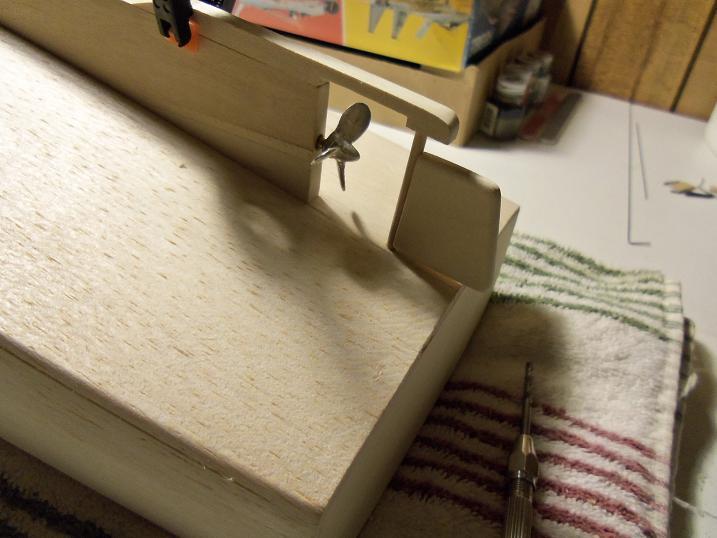
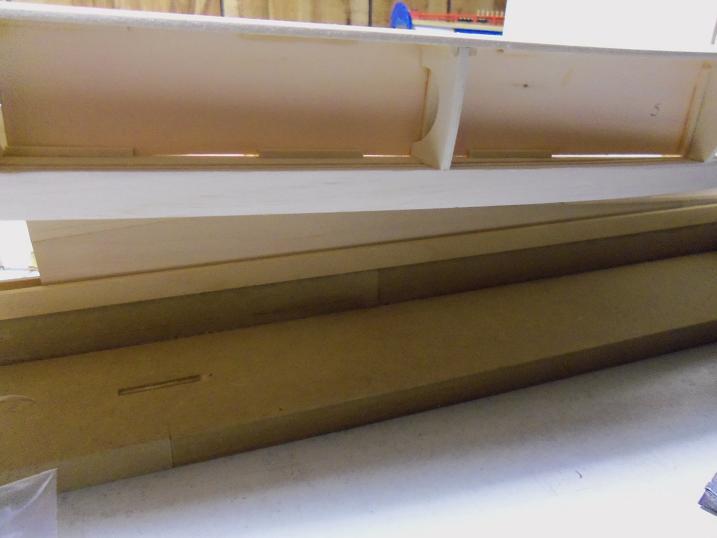
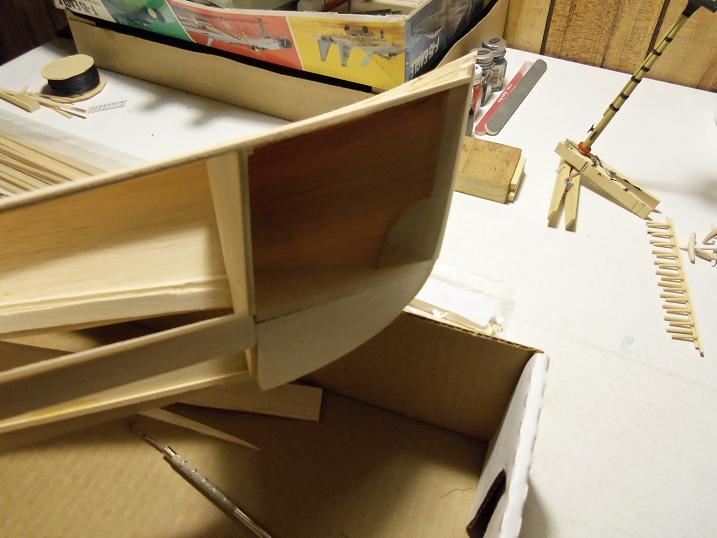
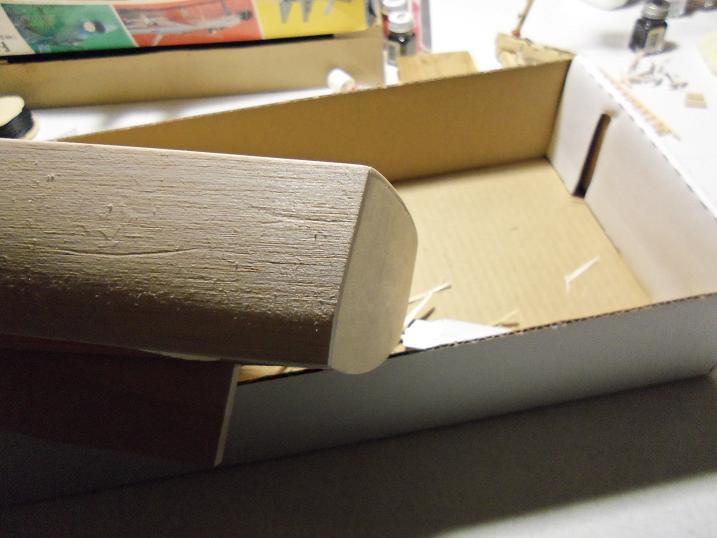
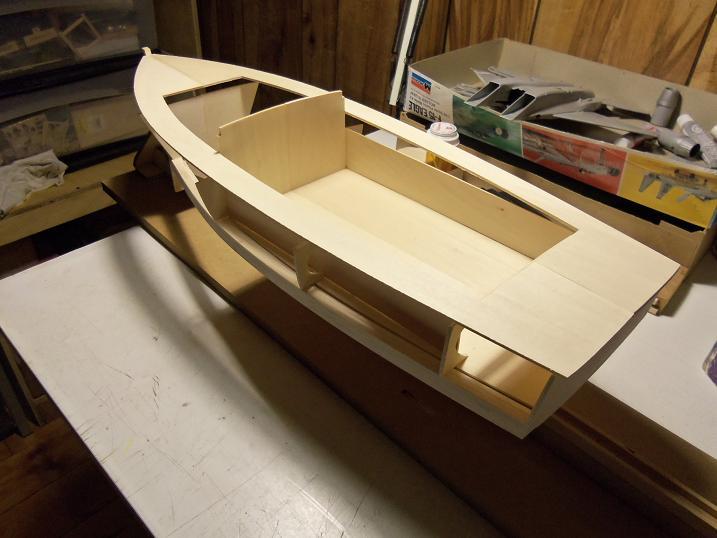
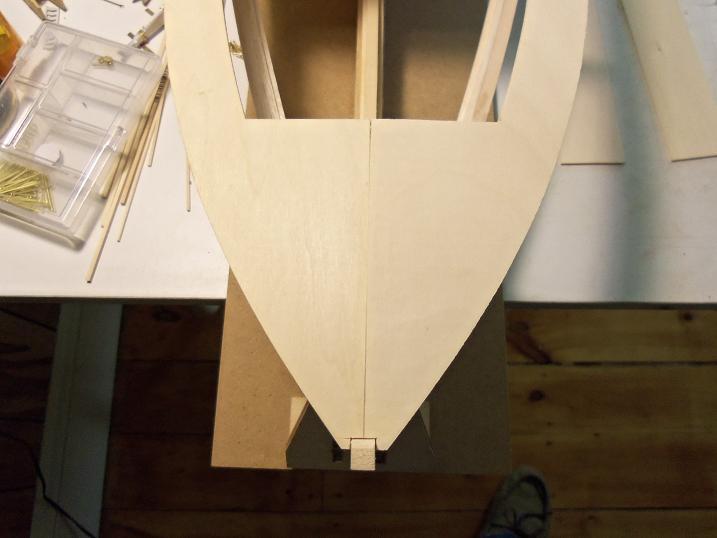
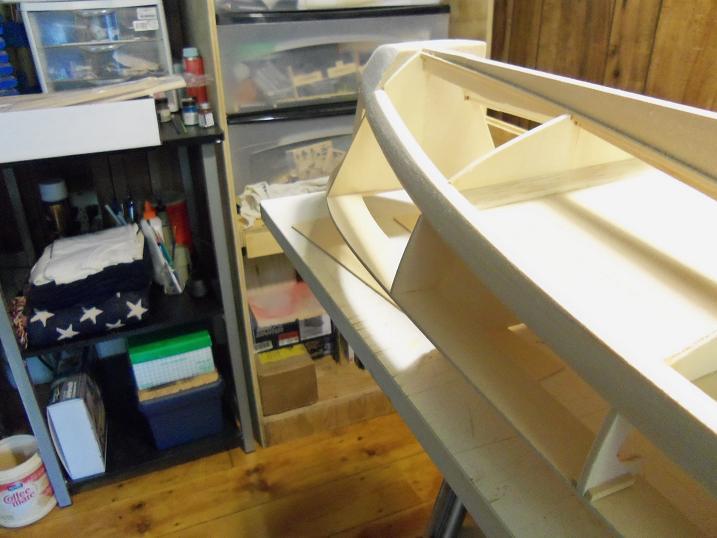
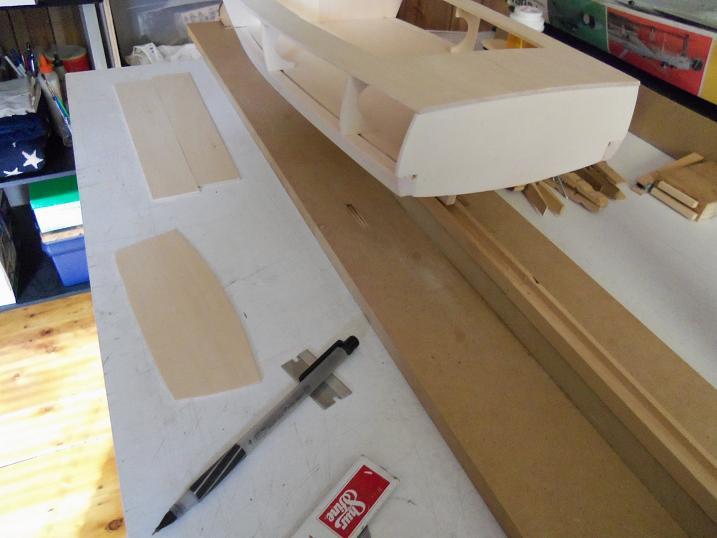
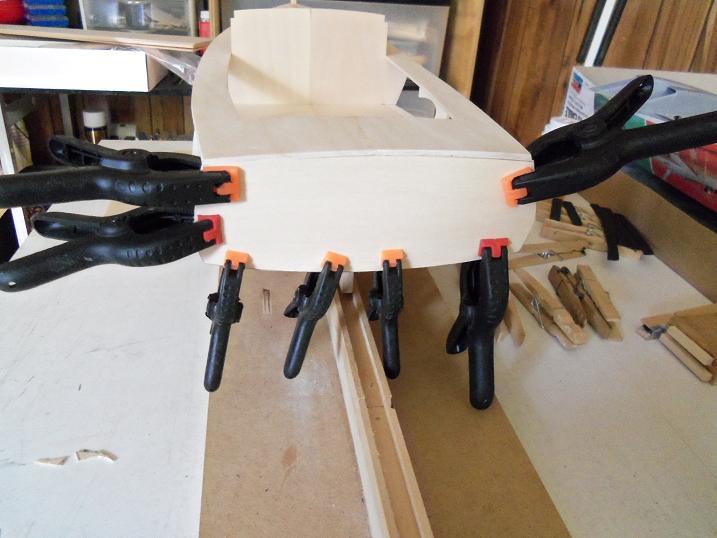
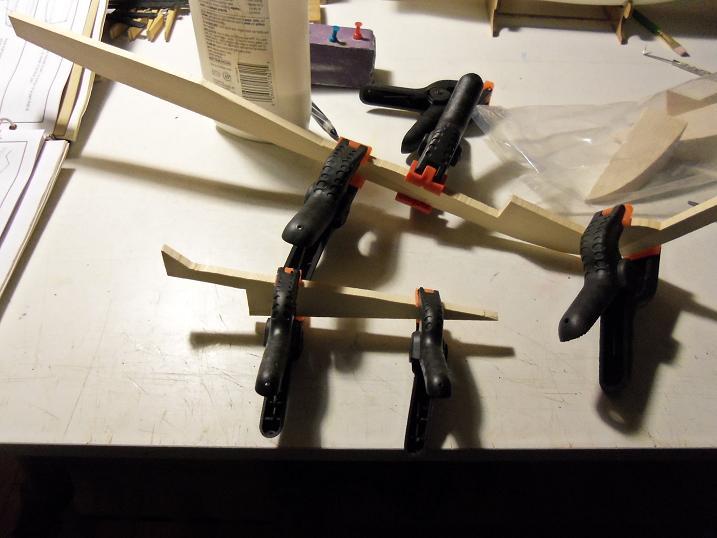
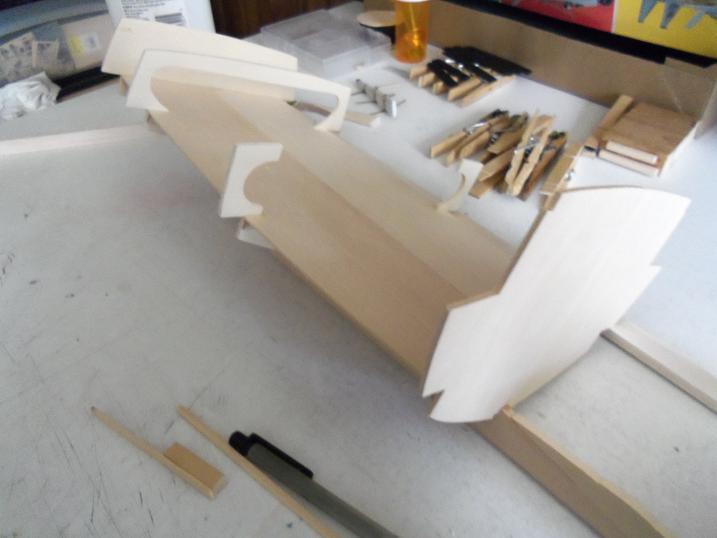
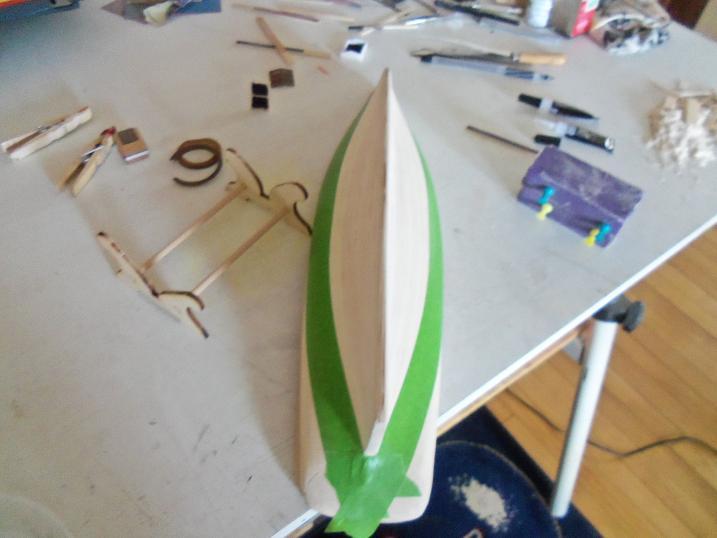
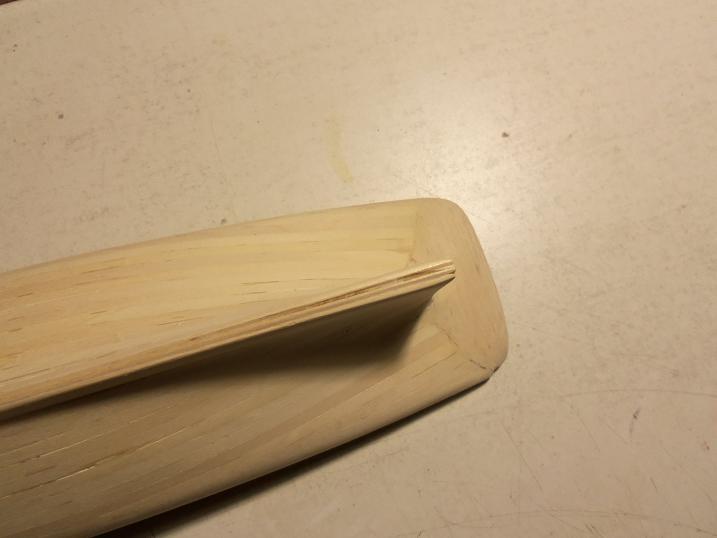
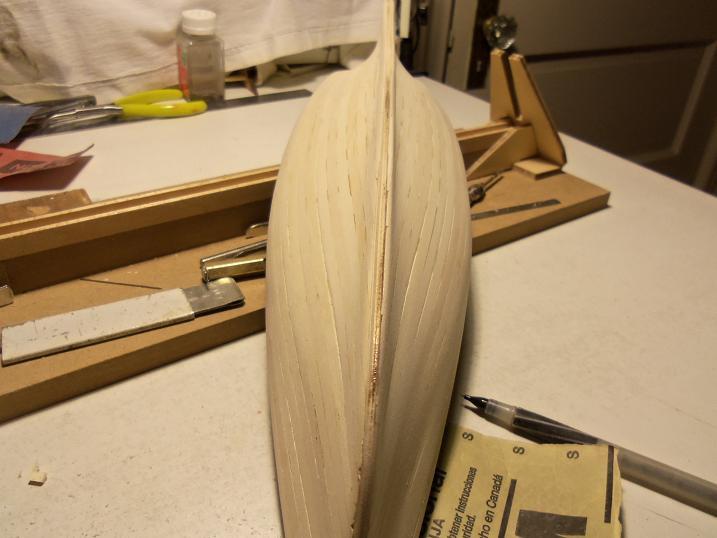
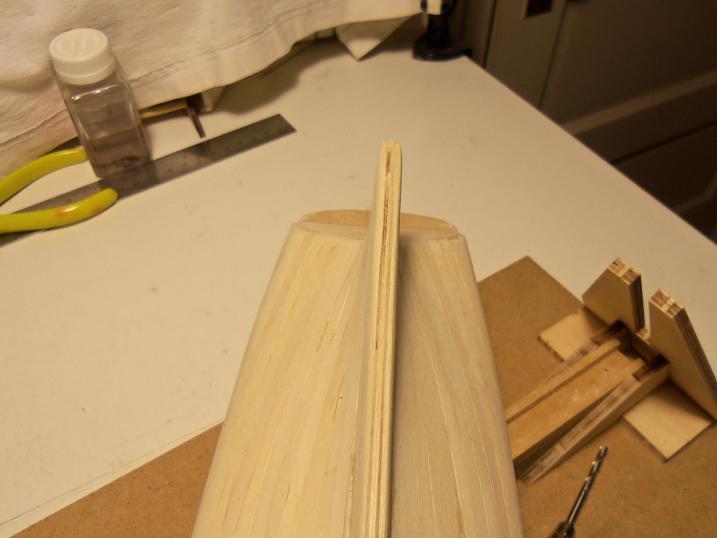
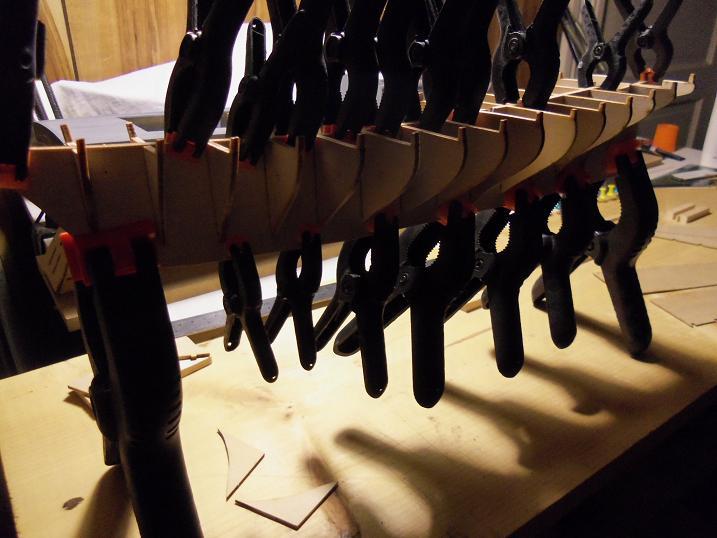
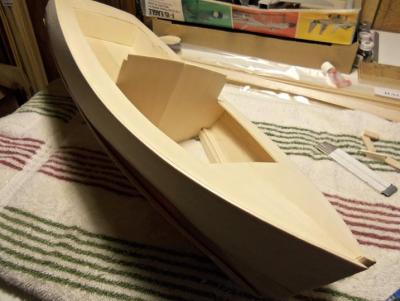
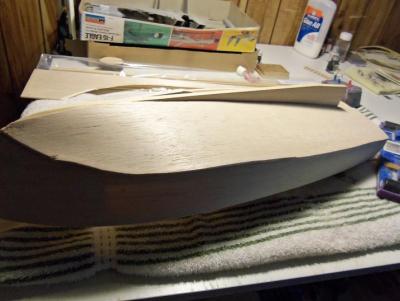
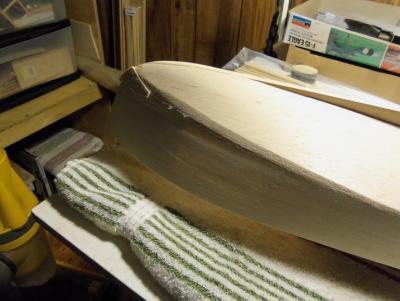
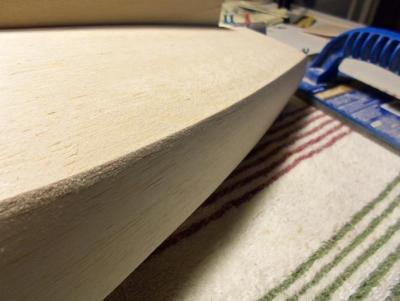
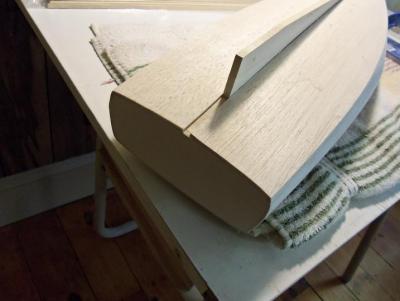
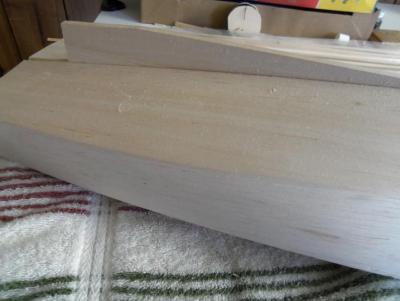
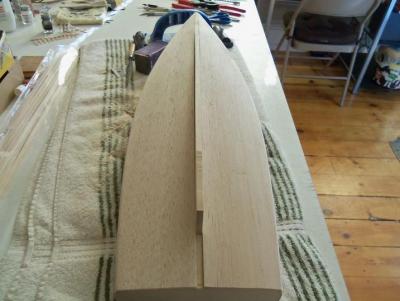
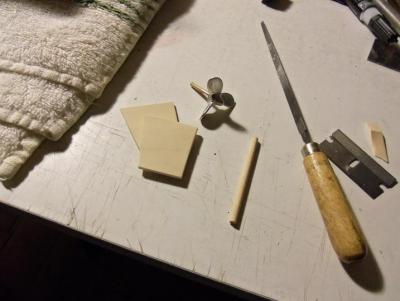
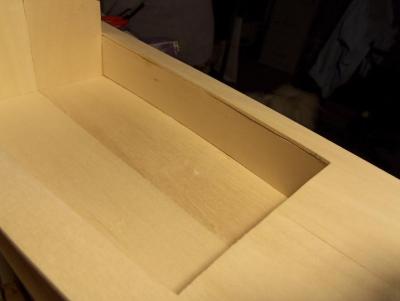
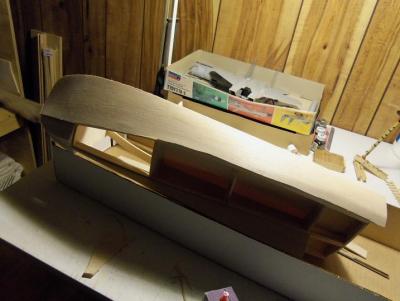
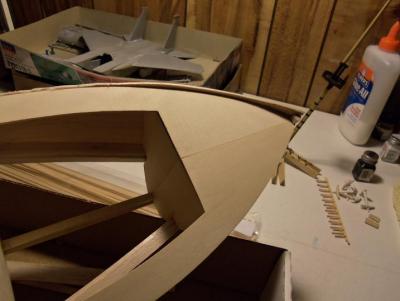
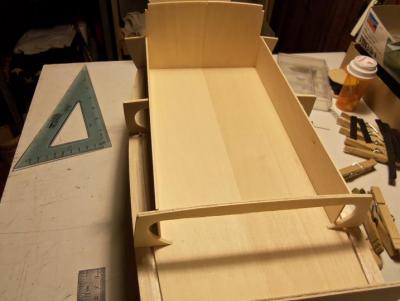
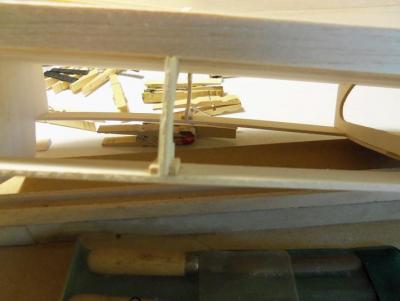
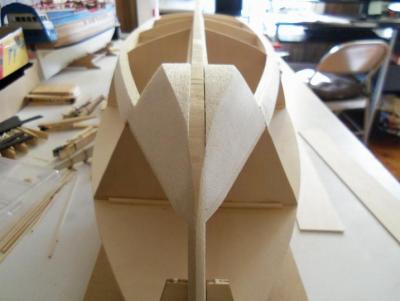
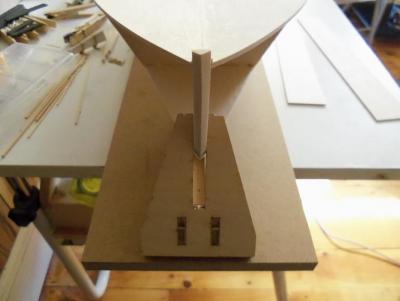
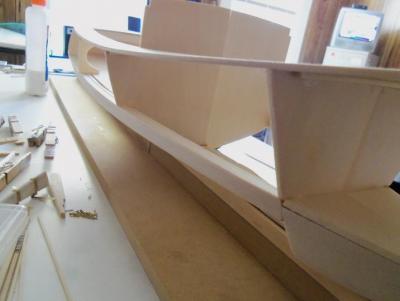
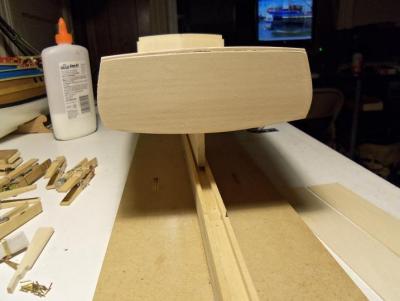
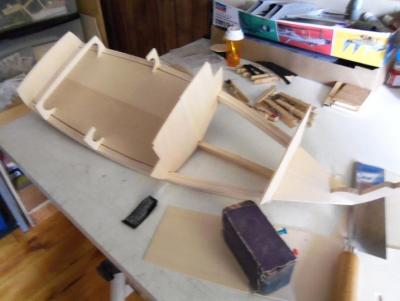
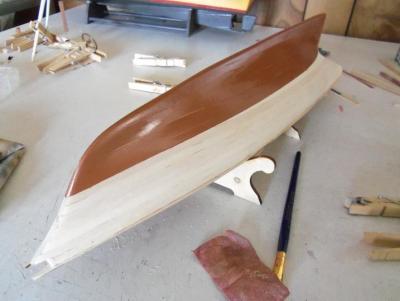
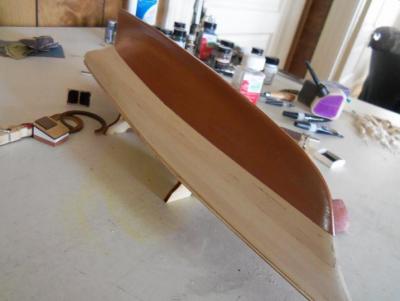
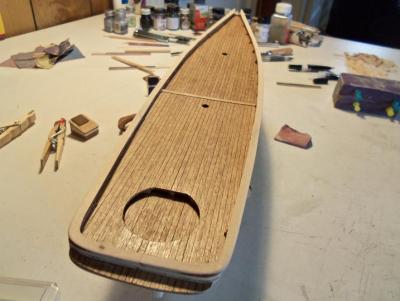
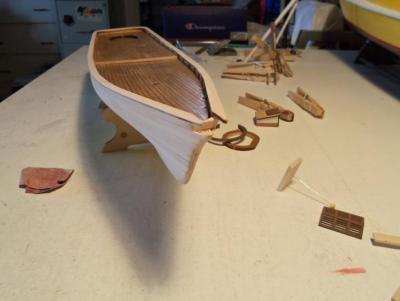
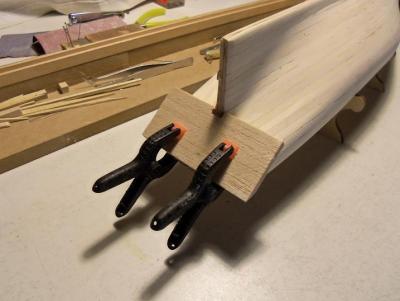
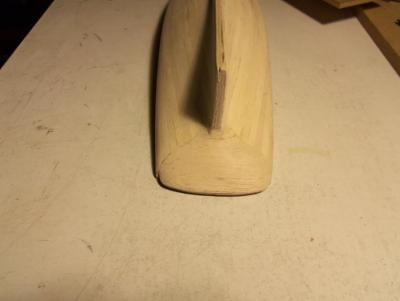
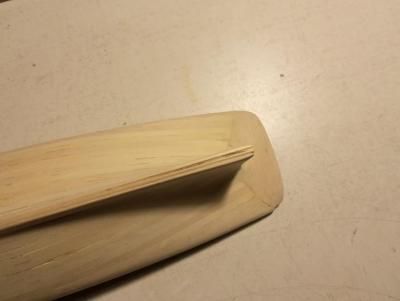
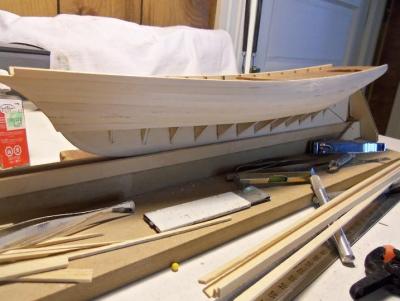
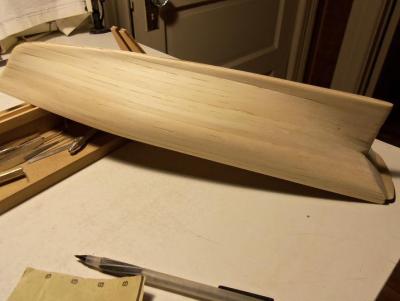
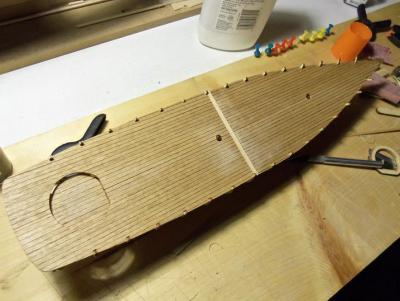
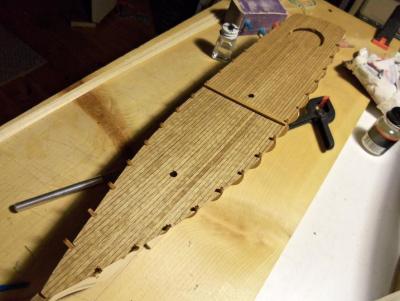
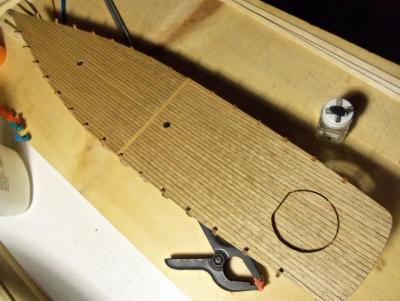
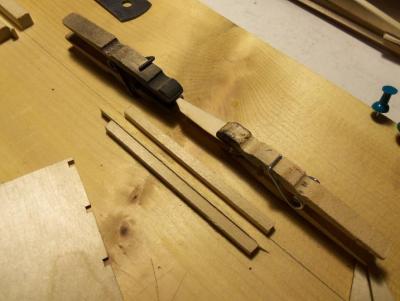
 Thanks Rick......I'm going to try and do this as complete as possible, especially with how it get more interesting later on. thanks for the good word! 11 - 6 - 2012 the sides of the hull went on......not too bad, for a guy whose never done a hull this way before. it was the bottom panels that reall caused the most grief. sanding down the bow fillers was a pain........quite a bit of material needed to be removed to get the contour of the bow. bad things began to happen........either taking too much material off, or the panels breaking.......it turned into a butcher job. the only thing to do was reapir and sand to the best I could. the gap at the stern bottom was closed up with a thin strip of balsa, and then sanded flush. the shoe was then cut to length and shaped. the prop tube hole was drilled and the rudder was assembled, sanded and shaped, and cemented to the shaft that goes through the shoe, to the underside of the hull.


-
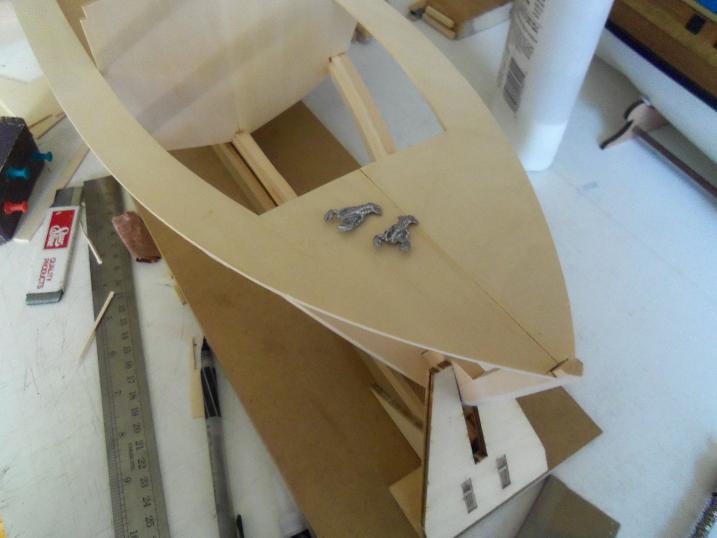
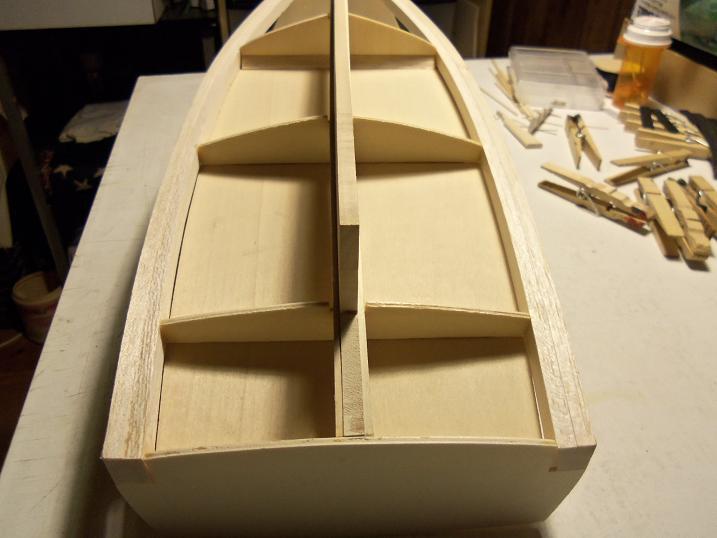
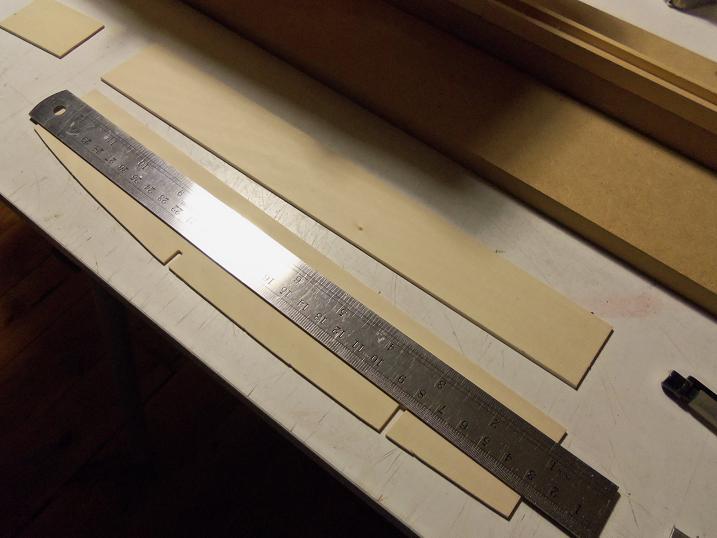
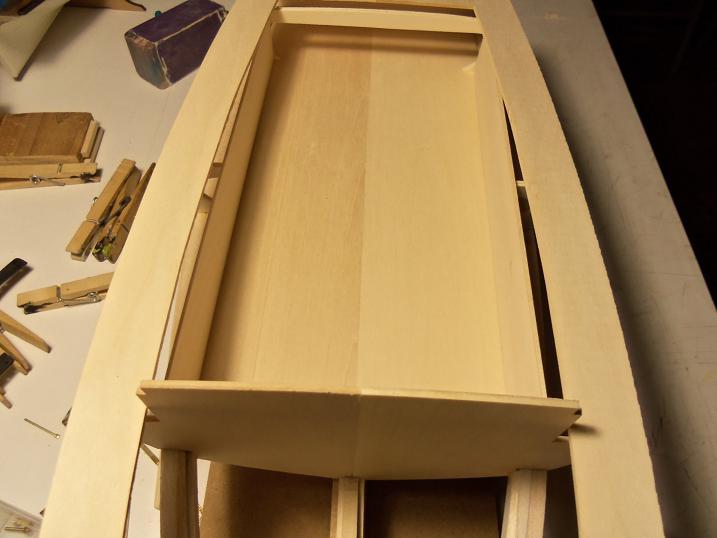
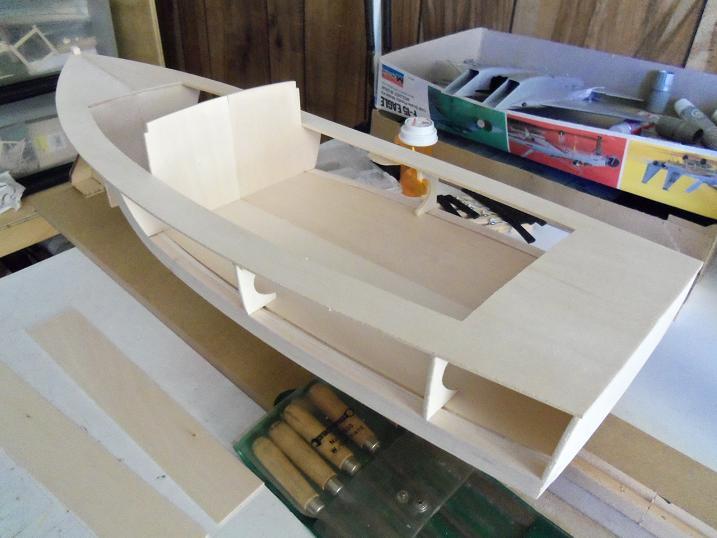
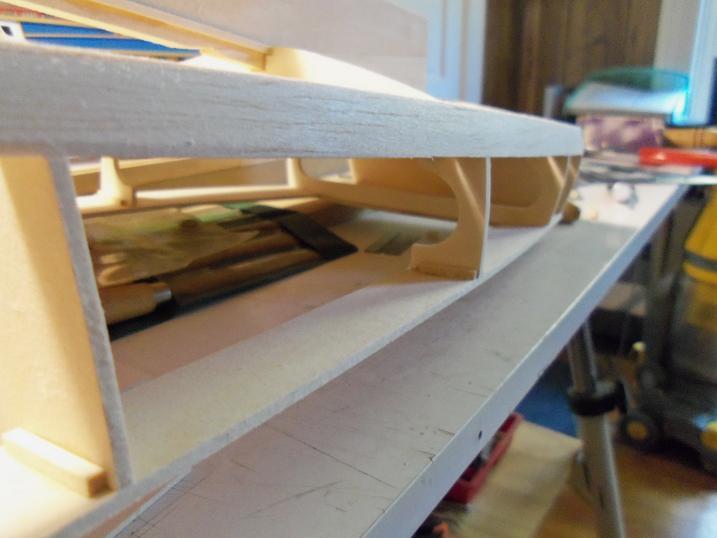
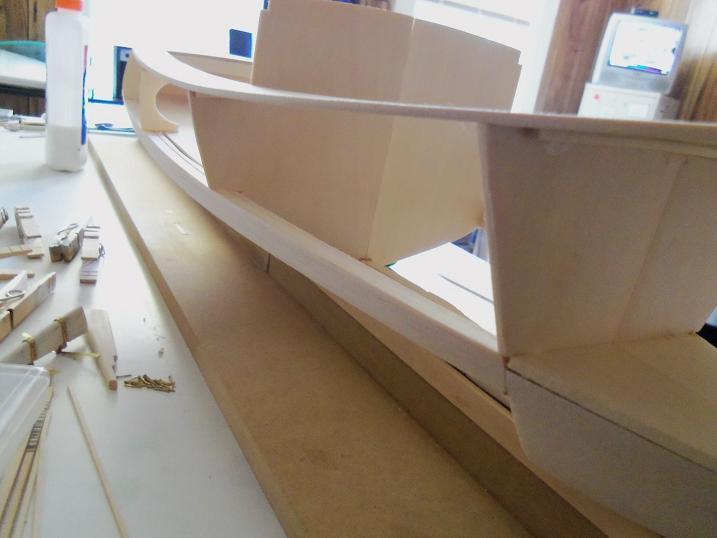
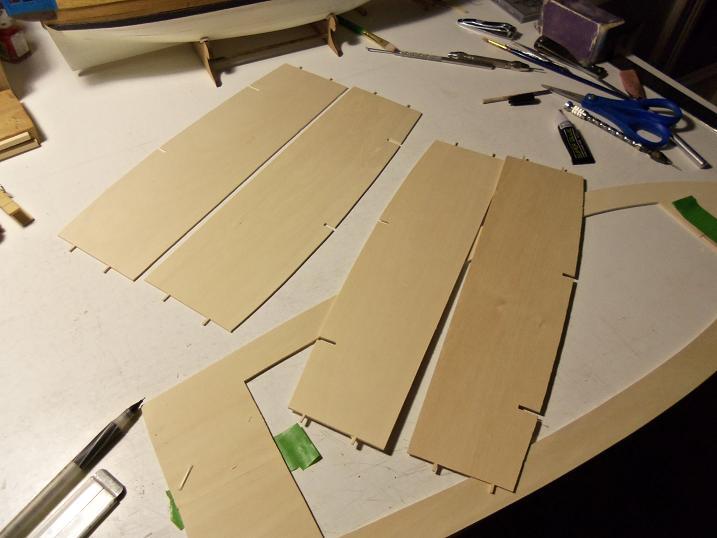
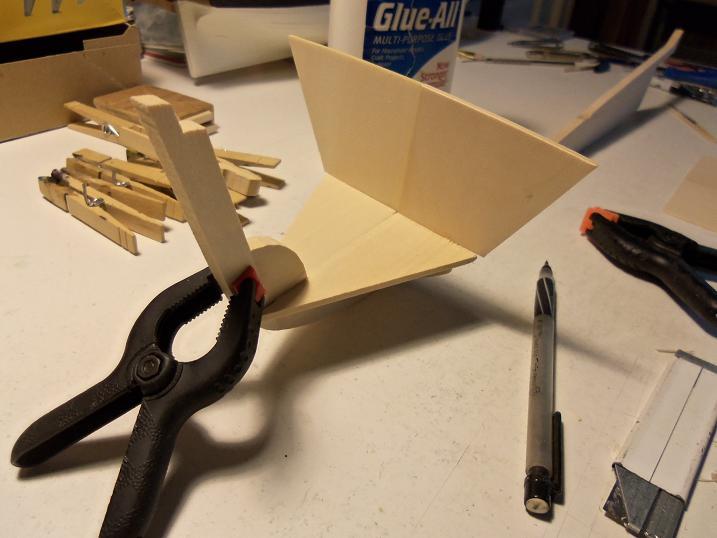
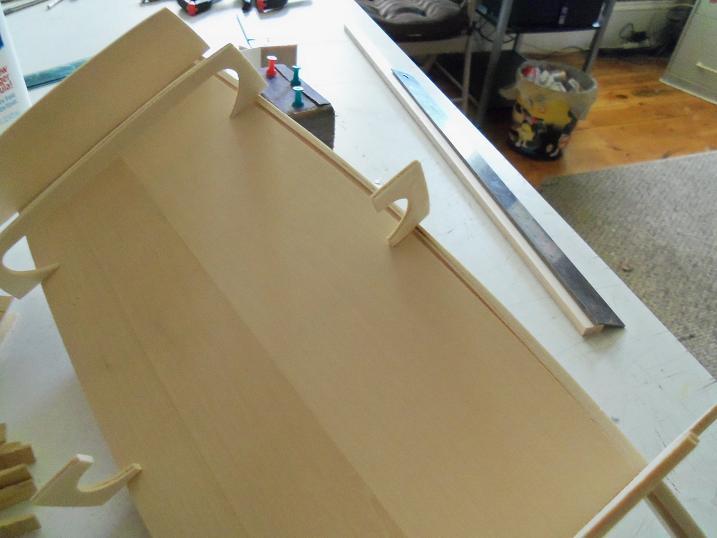
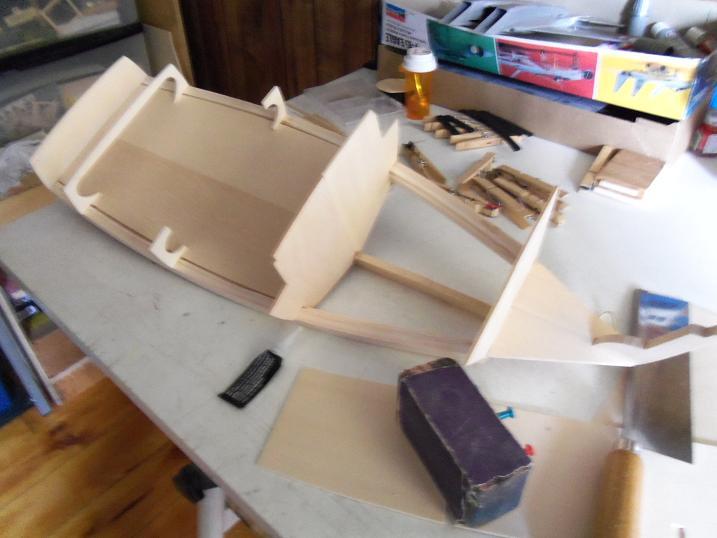
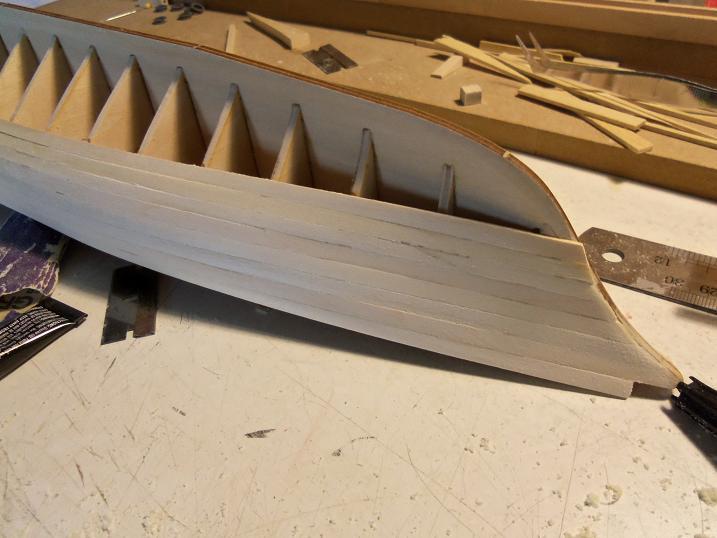
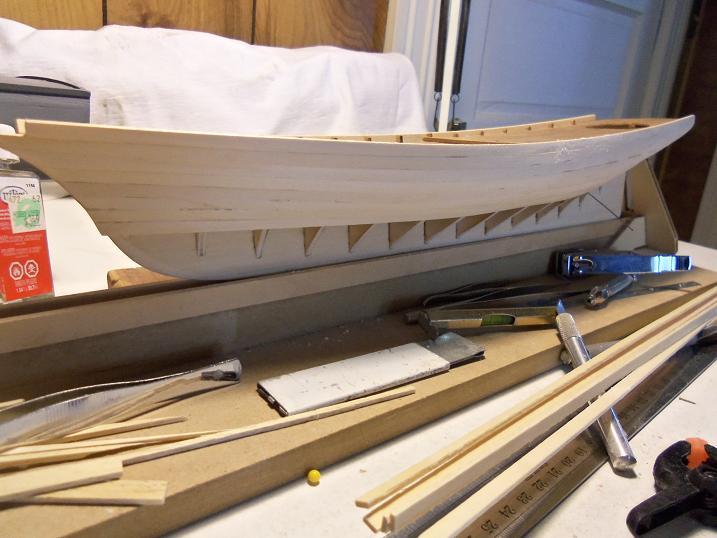
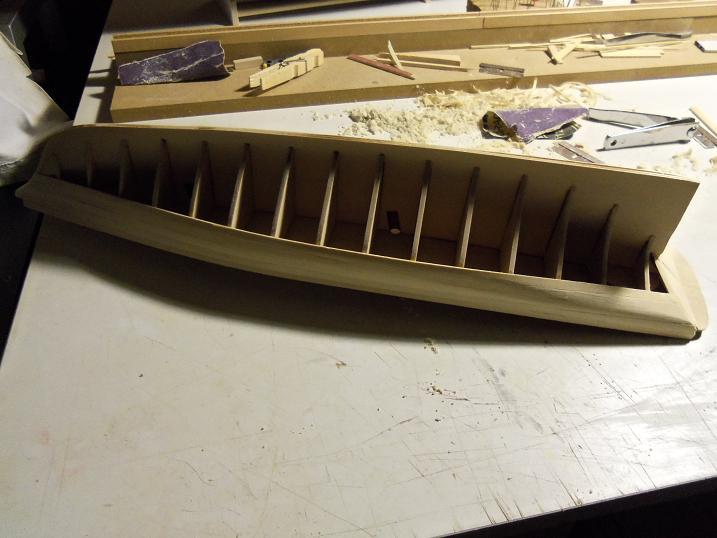
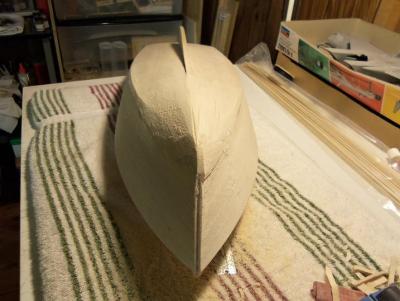
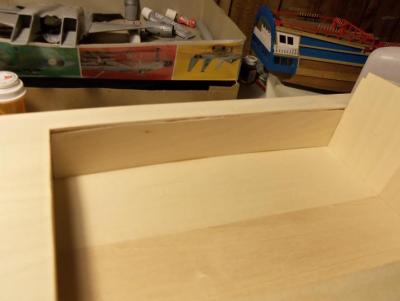
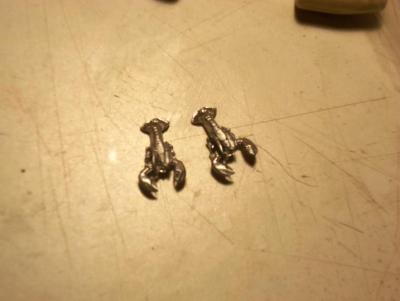
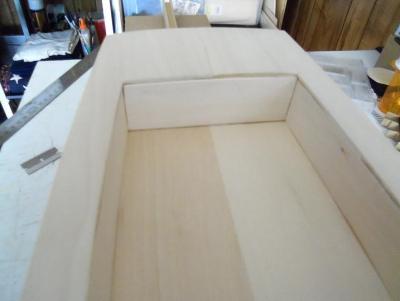
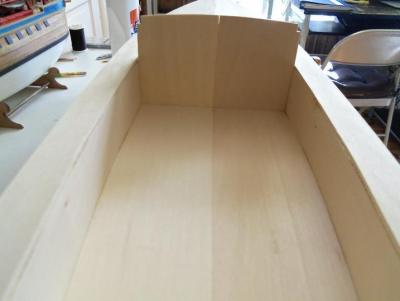
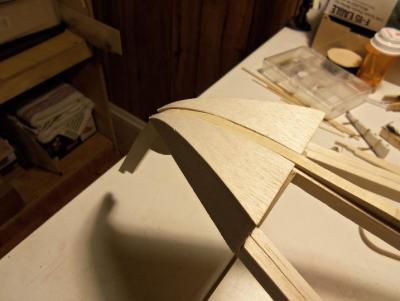
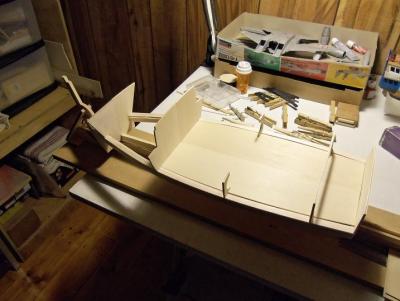
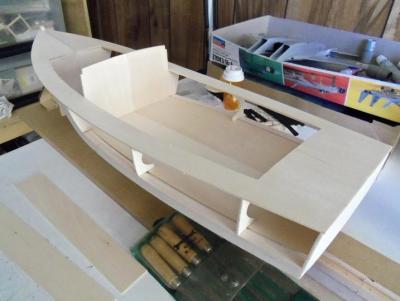
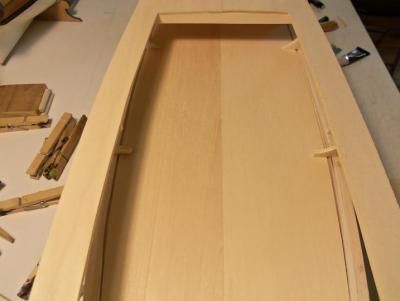
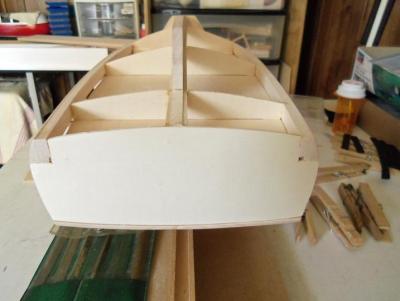
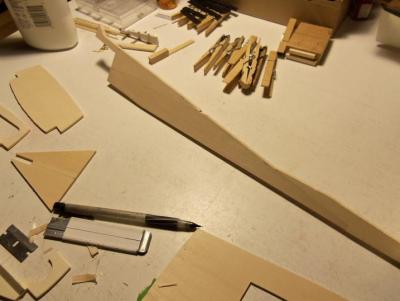
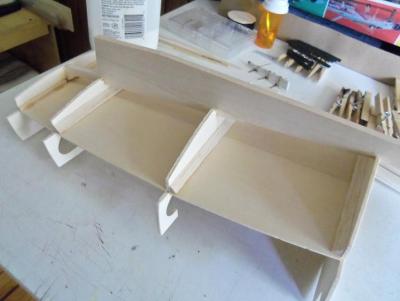
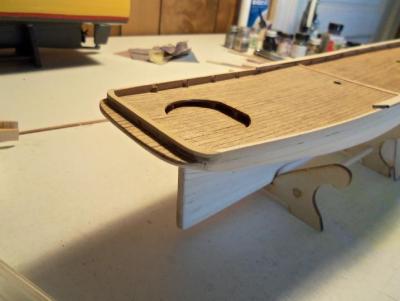
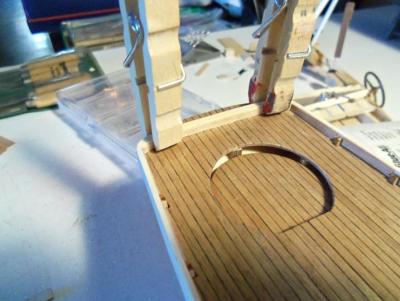
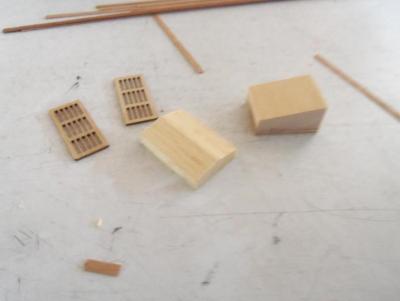
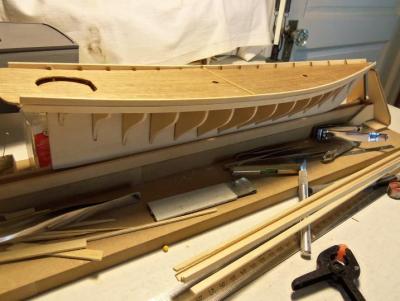
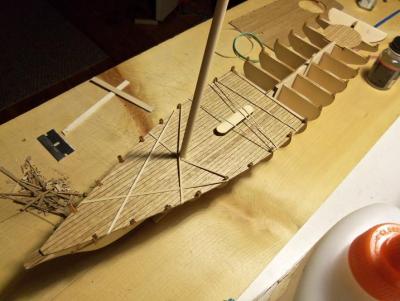
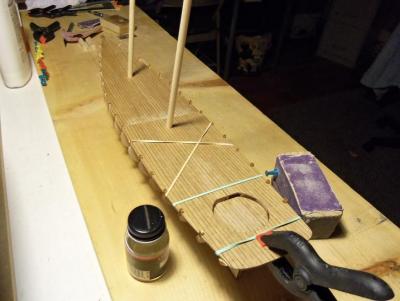
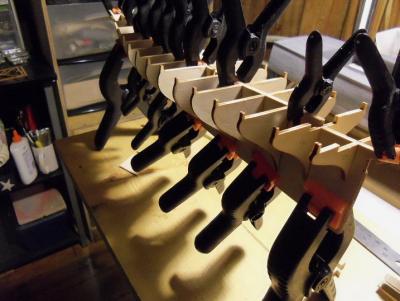
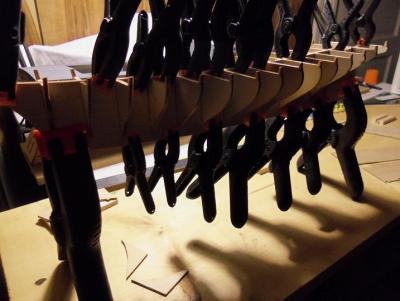
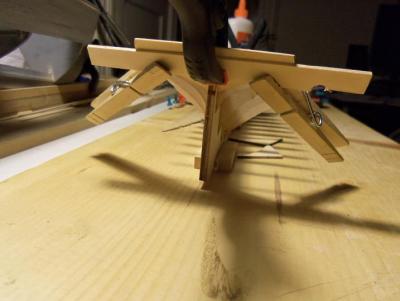
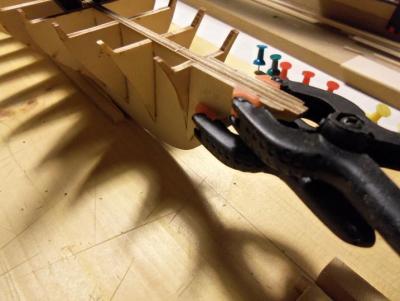
10 - 25 - 2012 with the frame and sheer assembly complete......and some of the sanding done.....the inner cockpit walls were cemented in place. pieces of strip were cemented in to strengthen them as well. someone wanted to see the lobsters, so I thought I would show them. it is a bit funny, but the traps on the plans don't look anything like the ones on the box. we'll see what they look like when I get to do them. the stern wall was made at this time and cementd in place. 11 - 1 - 2012 the hull sheeting started today. this is done with balsa sheeting. one bad thing I see right away, is no matter how hard I tried, I could not stop the sheeting from becoming scraped and scratched. making sure that various seams would not show is hard. the only thing to do at this point, is to sand them as flush as possible. strip molding is going to be the rule here.


- 552 replies
-
- 1
-

-
- maine lobster boat
- Midwest Products
- (and 1 more)
-
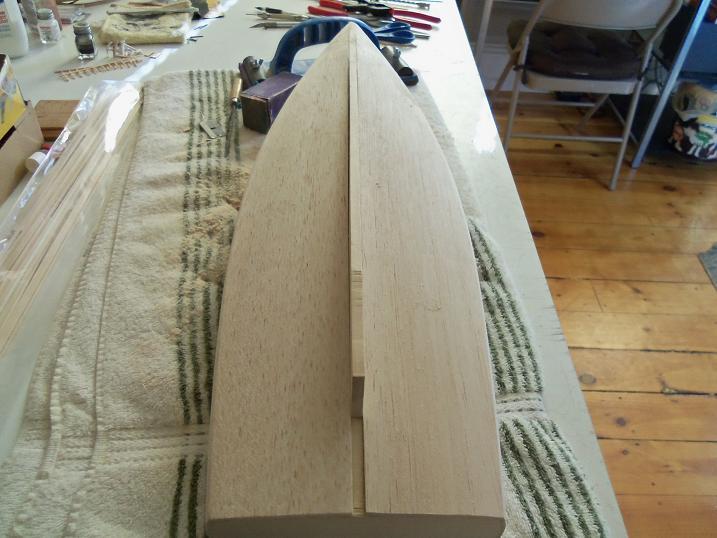
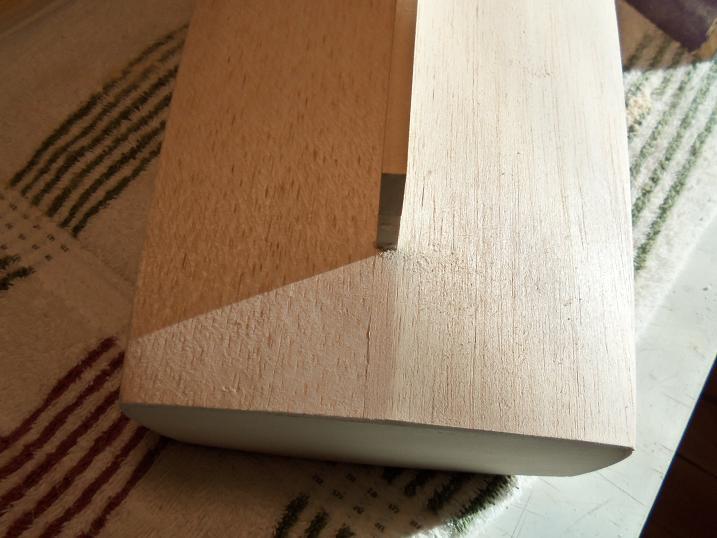
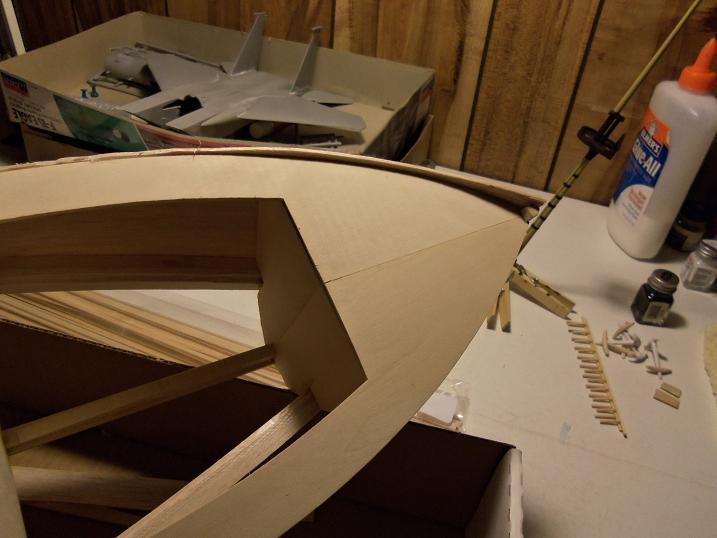
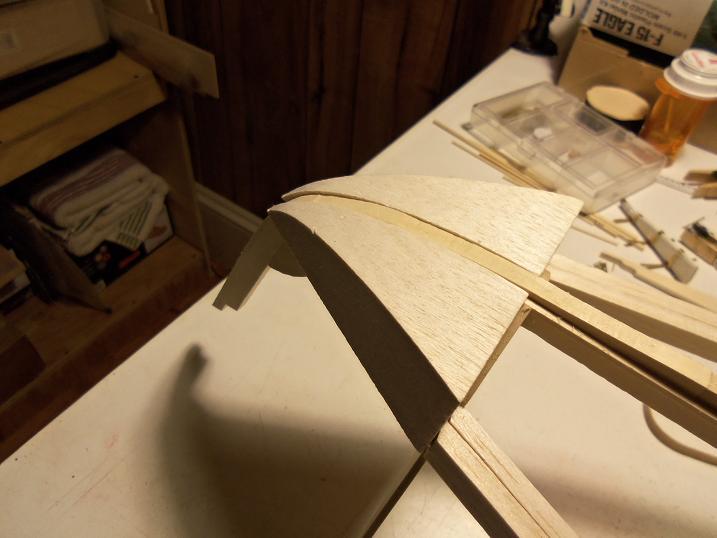
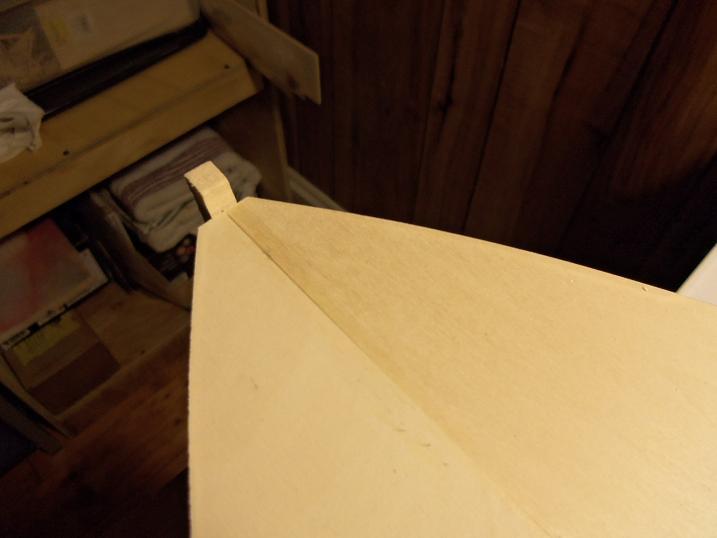
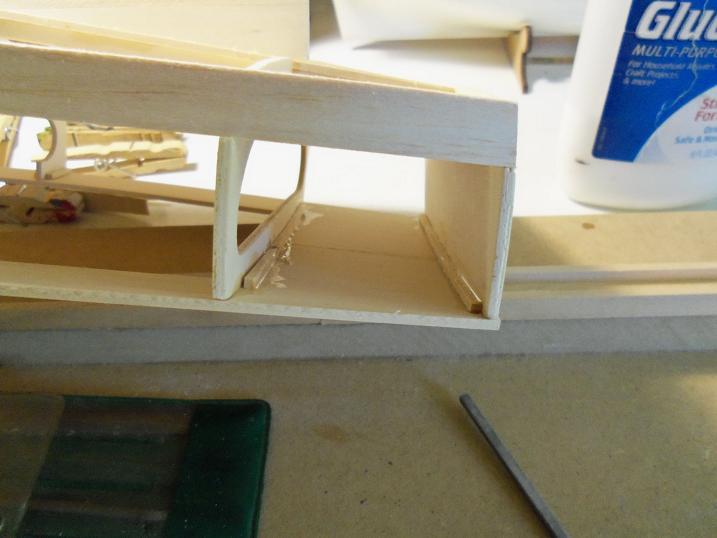
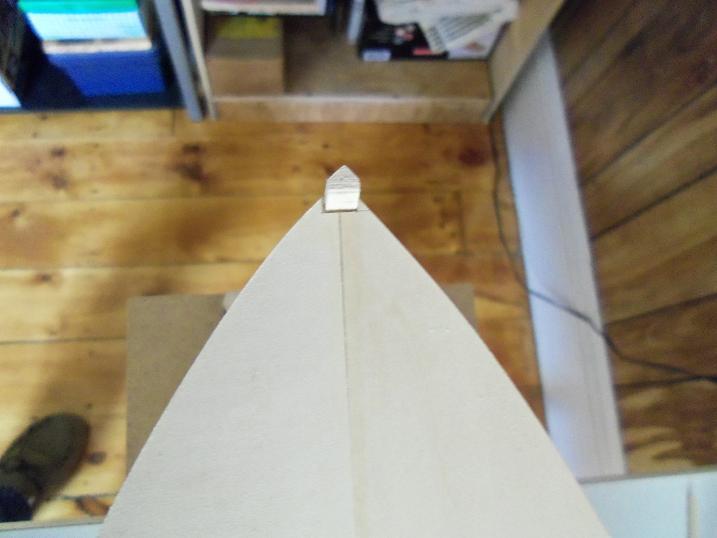
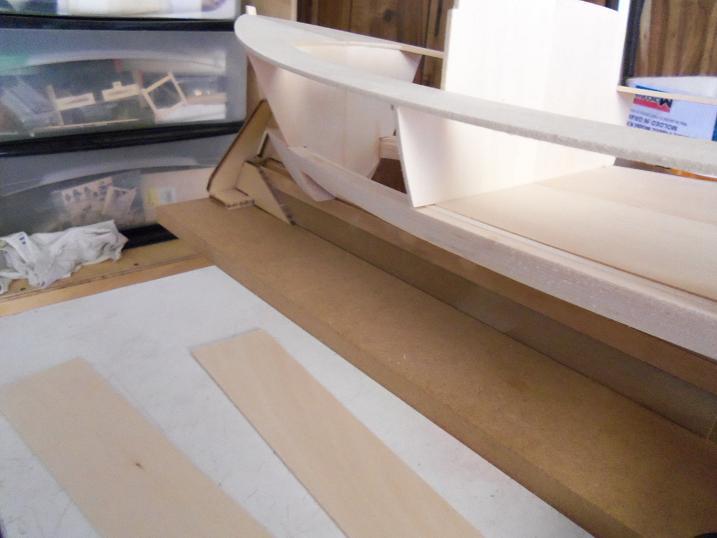
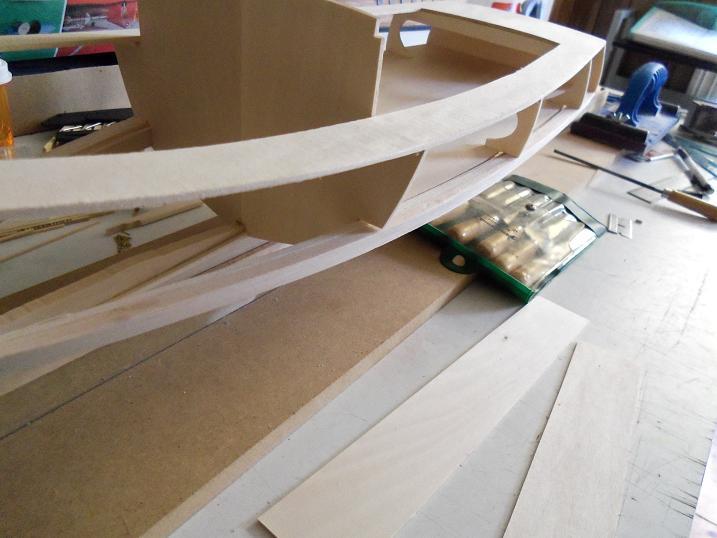
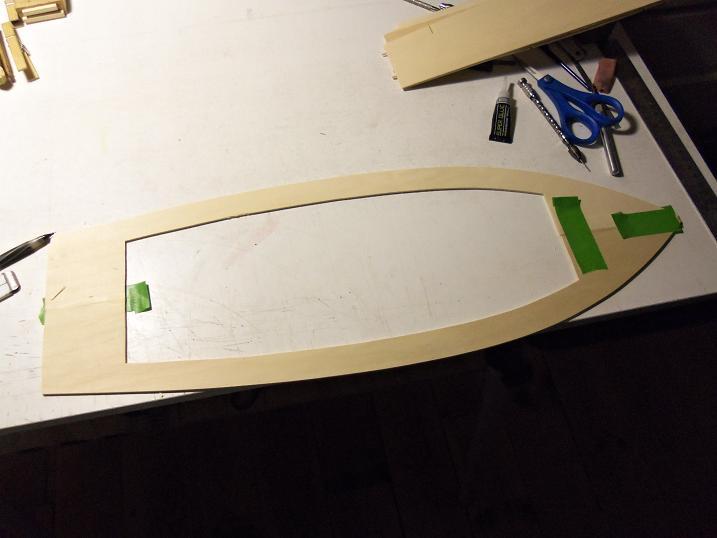
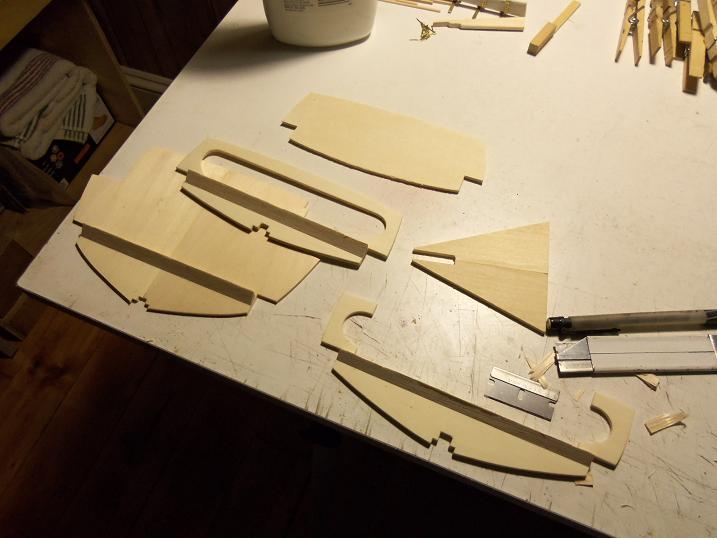
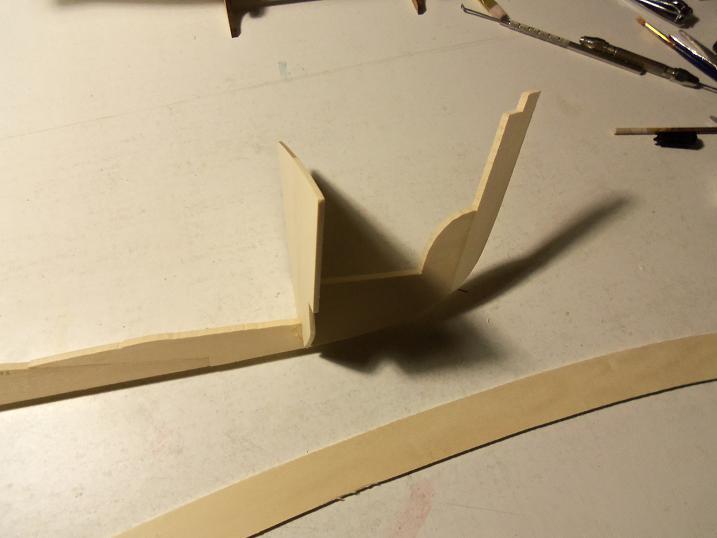
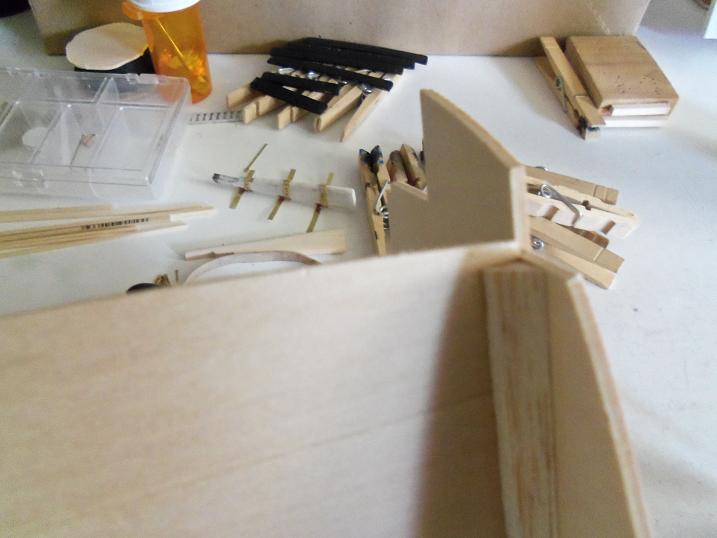
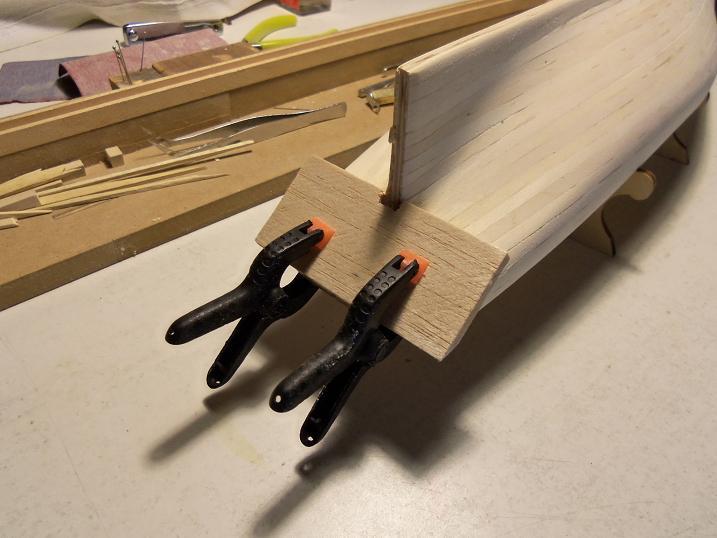
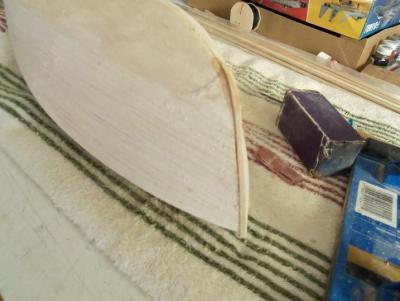
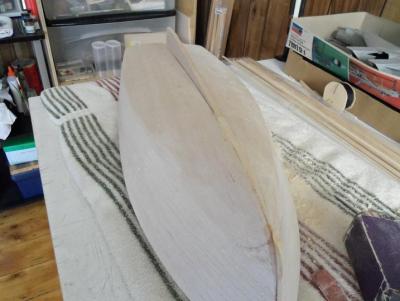
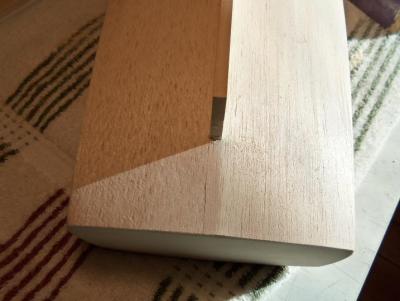
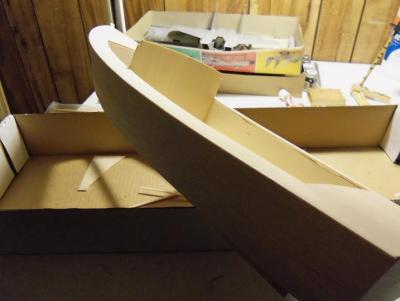
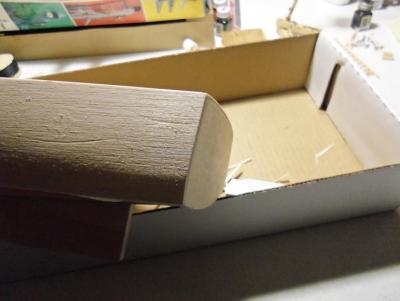
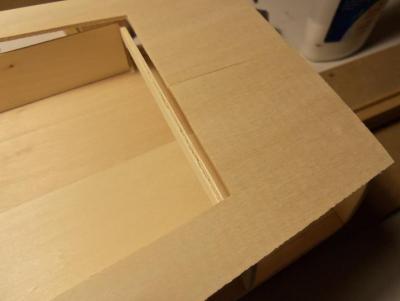
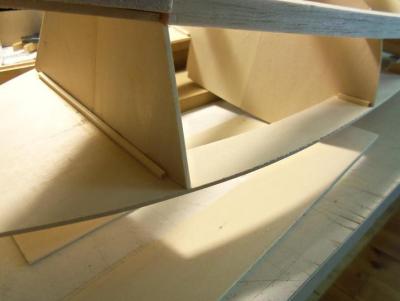
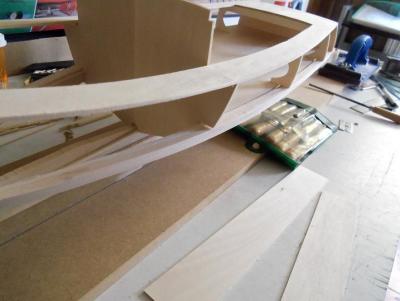
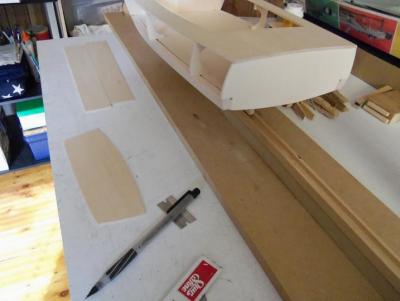
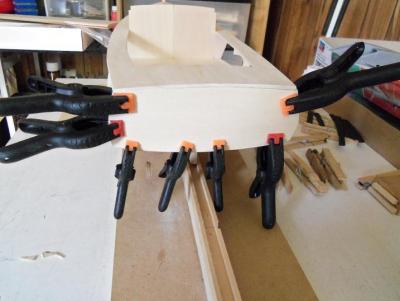
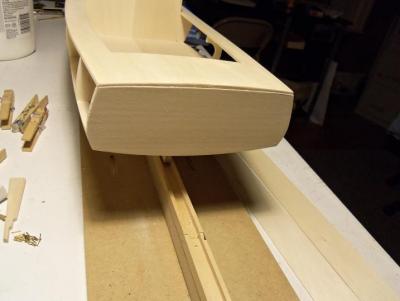
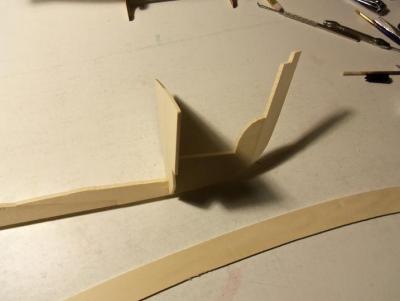
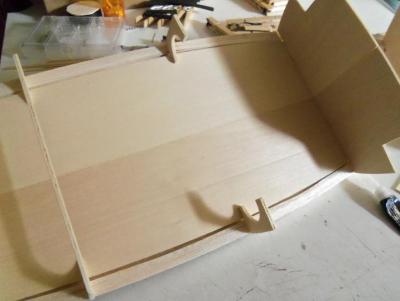
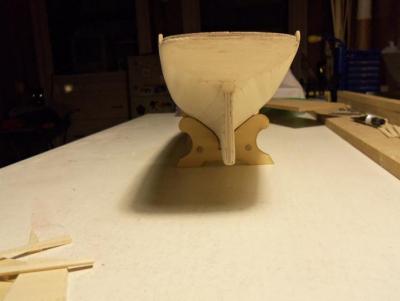
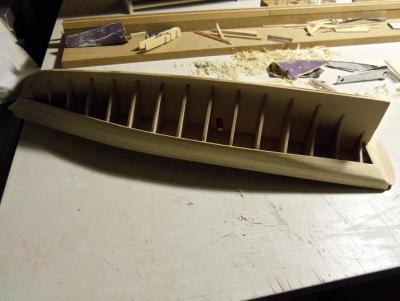
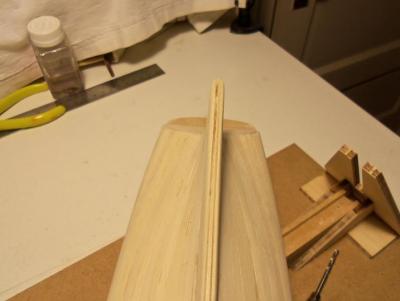
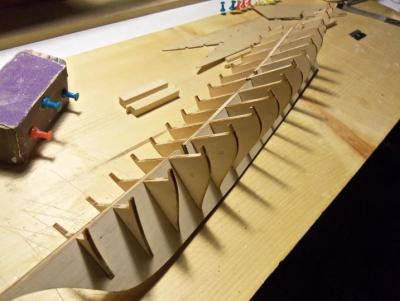
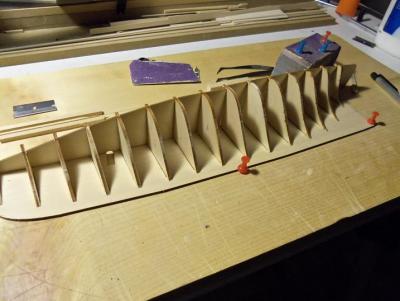
10 - 24 - 2012 ahhhhhh insight........what would we do if we had it. the apt of making mistakes would be a thing of the past. here I started this session with what I would later find to be a mistake......I glued the balsa bow fillers in place. added in as well, were the keel locator strips for the hull panels. the hull is to be covered with balsa panels, rather than the traditional planking. insight would have been a good thing to have had here as well. I used the extra deck panels to create the side cockpit panels. the sheer was fitted and later cemented in place. it was a bit too long at the bow, so it was notched and fitted in. The sheer needed to be installed before the sides could be cemented in place. to strengthen the cement points of the sheer to the frame, wood strip was cemented in the corners. the chine strips were then fared and contoured to the shape of the hull. the bow fillers were supposed to be cemented in after the bottom panels were cemented in place. now they have to be contoured to the bow line......too late to do anything about it now. but even this proved to be quite a hinderance. to paint the transom like this would show those ugly chine corners. I thought to make a cap for it to cover it over. sanded, the transom looks much better


-
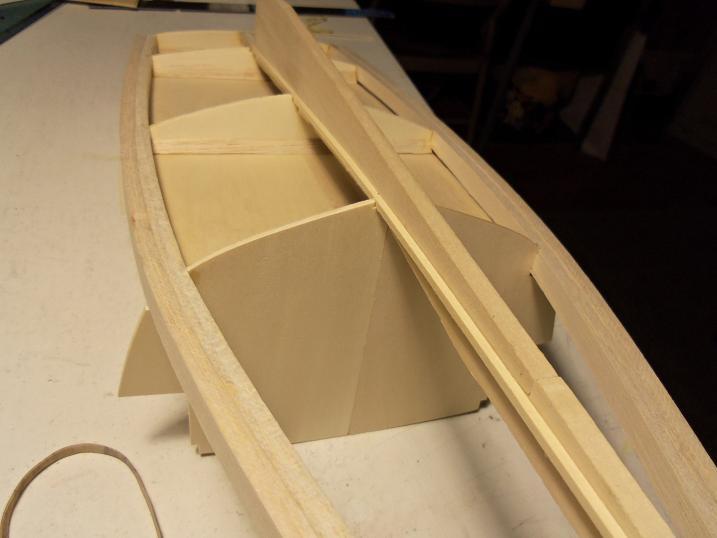
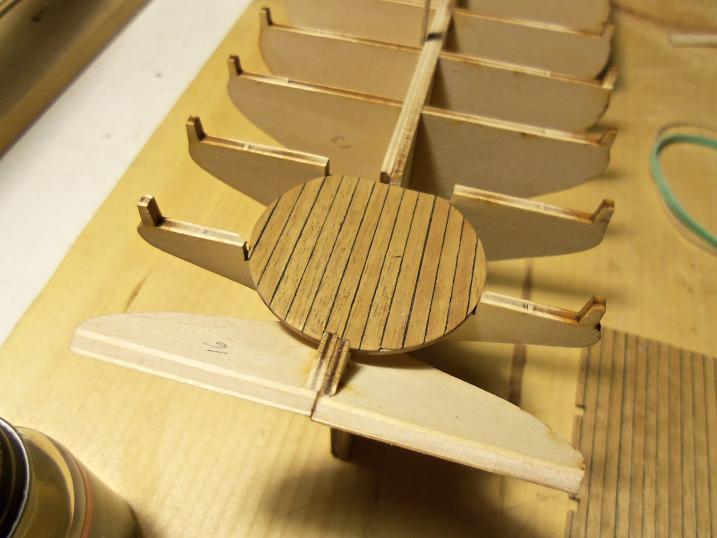
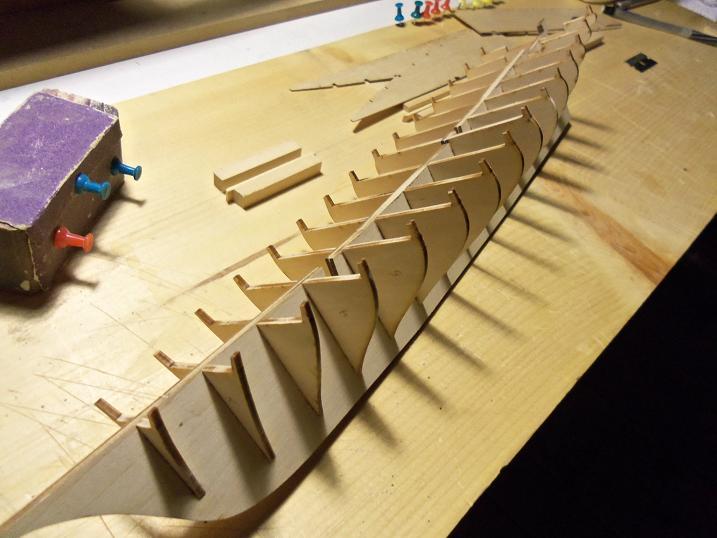
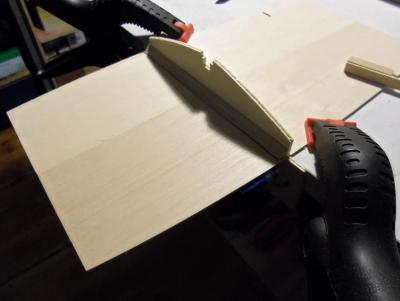
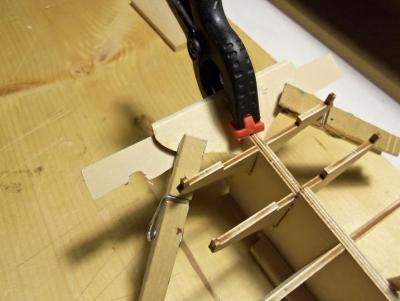
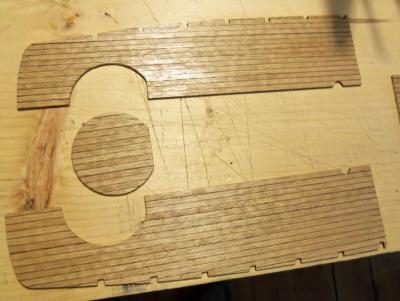
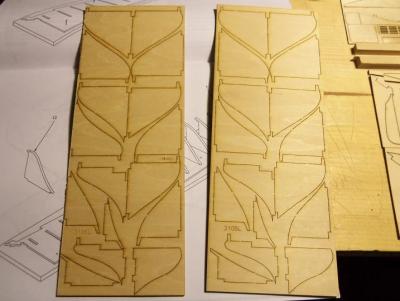
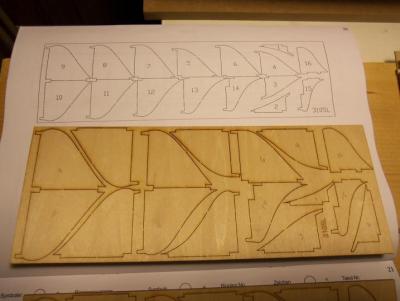
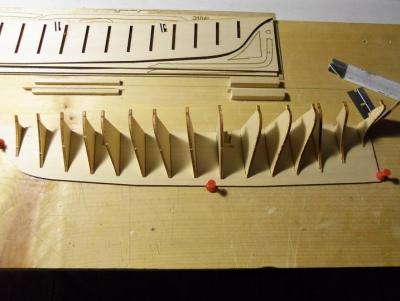
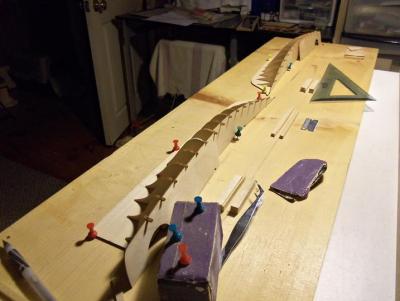
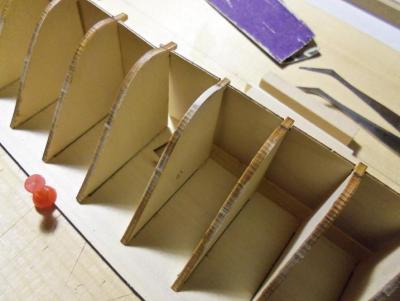
10 -22 - 2012 here is the saga of the Midwest Maine Lobster Boat. I call it that because of what this build became at mid-build. the plans for this kit are very good......so good in fact, that I planned to do a scratch build of this vessel, with a new subject. remember what they say.......be careful what you wish for? well, that's exactly what happened.......all the daydreaming I was doing about the scratch build, while I was building this one, manafested themselves into the build.....and began to stretch it like a giant rubber band. the point where the band snapped......was when someone said those immortal words......"it don't look like a lobster boat to me". we'll cross that bridge when we get to it. please excuse the grammar and spelling.... you know us "Popeyes' "......we don't spell to good. I will try and put as much in here as I can. we'll start with the hull frame construction.....that's always a good place to start......I used the Billing's build slip to assemble it. the keel is made from multiple parts. at this time, I thought to cement the sheer together....I'll have need of it soon. the floor platforms for the cockpit deck is a bit too much for me. the instructions say to draw the plank lines on the platforms......I plan to plank it, so I was able to do away with one of the pairs and go with a single layer platform. the ribs were set up with their various location tabs and set aside to dry. the keel was ready to go. #1 rib in place........I'm well on my way. 10 - 23 - 2012 the inner deck platform is goinmg to play a role in the frame construction. #3 rib was cemented in place. the breasthooks were also cemented in place as well. these are the chine border strips......there are to be two per side. I don't know why they just didn't supply thicker strips. the inner deck platform comes out a bit too far, so i had to notch the inner chine strips. in making sure I made enough of a notch, there was a gap. this will not be seen, because I intend to close up the sides of the inner cockpit. the aft deck wall will be closed in as well


- 552 replies
-
- 1
-
-
- maine lobster boat
- Midwest Products
- (and 1 more)
-
thank you pat.......and every one who 'liked' the poem. a great comedian once said in an interview, that he used to travel around with a note pad in his pocket......every time he thought of something, he'd write it down.
-
can't wait for an update Paul.
-
my first build was the nordkap.....it spent over 20 years in an attic. the wood was a little hard to work with, but it was OK. truth be told, with the effort you've put into the Regina.......your scratch built ship's boat will surely come out better than the kit supplied one. I'll look forward to your update.
-
I see you have more added Kat.........very good! wonderful build......very well done too!
- 237 replies
-
- 1
-
-
- cutty sark
- revell
- (and 2 more)
-
thanks Sherry.........more progress soon.....I hope. have you decided on another build? I'll keep my eye out for your log.....as I try to rebuild.
-
thanks Frank.......I just redid my signature.........you can see what I'm up against.......scary!
-
I want to thank everyone who commented here....I'm quite humbled with your positive responce. I only have this build up so far, and a couple in the finished gallery......trouble is, they're in the wrong one. I will see if I can have them moved to the proper forum. I'll have some more progress up for this build very soon. I'm no expert by any stretch of the imagination.......and I should know about imagination, but your good words tell me that I'm on the right track I will continue to raise the bars and eyebrows, as I move along in this wonderful, and very interesting hobby. thank you all.....it's great to be back........and here with all my friends! oh.......Frank......I'd put a statue on the table.....but I'd be too afraid that it would end up in a build somewhere!
-
beautifully done Frank......so glad to see your up to date. I'm still in the works with mine.....so far the America is the only one I have up and running. I also put the Gundalow and the M&M fun ship in the finished forum.......but in the worng one.....have to see if they can be moved. I like you dead eye jig.......I was wondering how I was going to do it on the Goth when I get to it. I had tried to order the dead eyes from a place in Florida......but they were a bust {idiots}. I'll order them from model expo, or somewhere a bit more well known and established. superb work on your rigging, my friend......your furled sail looks great! keep up the good work!
-
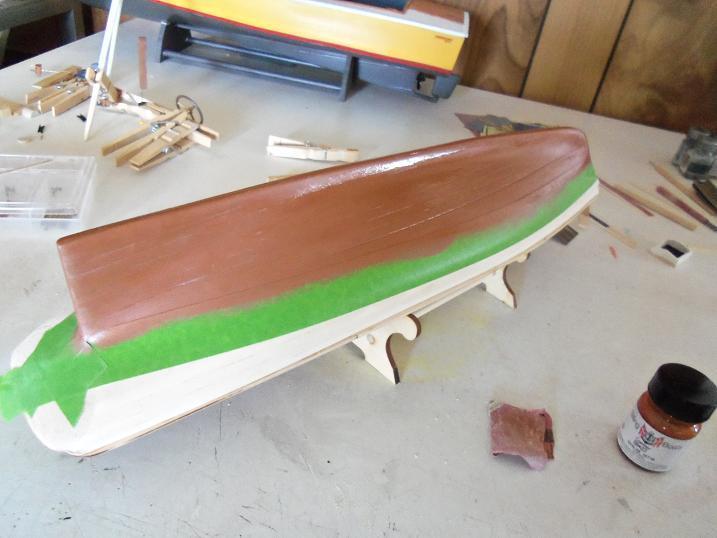
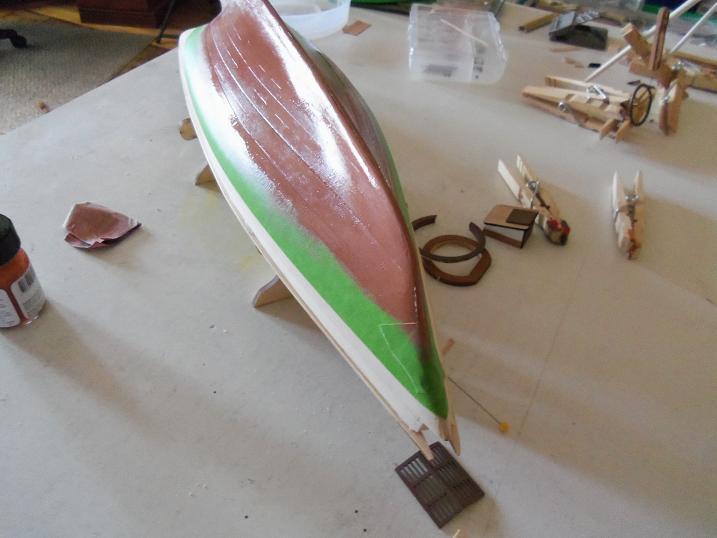
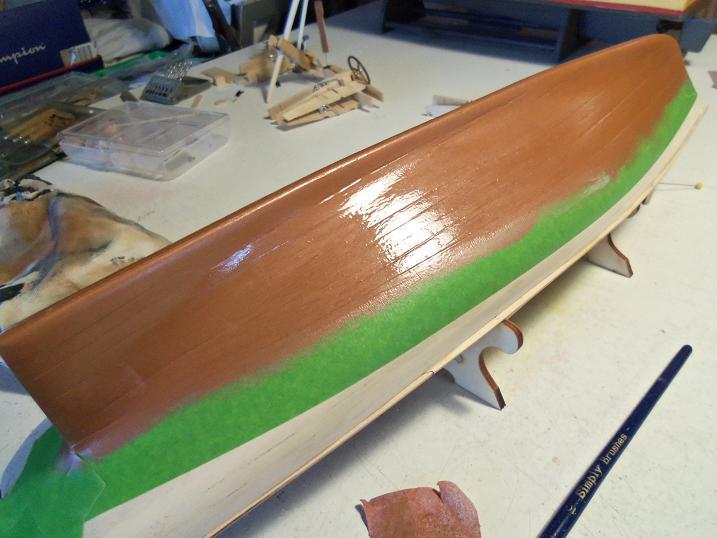
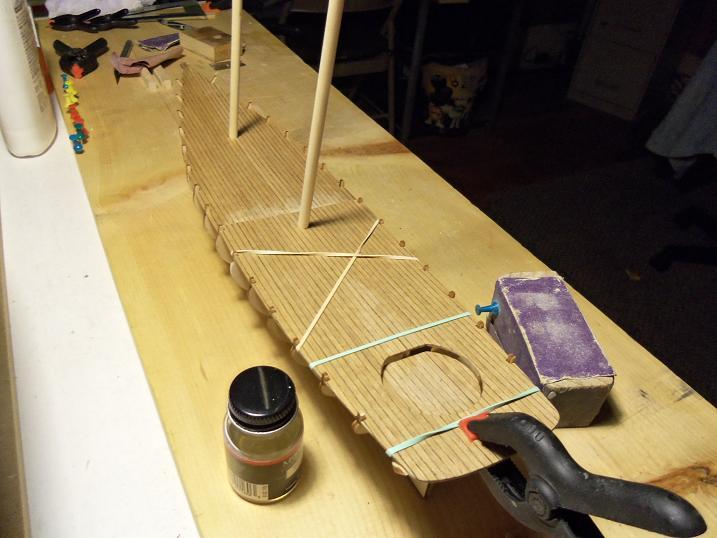
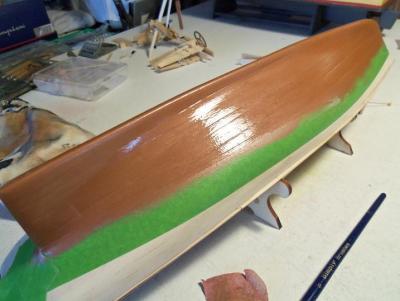
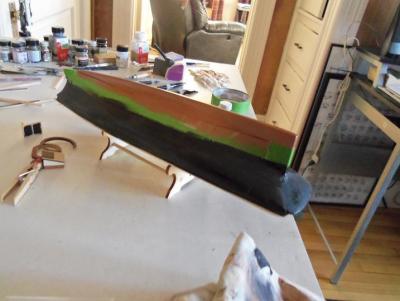
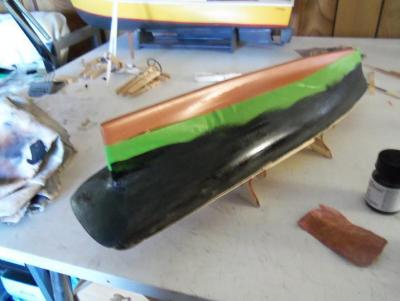
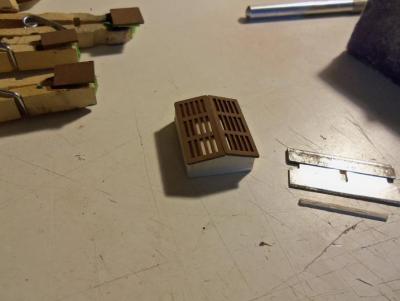
hi Mark! thanks for the good word......be proud to have you follow along! this will definitely get this build up to snuff......the hull paint! I used the Billing's paint on this.......I went with copper for the bottom. the slots in the skylight roof was filled with the window maker, and then the inside walls of the structure was painted flat white......the bottom was painted flat black, the masking tape was removed........this copper is more of an earthy tone.....not a real shiny copper color....once the sheen calms down, it should be good. I had to do two coats.......I used a brush instead of the airbrush. I should have used it......I am so spoiled now! the copper had dried long enough, I think........so, the upper portion was masked up and it got it's first coat of black. and there it is.........I am all caught up! I have more progress, but it's still in the camera. I took tomorrow off, so I'll try to get more done.....my morning will be a busy one though.....both grand kids are coming over! can't wait to see them!


- 377 replies
-
- 2
-
-
- america
- billing boats
- (and 1 more)
-
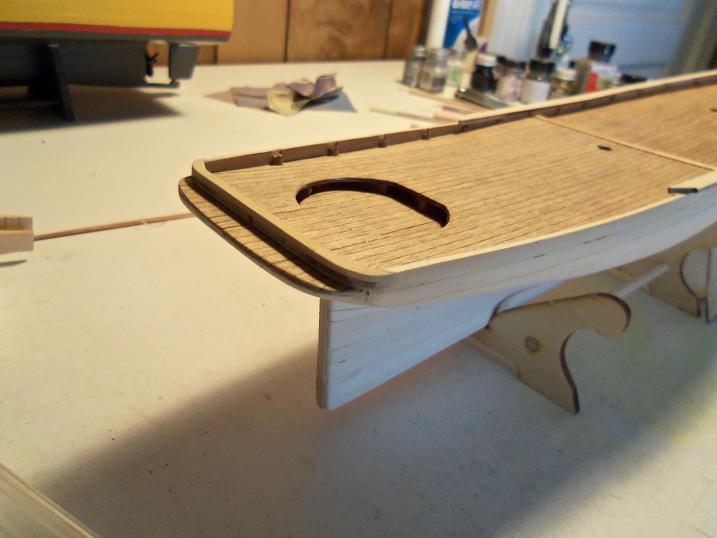
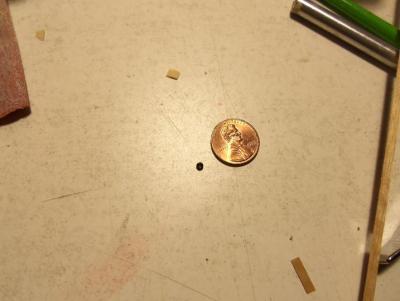
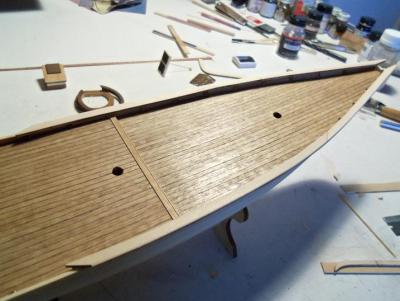
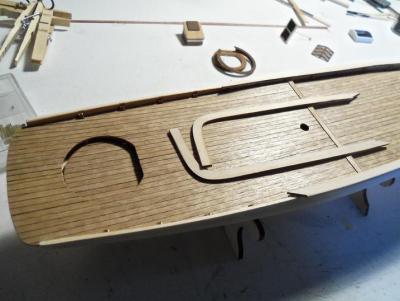
I had a stroke of good luck. I wa walking from the living room, to the computer room. looking along the edge of the wall as I was coming through....and I saw a tiny round thing.......it was that silly perls! I got it back! here is how small it is. this should just about catch this build up. I had halted it to work on the lobsie twins. now that I have the both of them well in sync with one another, I thought I'd switch over. I cemented some light mahogany on the inner bulwarks, and prepped up the top rails to be cemented on without flaws, the stern bulwark wall is a two piece part, but it seems too low to mate with the side bulwarks. I added a piece of flat stock to the bottom and brought it up. after the stern wall was sanded to shape, it was fitted and cemented in place.......the aft top rail sections were then cemented on. I took som of the same mahogany and covered over the wood plys on the deck side.....the other side is painted Across the bow, a small piece of planking was cemented in to bridge the gap. a concave deviation was filed into it for the location of the bow spirit.


-
hello Frank......I'm finally getting my butt in gear........don't want to let you guys have ALL the fun! yes, I will be posting the rest of my active builds. the finished builds will go in the completed gallery.......I have those pictures ready to go as well. this one is easy.....it's still rather early in the build.........the Gothenborg and the Lobsie twins are the ones that's going to give me fits! LOL! thanks for the good word.......hope you follow along.
-
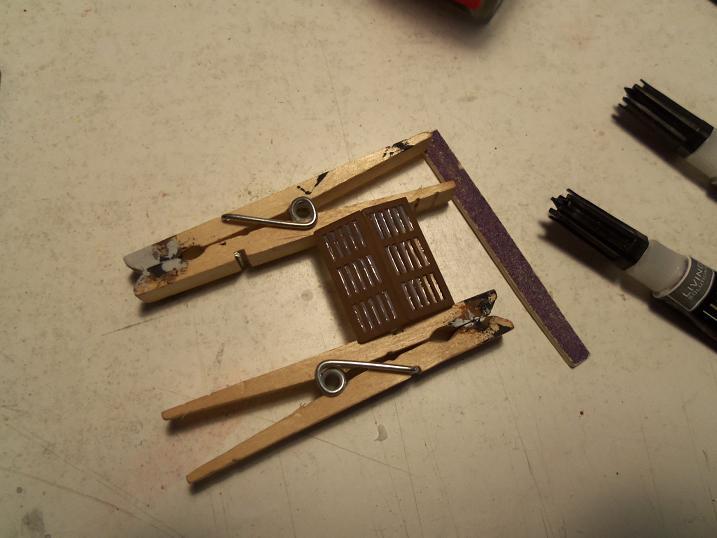
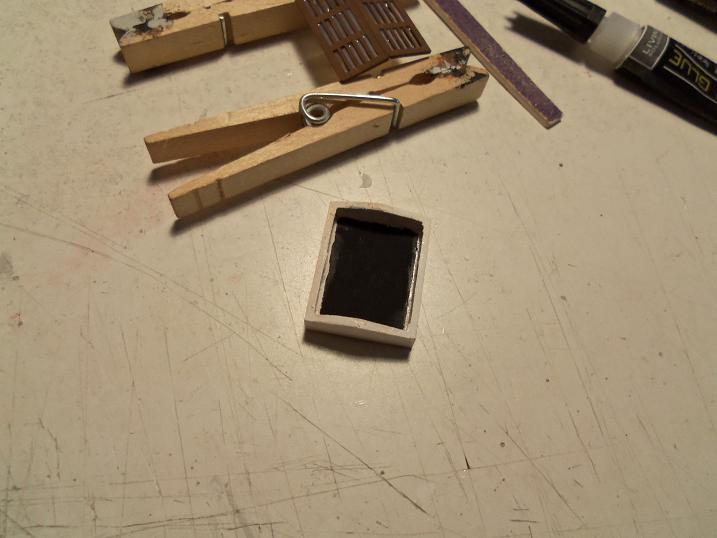
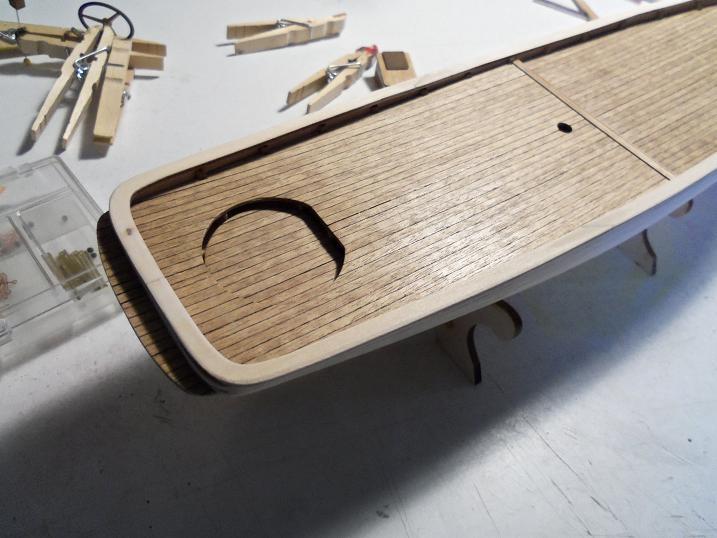
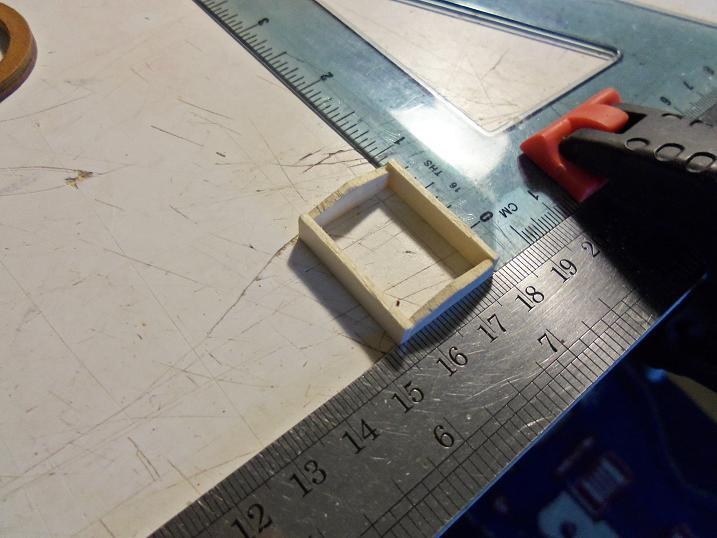
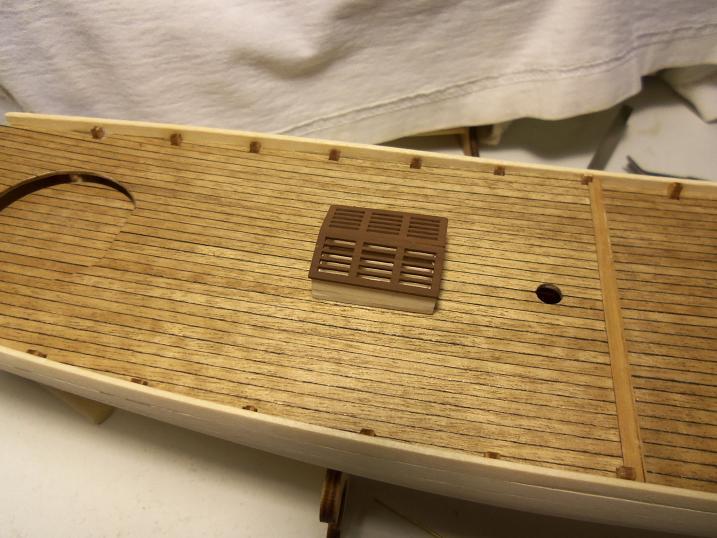
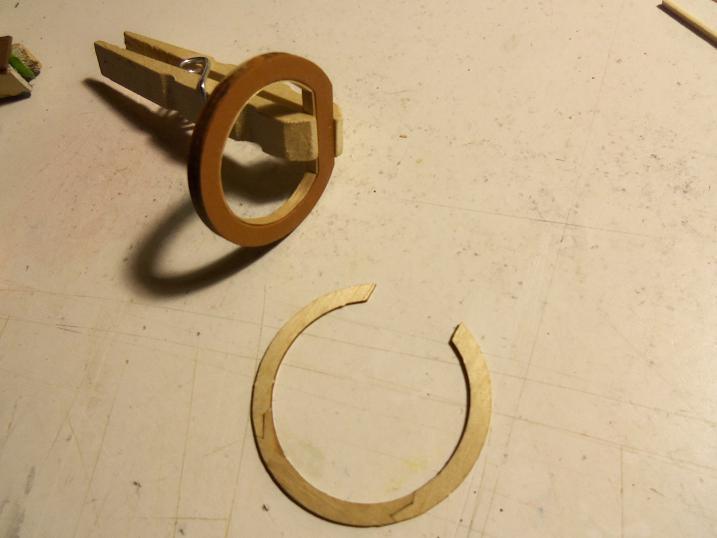
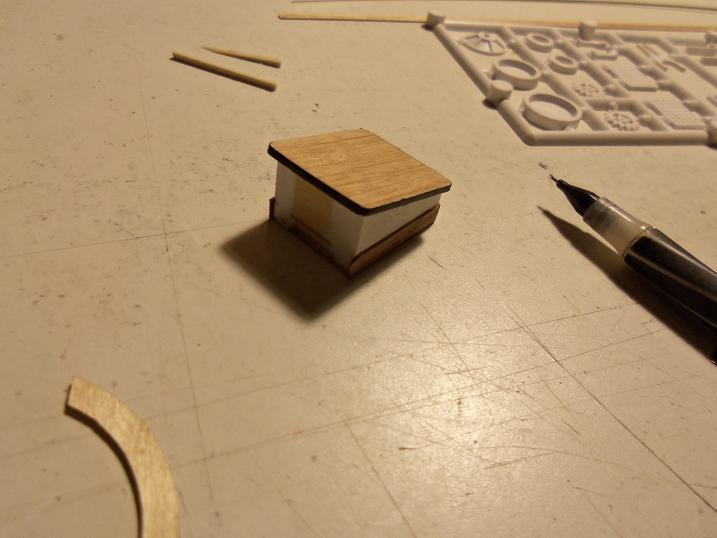
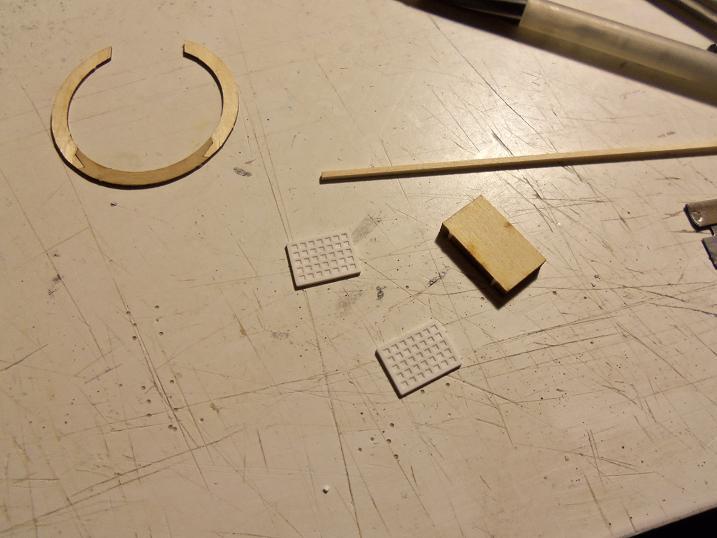
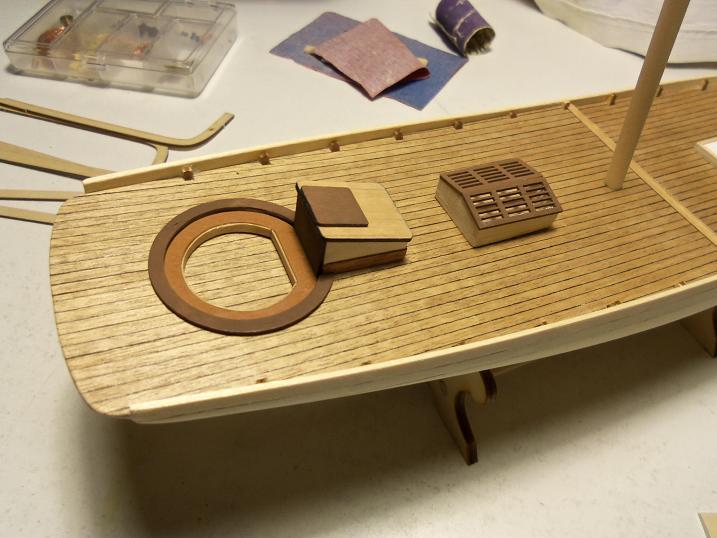
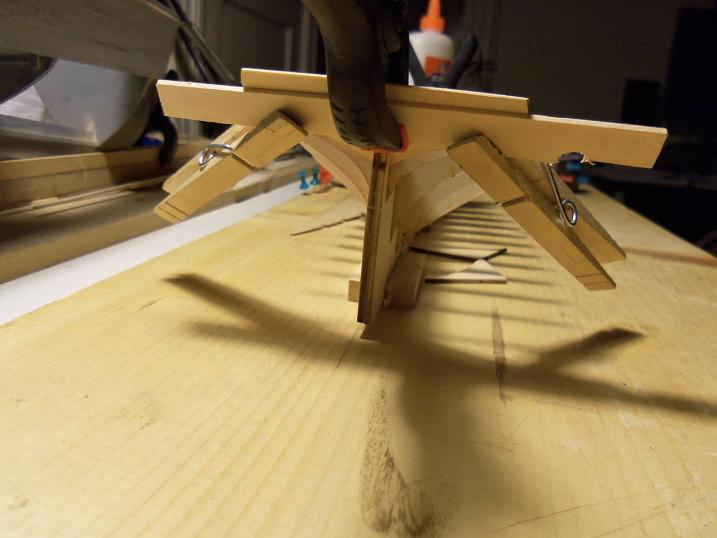
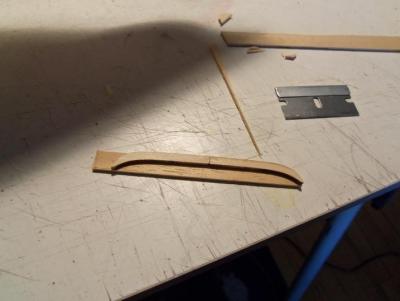
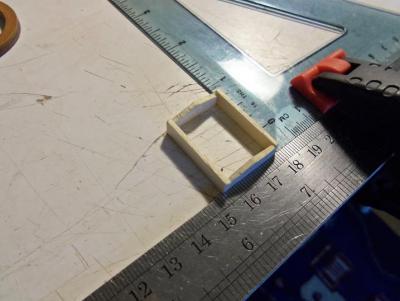
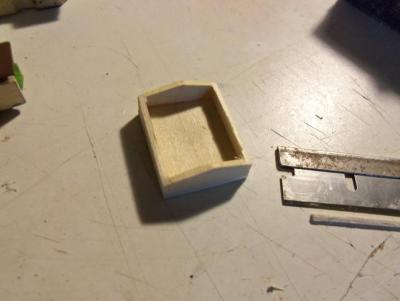
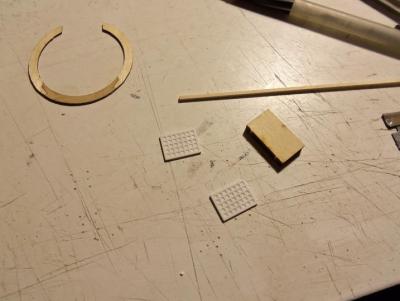
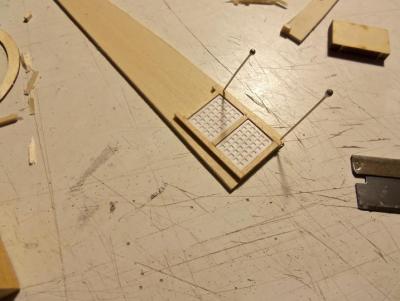
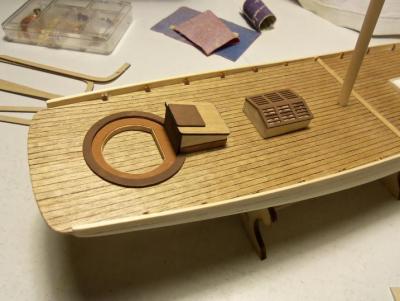
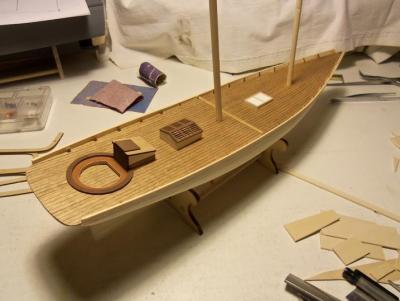
OK........so, I got the planking done. I messed around with the deck fittings next. I also separated the bag of fittings as well.......and wouldn't you know it! I lost one of the tiny perls beads for the booms! I looked around for it.....but it was long gone! luckily, I had bought a container of them for the Gothenborg and noted that they were the same size. so, I added a couple to replace the one gone, and went on my merry way. I started to work on the structures. the companionway plug and the skylight plug. I couldn't do much with the companionway plug, but I thought of something for the skylight plug. I wanted to make it look open inside, so I cut two slivers of the plug and glued on the sides. I will add a bottom. this is what it looks like sanded and cleaned up. with a flat black bottom, it will look open inside. the tiller seat, trim ring and companionway is partially assembled. the grate on the deck looked a bit out of sorts too......too tall and both grate pieces wouldn't fit on the plug for them I framed them in and made them lower to the deck. so, then I did a dry fit


- 377 replies
-
- 2
-
-
- america
- billing boats
- (and 1 more)
-
hello John.........I'm on the road to recovery as well! we'll get this place ship-shape in no time! cripes! I was shocked to see how much was already here when I got in the other night.....makes a fella proud....don't cha know! I so glad everyone like my little prose.....I read your post and verses came into my head......gotta put'em somewhere! LOL! believe it or not {i forget the fella who posted it}...I think it was in my original post introducing myself......someone posted a poem to me. I was touched........ In the evening breeze, from our seats of ease We hold our court in the bow Tho’ me mates thinks I’s daft, on art verses craft On applied research I’m a “WOW”! When the day is done, they take their fun With a tot of rum at the peak Whilst I, if I’s able, I borrows a table And works on me scarphs for the week Now I ain’t prolific and I ain’t terrific But I gets me little job done If I’s hard pressed to finish, I has me spinach And carries on with me fun Because in the end – I am what I am I copied and pasted it........the heck with telling you about it! I {again} want to thank the person who sent me this........I keep it in file, and in backup on memory stick 16GB......it has every picture and stuff I've done to date.....except for the Wharf logs thank you very much for the welcome home....to you and everyone!
-
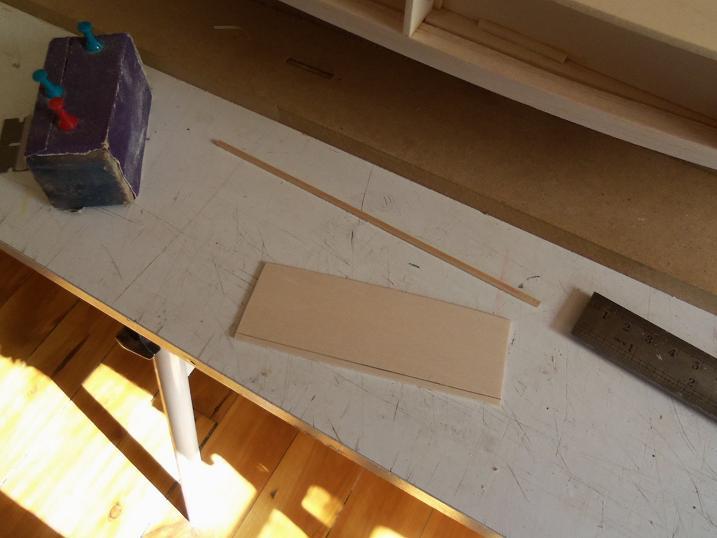
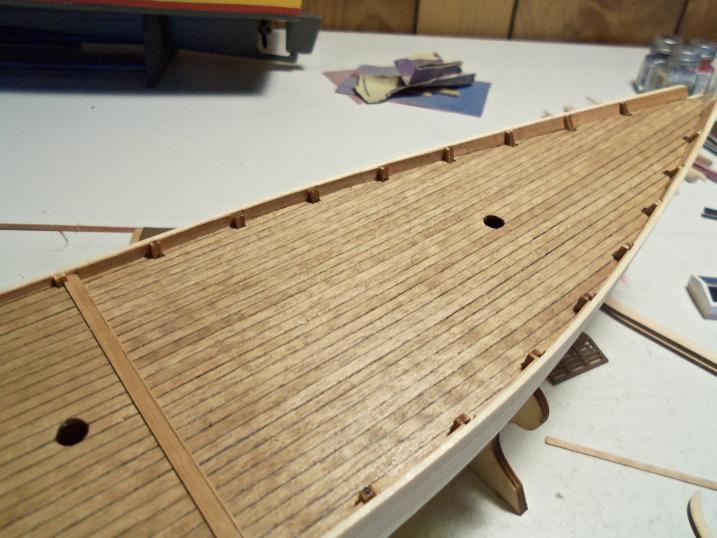
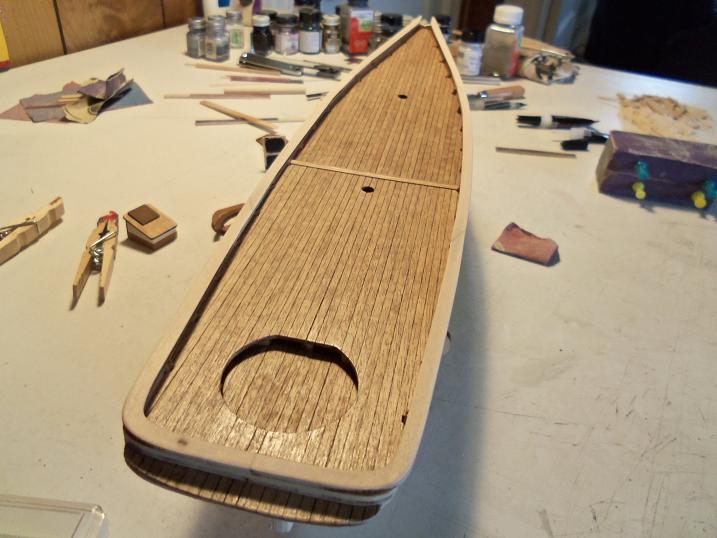
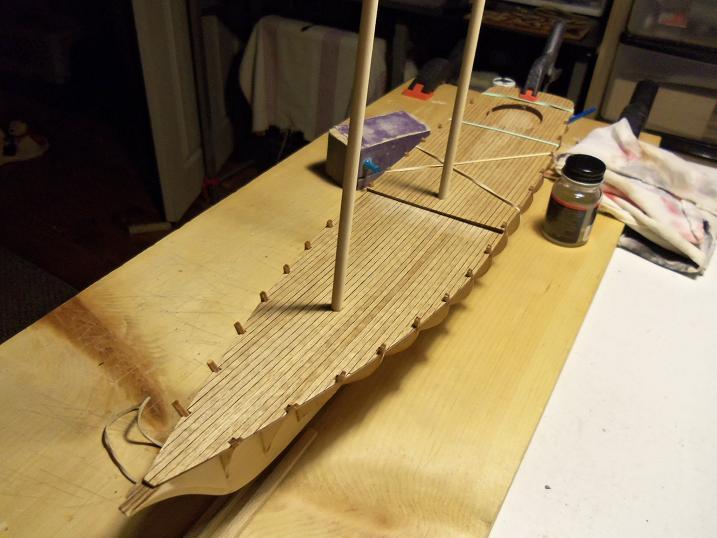
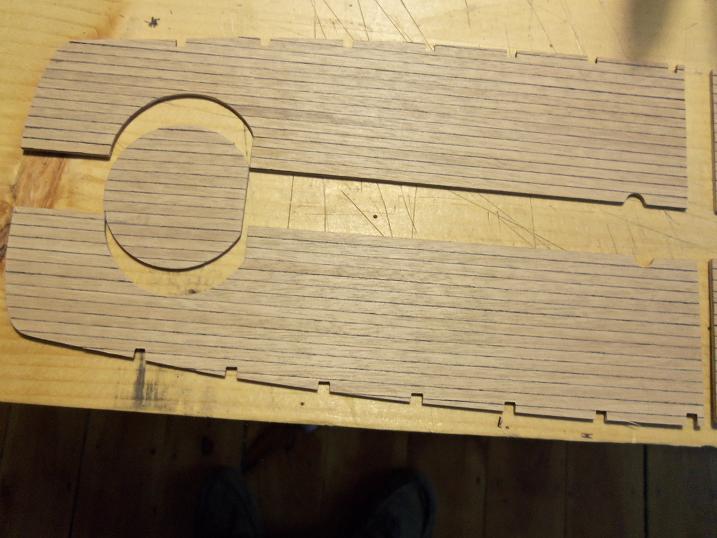
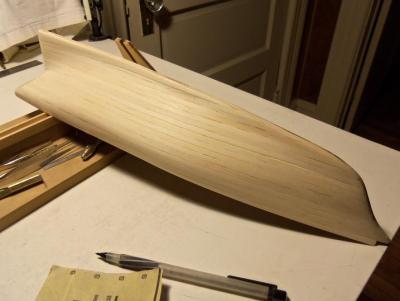
Hi Anja........I thought you might like it if I put the link up.....I know how you love to read I did a lot of sanding at this point, to quiet down some of the plank lines. I hardly used any filler on this hull.......I did not want to spoil that aspect. there is a balsa plate that is to be cemented onto the transom area.......as far as ships go, balsa seems to be my achillie's heel. it proved to be as big a pain with this build as well. it needs to be trimmed to shape.......as I was doing that, a chunk broke out of it, ruining the looks of it. I cemented the chunk back in place, and made up some sawdust and white glue, to fill in the bad spots here is how the transom looked after I treated it.

-
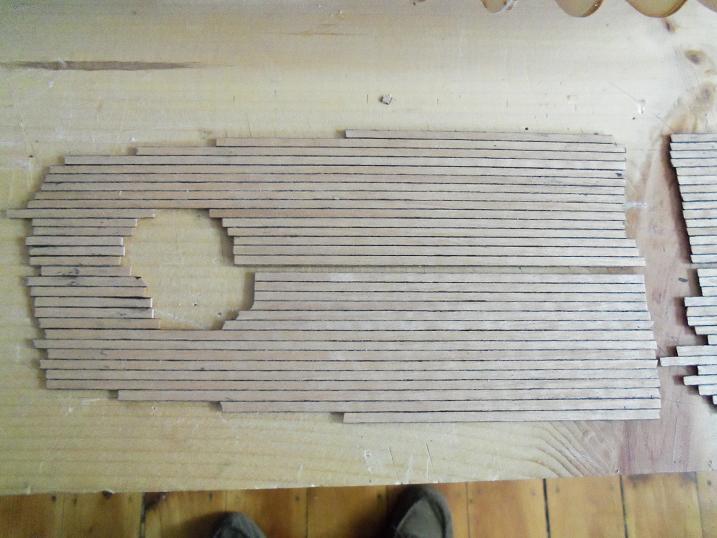
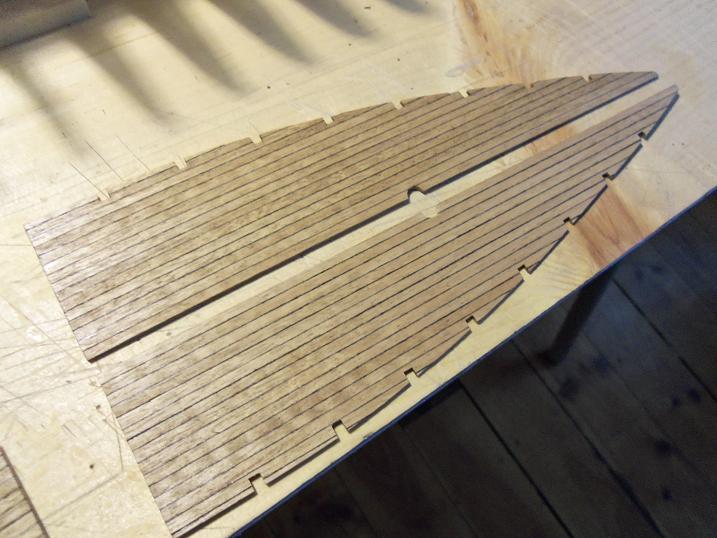
well.....hello Walter! so glad to be back! I chimed back in the other evening, but was too pooped to pop! I have a lot of ground to cover.........I do hope you follow along! saw you began your build log.....I will visit, I promise! I didn't get back to her till the 11th of January........damn Lobsie twins were keeping me in stitches! I was busy building what would come to be known as the Denny-Zen......I was working full steam to get him up to speed with his counterpart, the Phylly C. I began to plank the America....the next step in her assembly. here is where the other problem was.......the planking looked as though it had been cut with a dull blade. the edges were very unruly......I won't go into this......if you want to see it, please refer to the link at the beginning of the thread. you'll see pictures that aren't posted here. I was able to clean them up and use them, beveling the bow for a better fit, as well as the mating edge to the preceeding plank, to fit against the plank better.


-
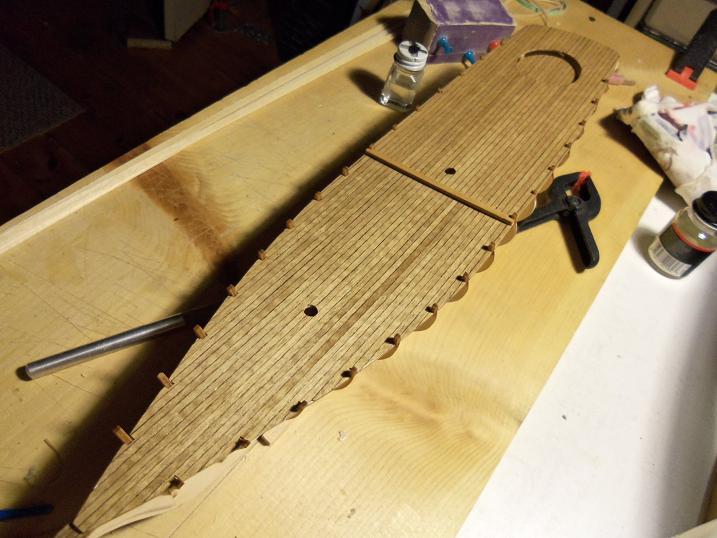
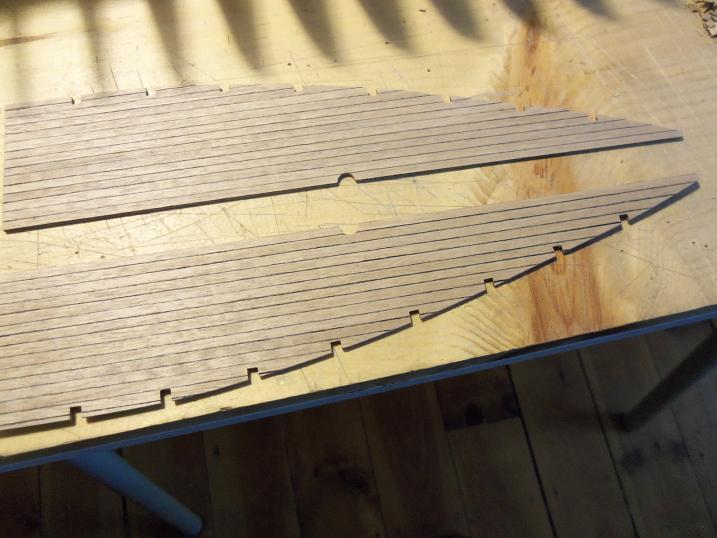
I guess you can add Dick Clark to the list of New Years memories......right next to Guy Lombardo. it is the evening of the 31th......I'm plying the beers......the TV is is shouting the festivities {I'd rather be watching NCIS}......and I'm still at the table, playing with the hull frame, sanding the top surface. the admiral is lost in her Zooworld......poor lass......I keep trying to tell her it's virtual, but she won't listen. time to cement the sections in place on the frame. I gave it two beers to dry..........american domestic.......oh, well.....better than 'ole Millwalkie, I guess in gluing the center border in place, I got some white glue on the deck.......never use water on fresh lacquer........ I sanded the offended areas lightly with some fine sandpaper, and gave it another coat of lacquer, in a effort to solve my problem......it did as I hoped!


-
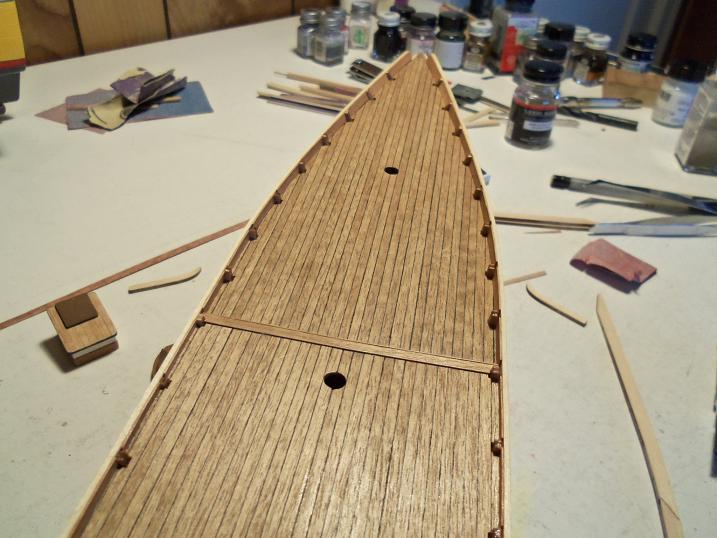
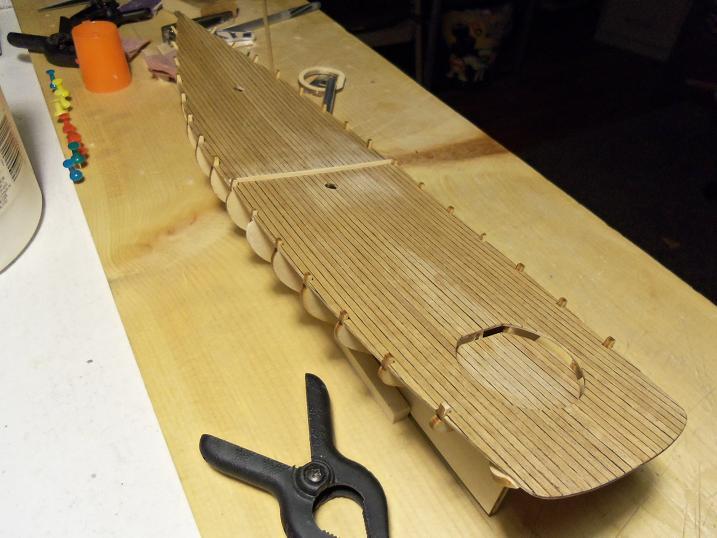
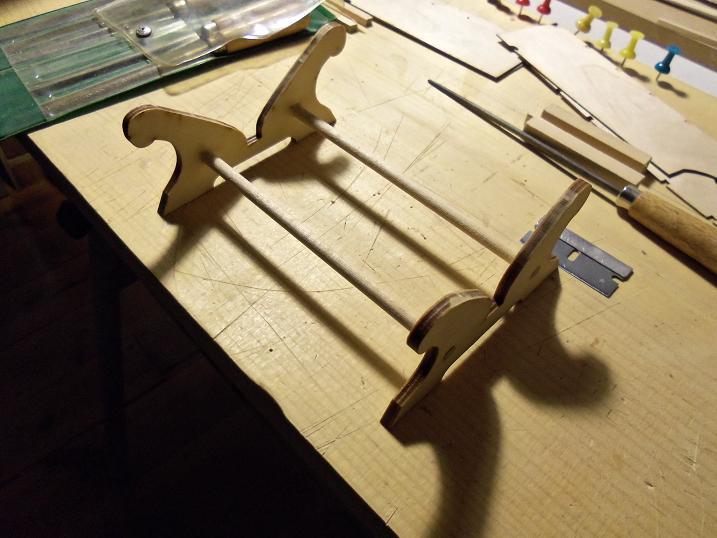
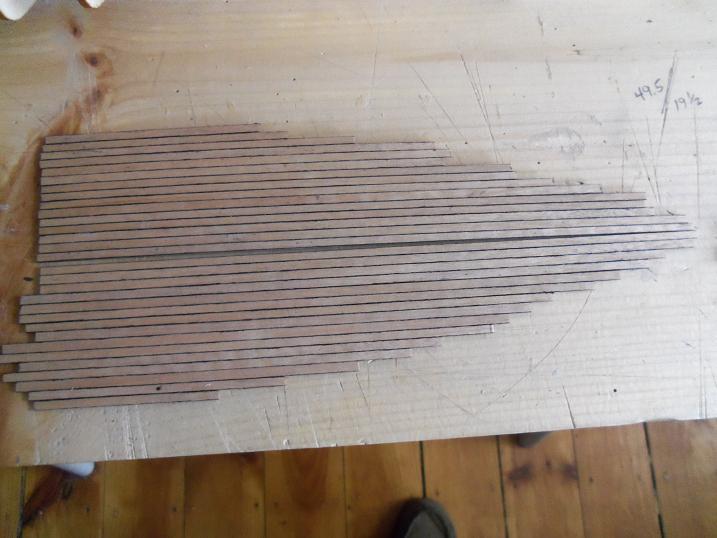
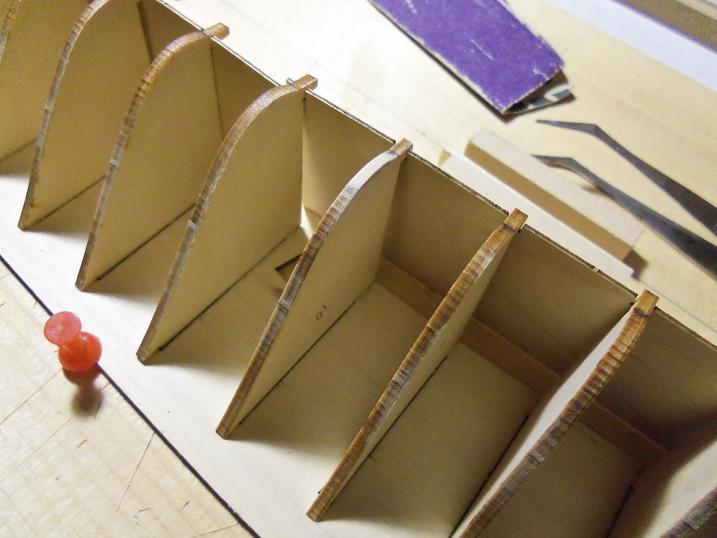
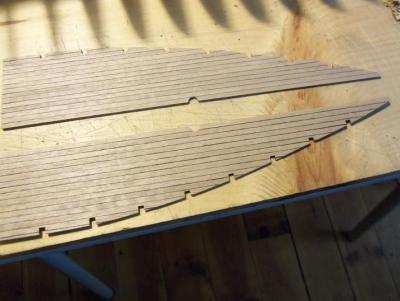
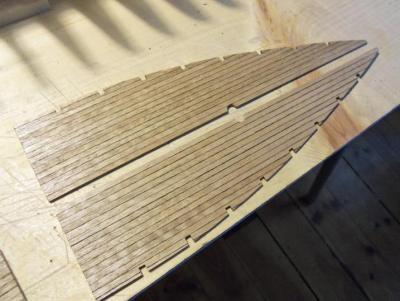
to continue the build log is quite easy.......I'm liking this a lot.....my hat's off to you folks here at MSW this next section occurred on new year's eve day......and into the eveining. I used the deck platforms to keep the ribs in correct alignment over night, until the glue had dried. I did the assmbly of the keel halves, decking, and even the planking, in a different order. I felt it easier for me to do it this way. it begins with cementing the halves together. the rudder keel assembly the stand I did not cement in place the transom ribs yet......I wanted to make sure they were even and level to each other. here is how I did this. ....and then the bow rabbits the deck sections will be planked before they are installed. it was shown in the instructions as full length planking......I'm sure there is staggering involved, but I went with it even though logic told me not to. I used the archive pen to simulate the calking. then they were trimmed and sanded. ....and then given two coats of semi gloss lacquer.


- 377 replies
-
- 1
-
-
- america
- billing boats
- (and 1 more)
-
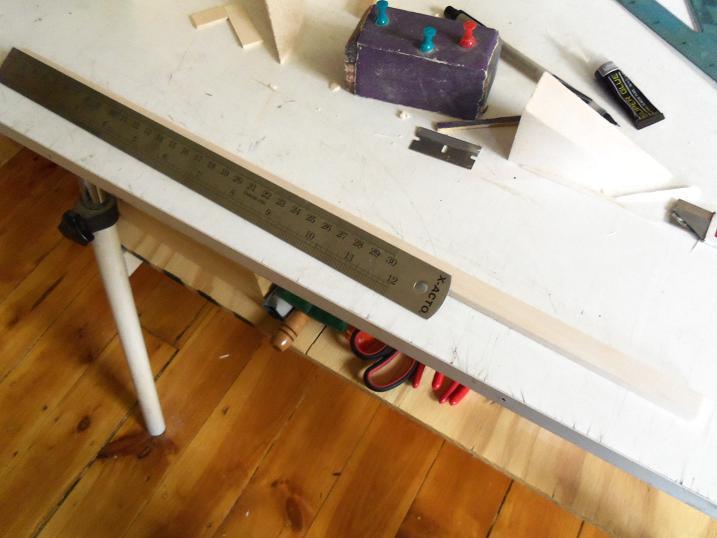
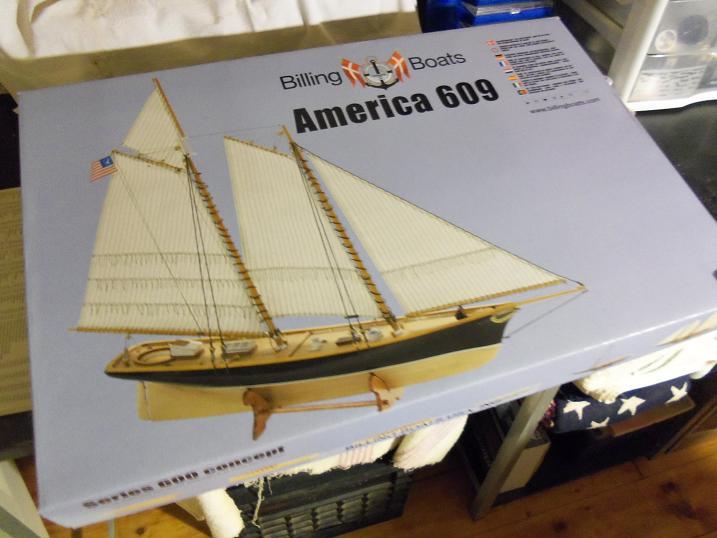
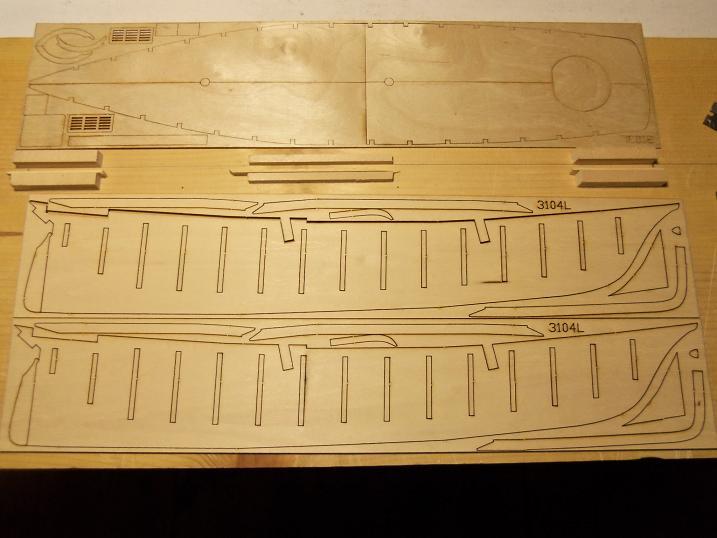
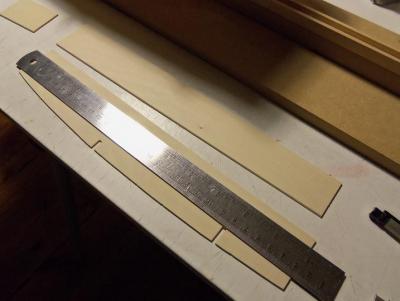
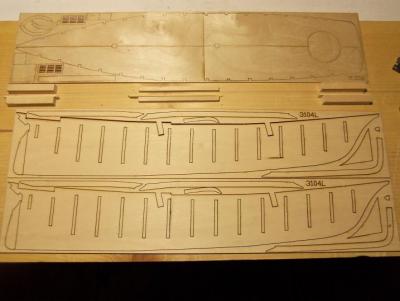
I started this kit just after Christmas, although I didn't get this as a gift. this is a reissue kit.....I've never seen the older version, but this version looks to be of good quality. I did find a couple of small flaws in it, but nothing to go ballistic over.......they were quite easy to repair. the build starts as a split keel design, numbering the pairs of ribs was a bit of a challenge........the rib layout diagram was different than the laser cut part's panels. once I figured it out, it went much better. I will try to narrate some of the missing text, but if you'd like to read the entire build as it stands so far, you can go here: http://wenzelswharf.wordpress.com/2012/12/30/billings-america-a-172-scale-kit/ there is much more text here than I could ever put into any site.....without seeming long winded, of course. this is where the first problem surfaced.....one of the ribs was nicked by the saw and caused an edge to be flattened. the fix was to cement a piece of basswood onto the offended area and sand it to shape. on the 30th od December, the numbering, fitting and subsequent assembly of the keel halves began. they supply a nice board to assemble the halves on, but I have a large length of pine board, that worked even better......more than enough room to do both sides at the smae time. this picture gives you a good idea as to how large this pine board is. in this next picture, I will show the repaired rib.....I'm certain you can see which one.

- 377 replies
-
- 2
-
-
- america
- billing boats
- (and 1 more)
-
good to see your superb build bob.......the spray looks fantastic!
-
first time I've ever seen this Daniel........interesting and unique. beautifly done ....and great story too!
- 33 replies
-
- 3
-
-
- trinkstein
- frigate
- (and 2 more)
-
great looking rigging Patrick.......nice and even with the shrouds and the dead eyes