


glbarlow
-
Posts
4,134 -
Joined
-
Last visited
Content Type
Profiles
Forums
Gallery
Events
Everything posted by glbarlow
-
 Looking great Fred!
 -
Very interesting background and project beginning.
-
The overlap of the second planking should cover that. The counter is planked first then trim the hull side planking flush with the planked counter. The gaps should easily be covered, the first planking is a foundation, doesn’t always need to be a perfect match to the final look generated by. 2nd planking. The parts are generally oversized on purpose as every hull is different. You can also sand the counter piece to fit a little better. Do make sure the second planking is equal, by trial fitting, to the rudder at the stern post, generally this is more problematic than the counter. I wish my Pegasus log wasn’t lost in the great 2013 crash.
-
And you I’m glad you did and hope it’s helpful. Studying other logs is something I sure do too.
- 840 replies
-
- 2
-

-
- winchelsea
- Syren Ship Model Company
- (and 1 more)
-
Thanks for explaining. I had no idea, I just glue stuff on😁
- 840 replies
-
- 7
-
-

-
- winchelsea
- Syren Ship Model Company
- (and 1 more)
-
What glue to use
glbarlow replied to David Enghauser's topic in Building, Framing, Planking and plating a ships hull and deck
I use the medium (purple) Insta-cure+ for planking. For some things, like cannon carriage to the deck, I use the red Maxi-cure - I never use the blue Thin version. It's good stuff. -
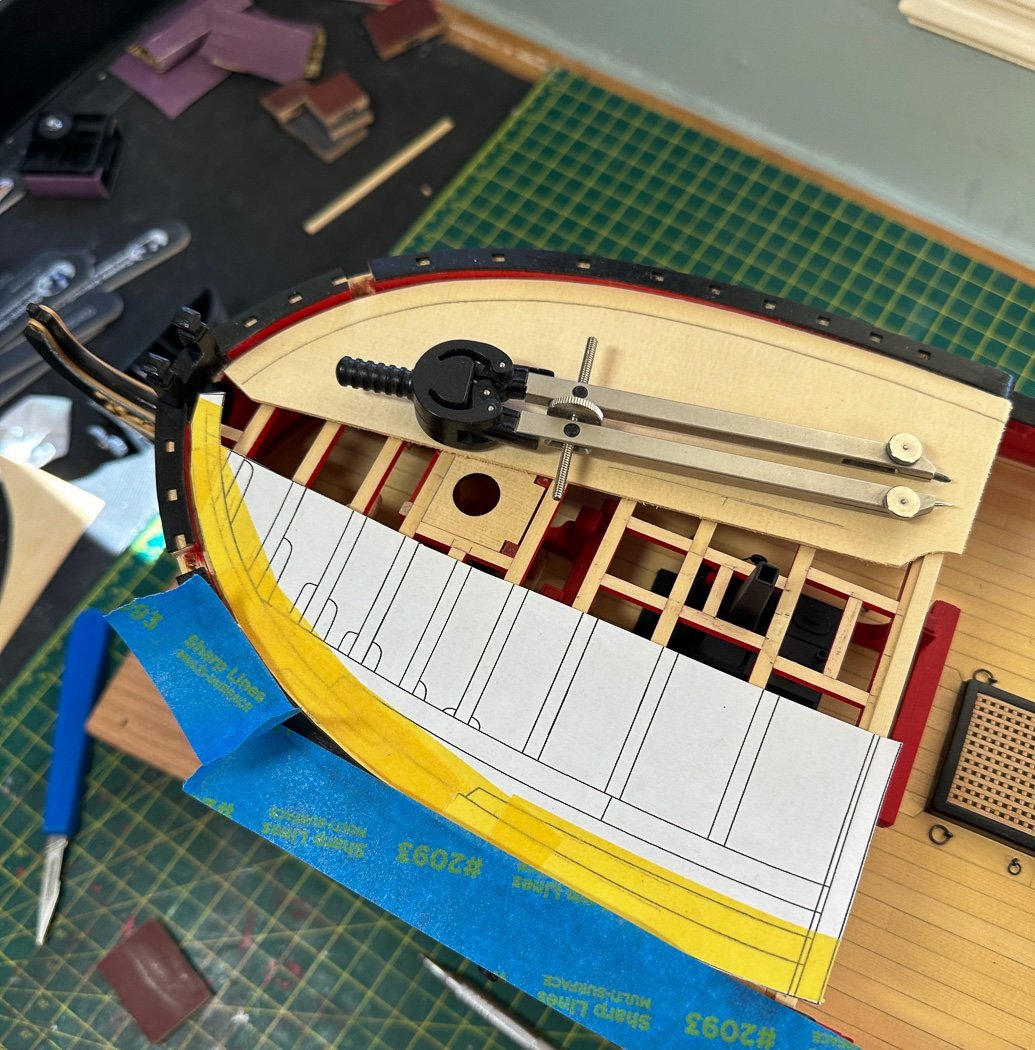
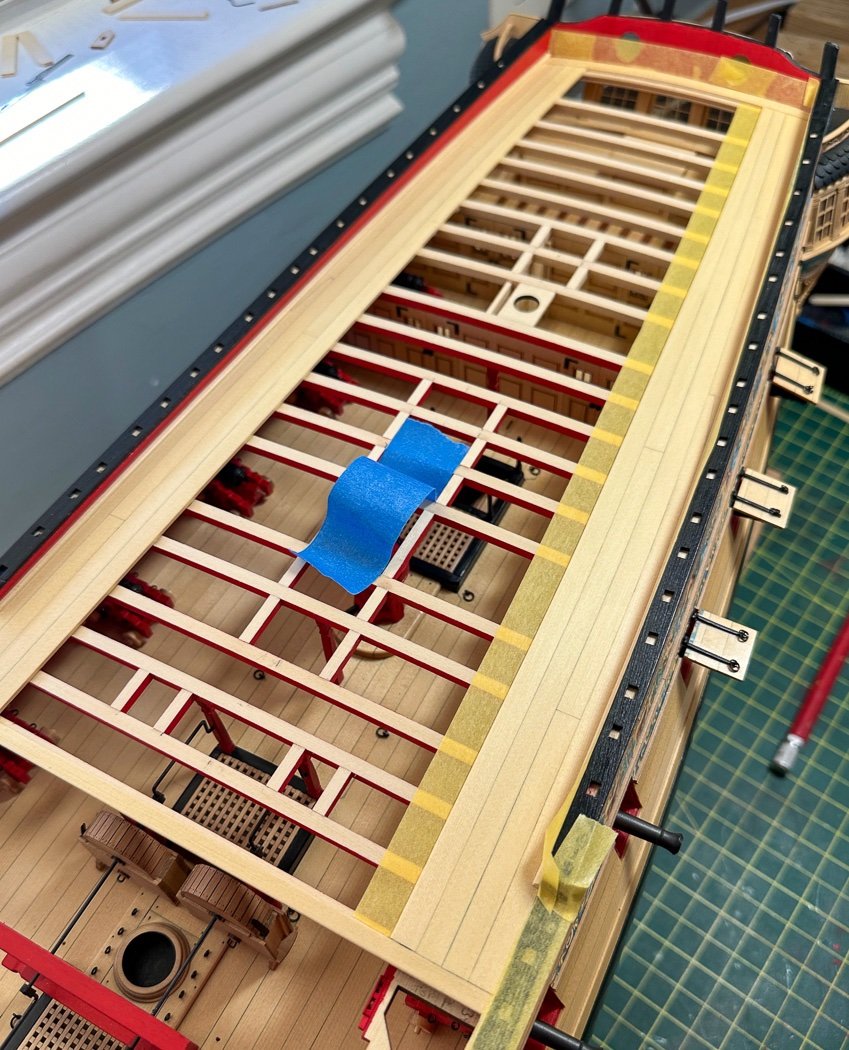
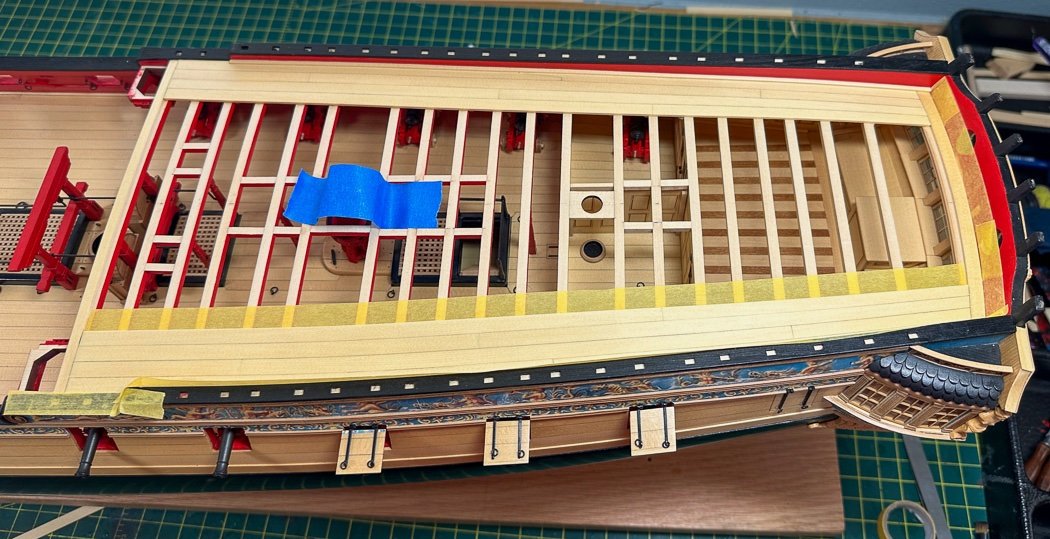
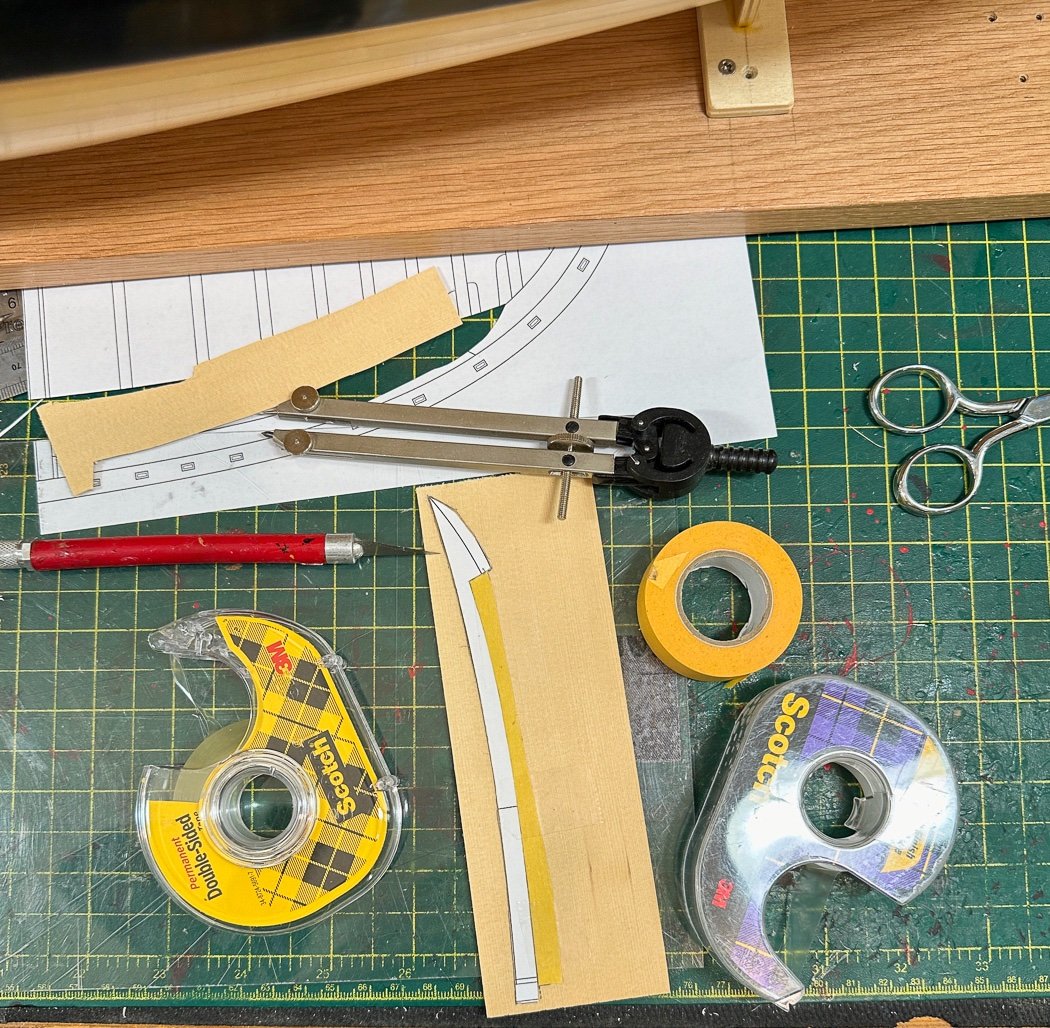
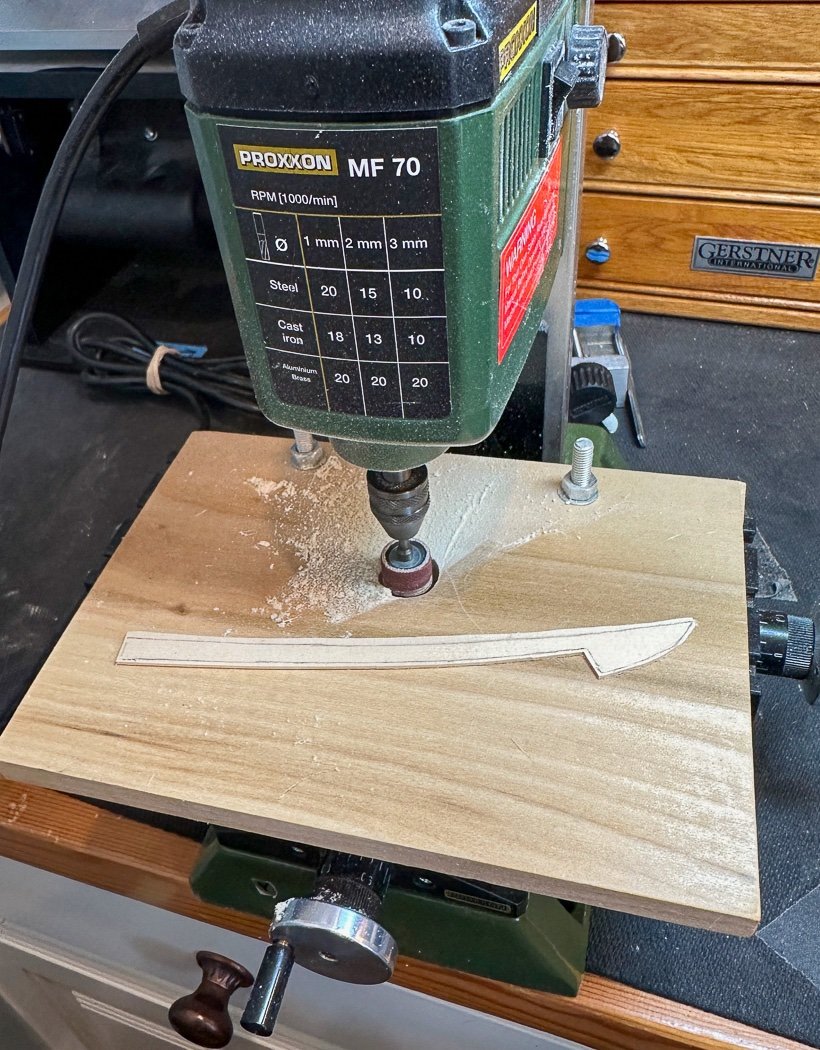
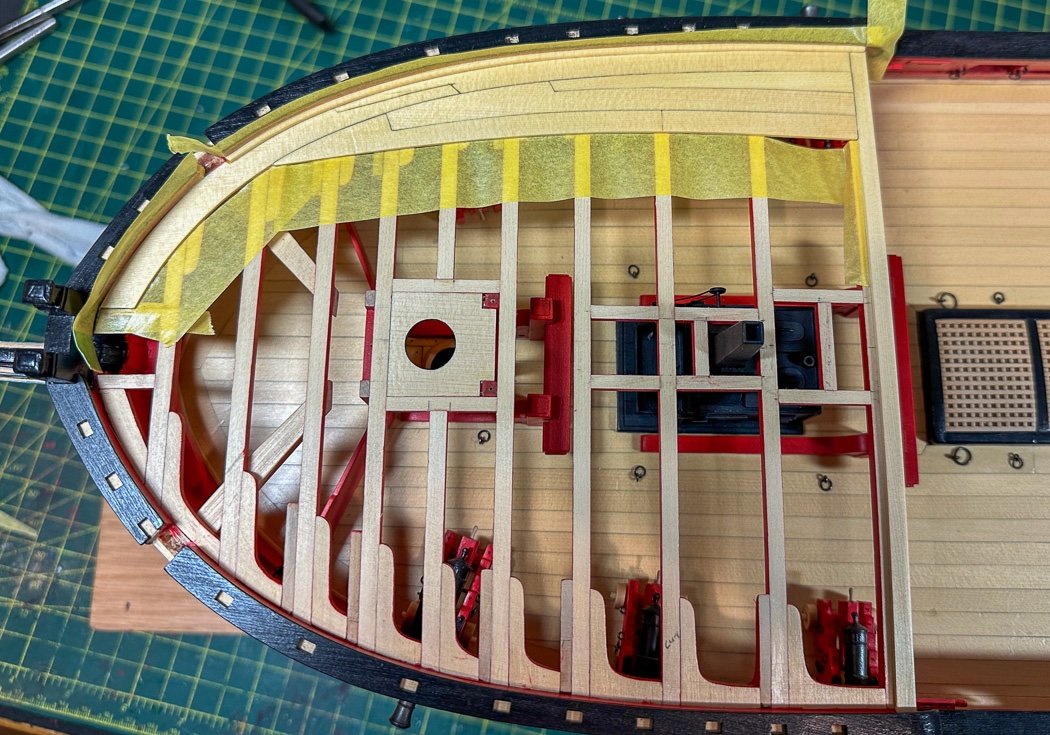
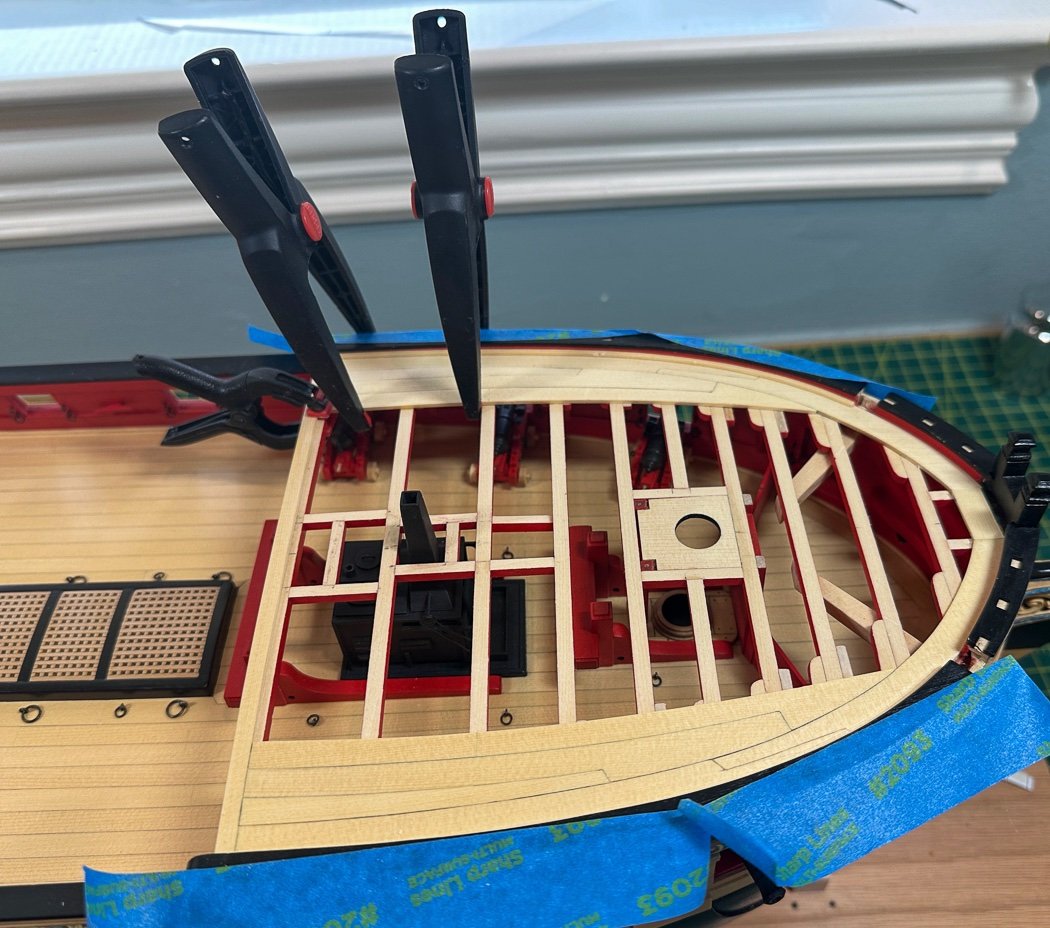
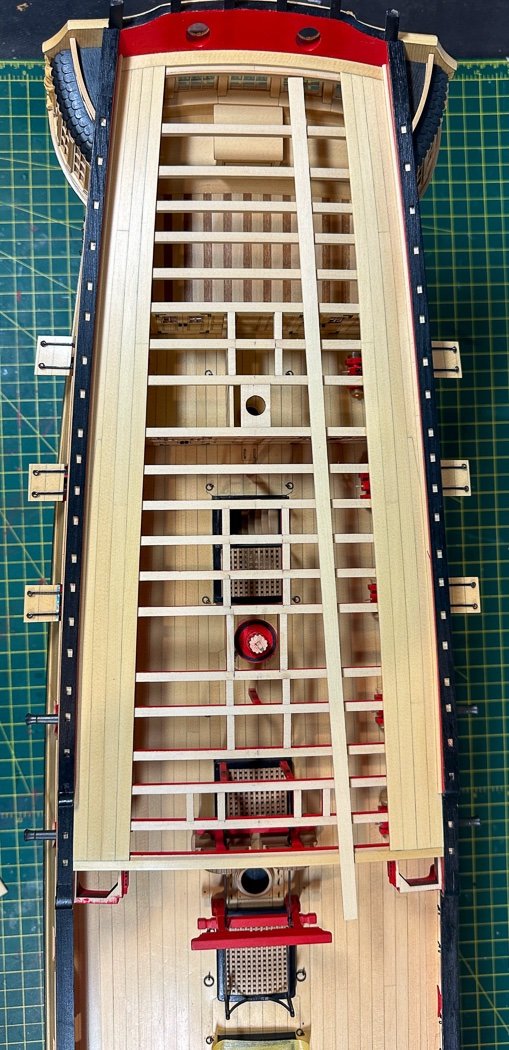
Margin and outboard Planking Time for the margin planks, waterway, and outboard planking. I started with the quarter deck. The margin planks are heat bent with my trusty travel iron (I had a brief flash back to those long months planking the hull). I elected to use one long strip and then once shaped I use the template as a pattern to cut a scarf joint midway. I did the same with the four planks, all ¼ widths I’d ripped and run through the thickness planer, tapering the planks towards the stern per the template and using a razor saw to simulate the planking end cuts and then adding #2 pencil along the long edge for caulking. Running a single long plank with the simulated break made for a cleaner run and easier fit. (the angle of the iPhone photo makes it seam the port side planning seem wider than starboard, it isn’t). I half-rounded a strip for the waterways to finish up the outboard work. This small strip adds a lot, it won’t wash away any water but it does a nice job of bridging the deck and bulwarks. After sanding and 4 coats of WOP it’s done. I may WOP the beam tops late,r for now I haven’t. The q-deck was easy enough and done fairly quickly, the forecastle not so much. The forecastle margin planks are too curved to bend a plank so they are cut from 3/64 sheet. I started with the template (template beams and actual beams were lined up for measuring, just not for this photo) then added Tamiya tape to make up any differences (really not much, but some) with my hull and transferred the outer edge to the sheet. The outer edges were then cut roughly with a #11 blade. Using dividers, and a technique learned from Rusty, I drew the proper width for the inboard side. This step is done after the cut and completing sanding of the outer edge. Once again I again did the full length and cut the scarf joint after the fitting, amazing how nice they match up that way. My Byrnes sander does a nice job of rough sanding the outer curve smooth. The new version with the reversible direction makes it even easier. I converted my mill into a sanding table for rough sanding of the margin and forecastle planks inner curves. The same process of starting with template, modified by tape, transferred to sheet with double sided tape, rough sanded and finally the time consuming part, final sanding by hand with sanding sticks to a tight fit. While there are only 6 planks plus the margin plank they are all cut from sheet and sanded to custom fit, a slow process but a rewarding one with the final result. Once again the waterway and 4 coats of WOP are added (four because that’s how many I used on the main deck so the finish and tone match up). The WOP is wiped on and off and lightly sanded between the second and third coat. A lot of cut up templates and Tamiya tape were used to make it all work. My blue canary tape is also shown - it serves as an early warning before an elbow snags a cannon barrel. Kinda dumb, but it works. There is a pronounced curve to these planks, while they were cut with that curve, clamping while gluing keep them that way. The completed quarterdeck. The completed forecastle. On to the center planking and deck furniture. As always thank you for your comments and the likes and for stopping by.

- 840 replies
-
- 24
-

-
-
- winchelsea
- Syren Ship Model Company
- (and 1 more)
-
What glue to use
glbarlow replied to David Enghauser's topic in Building, Framing, Planking and plating a ships hull and deck
I wonder how many threads there are on this topic, it always serves to bring out the the same comments and commenters. I use the best glue for the job, for framers and bulkheads it’s Titebond wood glue, for planking it’s Smith Industries CA(not all CA glue is the same), because I heat bend and fit each plank first. For other work it’s White PVA. For those sensitive to CA, Smith Industries makes an odorless version. Use what works for you, for more opinions (and entertainment) do a search on this site on this topic. -
These are beautiful, so well crafted. I bet a bunch of Winnie builders would happily buy a set. I have no clue how I’ll mount mine and certainly don’t have the skill to make anything like this. Well done!
-
Not sure from the photos. The planking for Cheerful’s deck is unique in that there is a very visible curve, especially at the bow forward of midship the finished deck is a signature point of the model. If your pencil lines capture that then great. Keep in mind a pencil line is thinner that the meeting point of cut wood. A marked line doesn’t completely reflect planking.
-
Let’s end this thread with; ZHL are Chinese pirates. Nothing said on SOS is true when it comes to ZHL. Let’s move on.
-
I’d like to leave mine bright but char removal is a limited skill for me. Still looking great and glad to see you back at it.
-
Seems ready for second planking to me, well done!
-
Thank you both, it was indeed both a Merry and a Happy Christmas as I hope it was for you.
- 840 replies
-
- 3
-
-
- winchelsea
- Syren Ship Model Company
- (and 1 more)
-
I had great fun making the companionway, yours looks good pin wash or not.
-
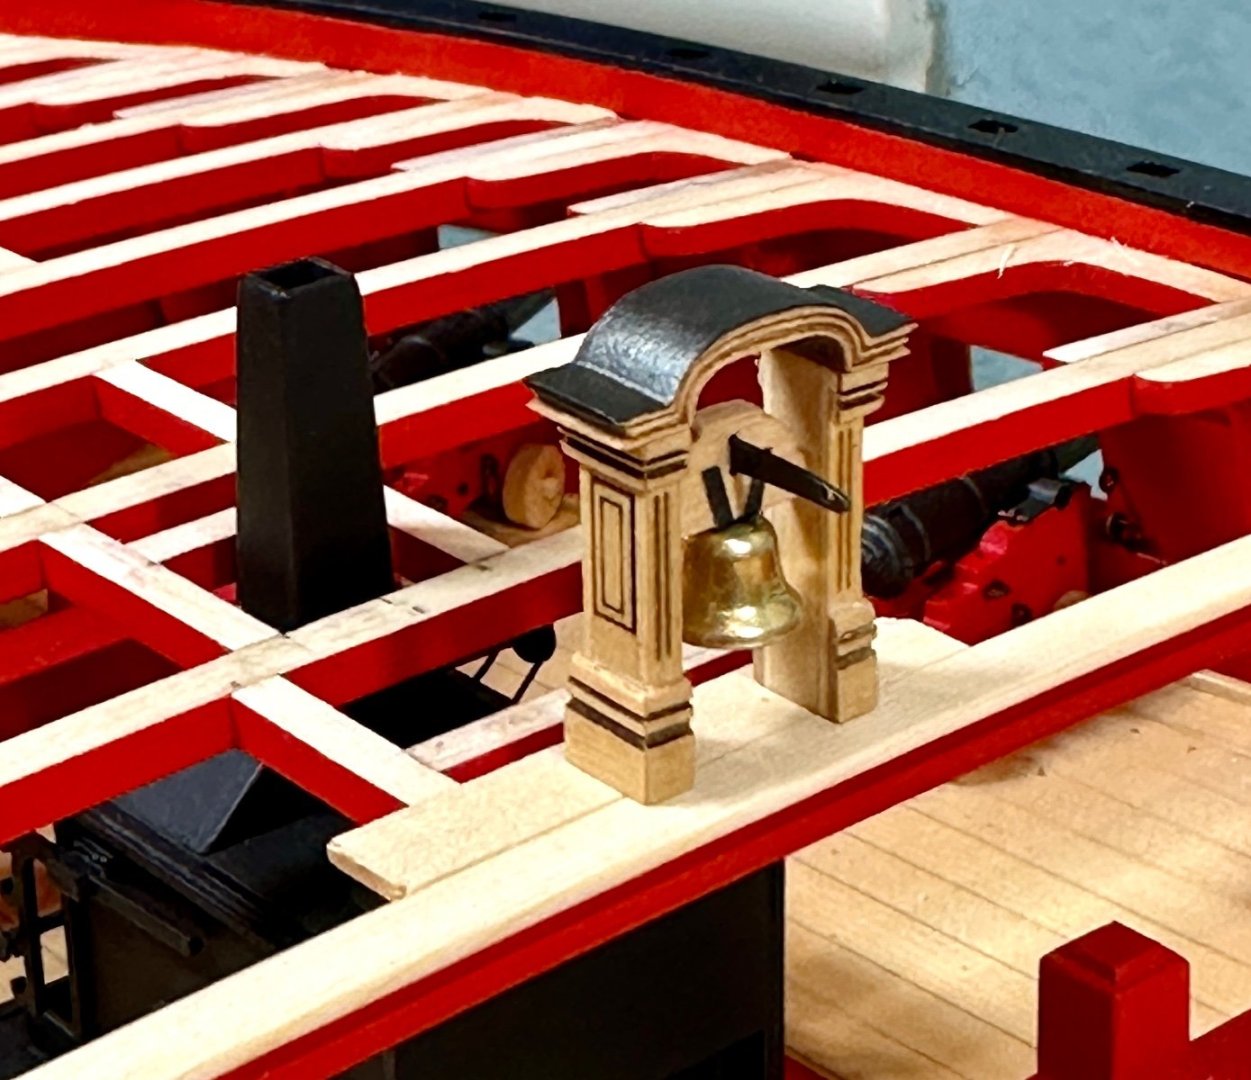
Belfry I spent a long time on the belfry, lots of char removal on small pieces and tiny mitre cuts. As you can see I went a different way using black masking tape and a blackened rope pull I fashioned from brass strip. These were planned. After spending hours unsuccessfully trying to remove char from the roof and with assurance from Chuck these were often painted black on contemporary models I went that route. However I weathered my Ironwork Black paint to give it, in my char-addled mind, the look of the lead sheet the captain ordered to prevent wood rot. That’s my story anyway. Merry Christmas and Happy New Year to you all.
- 840 replies
-
- 19
-
-
-
- winchelsea
- Syren Ship Model Company
- (and 1 more)
-
Nice to see you back working on Cheerful, it’s all looking. Great, excellent work!
-
Props for the tree nails, I wouldn’t even do that on my Cheerful. I’m sure it will look great.
-
Thank you both as Winnie modelers I’ve followed throughout my build for ideas and inspiration. I seem to being going so much slower lately, these smaller steps are equal time to the larger ones. The addition of a puppy to our house isn’t helping. 🙄🤣
- 840 replies
-
- 6
-
-
- winchelsea
- Syren Ship Model Company
- (and 1 more)
-
On mine the corners of the skylight are much less rounded than the coamings making the square off for the planking barely visible. As you noted, whatever works for you with your more rounded corners.
-
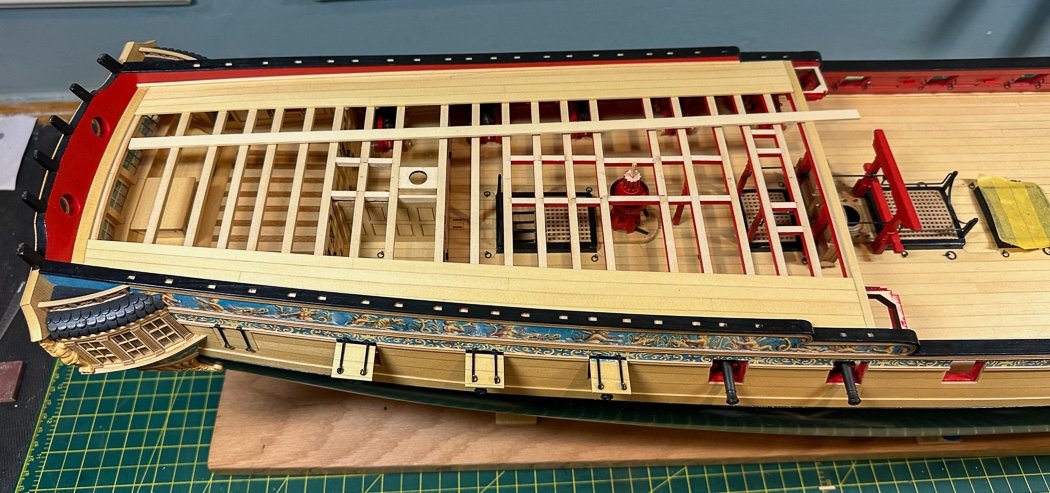
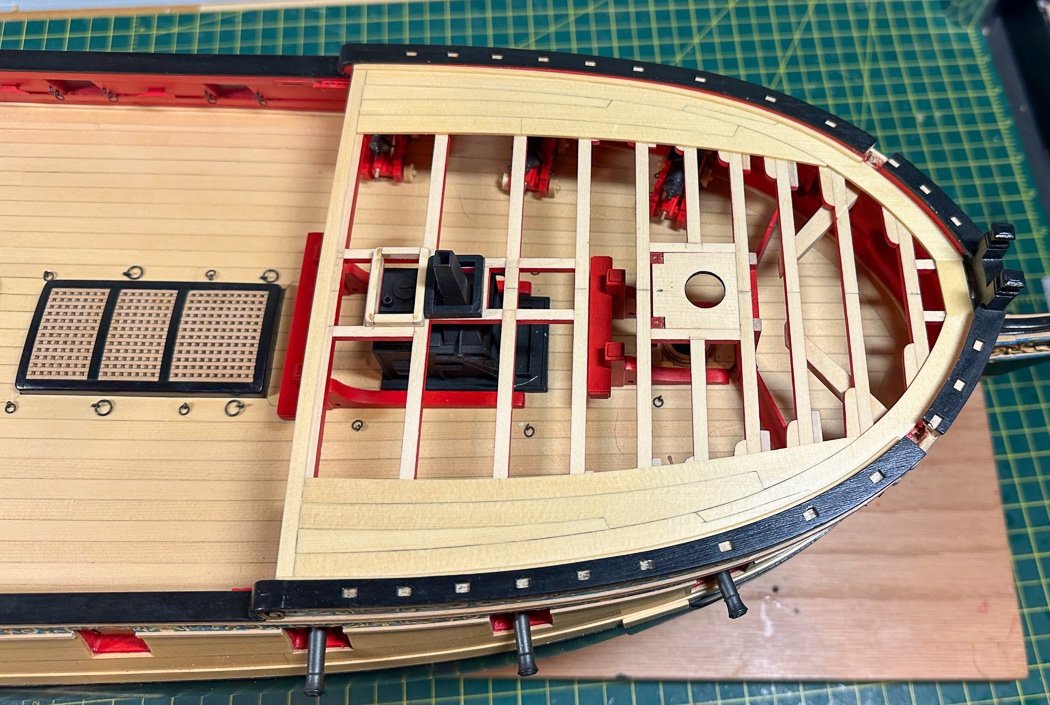
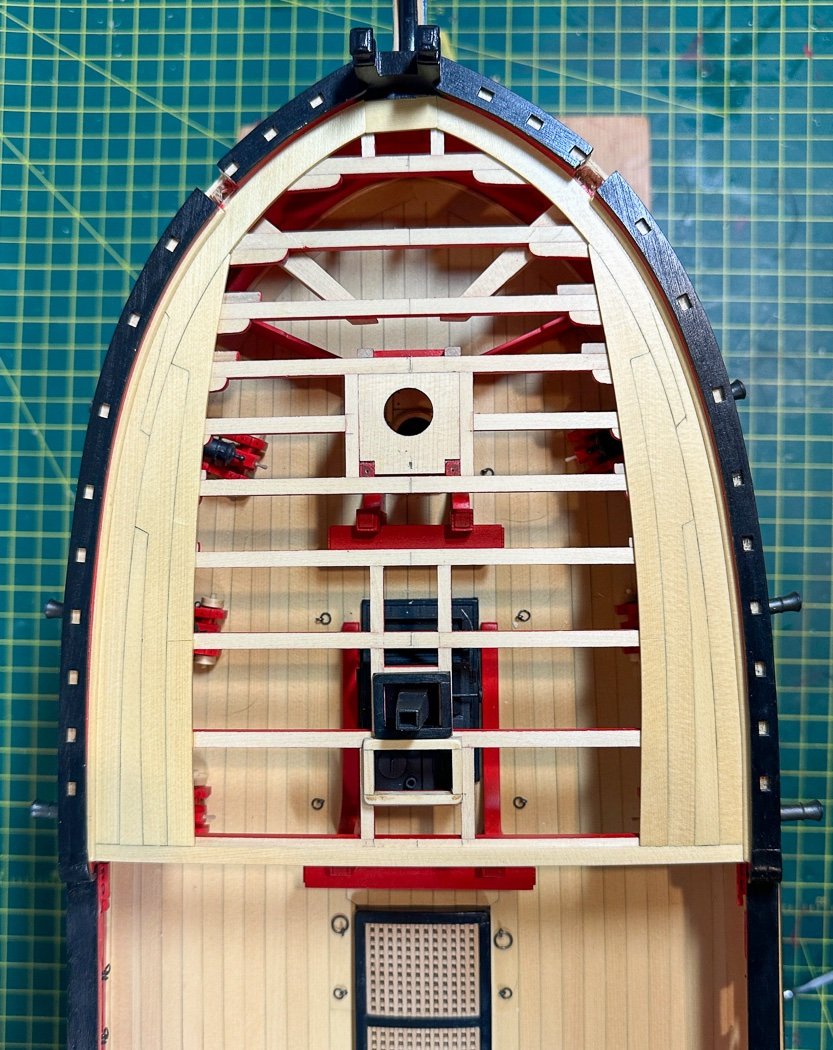
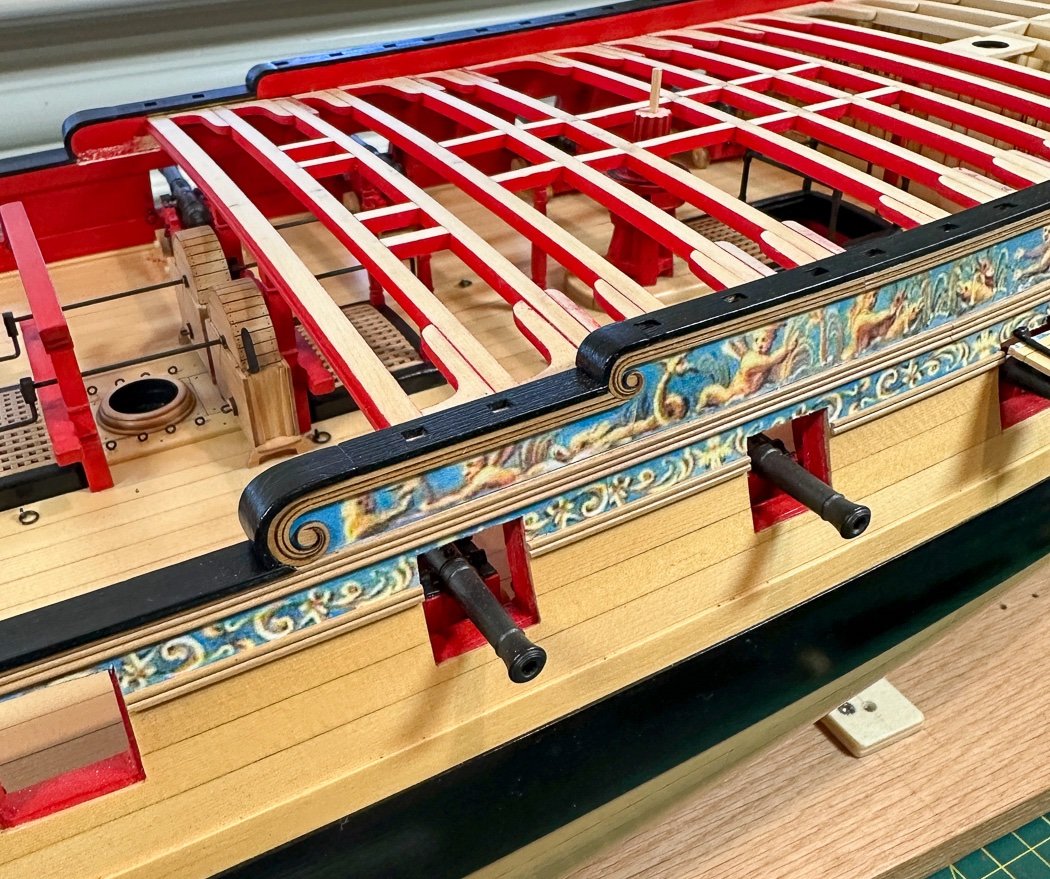
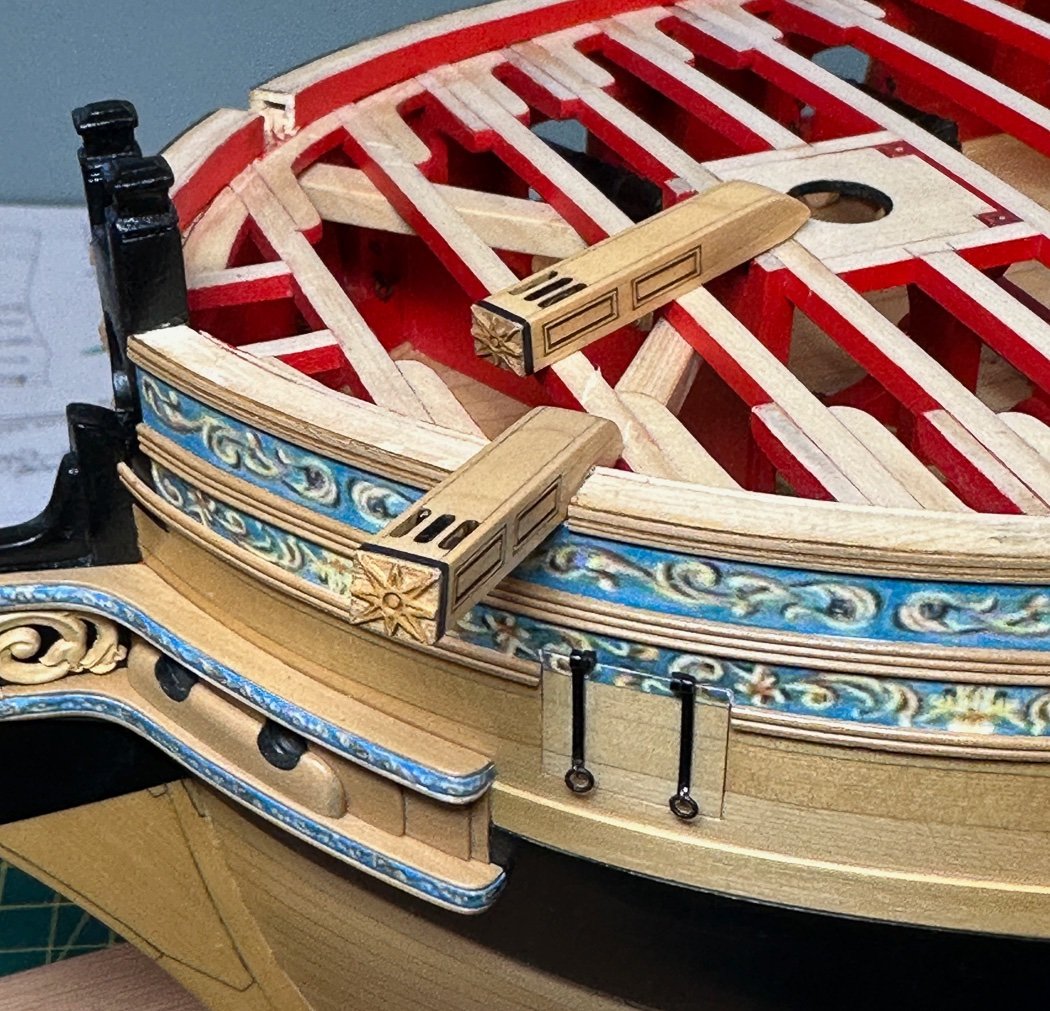
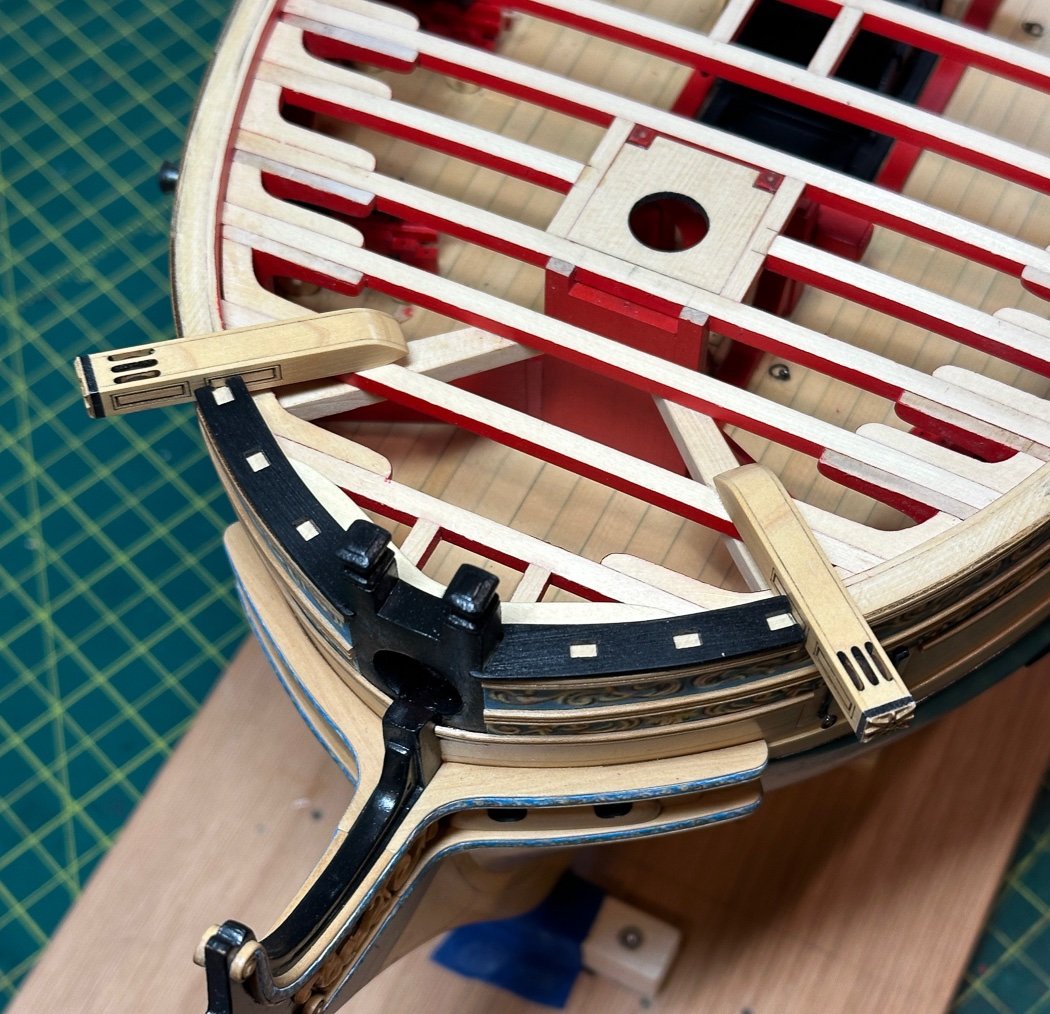
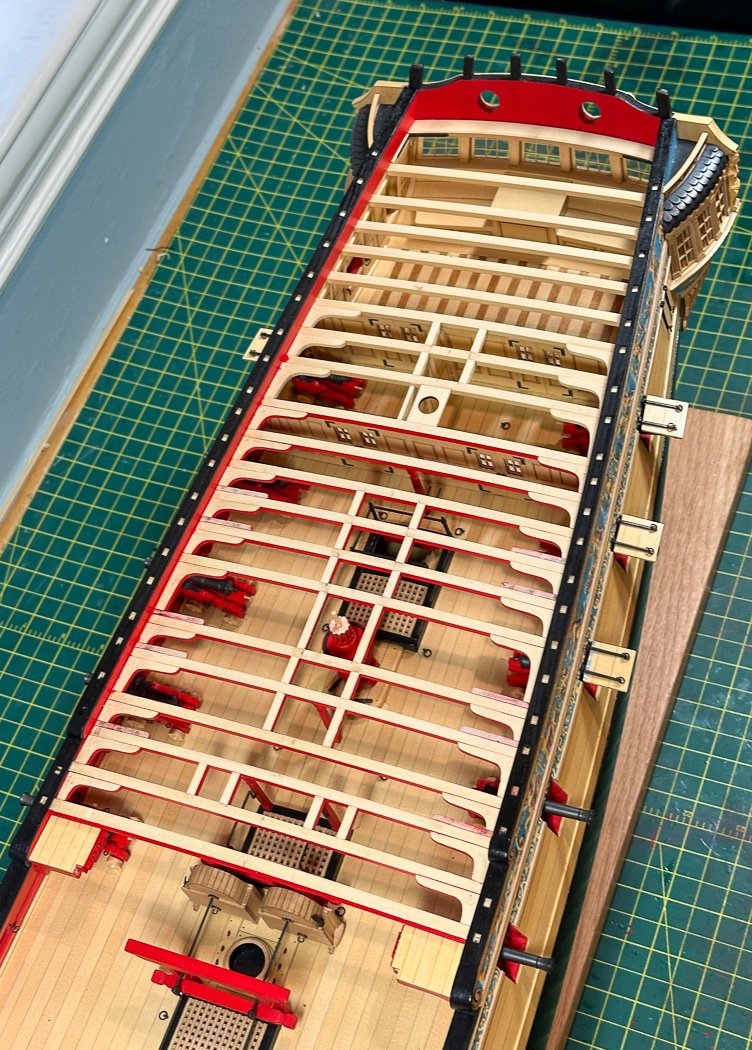
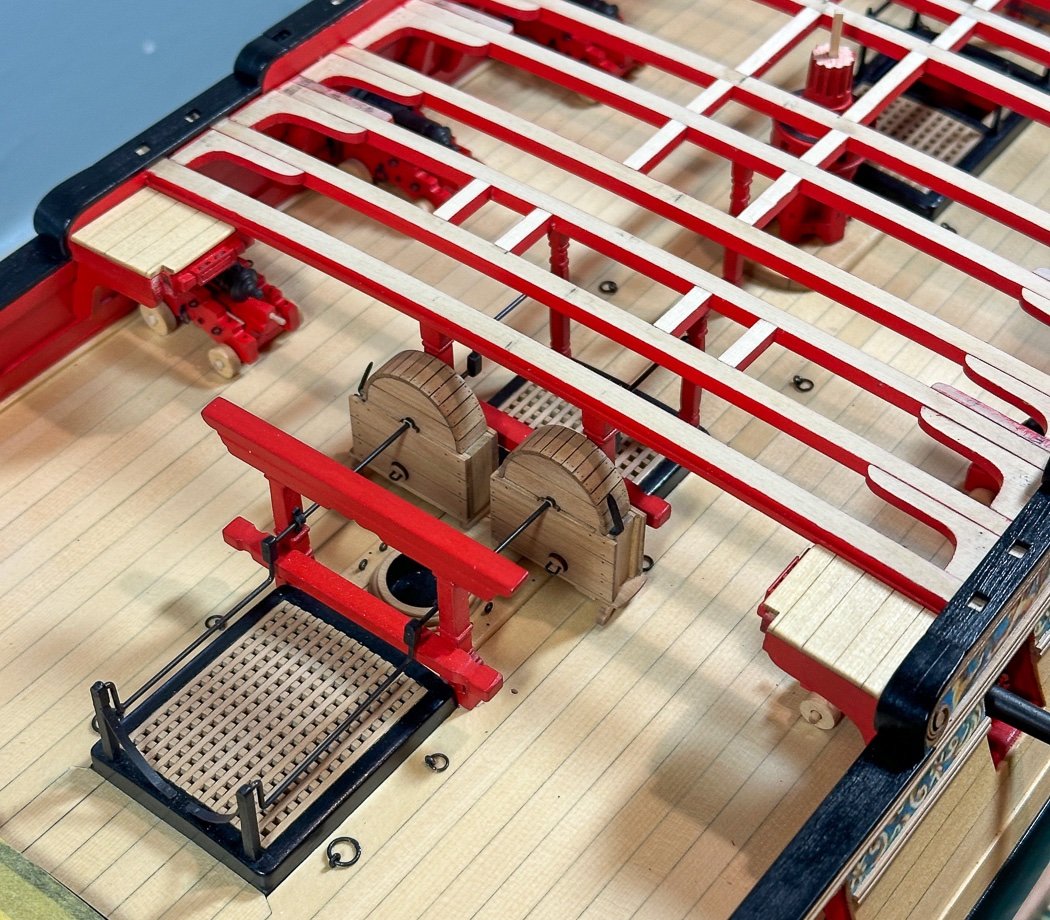
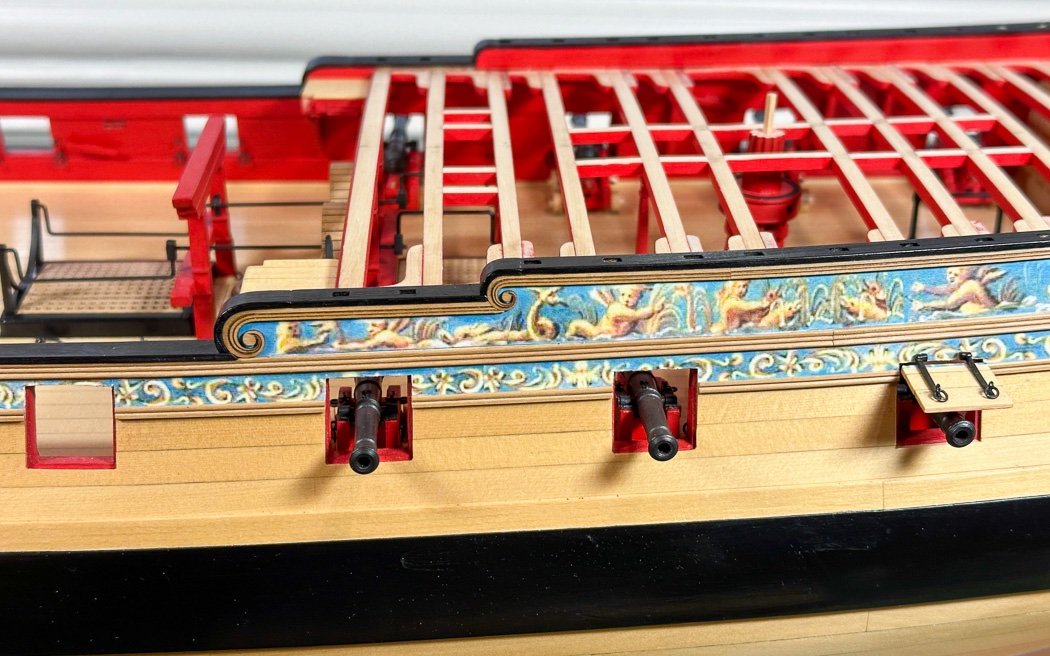
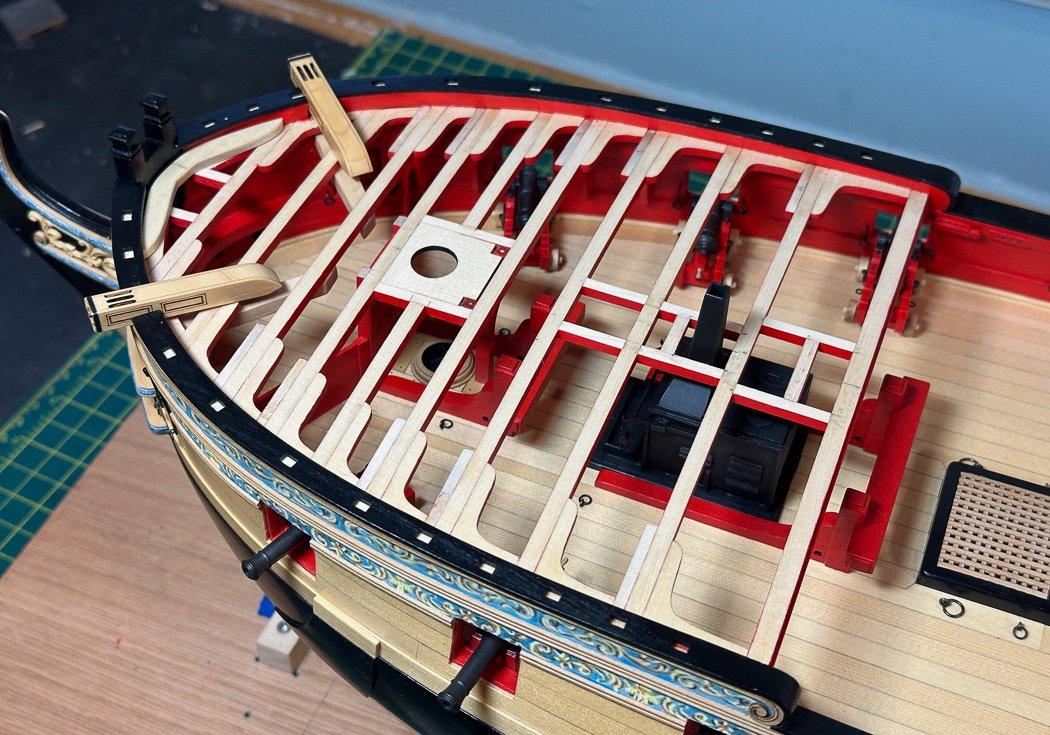
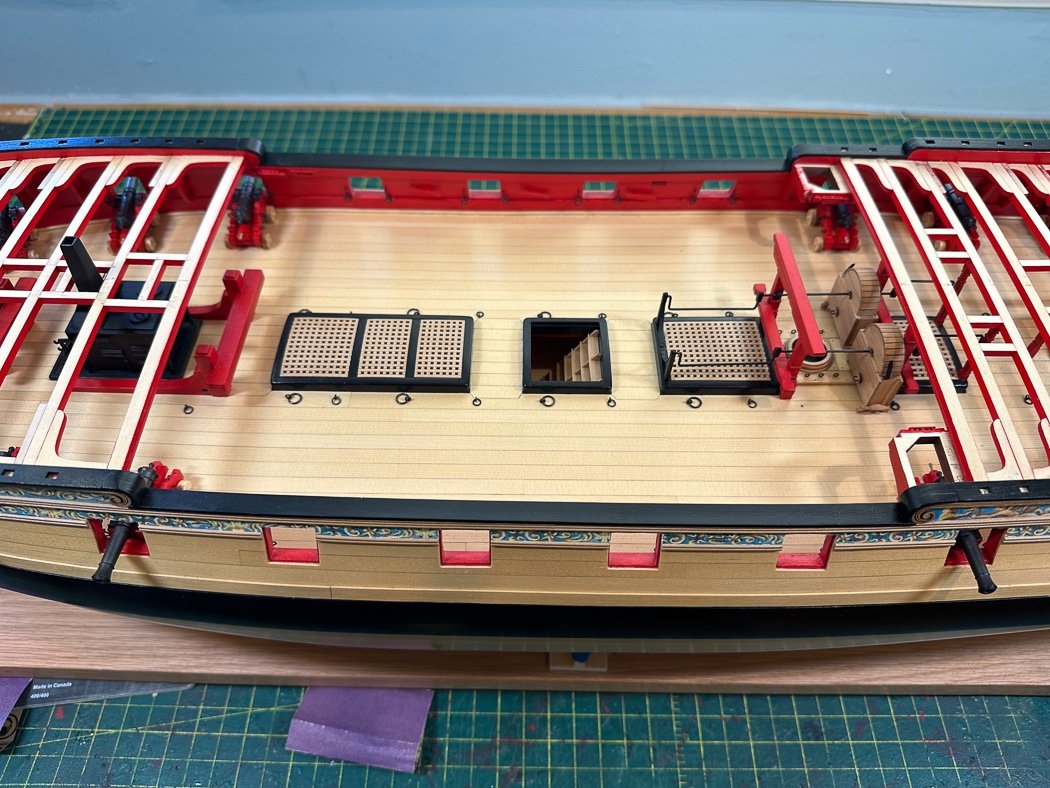
Caprails Maybe not the most exciting thing, still installing the caprail is a test determining how well I did at the very beginning building the ship's infrastructure. That work and the pre-testing and fitting I did back then (nearly two years ago now) turned out to be ok for the most part. The laser cut caprail fit the top curves of the hull, finally finishing off the last of the exposed hull. First up was the waist, a 5/16 plank fit the bill. Seemingly simple, this was a first example of early testing making it so. Originally my run of planking did not leave the flat surface between the scrolls required. It was so much easier to correct that back then than it would have been now. Way back before I started building I admired how the caprail fitted with the two scrolls and wondered how I’d manage to make that happen. Naturally Chuck has a great design starting with those hance pieces from chapter one on to the scroll moulding and friezes, finally arriving at the curves of the caprail up from the main deck to the quarterdeck, it all works together. The curved portions of the caprail are two pieces pieces glued together extra wide for good reason. First the rail narrows from 5/16 on the main deck to ¾ on the qdeck, plus there is an inward angle as the hull narrows going towards the stern. There was a lot of sanding and fine tuning to create a proper transition up and back. Also I appreciate the extra sets of this curved piece Chuck provides, I’ll just call the first attempt a prototype. Next up was the quarter deck, first closing up the bulwarks having first painted them red then adding the cap rails. I switched to Admiralty Paints Dull Black for the rails, not sure why the name, it is the very opposite of dull. Though I had to make a few adjustments, for the most part I had a good fit matching the laser cut rail with gentle inward curve from mid-ship to stern. I always look ahead to determine what I can do now that might be easier than doing it later, the two gangway platforms are an example. They aren’t a simple fit given the angles and placement required, including the tricky fitting of a knee below. It was much easier to build and install them now than later in chapter 11 when I’d have to work around, and likely knock off knowing me, the qdeck rail. The decking for both is fitted, but not glued on, it can wait as can the rest of the gangway. Staying with the look ahead concept I elected to build the catheads and use them as guides to cut the opening in the hull to the deck called for later. A small laser cut template is provided which of course would work, I just wanted to have as tight a fit as possible and match the angle to the rest of the simulated cat tail below the beams. More importantly I wanted to get this cut made before I’d risk damaging any deck planking. The cat heads are just laying there, this is not how later they'll be mounted further out and at a much higher angle. It’s kinda cool how they make up from seven parts (including sheaves inserted in the slots) to look as one, they will stand out nicely in the final fit. The bow section of the cat-rails are added, with the catheads laying in the slots confirming a tight fit. It took me a minute to recognize the grain in the wood wasn't more char. That was followed by the remainder of the forecastle caprails. It’s worth mentioning again as I did in a much earlier post, and as suggested by Chuck and others, to use the paper caprail templates way early as the bow is being framed. Matching them up then makes installing the laser cut caprail easy now. I wouldn’t want to get to this point and find out they didn't not follow the curve of the bow. The final result of the forecastle caprail installed, again with catheads just laying in the slots. You might notice there is no windscreen behind the stove. I did fit it but decided I’d rather have a peek of the stove visible from the main deck. It's such a cool stove and much of it will be hidden by the partial forecastle decking. Note in this photo I’ve also pre-fit the breasthook though I won’t paint it until I can make a final fit after the planking is installed. An over-sized laser cut piece is provided, it took a lot of sanding to get a decent fit for my hull, including a little work on the back side of the bollard timbers. With that I’ll move onward with the balance of chapter nine. Can’t wait to remove more char, if anyone comes up with a char removing formula I’ll be first in line. Wouldn’t it be nice to dip a piece of laser cut material in a little vat and it came out free of char… By the way, while RED, my paint isn't as red as these photographs always make it out to be. Apparently my workshop lighting and iPhone combine to make everything more vibrant. As always thanks for stopping by with your likes and comments, I appreciate you’re doing so.

- 840 replies
-
- 23
-
-
-
- winchelsea
- Syren Ship Model Company
- (and 1 more)
-
Nicely done, and so many good lessons learned along the way.

