


glbarlow
-
Posts
4,126 -
Joined
-
Last visited
Content Type
Profiles
Forums
Gallery
Events
Everything posted by glbarlow
-
 I’m all Apple products so not windows specific as I’ve encountered the problem as well.
 -
The crop doesn’t matter, I always crop freehand for uploads. Nice looking work, you’ve done a great job, not only the model but recovering from the mistakes we all have.
-
Mike, Do you have a photo of the actual scraper you used for molding? You have such a great profile.
- 607 replies
-
- 1
-

-
- winchelsea
- Syren Ship Model Company
- (and 1 more)
-
The edge bending method I described in my logs accounts for the curves of the bow, that’s why it works so well. My best advice on this process is in my logs. You’ll find in other logs to sand down the gun port pattern, not fill up to it.
- 362 replies
-
- 2
-
-

-
- Amati
- Lady Nelson
- (and 2 more)
-
I took a look back at my log and saw, much to @DelF delight, every time I wrote ‘winch’ autocorrect changed it to ‘wench.’ I need to do better editing. I see Flirt sitting on my shelf waiting for her rigging, I haven’t forgotten.
-
Routing table….you have way too many toys😆. The strips to cover gaps and pinning of rudder straps are creative as ever, you always find great ways to solve problems many would just overlook. Nice work!
- 345 replies
-
- 3
-
-
-
- Duchess Of Kingston
- Vanguard Models
- (and 1 more)
-
This is where I said choose one method and go with it. Mine (the Chuck method) requires only heat, I don’t soak anything. I use CA and don’t pin anything. Like I said there are many methods, most work ok, but trying to blend them won’t help.
- 362 replies
-
- 1
-
-
- Amati
- Lady Nelson
- (and 2 more)
-
I don’t think your explanation to a disgruntled poster is necessary, the vast majority know all this. That guy needs to take it up with his government, not the provider.
- 1,784 replies
-
- 3
-
-
- winchelsea
- Syren Ship Model Company
- (and 1 more)
-
You need a solid metal ruler for trimming planks, not that plastic thing. Try this one Here
- 362 replies
-
- 2
-
-
-
- Amati
- Lady Nelson
- (and 2 more)
-
This is fundamental to the edge bending method. I recommend you plan out your second planking using tick strips to taper them in order to prevent the problem you have with the first planking ending in the middle.
-
You need only two belts for LN, no more. You definitely don’t need a drop plank and stealers only if you don’t plan and taper correctly. You can see this in my log. choose one method and start. Way too many opinions and methods, you’ll be paralyzed looking at them all and definitely don’t try to blend two. just start.
- 362 replies
-
- 3
-
-
-
- Amati
- Lady Nelson
- (and 2 more)
-
That small variance can easily be sanded out. You’re fortunate, that’s not much at all.
- 362 replies
-
- 2
-
-
-
- Amati
- Lady Nelson
- (and 2 more)
-
Chuck’s plank bending method and using CA as I describe in my logs is the way to go.
- 362 replies
-
- 1
-
-
- Amati
- Lady Nelson
- (and 2 more)
-
I can’t imagine recommending epoxy used in the way you have or why anyone on this site would recommend doing so for a wood model hub, it is an adhesive not a sealant at least for modeling purposes. If you ever sort out a means to sand it I wouldn’t think the finished result would be very appealing. You really should be able to remake the hull without sacrificing the rest of the kit provided there are decent plans. Modelers Sawmill can likely provide the wood you’d need, if you don’t have a scroll saw for the bulkheads you’d spend less time with hand tools cutting new bulkheads than you will with sanding your rock hard mistake. Sometimes you just have to accept the error and start over.
-
Totally agree with BE’s comments
-
This won’t br helpful at this point, it was unnecessary to seal the hull for painting and if you did it would be sanding sealer or something like wipe on Poly. I’m not sure anything will change with that much epoxy. Sorry.
-
You should consider not tree nailing the hull. It is very beautiful as it is. My opinion is the tree nailing gives the hull a case of the measles. I’m still quite happy with my decision to forgo tree nailing on mine.
-
Merry Christmas Chris, so glad your business has taken off, we’re Al the better for it.
-
Nice modifications to the hatches BE, well done and a step up from the kit for sure. My recommendation for the hatches is black I didn’t think I’d like it until I saw it on other Winchelsea build logs, it looks quite sharp and a nice contrast to the surrounding red. Merry Christmas to you and your family as well. I find it fun we say ‘Merry’ and the English say ‘Happy.’ 🧐😊
- 857 replies
-
- 2
-
-
- Sphinx
- Vanguard Models
- (and 1 more)
-
I’m sure, like your Speedy and Duchess, it will become the Vanguard reference build once you do. With Winchelsea underway it will be a long time before I get my Sphinx out of the cabinet. I’ll likely follow BE’s path of an admiralty build when I do but I might miss rigging something by then.
- 542 replies
-
- 3
-
-
-
- Sphinx
- Vanguard Models
- (and 3 more)
-
Thanks Frank, your build is one I regularly check to learn from as I move forward. Thanks Bob, as you know from my past logs this is something I strive to achieve. Thank you, glad to be a part of this journey.
- 840 replies
-
- 4
-
-
- winchelsea
- Syren Ship Model Company
- (and 1 more)
-
Your craftsmanship with the boxwood coupled with the well done decorations make for a stunning look. The window technique is very creative thinking. Merry Christmas Derek to you and your family. I’ve enjoy our cross-pond dialog this past year and look forward to more next year.
- 345 replies
-
- 5
-
-
-
- Duchess Of Kingston
- Vanguard Models
- (and 1 more)
-
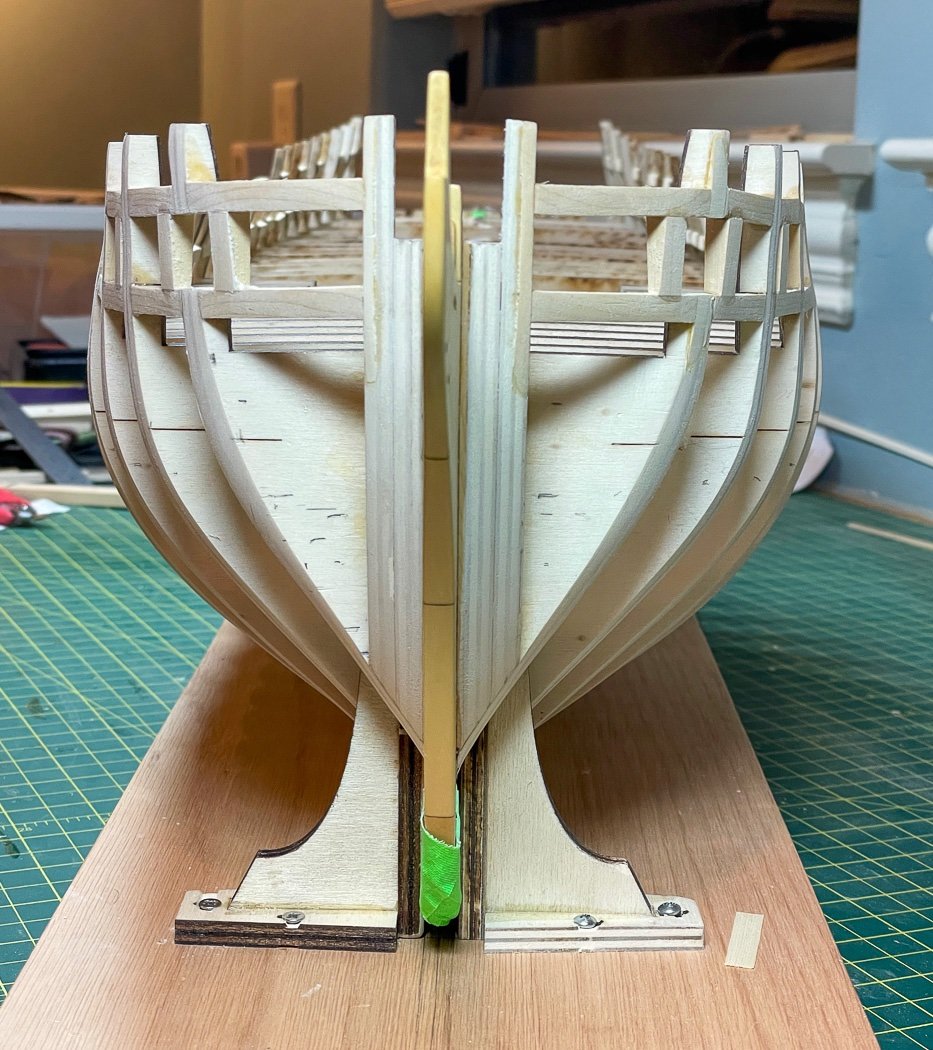
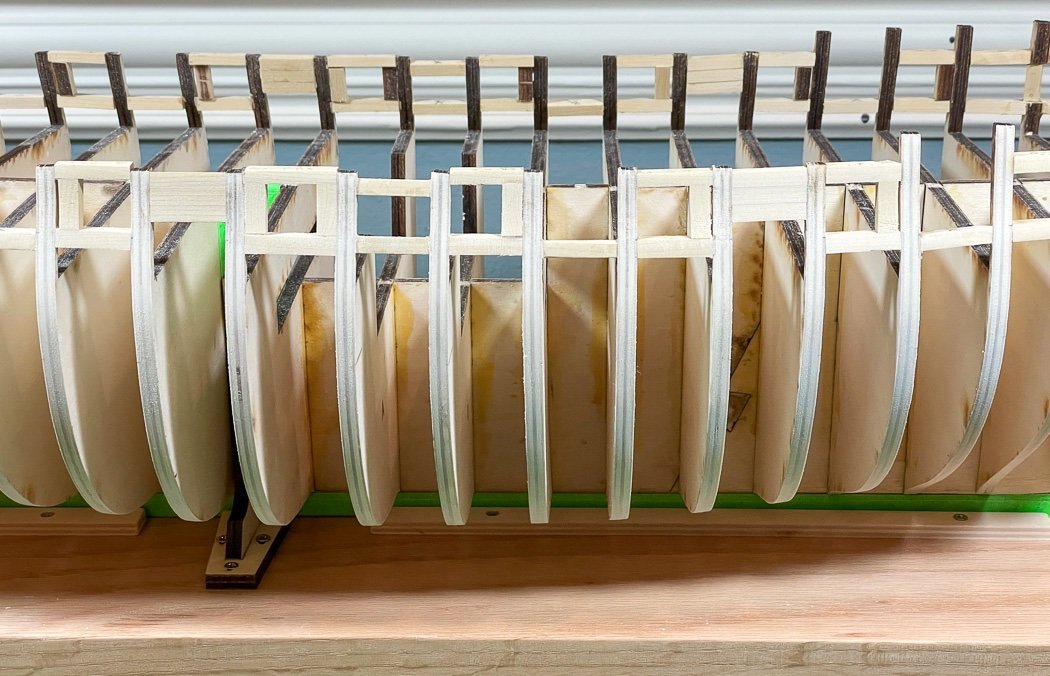
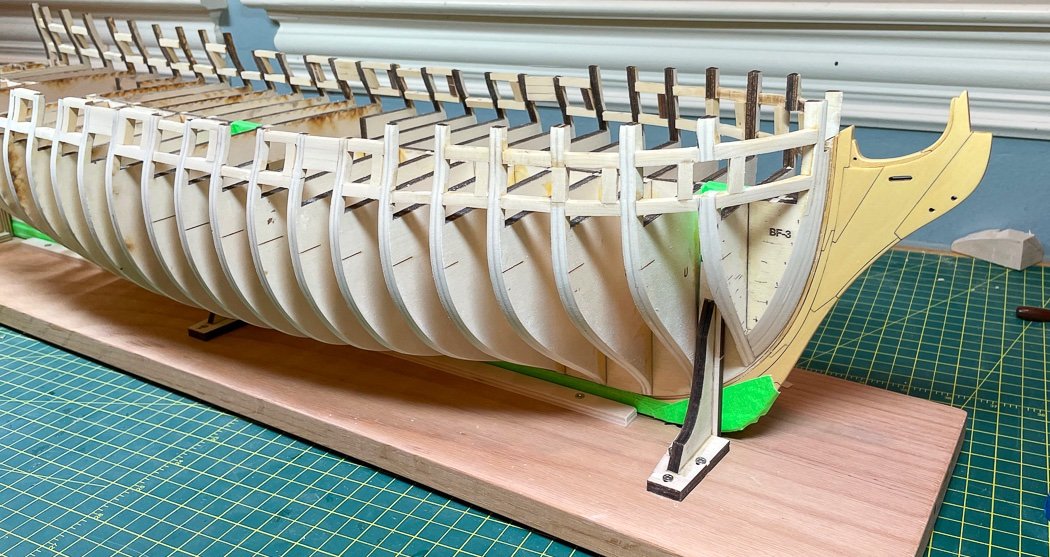
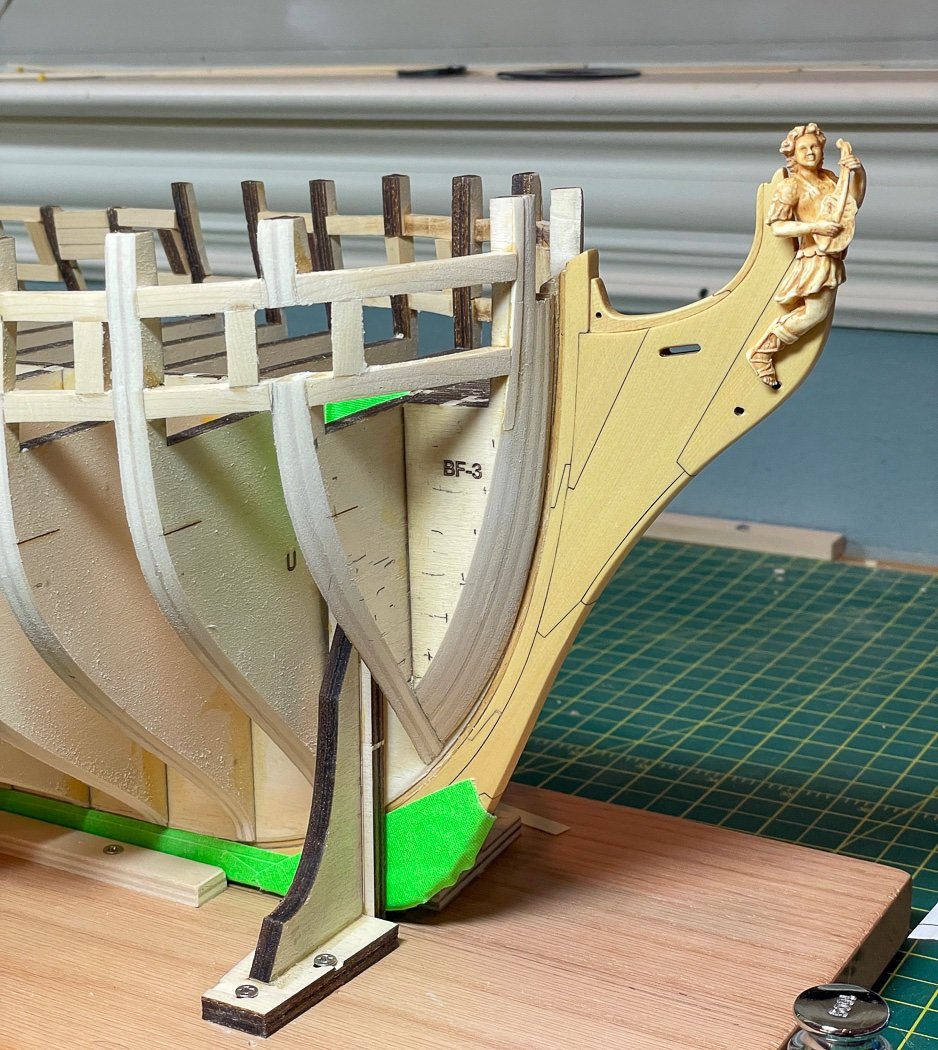
I thought I'd add a few closer photos of my framework before I move on to the stern. Maybe a little more interesting to look at than my previous post caught up more on the process than the result. The ship is straight the photo isn't - the tick marks are a sign of my many measurements to ensure symmetry. No bulkhead from front to back has more than a .5mm difference from it's opposing side - the front three are through measured effort, the rest more ...'how'd that happen...' Still have the top to fair. The off-centered ones between ports are there for support (two where a bulkhead was troublesome) and ensuring equal distance between bulkheads. Per Chuck's guidance every sill and support piece was measured close to the former, not at the outside, it's opposite on the other side is it's exact twin. The challenge, maybe not obvious in the photos with these are all the angles involved, as I noted above the angle finder and Byrnes sander were essential, for me anyway. A single plank run will be placed 1/32 from the bottom of all 14 ports, another along the top edge, front to back. I think I got it right, not a lot of tolerance, time will tell. It does't quite look like a ship yet, but it's getting there. The lines are really nice, 1/48th is so cool to work with. I happened to notice the scale is very near the NMM plan I have framed on my work room wall - I was comparing measurements and was taken by my building a model so nearly equal in size to it's original draft. More evidence of the tick marks, I showed in an earlier post how I record these on paper and fair for symmetry. I hope the eventual planks are appreciate of the beating the bulkheads took for them. I messed up and not am happy with my staining of the figurehead, I'm going to acquire another from Chuck and practice a little more before staining the next one. Still it looks pretty cool setting there. So now on to the stern, I've tried and continue to try to learn all I can not only from Chuck's monograph, but the many build logs long past this stage with dates more than two years old now. My journey is underway. Thanks for stopping by. You have many choices in Winchelsea build logs, I appreciate your taking a look at mine.
- 840 replies
-
- 22
-
-

-
- winchelsea
- Syren Ship Model Company
- (and 1 more)
-
I personally don’t think “speed” is a word I associate with good workmanship. The care and thoughtful forward thinking is more testament of what I see viewing BE’s work. This kit has a lot of new challenges based on its innovative design given what I’ve seen on various build logs. BE, how did you come to have the black & white floor? I think it looks great but may over power the rest of the model based on what’s around it. I’m sure time will tell.
- 857 replies
-
- 4
-
-
- Sphinx
- Vanguard Models
- (and 1 more)
