glbarlow
-
Posts
4,126 -
Joined
-
Last visited
Content Type
Profiles
Forums
Gallery
Events
Everything posted by glbarlow
-
 Where were you when I built four boats for Vanguard, it was the 2nd least favorite thing on that model, a very distant second to copper plating it. 😂🤣
 -
You can get there from here. It’s wood, wood can be managed
- 362 replies
-
- 3
-

-
- Amati
- Lady Nelson
- (and 2 more)
-
So. Does the aft end of the template start at the bulkhead M or the aft end of the hance piece?
-
Sorry, I agree with everyone. I took off and replaced whole sections of my singled planked Cheerful, in one case 3 times. As I look at it each day now I’m so glad I did. There is truth to just get the first planking done, but you have to be closer to right than you are. We’ve all been here. The ones that started over are happy, the ones that didn’t …….
- 362 replies
-
- 4
-
-
- Amati
- Lady Nelson
- (and 2 more)
-
I have to agree you should remove those two planks and fit replacements. Following the heat bend down to curve up methods should result in a tighter fit. San the gunport pattern down at the curve to meet the plank.
- 362 replies
-
- 2
-
-
- Amati
- Lady Nelson
- (and 2 more)
-
Thanks. I’ve graduated to struggling with stern fairing 😊😏
- 840 replies
-
- 2
-
-
- winchelsea
- Syren Ship Model Company
- (and 1 more)
-
There is both spriketting and waterways, I have both on Cheerful but I only added spriketting on the smaller Flirt.
- 345 replies
-
- 1
-
-
- Duchess Of Kingston
- Vanguard Models
- (and 1 more)
-
I’m a big fan of my Ibex finger plane, it works great for masts and rabbets alike. I’m not sure the rudder can pivot with the way you have the boot. I’m betting BE’s Pegasus log provides a good example boot.
- 542 replies
-
- 2
-
-
- Sphinx
- Vanguard Models
- (and 3 more)
-
Nice work on capturing the angle. The open doors will be interesting to see. Your Cheerful is really coming together, I enjoy seeing the effect of the different wood.
-
I love my mill, I’m always learning new things it can do. Nice sander.
-
Really nice work, well done!
-
Welcome aboard, very nice start.
-
Thanks Frank, your log helped bring that to my attention, so thanks for that.
- 840 replies
-
- 2
-
-
- winchelsea
- Syren Ship Model Company
- (and 1 more)
-
Thank you, it’s a long road, but at least I’m now on it😊 Thanks Rusty. If I can just stay out of my own way and not obsess about small millimeter discrepancies … Thank you. It’s gaffer tape, it’s thick enough to protect and leaves no residue when removed. The neon colors is a fun bonus 😊
- 840 replies
-
- 5
-
-
- winchelsea
- Syren Ship Model Company
- (and 1 more)
-
Thank you for the heads up, I was intentionally waiting until I had the qg framing based on seeing some had over-sanded the counter. I’m very good at over-sanding 😆
- 840 replies
-
- 3
-
-
- winchelsea
- Syren Ship Model Company
- (and 1 more)
-
Chamfering Cutting Tool
glbarlow replied to Dave_E's topic in Building, Framing, Planking and plating a ships hull and deck
Total gimmick and totally unnecessary. You’re guilty of overthinking it again. You can simply sand the bevel onto the inside top edge of the plank. You don’t need to get overly detailed with this, especially if the plank is properly tapered and shaped -
I forget comments are put at the end…. I was admiring your stern, you showed some of the tools you used to make the scraper for it, it was that one I was asking about. I’ve not made anything with that much depth and tiered so well.
- 607 replies
-
- 1
-
-
- winchelsea
- Syren Ship Model Company
- (and 1 more)
-
The plans should be to the scale of the model. It is common to take measurements from the plans to transfer to making the model.
-
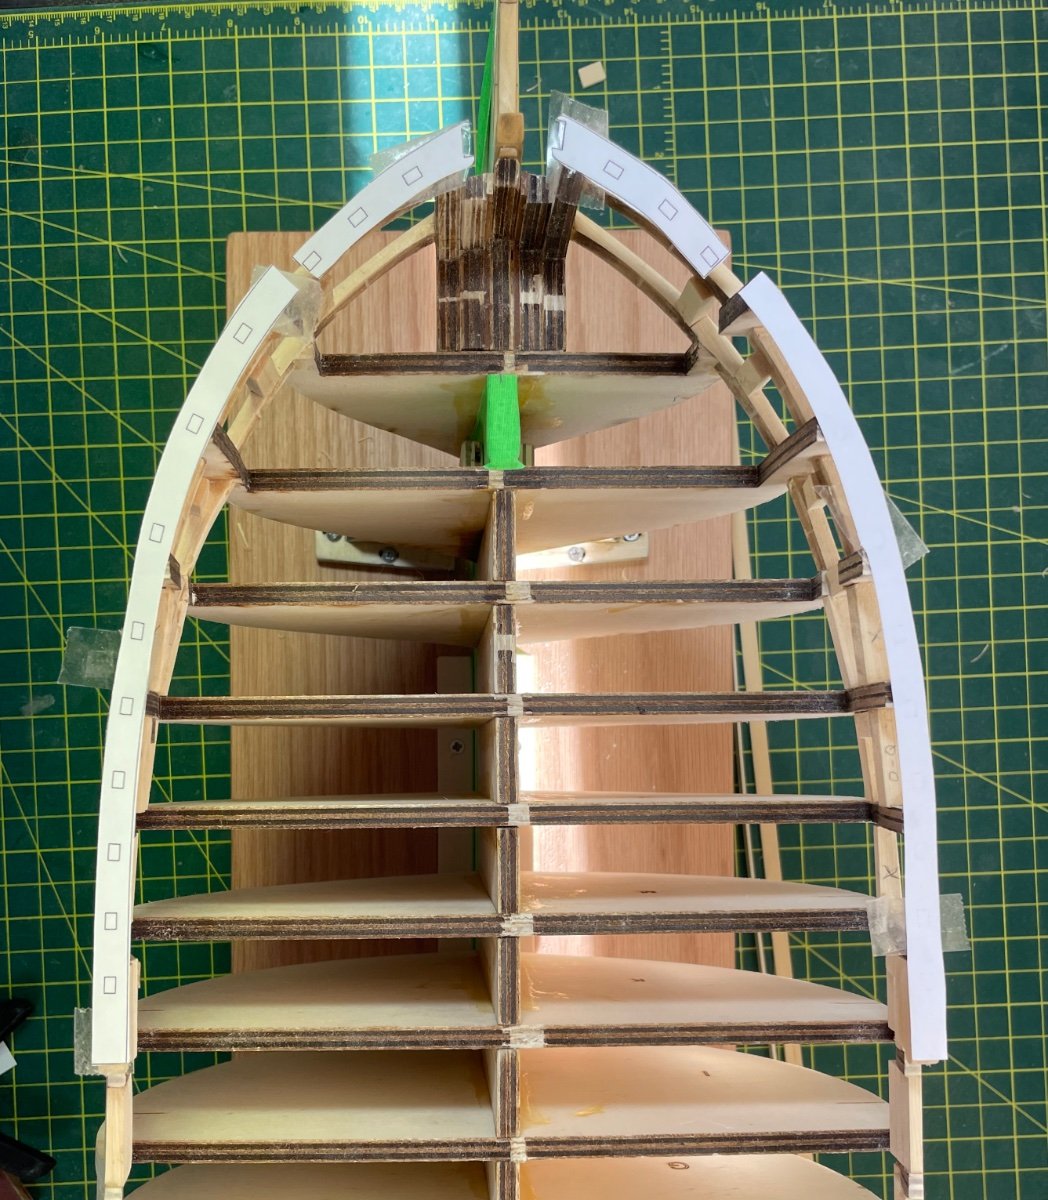
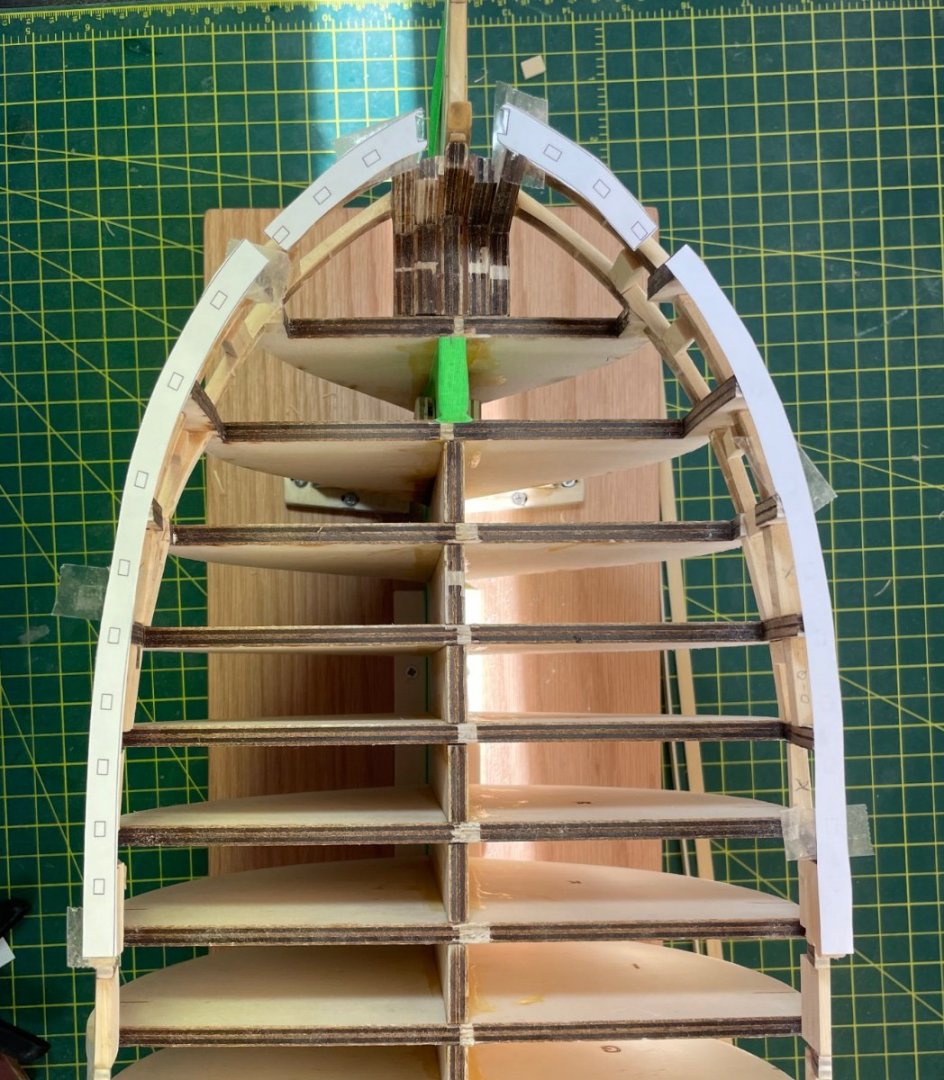
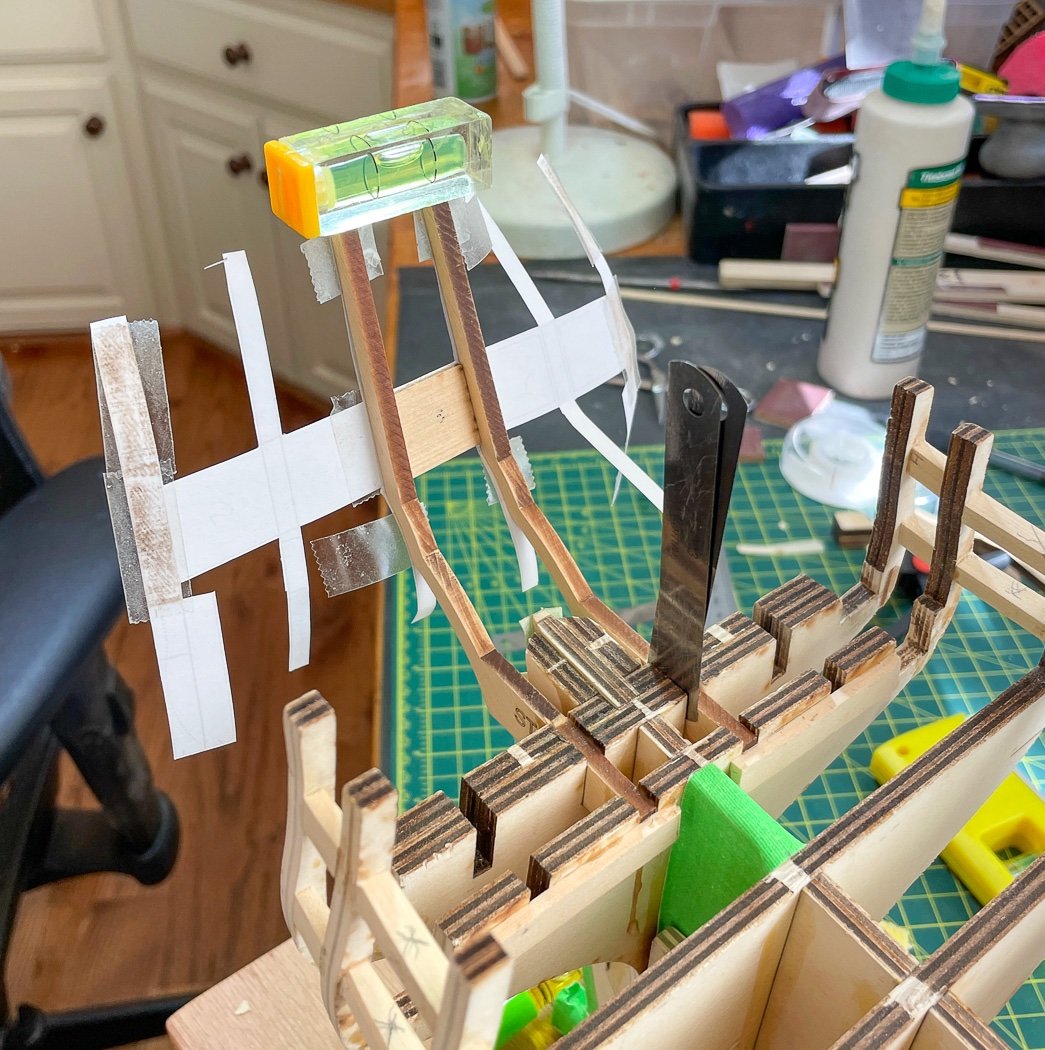
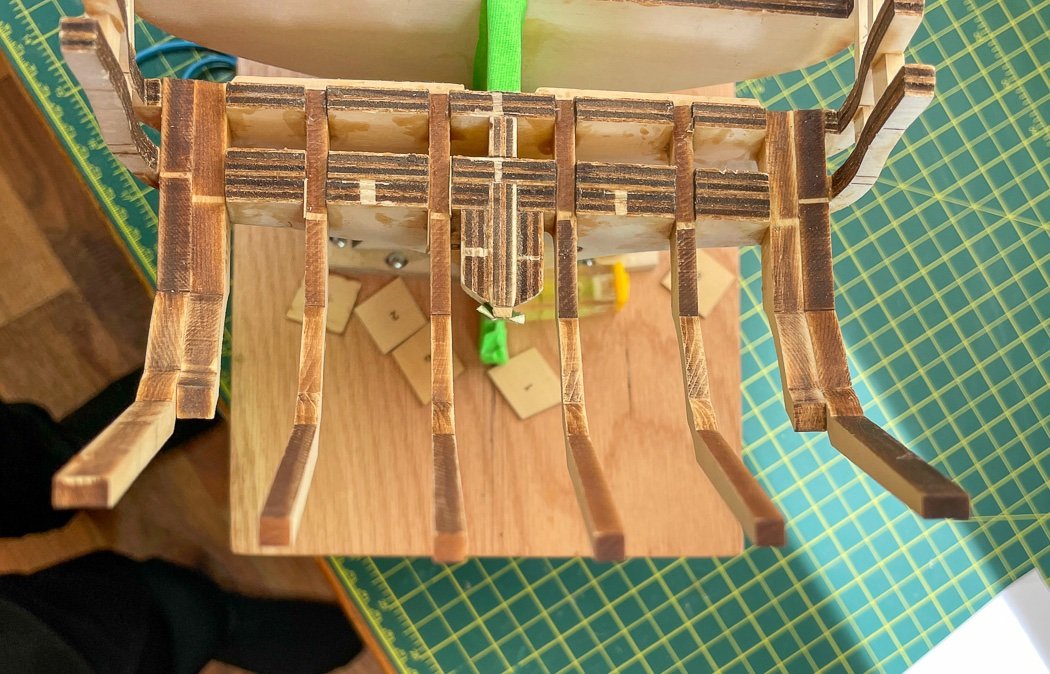
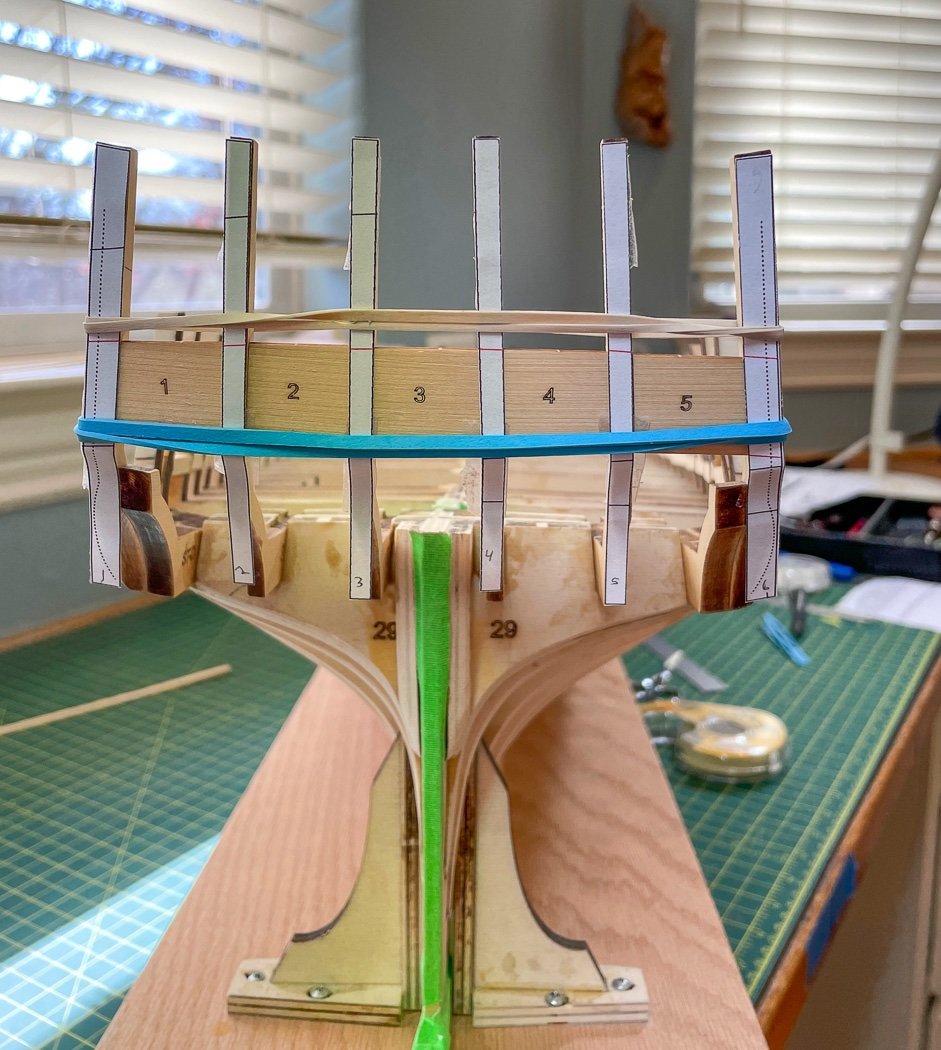
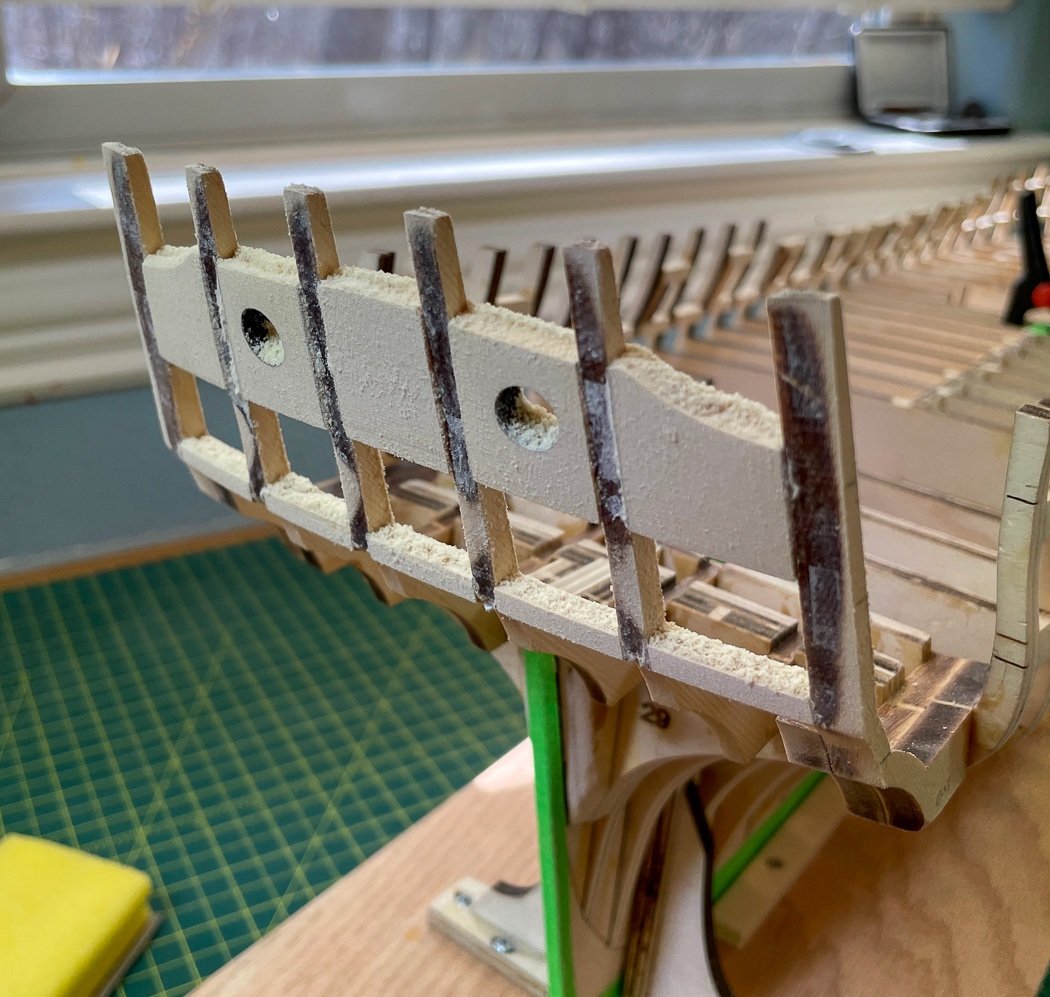
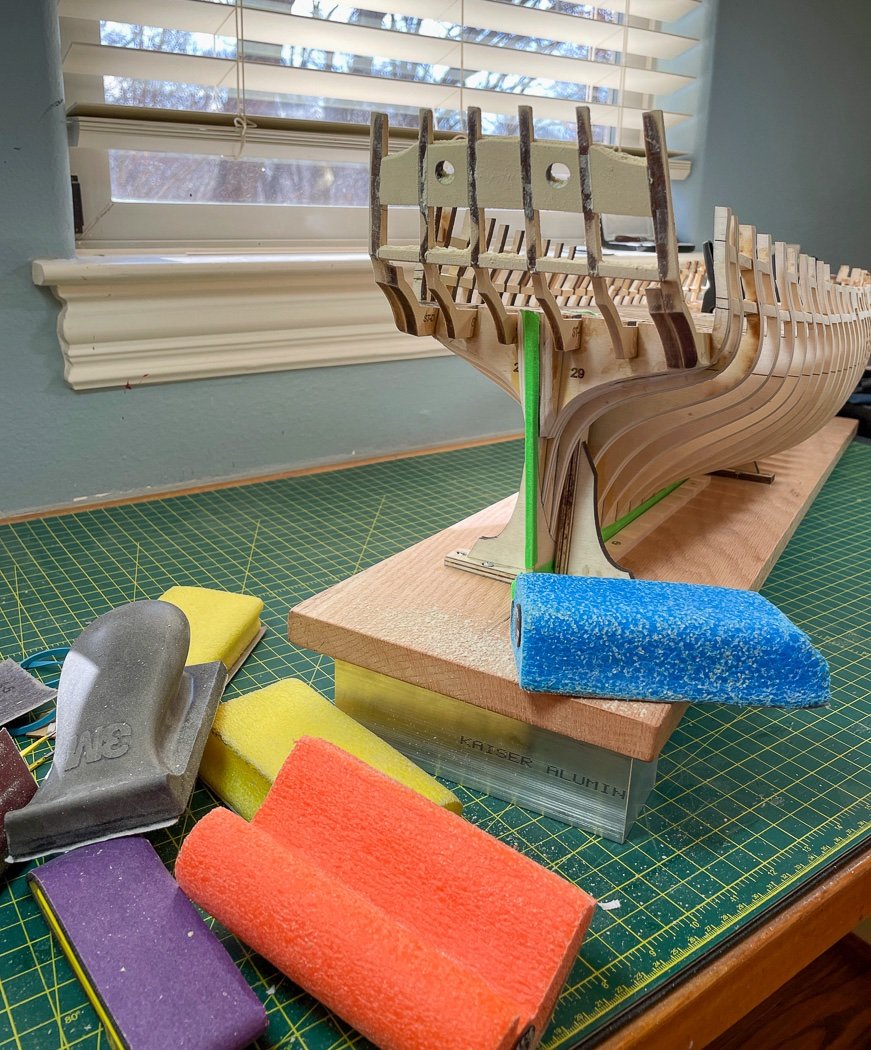
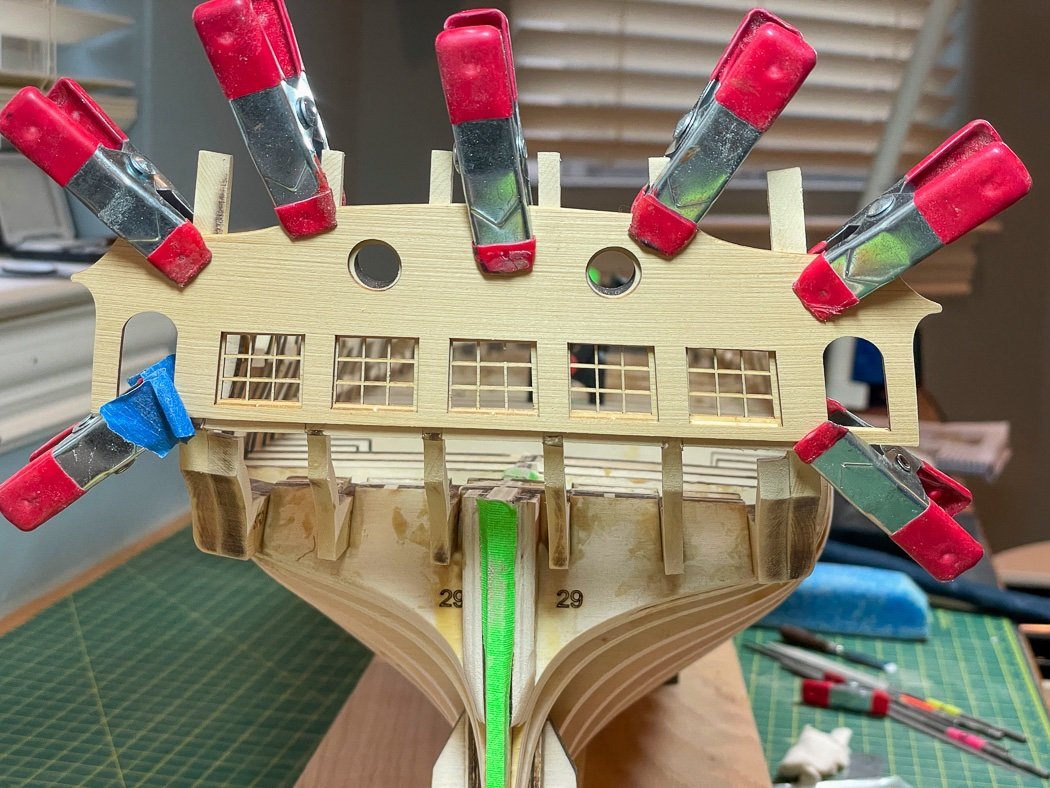
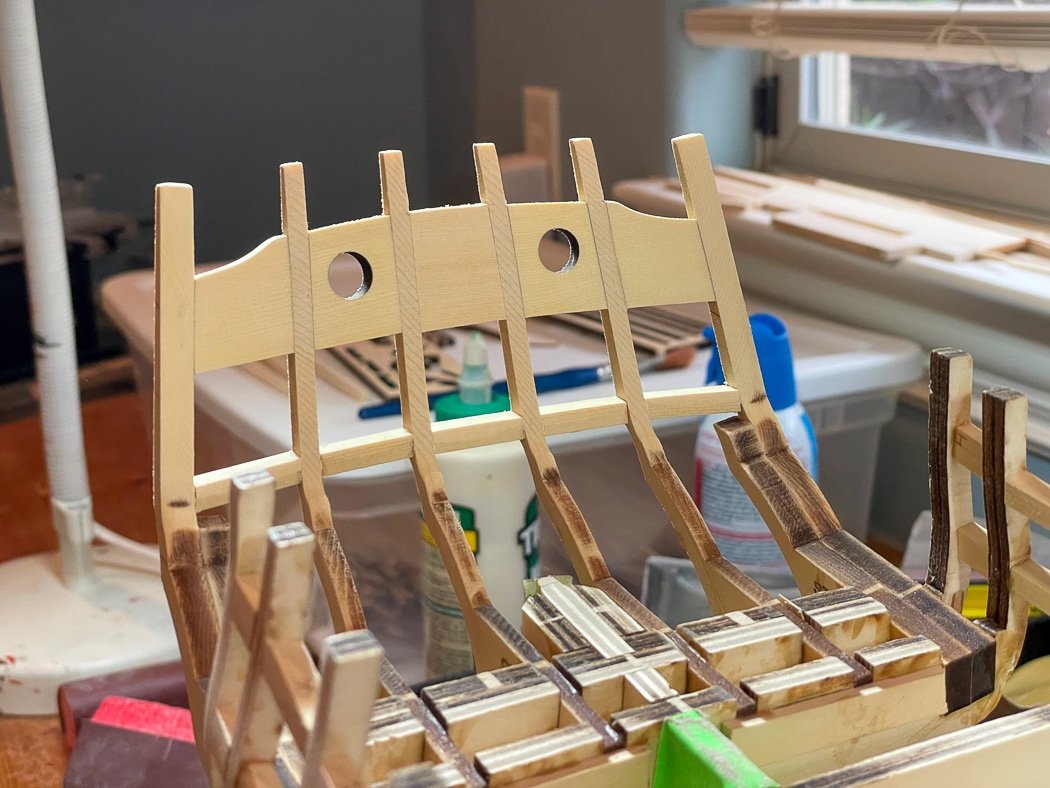
Stern framing Patience and perseverance - just a couple of random words, probably not connected to this post… Ship sterns on kits always seem problematic, no matter what level of quality they might be they often seem to be an afterthought, overly simple, or at best a challenge to fit pre-cut pieces together properly. The challenge part doesn’t go away with Winchelsea but any questions of design do. I felt like I was building the actual ship with Chuck’s well thoughtout process for Winchelsea. I made several copies of the provided stern plan, I’m not sure I needed each use after the fact but at the time they were helpful in some way. There are six frames with the outer one bulked up with an additional half frame. The objective is for them to be all properly spaced and equal distance in pairs, level and equal in height also in pairs, together forming a curve. For whatever reason one frame didn’t want to cooperate so I had to file the slot a bit. A couple of my old feeler gauge blades used for milling work came in handy as a temporary spacer to determine the position and were later replaced with a thin shim glued into place. It’s hard for me to walk away to wait on glue, but that’s what I did, a couple of hours for each pair (I sanded some other stuff). Then I left them overnight to lock them in place. Another copy of the stern plan was sliced up and double sided taped to each frame. That plus the temporary templates shown in the photo make the whole thing possible, they set the widths and heights for the fillers and sills. Despite my careful frame alignment they didn’t stay in place without the help of a rubber band (I only needed the blue one, the second was to help with this photo). The laser cut fillers are provided as part of the Chapter 1 parts package. Despite the fact that essentially all I needed to do was bevel the sides properly to account for the curve I managed to use all the duplicate fillers Chuck provides in doing so, some people are slow learners - plus I was a little obsessed with getting them right (and they aren't in this photo, but later they were). With the fillers in place next up was the sills - again the templates coupled with the strips taped to the stern made it possible. All I had to do was get the right level, bevel and width from a length of ¼ x 3/16 wood. Fortunately 3/16 is the same thickness as Cheerful’s planking and I had a few leftover planking billets I cut into ¼ widths. Why you ask, because it took me a lot more than 5 attempts to get the 5 sills, again slow learner or too heavy handed on the Byrnes Sander (which was once again indispensable in gaining the angles and sizes required along with the cross cut table for my Byrnes Saw) …Measure. cut, sand, dammit, repeat… After an overnight glue drying session it was sanding day, and I mean it took me a full day to fair the front and back sides. I needed a little comforting so I unwrapped my chapter 3 parts and tested the fit of the transom piece and the windows. Remarkably (or really not, its designed for them to do so, just means I followed the monograph) they all fit properly. (note in the photo the transom isn’t exactly level or even, I corrected it later and confirmed the fit but didn’t re-take the photo). I also needed a few adjustments to ensure it was even across the top between pieces, they are now. And with that the stern framing is complete. Is Yellow Cedar pretty or what... What doesn’t show in a two dimensional photo is the gentle curve resulting from all the alignment, angled, and beveled cuts I made brought out by the fairing. It’s quite pleasing, and pretty remarkable I more or less pulled it off. New respect for all the Winchelsea builders that have gone before. There was nothing easy about building this stern, it is though rewarding to see it completed. On to the quarter gallery framing. Thanks for stopping by along with the likes and the comments. Happy New Year!


- 840 replies
-
- 22
-
-

-
- winchelsea
- Syren Ship Model Company
- (and 1 more)
-
I imagine it really grates on you, hopefully you’ll be able to hatch a solution.
- 857 replies
-
- 10
-

-
-
- Sphinx
- Vanguard Models
- (and 1 more)
-
I ended buying multiple sizes for Cheerful (of course it only has 14 guns so not that many to buy) I can tell you 15mm is way too big🤣. I thought between 8-11mm were good options just my opinion, no supporting research😊
- 642 replies
-
- 3
-
-
- winchelsea
- Syren Ship Model Company
- (and 1 more)
-
A batten is a good idea, I recommend a long very thin, like 1/32, plank rather than string. I have several such planks for only that purpose. As I’ve recommended a couple of times, pick a method and stick with it. Personally I never soak planks due to the possibility they warp, expand, and shrink - especially kit planks. But as I’ve said their are many methods and people are zealous about theirs. Choose one and don’t mix methods. Just reading about all them is enough to leave your head spinning.
- 362 replies
-
- 4
-
-
- Amati
- Lady Nelson
- (and 2 more)
-
I used 8mm ones from Crafty Sailor on my Cheerful. I agree 6mm is too small, maybe time for another order😊