


glbarlow
-
Posts
4,126 -
Joined
-
Last visited
Content Type
Profiles
Forums
Gallery
Events
Everything posted by glbarlow
-
 This is really helpful dialog, a great benefit of a group build and others willing to share their experience. 🍻
 -
Great questions. I’m not that far behind you and benefiting from your nice work.
-
Error code 200
glbarlow replied to Blue Ensign's topic in Using the MSW forum - **NO MODELING CONTENT IN THIS SUB-FORUM**
I just retook the same photo and loaded it, I rejected algo rhythm’s summary judgement of my photo’s quality and fooled it by replacing it with its twin. Take that Algo and your EC200. 🙃 -
Error code 200
glbarlow replied to Blue Ensign's topic in Using the MSW forum - **NO MODELING CONTENT IN THIS SUB-FORUM**
I had this problem too. I’ve uploaded 15-16 at once before. Today I had it with an upload of 10, it uploaded 9 but not the tenth. I finally had to upload a different version of the photo, once it didn’t like the 10th one it just refused to accept it. -
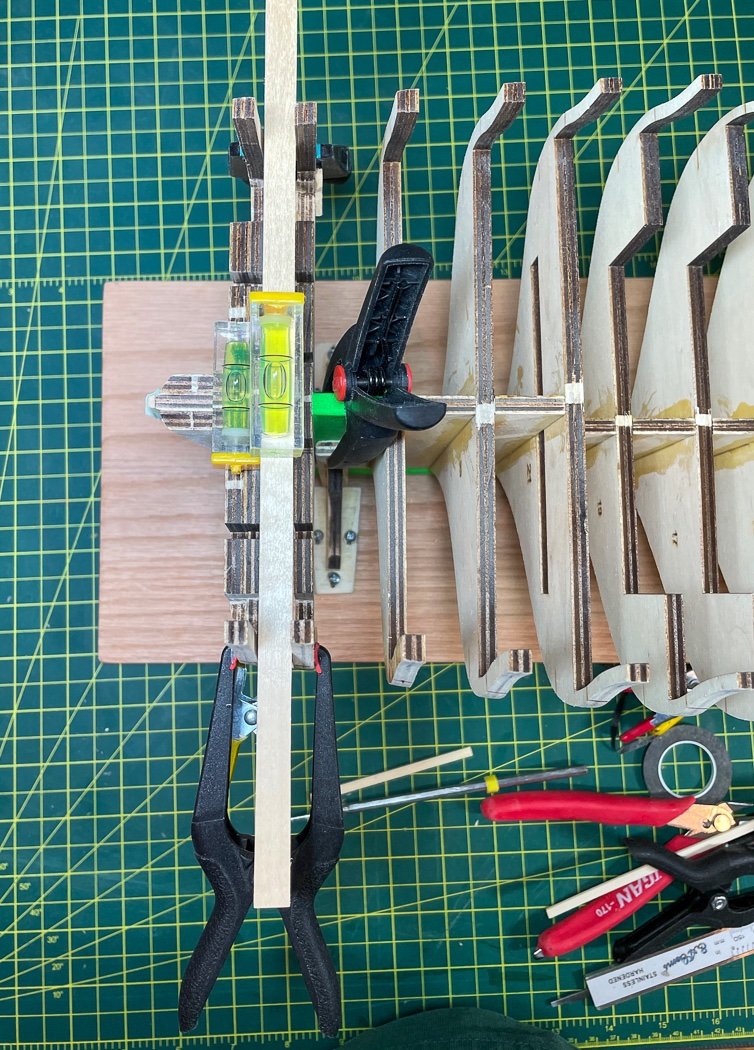
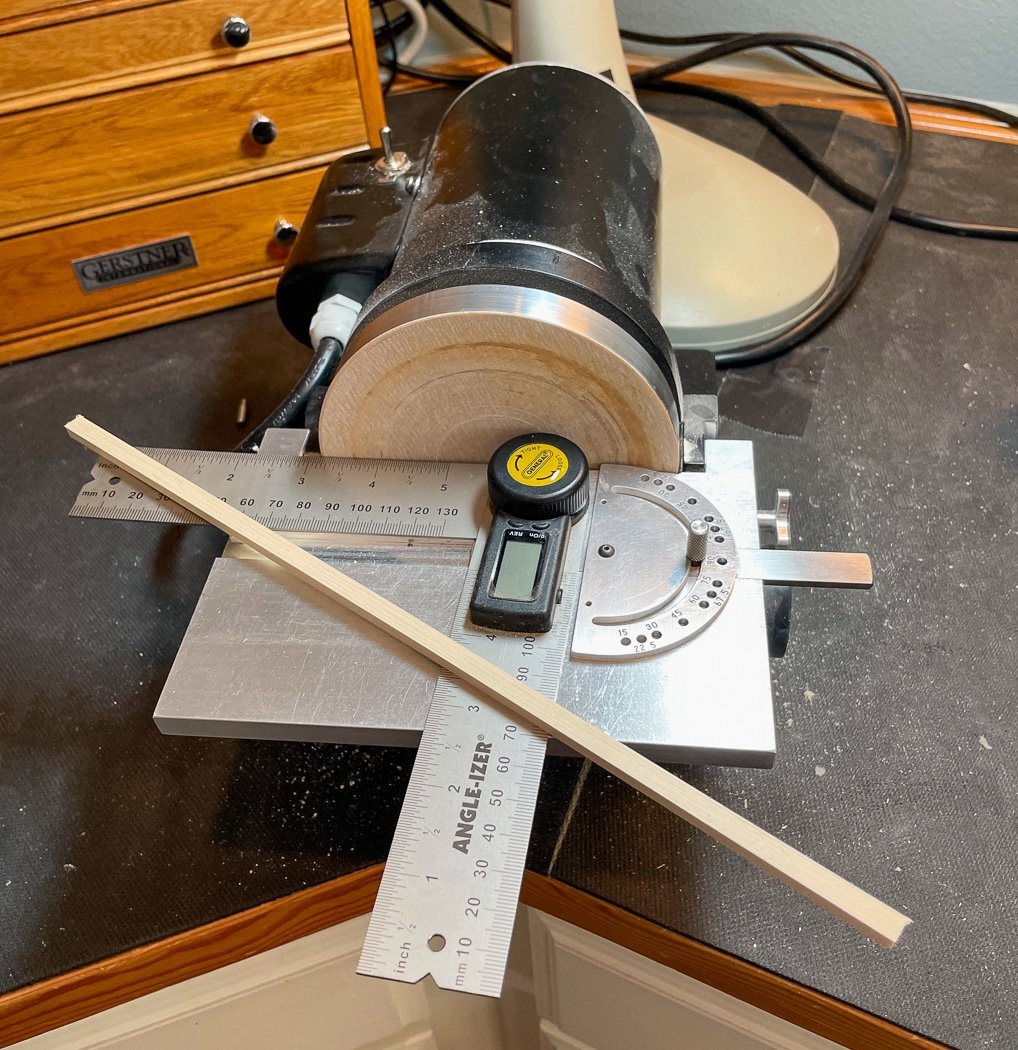
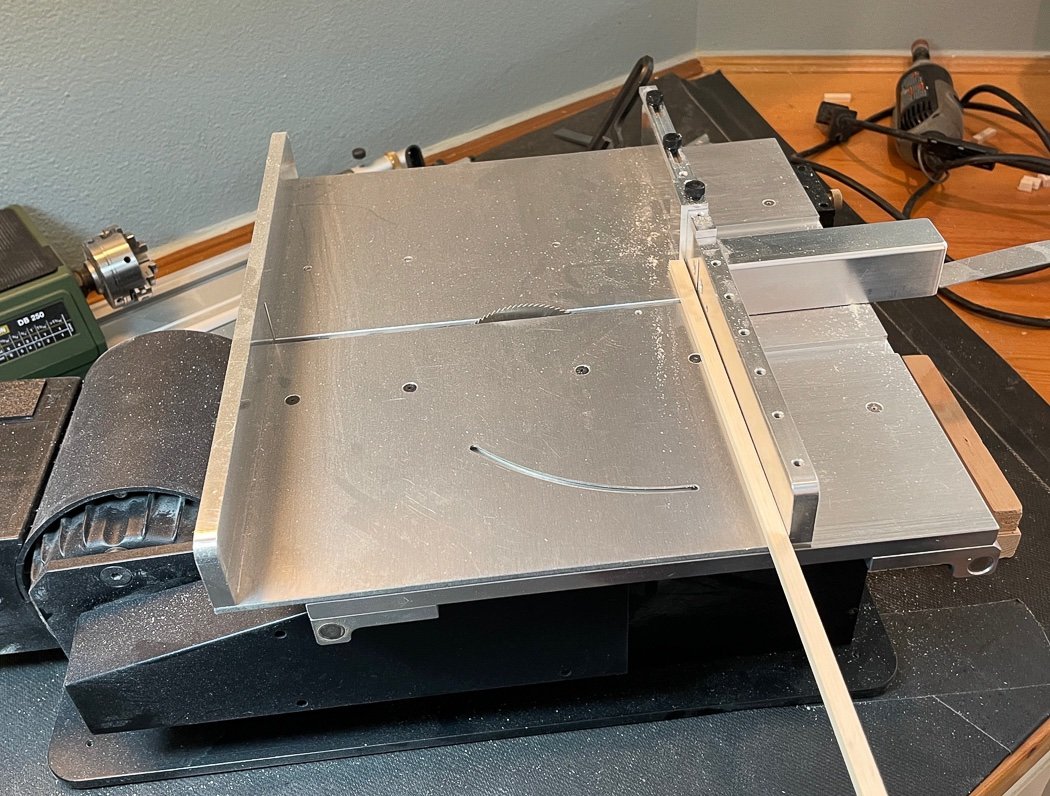
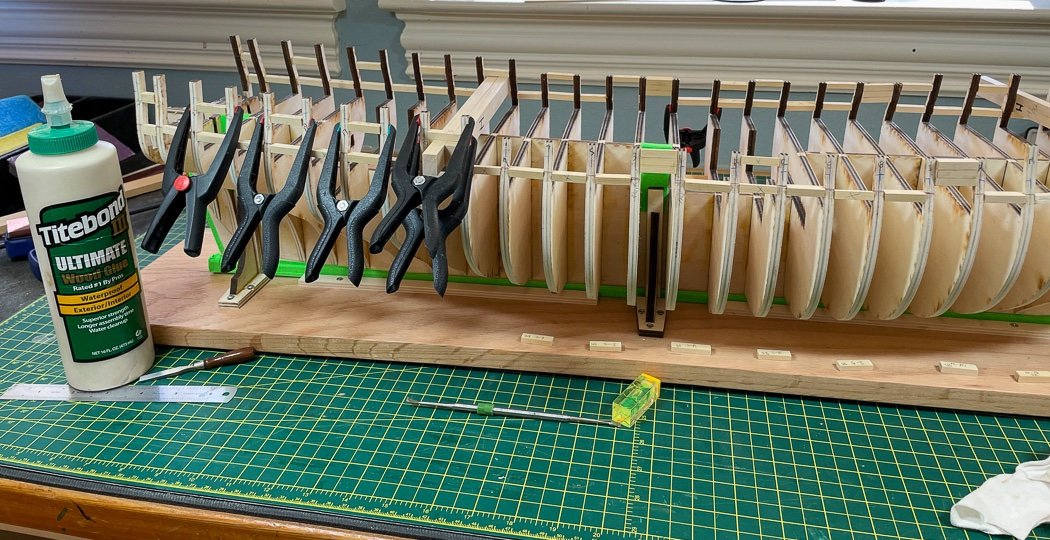
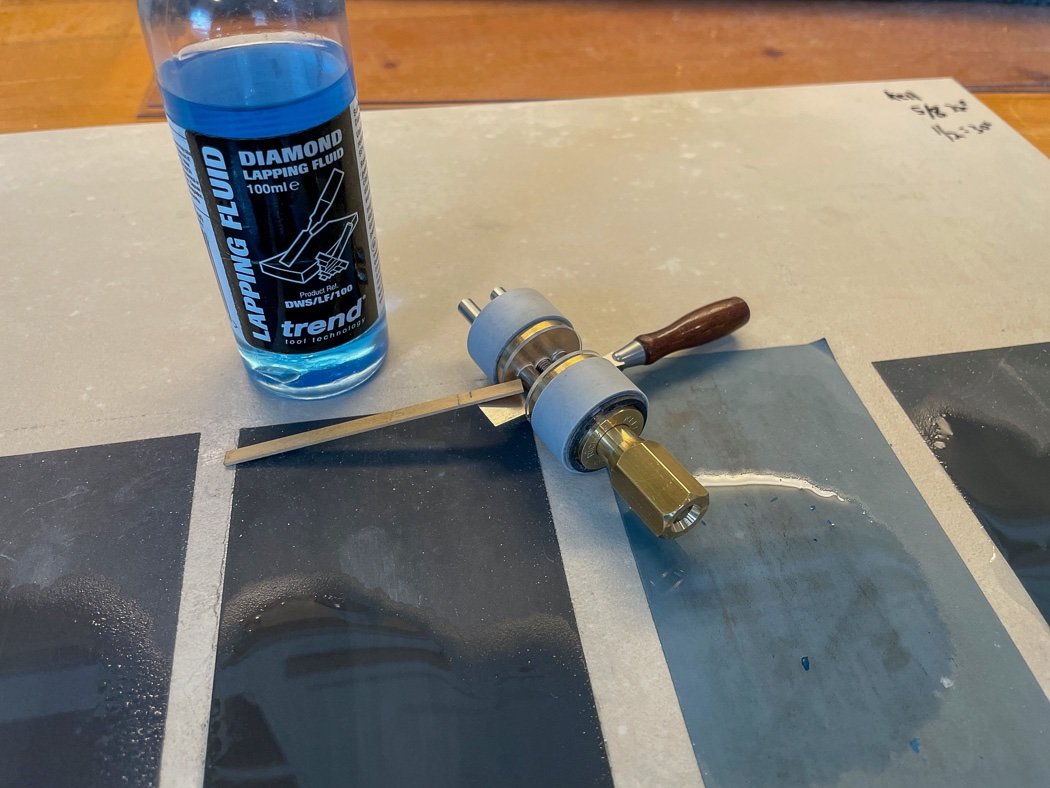
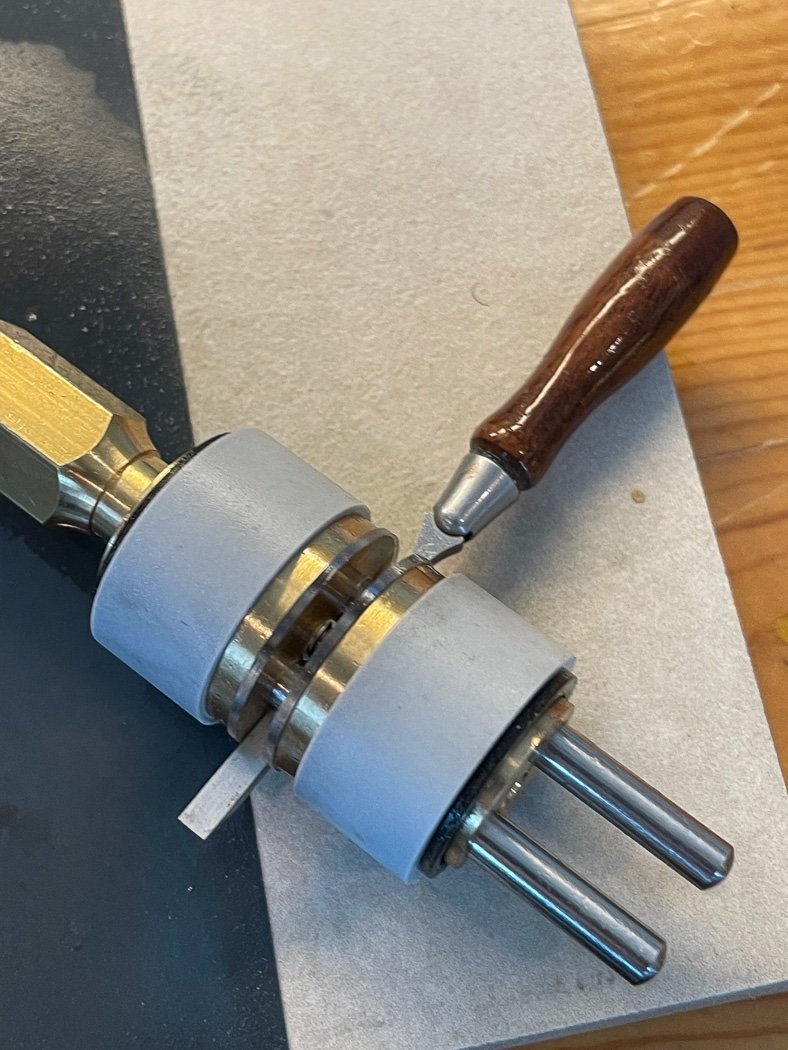
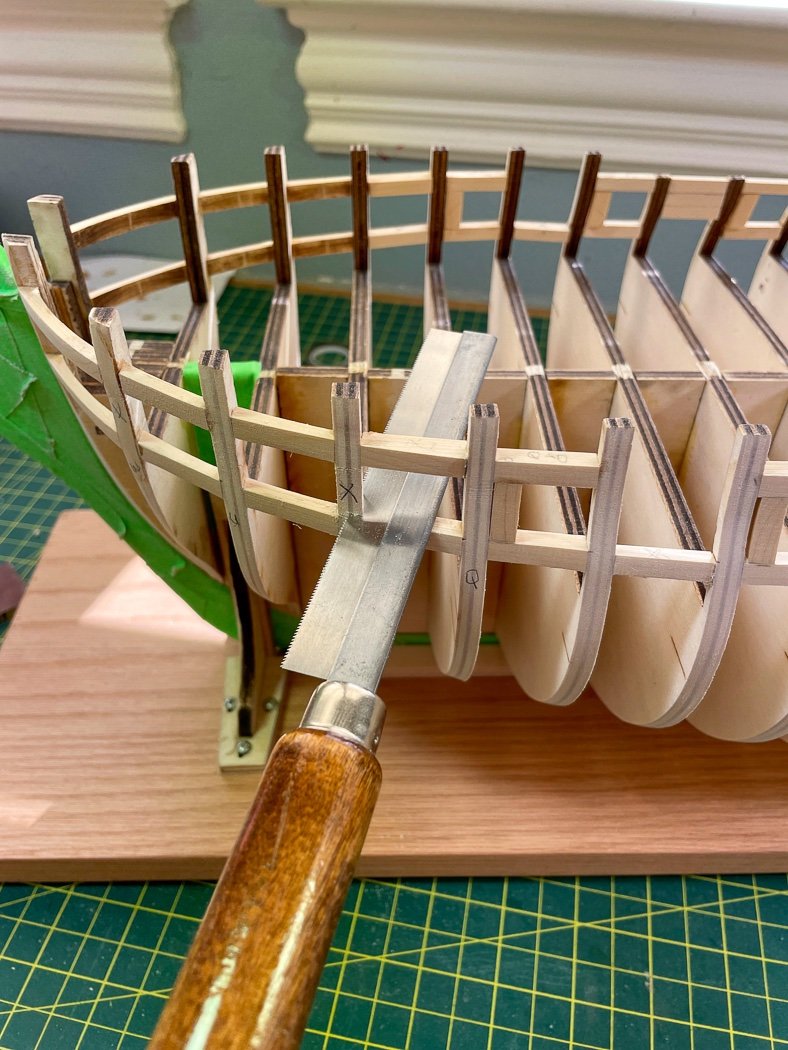
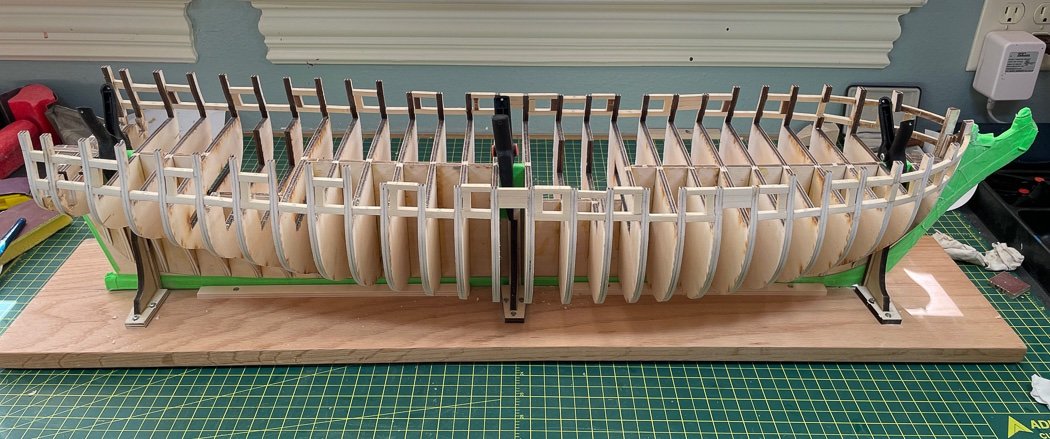
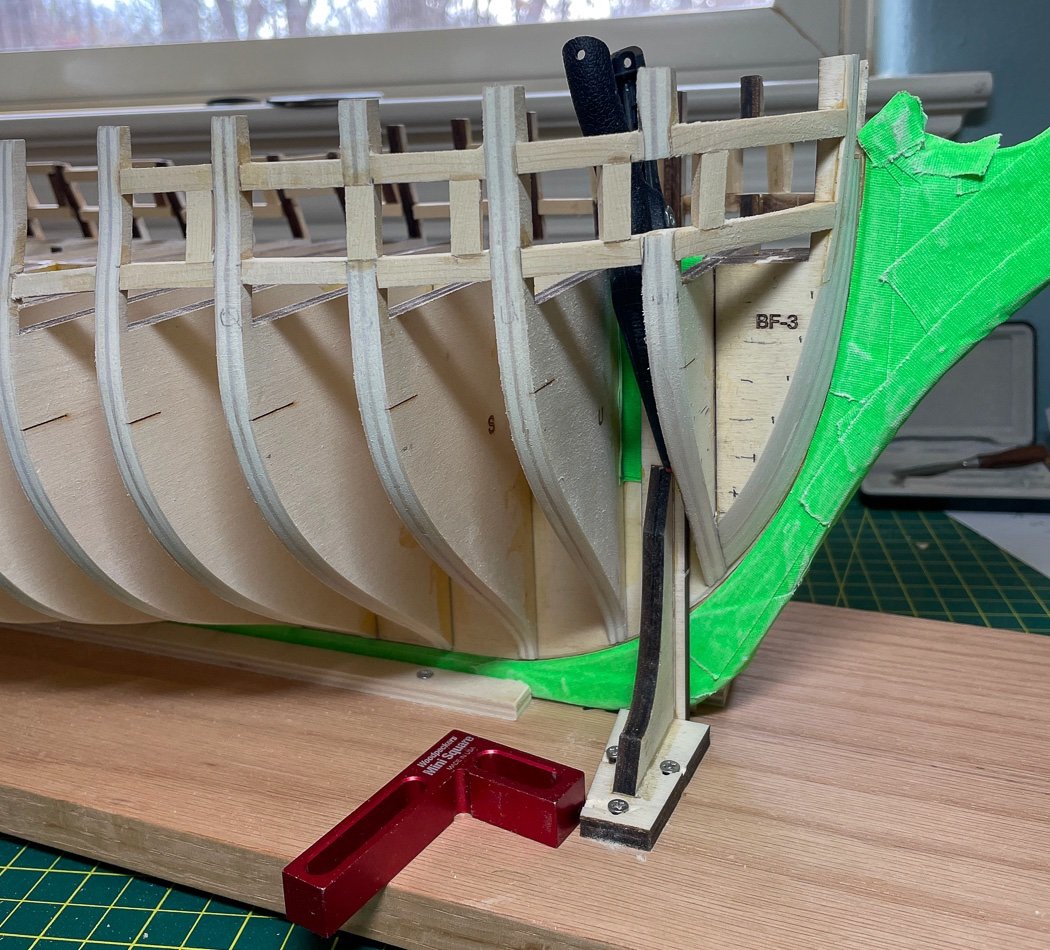
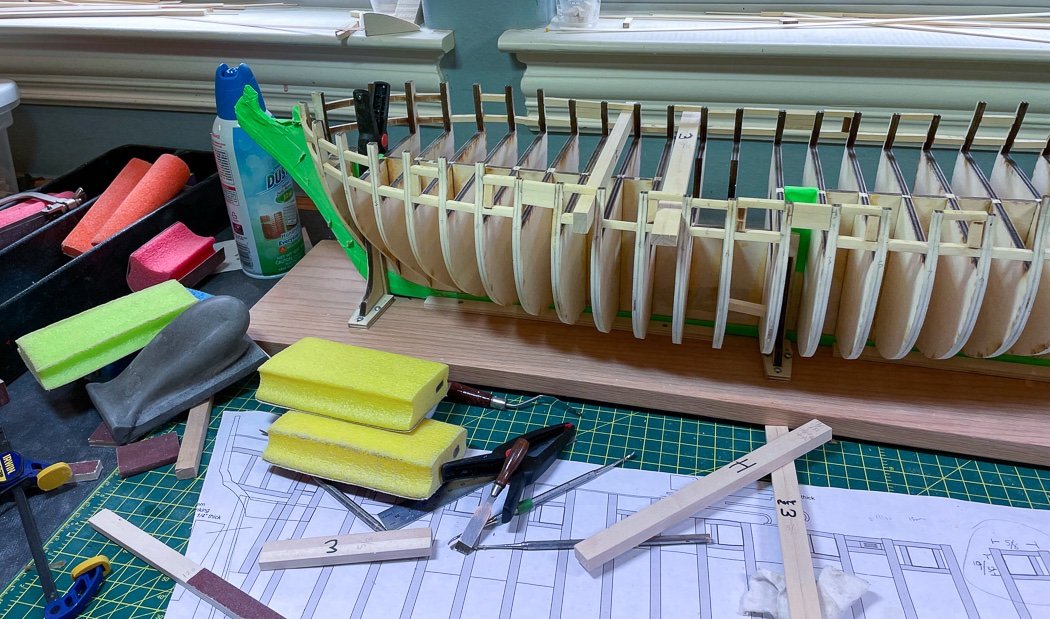
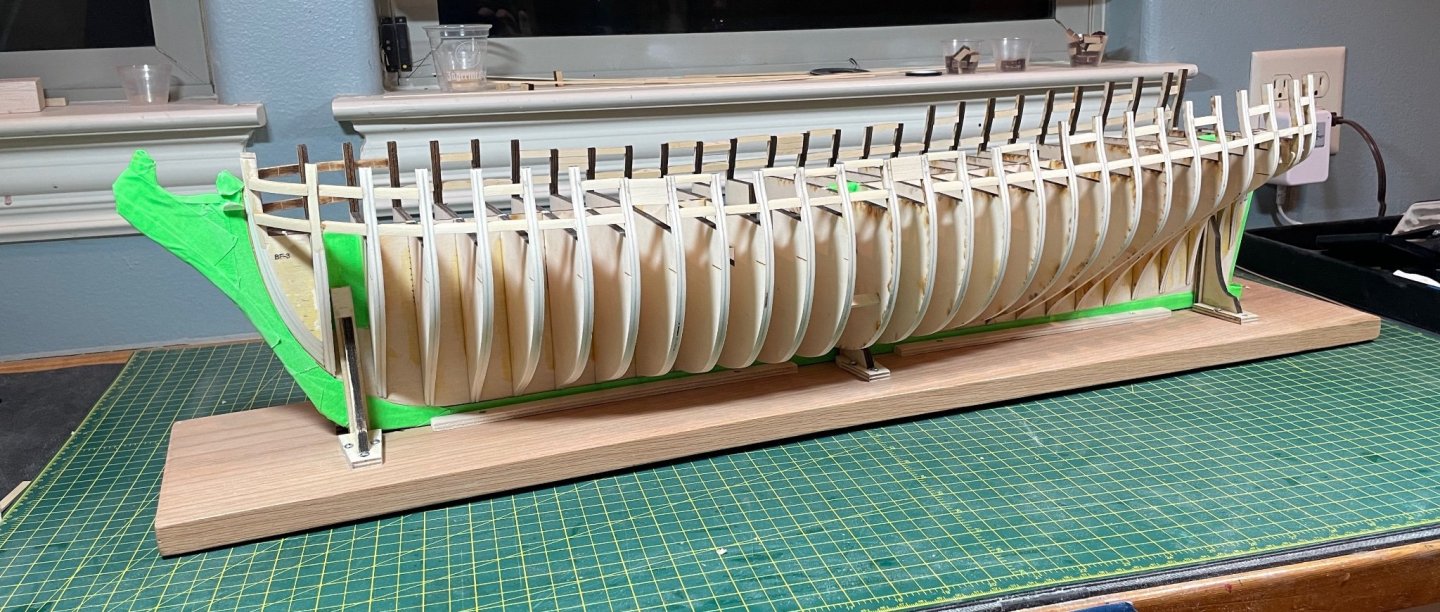
The Sills It’s taken me a long while to finish the sills. There is a lot of work involved, as other I'm sure Winchelsea builders know. For half a moment I was wishing for a nice gunport pattern to bend on, but then I wouldn’t have had nearly as much fun. My Veritas Chisels played a big role in the process, so happy I acquired these. Even happier I learned how to properly sharpen them with the Kell Sharpener (thanks again @DelF for both). Someone asked how small of a chisel it would hold, here it is with my 1/8 chisel. With the cut angle set by the distance from the roller (½ inch for 30 degrees) and my sandpaper sharpening tile setup I get them nice and sharp. I tuned them up in preparation for this task. Invaluable in determining the many tricky angles involved is this inexpensive ,if a bit over-sized, angle finder. To precisely fit the sills the cross cut table on my Byrnes saw and the ability to both tilt the table and set the mitre guide of the Byrnes Sander proved equally invaluable. As a side note I’ve had both Byrnes tools for over 10 years, I had the first problem ever, likely one I caused. I was unable to adjust the drum distance to and away from the table, it had locked in place. I called Jim Byrnes, he explained to me how to pull the sanding drum, file the spindle, and add the right grease. It took me less than an hour and I was back in business with the sander quieter than ever. The machining and precision of these tools is simply amazing along with the exceptional customer service that goes with them, they are worth every penny. Rounding out the tools for this job are spacers I cut to fit the width and height of the ports, that plus a couple of bubble levels and off I went to build out 28 identical ports. First were the sills and mantles both port and starboard, keeping both sides level and maintaining my line to conform with the sheer of the eventual deck. I stayed with the Titebond III, it really is stronger than the wood once cured. Per the monograph I included supports between bulkheads for extra strength, marked with a X so I didn’t obsess about their angles. Then on to the port sides and more angles to sort out. It’s a slow process process but one made more accurate and easier with these tools. I need all the help I can get. Even with the right tools and a patient pace thank goodness for denatured alcohol. I’ve taken off various sills and sides only to reposition them for a millimeter or two difference. I could likely ignore and work past these small alignment errors, but while an omission now might never be noticed it might instead compound and multiply as the build progresses. I have to do what I can where I can to fix stuff, and I make enough mistakes to have stuff to fix. It all that wasn’t enough fun, then it was time to cut away two bulkhead uprights to make room for the forward two ports. It was a little bit frightening in concept, but by going slow and having the port sides ready to go in advance it turned out to be fairly easy (a little more fairing to do). With almost three weeks spent on fairing and and cutting, aligning, and installing ports I’m finally ready to move on to the no less challenging task of installing the stern. I won’t get much build time over the next two weeks with family around, so Merry Christmas to all.
- 840 replies
-
- 14
-

-
- winchelsea
- Syren Ship Model Company
- (and 1 more)
-
I used the crafty sailor belaying pins as quoins, the do work well. It’s a long way off for me but I’m thinking just breach ropes and on the ships wheel as the only rope on mine. But who knows… I like the natural wheels, lots of char removal, so fun.
- 642 replies
-
- 2
-
-
- winchelsea
- Syren Ship Model Company
- (and 1 more)
-
You could start on the boom crutches, and the heads. Hope you aren’t gone long.
-
You can do a nice job painting the ones that came with the kit, mine didn’t need boring and the end result isn’t mediocre, it is consistent with the rest of the average starter kit this is. The other option is buy new wood carriages and resin barrels and replace them entirely. They are 4 pounders, I’d bet Vanguard has them. Pin vises in several sizes are essential tools. Power drills or rotary tools are hard to control at this scale, hand drilling yields the most accurate result. I would in any case drill these little things. I think they are bronze, not brass, any drilling may cause them to split.
-
You have all the cool tools😆
-
Your transom and stem paintwork is outstanding. So many make a mess of this, it takes patience, very small brushes, and many touch ups to get it right. Well done!
- 345 replies
-
- 2
-

-
-
- Duchess Of Kingston
- Vanguard Models
- (and 1 more)
-
Looks more like my high school shop class, scary how big all that stuff was then.
-
I believe the period after the name is accurate but I’m curious as to why there is one🧐
- 857 replies
-
- 1
-
-
- Sphinx
- Vanguard Models
- (and 1 more)
-
I wonder about the durability and longevity of this as glue, it seems almost too good to be true?
-
I doubt I’ll ever soak anything again, heat is the way to go. Nice recovery from the soaking problem. I like the window experiments, I could see myself dropping the frame and it disappearing to the bottom of the can.
- 345 replies
-
- 1
-
-
- Duchess Of Kingston
- Vanguard Models
- (and 1 more)
-
Thanks for providing the drill bit sizes, that is very helpful. Since you’re in a rhythm want to double the amount 🤣😁
- 642 replies
-
- 1
-

-
- winchelsea
- Syren Ship Model Company
- (and 1 more)
-
We’re not talking the future of investing here, it’s just the cost of a model. No reason to overthink it, deep thoughts not necessary. The Vanguard line represents the latest in kit design, Caldercraft (I’ve built several) hasn’t done anything new In decades. I’d choose what you can afford from the Vanguard line and have it on hand. The Lady Nelson took me less than three months to build, you’ll be ready for the next one in no time. With a few kits under your built I’d then recommend HM Cheerful from Syren, it’s a real challenge and a beautiful finished model, the kits will give you the skills to build it later, it would be frustrating to go there next though. Take the time to get comfortable with building laser cut parts before making them yourself. One thing though, how ever many tools you have now there are so many other cool tools out there to be had. Save some money for those.
-
Great work! Did you use the fruitwood gel on the decorations, how did you apply it?
- 399 replies
-
- 2
-
-
- winchelsea
- Syren Ship Model Company
- (and 1 more)
-
Glue suggestion for connection
glbarlow replied to Koopyetz's topic in Modeling tools and Workshop Equipment
Titebond needs to be clamped for at least 20 minutes and cure overnight, once it sets it wont pop loose, it’s stronger than the wood at that point m However I do all my planking with Smith Industries Medium CA. It sets in 20 seconds but should also be clamped or held fast at the stem. of you didn’t pre-bend the wood it will be more inclined to spring back Now there will be 10 contrary opinions -
Wish you the best n your recovery, both the model and your post op.
- 505 replies
-
- 8
-
-
- vanguard models
- Sphinx
- (and 1 more)
-
Making progress, building the frame is a chore, a fun chore, but a chore. Going slow is easy, there is no fast.
- 840 replies
-
- 13
-
-
- winchelsea
- Syren Ship Model Company
- (and 1 more)
-
I may be mistaken, it looks like you can only turn to port. Shouldn’t the rope come up from below, wrap around the wheel then go back down below on the opposite side? Looks you only have it coming up one side. Again I don’t know what a spanshackle is so…😳
- 542 replies
-
- 3
-
-
- Sphinx
- Vanguard Models
- (and 3 more)
-
It really looks great Rusty, I hope I can get anywhere near your level of craftsmanship.
- 642 replies
-
- 2
-
-
- winchelsea
- Syren Ship Model Company
- (and 1 more)
