-
Posts
4,097 -
Joined
-
Last visited
Content Type
Profiles
Forums
Gallery
Events
Everything posted by glbarlow
-
Thanks for the comments Derek, always appreciated. Absolutely! The assorted shapes and adhesive sandpaper in multiple grits are a game changer for me probably especially for the second planking. I just have to watch I don’t take too much. Very easy to use and there is a shape for every curve. Highly recommend. The laser etched deck is fine for this model as I’d guess it is for the duchess. The maple has a nice color.
-
Always a good practice many of us follow to move up a couple from the bottom then meet those coming down. As my UK Glenn friend notes, it allows for any corrections on the area of the hull that won't be seen once mounted. and as he also notes It also allows the garboard to more easily set the distance between wales and keel for planking widths.
-
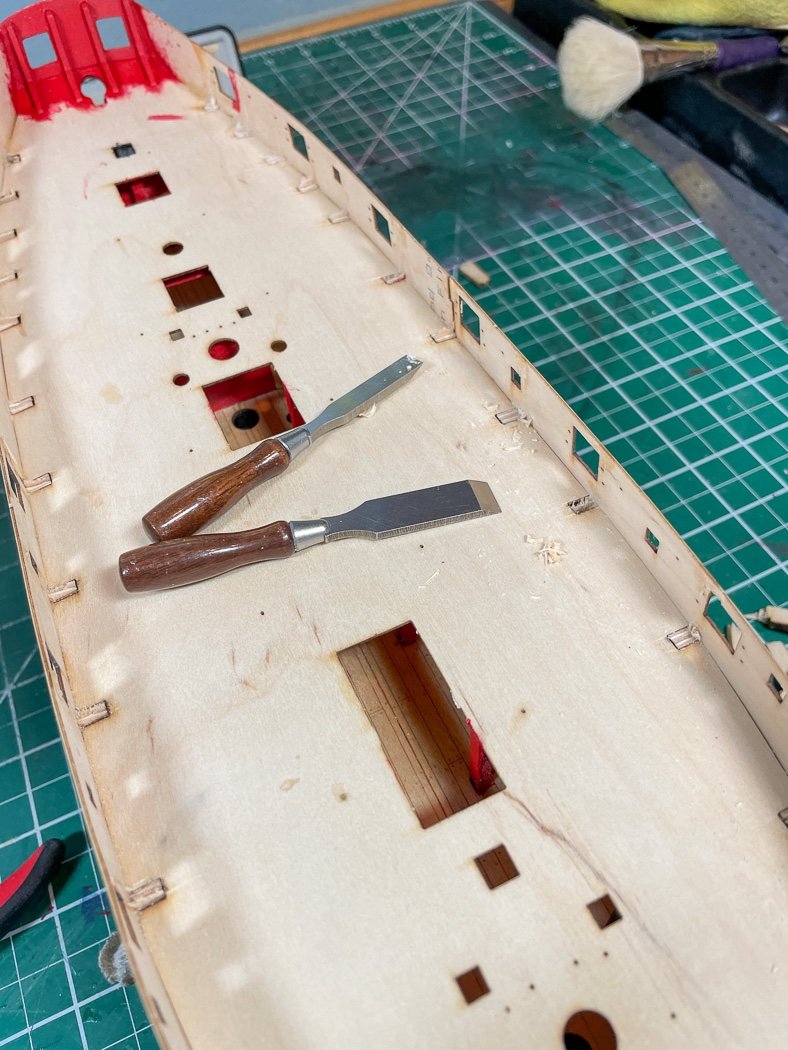
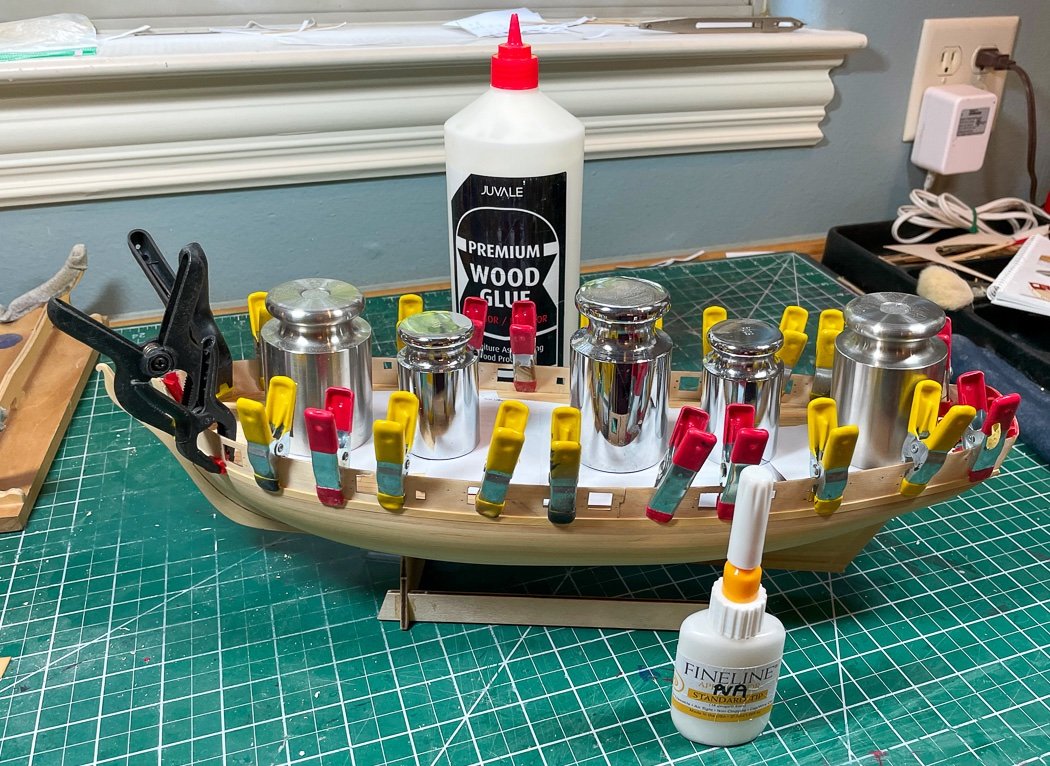
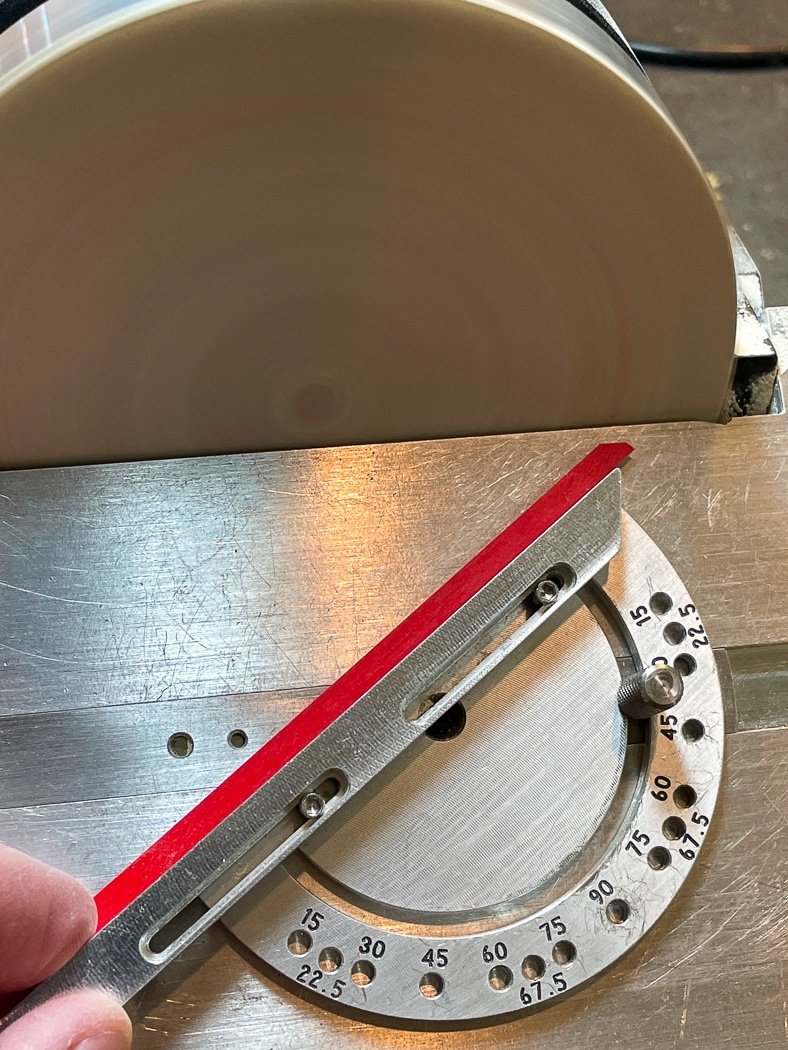
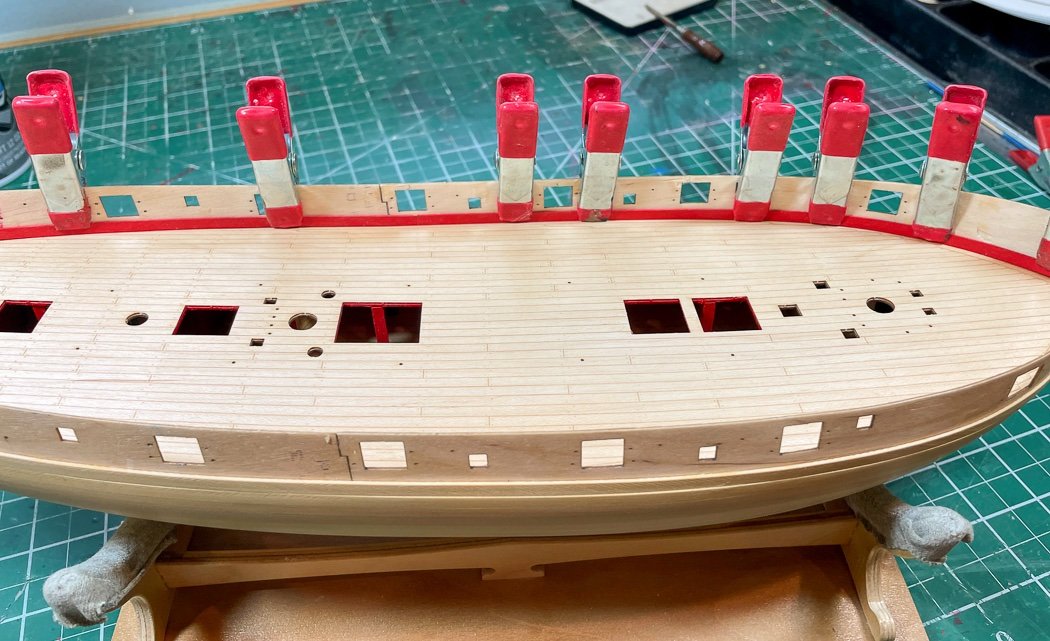
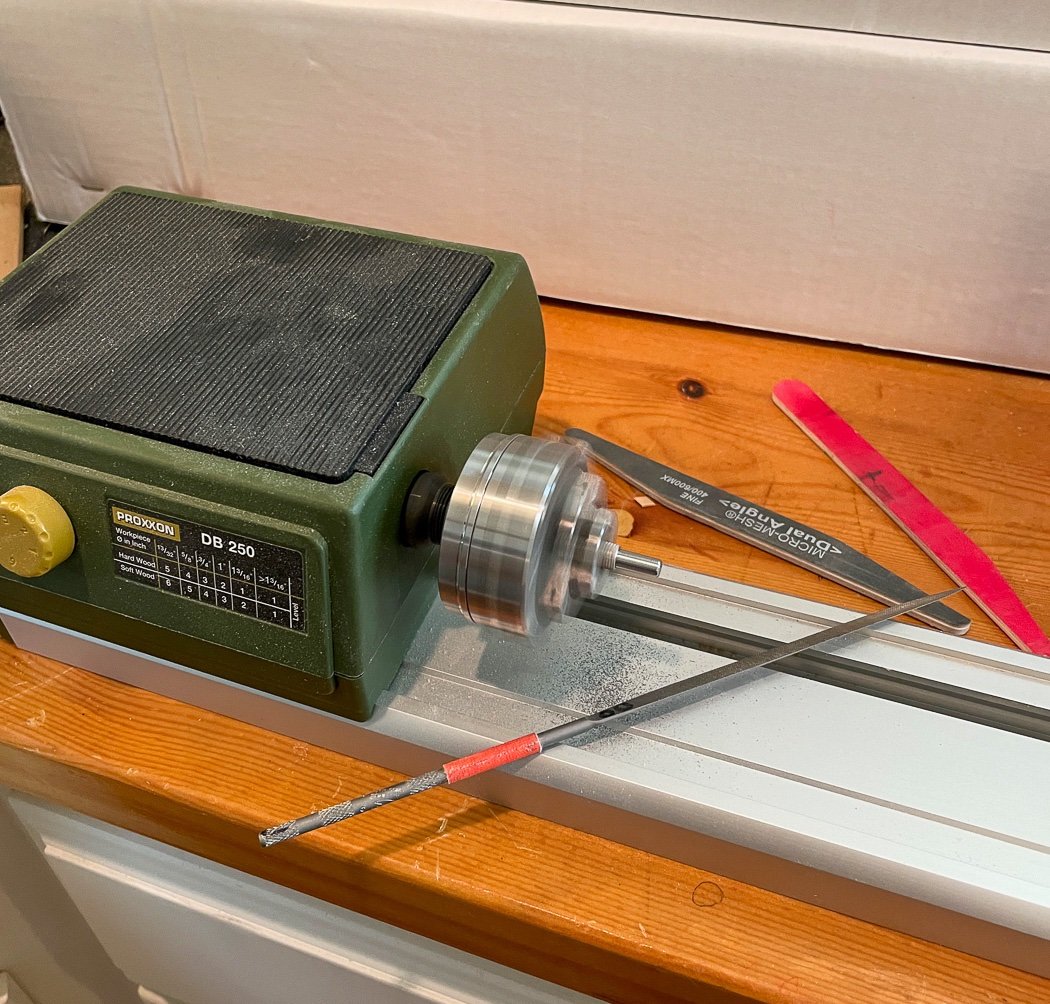
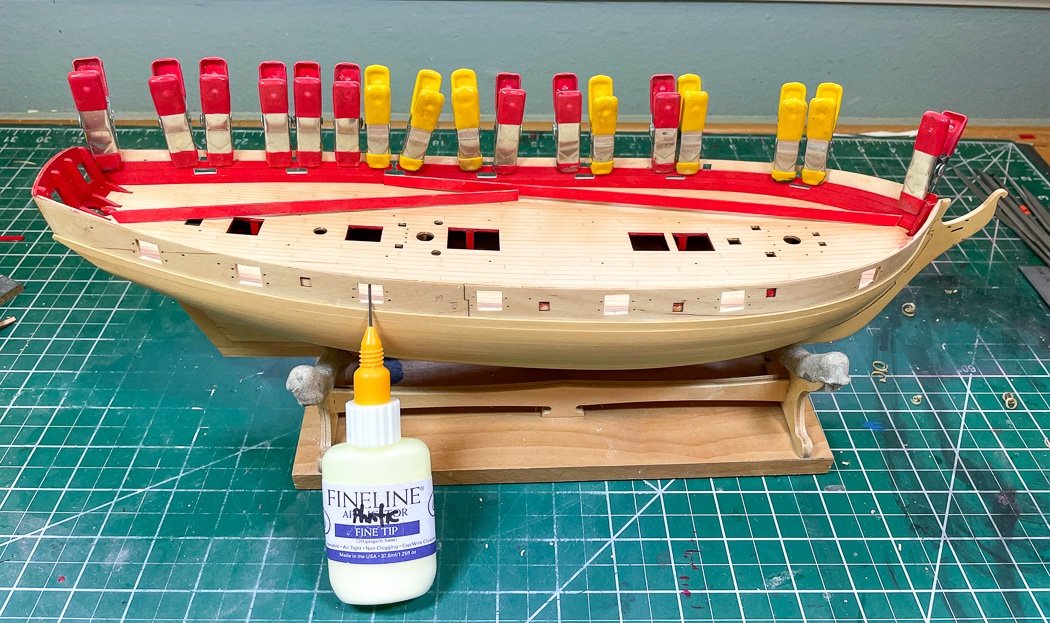
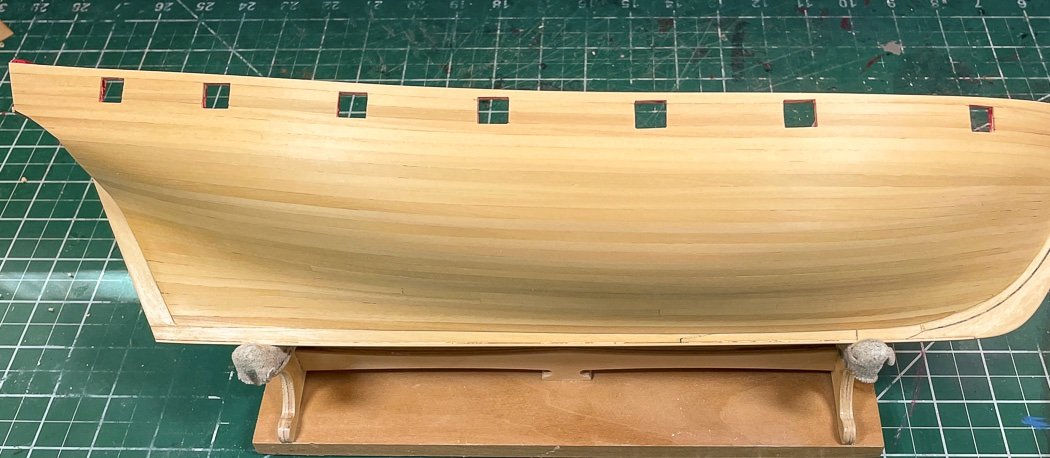
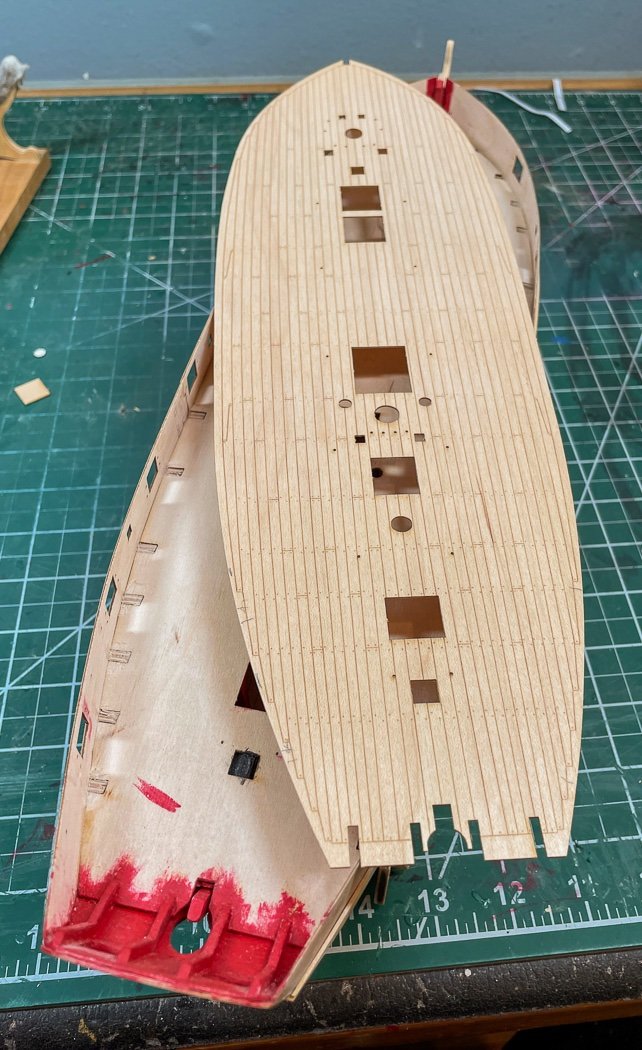
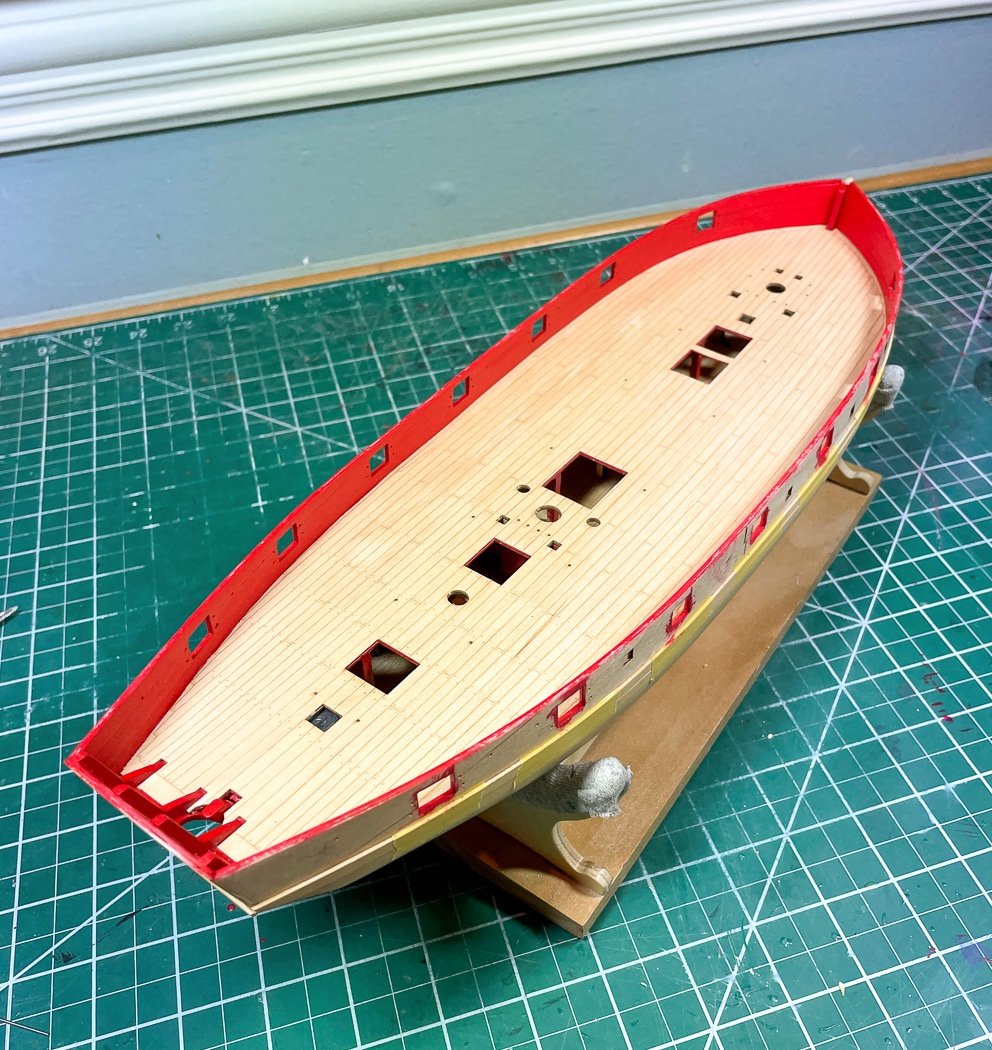
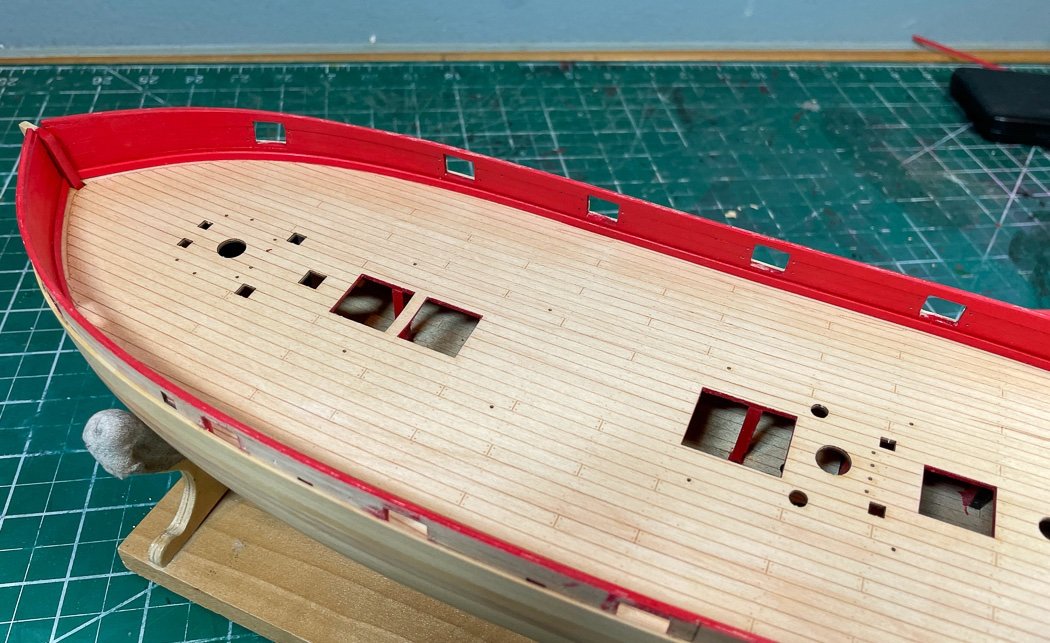
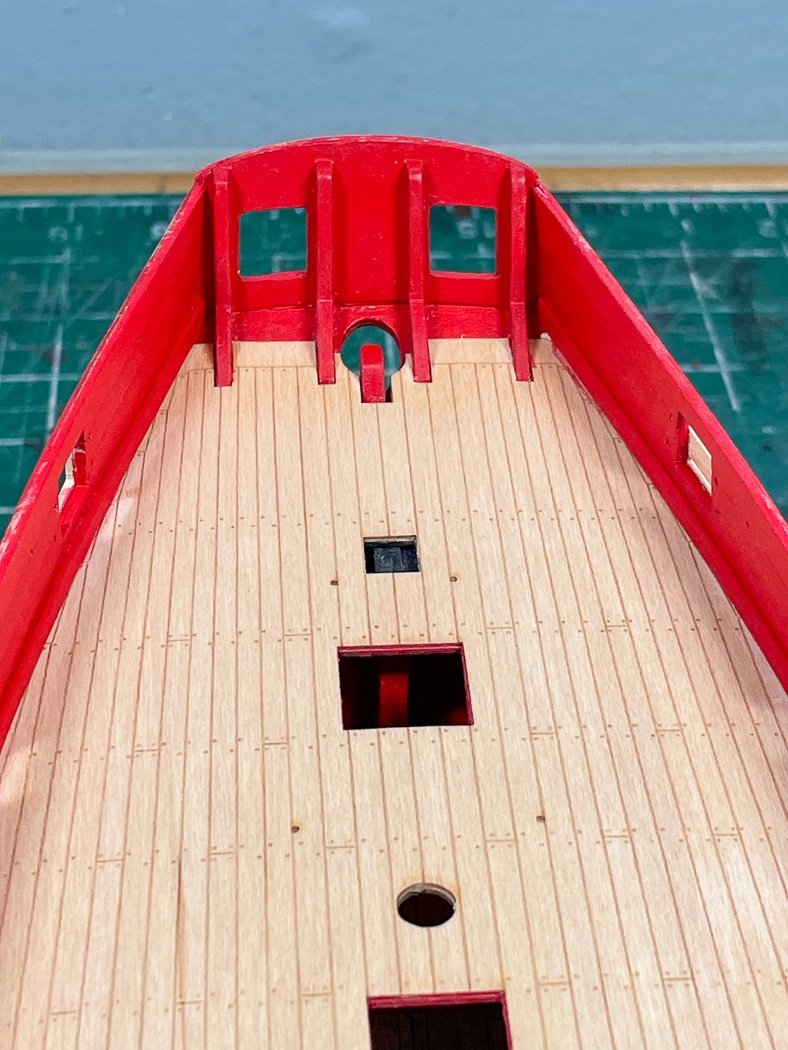
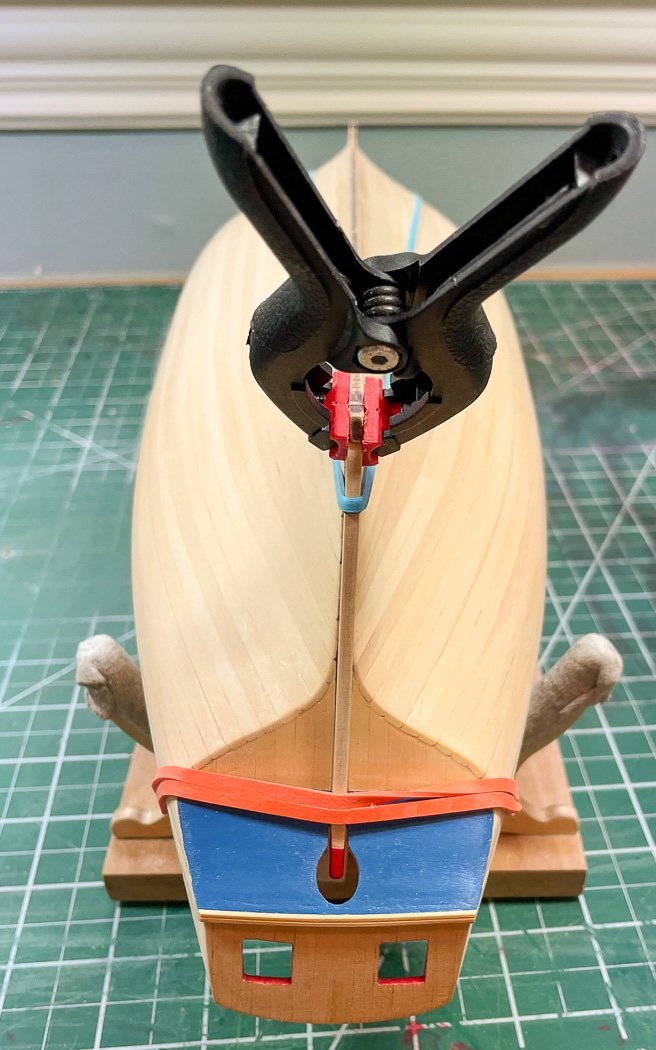
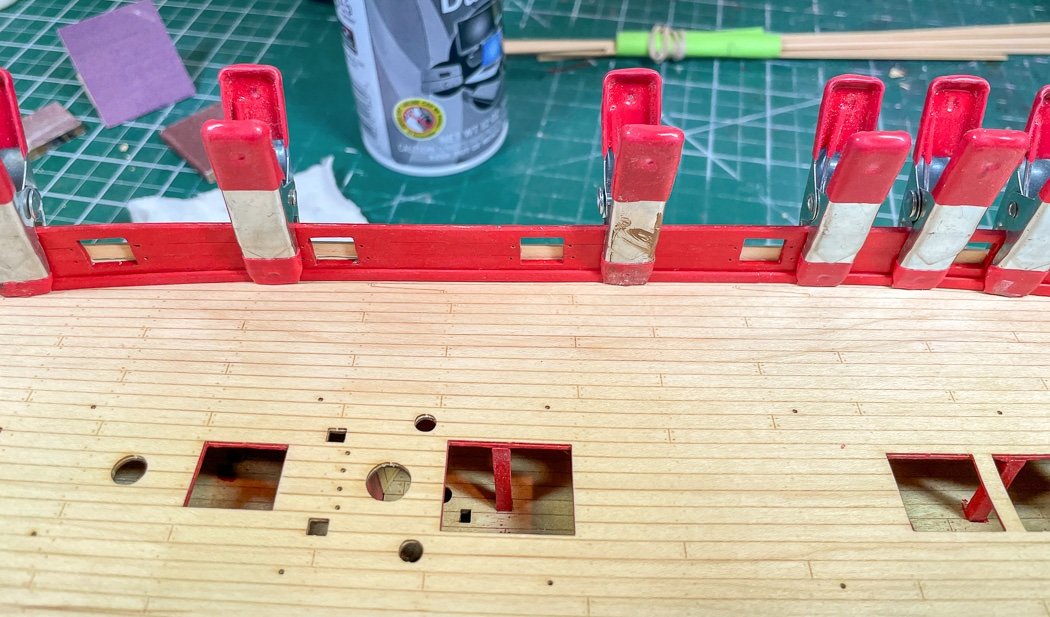
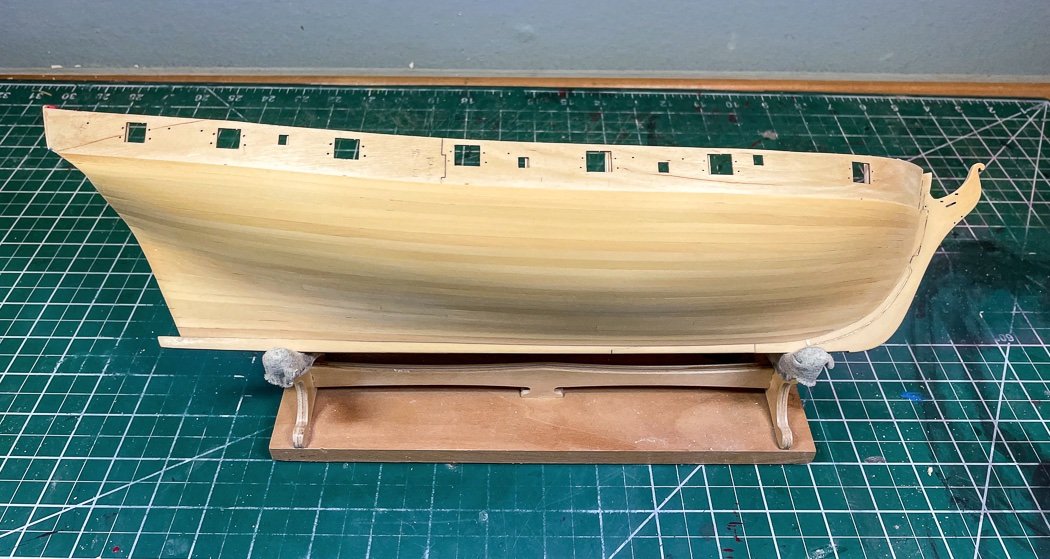
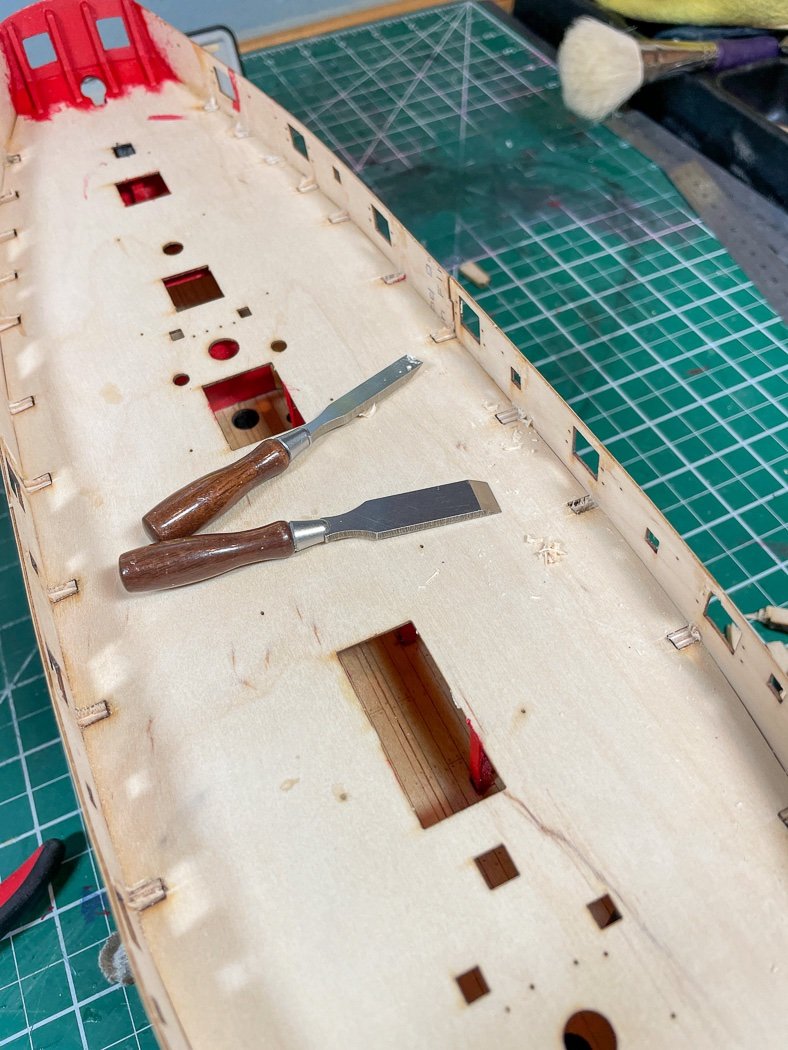
Planking Continues Work on the hull continues, not super exciting stuff but progress nonetheless. With the adjoining planking completed and after lots, and lots, of test fitting, adjustments, and sanding it was time to mount the stern post. This is something that seems so simple but getting a good fit takes time and patience along with a light touch with the sanding tools. Time to break off those bulkhead tabs on the deck. I mentioned at the beginning I lightly score these with razor saw on two sides before planking begins. It isn’t completely necessary but helps for a cleaner break which I completed with small pliers. Then back to my ever handy and now always sharp Veritas mini-chisels for cleanup. I committed to using @chris watton laser etched deck on this model and so I did. I’ve planked plenty of decks, this time I chose the nice maple deck Chris provides with the kit. I know all the debate about “real planking” and normally I agree, in this case though after 3 coats of WOP with light 400 grit sanding between I’m quite satisfied with the look. I think Chris heard us on earlier versions and made this one simpler without a lot of extra stuff, just planks in a proper shift pattern. I had to do some minor edge sanding for a fit, which is good, I’d rather it be slightly large than even a little bit too small. Some white PVA glue, some clamps, some weights, deck complete. Note I’m a new advocate for @Delf Fineline applicators though I prefer the standard 18 gauge tip. I now have one for PVA and one for Super ‘Phatic glue. There is a rule of modeling, whenever you think you have enough clamps, buy more clamps. One more advertisement for the Byrnes Sander. Shaping tight fits for the bulwarks planking is so much easier with the tilting table for various beveling (actual bevels, or maybe they’re chamfered who knows) and the miter gauge for angles. Side note: The tilt table pin on my sander has always been a bit of a rough fit, I was changing it so often during the bulwark planking I said to myself, self you have a lathe, use it. So I put the pin in the lathe, grabbed a file and some sanding sticks and a few spins later I had a nice smooth easy to insert pin. Why did I wait so long to do this. I pre-painted the bulwark planking. Turns out that was a silly thing to do other than for the bottom most plank. Once I finished it I ended up sanding most of it off and painting it again. There are no short cuts. I did want a “rougher” fit for these planks to show a little definition between them. Unlike my obsessive need for a smooth hull, I wanted the bulwark to stand proud here and there for affect. Most know I’m a CA advocate, but as I noted in my Cheerful log I use the glue I think best for the job. I like all of them, Titebond, White PVA, CA and here I chose Super ‘Phatic for the bulwark planking along with lots and lots of clamps. It is quicker setting the PVA, but not so quick that I can’t make and adjustment or two before clamping it down. I was concerned at one point about the holding power of 'Phatic when used ona cleat on Cheerful came loose with a rope attached, so I glued two pieces of wood together with each glue to see which was stronger or weaker. After letting them dry overnight I tried pulling each apart...and failed to do so on all of them short of splitting the wood itself. They all work fine. For whatever reason on my model four of the included planks were not enough to cover the bulwarks, five would result in a narrow strip at the top once cut to meet the top edge. So out came the 6mm stock, it was a near perfect fit at the top as the fourth row and it happens to be a nice look. Though not included with the kit or in the instructions I chose to add spirketting by rounding off a strip of 3mm strip and adding it to the base of the bulwark planking. I think it makes for a cleaner look mating the deck to the bulwarks. I could have also used a 4mm strip, but the 3mm fit cleanly beneath all the gun ports so I went with it. I did pass on also adding a strip for waterway, I thought that might push the small Flirt cannon back too far. Chris' design includes drilled holes on the gunport pattern, so before put-on on the top rows on the outside and after the bulwarks are done I drilled all the gun tackle pin holes from the outside in...now that was handy... With that the deck and bulwarks are complete. I really like my Crimson Red, don’t care how “accurate” it may be, it looks bright and sharp and will adorn the decks of the Winchelsea in the future. There are some light spots on the deck where I had to scrape off some careless paint brush strokes. The nice thing about having three coats of WOP is that’s what I’m scraping off, not the wood. It’s been since touched up again. You might note the pillars, beams, and openings below the main deck have all been painted red as well. I’m hoping I can leave a hatch or two open enough to get just a glimpse below, nothing elaborate, just a sense of dimension. It is my opinion…this stern shot shows that the laser etched maple deck, while not true planking, is an excellent choice and looks quite nice installed. I recall how hard (and how proud) I worked on Cheerful’s intricate curved planking and finely cut margin planks. With all that’s now on that deck between furniture, guns, ropes I can barely see all that work. Of course “I know it’s there” is important and I wouldn’t do anything different on Cheerful but for this model and for those of us that may need a break from planking the etched maple deck @chris watton provides is an excellent choice, realistic enough to pass my muster. With the deck and bulwarks finished I completed the hull planking above the wales. My next task is to touch up the gun ports, I wanted to have a dry coat of WOP on the hull first. Note the stern post and the strip for the false keel (I think that’s what its called) are in place. I did my best to match up the best strips of boxwood, the WOP though seems to find a whole other color in some of the strips. Though it seems no two planks are the same shade It’s still a nice warm look of and definitely has grown on me. I plan to follow the paint scheme and hull ornamentation provided with the kit so this might be the last clean look at the hull I’ll have. As always thank you for following the build and for your likes and comments. They are always appreciated.
-
You’ll definitely have to sort out the keel back to square. I’m not sure what to suggest, but it won’t work as it is. Maybe running the first planking out and gluing the insides together after attaching the keel?
- 20 replies
-
- Amati
- lady nelson
-
(and 1 more)
Tagged with:
-
This Proxxon at $398 vs the real deal Byrnes saw at $475 does seem like much of a price difference. Whatever it costs anything other than the Byrnes saw is settling for second best.
-
An architect at work, one bold move after another!
- 857 replies
-
- Sphinx
- Vanguard Models
-
(and 1 more)
Tagged with:
-
Well done, such nice lines with the planking.
- 399 replies
-
- winchelsea
- Syren Ship Model Company
-
(and 1 more)
Tagged with:
-
Your bearding line is fine, it can be half that following the same curve you’ve drawn. Don’t overthink it, it’s only purpose as far as this model goes is for the frame and finished two layers of planking be equal to the width of the stern post. That’s accomplished by thinning this deadwood area, not covering it with the first planking, or a combination of both. Just need to plan that out.
- 20 replies
-
- Amati
- lady nelson
-
(and 1 more)
Tagged with:
-
Very interesting approach and your usual thorough description, I don’t think I could manage the tools to taper that way, very skillful. No doubt you’ll end up with a wonderful planking. I appreciate the description of the garboard, I always struggle with it. I hope the SI CA continues to work for you. Well done!
- 345 replies
-
- Duchess Of Kingston
- Vanguard Models
-
(and 1 more)
Tagged with:
-
Enjoying the creative approach, it will be fun to watch it unfold.
- 857 replies
-
- Sphinx
- Vanguard Models
-
(and 1 more)
Tagged with:
-
I believe the shoulders on the mast should be thinner and flatter per the plans, but it's your model. Nice work on the stop and chocks - it's hard getting all that stuff to line up right, well done.
- 274 replies
-
- Cheerful
- Syren Ship Model Company
-
(and 1 more)
Tagged with:
-
Well done, congratulations! No need to fear rigging Flirt, other than ratlines rigging is a favorite part for me. The complexity is fun, just start inside out and bottom up. Don’t do final tension and fix lines until most all are installed and don’t over tighten, a little slack is fine. My favorite rigging too is taking a 6-8 inch pencil size wooden dowel, cutting off the threading end of a large sewing needle, filing or sanding the rough edge smooth and gluing the pointed end into the dowel. The resulting open V allows me to ‘push’ ropes about, especially handy when attaching rope to belaying pins. Look forward to seeing your next build.
- 41 replies
-
- artesania latina
- dallas
-
(and 1 more)
Tagged with:
-
Well, that’s sort of lining the hull😊. I enjoy seeing our different planking styles and how both come out looking great. Also, I’m looking for misspelled words🤣😂.
- 345 replies
-
- Duchess Of Kingston
- Vanguard Models
-
(and 1 more)
Tagged with:
-
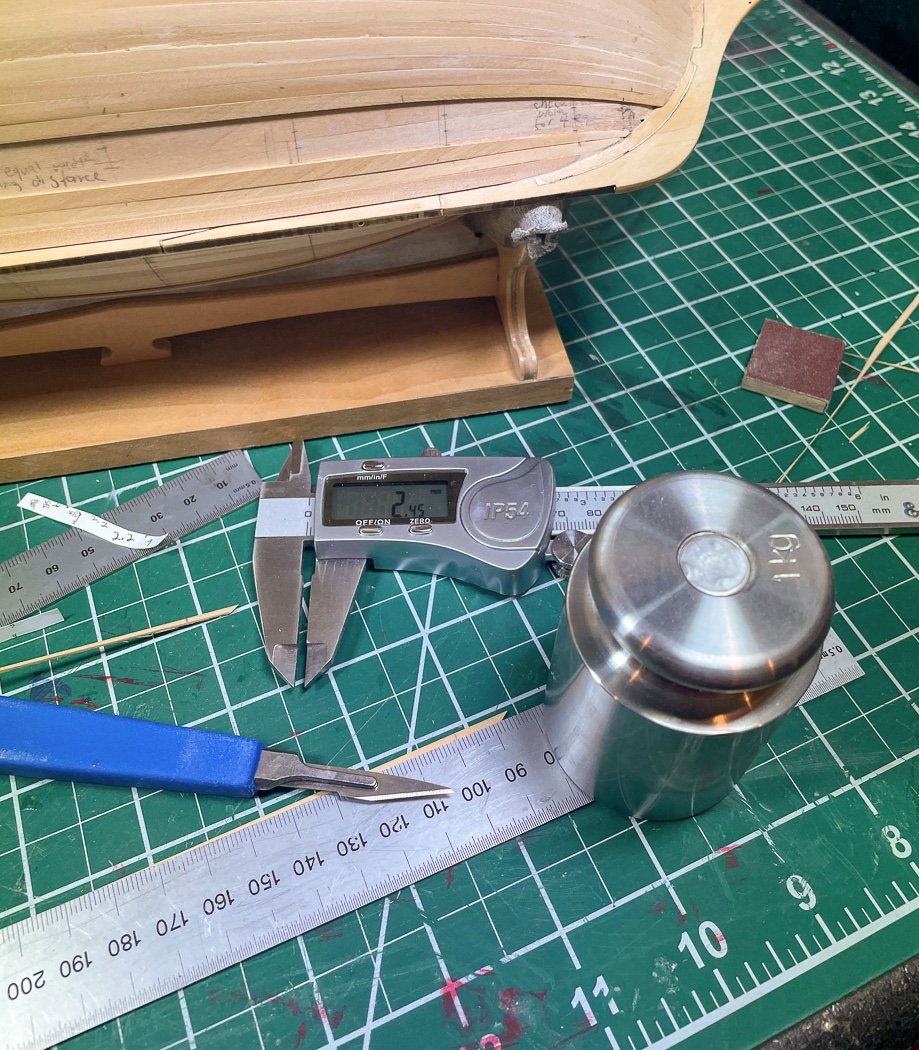
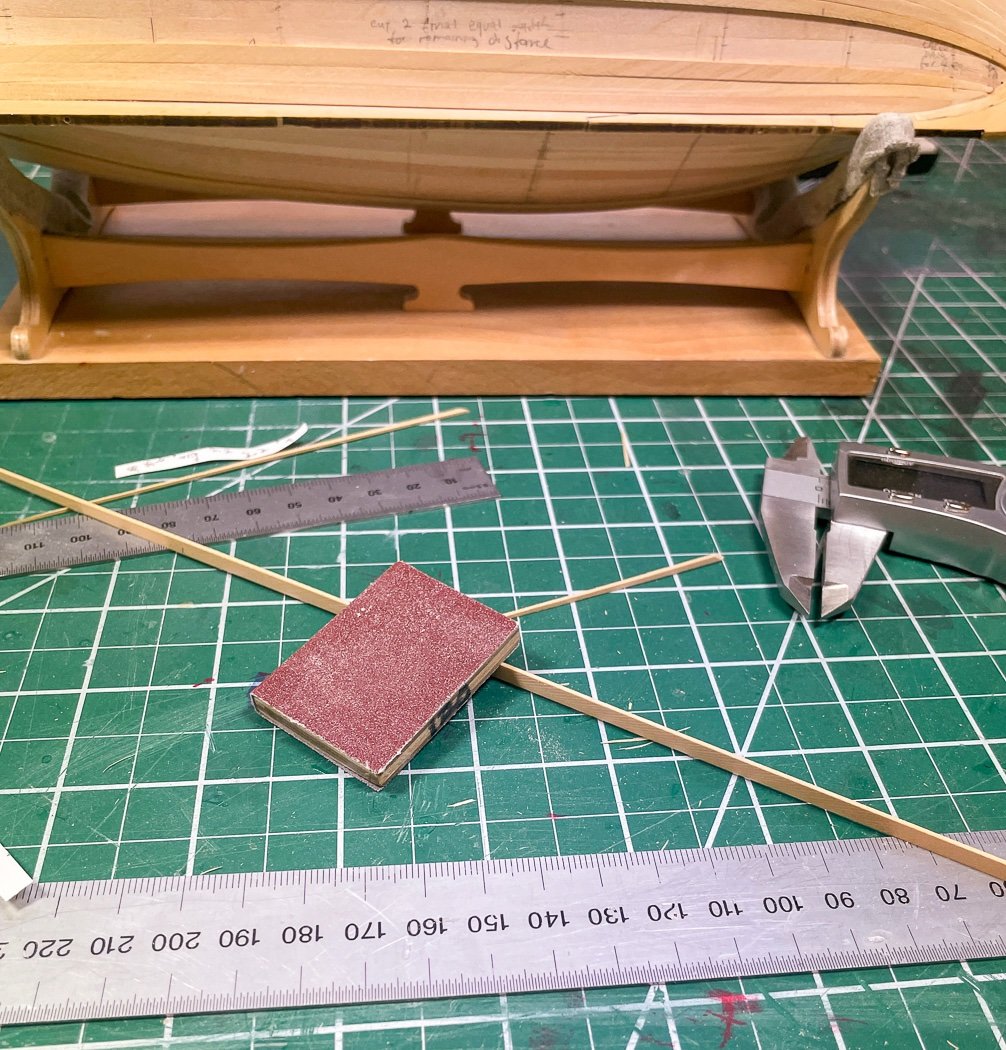
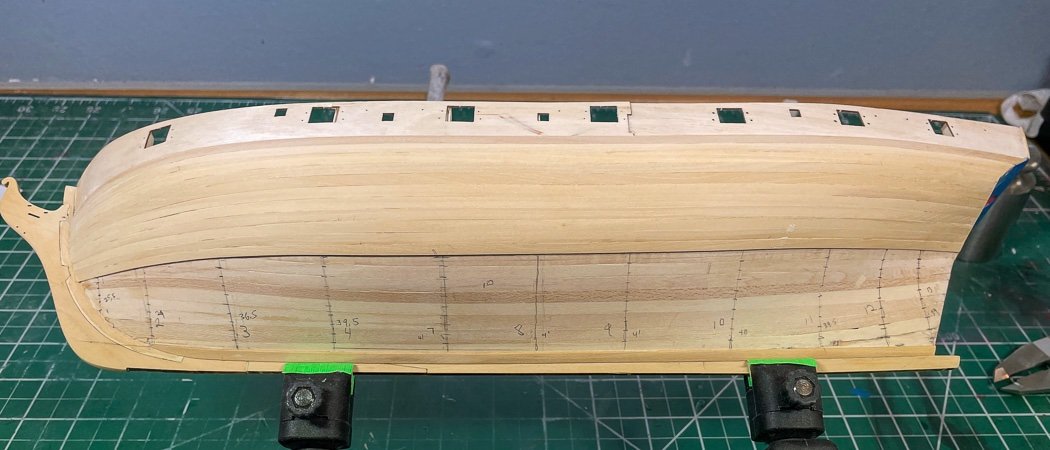
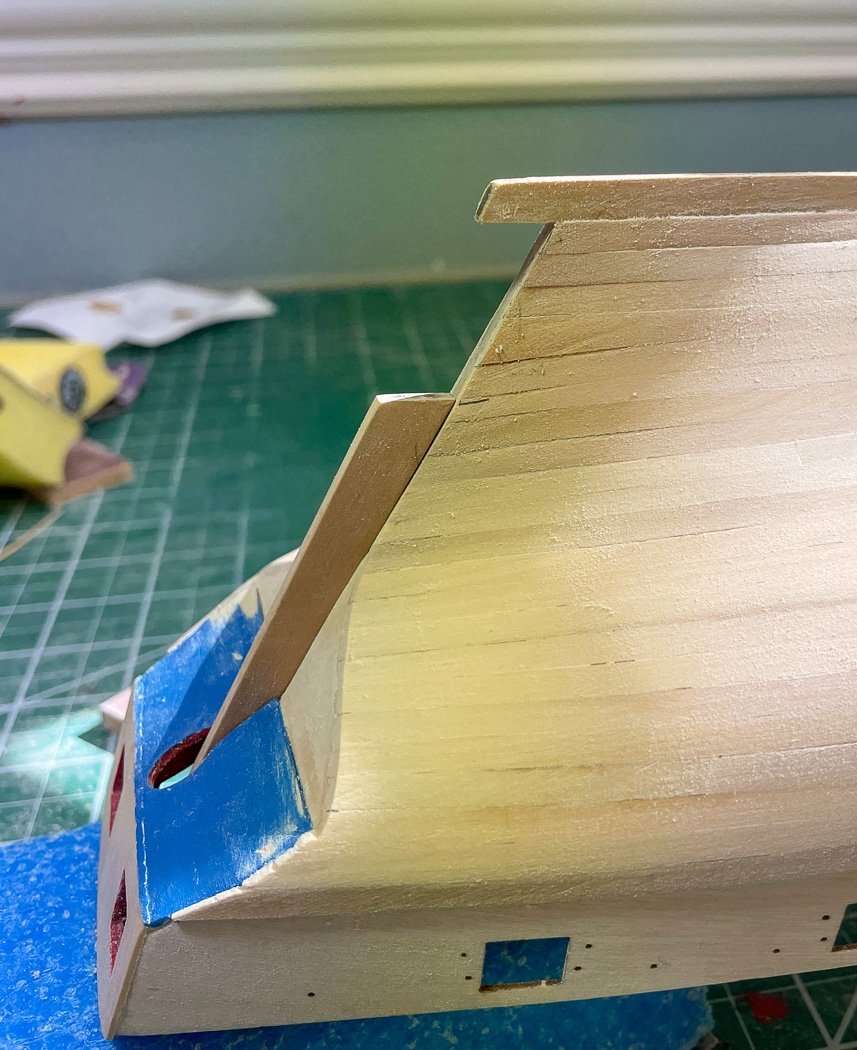
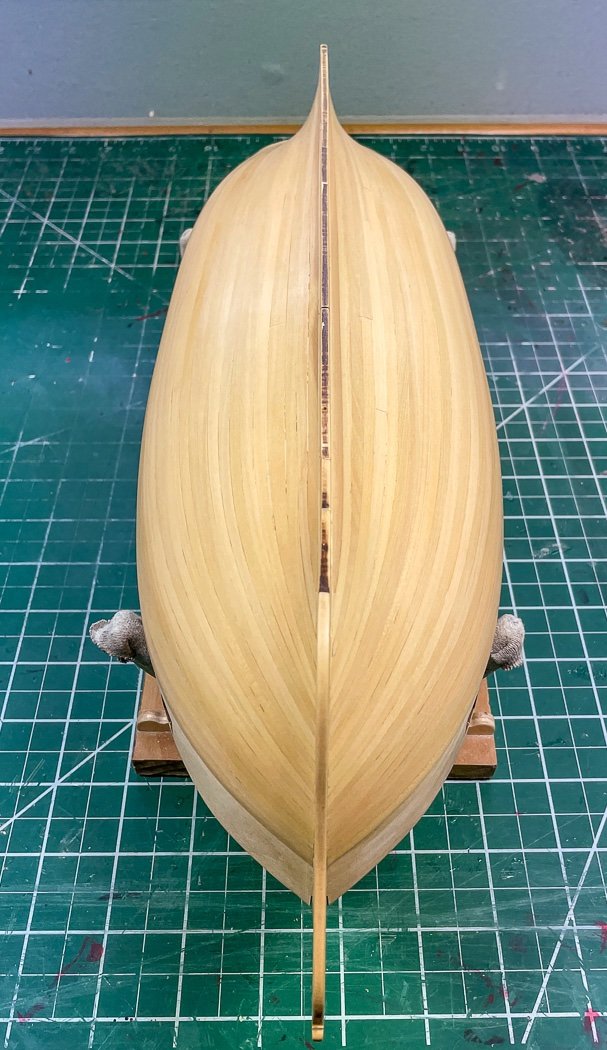
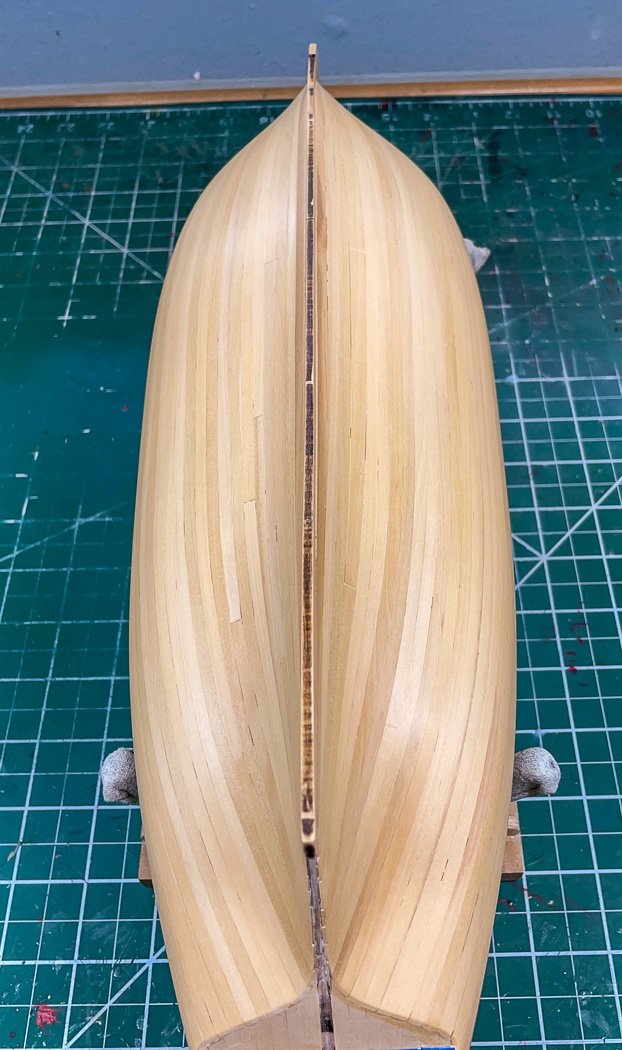
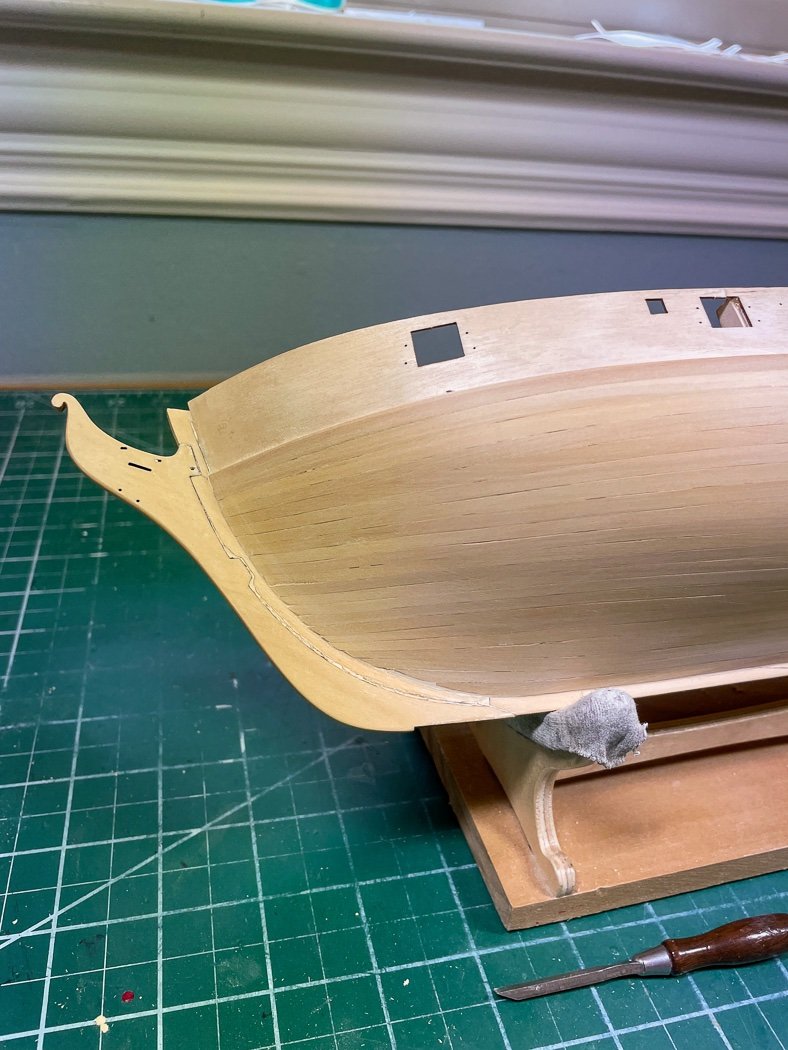
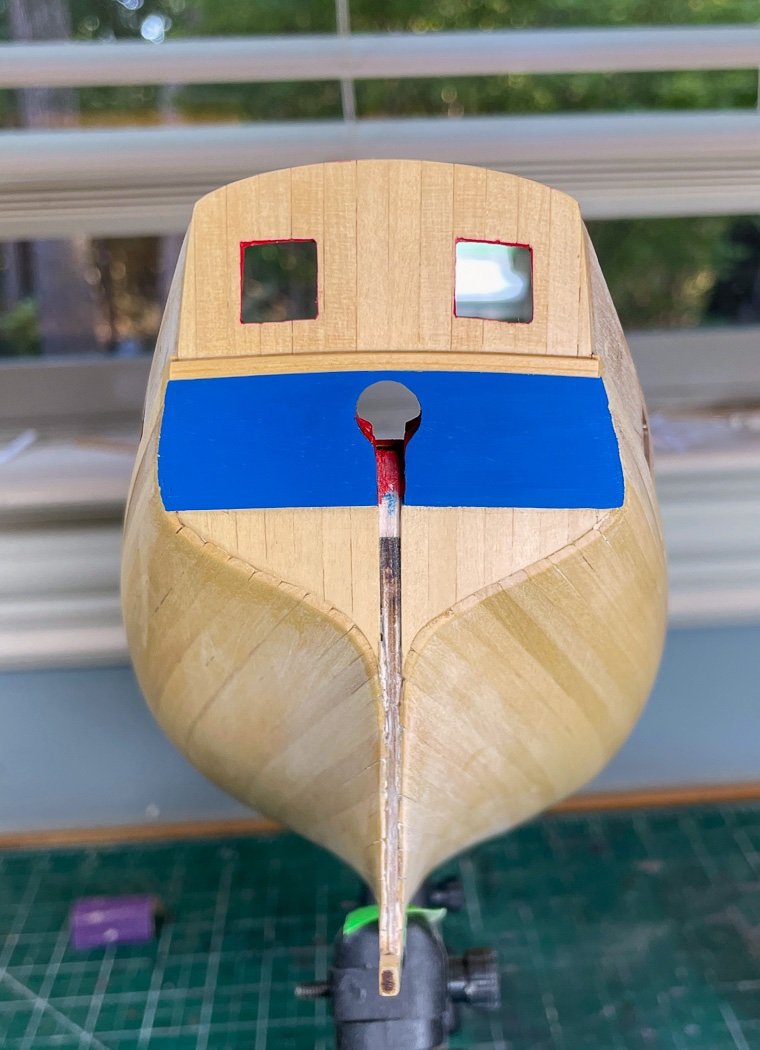
2nd Planking - Part 2 I thought I’d provide a bit more detail than just the one photo in the prior post regarding the second planking. I’ve written about lining the hull earlier in this log and in my Cheerful build. I’m not sure how I ever planked a hull without doing this, along with hot iron plank bending. I proved the point to myself again with the starboard side of Flirt. I figured I only needed to line forward of midships and run full width planks to the stern. That sorta worked but as it turns out it gets narrow at the 2nd and 3rd to last bulkhead and then flares out at the sternpost, at least on my hull, so I ended up doing some patch work on the underside. That’s fine on a hull I’ll later paint white, not so fine on my next project. Winging it doesn’t work out well when you’re single planking an unpainted hull. So on the port I completely lined the hull as I should have in the first place - the run of the planks is better than the angle shown in this photo - I’ll show you from the side in a minute. While I realize I’m fully in broken record mode I encourage everyone to learn and take the time to follow this method, even if you want to nail and clamp with PVA and heaven forbid soak your planks, you still need to know the right plank widths. I probably still don’t do it as well as I should, but I feel better getting one gold star as a Lining Evangelist. Lots of ways to achieve those plank widths, mine involve digital calipers (to transfer widths from the planking fan and tick strips to the wood) a scalpel and a metal rule. Mark the planks, lay the rule over the plank, and cut with the scalpel (or any #11 blade). I had a little difficulty keeping the rule from sliding off the boxwood during the cut. That may be because I was working with three fingers on the holding hand, having sliced my index finger when the wood slipped (sliced, not cut off, I’m fine thanks for asking 🙂 ). So the 1 KG weight came in handy to keep things were they were supposed to be. Bevel or chamfer has come up a couple of times on other logs, with diagrams and everything. Personally I thought the terms were interchangeable but I guess technically they aren’t. I plan to keep using the word bevel because chamfer is just a weird word. So what do I do - really neither after I read the definitions. After I taper and before I bend I bevel. See, I used bevel, because that is a fun sentence. The objective is a tight fit between planks. With proper beveling, oops, I mean edge softening and plank bending at my bending station (I won’t repeat all that part) I can get a tight fit. I use one of my little home made sanding blocks with 150 grit and knock the corner off the top inside edge of each plank, only the top. How much - well its a feel thing. Basically I just round off the edge and that’s enough, on tighter bends I may need a little more. Almost always I need more at the twist of the plank at the stern. The thing is to not get carried away, which is why neither the strict definition of bevel or chamfer really applies. After these planks are glued down they will be sanded heavily - if too much of the edge is removed or there is too great an angle I’d sand right to the frame between every plank. So I think of it more as turning an edge to a curb, or a hard edge to a soft shoulder. Anyway that’s what I do. I never edge glue, doing what I described makes that very unnecessary, especially for us CA planking guys. I hope that helps those that have asked and got a laugh from those that didn’t - why did he write so much on that topic, because that’s what I do. I don’t have a second planking photo of this. For both the first and second planking I shape for the stern post as I go. Much easier to do it a couple of planks at a time than trying to figure out at the end which one plank is screwing up the fit. This, as we all know, is a task that seems should be simple, but making the post fit involves a lot of fiddling (I love that British word, perfect description). So with all that I completed the second planking. I don’t use stealers, whether real ships used them or not I don’t like the look. But as I said the width got narrow then faired out at the post, stealer opportunity right- so what I did instead was grab a 6mm billet from my small boxwood stash and cut a plank at the same 1mm thickness as the 4mm planks from the kit and tapered it to fit from the stern post to about 3 bulkheads in. Some may call that a stealer, I call it planking with all the wood available to me including what wasn’t in the kit. It's all getting painted white so why bother…good question. I know others have commented they like my zebra colored boxwood hull. I think it’s growing on me. I think I have a nice run of planks at the stem, I later added a little watered down PVA and boxwood sawdust to fill the areas that needed it. In retrospect I should have followed the instructions and not added the stem when I did. That sucker is very fragile, I've broken it off twice. As a result it will be painted white below the water line and black above, my dreams of a natural stem faded away at the crack of the wood and the ensuing repair. With the second planking complete I finished up the stern with my cerulean blue painted counter. There are three small laser cut trim pieces included in the kit, I’ll probably add the upper two later. I elected to use my new found (from Cheerful) scrapping skills and made a bolder trim piece to marry the transom to the counter. Not the best photo, it has more definition than what’s showing. I now turn to laying the deck, I’ll pick it up from here next post. As always thanks for the likes and especially the comments.
About us
Modelshipworld - Advancing Ship Modeling through Research
SSL Secured
Your security is important for us so this Website is SSL-Secured
NRG Mailing Address
Nautical Research Guild
237 South Lincoln Street
Westmont IL, 60559-1917
Model Ship World ® and the MSW logo are Registered Trademarks, and belong to the Nautical Research Guild (United States Patent and Trademark Office: No. 6,929,264 & No. 6,929,274, registered Dec. 20, 2022)
Helpful Links
About the NRG
If you enjoy building ship models that are historically accurate as well as beautiful, then The Nautical Research Guild (NRG) is just right for you.
The Guild is a non-profit educational organization whose mission is to “Advance Ship Modeling Through Research”. We provide support to our members in their efforts to raise the quality of their model ships.
The Nautical Research Guild has published our world-renowned quarterly magazine, The Nautical Research Journal, since 1955. The pages of the Journal are full of articles by accomplished ship modelers who show you how they create those exquisite details on their models, and by maritime historians who show you the correct details to build. The Journal is available in both print and digital editions. Go to the NRG web site (www.thenrg.org) to download a complimentary digital copy of the Journal. The NRG also publishes plan sets, books and compilations of back issues of the Journal and the former Ships in Scale and Model Ship Builder magazines.


