Charter33
-
Posts
455 -
Joined
-
Last visited
Content Type
Profiles
Forums
Gallery
Events
Everything posted by Charter33
-
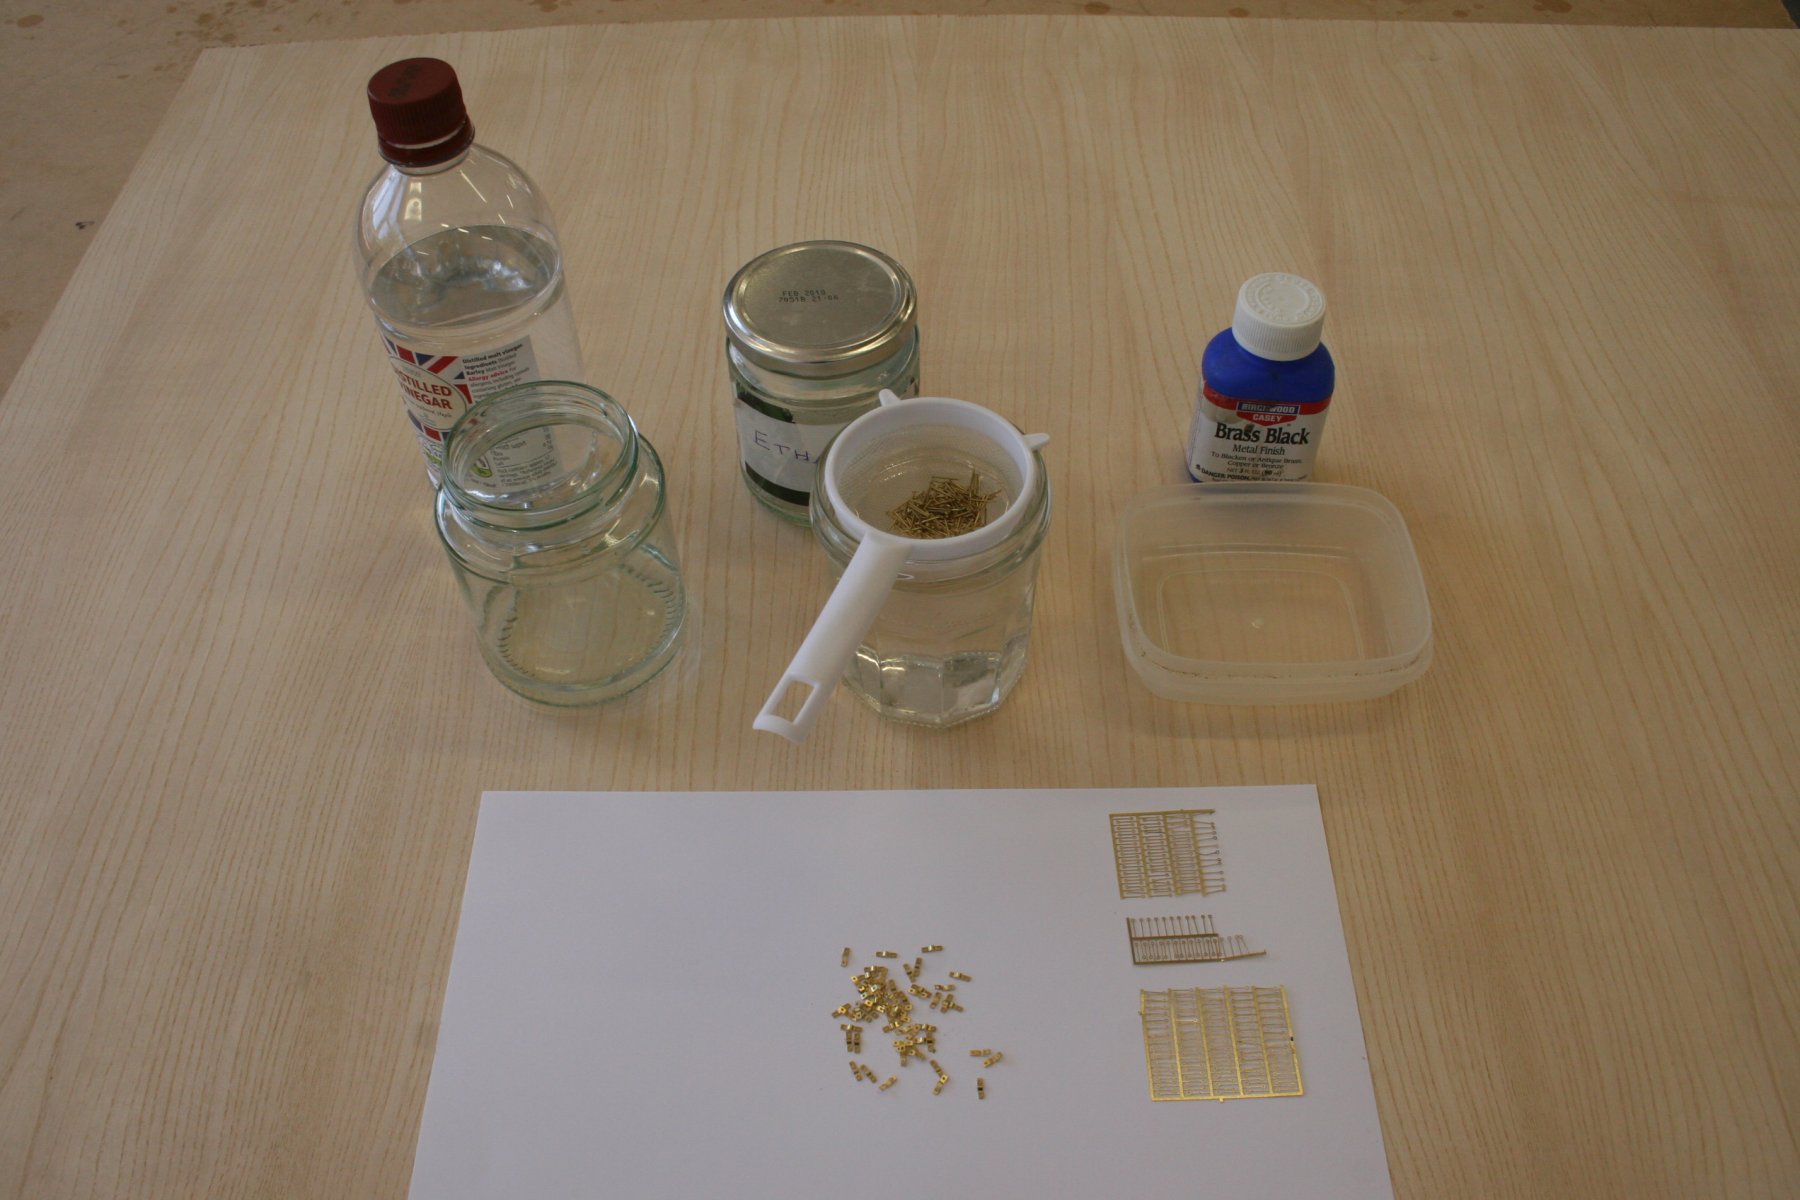
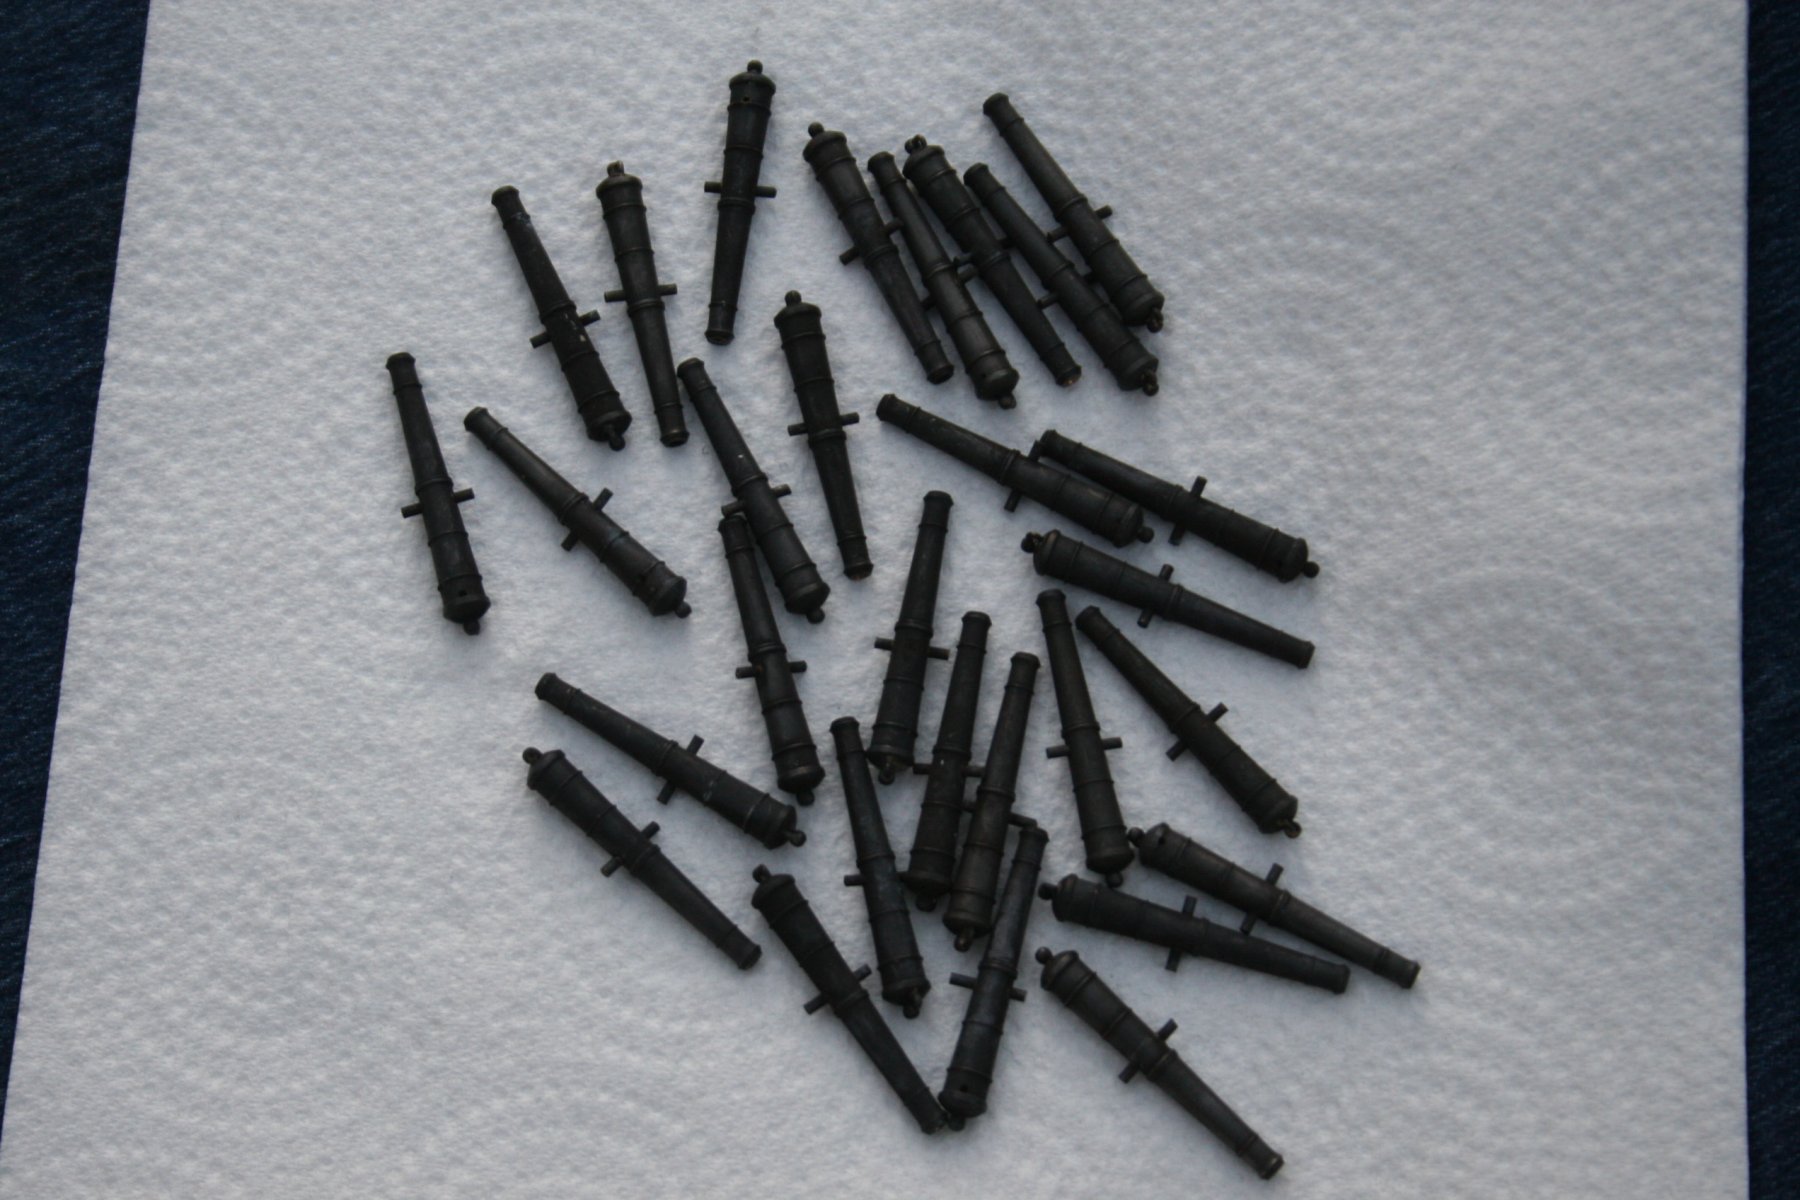
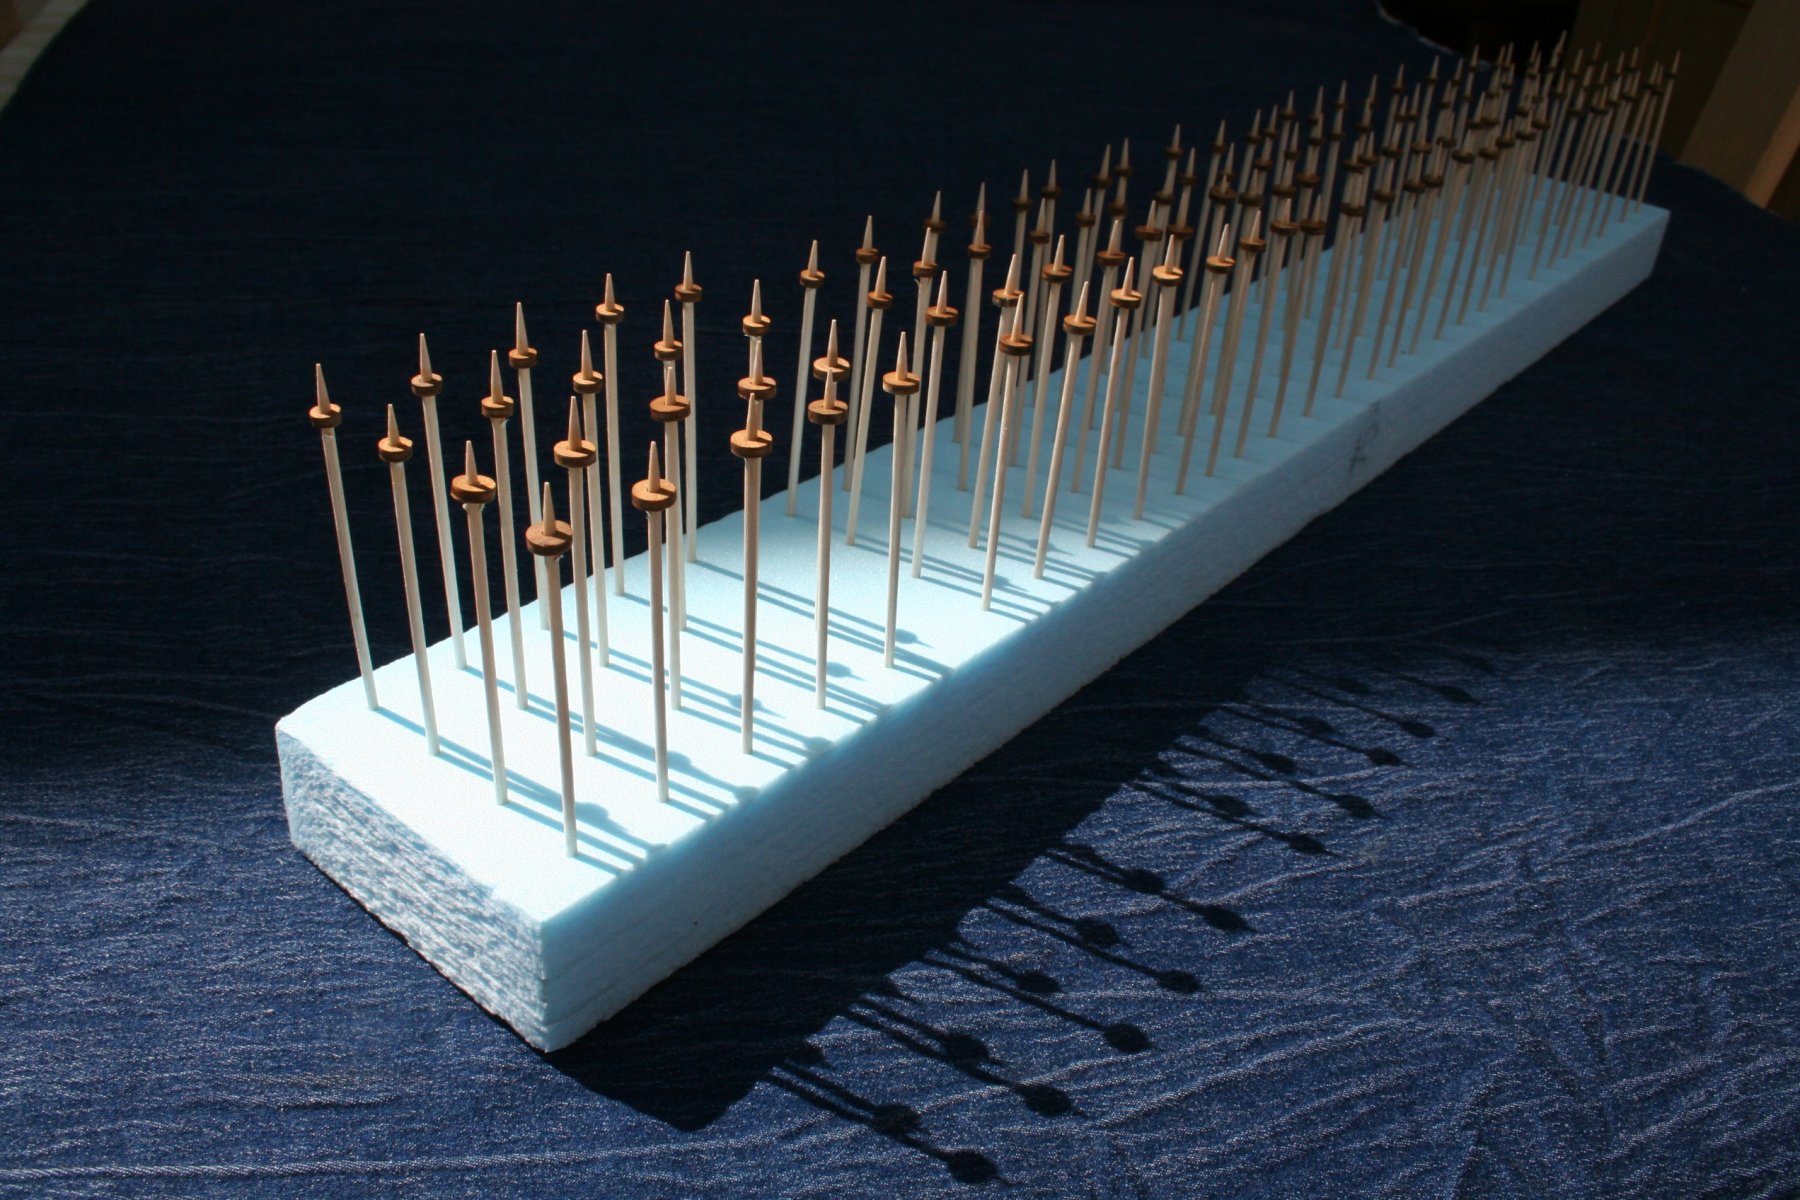
Unbelievable - but true! Things had been going so well. The Boss (Admiral) gets a bit touchy about messy processes being done at home, especially when it involves chemicals and strange odors, so I decided that to keep to the secret premise of a happy marriage, ie. 'anything for a quite life' the blacking of the brass components for the gun carriages would best be done at work (school), before and after the working day. Yesterday good progress was made with eyelets, trunion brackets and round headed pins successfully treated ........... ......soaking in white vinegar, rinse, soaking in ethanol, dry, and finally thirty seconds in Birchwood Casey Brass Black. A cheap plastic mesh tea strainer was a big help when dealing with small components. Today my aim was to carry out the same technique on the canon barrels. Once again the work flow was in full swing with small batches moving through the various stages. I hadn't quite finished the final rinse of the last five barrels before the working day started so put I them to one side ......... Lunch time arrives - 30 minutes of piece and quiet, should be able to finish them easily before the next lesson ...... A minor problem - the large 'Belfast' style sink in the workshop is blocked. It's half full of off-white opaque water left by students attempting (half heatedly) to clean paint brushes. The site maintenance team have been notified but, with the school celebrating its Diamond Jubilee at the weekend they are busy preparing for visiting VIPs including a 'minor' member of the Royal family...... No Problem!!!! A small plastic tub was pressed into service, held under a running tap while shiny, clean barrels are transferred from jam jar to tub with a pair of tweezers .... then it all goes 'pare shaped'. The last barrel slips out of the tweezers between jar and tub and drops into the murky depths of the sink..... Sleeves pulled up I start to feel my way over the hidden sink bottom. NOTHING! Had I miss-counted? Did it actually fall into the tub? A quick count of completed and half finished barrels confirmed my worst fears - one short. Could it have dropped through the plug hole? Am I going to have to buy a spare barrel from CWM? Do they even supply them? (I've checked this evening - yes they do) Right, bale out sink, remove screws that hold access panel in place, find tool to undo sink trap ... 5 minutes to next lesson ..... There, gleaming like a golden nugget in the black sludge, the missing barrel ..... big sigh of relief and the sink was re-assembled just as the the students started arriving. With the sink now empty and fully functioning investigation proved that the barrel could only have passed through the small hole exactly in the middle of the strainer in the plug hole, and even then with barely any clearance. Pure fluke .... With the school day over the escapologist barrel was re-cleaned and the supposedly straight forward task was finally completed with the barrels just needing a final buff with a soft cloth. I'll do this just before painting the ends red prior to fitting them on the carriages. I'm now working on shaping 180 small eyelets into rigging hooks ...... no rush ... Graham.


-
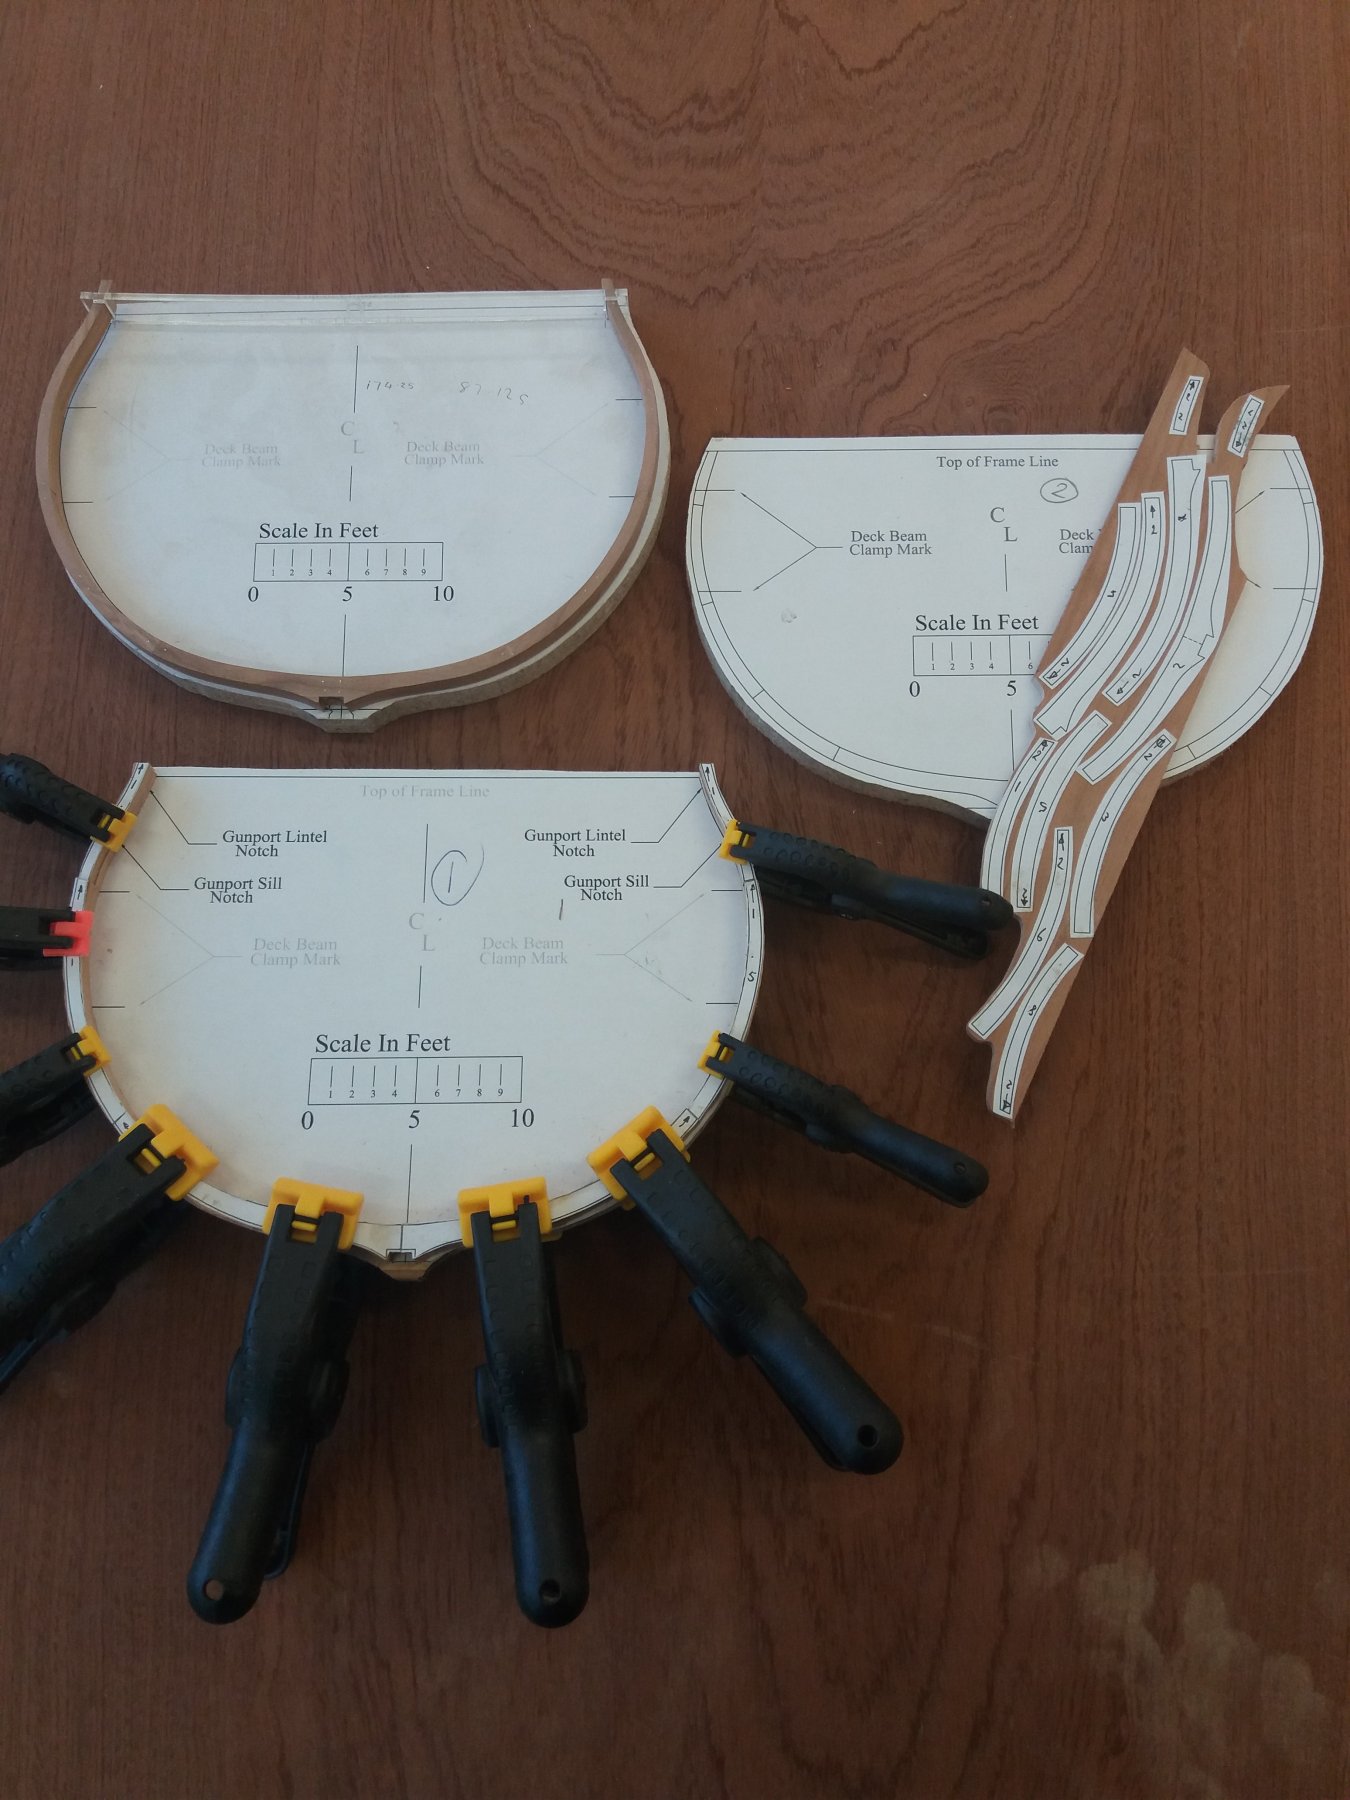
Hi, Finally managed to get the all clear to get back to the workshop after five months of convalescence. My Triton build is now in the process of being resurrected - just breaking myself in with some more of the more straight forward frames from mid-ship while I try to get my head around the convolutions and challenges of the hawse and bollard components .......... Graham.

-
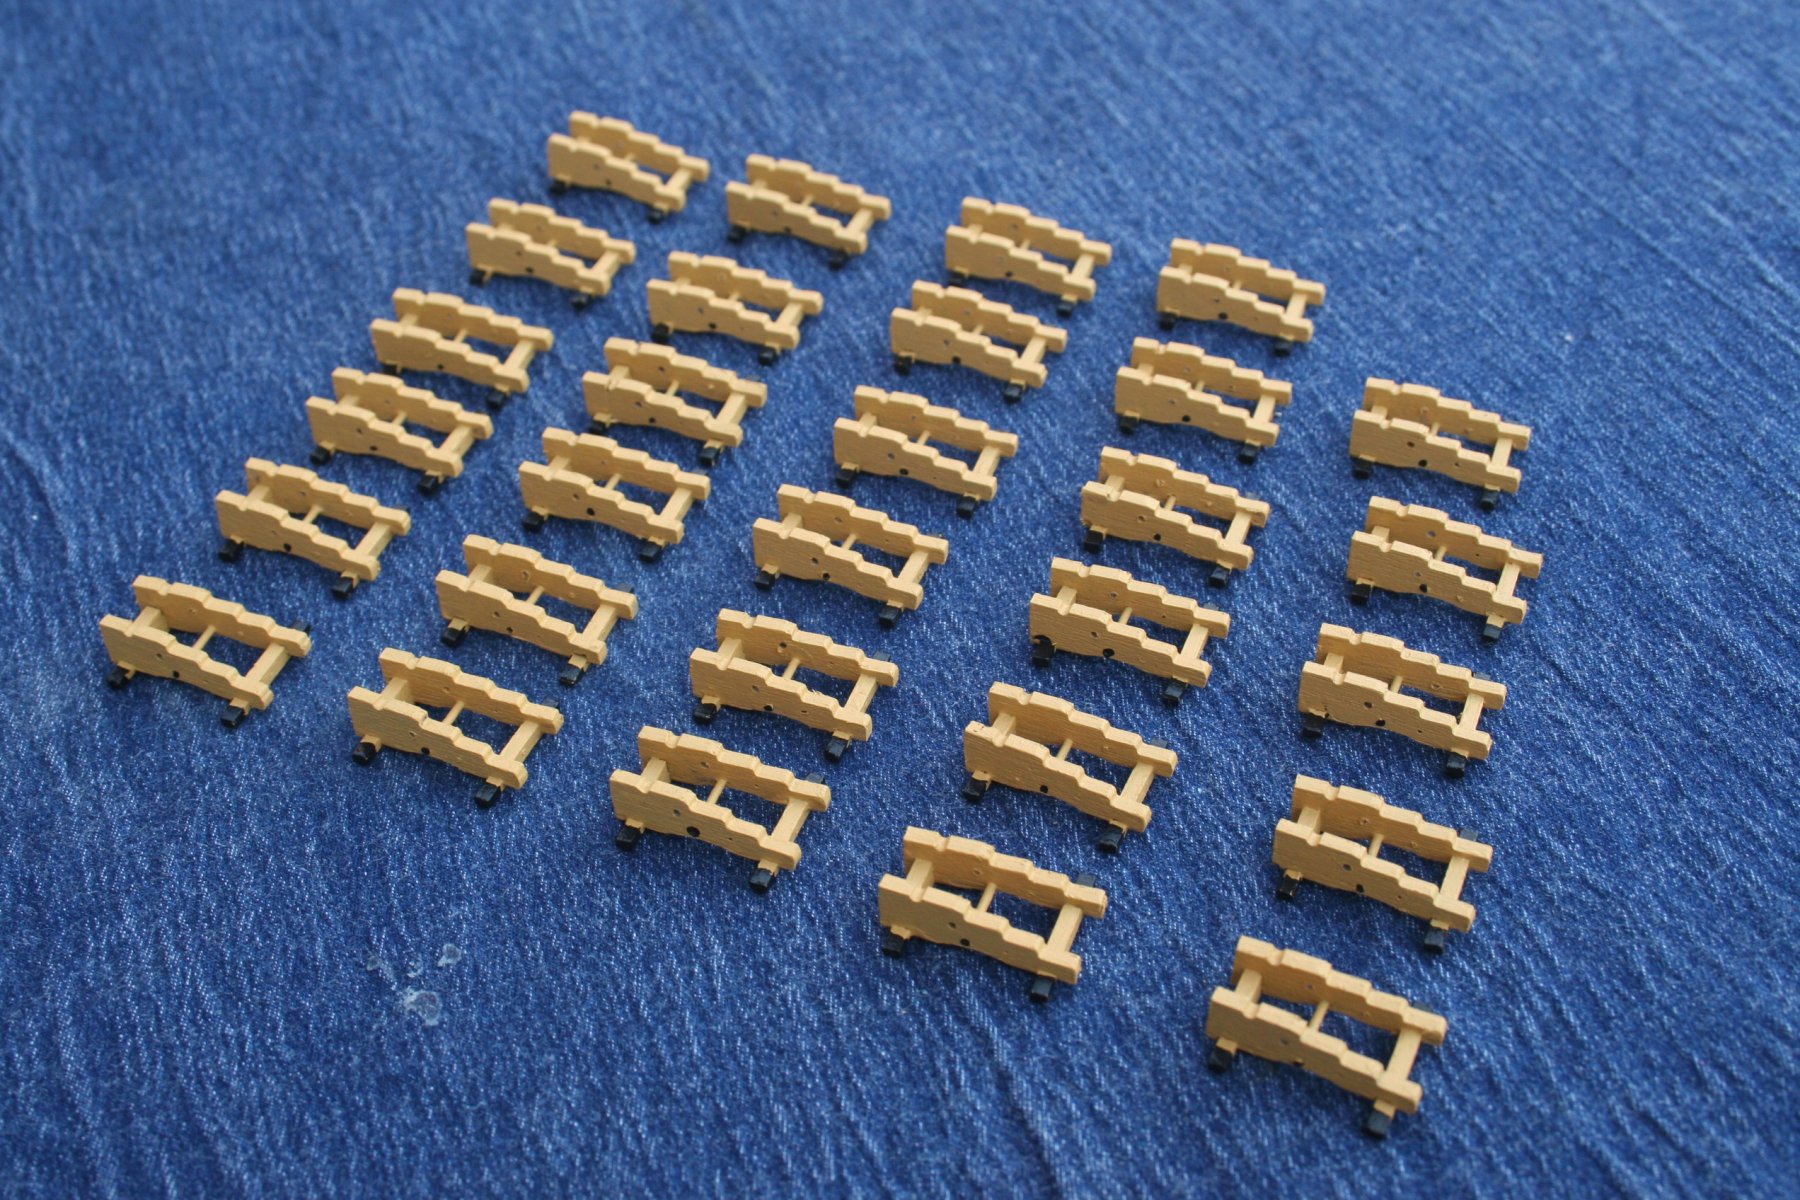
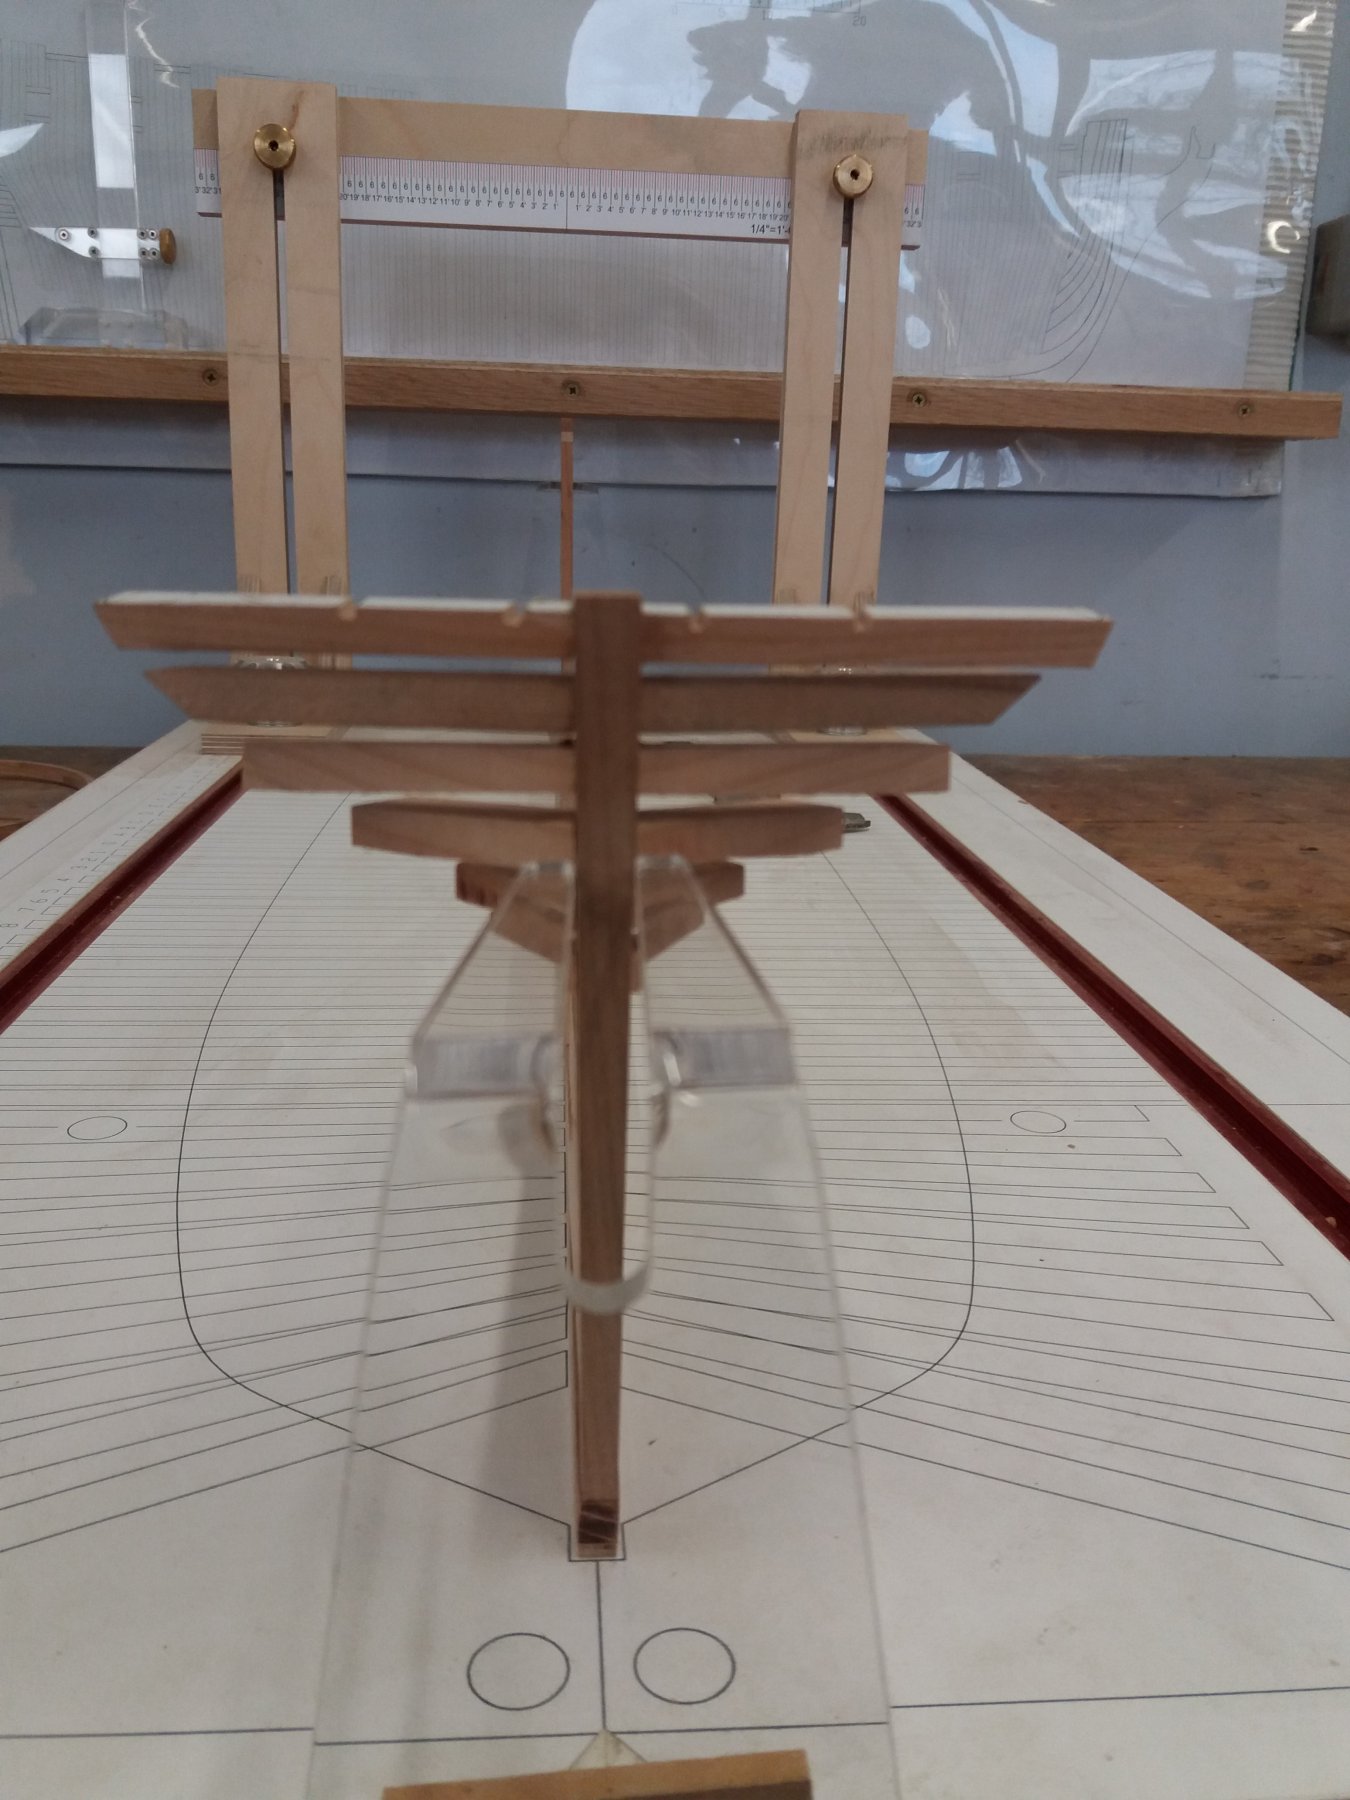
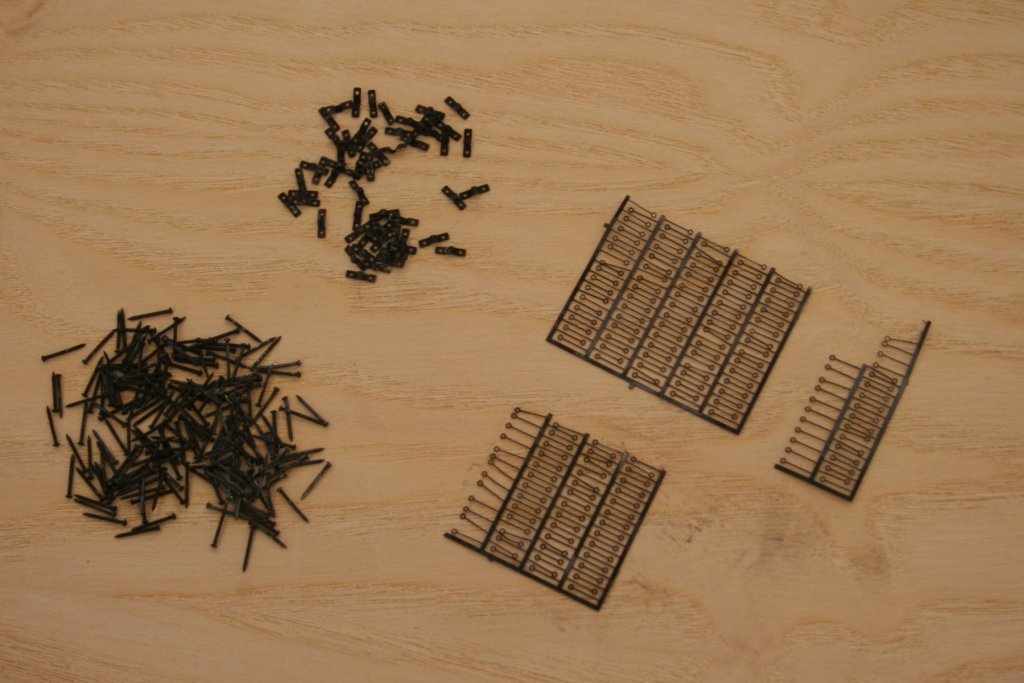
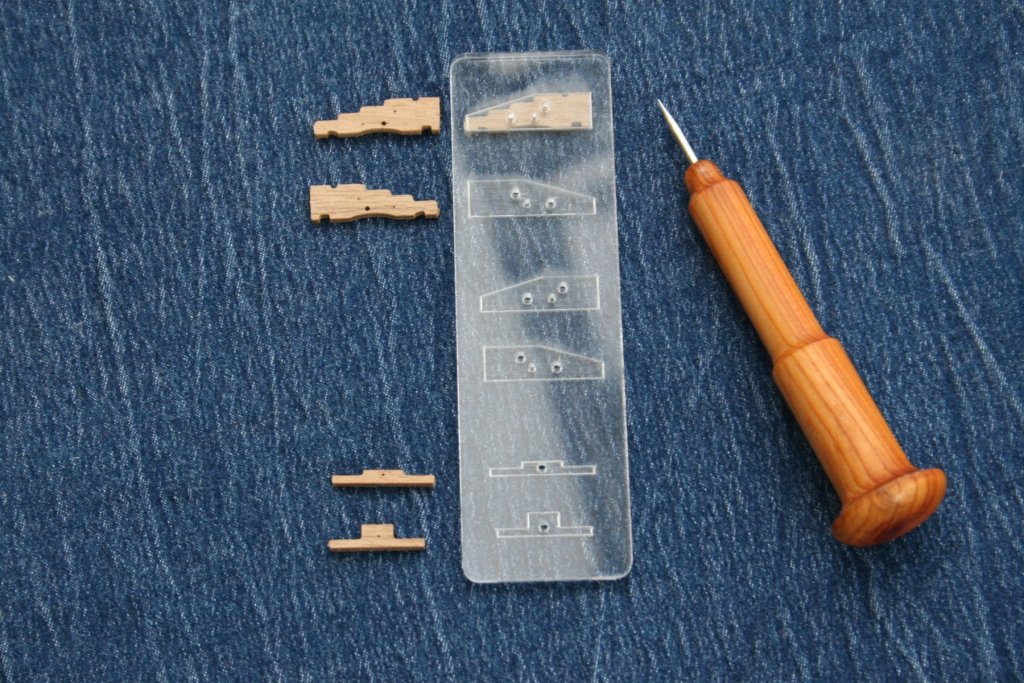
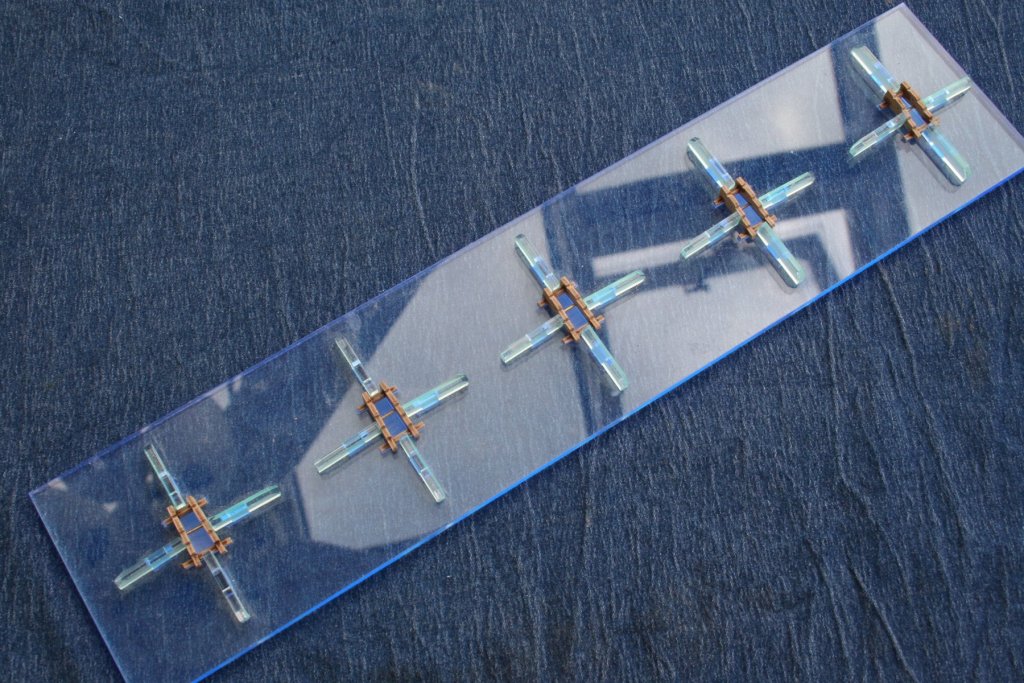
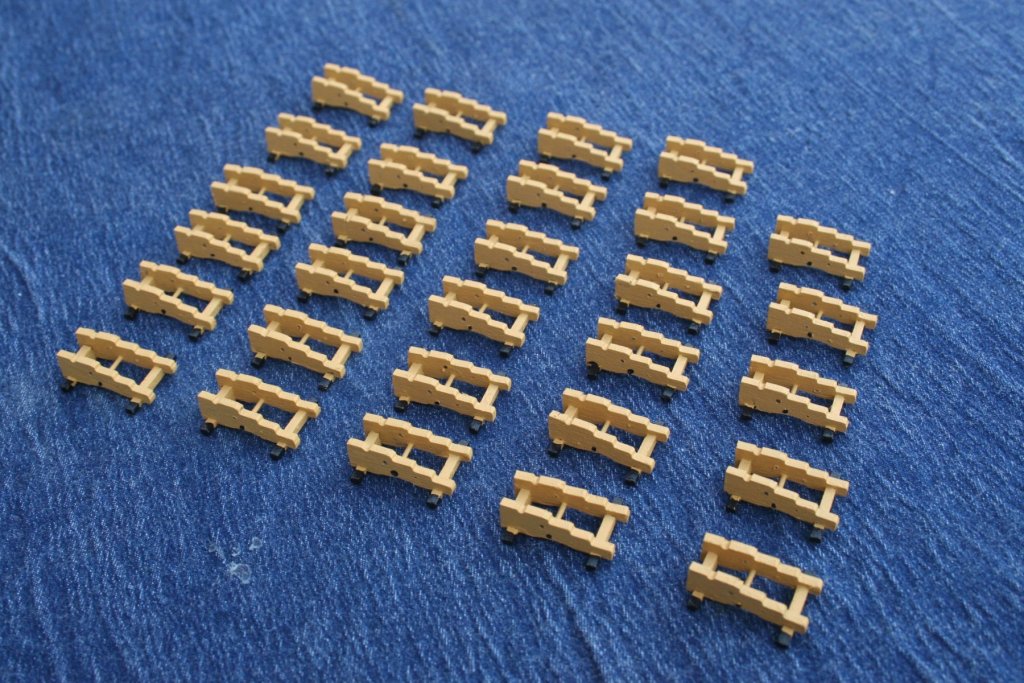
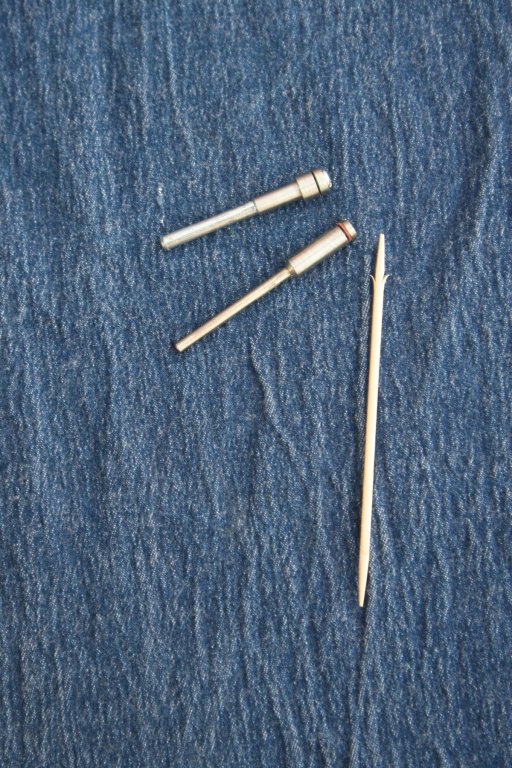
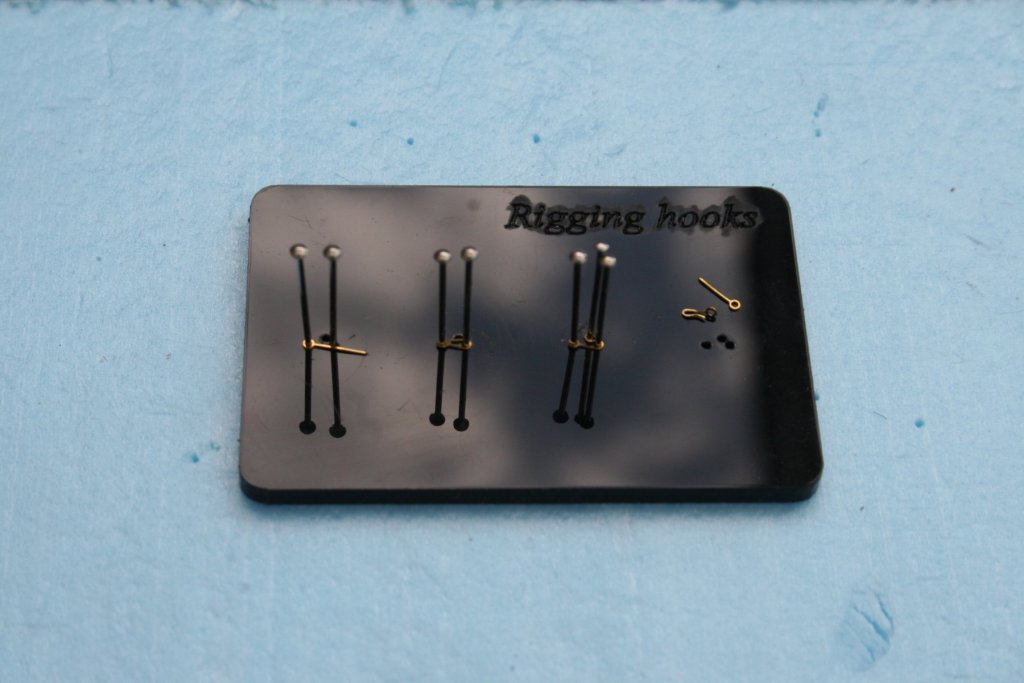
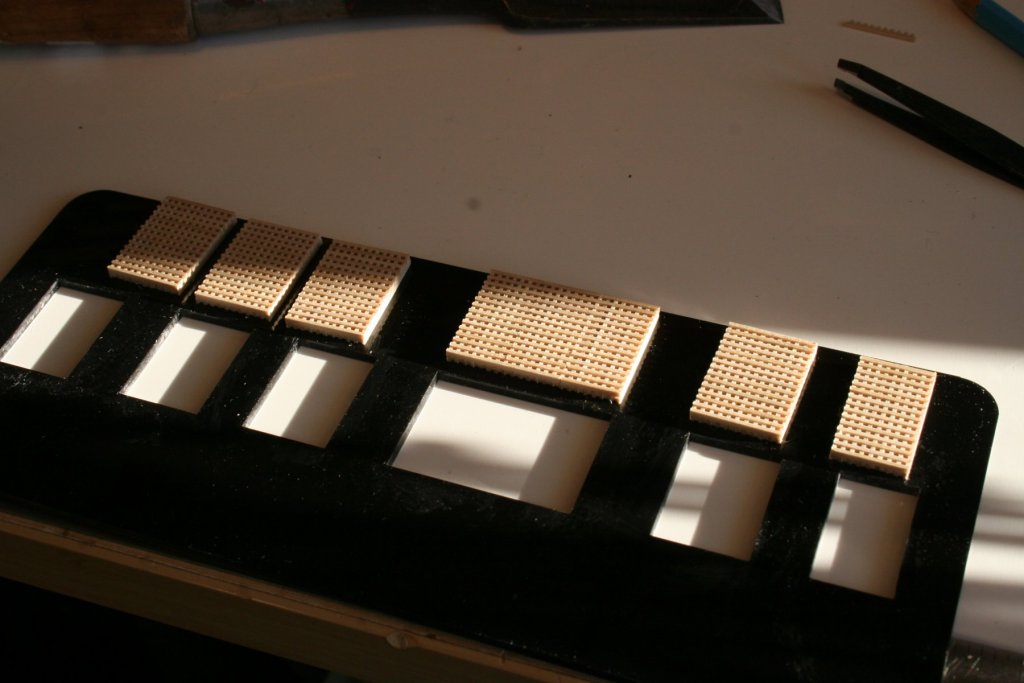
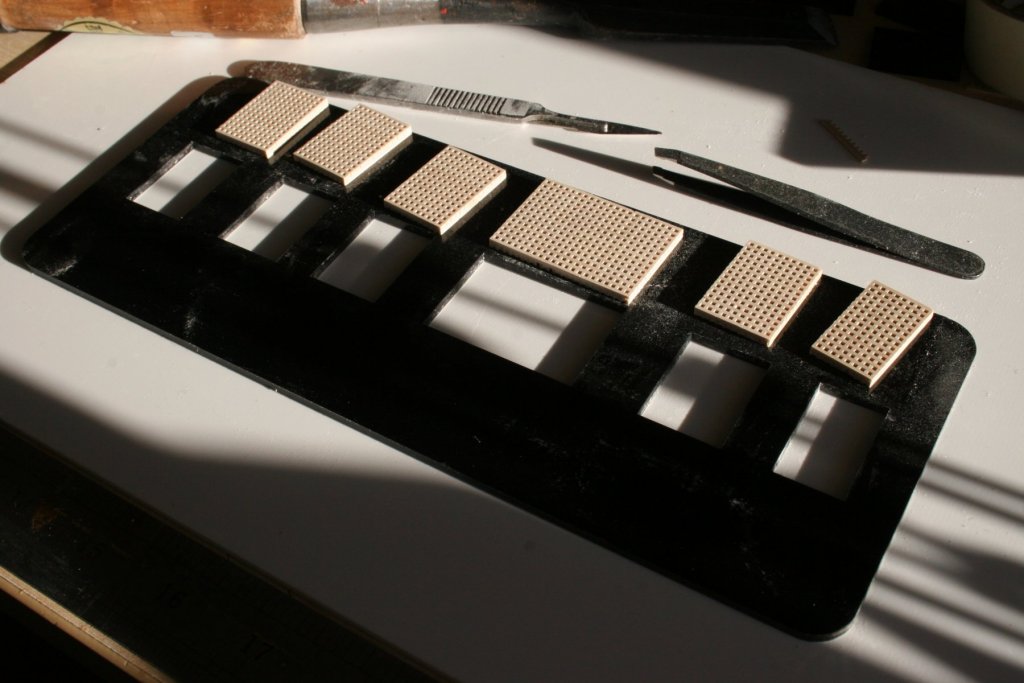
The gun carriage sides needed little cleaning up other than removal of the nibs that secured them in place on the walnut ply sheet when originally machined and squaring up and slightly widening the slots for the joints. I wanted to drill various holes for the eyelets before assembly and came up with this .......... A spare point from a pair of compasses fitted with a handle turned from a scrap of yew marked the centers which were then drilled using a Dremel drill. Two Dremel mandrels were modified to help true up the carriage wheels. The cocktail stick shows how a quick couple of cuts helped to keep the wheels supported while these were vanished. Another batch of five assemblies ......... ..... all now painted and awaiting the fitting of the iron work. I wanted a way to effectively and efficiently convert eyelets (480) into rigging hooks for the gun tackles. This is my solution ....... My focus is now to shape and black the components that complete the carriages together with the breech ropes and tackles. Cheers, Graham.

-
Le Sinagot, Bon Retour and Cotre Kurun by Heller
Charter33 replied to Williamo's topic in Plastic model kits
Hi. Just did a quick search for Sinagot out of pure curiosity - seems Amazon.fr have the Heller kit for just over €18, free delivery, if my French is up to scratch. Any good to you? Cheers, Graham- 5 replies
-
- 2
-

-
- sinagot
- bon retour
- (and 2 more)
-
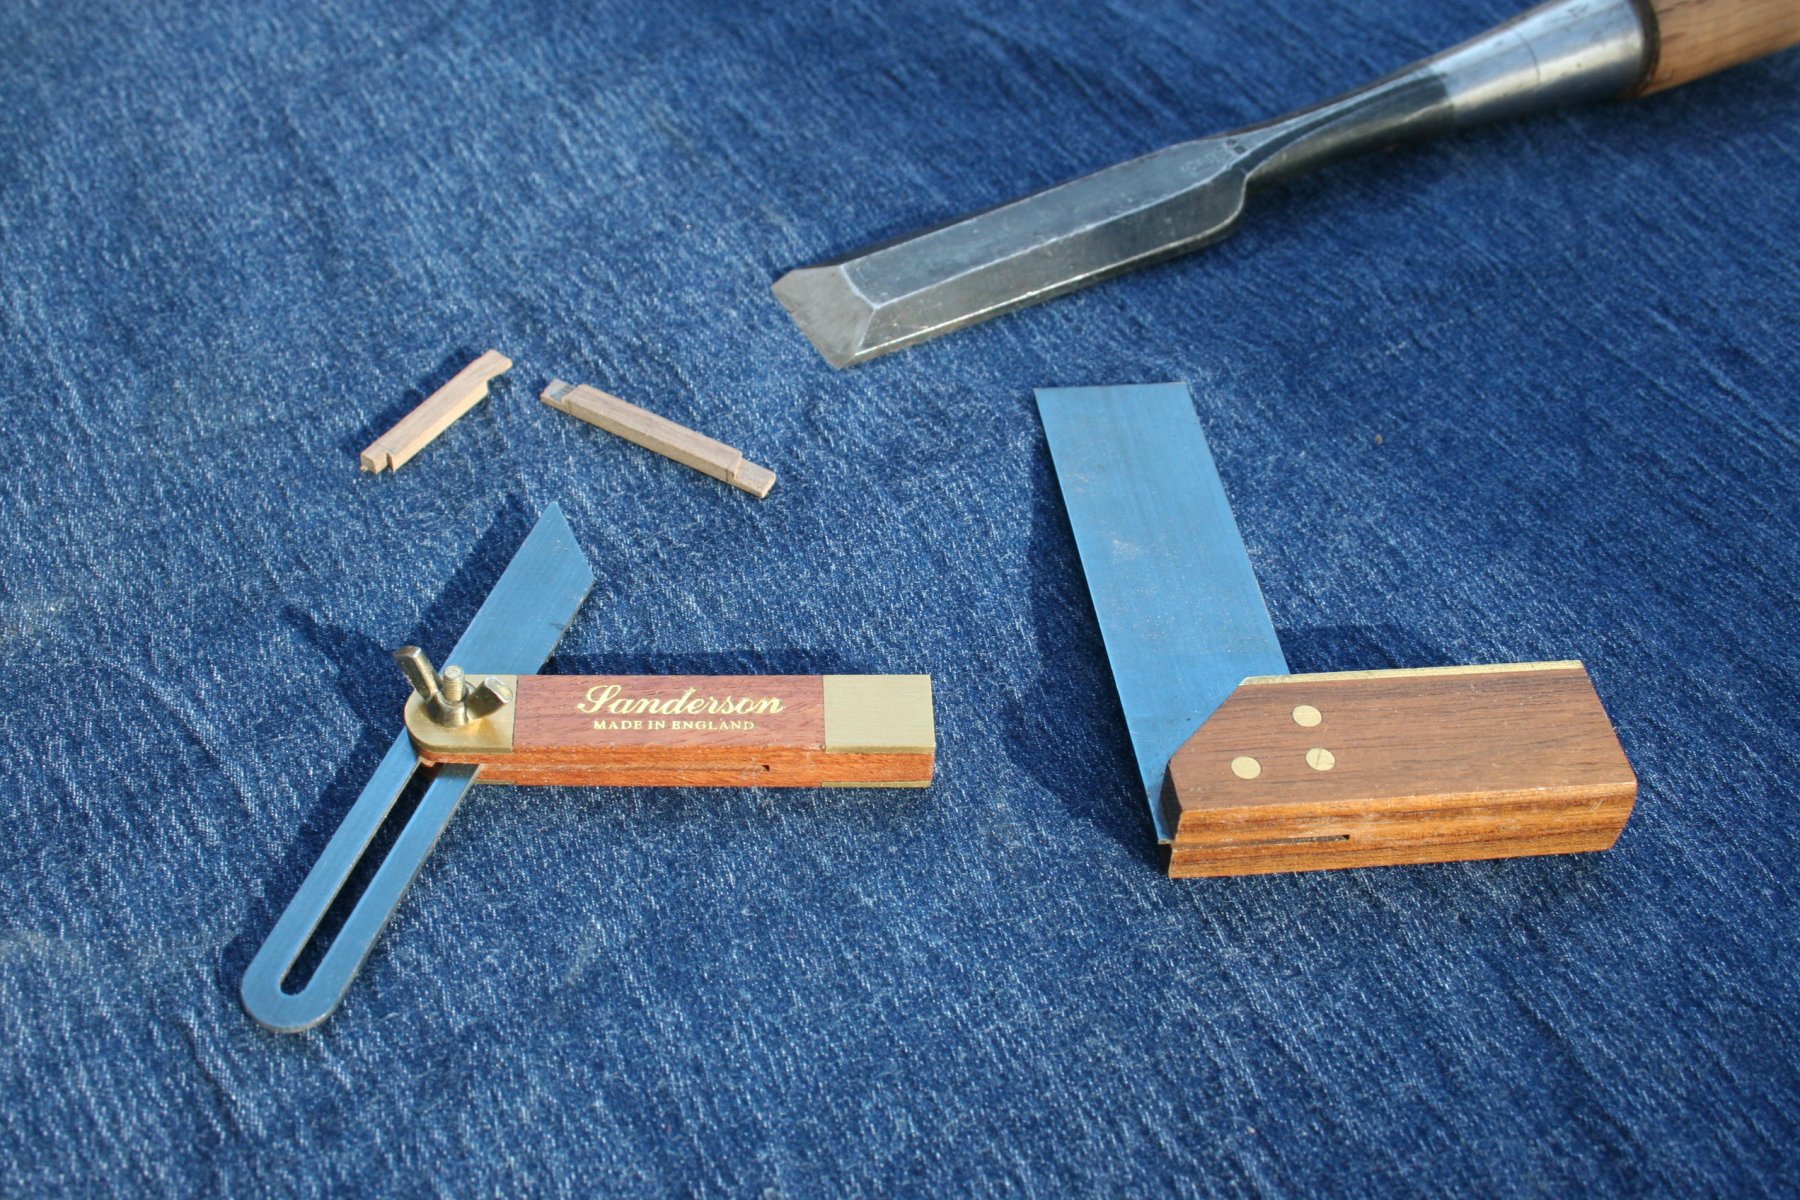
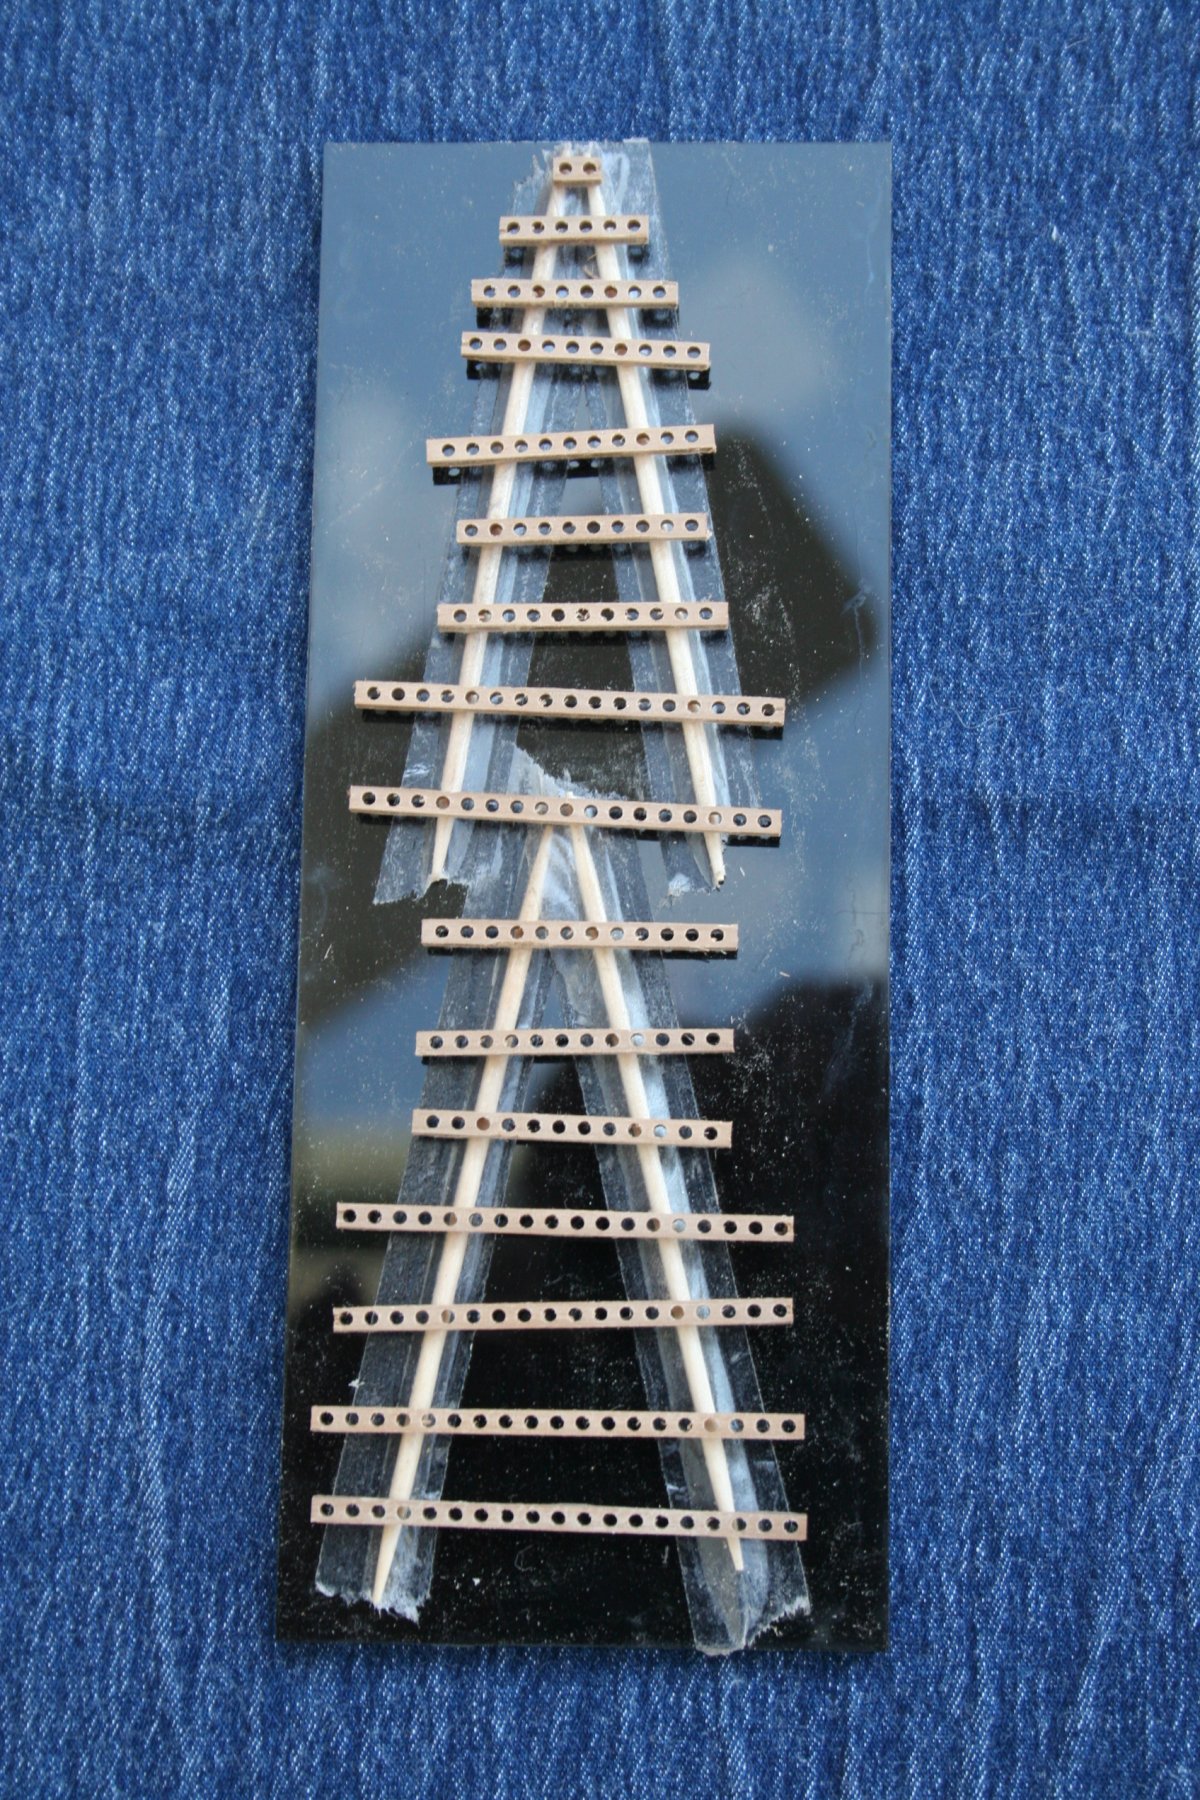
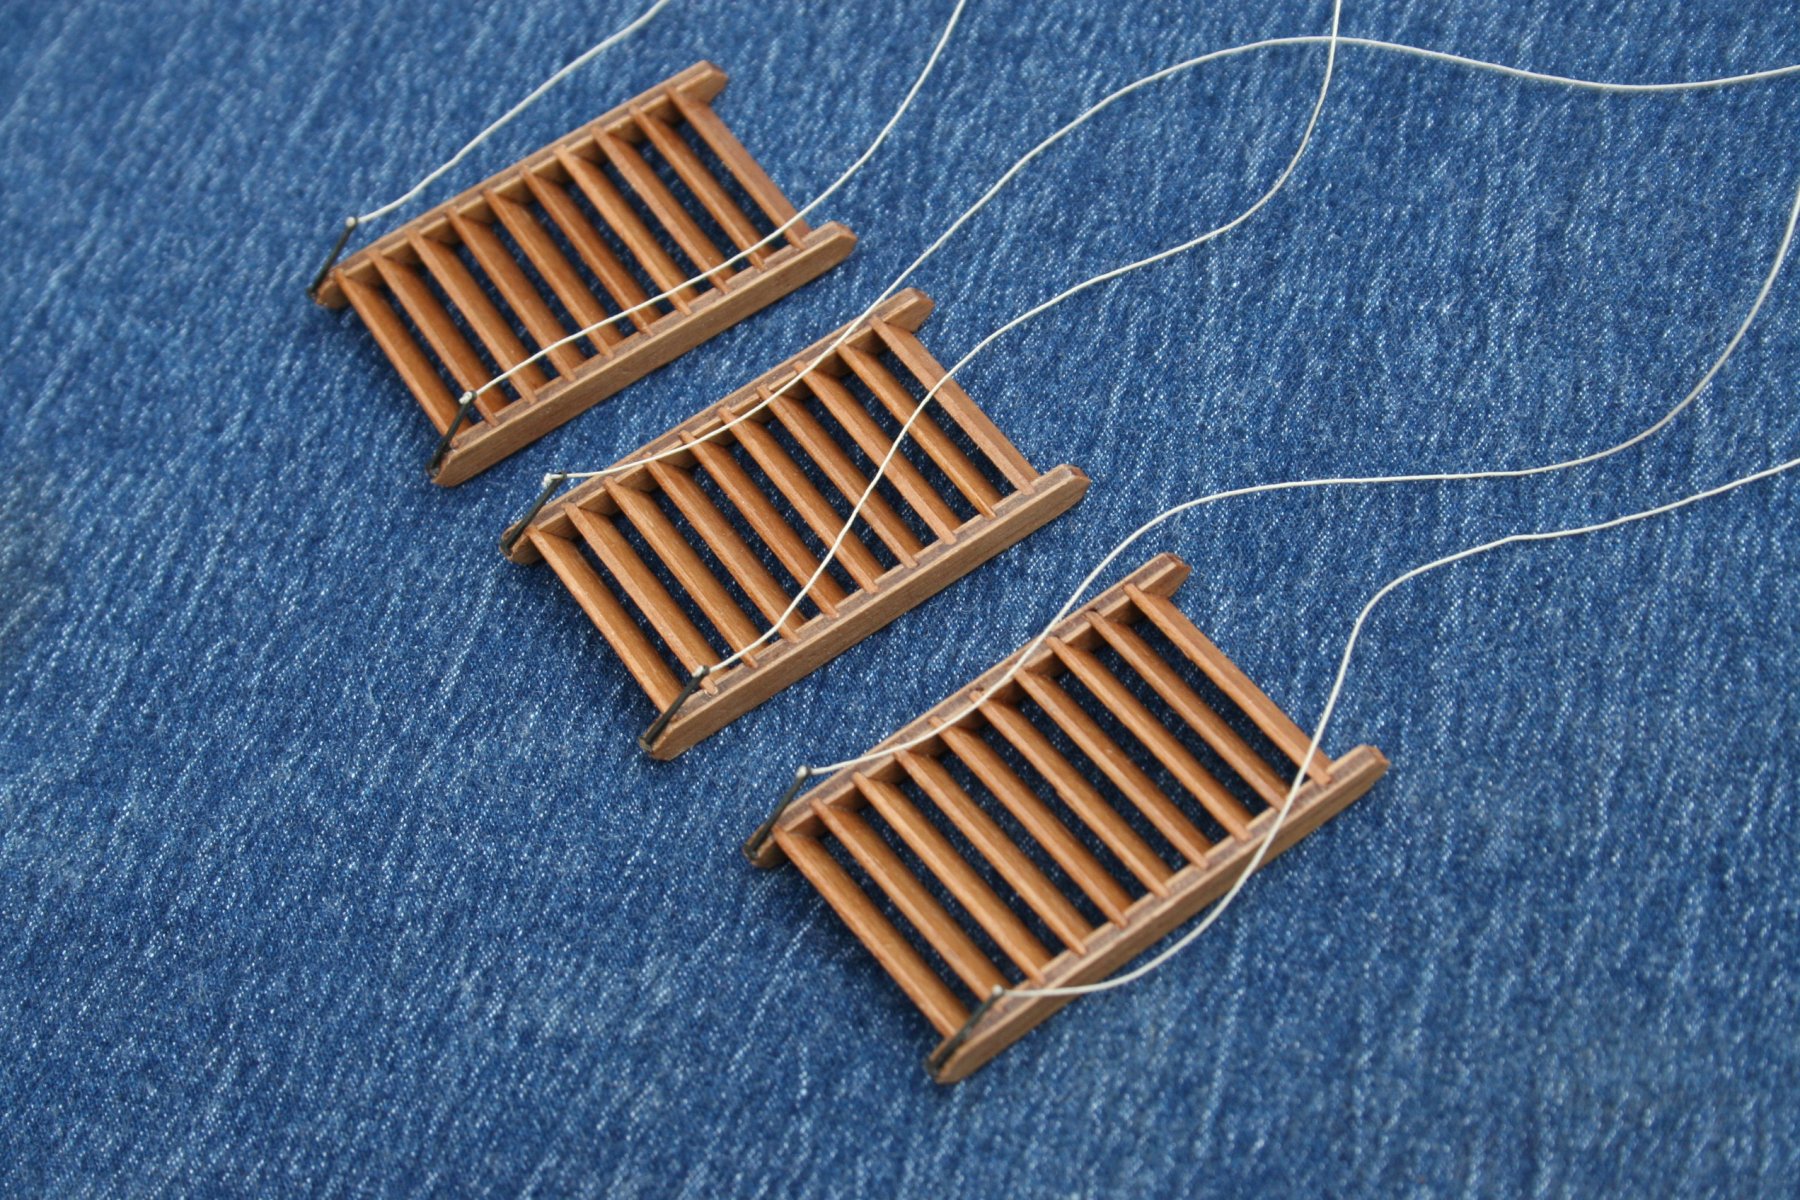
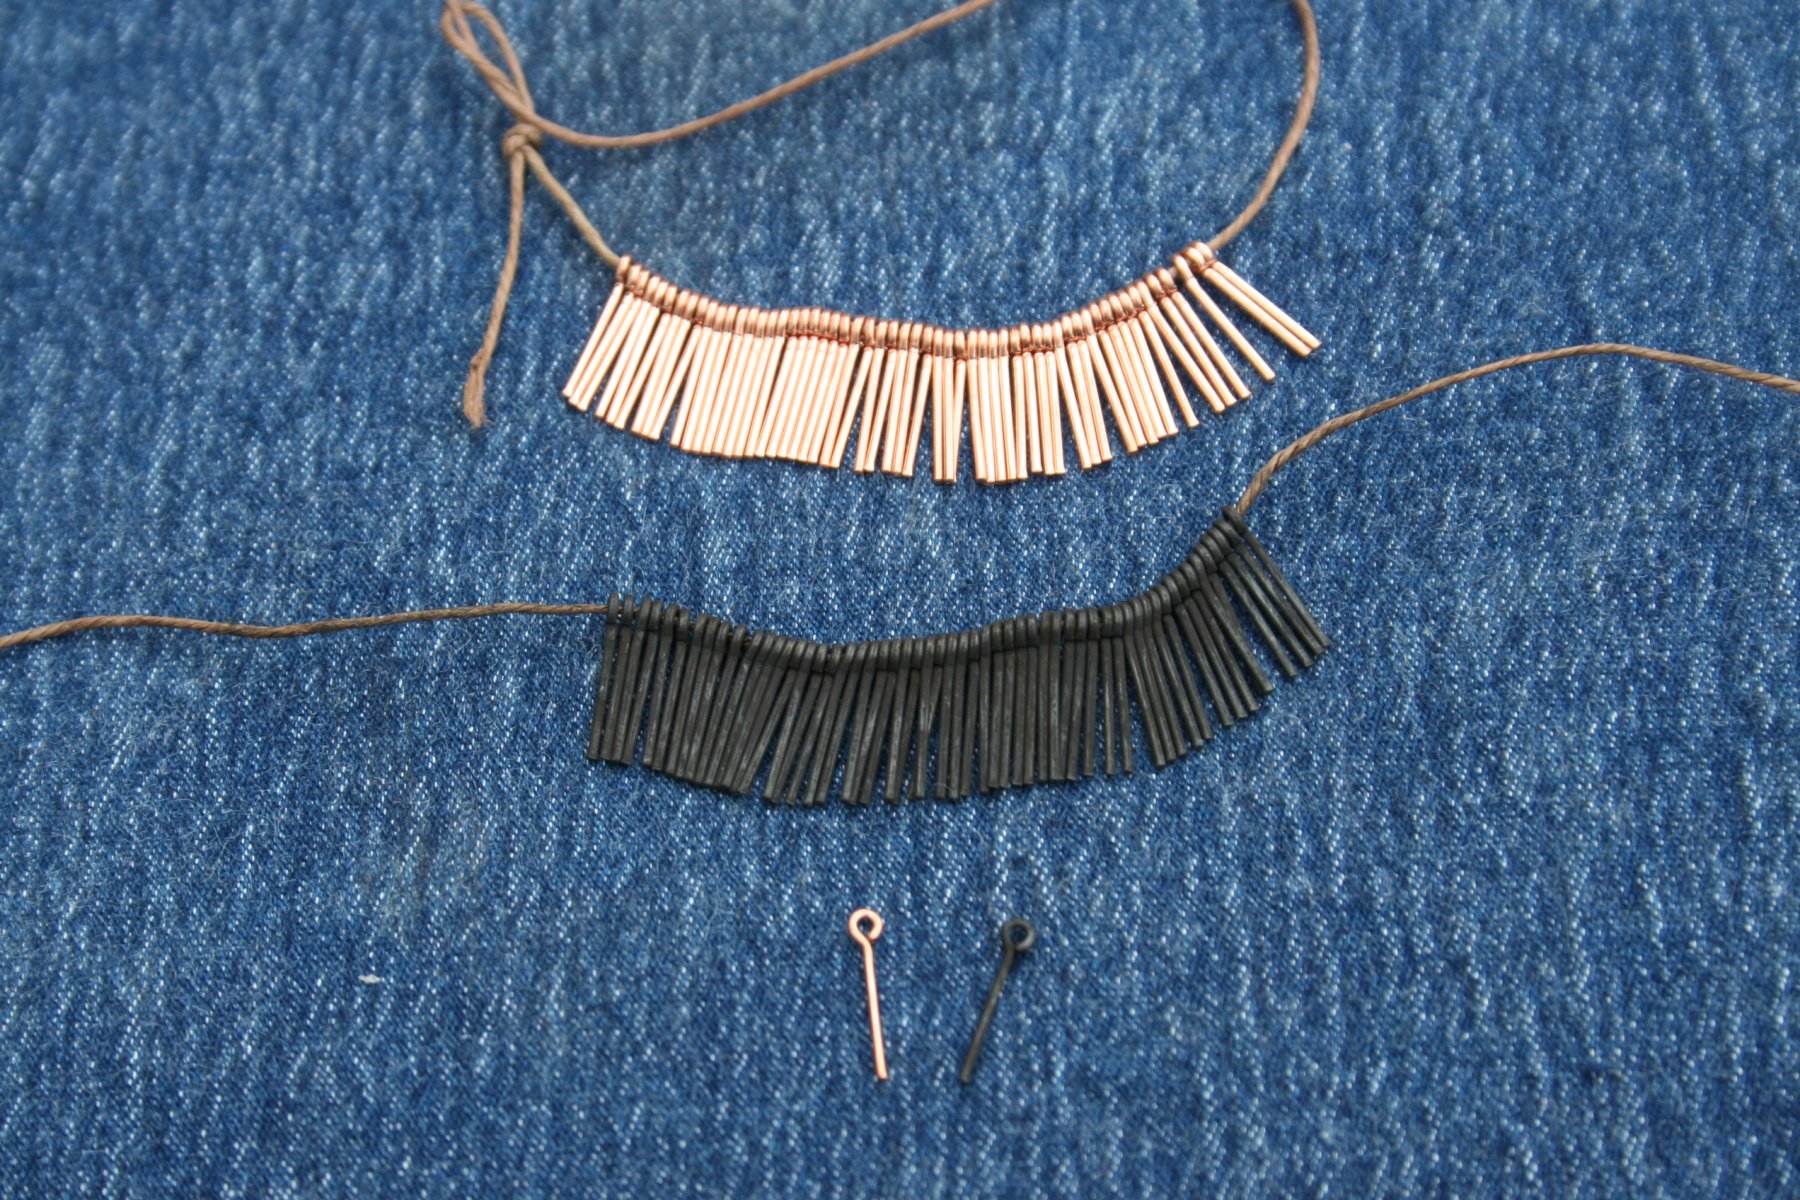
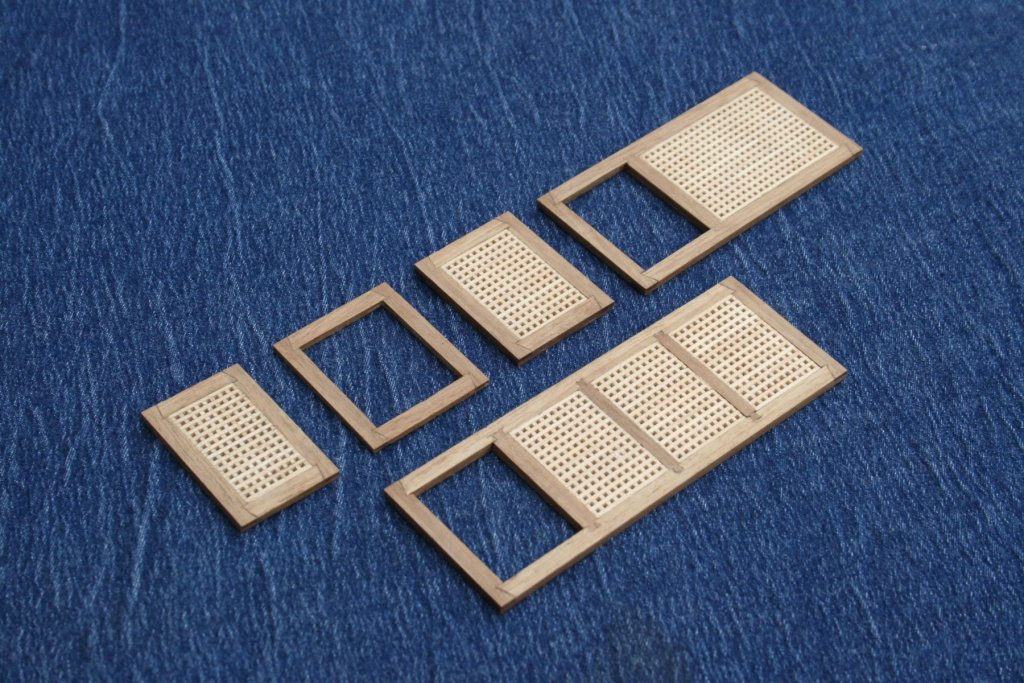
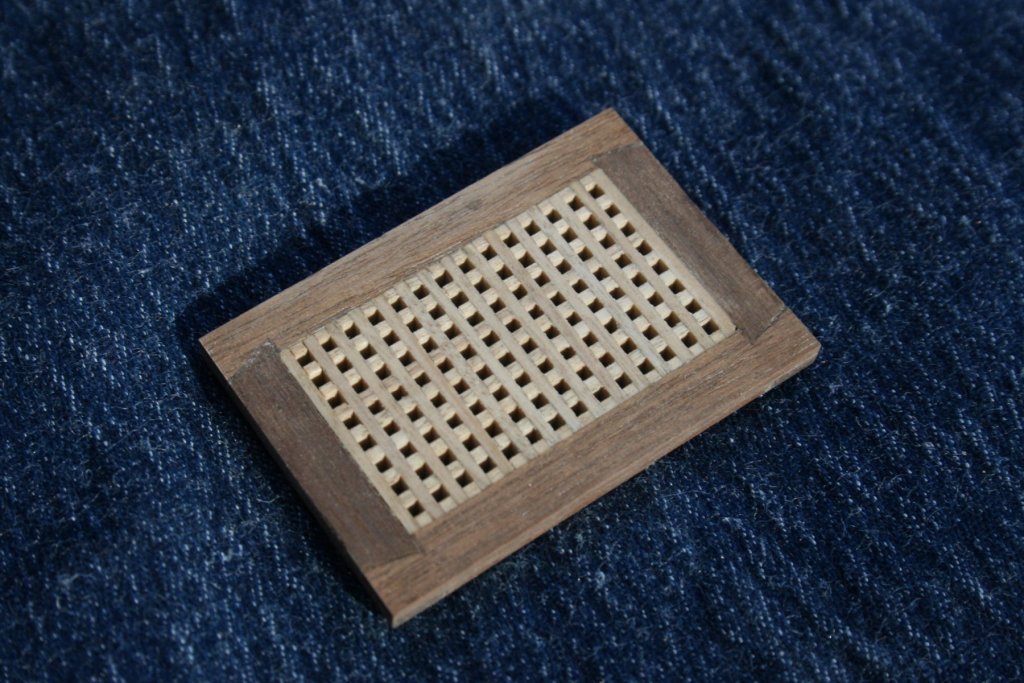
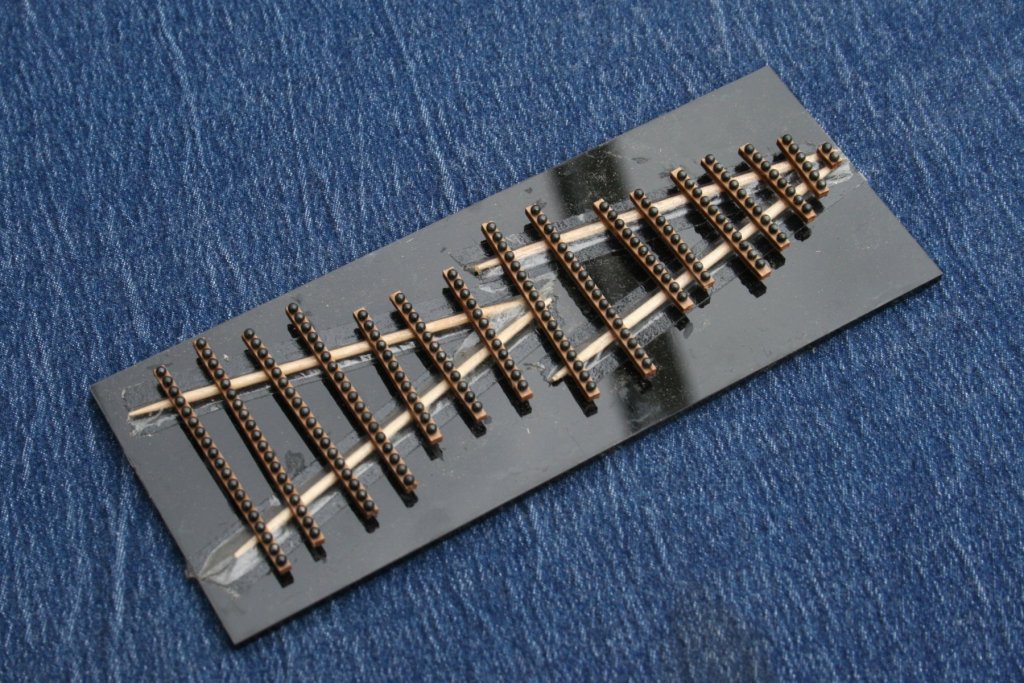
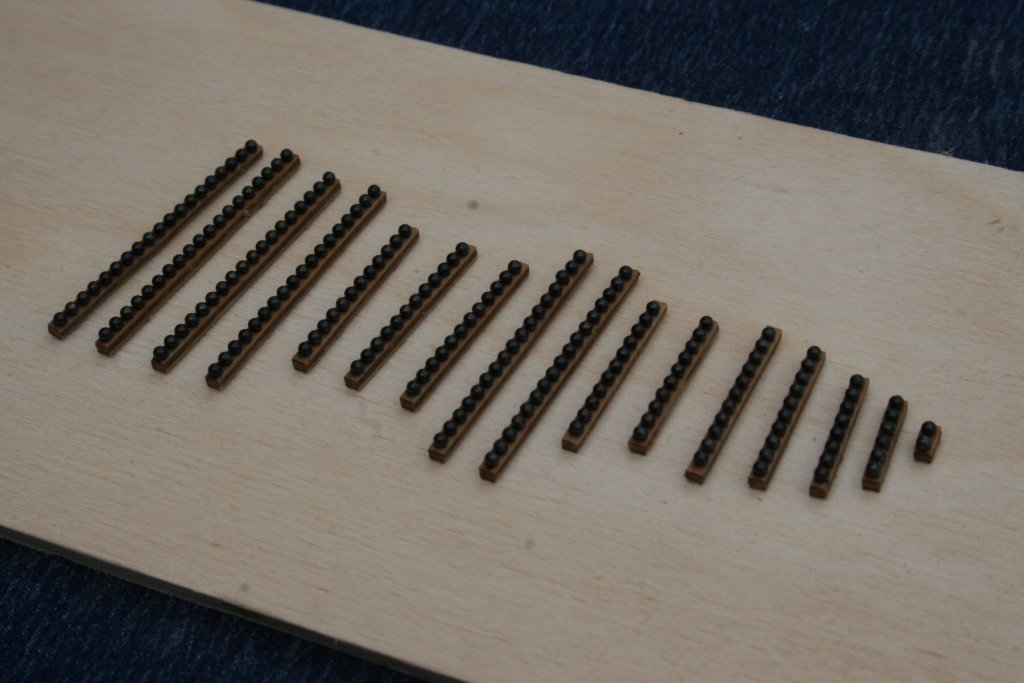
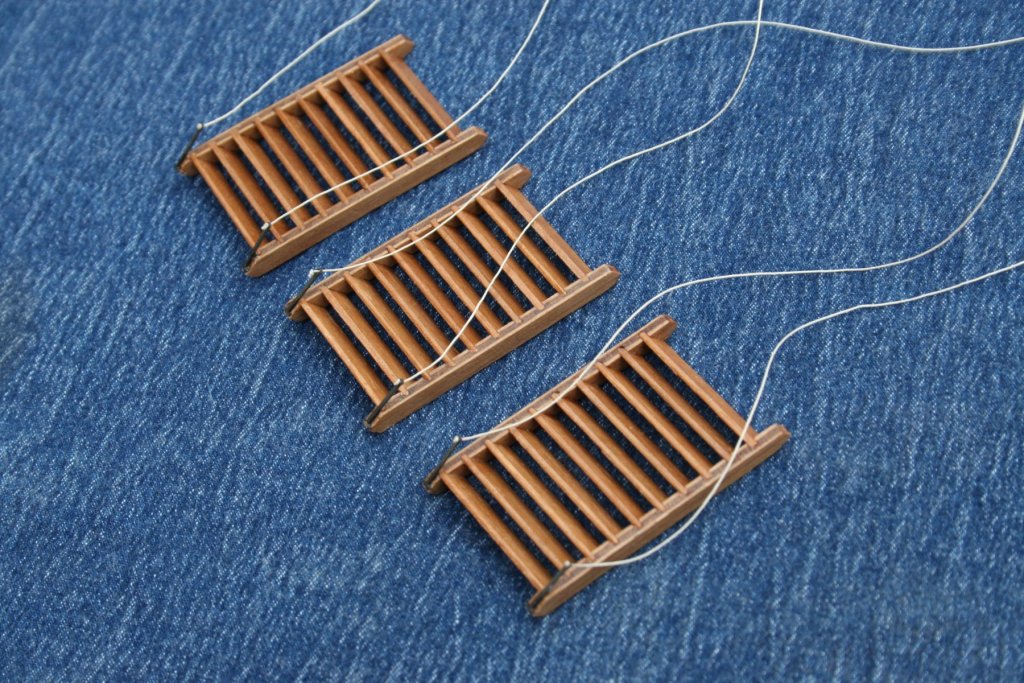
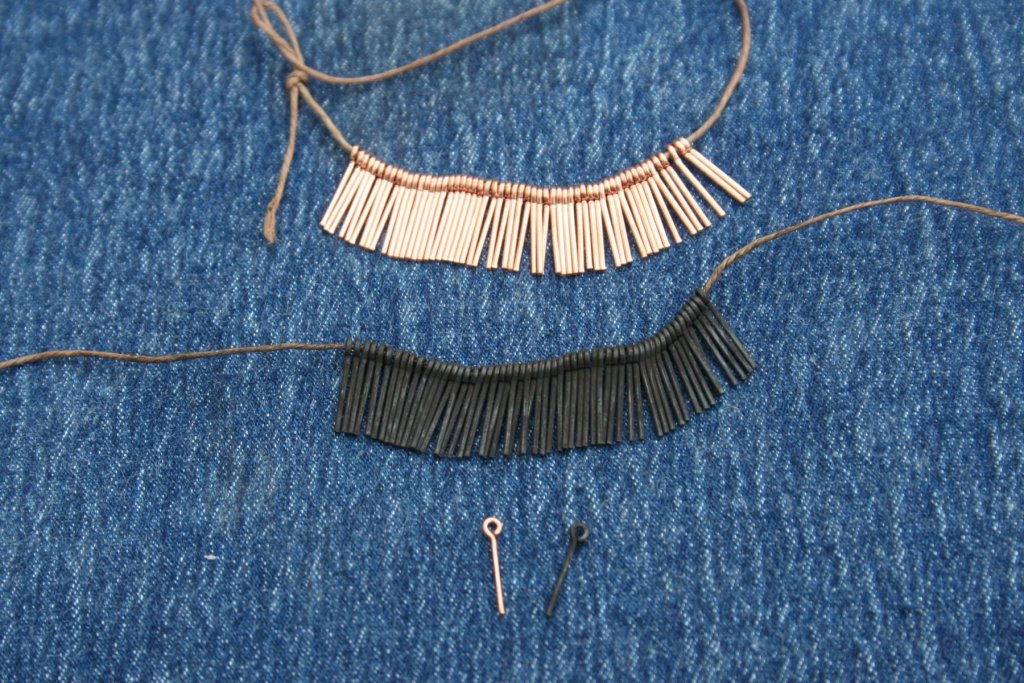
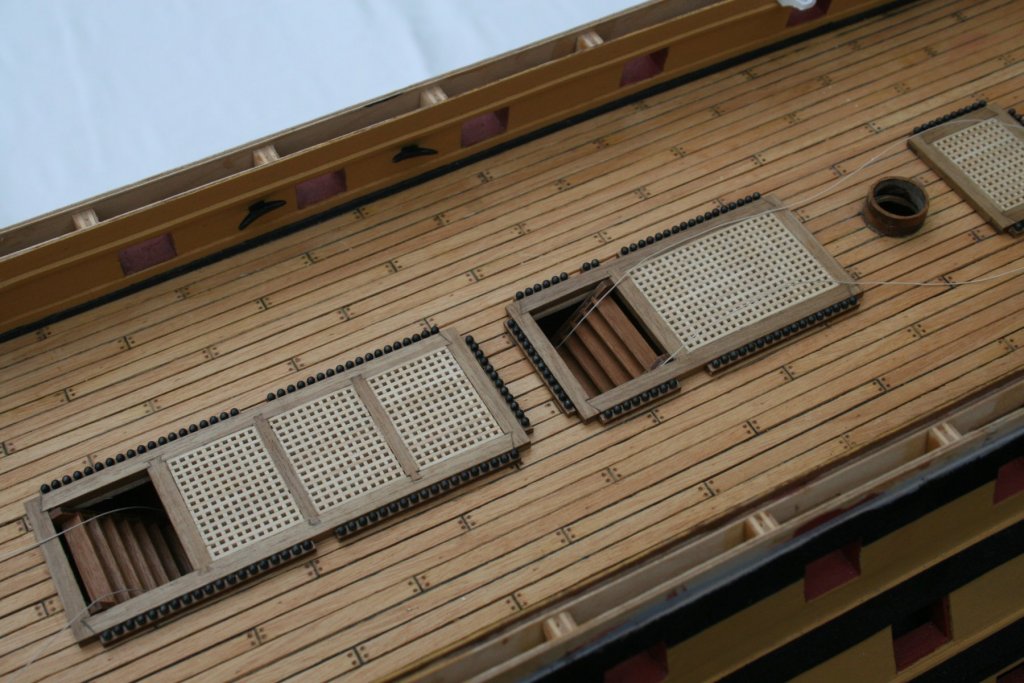
After a bit of practice marking out and cutting the joints ......... ......... the gratings have been fitted with coamings. Cocktail sticks covered with double sided tape held the shot garlands off the surface but firmly enough for varnishing. Cannonballs were placed on each one as soon as the varnish had been applied. A second coat was enough to fully bond these in place. Construction of the ladders was straight forward. The stanchions were coloured with Birchwood Casey Brass Black. Handrail ropes were added before these were glued to the front of the ladders. This solution was also used to black the copper eyelets I intend to use to fix the breeching ropes to the inner bulwarks and to take the hooks of the tackle ropes on the gun carriages. The gratings, garlands and ladders are now all fitted in place ....... .... together with the four large cleats. Next task - 30 x 12 Pounder long guns and carriages, plus rigging .... Cheers, Graham.


-
As you're building the Caldercraft version of Victory, I'd go for the New Period Ship Handbook first. When I purchased my kit from Cornwall Model Boats this was the book they recommended to me.
-
I totally disagree with these comments. As a relative novice to building model ships, with only one previous model, Le Hussard, my approach throughout my build has been to read, and often re-read, the instructions, check the related section in The New Period Ship Handbook, look at how others have tackled the stage on this site and then to dive in and have a go based in what I've found out. It hasn't failed me yet.
-
Hi Micheal, I also recommend the books listed by Modoatman99, all of which are in my collection too - especially The New Period Ship Handbook without which I would have struggled even more than I have with my own build of Victory. A couple of additions you might find interesting as much for details of the battle of Trafalgar itself as well as the ship are: HMS Victory - Pocket Manual 1805 by Peter Goodwin The Fighting Temeraire by Sam Willis. Although this book focuses on the Temeraire, which followed behind Victory into the battle (although it was actually planned to lead Nelson's ship!) the description of what happened is explained in a very readable and detailed way in chapter 7. Got my copy second hand on-line, it was originally on the shelves of Baltimore County Public Library.....
-
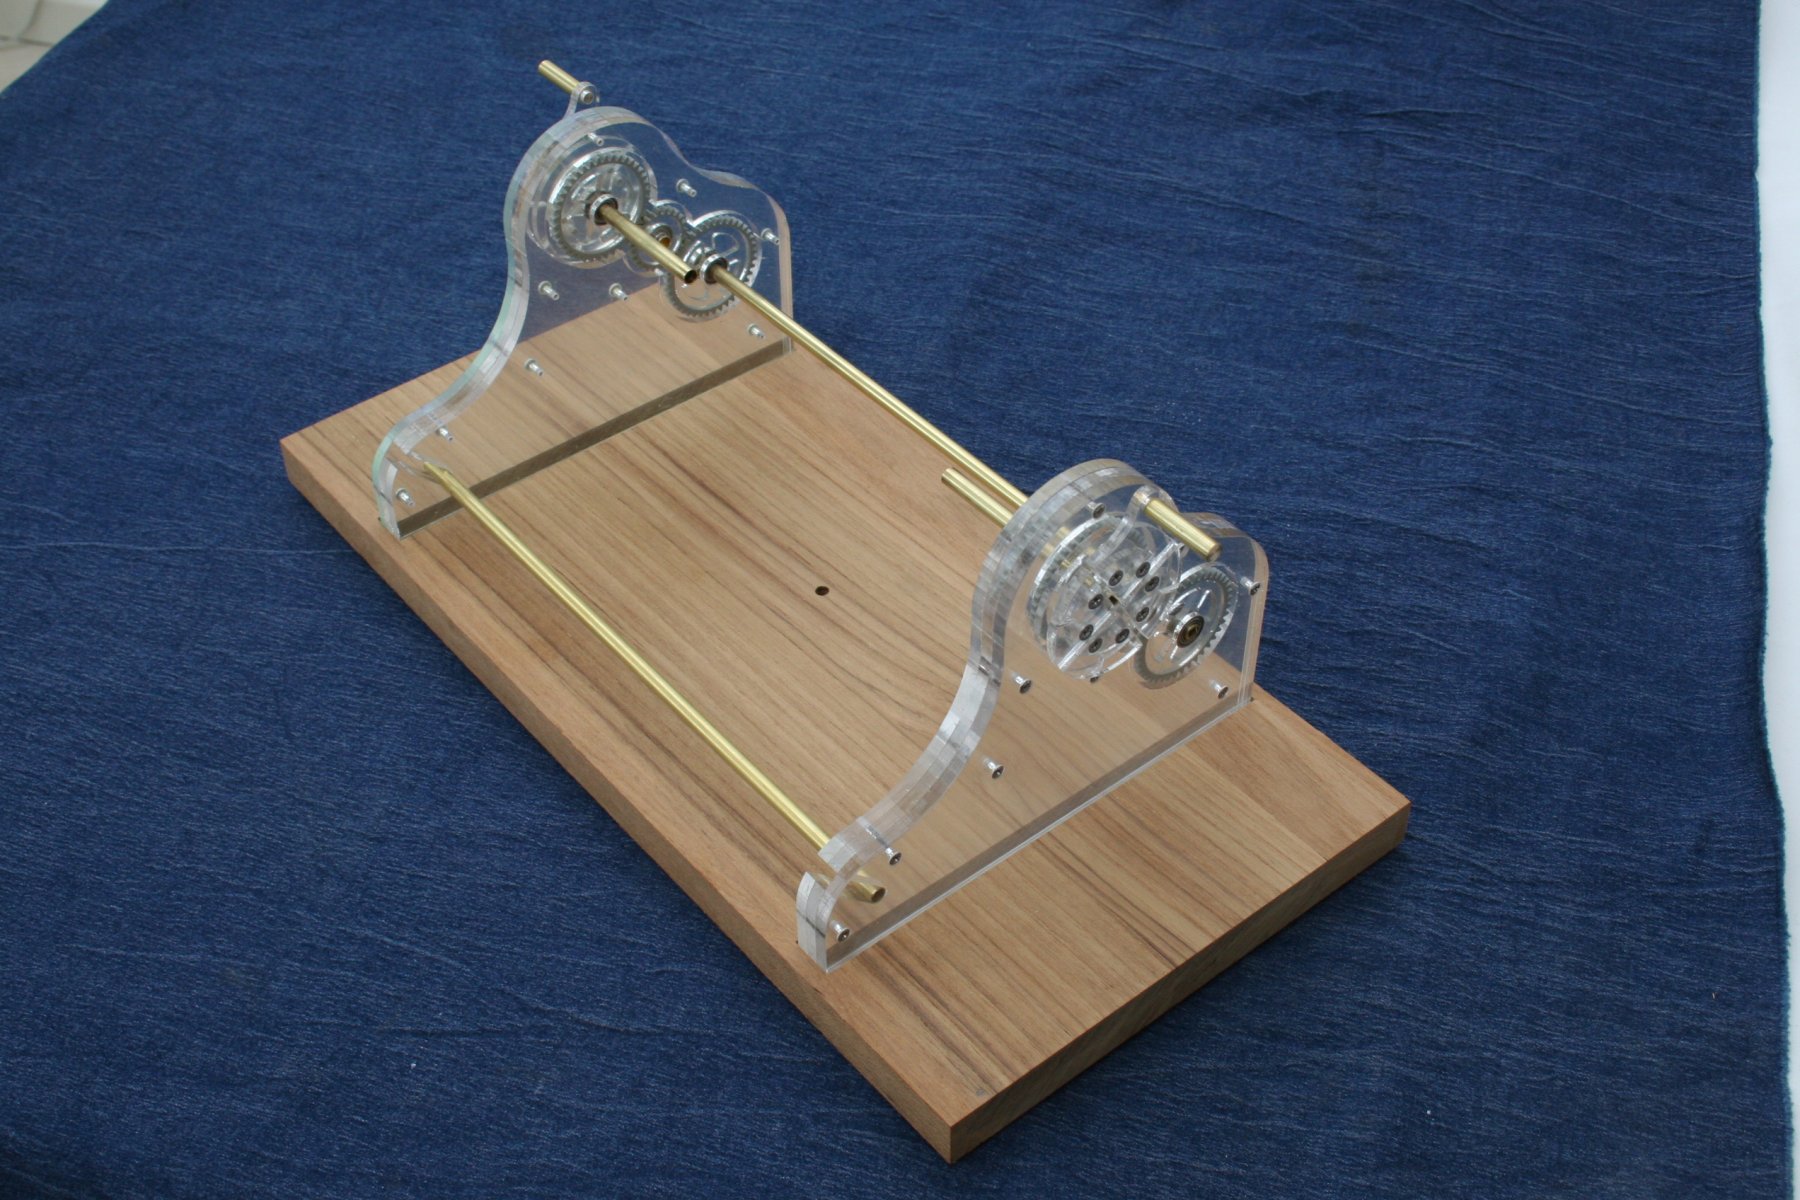
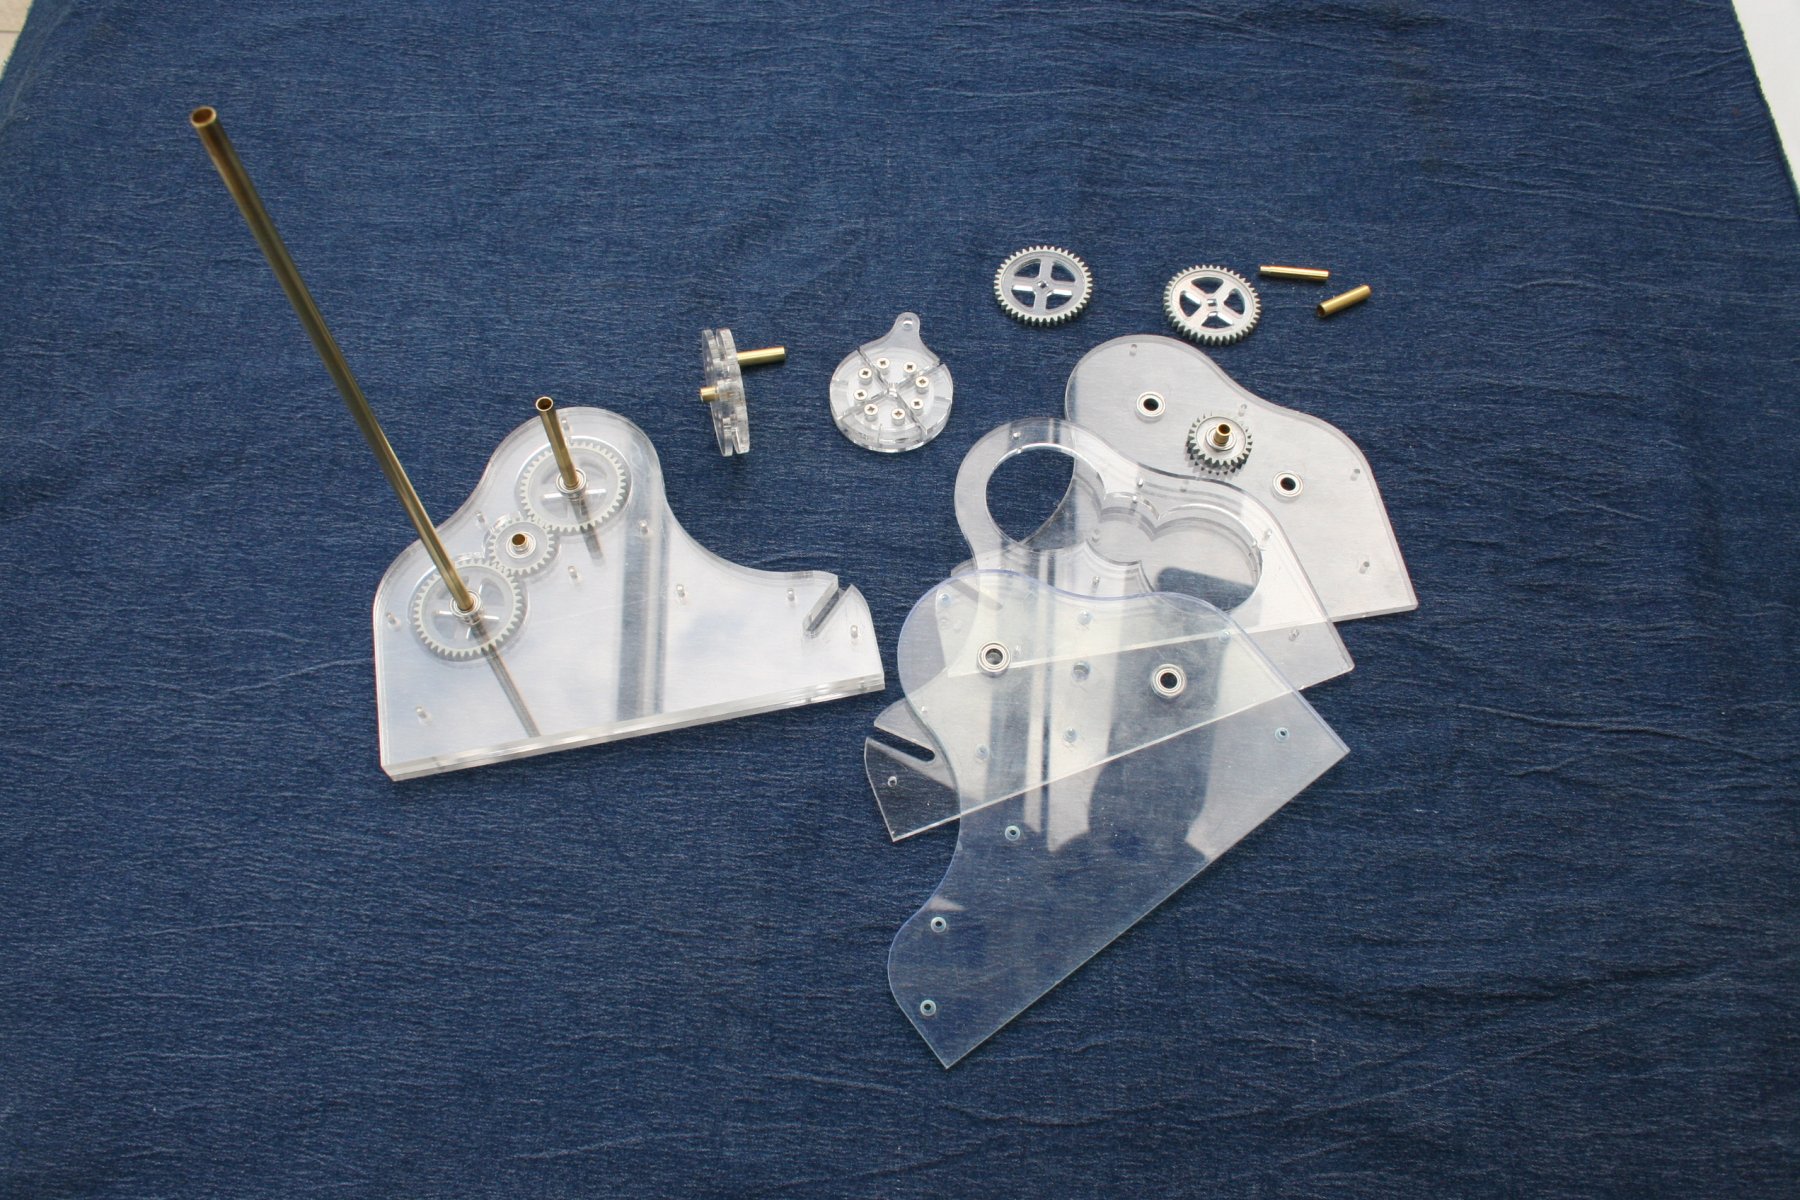
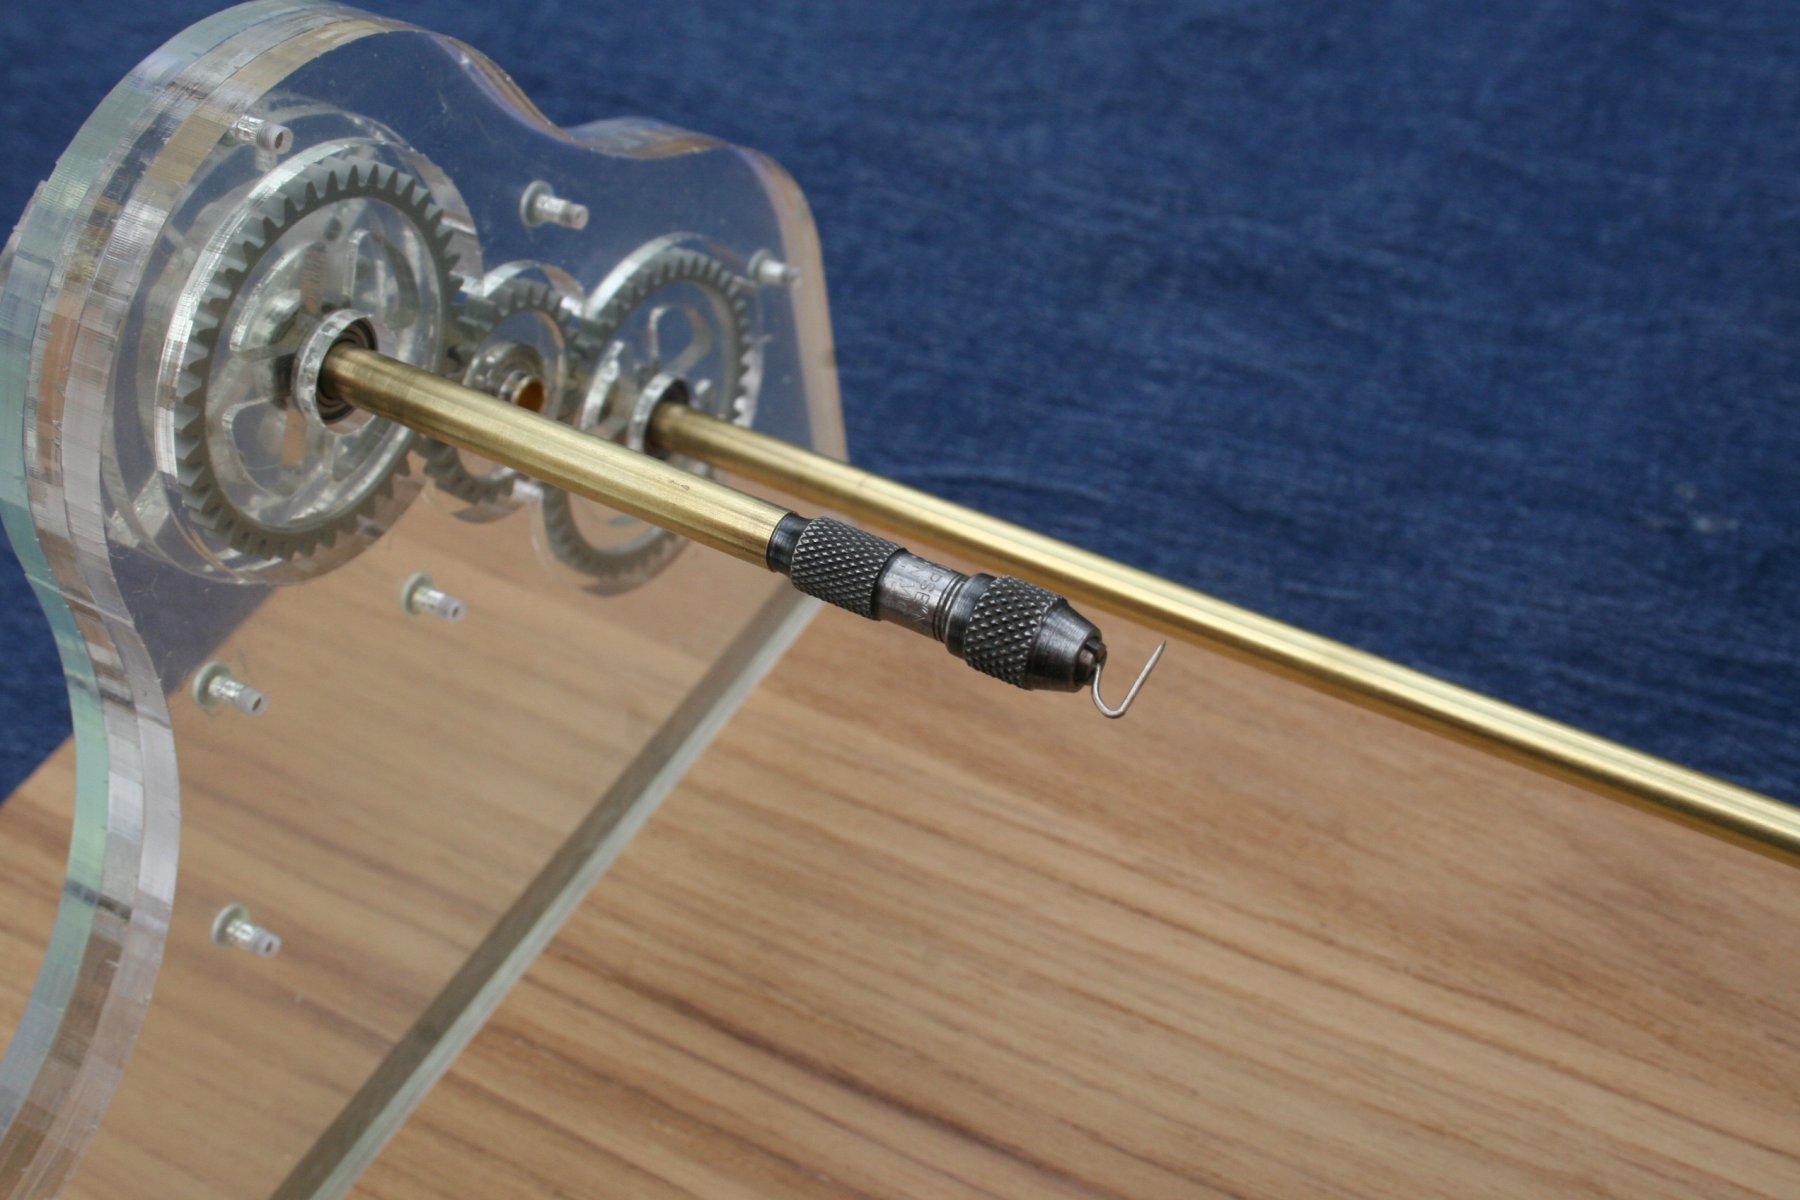
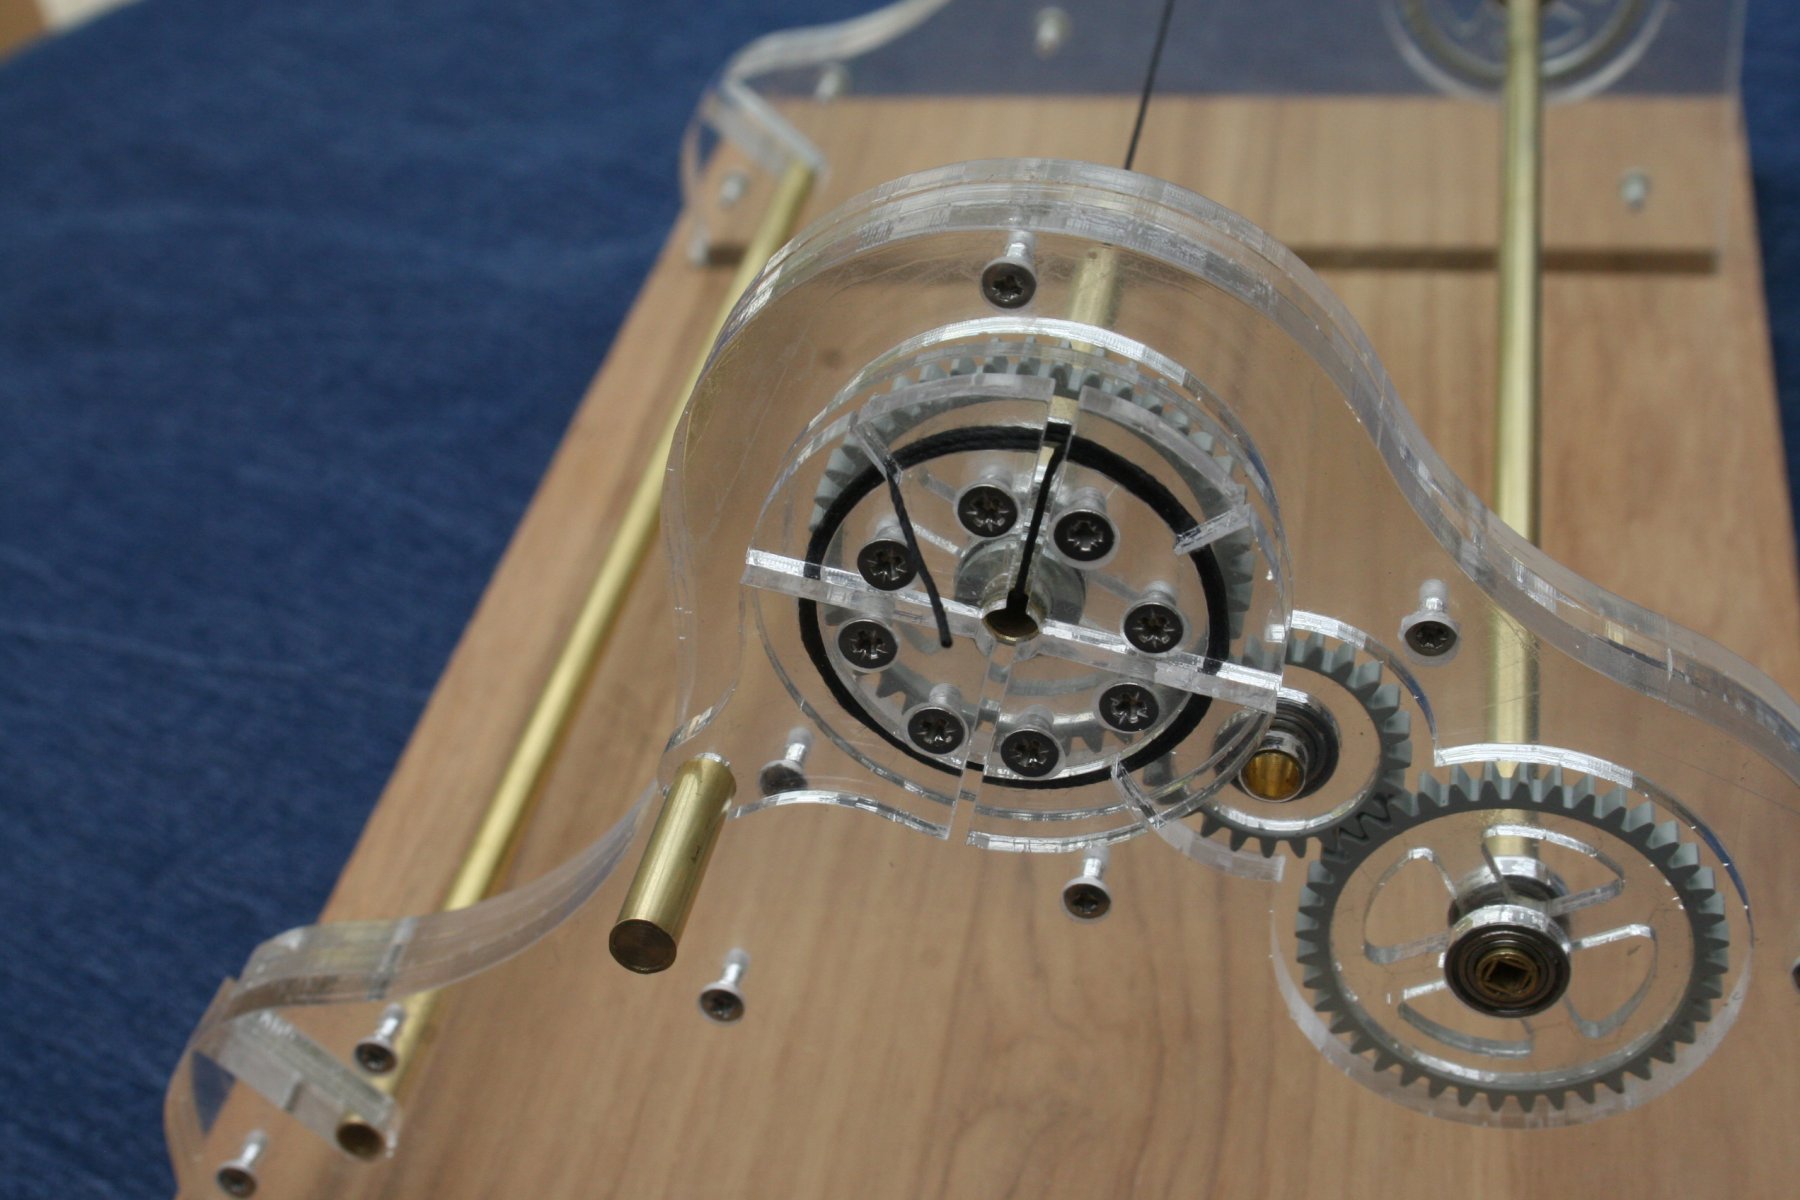
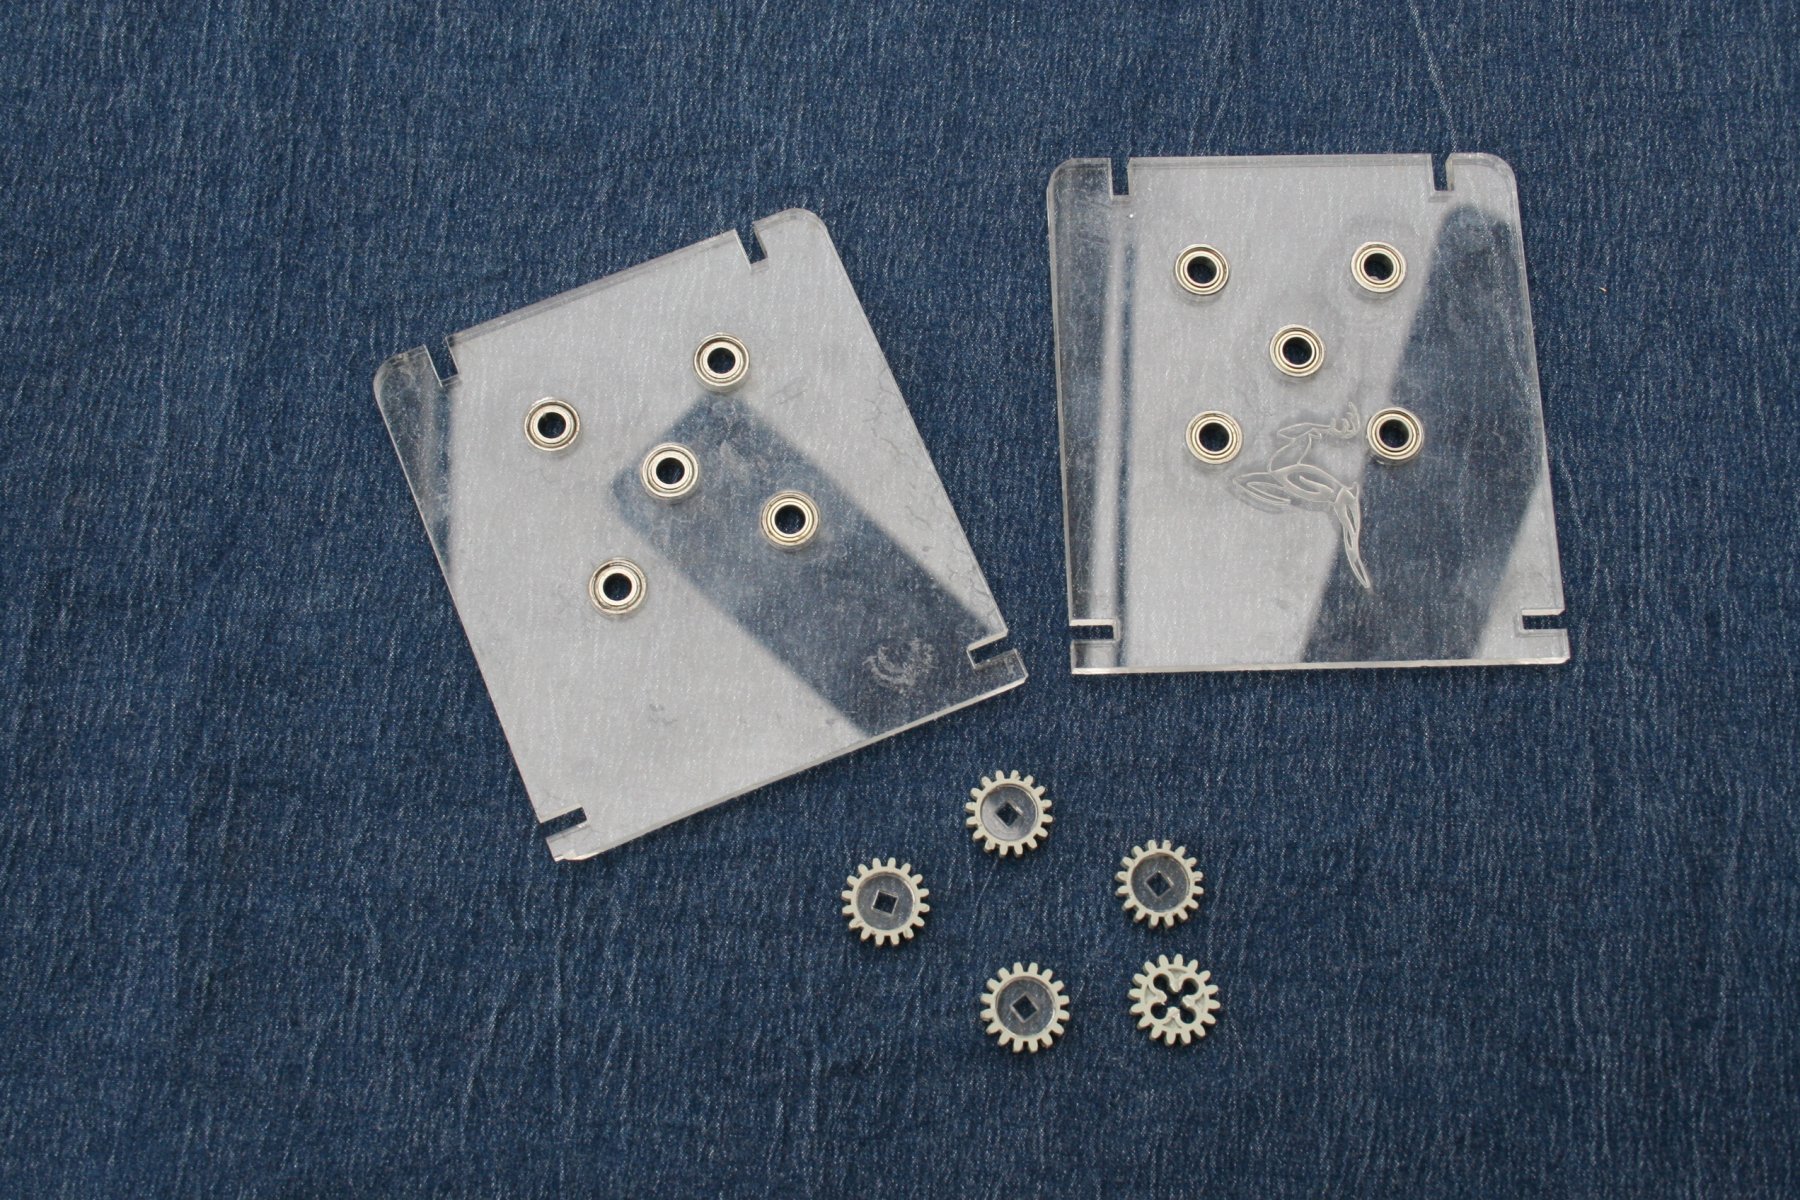
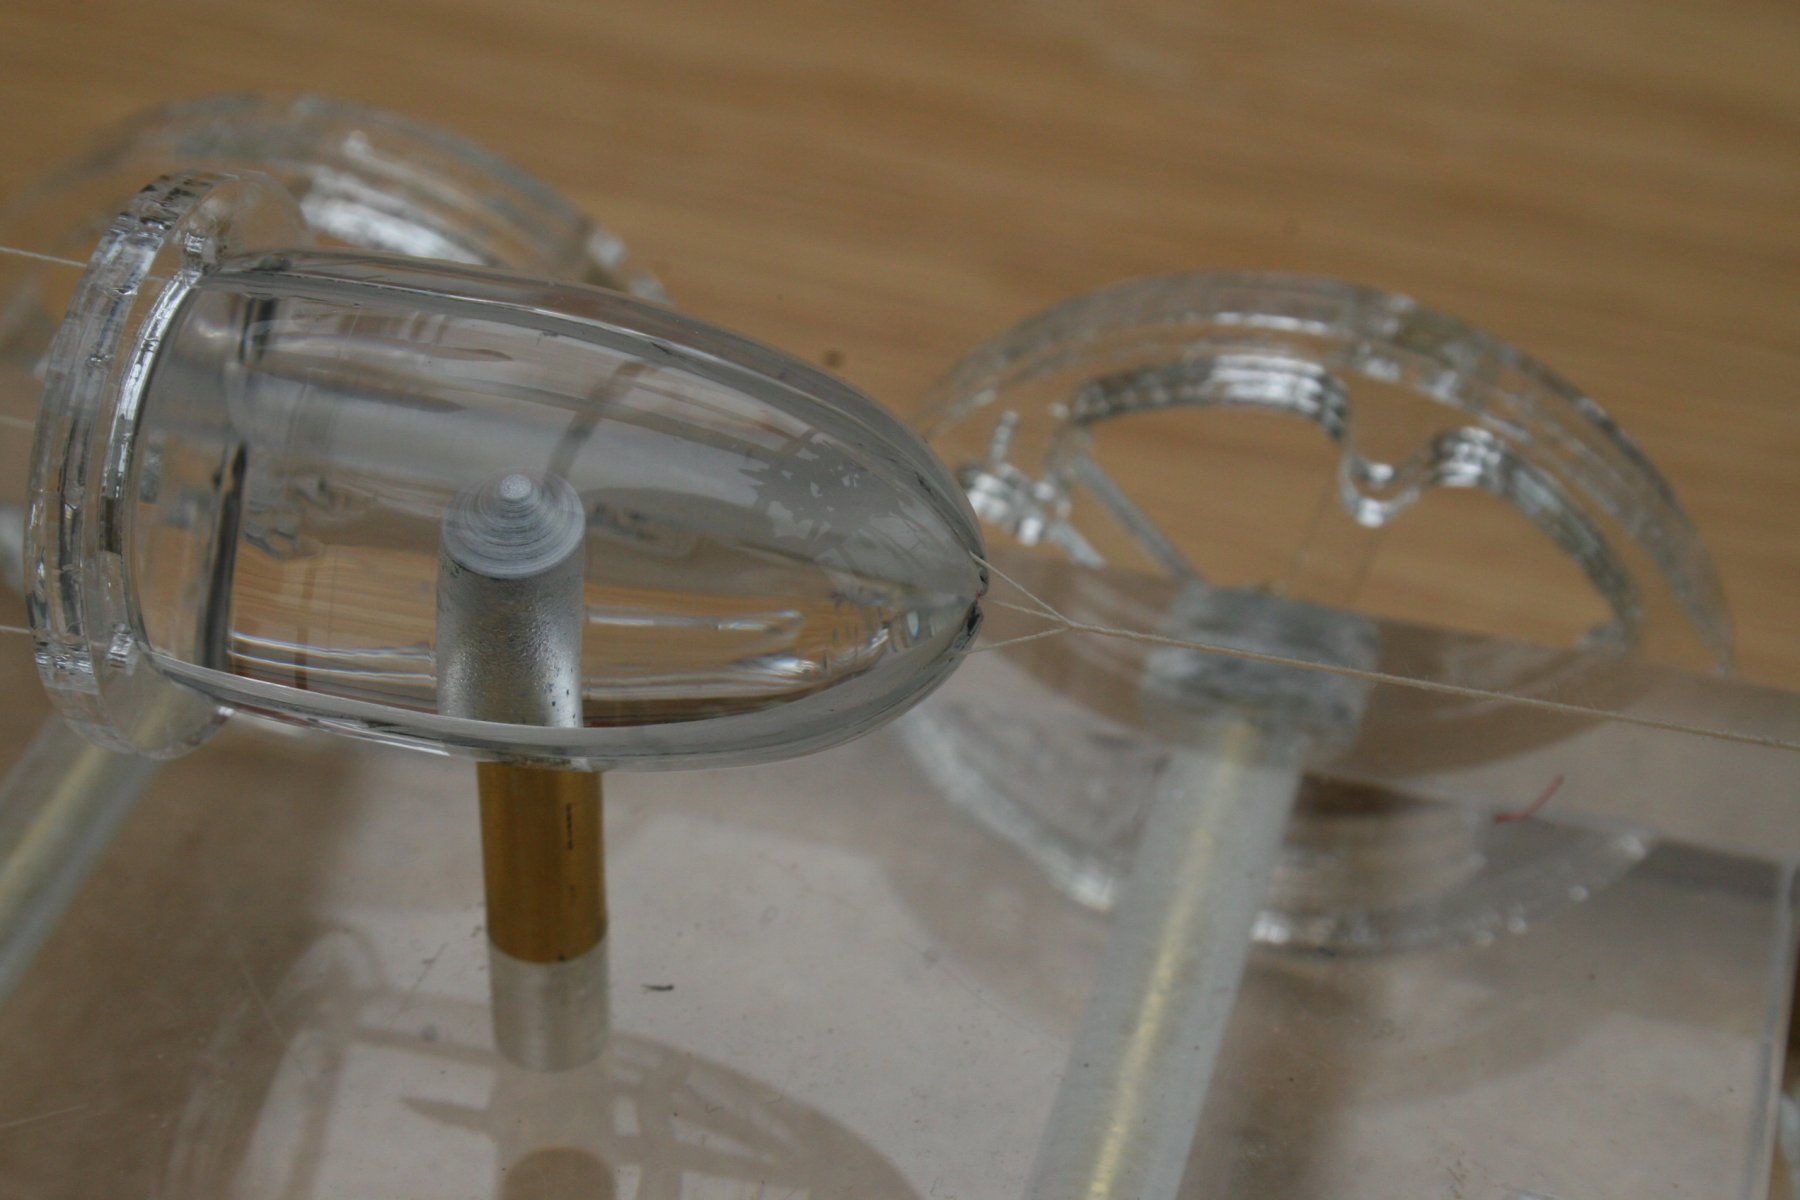
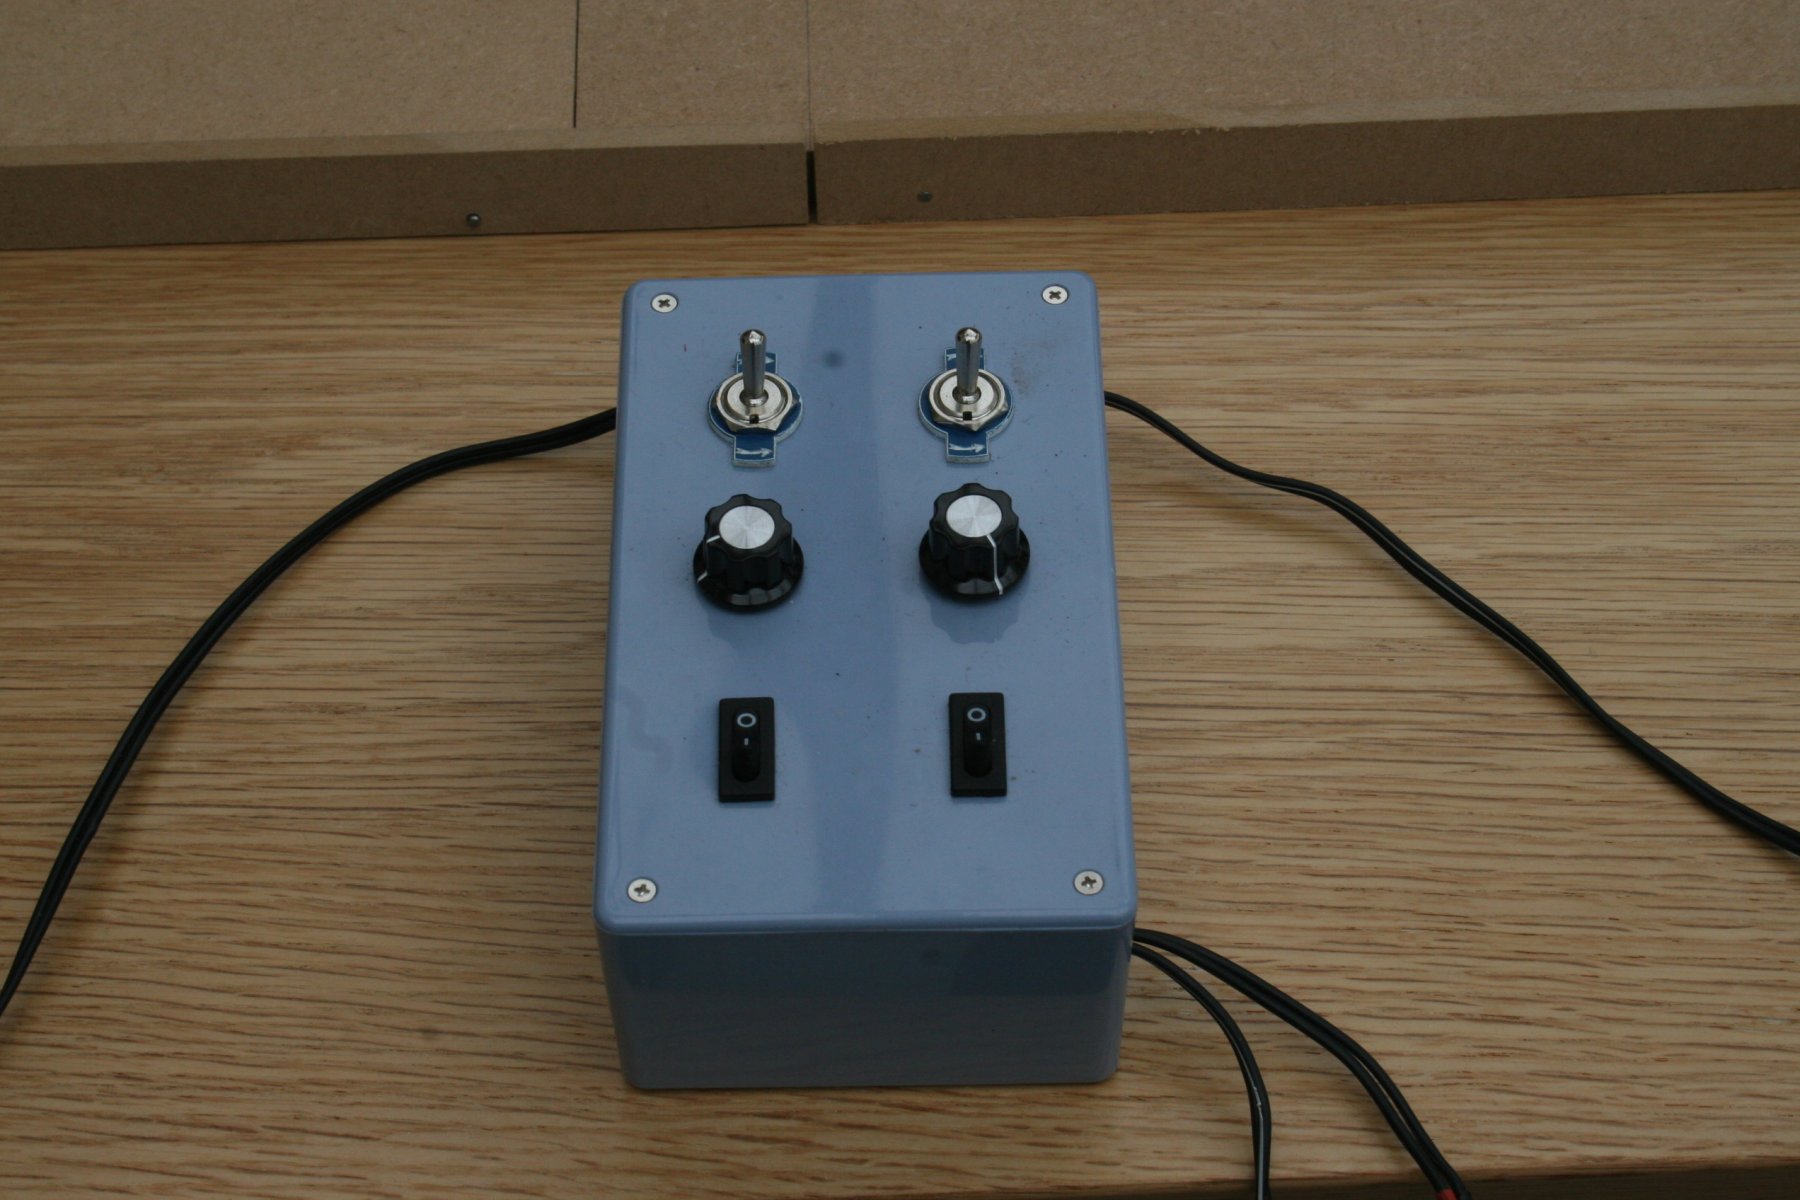
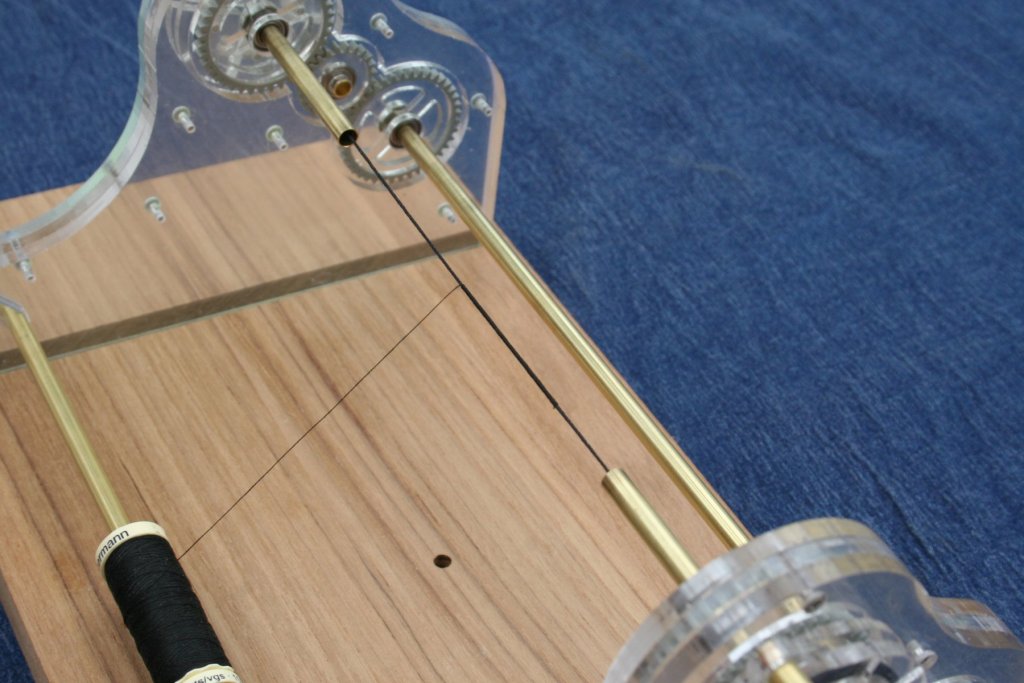
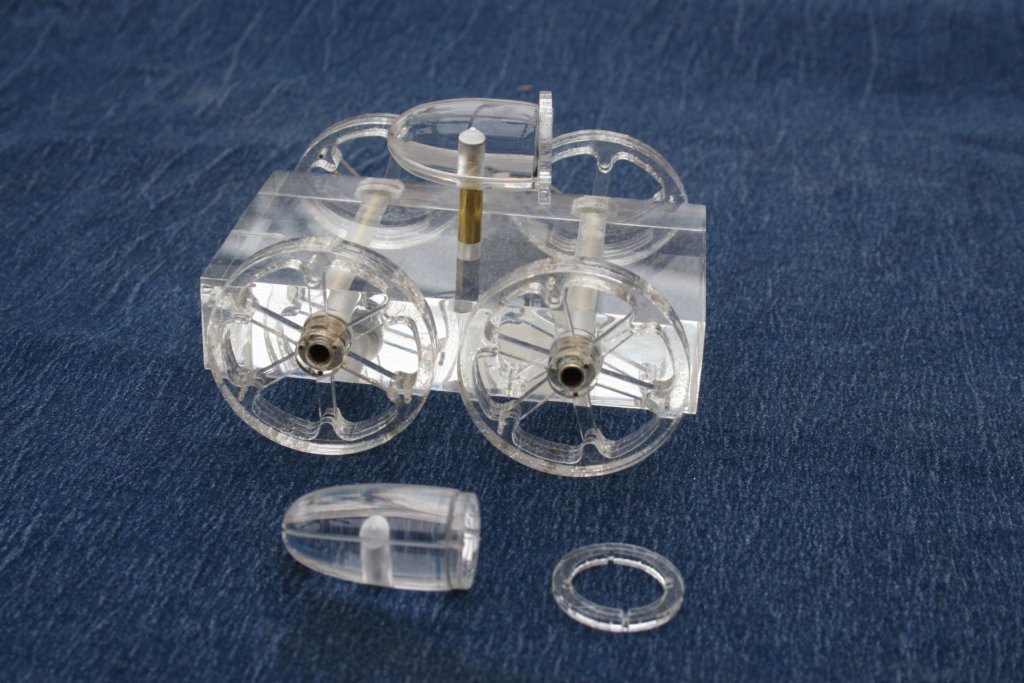
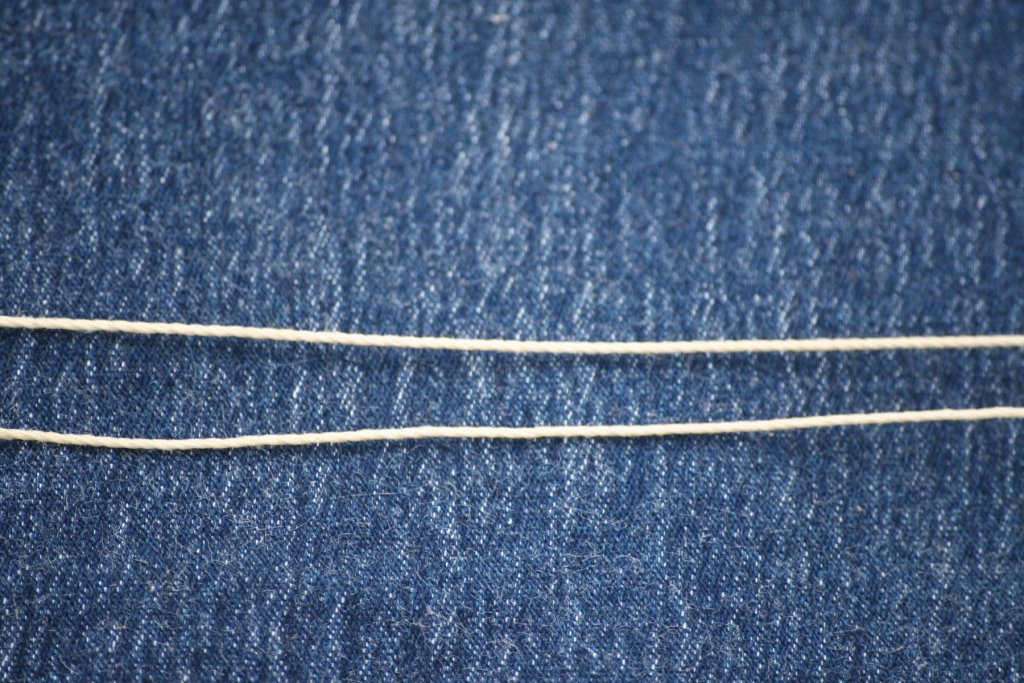
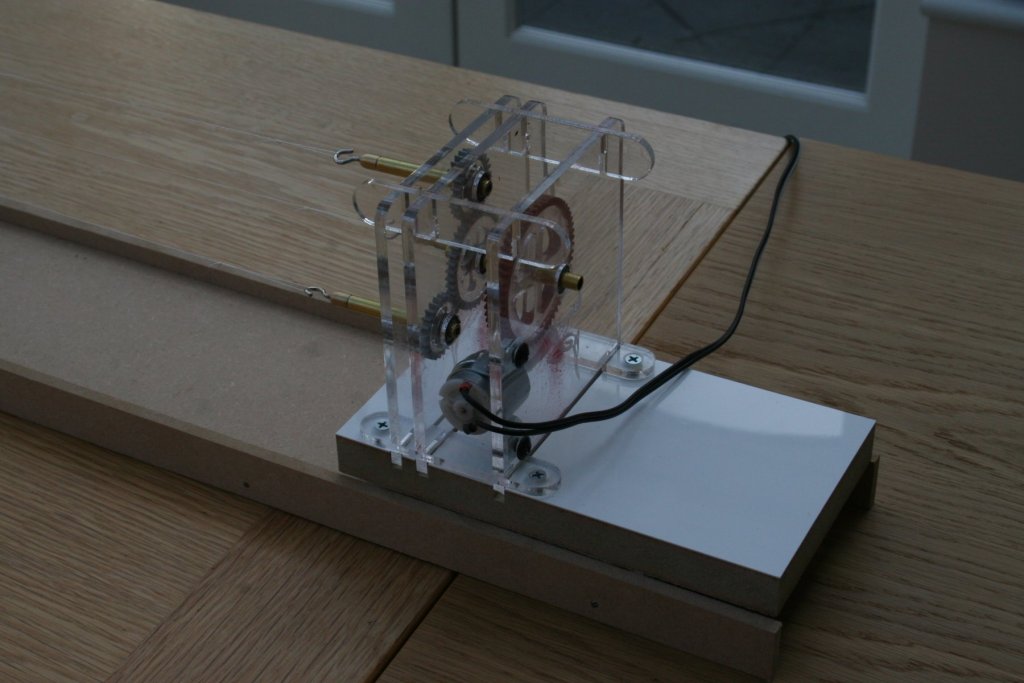
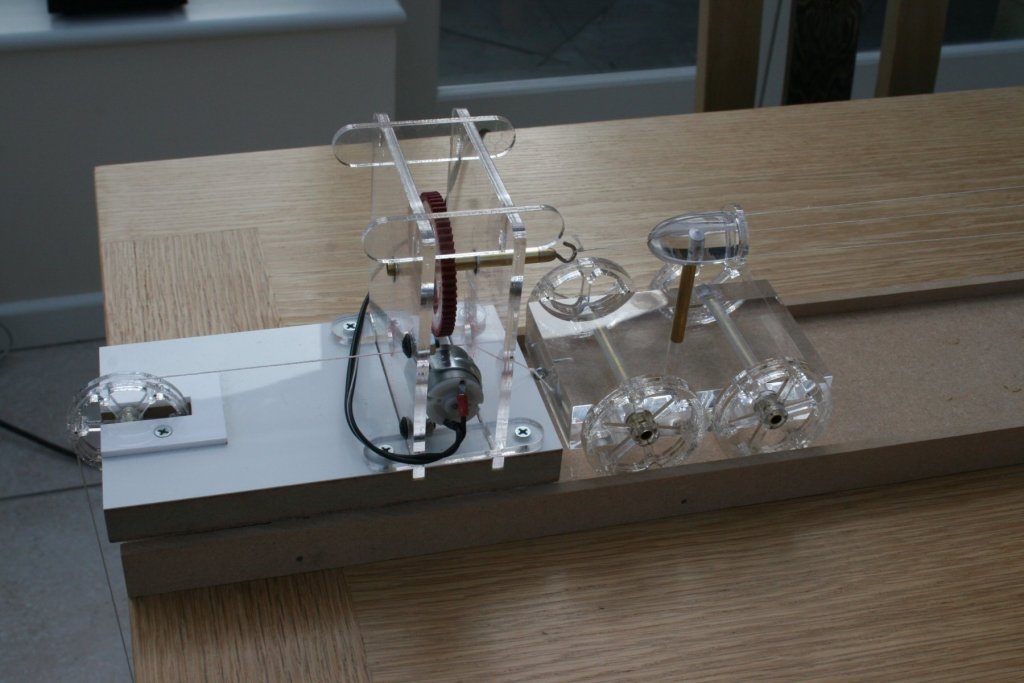
Hi, Last October a thread started by Derek (Worldway) in this section of the forum gave me the final nudge to get started on making my own ropewalk. I have previously built a serving machine and decided to try and use similar construction techniques such as using acrylic for the main structure and modified Lego gears for the mechanism. Here are some pictures of this earlier project: The Ropewalk: Clear acrylic components were built up to make wheels and pulleys. Small holes around the rims aid alignment using the brass pins recovered from the first planking on my HMS Victory - I knew there would be a reason to keep them! The Lego gears had their centers machined out and replaced by acrylic hubs. These have a square hole in the center through which 5/32" square brass tube is pushed. This tube, after a little filing, slides firmly into 6mm O/D brass tube axles which in turn fit into the ball races press fitted into the various support plates. The track is in sections each about a meter long, which slot together. I decided to try and use one motor to drive the end that twists the individual strands and a second one to twist these strands together. The control box provides separate on/off switches, variable speed control and finally a switch to reverse the direction of rotation. The motors were initially powered by batteries but I have now replaced these with a 6 volt power supply. The 'Top' which guides the strands is mounted on an acrylic truck. This is fitted with the three stand top in the photo but there is also a four stand top. These four strand gear plates are easily fitted in place of the three strand gear drive. In use the strand twisting end is fixed to the track but the other end that twists these together to produce the final rope is free to slide along the track as the twisting process reduces the length of the rope. I'm still getting to grips with the best way to operate this device and need to experiment more with types of yarn, motor speeds etc. Early attempts are encouraging however.......... Cheers, Graham.


- 26 replies
-
- 23
-
-
Hi Mike, I found the same thing when I started my build. As I was swiftly advised, you should find the missing drawings either in the 'cross section' download or fully drawn and explained in the NRG Articles database section - on this site's home page, click on 'more' (top right). Good luck with your build, and I look forward to following your progress. Cheers, Graham.
-
Thanks for that Guy, but still a long way to go! I'm hoping to get back to work next month and when time permits I'll be tackling those hawse timbers. I have, however, made progress with cutting out the components for the many frames since my last post. I've devoted a bit of time designing and fabricating parts for a rope walk which is close to completion, as much for the mental stimulation as any other reason, while I recover strength and fitness. I'll post details on an appropriate topic thread once I've finished and trialed it, assuming it works! Cheers, Graham.
-
Simply stunning - lost for words, Thank you for posting this. Graham
-
Superb work Mike. Love the detail on the sails. I'm really enjoying following your progress - thank you for sharing it. Must say I'm very impressed by the quality of Maris Stella kits as well. Keep up the good work. Graham
- 204 replies
-
- 1
-
-
- trajta
- marisstella
- (and 1 more)
-
Thank you for your generous comments, Christian. I apologize for not being in a position to reply sooner which brings me to the main reason for this particular up date. There has been little progress recently, initially due to work pressures (the end of a school term is a busy time!) and then at the start of the new year I finally was given a date for a follow up medical procedure that had been on the cards since August last year. I have subsequently been off work, returning home after a month in the very capable hand of the NHS yesterday. Access to this site was limited to very variable connectivity with my phone, but being able to follow the work of others here certainly helped the time to pass. I have, therefore, had to put this build on temporary hold . I will get back to it, I promise. It's a real challenge, and a steep learning curve, but so much fun. When I am up to it I intend to drop into work and while there I'm planning to pick up the cherry pieces that I've prepared and print off some frame drawings so that I can at least make some progress back home with my more limited equipment. In the mean time I will be focusing on my HMS Victory build and, for a bit of a technical challenge, continue working on my design for a rope walk. The secret is to stay positive and as busy as possible. Onwards and upwards ...... Cheers, Graham.
-
Great news, Zoran. Thank you for resolving the problem. With normality re-established I can get back to planning a couple of future projects ..... Cheers, Graham.
-
Hi Zoran, I'm currently experiencing withdrawal symptoms similar to those I had earlier in the week when the MSW site went down! I'm having problems accessing your website - I hope this is just a temporary glitch - I really appreciate and admire your models of Adriatic sailing craft! ... or is it just my aging laptop playing up? Cheers, Graham
-
Superb detail and craftsmanship, Jens - as always! Great to see you back. I'm looking forward to following your build through to completion. Graham
- 188 replies
-
- 2
-
-
- cutty sark
- billing boats
- (and 1 more)
-
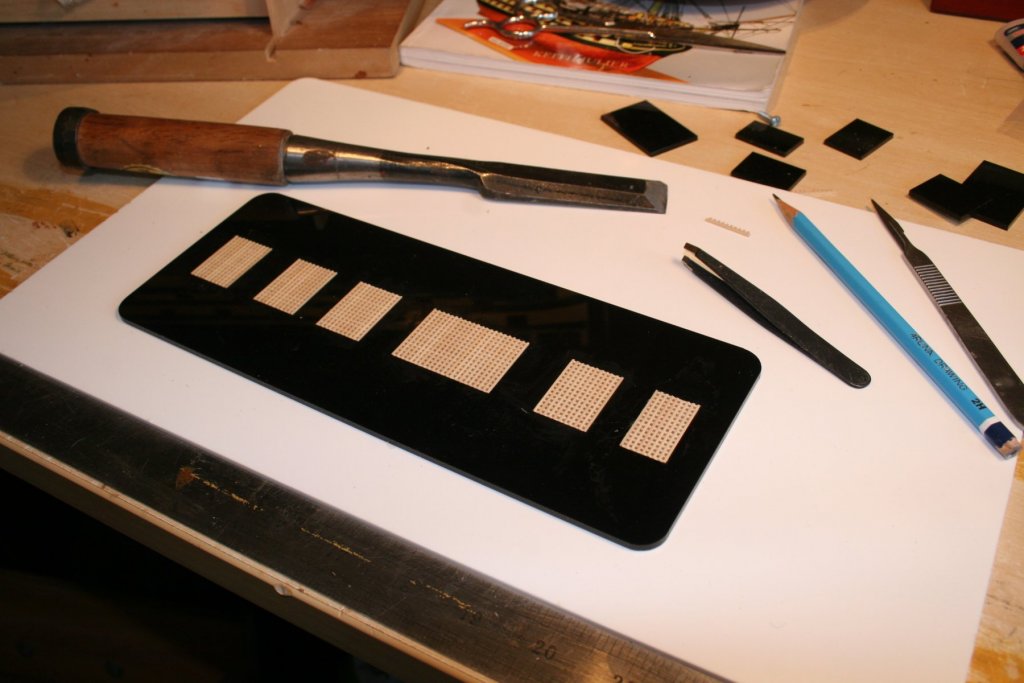
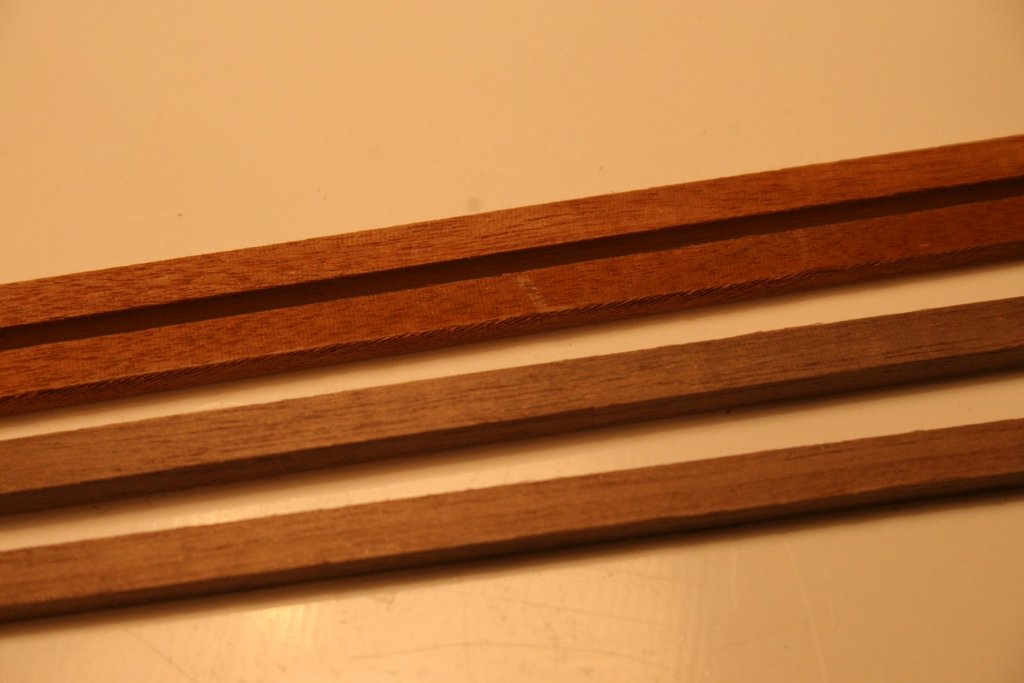
Thank's for your generous comments, Michael and Nigel - much appreciated. With the plating complete I've moved onto the gratings. I found that a sharp chisel and a cutting mat was my most successful method of cutting the individual components to length. A simple assembly aid held the pieces in place while the watered down PVA glue dried. Gratings removed ... ...and sanded. Coamings next. I was a bit disappointed with the quality of the 4 x 3 strip provided. It had a more pronounced open grain and is a much more red colour compared with the other walnut in the kit. I made the decision to convert the remnants of the 5mm sheet that held the rudder etc. into a suitable alternative. The original strips are at the top of the picture. Inspired by having seen Paul B's recent posts and his photographs of these gratings I'm tempted to try his method of dealing with the joints rather than the mitres shown on the plans. Time to 'play' Graham.
-
Outstanding work, Paul. Your build log has become one of my first 'ports of call' when the need for inspiration arises. So much detail to take on board - keep up the great work! Graham
-
I have a feeling that was the method this industrious and illustrious colleague used, Mark. i just dropped if off in her 'in tray' and she did her magic. She's usually rushed off her feet - must have been a quiet day, it was delivered to my classroom / workshop by hand, and the scale measured up true. Graham
-
Hi Ben, Thank's for dropping in, and I'm pleased that you are enjoying the work so far. You're right - the Hawse timbers are proving an interesting challenge! I had been trying to figure out how to get an accurate reversed image of the various components for the opposite side of the hull. I used to oil model aircraft plans so that the lines could be seen through the back of the paper if the need arose. Not much help here with the paper needing to be cut and glued to the wood as a template. Almost had to dig out the old light box. However, two of the most important members of staff at my place of work are the caretaker and the lady who runs the reprographics support - the latter came to the rescue. It seems that these all singing and dancing photocopiers have a 'mirror' setting Modern technology is a wonderful thing, and this old dog has learnt another new trick. Cheers, Graham.
-
Sorry - but that's way beyond any knowledge that I have. Any one else able to help out here? I could be wrong, but I thought the model built by Longridge, the basis for his book 'Anatomy of Nelson's Ships' is regarded as a very authoritative and accurate representation.
-
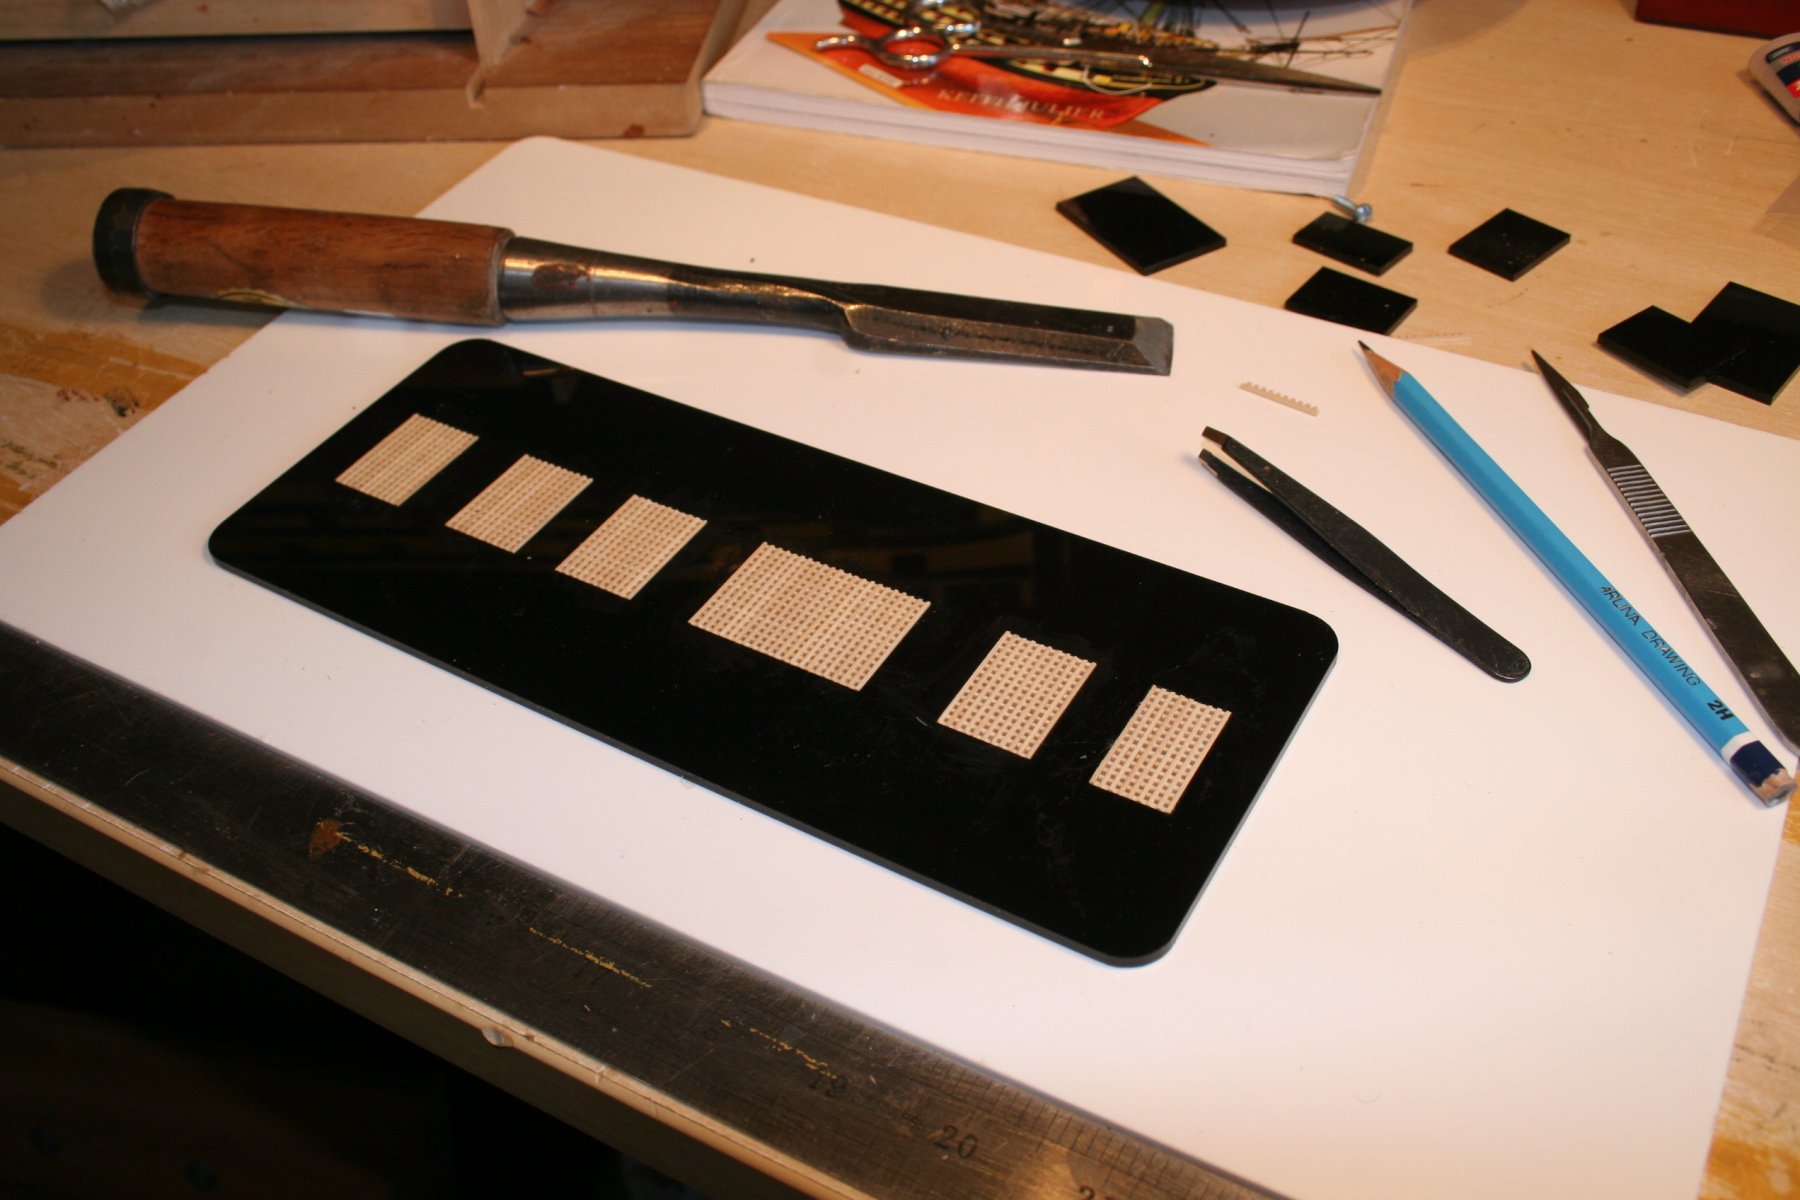
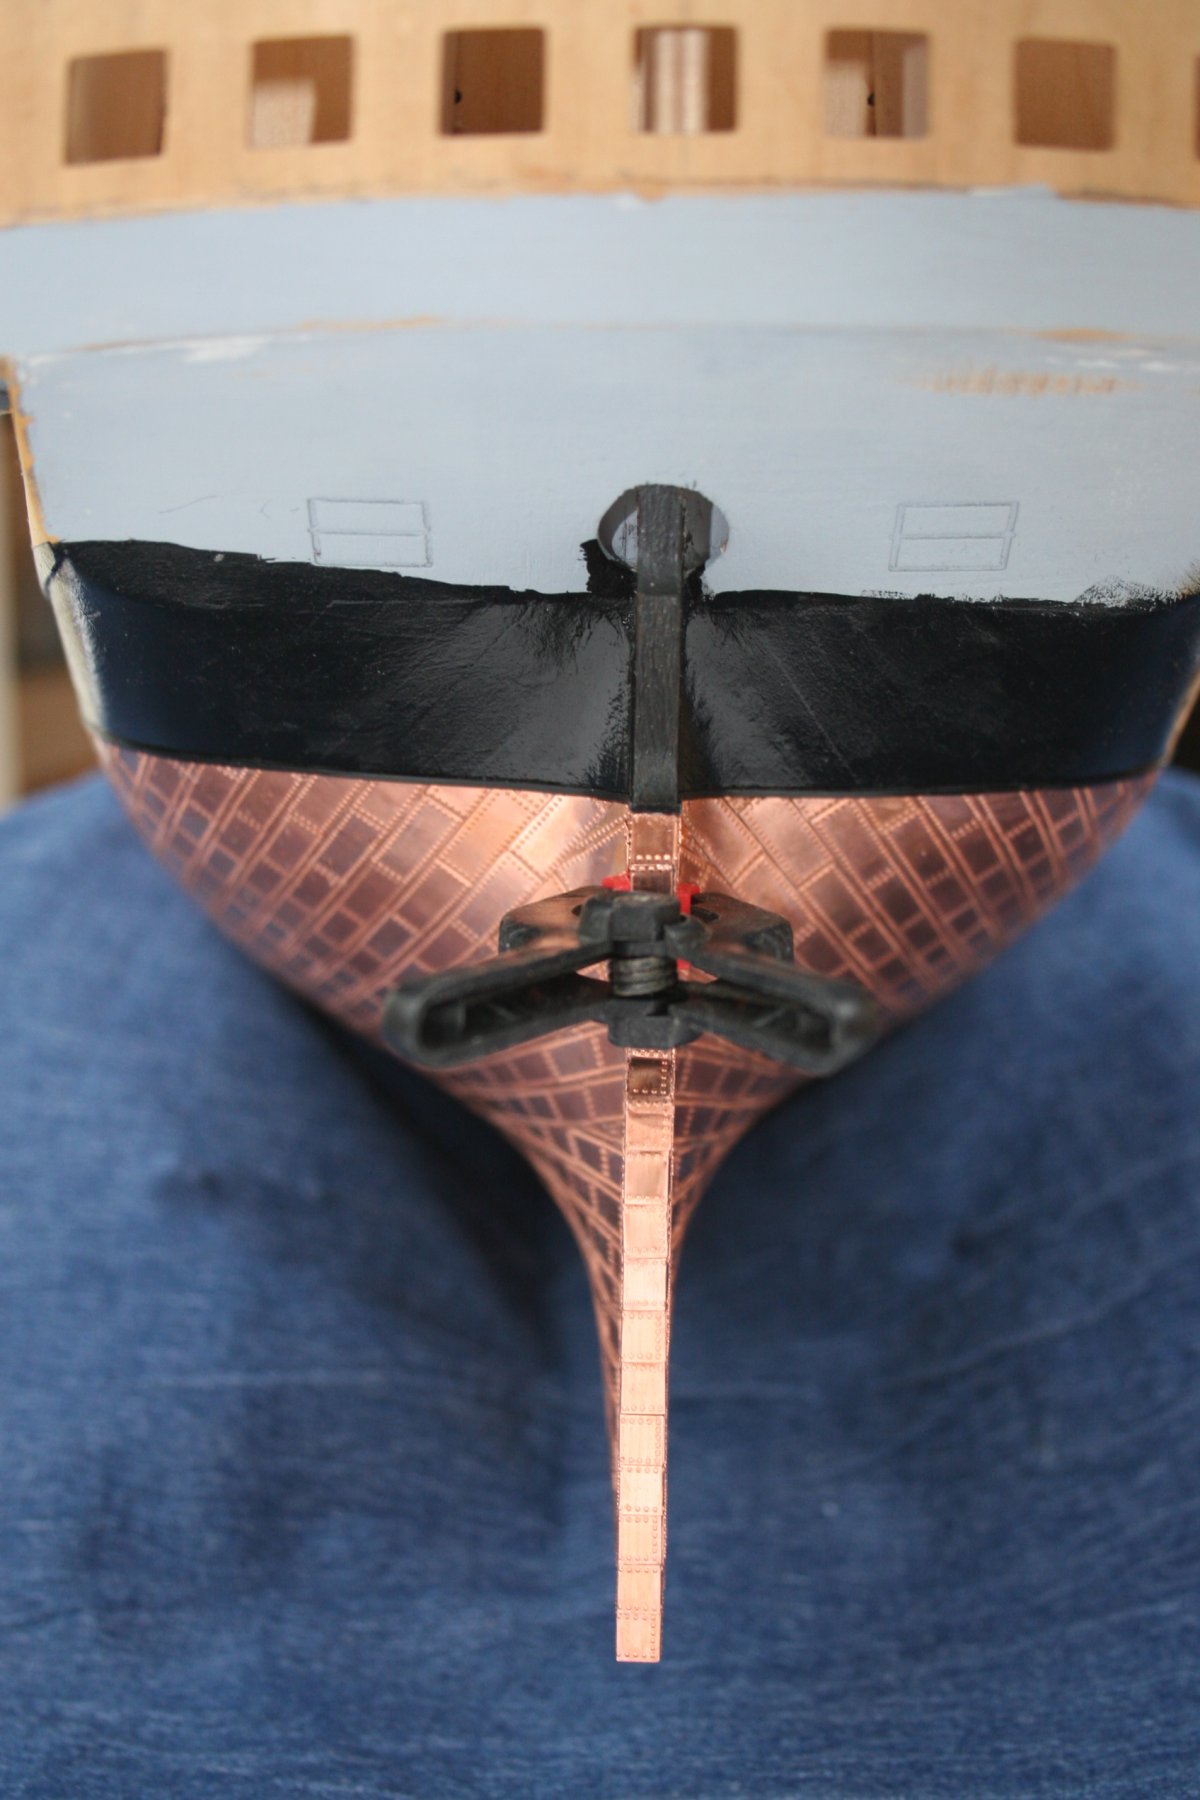
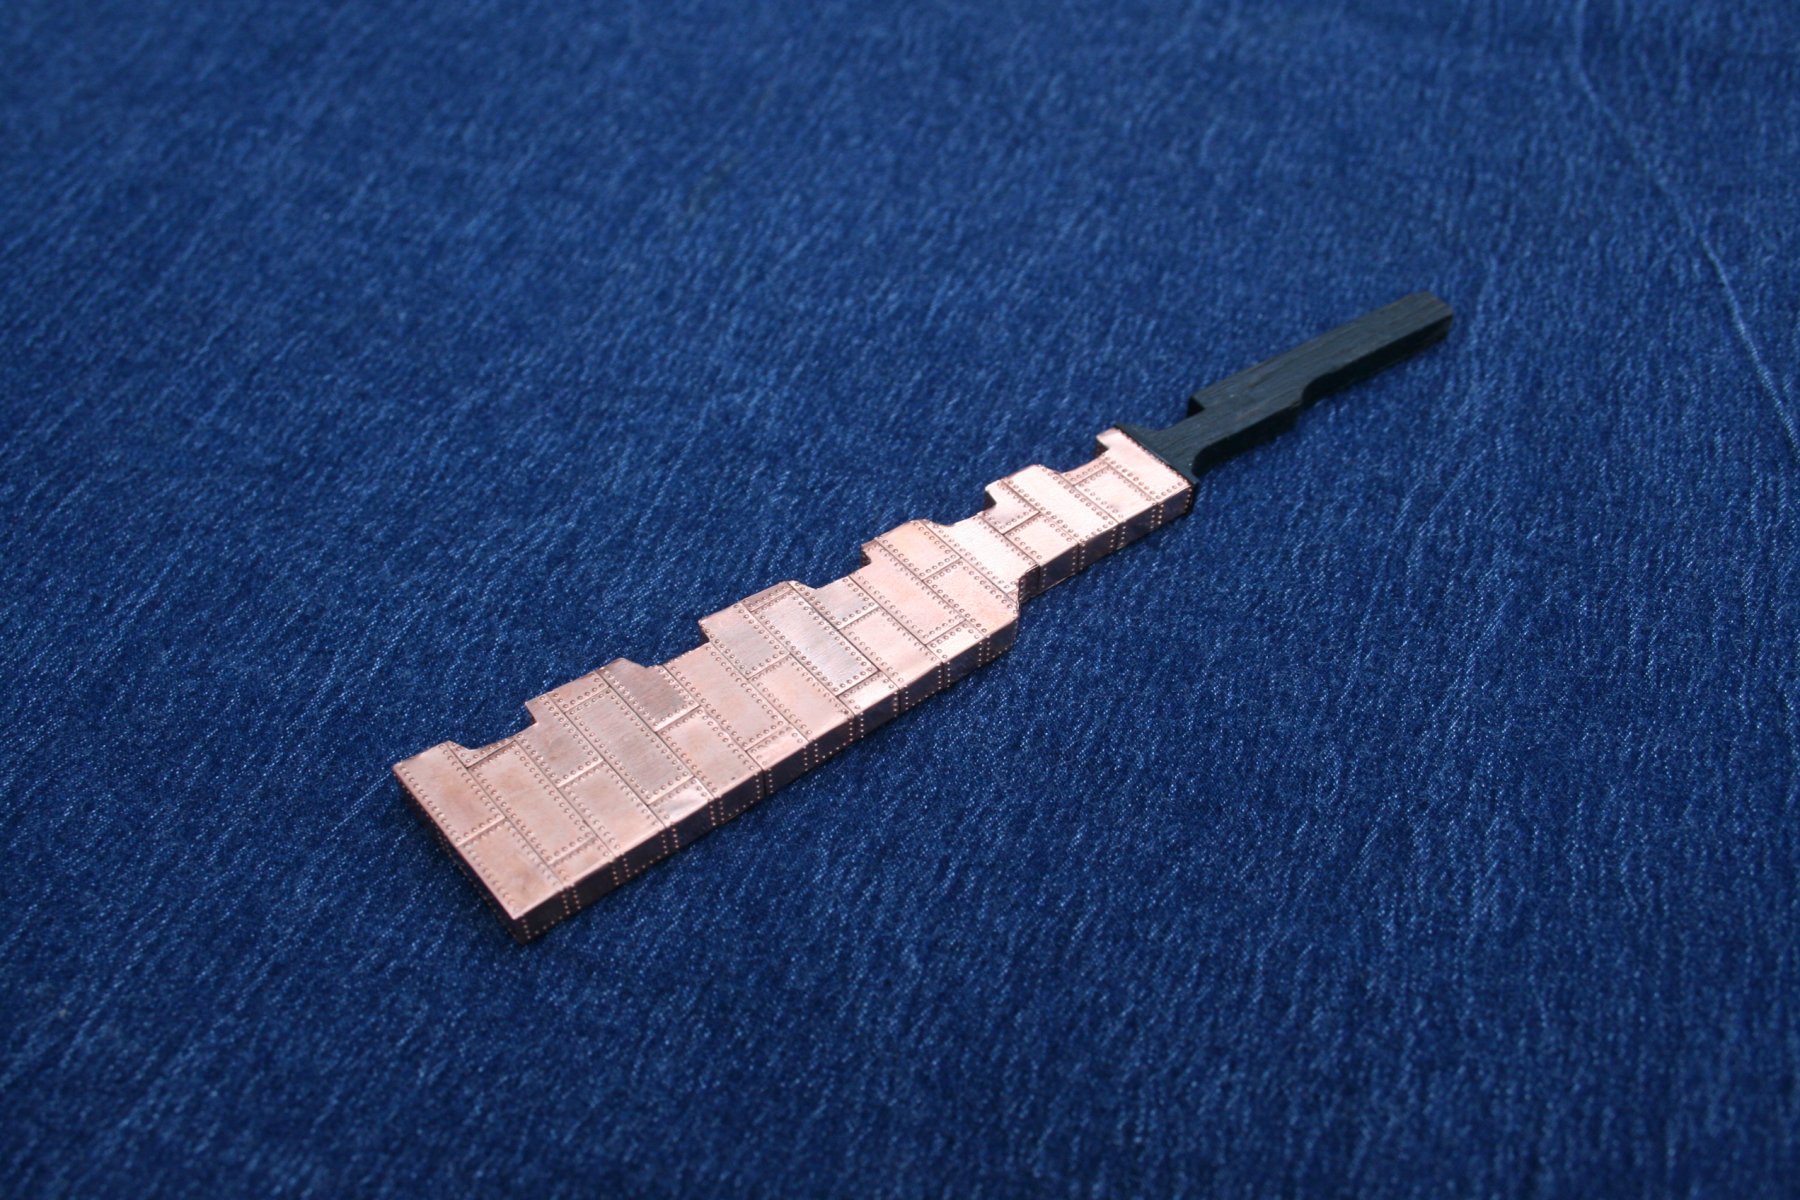
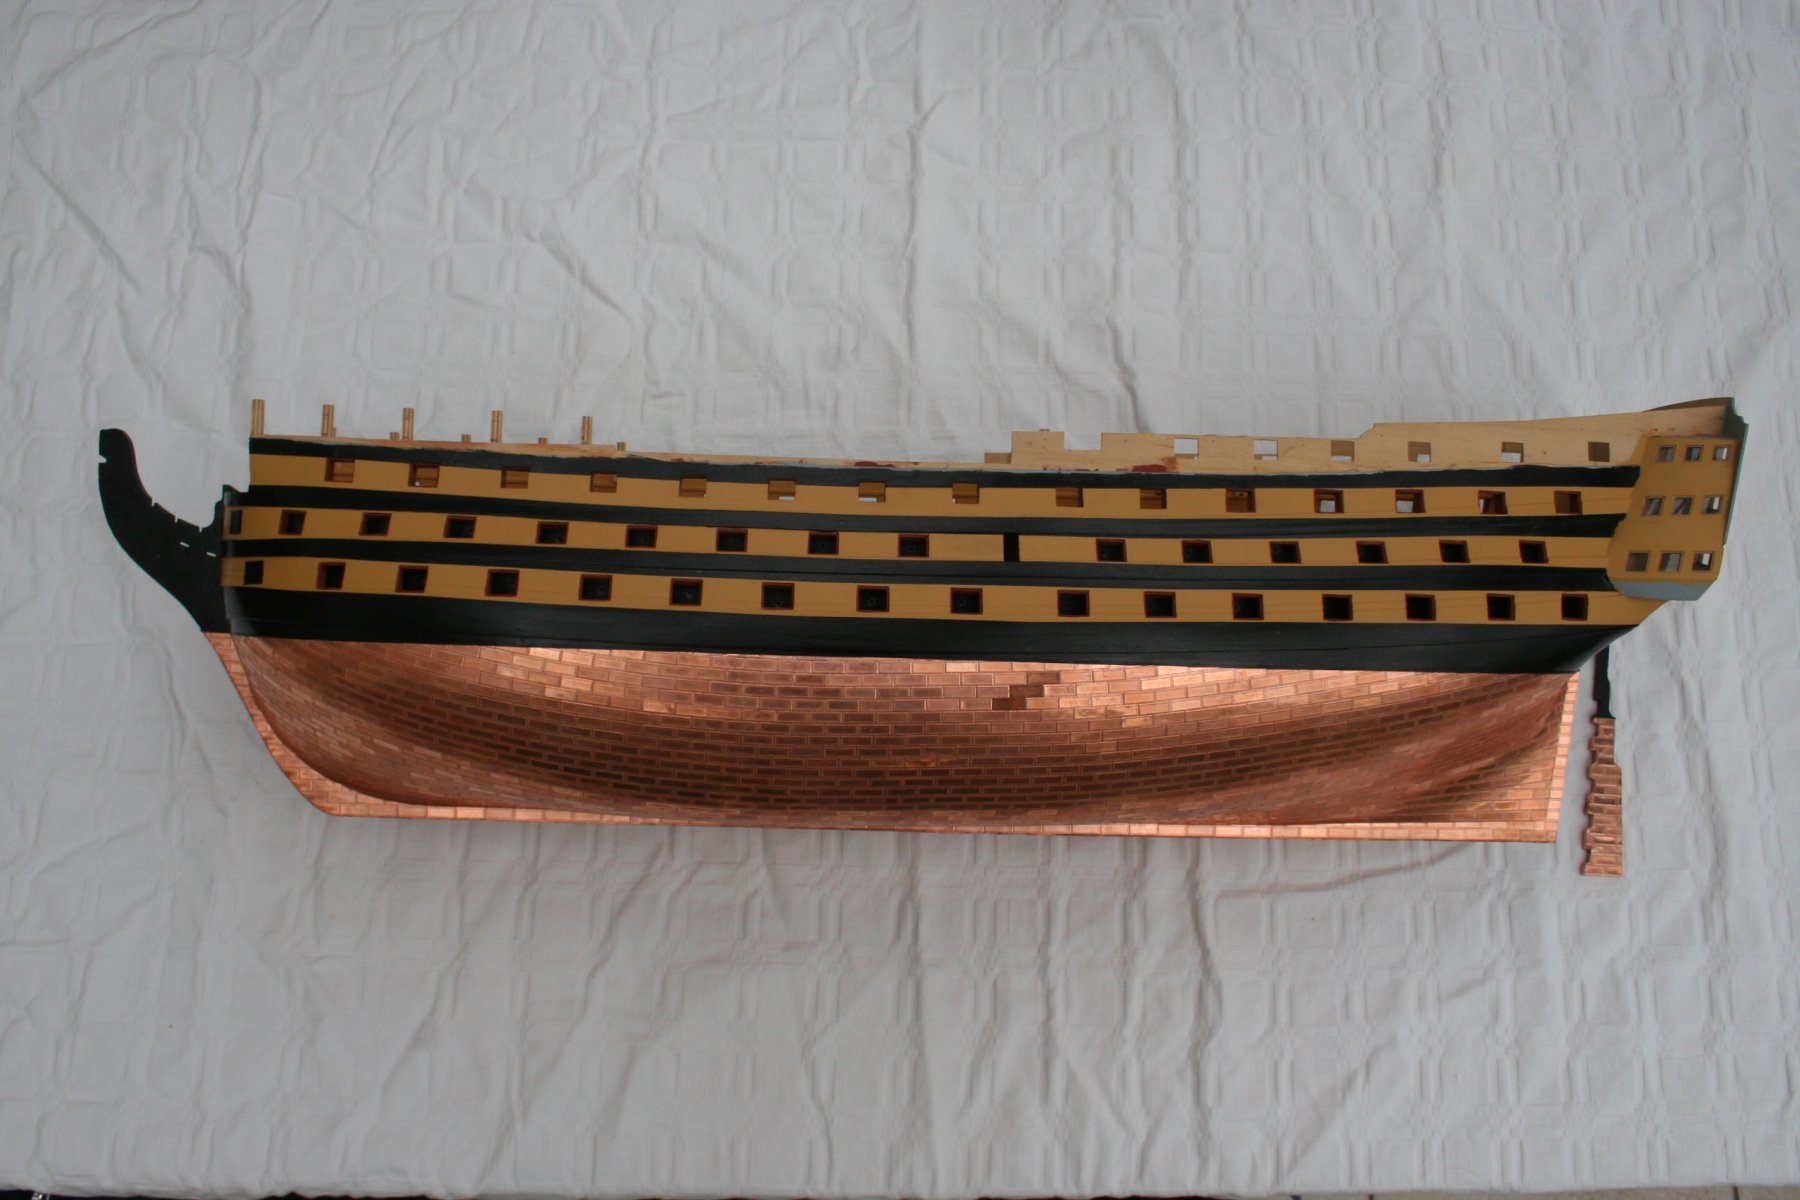
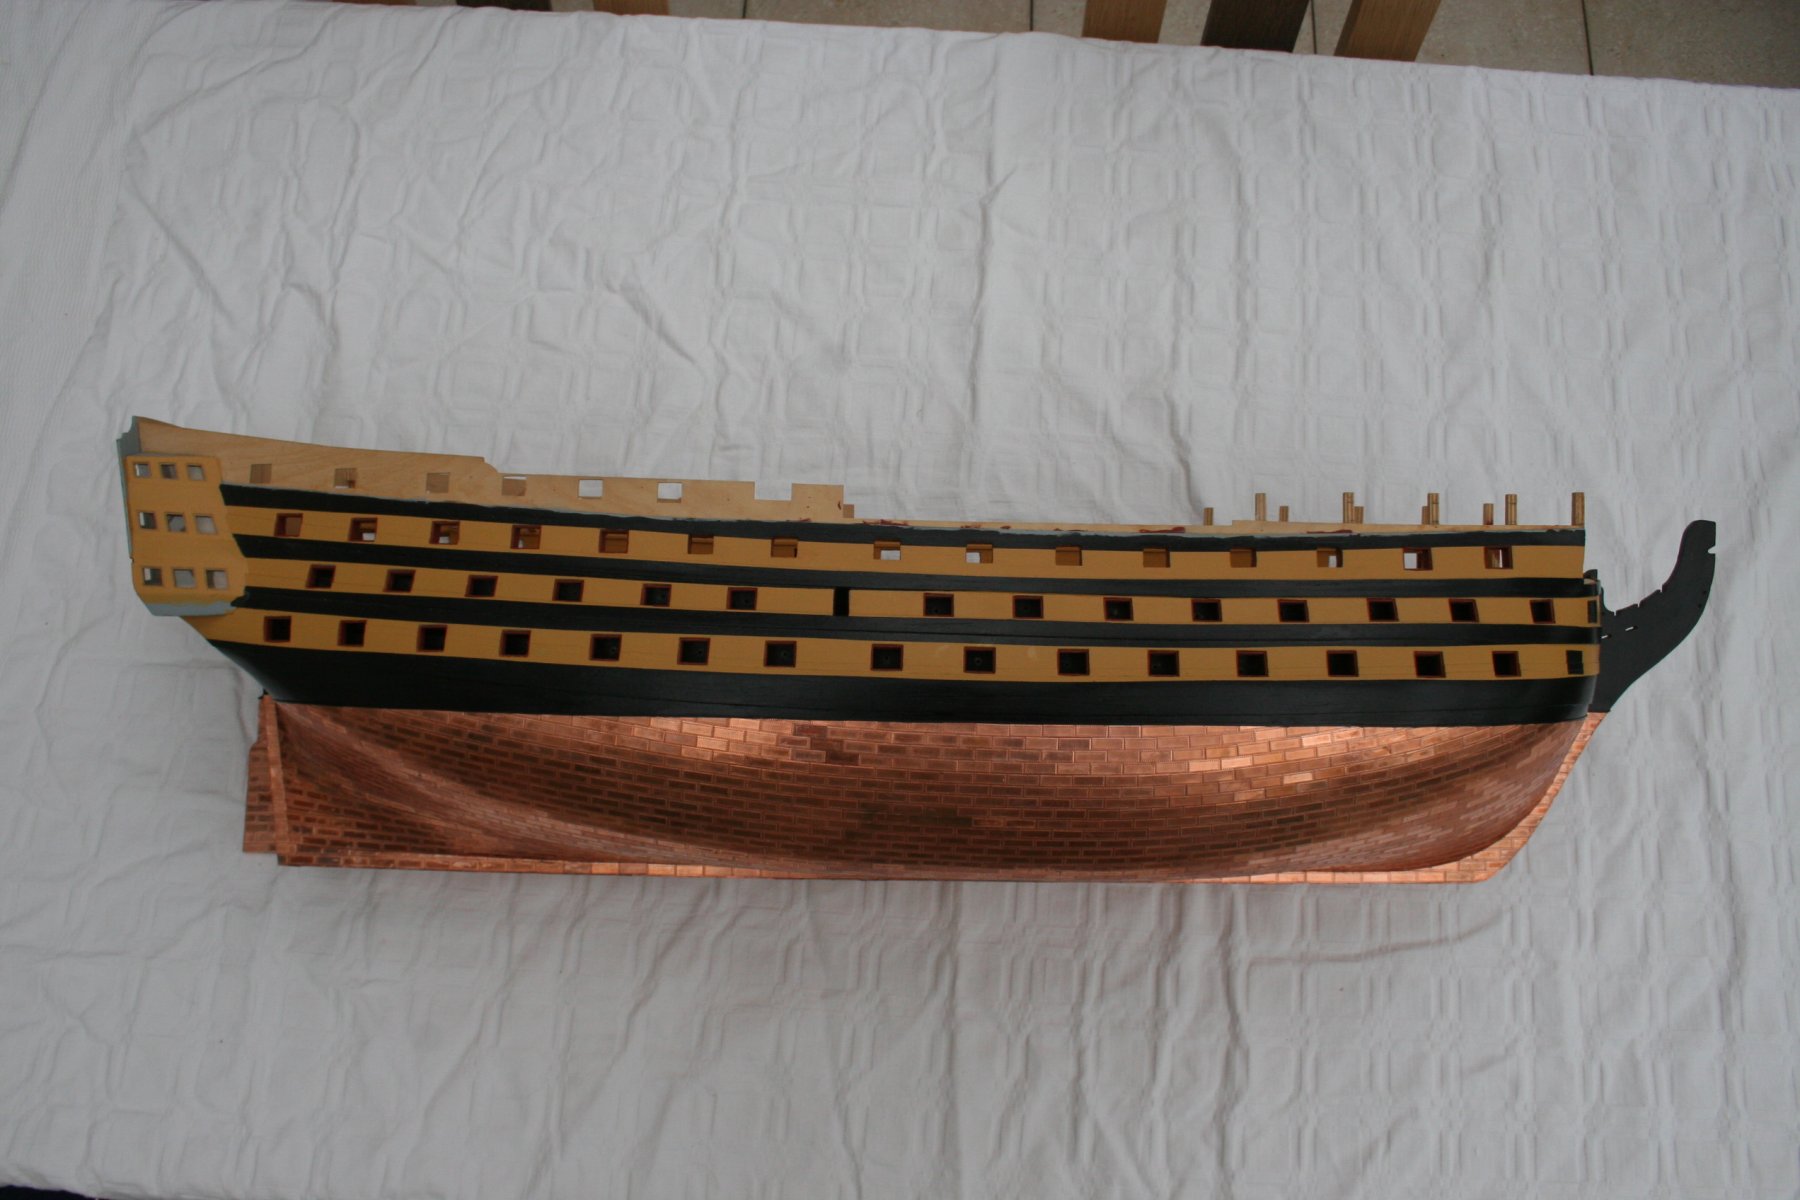
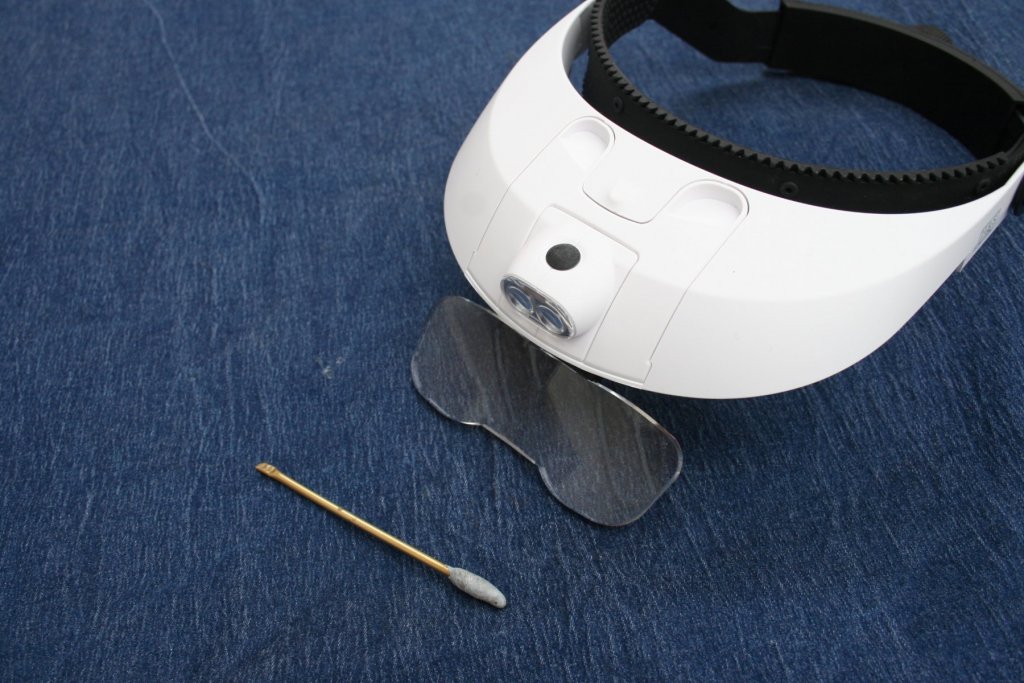
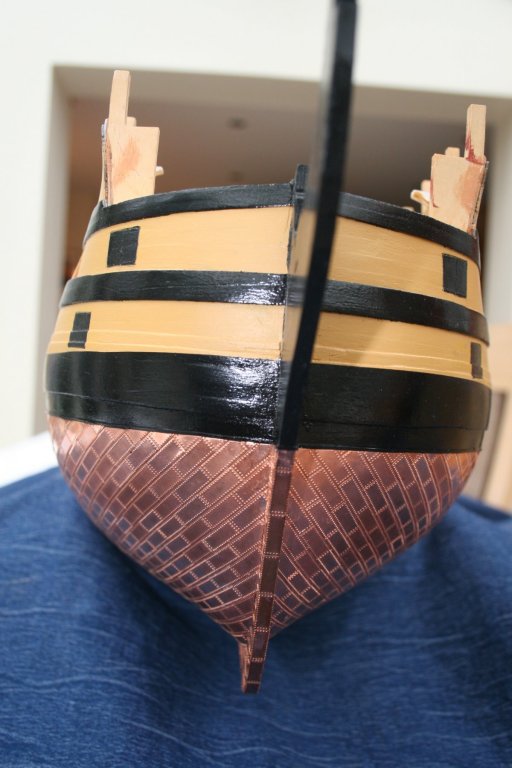
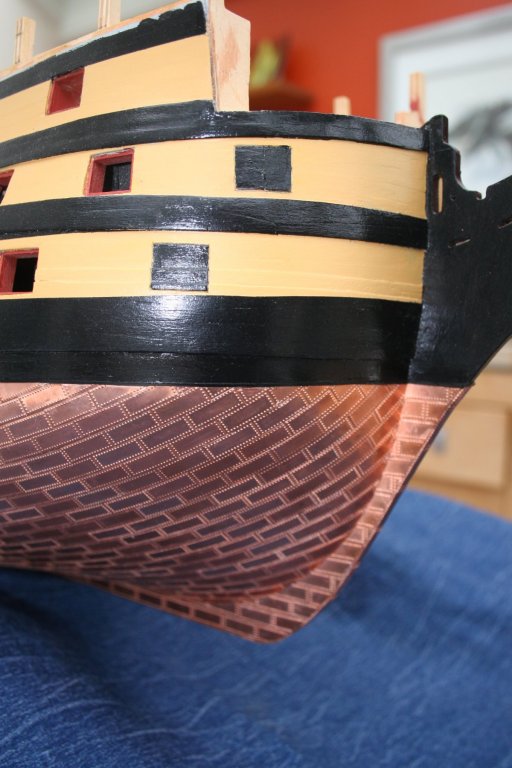
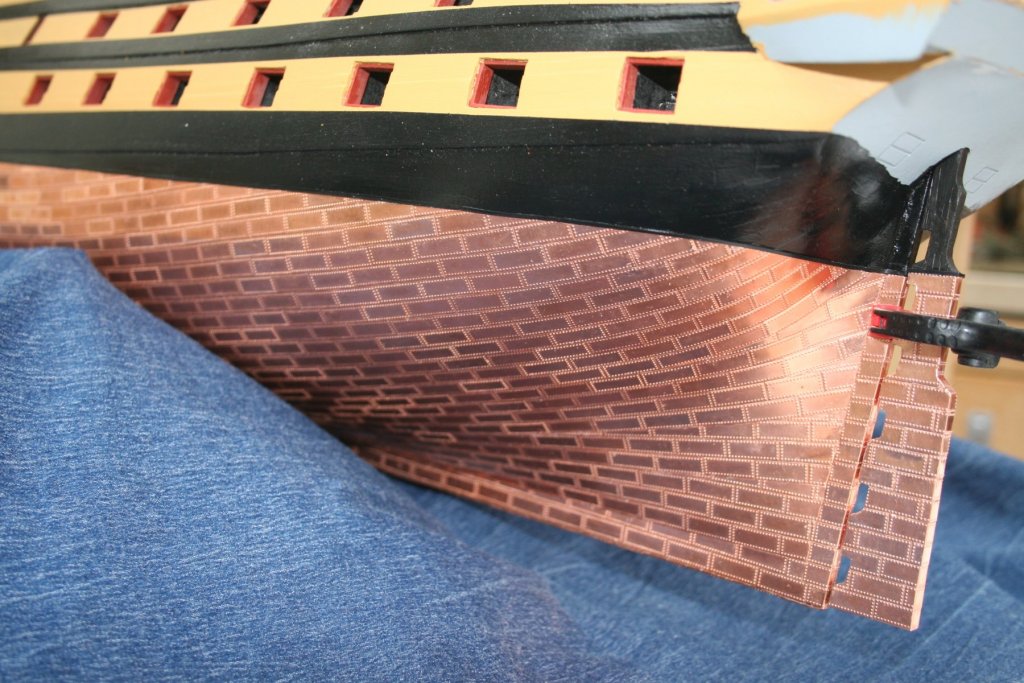
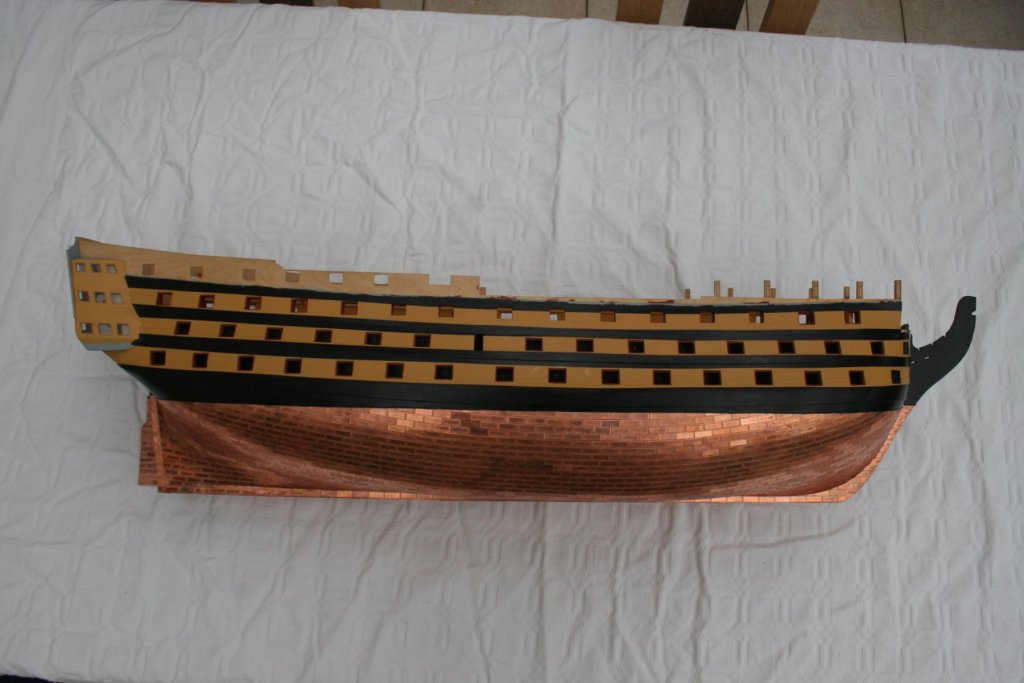
Hi, Just finished the copper cladding! I was struggling to see and apply some of the smaller cut plates needed to fill in gaps along the keel and waterline on the first side of the hull so I decided to invest in an illuminated head loupe. I wish I'd bought one earlier as using it for the first time resulted in me having to re-work several areas as I was not happy with the gaps between some of the plates already in place. Also in this picture is the most useful tool I found to hold plates in position for marking out and then positioning whole and cut plates when gluing - Blue Tack on the end of a short length of brass tube. Even the tiniest pieces could be located accurately although the tip of a scalpel blade was needed occasionally to apply final pressure until the c.a. glue had dried. I followed the kits instruction's and the guidance in The New Period Ship Handbook for the layout rather than more historically correct patterns. I also went with Keith Julien's advice in this book about getting a cleaner looking edge at the waterline by adding 0.05 x 1.09 mm polystyrene strip pre-painted black. The rudder, made from oak from Victory, was the last piece to be tackled. Rather than paint the top, unclad, section I 'ebonised' it using the wire wool and white vinegar technique I described on another thread. This was followed by a couple of coats of satin varnish. The result is a black finish that still allows the grain of the oak to be seen. The three 'Victory' copper plates on each side, just under the entry ports, can be seen in these two views although they are actually less conspicuous than the pictures suggest. There is a little c.a. residue still to be carefully removed with acetone and cotton buds. Fears that I'd run out of plates proved unfounded - just. Mistakes, re-worked sections and experiments with forming plates to fit around the keel took their toll. Got to the end with about half a dozen whole plates left! I'm happy to have completed this aspect of this model - but you can have too much of a good thing and at this moment in time I can safely say that any kit I attempt in the future will be copper plate free, probably cannon free too. This site is full of pearls of wisdom and two of them that are lodged in my mind at present are: 'Buy your toys before you retire' and 'it's probably best to seek forgiveness than permission' ... just maybe there's room in the 'stash' for a different type of vessel, possibly one rarely found 'outside the Straights of Otranto' ..... waiting for the day when Victory is finished - no rush! Cheers, Graham.


-
Hi Robert, Superb planking like yours needs to be celebrated, not hidden. Any mileage in considering plating just a small area? ..... probably not... I do know that if I had achieved this level of craftsmanship on my own model the planks would stay fully exposed - and I'm speaking as a fellow builder who completed copper plating just under an hour ago! Cheers, Graham.
- 527 replies
-
- 3
-
-
- caldercraft
- victory
- (and 1 more)
-
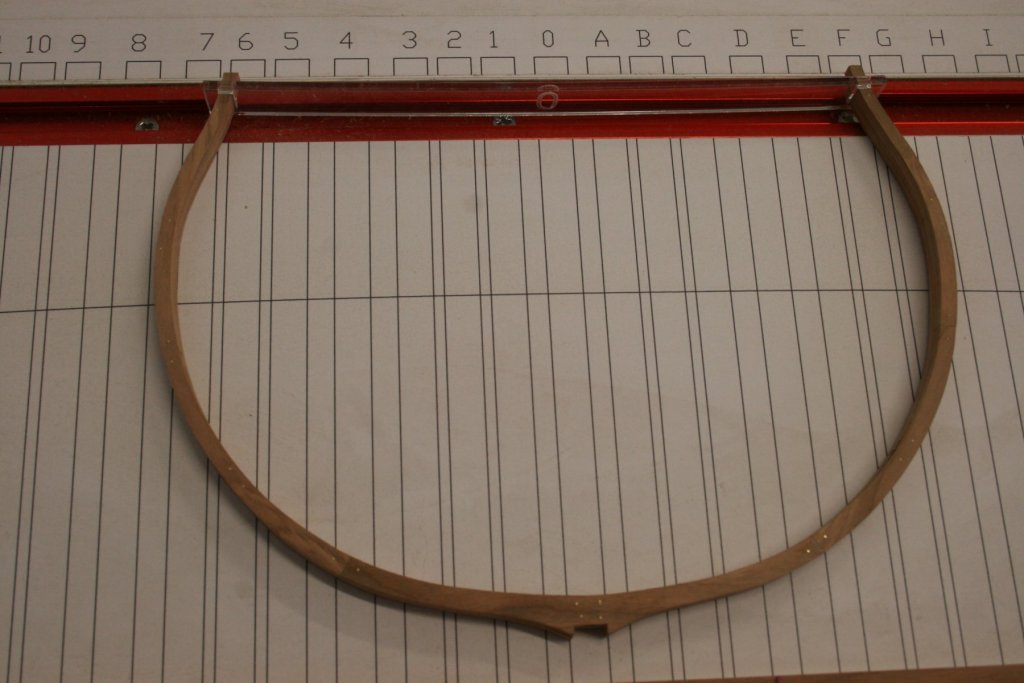
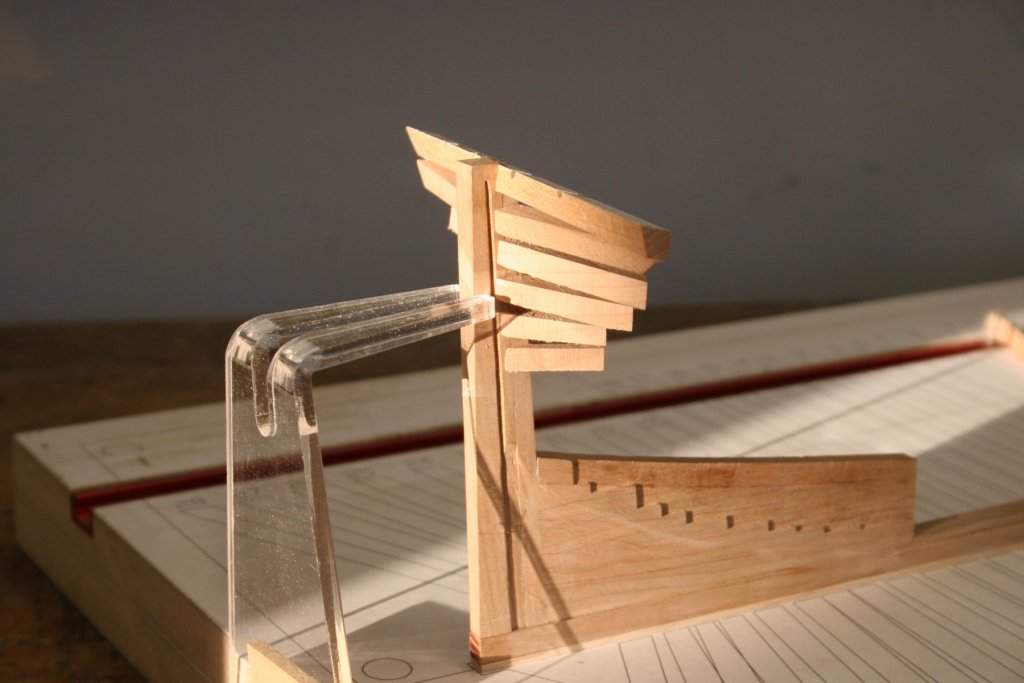
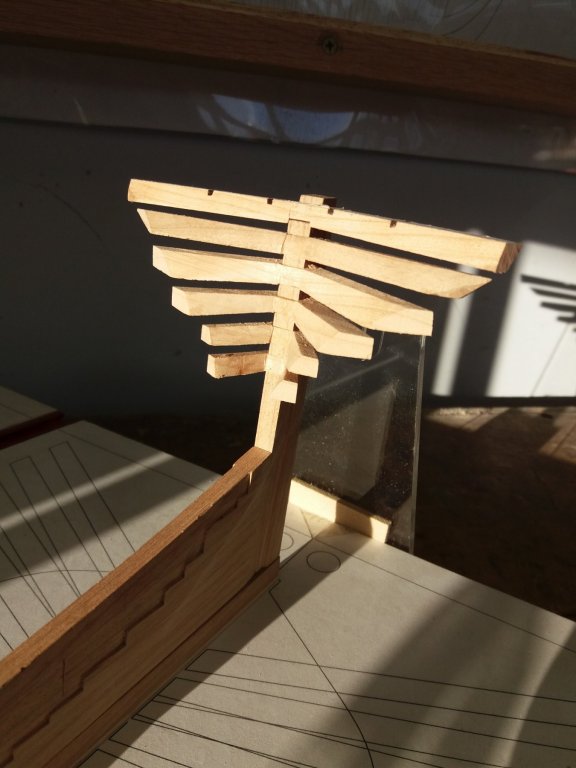
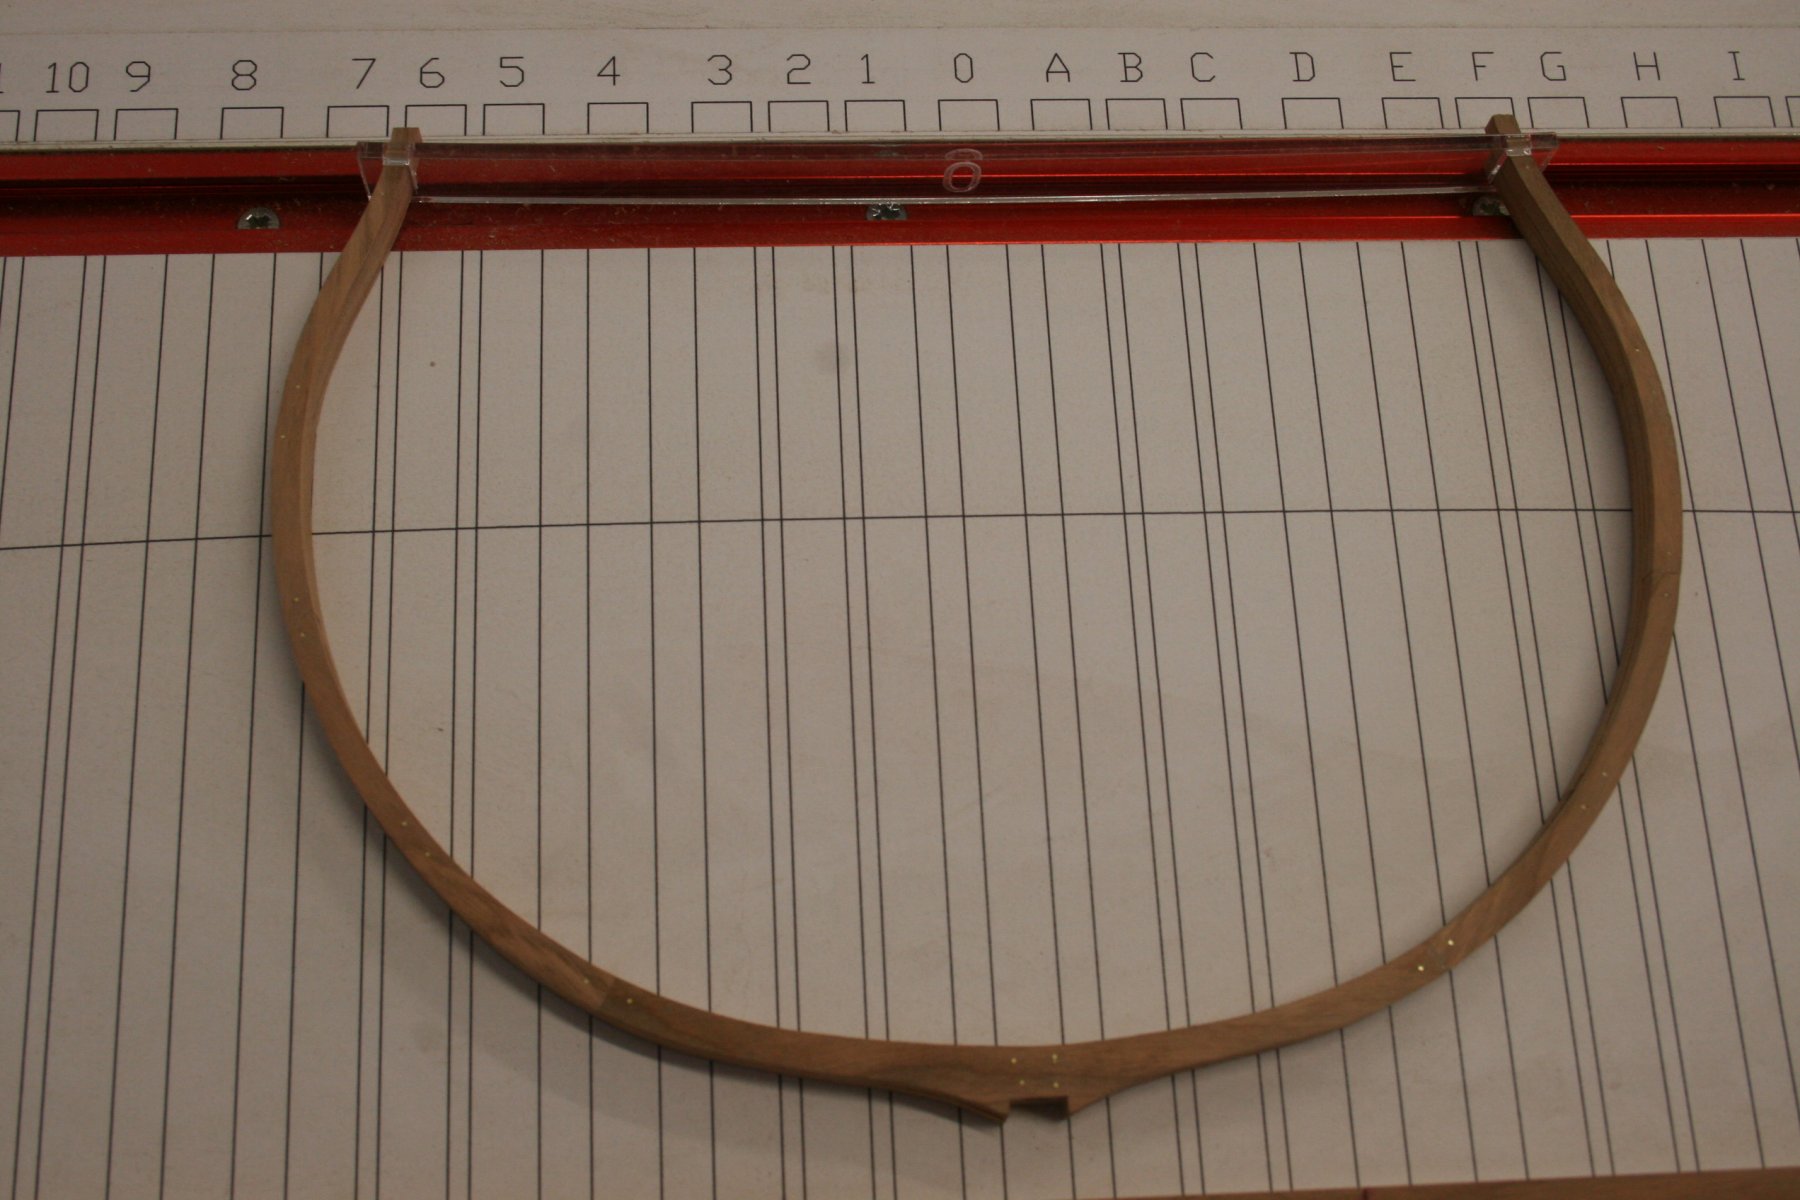
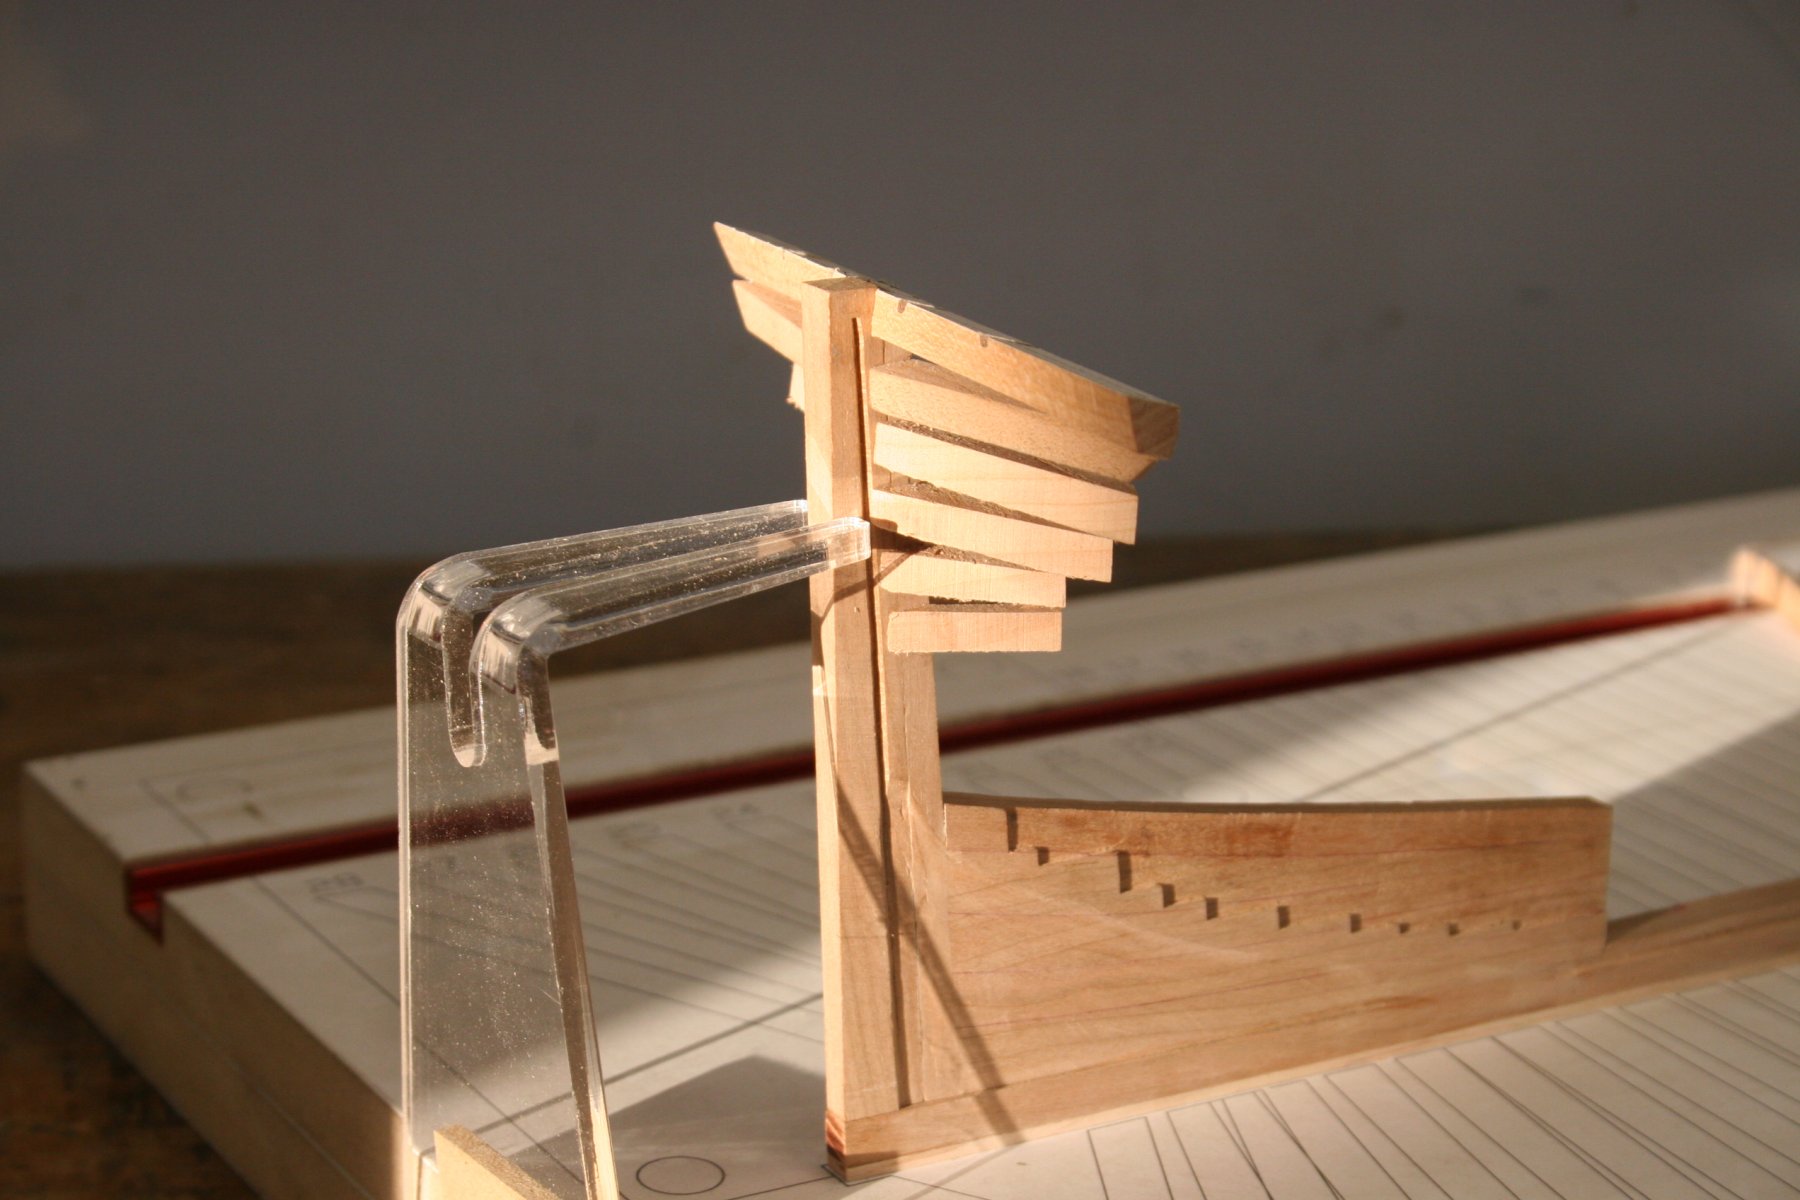
Hi, I managed to find a local supplier of 0.5 mm brass wire and my first attempt at a frame now has the pins I mentioned earlier. I decided to focus on the stern and to this end I've worked on the transom pieces. I made the lowest filling transom first and to be honest it was a bit of a disaster. Subsequent attempts were more successful. The filling, deck and wing transoms have been cut to profile and the joints adjusted to ensure a good fit with the inner post. They have not yet been glued into place. Inner surfaces have been given an initial fairing but I'm thinking of leaving the outside faces and the ends until the appropriate frames are ready. This way I can refine the fit to the frames and they will be better supported and stronger to withstand shaping. Next task will be the bow - once I've worked out which version of the Hawse to use. There seem to be two versions: 'Hawse, 1 - 5' and 'Hawsetimbers 1 - 6'. I think it's the latter ..... Cheers, Graham.