Charter33
Members-
Posts
455 -
Joined
-
Last visited
Content Type
Profiles
Forums
Gallery
Events
Everything posted by Charter33
-
CMB = Cornwall Model Boats. In the UK especially, but not exclusively, a 'go to' source for model boat kits, model making tools and, from personal experience, spares and supplies for when things don't go according to plan and you need to dig yourself out of a hole.....! (no, I have no connection with them, other than as a satisfied customer, grateful that they are a reliable company, there when I need them...)
- 527 replies
-
- caldercraft
- victory
-
(and 1 more)
Tagged with:
-
Hi James, From just over the A30 Surrey boarder in chilly Berkshire welcome to the site - a great place for assistance should you ever need it which ever model you decide to go for. Cheers, Graham.
-
Hi Ronald, Steaming should help. As Mark explained, wetting the wood and then applying heat from a curling tool, or similar, will change the water in the plank to steam and this is what enables the fibres to move to a curved/bent shape. I've also achieved good results heating wet planks with a small travel iron. Graham
-
Hi Ronald, The construction method that this kit uses is expecting an awful lot from the planking strips. That bend at the end appears very exteme. I see that you have tried crimping and heat, but have you tried soaking the planks in hot water? This often makes wood more pliable. Might be worth soaking a strip, gently pressing it around the bulkhead (or even a similarly shaped object) and leaving it to dry overnight. Once 'pre-formed' it may be less of a strain to glue in place. You also mention that you got these strips some time ago. Sometimes wood can get more brittle with age. Hope you find a workable solution to this problem. Good luck!
-
Hi Mike, The best answer to your question probably depends on the reason behind why you need to harden the wood. If you want to achieve a silky smooth surface that sands well enough to enable you to get a good quality surface to subsequently apply a painted finish to you will probably find that a good quality sanding sealer will do the job. If you're trying to toughen the wood to improve impact resistance you could try applying something that will give a good depth of penetration and bind the wood fibres together such as a wash of watered down PVA wood glue. I think that I'd only resort to polyester or epoxy resins if I was hoping to achieve a waterproof finish, but here again it would depend on the size of the area being treated for reasons of cost if nothing else. Wood varnishes, polyurethane and acrylic, will also improve surface hardness and reduce damage from scuffing and knocks etc. Hope this helps.... Cheers, Graham
-
As ever, thorough research immaculately executed! Keep up the good work - I'll be dusting off my copy of Longridge's book, that's for sure!
- 527 replies
-
- caldercraft
- victory
-
(and 1 more)
Tagged with:
-
Hi Patrick, I'm still here but sometimes life gets a bit complicated. I had to retire from a 43+ year career teaching Design Technology last December . The impact of this was significant including the loss of access to a great suite of workshops, equipment, and the loss of 'my' computer. My own personal tools, including work bench (rescued from a skip when my faculty was extended and modernised), wood turning lathe and numerous woodwork and engineering tools collected over the years had to be packed away and put into storage. The more valued and precious items are currently cluttering my already cramped model room, ie. the smallest bedroom in the house. My aim is to now build a workshop in the garden - I've planned it and hope to start construction soon. I made the mistake of putting things off until I retired, forgetting the the Admiral would have her own ideas for how my practical skills could be employed! My Victory is safe and a little progress has been made. I hope to be in a position to crack on with it in the near future. I do have some photos on my camera, but no way of downloading them at the moment. I can only access this site via my phone - but following the various threads on it is a great pleasure. Good to see the number of Caldercraft Victorys now under way; some superb and truly inspirational work, including your own! Cheers, Graham
-
An very impressive resource, and now right at the top of my 'must have' list. Thank you for bring it to my attention! For those with an interest in Adriatic sailing craft there's an impressive collection afloat on the Fosso Venarella canal, adjacent to the Museo della Marineria in Cesenatico, about 140 km down the coast from Venice, 23 km up from Rimini. I came across it when researching these types if vessel. I've only been able to explore it 'virtually' using Google Earth, but there's a wealth of detail to be seen. I recommended using the street view function and viewing from both sides of the canal. 'Photo sphere' pictures show views of the boats in different rigging stages, including full sail. Enjoy!
-
Any other Glowforge laser cutter/etcher users?
Charter33 replied to Tim Holt's topic in 3D-Printing and Laser-Cutting.
Hi, I used to also have access to a laser cutter at work - and really miss it now! One way that I found to reduce char was to drop the power level and then repeat the cut several times until separation was achieved. It didn't stop the charring completely, but did reduce it considerably. Good luck! Graham. -
Jagdtiger by Jörgen - Tamiya - 1/35 - PLASTIC - Weathering
Charter33 replied to Jörgen's topic in Non-ship/categorised builds
All sorted, Jorgen - magnificent work! -
I'm rapidly running out of superlatives - just superb, Robert, Stunning!
- 527 replies
-
- caldercraft
- victory
-
(and 1 more)
Tagged with:
-
Dutch yacht by henry x - RESTORATION
Charter33 replied to henry x's topic in - Build logs for subjects built 1501 - 1750
Not so good with the things myself either! Hope this works ......... Sotherby's site https://www.sothebys.com/en/buy/auction/2019/master-paintings-evening-sale/jan-abrahamsz-beerstraten-dutch-ships-at-anchor-in Fine Arts Museum - Boston https://collections.mfa.org/search/objects/*/Yacht of the Princes of Orange and Other Ships Cheers, Graham. -
Dutch yacht by henry x - RESTORATION
Charter33 replied to henry x's topic in - Build logs for subjects built 1501 - 1750
Just found it! - on the museum's website, last page (7) of the 'Nautical' section. Similar stern view, but this time slightly to starboard. -
Dutch yacht by henry x - RESTORATION
Charter33 replied to henry x's topic in - Build logs for subjects built 1501 - 1750
The Sotheby's catalogue notes say it was the Royal Yacht of William ll which was completed in 1647, athough originally intended for his father. The notes also mention another painting of the same vessel, by the same artist, that is now in the collection of the Boston Fine Art museum. -
Dutch yacht by henry x - RESTORATION
Charter33 replied to henry x's topic in - Build logs for subjects built 1501 - 1750
This might help - there was an oil painting by Jan Abrahamsz. Beerstaten that has a vessel of that name as the central image, viewed from the stern, slighly to port. Sold by Sotheby's, N.Y. on the 29th January 2020. I can't attach an image, but it can be viewed in the auction catalogue, Lot 24. -
Hi, I have to give you some information about laser cutting machines - I could be wrong, and in many ways I hope I am and other members will correct any errors in my understanding of this subject. 'Laser cutters' are basically a speciaised form of printer. Instead of producing printed lines with ink on paper a laser beam is focused onto the material and 'vapourises' it. I have not come across one that isn't connected to a computer, or that doesn't need the components to be drawn up using some type of CAD software. There are some relatively inexpensive packages out there I'm sure. My experience is based on many years teaching this type of technology to secondary age students. It is amazing just what can be produced, and I developed my own understanding by making the components for balsa R/C model aircraft - drawing and cutting the ribs for a bi-plane was very rewarding. I have also used it to make various jigs and fixtures to assist with my 'Victory' build. Graham.
-
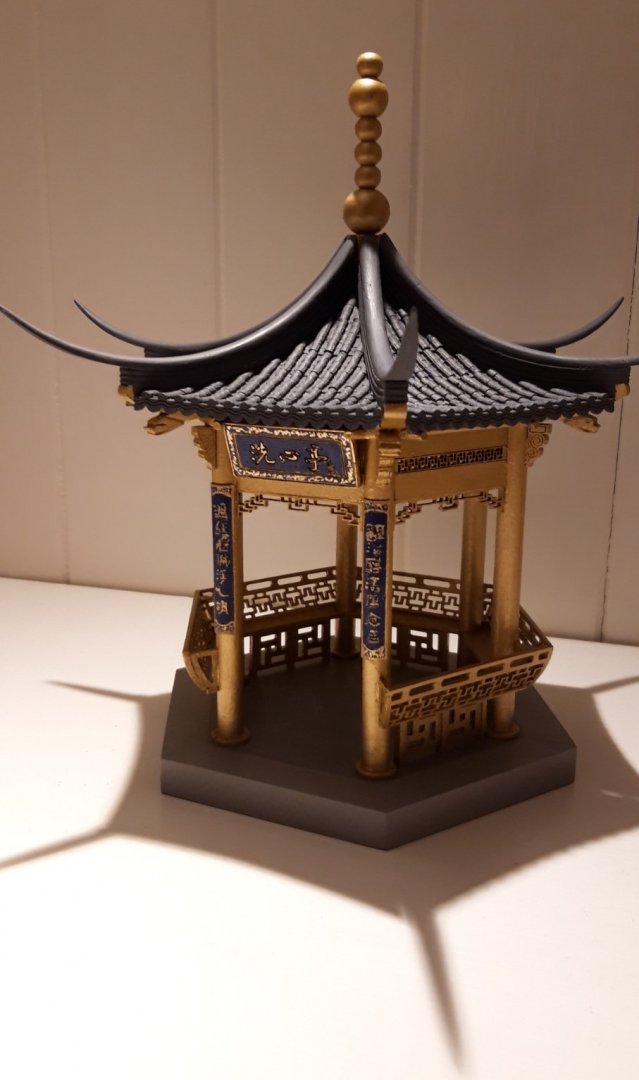
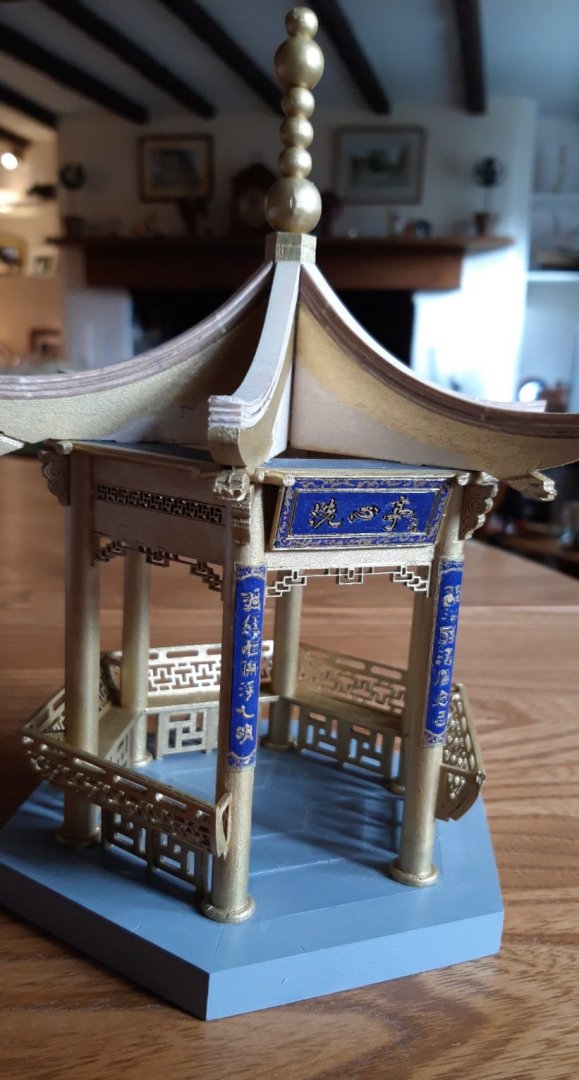
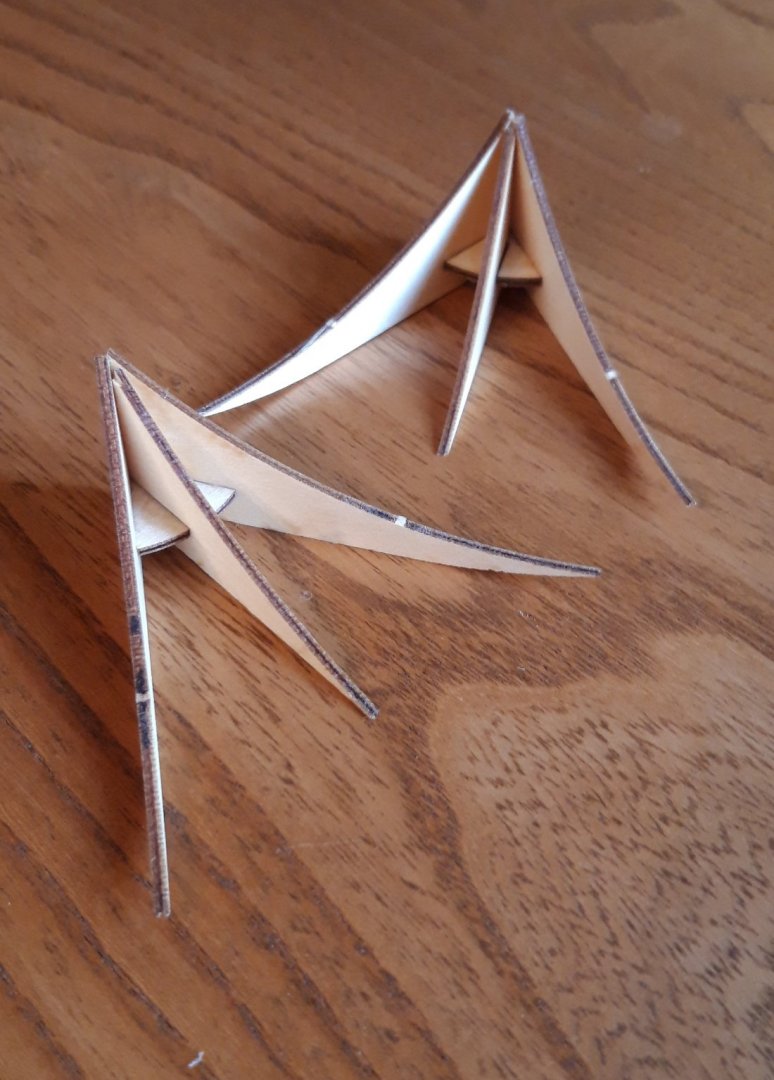
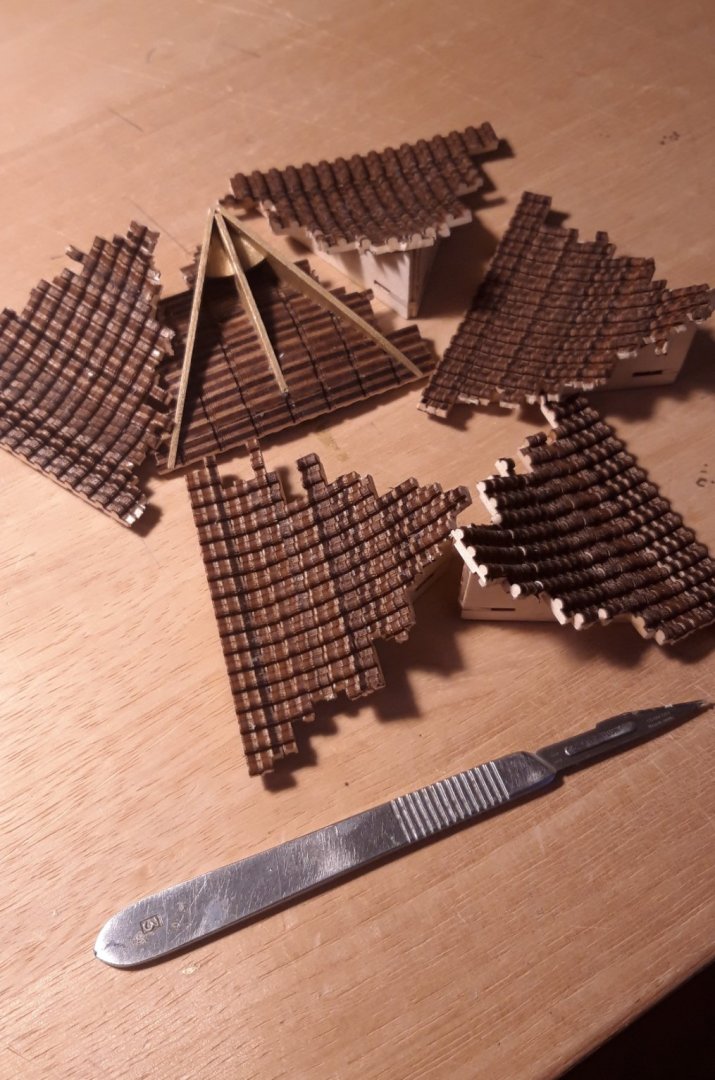
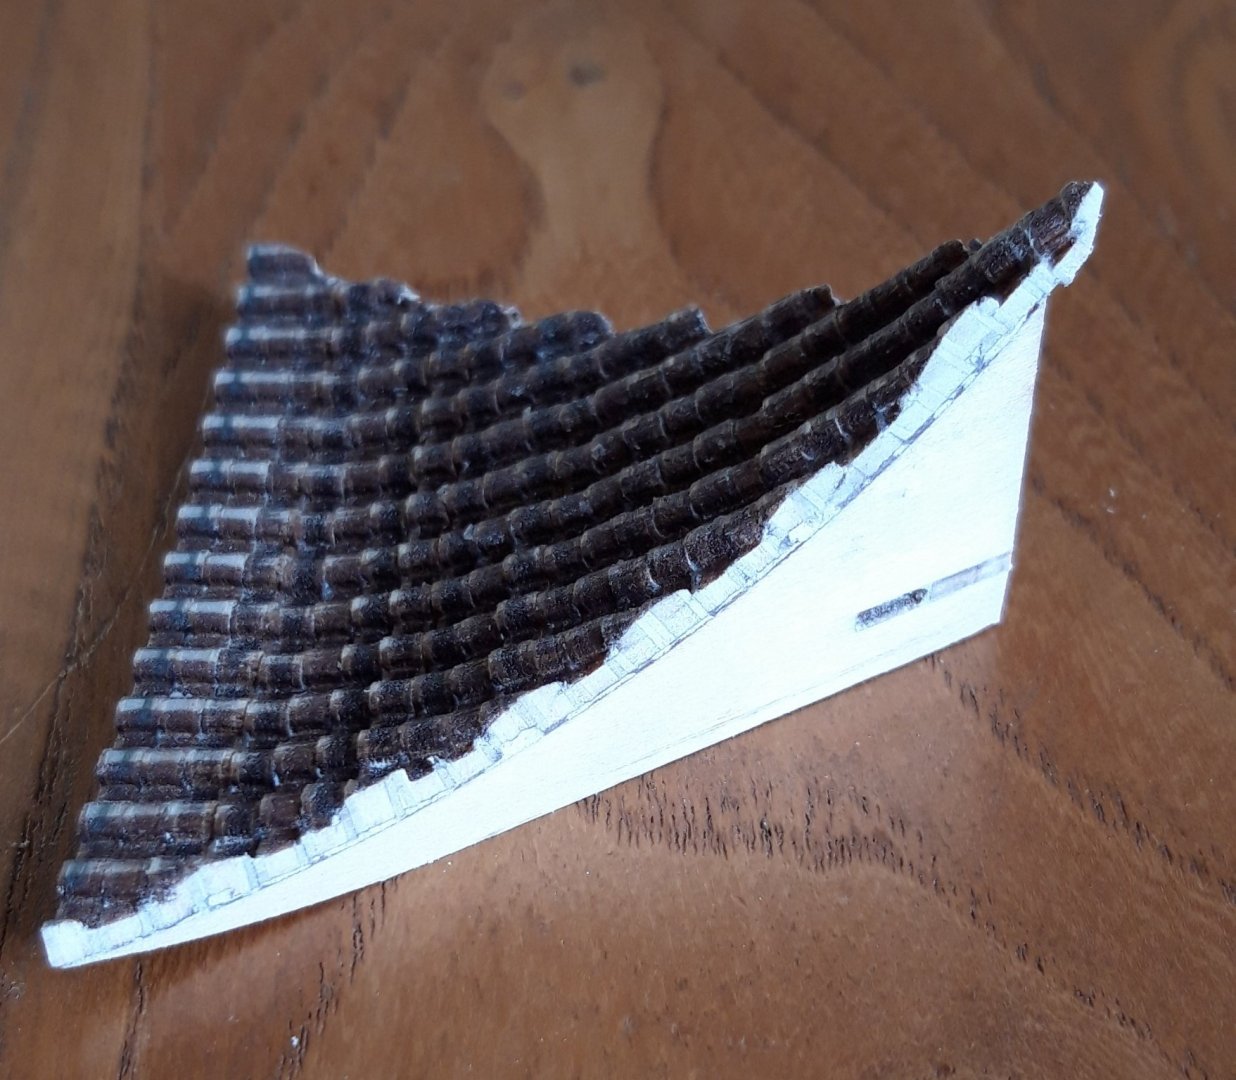
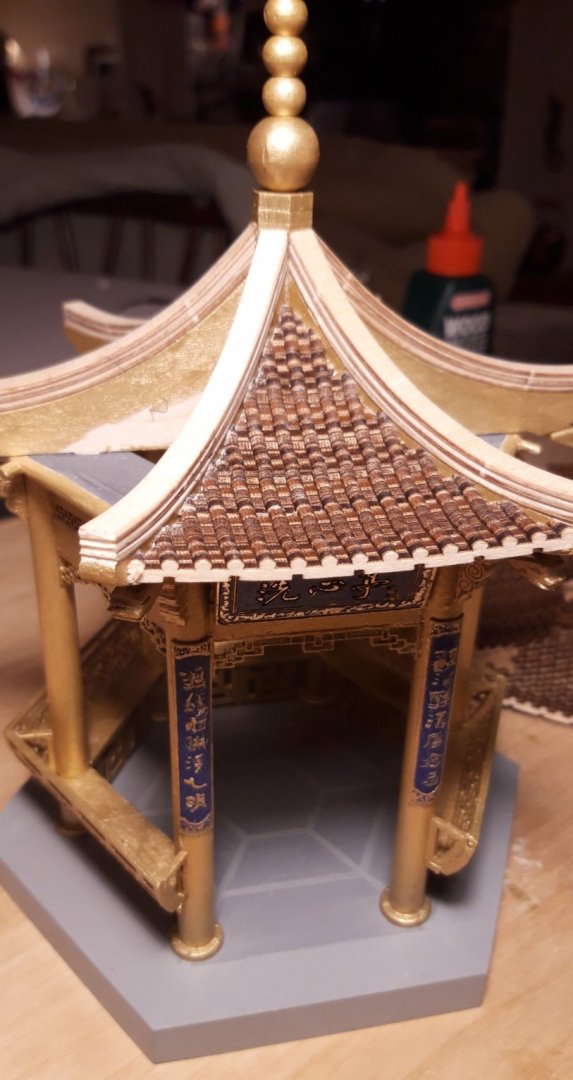
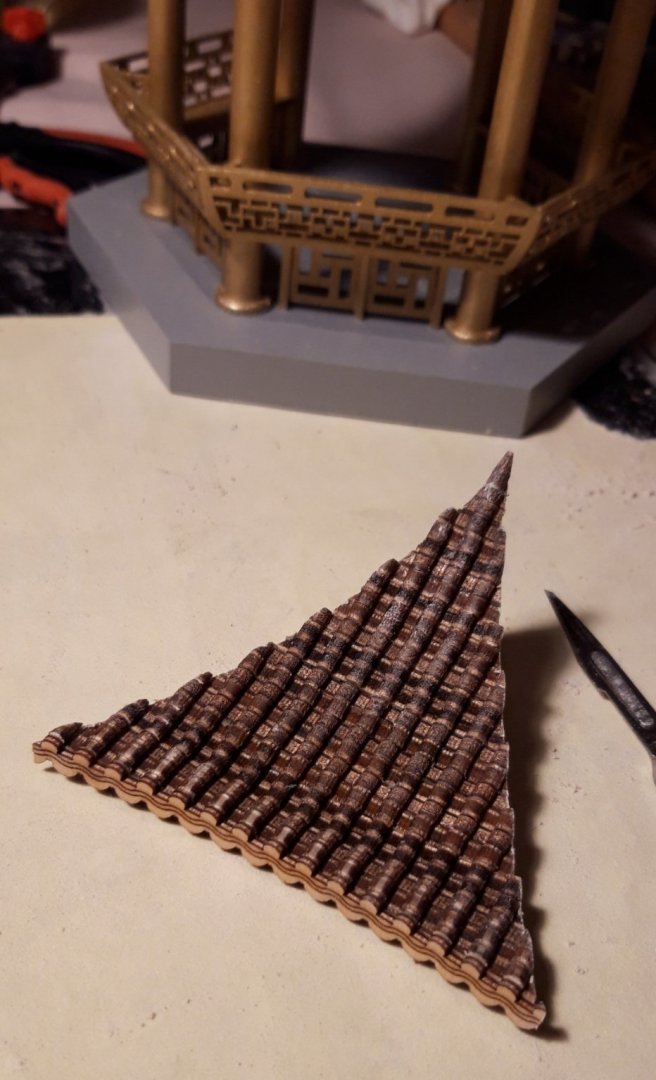
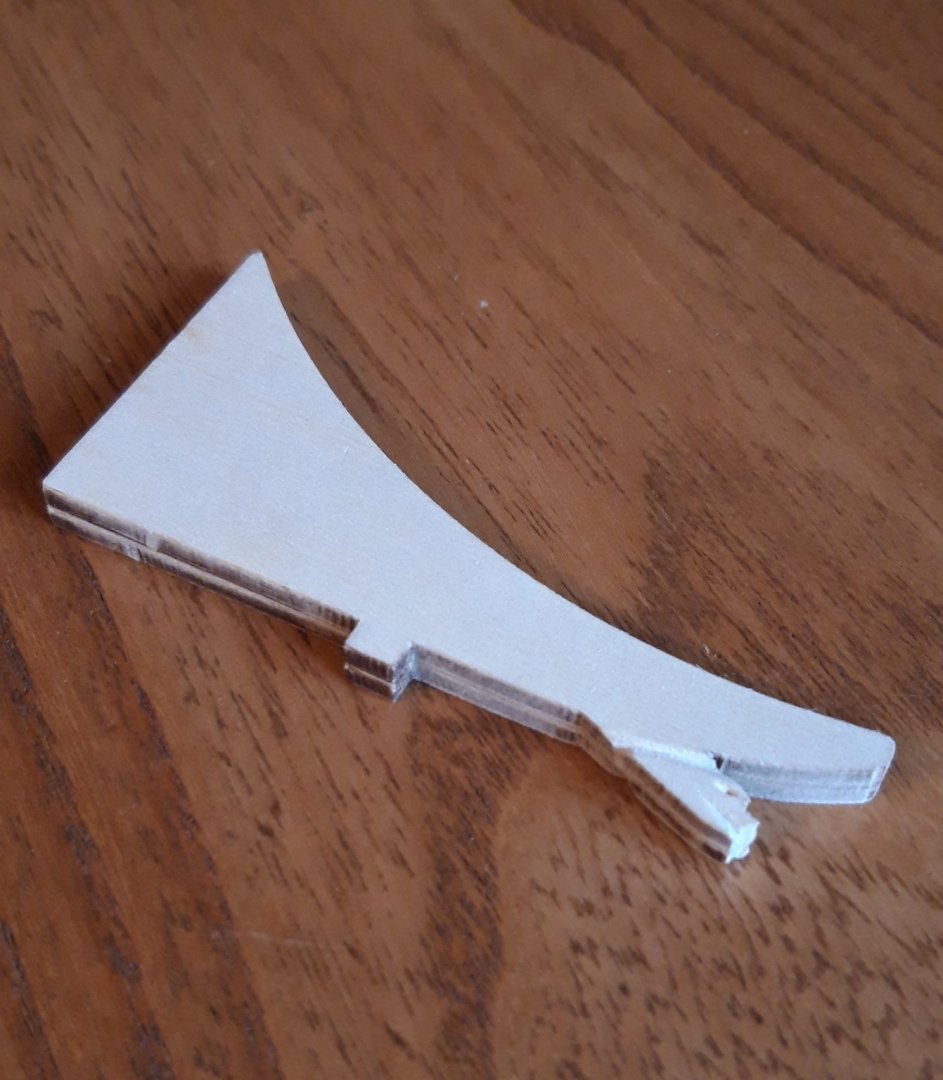
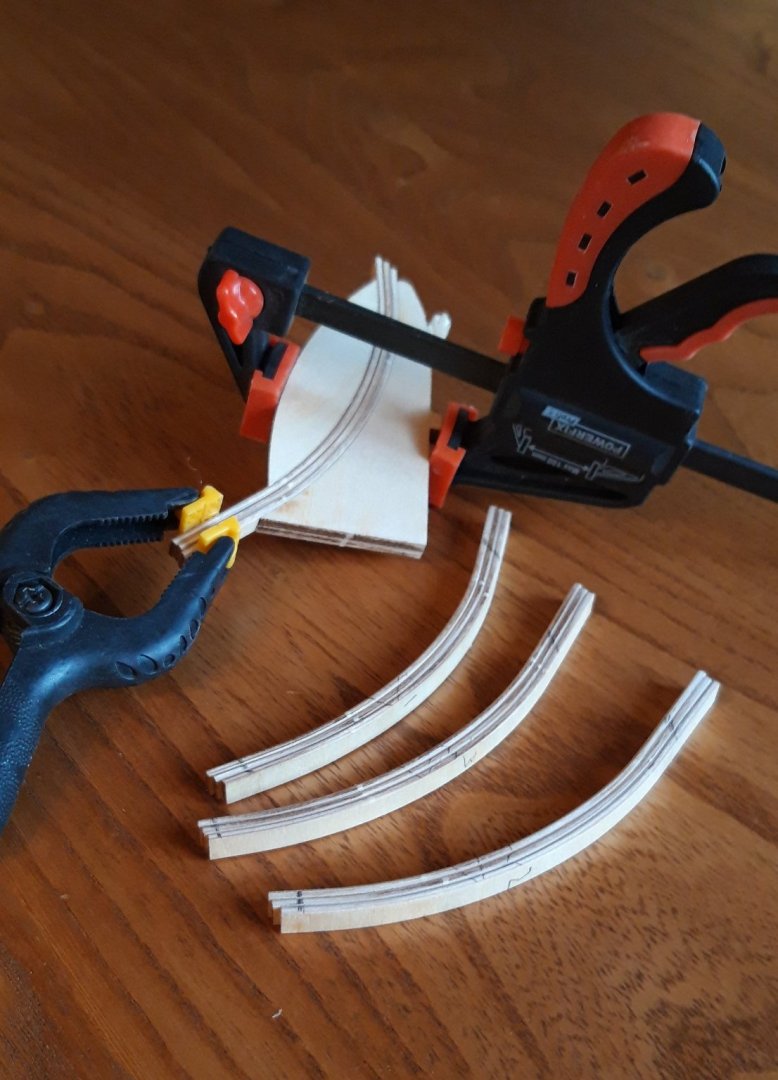
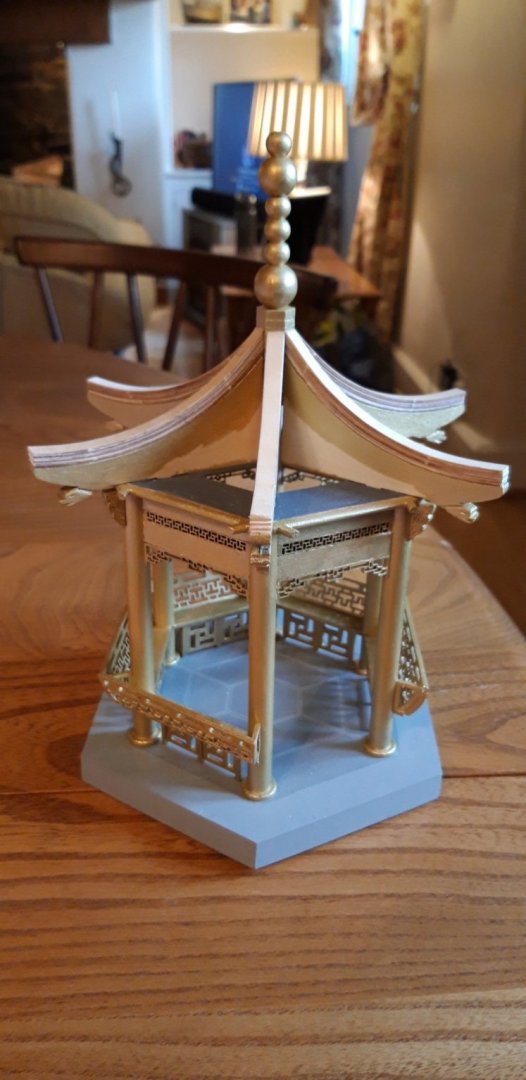
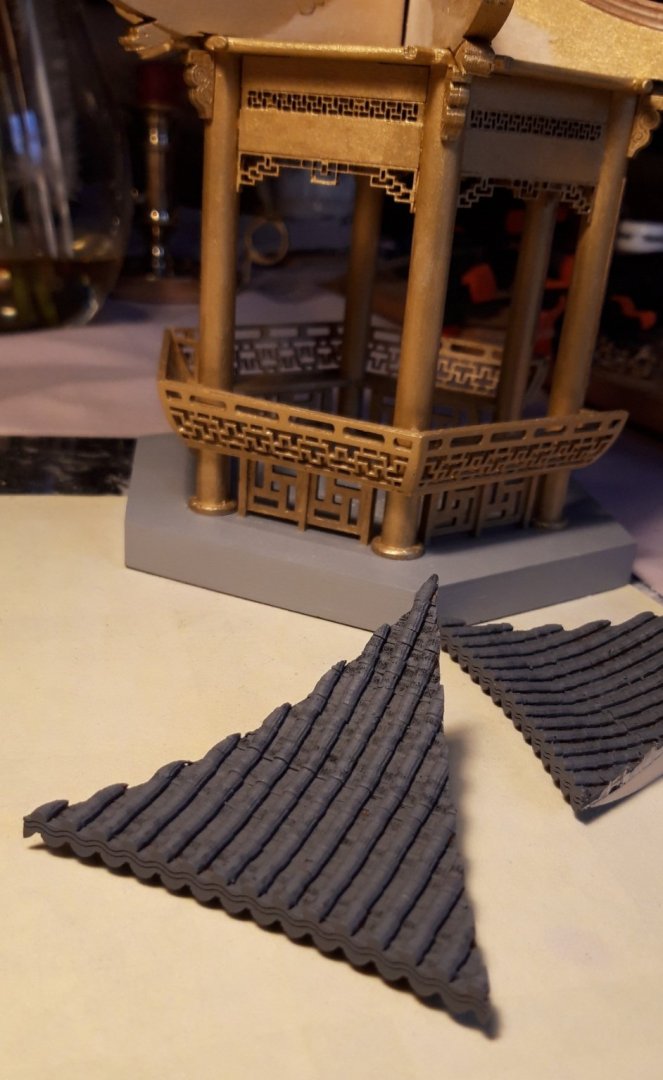
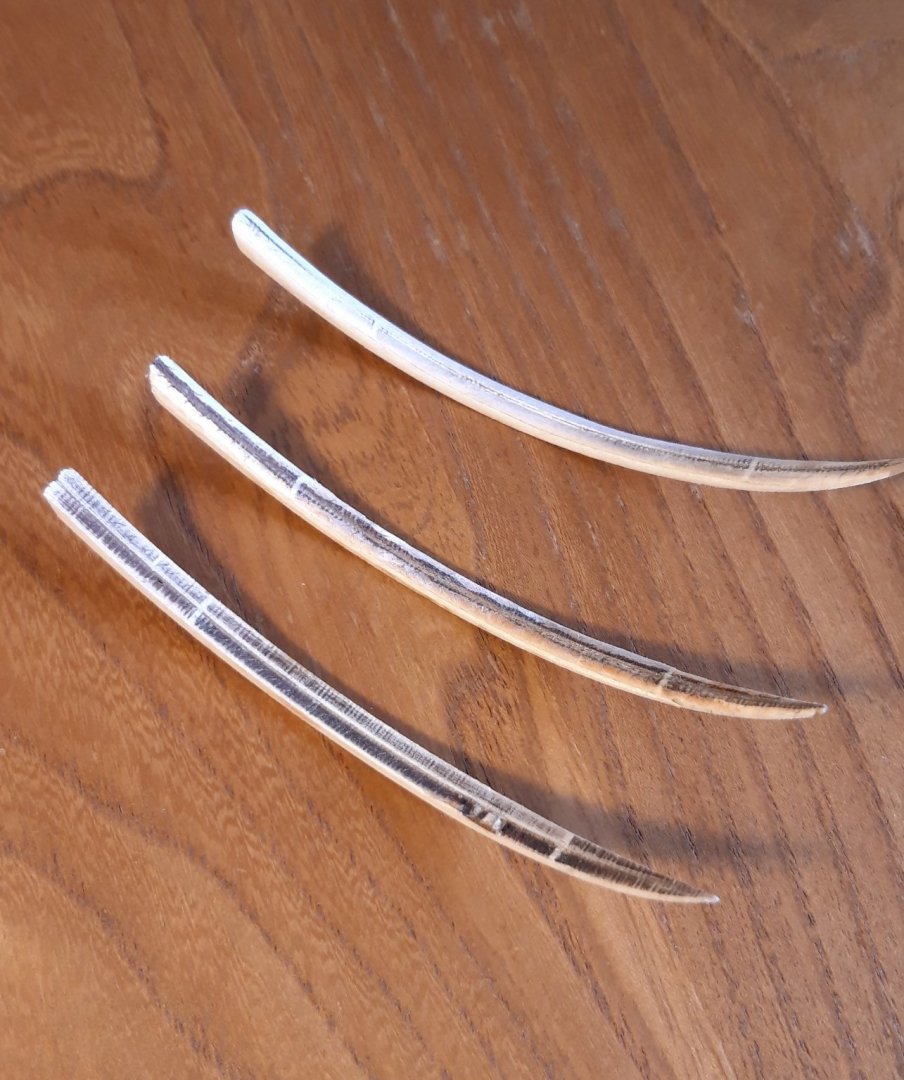
Thanks for that Popeye. The quality of the laser cutting on this kit is exceptional - in fact it really does push things to the limit with the fretwork pieces! I guess that the high quality ply the manufacturer uses has a significant impact too. The only de-lamination I had was with a couple edges on the seat backs after they had been soaked to make them more pliable but, as you say, easily fixed. Yes - those side edges were radiused. Basically if it's gold on that piece of roof base, it's been curved. With a painted model the charring is not an issue but I can see where if would definitely be beneficial with an unpainted version, especially the roof tiles. I gave the six tiled roof assemblies an initial coat of the dark grey paint before gluing them in place. The paint is being applied onto mostly end grain which absorbs the acrylic at an alarming rate so they were given an initial coat of sanding sealer to achieve a more even finish. The final construction task is the distinctive curved ridge pieces. As with some other elements the first stage is to glue together pairs of components. Once dried, and with the cut surfaces lightly sanded to match, the overhanging ends have to be tapered - quite a delicate challenge it turned out to be too! (lower) The top of these pieces then had to be radiused which was done by first lightly paring with a scalpel (centre) and then VERY gently sanded with 240 grit glass paper (top) A little adjustment had to be made where these butt up against the central spire, sorted with a few light strokes on a sanding board. Once glued in place these pieces and the fluted laminations underneath them were painted. A second coat over the whole roof finished the project. In summary this is an excellent kit. Well thought out and engineered from good quality materials it has given me a welcome diversion over the Christmas and New Year period. There is a satisfying level of diverse challenges and can be completed with just the basic range of tools and equipment. And to top it all - the Admiral loves it and now has it prominently displayed! Cheers, Graham.
-
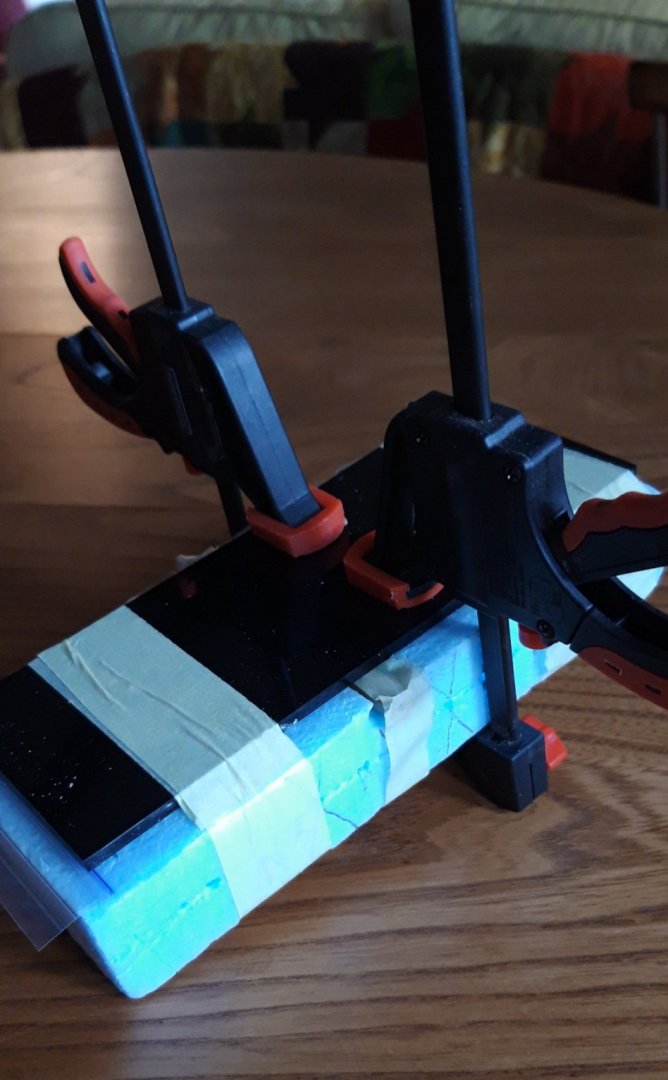
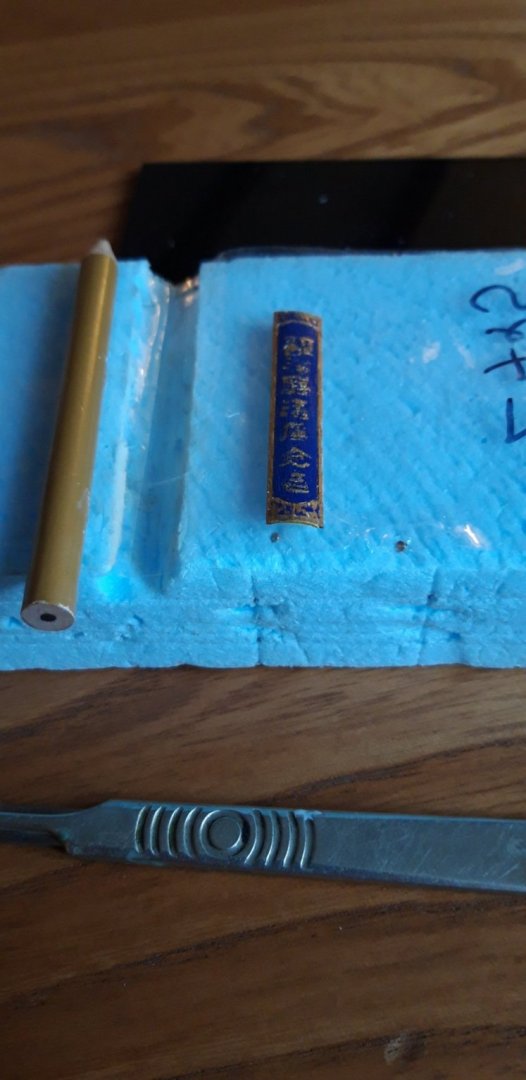
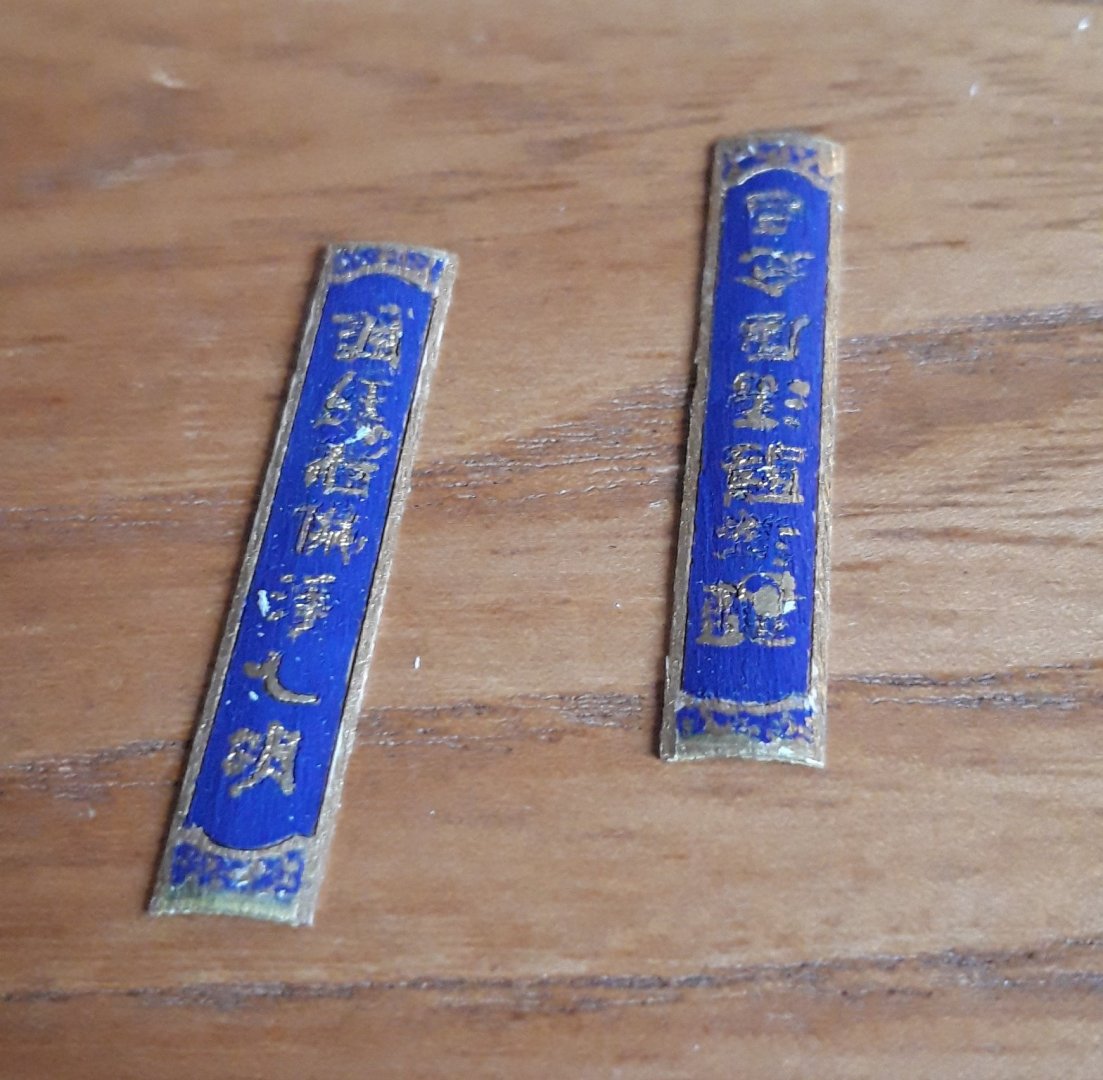
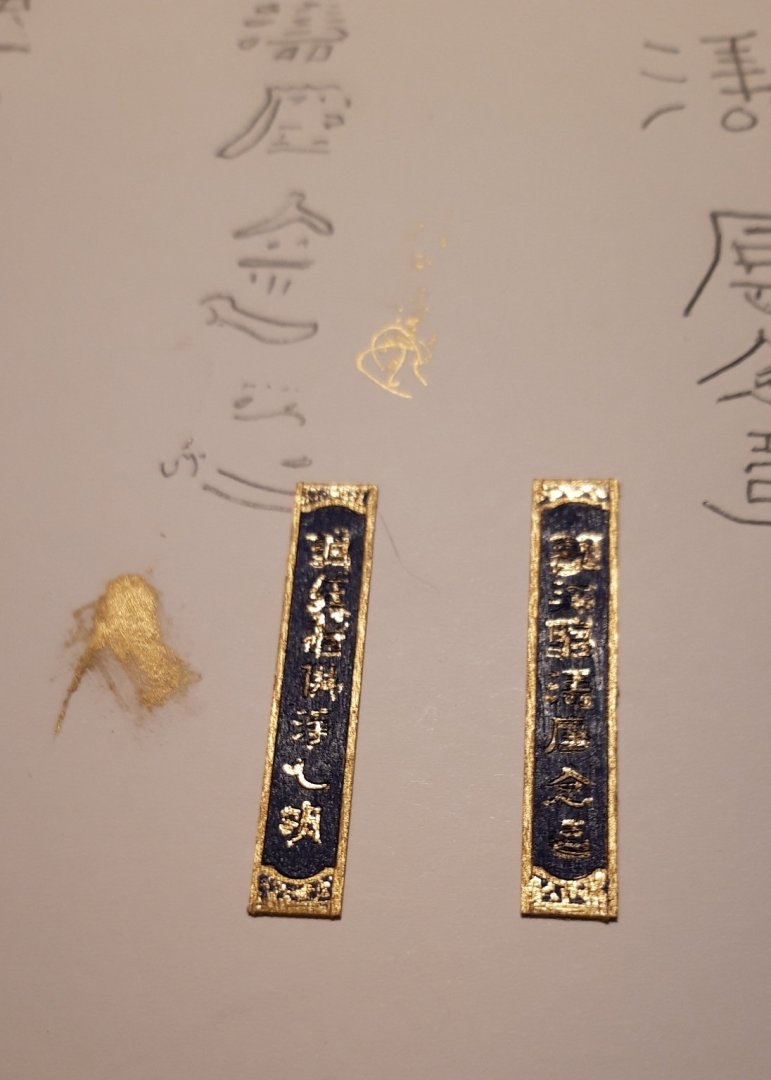
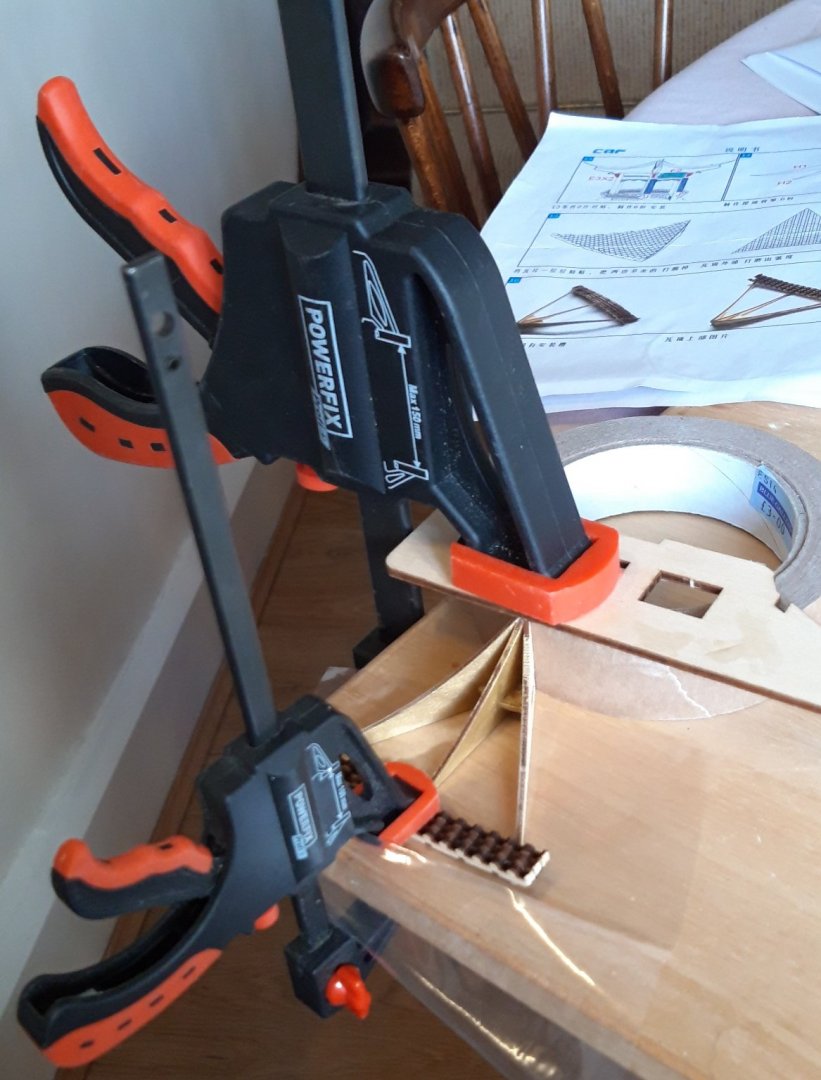
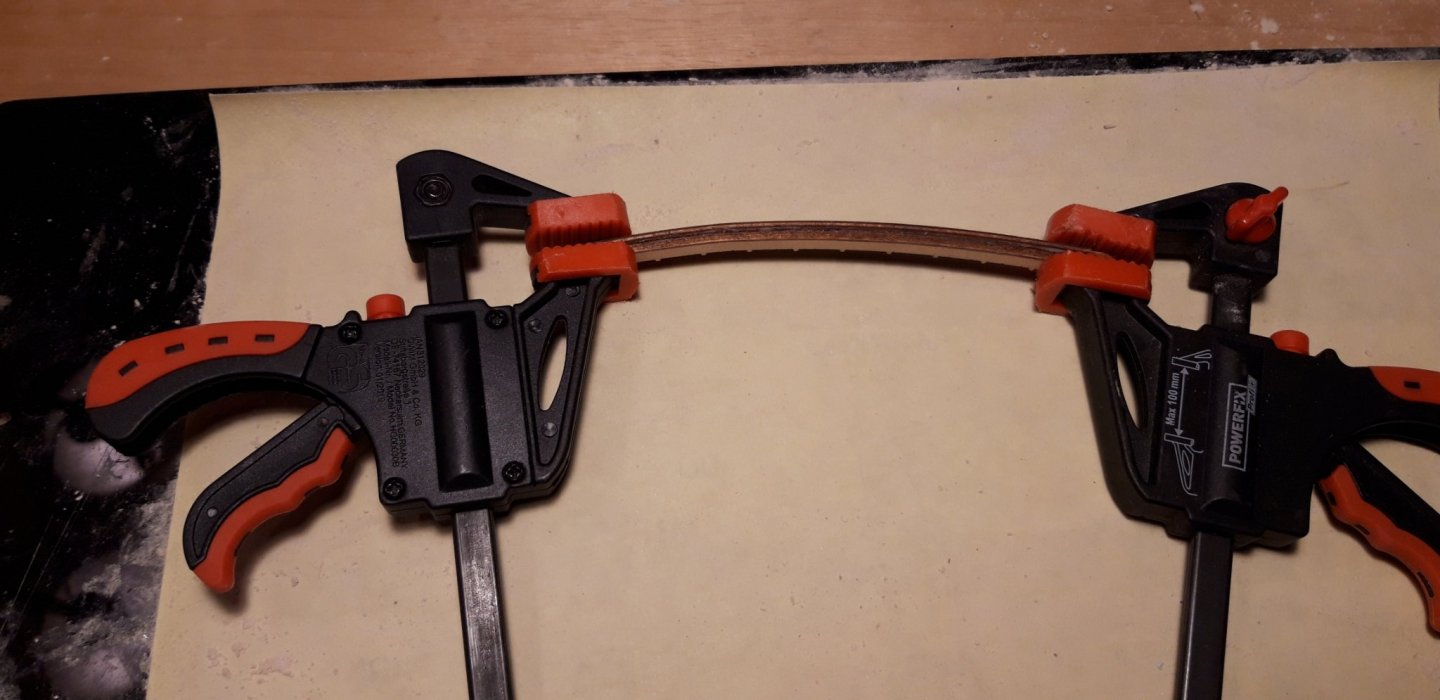
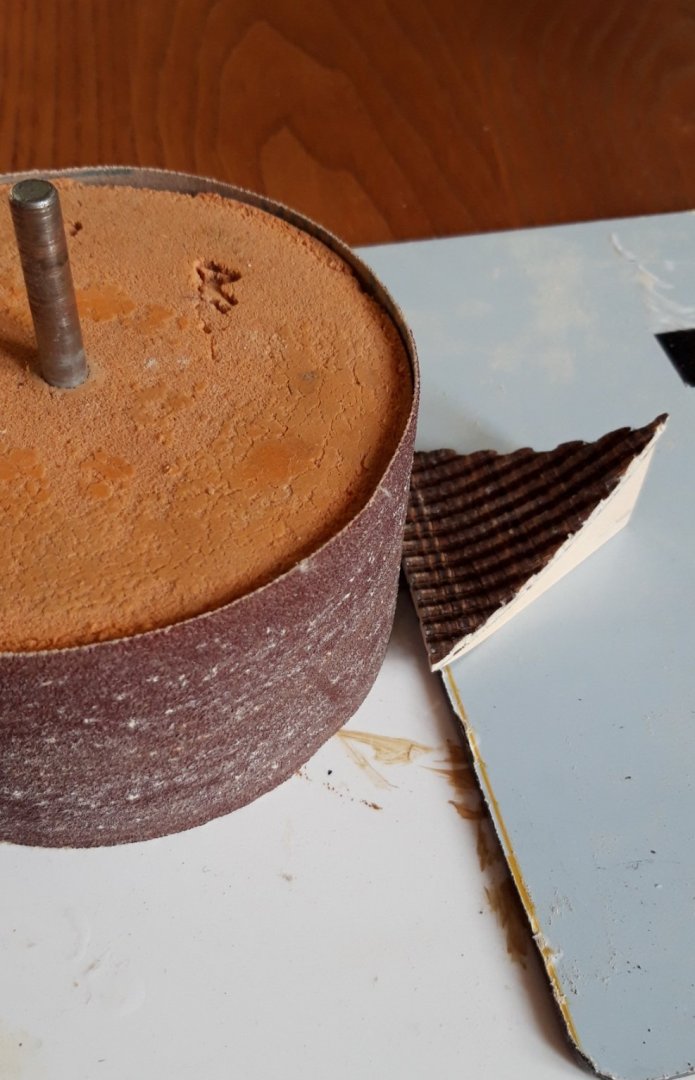
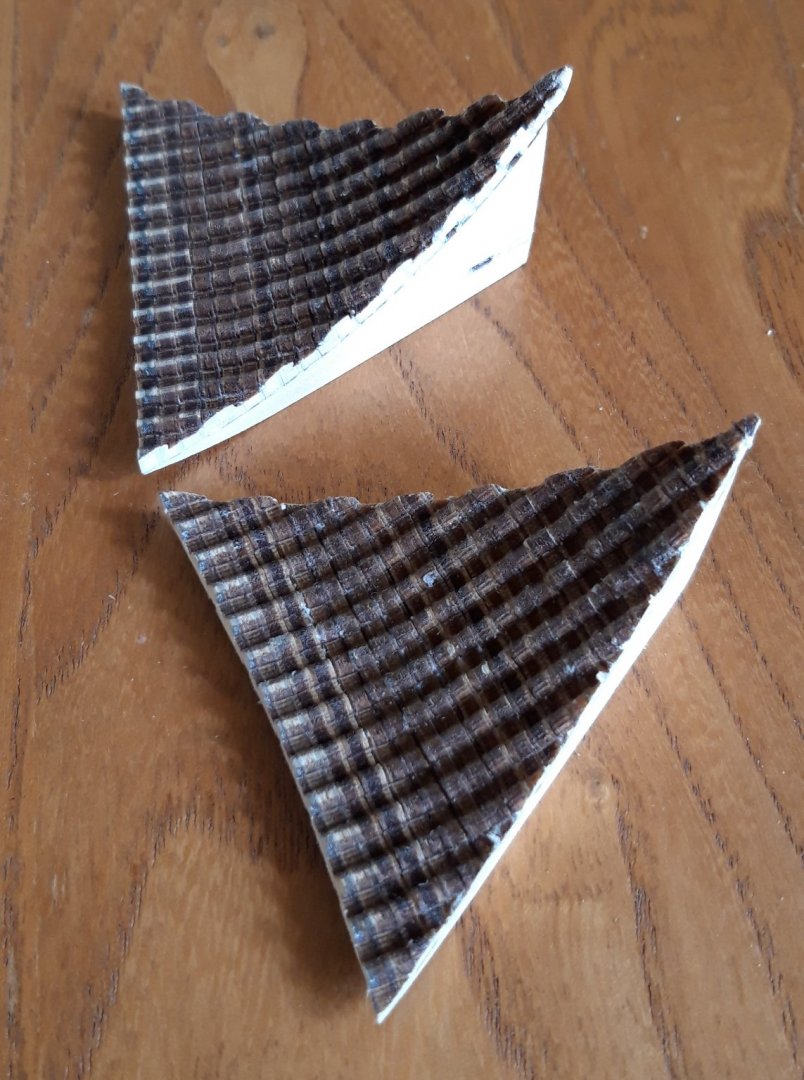
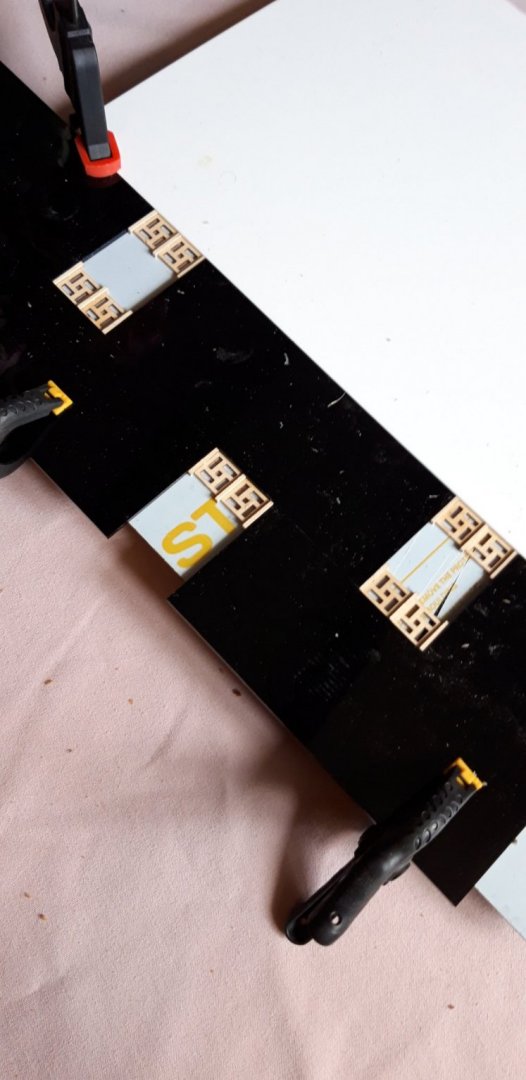
The next stage is to tackle the decorative panels that adorn the the two columns either side and above the front entrance. The two vertical pieces are the thinnest ply I've ever come across. Once the base coat of blue paint had dried I resorted to a fine tipped gold paint fine liner pen for most of the Chinese symbols etc. using a sharpened cocktail stick to apply the most delicate details. These vertical panels wrap around the columns so I decided that they would be easier to fit if pre-curved a bit. To achieve this they were clamped in a grove cut in a scrap of foam block, using a pencil to apply the forming pressure........... ..... and left overnight...... These, and the central panel, were then attached to the main structure. At this point I decided not follow the graphic instructions to fit the top curving ridge pieces in order to avoid damaging them while working on the tiled roof panels. Construction of the tiled sections of the roof begins with the assembly of a sub-structure. I suggest that each one is glued together and placed in it's space on the roof to dry. Number it, and the space, so that they don't get mixed up later. They should all be identical of course, but there can be very slight variations between them (I found out the hard way!) Areas that could be visible were painted gold. Adding the strip profiles begins with the gluing of three pieces across the lower end ...... Once these had dried it is a case of working up the curve to the apex, (and a bit further as will be explained later) .... Using a combination of a fine junior hacksaw blade, scalpel and glass paper the excess ends were trimmed and smoothed to the level of the side pieces. The extra spur at the top ensures minimal gaps at the top when fitted. Before these panels can be glued into place the bottom edge needs to be given a concave arc. Even our largest diameter dinner plate was too small to mark this out so, once again using off-cuts from the kit, a curved template was made ... This was used to mark a line to guide careful paring with a scalpel almost to it's final shape. The finished curve was achieved using an old drum sander, rotated by hand I hasten to add! The last step is to add the laser engraved decorative strip and trim it to size ...almost there..... Cheers, Graham.
-
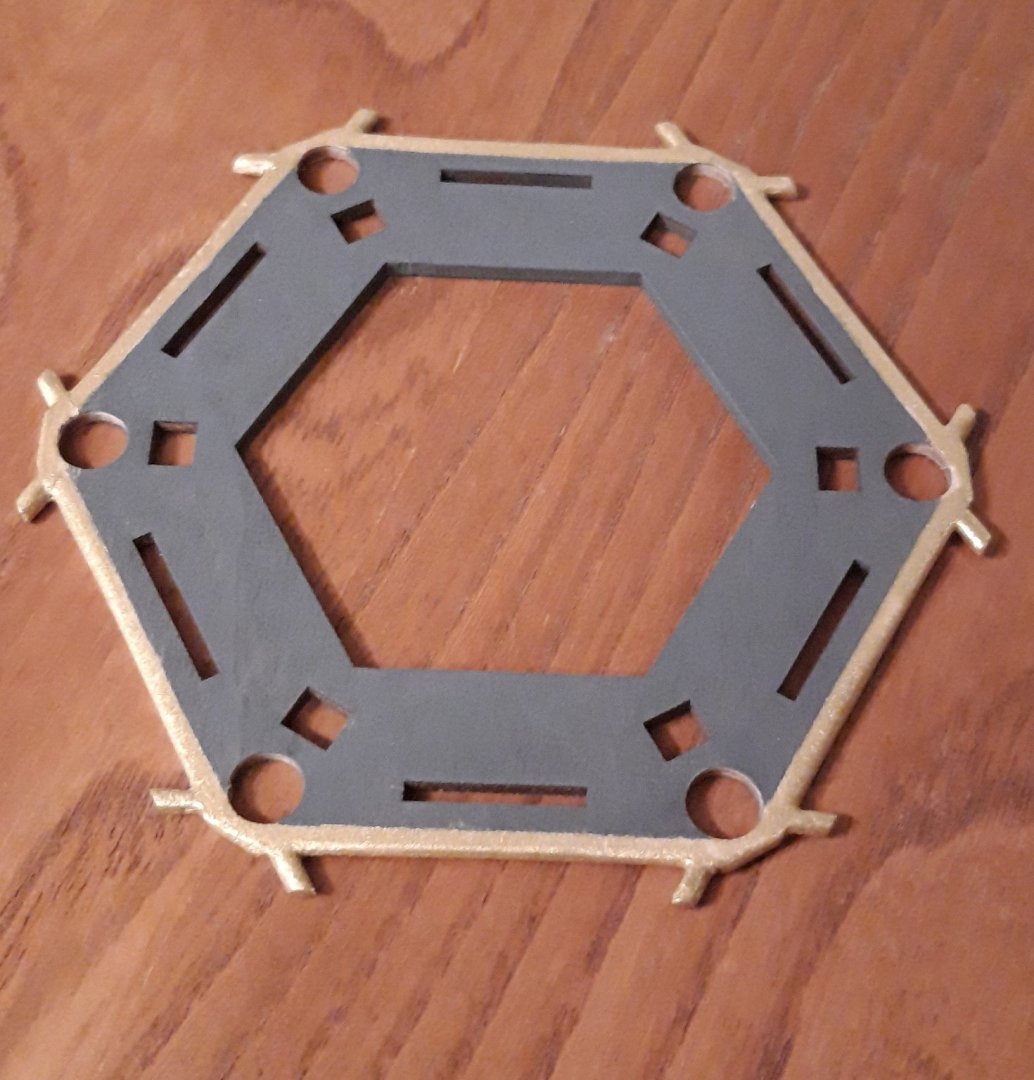
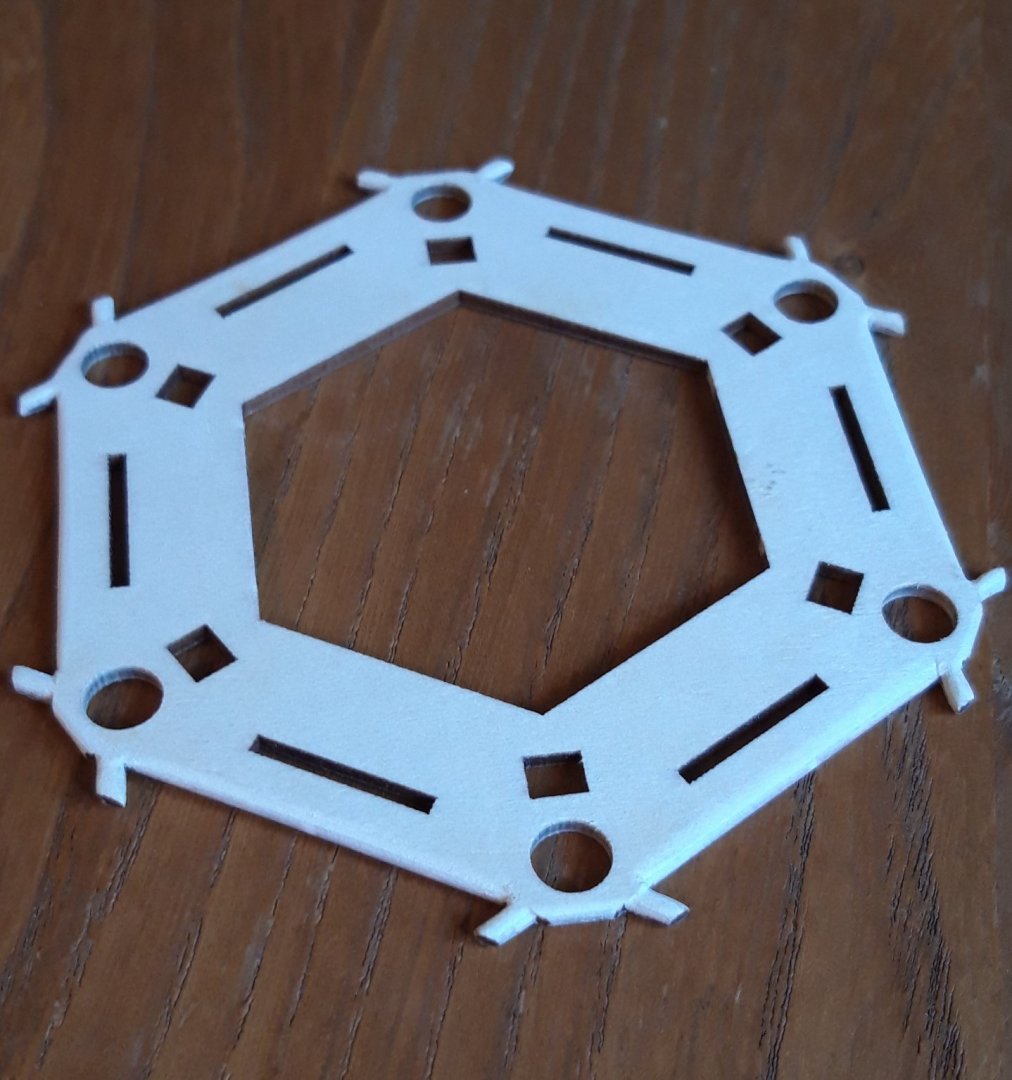
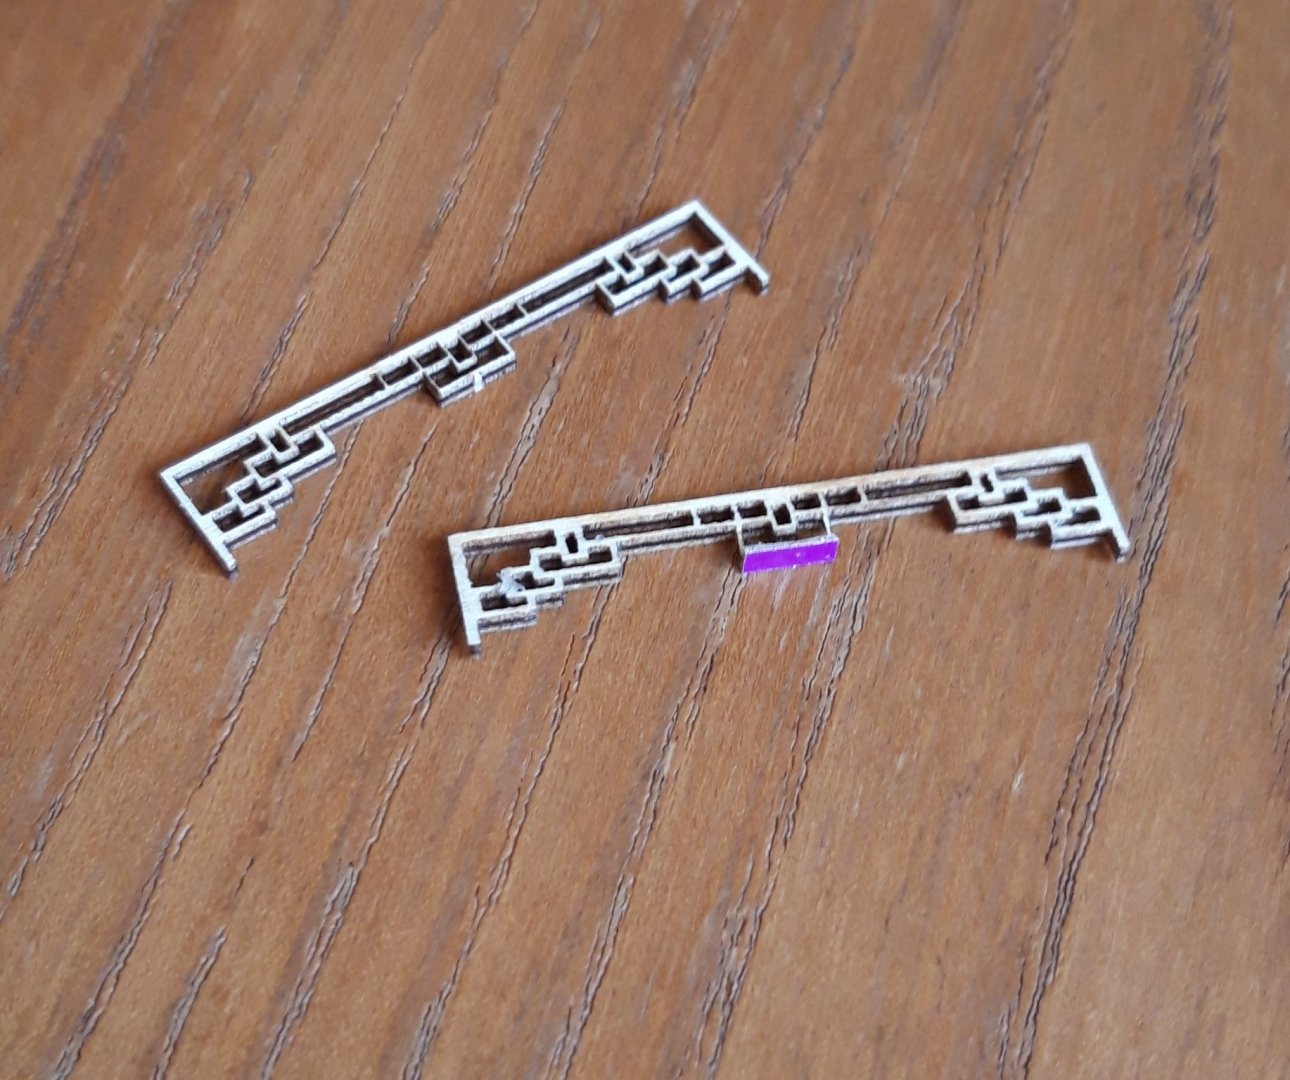
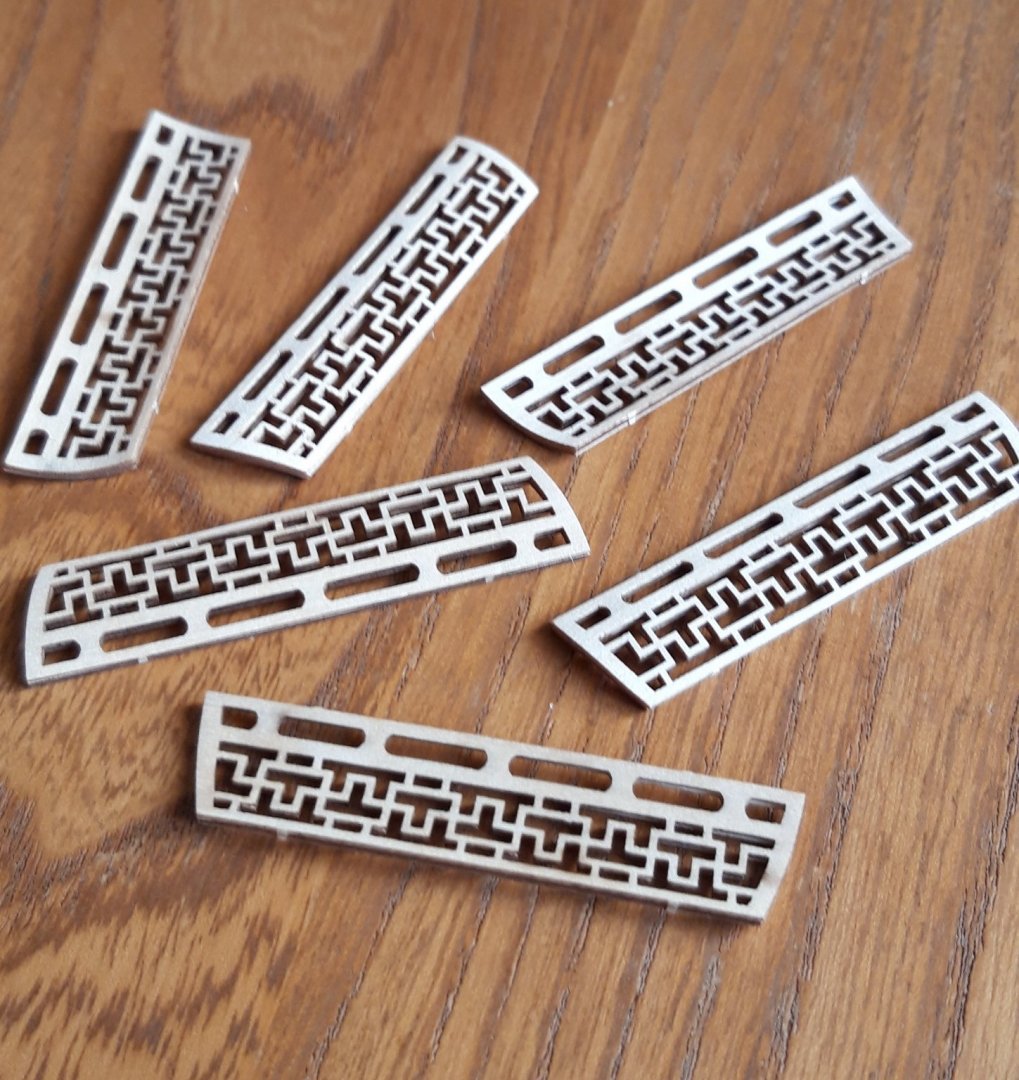
Hi, Thank you for the 'likes', a genuinely appreciated encouragement to keep going ...... The next task is to fit the roof base. Looking at the photographs of the real example the additional extensions on the corners represent distinctive gold painted round section beams. I tried to adapt the hexagon's side square edges by rounding them off and shaping the beam ends to full rounds. This was then painted with the same darker grey paint that will be used on the roof tiles later, and the rounded edges painted gold, before the piece was glued into place. The four separate components, two plain and two pierced, that fit in the top each of the six sides are so well laser cut to size that no trimming or sanding is needed. The lowest fretwork piece, however, is very fragile to the extent that I managed to damage some just picking them up! Repairs were made by grafting on small pieces of card .... All bare wood on the main structure was now painted gold. From now on I have to 'wing it' and rely solely on the kit's illustrated instructions ...........🤔 There are six curved 'ridge' bases that locate onto the top of the roof base. The front protrusion that sticks out on underside is ornately carved on the full size pavilion to form a dragon's (or lion's?) head so ....... There are three separate lengths of ply that are glued to the top curve. Edges of this ply were rounded with glass paper to produce a fluted effect. Off-cuts left over from the kit made ideal clamping aids. Once fully dried a fine toothed junior hacksaw trimmed these laminations to final length. At this point they were finally re-clamped in place with glue. Gold paint was applied where required and they were glued in place together with the central spire assembly. As the top three of the eleven hexagonal core parts at the bottom of this spire also need gilding I decided add the various wooden spheres and paint these too rather than leaving them to the end of the build. Slowly getting there! Cheers, Graham.
-
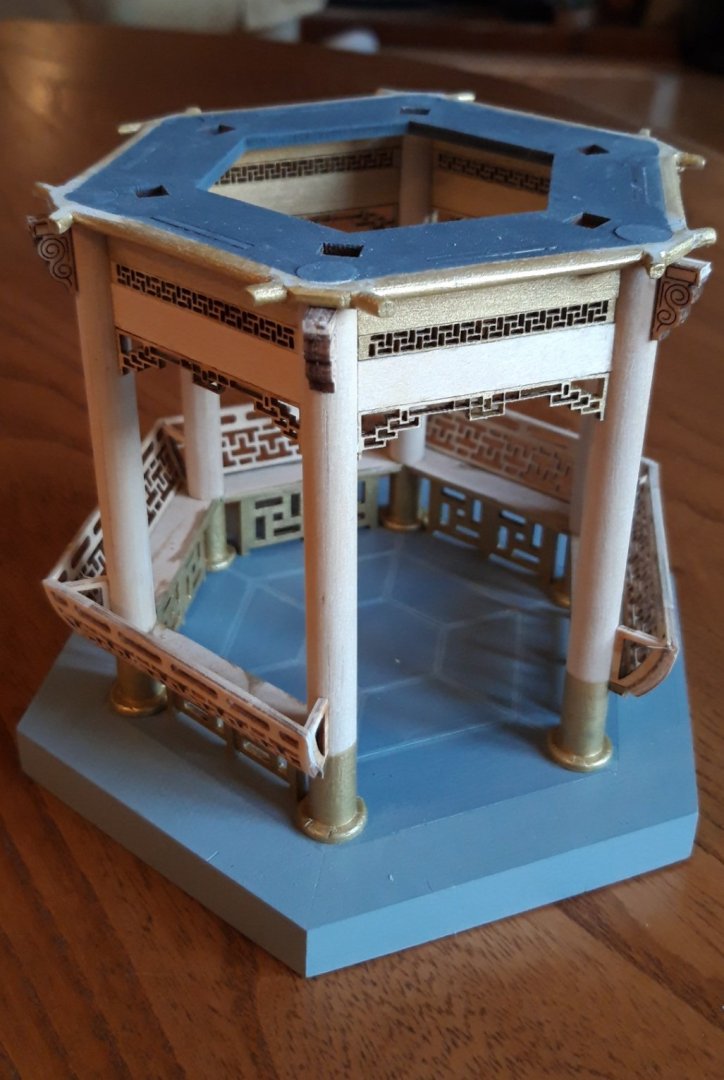
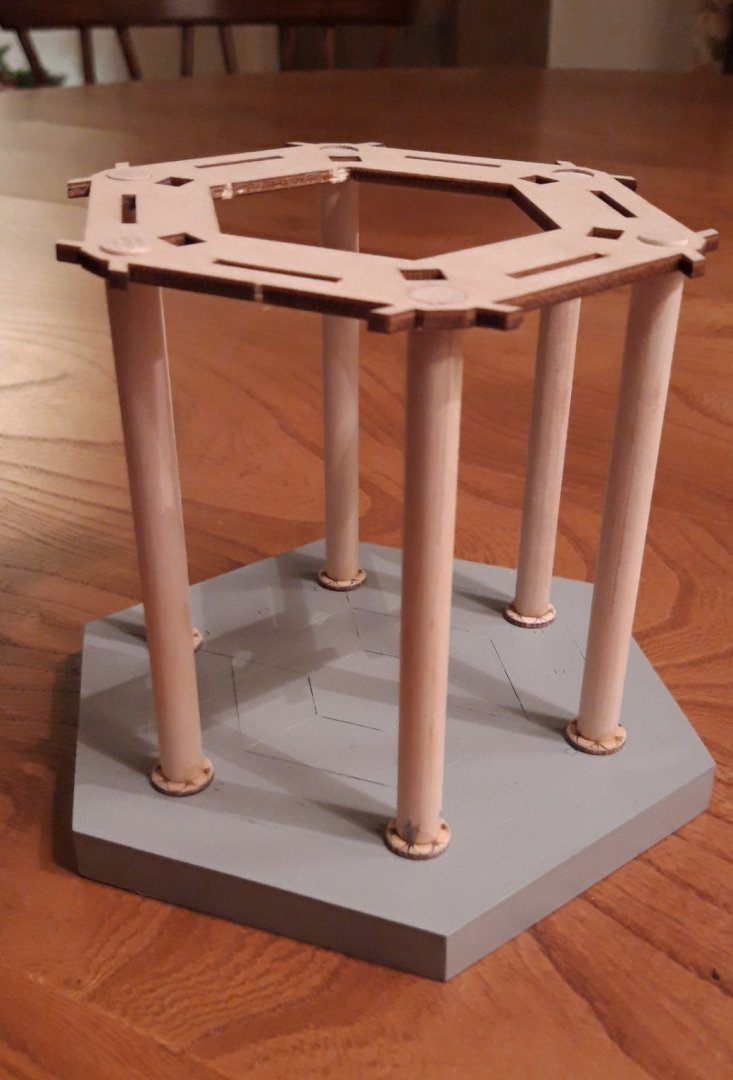
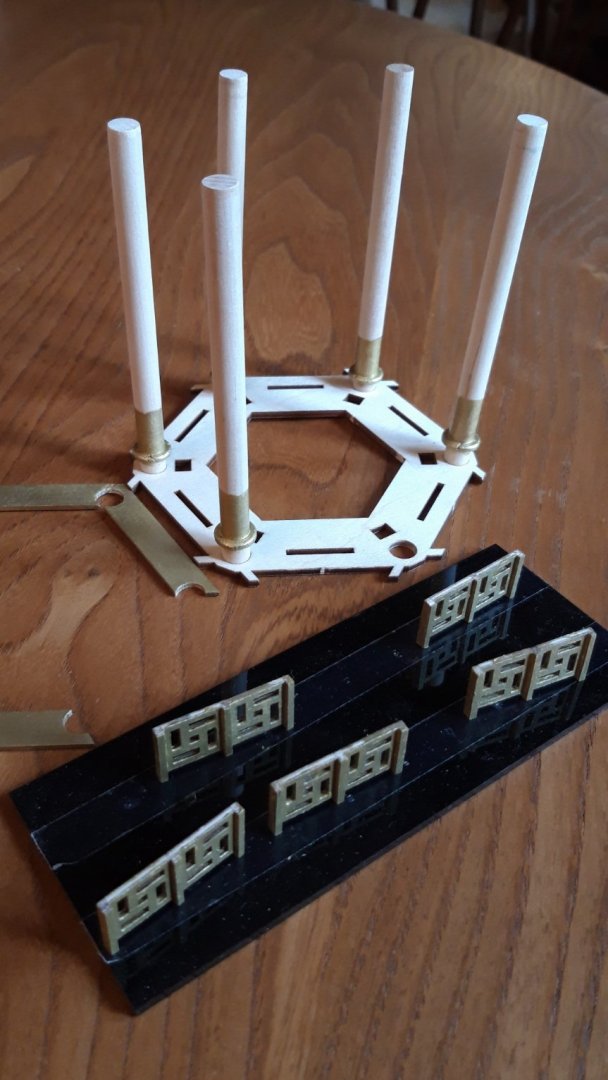
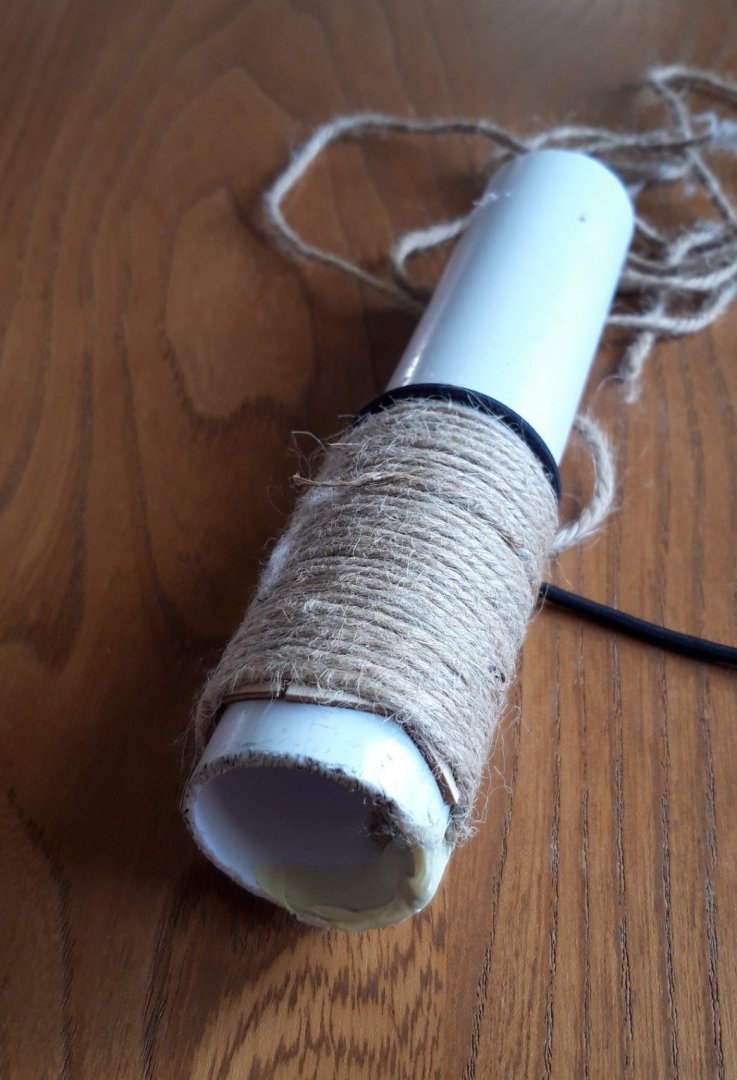
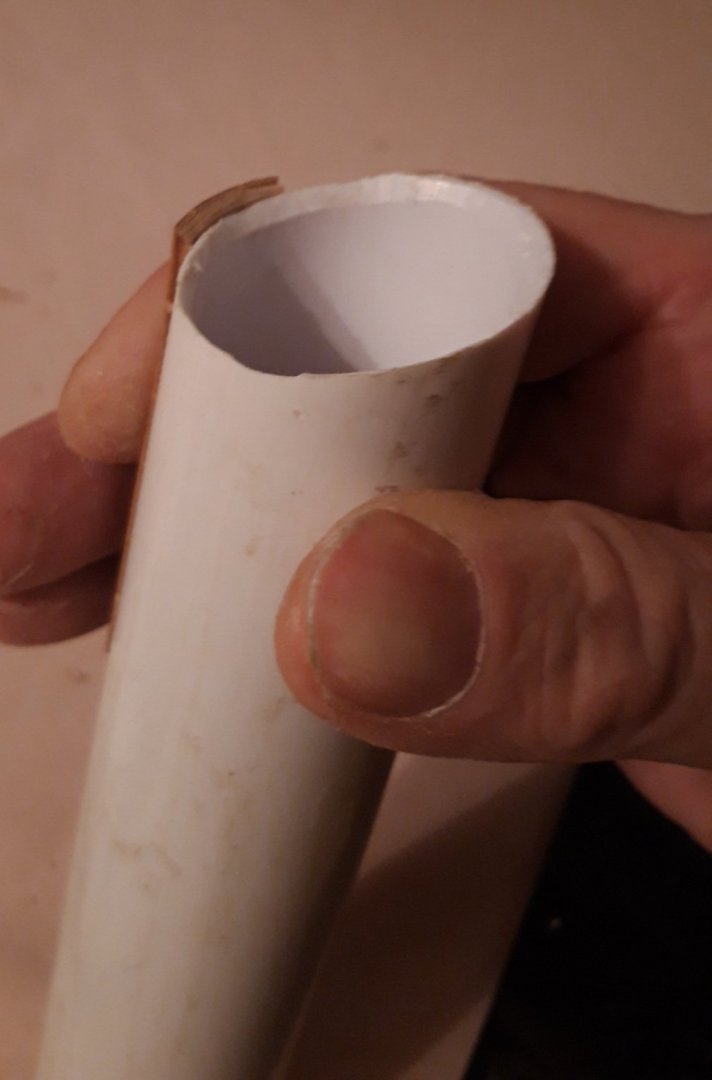
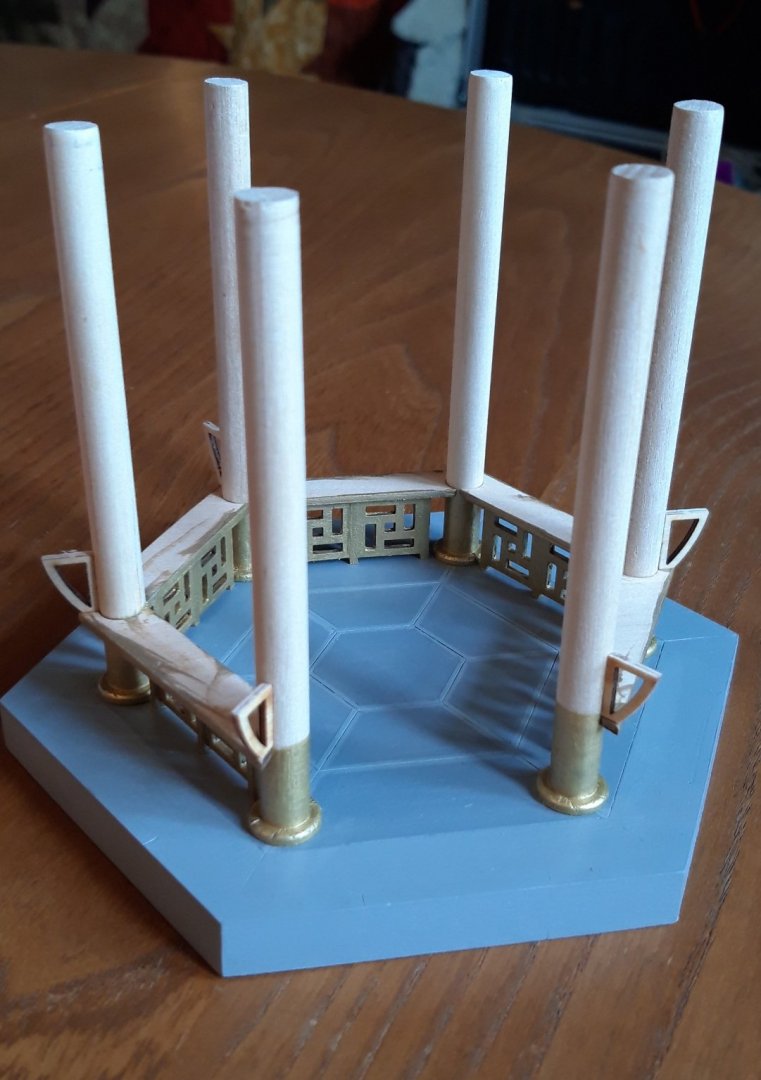
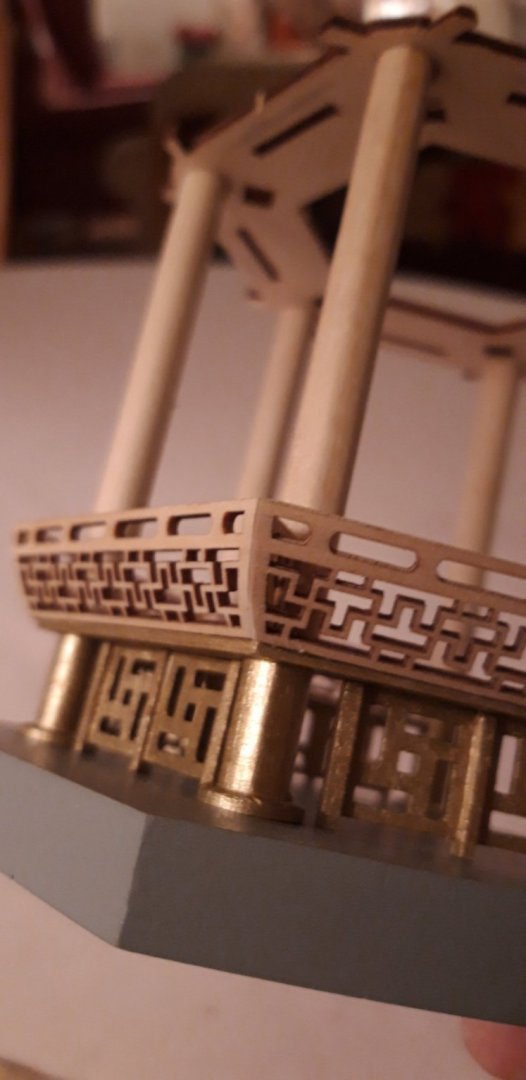
Hi, Having successfully uploaded my images to a downloading site (thanks again OC.) another problem arose - the laptop I'm now granted occasional access to is set up to block this method of accessing and downloading them! The Admiral, bless her, has now shown me an alternative bit of I.T. manipulation to get around this so this build log can now, hopefully, continue. The next stage is dealing with the six columns. Each has a laser engraved ring at the base. After opening the internal holes a bit to make them slide over the dowels they had the top edge radiused and the decoration extended down the side of the ring with a sharp scalpel. In this picture the assembled columns have been inserted into the base to set rings at the right height while the glue dries. They are not glued into the base, however. The top piece is dry fitted to ensure the dowels are vertical. (This was done prior to applying the tape and final coat of darker grey paint.) Next task was assembling the five decorative panels ..... These panels, together with the underside of the seat base and the columns up to the seat level were painted with gold acrylic. These parts were then glued in place together with the supports for the seat backs. Curving the seat backs proved 'interesting'! After a false start I came up with this solution. Fortunately the kit comes with a spare. After soaking in hot water they were bound to a piece of 36 mm OD plastic waste pipe with garden twine and left overnight to dry. To achieve a neat joint at the ends of the seat back pieces I used another off-cut of the waste pipe, cut at a suitable angle and roughly bevelled on the inside, to support the ply while it was bevelled with a scalpel. The finished seat backs were then glued in place. Cheers, Graham.
About us
Modelshipworld - Advancing Ship Modeling through Research
SSL Secured
Your security is important for us so this Website is SSL-Secured
NRG Mailing Address
Nautical Research Guild
237 South Lincoln Street
Westmont IL, 60559-1917
Model Ship World ® and the MSW logo are Registered Trademarks, and belong to the Nautical Research Guild (United States Patent and Trademark Office: No. 6,929,264 & No. 6,929,274, registered Dec. 20, 2022)
Helpful Links
About the NRG
If you enjoy building ship models that are historically accurate as well as beautiful, then The Nautical Research Guild (NRG) is just right for you.
The Guild is a non-profit educational organization whose mission is to “Advance Ship Modeling Through Research”. We provide support to our members in their efforts to raise the quality of their model ships.
The Nautical Research Guild has published our world-renowned quarterly magazine, The Nautical Research Journal, since 1955. The pages of the Journal are full of articles by accomplished ship modelers who show you how they create those exquisite details on their models, and by maritime historians who show you the correct details to build. The Journal is available in both print and digital editions. Go to the NRG web site (www.thenrg.org) to download a complimentary digital copy of the Journal. The NRG also publishes plan sets, books and compilations of back issues of the Journal and the former Ships in Scale and Model Ship Builder magazines.


.thumb.jpg.177d5224bec7fb9e4d6d02acad9a85eb.jpg)
