No Idea
-
Posts
1,025 -
Joined
-
Last visited
Content Type
Profiles
Forums
Gallery
Events
Everything posted by No Idea
-
 Allan - cheers for that information - so being from England 5/8th is about 15mm in the real world 🤣 I really like the look of these little barrels and they are not expensive either. https://www.hobbies.co.uk/walnut-barrels-5-s 5 barrels made of walnut for about £3 which I think is about $4? I know that they would be a bit square in dimension but they may work? They may be a little short but wow this would save me a whole lot of time. I would make a master as Jaager suggested but its the staves that are the problem - They are not straight pieces of wood they are convex and so many would need to be made. I just know that when the ship is finished no one will see them except for me - When I'm actually retired I'll have a go at this as his solution will defiantly work. As for withy - I reckon some sanded down rope may work to get the fibres sticking out. Cheers Mark
 -
You know what I've thought about this (I do sometimes) and this is genius - Jaager this would work so well for such a difficult shape and as you say you would only need to make one master. I'm not going to do it as its a project in itself but what a very clever solution - cheers!
-
Allan you'll probably find that there was a guild of withy men that held the sole job of wrapping gunpowder barrels which was only allowed by the King! I only wanted some barrels and look what I've started 🤣
-
Thanks druxey - As above I really need to do some proper research and make a decision. I guess when you think about it - no metal = no sparks. I had not even considered this until tonight given the information you guys have supplied. I don't think I'll be getting a job as an armorer any time soon and the crews happy about that!
-
Keith / Bruce Thanks both for the really good information - I did not know that gunpowder barrels had wooden hoops. Everyday is a school day! I was hoping to be lazy and just buy some off the shelf wooden barrels but you have made me see that as per usual there's a lot more to it than that. I need to try and find out more as I would rather have an empty hold than something that is completely incorrect. Can't thank you both enough for your input here - cheers lads 😀
-
I dunno - buy a Jolly Roger and I can carry anything. Wooden cannon barrels there's something just wrong with that 🤣 Mate where do you find this stuff this cracked me up 🤣
-
Cheers Keith but any idea of how big a barrel is to convert it? I honestly have no idea (get your jokes in) at all!
-
Trucks and ships its all the same - if its on its gone 🤣
-
Hi Keith what a great find and thanks very much for looking for me! Ok maths was never my thing so does anyone know what size a 1/24th gunpowder barrel should be? I'm clueless so any help would be great.
-
Hi Allan - I've just read my post back to myself and its one of those posts where I assumed everyone had the same conversation as me in my head 🤣 You are quite correct to ask this and I should have said - I'm looking for gunpowder barrels! I must apologise to everyone who isn't physic and for those that are - well you know 🤣 No mate you wasn't - Its my lack of explanation! You can see why I drive a truck for a living and not a mega manager 🤣 I have these conversations with myself and just expect everyone else just to keep up!
-
Hi Can anyone help? I'm being completely lazy here and I don't mind admitting it but I would like some 1/24th scale wooden barrels for my build. I don't own a lathe and for the amount of use it would get its really not worth me buying one. In fact I don't fancy making the barrels at all 🤣 So does anyone know where I could purchase some good quality 1/24th wooden barrels - and they need to be made of wood. I can't find any but I'm sure that someone will know the answer on here. I live in the UK and don't mind importing them but I do need good quality ones. Its not mega important as I can easily leave the hold empty but I think they may add something to the finished build. Cheers Mark
-
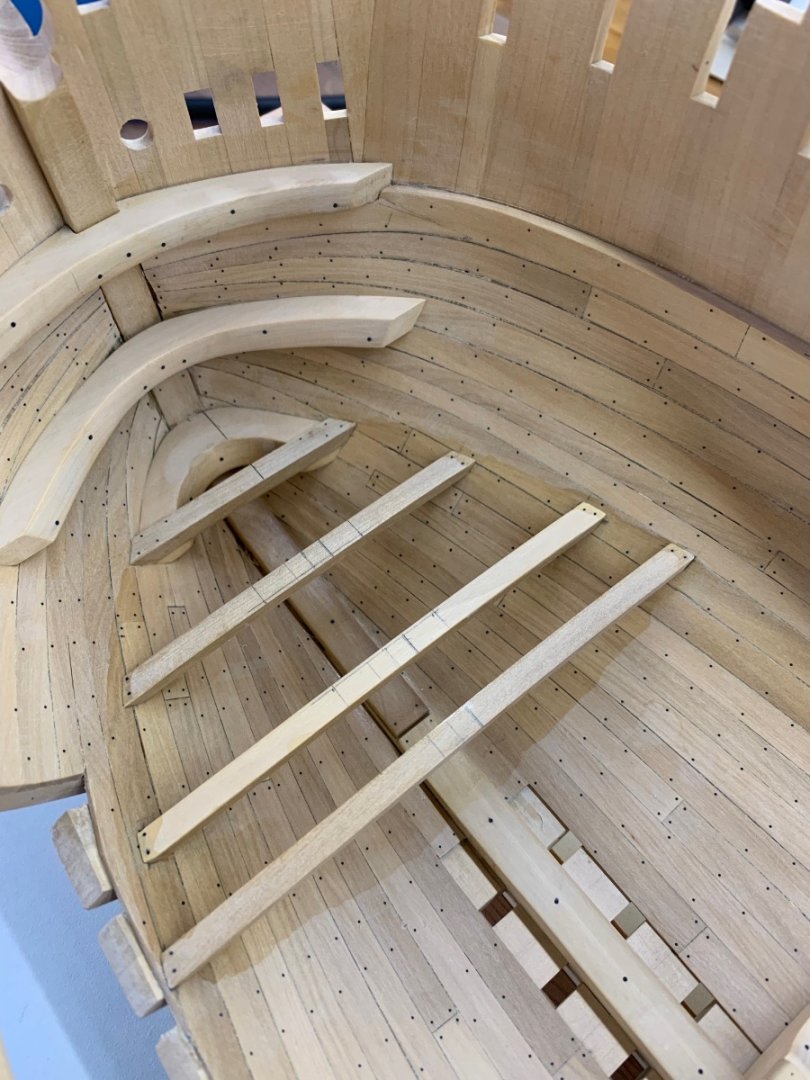
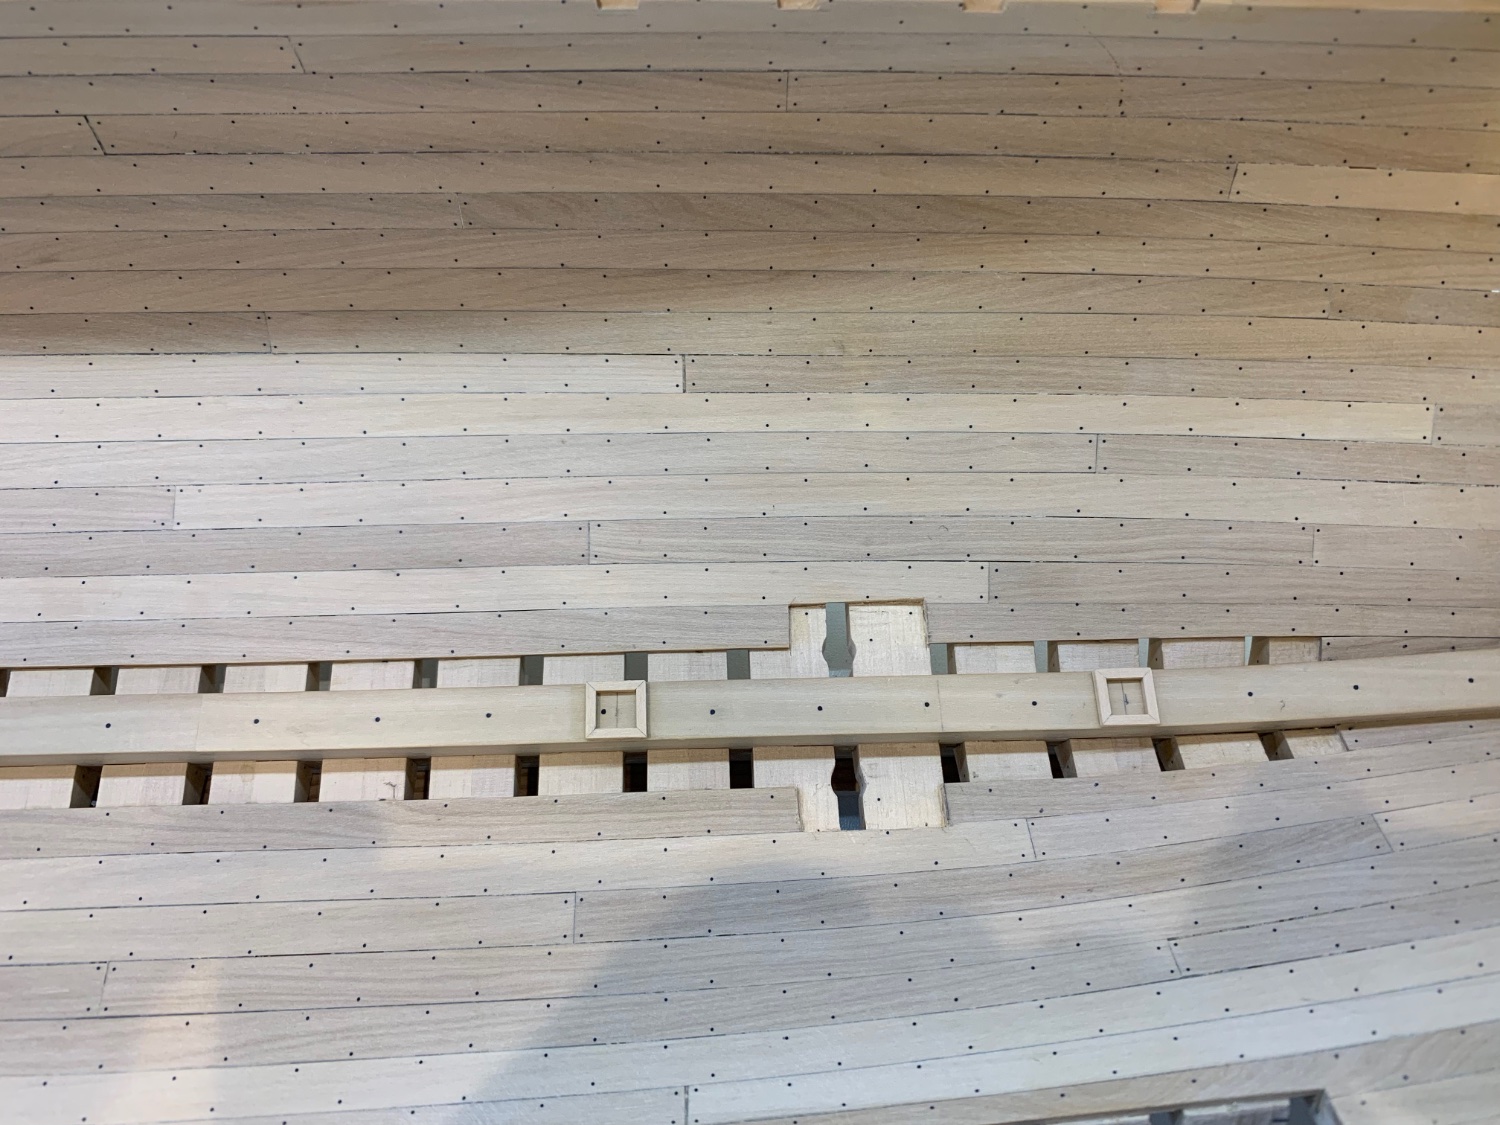
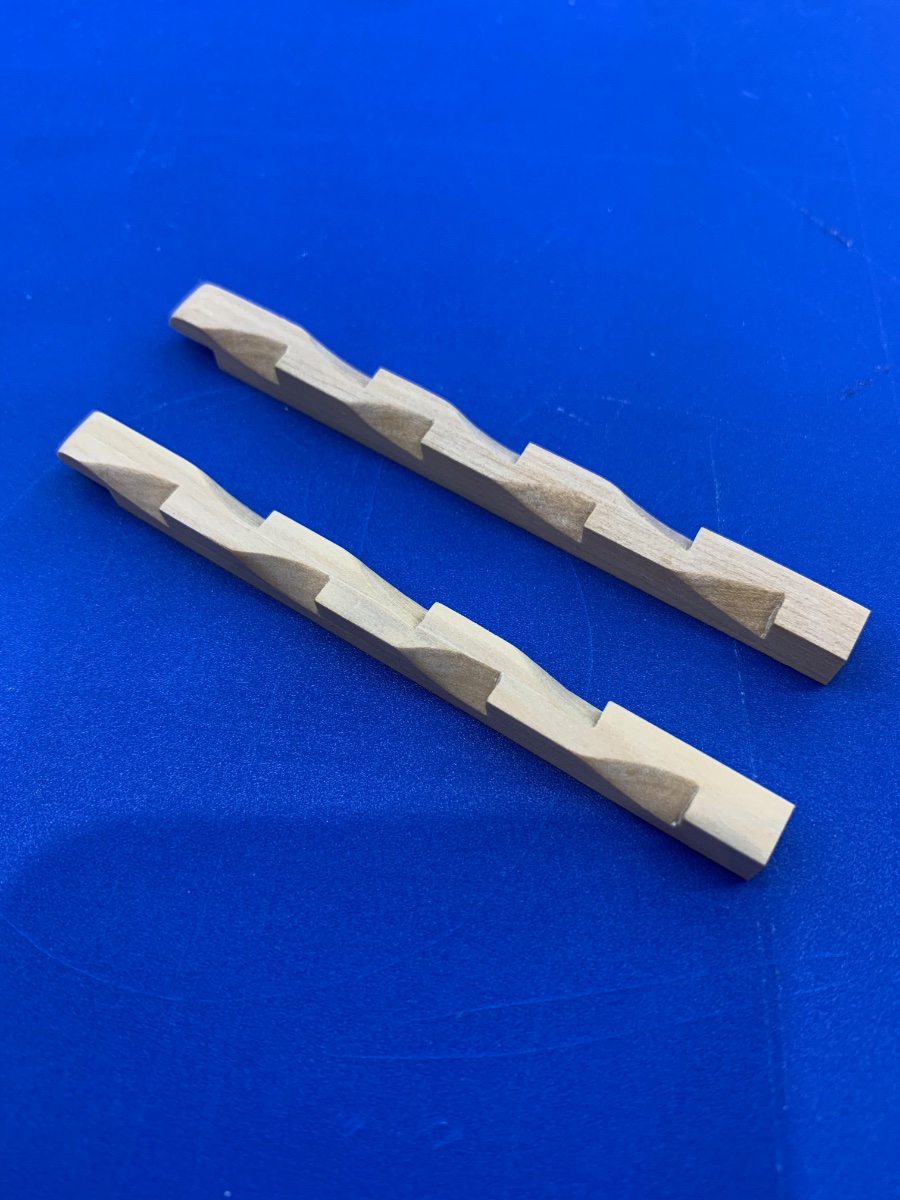
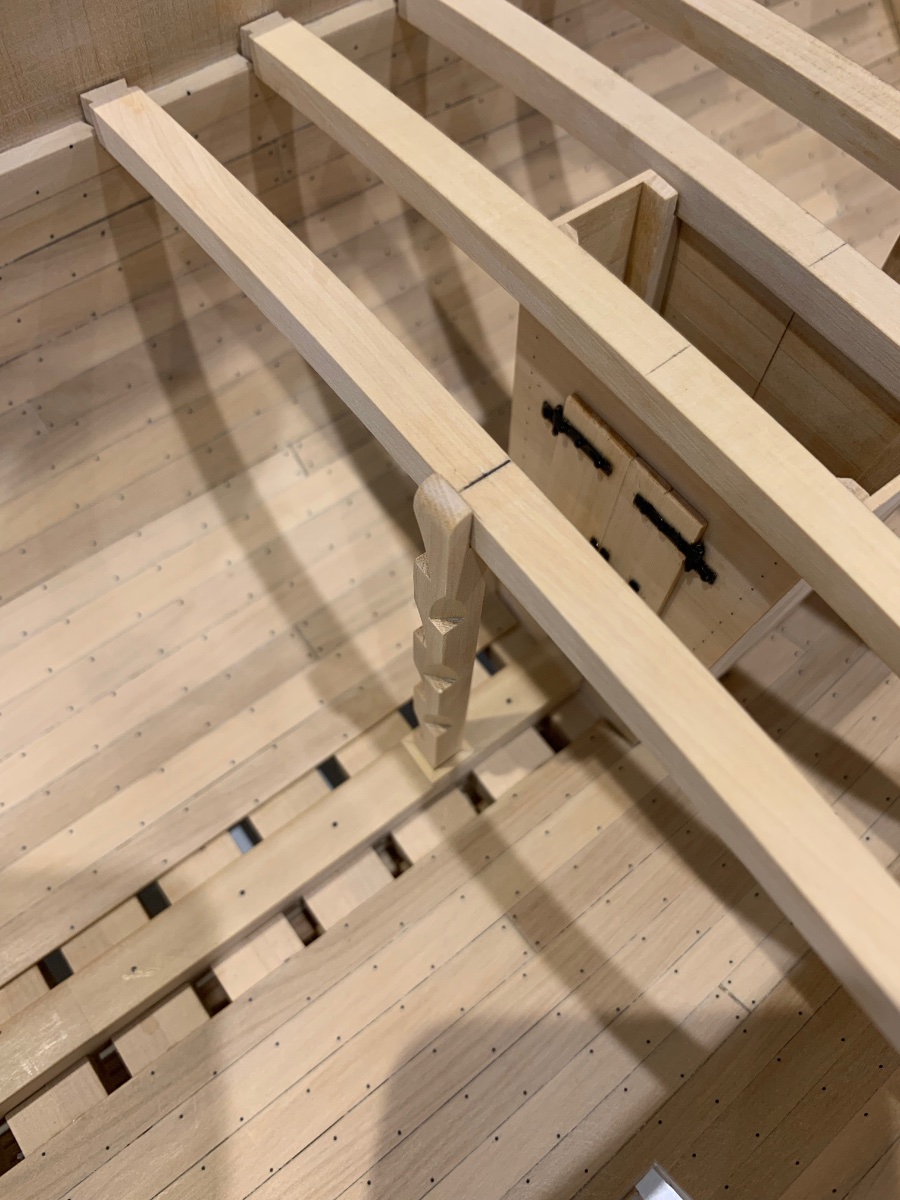
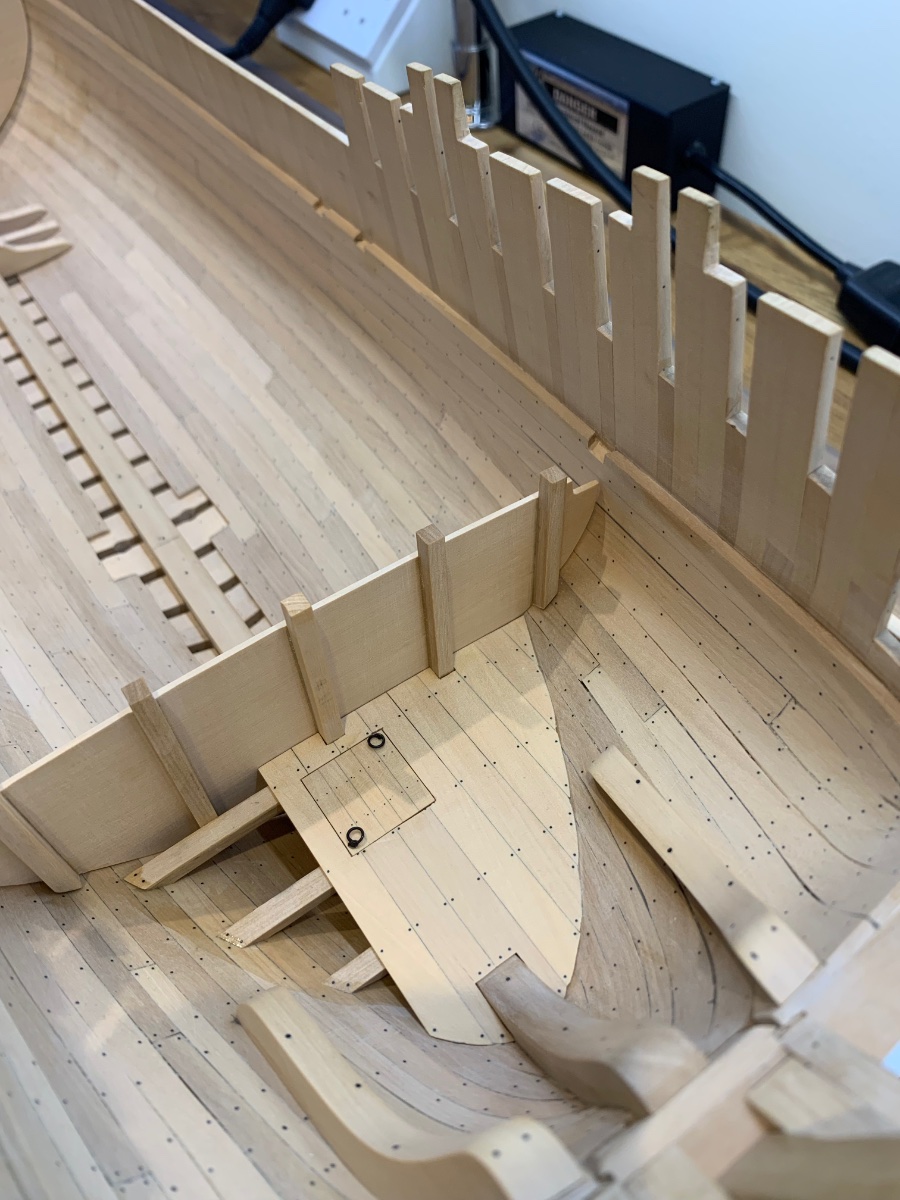
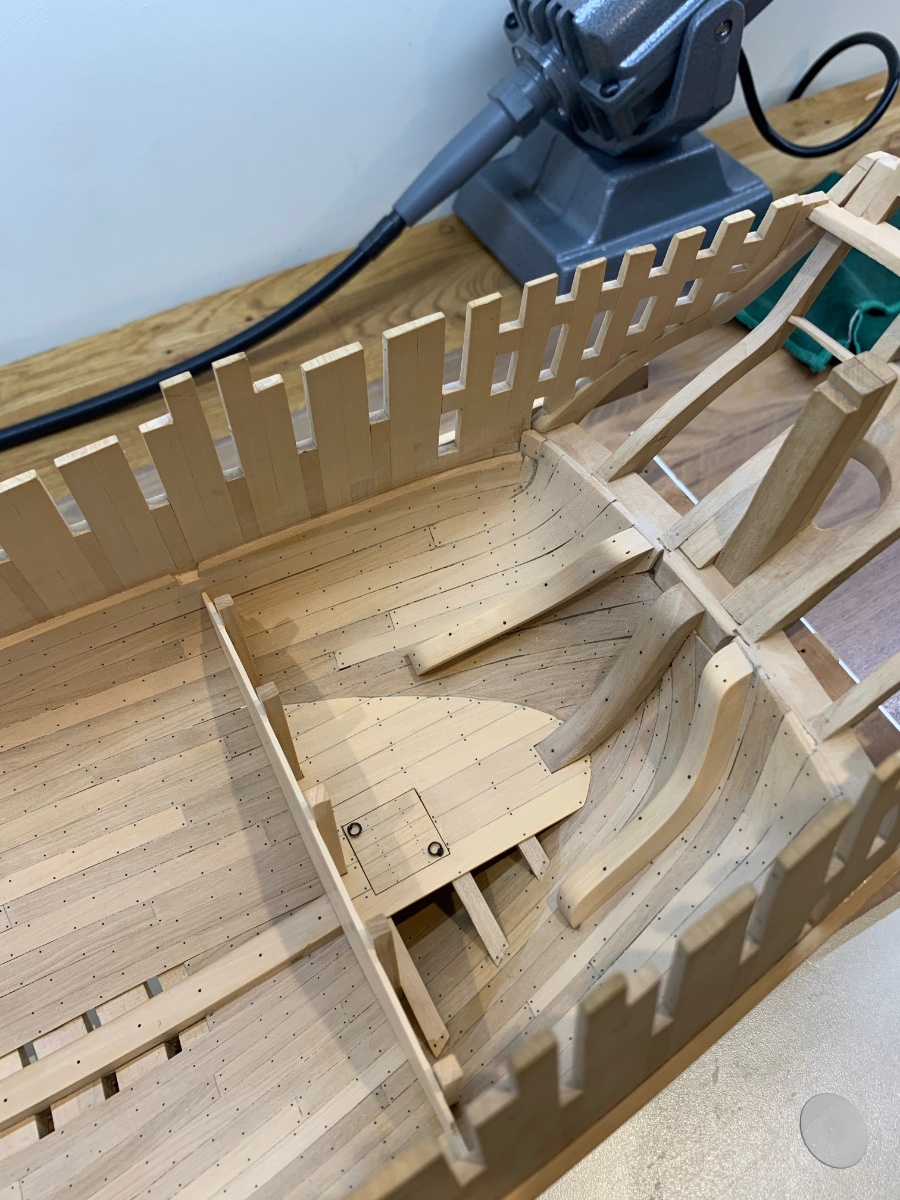
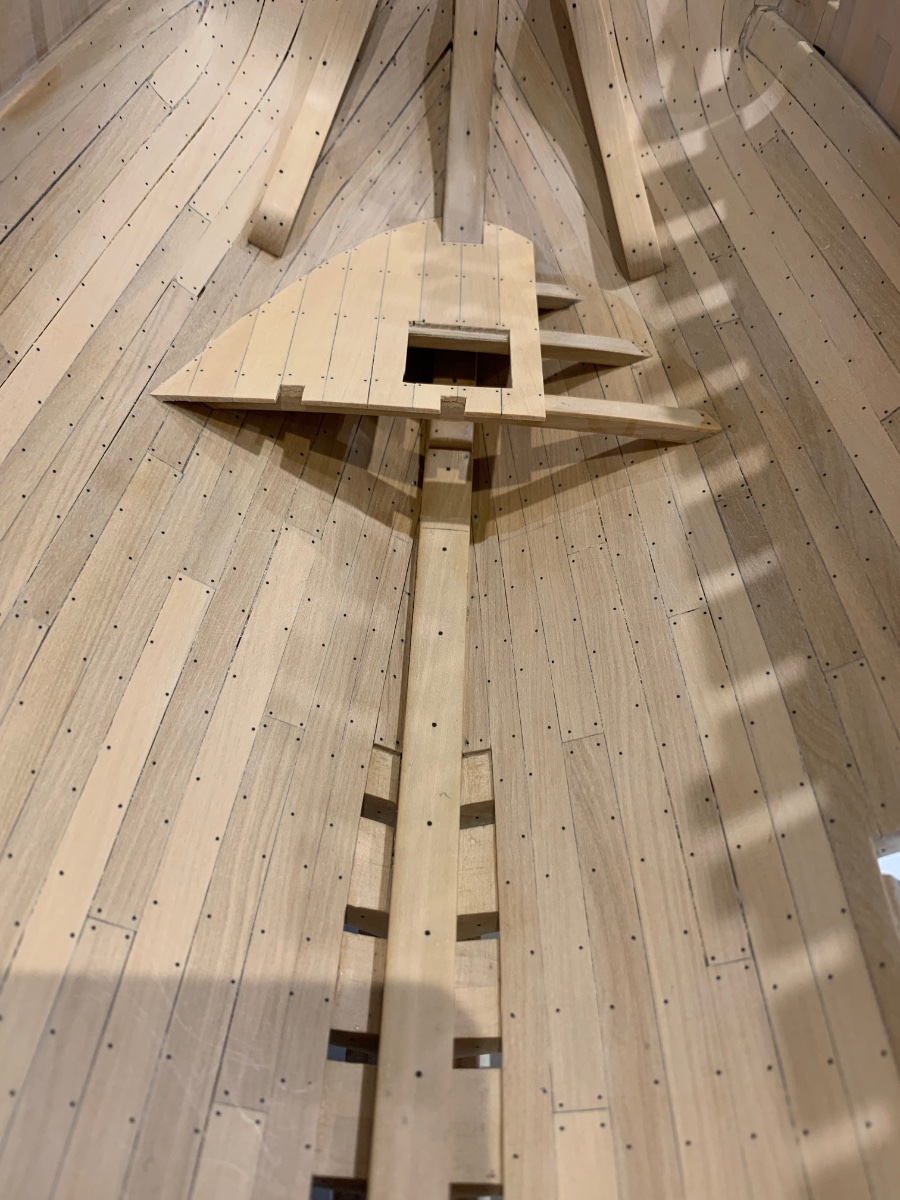
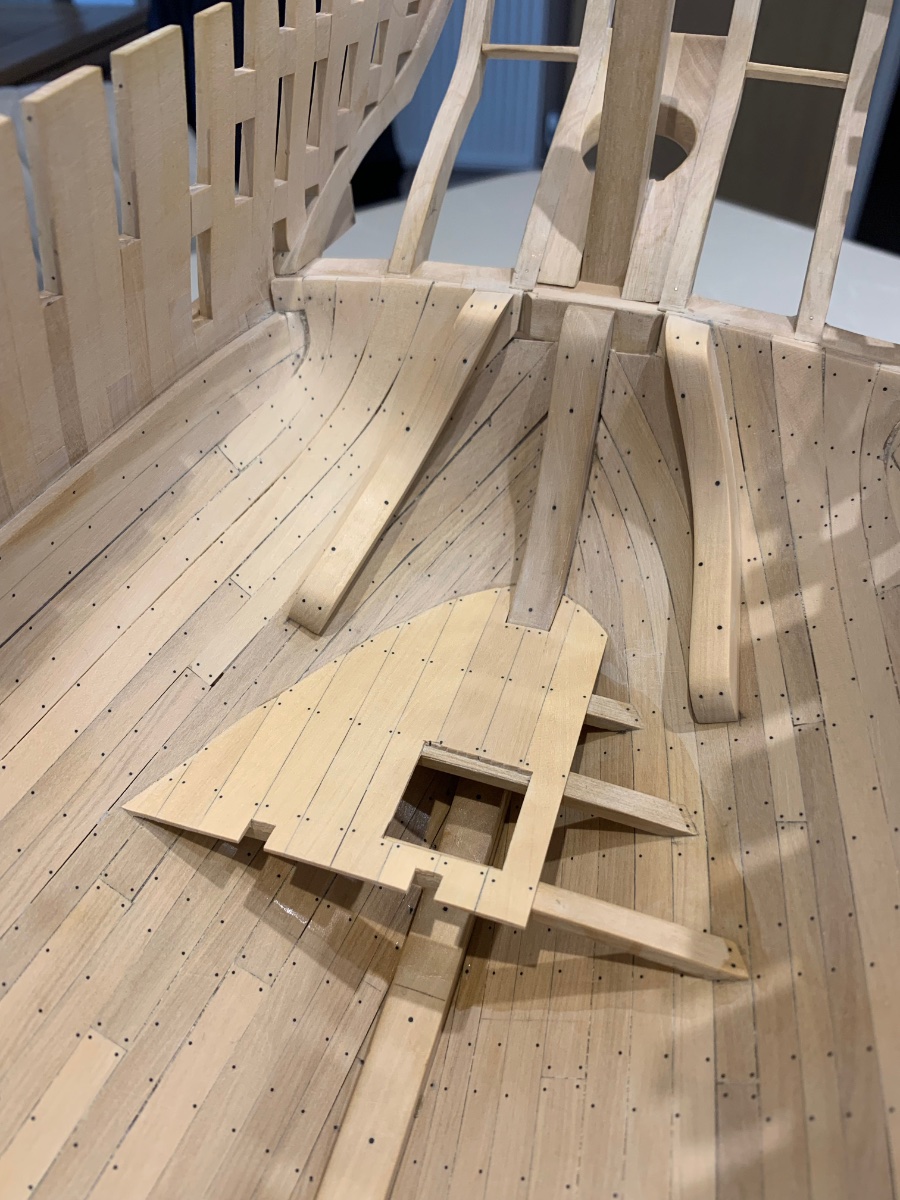
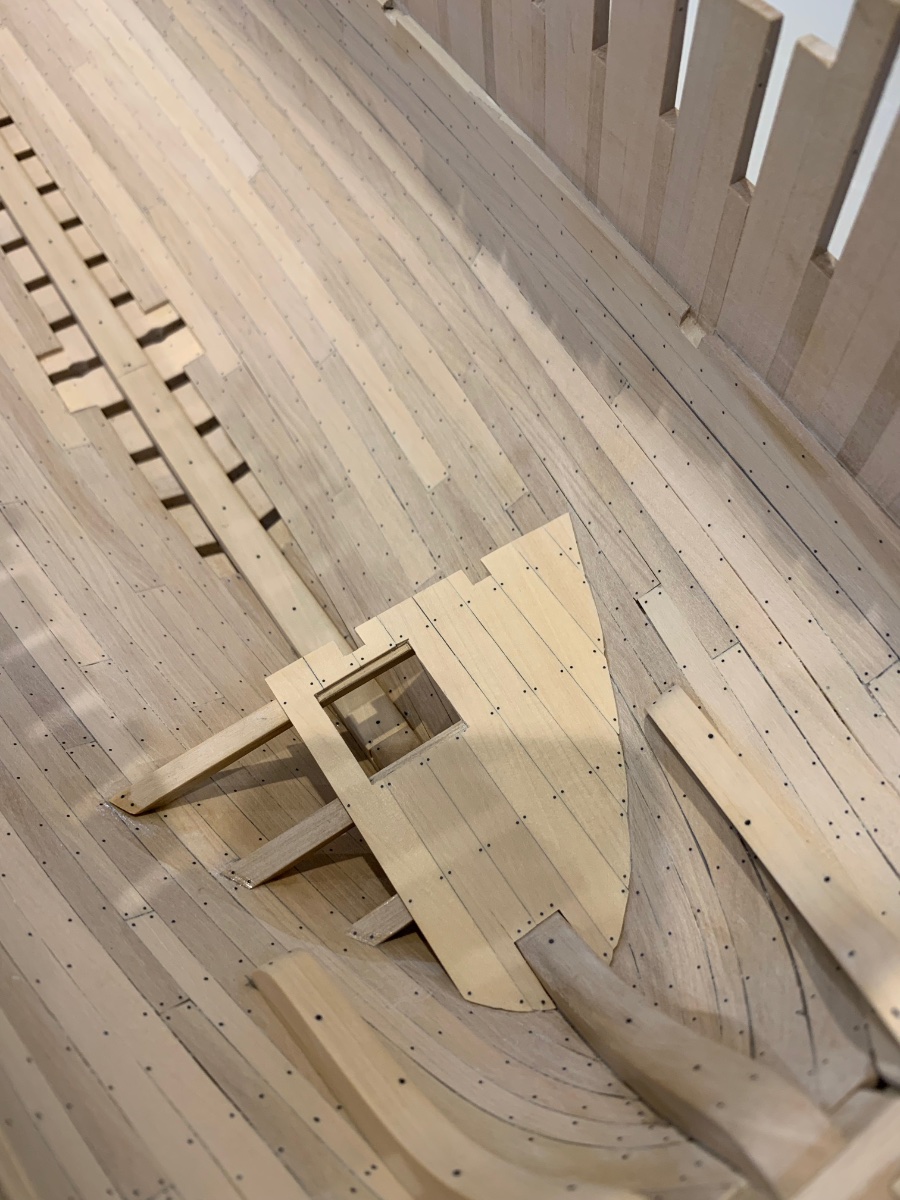
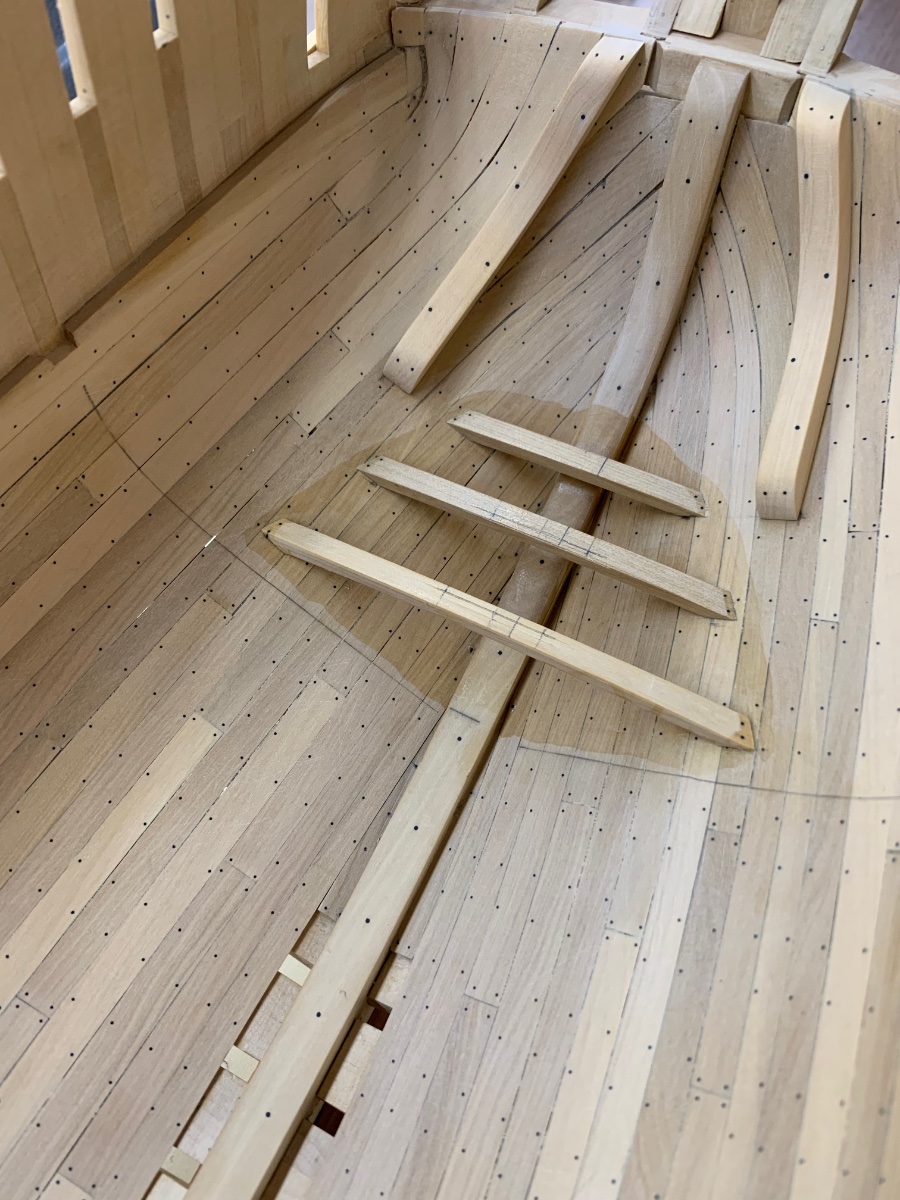
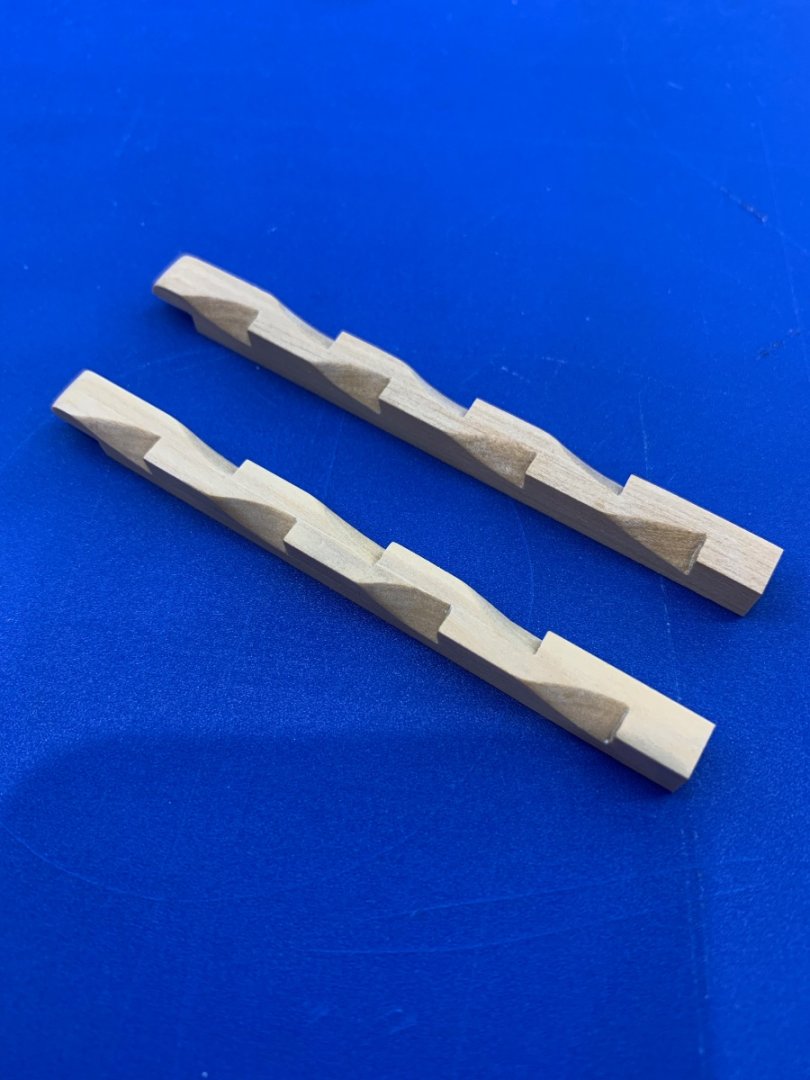
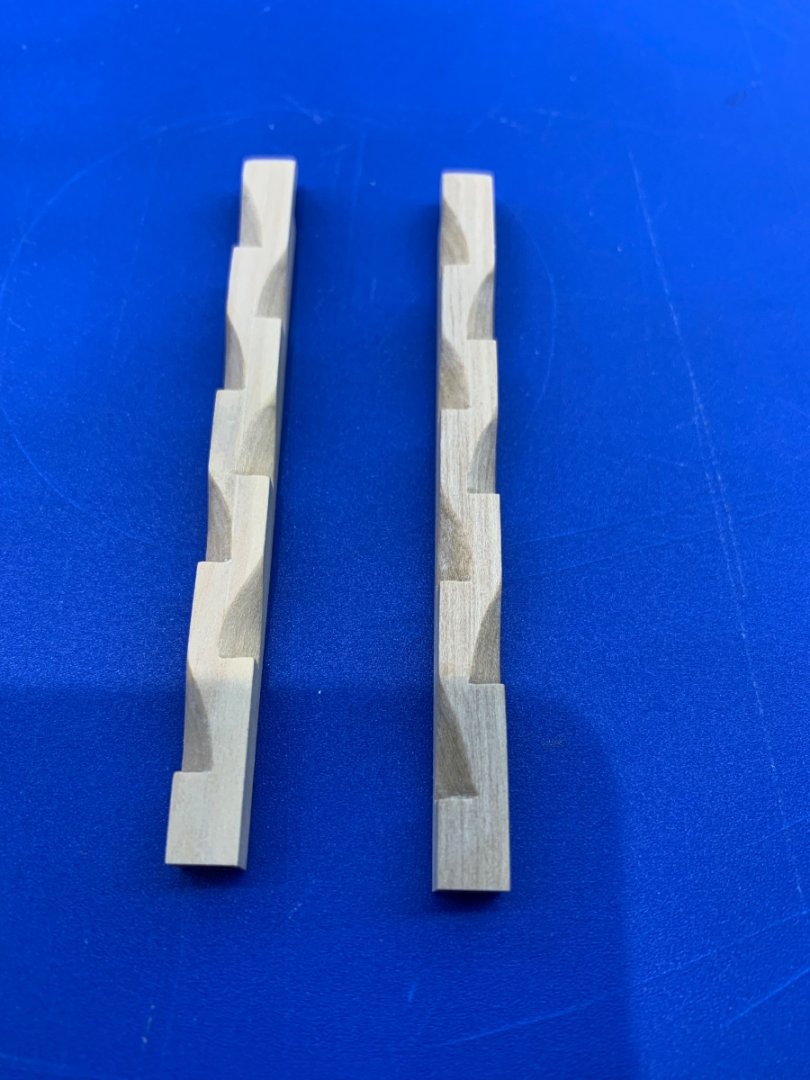
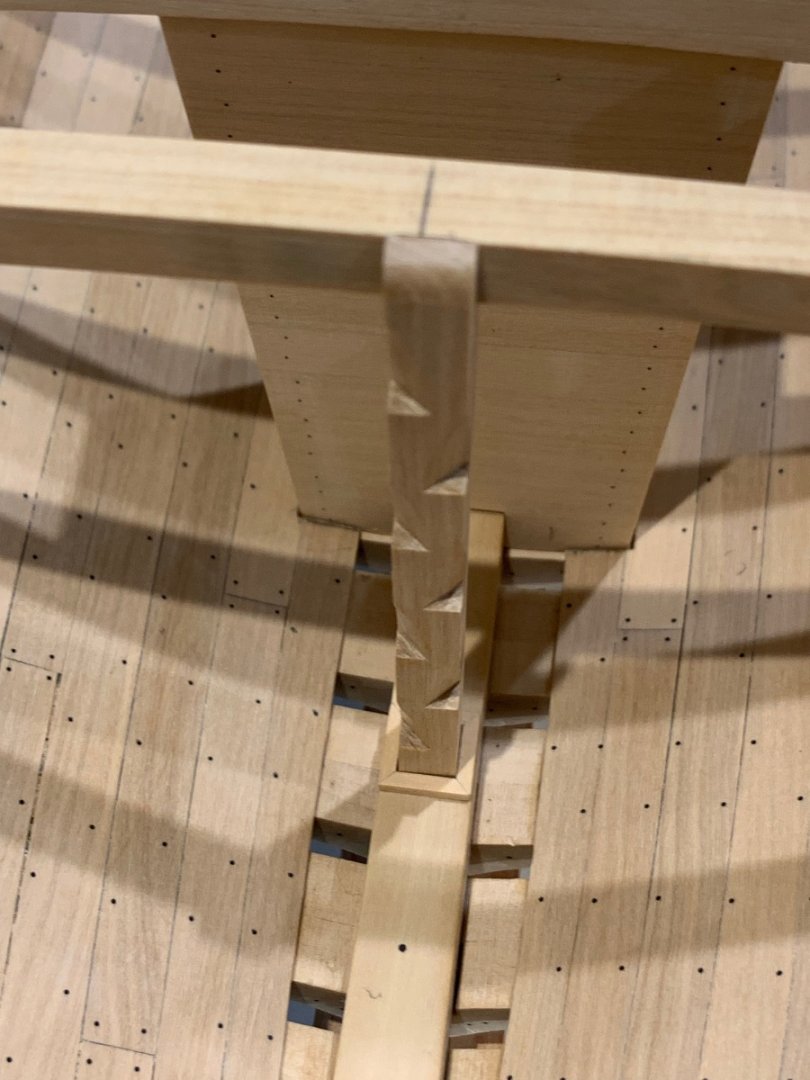
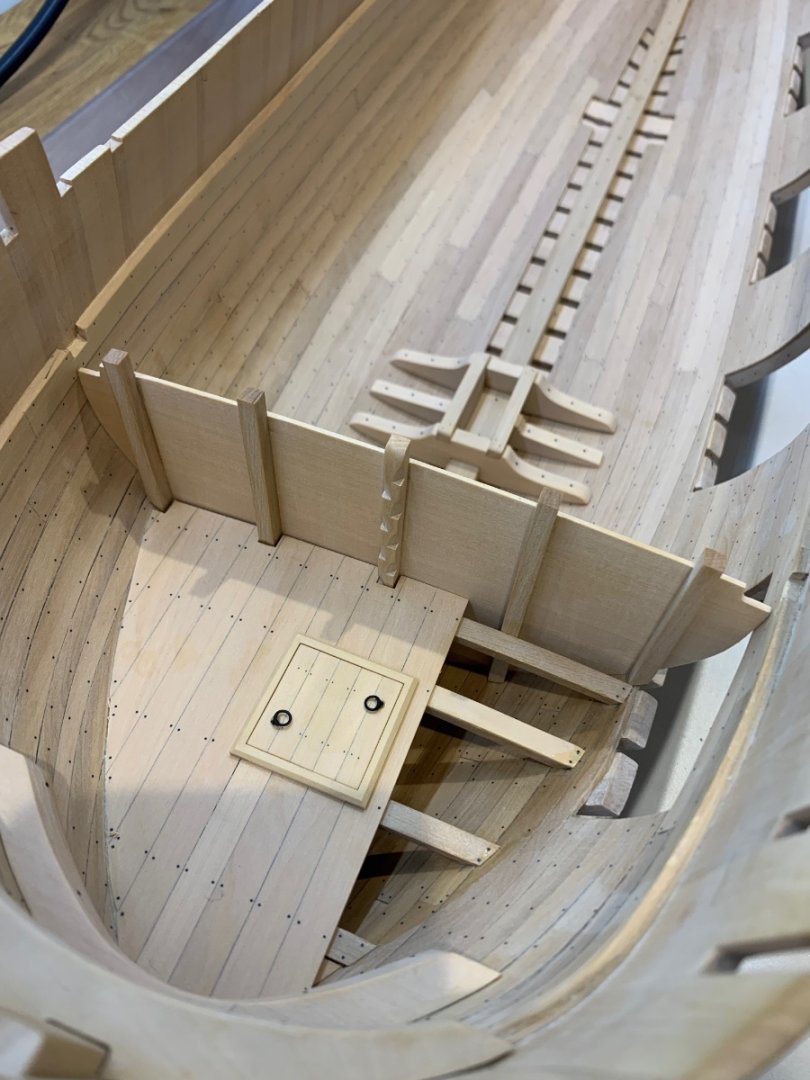
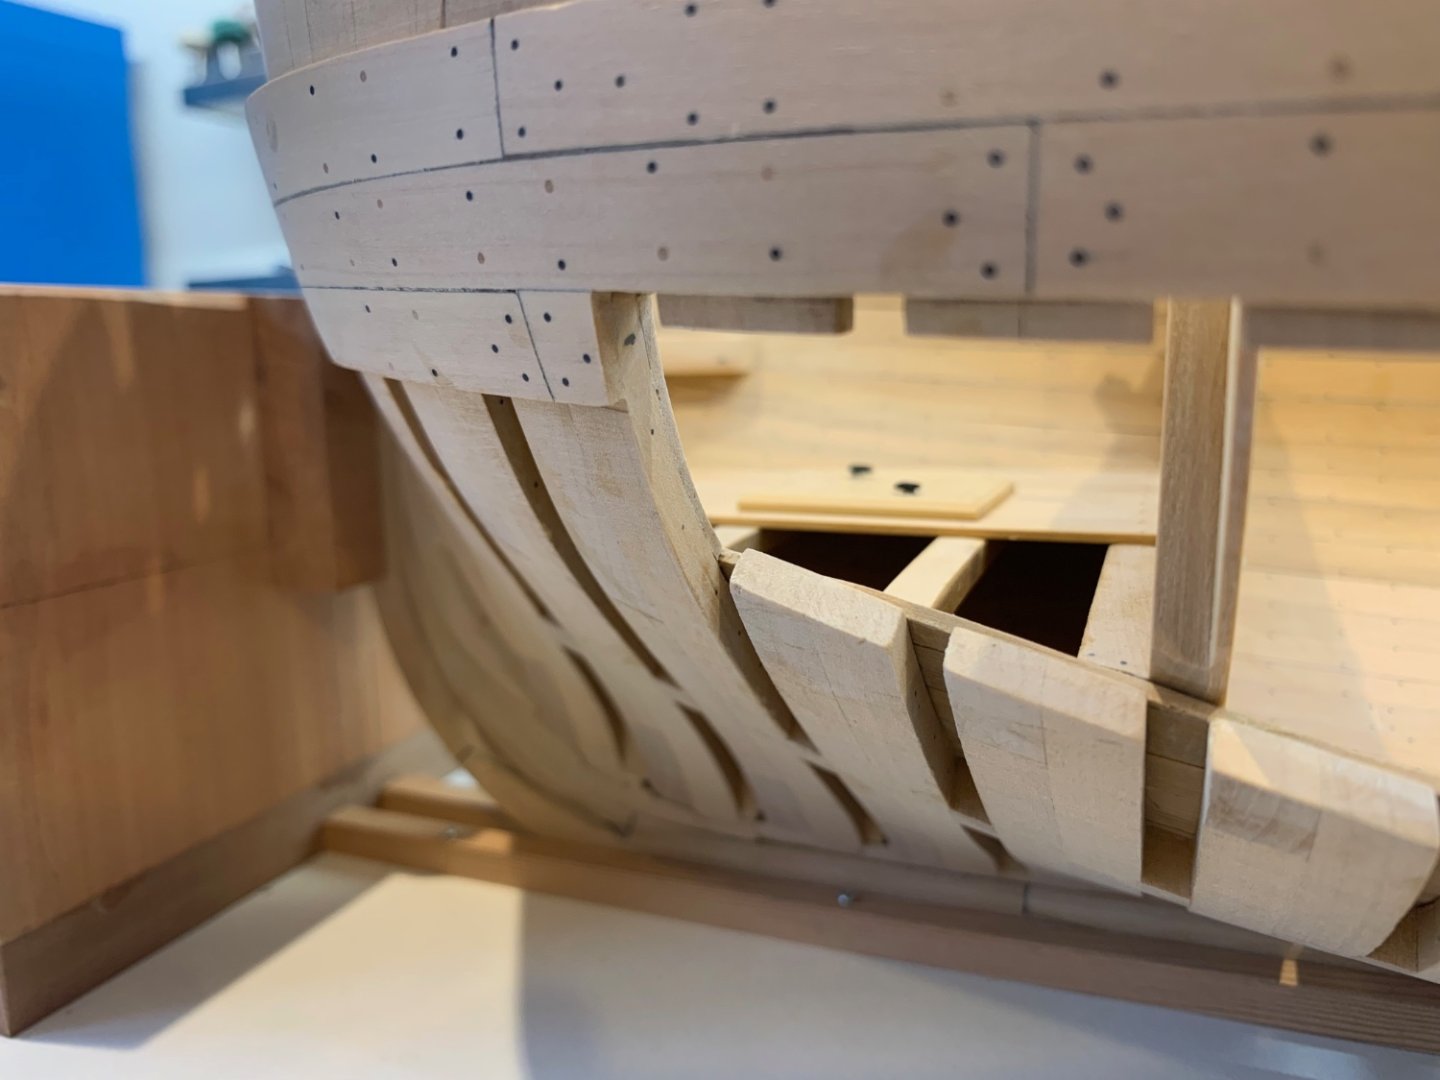
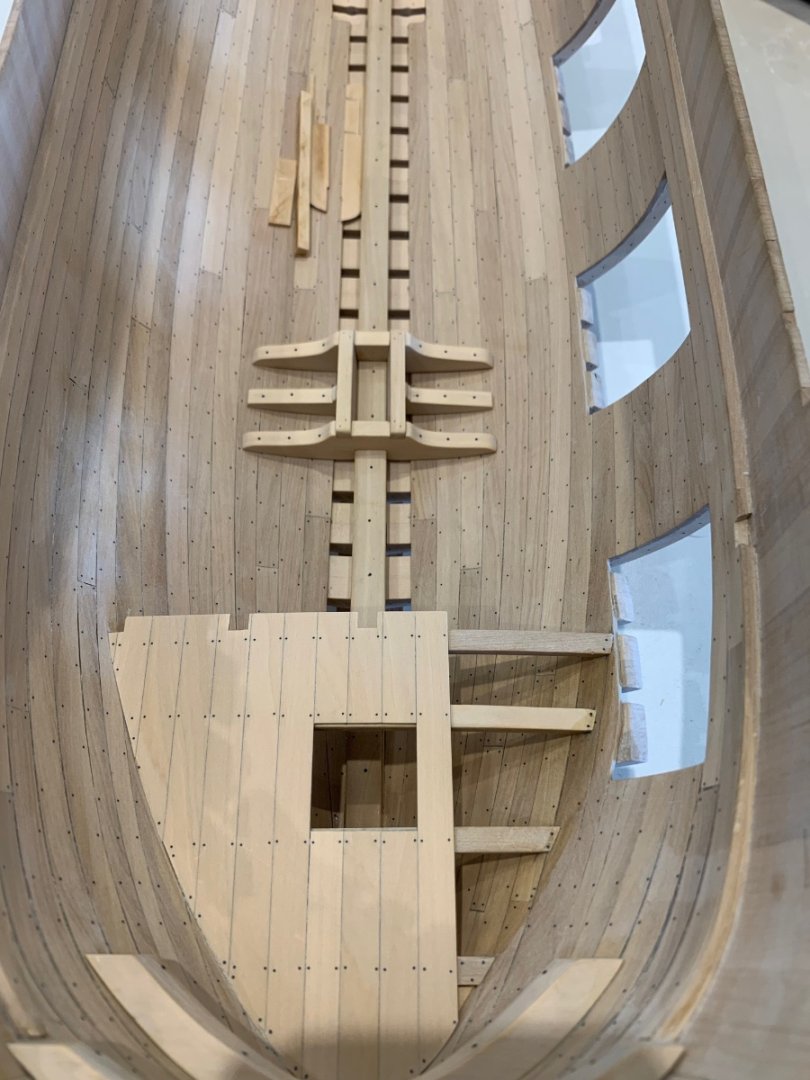
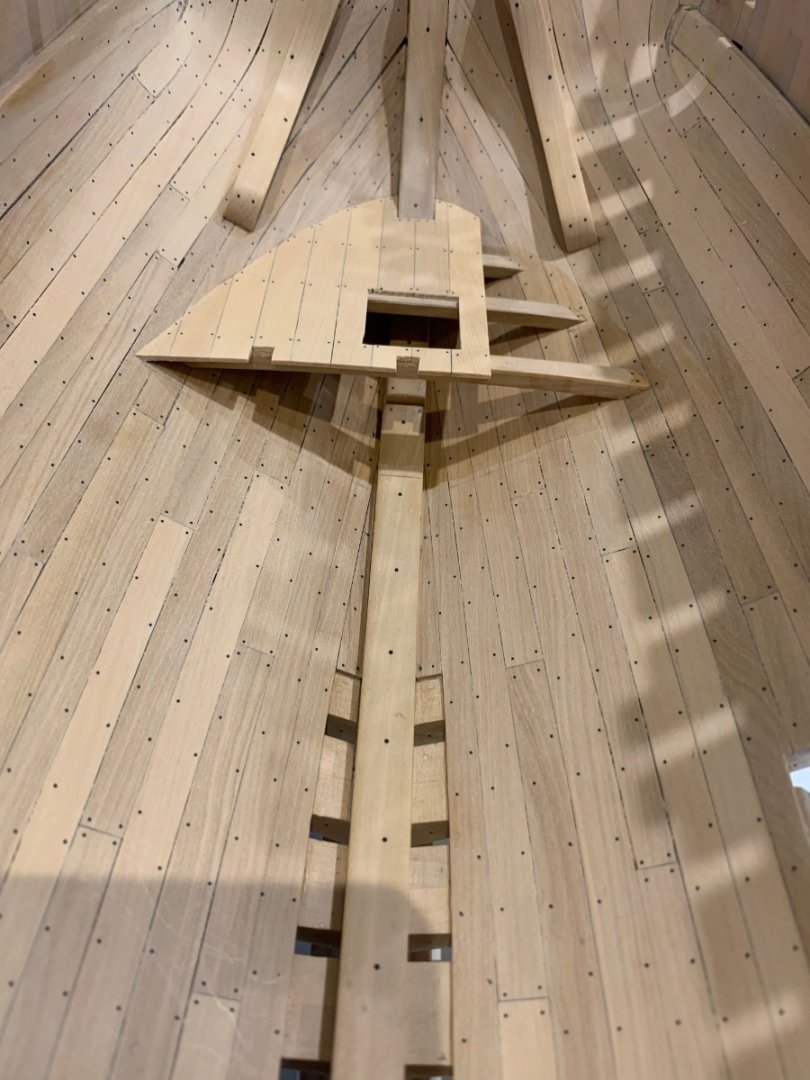
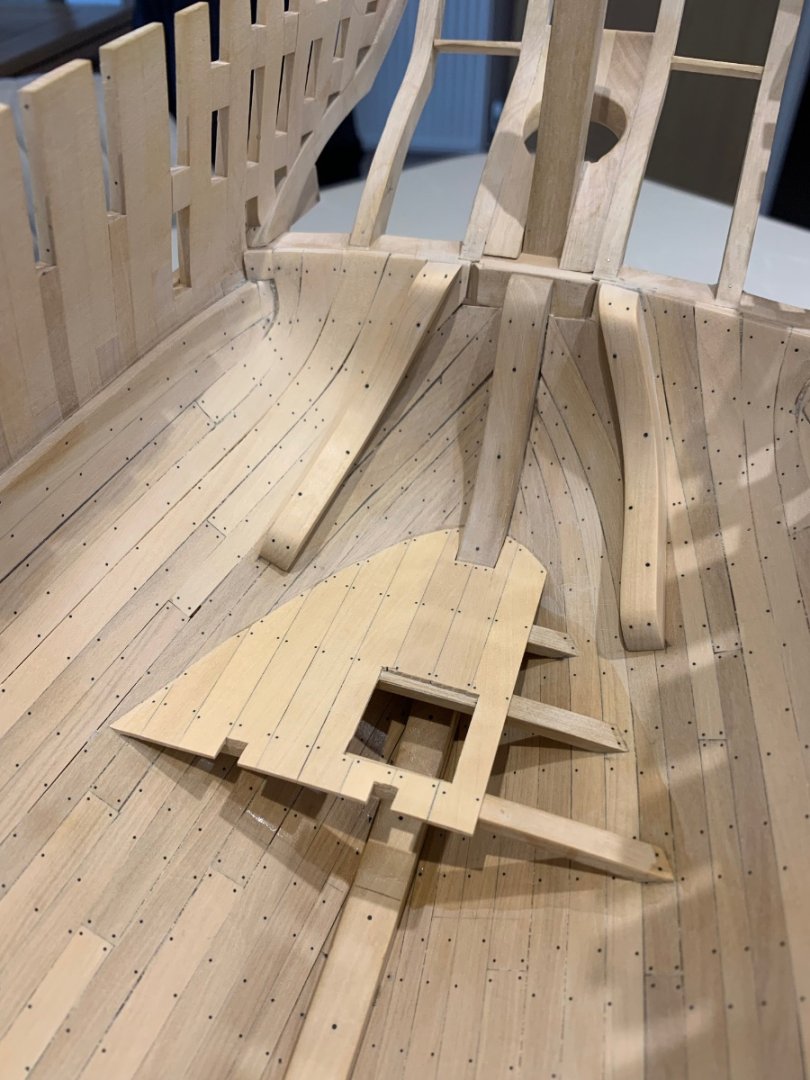
Some more done on Le Rochefort Simple bases for the samson posts which are then fixed to the keelson. The wood used is 1.4mm square The samson posts themselves - Although I had already carved one of these I pondered for quite a while how to machine them instead. In the end I just carved them again and actually I really like the finished posts Next I made the two beams that the posts attach too just to make sure that everything aligned ok. A few pictures of the posts and beams dry assembled Now I need to think about the limber boards as once the hold deck beams are in place I think they would be quite tricky to do. So those are my next jobs Cheers Mark


-
Have you tried roughing up the surfaces? This has worked for me before.
-
This exactly what I would do - I'd cut the damage completely off in a straight line down towards the keel. I would then glue a new piece in strengthened using dowels and then shape it to suit.
-
Hi Chris - Firstly I can only give you my experience as I am no expert with table saws but this is me. I buy my blades from Jim and Donna Byrnes as I think it's important to give their business as much sales as possible. The last blades that I received from them are made by Martindale and to my eye they look exactly the same as the Malco blades. For anything above 6mm I tend to use the 4" 0.4 110T blade as is does not deflect and gives a very clean cut. I can usually cut 13mm thick wood with this blade but I can't force the wood through. It has lots of teeth and can get clogged and overheat if I do. So I've learnt to just let the blade and the saw do its thing in its own time. It's hard to describe but I can feel when it's not right I just know. Anything thinner than 6mm I drop down to a 0.3 blade as it gives such a lovely clean cut. For small pieces I use a 0.2 blade and this is my favourite as its just so ridiculously accurate. The planks I cut are often at least 500mm long and I usually have no issues at all. If you are getting stalling and the fence is set to exactly how it should be it's probably the way you are using the saw. My advice would be push the wood through as intended which is pushing from the rear of the piece keeping it tight to the fence. Because the blades we use are slitting saws its no good trying to straighten a cut half way through as this will just twist the blade and cause it to stall. Make sure that the side of the wood that follows the fence is perfectly flat - I've made up a simple sled to make sure that I have a true face and also turn the piece over often to keep that true face. And that's it I guess but I'm sure many others will have better opinions than me. I've had my saw now for many years and this is the first time ever I've even considered checking the fence. It just goes to show to me what a great machine this is. I did cheekily ask Jim to get on and make us a spindle sander again and I wait in hope that he will! Mark
-
Hi both The fence is set completely parallel up to the middle of the blade as the fence has a taper ground into it beyond that point. The taper is around 0.10mm from the centre of the blade towards the end of the fence. These measurements will be in my head forever as I have measured them so many times. I ran a piece through for the umpteenth time and it still jammed so I simply changed the blade. After changing the blade the saw worked exactly as it should with no jamming at all. In fact I've been using it since and it's like new - no jamming; clean cuts and no hesitation in pushing the wood through. Definitely a blade issue and I should have kept it to check it out but I used it like a Chinese throwing star and its stuck in a tree somewhere opposite our home. That thing cost me a few hours of my life I'm never getting back 🤣. I didn't even get the piece in far enough for heat to become an issue. In all of my years of machining I've never seen this before and it completely perplexed me trying to sort it out. This is why I posted my findings to maybe save someone else the frustration of such a simple issue. We work with such fine tolerances that it doesn't take much to jam up a perfectly good machine with a one off dodgy blade Mark
-
A bit of a story here but this may help someone. Today I needed to cut quite a lot of wood starting with some 13mm thick Castello. It's been a while since I had changed my blade so I fitted a brand new Malco 4" 110T blade. Now 13mm wood can be difficult to pass through with this blade and sure enough as I got almost through to the end of the blade it all jammed up. So I did the rest of this job using a carbide blade which I don't like using as they are a bit brutal on the wood. Next I needed to cut some 8mm wood and reverted back to the Malco blade and the exact same thing happened - I literally could not get anything passed the full width of the blade without the whole thing jamming up and stalling. My lovely saw sounded like a cat in pain 🤣 So I thought that the fence must have somehow moved out of alignment so I checked it with a dial gauge and sure enough it was slightly off. So I corrected this and tried cutting again. This time it was even worse which really surprised me and I thought that I must have done something wrong setting the fence up. So for the next couple of hours I must have set the fence at least 10 times and each time I could see that the alignment was perfect but the problem remained. As a last resort I swapped the brand new Malco blade for a brand new Martindale blade - Problem cured!!! I have no idea (I must change my forum name) what was wrong with the Malco blade as I put it back in again and I had the same problem. So if you have this issue and just cannot see why - swap the blade out even if it looks perfect. It worked for me and as the fence is now probably the most perfectly aligned in the world the saw is back to its amazing self. Needless to say the Malco blade became a frisby and is no longer in the house! Cheers Mark
-
Byrnes saw belt source in UK/EU?
No Idea replied to bruce d's topic in Modeling tools and Workshop Equipment
Bruce if you do find a replacement I would be very interested in buying a couple as well 👍 -
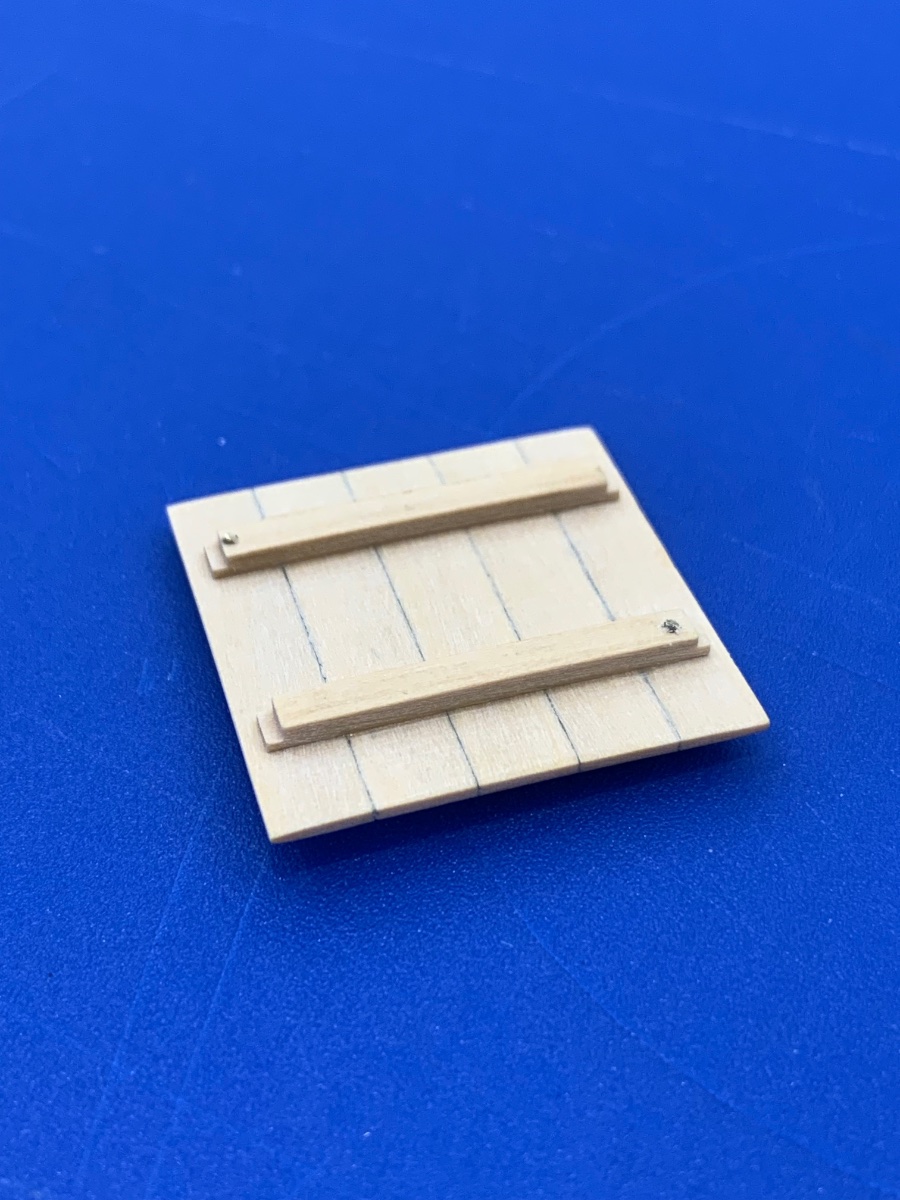
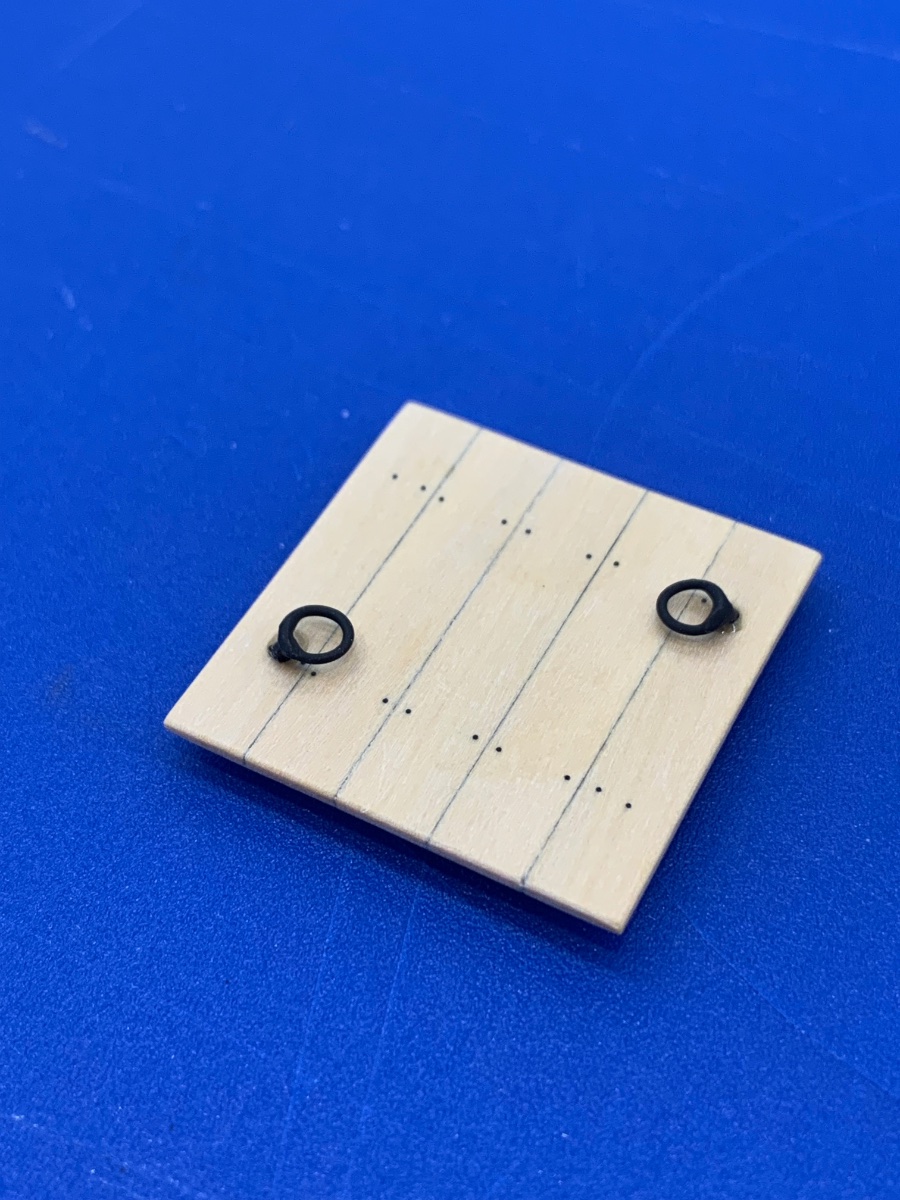
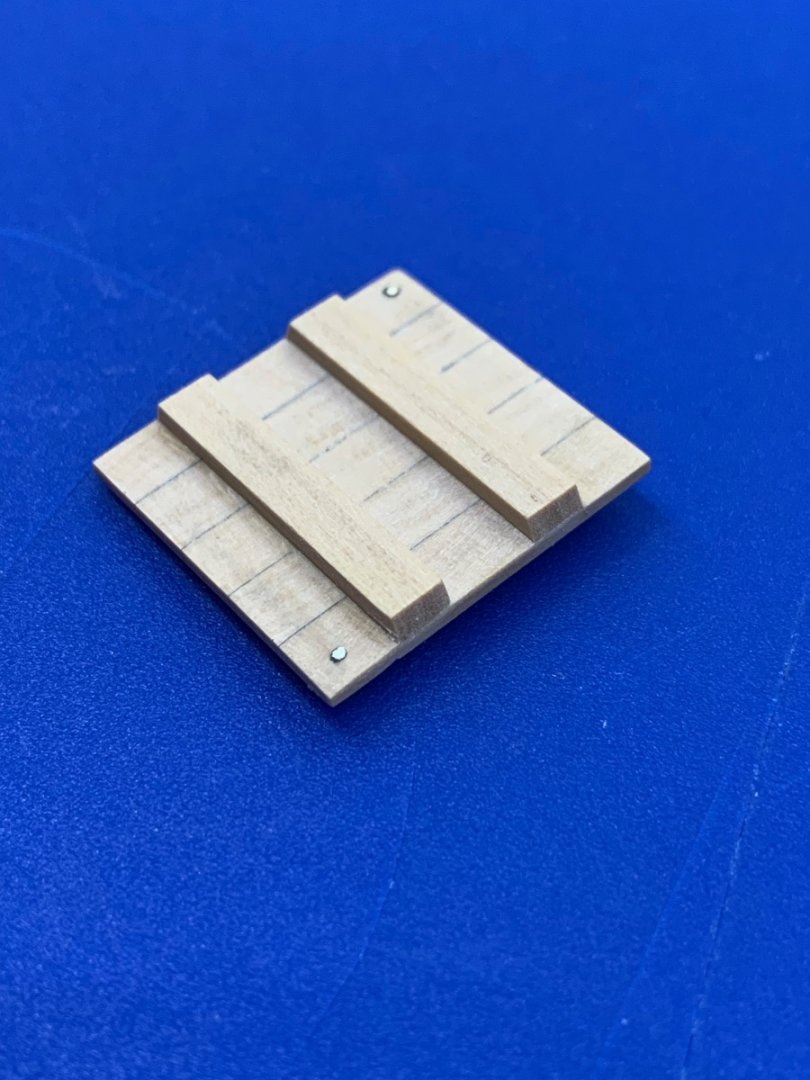
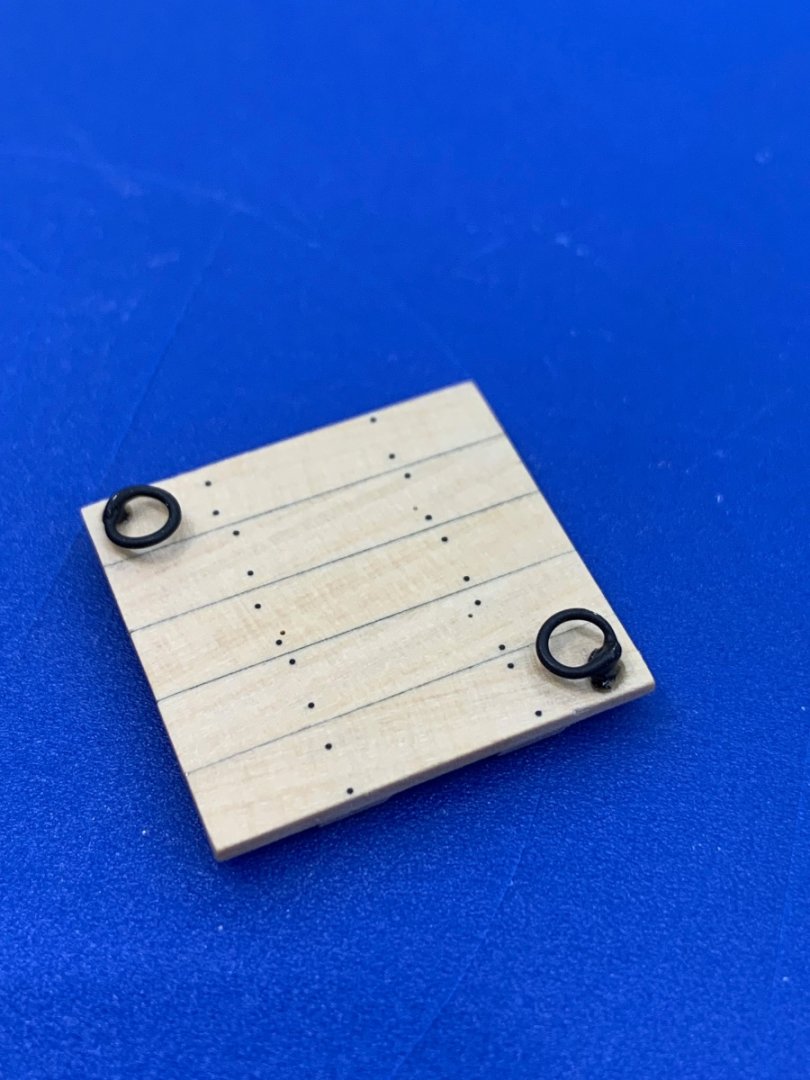
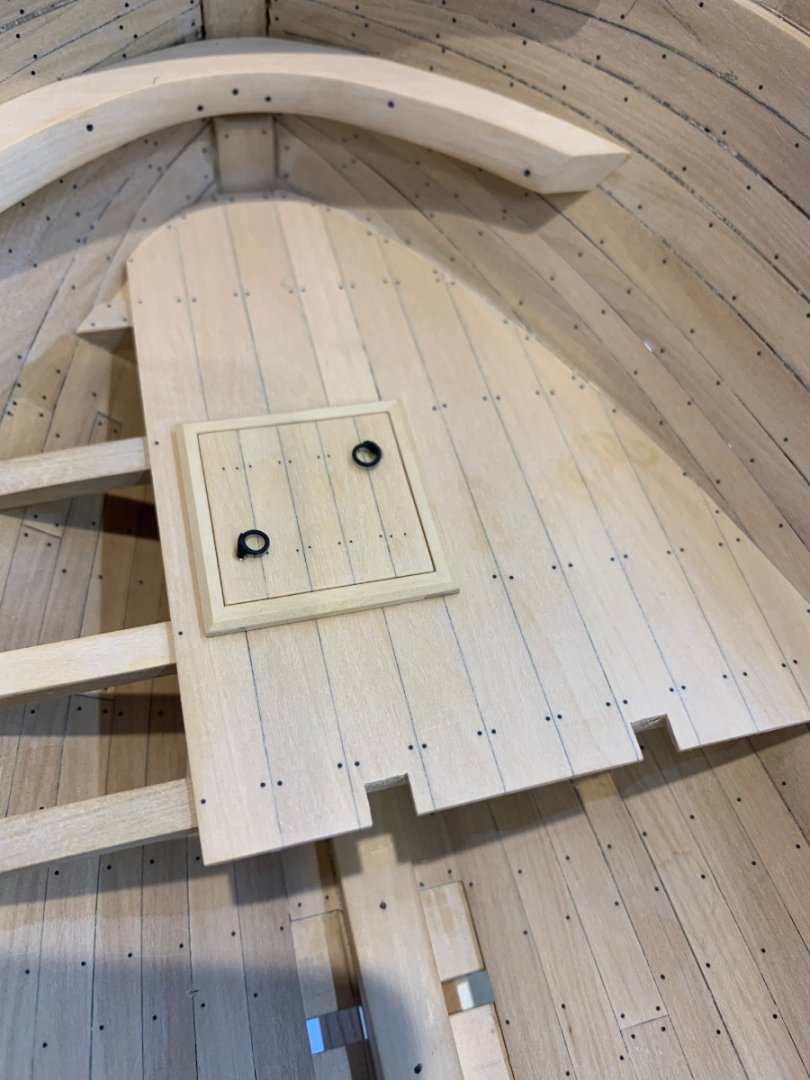
Another update from me - The hatches are now finished 👍 I completed the front hatch by cutting the small rebates into the frame that the battens sit in. The battens were cut to match which was a little bit fiddly to do. I also cut the 45 degree angle that sits around the edge of the frame and glued it in place on the hull. Then it was onto making the front hatch cover Then the rear hatch cover which was a really nice simple job to do. Next I put all of the pieces in place and also fixed the bulkheads permanently into the hull. So my next job is to make two more Samson posts that lead up from the hold to the main deck. I need to make another two beams to make this happen so I hope my order of 0.7mm end mills arrive soon as I've broken all of the ones that I had. Cheers Mark


-
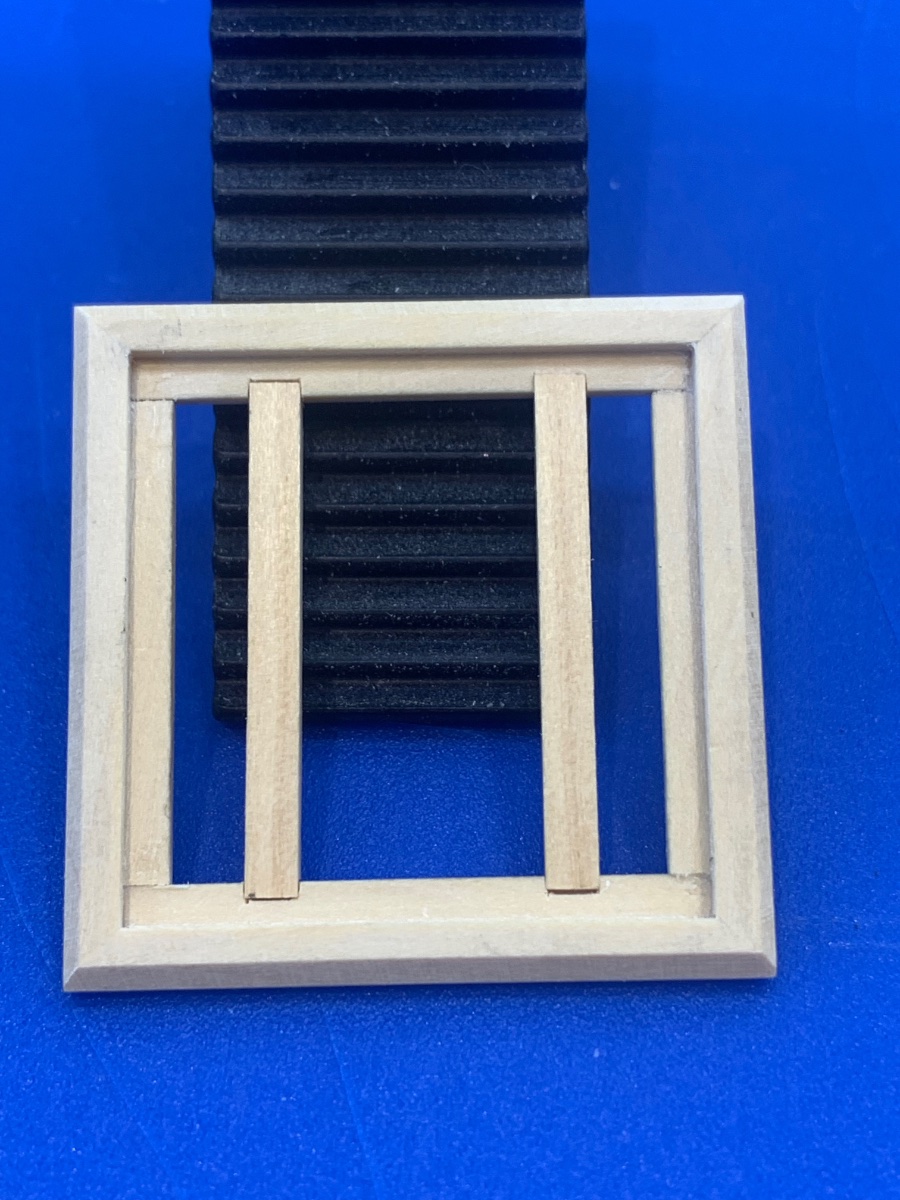
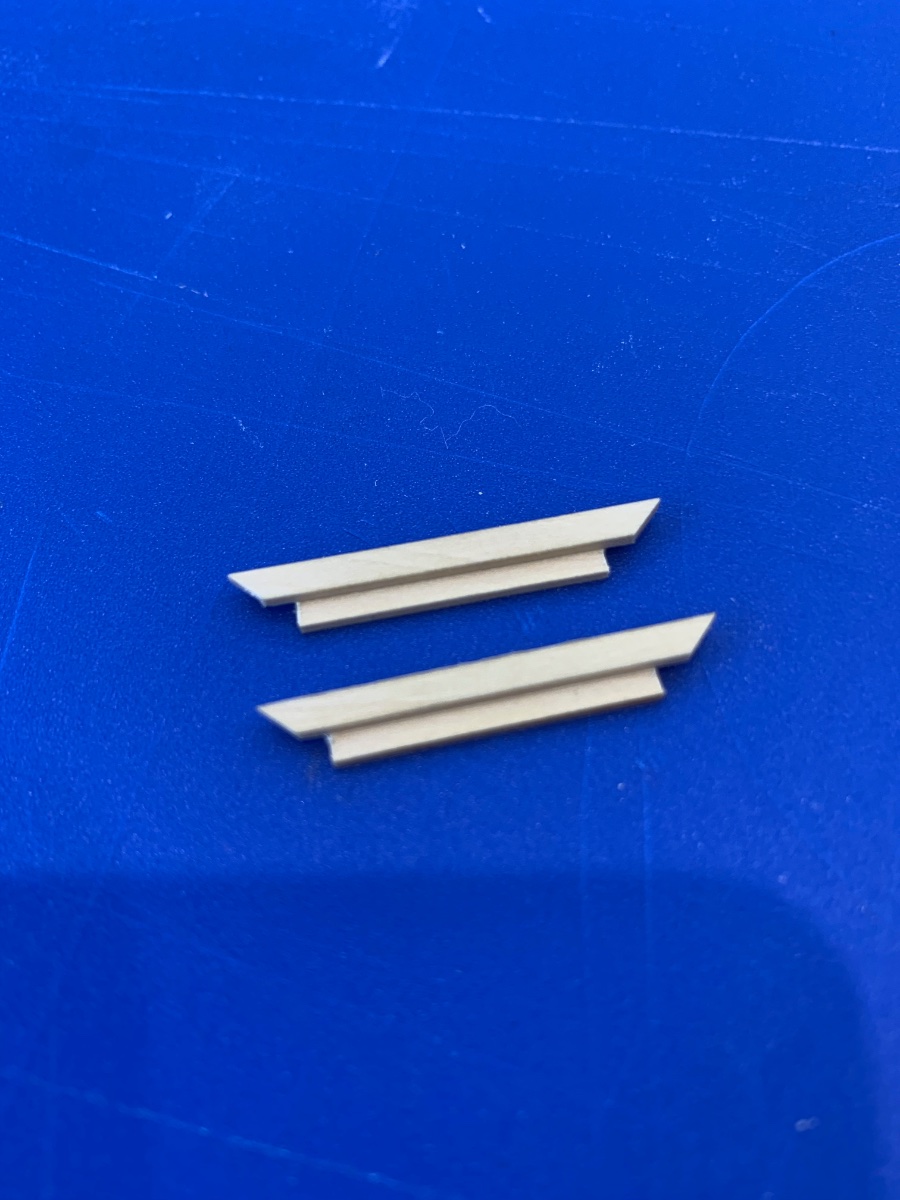
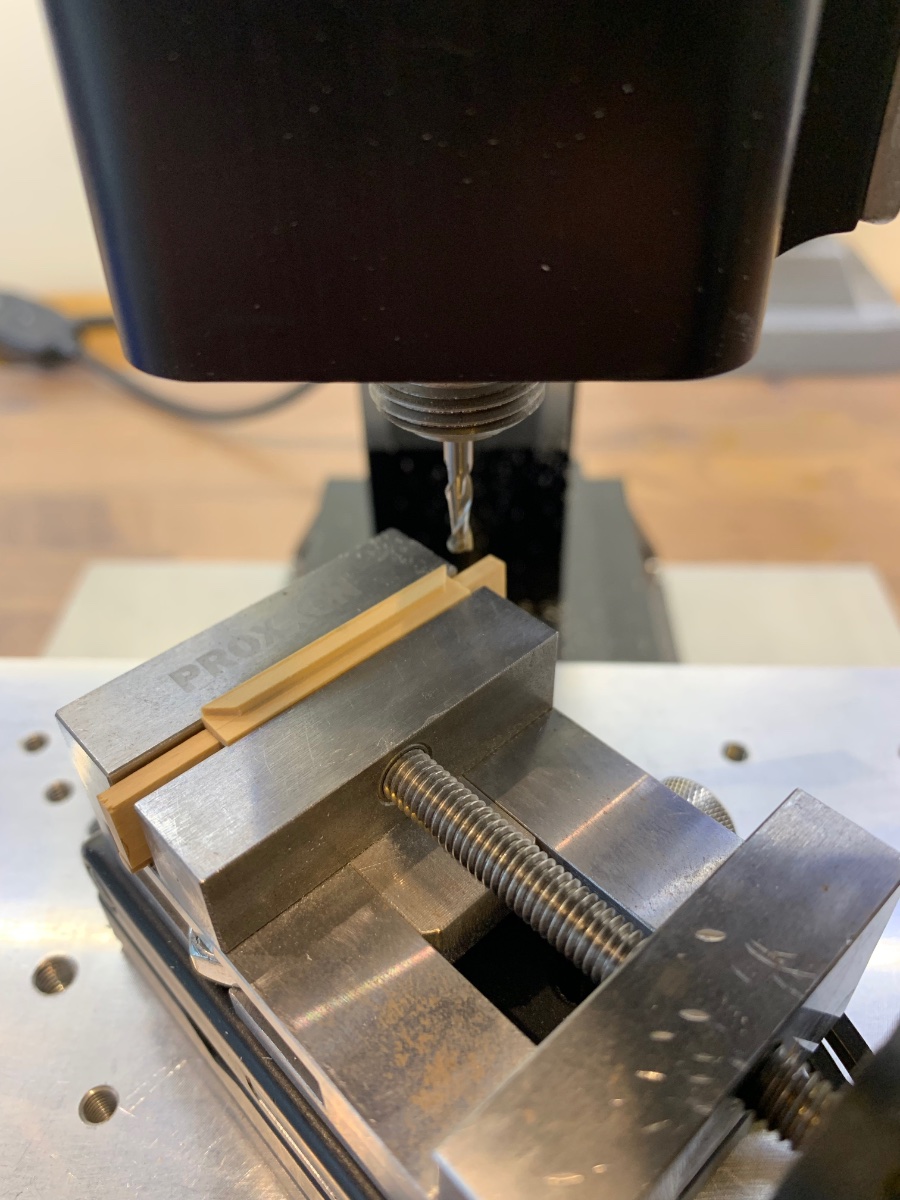
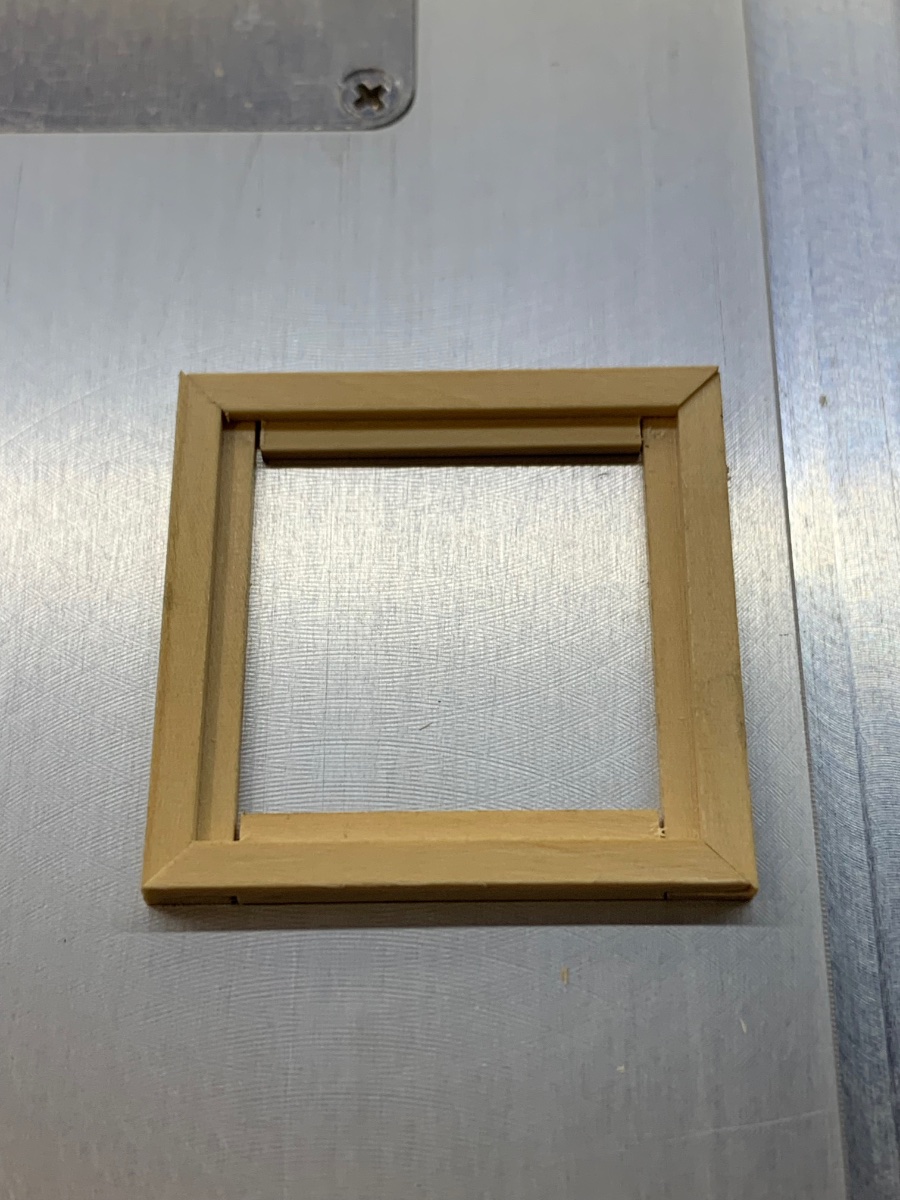
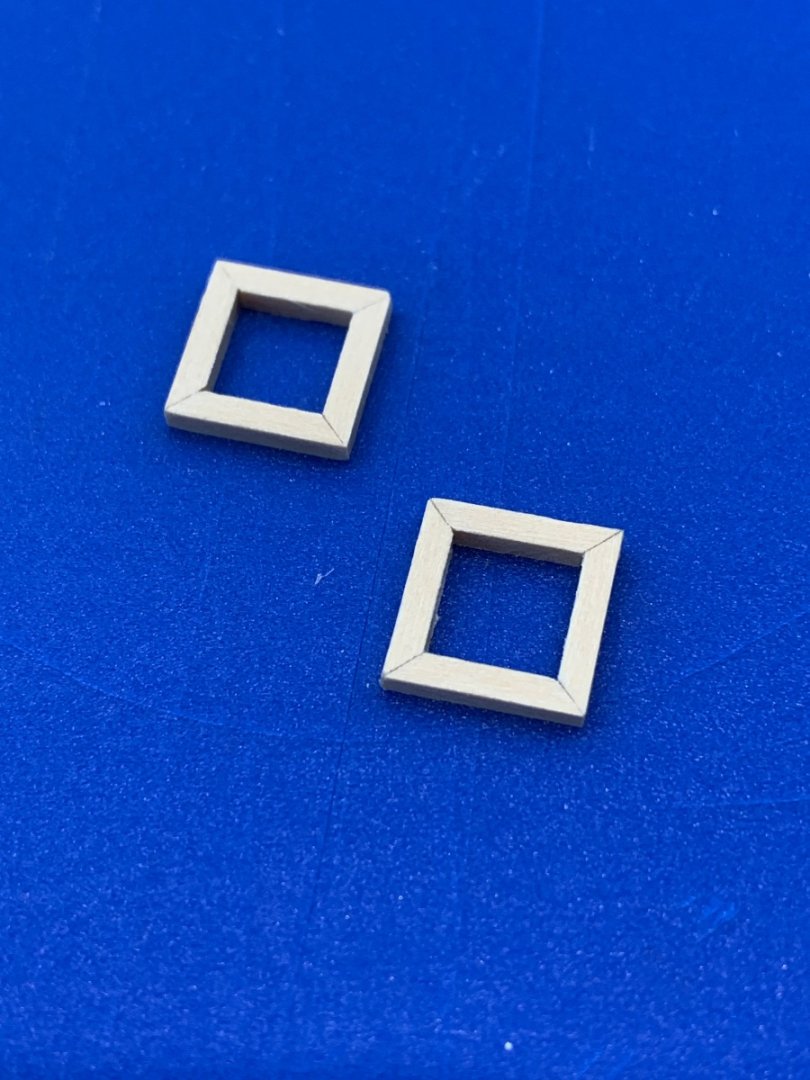
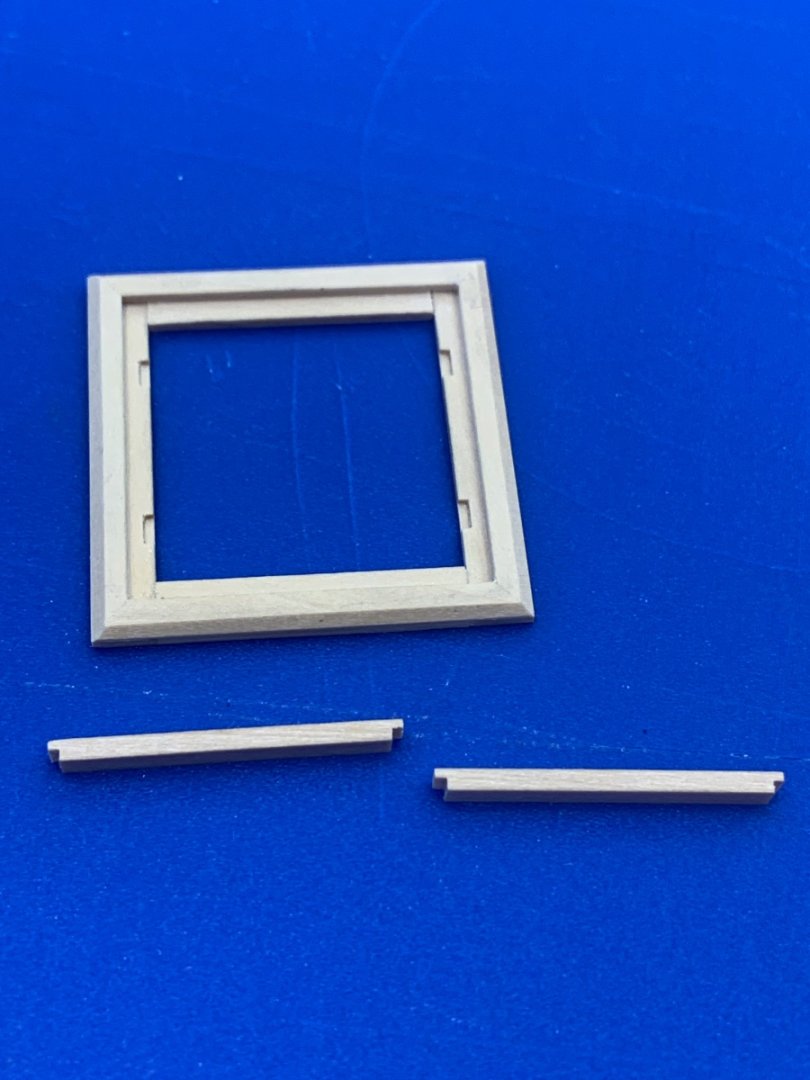
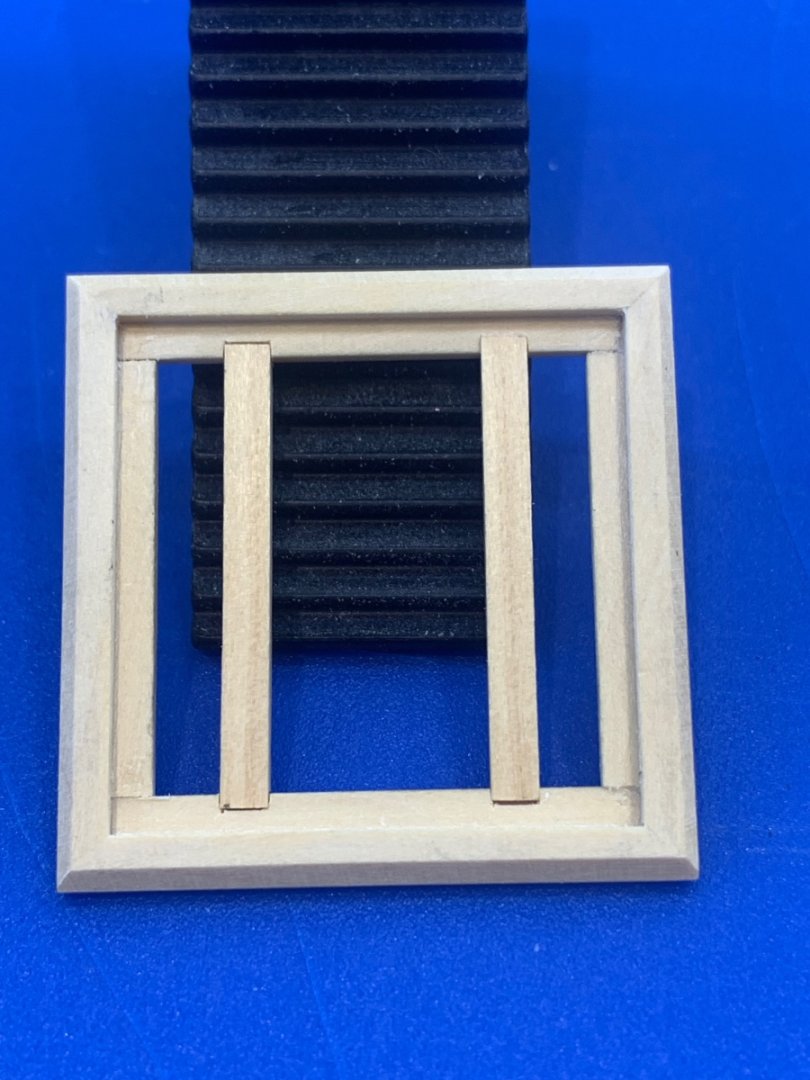
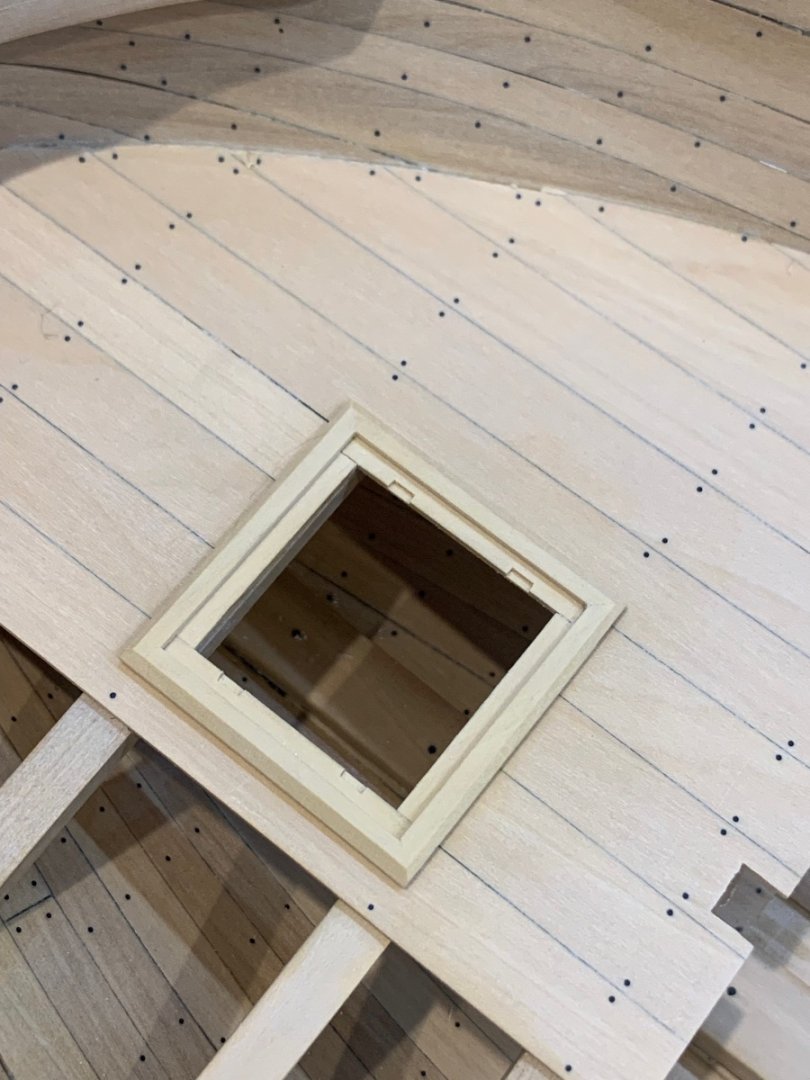
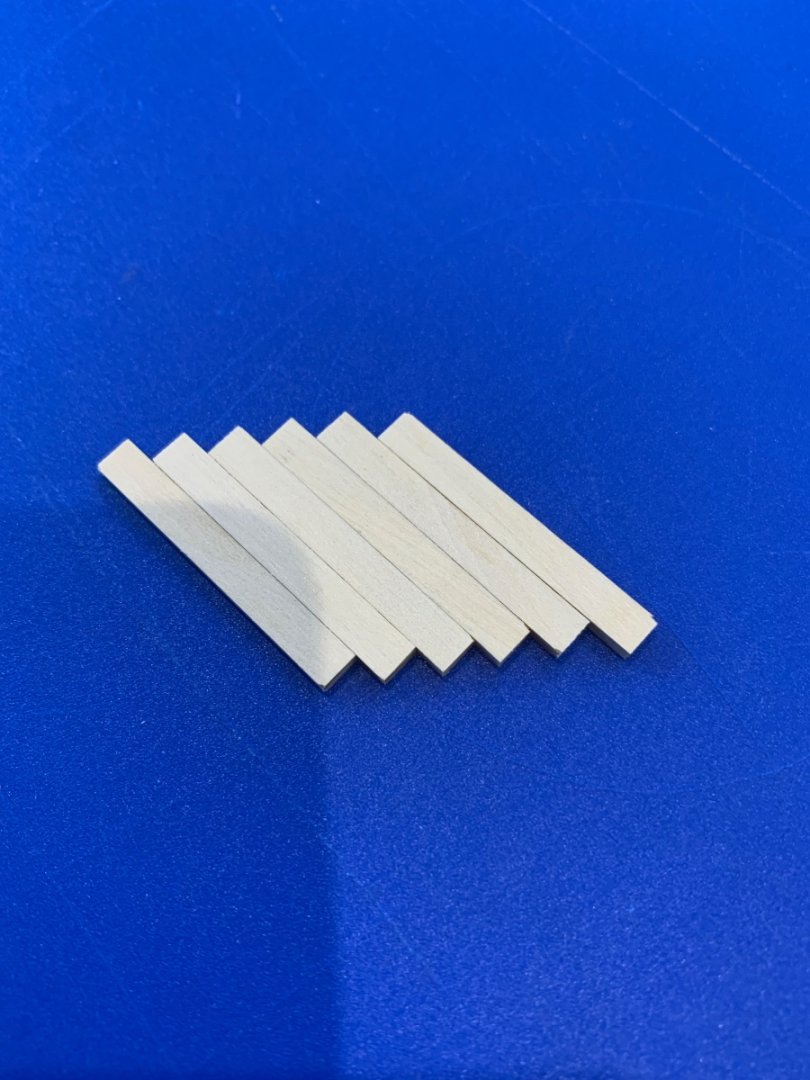
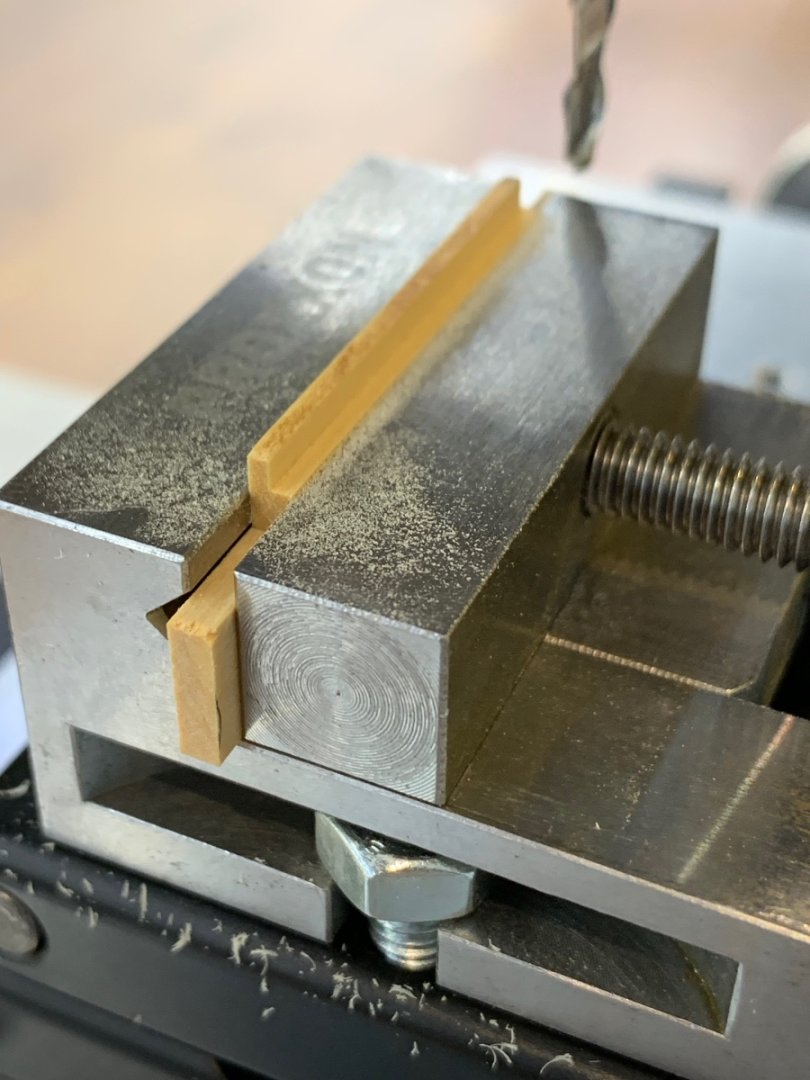
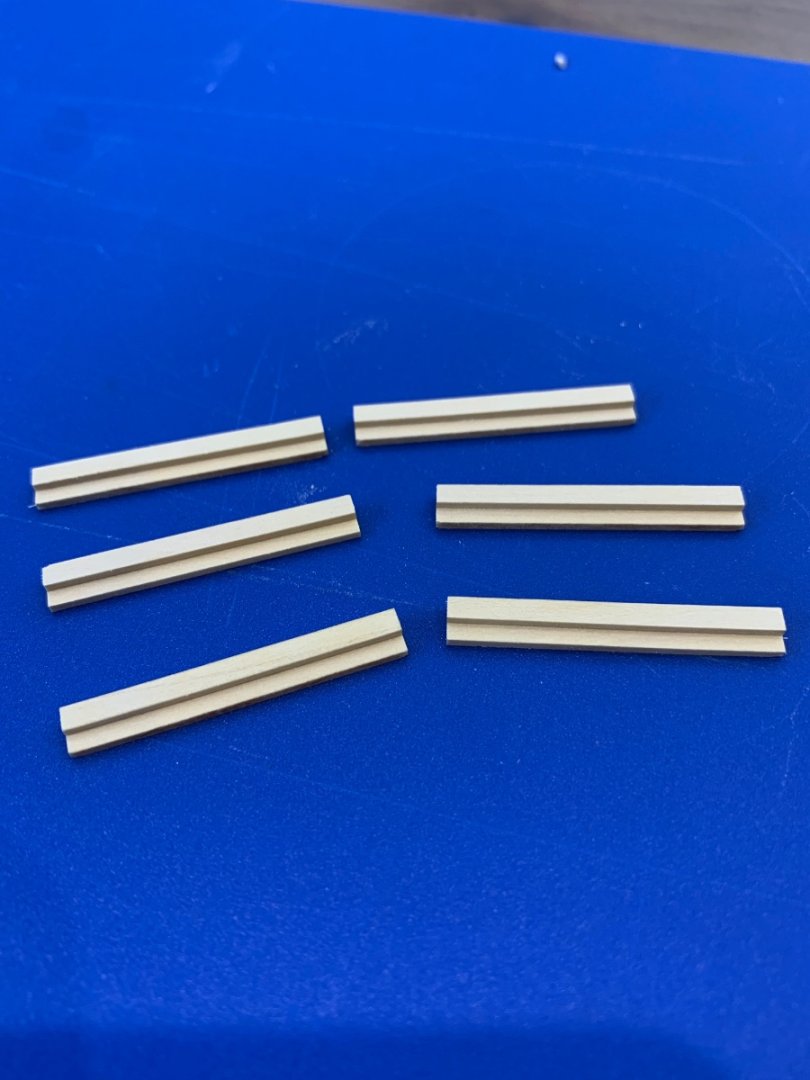
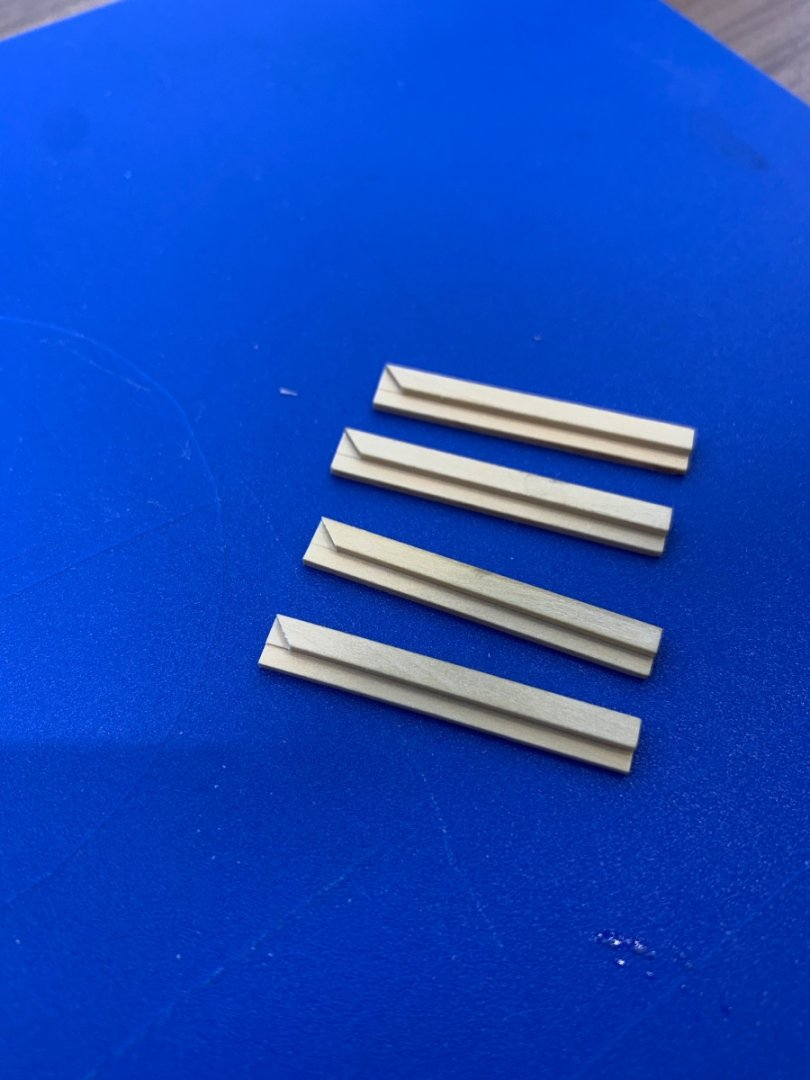
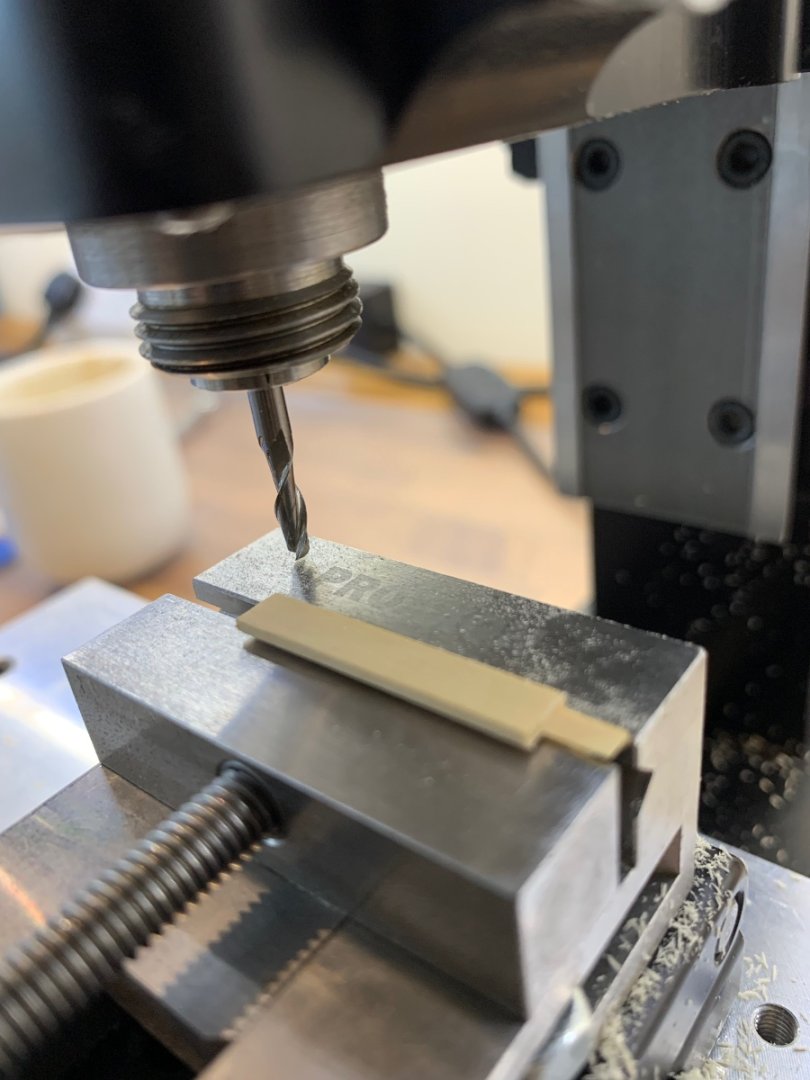
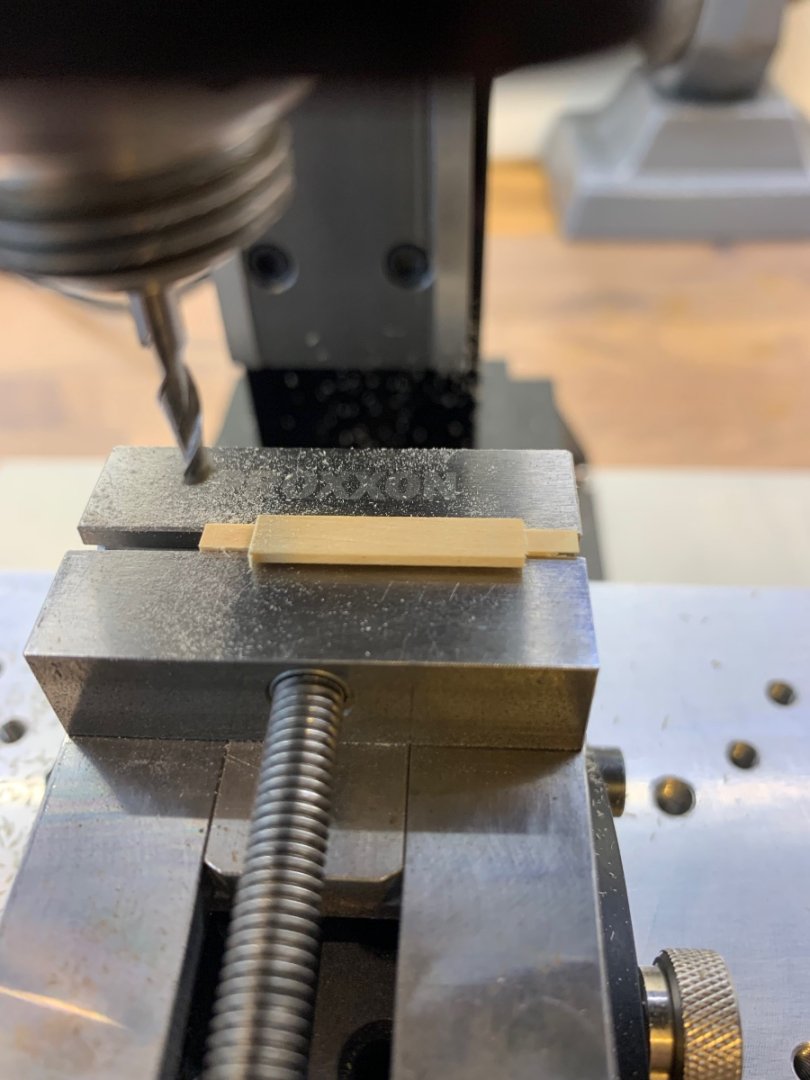
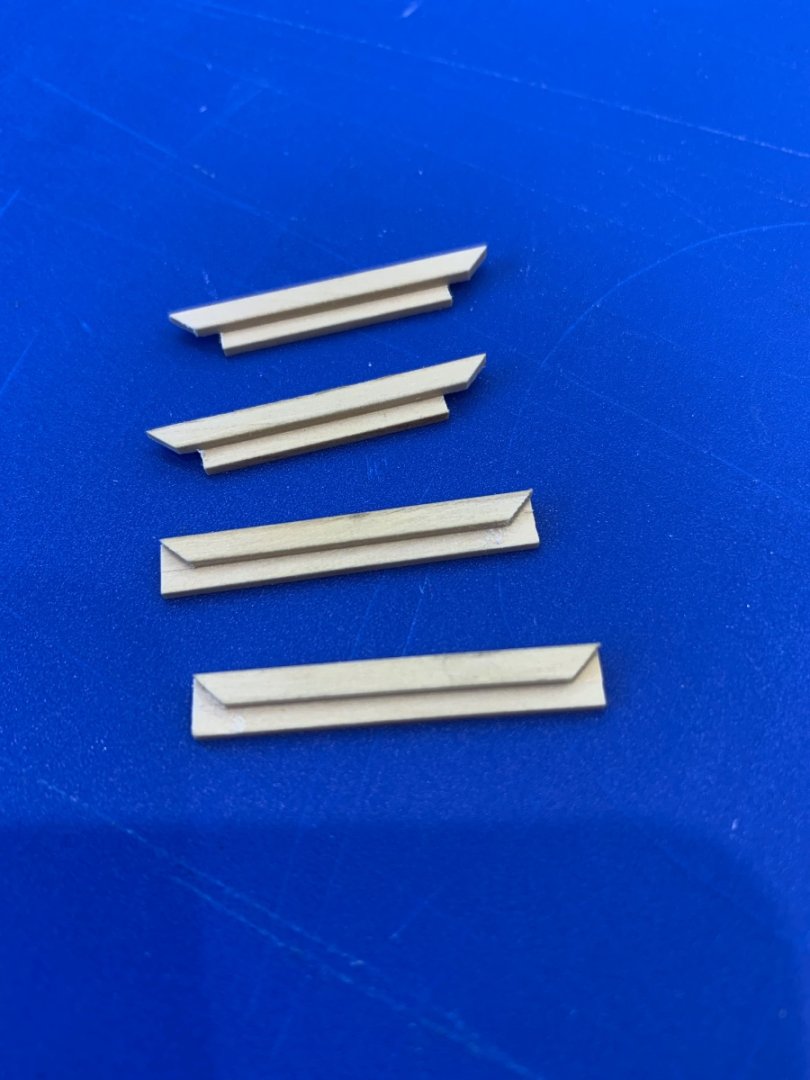
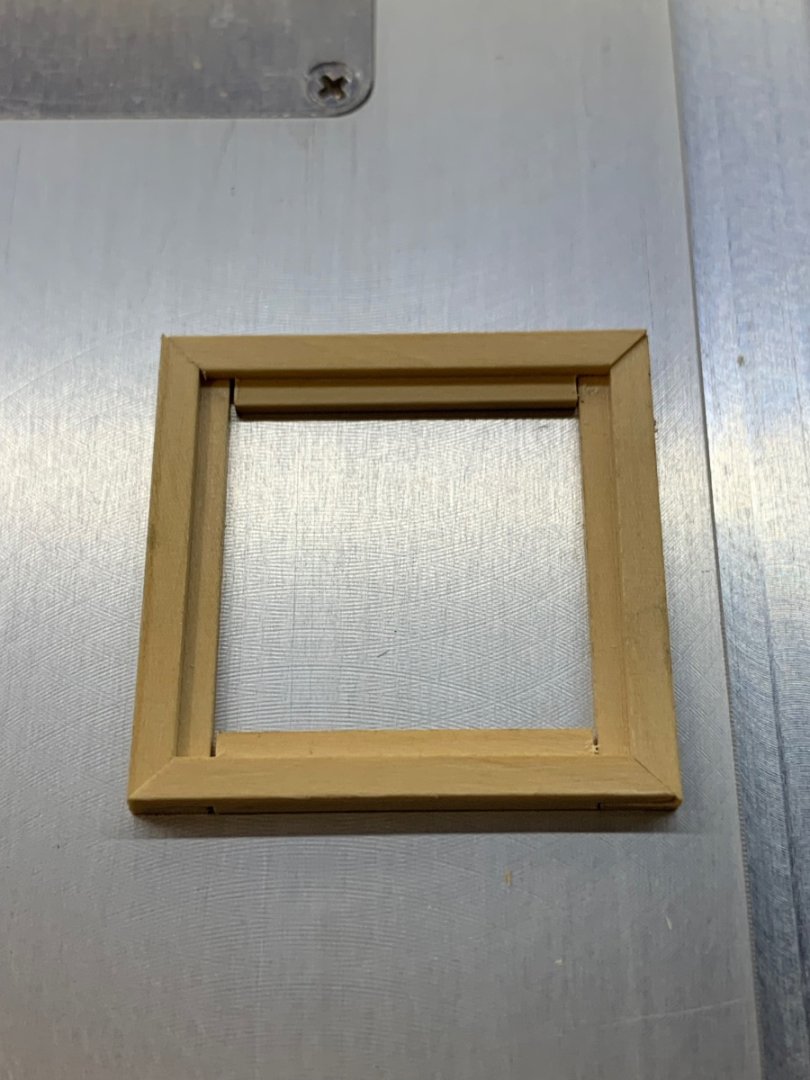
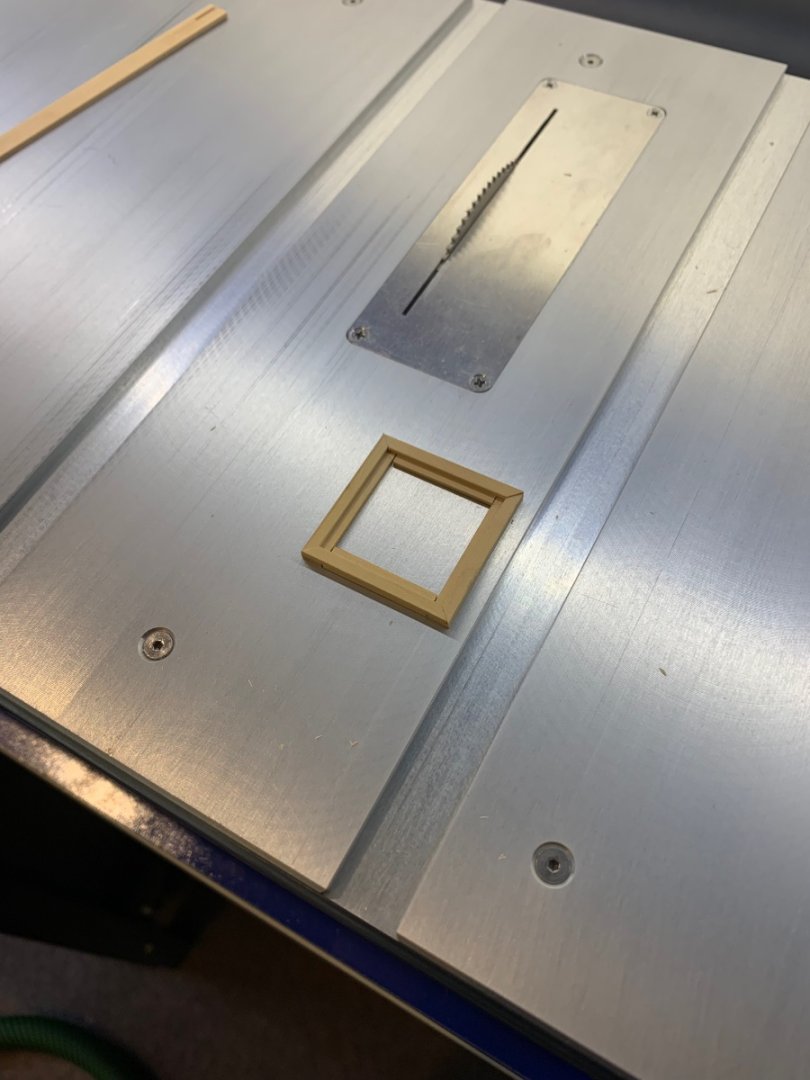
Hatches - or should I say hatch frames first! I've never made one of these before and it wasn't until I had a quick look at Adrian Sorolla's book that I realised that the joints are not plain mitred. Looking at the plans too I could see how they needed to overlap so here's my first attempt and how I went about it. Firstly I cut 6 - yes 6 equal parts (I always make mistakes) which were 4.8mm x 2.5mm x 36mm. Its always good to have spares on hand These then needed to be rebated. The rebate is 1.1mm x 1.9mm and I don't know how everyone does this by I prefer the mill for short pieces of wood. The reason being is if I use a parallel under the piece being cut I only need to set the cutter to depth once and then I get equal pieces. I also get the piece as low as possible into the vice to stop any deflection as the end mill passes along. Next I swivelled the vice around to 45 degrees to make the first corner cuts. I know that the cut needs to be 1.1mm but I did this to 1mm so that I could finish it with a chisel if necessary. Right this is where it gets a bit complicated - So decided to cut the two ends with the ears first (I'm sure they are not called that) 🤣 Using the already mitred end I cut a rebate 4.8mm in from that end at a depth of 1.25mm. Once this was done I used the indexing on the cross slide to measure my finished frame length of 33mm and made another cut. You have to allow for the diameter of the cutter doing this so from the 4.8mm rebate I moved the slide forward 31.8mm. I then repeated the 4.8mm rebate on the other end and then simply cut the other 45 degree angle on the face sander. Lots of words I know but they look like this when complete. Next were the other two parts which I again used the indexing on the slide to get the correct length. To cut the other 45 degree angles on these pieces I swivelled the vice the other way. The finished 4 pieces look like this Here they are dry assembled and I'm pleased with the way they turned out. So it's not finished yet but I thought that this might help someone else. Cheers Mark


-
Alan that is an amazing hull you have built there! Wow it looks complicated but really nicely faired by you.
-
Oh yes!! The next ship I build is only going to get the essential planks inside. I had to blow the dust off of my mill its been that long since I used it. Thanks Keith 👍 Thanks Vladimir 👍
-
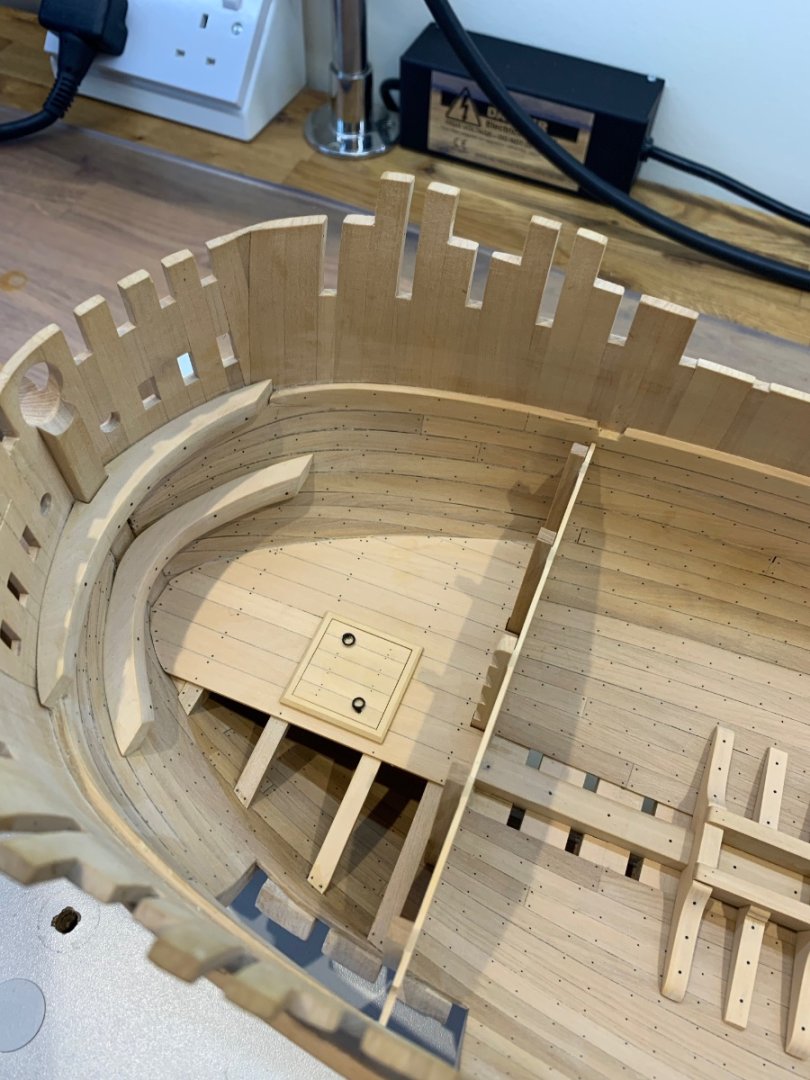
Just a small update - The bow and stern small decks have both been planked. I'm not fully planking them thats as far as I'm going. Next is to make the hatches - The bow hatch is framed but the stern one is just a simple design. Then I can get the bulkheads fixed in place. A few pictures of the decks Cheers Mark


-
Hi Derek and cheers for you nice comments - I think scratch building is as good as the plans that you have. Ancre plans literally give you everything that you need to build a ship which is great as I do not have the skills to do my own drawings. They are so precise that as long as you are too as the builder it should all come together for you. It's also a lot more expensive than I thought it would be. I bought my first batch of wood and I would say I've then bought the same again due to my many many mistakes. It lovely though when it all comes together! I do think you should finish your Vanguard models first or I'll have Chris Watton on my case for loosing him sales 😂 They really are fantastic kits! I'm pretty pleased with the results of the shellac that I bought and I now have enough for about 2 complete ships. It wasn't totally matt but a quick rub with a fine (grey) scotchbright pad brought it down to what I wanted. I've dropped a couple of pictures below which show what it's like. Thanks for your recommendation too! VTHokiEE - Thank you too! My go to tool for measuring is a 150mm Mitutoyo digital vernier caliper with carbide tips. It's the best £300 I've ever spent and is just so accurate. Other than that I also have my height gauge and that's really it. All of the compound angles that I cut are taken pretty much from the plans as they are all clearly drawn. Often I will have to look a 2 sheets to find both angles but its all there if I look. It's also really important to have a datum that does not change. All of my measurements where possible are from the bottom of the keel upwards. That way if I put one part on slightly out of place it won't affect anything else and then later stands out like a sore thumb. Also allowing for the kerf of blade cuts and cutting the correct side of the line drawn pretty much sums up what I do. If you need anything else drop me a PM and I'll do my best to answer it. A couple of pictures of the shellac which I think looks ok. It's not the easiest place for a test under the decks but I've got to start somewhere. Oh and ignore the nice gap in my planks - that particular carpenter has now been sacked