No Idea
-
Posts
1,036 -
Joined
-
Last visited
Content Type
Profiles
Forums
Gallery
Events
Everything posted by No Idea
-
Hi Tim and welcome to MSW mate - I live not to far from you and we often visit Hereford as its one of our favourite cities in the UK. Good luck with your choice of new build and if you start a build log you will get loads of helpful advice. Mark
-
 I think the work you have done is beautiful - the spacers are just about right and I know this as I made mine far to big. I tend to use abrasives around a round dowel when sanding the spacers as it gives a small and controllable contact patch. I also agree with druxey rounding off is not an issue if you don't go free hand - good luck!
 -
Planking improvement
No Idea replied to Picard's topic in Building, Framing, Planking and plating a ships hull and deck
Hi Picard - firstly I think your planking is actually pretty good and it just so happens you are comparing your efforts to a very experienced builder. So this may not be popular but many issues with planking including my own is time. Planking takes a lot of time to get right. It just cannot be rushed and takes a lot of planning and fitting - if a plank doesn't look right its probably not but often its easier just to glue it on. Keep going buddy - make mistakes just like everyone else including me as its a great learning curve. Incorrect bevels tend to lead to wide gaps between planks and incorrect tapers make the planks look crowded at the stem. This is just my thoughts - Cheers Mark -
Thanks very much all She's lovely and they grow up so fast. This is our 7th grandchild so Christmas is getting very expensive now!
-
Chris I think that most model ship builders are their own worst critics. Looking at your pictures your build looks very nice indeed and I wish you luck through to completion. I'll be following 👍
- 69 replies
-
- 8
-

-
- fly
- victory models
- (and 2 more)
-
La Palme by Tobias - 1:36 - POF
No Idea replied to Tobias's topic in - Build logs for subjects built 1501 - 1750
Hi Tobias - nice work mate. I see that the stem is now full of planks but you still have a few to install. How are you going to get all of the planks running to the stem? Are you going to trim the one's installed or taper the outstanding ones into the clamp? -
I have to agree that is really lovely delicate work - I would be very happy with that if that was my work. Keep the updates coming!
-
Hi both - This is one of those things that I'll need to decide nearer the time as it's so far away. Thank you for your very kind words I'm hoping to get the ceiling finished in the next 2 weeks. Our Granddaughter (She's 10 weeks old and beautiful ) has been taking up much our spare time but what a great way to spend it
-
Tilting mount for Proxxon Vise for MF70
No Idea replied to ChrisLBren's topic in Modeling tools and Workshop Equipment
Here you go Mike https://www.renishaw.com/shop/Product.aspx?Product=R-PCA-135075-12-6 -
Hi clogger - wow mate your build looks amazing 🤩. Fantastic job and I hope my finished ship looks a good as yours. I should have said that I never intended to rig my ship purely down to its size. Yours is the first Le Rochefort that I’ve seen rigged as such and it really finishes it beautifully. Maybe I’ll change my mind if I can find a place big enough to keep it. Thanks for sharing your picture 👍
-
Keel klamper alternative
No Idea replied to zamboknee's topic in Modeling tools and Workshop Equipment
I'm with you on this Roger - I do have a panavice but my ship never goes into it. I prefer to have it on my lap or in a fixed cradle which is made up of scrap timber. -
That is awesome work marsalv - I don't actually know what the small blocks on the bowsprit are for but you have put them on so evenly and neatly. They must have taken ages to align like that.
- 589 replies
-
- 1
-
-
- le gros ventre
- cargo
- (and 1 more)
-
Wow that is beautiful work 👍
-
A little ripper from Veretas
No Idea replied to PeteB's topic in Modeling tools and Workshop Equipment
These little planes are great I use mine every time I’m modelling. I put a small drop of thin oil on that piece of cardboard and so far I have no corrosion on mine. -
Check out Kevin Kenny's review and set up of the Foredom tool its very good. I love mine as it has so much torque at very low speed. The best on the market but they are also very expensive. I used a Dremel successfully for many years and although they do the same job the Foredom makes it easier with better control.
-
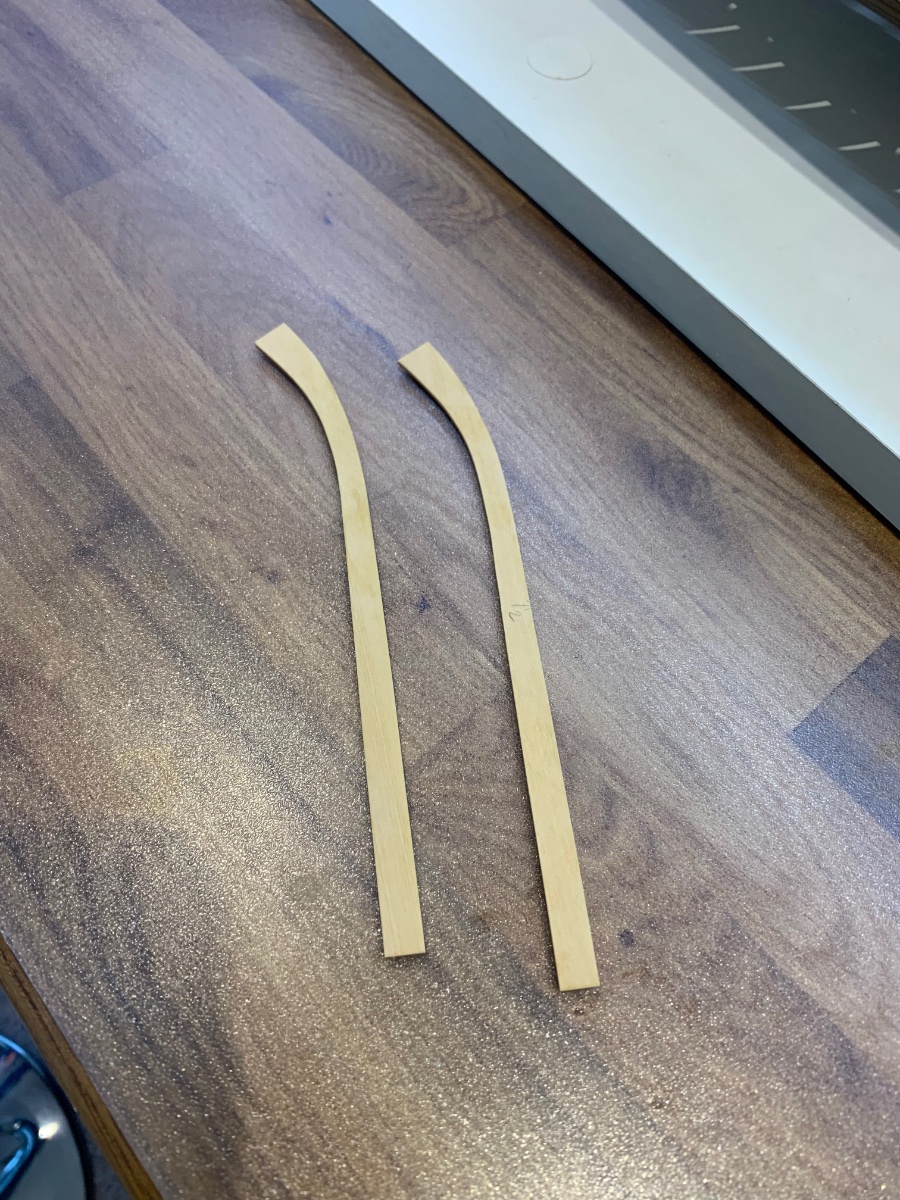
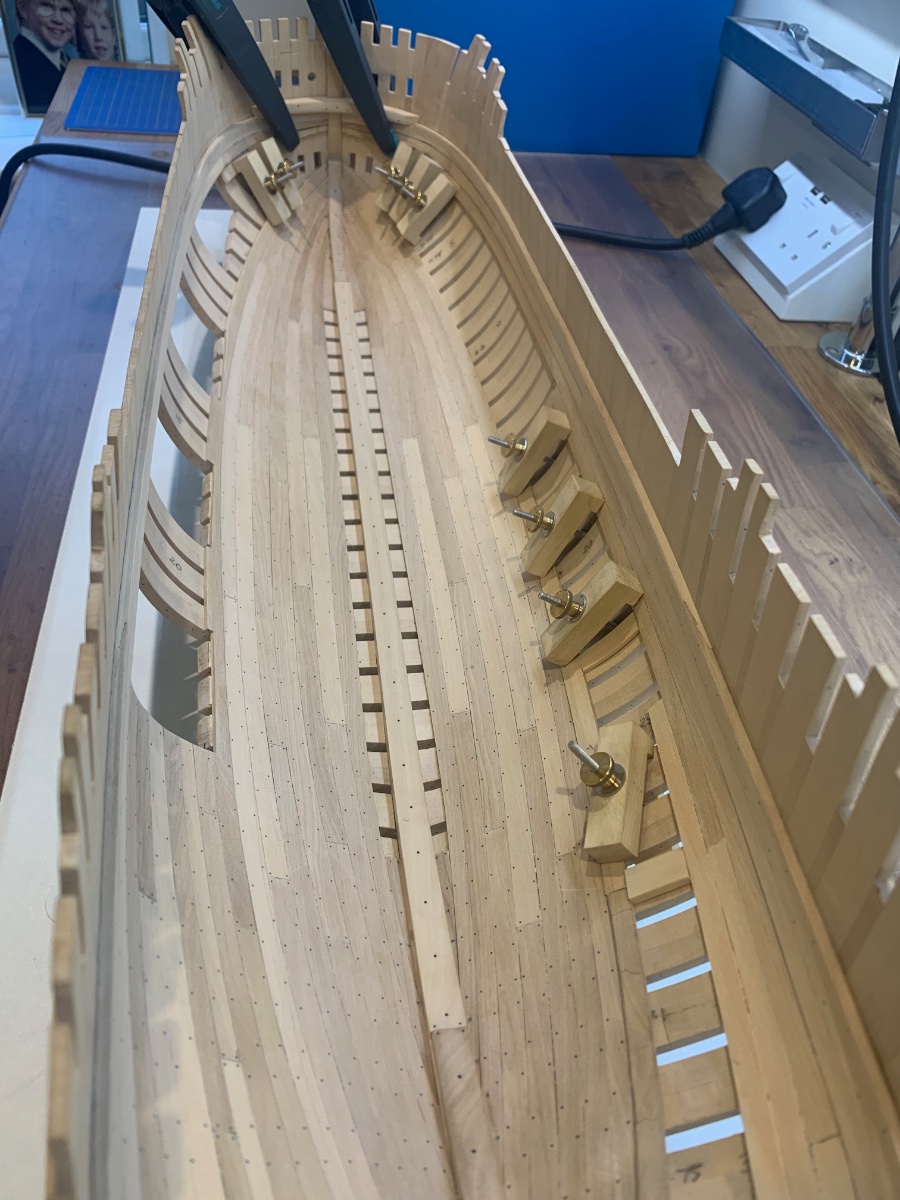
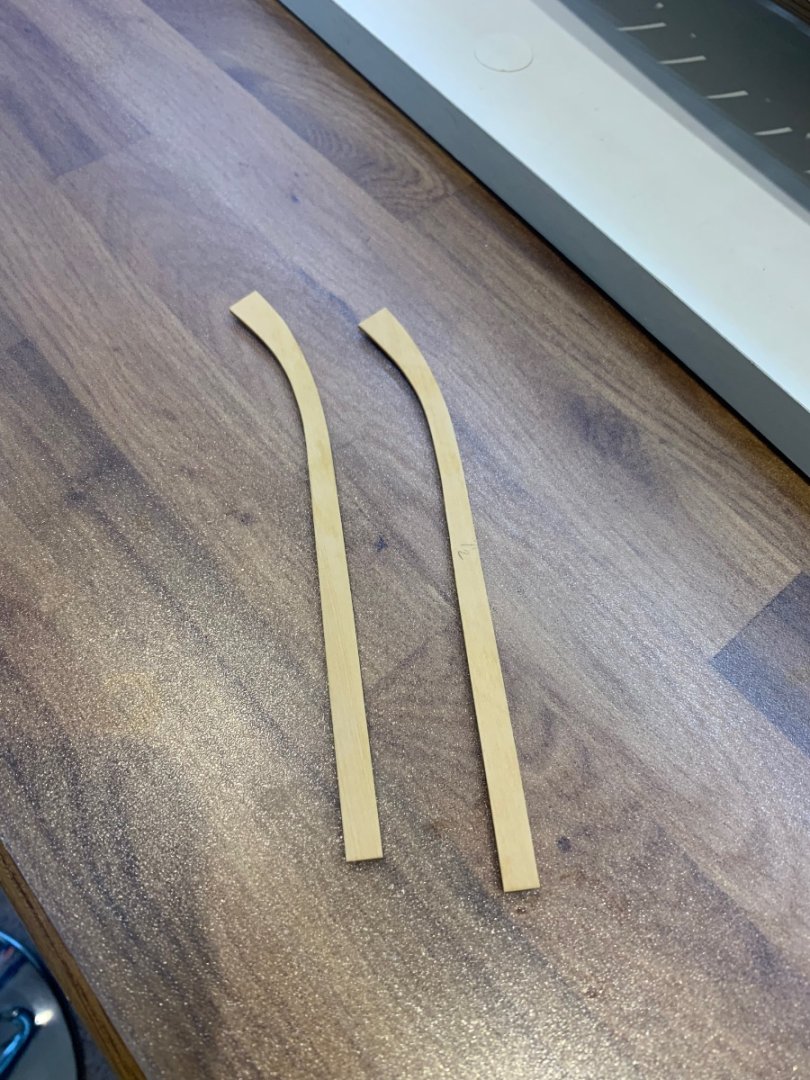
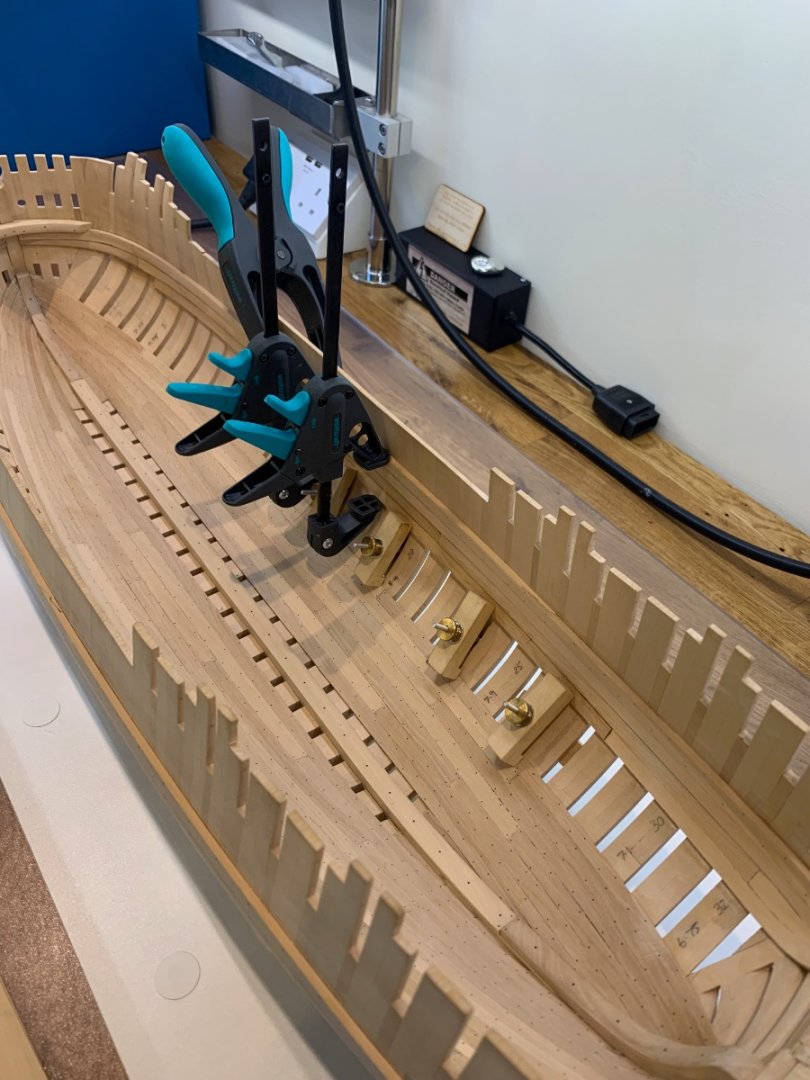
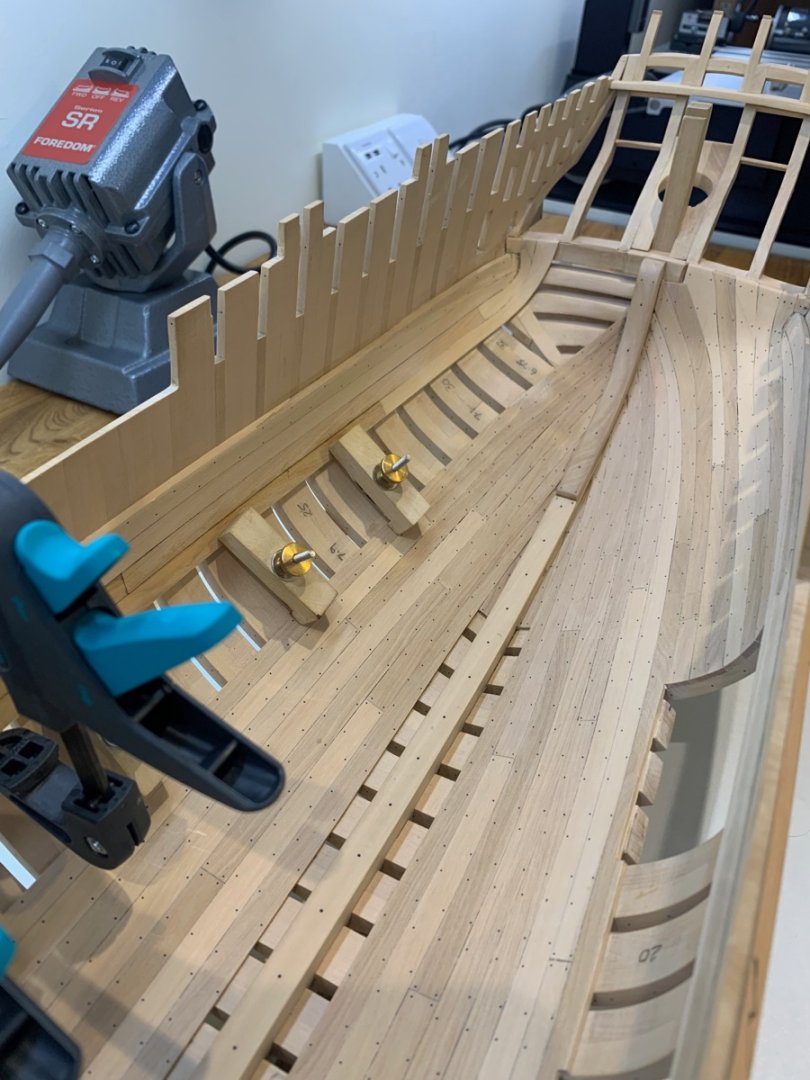
Tobias that is spot on mate 👍 Not really an update but just a few shots of how things are going. I'm working on the bow and stern at the same time to get things done. As I've discovered planking the inside of a hull takes the same amount of time as planking the outside. So a few pictures of spiled planks, clamps and unfinished fitted planks too! The planks look stepped as the thickness decreases as they go down towards the keel. Things are getting easier as I'm learning new skills everyday. Its coming along nicely but these things take time and a lot of measurements - Cheers Mark

-
That is beautiful work and looks like a proper mirror image from starboard to port.
- 72 replies
-
- 2
-
-

-
- Glad Tidings
- Model Shipways
- (and 1 more)
-
😂 I’m making good progress but it’s slow. It’s also getting more enjoyable as I get better at ceiling work. I’ll have an update in few weeks 👍
-
If you look at Chucks video the point that the plank touches his jig has a larger surface area. This would help spread the forces away from a very small focal area when bending. Using a pin would make the contact point tiny and therefore increase the forces in that tiny area. It’s got to go somewhere so the wood will start to lift instead of bend. l had this problem until I made a better jig to bend the planks on and allowed the plank to be bent with less pressure in a very small area. So try making a jig and also make the hold down the same gap as the plank is thick. Cheers Mark
-
Again so cleverly thought out using what you have at hand. I know I’ve said it before but your technique here is fantastic. I also like the way it wastes very little wood in the process. I think your finished result is beautiful. I also think that you don’t need to work on your woodworking skills. You’ve got them already 👍
-
I find this so fascinating as I'm just really getting into the history of ships and I have so many questions. But could someone do me a very simple diagram of why a square tuck would affect the rudder more than a rounded one. I'm sure that once I see a diagram it will all make far more sense to me.
-
This is a really clever technique and it certainly gives me some hope that I will be able to do this when the time comes on my build. Cheers for sharing BW as I would never have thought of using two pieces as you show so clearly above. The end result looks fantastic.
-
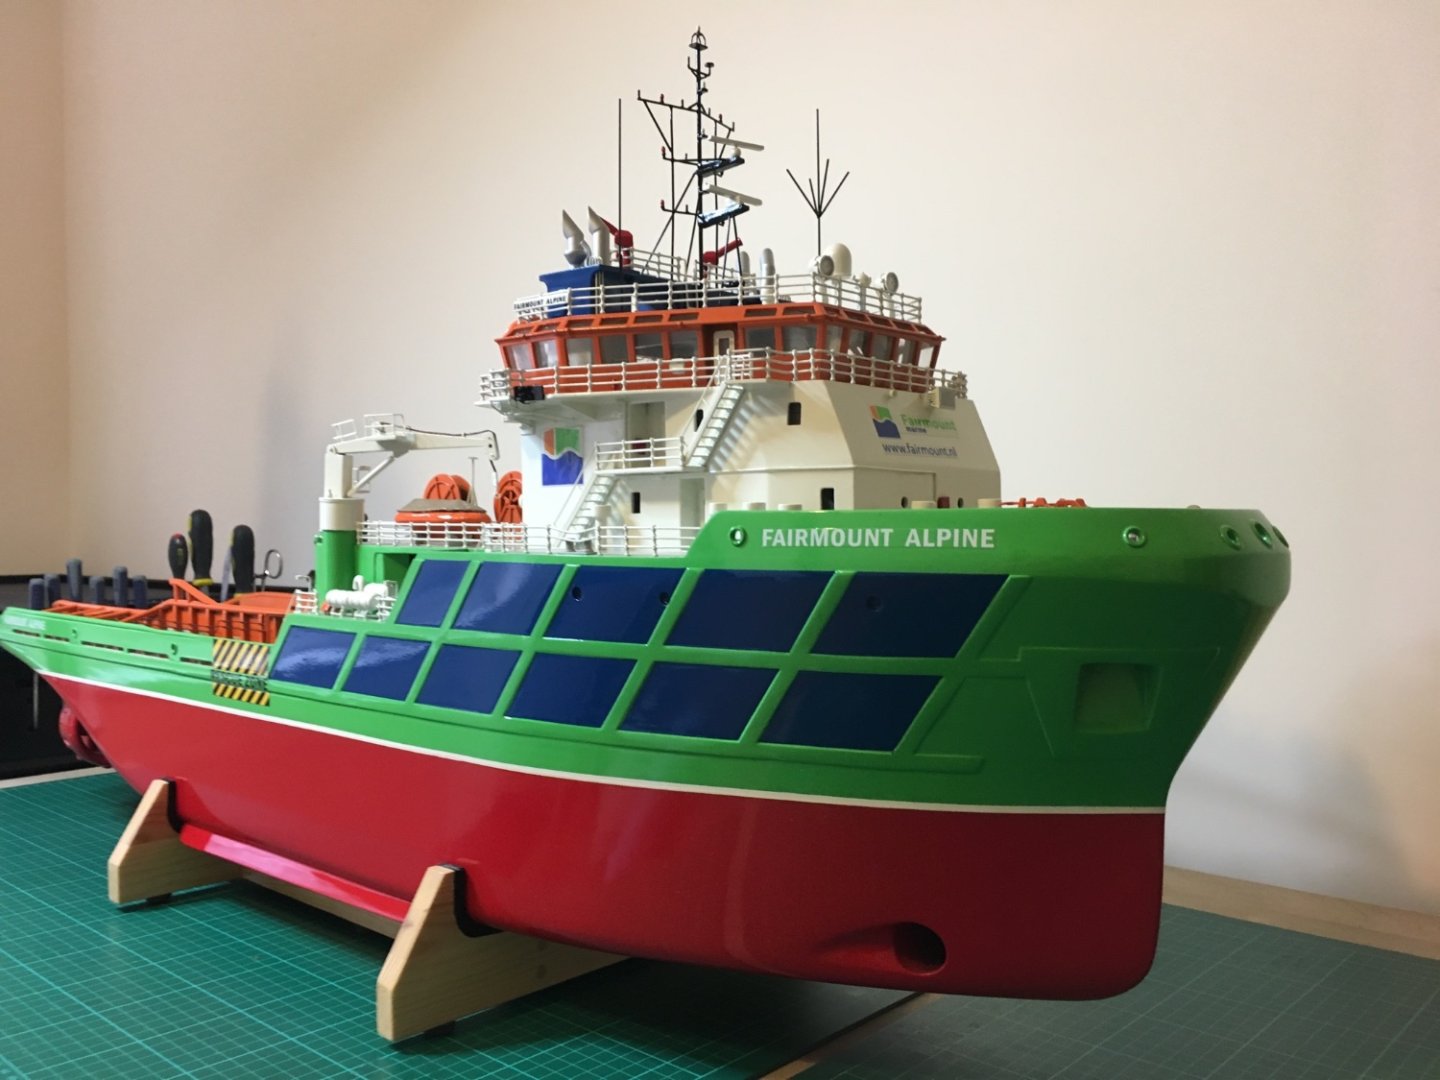
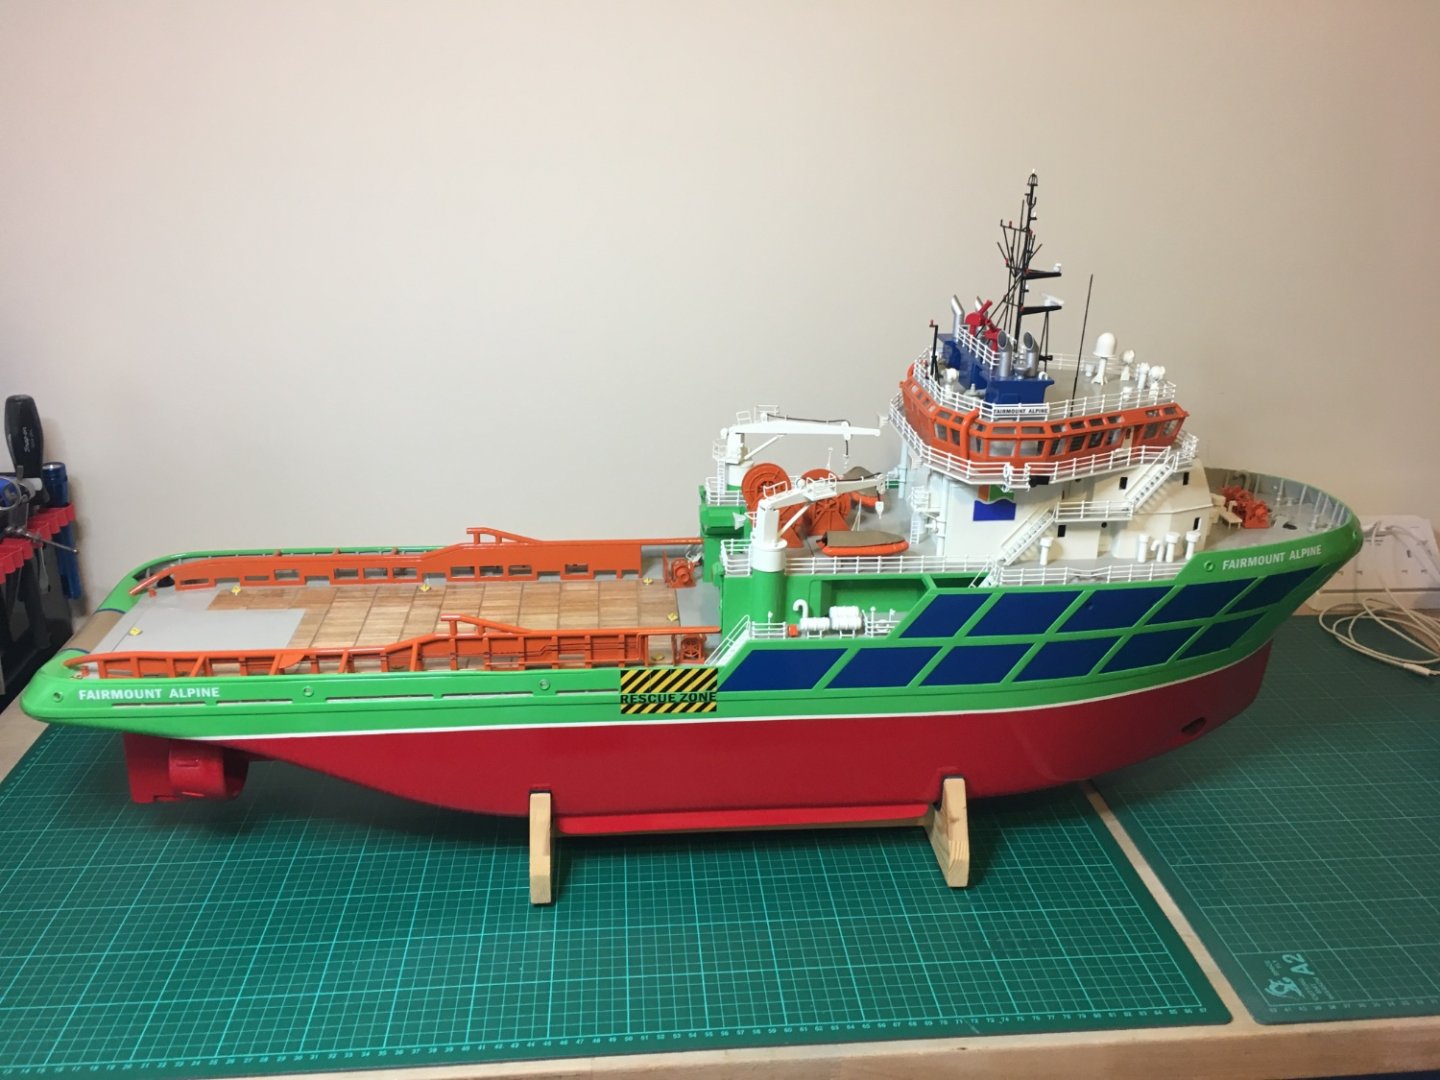
Some great advice but there is no short cut to getting a super smooth finish. I built Billings Fairmount Alpine using epoxy as a sealer and I too used Halfords Matt primer to see the imperfections. Any imperfections were filled using a fine two pack polyester car filler. It just takes hours of patience which you obviously have. The finish you have achieved is fantastic and a real credit to you. Here’s my effort after probably the same hours that you put in. Looks about the same I would say
-
ancre Le Gros Ventre by ChrisLBren - 1/36
No Idea replied to ChrisLBren's topic in - Build logs for subjects built 1751 - 1800
That really is lovely work nice one Chris 👍 -
Fixing paint job
No Idea replied to Sam A's topic in Painting, finishing and weathering products and techniques
Hi Sam and welcome to the forum. Thats an easy repair and you have answered your own question. Firstly let the paint already on fully dry and then sand out the marks that you made. As you have an airbrush mask off the areas along the length of the hull that you do want to spray grey. Then just spot spray the area that wants sorting out and your done!