No Idea
-
Posts
1,025 -
Joined
-
Last visited
Content Type
Profiles
Forums
Gallery
Events
Everything posted by No Idea
-
 Thanks druxey - one of the fantastic things about this monograph is; if you look all of the angles you need to cut they are already drawn for you. I found that they just needed a small adjustment to fit my sometimes wonky build. Thanks captain_hook 👍 I'm really enjoying building this little ship.
 -
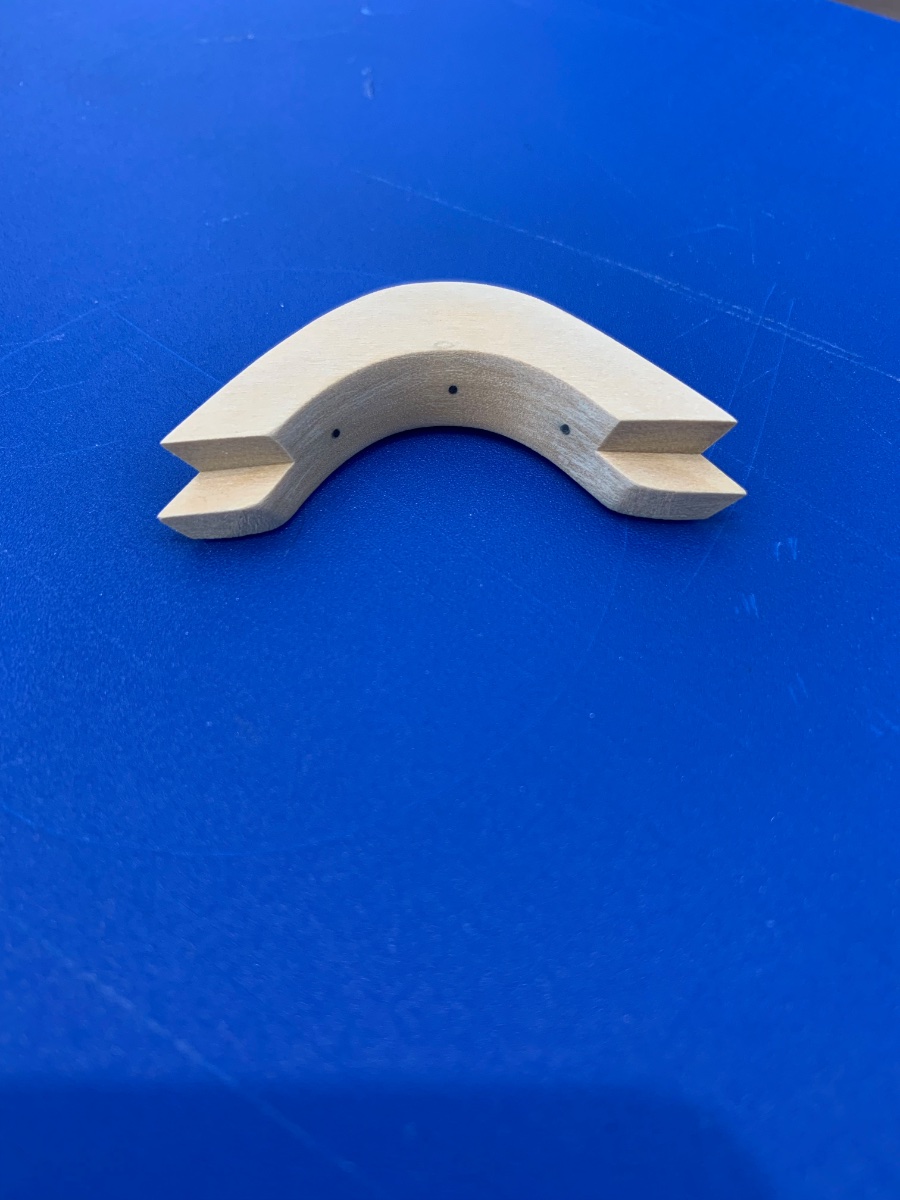
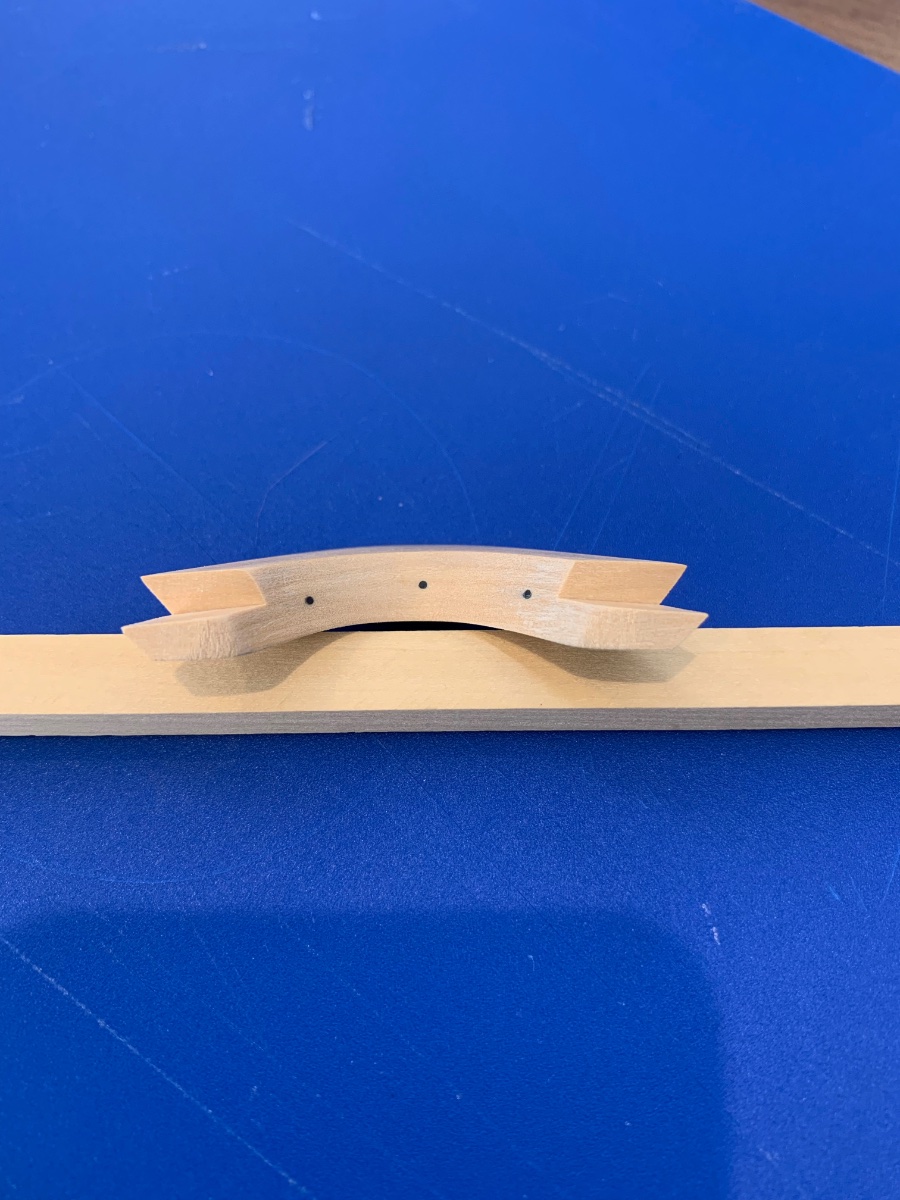
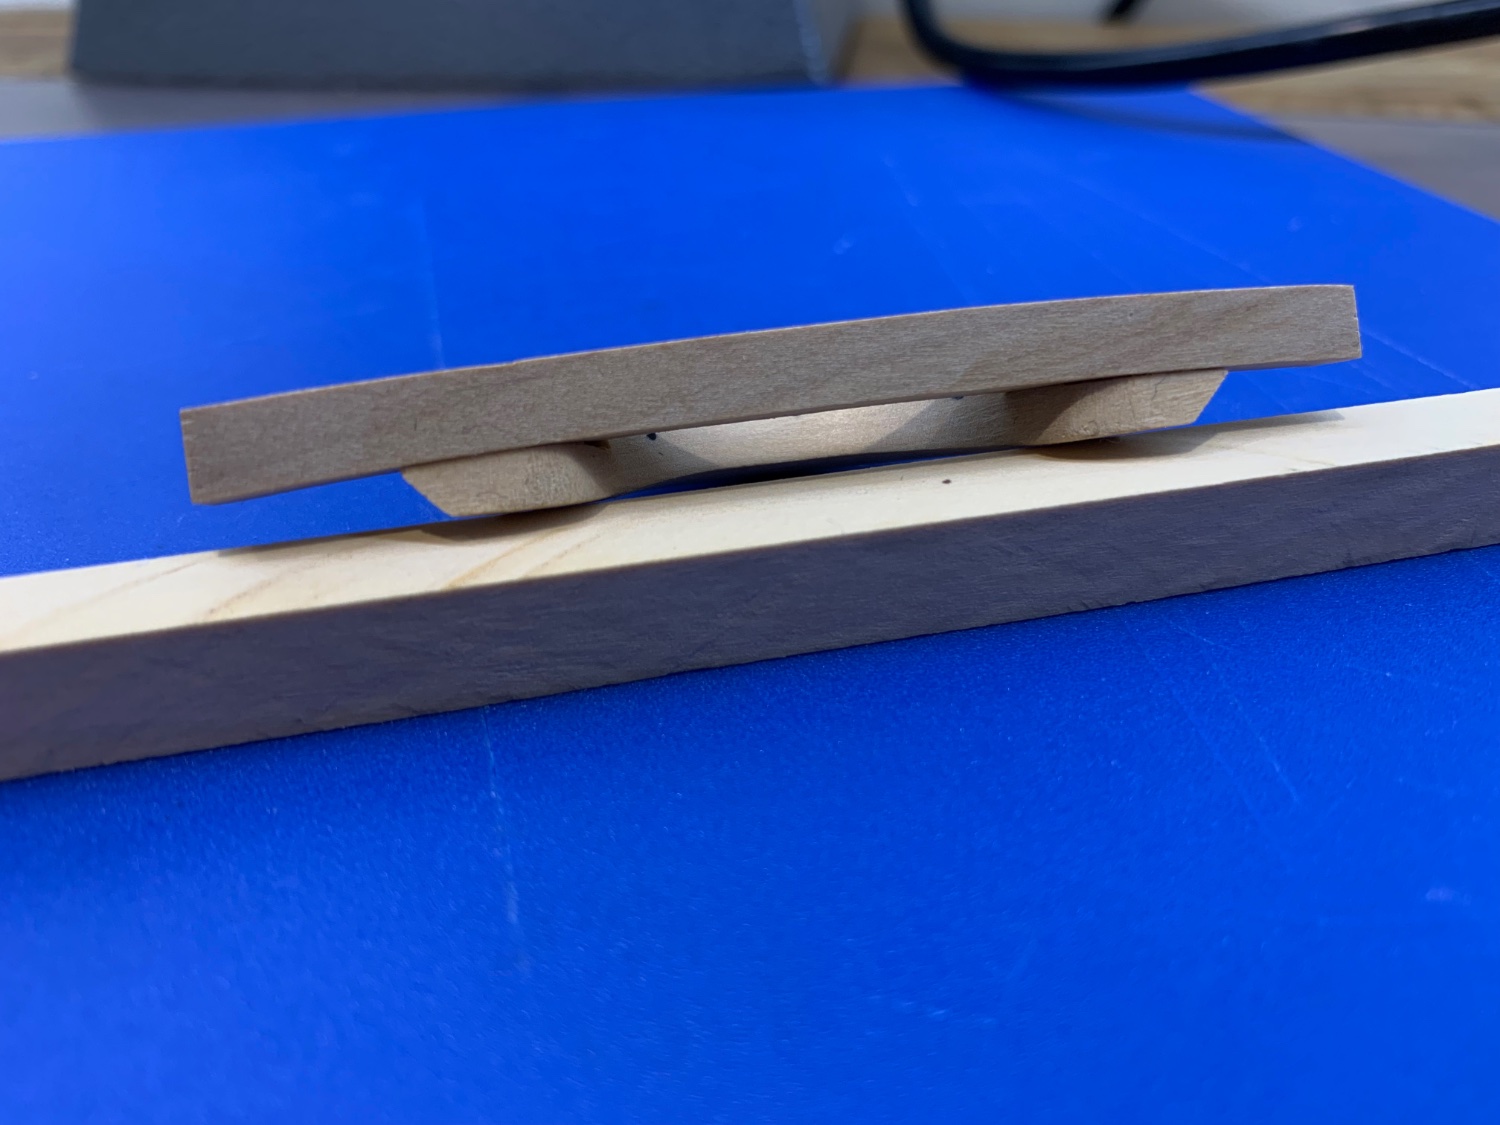
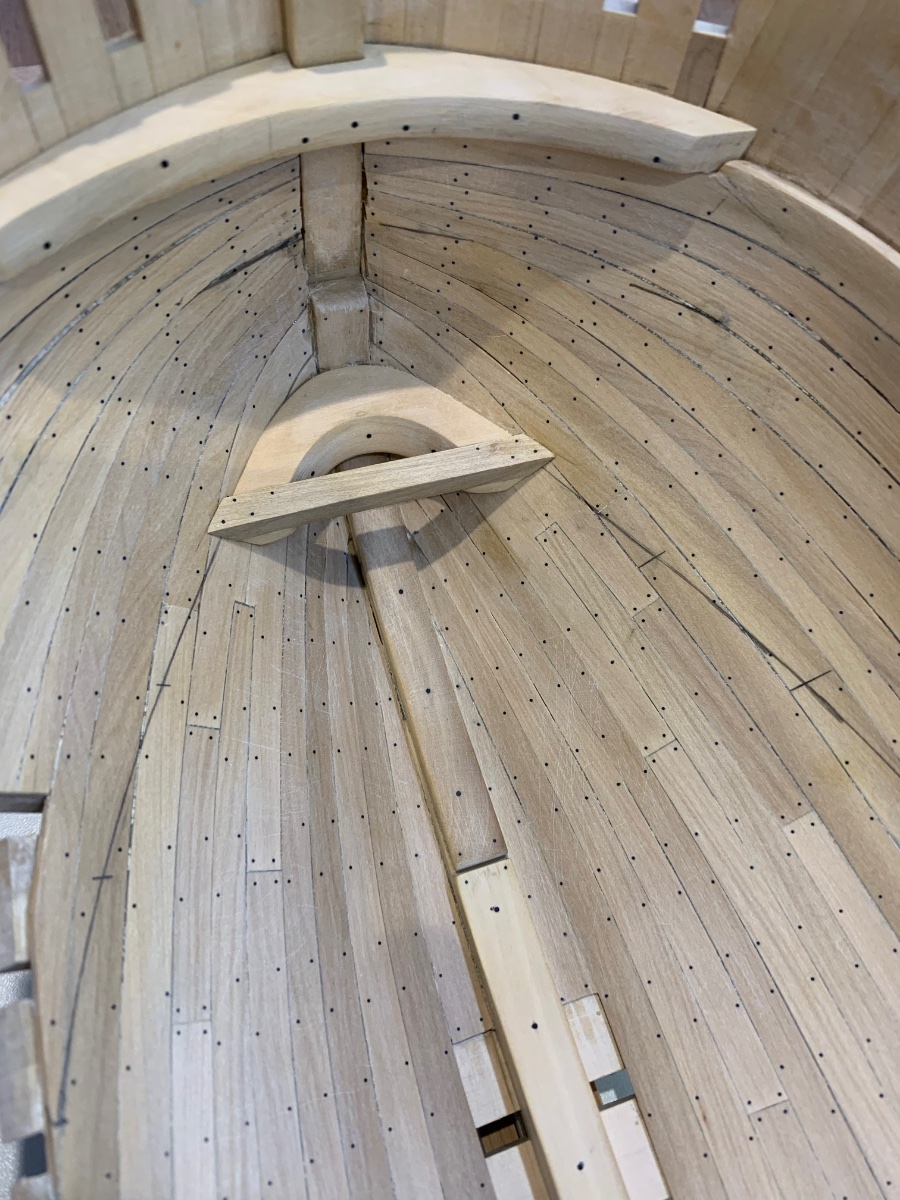
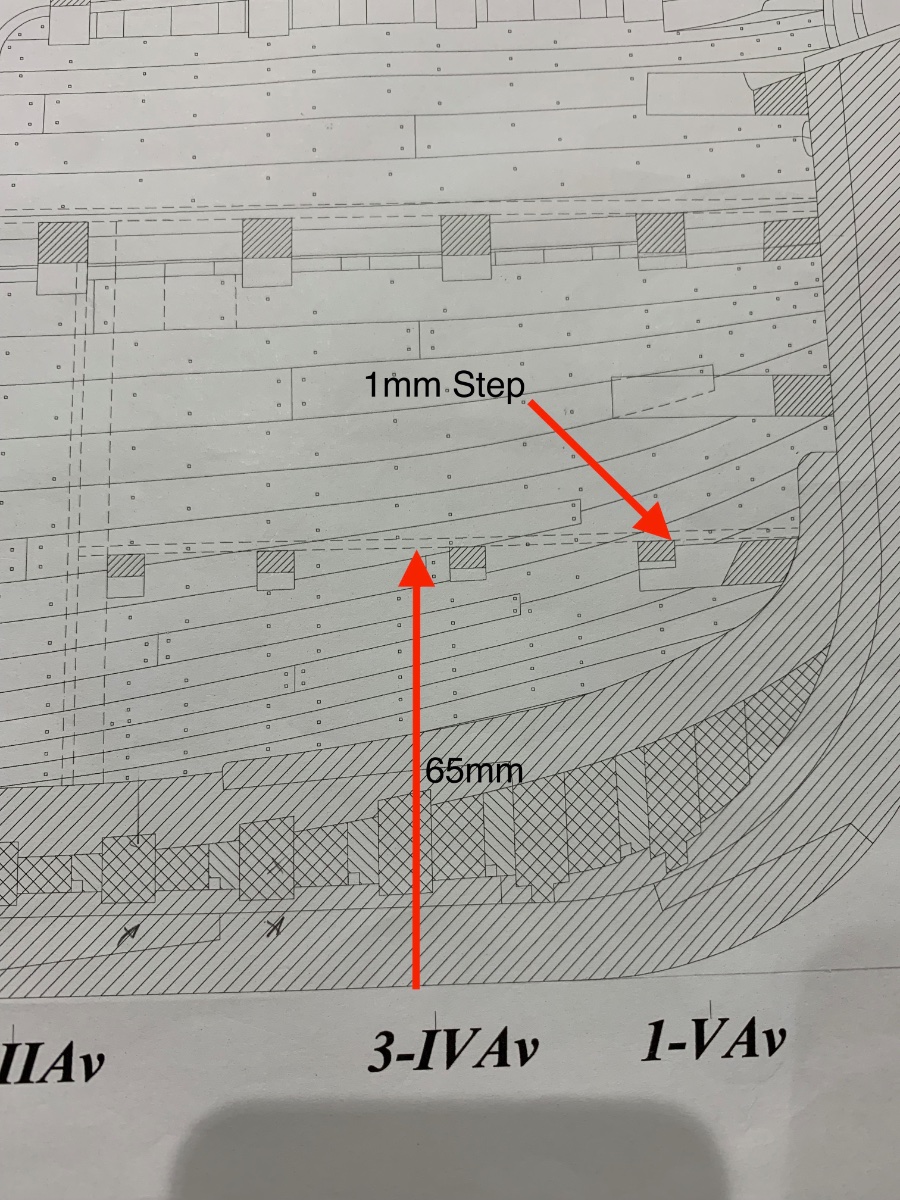
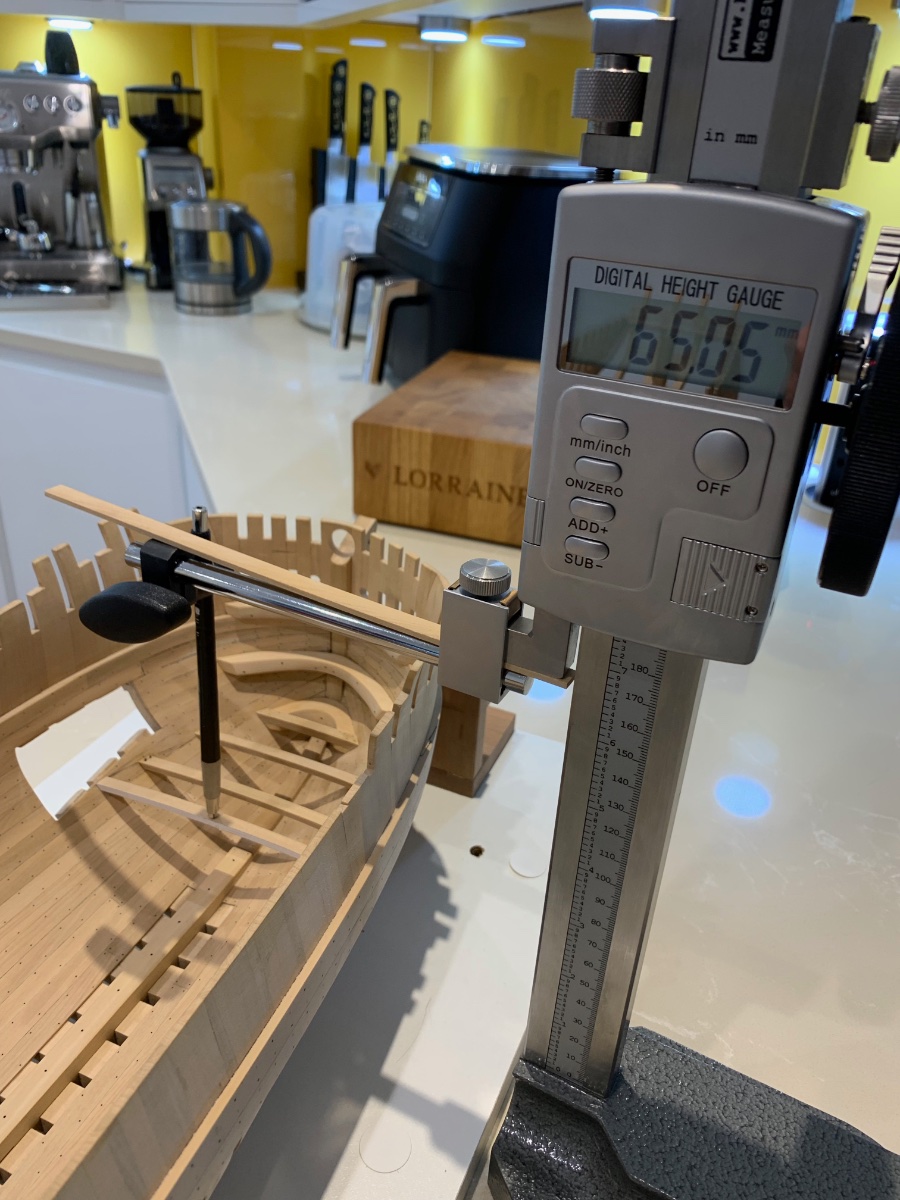
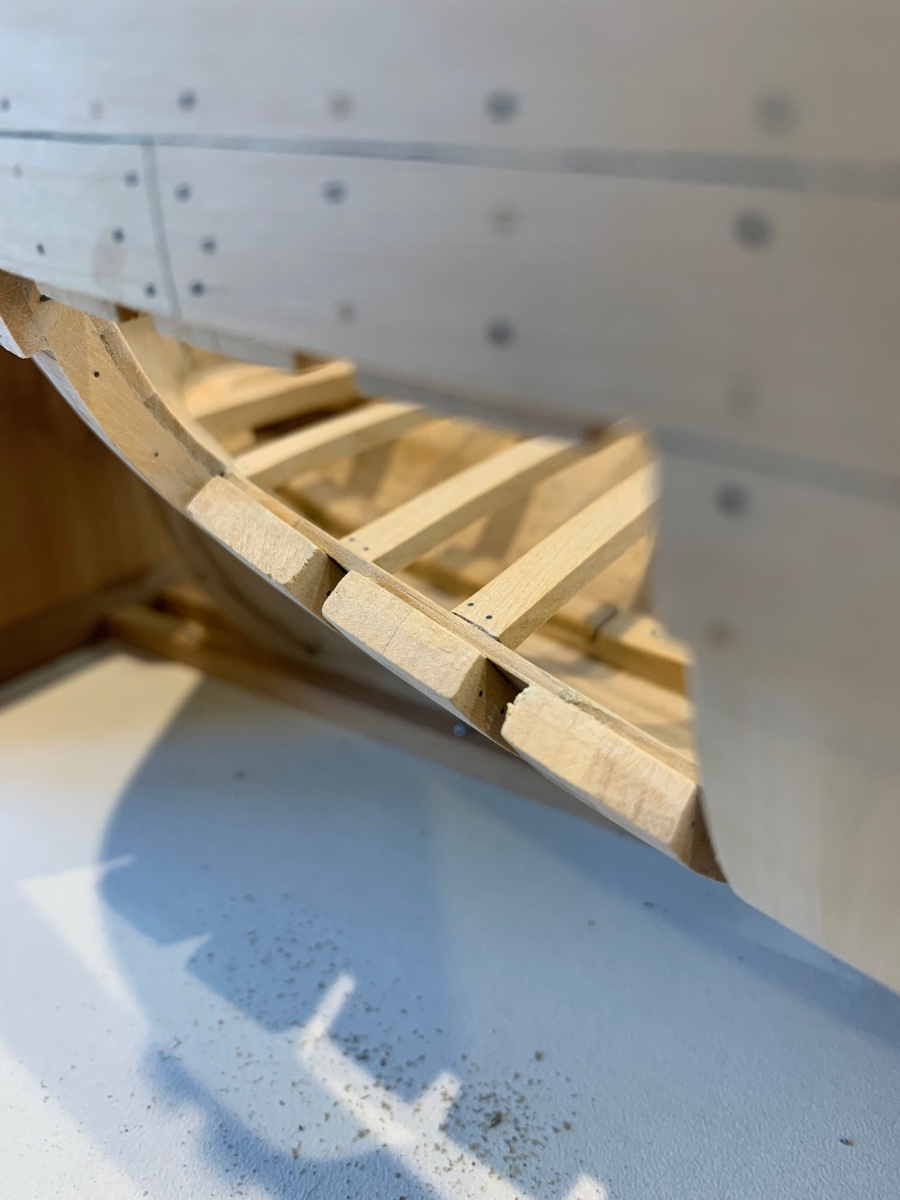
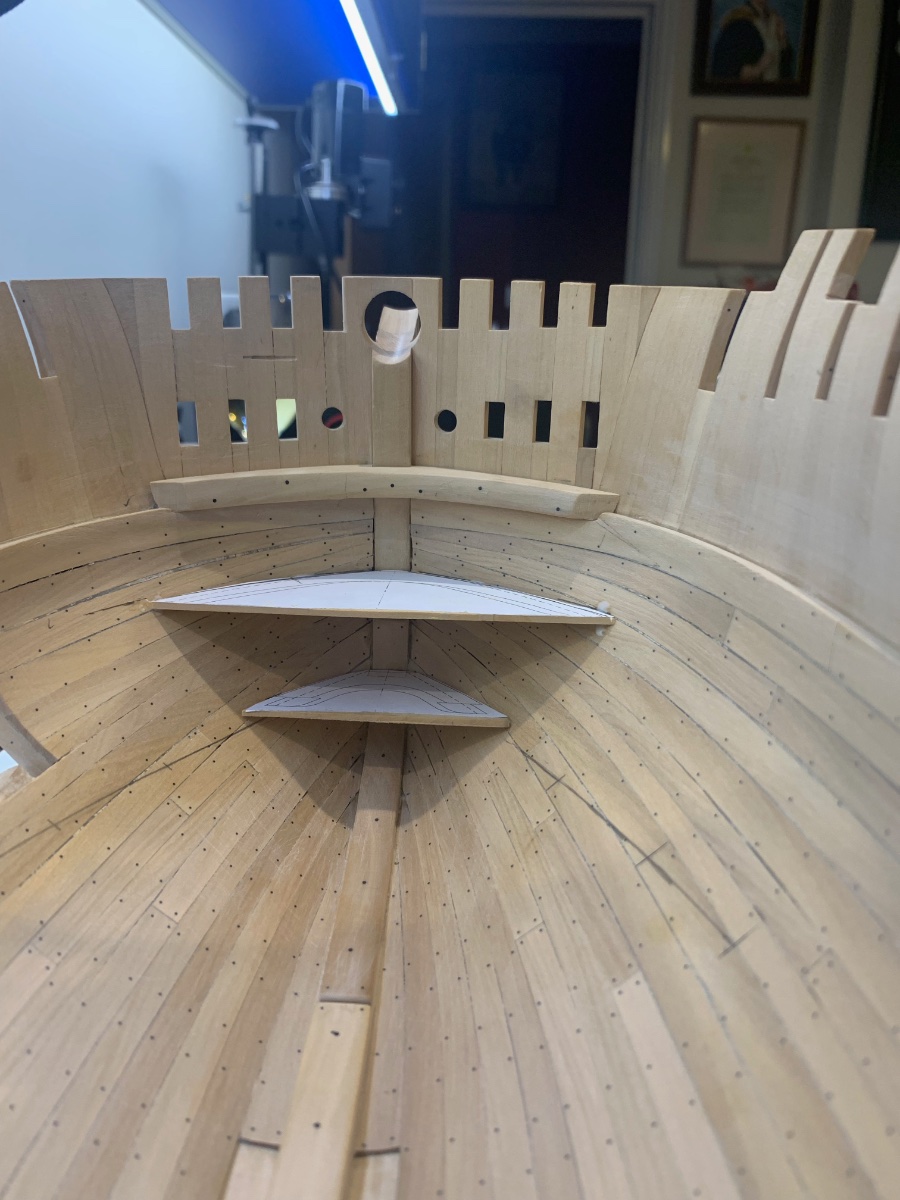
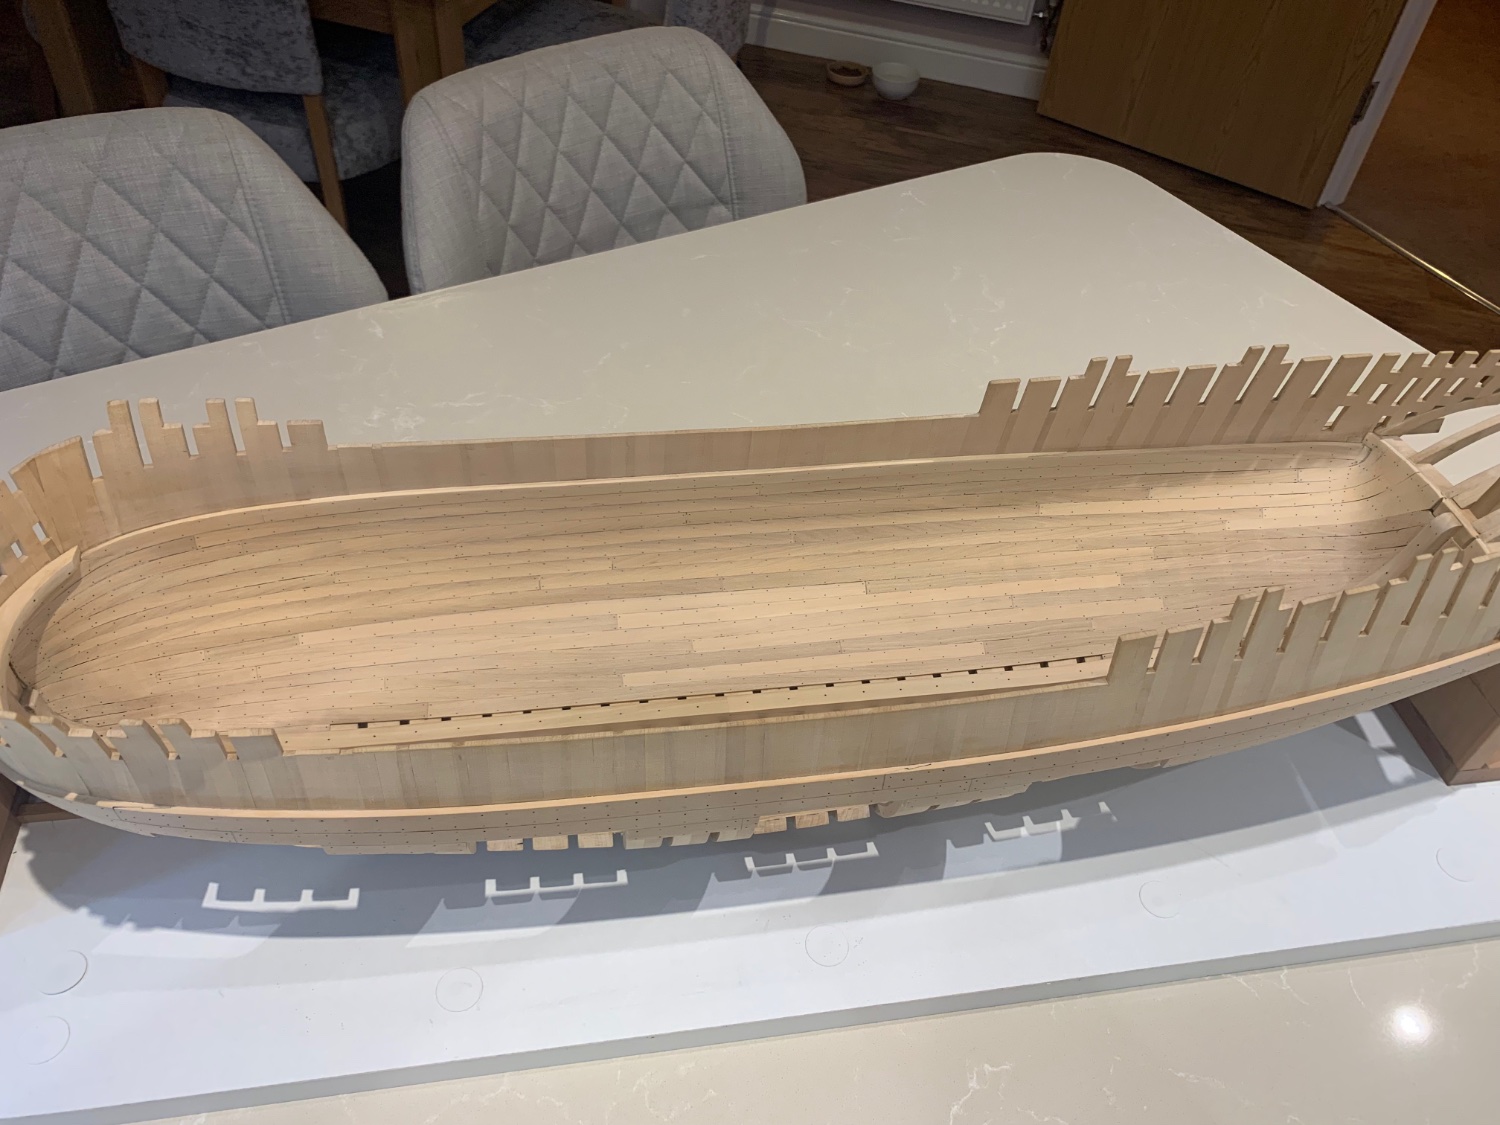
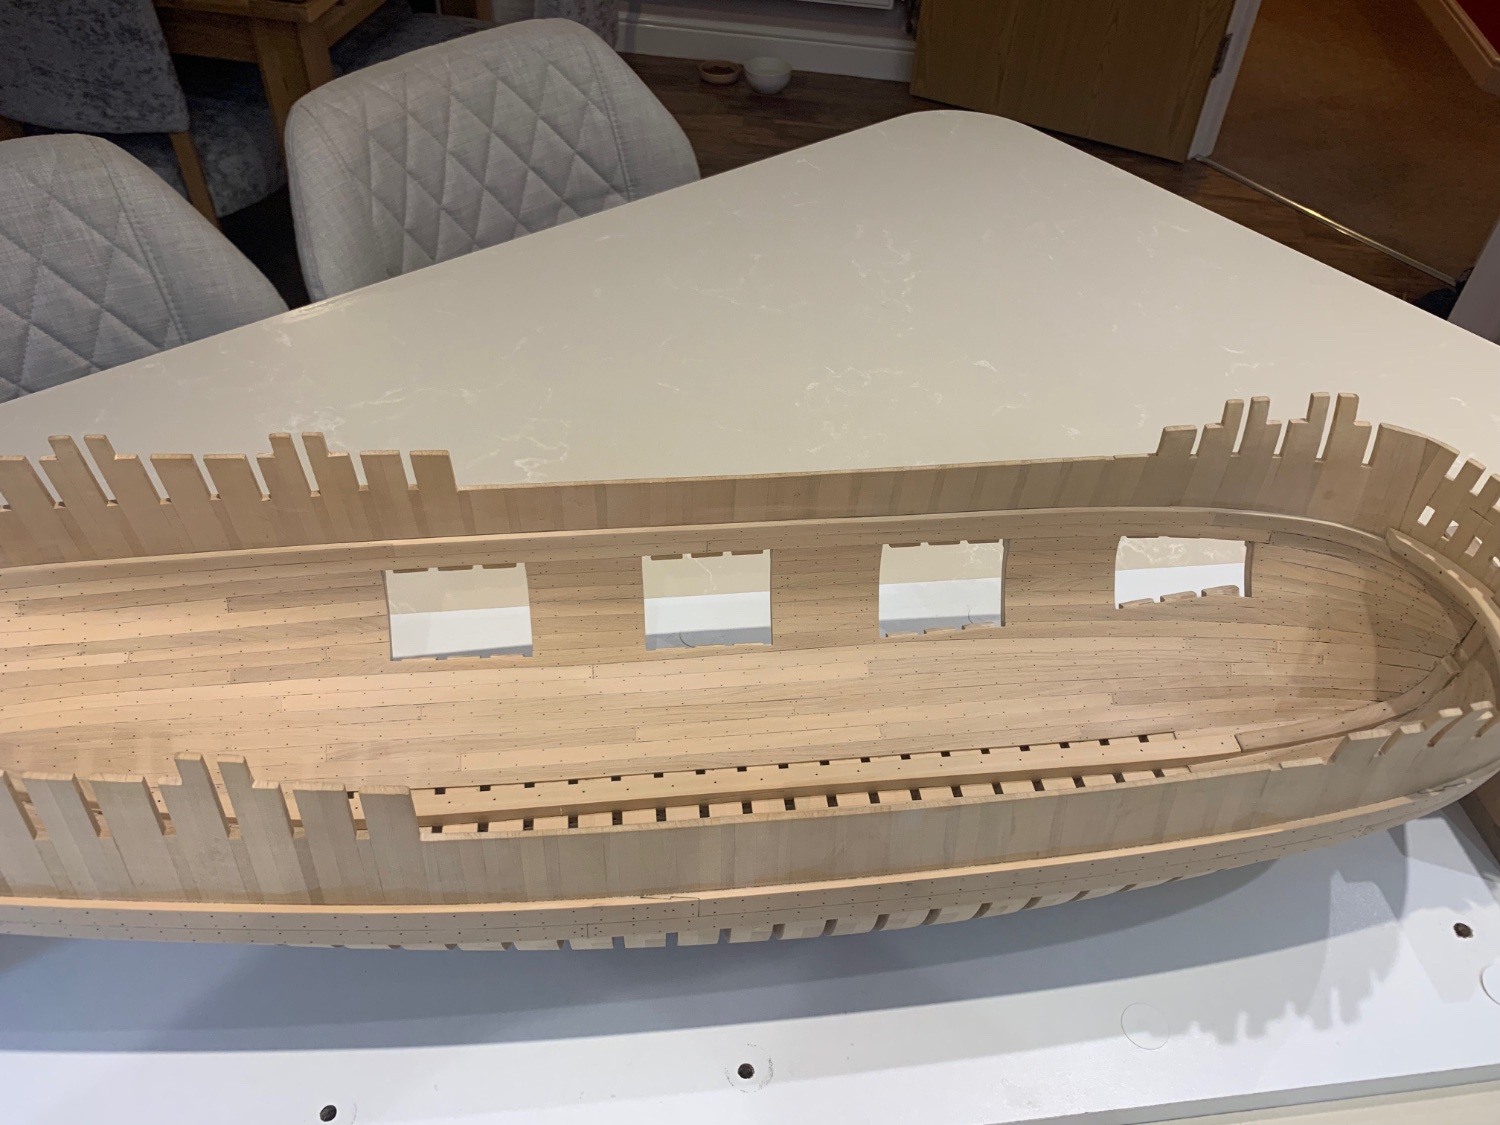
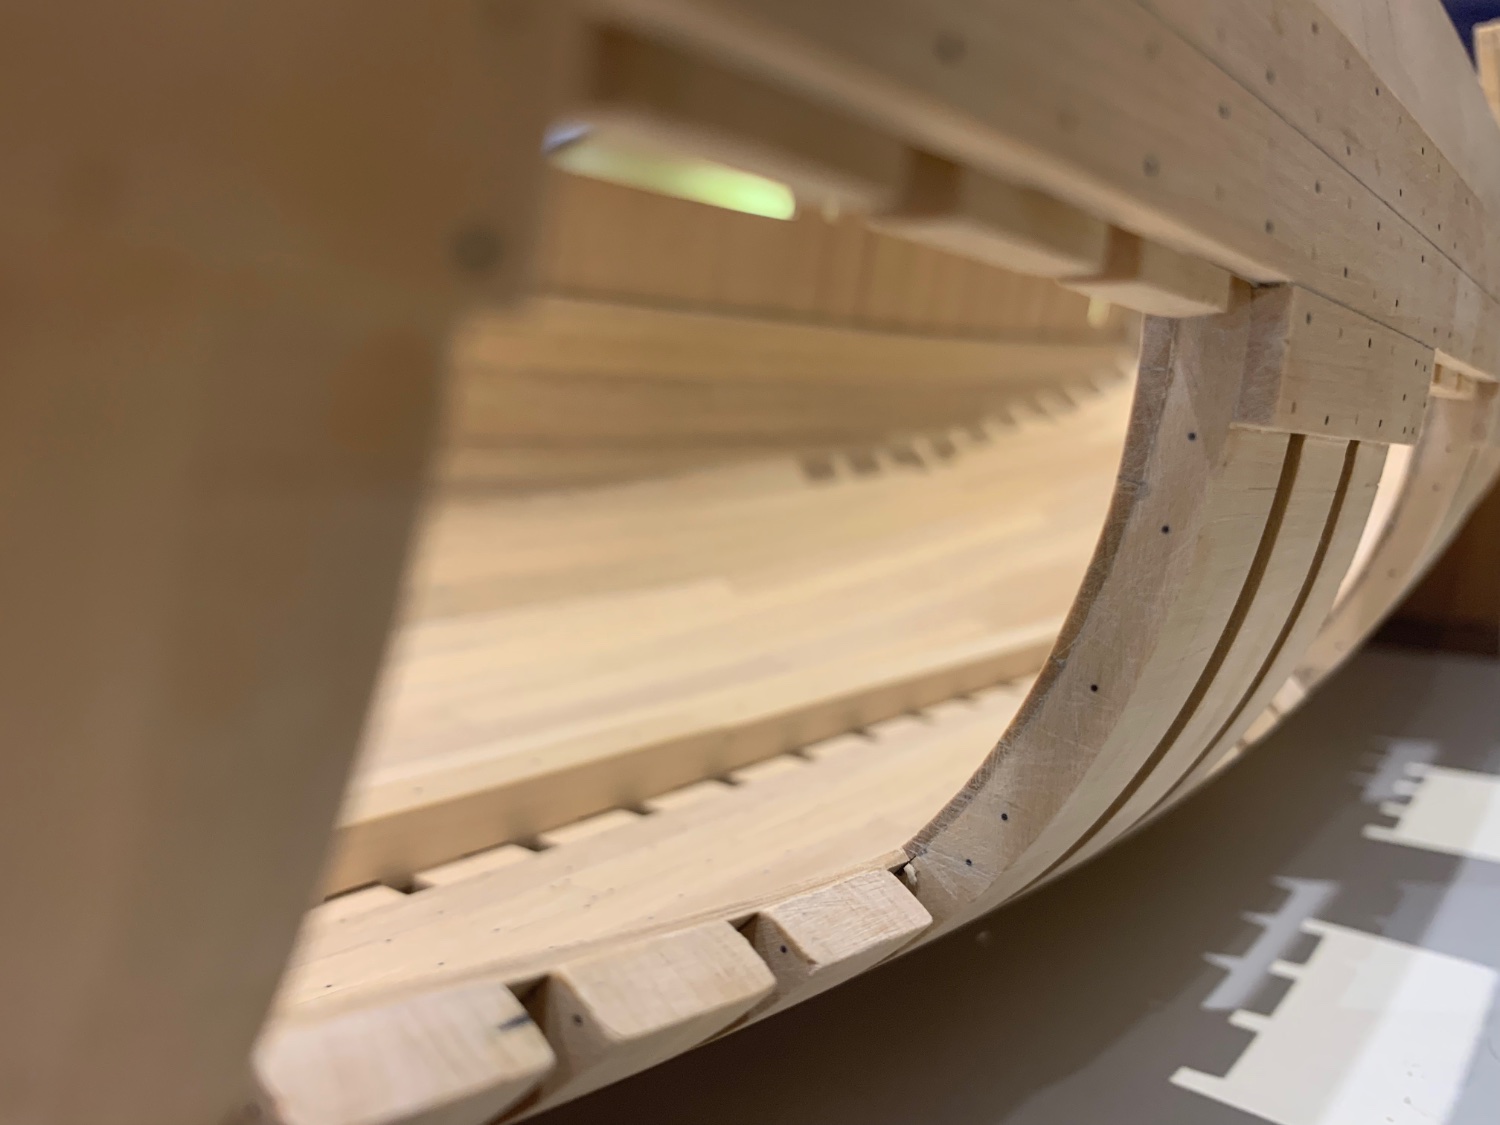
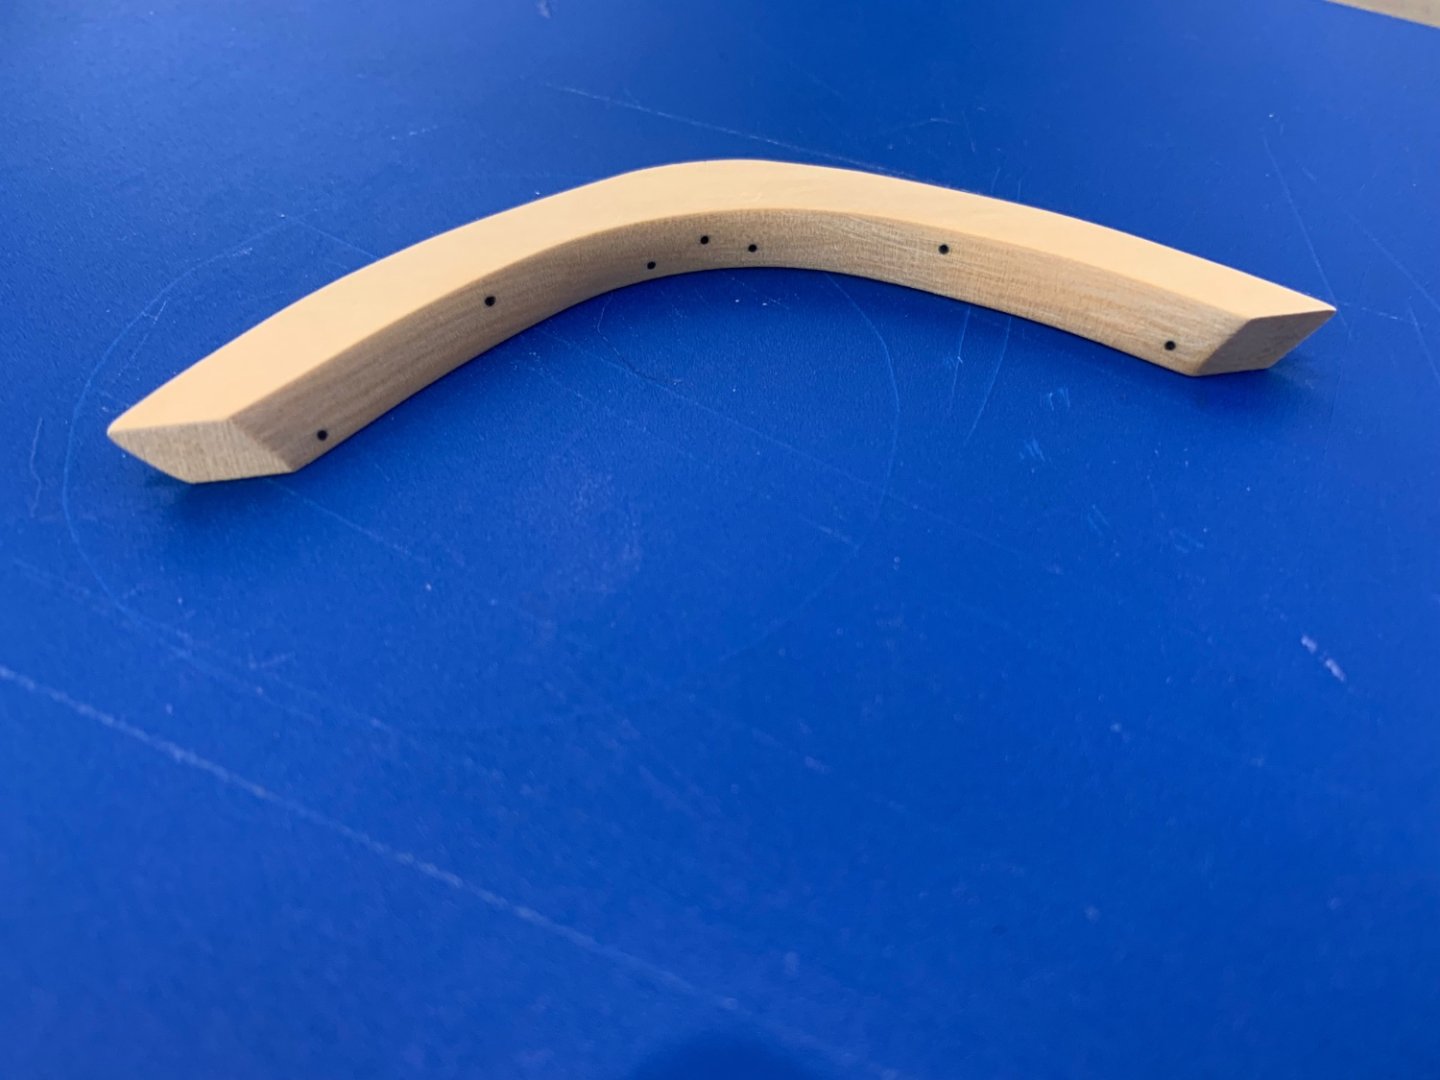
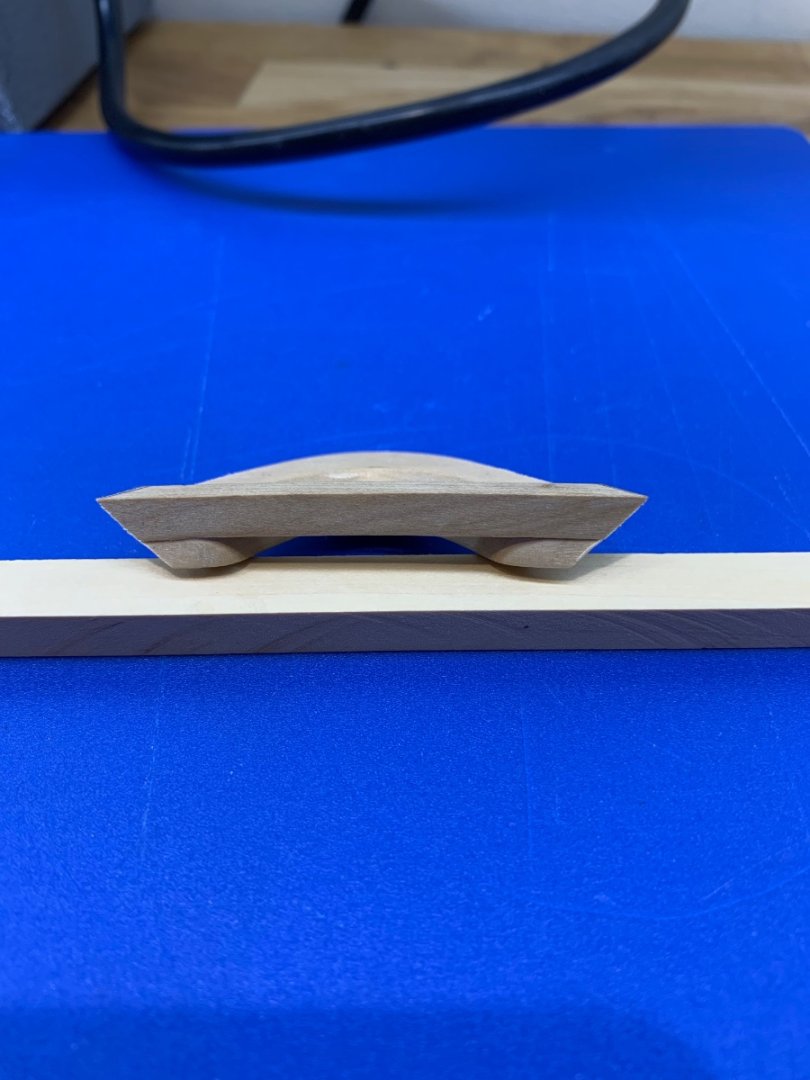
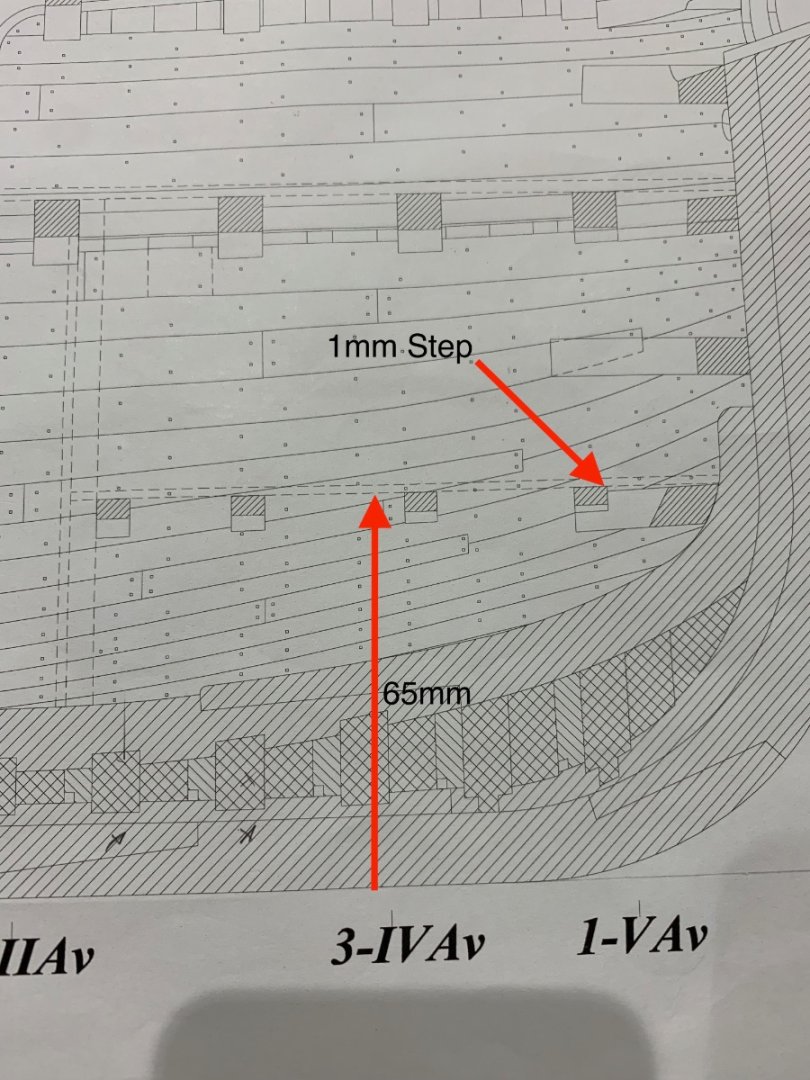
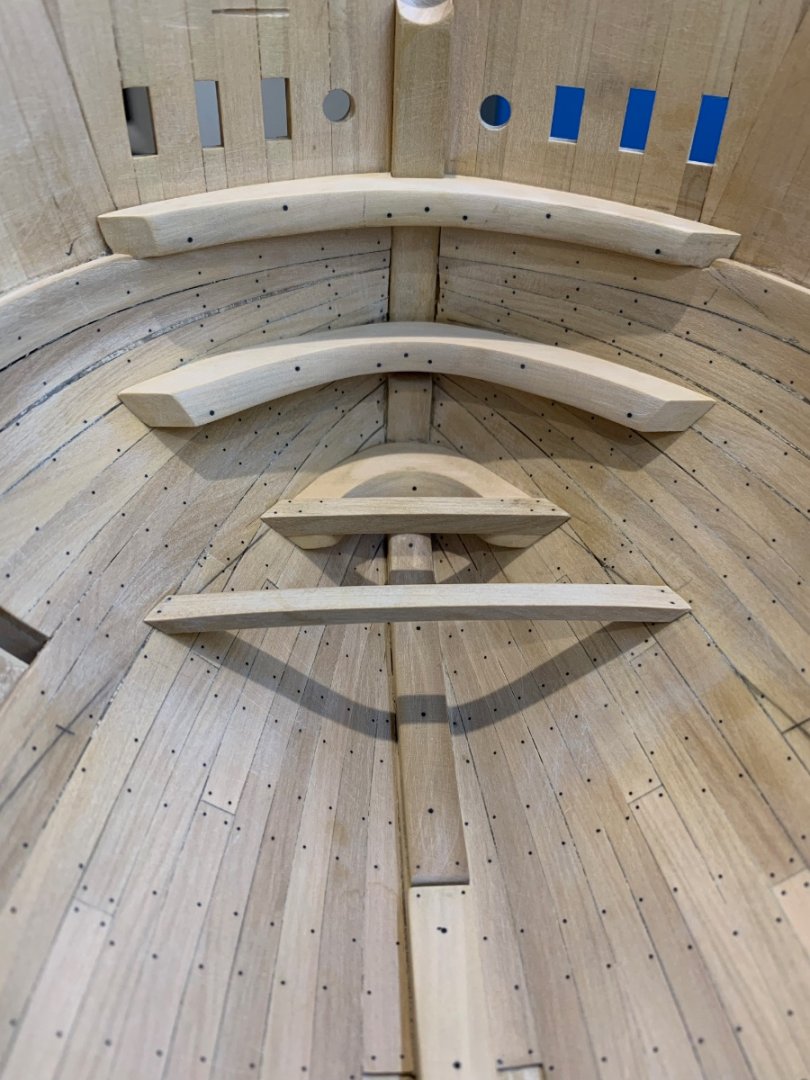
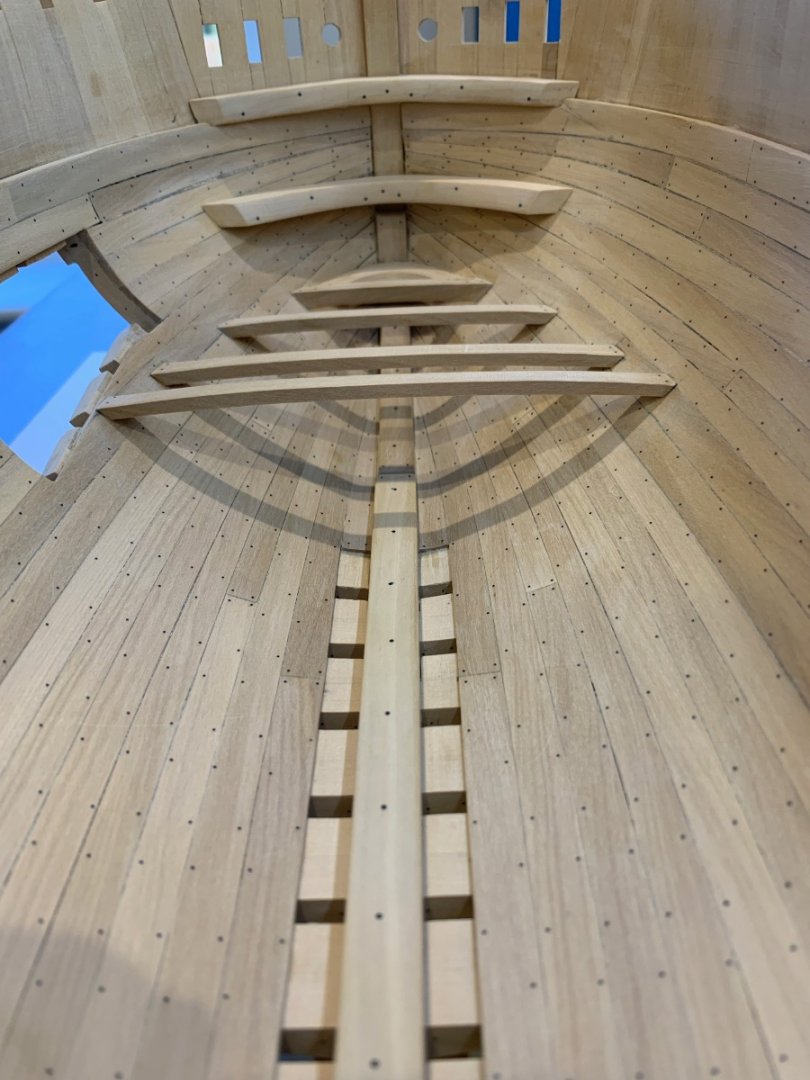
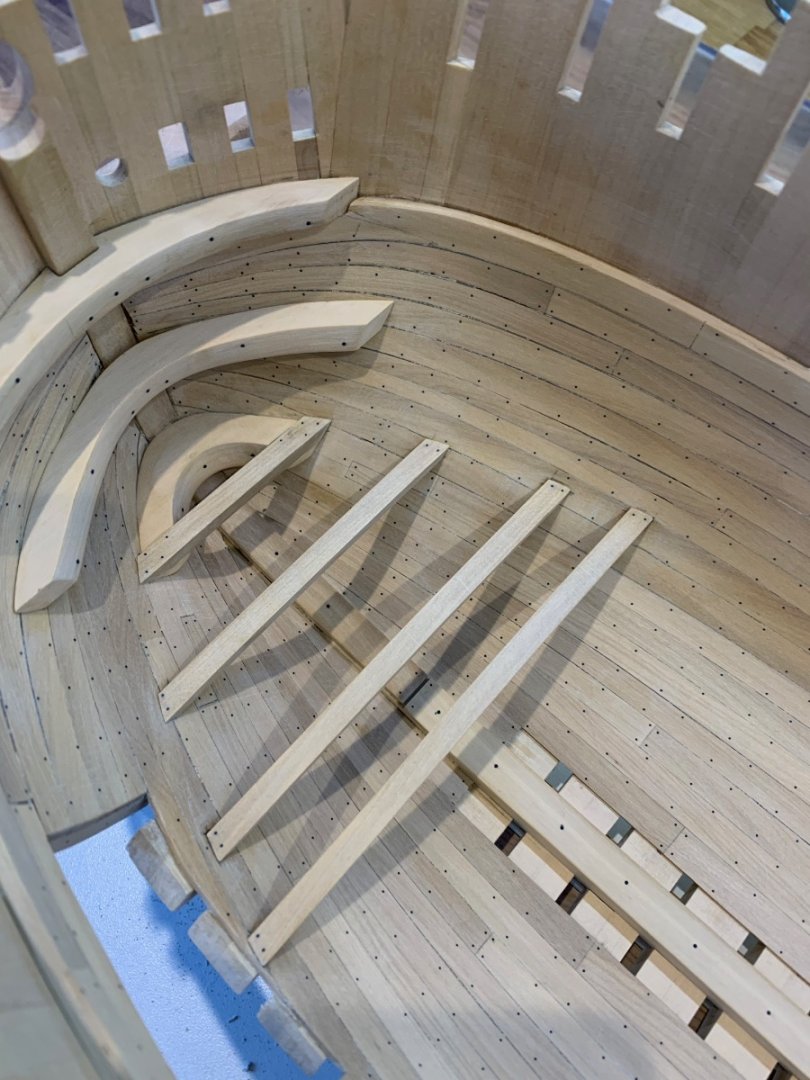
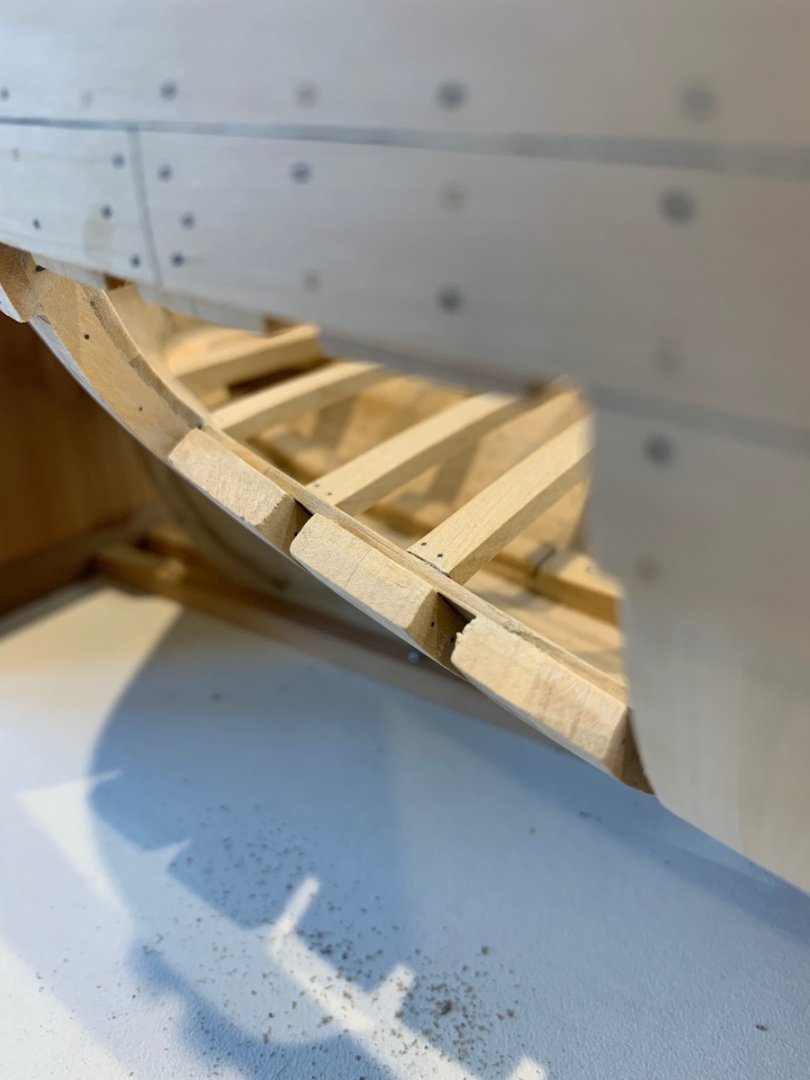
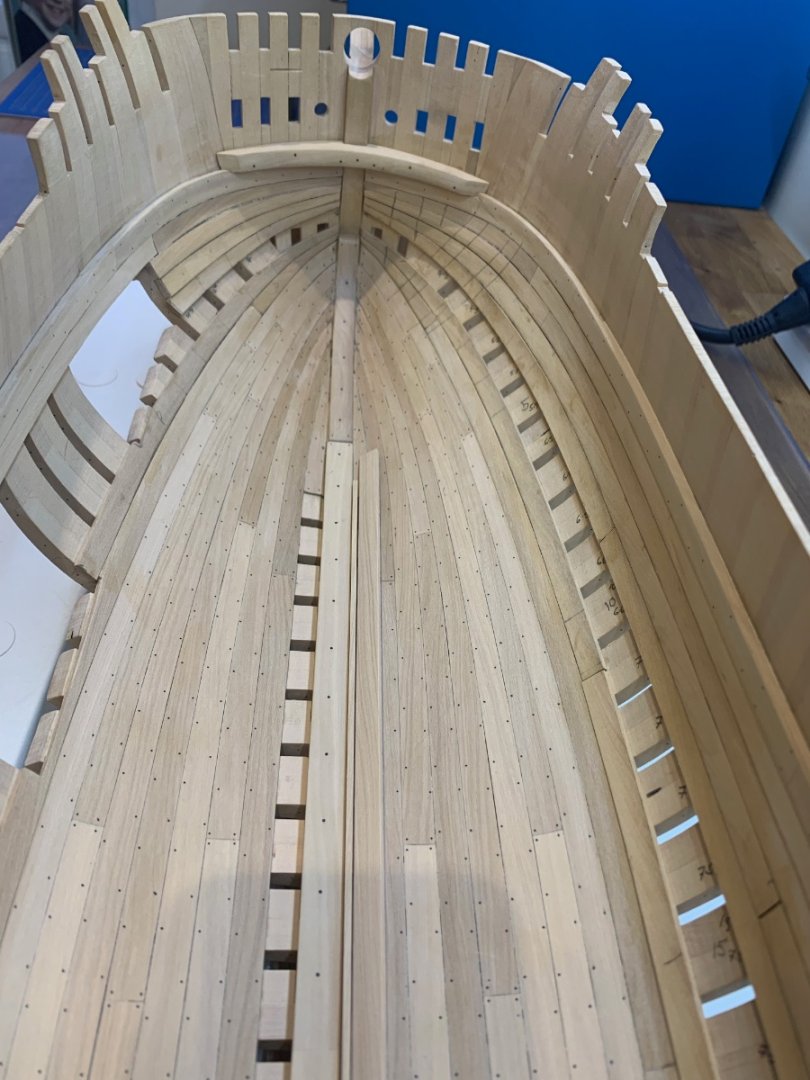
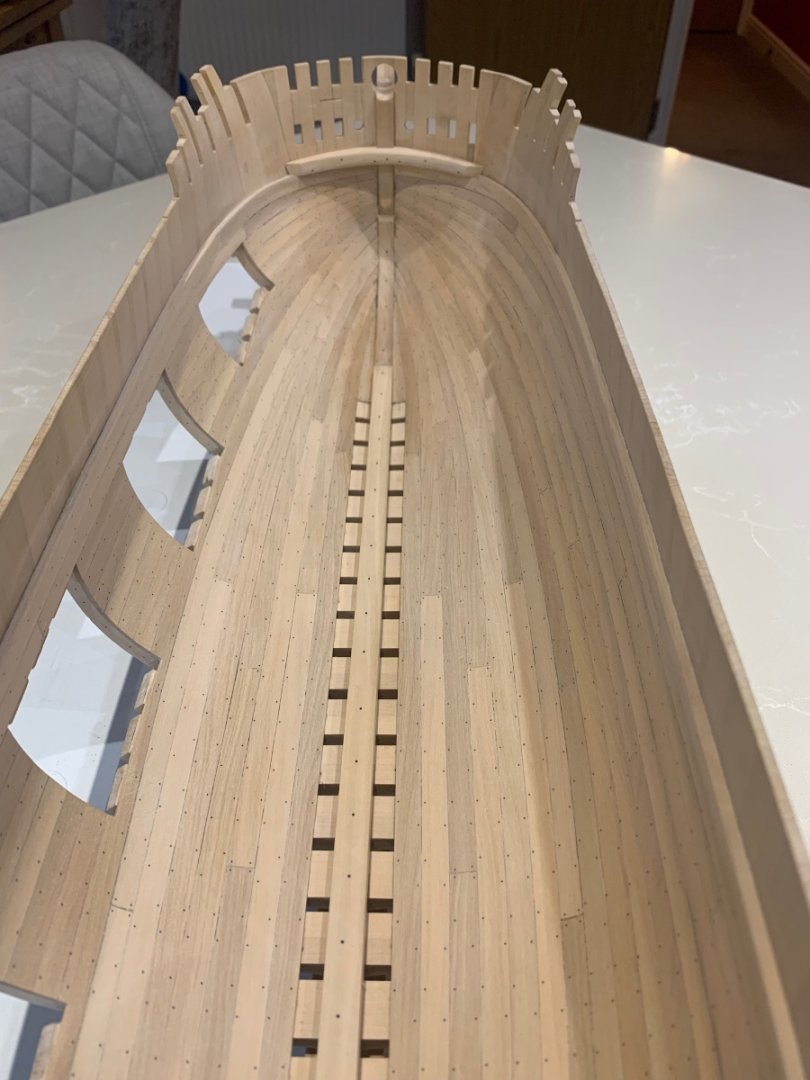
Another update from me and I have to say its been very nice making parts instead of planking 🤣 So starting with the very lowest breast hook- This part is not flat but is curved to match the deck that rests upon it. It is also recessed as it receives the first beam of that deck too. This hook is supposed to be recessed for the stem apron as well but I've obviously done something wrong way back when I made the hawse timbers. So instead I opted (was forced) to make it the fit as best that I could. Next was to make and fit the beam that is attached to it Which was then trimmed to shaped - Its worth noting that the beam must stand proud of the hook as the hook is angled down towards the keel. This can be seen in the lower picture. This assembly was then glued in place in the hull at the correct height but more on that later. Then I made the middle breast hook which needed to be scribed in to match the hulls shape which I seem to have sanded a little too much on the port side. This wasn't difficult to do just time consuming to get a decent fit. Once again I could not recess this hook into the stem either. Next was to make the 3 beams that complete the small deck at the bow. These are really easy to make and extremely difficult to fit accurately. Luckily I only wasted one beam. The second beam and middle hook after being installed Now going back to Greg's excellent point about marking out the inside of the hull which I do find quite difficult I thought it best to show how I installed all of the beams and hooks at the correct height. Looking at the drawing and working from the very bottom of the keel as my constant datum you can see that the crown of the beams should be 65mm high. You can also see the small step in beam number one and the angle of the lower hook too. So I use my height gauge but anything that can hold the correct height can be used. It was zero'd on the base board and not the work surface and then set at 65mm. This then allowed me to gently sand away the ends of the beams until they sat in the correct place and at the correct height. If I put a small ruler across all of the beams it is flat so I'm very happy with that. Here's a picture that explains things far better A few pictures of the beams all in place. It's also worth noting that there is a hatch to be fitted between beams 2 and 3 so the distance between them is very important. I was really pleased with my marking out for the cut aways on beam 4 - I don't think I could have got it an closer! Next parts to make are the mast step and the stern sleepers - Thanks for all of your comments and like's - Mark


-
Wow mate wonderful work 👍
-
Hi Greg I’m using a digital height gauge that I’ve adapted to reach over to the inside of the hull. There’s a pencil on the end so it makes the marking out much easier. I always use the very bottom of the keel as my datum and literally measure everything from this point. So I zero the height gauge (The tip of the pencil) on the base of the building board and go from there. It seems to give me good results Cheers Mark
-
Hi mate - yes this was an error through my lack of experience as this is my first POF build. If I was building this ship again I would use your technique and build the keelson after making the axial parts to ensure a good line up. I think it's safe to say I got lucky! It did line up but it could have easily not lined up too. I took that as a fluke but next time I'll build it first. The entire frame must be built as a complete entity or at least that what I have found. The other thing I will never do again is photocopy all of the axial parts. I will buy a second set of plans from Ancre and cut them up instead. I have tried so many companies to copy them exactly and none of them are accurate enough. It would have been cheaper just to get an extra set of plans. We learn so much as we go along but wow what a ride eh! Tony I built my keel twice as my first effort was not quite straight. If I had of used it can you even imagine the corrections that I would be making now. The knock on effect to me just isn't even worth thinking about. Good luck mate and if I can help in any way please just ask
-
Dave this looks like a decorative covering for the dogs legs (The very outer counter timbers which are shaped to match the lines of the stern). Lovely build BTW
-
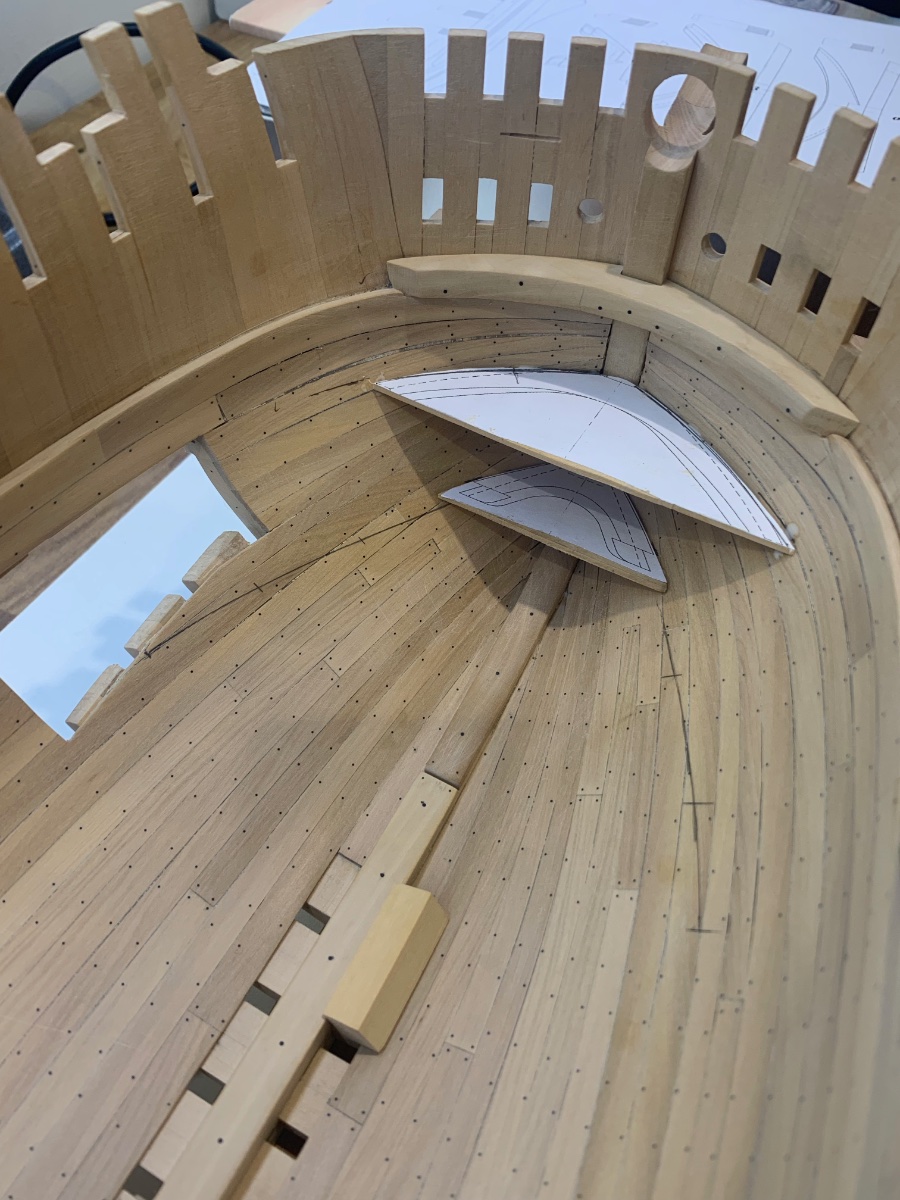
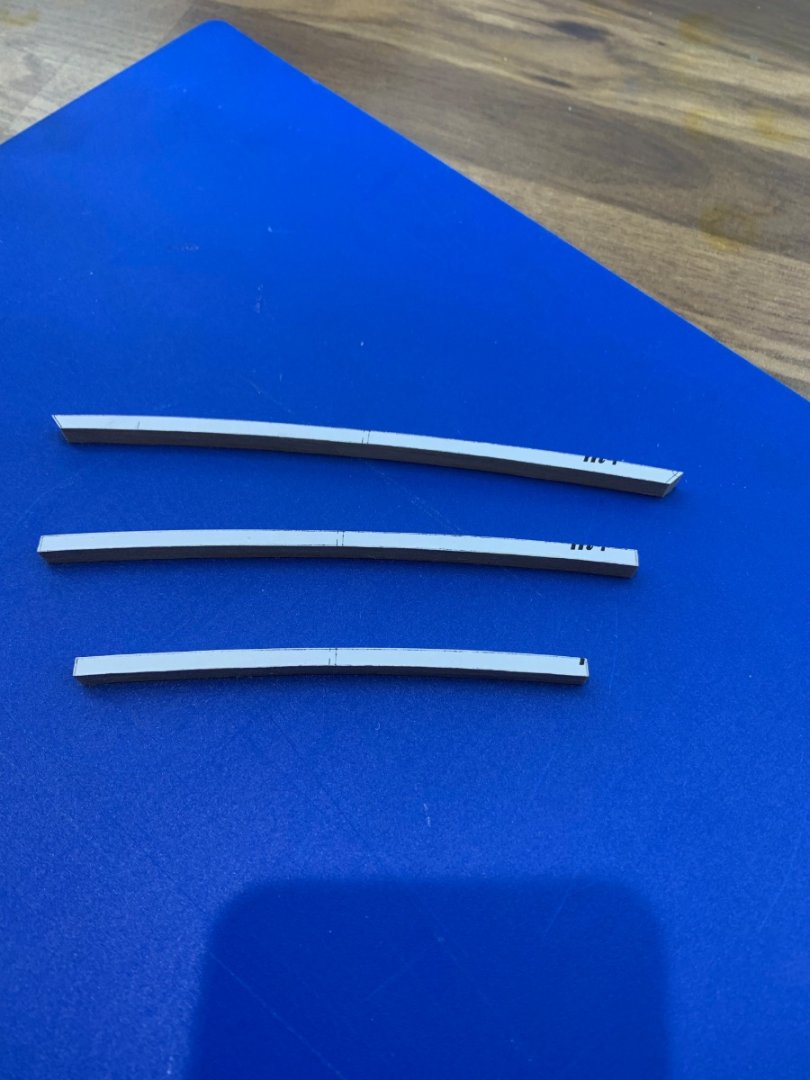
Just a quick update - I was asked quite a lot of questions about the last breast hook that I made and how I got it to fit. So here's my technique and I do this to save wasting time and wood. I use some very thin off cuts and glue the templates on. I then use these to get a pretty good fit as its quick and easy with little wood to remove compared to the actual breast hook. I hold them in place with a tiny drop of PVA glue to check my marking out of the positions and also the level comparative to each other. They come off very easily and these are now my templates for the actual hooks. A couple of pictures are better then a thousand words! I can now get on and make the actual things! Cheers Mark


-
Thanks chaps for the nice comments - I'm glad this part of the build is complete I did find it quite hard to do. I now understand why some builders only put the thick stuff on and leave it at that. Its a shame that most of it will be covered up by other decks but I know its there and done as best as I could. I'm starting the breast hooks tomorrow so hopefully have an update soon - thanks for all of the encouragement and likes as it does help get through the more difficult parts of the build 👍
-
Tony you will get there mate and if its any consolation I made most of my frames twice and the axial parts too. Some will think what a waste of wood but it's not. It's a learning process and experience that I'm sure we all go through and probably still are if we are honest. Keep going and trying your best 👍
-
Best Spindle Sander for Ship Modelling
No Idea replied to whaynes's topic in Modeling tools and Workshop Equipment
Christership welcome to the forum That is a very good looking piece of kit but a little too small for my needs. Thanks for sharing though as we need more of these tools in our hobby! -
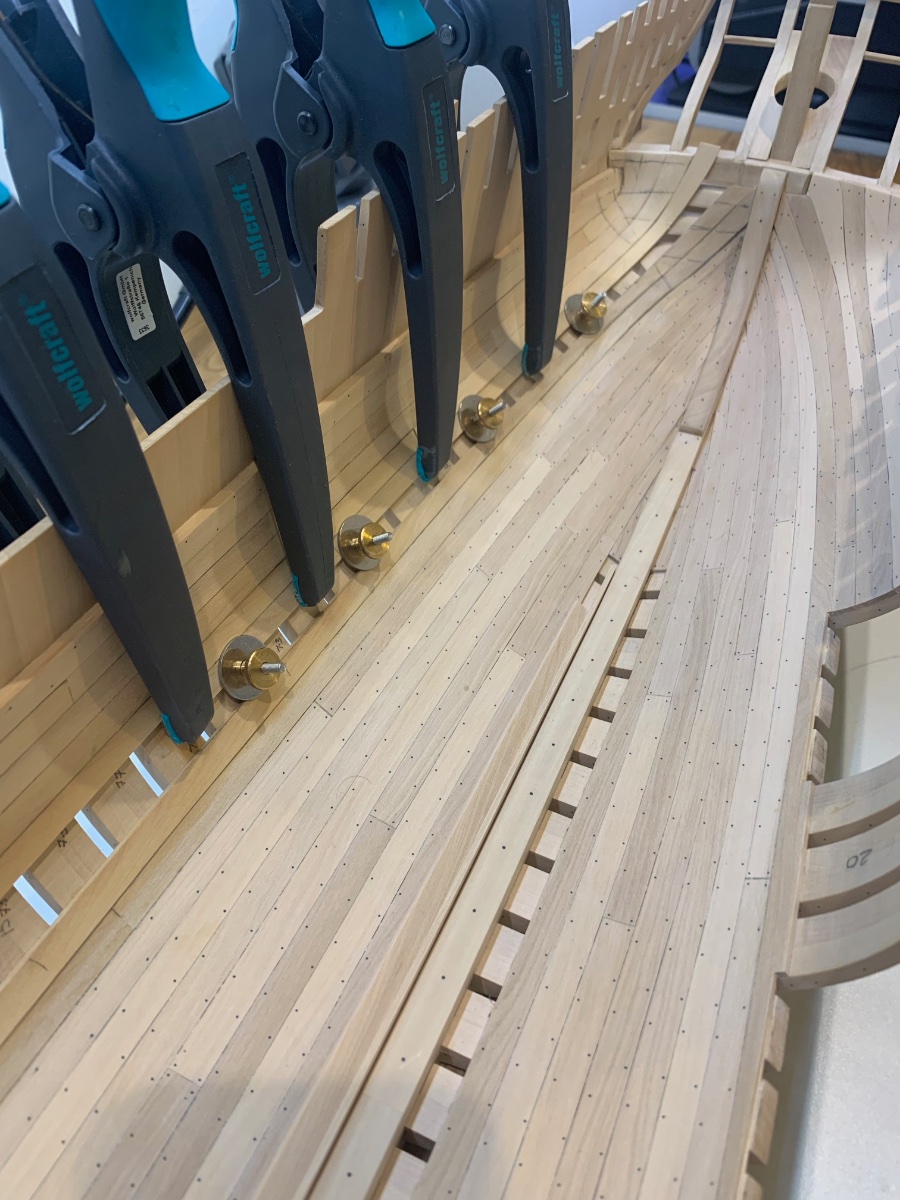
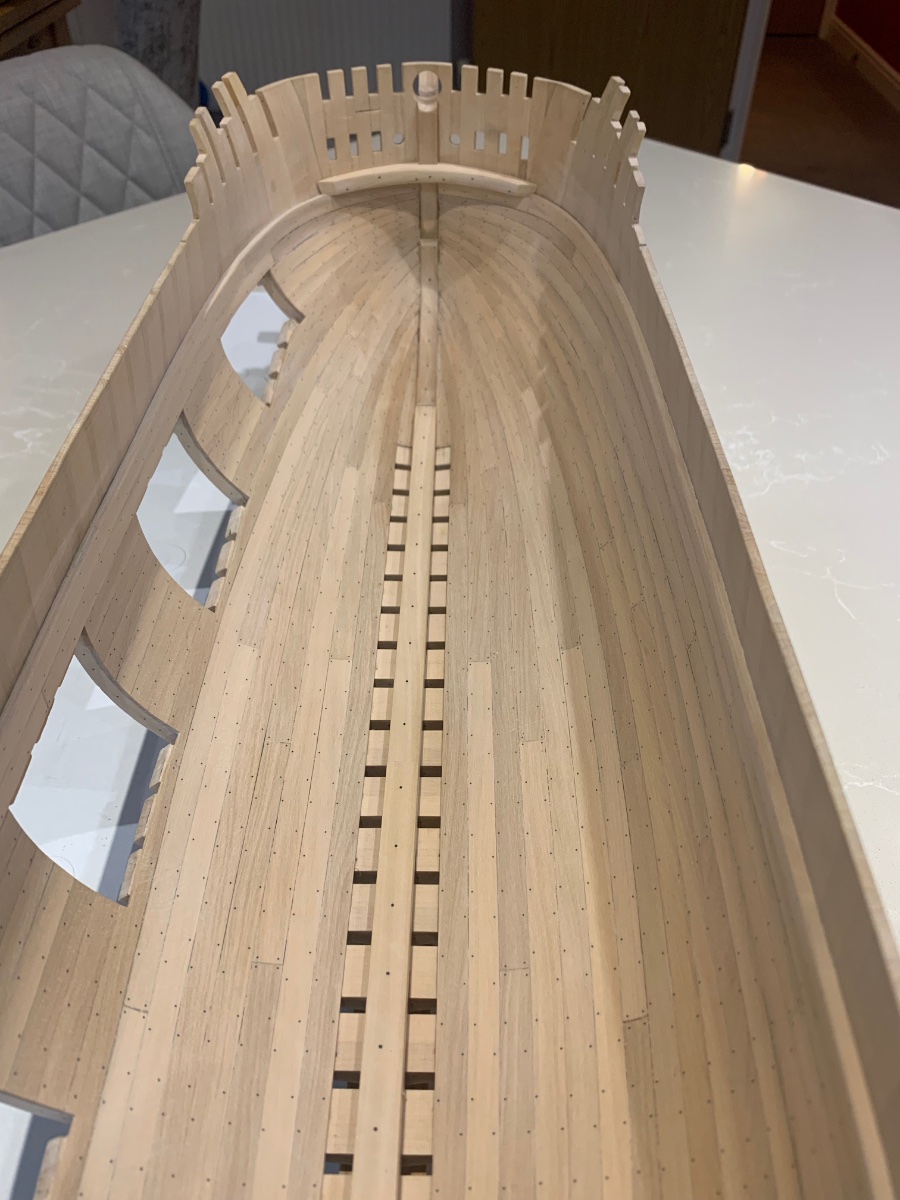
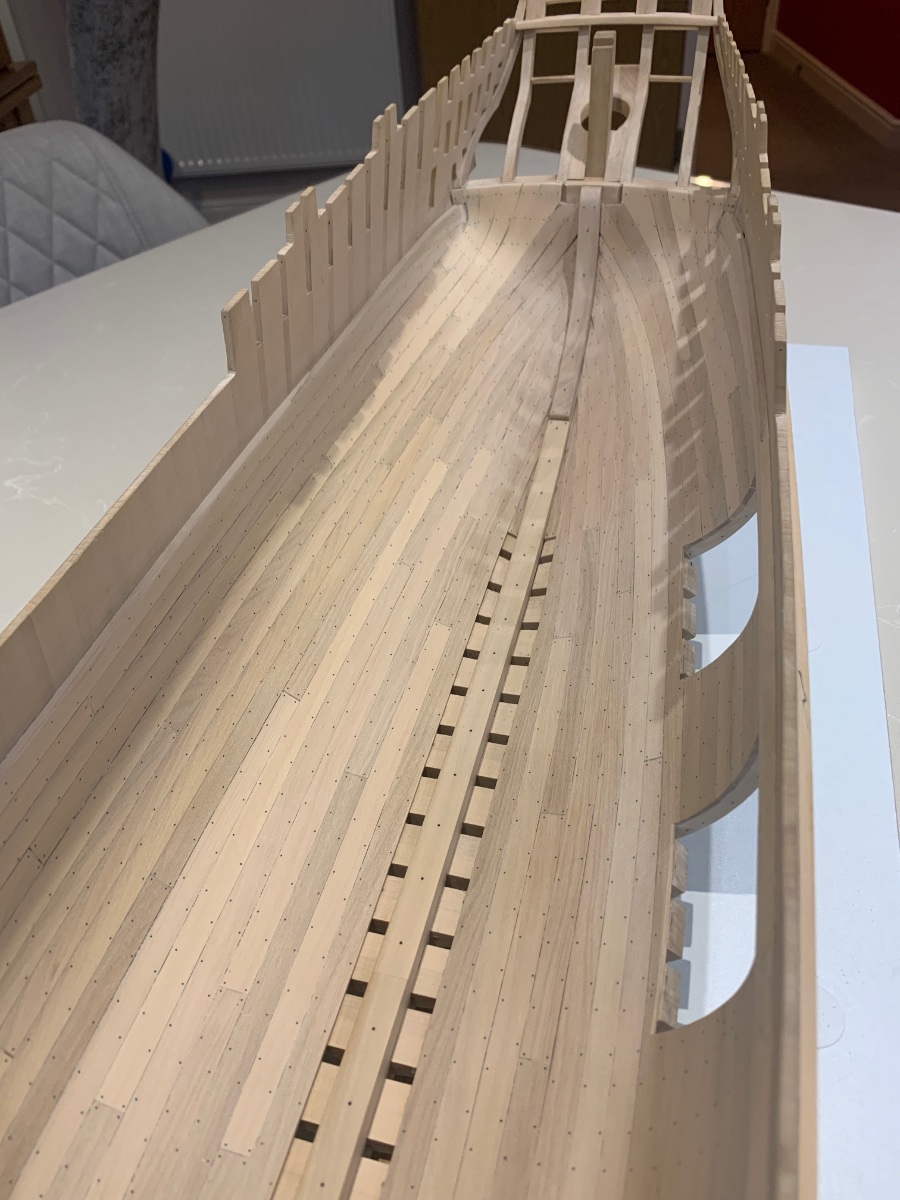
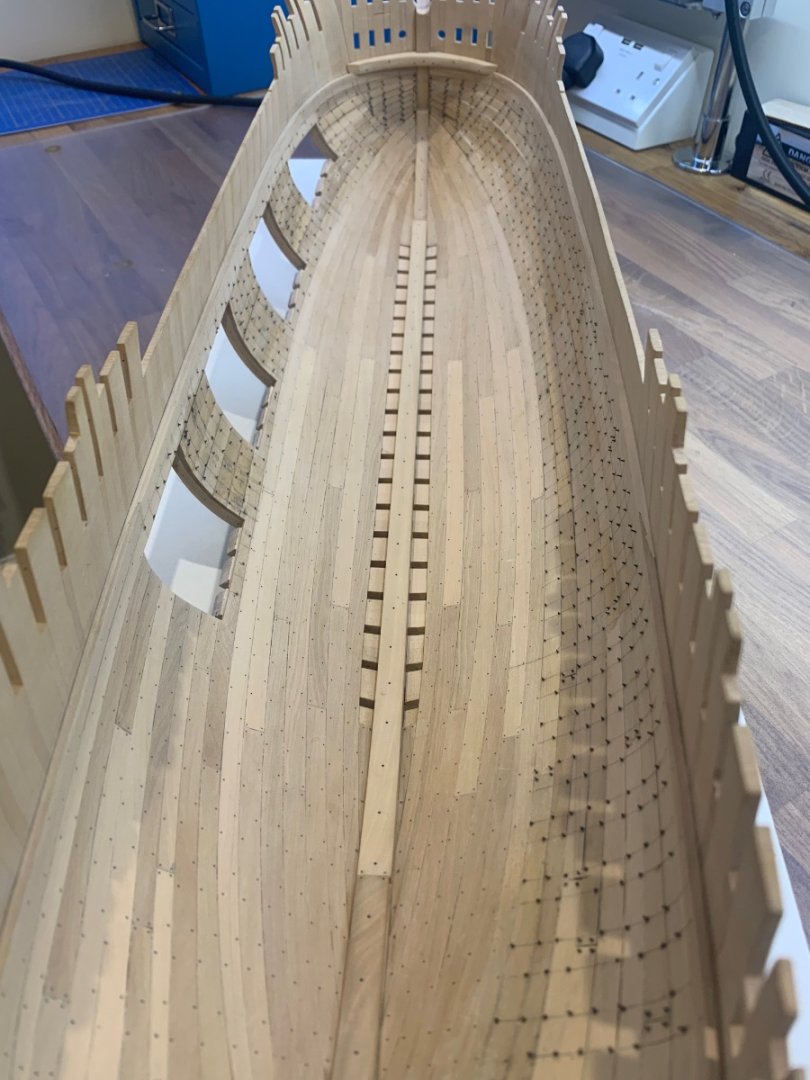
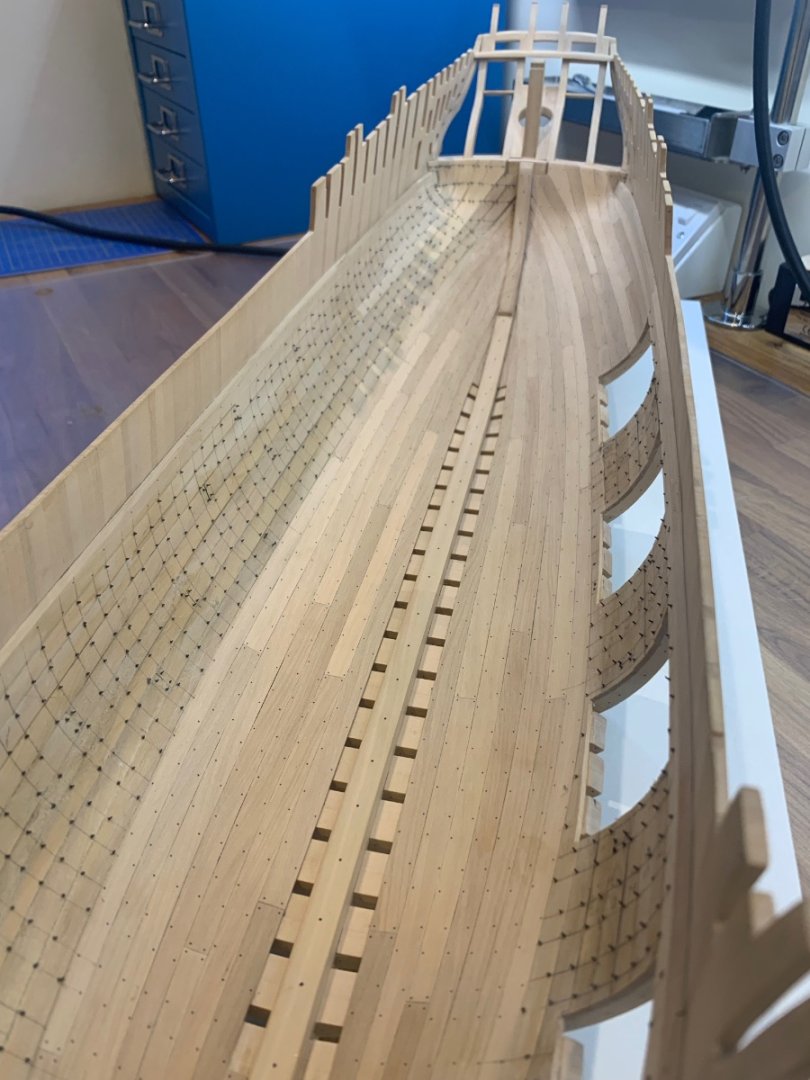
Hi All Thanks for the nice comments and Tobias what a great photo!! So I hope you have all had a nice Xmas and are looking forward to new year. Ok another update from me - I've been getting on to get the ceiling finished and at last I'm very glad to say that it is. A couple more pictures of the process Here's some pictures of it looking very rough and ready. All of the planks are on but without any sanding and also all of the nails are in place. Pictures of the final sanded finish - There are some gaps but overall I'm quite happy with the way its turned out. Its taken ages to do but but I'm finally there - I've learnt a lot about ceiling planking and I could definitely do better next time around. So next I'll be making the two other lower breast hooks and the stern sleepers. It'll be nice to actually make a part again Cheers Mark


-
Yea I do - Its a great way of filing gaps as I cannot make all of my joints perfect despite trying. I have found though that it's best to use the finest saw dust that can be made to make it seem a part of the build. So I actually make a deliberate stash of saw dust and then make it into a nice thick paste with PVA. It is however difficult to sand down as has been said before . So I apply it before the first sanding.
-
Swan-Class Sloop by Stuglo - FINISHED - 1:48
No Idea replied to stuglo's topic in - Build logs for subjects built 1751 - 1800
Thats really nice work mate -
Best Spindle Sander for Ship Modelling
No Idea replied to whaynes's topic in Modeling tools and Workshop Equipment
I’m waiting for Jim Byrnes to make one I’d buy it in a heartbeat 👍 -
Hi Tim and welcome to MSW mate - I live not to far from you and we often visit Hereford as its one of our favourite cities in the UK. Good luck with your choice of new build and if you start a build log you will get loads of helpful advice. Mark
-
I think the work you have done is beautiful - the spacers are just about right and I know this as I made mine far to big. I tend to use abrasives around a round dowel when sanding the spacers as it gives a small and controllable contact patch. I also agree with druxey rounding off is not an issue if you don't go free hand - good luck!
-
Planking improvement
No Idea replied to Picard's topic in Building, Framing, Planking and plating a ships hull and deck
Hi Picard - firstly I think your planking is actually pretty good and it just so happens you are comparing your efforts to a very experienced builder. So this may not be popular but many issues with planking including my own is time. Planking takes a lot of time to get right. It just cannot be rushed and takes a lot of planning and fitting - if a plank doesn't look right its probably not but often its easier just to glue it on. Keep going buddy - make mistakes just like everyone else including me as its a great learning curve. Incorrect bevels tend to lead to wide gaps between planks and incorrect tapers make the planks look crowded at the stem. This is just my thoughts - Cheers Mark -
Thanks very much all She's lovely and they grow up so fast. This is our 7th grandchild so Christmas is getting very expensive now!
-
Chris I think that most model ship builders are their own worst critics. Looking at your pictures your build looks very nice indeed and I wish you luck through to completion. I'll be following 👍
- 69 replies
-
- 8
-

-
- fly
- victory models
- (and 2 more)
-
La Palme by Tobias - 1:36 - POF
No Idea replied to Tobias's topic in - Build logs for subjects built 1501 - 1750
Hi Tobias - nice work mate. I see that the stem is now full of planks but you still have a few to install. How are you going to get all of the planks running to the stem? Are you going to trim the one's installed or taper the outstanding ones into the clamp? -
I have to agree that is really lovely delicate work - I would be very happy with that if that was my work. Keep the updates coming!
-
Hi both - This is one of those things that I'll need to decide nearer the time as it's so far away. Thank you for your very kind words I'm hoping to get the ceiling finished in the next 2 weeks. Our Granddaughter (She's 10 weeks old and beautiful ) has been taking up much our spare time but what a great way to spend it
-
Tilting mount for Proxxon Vise for MF70
No Idea replied to ChrisLBren's topic in Modeling tools and Workshop Equipment
Here you go Mike https://www.renishaw.com/shop/Product.aspx?Product=R-PCA-135075-12-6 -
Hi clogger - wow mate your build looks amazing 🤩. Fantastic job and I hope my finished ship looks a good as yours. I should have said that I never intended to rig my ship purely down to its size. Yours is the first Le Rochefort that I’ve seen rigged as such and it really finishes it beautifully. Maybe I’ll change my mind if I can find a place big enough to keep it. Thanks for sharing your picture 👍
-
Keel klamper alternative
No Idea replied to zamboknee's topic in Modeling tools and Workshop Equipment
I'm with you on this Roger - I do have a panavice but my ship never goes into it. I prefer to have it on my lap or in a fixed cradle which is made up of scrap timber.