No Idea
-
Posts
1,036 -
Joined
-
Last visited
Content Type
Profiles
Forums
Gallery
Events
Everything posted by No Idea
-
 The honesty in your build Kevin is really inspiring mate - thanks for sharing such a fantastic build 👍 I could see in your video just how disappointed you were but you bounced back and got it all back on track. That takes real determination which I can only admire.
 -
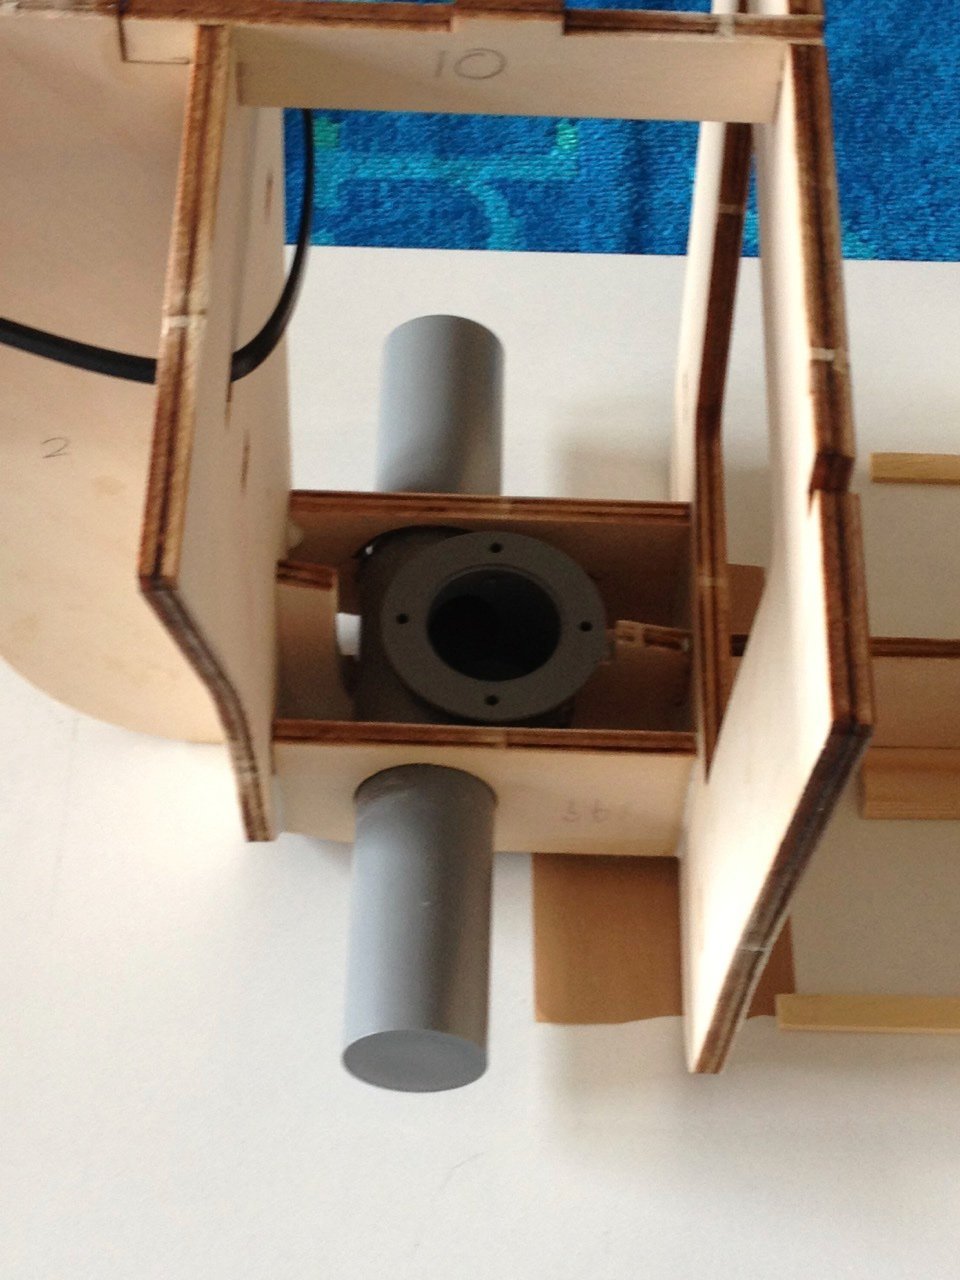
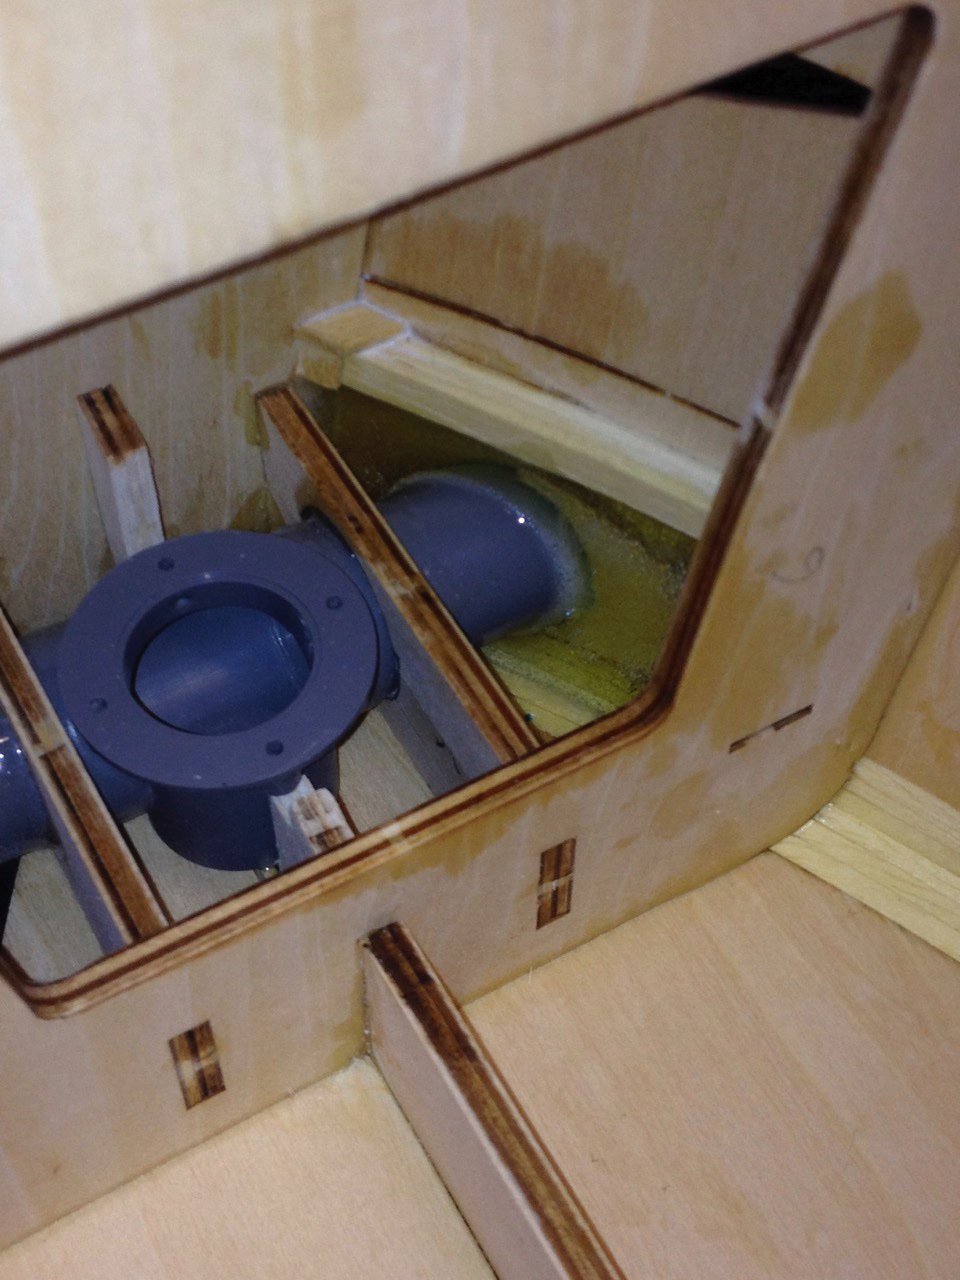
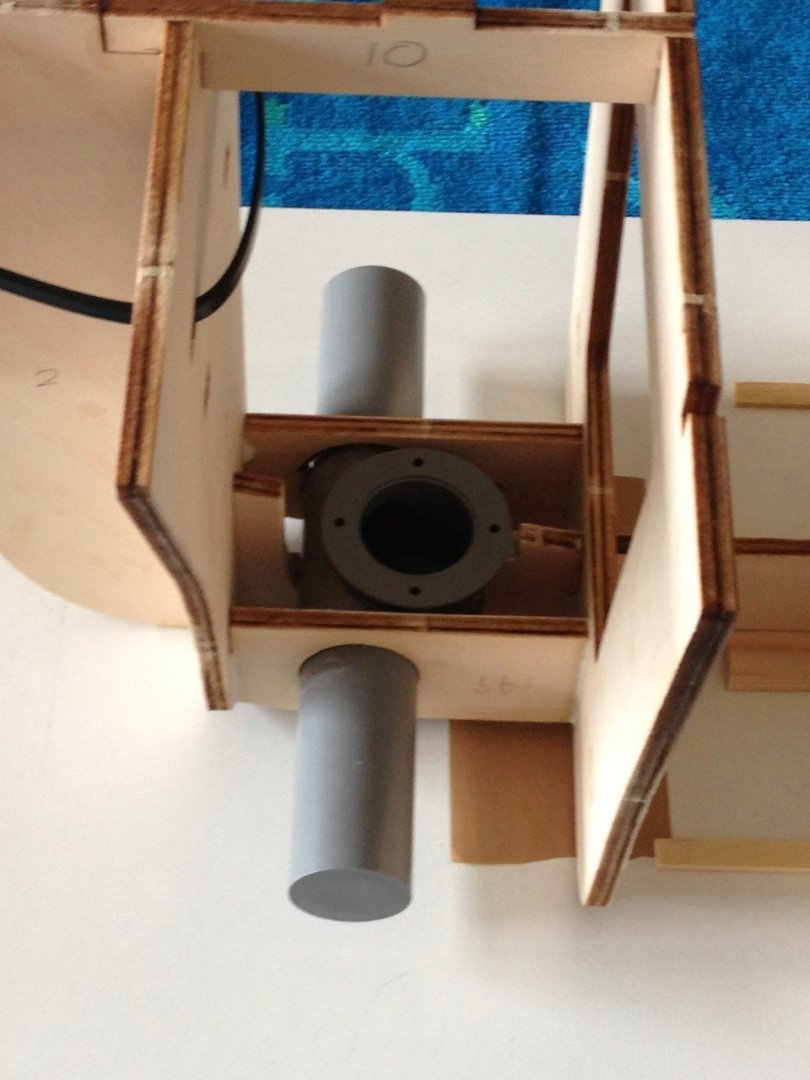
Kurts advice is absolutely spot on. Just remove as much material as you need and fit the thruster. What a lot of builders do is then make a false very low bulkhead and then back fill the entire void with epoxy resin. Here's a couple of pictures of the thruster that I fitted in a Fairmount Alpine which didn't need that much backfilling but I could of completely filled the space if I wanted too. I hope that this helps.

-
Give these people a ring and they will tell you exactly what you need https://www.cornwallmodelboats.co.uk/acatalog/bow_thrusters.html
- 1 reply
-
- 3
-

-

-
I bought the set of 4 vices and found them to be very well made. In the UK they cost about £80 which I guess is about $110? Starrett tools over here are more expensive than in the USA. The smallest vice will hold a micro drill and the largest one will hold a 4mm drill. I’m glad I bought mine.
-
Same here they really are worth the money 👍
-
Fiberglass a boat Hull
No Idea replied to Riotvan88's topic in Building, Framing, Planking and plating a ships hull and deck
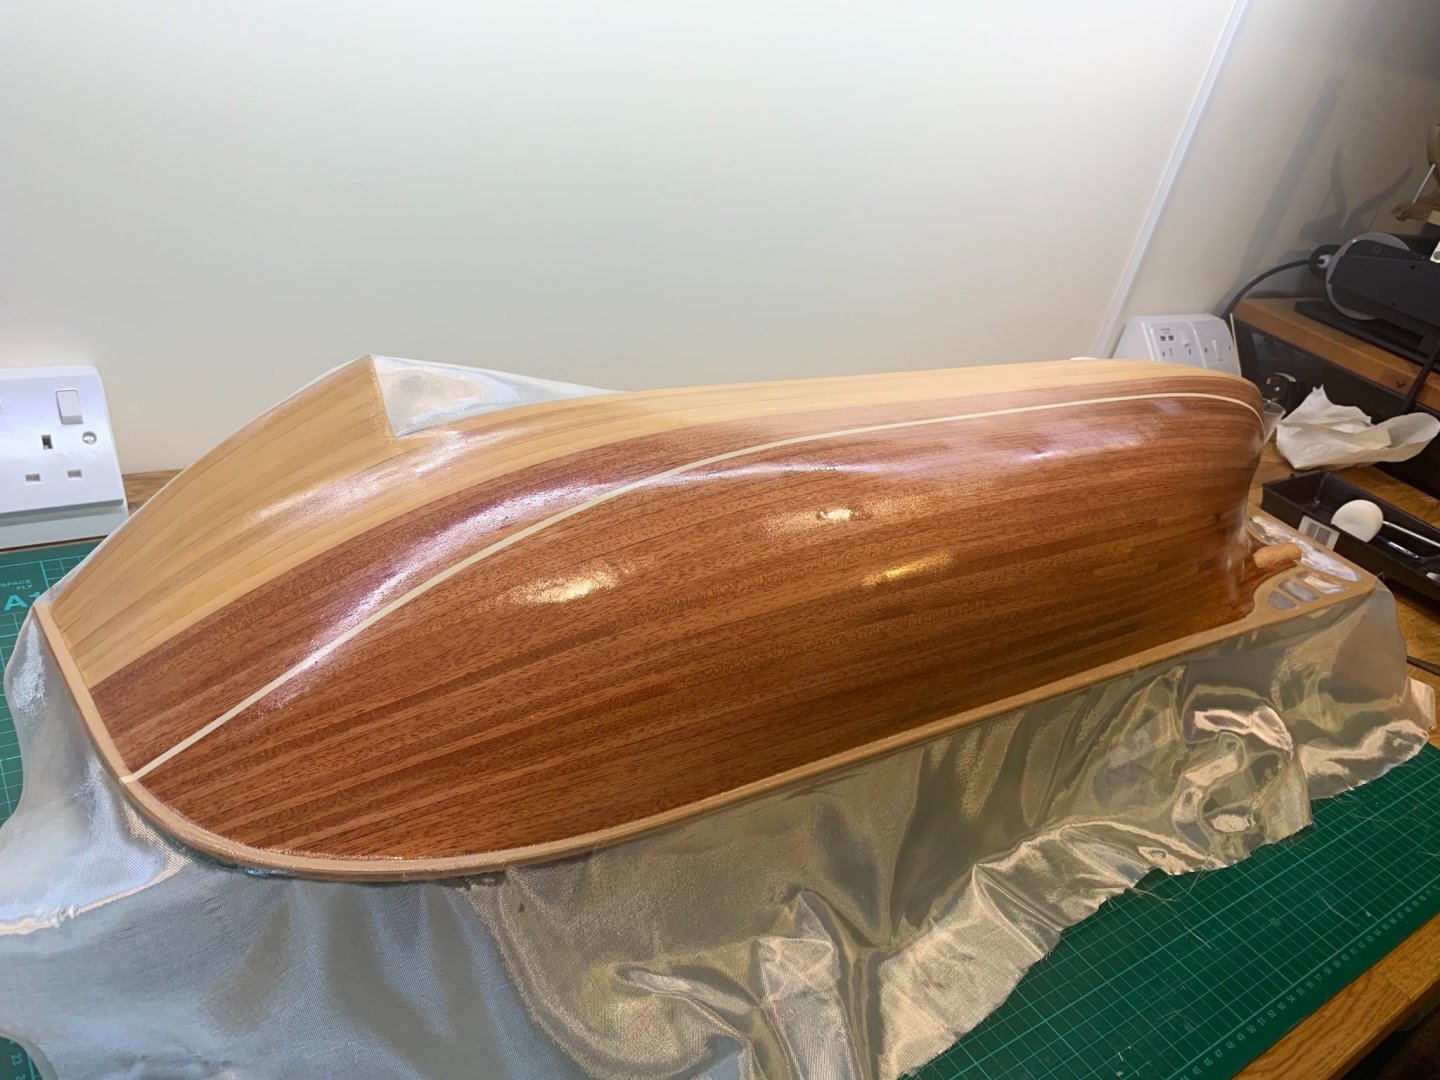
I would recommend using 49g fibreglass cloth and a good non blooming epoxy finishing resin. You will need to apply 2 coats of the resin and then spend time sanding it flat. The cloth will take just about any shape and it’s an easier process to do rather than explain. It will give you a glass like base for your paint. Here’s one I made earlier using exactly this process.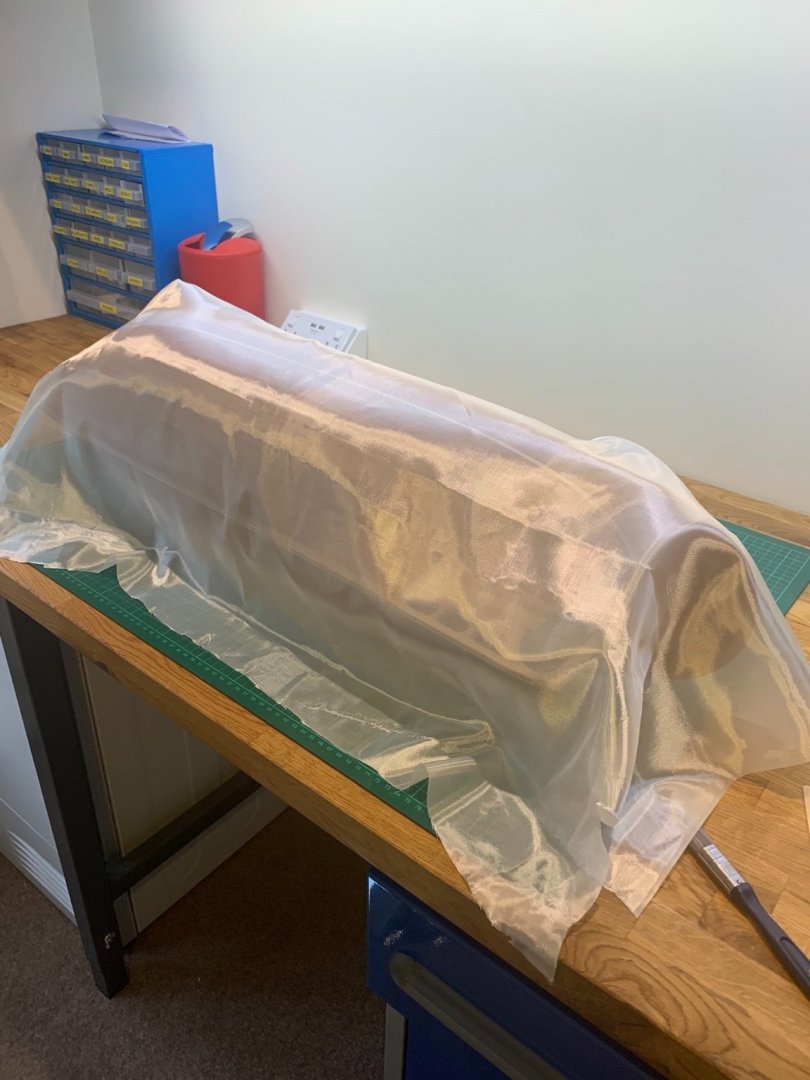
-
Thanks druxey 👍. Leaving parts fuller is one of those things that I need to get a feel for. I never really expected this ship to turn out perfectly as it’s my first pof build. I’m learning with each piece I make. Loads to learn but I am enjoying the process 😀
-
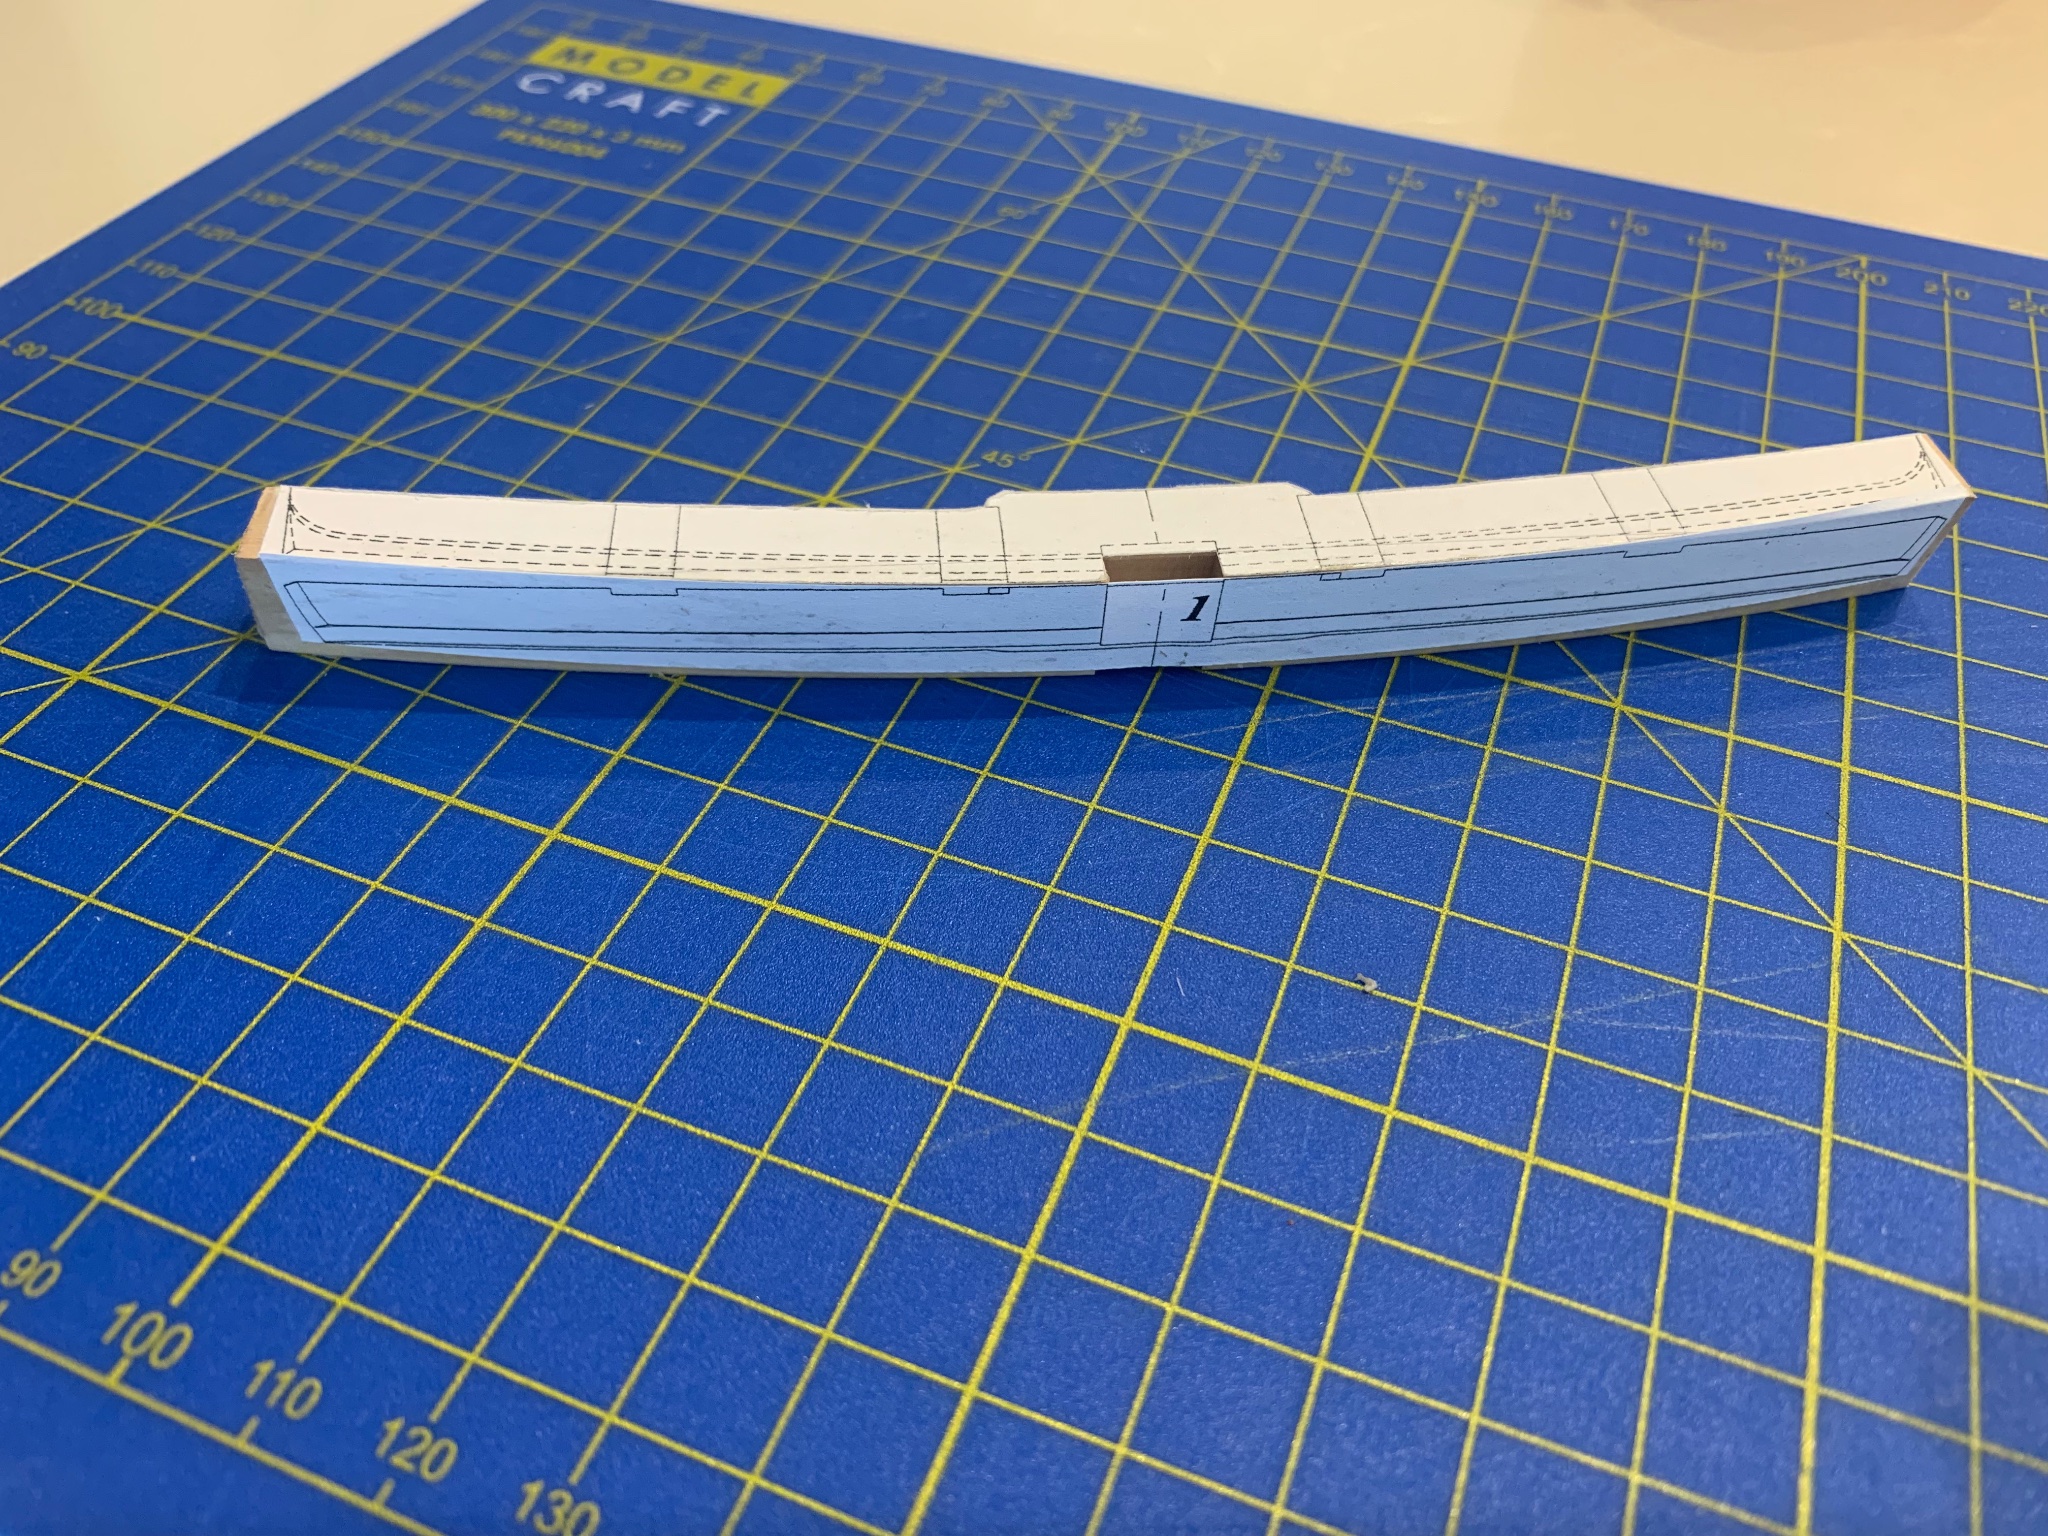
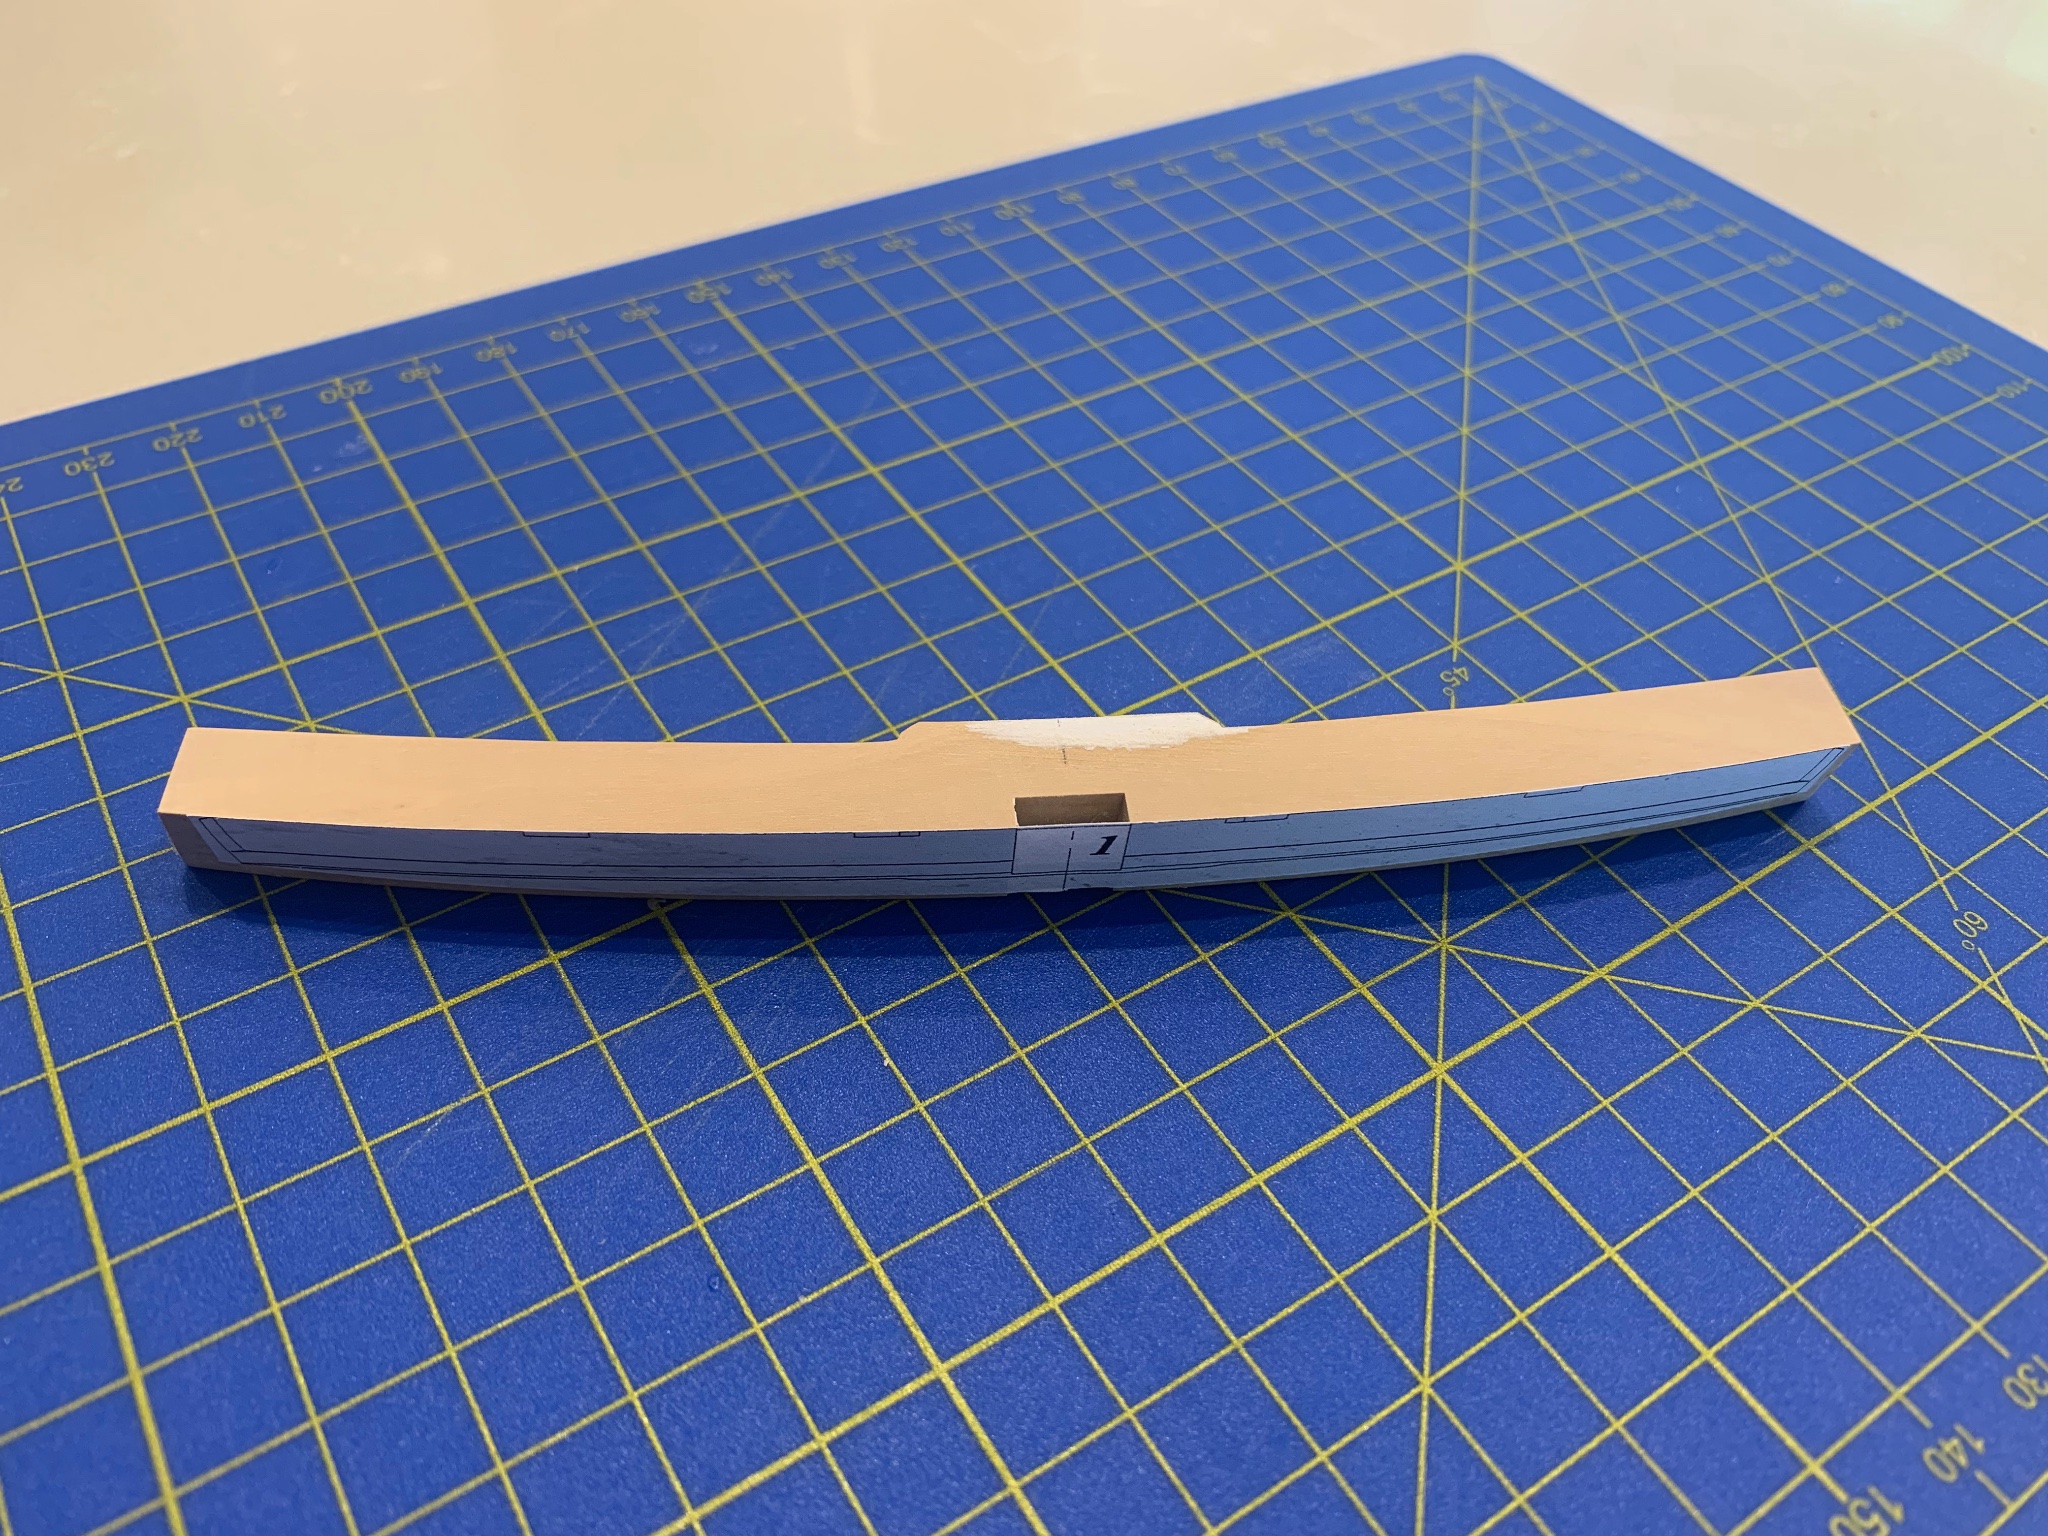
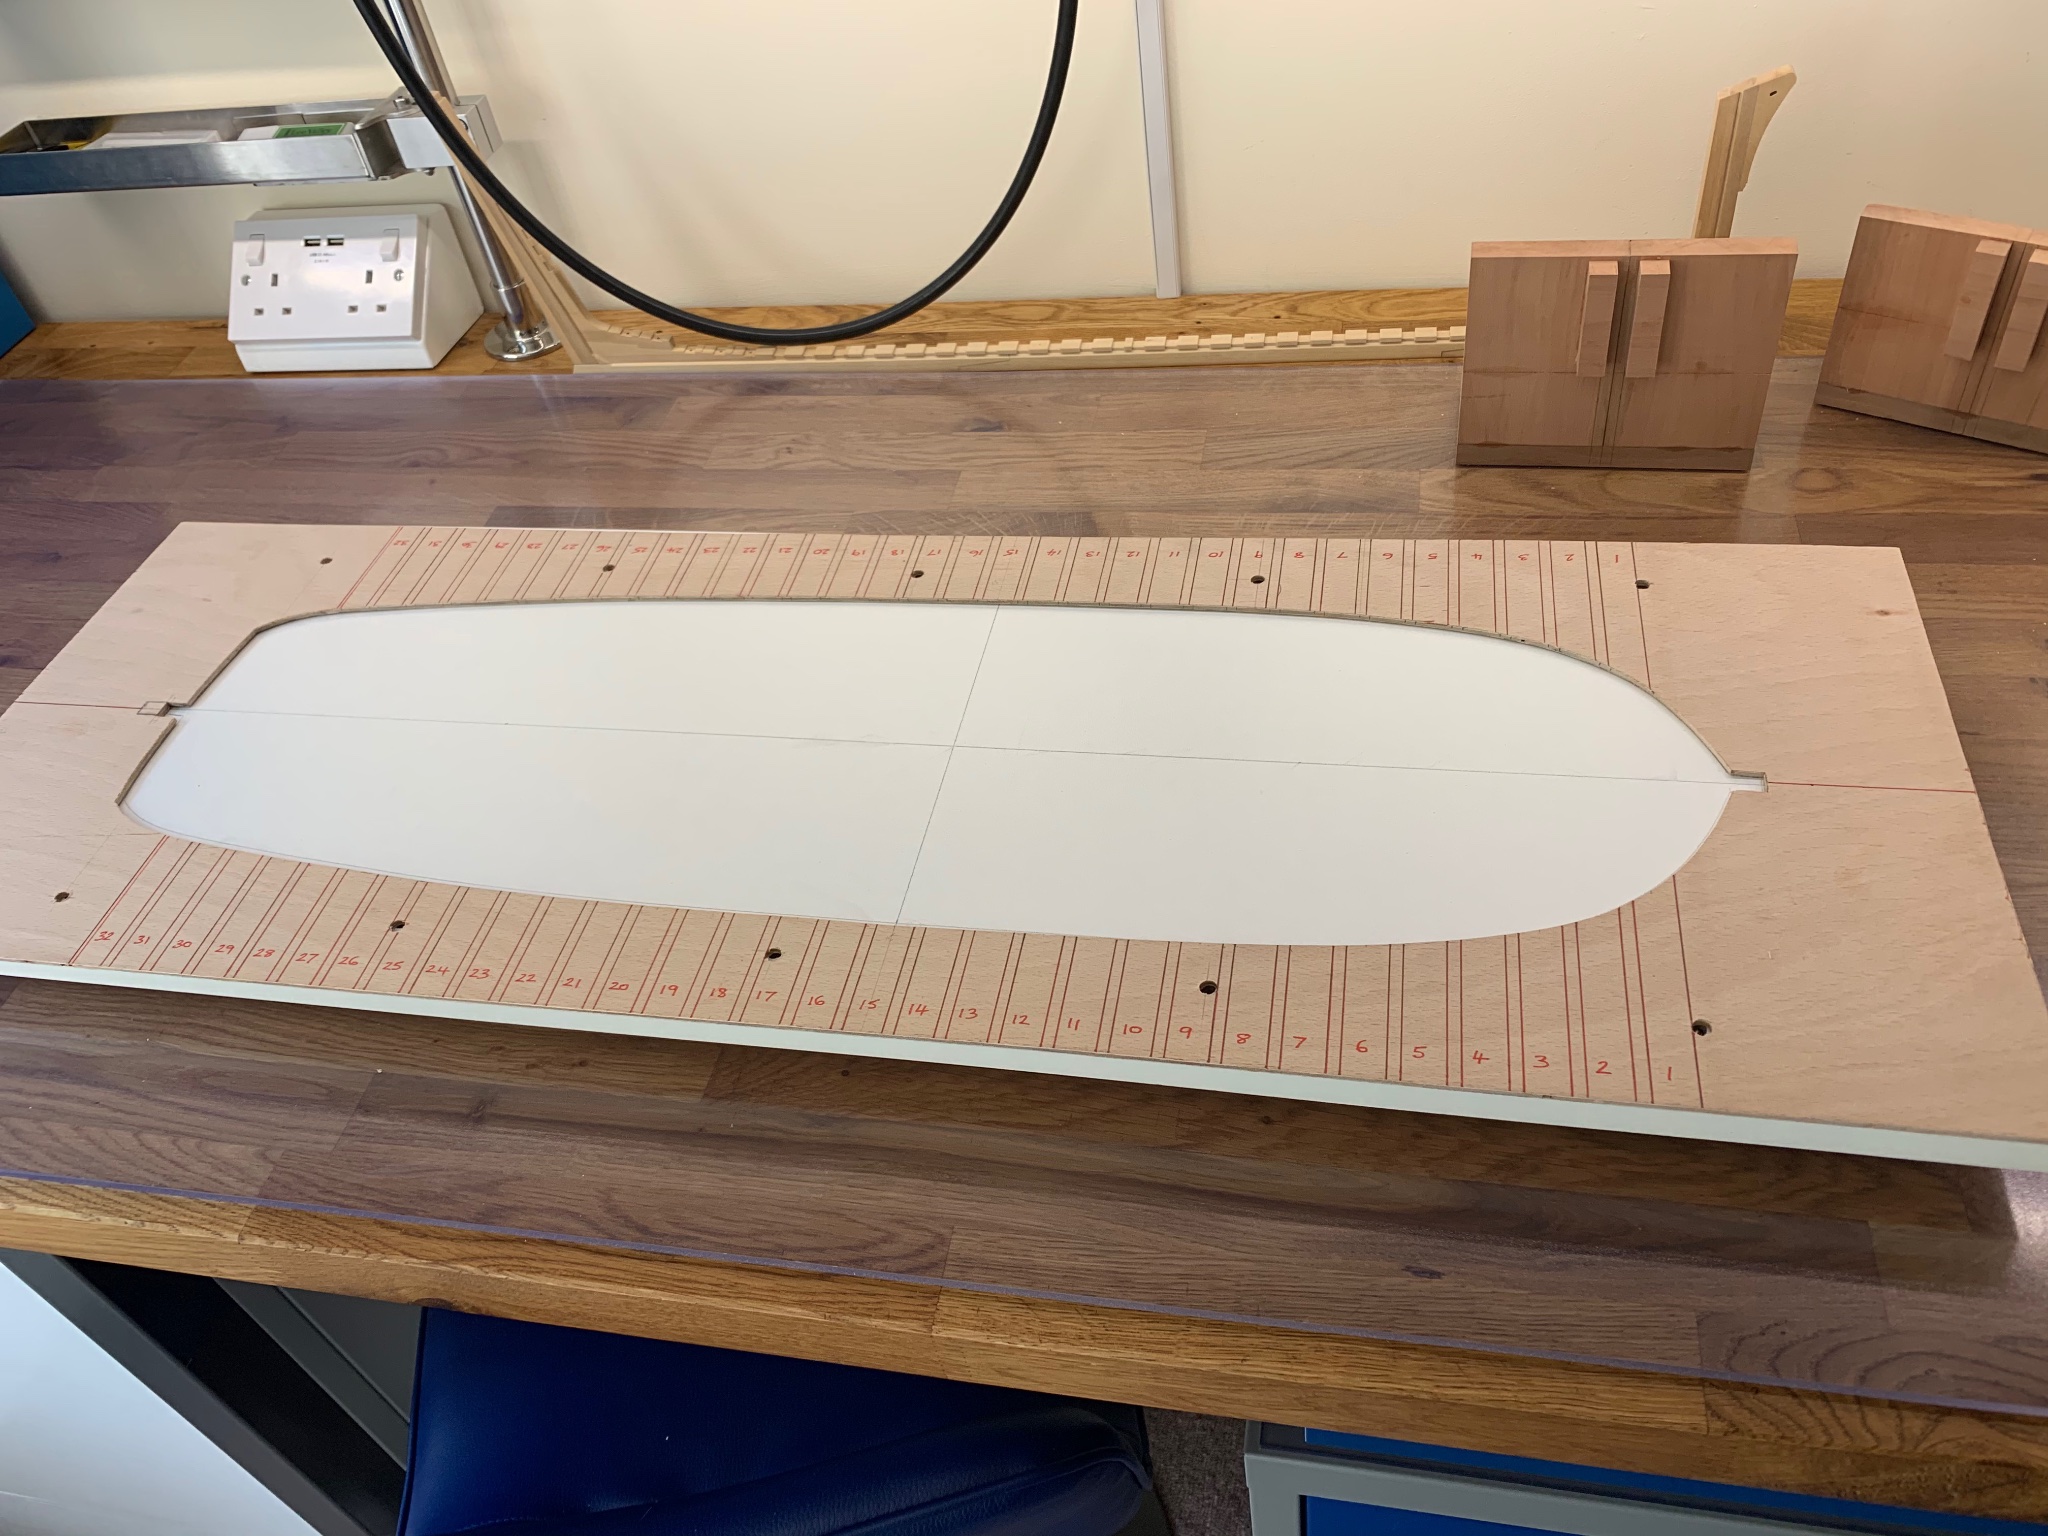
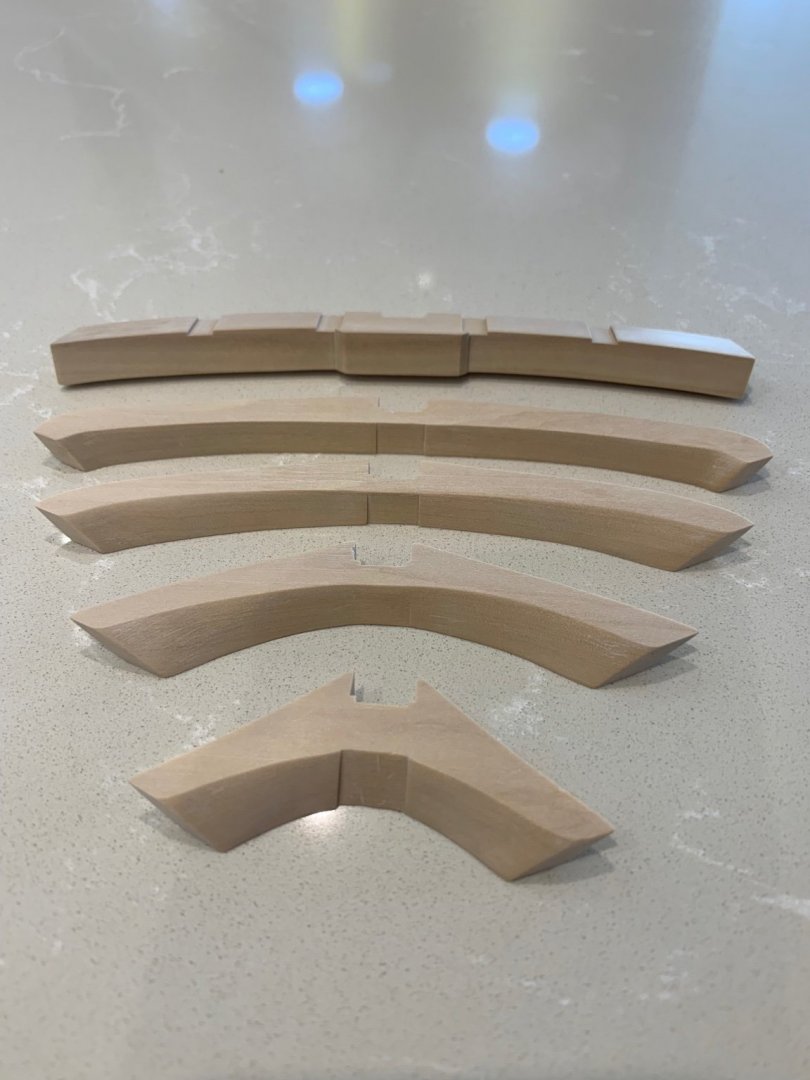
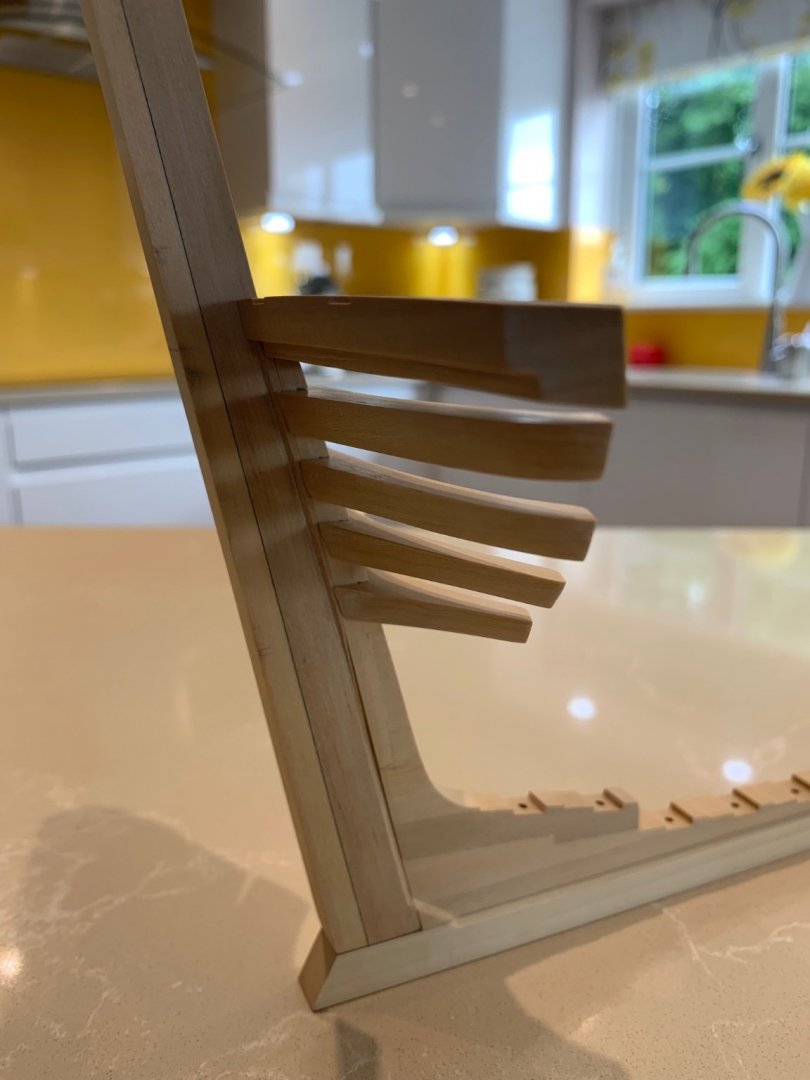
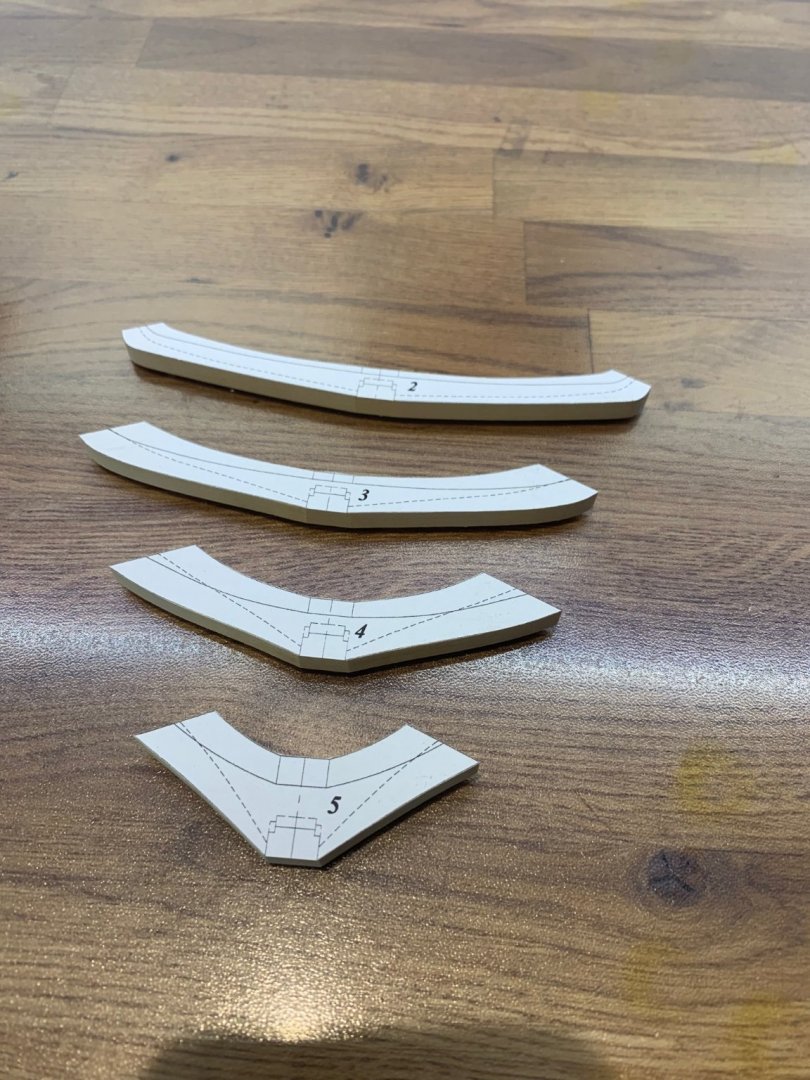
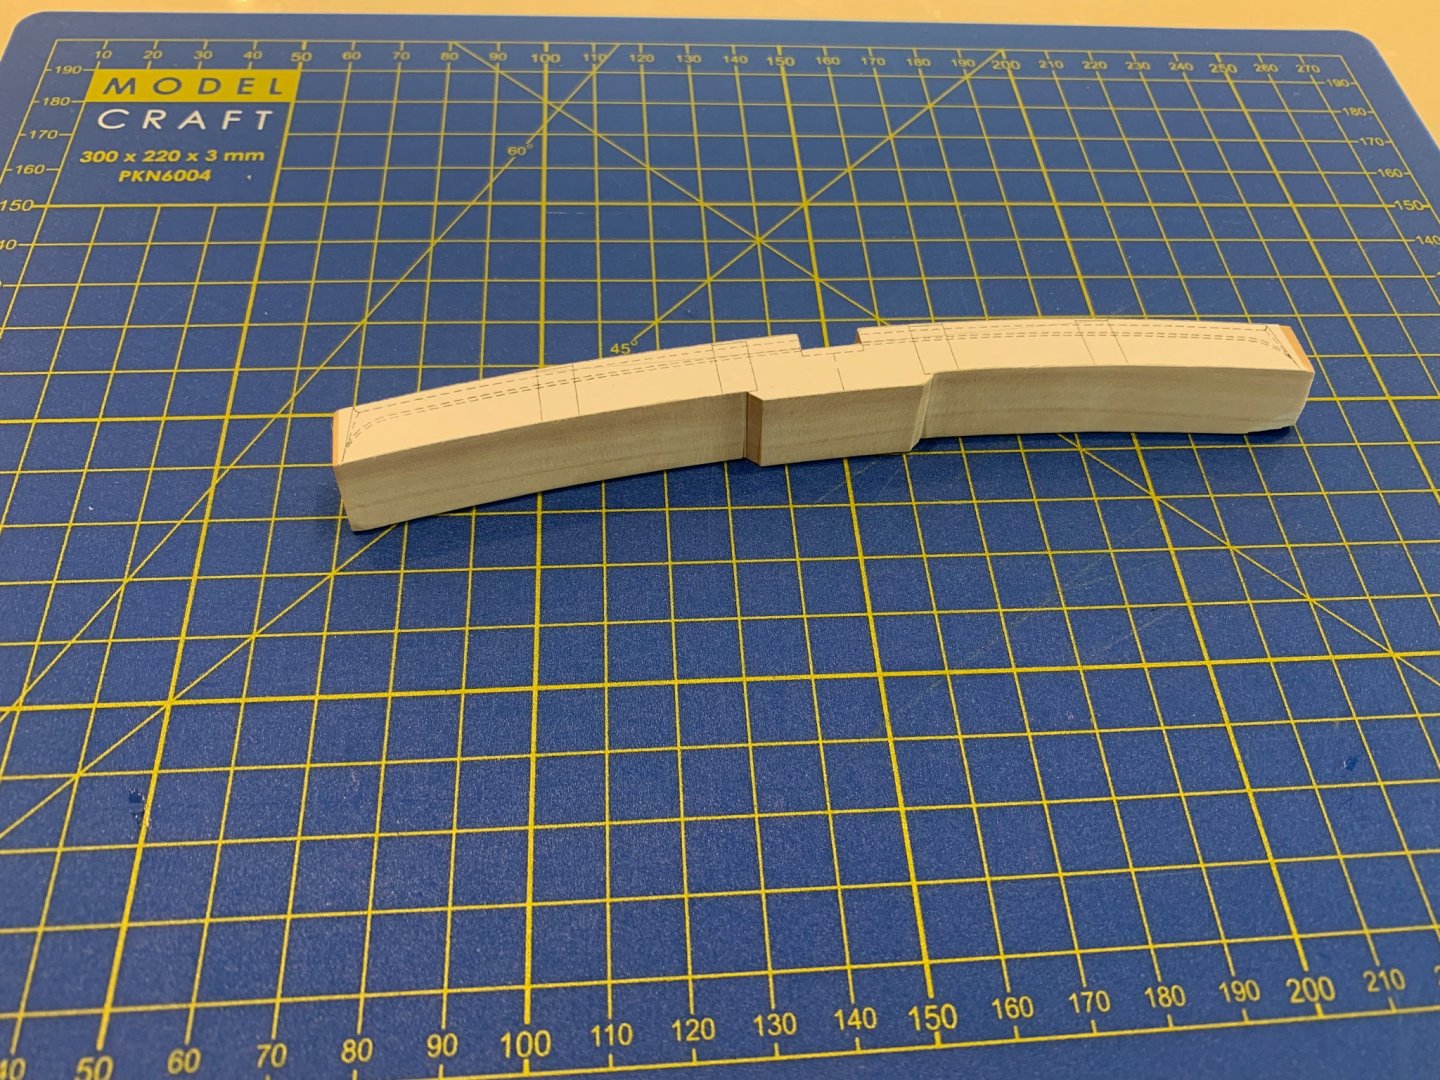
Hi All I got a bit more done this weekend and have now finished shaping the transom pieces. I think the advice that Adrian Sorolla gives in his excellent book is spot on with these parts. He recommends just taking your time and getting them right and I agree with this. I'm hoping that they are as they should be but I guess I'll find out when I make the fashion pieces which is my next task. They look particularly tricky but I'll give it my best shot. A few pictures of the progress below Cheers Mark

-
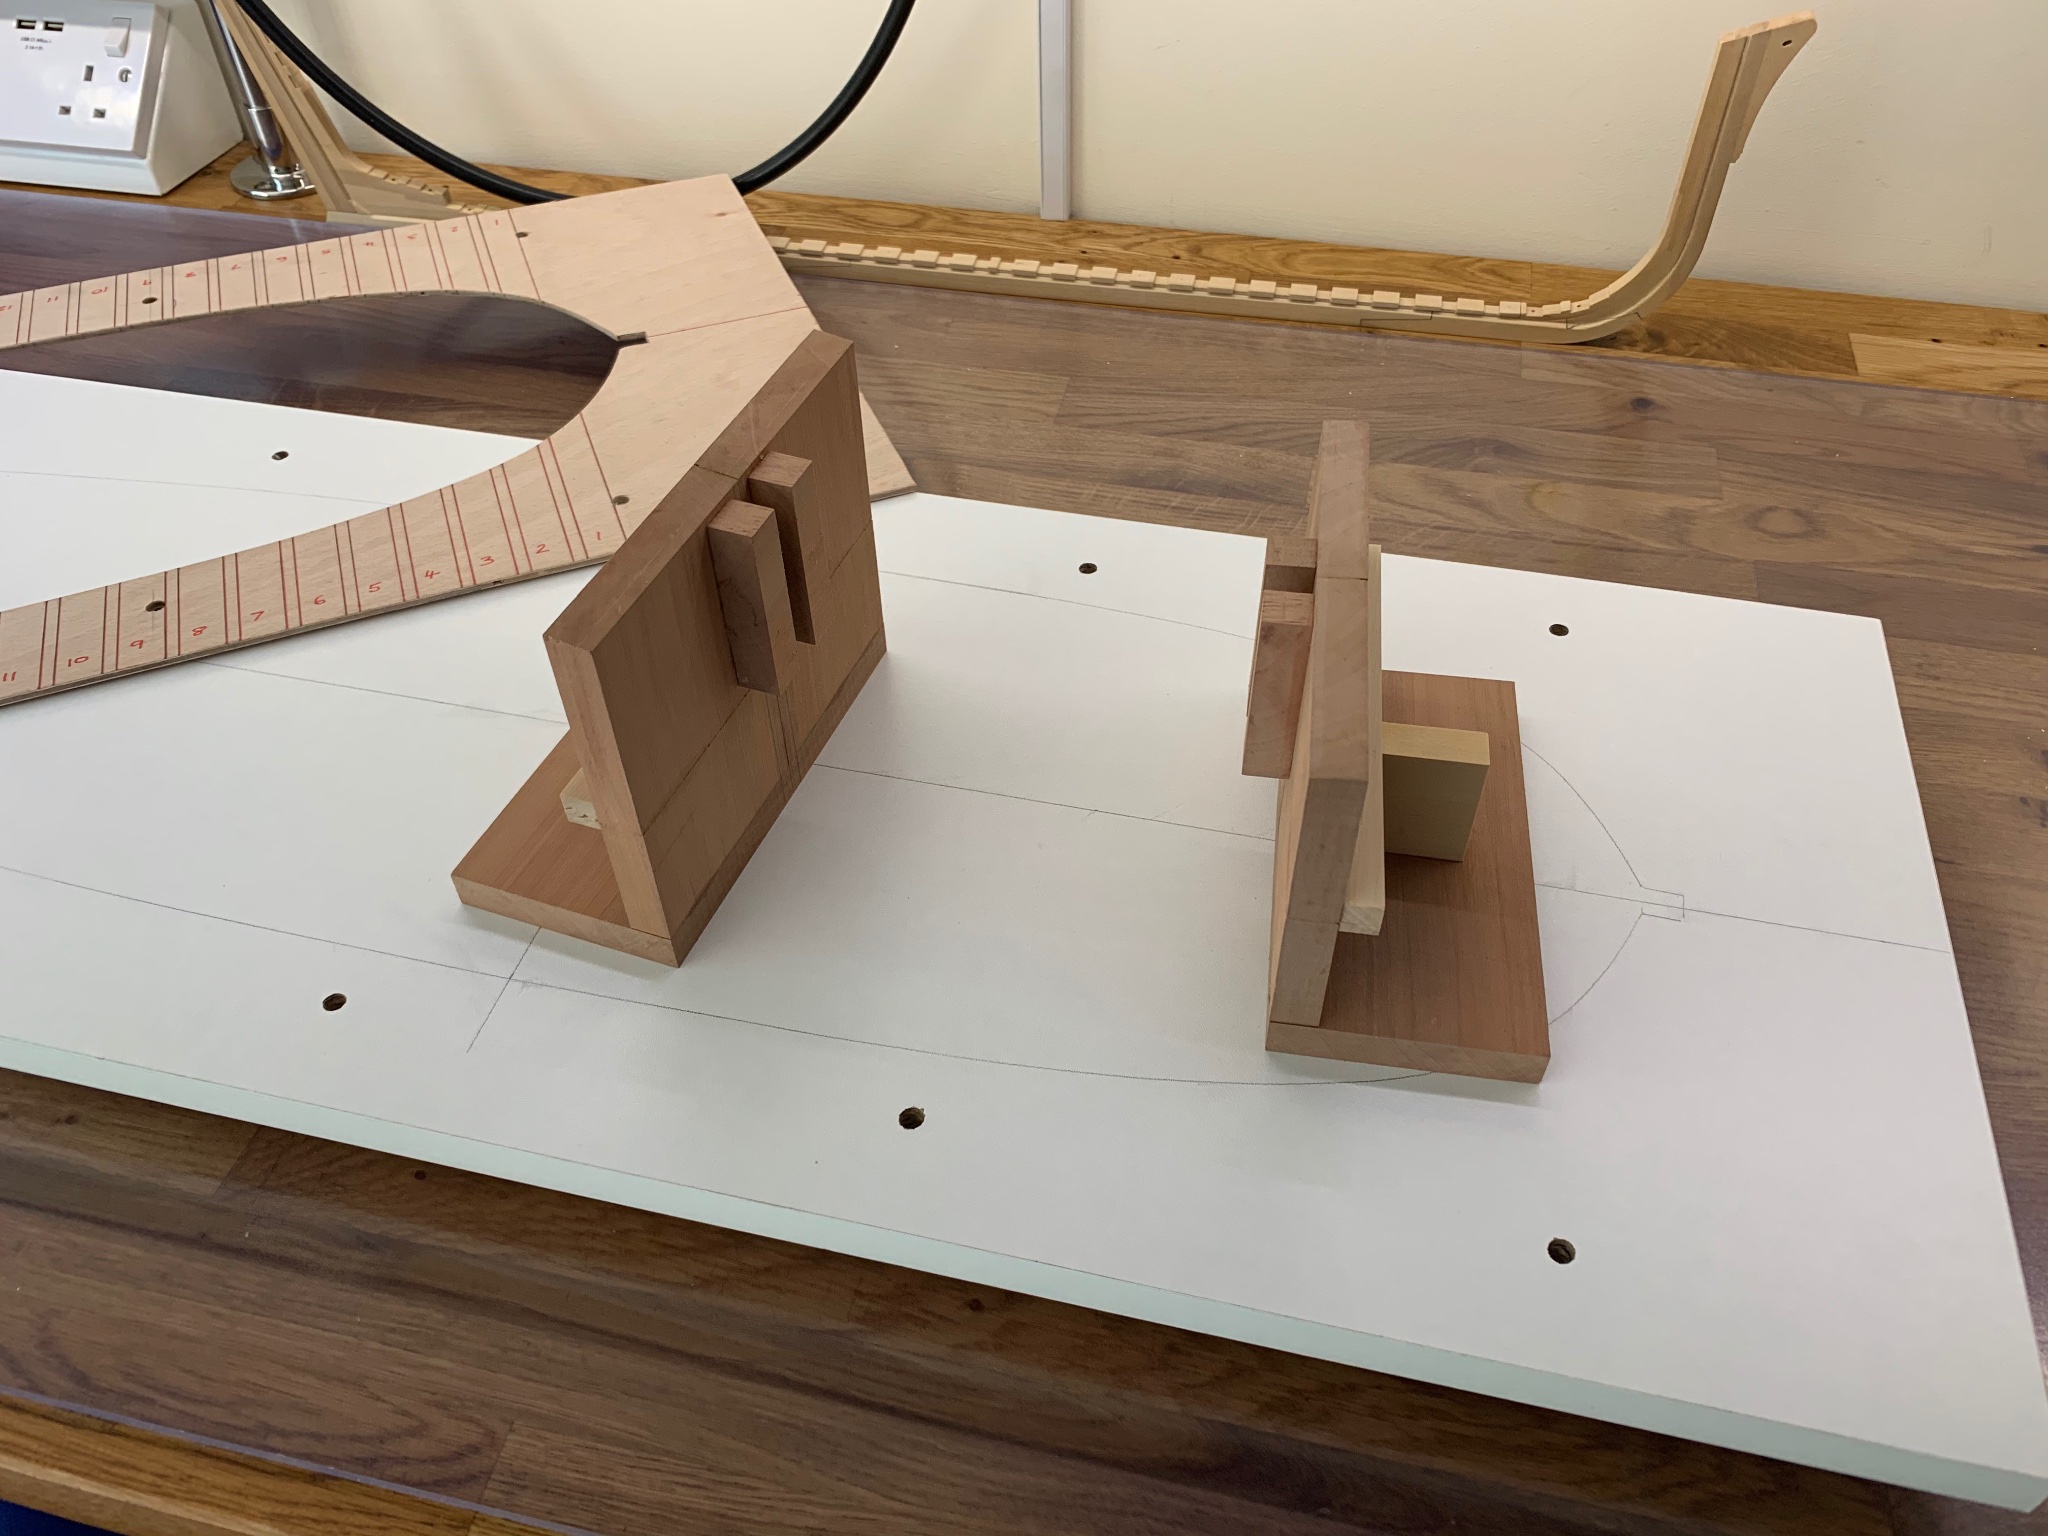
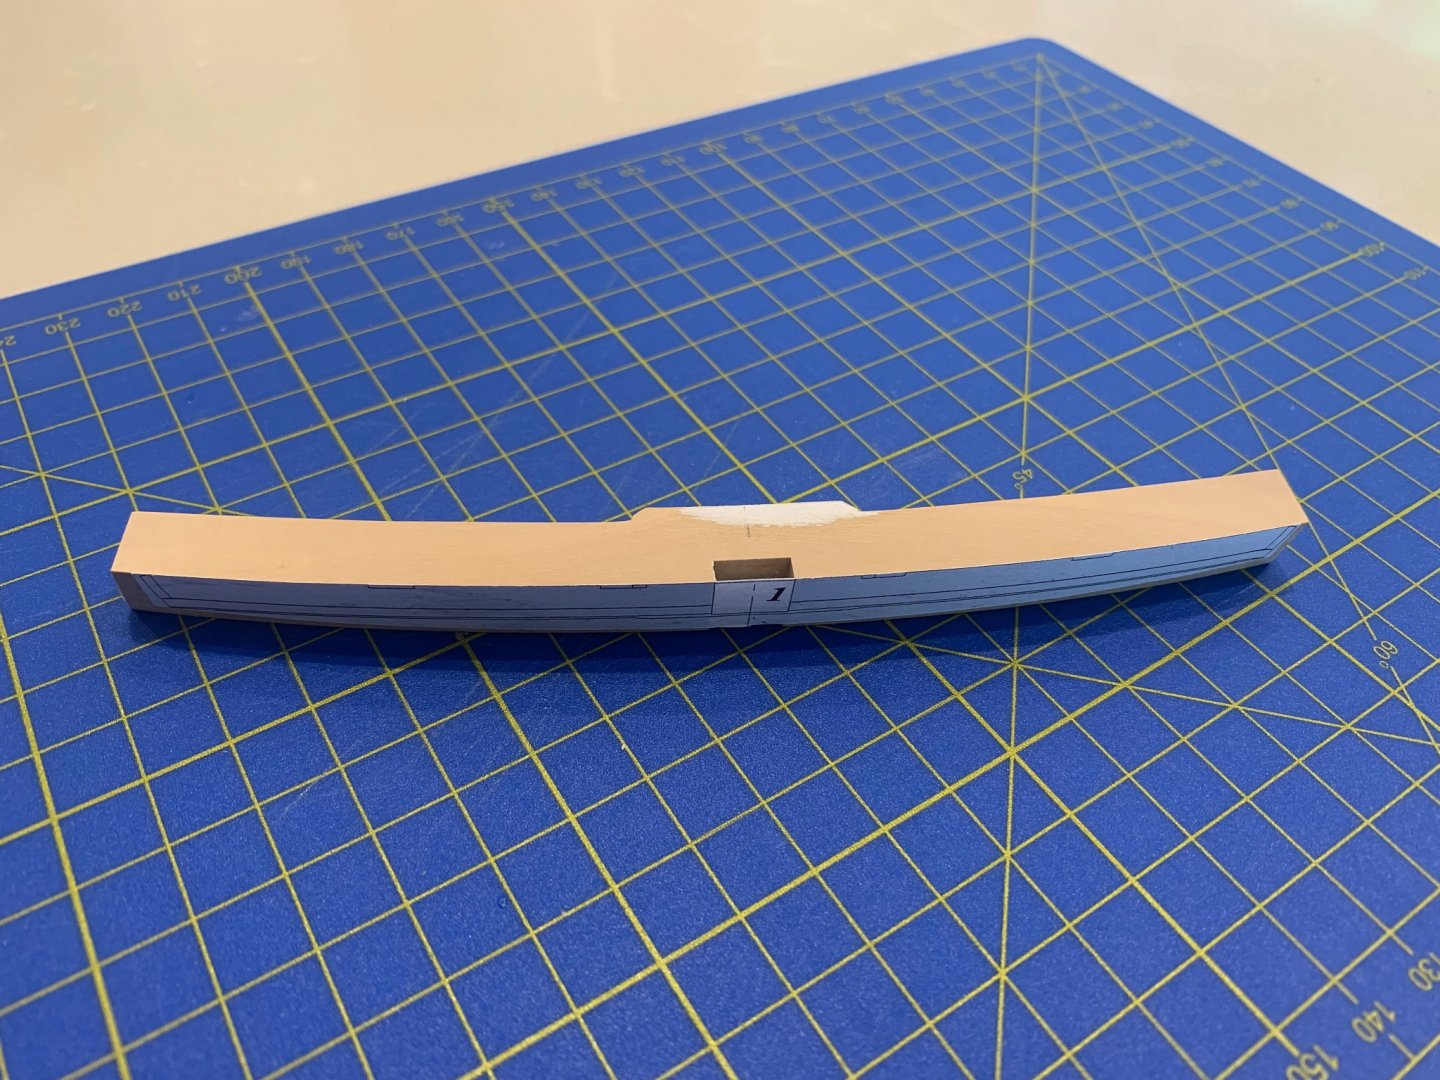
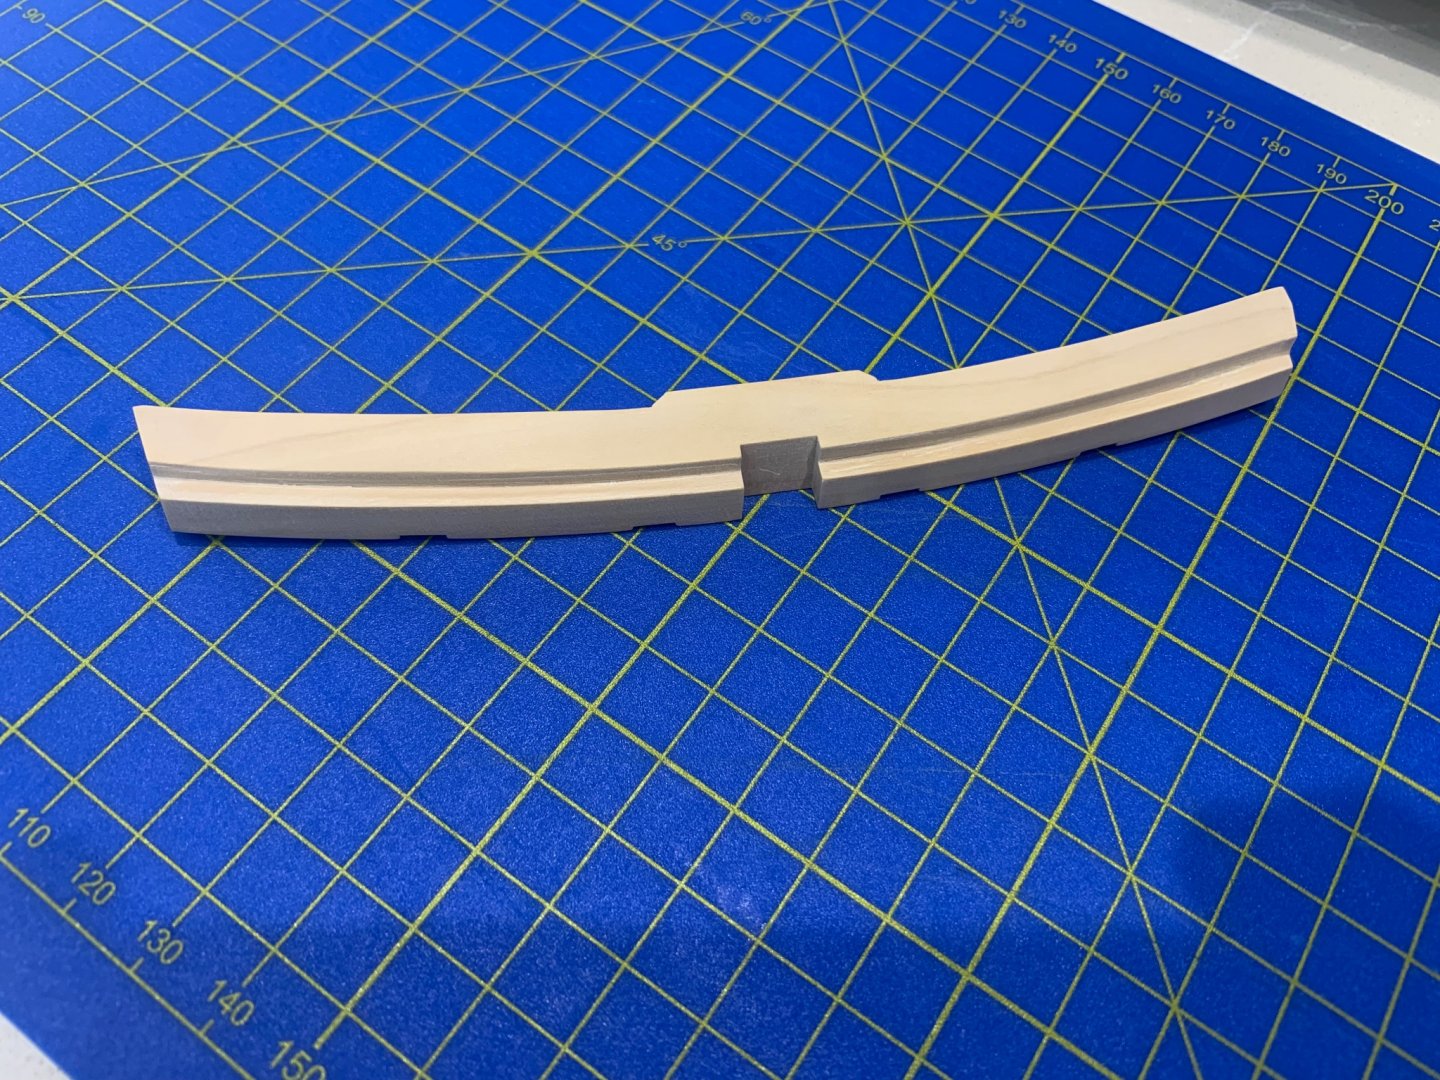
If only it was clogger but we try our best 😄 I've now finished milling out the rebates and then did the same on the other side of the transom pieces where the sternson joins onto them. I've also bevelled my first piece which seems to have come out ok. I found that the bevelling was quite a difficult task to do and took a lot longer than I thought it would. I'll have a go at the three remaining parts next weekend and I'll see how they go. Mark


-
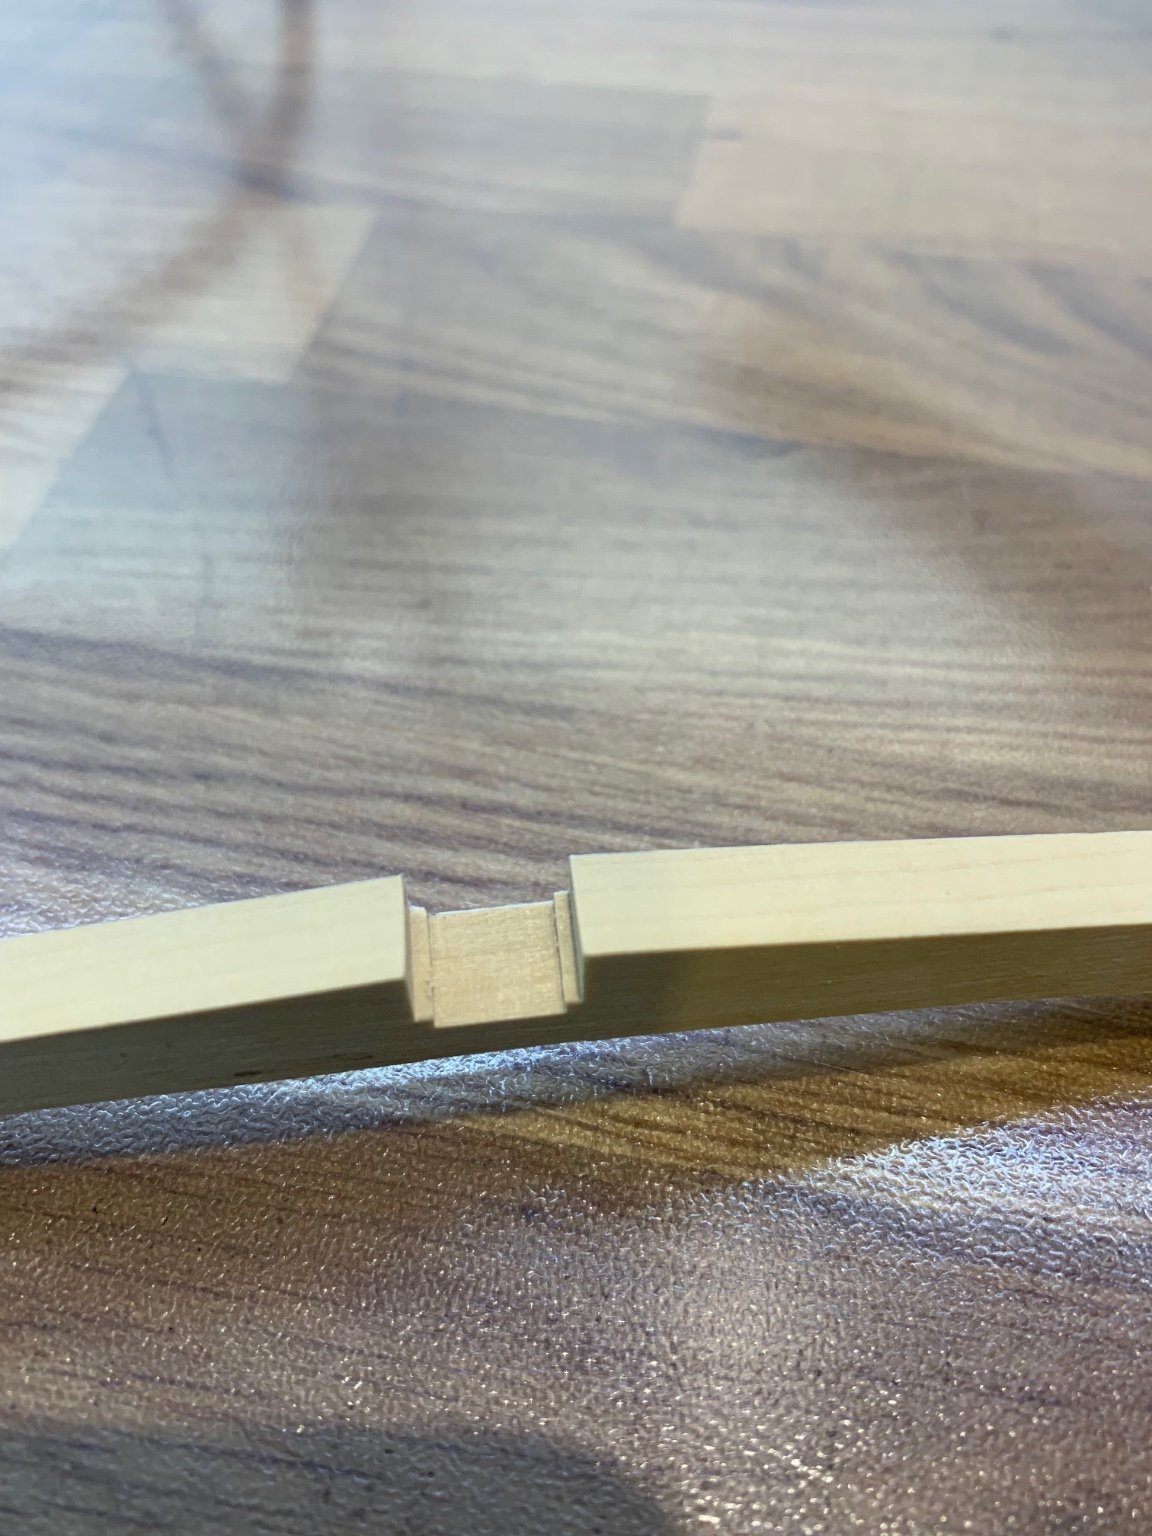
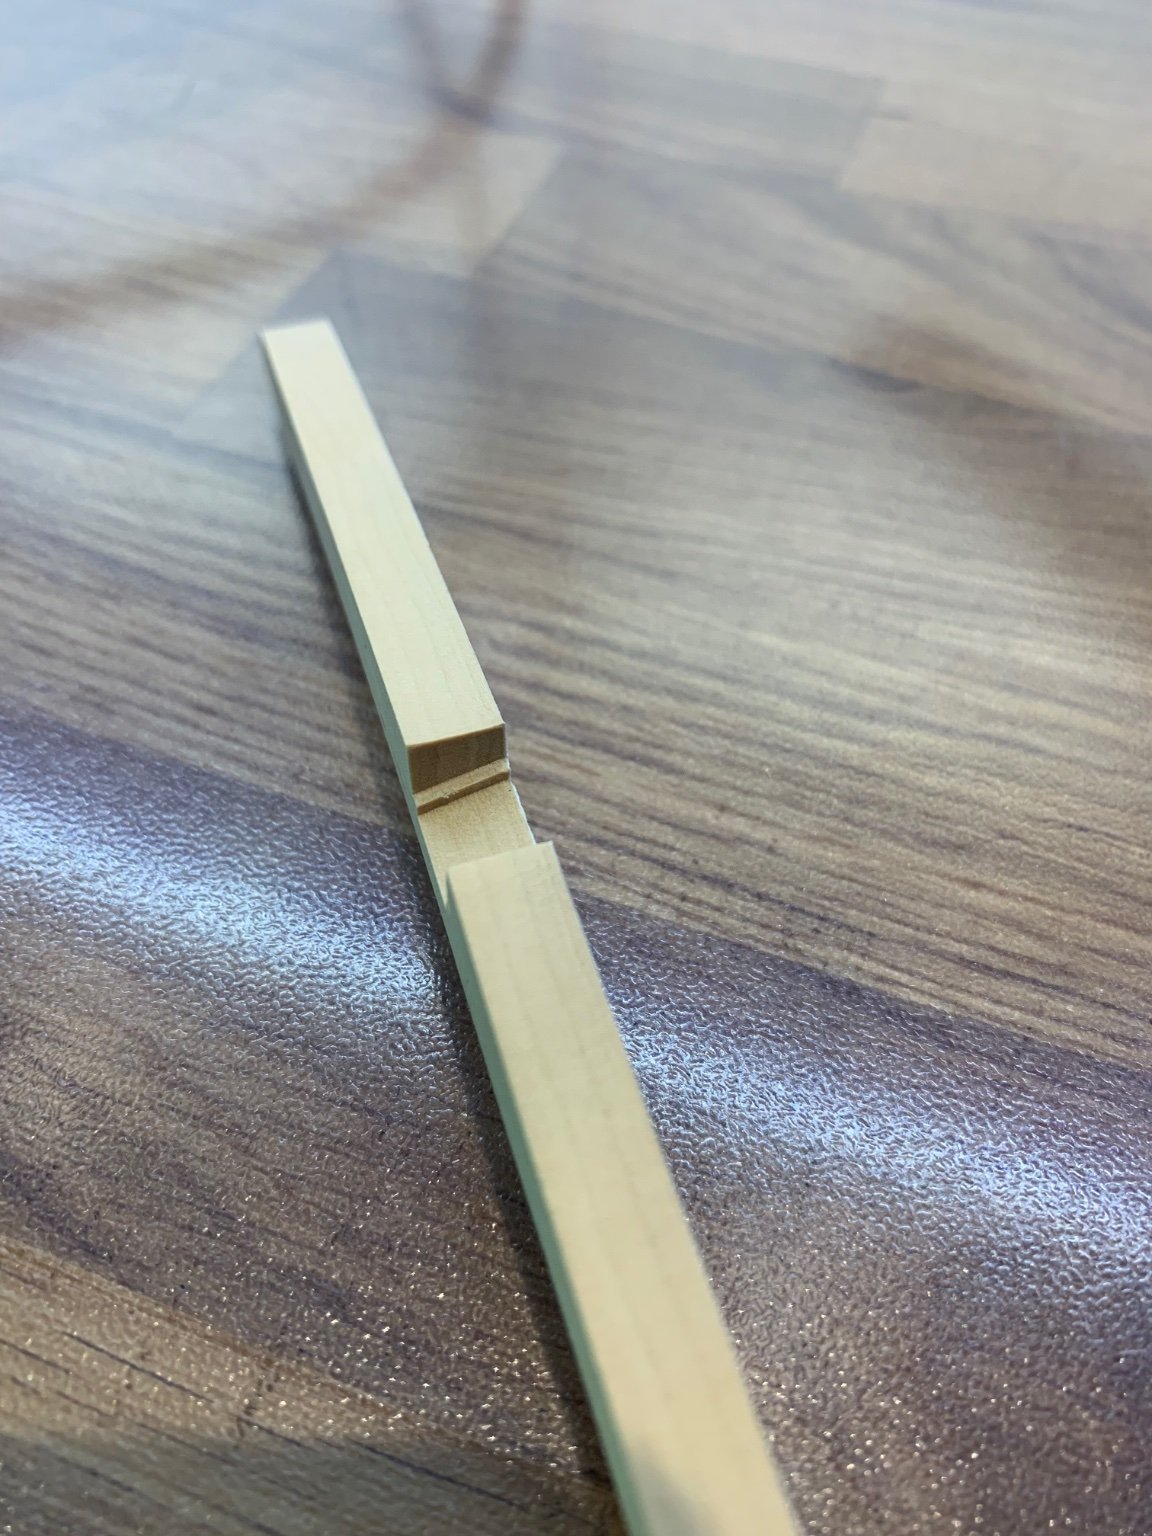
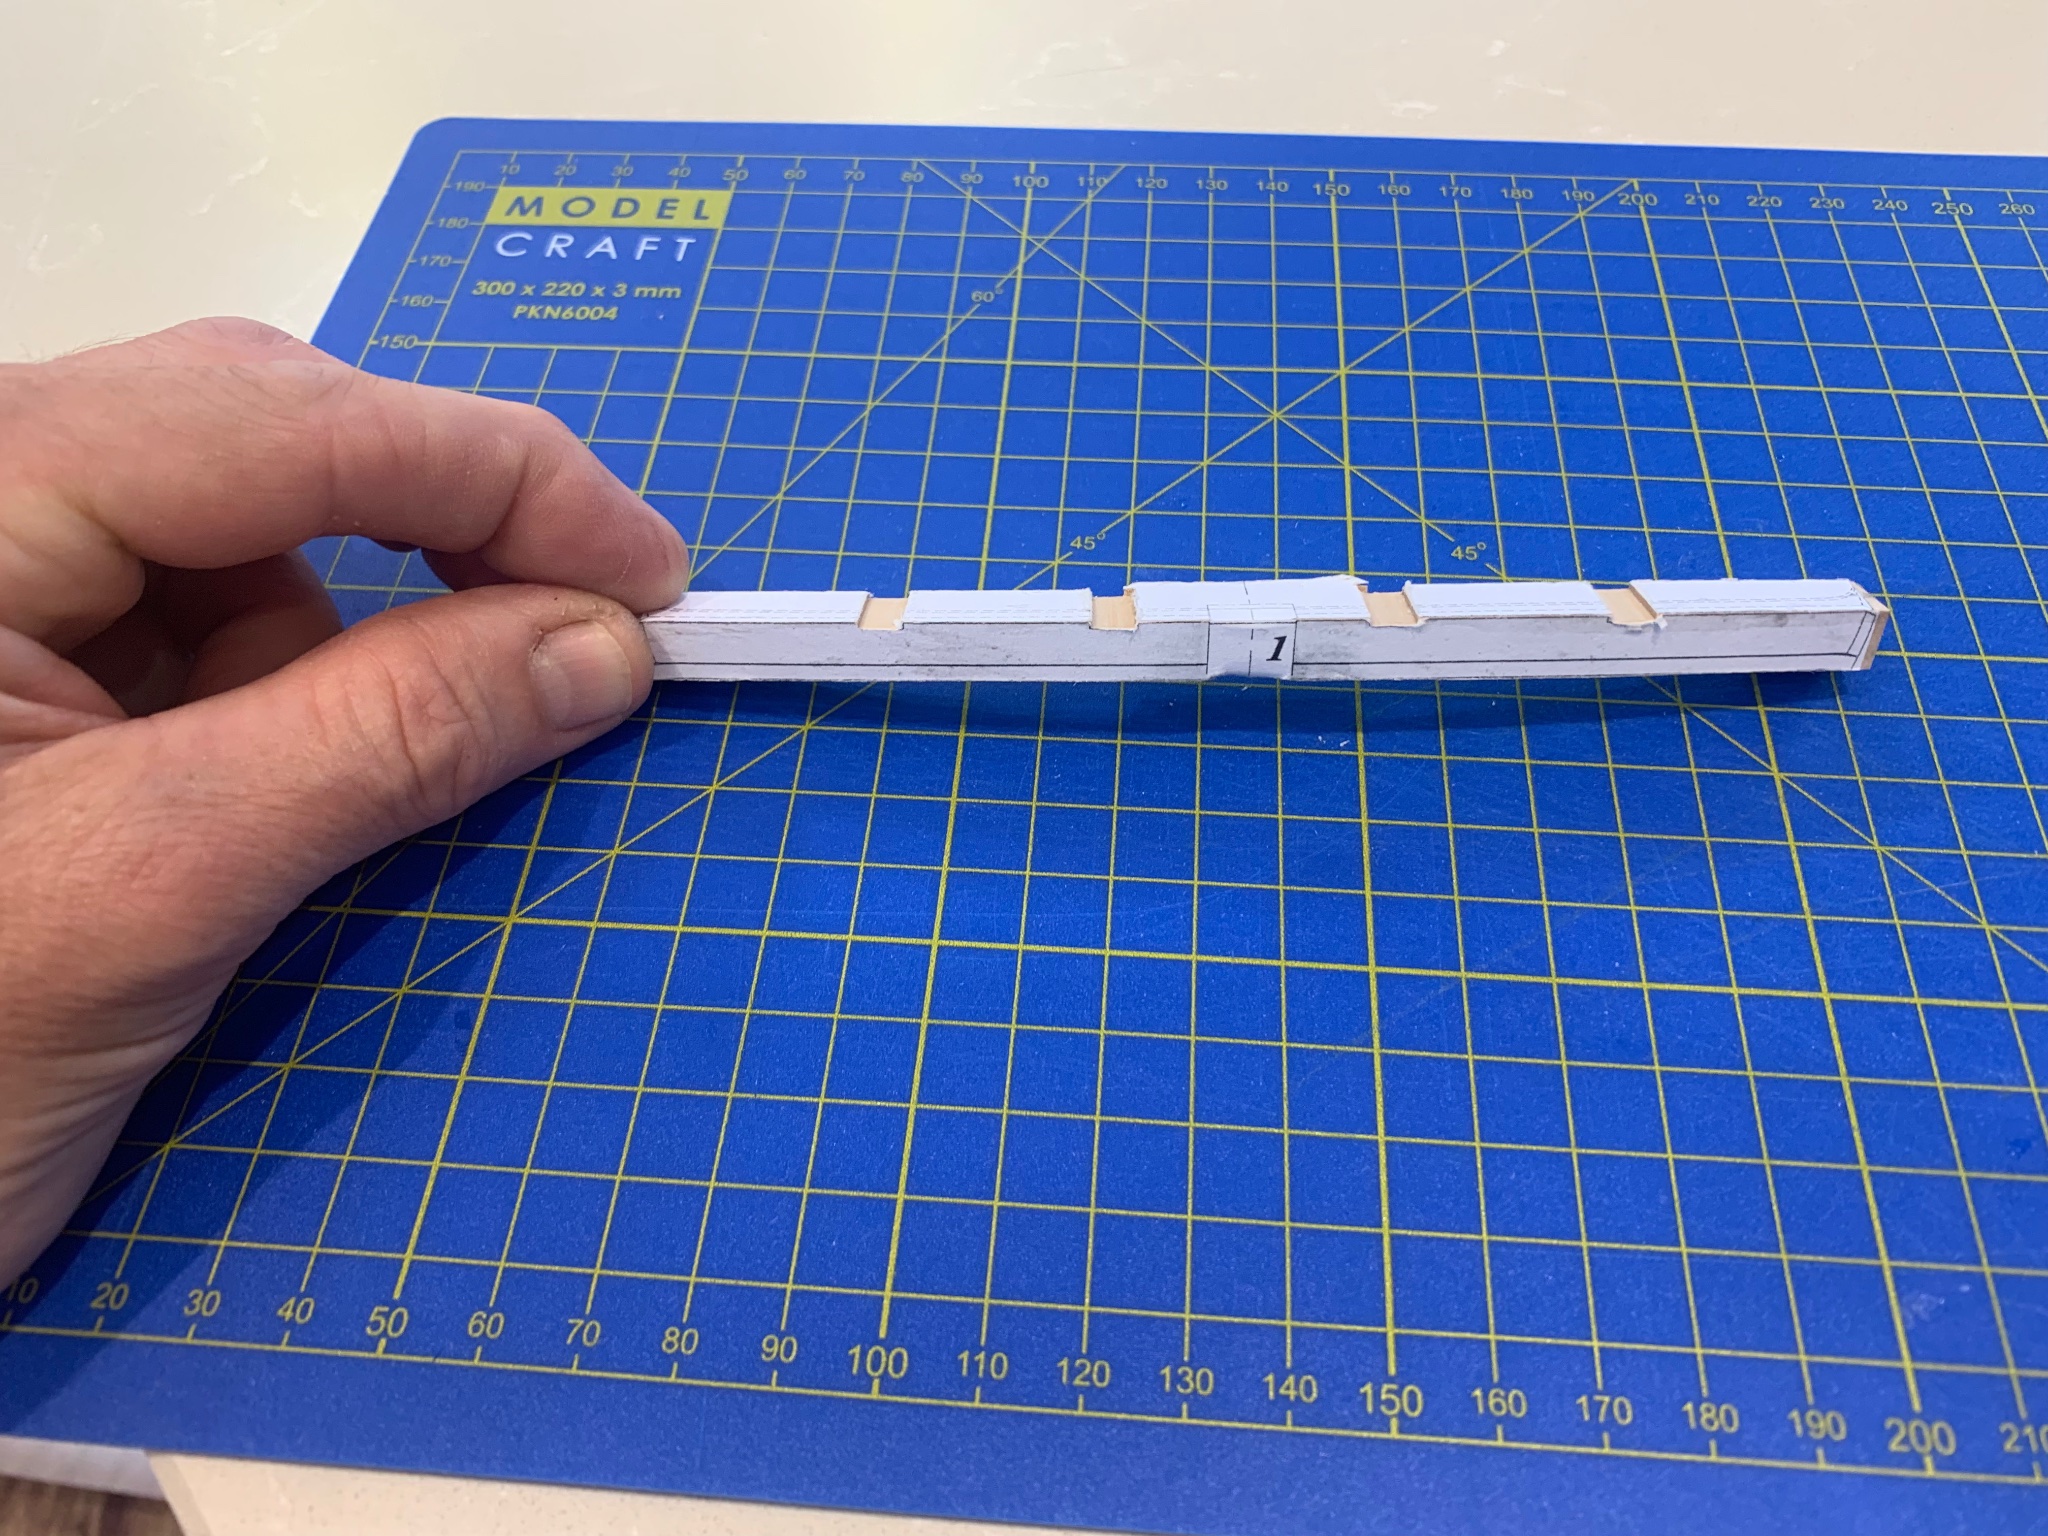
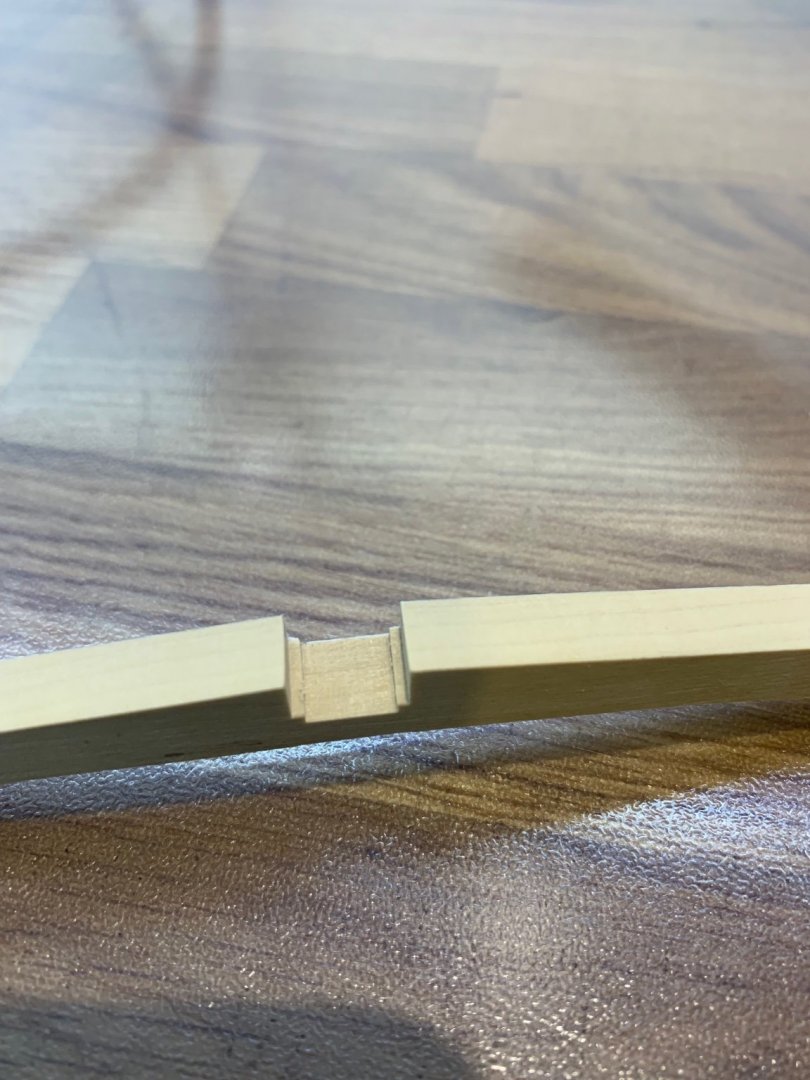
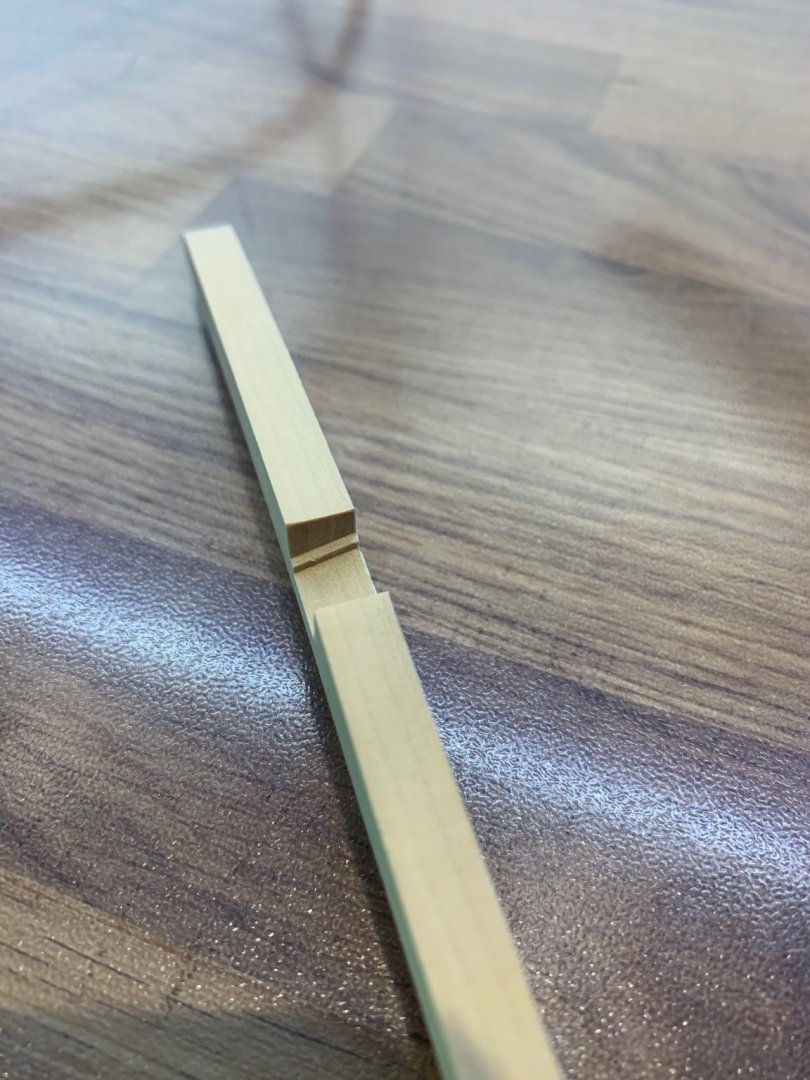
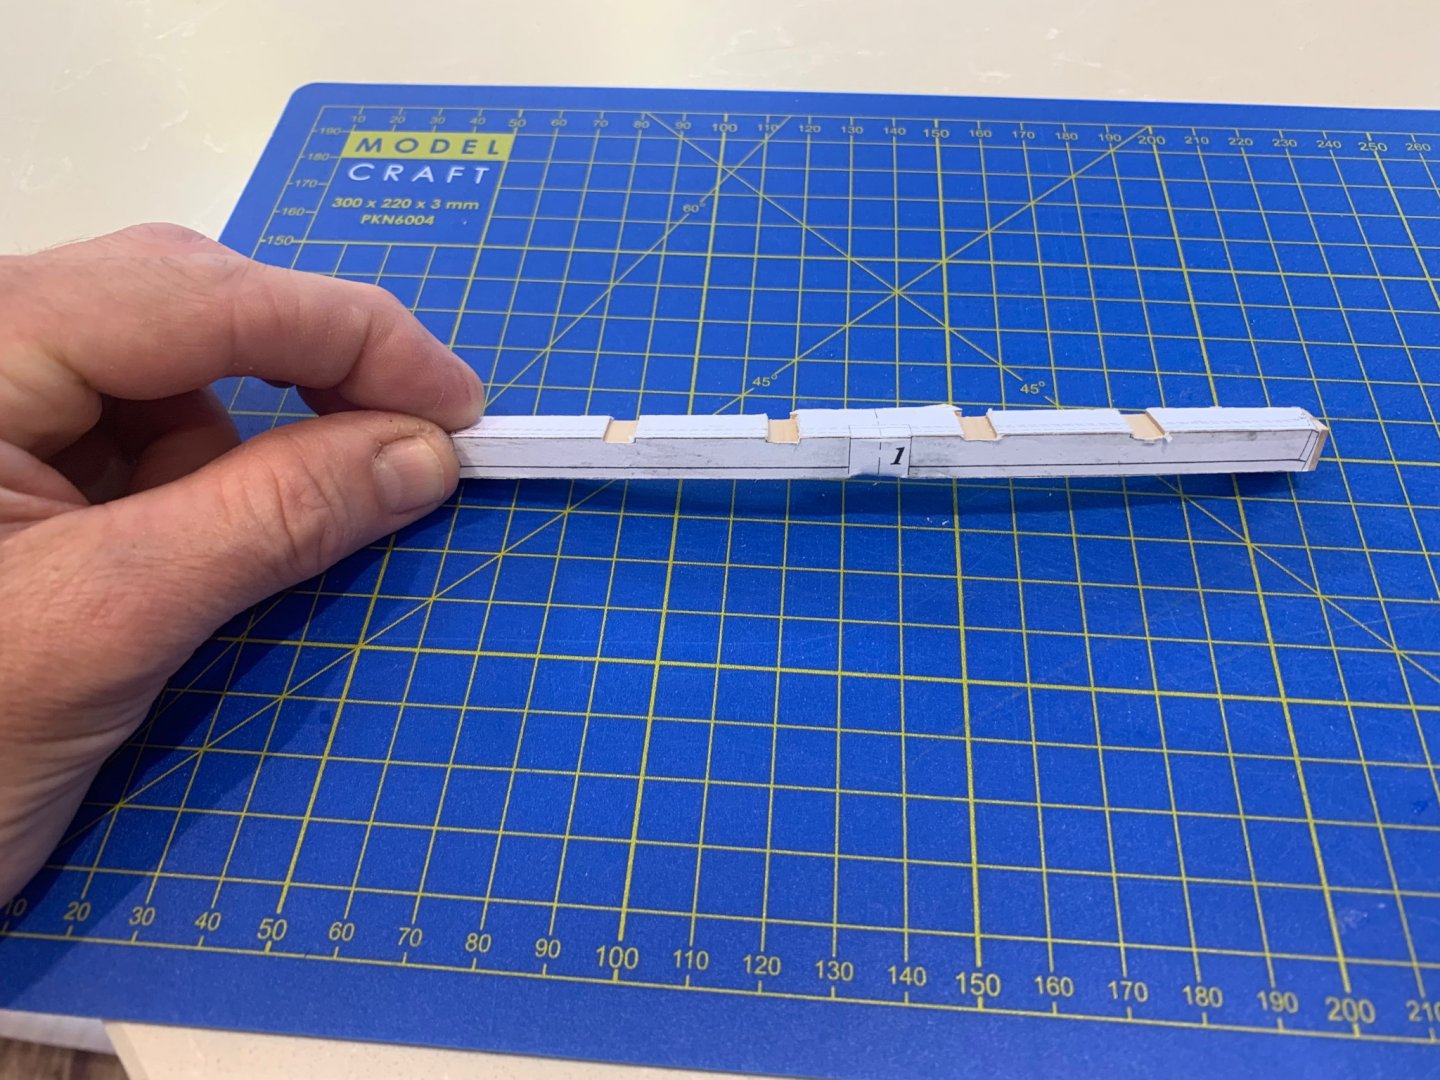
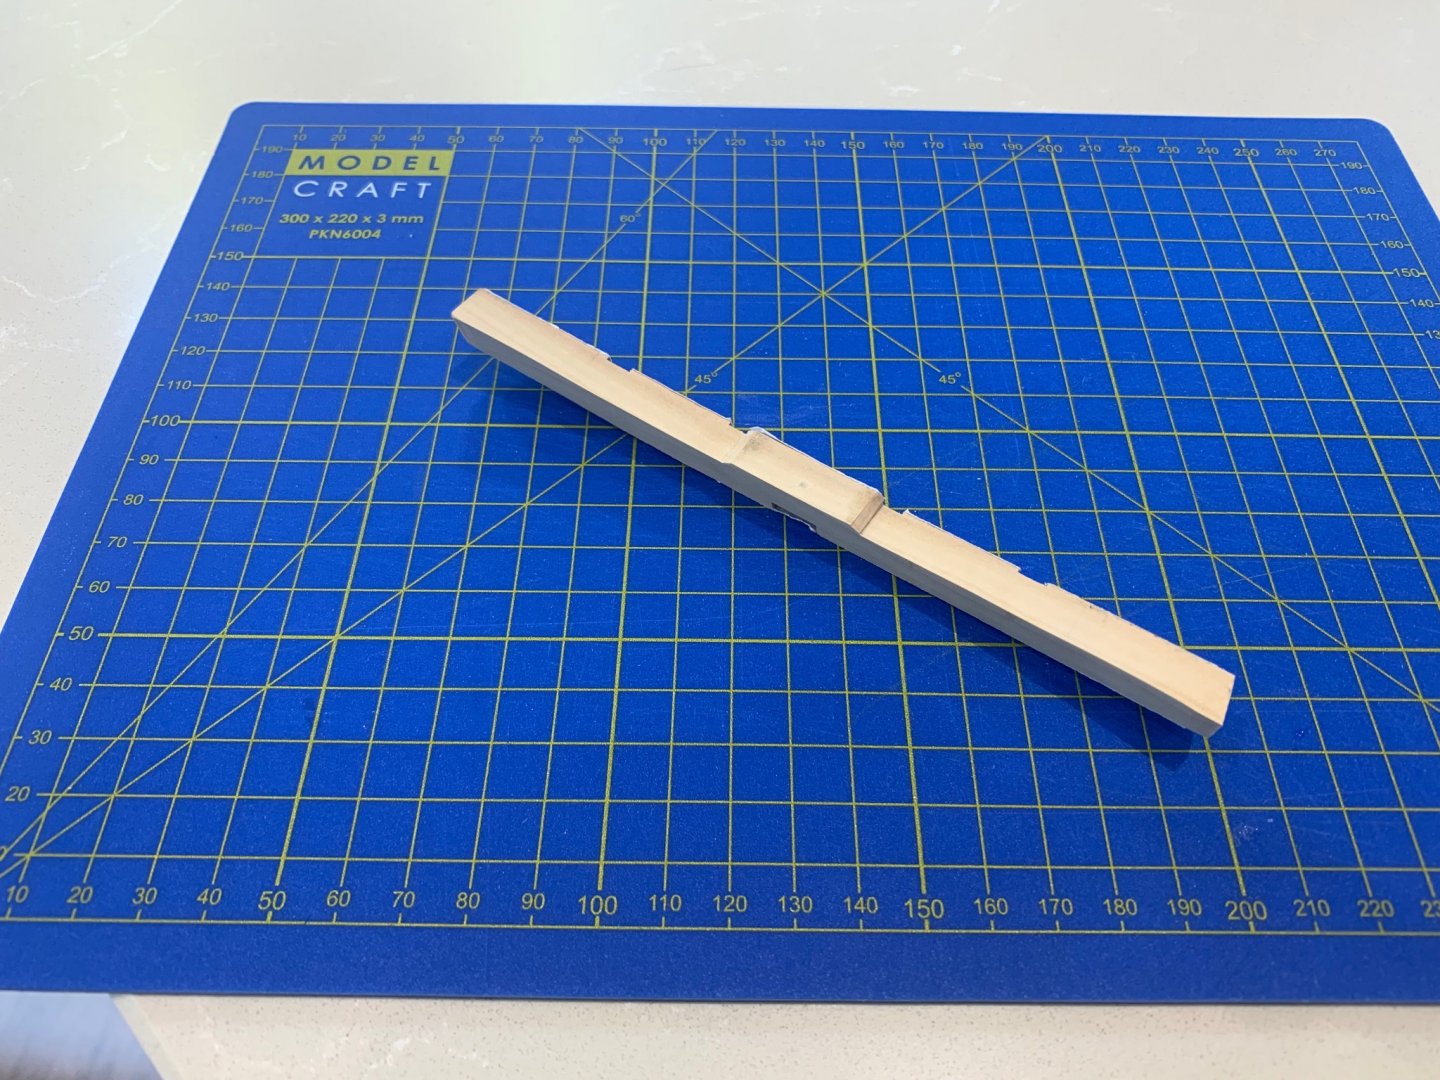
Mark and druxey thanks very much - I did accidentally catch one of the corners on the sander and took the tip off of the wing transom but I reckon that it'll be ok. I've made a start on the next 4 transom pieces and so far so good. These are made from 6.75mm thick wood so they are quite a lot thinner than the wing transom. I've so far cut them out and shaped them to their outer edges. I have also made a start on cutting the angled and stepped rebate so that they can lock onto the sternpost knee extension. I think you could leave out the step if you wanted to and no one would be the wiser. I decided to give it a go and found that it gives an extremely strong joint. I've not shaped them yet so thats one of my next jobs. Cheers Mark
-
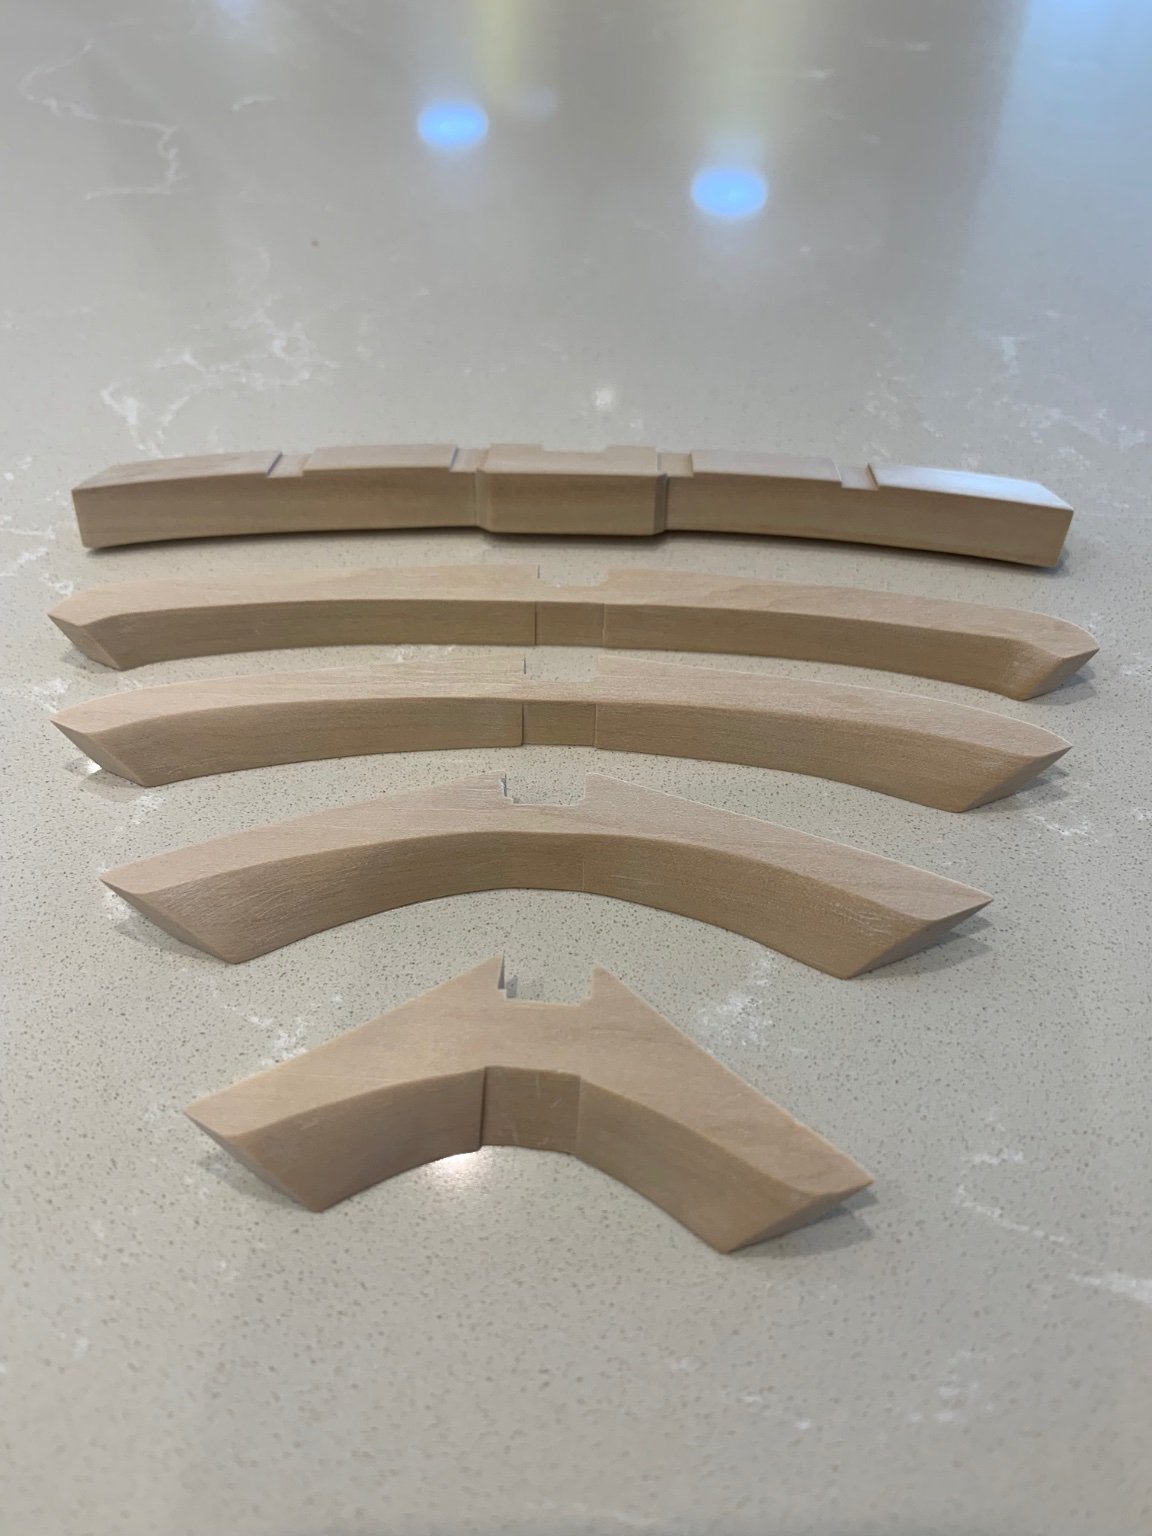
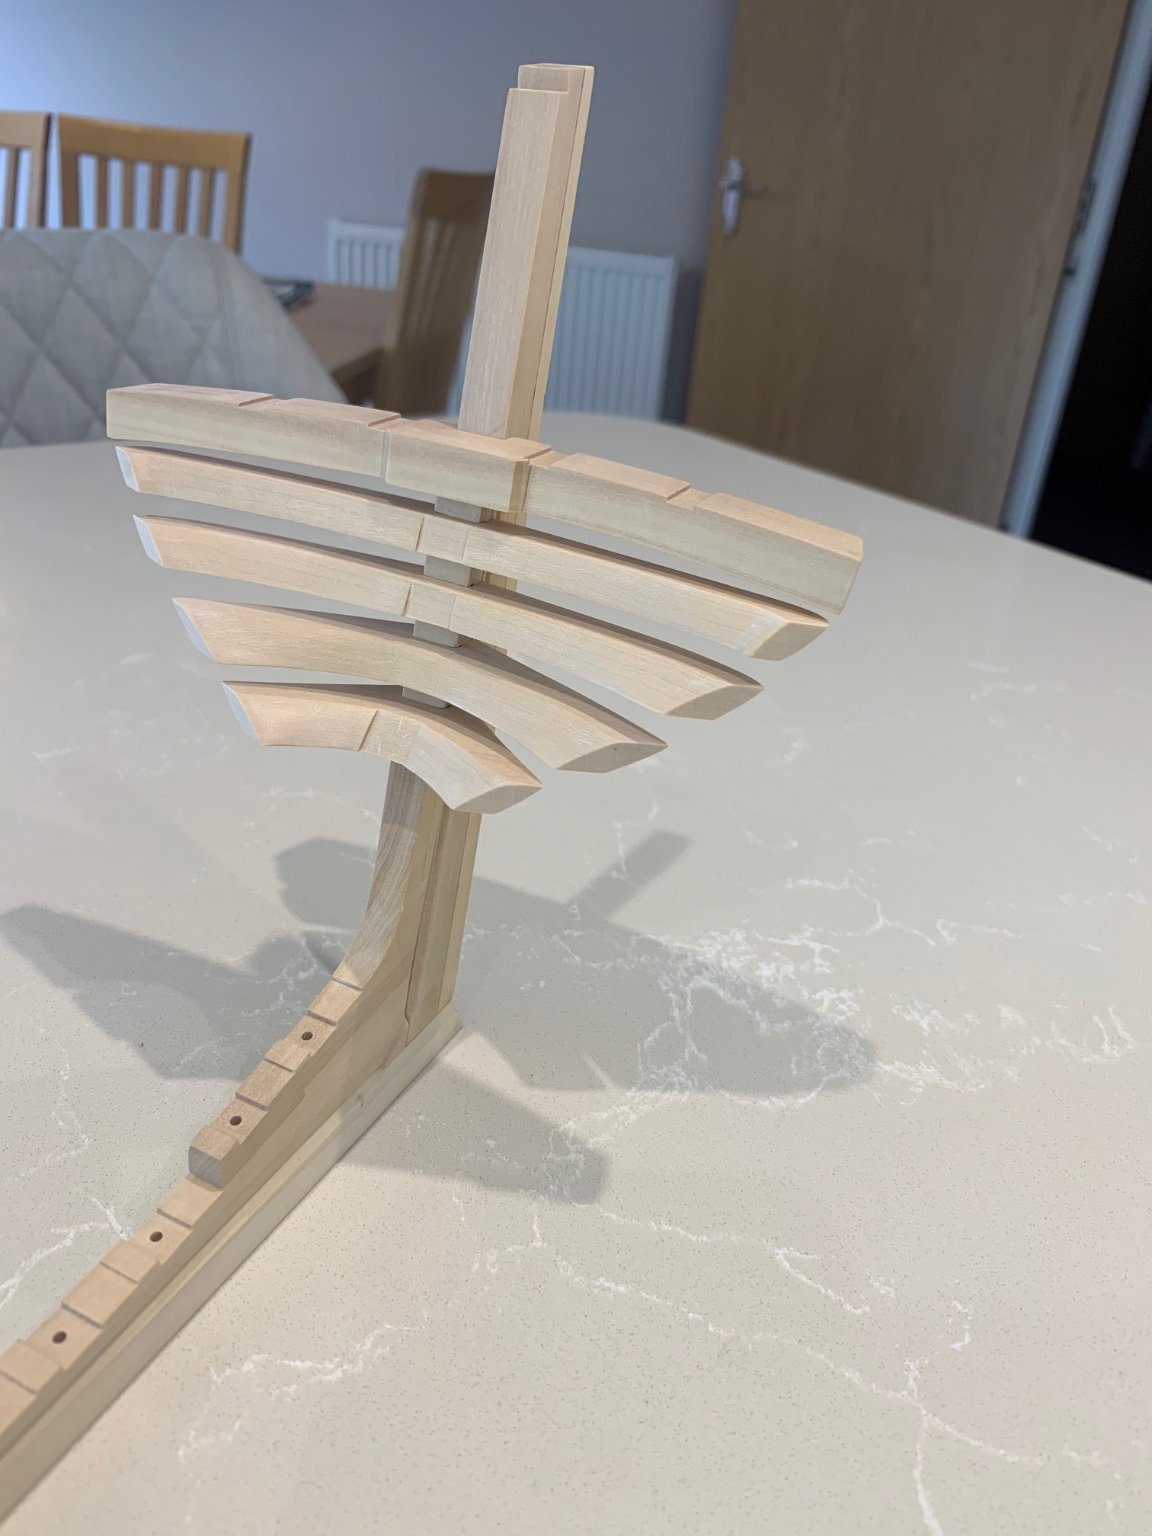
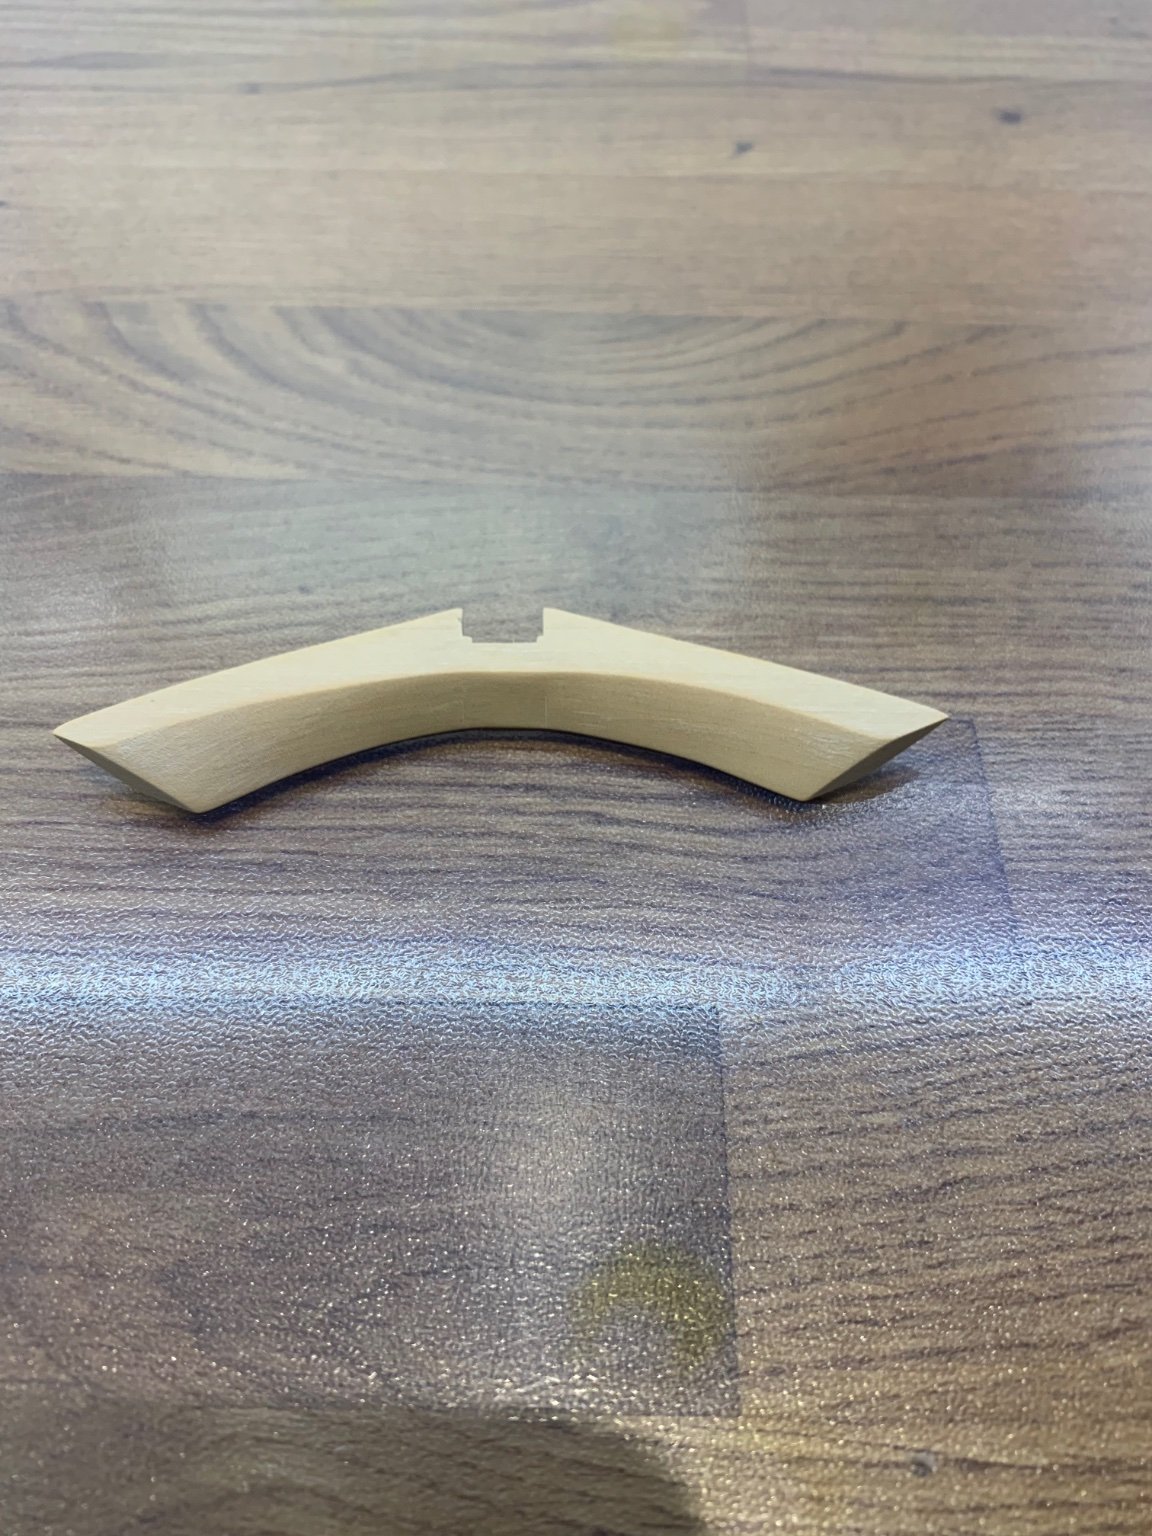
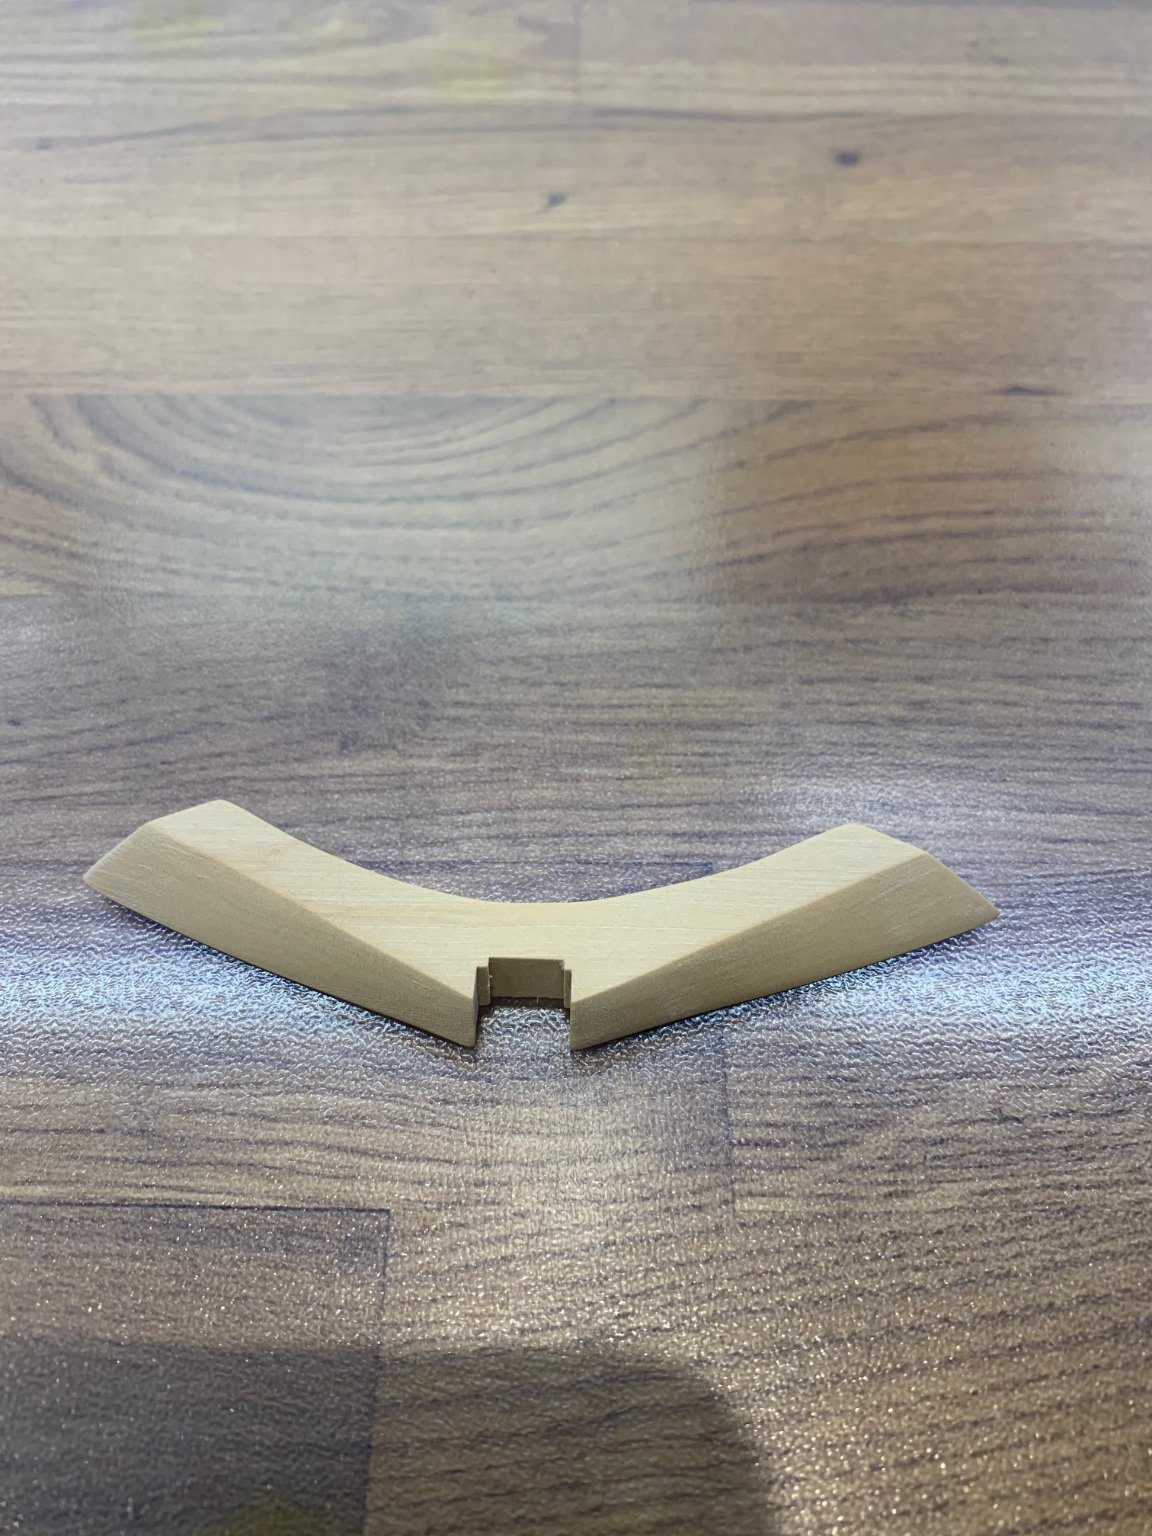
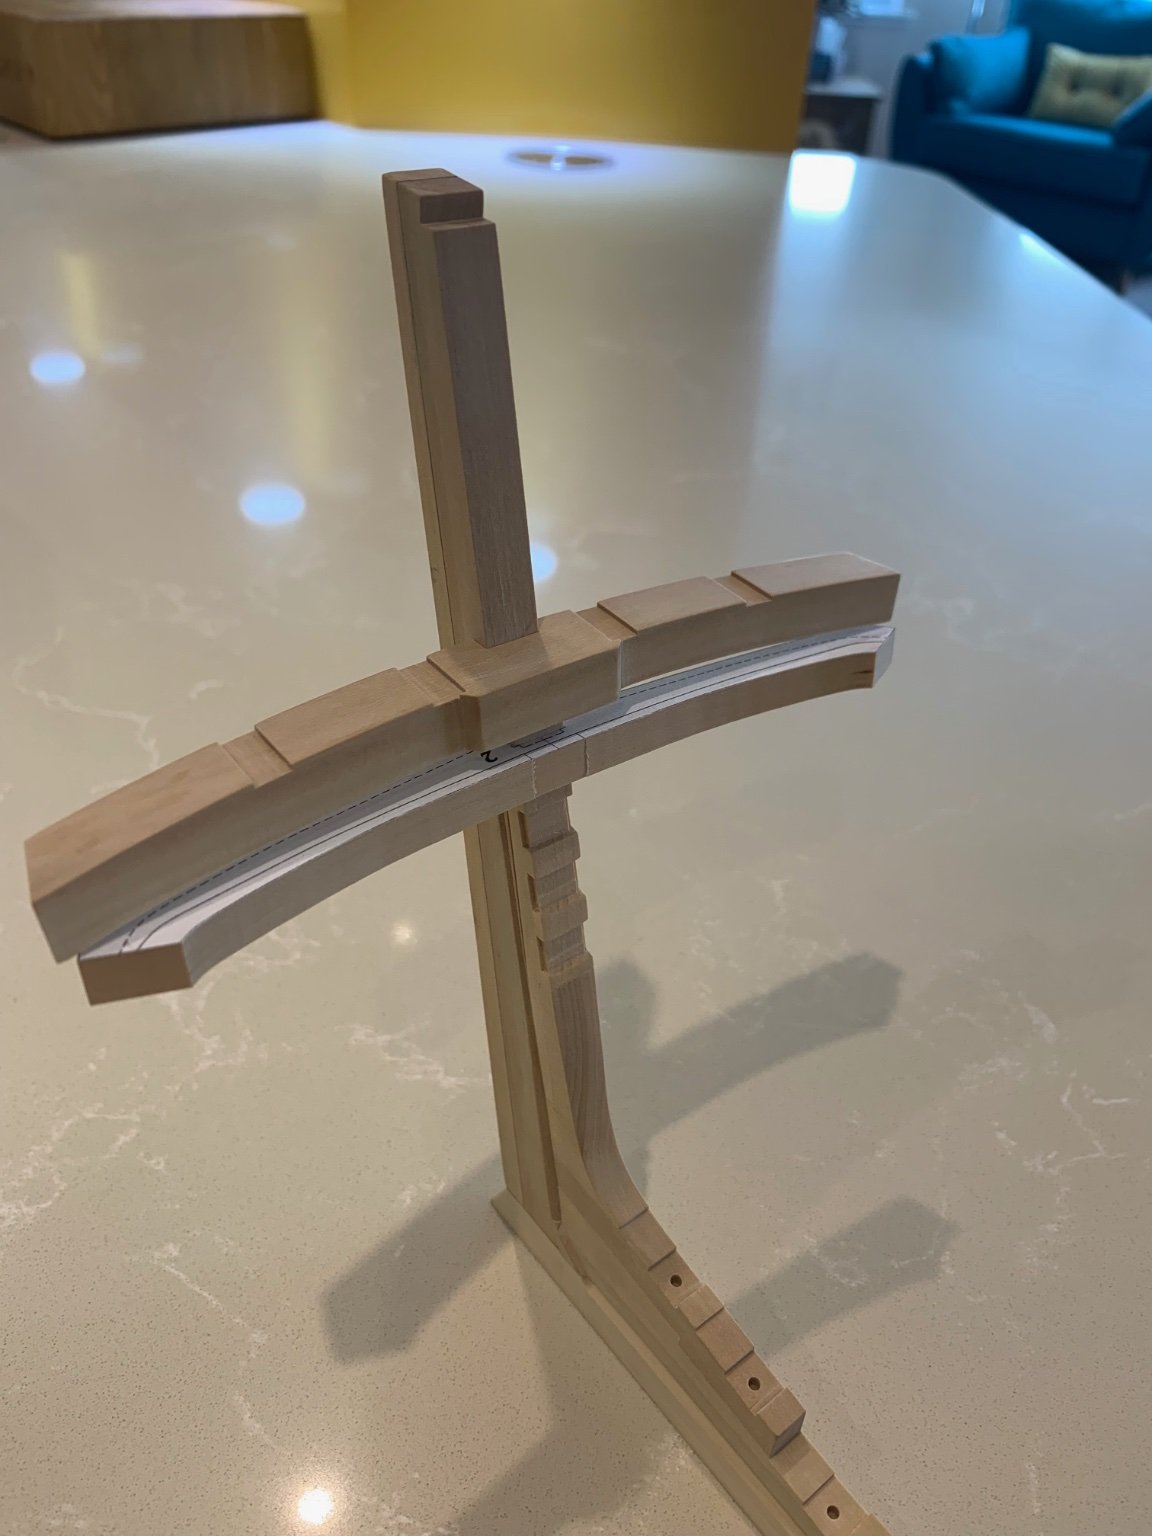
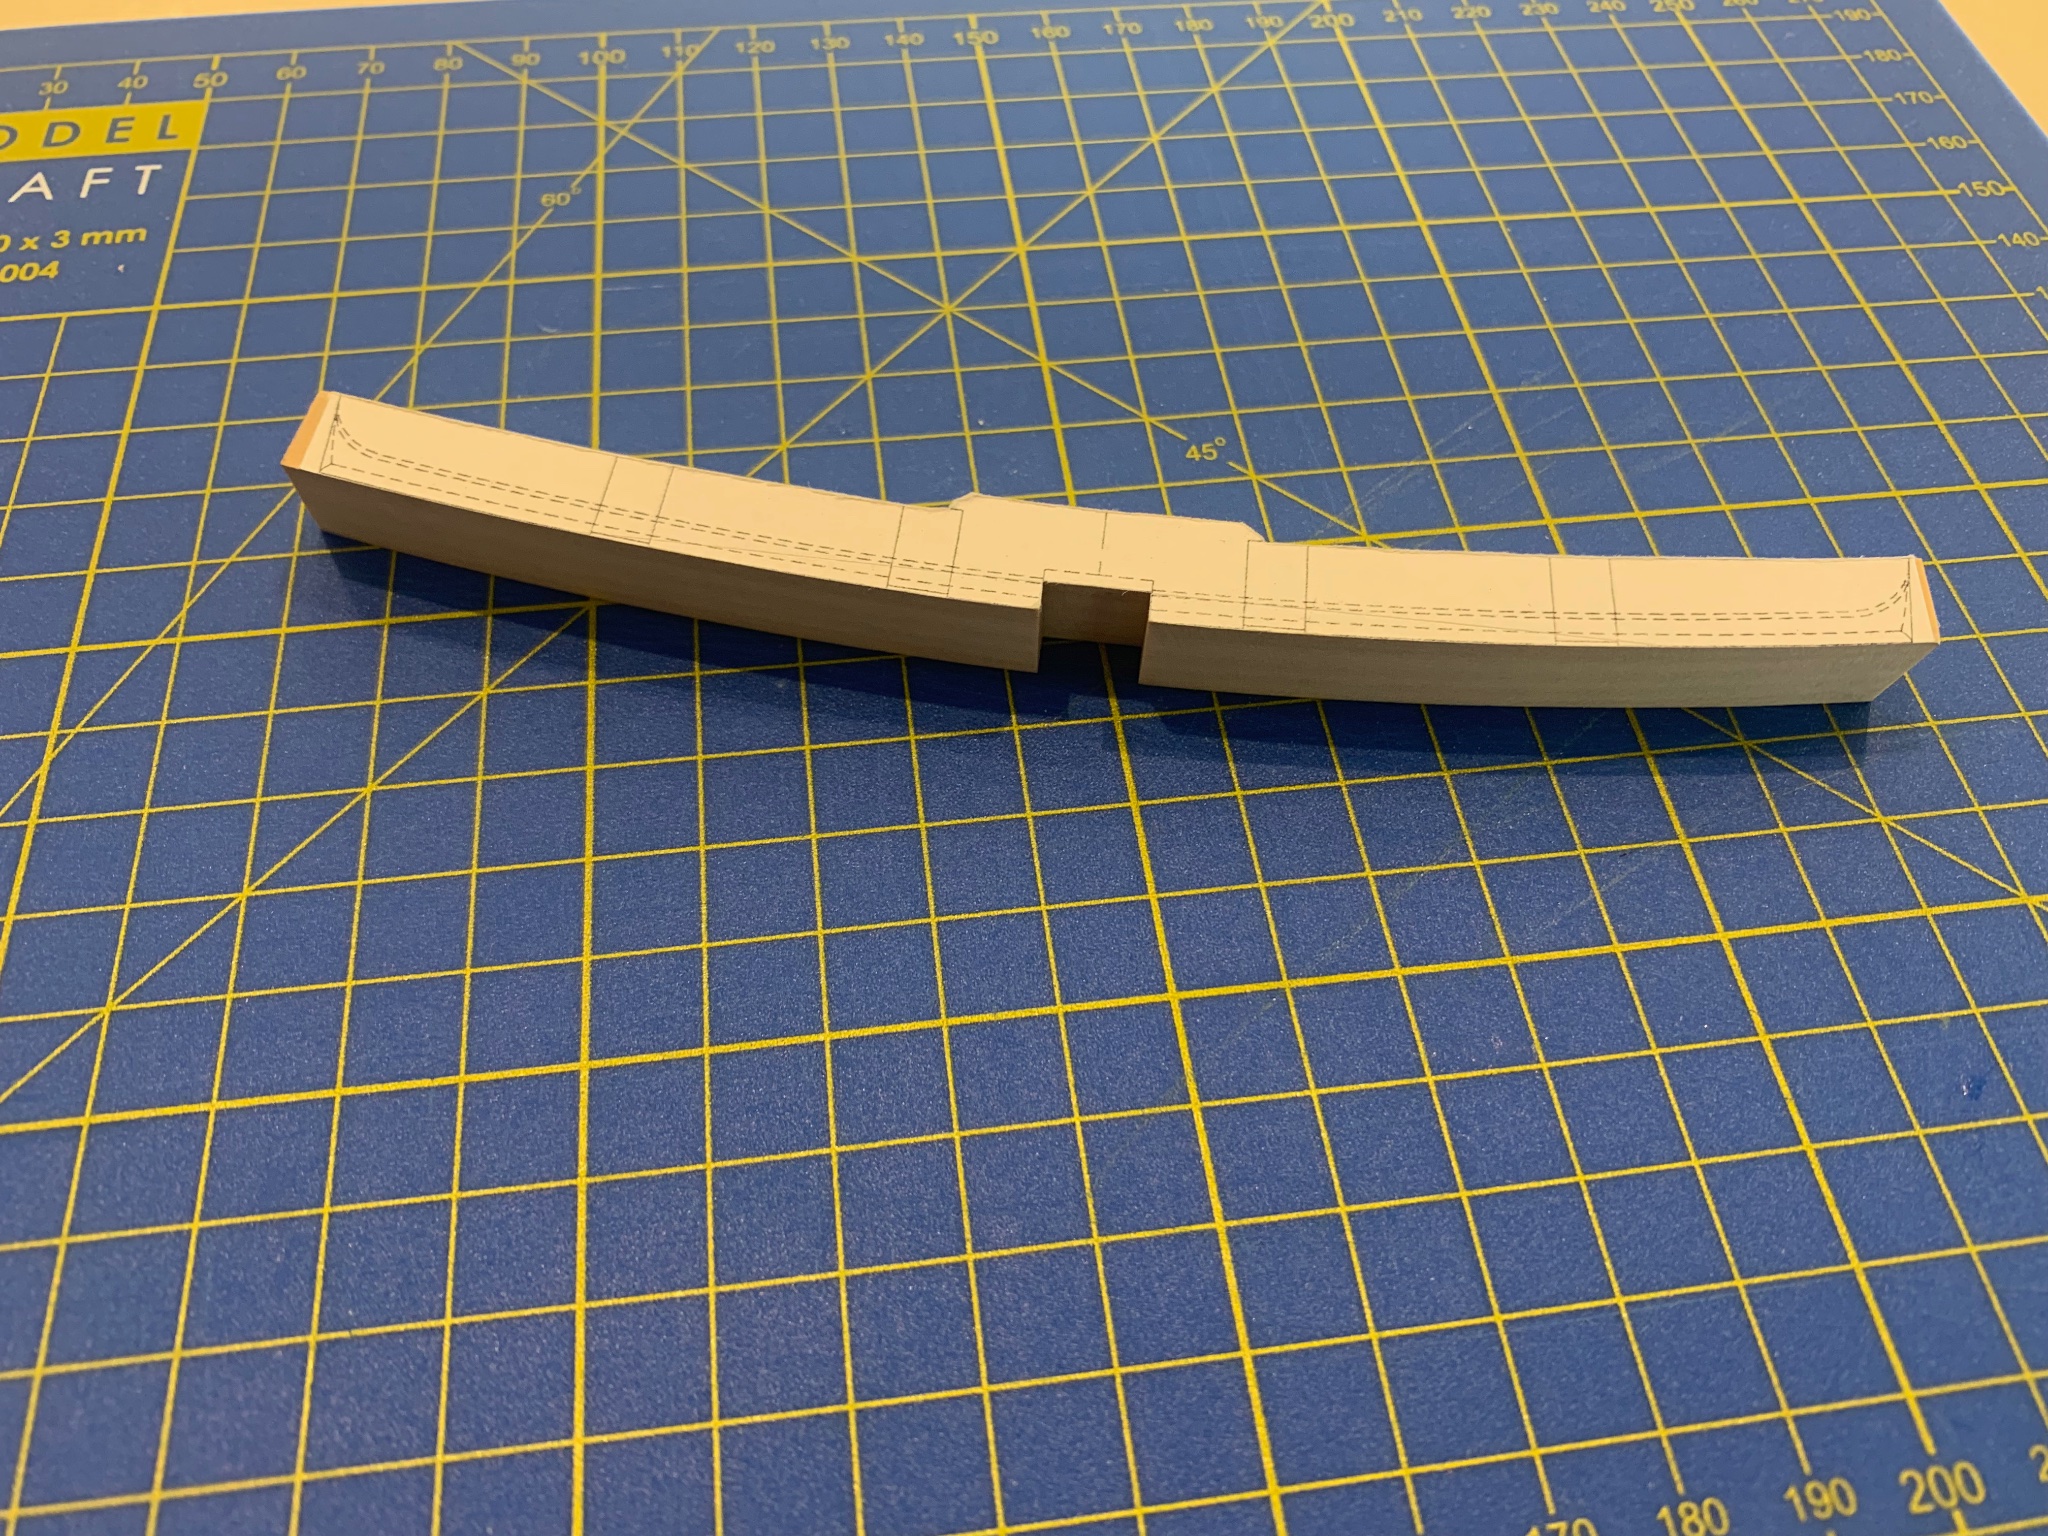
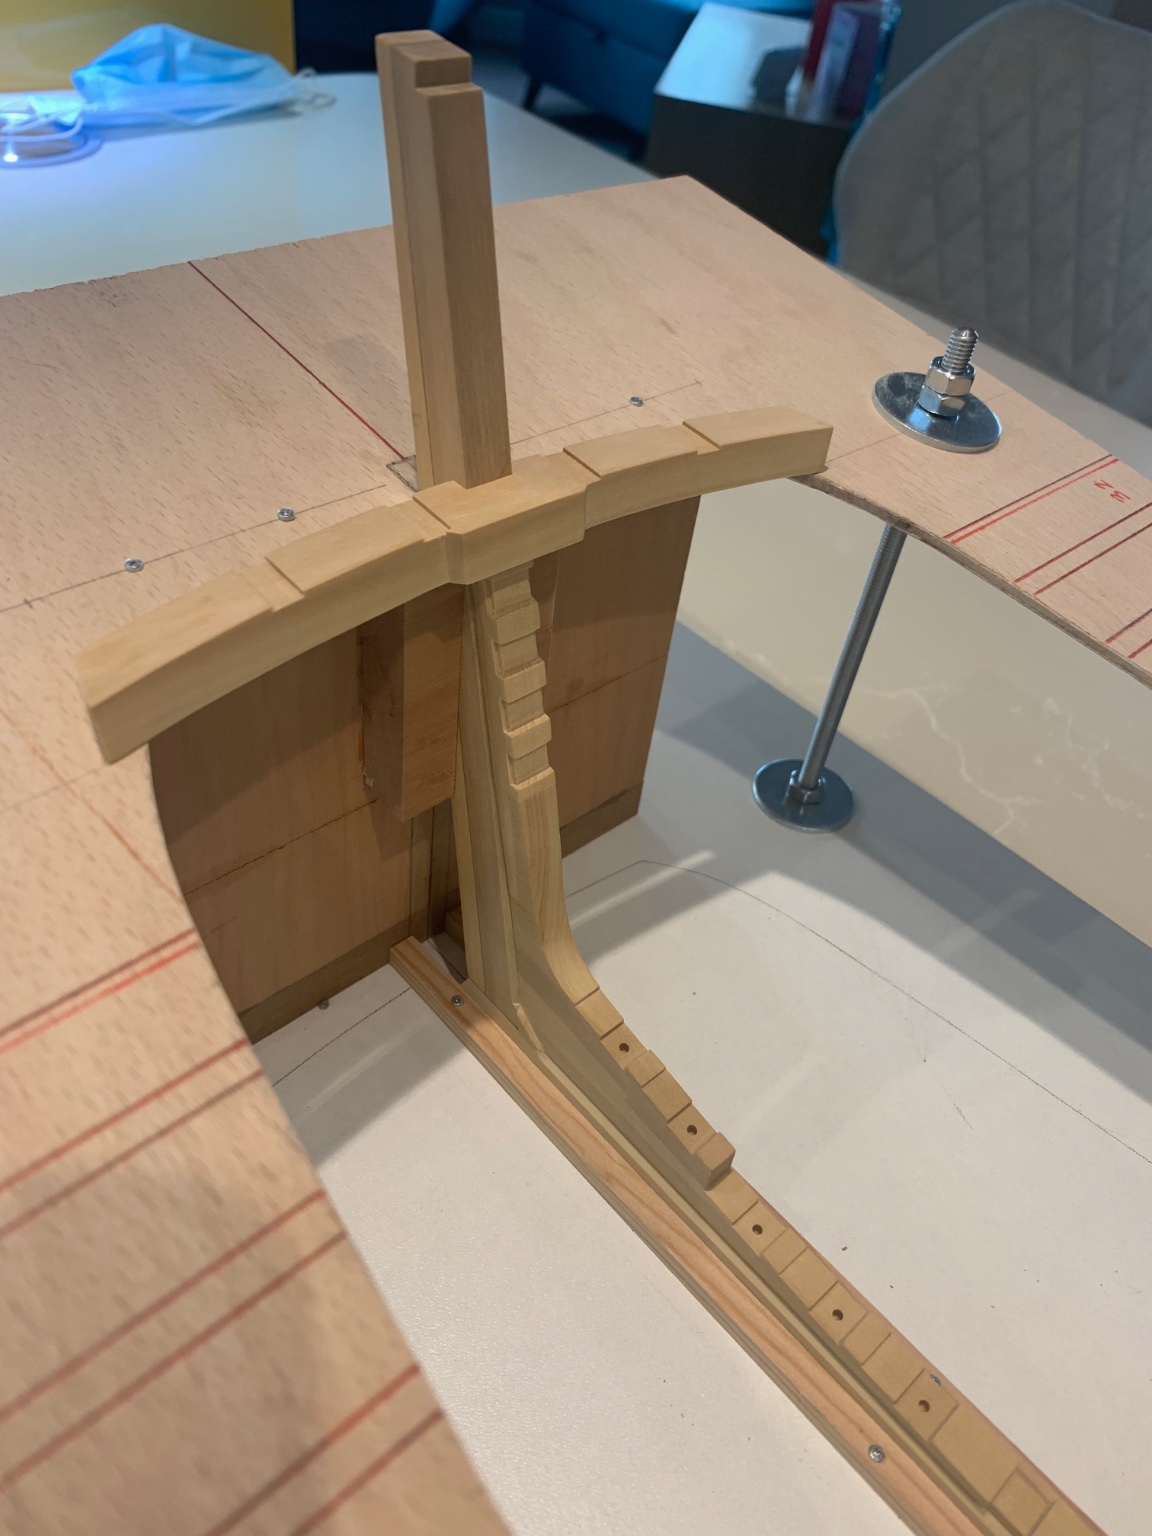
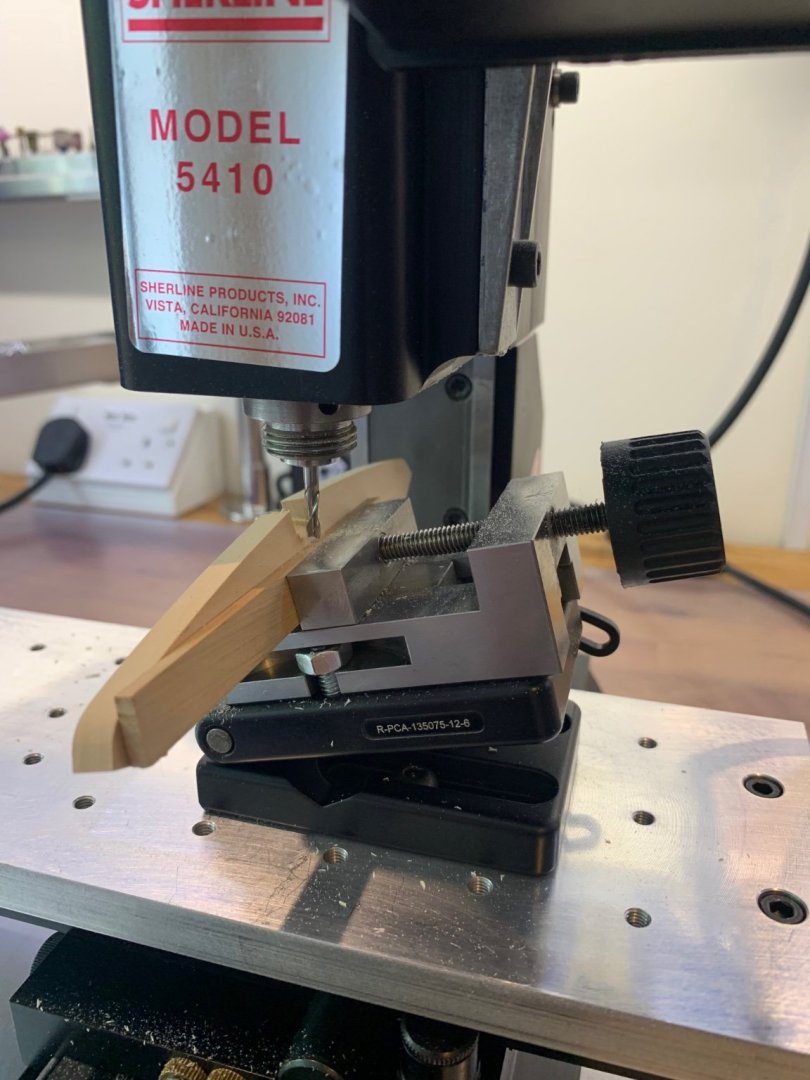
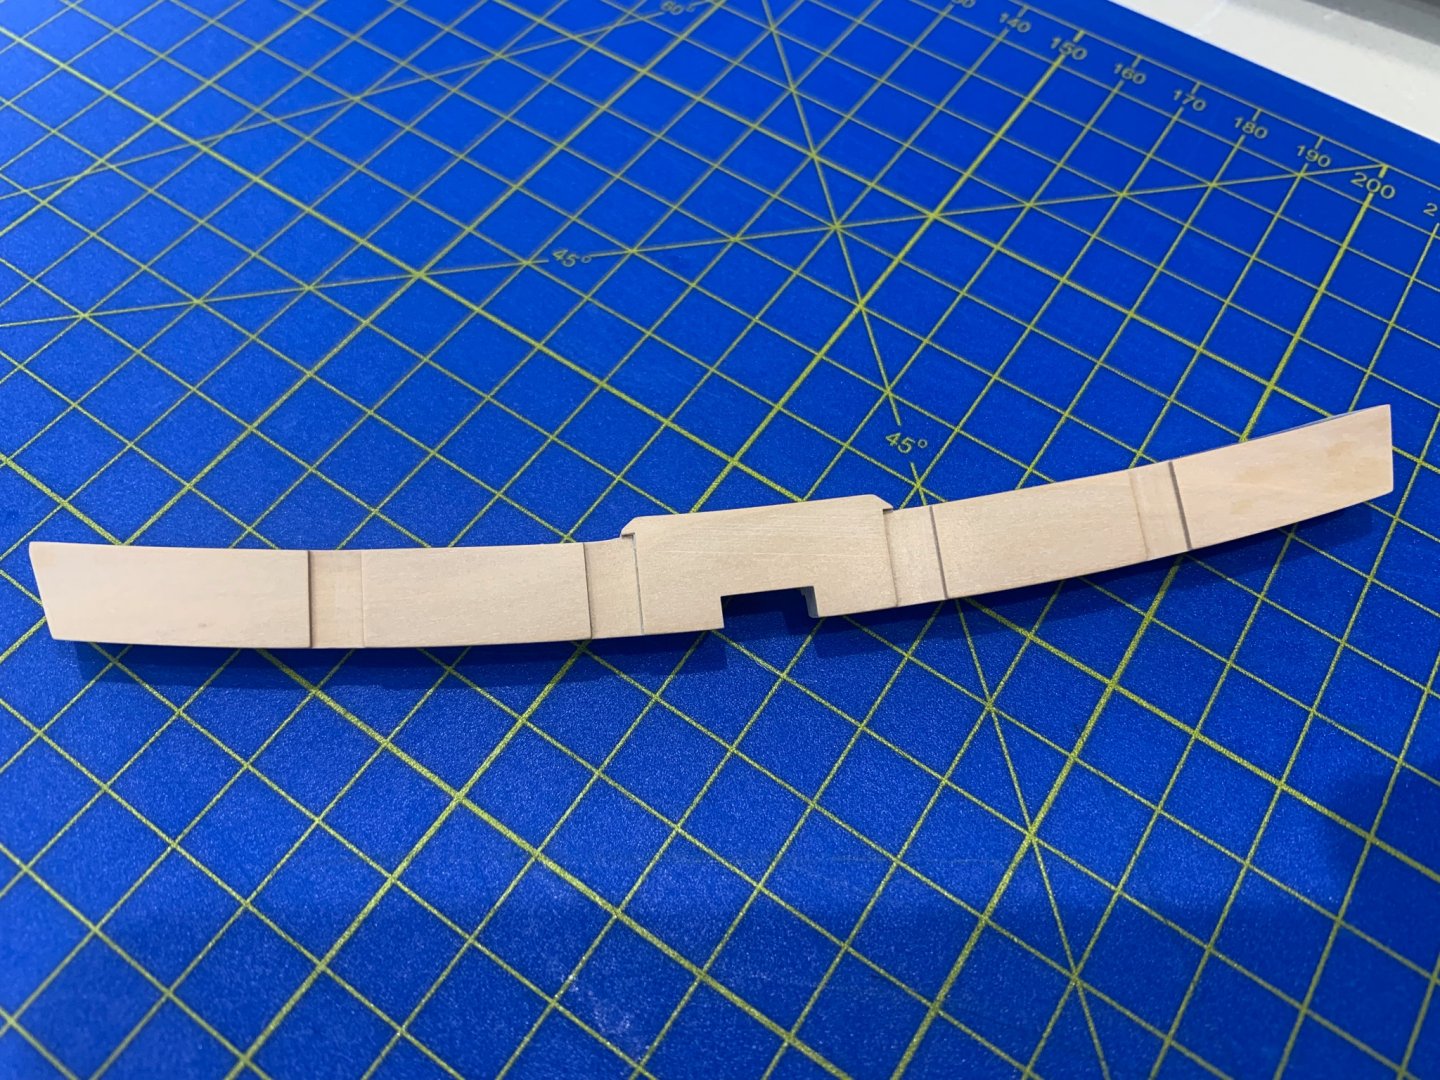
After a few lovely weekends catching up with the family I've at last got around to having a go at the wing transom. So what did I discover? Firstly its quite a complicated piece to make and requires a big piece of timber to make it. Its a shame that about 40% of that piece of wood is turned to sawdust but thats just the way it goes. It took a lot longer to make than I thought it would due to all of the angles involved. A few pictures of the process below and for a first attempt I think that it came out ok.


-
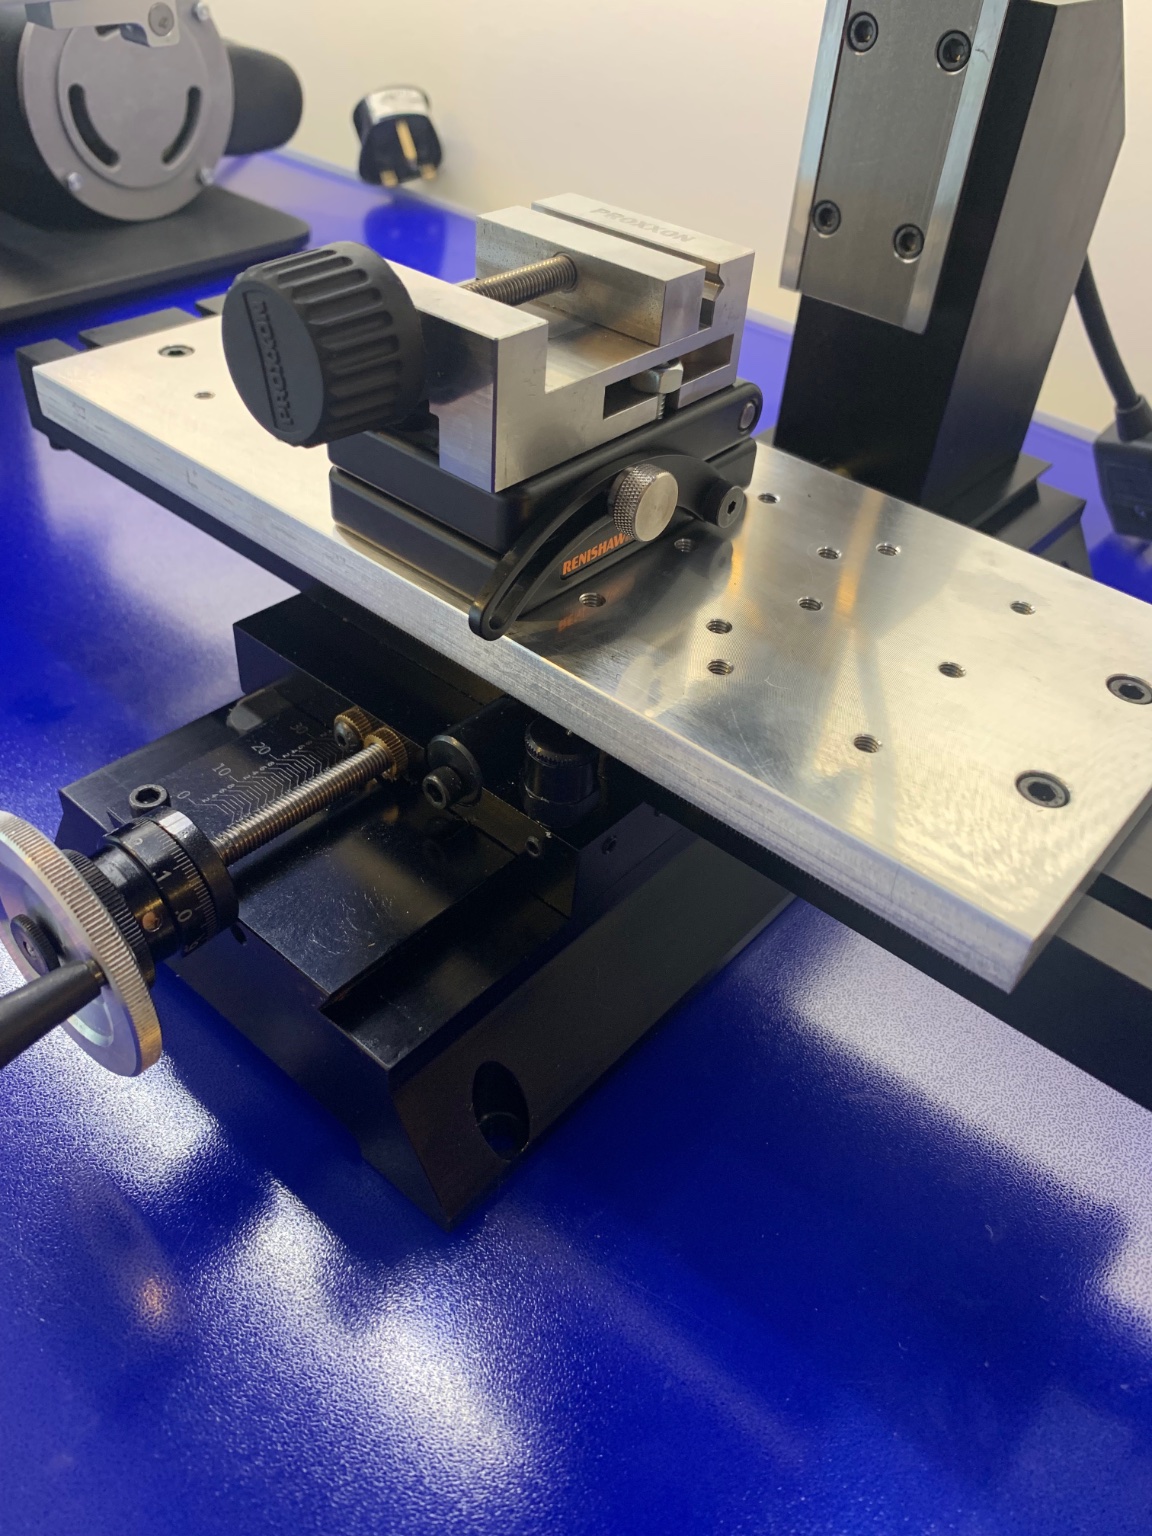
Sherline Mill Essential Accessories?
No Idea replied to No Idea's topic in Modeling tools and Workshop Equipment
Your right there equipment really is nice but eye wateringly expensive . Lucky I have a friend who’s company use a lot of their tools so he managed to get it for a reasonable price for me. Amazingly it fits the Proxxon vice with no modification required -
Sherline Mill Essential Accessories?
No Idea replied to No Idea's topic in Modeling tools and Workshop Equipment
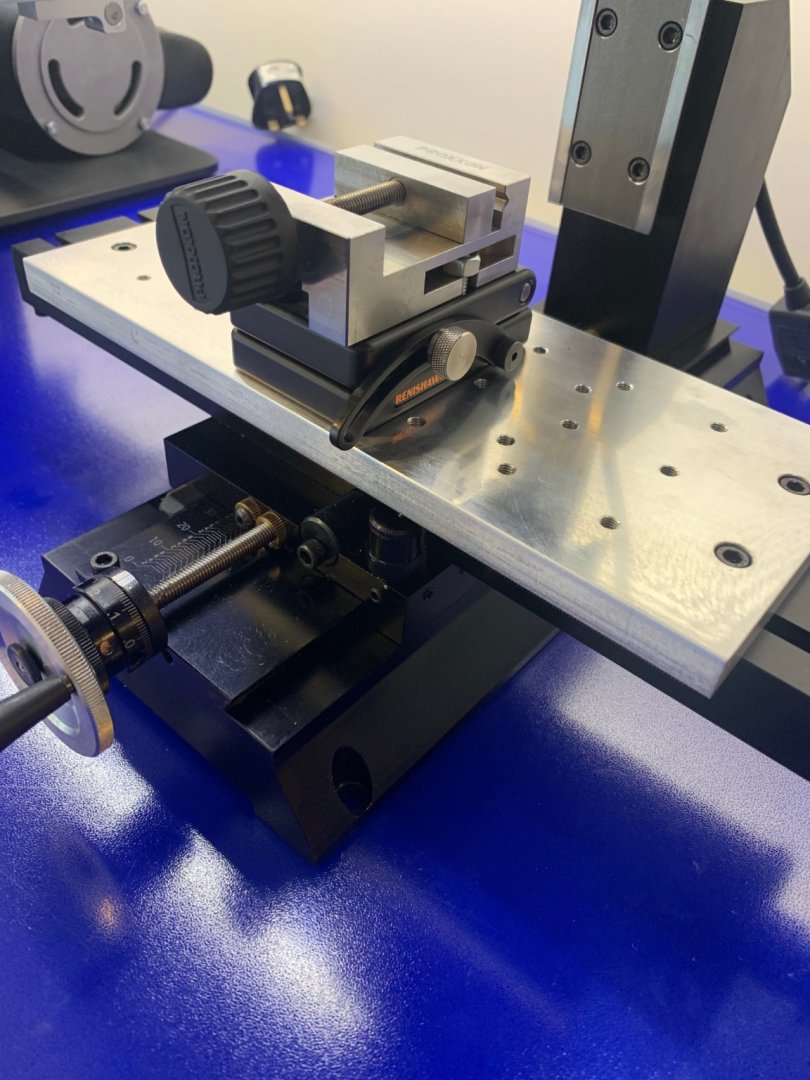
Just a couple of pictures of the tooling plate which will be better for my needs as I only mill wood. I like the way I can just unbolt the vice and then have loads of points that I can use the hold downs with. Its quick and simple and also protects the bed.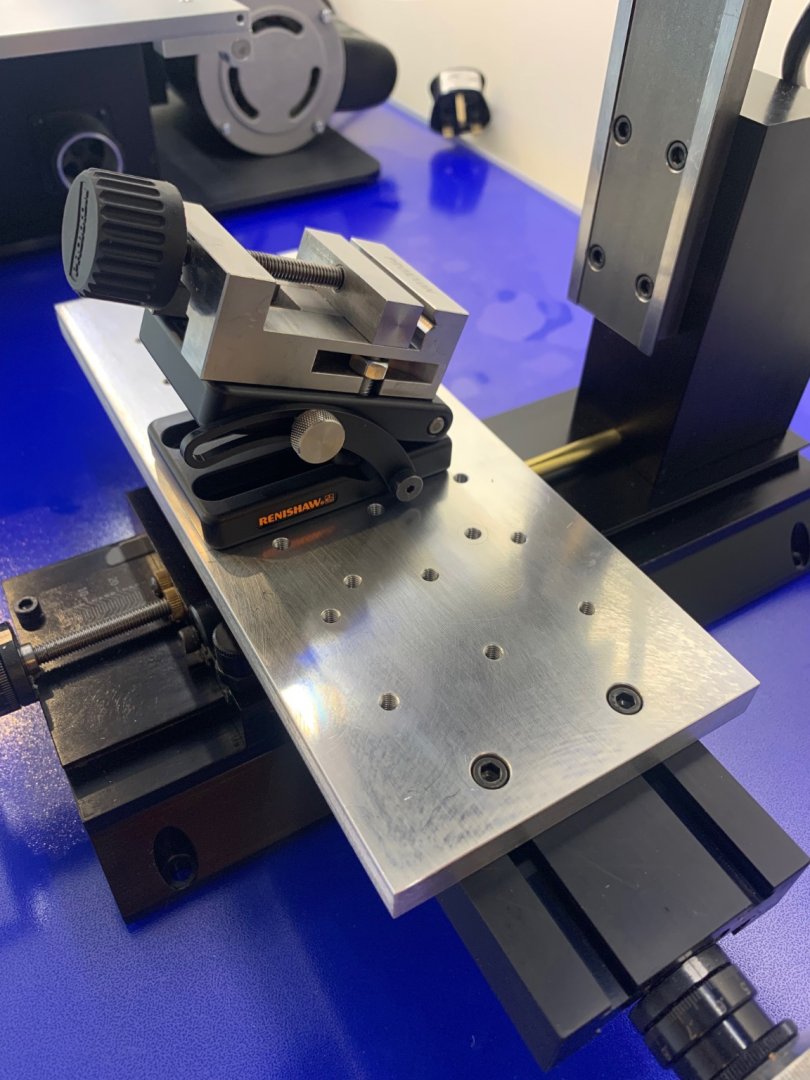
-
Sherline Mill Essential Accessories?
No Idea replied to No Idea's topic in Modeling tools and Workshop Equipment
Its a Sherline 5410 - I've been really impressed with it so far. -
Sherline Mill Essential Accessories?
No Idea replied to No Idea's topic in Modeling tools and Workshop Equipment
Bill I never would have guessed the age of your mill it still looks great. I don't understand why though T bolts have the thread all of the way through. If they were blind holes we would get less marks on the table and probably less man made distortion too. Thanks for the pics -
Sherline Mill Essential Accessories?
No Idea replied to No Idea's topic in Modeling tools and Workshop Equipment
Hi Roger - Luckily I've found a supplier in the UK so my shipping costs this time are minimal. But as I ordered the standard and stepped hold downs I have quite a few T nuts etc. The quality are very good and I'm glad that I bought them. Thanks Jim - I do have two draw bar collets and they are quite expensive and yes the cutter has to be within .001" to fit correctly according to the instructions. Any chance you could recommend a make of collet chuck or two that I could have a look at. I did make a mistake - I ordered a tooling plate as I have used these in the past. Anyway after paying for it I realised that I have a mill and just could have made one. I've been out of the game for too long but I did laugh at myself. I'll get some pictures up next week but it is a good bit of kit which is easily dialled in with a DTI. -
Thanks PRS 👍. I have to keep things clean and tidy as I work in our spare room
-
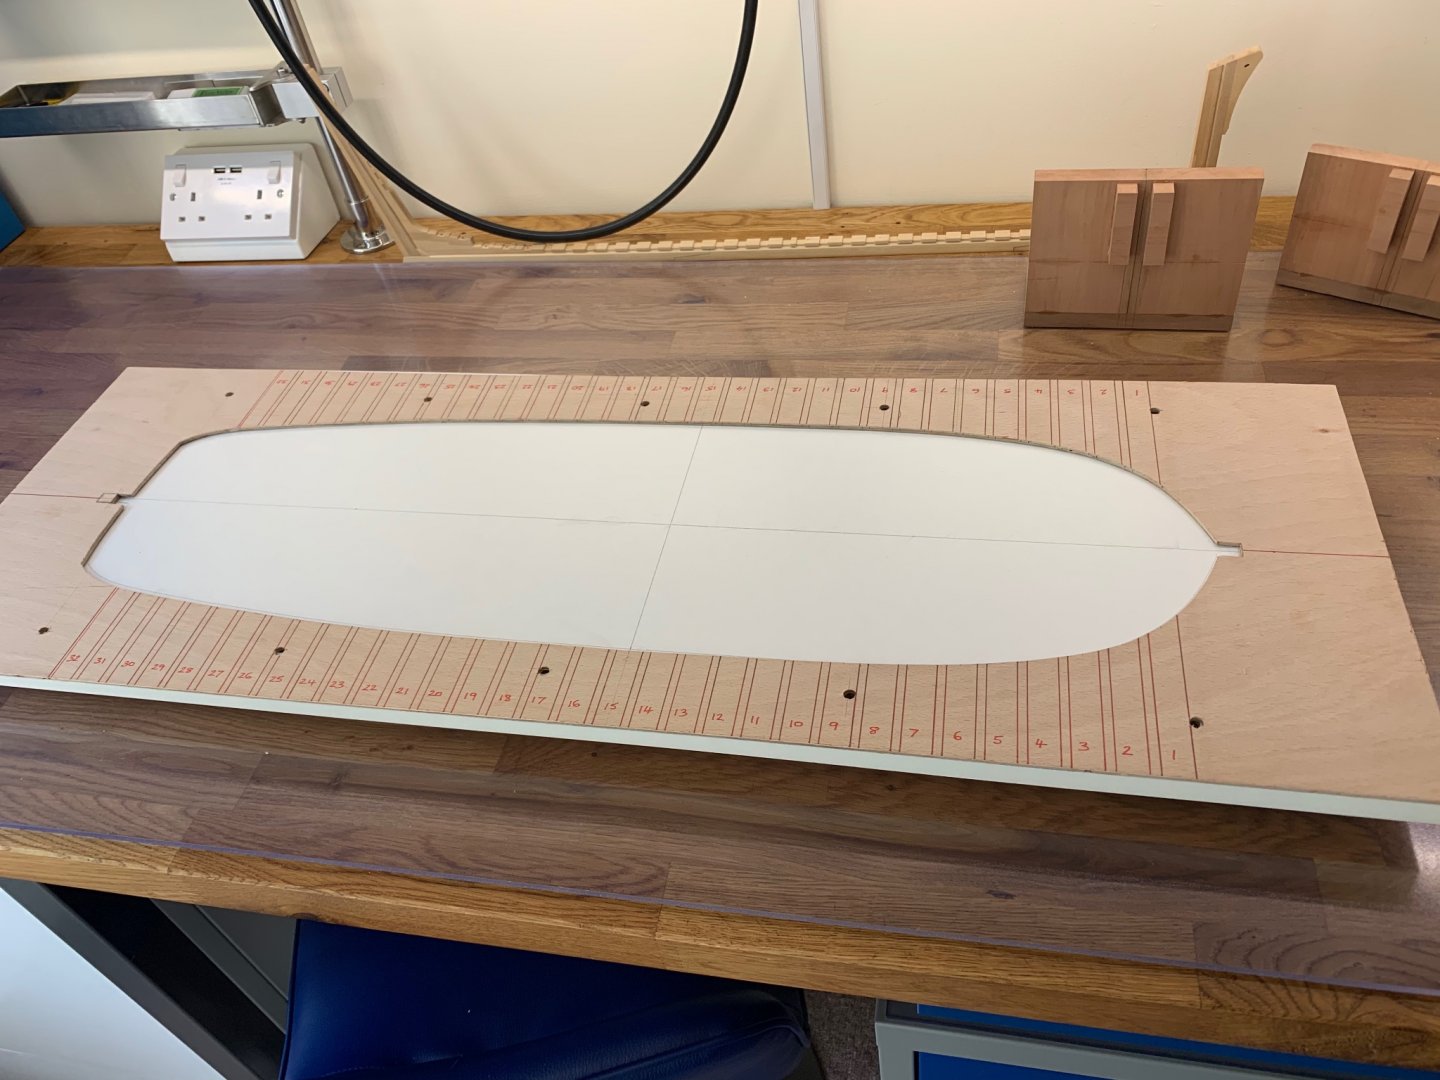
Hi Clogger I followed line “e” on the plans. The line is only drawn on the starboard side of the plan and is not reflected on the port side. To solve this I ran a centre line down some tracing paper and traced the starboard side. I then flipped the paper over to get the same profile on the port side.
-
Sherline Mill Essential Accessories?
No Idea replied to No Idea's topic in Modeling tools and Workshop Equipment
wefalck thanks very much for this information as this is exactly the kind of thing that I need to learn. Although I did a tool making apprenticeship in the 80's things have changed so much since then. I currently have two collets (3mm and 1/8") which are secured using a draw bar for this mill and are rated to 12K RPM. I like this system as it has few interfaces and from my two day experience of this mill its a very very secure holding system which also seems to runs true. My curiosity and other posts on this forum made me think that maybe an ER16 system may be better for my needs. Also when you look at the Sherline spindle its threaded like a mill chuck should be there. I guess this is something to do with the lathe. I'm on a very different learning curve here but one which I'll hopefully understand soon Mark -
Sherline Mill Essential Accessories?
No Idea replied to No Idea's topic in Modeling tools and Workshop Equipment
Hi wefalck and thanks for your comments I don't actually know what an ER collet chuck is? I've just assumed that it is an adjustable collet chuck that fits many sizes? I only machine wood and use very few shank sizes - however a Sherline collet in the UK is £27 or if you like $35 a go. So over here 3 collets is the best part of $100 so I was wondering if there was maybe an equivalent way for a reasonable price. Thanks for the advice on the tool makers vices I'll have a good look on the internet Mark -
Sherline Mill Essential Accessories?
No Idea replied to No Idea's topic in Modeling tools and Workshop Equipment
Hi Bill and Joe and thanks for your comments Bill - I've actually ordered the step blocks as I thought that my Proxxon one's would be adequate and fit but the don't. They should be here next week and I've also ordered the T bolts too. Interestingly I've also found that the headstock bearings heat up on high speed and I've even adjusted the end play on the preset nut as per the instructions. They don't get so hot though that I can't touch the headstock so I'll see how that goes. The instructions say that the bearings cannot be damaged by heat and if I have any problems I'll contact Sherline but its nice to hear that its just not me. I've found that I do not get tear out or chip out at the higher speed which is very encouraging. Bill and Thistle17 - I've already got a tilting table but I have seen the rotary table. Thanks for the advice here as I thought that I would need one of these at some point. They look extremely well made so I'll get saving for one. Thanks Mark -
Sherline Mill Essential Accessories?
No Idea posted a topic in Modeling tools and Workshop Equipment
Hi All Following on from a thread regarding whether buying a mill was justified or not, I've upgraded to a Sherline mill from my Proxxon mill. I really cannot compare this to my Proxxon mill as this is in a very different league and I've been more than surprised by just how good it is. In fact I'm really surprised just how good it is. Being from the UK tools imported from the USA carry quite a tariff but I'm used to that having bought a Byrnes saw. As I use mainly only small end mills I invested in the 10k RPM pulley accessories which works great and cutting just wood there is more than enough power in this mill to do the job. So my question is........what accessories would you recommend? I keep on reading about ER - 16 collet chucks but I don't really know what they are. I'm guessing that they are contractable collect chucks but are these things really worth getting? I have found that most of the cutting shanks that I use are either 3mm or 1/8" so simple collets may do the job. Any advice / experience would be welcome Thanks Mark -
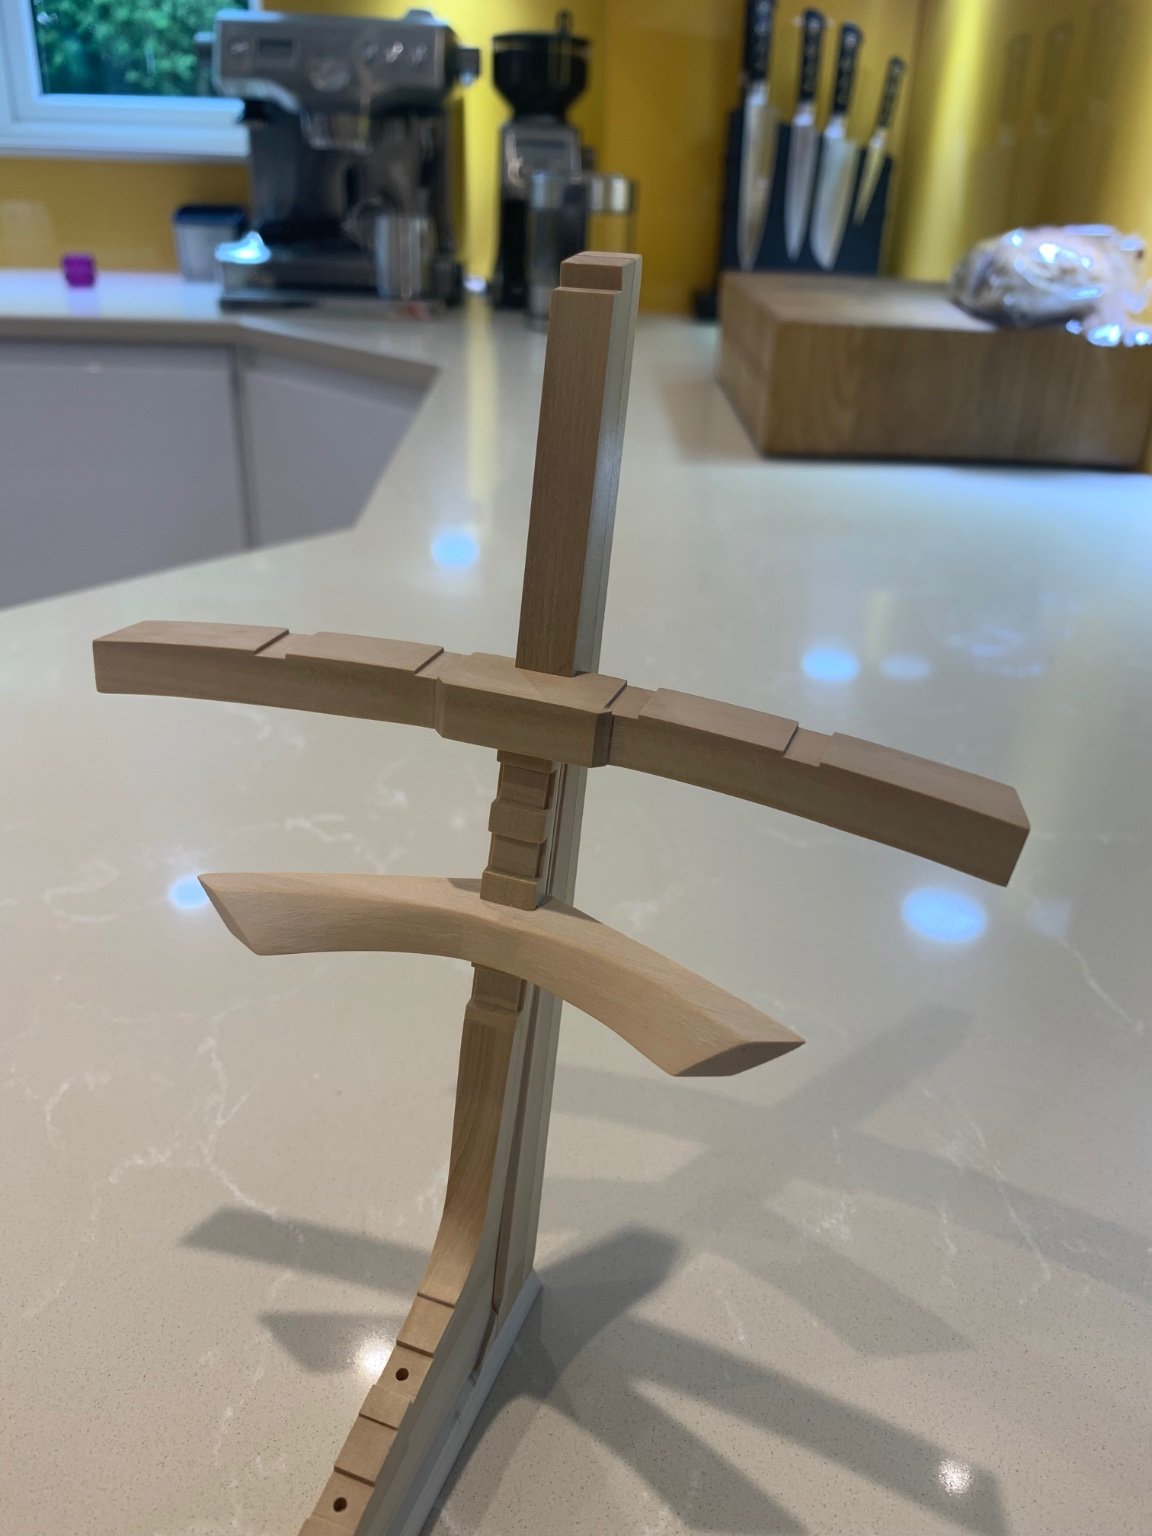
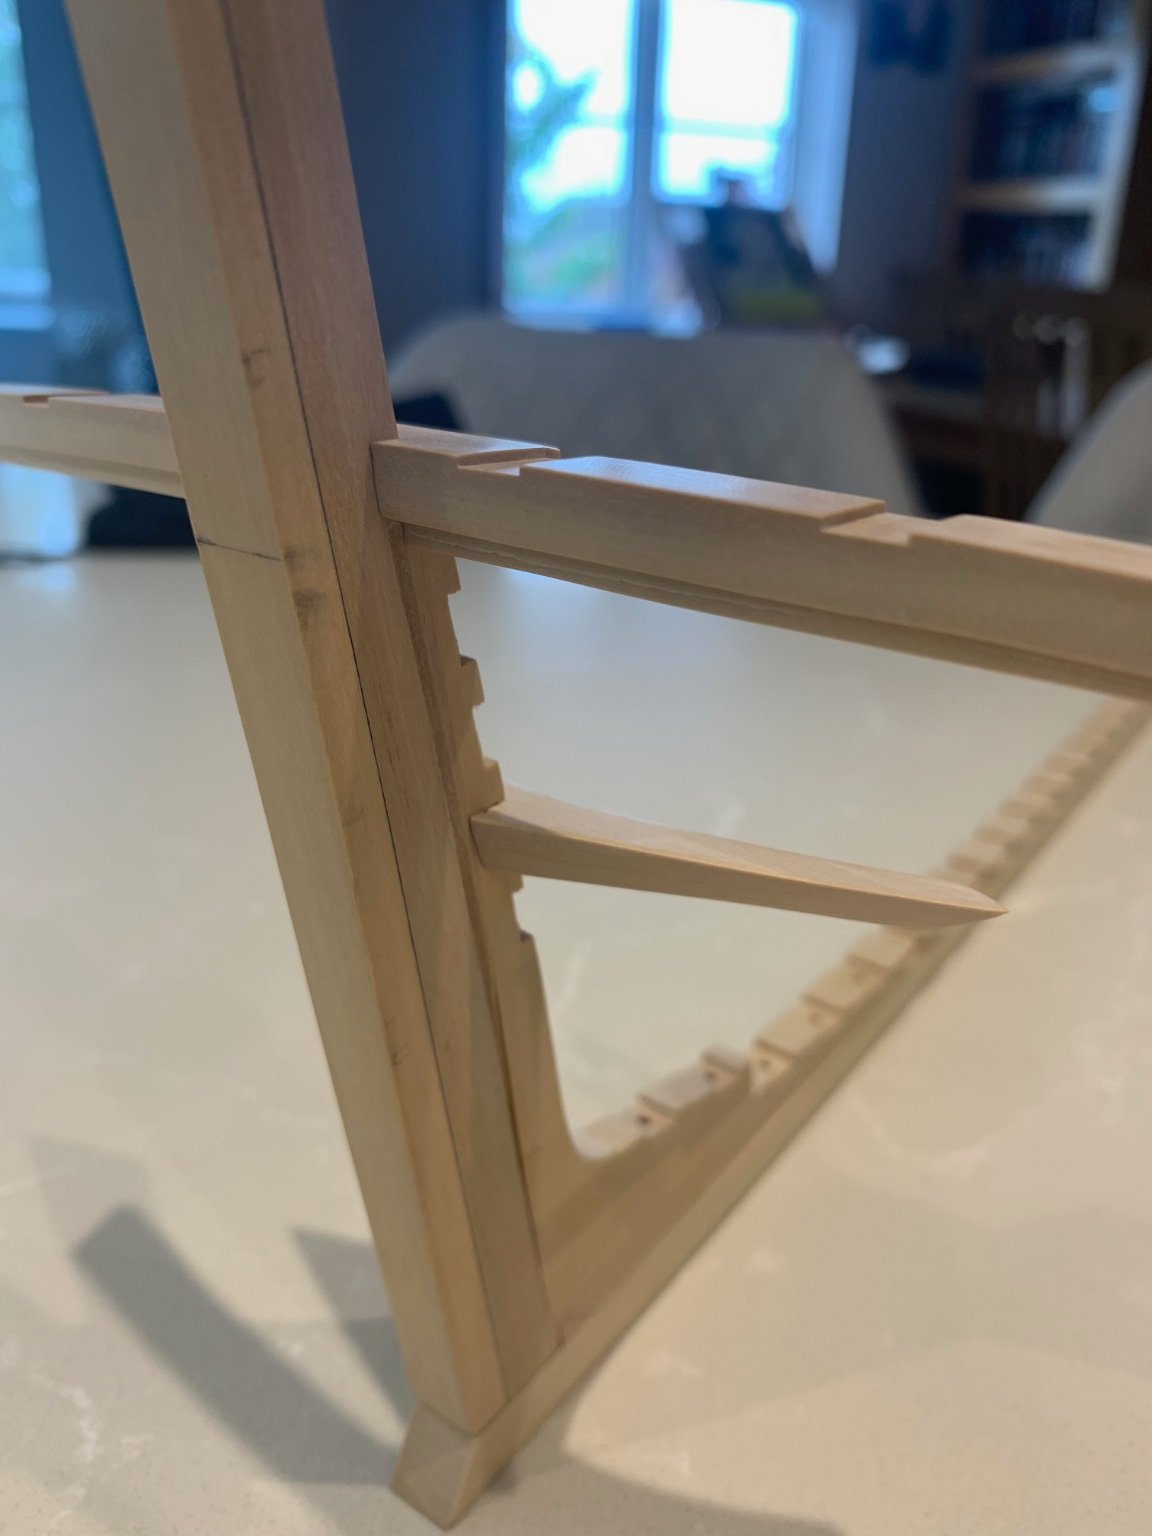
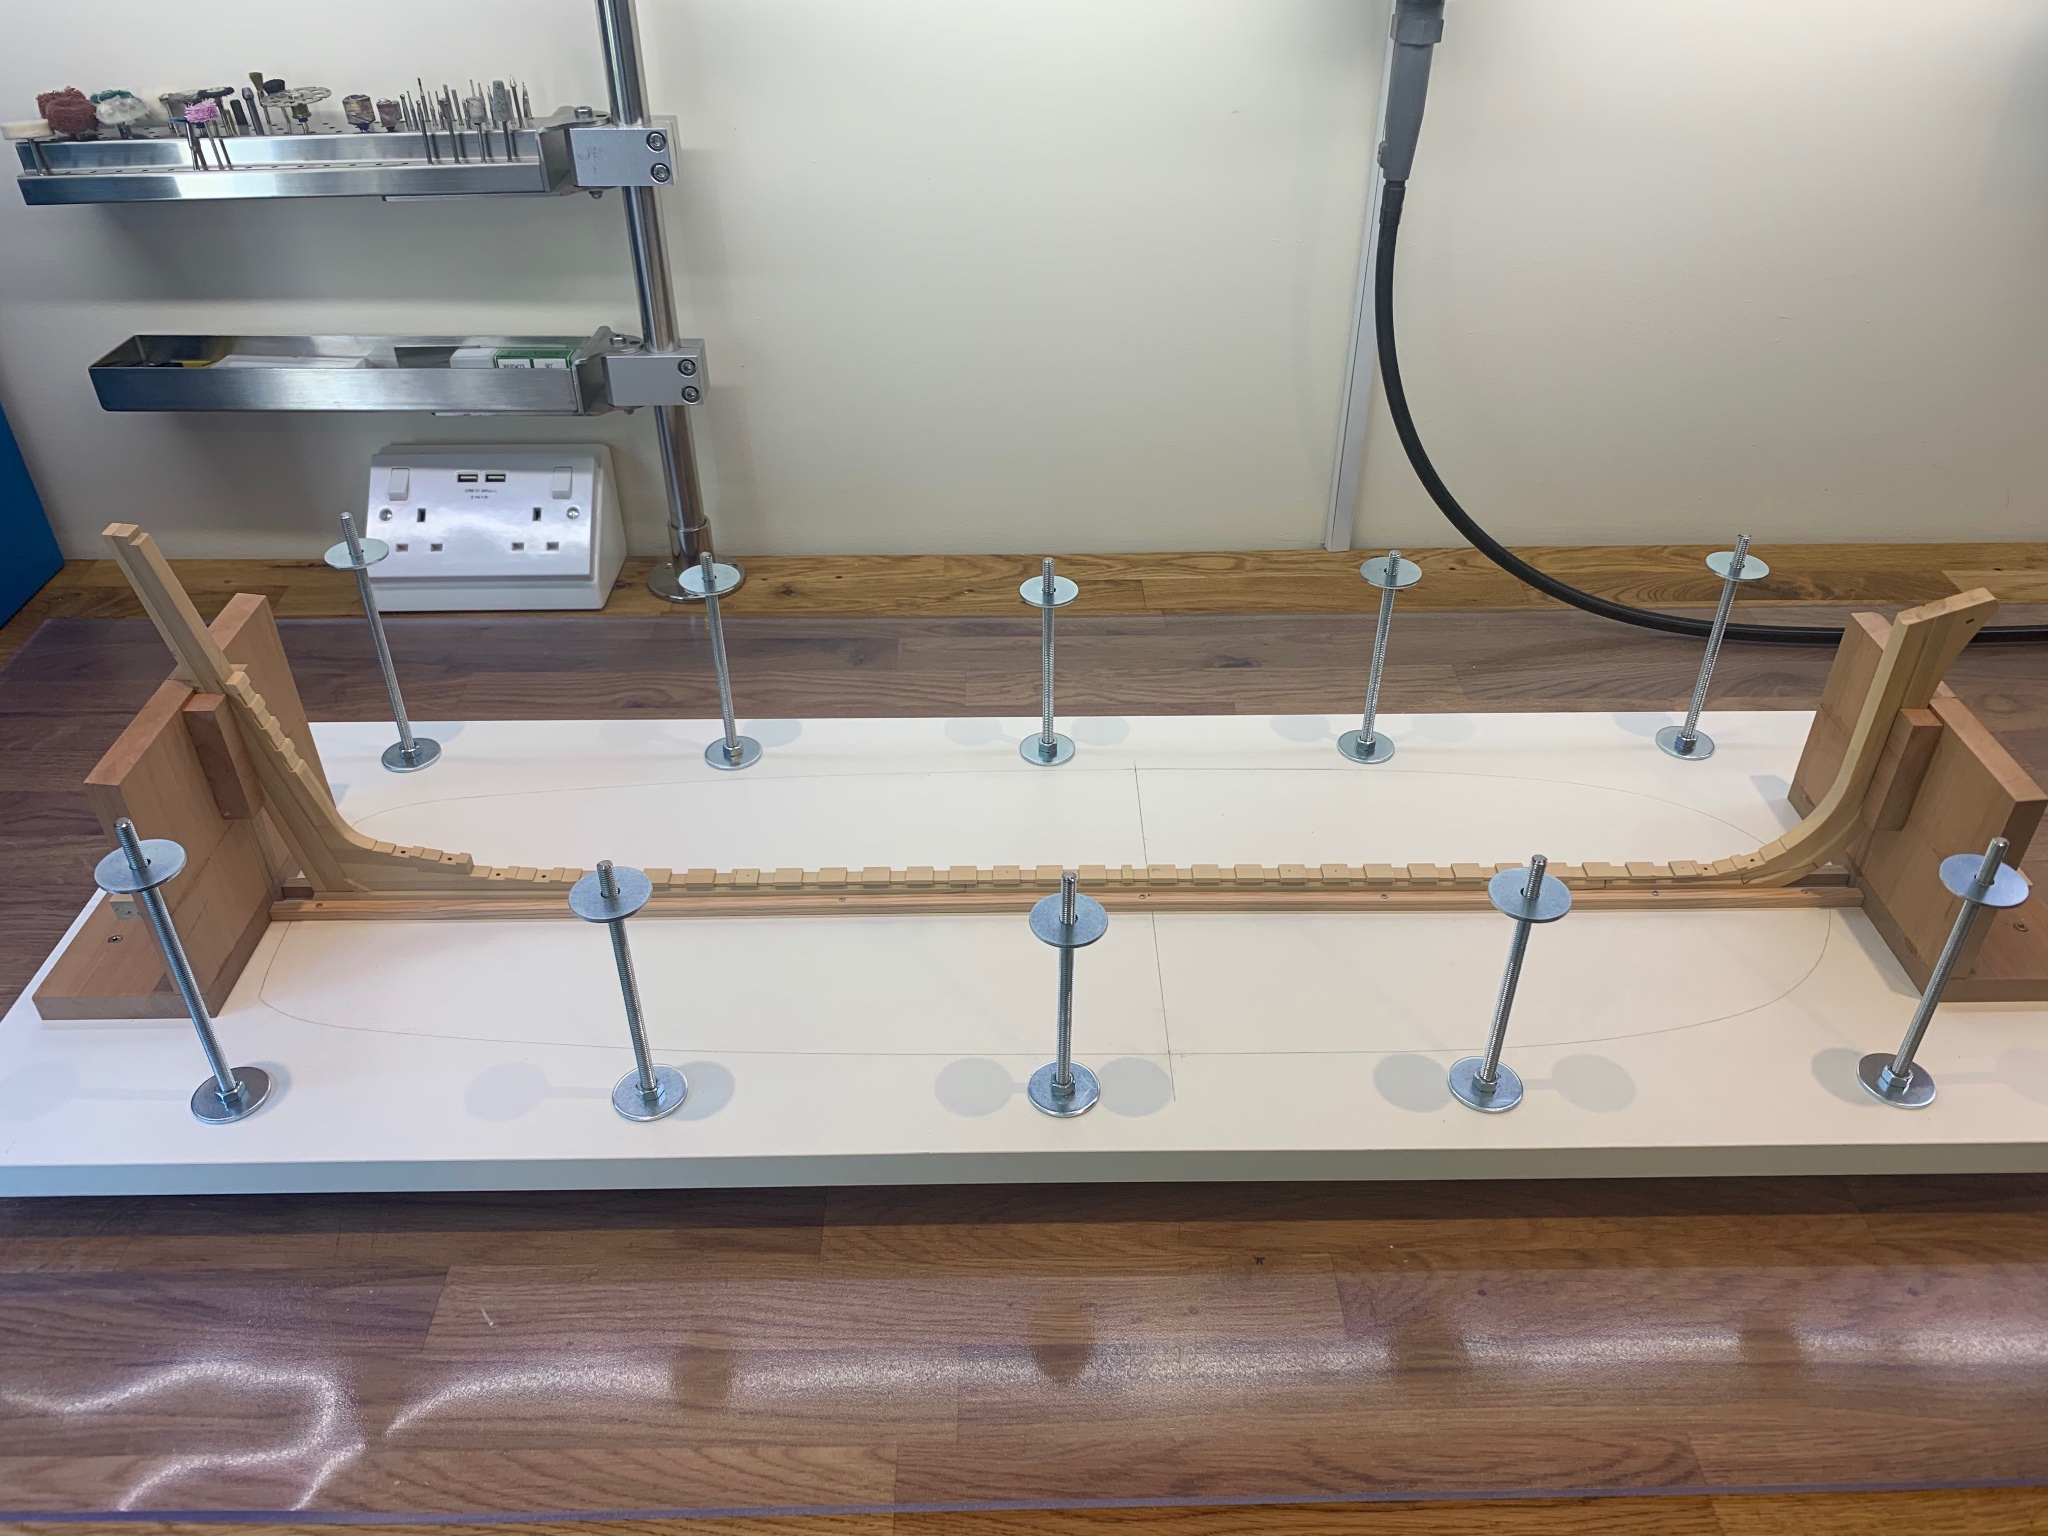
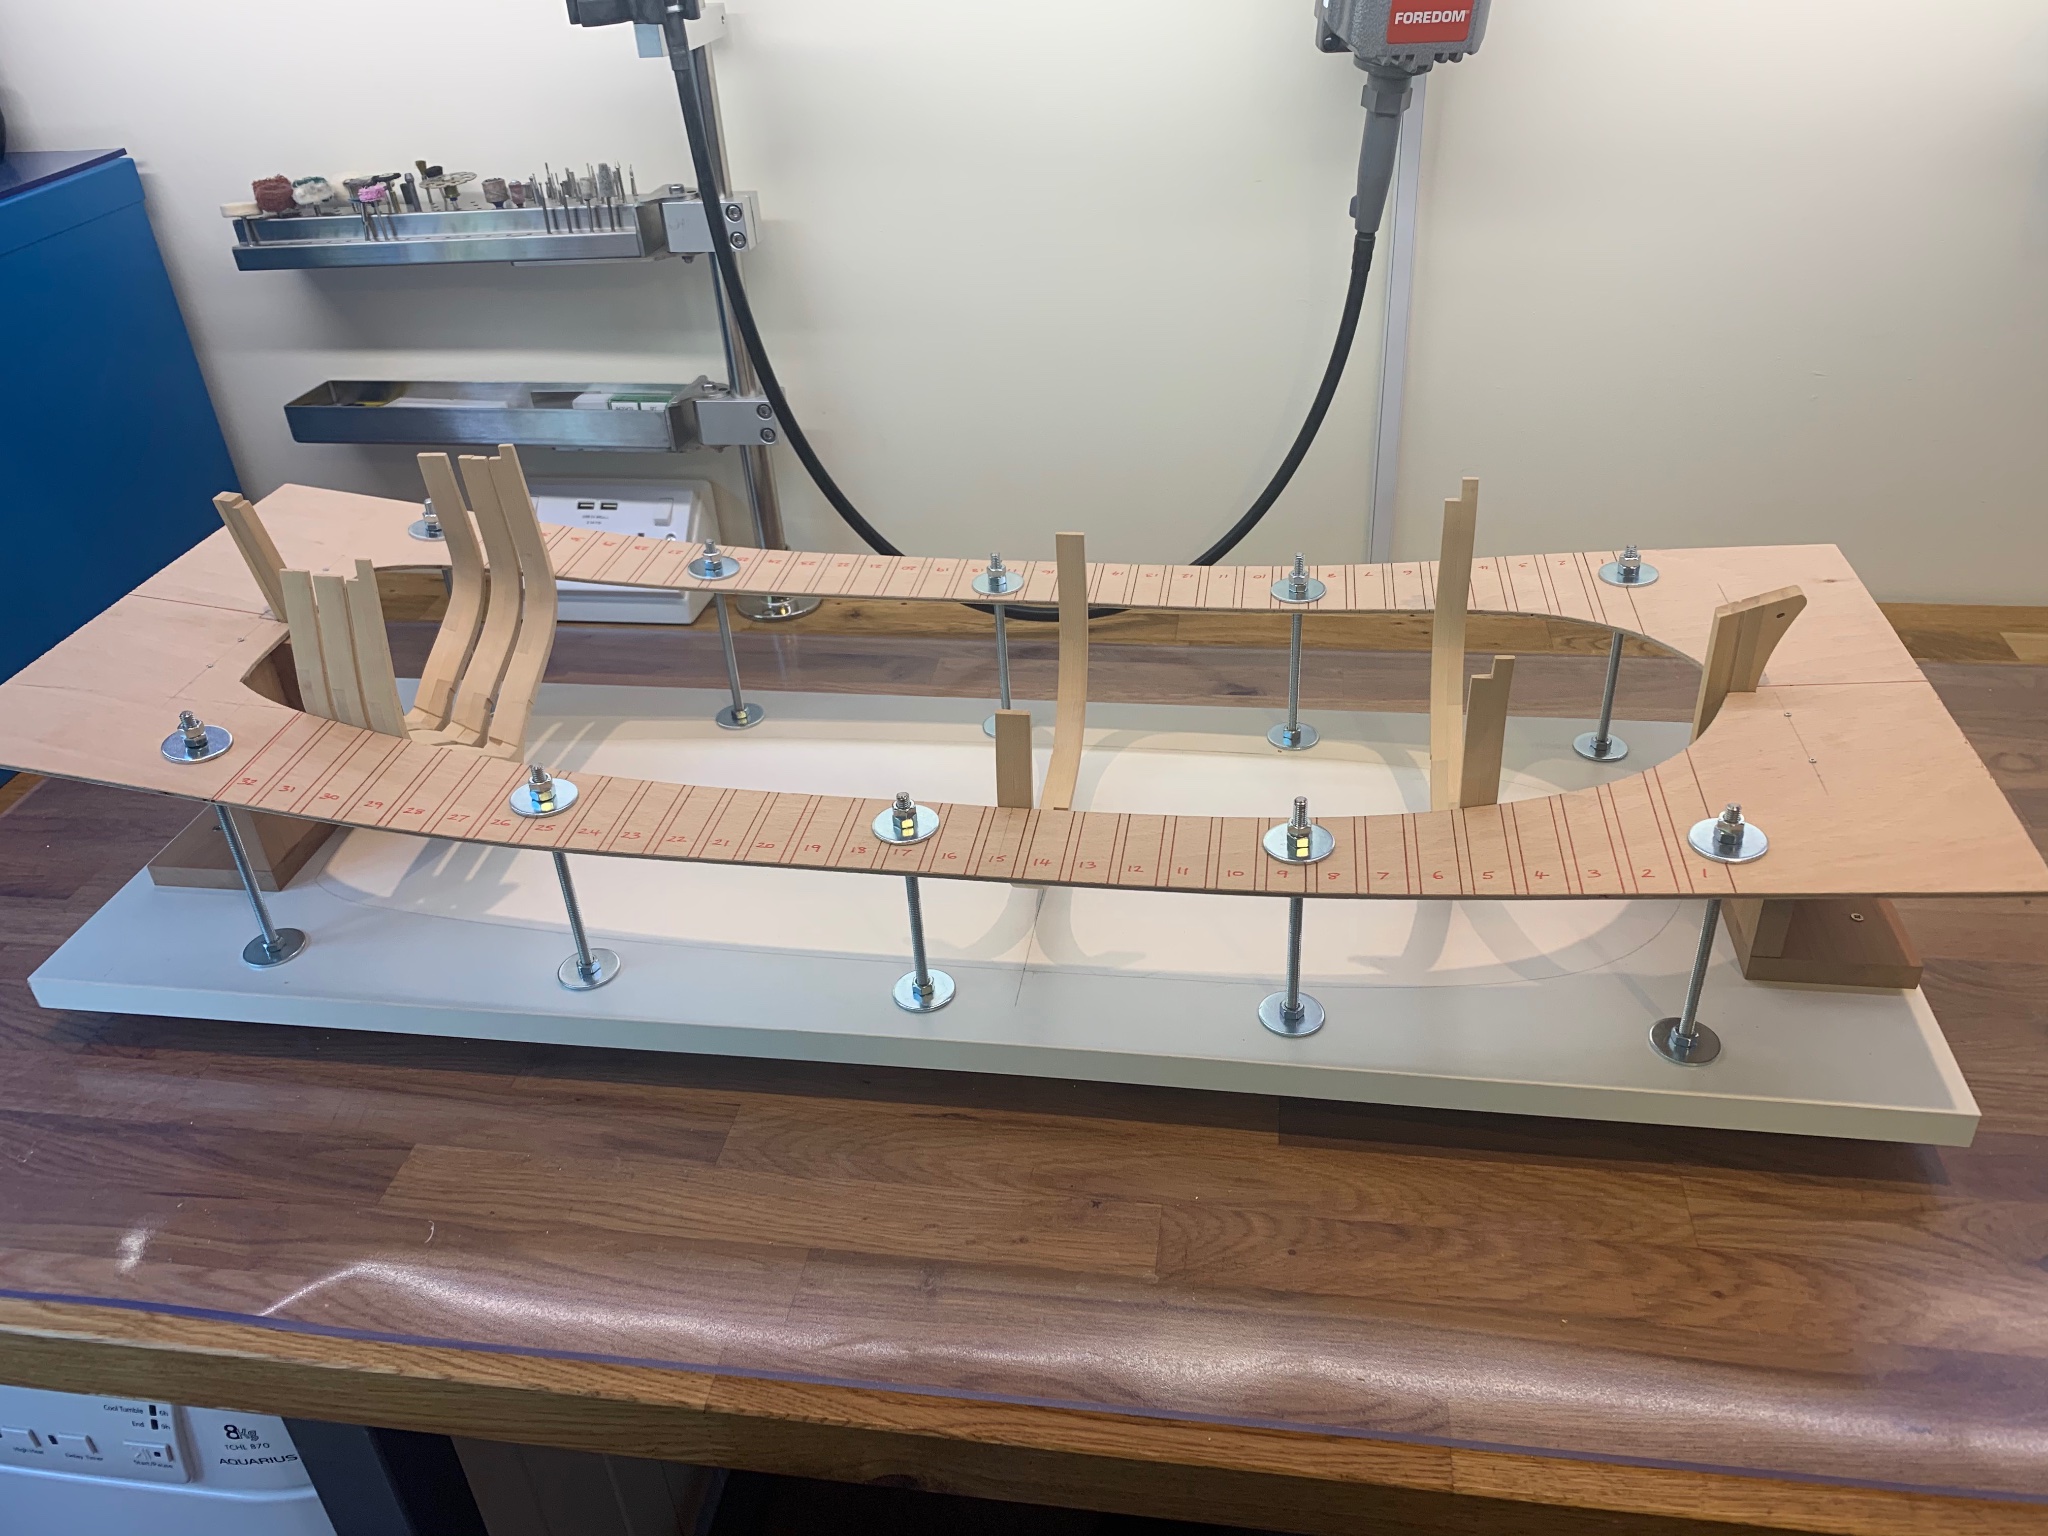
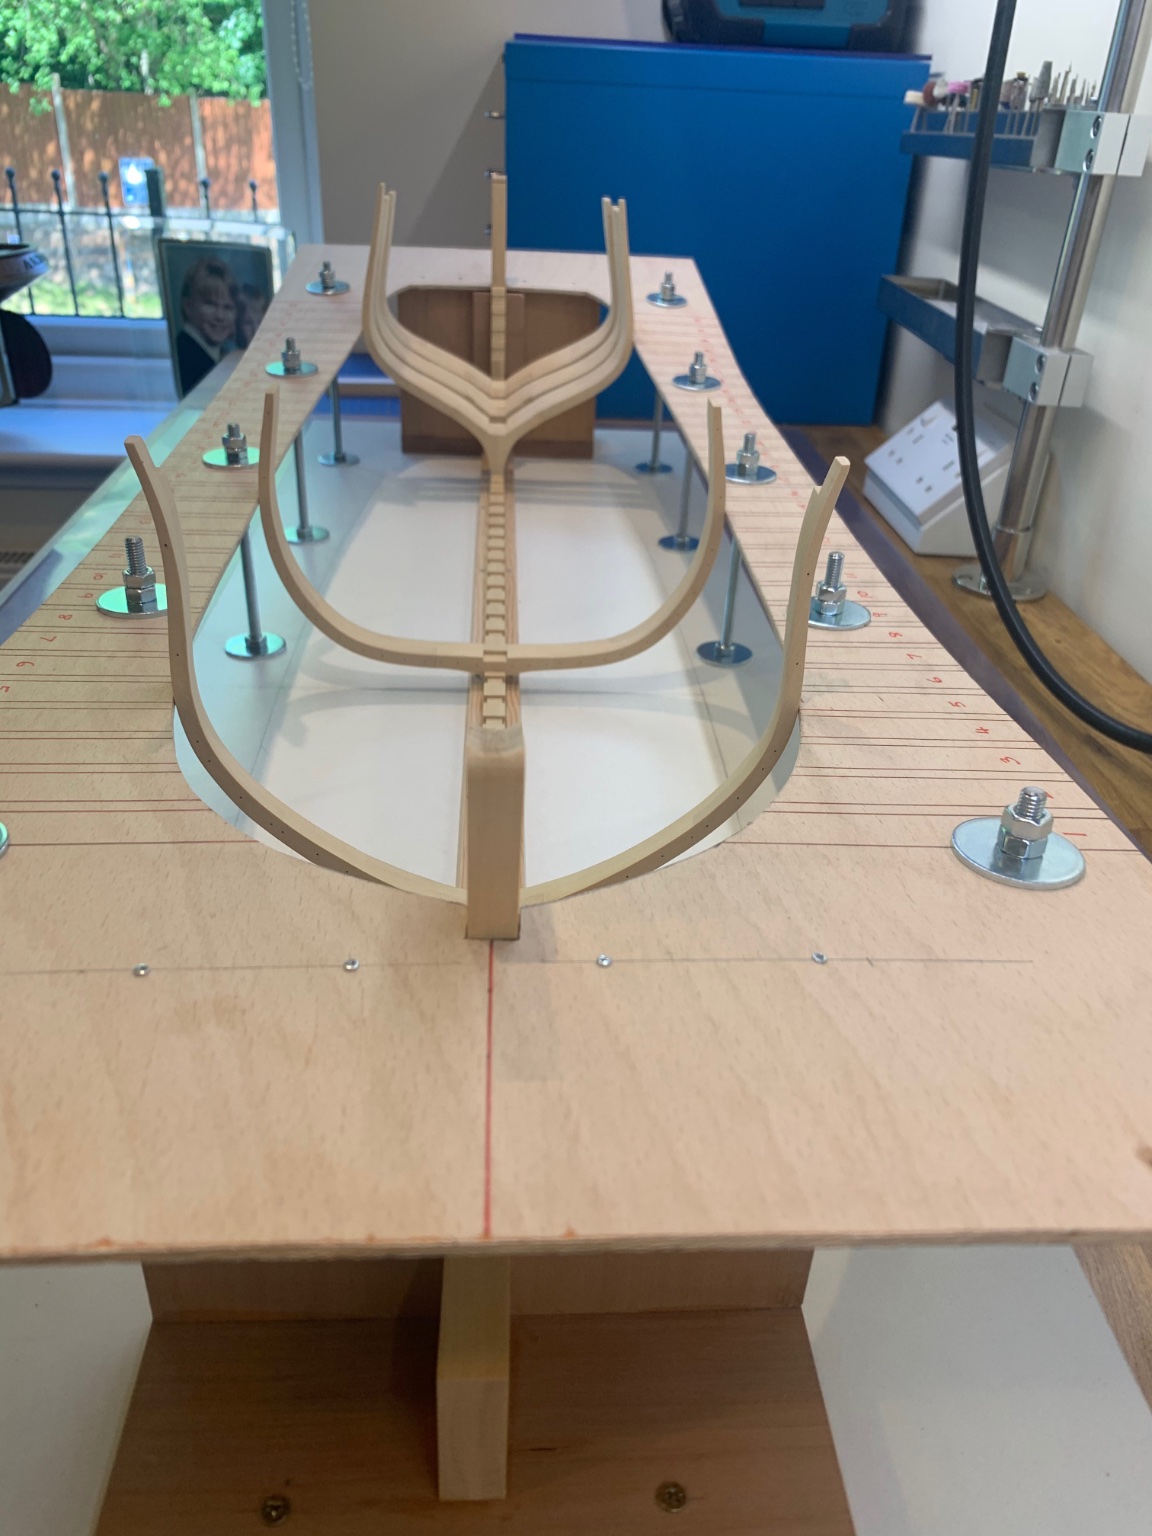
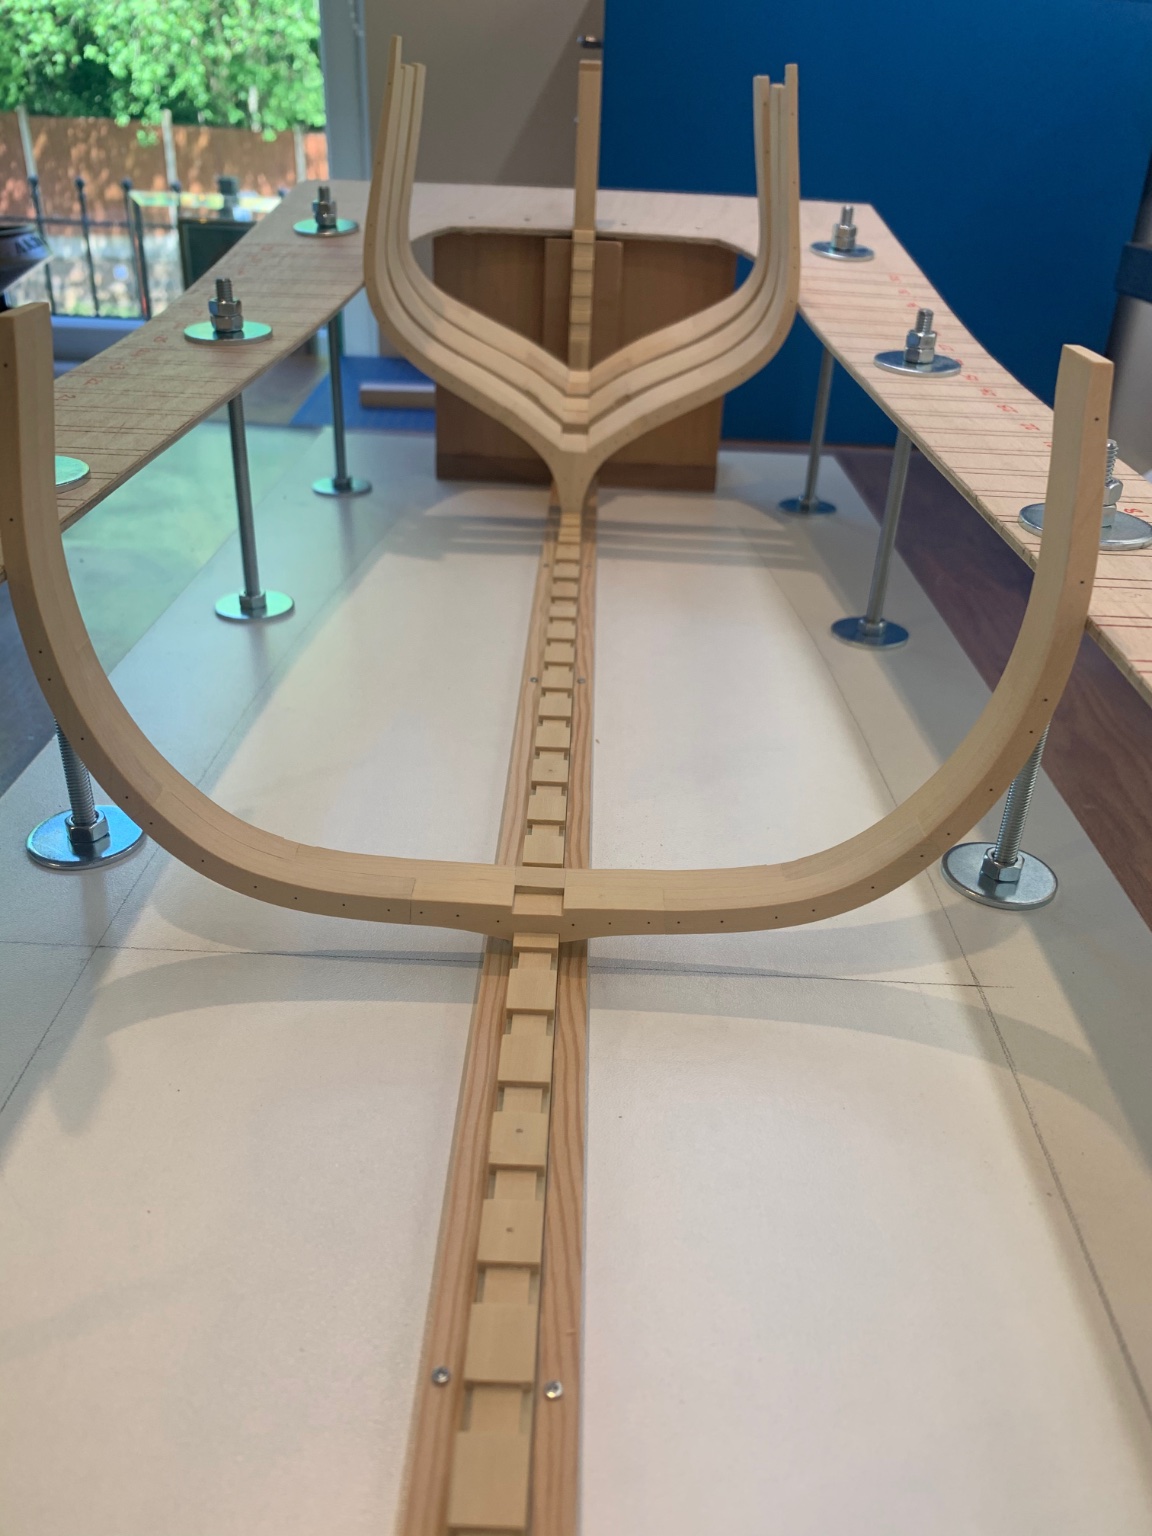
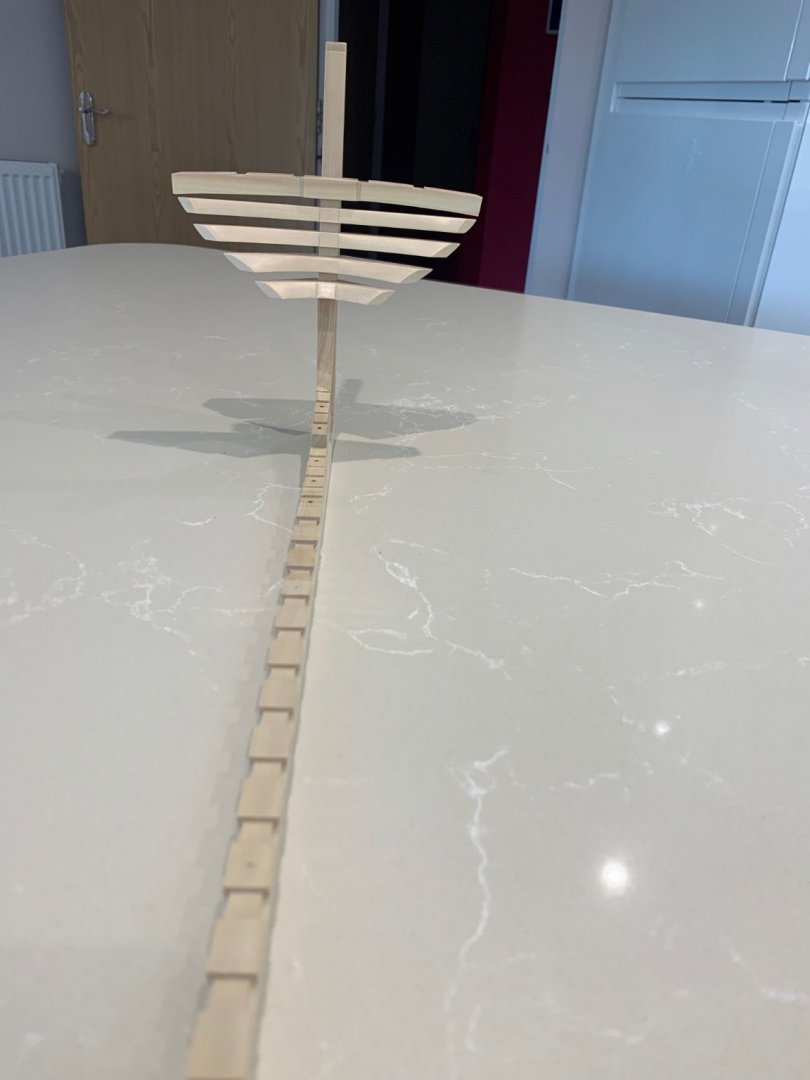
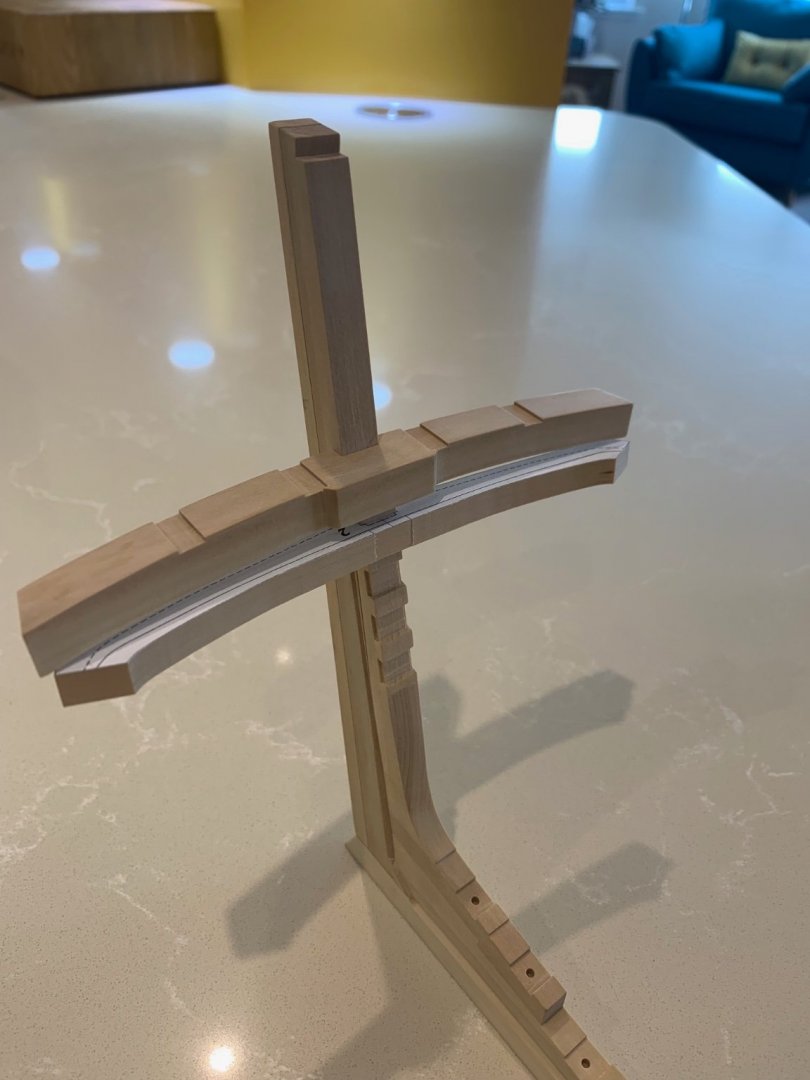
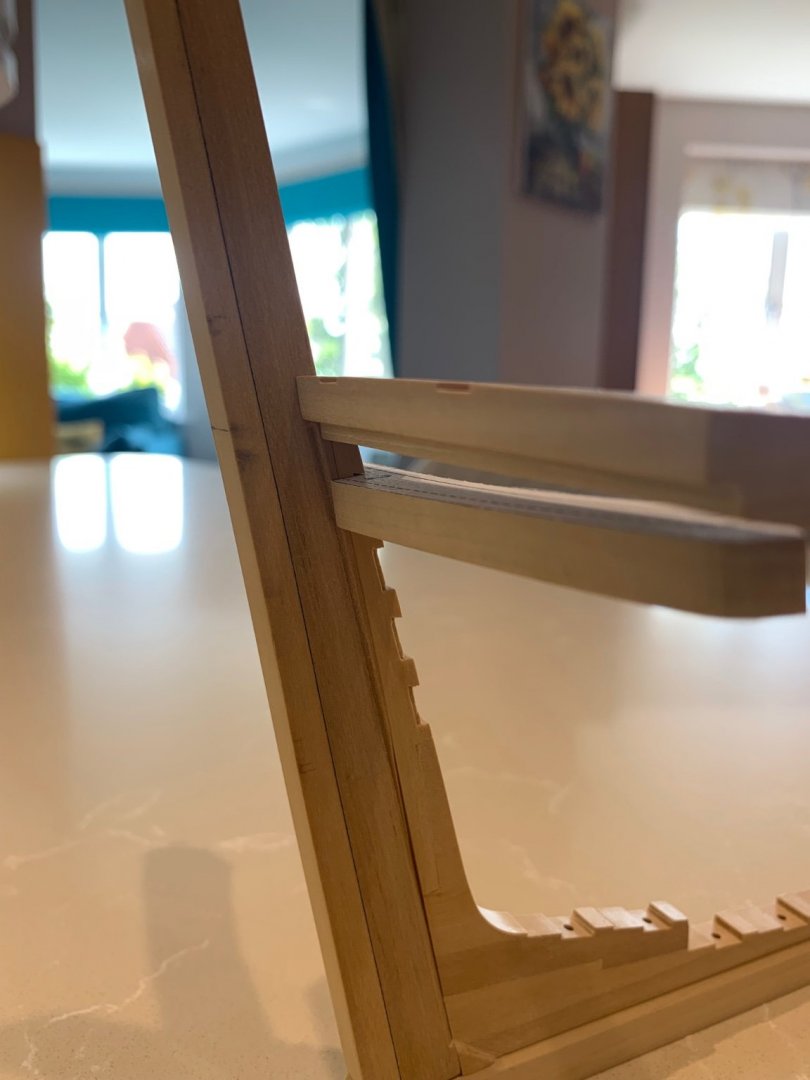
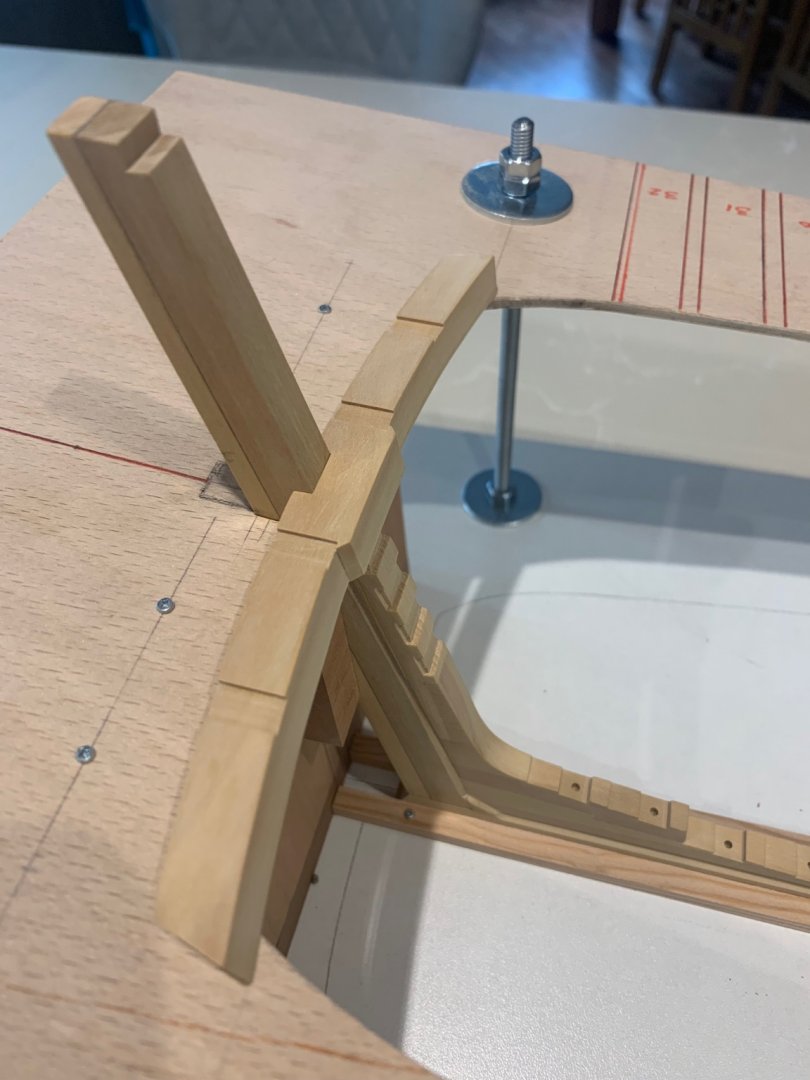
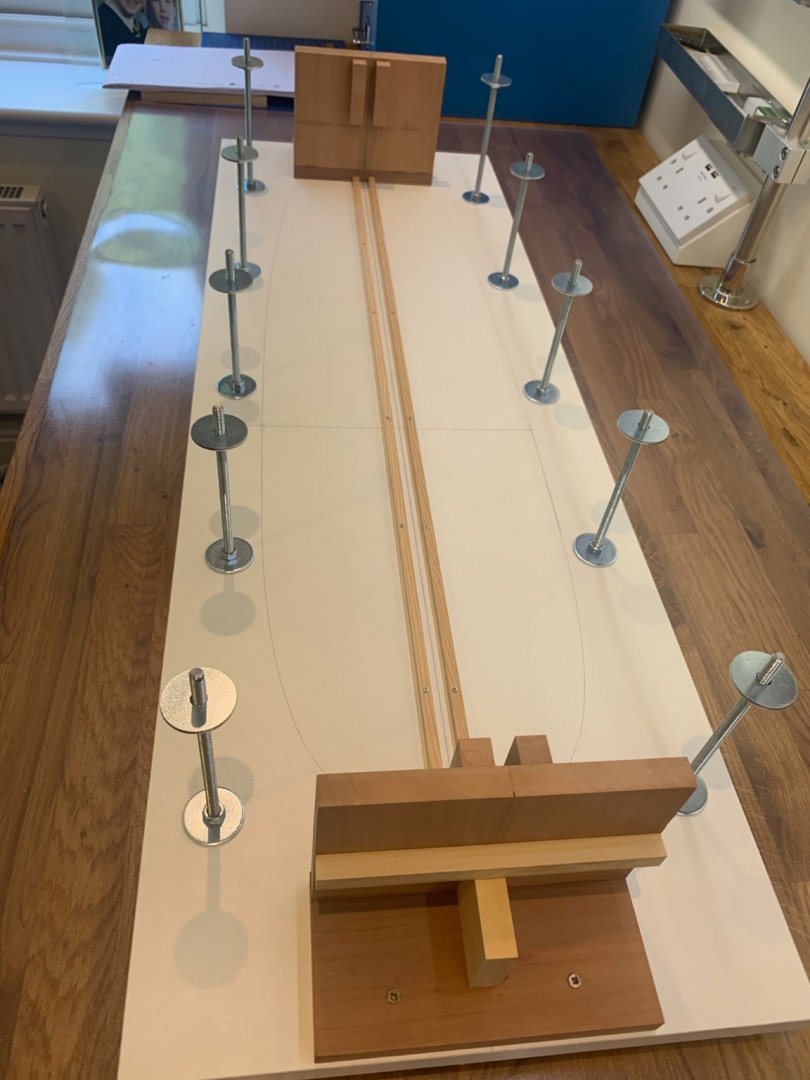
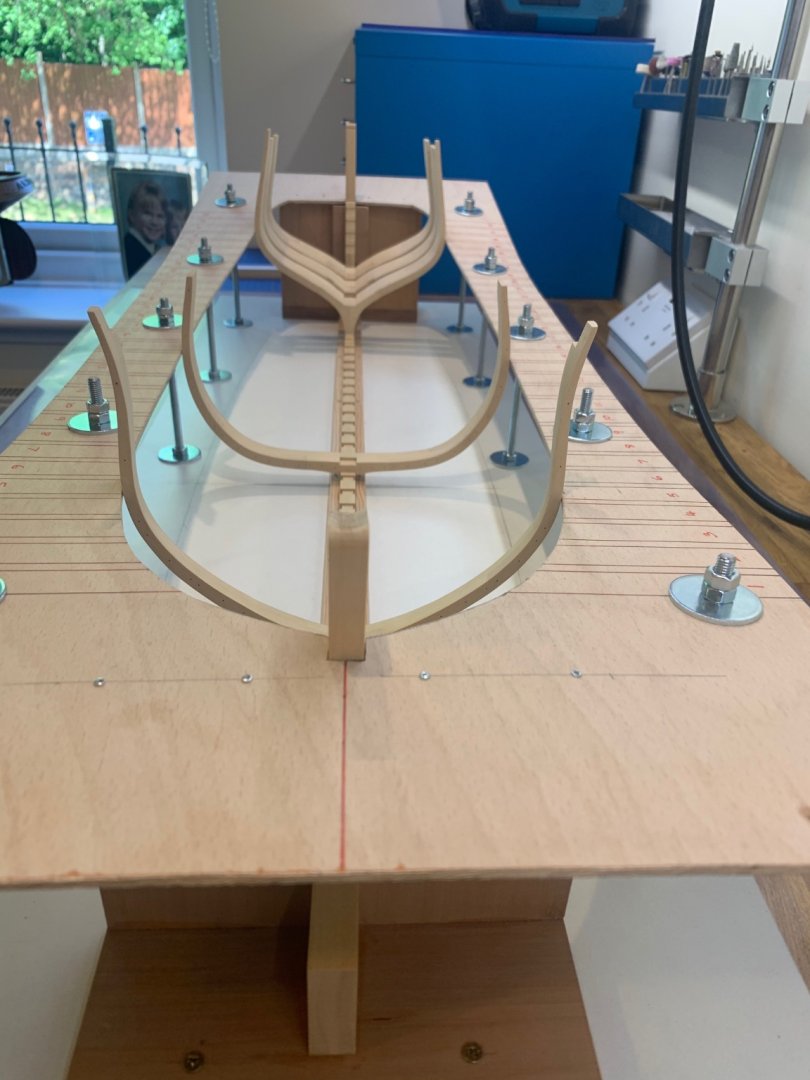
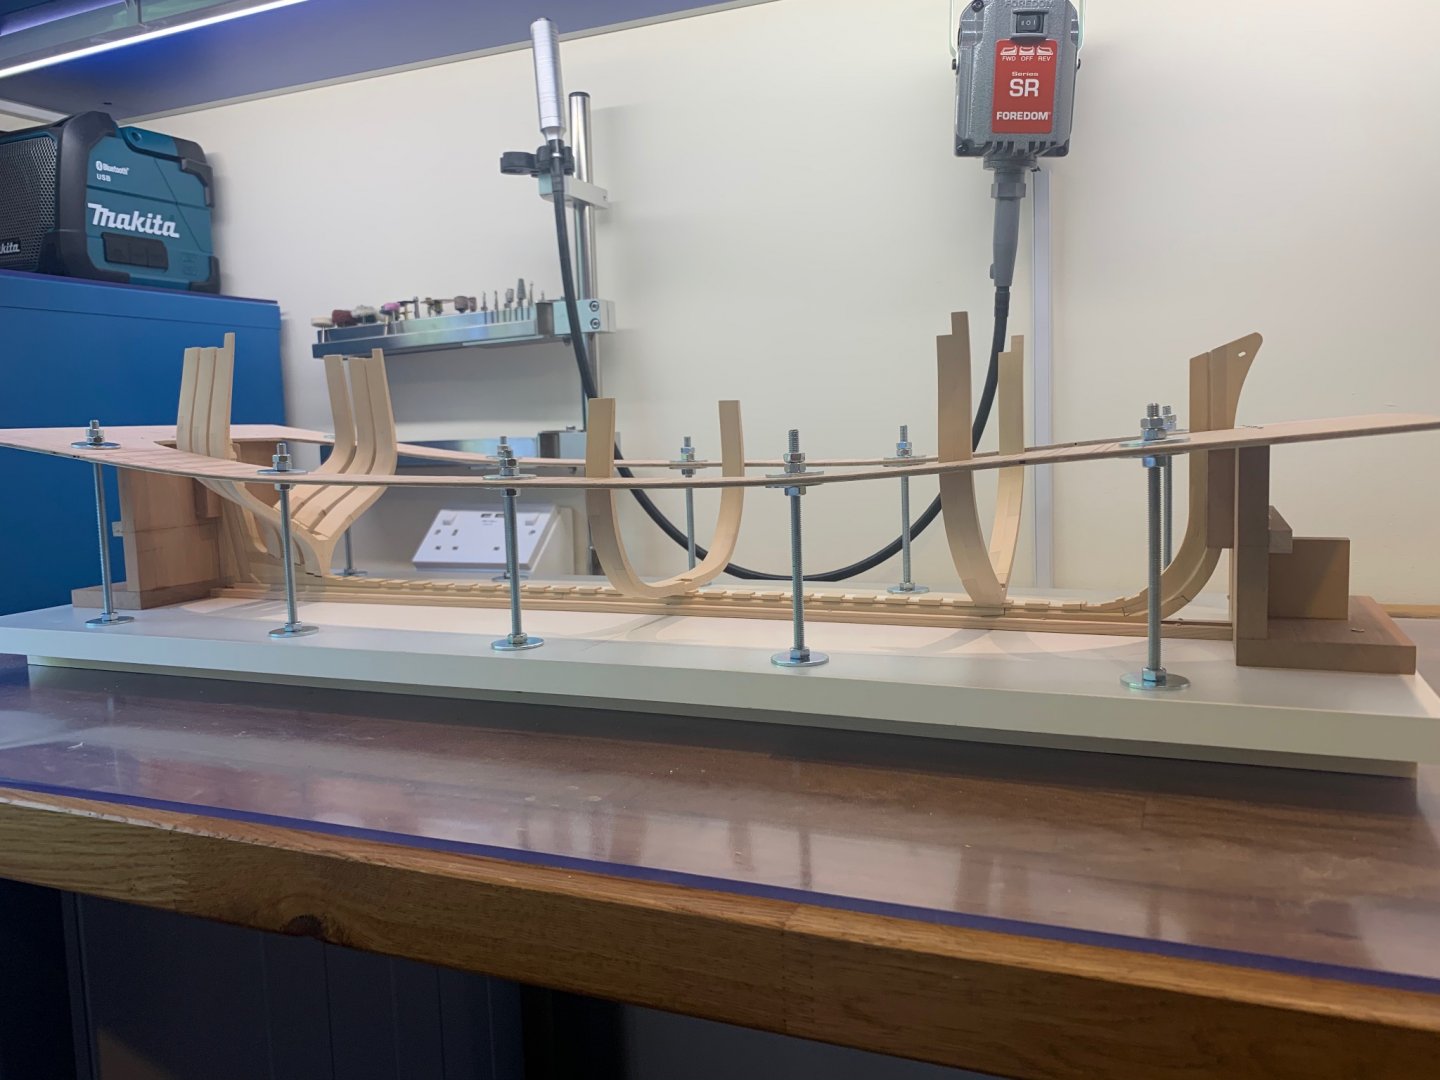
Sorry for the lack of updates but I'm waiting on a small adjustable angle plate to be delivered for my mill vice. I've now been told it will probably be a couple more weeks yet So while I've been waiting I have made the assembly jig which turned out to be a project in itself! It's very sturdy and holds the keel firmly and straight. I used the station line on frame 15 as my datum for everything to line up and its seems to have gone ok. I did find that when I curved the upper platform it shortened the aperture a little so once it was bolted in place it did need slightly adjusting it to allow for this shrinkage. I've roughly tried a few frames and they seem to fit nicely apart from the first four frames at the bow. I've checked them on the plans and I've left them a little on the thick side. So I reckon that if I sand them down to their correct size they should fit ok but I'll worry about that nearer the time. Here's a few pictures


-
What an amazing build - that is absolutely beautiful 👍
- 433 replies
-
- 6
-
-
- open boat
- small boat
- (and 1 more)
-
Thanks Mark and I hope so too. I'm finding with building this ship that I just cannot cover all eventualities no matter how hard I try. I'm certain that all model builders have the same thoughts. Cheers again as I really appreciate your comments