Some Idea
-
Posts
1,156 -
Joined
-
Last visited
Content Type
Profiles
Forums
Gallery
Events
Everything posted by Some Idea
-
 Wow that looks nasty but I'm really glad that you are ok 👍 It doesn't take much to hurt yourself thats for sure. When I was an apprentice we were told that there were two rules when using power tools of any kind 1. Use it only as intended with the utmost respect for own health and safety. 2. Break rule 1 and the tool will do you some serious damage.
 -
Sorry I should have said to Riotvan88 - In my opinion all is not lost. You have applied way too much epoxy and have tried using it as a filler and I'm sure that you are aware of this now. So moving forward I would use aluminium oxide paper starting with 120 grit working my way down to 320 grit. This stuff will tear through hardened epoxy so give it a try. I reckon that you have a good 2 or 3 days solid sanding ahead of you so wear a mask. Sanding blocks for this sort of job are not the way to go. You will use lots of paper but so be it. Good luck and the effort will be well worth it - just learn and move on
-
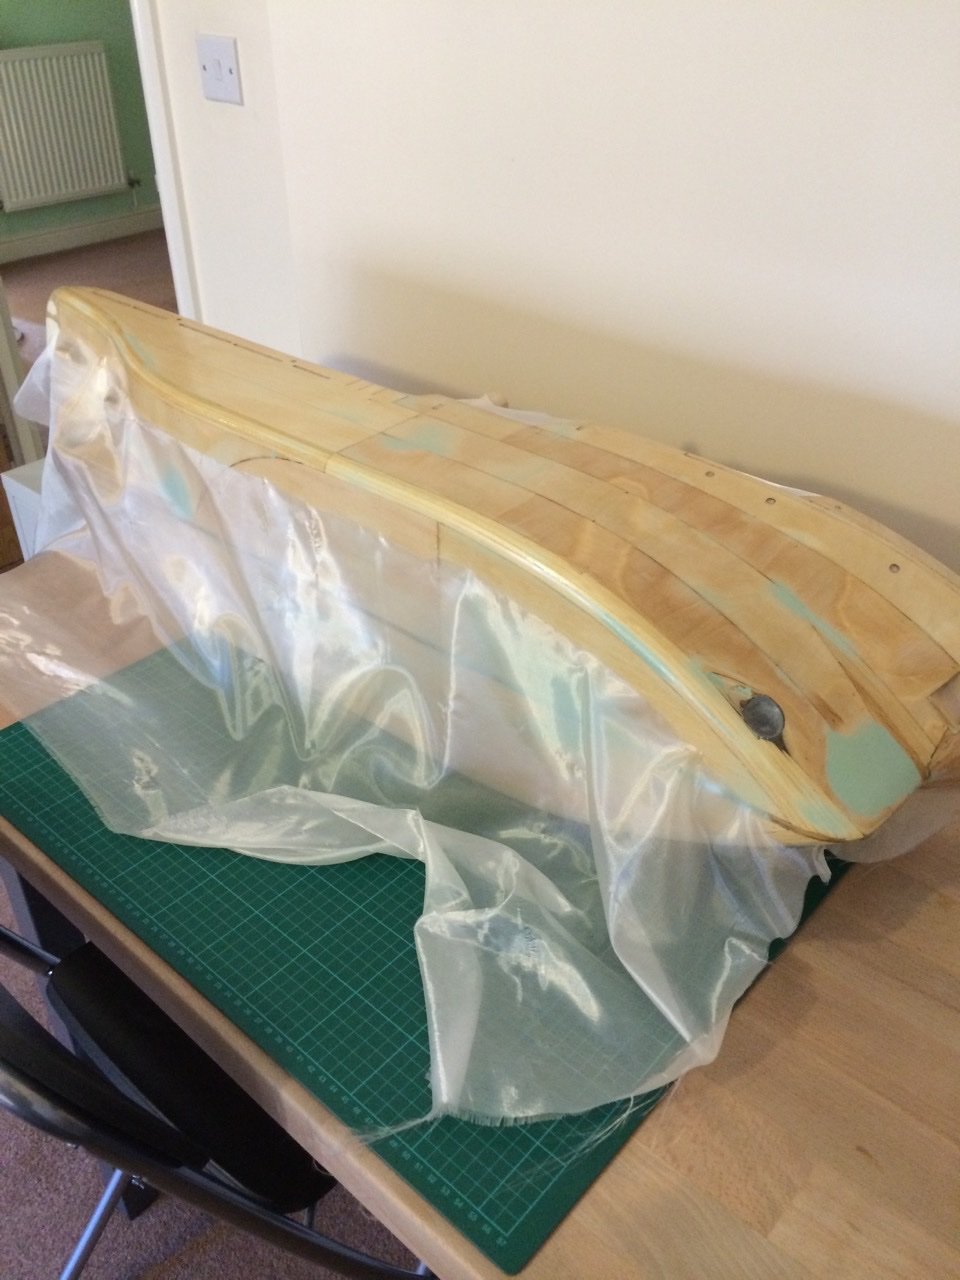
There's nothing wrong with using epoxy on a hull. The Smit Rotterdam is a kit that is also designed with radio control conversion in mind. These boats do get battered a bit whilst being used so epoxy is a favourite with RC builders. I usually use epoxy in combination with fibreglass cloth and it gives a beautifully smooth surface ready for paint. It does need to be applied correctly though as its not a filler its a sealant and gives very good protection. Here's a ship I made a few years ago with one side being epoxied with cloth.

-
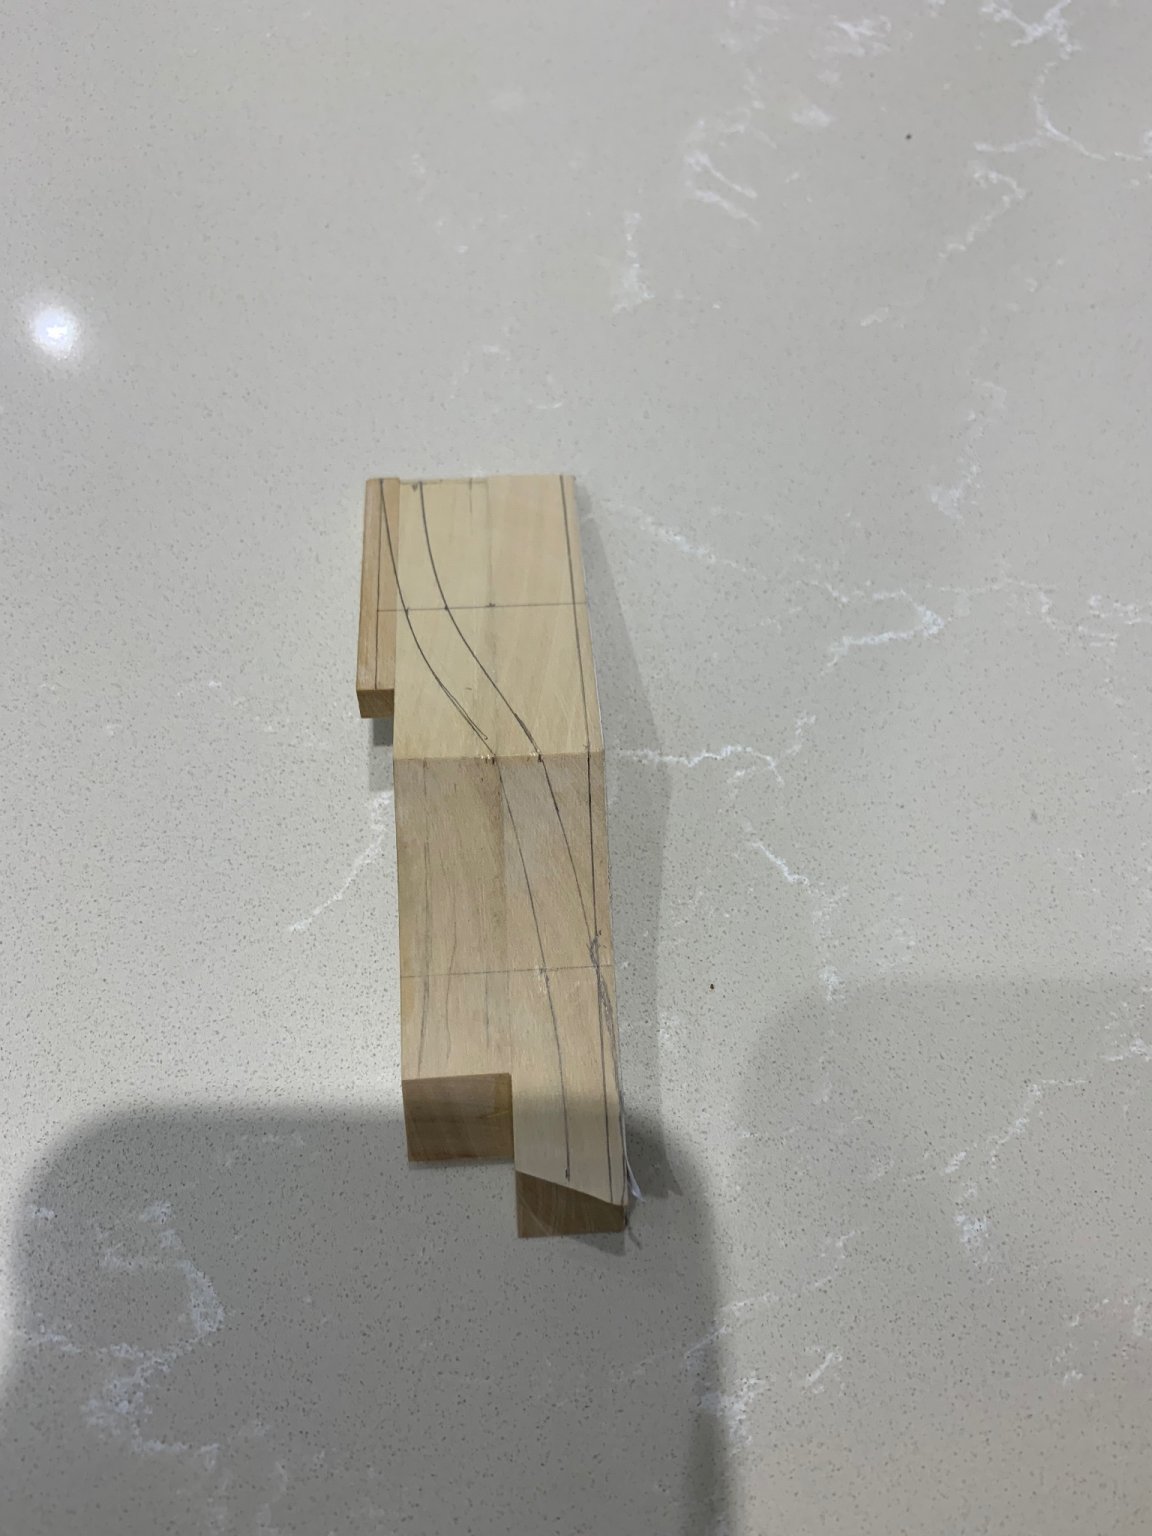
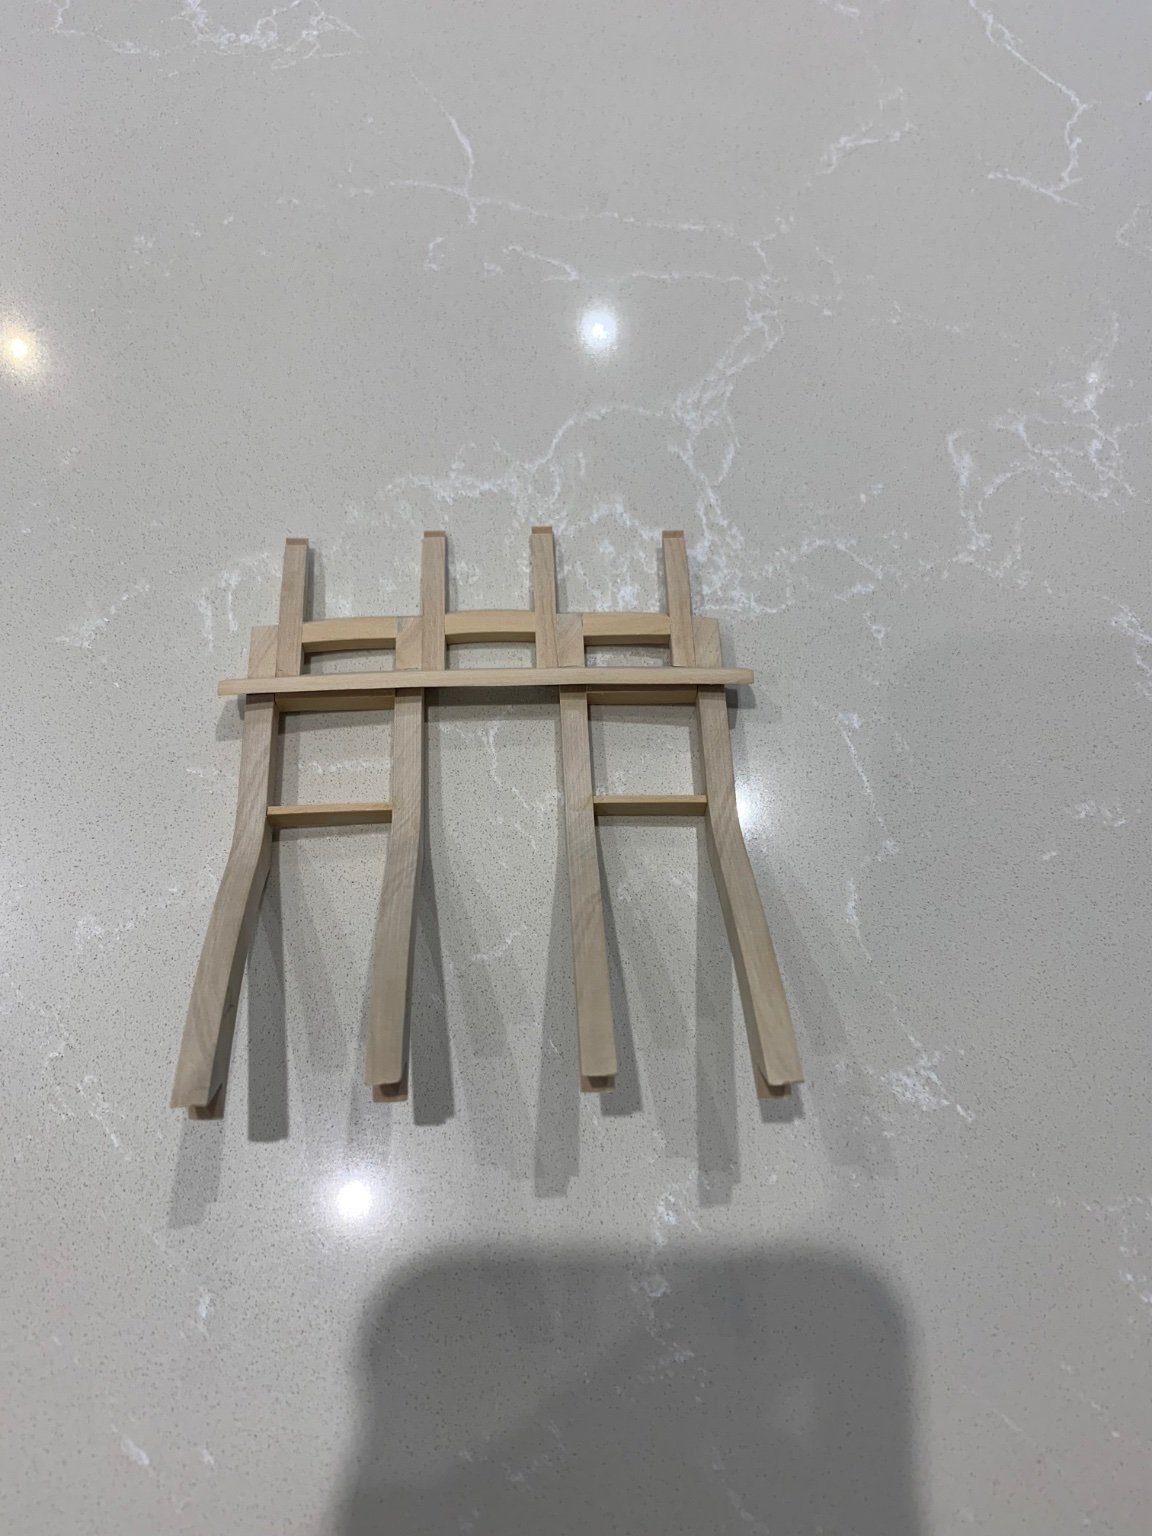
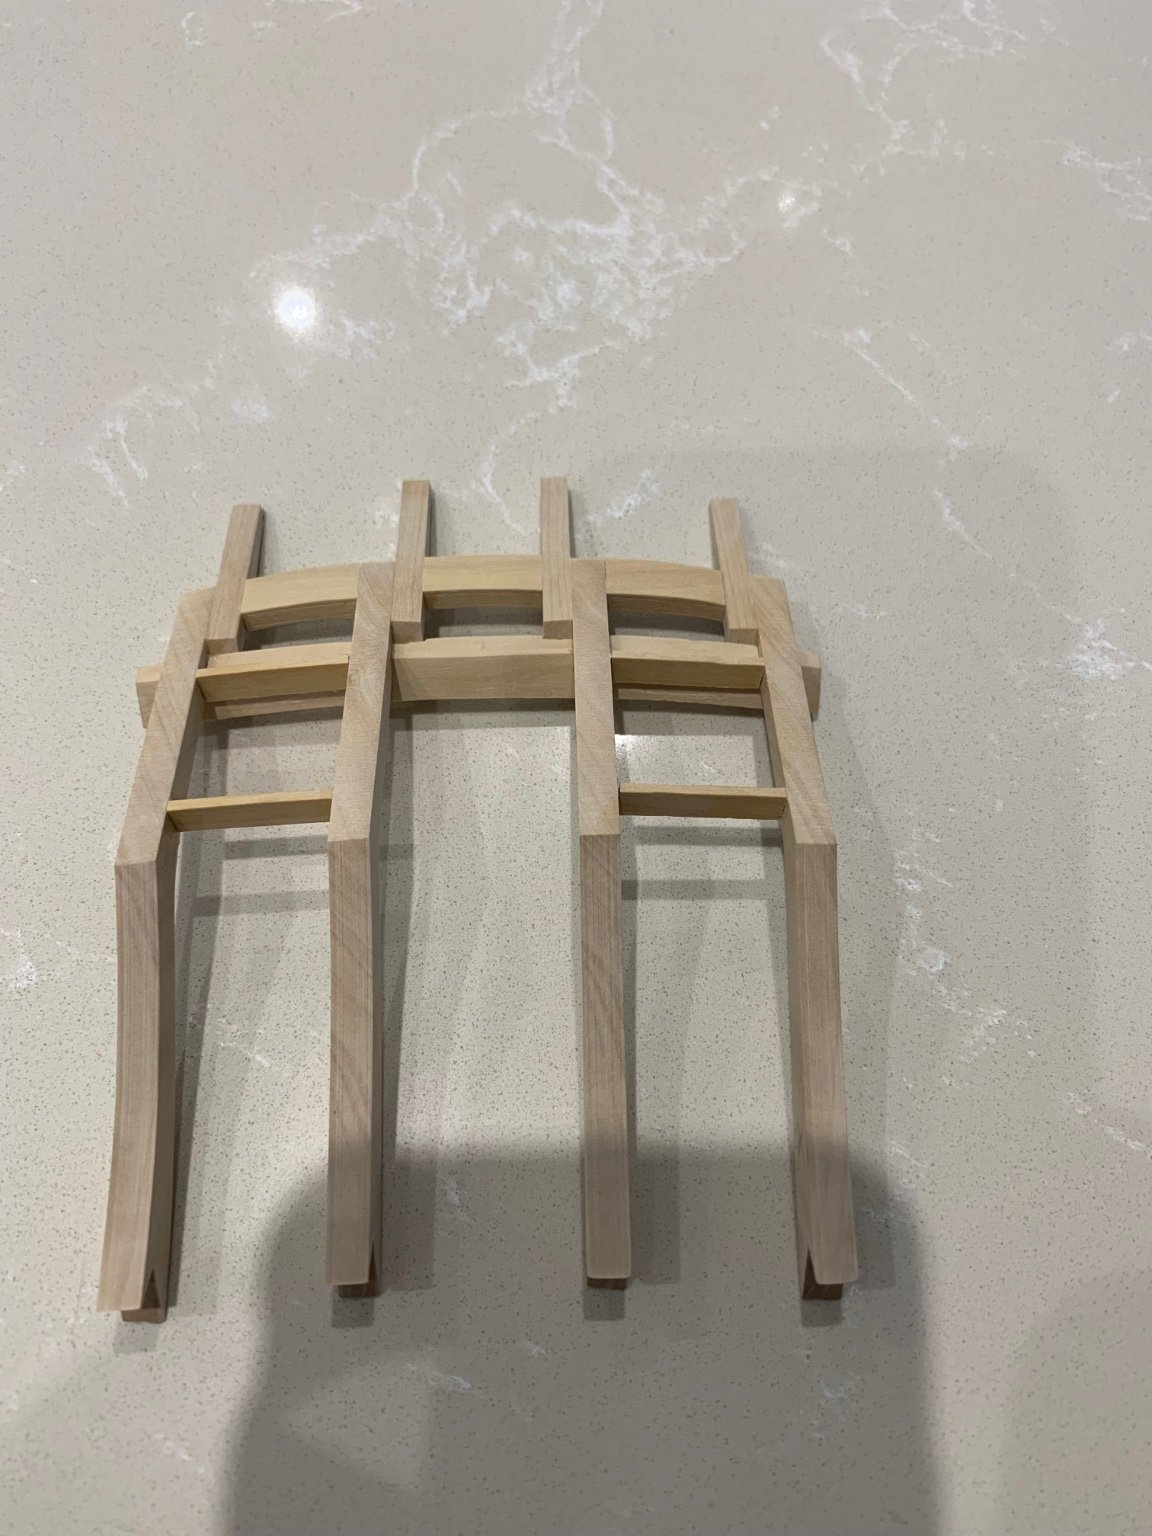
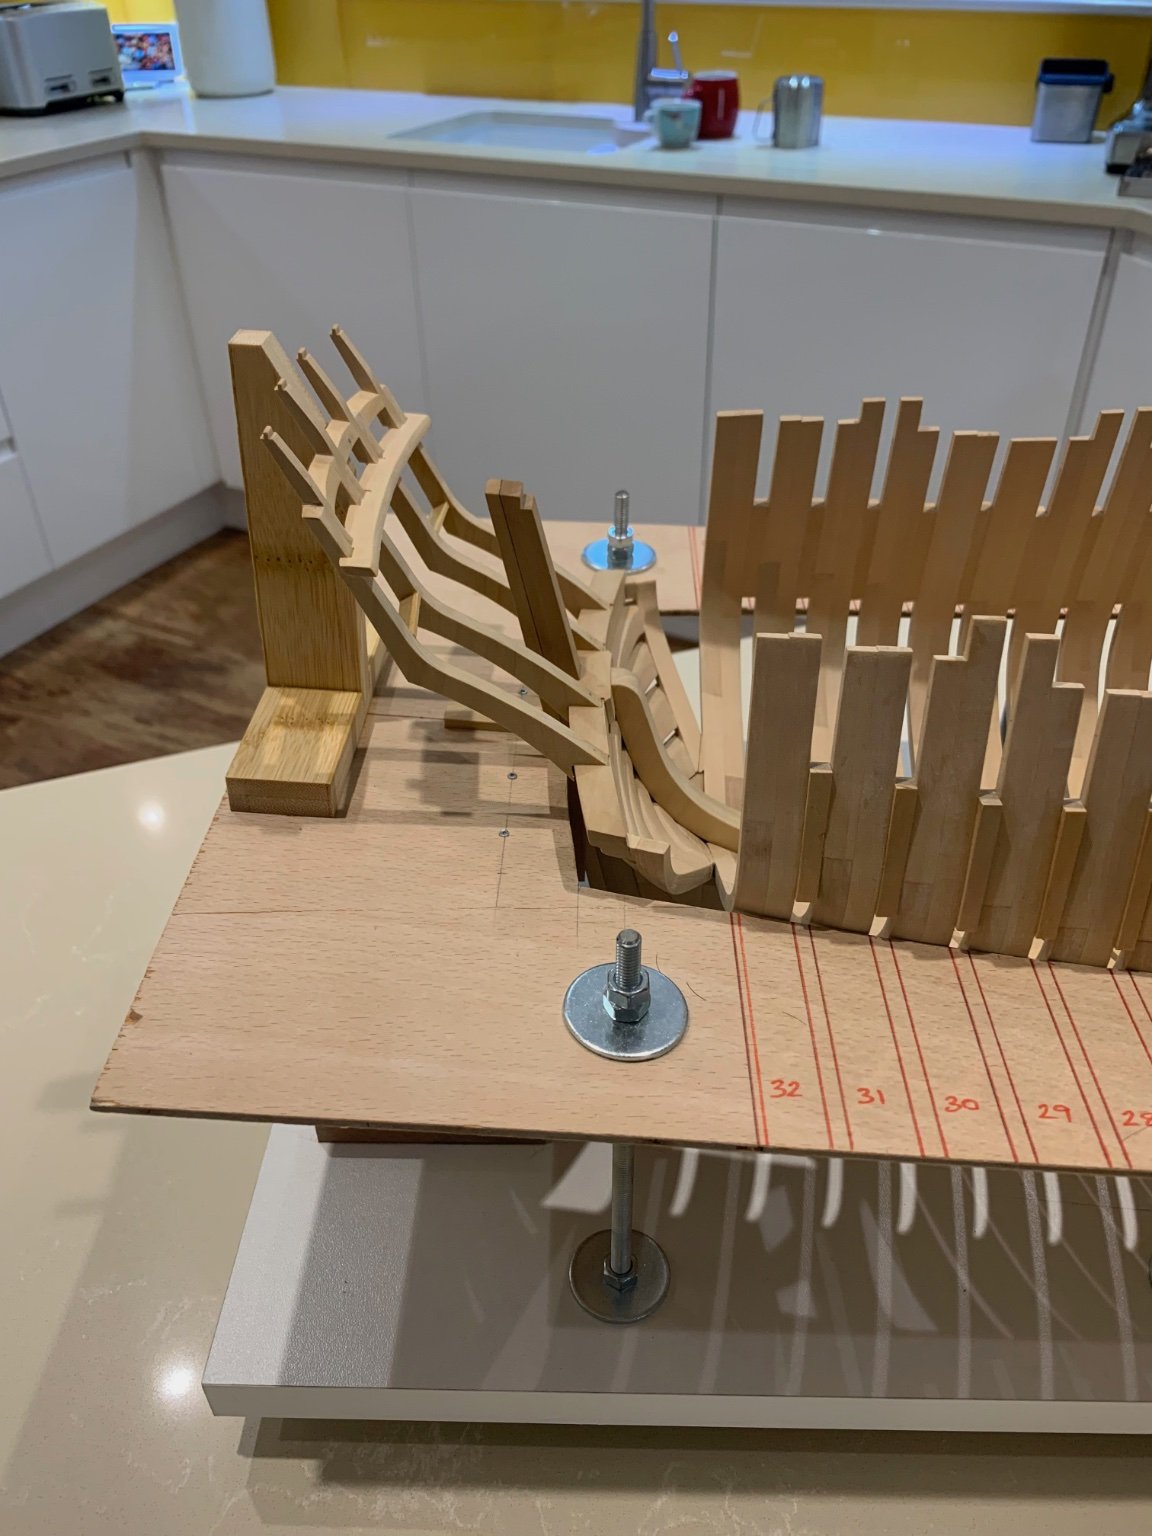
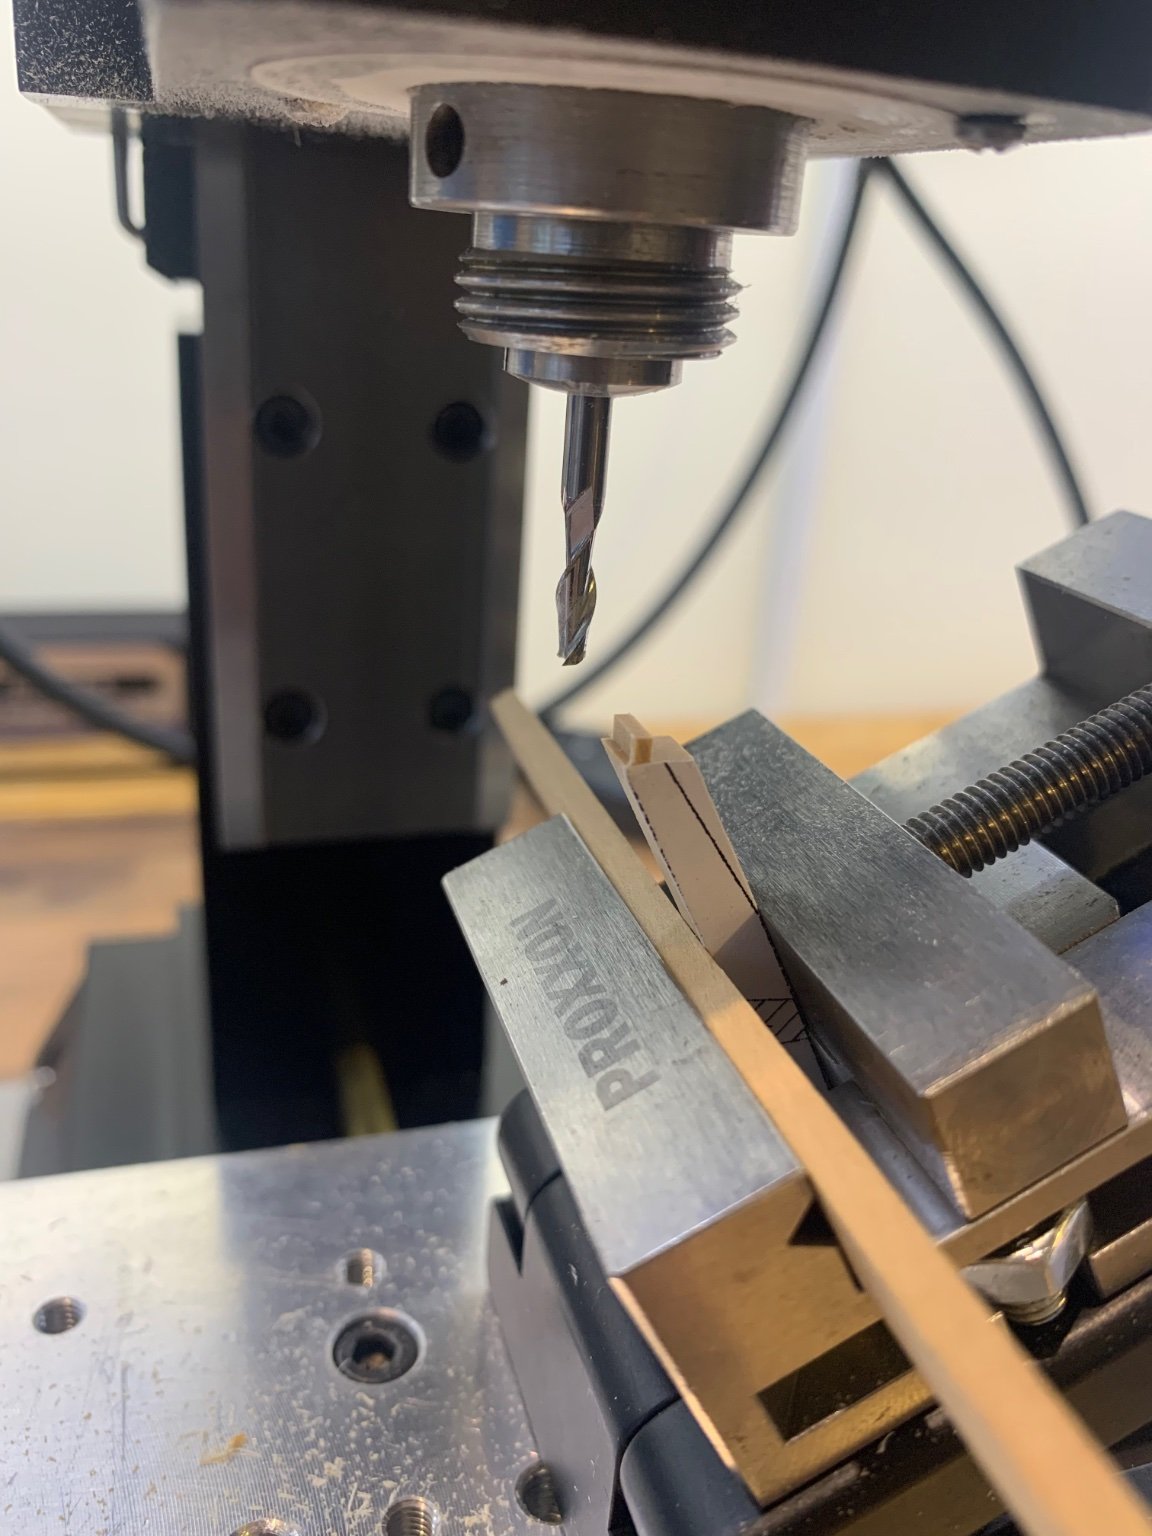
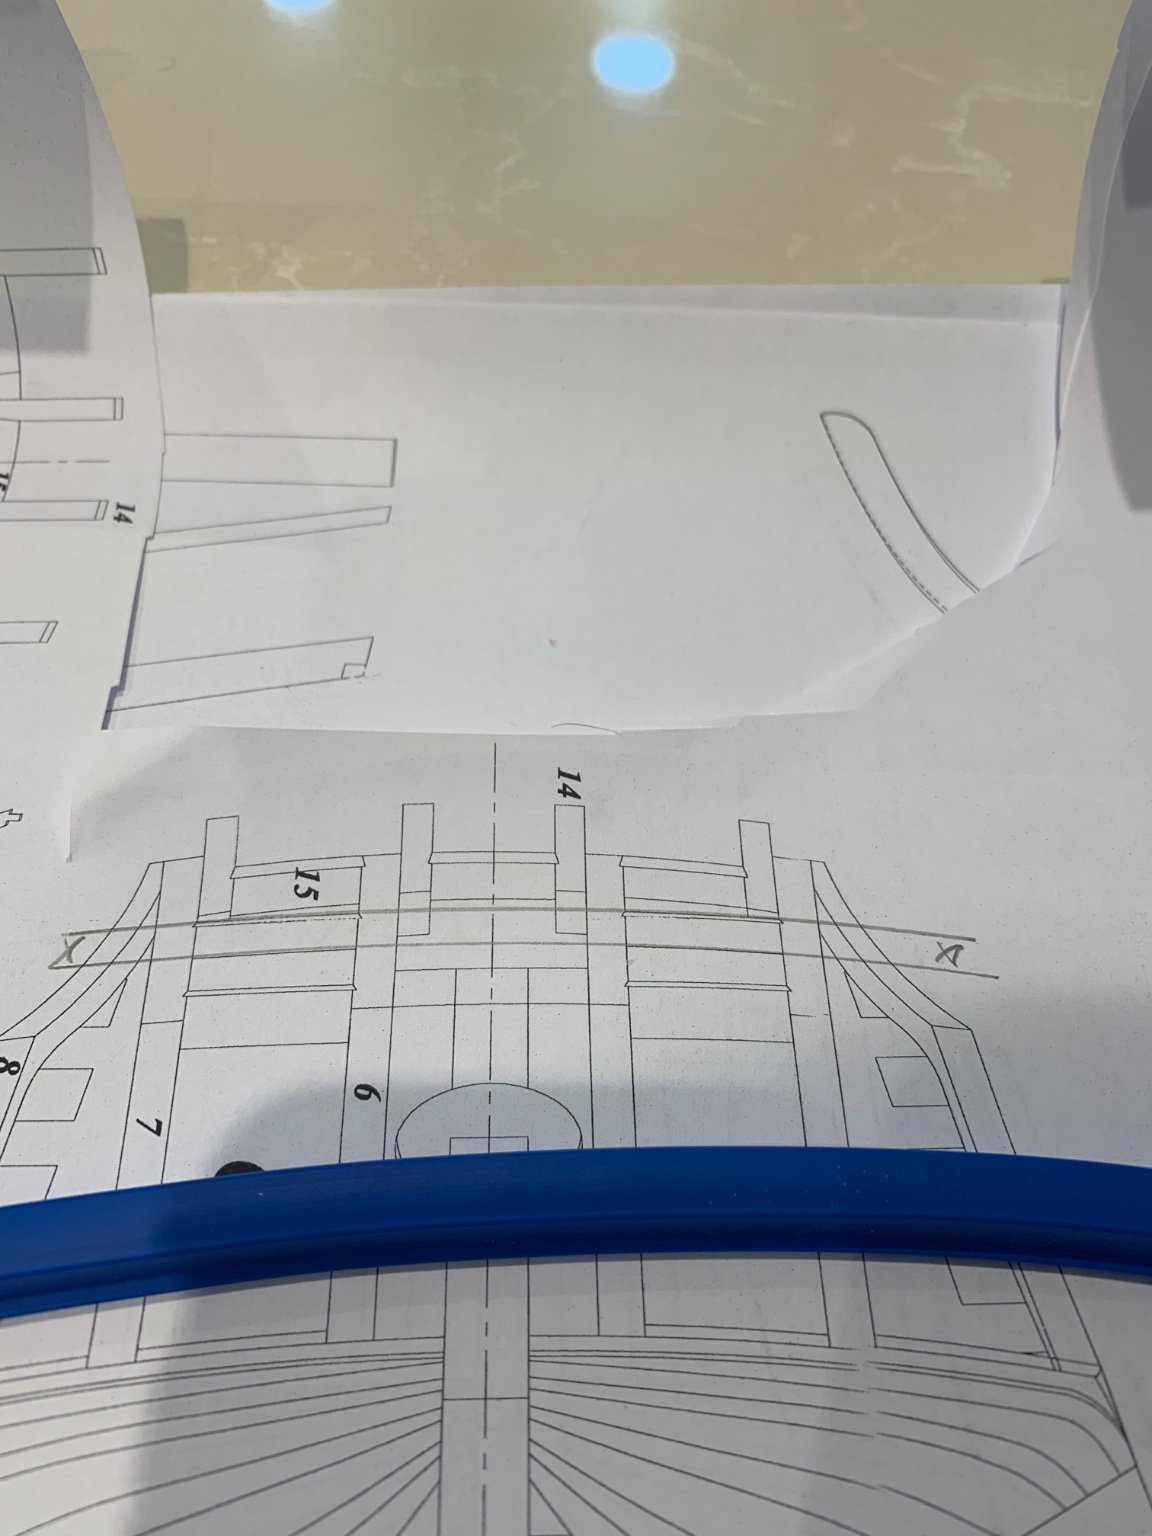
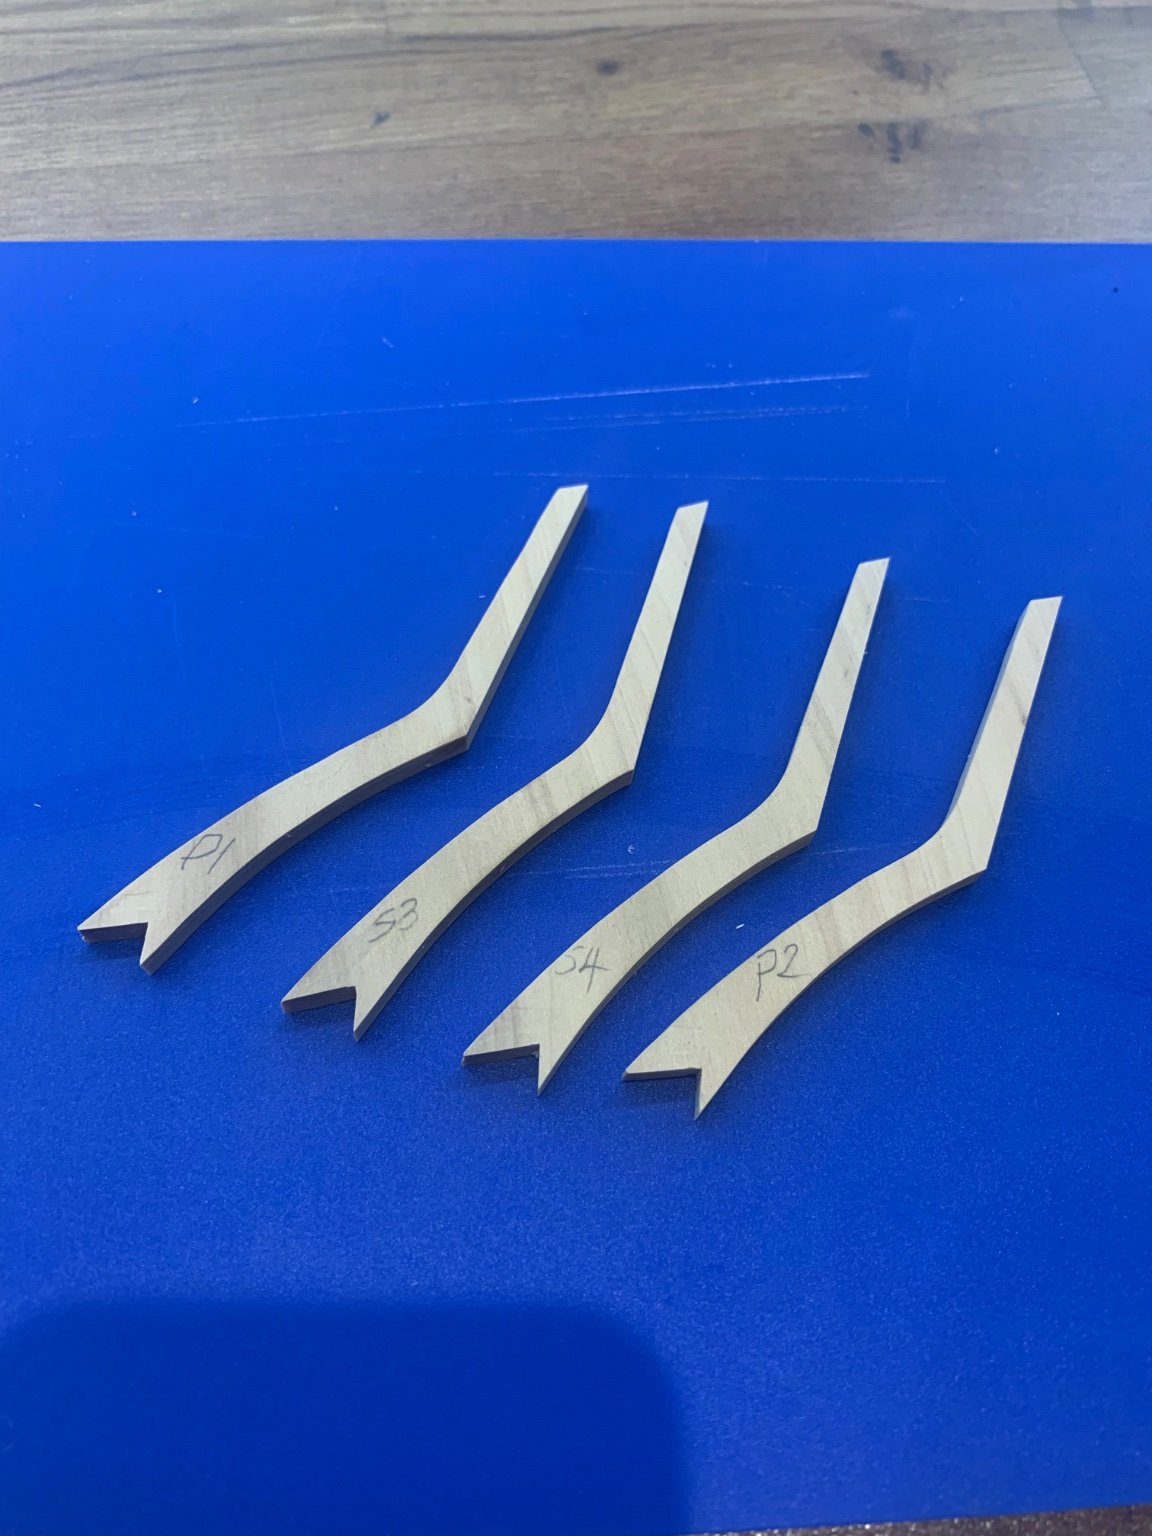
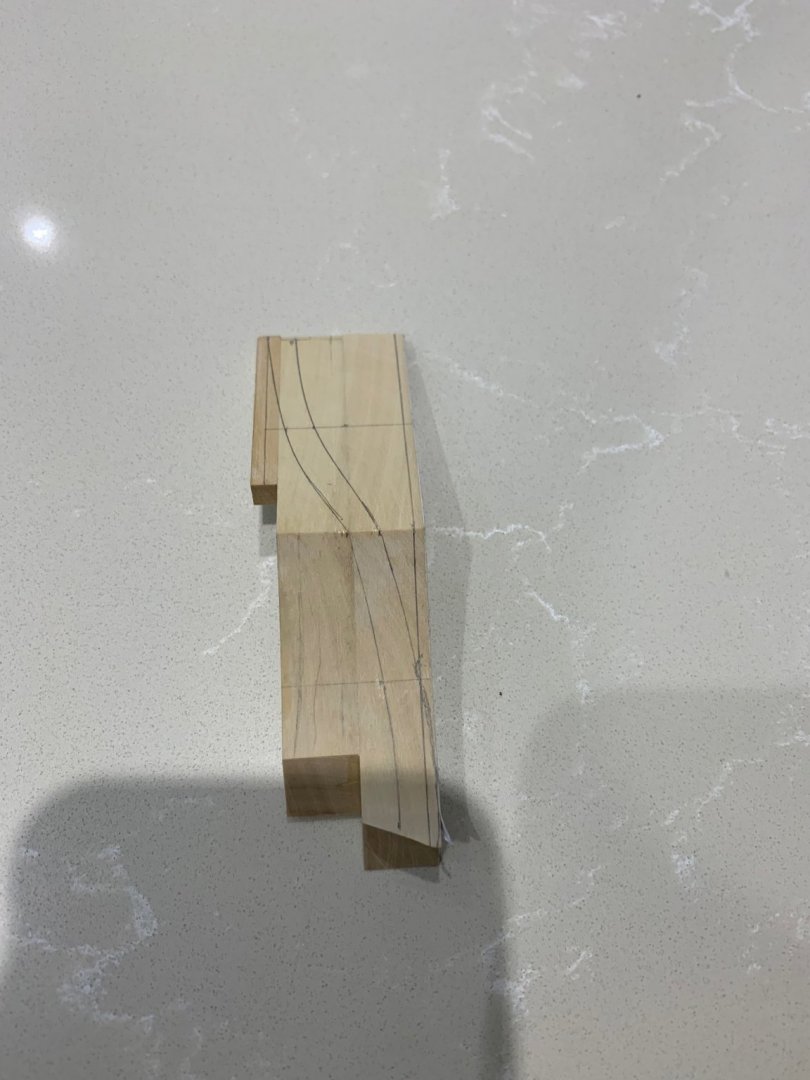
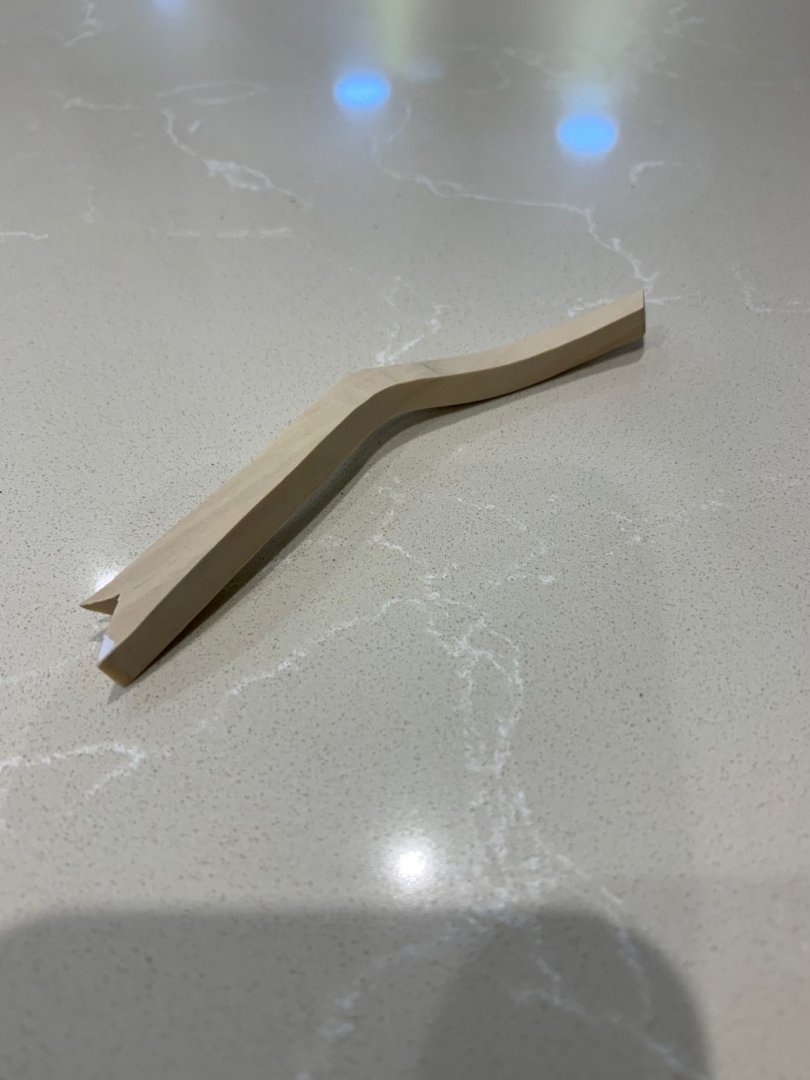
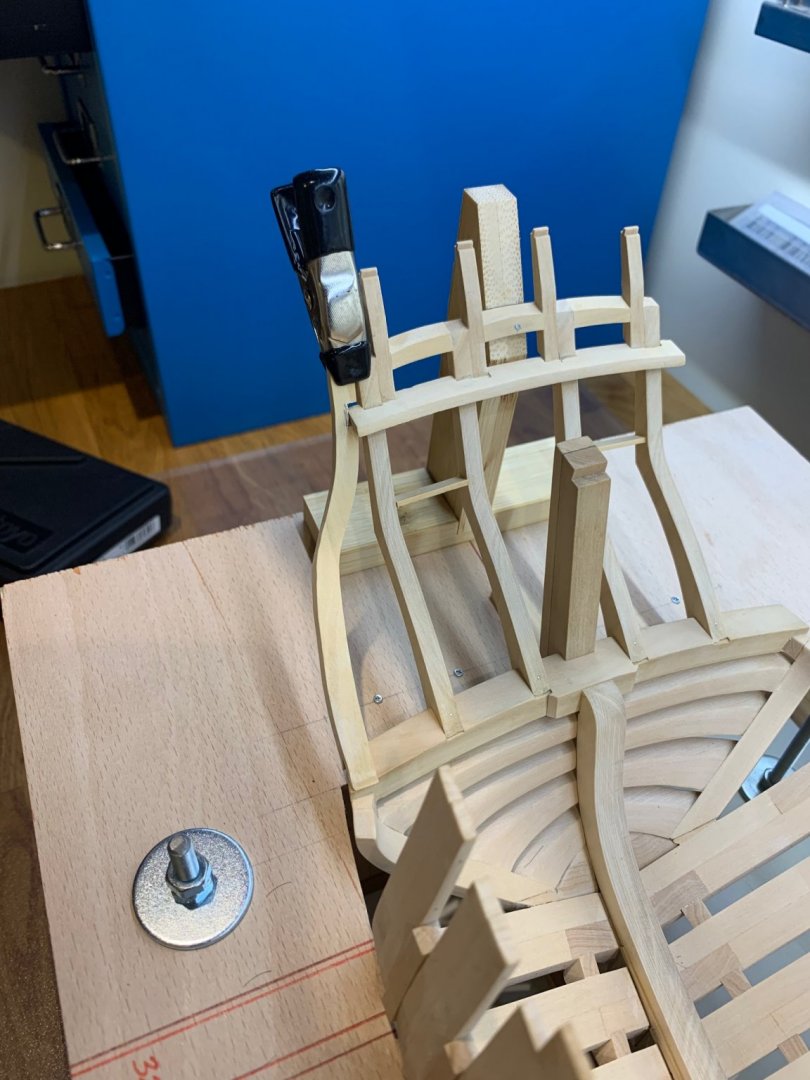
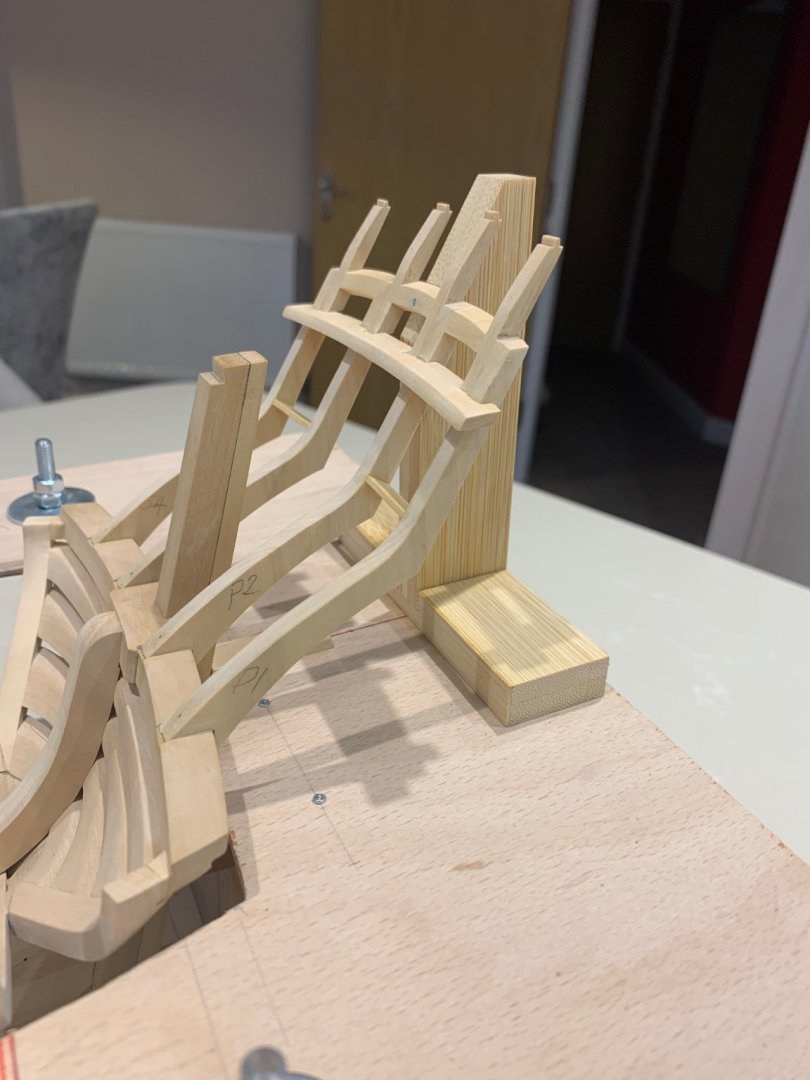
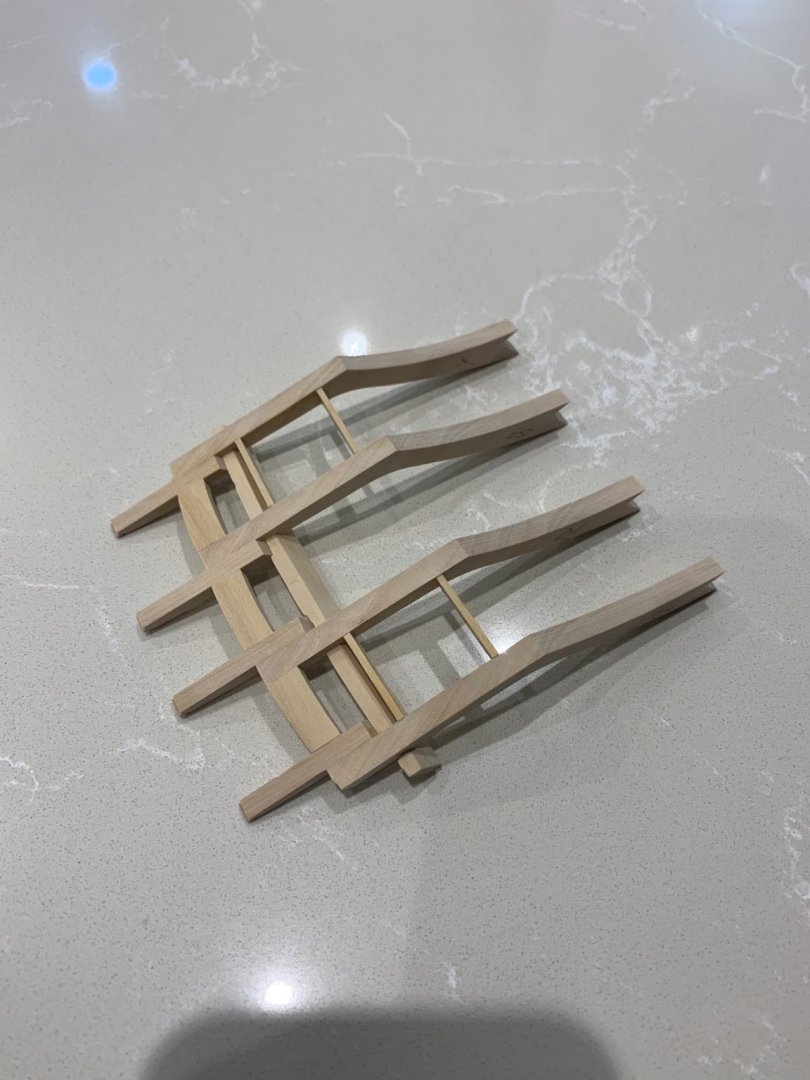
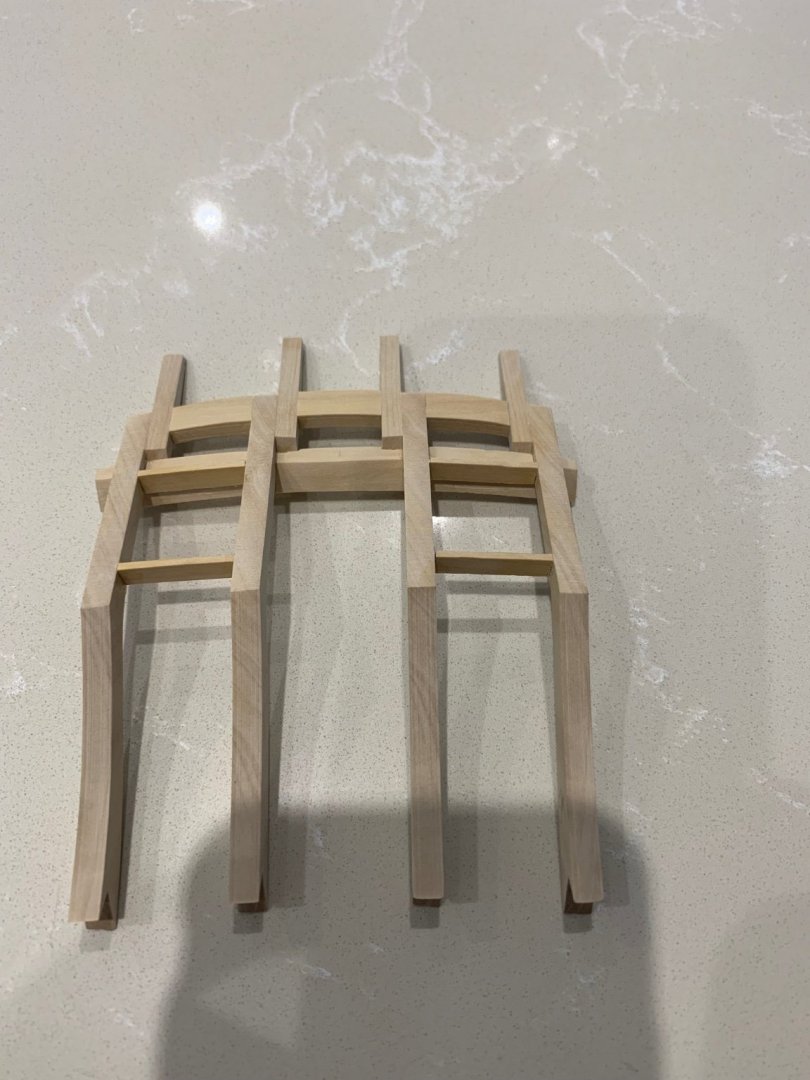
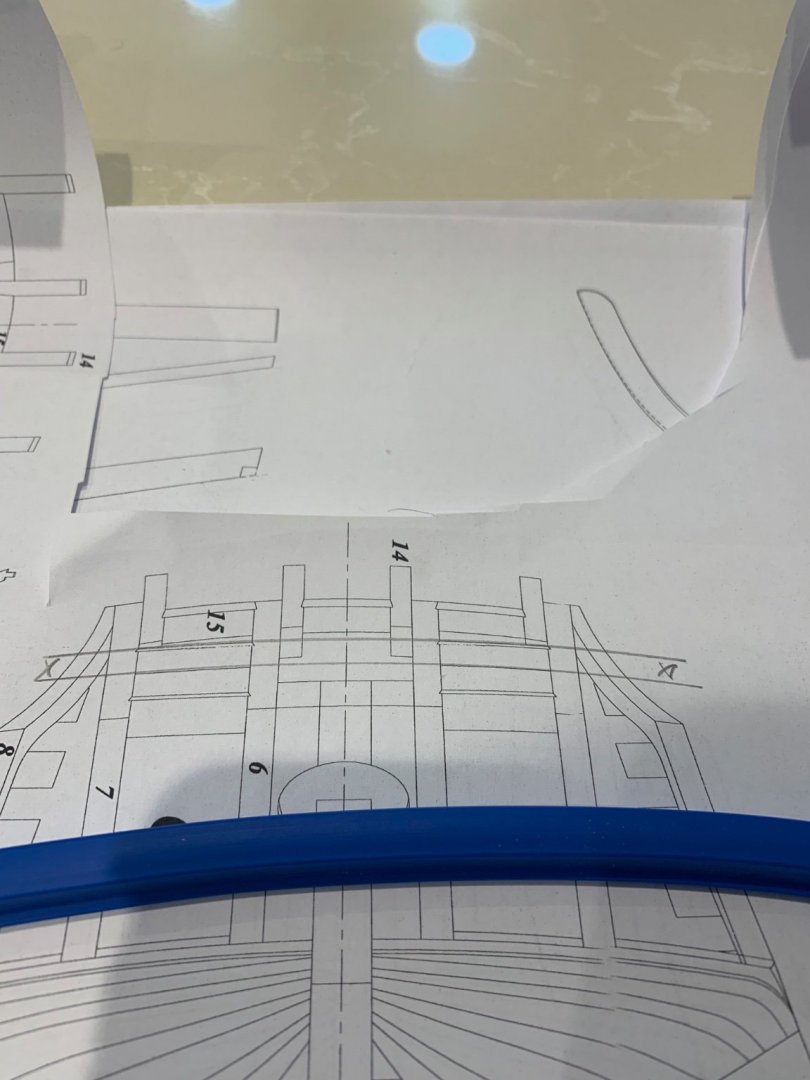
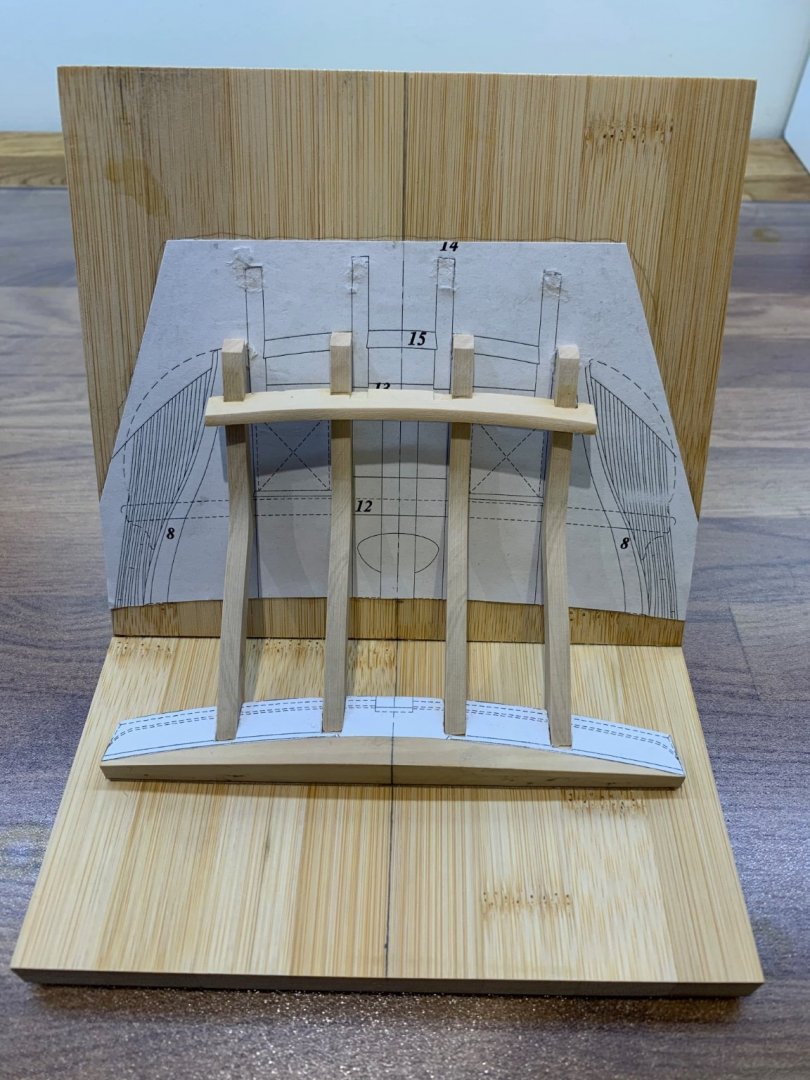
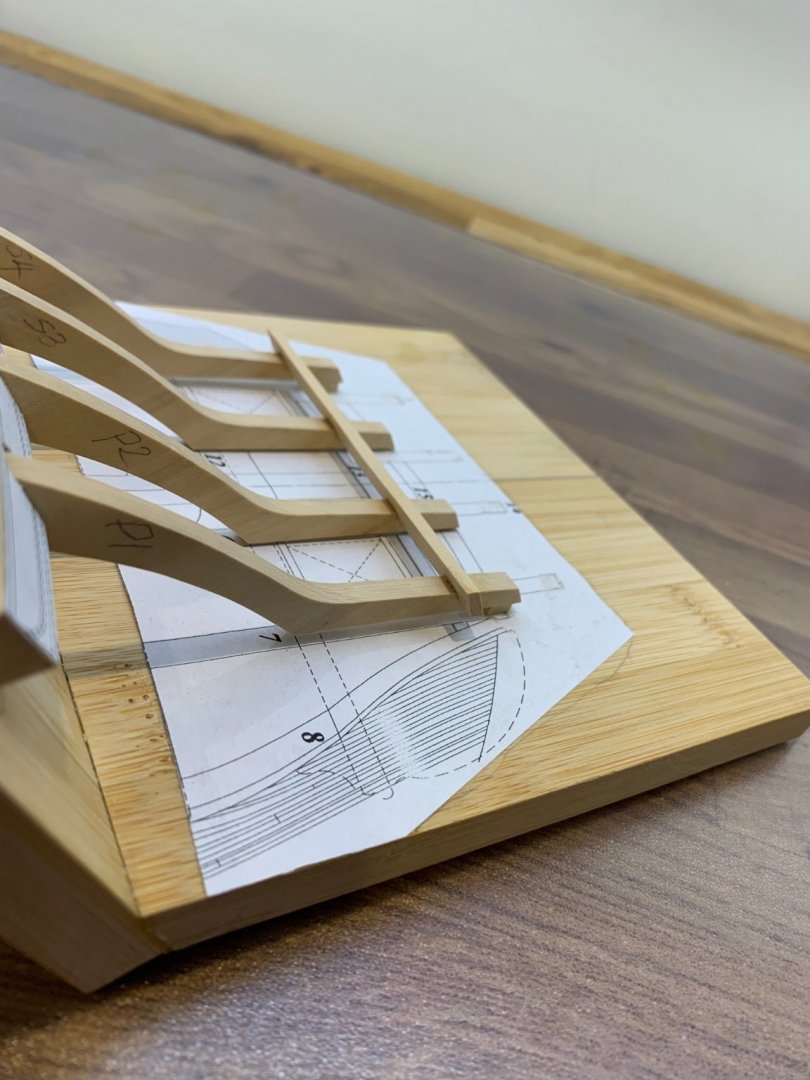
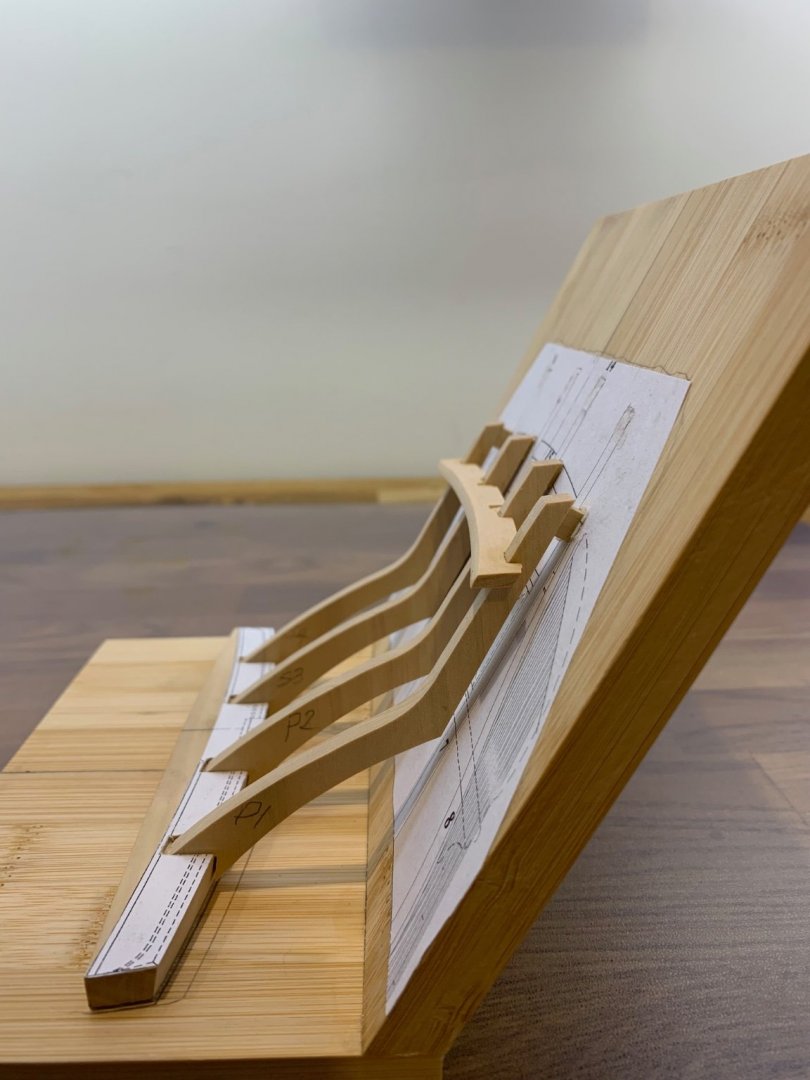
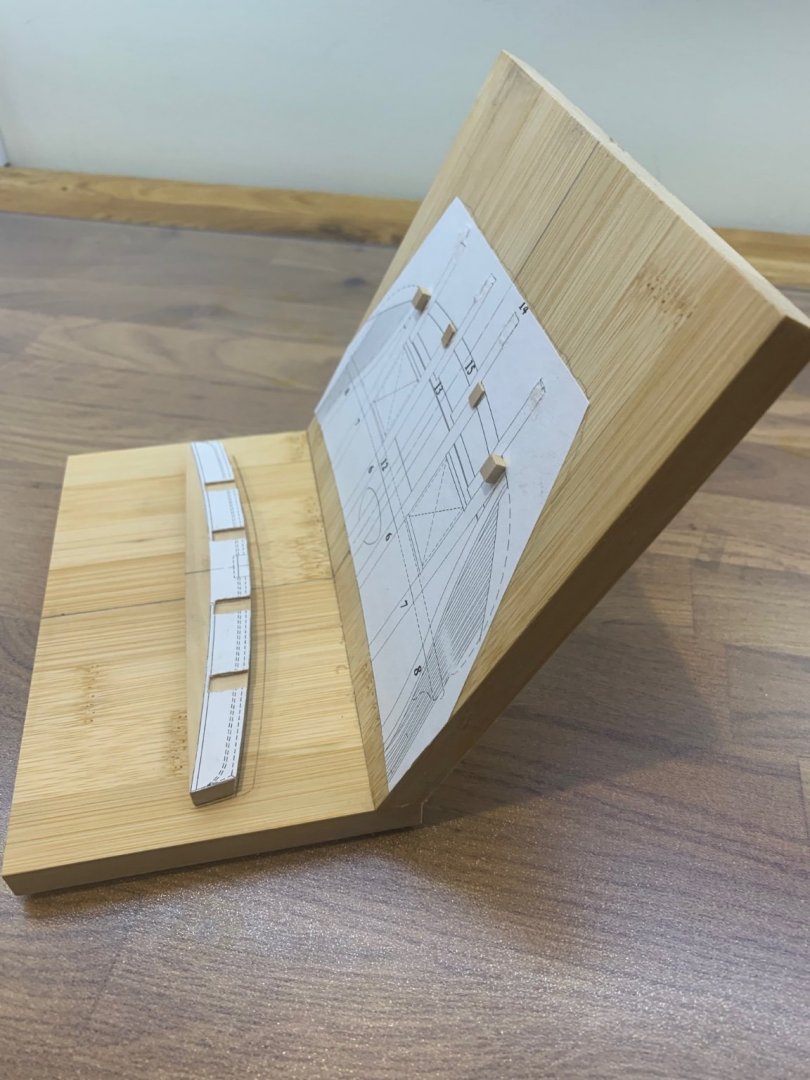
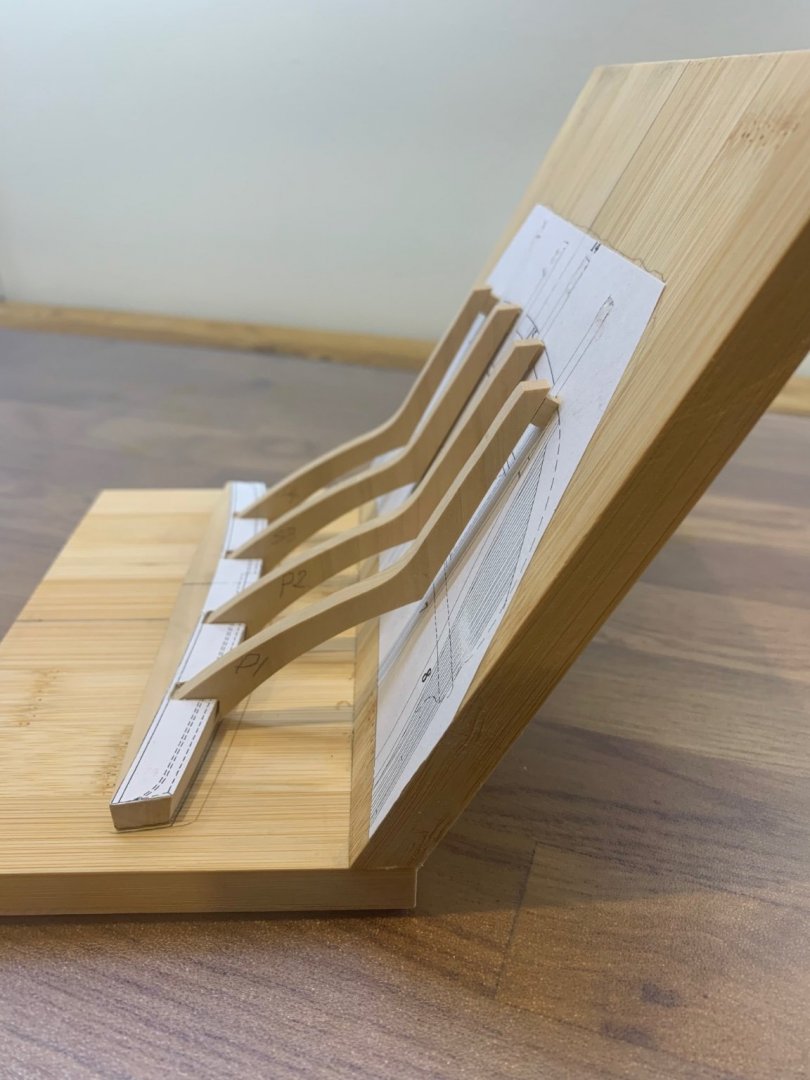
Thanks for all of the likes 👍 "Dogs legs" - Wow these are tricky things to make. I've been following Adrian Sorolla's excellent guide and have tried his suggestion on how to form them. He uses a slightly wider piece of wood than the actual counter timbers and basically shapes it slightly diagonally to obtain the dogs legs. Now I've tried this approach and discovered that although it seems quite simple it has two issues that I think can change the shape of the stern slightly. It makes it very difficult to come off of the wing transom vertically as two angles in different planes are required even if coming off straight. More worrying is the way it changes the shape underneath the counter timbers which I believe is called the stern vault. I've made two pieces this way and have found them to be completely unacceptable so I have decided to try a different approach. I have looked at this part square on which requires three timbers being glued together to make a very wide piece to work with. I then transposed the drawings as best I could to get the correct shape which I then cut. The result is actually quite close to what I want. I am now coming off of the transom vertically and the stern vault is keeping its square shape. I have attached a few pictures of my experiment below but I would like to know what others think? Is this a good way of making this part or am I way off base here? The part that is in the pictures is very rough just to try and help me see a way forward with these parts and it is not going on the ship. Any comments or advice would be very welcome and I hope you all have a great Xmas.

-
Thanks druxey and thats a great idea about the T piece. I'll get one on tomorrow as those little extensions are so vulnerable. I only wear T shirts now when I'm working on it too!!! Another photo from the other side too. For some reason this wouldn't upload earlier.
-
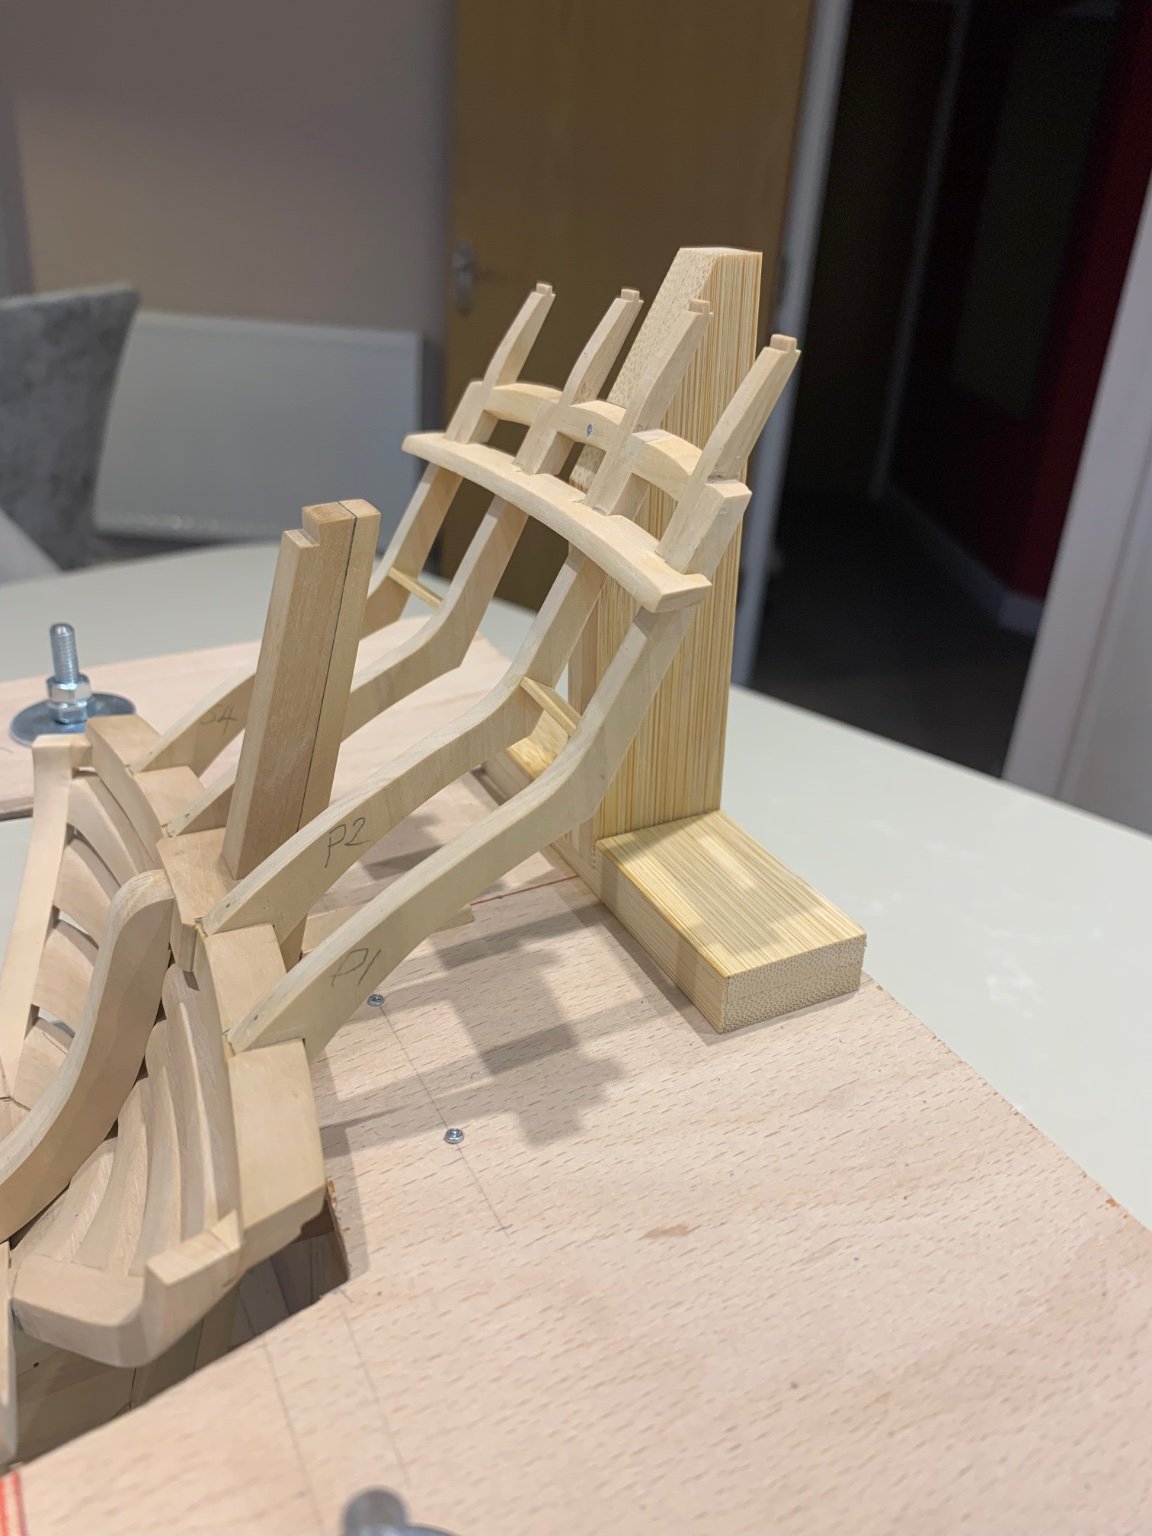
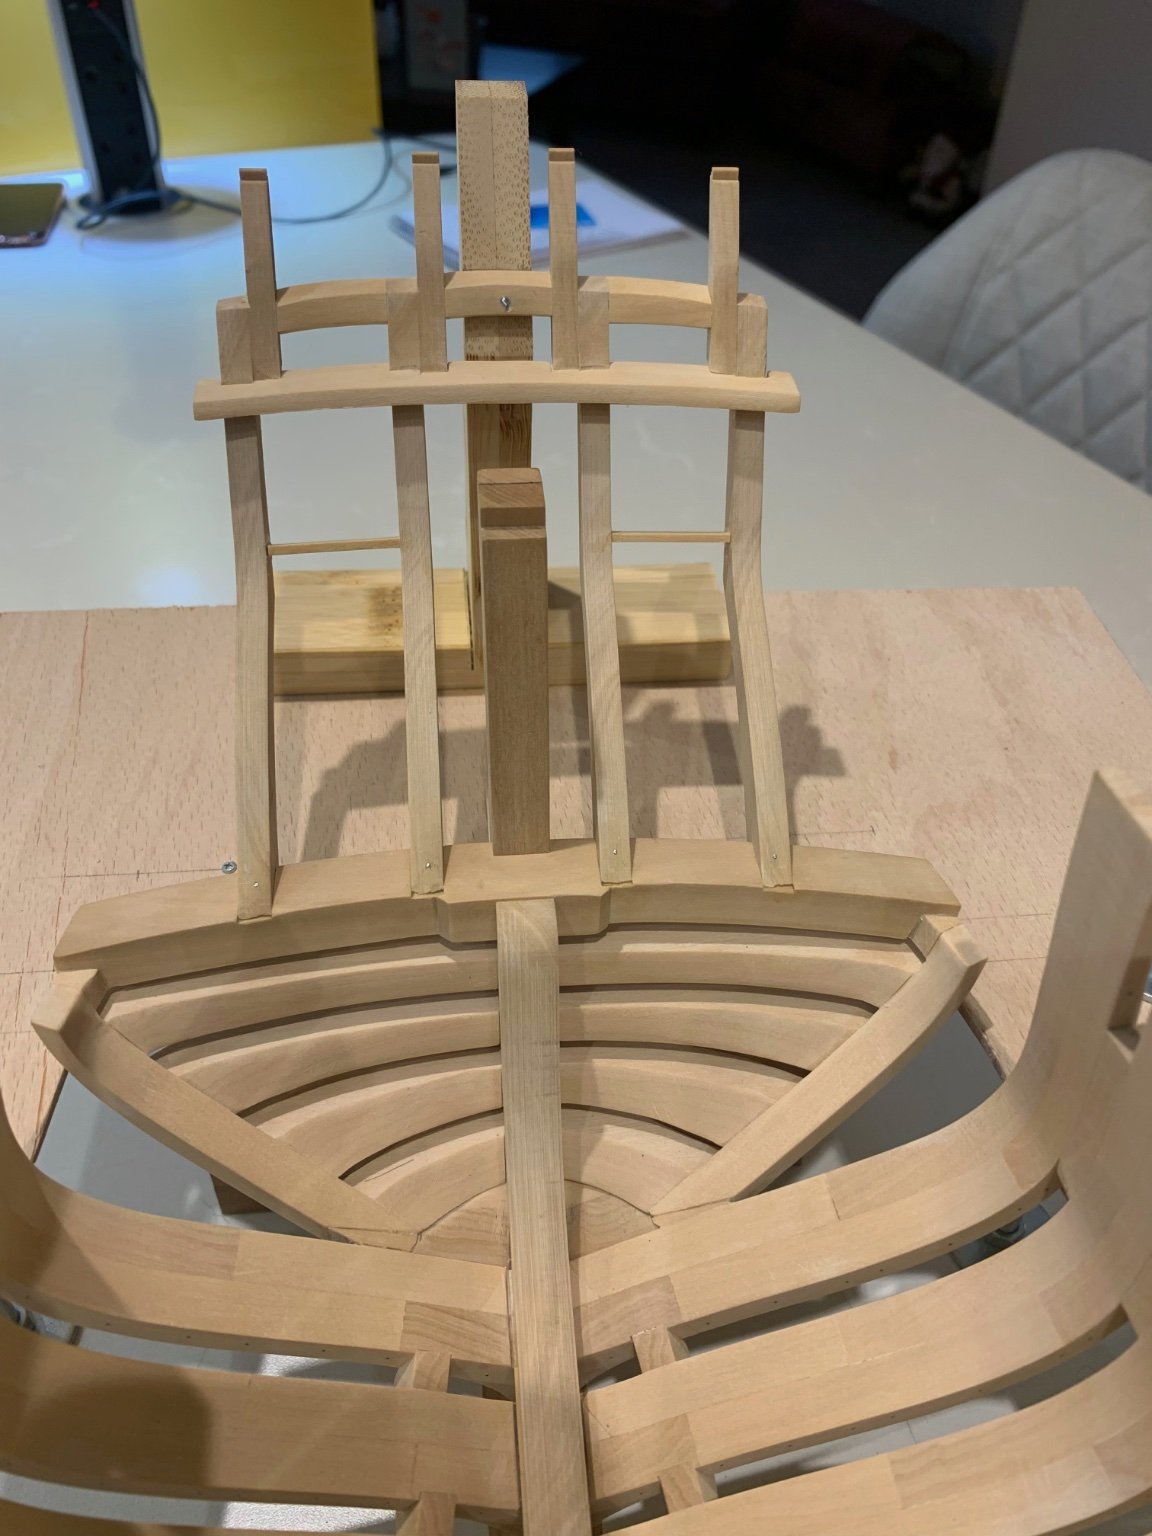
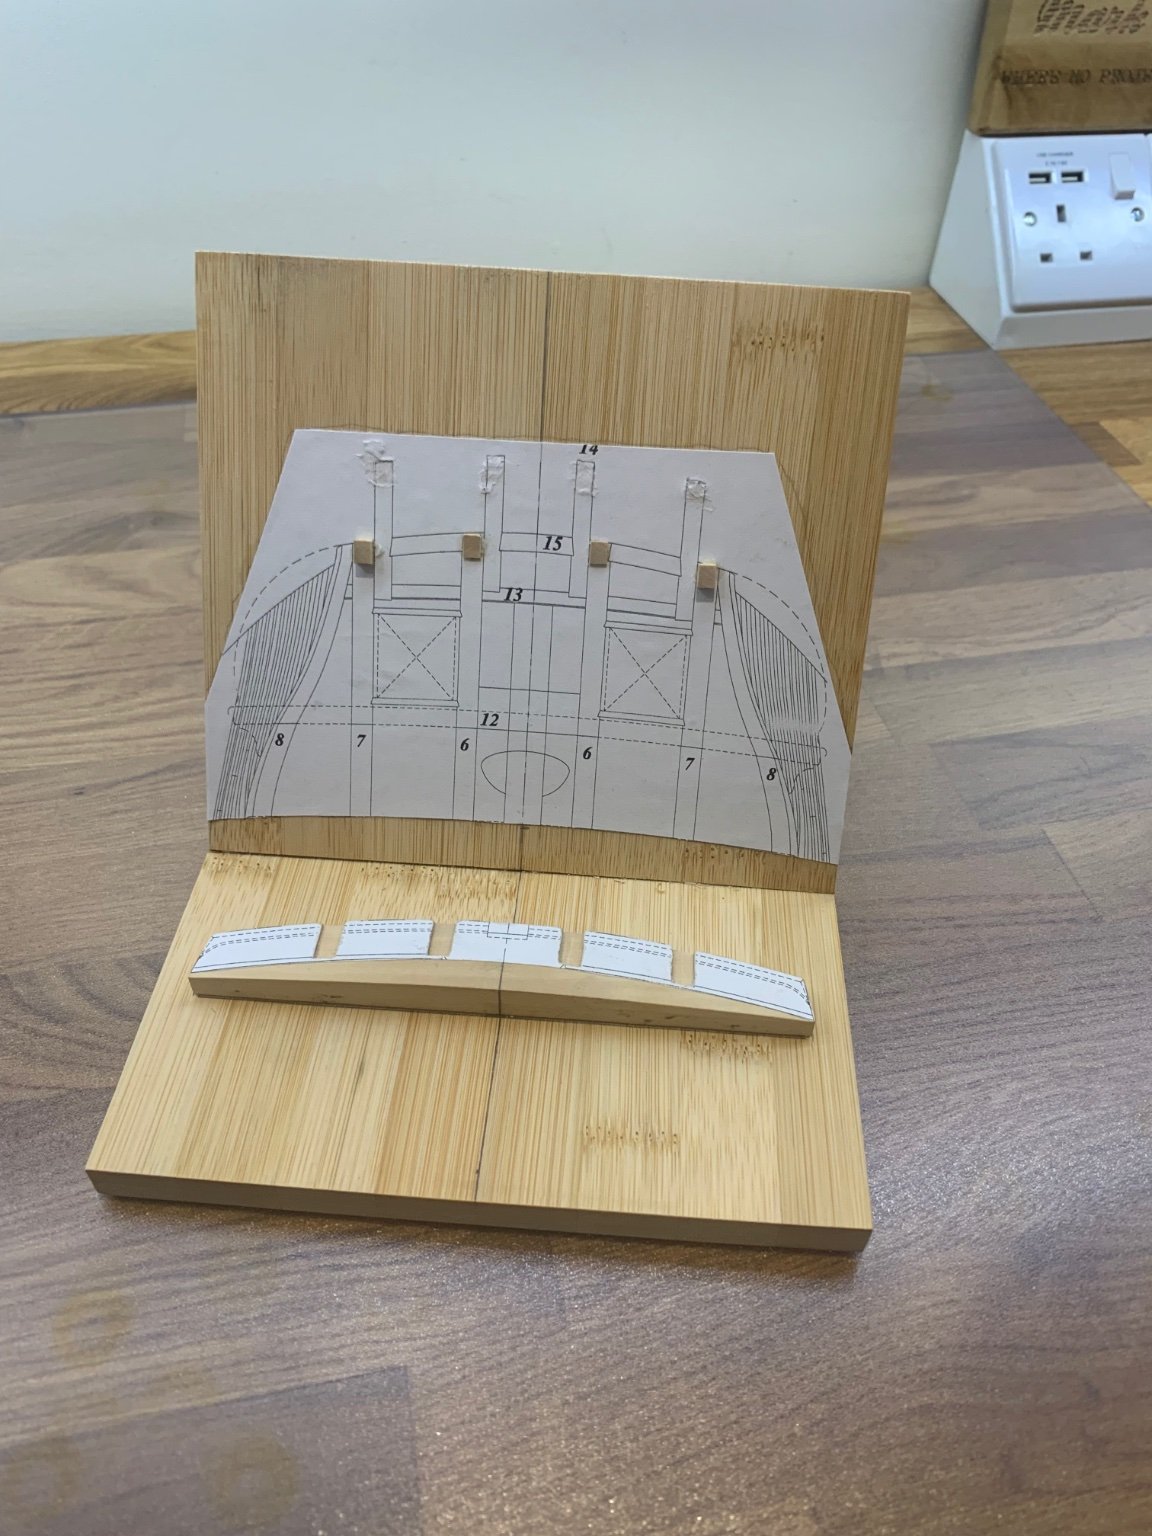
Hi All I've now made the taffrail filler pieces and also the window surround timbers which has made the counter timbers strong enough to remove them from the jig 👍 The counter timbers are now fixed onto the wing transom and are supported to keep the correct angle and hopefully protect them a bit too. I pinned them using some 0.5mm brass as I didn't want them to move whilst the glue dried. I set the angle by taking a measurement from the stem all the way back to the furthest point on the taffrail filler. The only thing that went wrong was the screw head on the support decided to shear off - so I'll have to cut the support away at some point and try and remove the screw from behind. Its on and square so I'm a very happy builder 😃 Now for my next challenge - the dogs legs! Happy Xmas everyone 🎄


-
NAIAD 1797 by Bitao - 1:60
Some Idea replied to Bitao's topic in - Build logs for subjects built 1751 - 1800
Once again just beautiful work by you that is so crisp and clean - Happy Xmas bitao 🎄 -
I've had a little more time in the shop today and I've now made the counter timber extensions that run up to the taffrail. They have nice little tenons on the top and were quite easy to make. It was just a case of making sure that I followed all of the existing angles to the counter timbers and beam so that they sat correctly. I give them a 50/50 chance of surviving until the end of the build as they will be pretty vulnerable as the build progresses. So if I have to make them again it's not a problem. I now need to make the parts in-between and the window frames which hopefully I will find some time this week. Thanks for all of the comments and likes too 🙂 Mark


-
HMS VICTORY 1765 by albert - 1/48
Some Idea replied to albert's topic in - Build logs for subjects built 1751 - 1800
That really is beautiful joinery Albert -
Mark and bitao thanks for the comments 👍 It is a very tricky piece to make correctly and I think that it’s ok. I’m hoping that I’ve read the drawing correctly and that the dog legs butt up against the beam. If they do then all’s good - if not I’ve probably made it a little short. I’ll soon find out 🤣
-
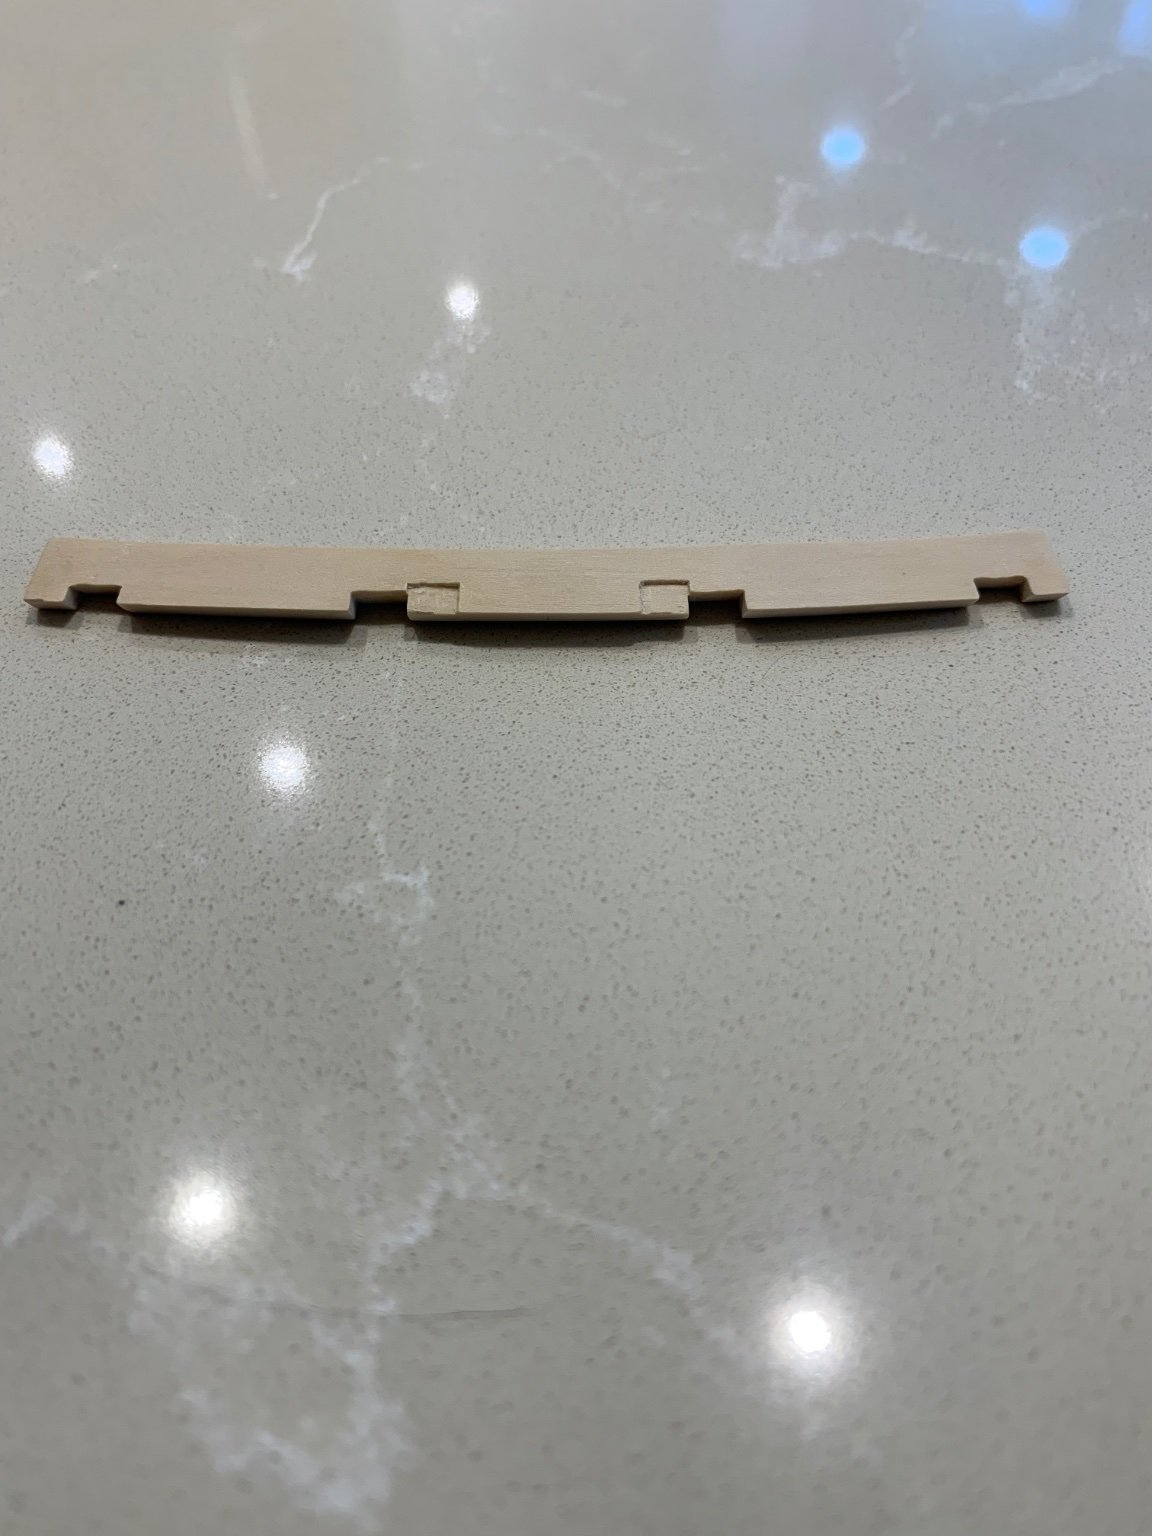
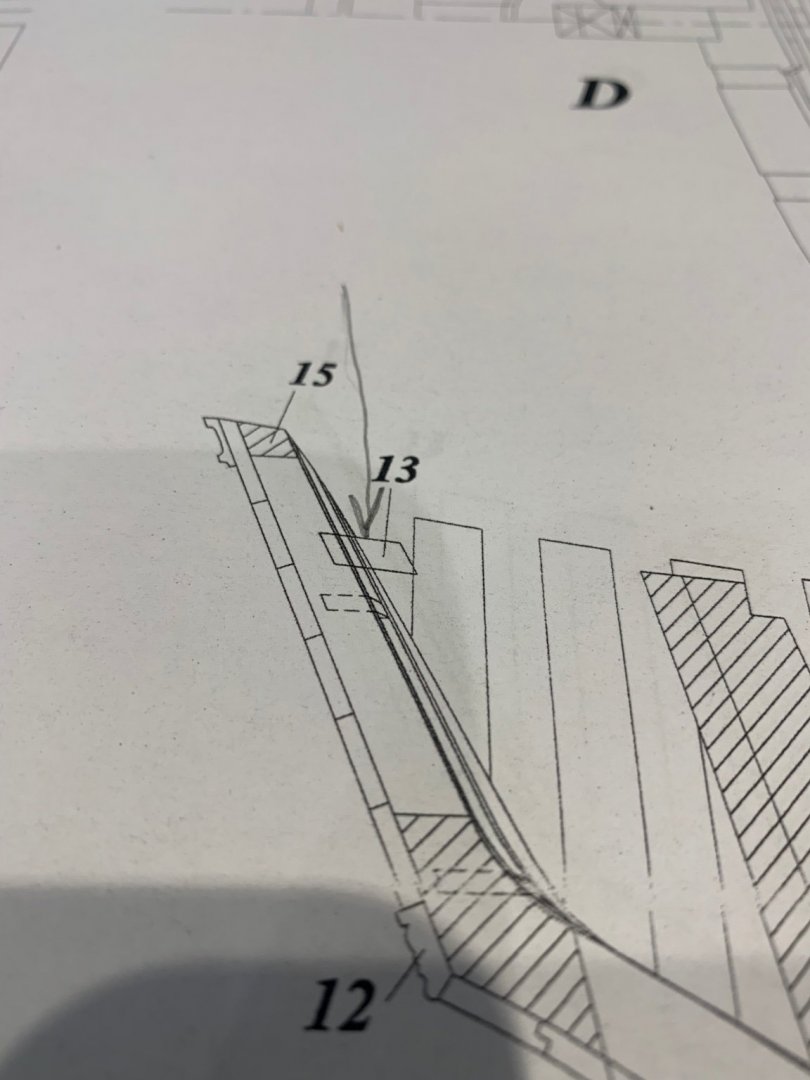
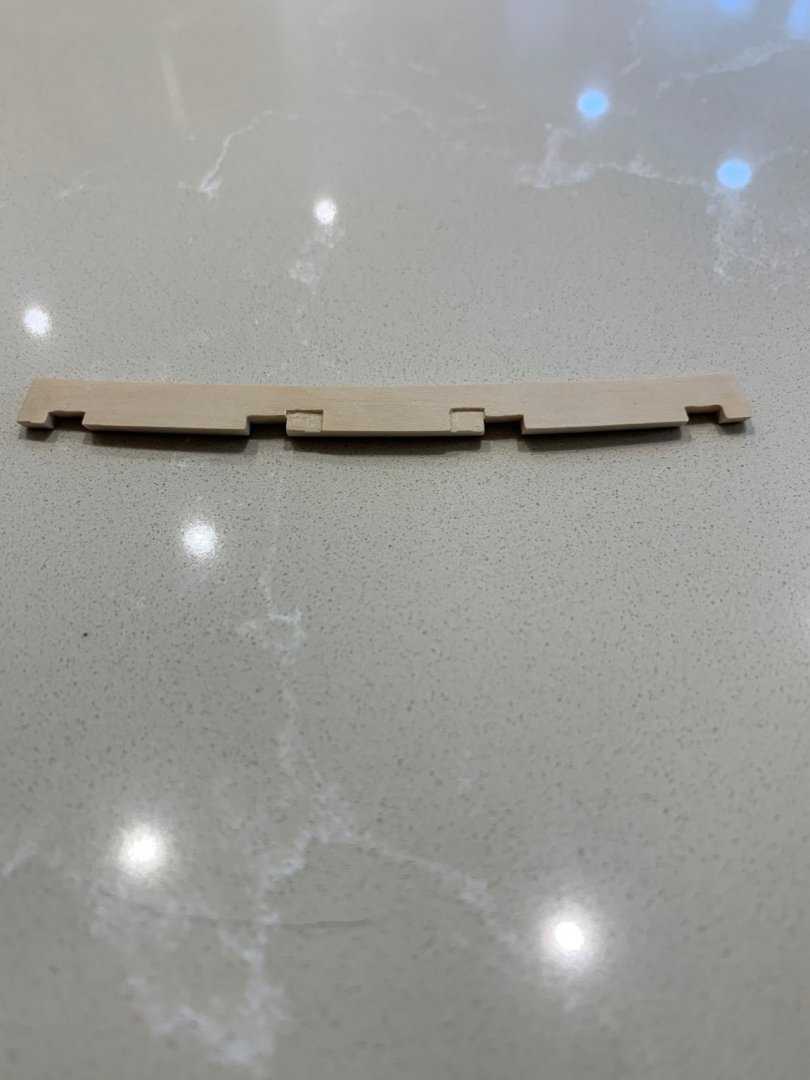
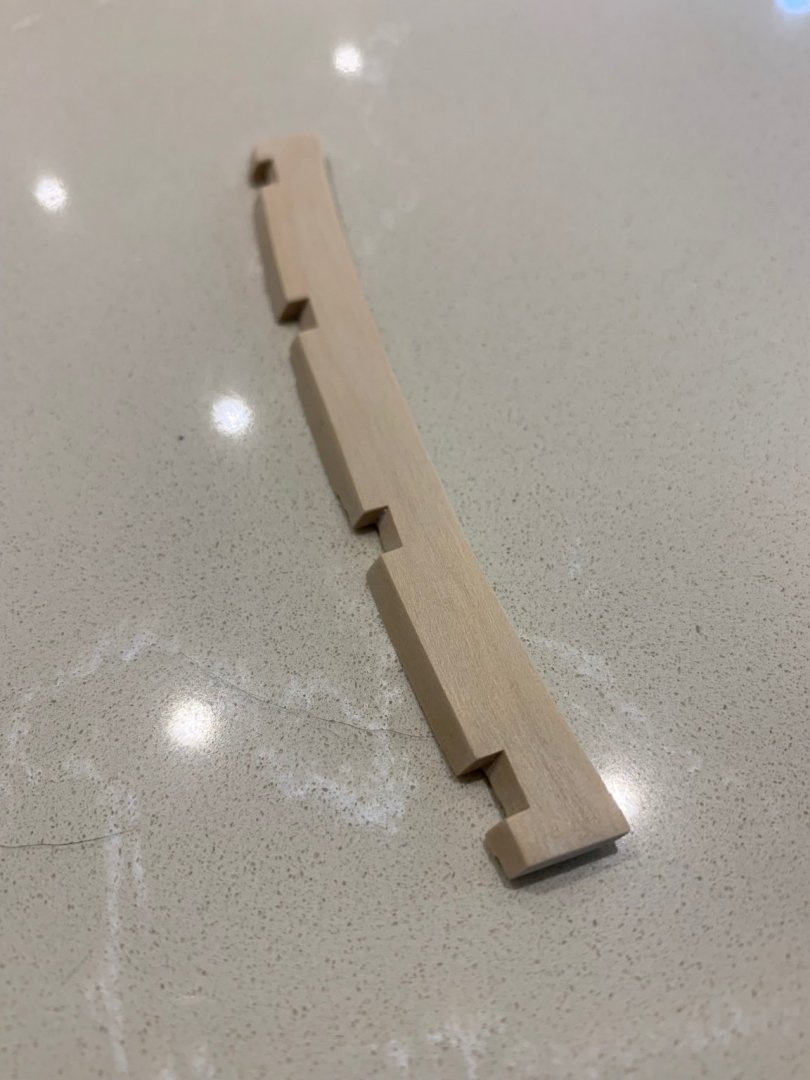
Hi All I've now made the quarter deck beam which I think has gone ok. The drawings do not give a separate drawing for this piece so the template's must be made from 3 different views of the same piece number 13. A few pictures below of the result Cheers Mark

-
Hi wefalck - I agree but I think that this is a bit too simplistic when ship building. If you have finished the framing and also the inside planking on say a sectioned model it would make sense to apply a finish to the inside. However this finish will inevitably run onto the outside of the frames and also if you want to finish a lower deck it is far too easy to apply your finish higher up the hull. The finish is also a preservative in my mind so I personally would like to apply it in places that are hidden too. Glue also plays a part in this as it tends to show after the event. I would also like to say that I have no idea what the best time to put a finish on is hence my post. I was just interested what other builders do.
-
Hi Roger I'm building a ship and I want a matt finish and I'm probably going to use shellac - the question for me is when does a builder start applying the desired finish? If the frames have been raised and faired does the builder apply a finish on these parts before the planking? If so how does the glue do its job through the finish? At what point in a build is the most desirable time to start applying a finish as some parts will be very difficult to get too even though there is so much more to do? This is the most important question for me - as the finish itself is more a matter of personal choice.
-
Wow that is beautiful work 😎
-
Thanks but honestly the jig is not my idea at all. It is Adrian Sorolla’s idea in his book on how to build this ship. I do think though that this method could be used on any ship.
-
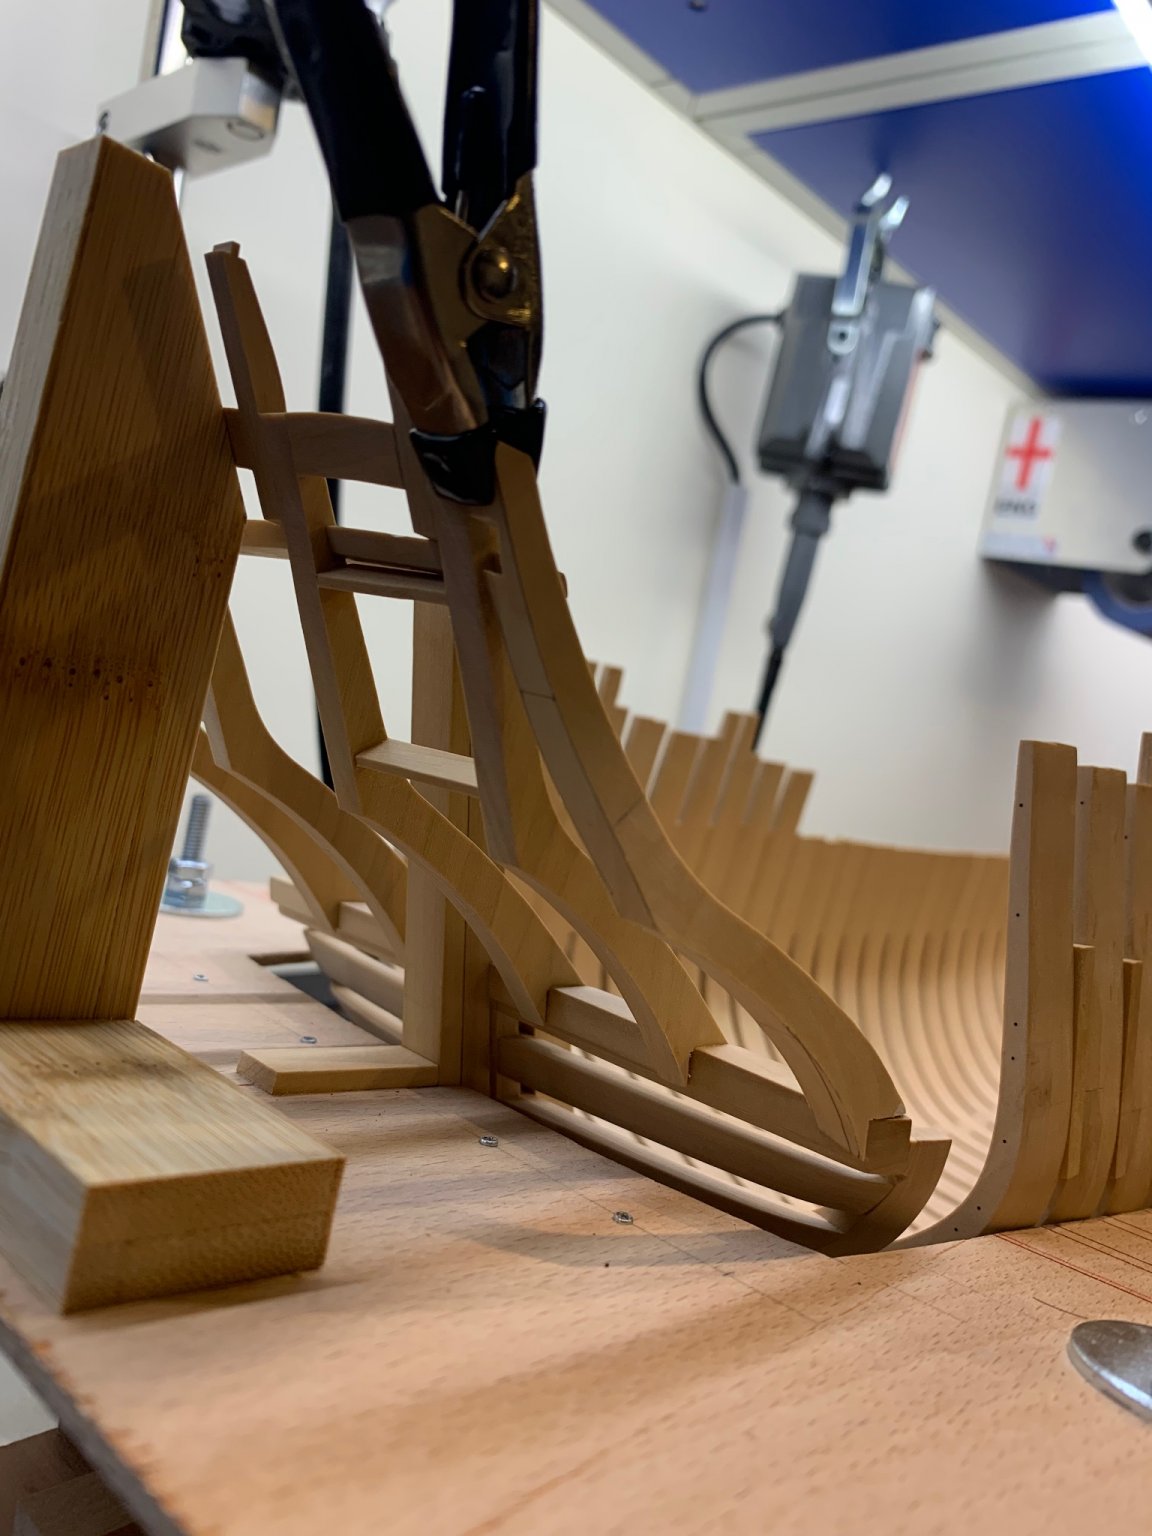
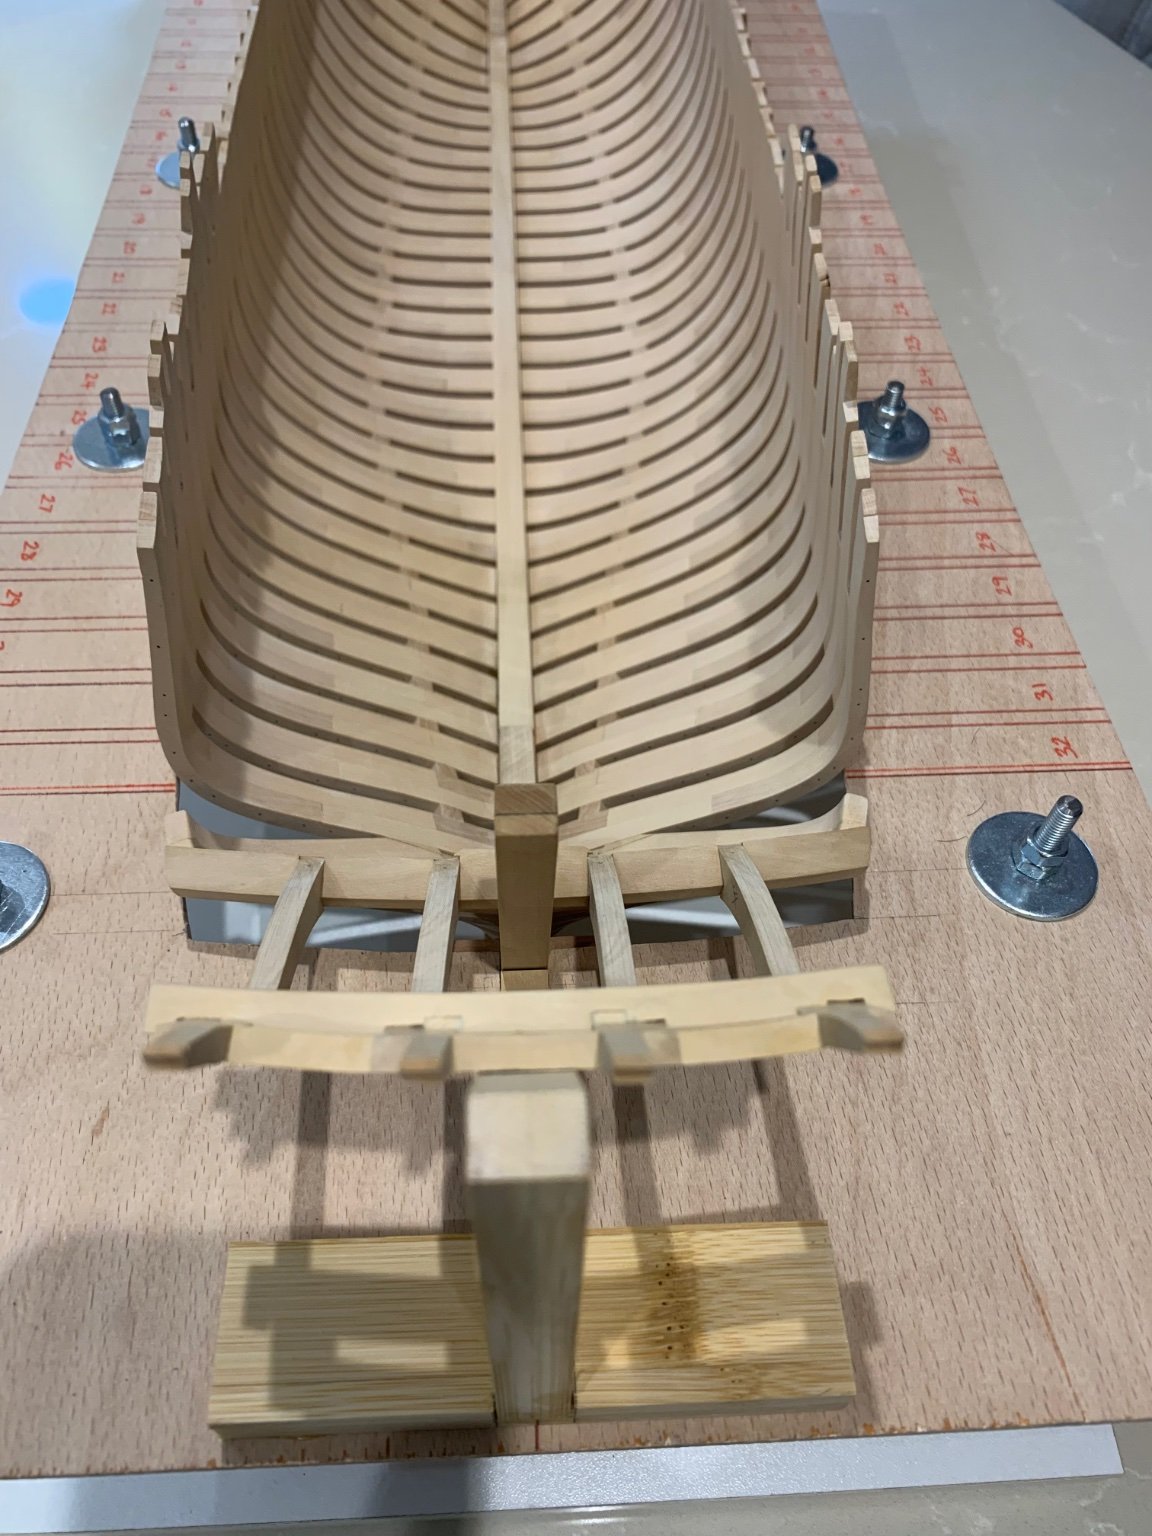
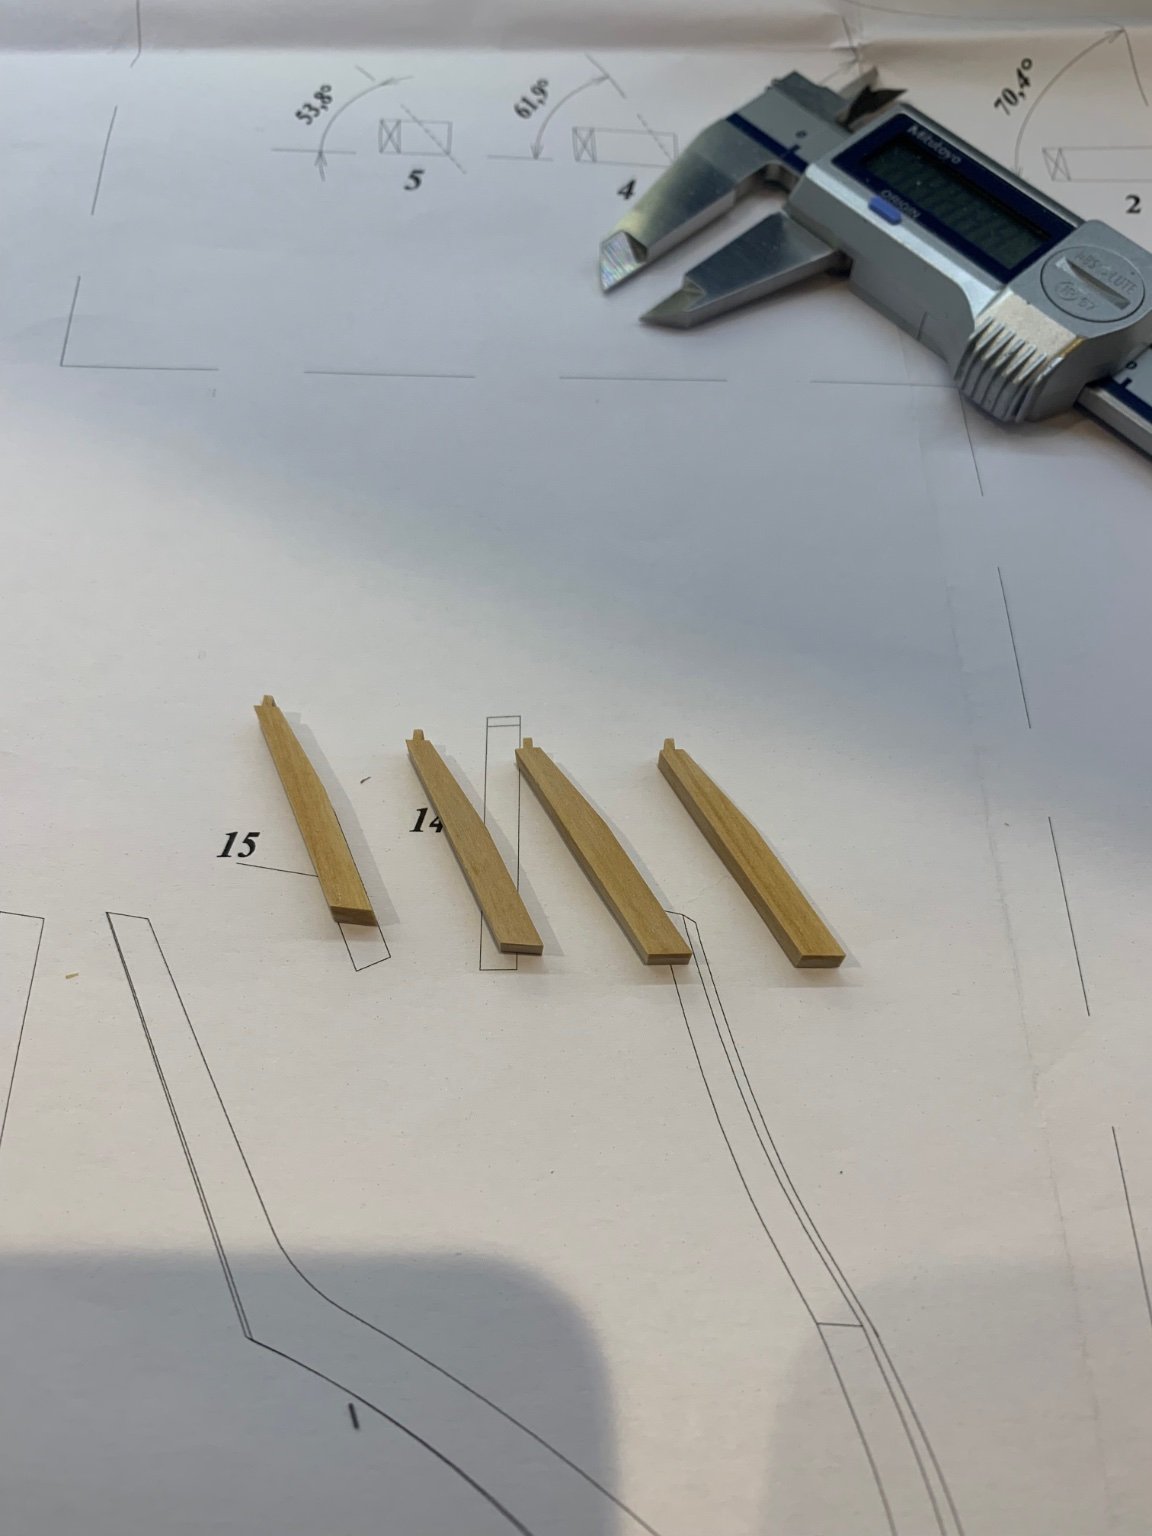
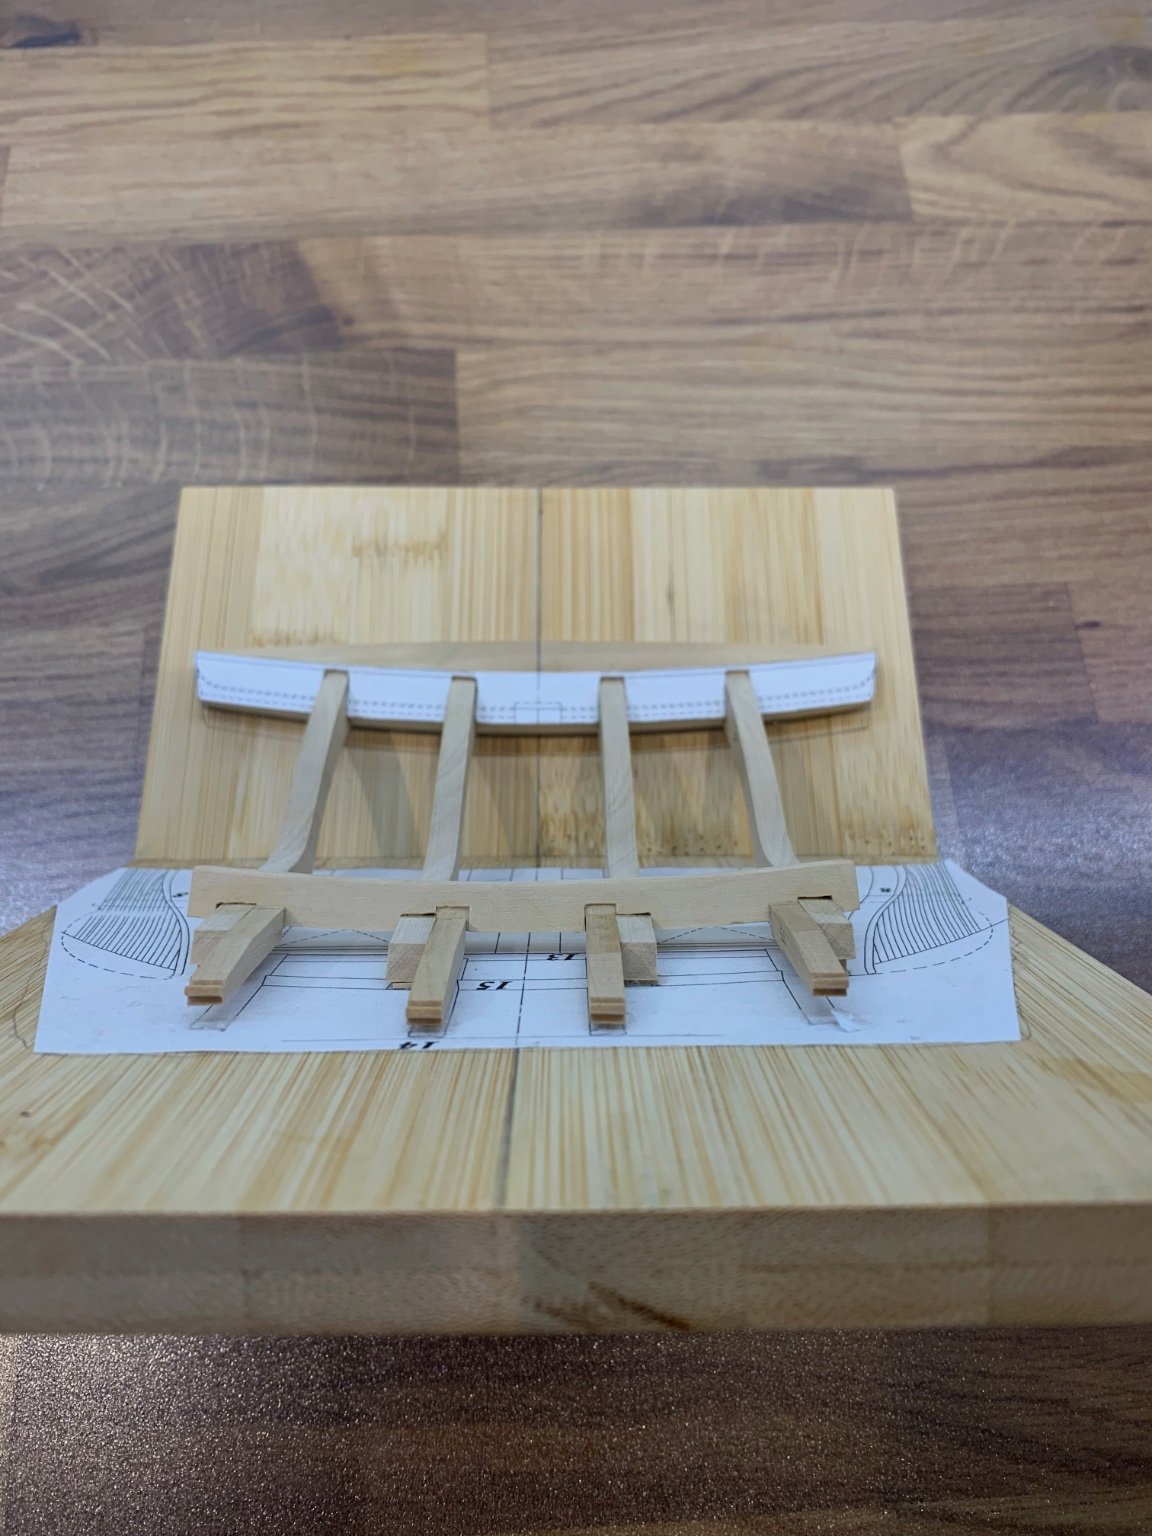
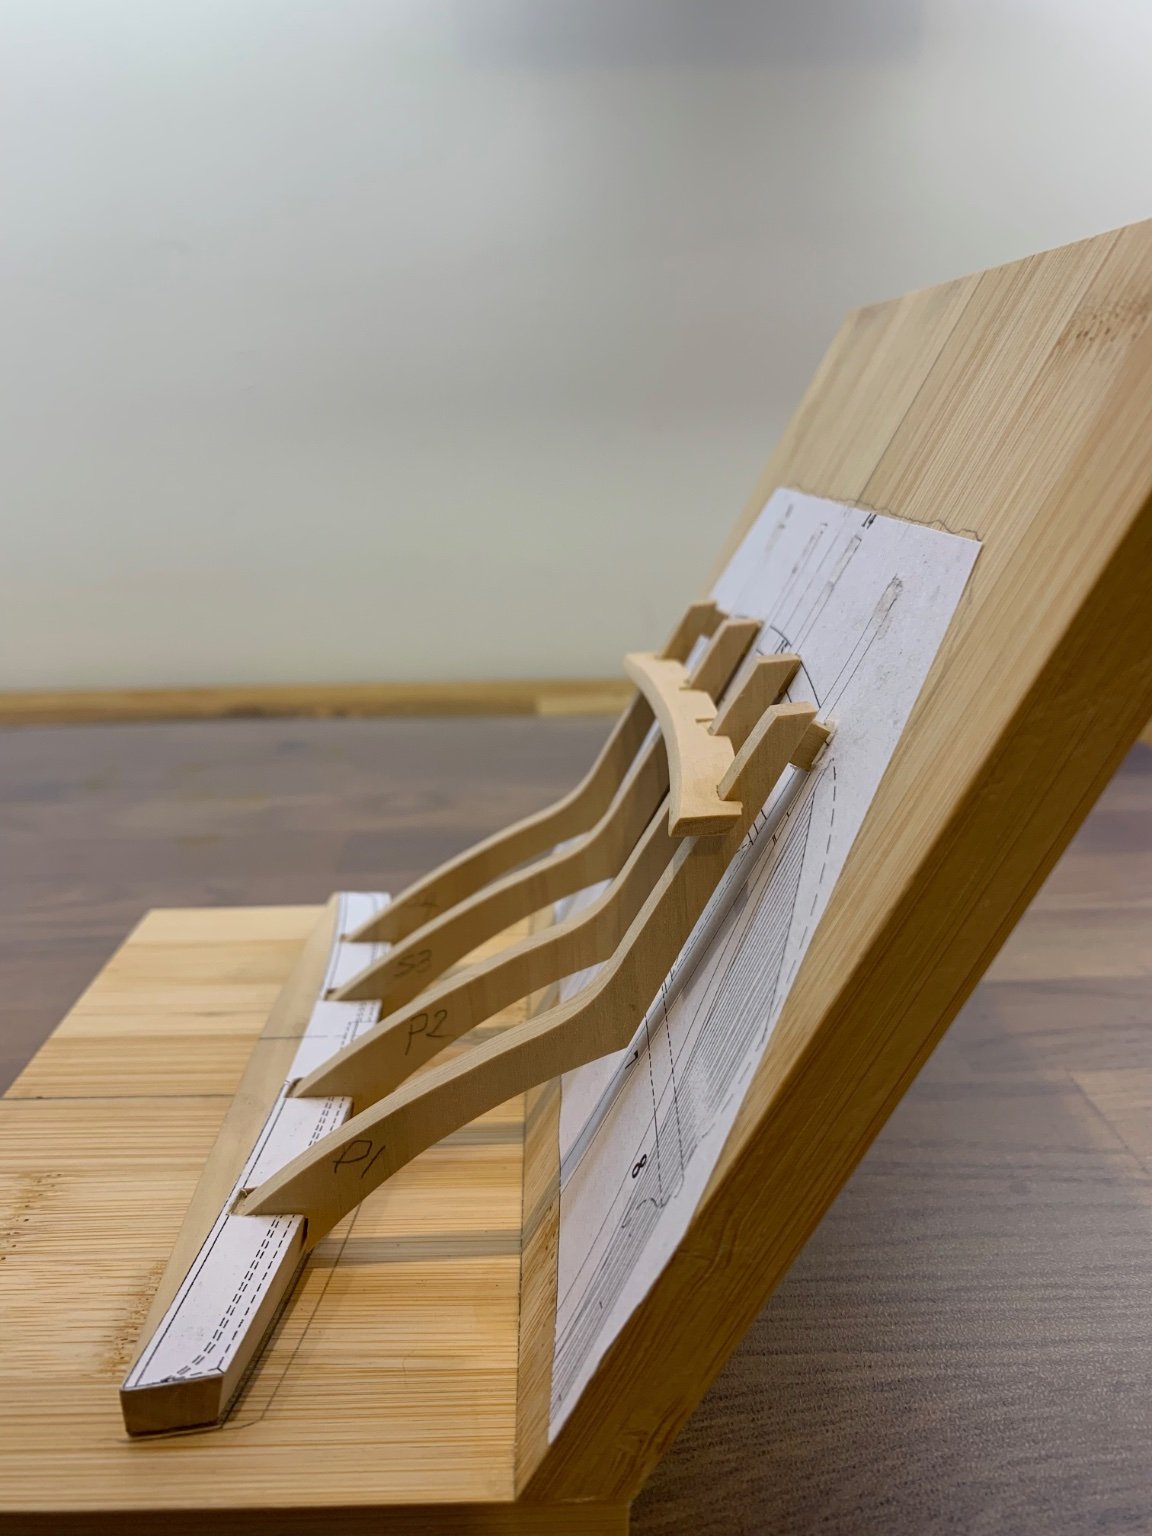
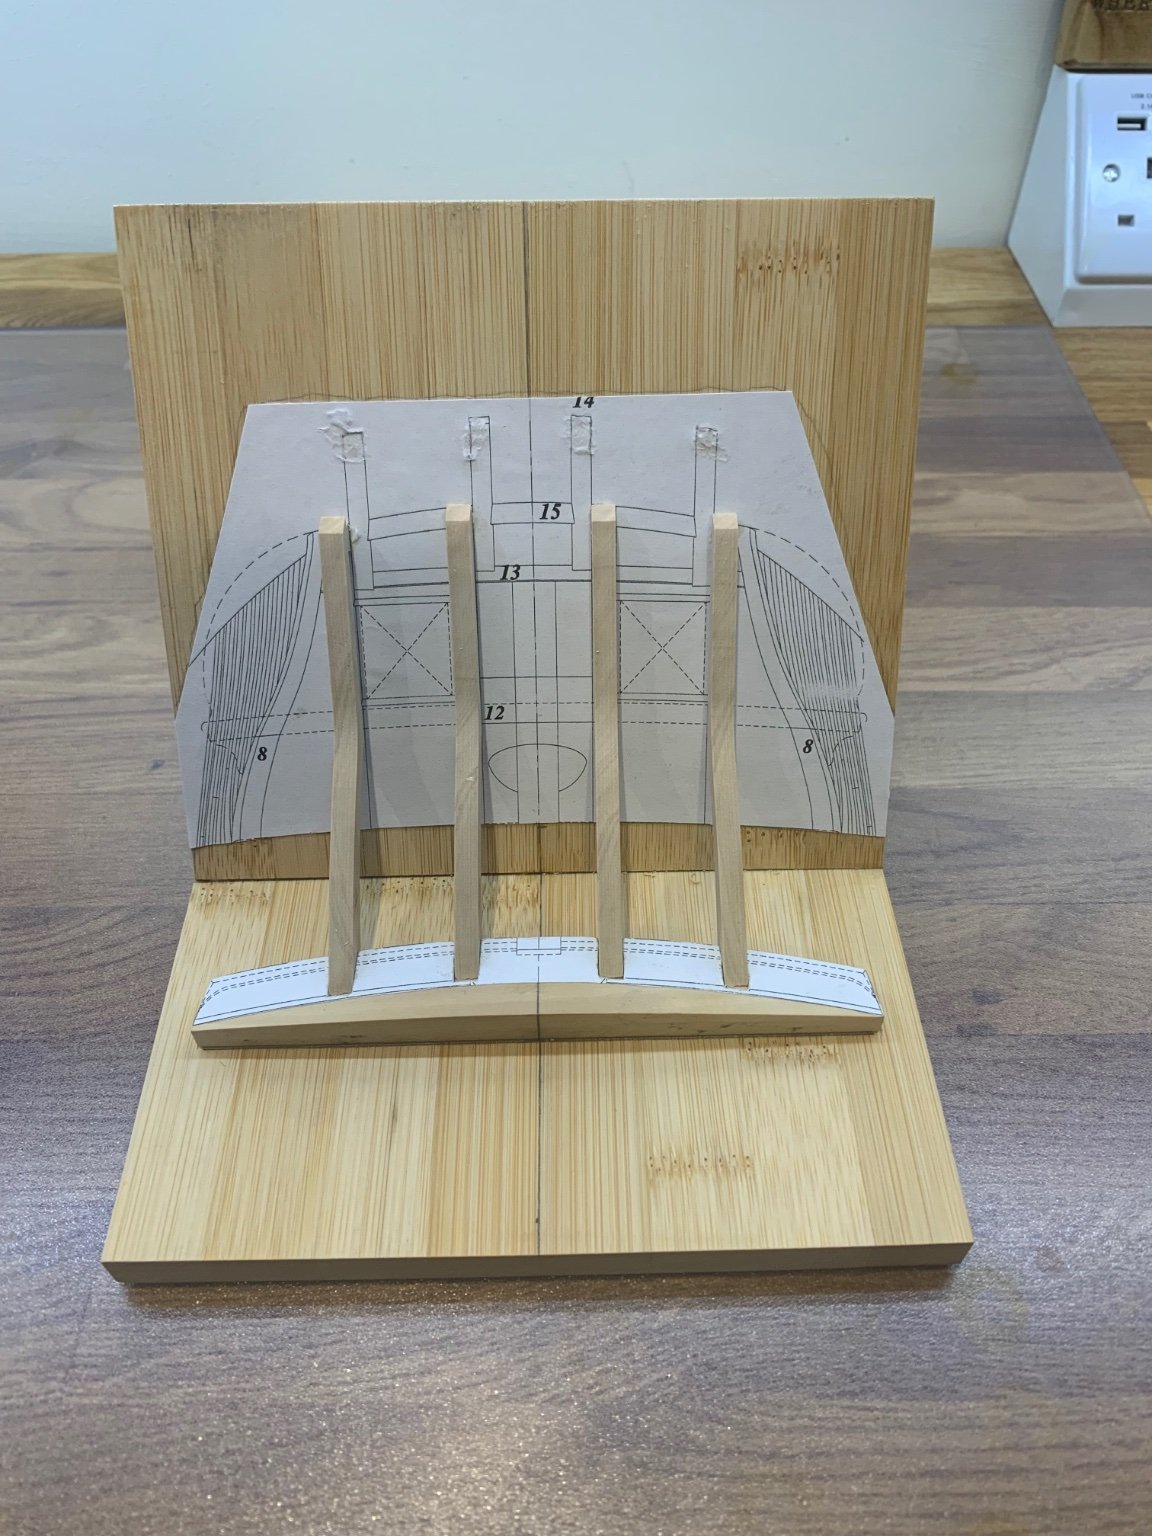
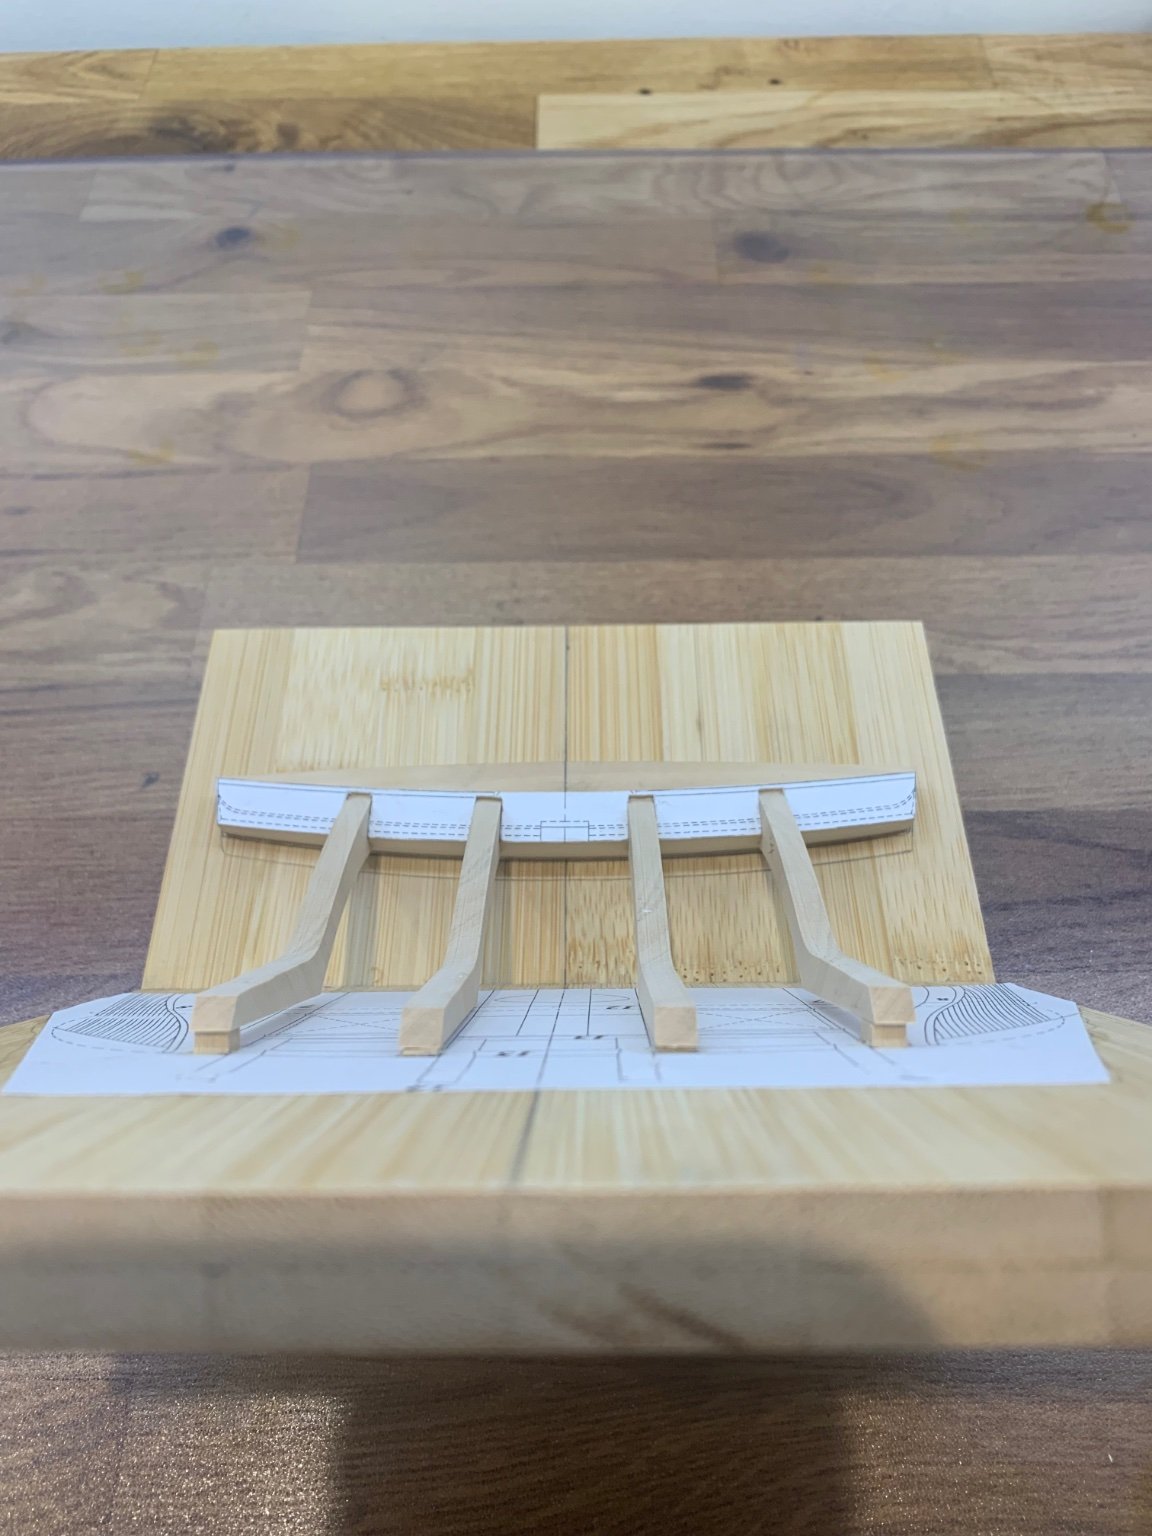
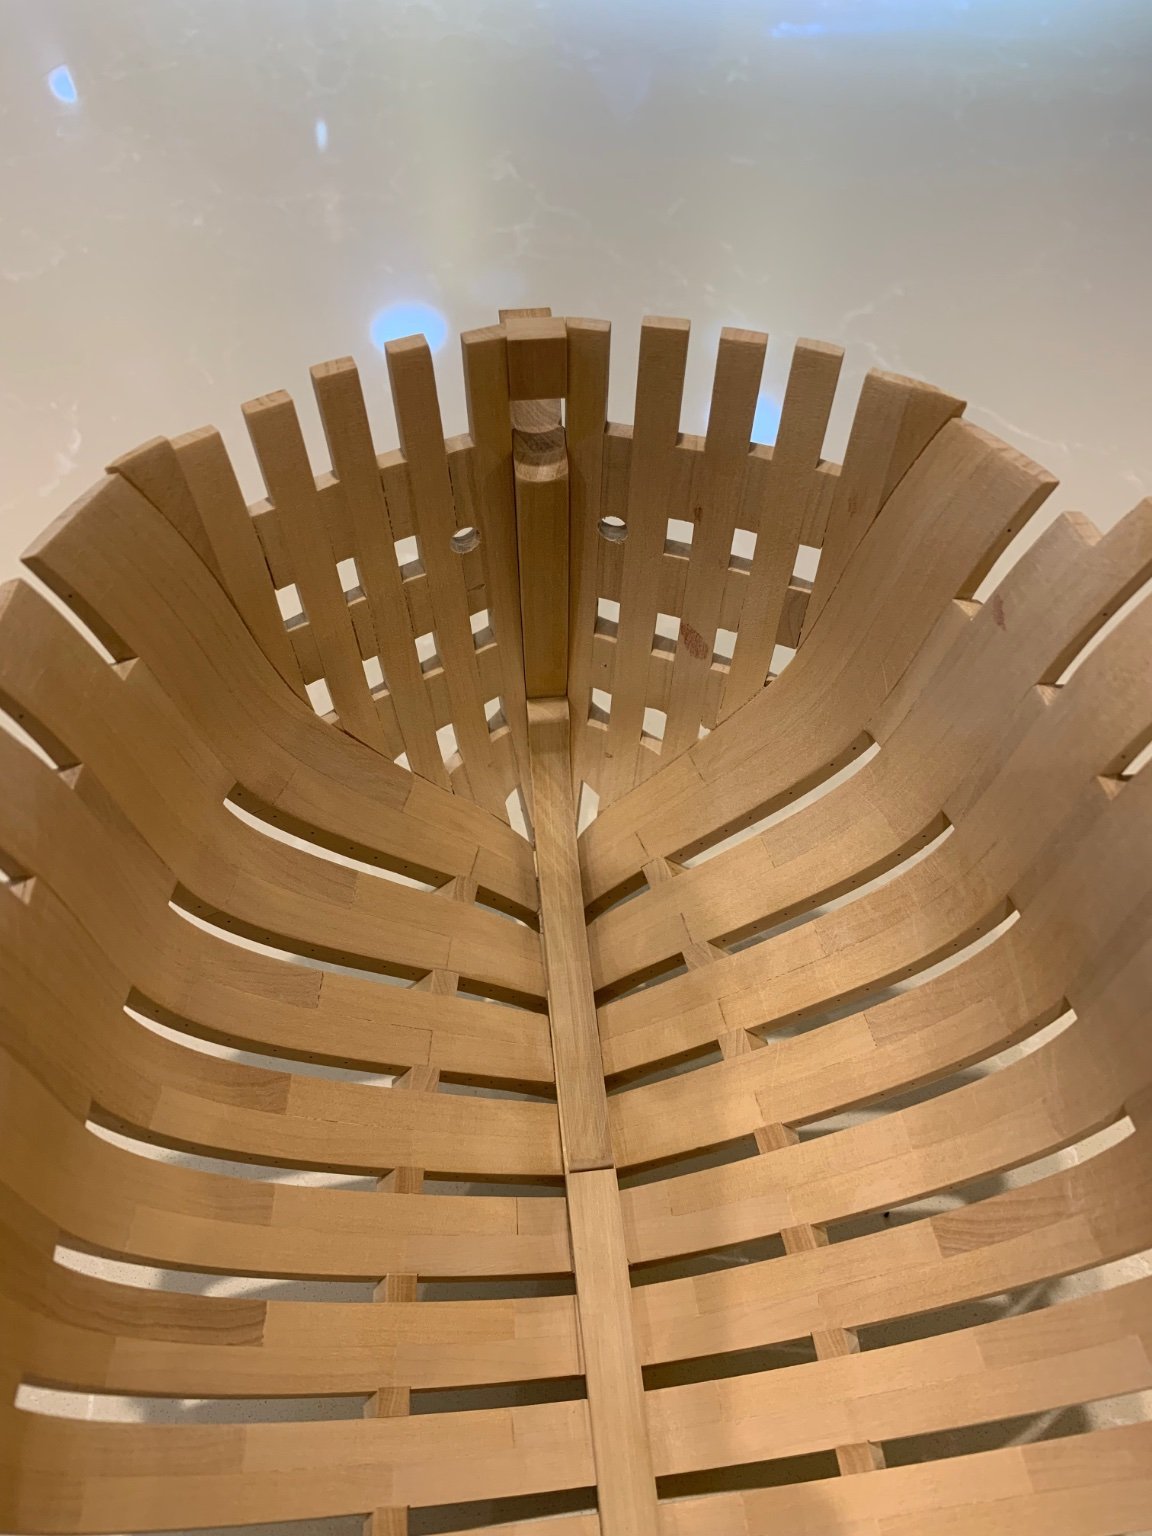
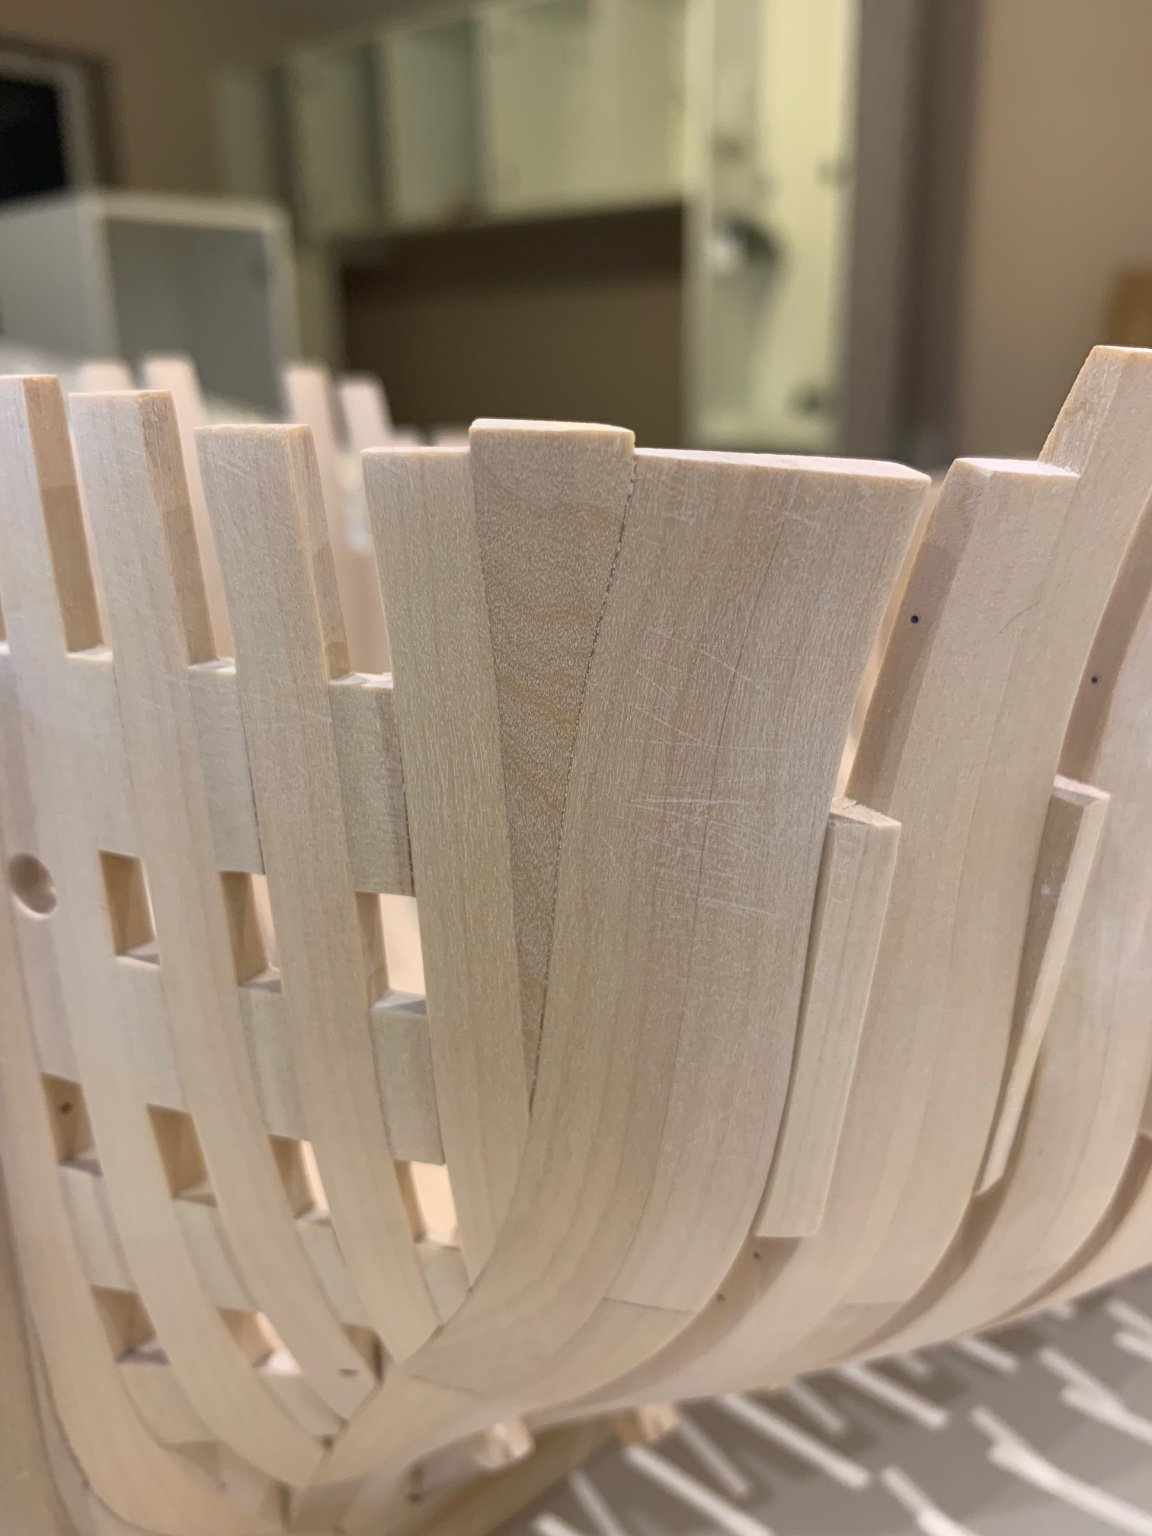
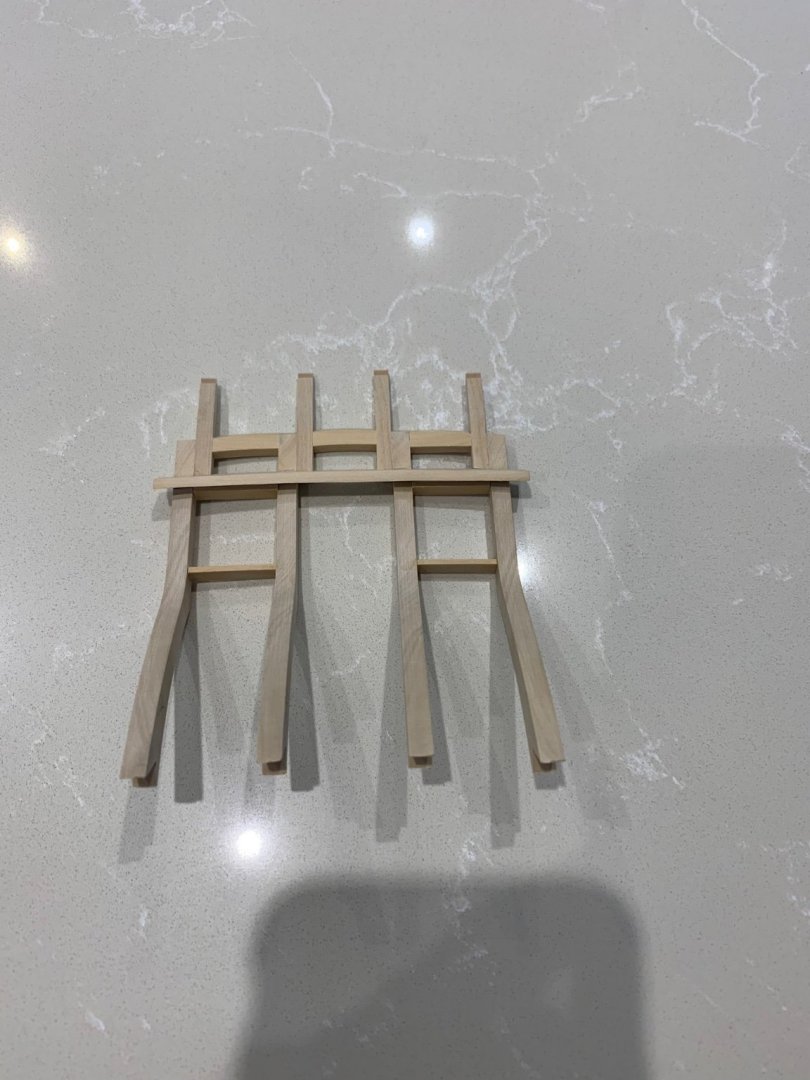
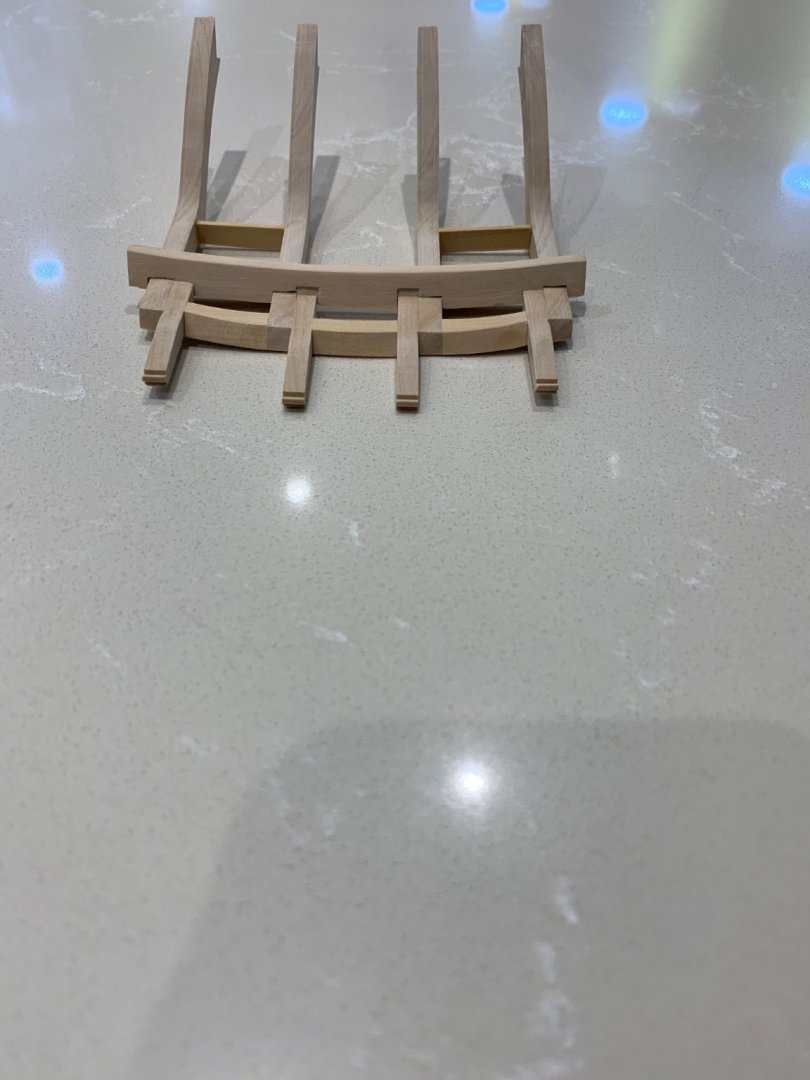
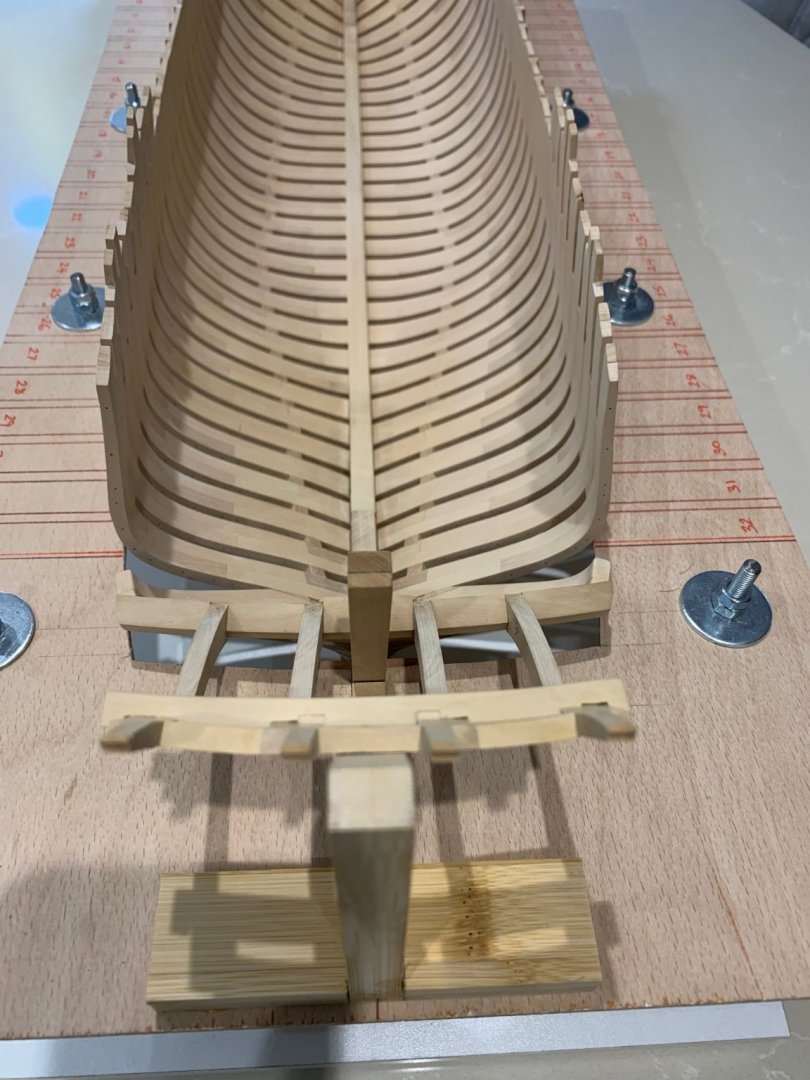
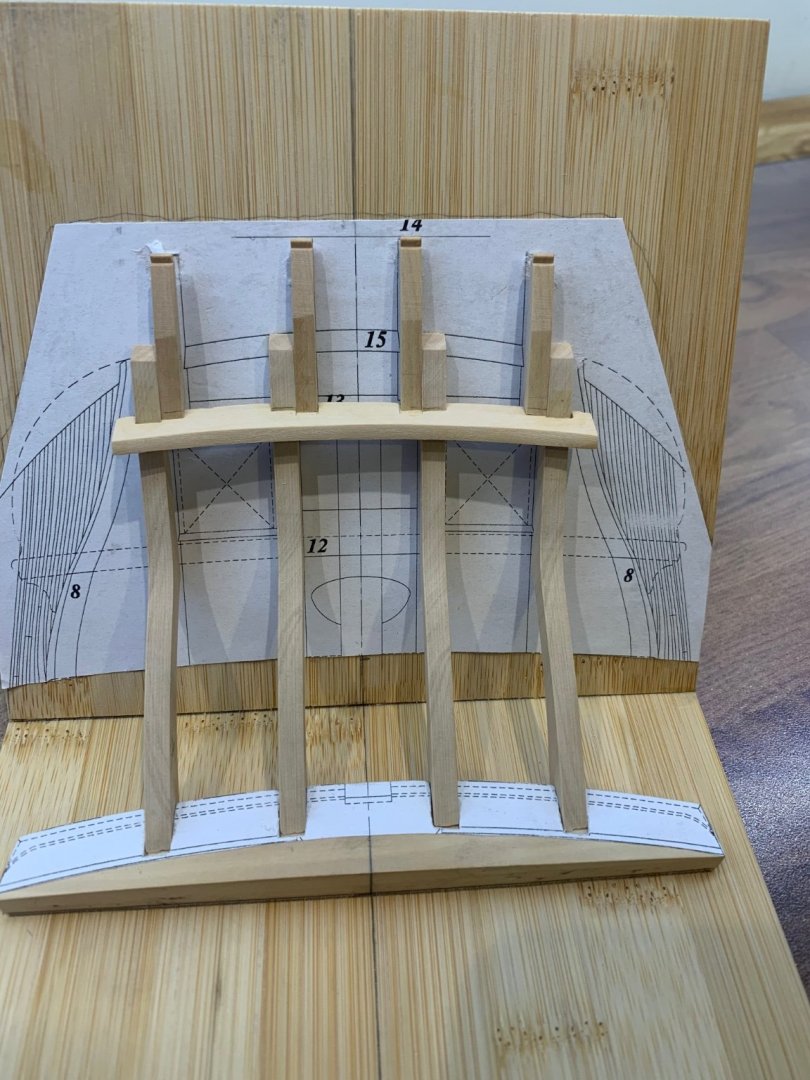
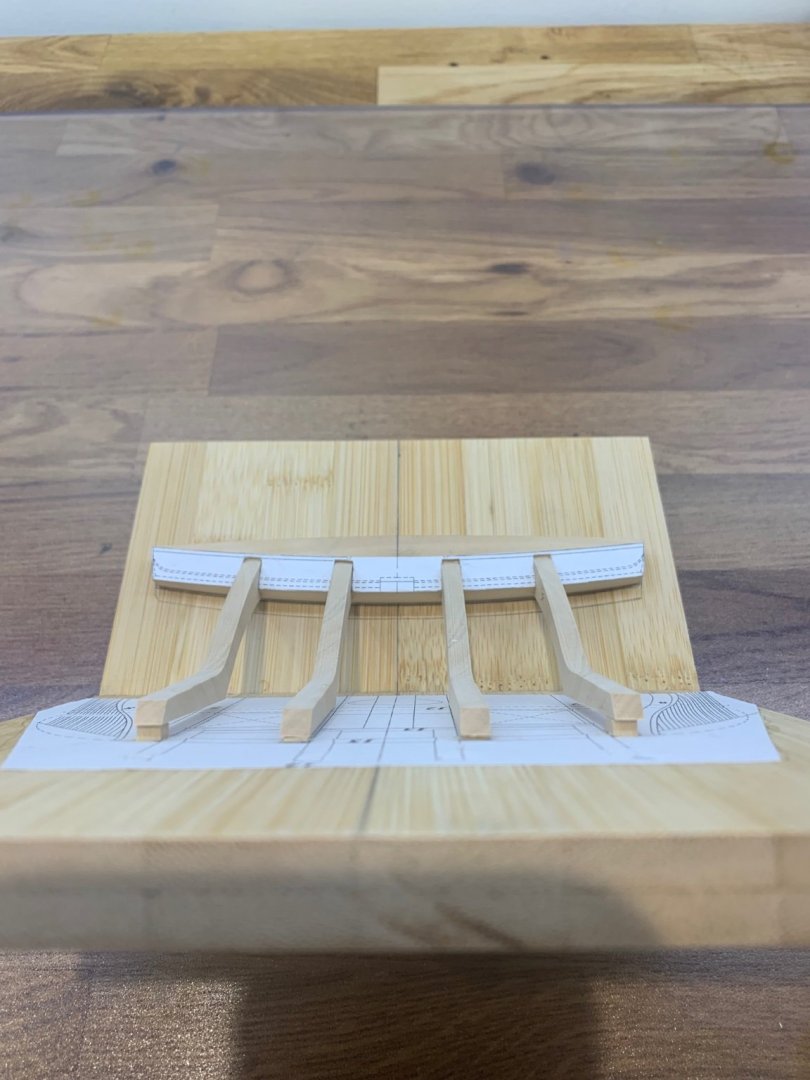
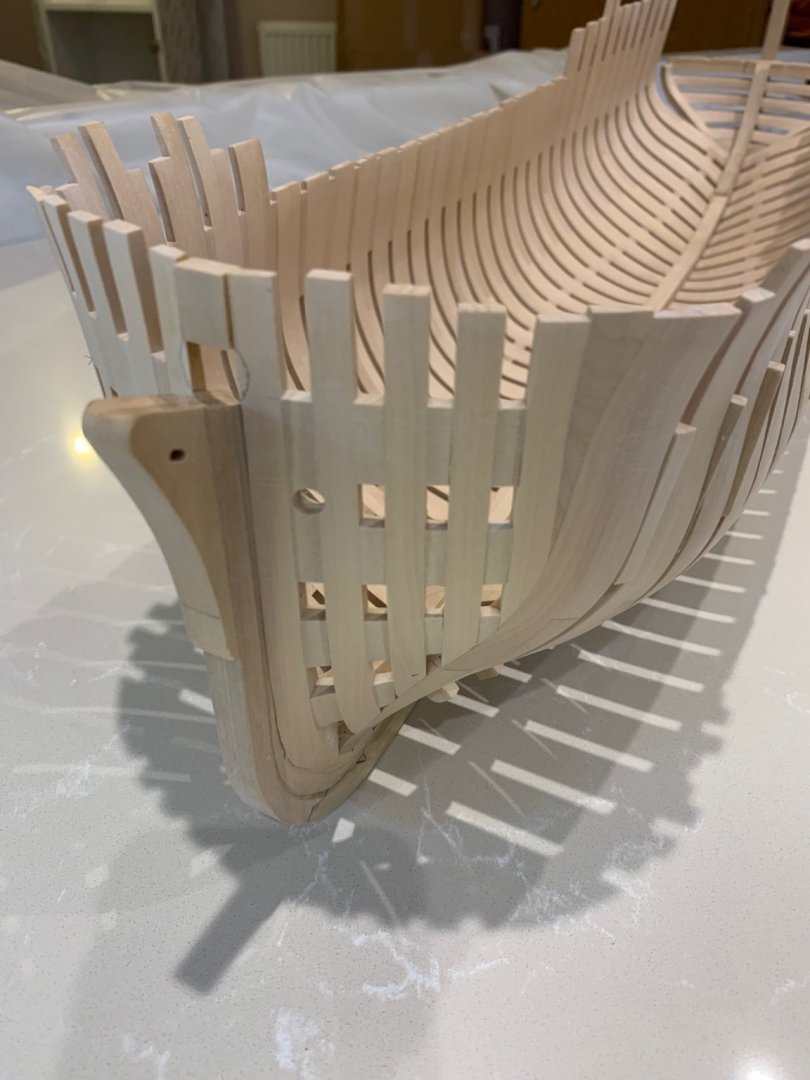
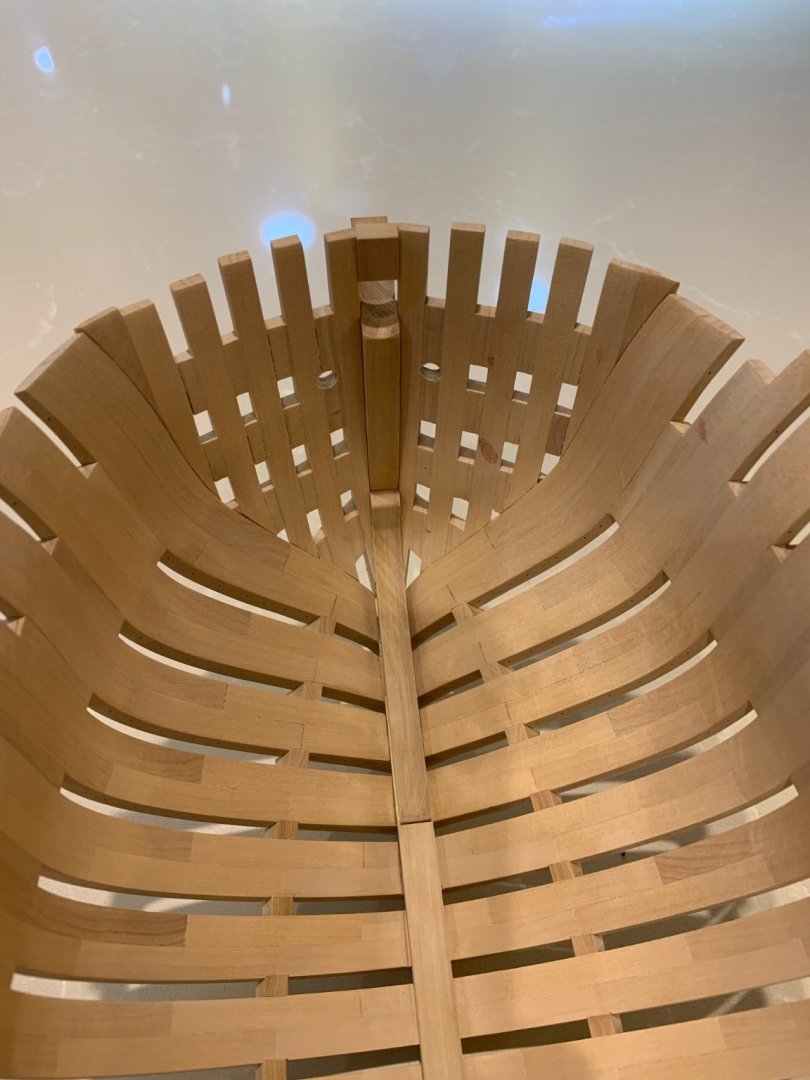
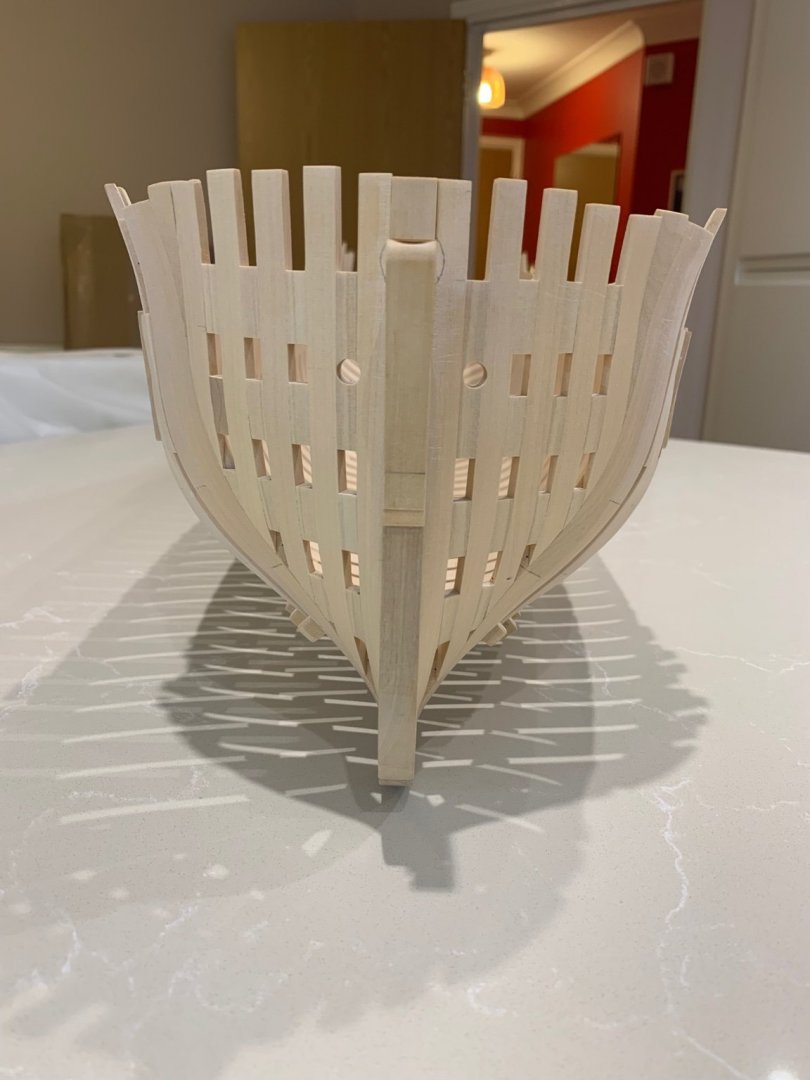
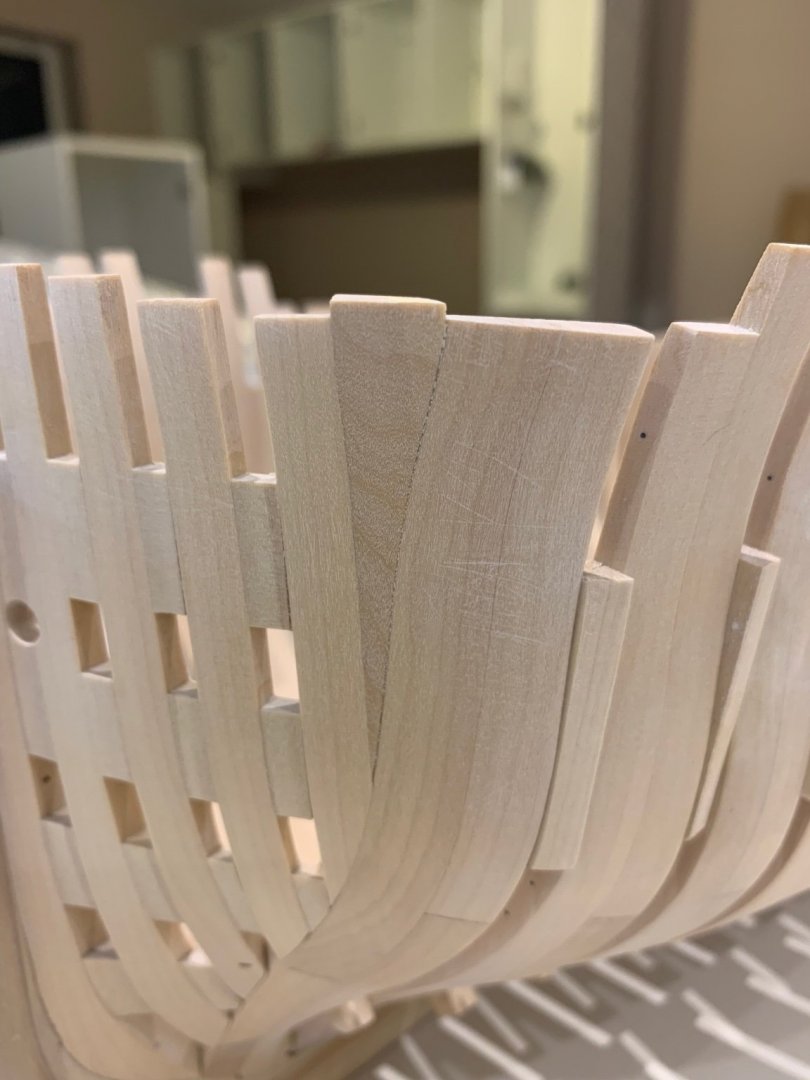
Hi All I've made a start on the counter timbers and I'm back to following Adrian Sorolla's excellent book. He suggests making a jig which involves making another although less intricate wing transom and an angle plate to set the timbers. Once the assembly is complete it is then transferred to the ship. So I set out to make this jig which is actually a bit more tricky than he lets on. Not only do you have to obviously set the exact angle there is a curvature in the stern too. I think the pictures explain this far better than my words but the jig took many hours to make compared to the hour it took to make the counter timbers. So having made the jig I next made the four counter timbers which were by now quite easy for me to make. The results are below and I just hope that they are right. Next up is to make the quarterdeck beam to begin to tie the counter timbers together. Cheers and thanks for the continued encouragement - Mark


-
Brass piano hinges
Some Idea replied to Chariots of Fire's topic in Metal Work, Soldering and Metal Fittings
Is this any good? https://www.dollshousemania.co.uk/brass-hinges-12-pcs-5-x-10mm-when-opened-up-diy96801.html -
HMS VICTORY 1765 by albert - 1/48
Some Idea replied to albert's topic in - Build logs for subjects built 1751 - 1800
Hi Albert - I'm a bit late to your build but wow!!! Such beautiful carpentry and I love your workshop. Good luck with your Victory and I'll be following along -
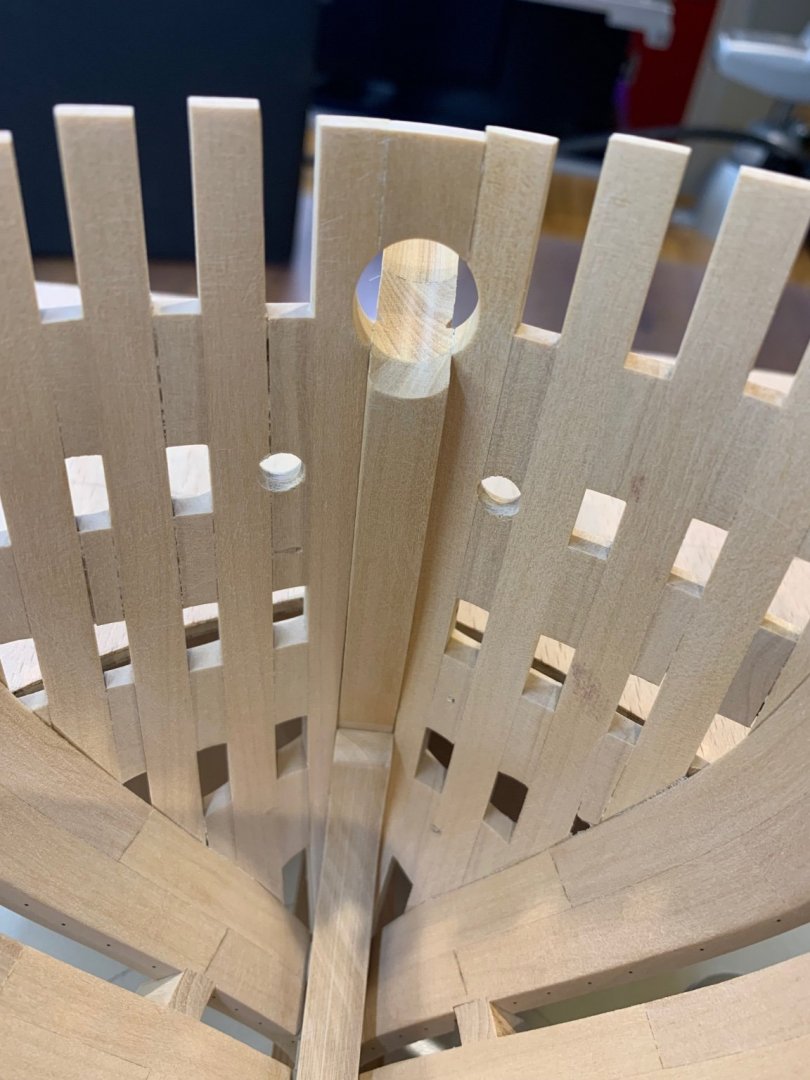
Hi mate - you know what they say; measure twice - pray 5 times and just pull the trigger on that drill 🤣 Would you believe I started off with a 0.5mm drill and then progressively went through each size until I got to 6mm. My thoughts were that I could maybe adjust it a bit if I needed too. Mind you lining up 4 holes precisely on a curved surface; you don't need much of an imagination to see the pit falls there!
-
Thanks very much Allan - I've only faired the inside so far I'm going to fair the outside once I get the deck clamp in and a bit of internal planking too.
-
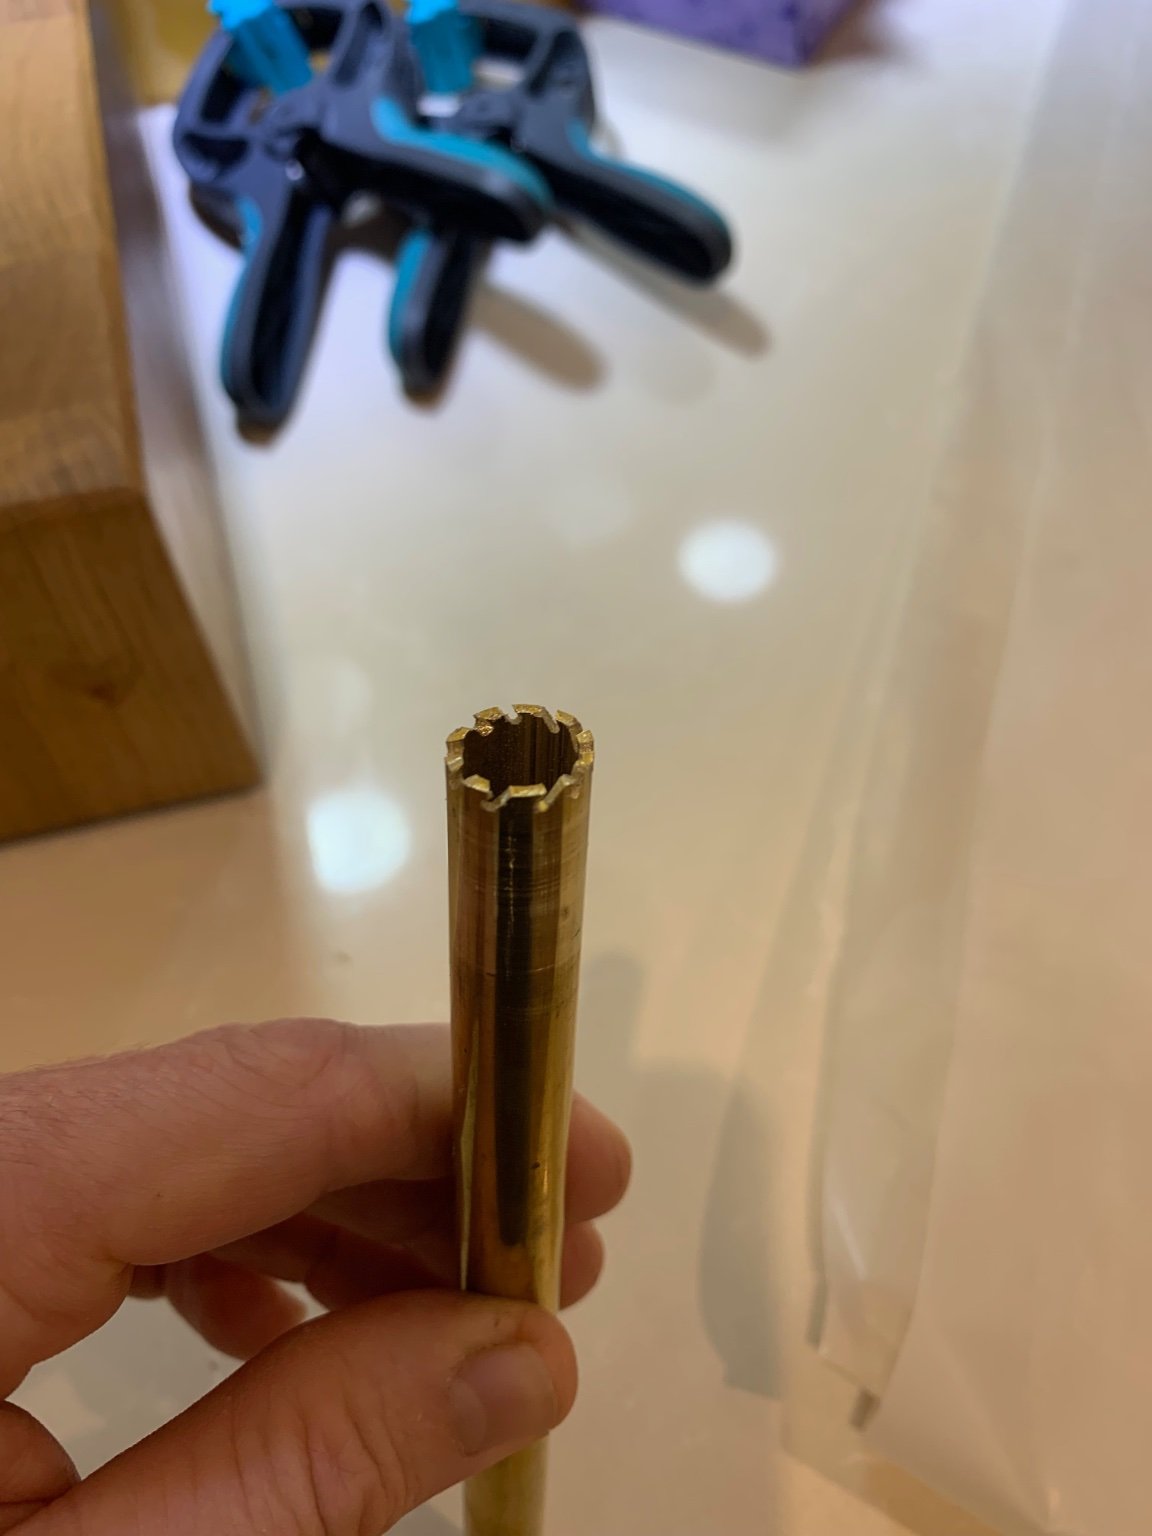
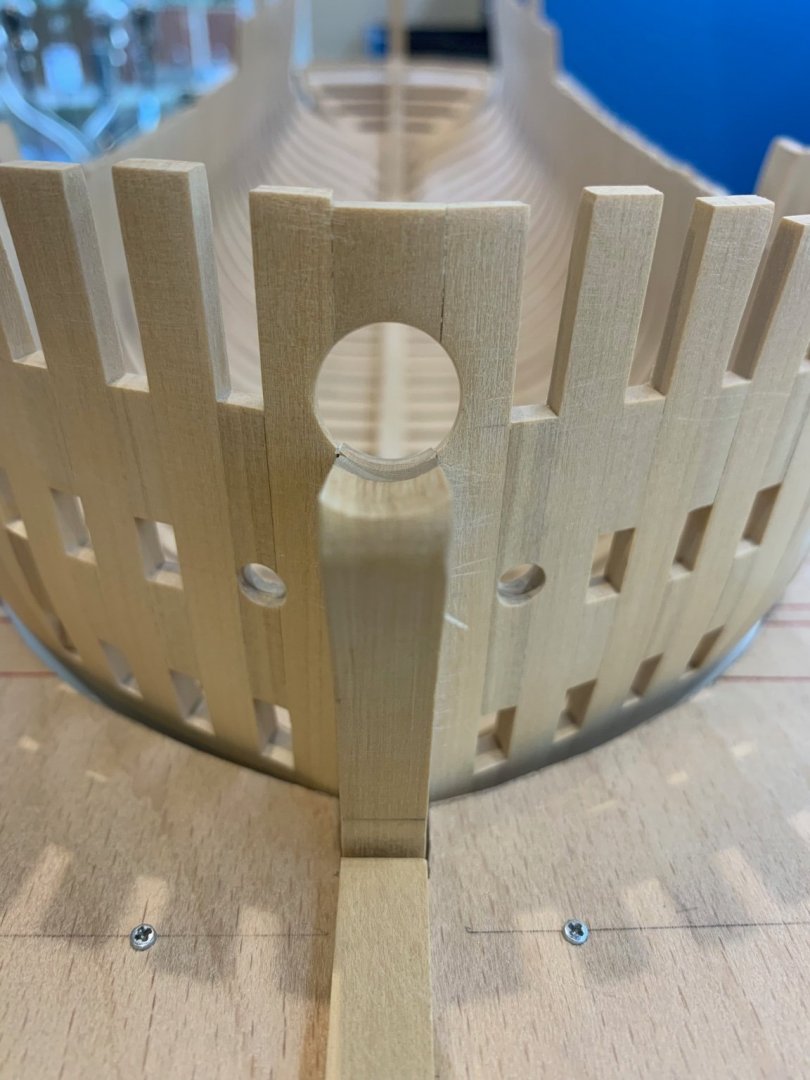
Thanks for all of the comments, likes and advice 👍 I cut the hole out for the bowsprit this morning which like most things required a solution. The hole required needs to be 14.70mm in diameter or there about's 🤣. I'm sure that many of you have looked at this hole like me and thought I really need to keep the correct angle or it will just look bad. So what I did was made a hole saw out of a piece of 13mm brass and used the bowsprit saddle as a guide. I popped the hole saw into a power drill and ran it through nice and slowly so as not to split the wood. To get to the final size I just kept on gluing sand paper to the brass until the correct diameter was achieved. So that's the bow now closed in so its onto the counter timbers at the stern for me next. This will have to wait to next weekend now and I'm looking forward to the next challenge. Mark


-
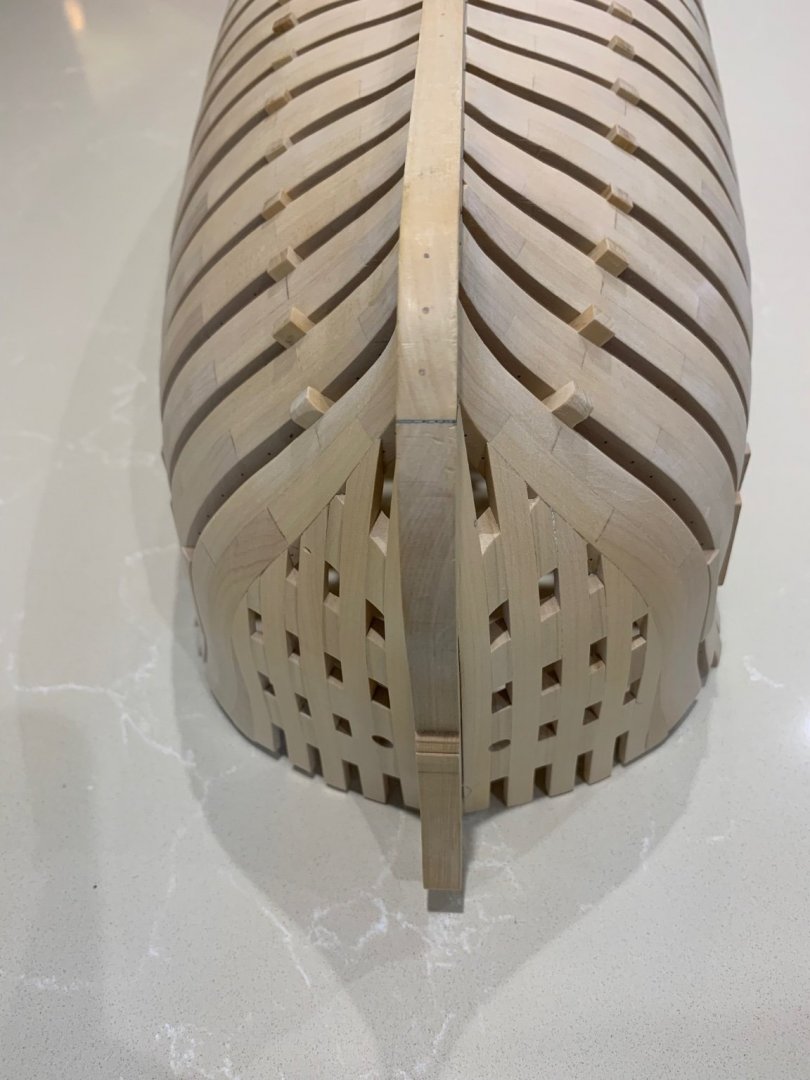
Hi All Well at last I've now completed the other side of the hawse timbers 😃 I must be honest and admit that I have found these few timbers to be the hardest on the build so far. The drawings are complicated and yet very precise and complete but the translation to the wood was difficult for me. I think that this was partly due to the way each piece is stacked onto the next piece. Assembly without glue is hard and yet the dry assembly is critical. I can now see the shape of the bow and its another milestone for me. I have not yet cut the top timbers to their finished height as this will wait until the outside of the hull is faired. I have made the hawse holes and also made the small triangular filler piece that fits between hawse timber 1 and the top of frame 1. I need to finish the hole for the bowsprit and I'll try and get that finished tomorrow; if I do I'll get some more pictures up for you. Phew I'm so glad that this is done even if they are not the best joints I've ever made. Thanks to you all for the encouragement - Mark 🙂
-
Miniature Russian carving tools
Some Idea replied to druxey's topic in Modeling tools and Workshop Equipment
He glues 1000 grade and 2000/2500 grade paper to a very flat piece of hardwood. He then uses this as you would a whetstone or diamond stone. His pictures paint a far better picture than this though. -
Your welcome mate - I have found this supplier to be extremely good and they really are proud of their products. I wouldn't go anywhere else in the Uk now. As for the kerf - I have found that we lose 50% of everything we buy its just one of those things. Its better to cut what we have correctly then try and save a few quid here and there. If you need a really good supplier of fantastic wood in the UK let me know and I'll pass on their details. Happy building buddy
-
Hi Glenn thats was me mate and I stand by what I said. I have found a few suppliers that can supply me blades but I buy mine from Jim and Donna. I live in the UK and the postage is high but so what. Support your supplier and they will be here for your children's children. If you don't our amazing hobby will become a thing that people used to do.