

catopower
-
Posts
1,615 -
Joined
-
Last visited
Content Type
Profiles
Forums
Gallery
Events
Posts posted by catopower
-
-
-
The castle structure is now done, except for the decorative fish fittings that adorn the corners of the castle towers. These fish figures are called shachihoko, and are found on many castles, gates, and the homes of some nobles. I'll save these for later, as it's easy to knock them off during construction – Something I know from first-hand experience.
Anyway, here's where we are as of now...
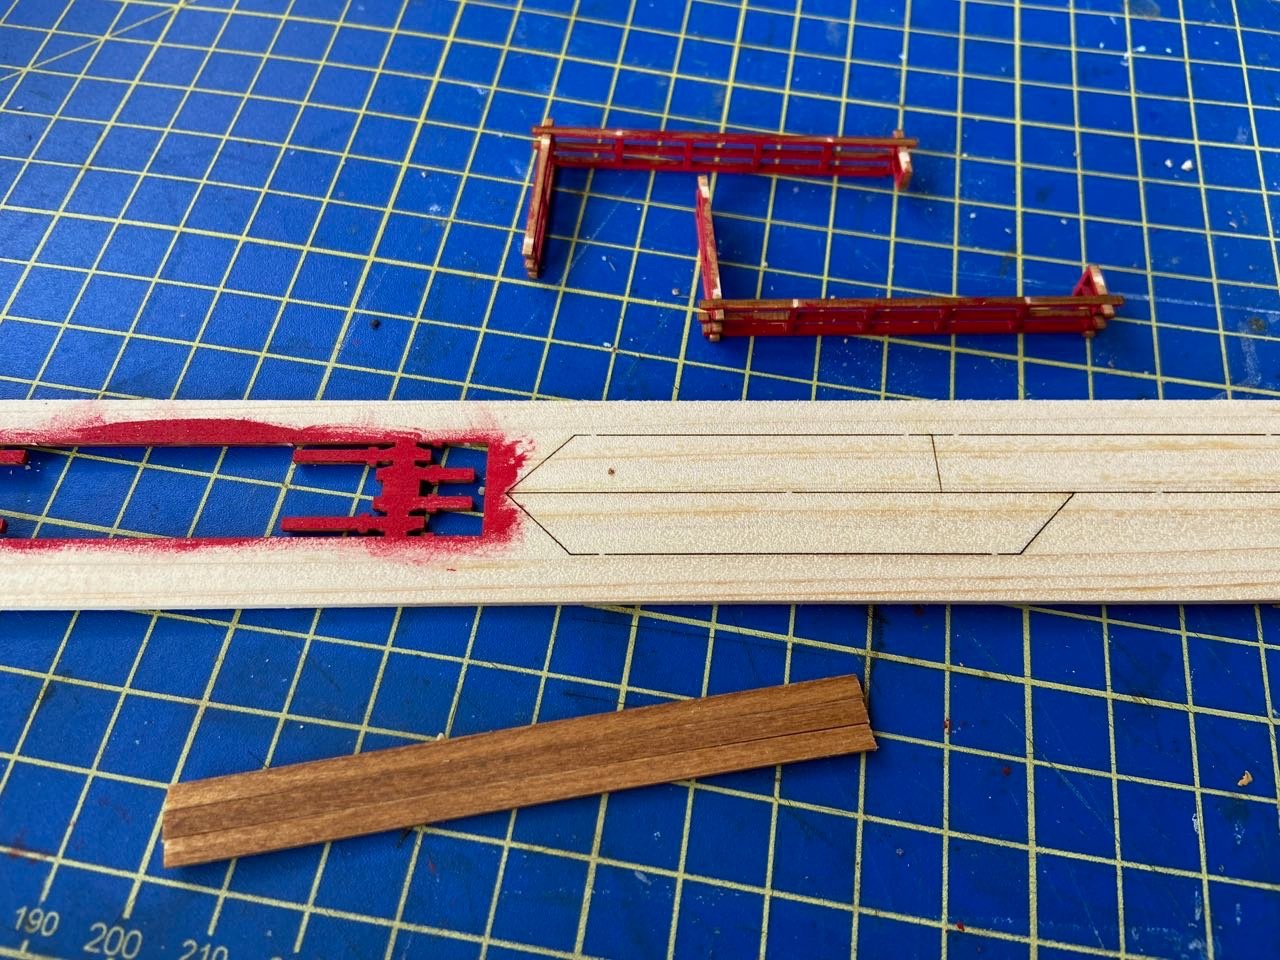
Next, I'll need to get back to finishing the lower hull modifications. But, before I get to that, I thought I'd start taking care of the many sculling oars I'll need. These are partial oars, so I don't have to make the whole oar, just the lower part that sticks out of the ship. This ship is represented as having 36 pairs of oars.
Below, at the bottom, you can see the pieces as provided on the laser-cut sheets. Immediately above those is an example of one oar that's been cleaned up. At the top is a sculling oar from another model, so you can see what the whole thing should look like. I might have to make some full-length oars from scratch if I display any of the doors open. But, I don't know if I'll do that, as that leads to so many other details that aren't provided in the kit, like the internal deck, walls, and structural members, etc.
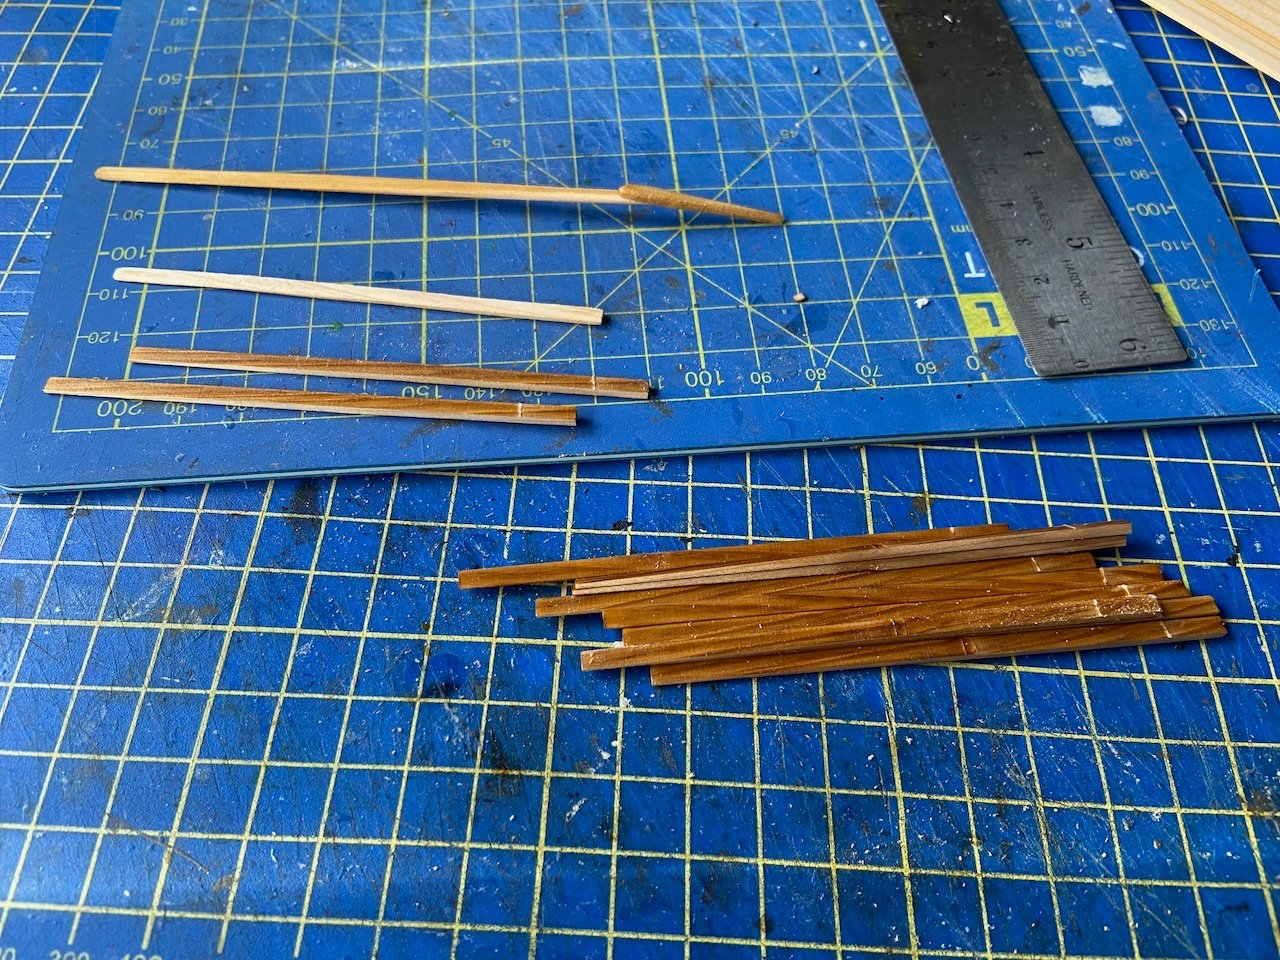
Cleaning up all these oars is slow going. Below are 12 cleaned-up sculling oars. Only 60 more to go.
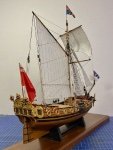
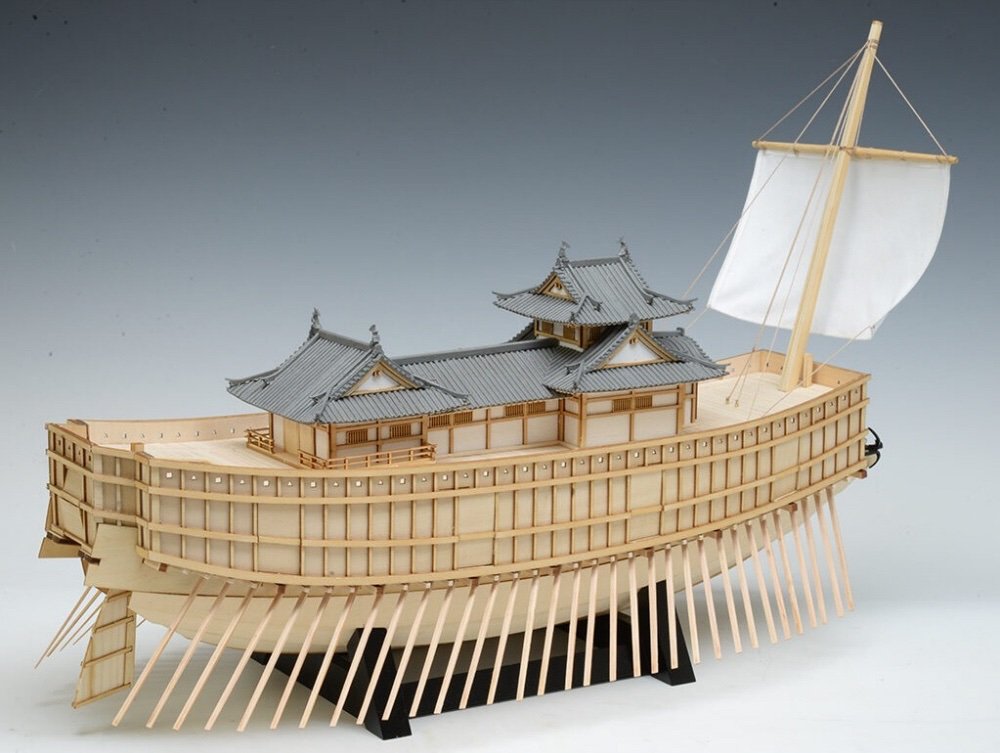
Now, another modification I'm considering, though perhaps this one will be fairly minor. The kit includes a forward leaning mast, equipped with a yard and sail. Only a mast is depicted on the museum model, as that's all that's shown in the original painting. But, the kit looks like this:
Now, I think whole idea that the mast wasn't in the center of the ship is somewhat controversial. But, that it leans out in front of the shipmay be even more controversial. To my knowledge, this arrangement isn't seen on any other Japanese ship in history.
Now, I have noticed that the museum ship has a feature on deck that leads me to think that the forward leaning position might be just to drop it out of the way from the castle structure, and that it might be pulled upright when actually sailing. This would pivot the mast at its base, deep inside the hull, and cause it to come up through the deck, a bit further aft.
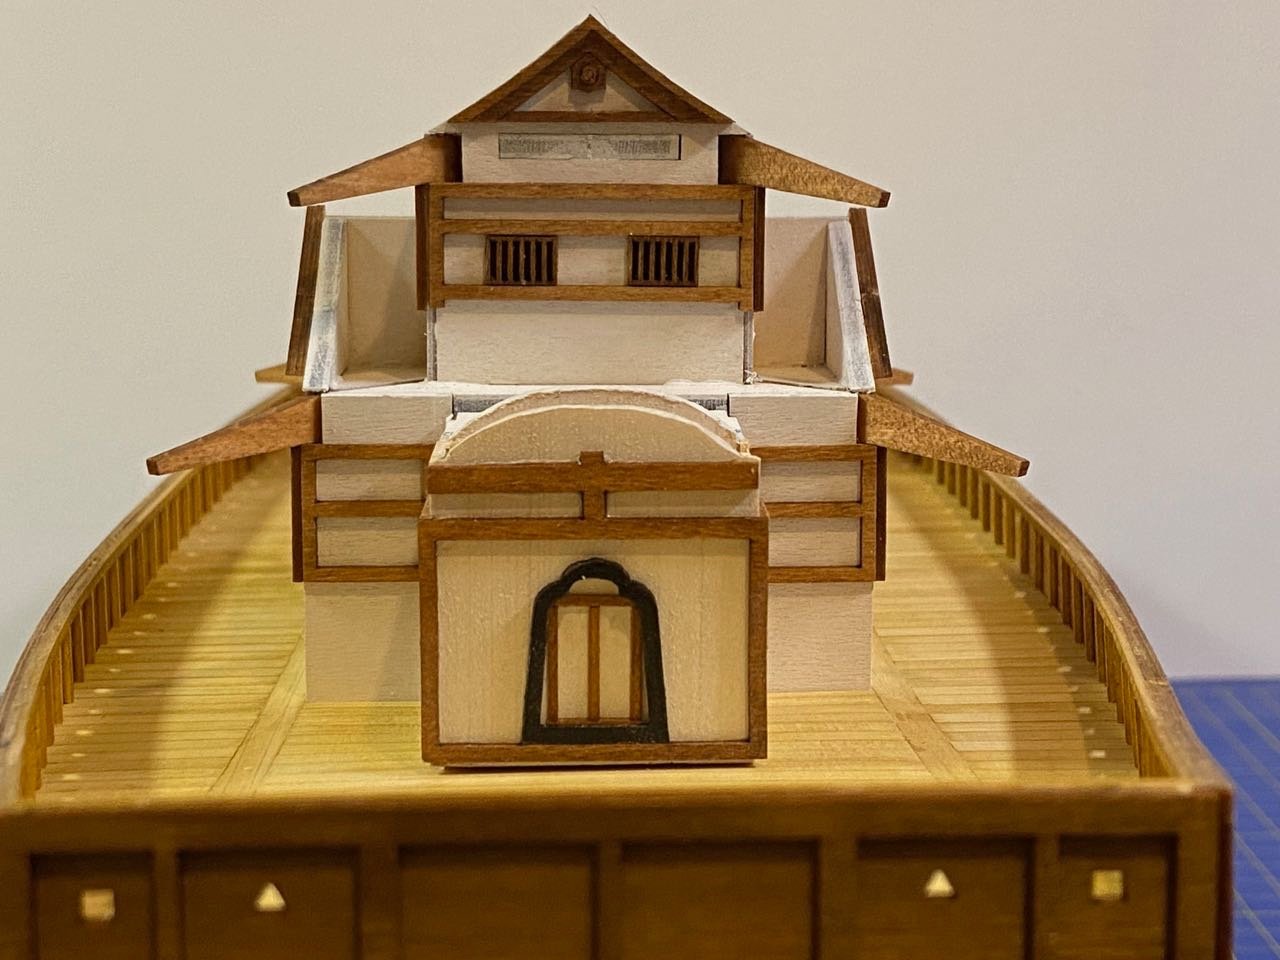
Unfortunately, the best museum photo I have that shows any of the deck in front of the castle structure is the on below. But, in it, you can see a few features that I've marked out with color arrows.
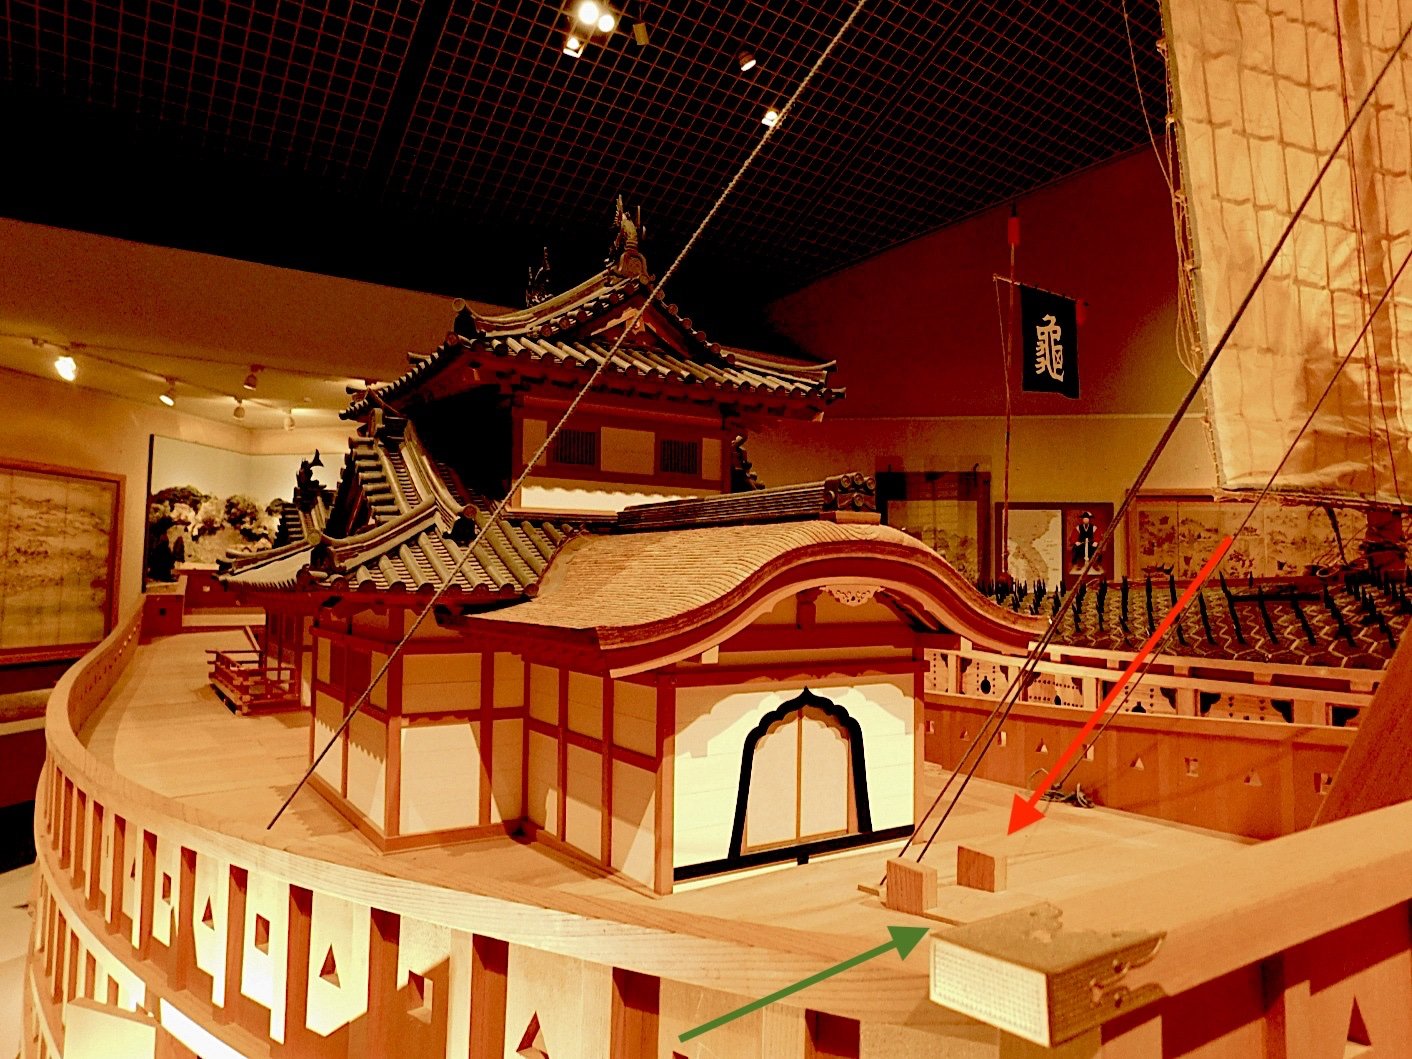
The red arrow points to what look like mast supports. To me, these are familiar as the tops of supports that stand to either side of the mast. The mast would usually be lashed to these supports.
The green arrow points to what look like deck panels. Removable panels that stick up from the main deck would cover a long, narrow opening, through which the mast could be raised to a vertical position. Similar panels are seen on coastal transports. And, similar slots for the raising of masts are seen on other types of Japanese sailing craft.
Now, this could simply be a museum invention to try to explain how this forward leaning mast might work. But, it makes sense to me. I can't see the whole features, but I can speculate. And, it would be easy enough to add this to the deck. Plus, it would give me a reason not to add the sail provided in the kit, which looks a bit odd to me anyway.
I suppose the yard arm could also easily be stored below deck and brought up through that slot when they decide to raise the mast and sail.
I'm going to try running this by a couple people who are familiar with atakebune before I make modifications there.
-
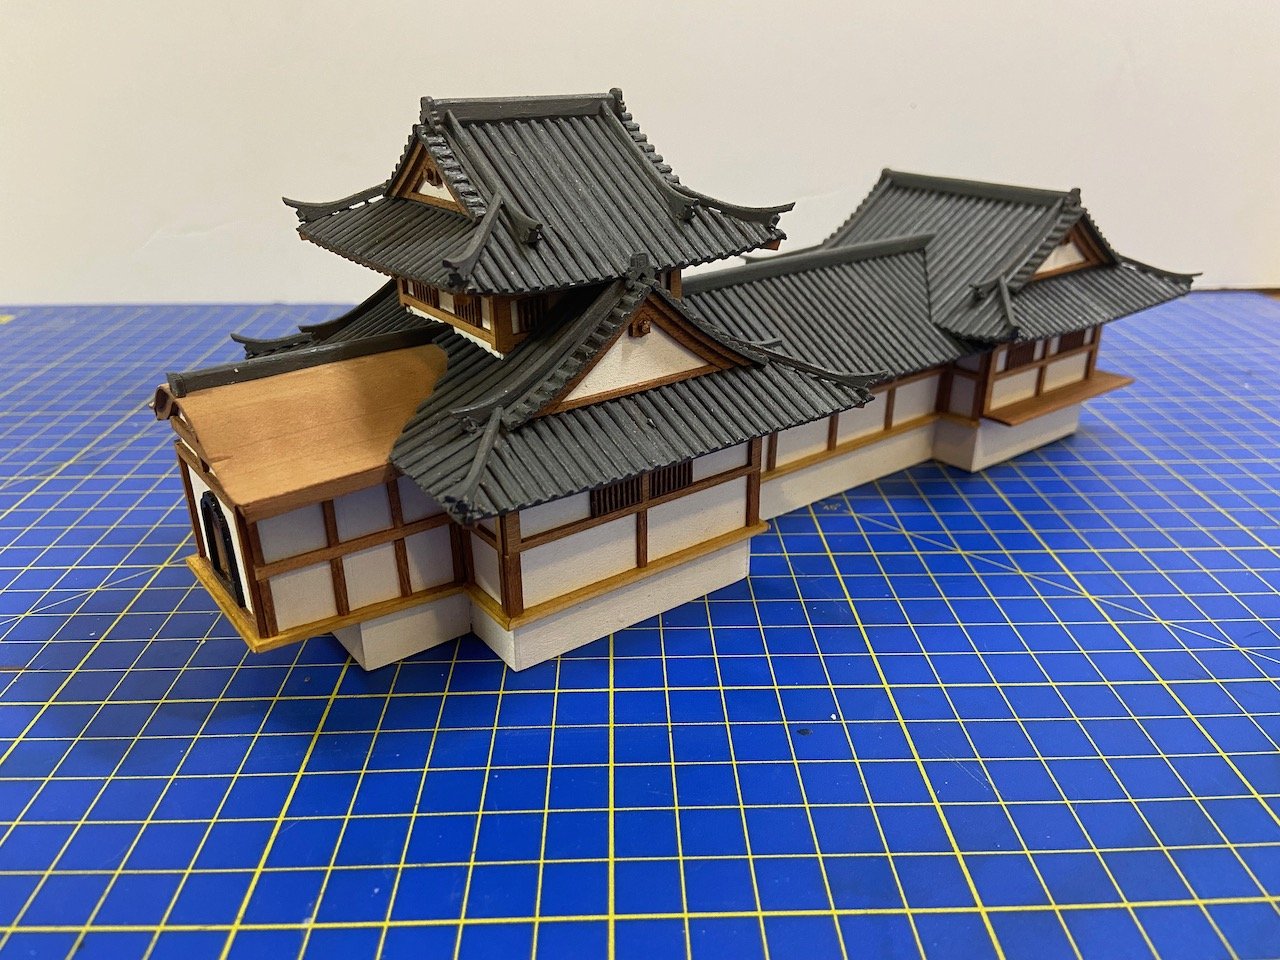
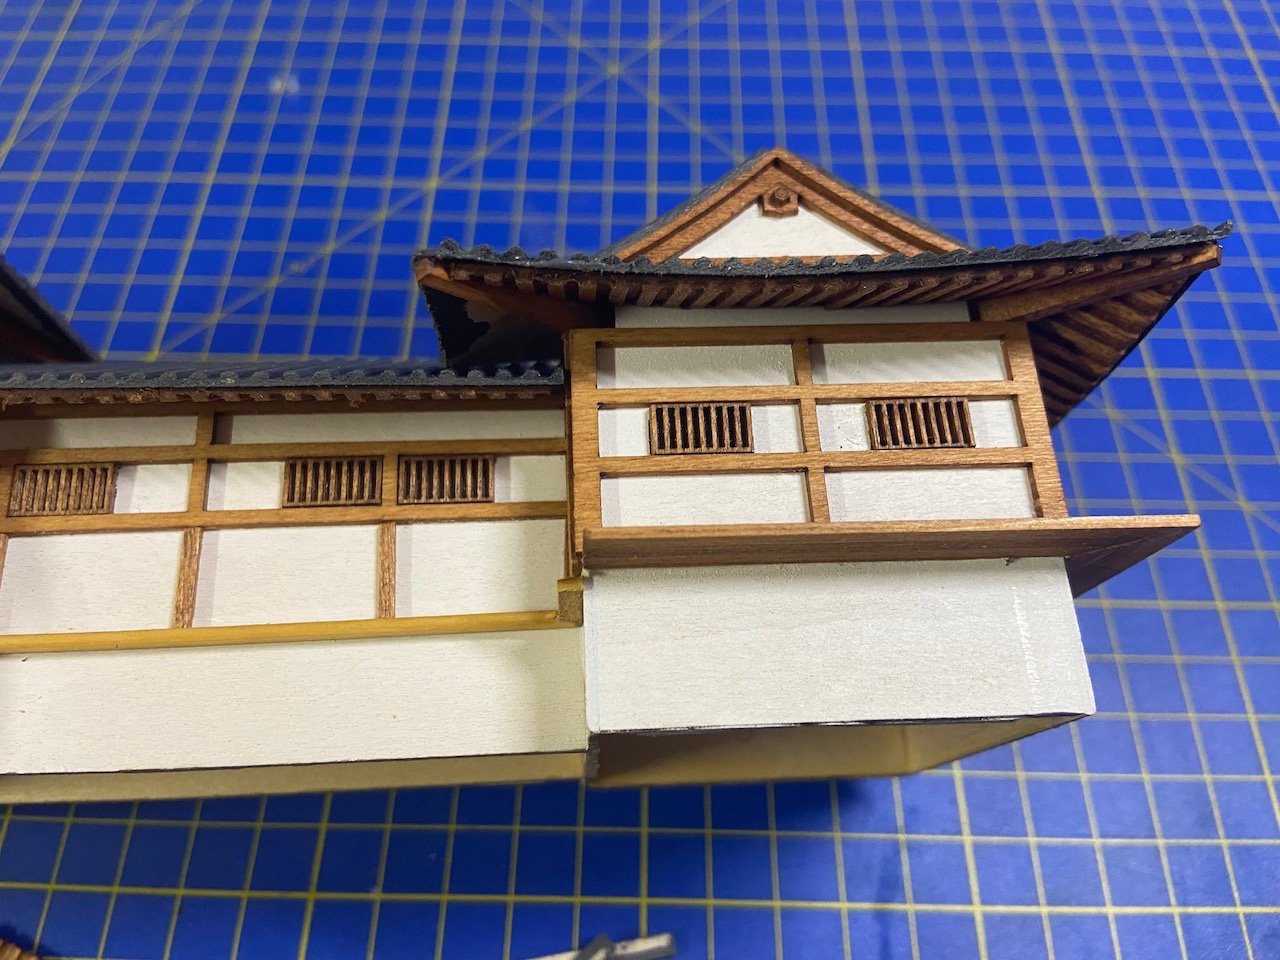
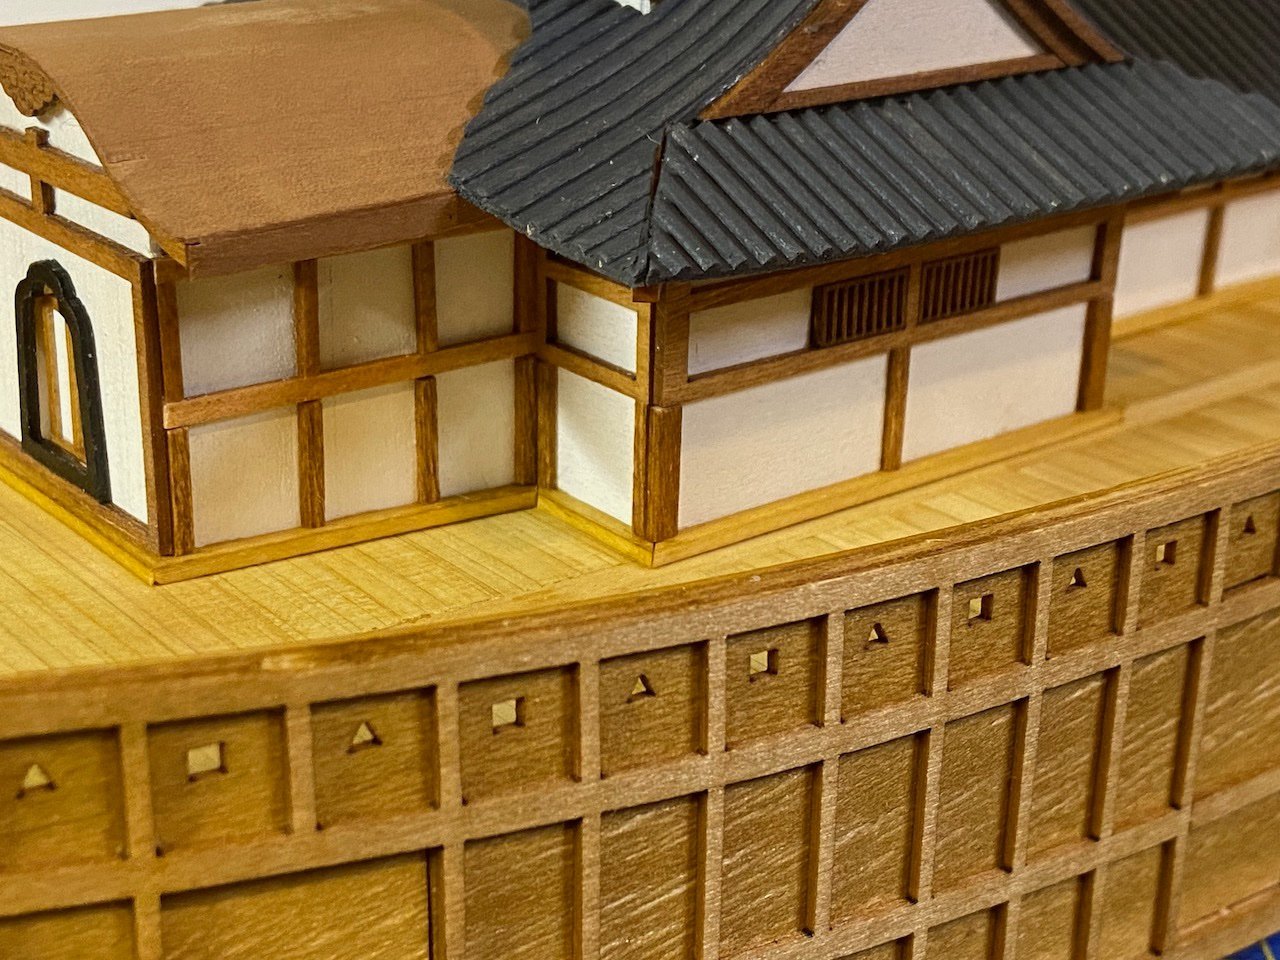
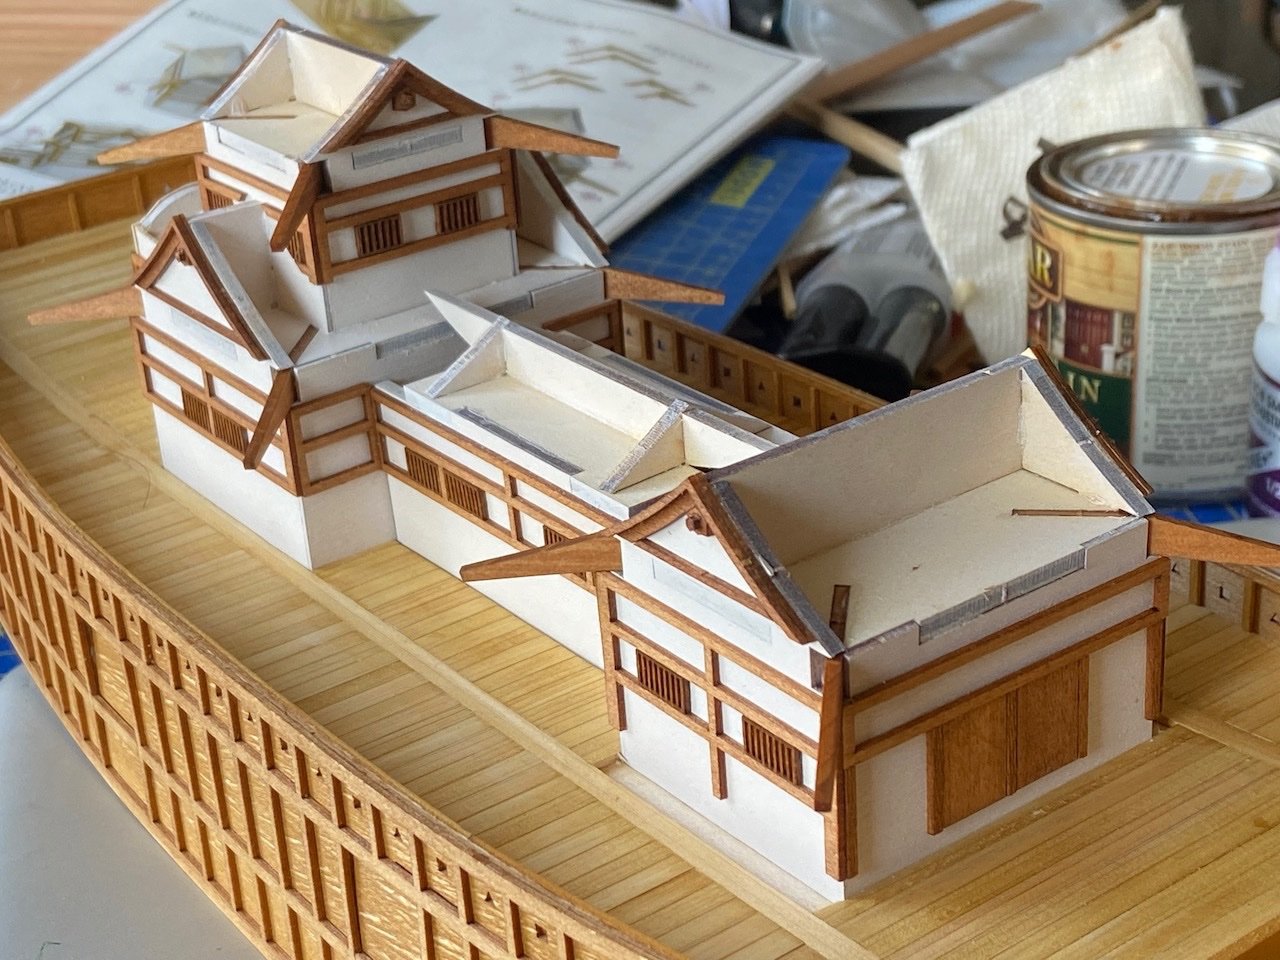
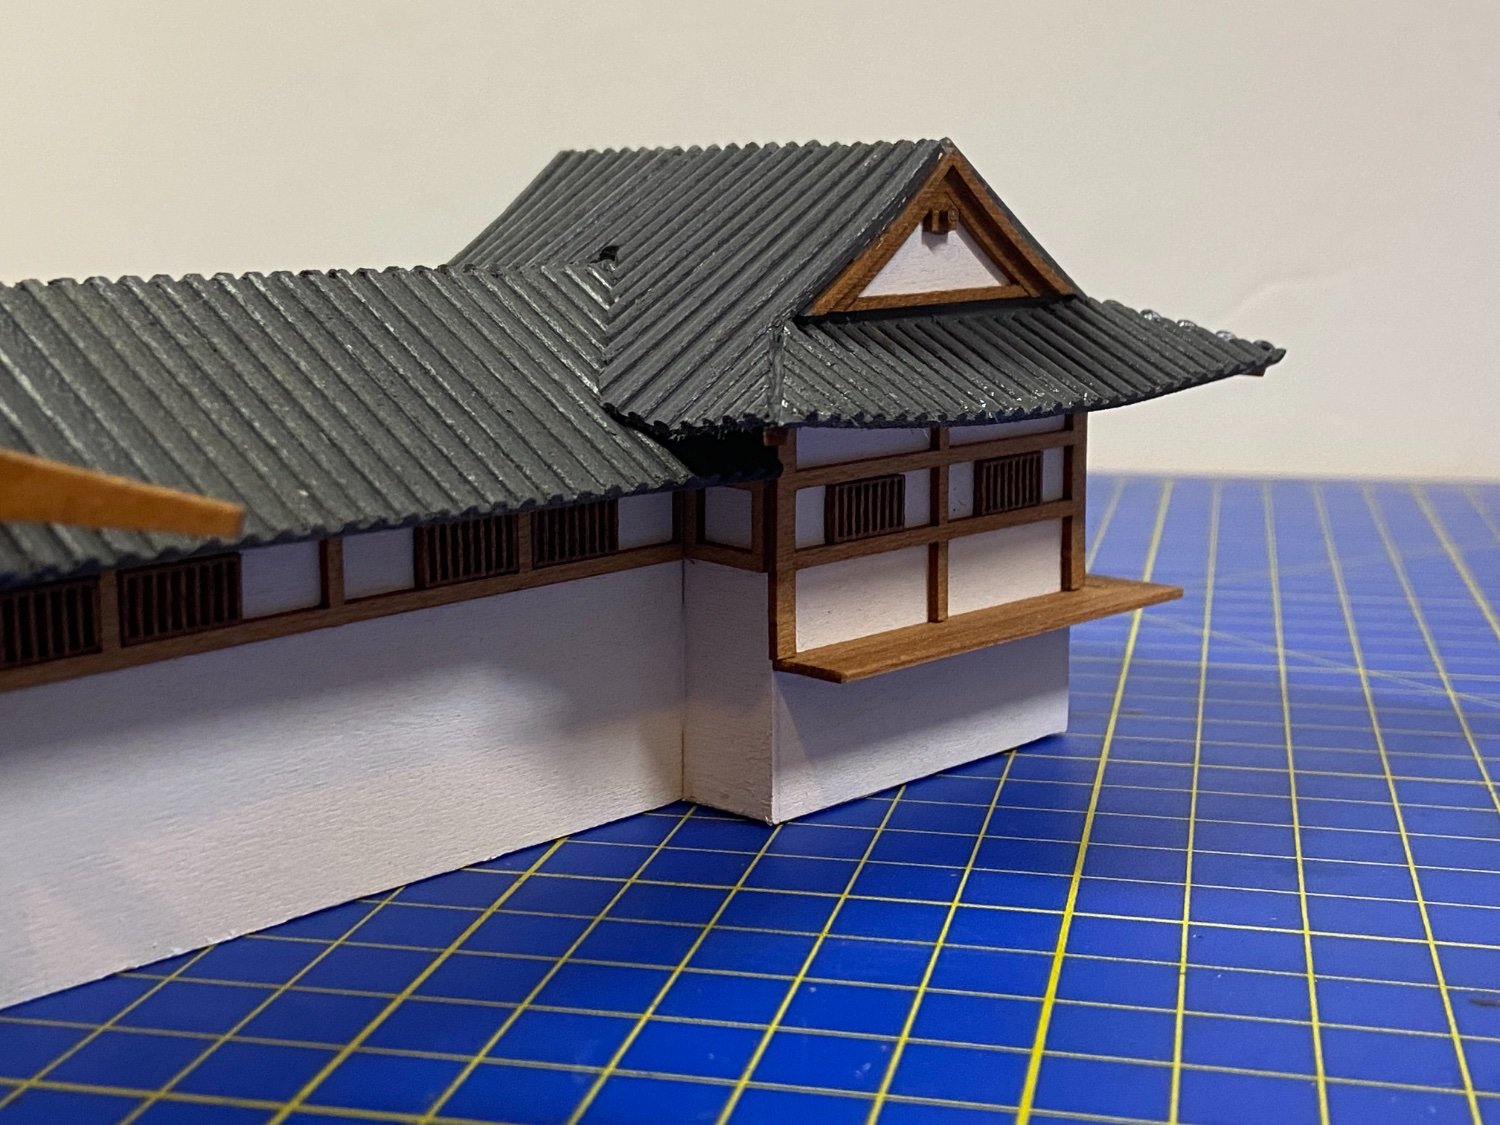
Not done yet with the castle structure details, but I did finish with the eaves detail and with with edge "tiles".
Also, if you look closely, you'll see that there are new pieces added to the peaks of the roofs, as well as some decorative pieces that kind of accent the corners. I've only finished about 1/3 of those.

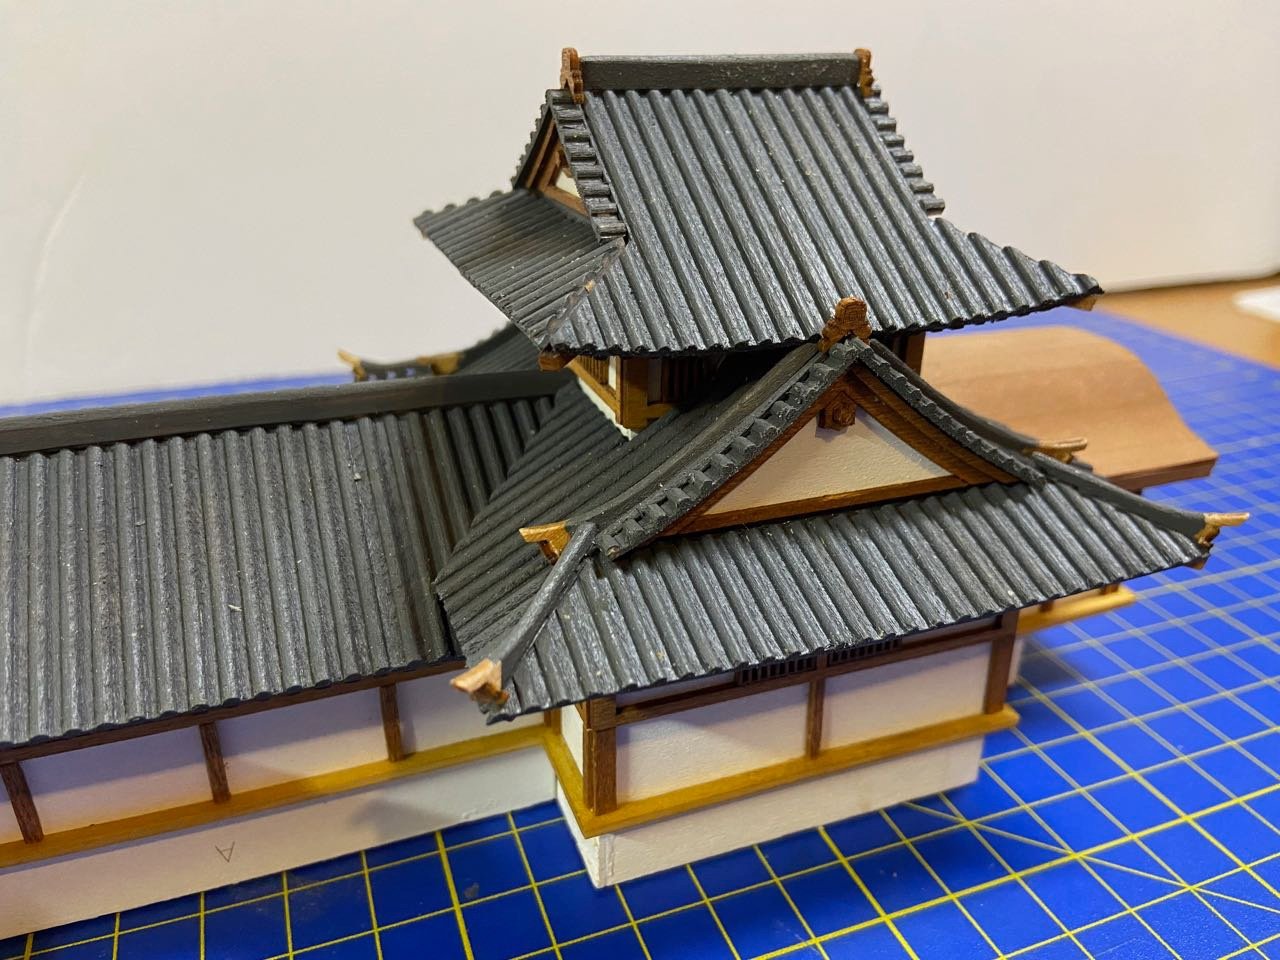
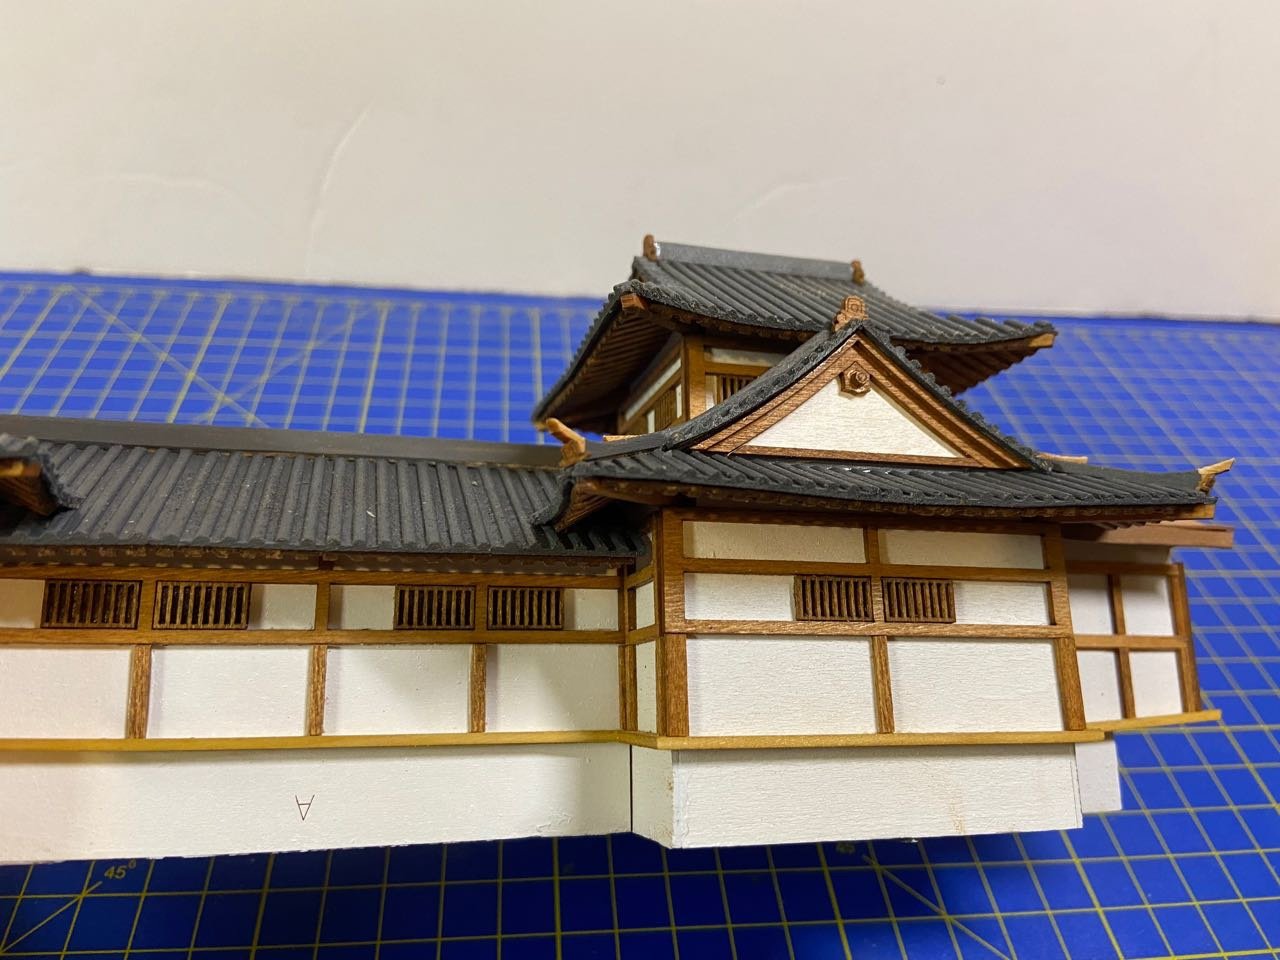
You'll notice that some of the ends of these decorations haven't been painted yet, but that will come.
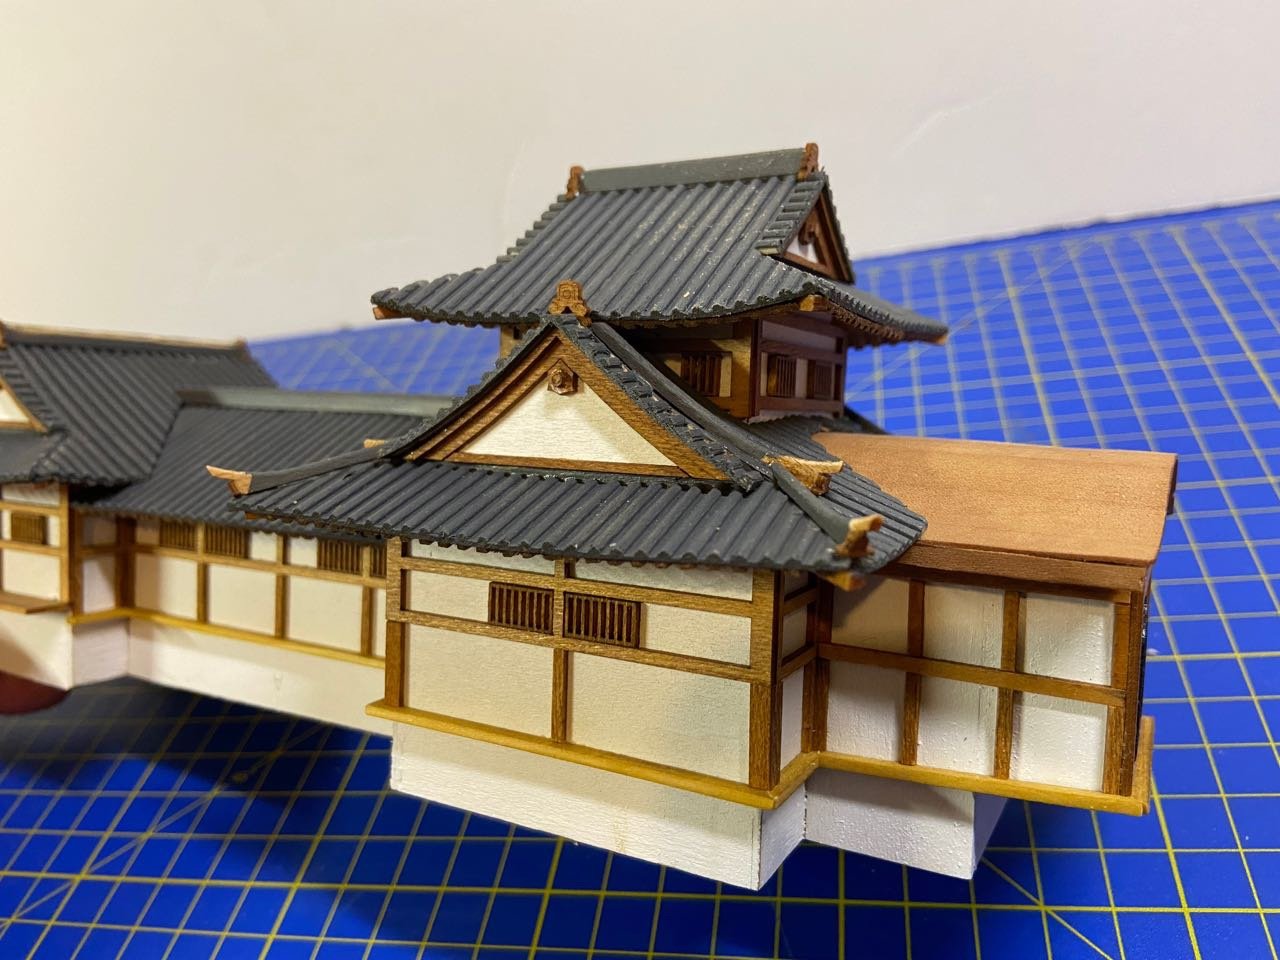
Also, there's a piece across the top of the natural finished roof that I haven't added yet. Since this roof is longer than what the kit provides, I have to fashion that piece from scratch. I just haven't figure out yet if this needs to be a natural finished strip. But, I think it probably is. There is also a decorative piece that will fit on the end of that strip. There's a little laser-cut piece provided in the kit for that.
The last parts of the castle structure are castings that go at the ends of the two main roof peaks. More on that later.
I'll this part of the model done by tomorrow, if not later tonight.
- BobG, mtaylor, Paul Le Wol and 4 others
-
 7
7
-
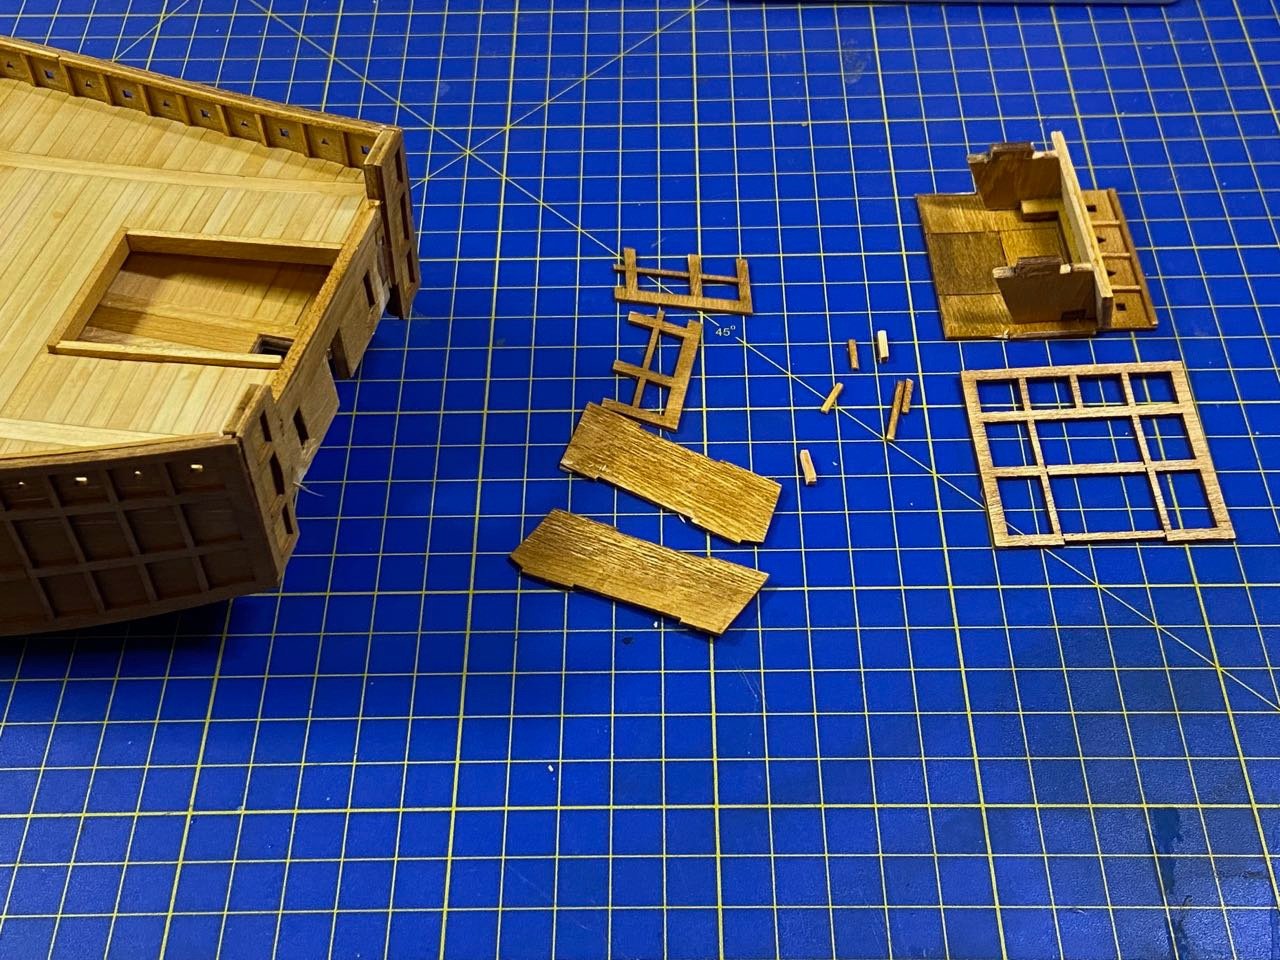
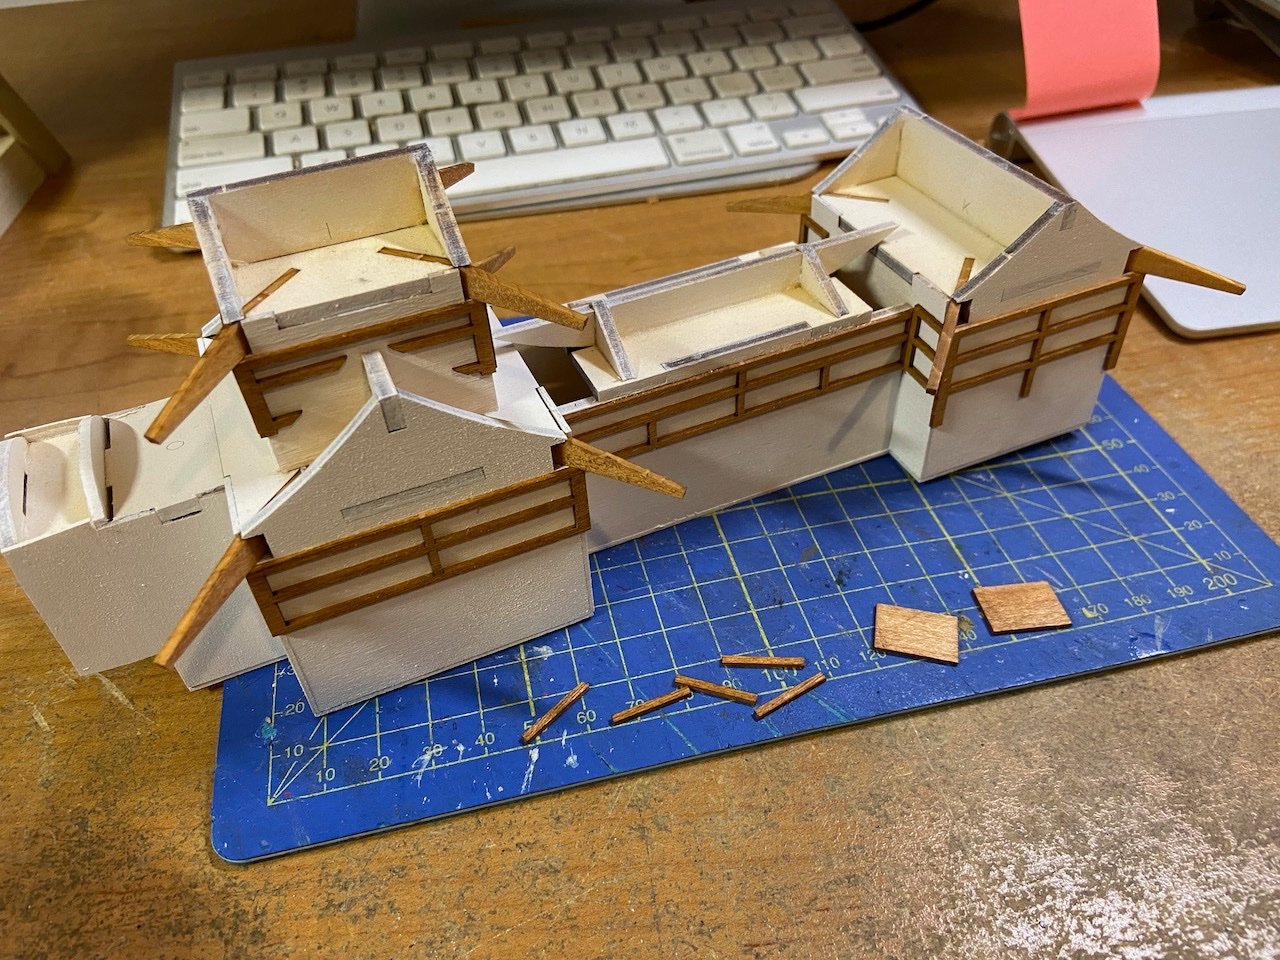
Regarding my Atakebune model, I'm working on more of the details of the castle structure. There's plenty to go onto the rooftops, but first I need to add the simulated supporting structure underneath.

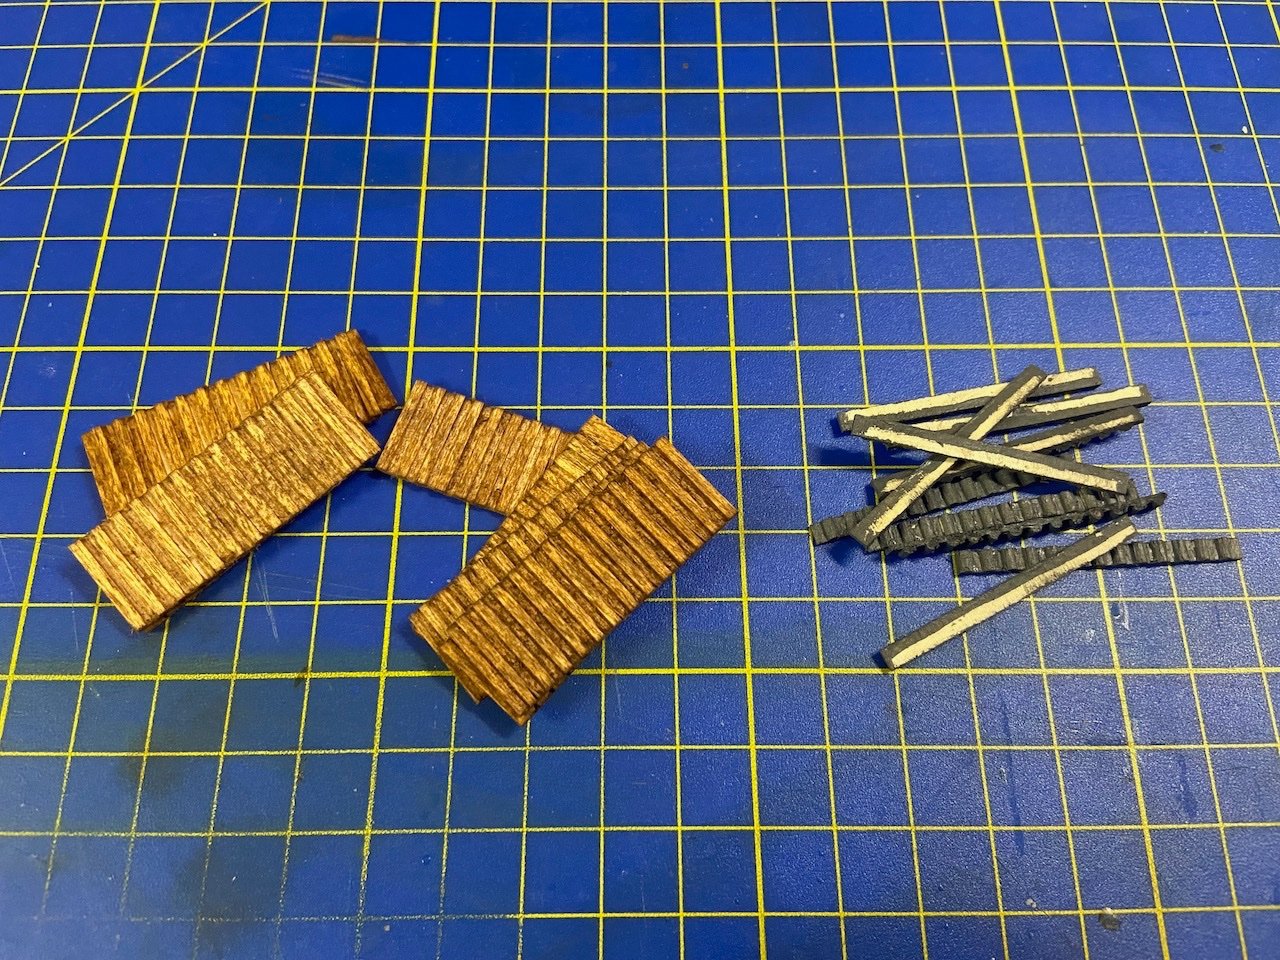
On the left are the pre-milled strips that go underneath the eaves of the roof. I gave these a couple treatments of natural teak stain, but the milled wood has a fairly rough surface from the machining, so the color application isn't perfectly smooth. Still, it's actually better than it looks in these photos. Anyway, the parts are mostly unseen, except at the edges.
On the right are the edging pieces for the tile roof. These will go on later.
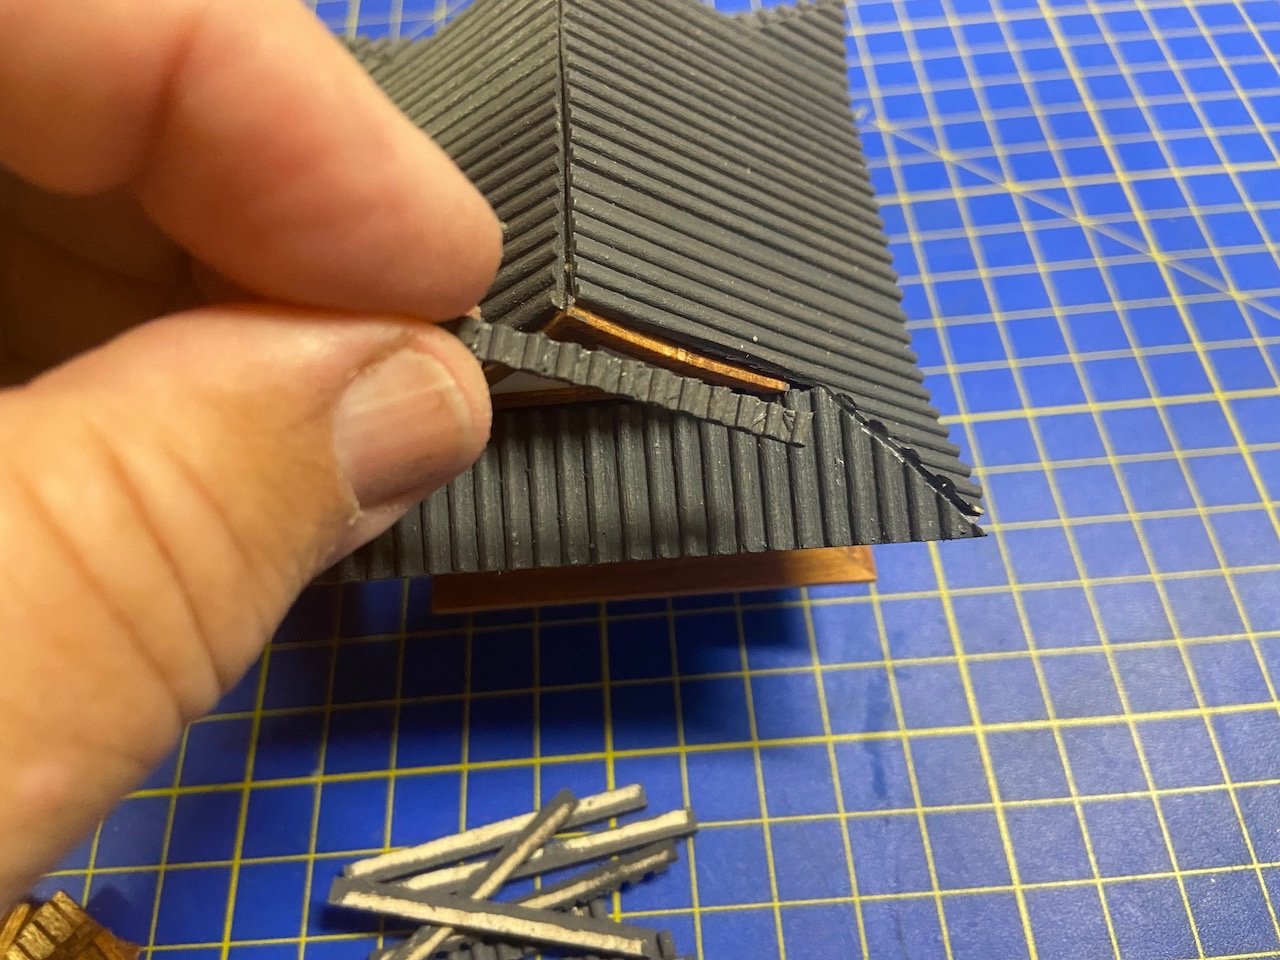
I painted the underside of the roof a dark gray near the edges before I added these eaves pieces. They have to be cut to fit, but all the angles are 45 degree, so that part is actually pretty easy. One thing is that on some of the eaves ended up a little narrower than the rest – that might be a measurement error during the roof construction. But, I had narrow these pieces in a couple places.
The hardest part yet to come is to fit pieces under those overlapping corners like the one just left of center in the photo below.
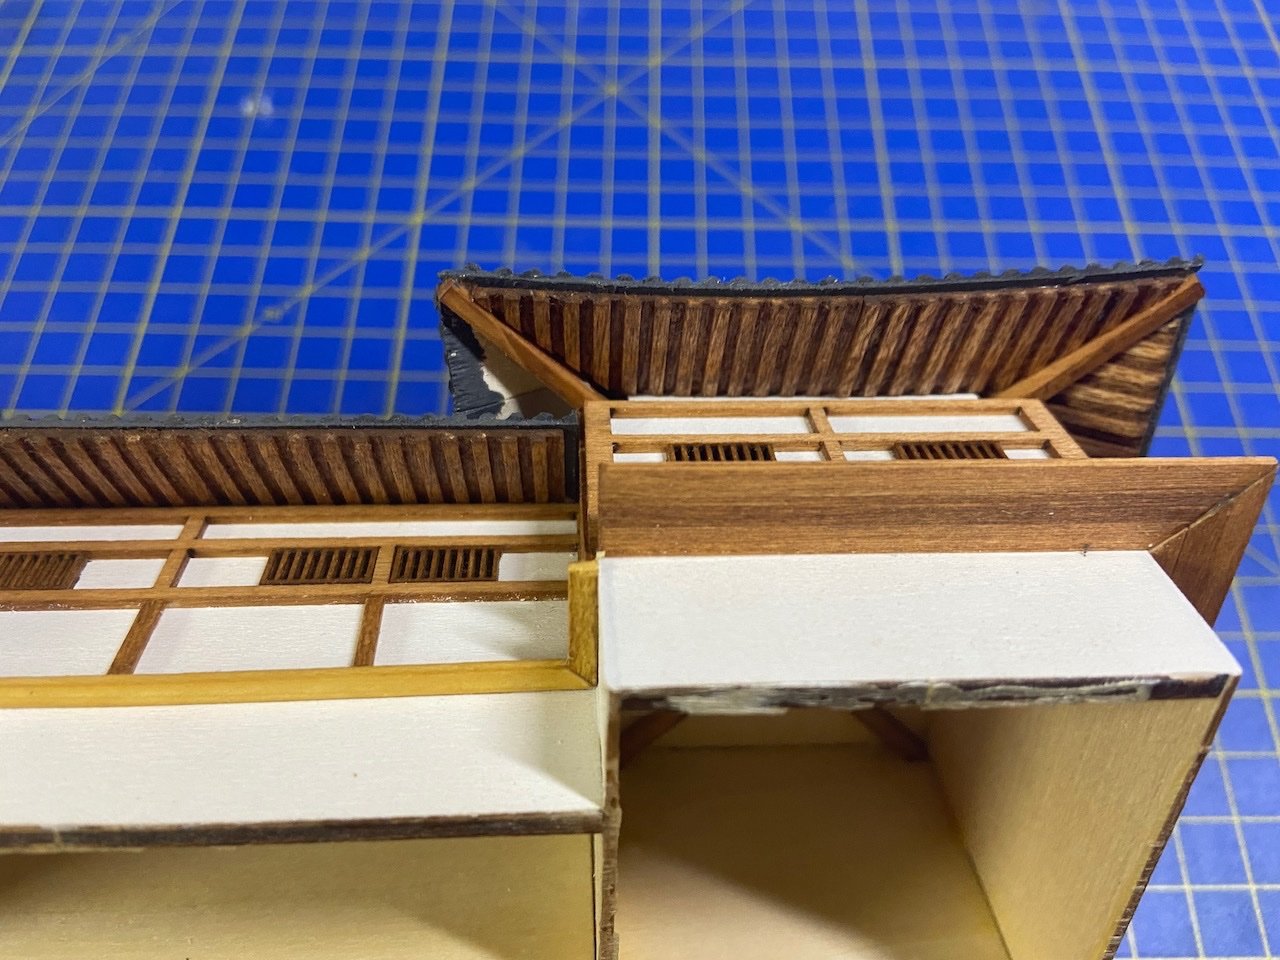
The edging pieces for the tile roof will get applied after I'm done with the eaves.
They'll need a little more cleanup due to the splintering from the machining process. I did some cleanup already, but it looks like it could use some more, followed by repainting.
In any case, this is just to show where these will fit.
This won't take that much longer. Then, I've got some trim that will go on at the roof seams and a few decorative castings that go onto the roof peaks.
- Harvey Golden, JpR62, Ekis and 8 others
-
11
-
After taking a couple weeks off the Atakebune project, I'm back on it now.
I had a couple things come up. Plus, I wanted to make some progress on another project that I'm just about finished up with – a build of Amati's American galley gunboat kit they call the Arrow. I didn't do a build log here, but I'll post some photos in the gallery in a couple weeks when it's done.
Anyway, as I got back to the Atakebune, I've been thinking about next steps. A fellow wasen enthusiast (wasen is the Japanese term for a Japanese-style wooden boat) found a website of a modeler in Japan, who's built a number of historical Japanese subjects, including another Atakebune. So, I got a ship modeler friend who is a member of the Japanese ship modeling society The Rope Tokyo to make some inquiries. Now, I'm in email contact with him and getting some pointers about making Japanese-style sails and such.
Anyway, it's a pretty interesting site: 日本丸図&模型 | 信長の鉄甲船の復元模型、阿武丸 (sayama-sy.com)
Yes, it's in Japanese. But, you can open it up in Google Translate if you like. Or try this link, which should open up in Google Translate: https://www-sayama--sy-com.translate.goog/lf?_x_tr_hl=en&_x_tr_pto=wapp&_x_tr_sl=ja&_x_tr_tl=en
You'll see some interesting modern paintings of atakebune and such. I have to learn more about the artist. Most of these paintings, and the model built by the owner of the site, depict a different atakebune from the one I'm building. But, still one of the large type.
- thibaultron, mtaylor, BobG and 3 others
-
6
-
Well, more progress this week on the castle structure and finishing the trim on the stern section that I rebuilt.
I have to say that I'm really starting to like the way the castle structure is looking, now that the lower trim is in place.

Next, I'll be finishing the details of the castle structure roof, including adding the simulated beam structure to the undersides of the overhangs. Then, I'll be able to finish the details of the box structure.
- Harvey Golden, Canute, mtaylor and 6 others
-
9
-
Knightyo, I don't mean to be disputing your memory on your build. But, I have seen this kind of thing before. And as I recall (my own memory may be very disputable here), it wasn't so much an issue of the copper flaking off, but some coating/finish applied to the completed model that has worn or flaked off, leaving partial exposure.
Or possibly that something spilled on the copper which was not initially noticeable, but caused the copper beneath to tarnish at a different rate from the rest of the hull. Maybe something like CA that was used to help affix/repair some tape that didn't adhere well?
This small blemish aside, you're coppering job looks excellent.
-
LOL 🤣
Druxey, I know you mean that in only the nicest way. However, I can't help but have flashbacks of my old girlfriend looking at hours or days of my ship modeling work and saying "It doesn't look any different..." 😣
- mtaylor, thibaultron and Canute
-
 1
1
-
 2
2
-
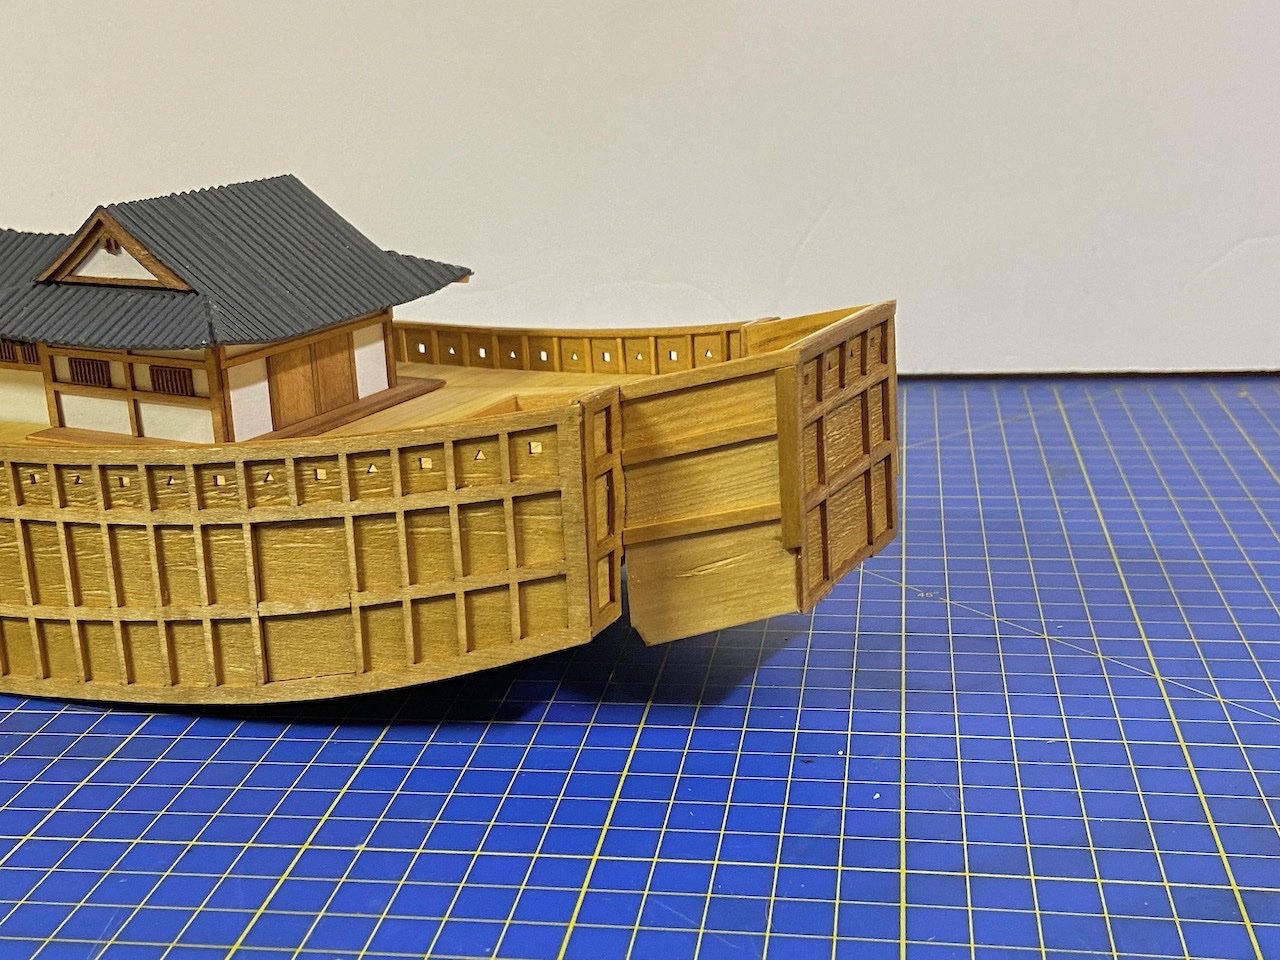
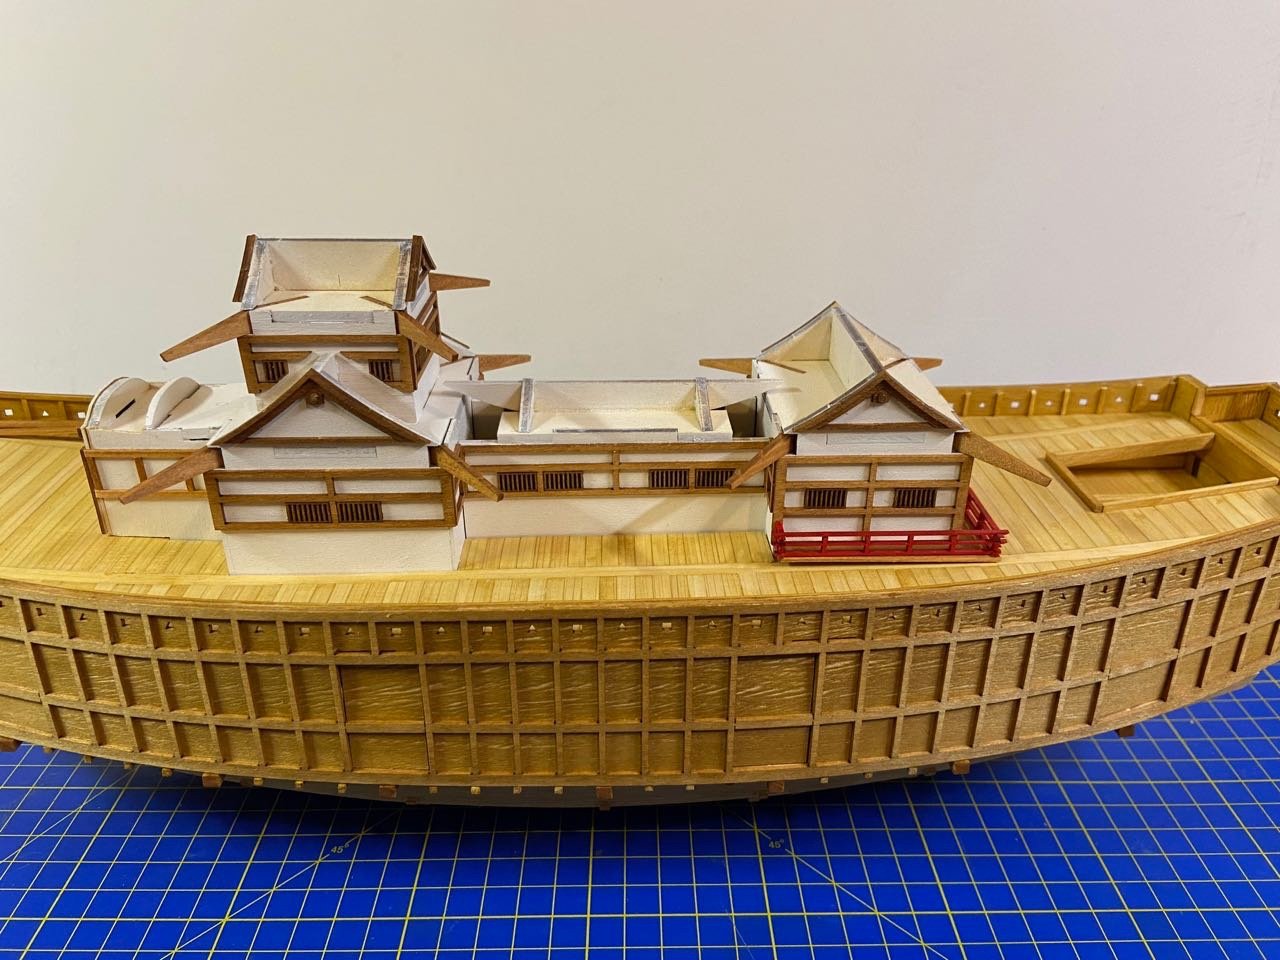
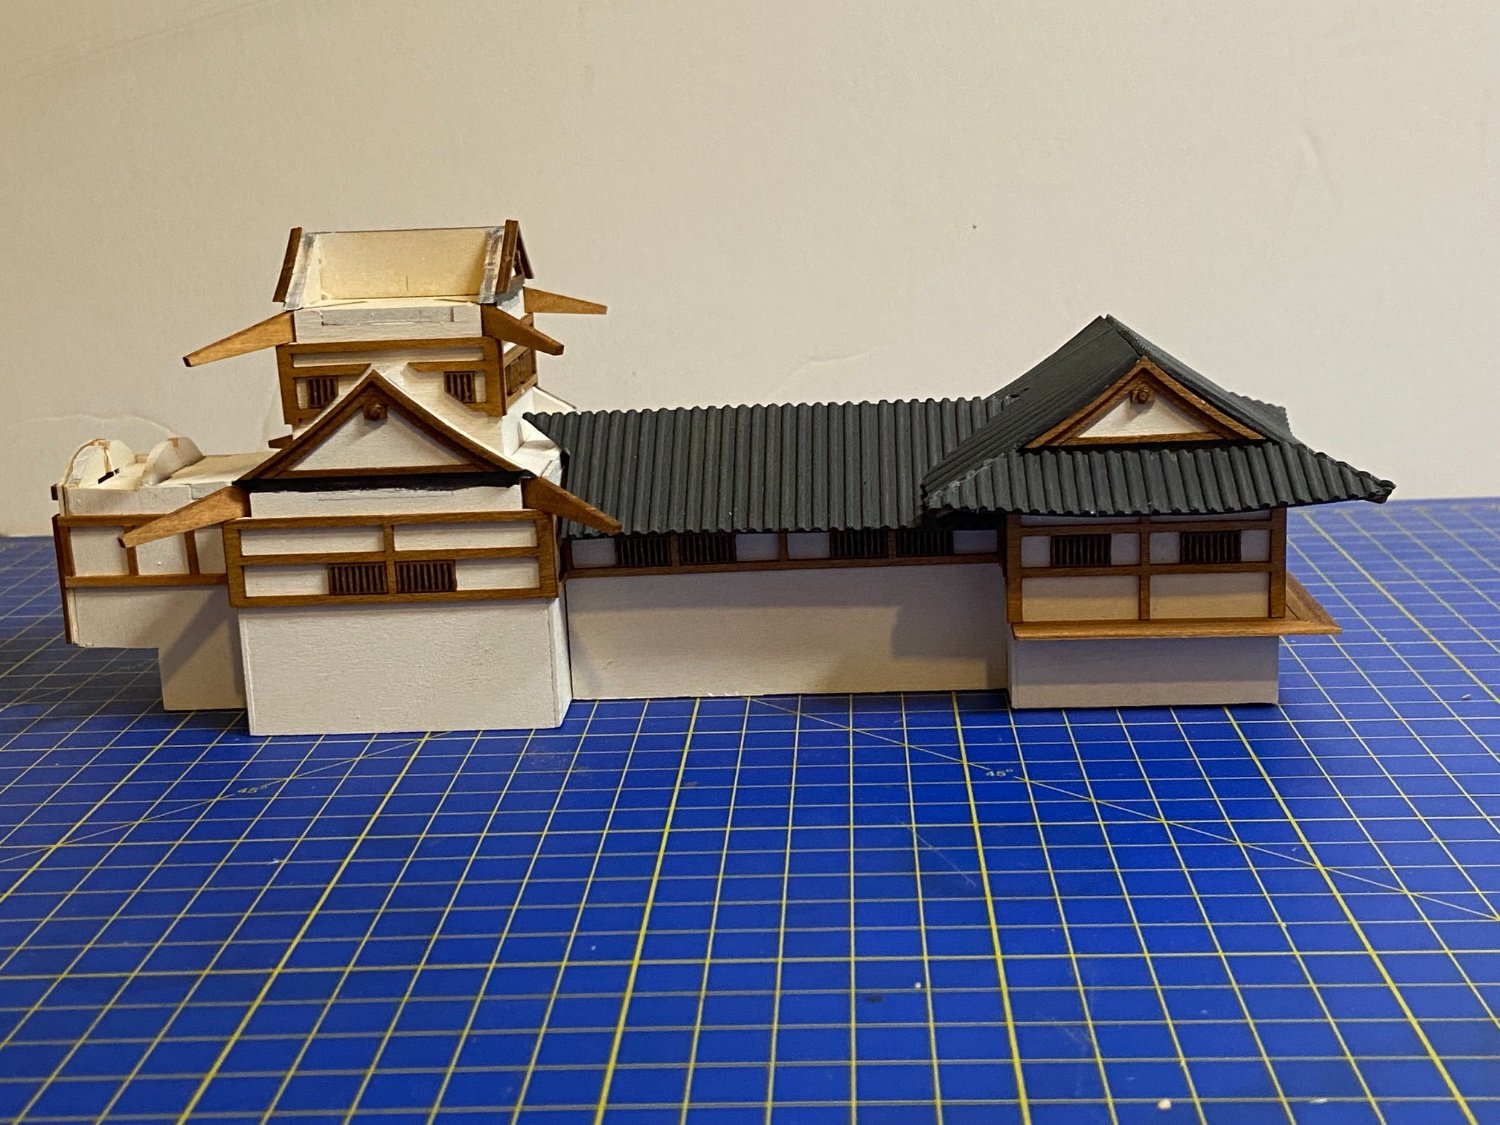
It occurred to me that the photos I posted showing the extended stern structure don't really show how it affects the overall look of the ship, which is a bit tubby. So, I took some more photos. I think the overall effect is to create a slight "slendering effect". Plus, it is closer in appearance to the museum model.
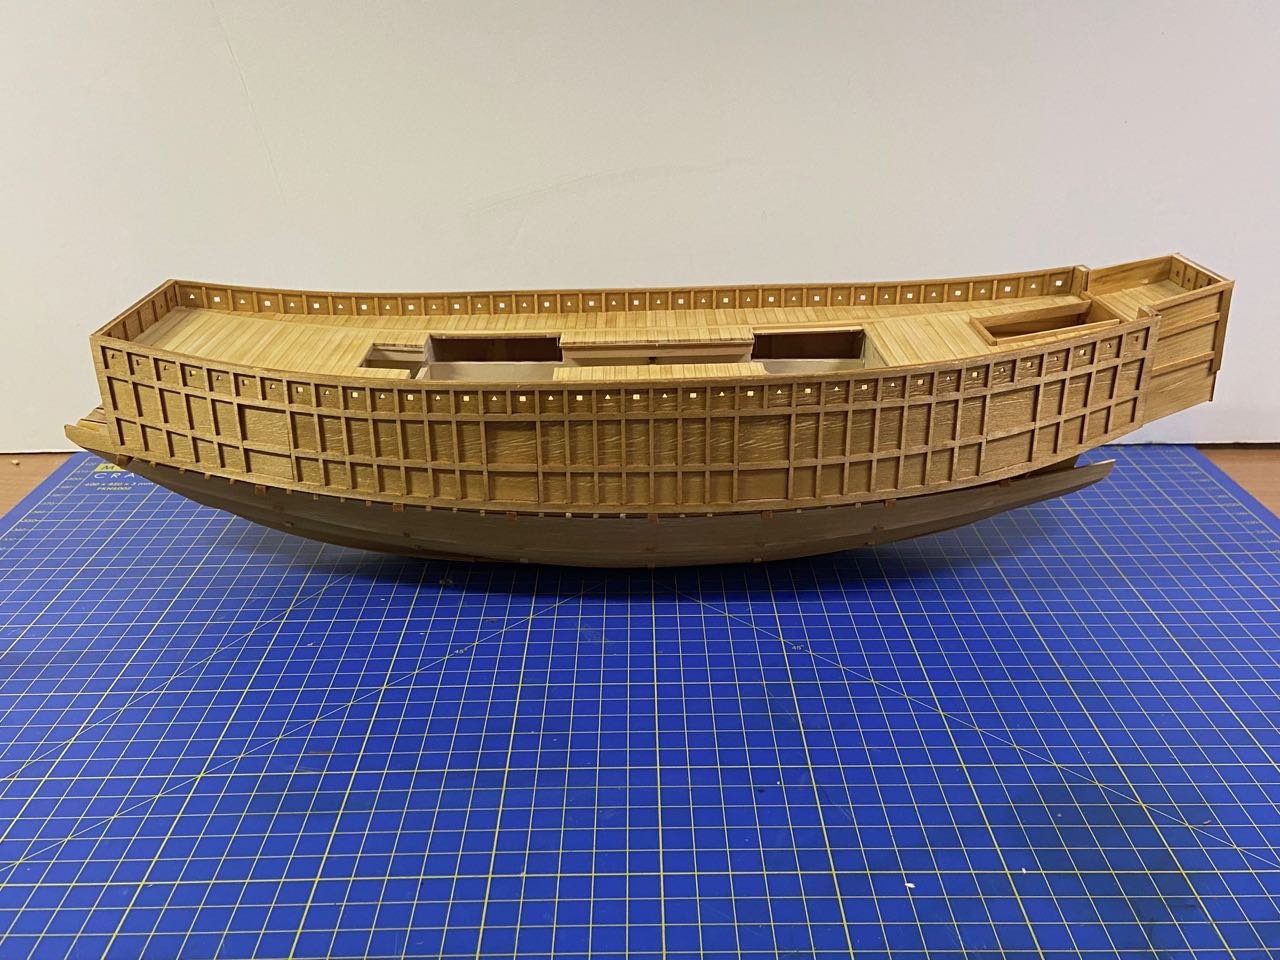
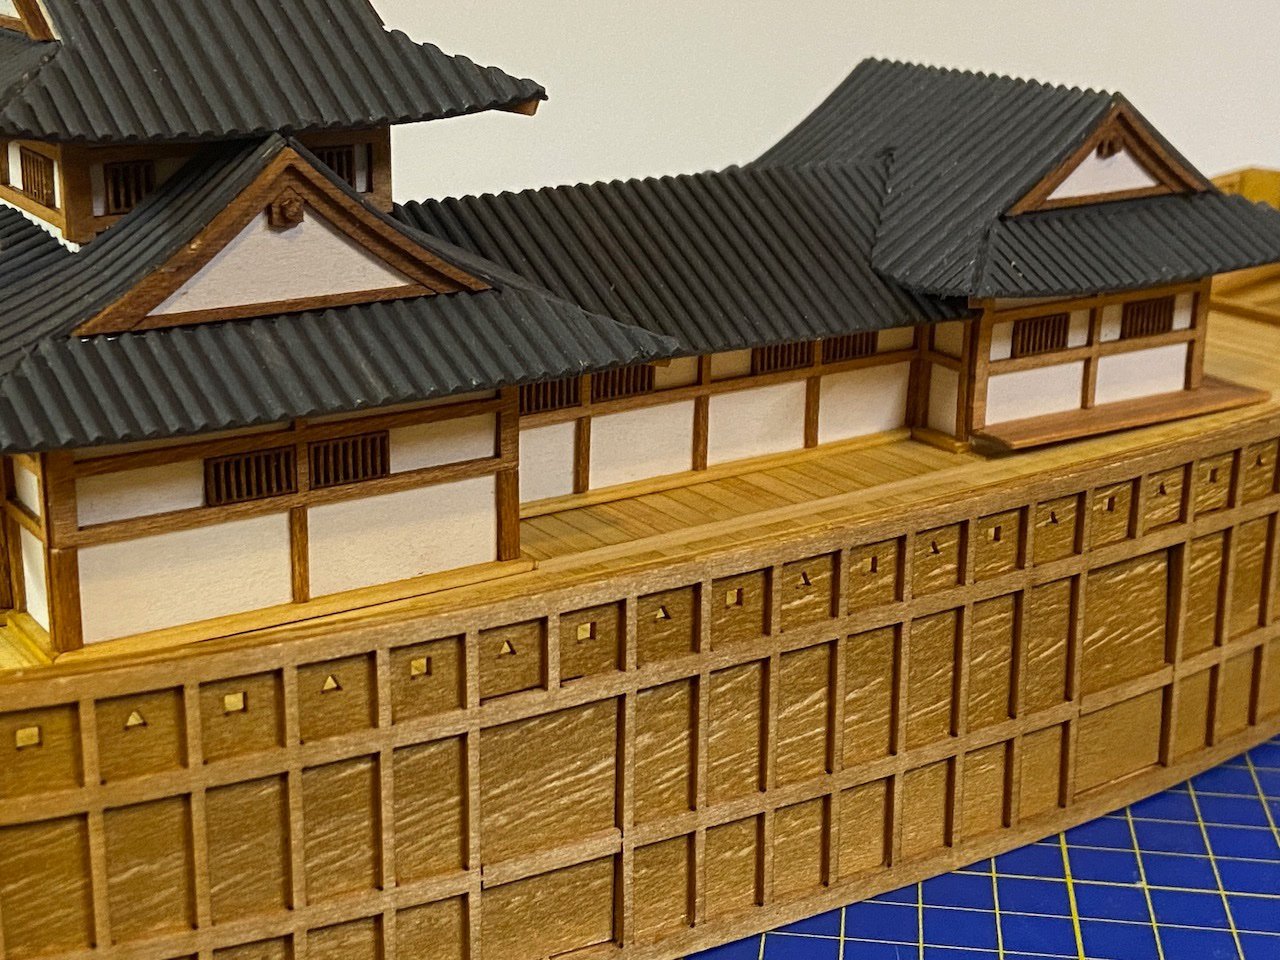
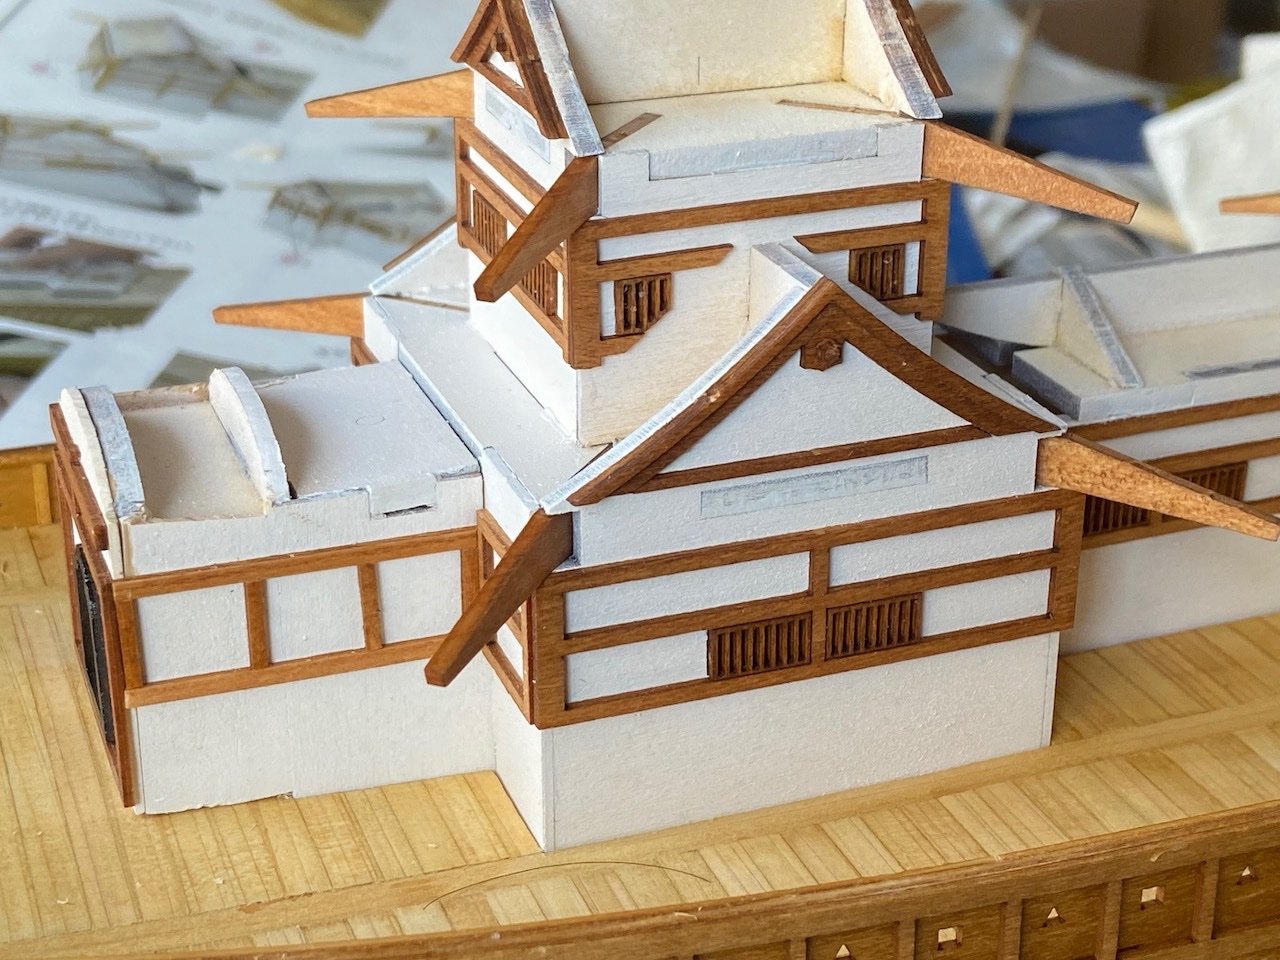
So, now with more of the castle structure roof done. It starts to take on more of its final appearance...
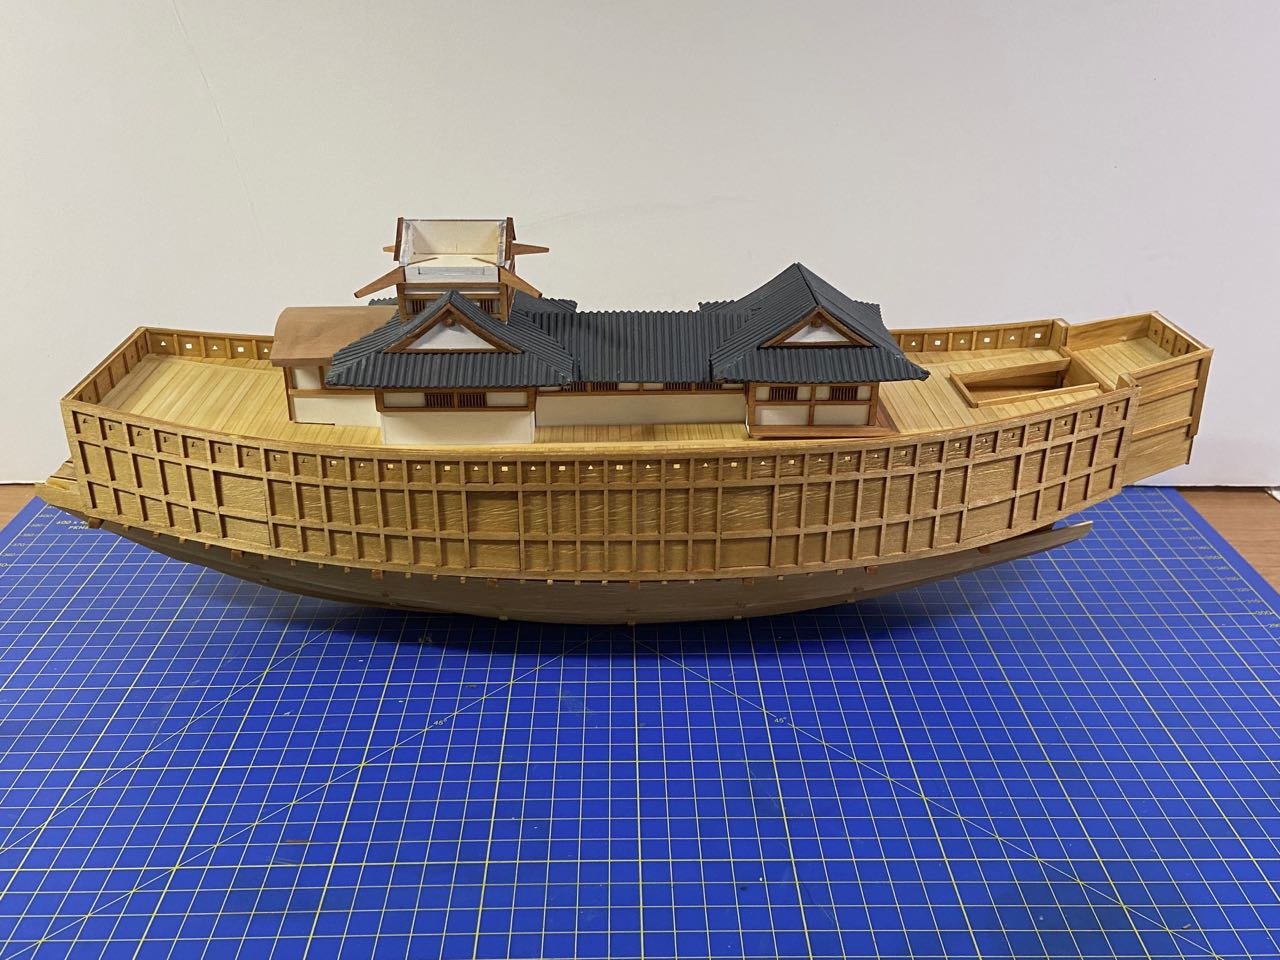

One more section of roofing to go, and the castle structure will appear almost complete. However, there are a lot of trim details to come.
- BobG, Ekis, baskerbosse and 8 others
-
11
-
Haven't seen the kit in person, but I've always like how well Artesania Latina kits go together. Also, they tend to be easy to upgrade.
As Allan mention, the kit is pricey. But, minor things like gratings and belaying pins are cheap to swap in. Or, if it is the case that such a ship would have had no belaying pins, eliminate all together. One things I've always enjoyed is upgrading kit builds, making them different from other builds.
Artesania Latina seems to be trying much harder to make their kits better since they are under a new owner. They may have a ways to go yet, but then they have to deal with the sourcing of their fittings and such. But, as a kit manufacturer, they appear to have done a very nice job.
I for one would love to see a build log of this kit.
-
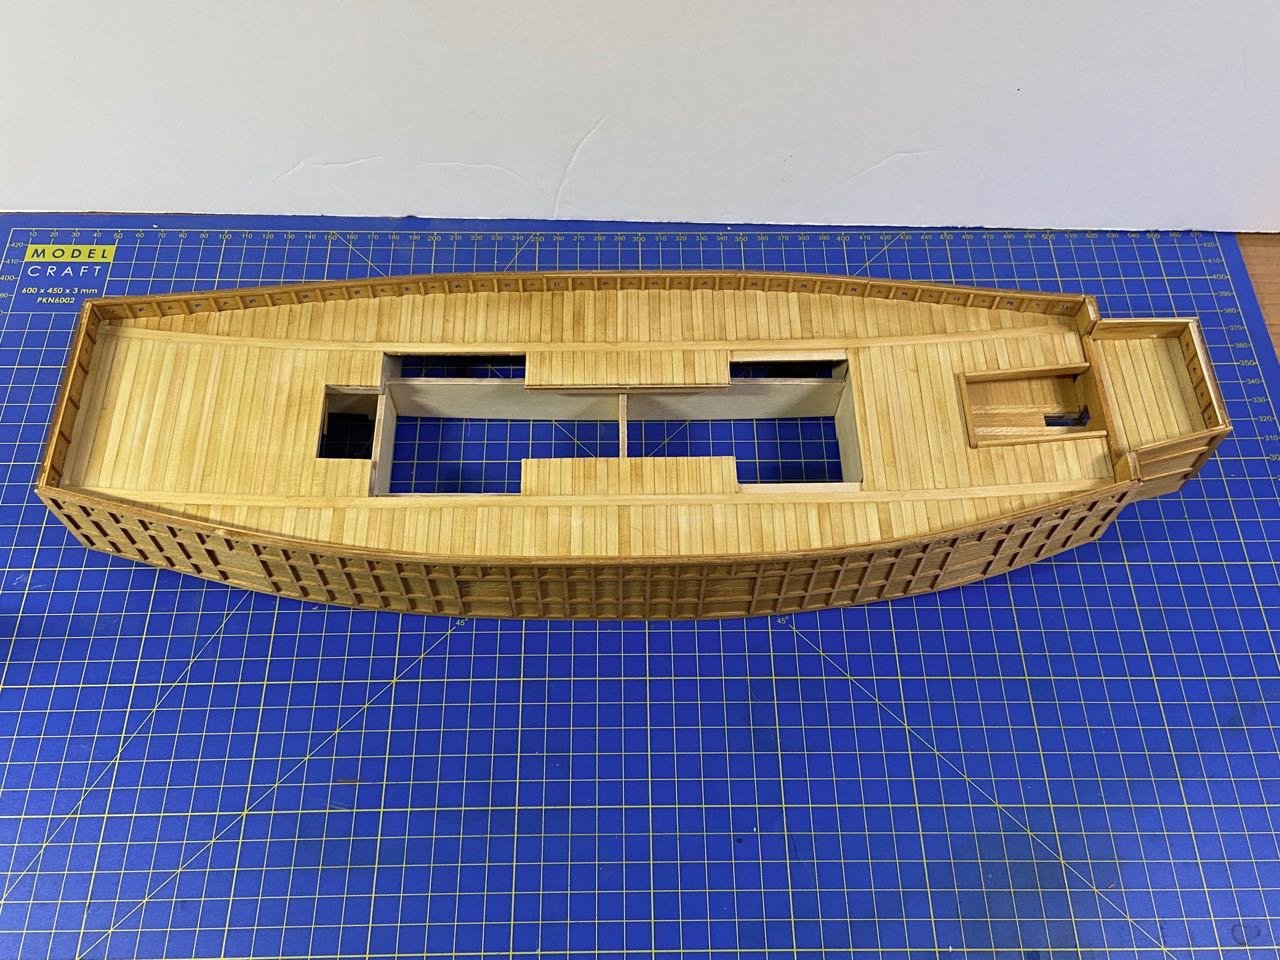
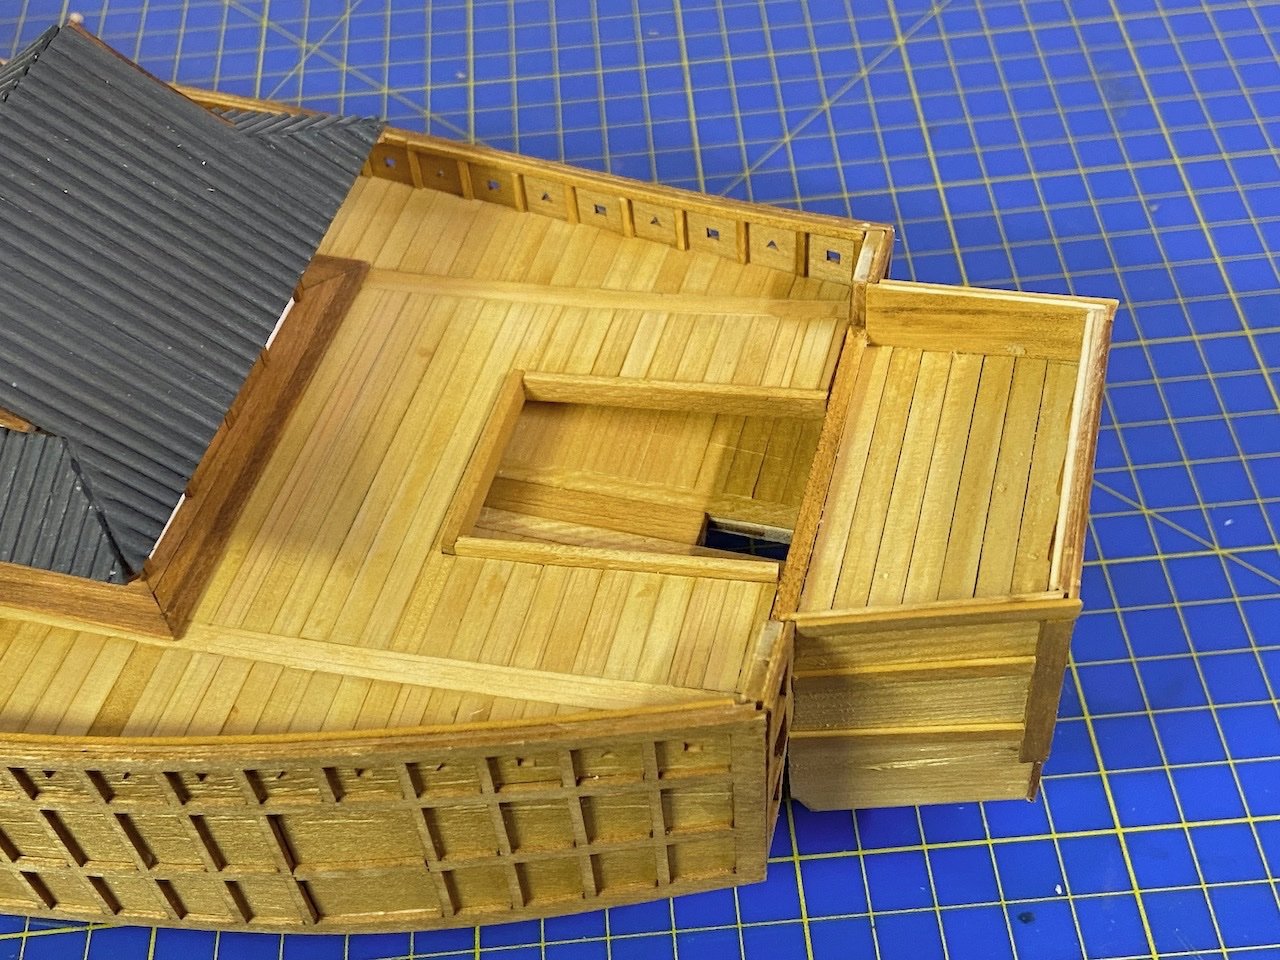
Turns out that reconstructing a longer stern section was pretty easy. I used as much of the existing structure as I could, but I had to build new sides and trim. Also I had to make a larger planked deck. But, it was quite straight forward.
Here, I basically added extensions for the existing supports that hold the back wall into place. Shown here is a temporary fitting of the assembly.
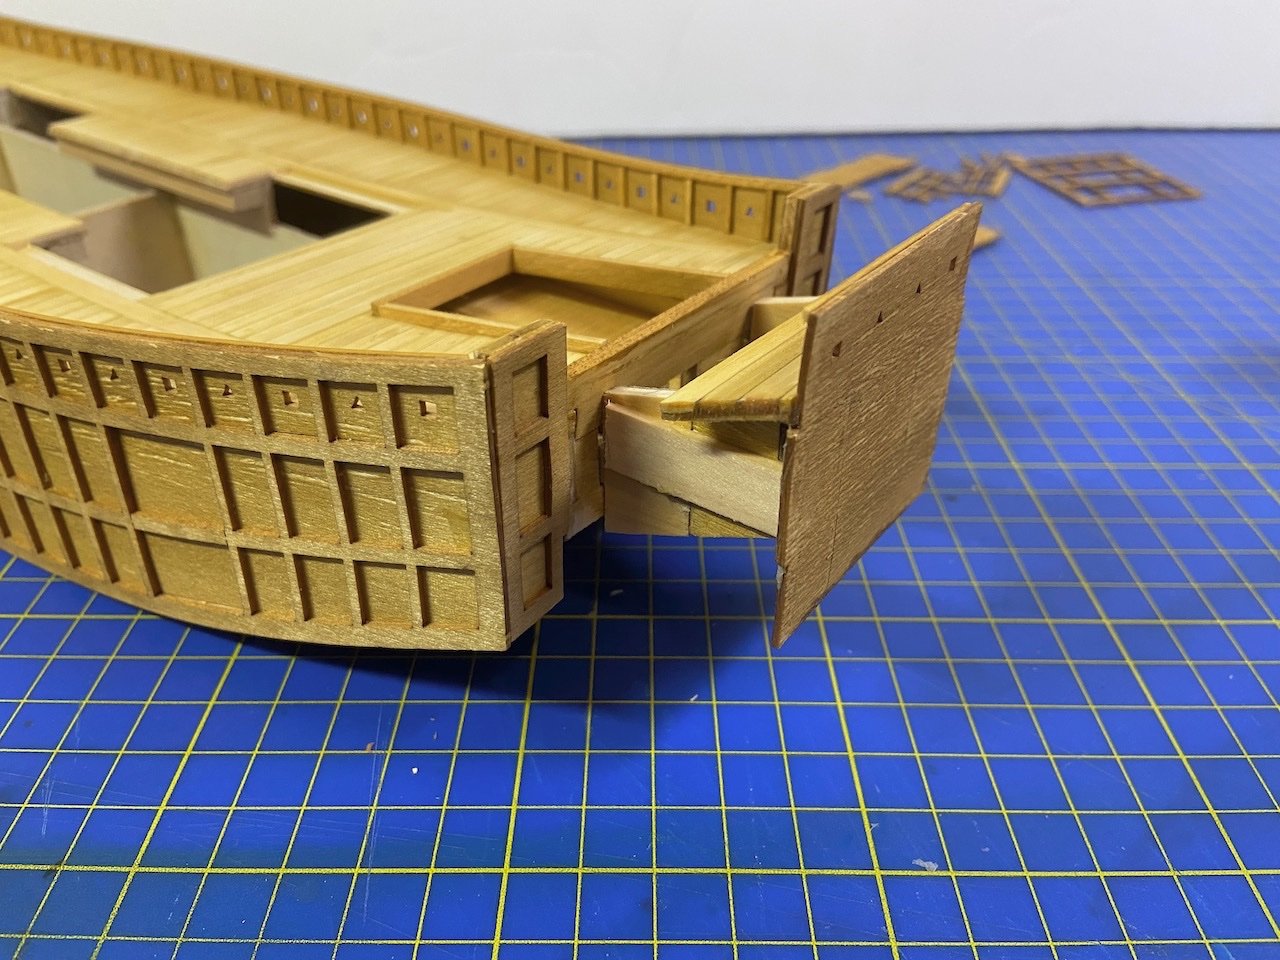
With this in position, you can now see the side wall piece, and how much longer the new piece will need to be. Also, you can see that the shape of the old deck is now wrong. It is easiest to simply make a whole new deck rather than modify this one.
Now, permanently in position with new side pieces, and the original back wall and laser-cut facade in place. As you can see, I've started adding strips to finish the outside of the side walls here.
I rebuilt the aft deck section using thinner strips of Japanese cypress. I don't know how, but it magically took an even number of planks of the correct width! The inner walls of the new piece will need to have the same framework of posts as on the rest of the interior walls. Also, I'll re-add some corner posts where the extension meets the main structure.
Now that this is done, I can probably add the rudder support posts that appear on the museum model. These posts will be located on either side of the hole in that well deck.
The longer box structure will also require some longer lower hull planking. But, I have to rebuild part of that planking anyway. Also, the longer hull will cover the rudder better, which I had repositioned earlier so that it sits properly behind the heavy beam at the transom, which caused it to hang out too much.
The stern extension has a few pieces of trim I still need to add, so it will look more like the rest of the box structure.
I also added the new roof material to the "beams" of the castle structure's forward extension. I've actually added this to the castle structure, but I don't have any updated photos of that yet.
Next, I'll finish up the castle structure, and then I'll get back to finishing up the lower hull.
- mtaylor, popeye2sea, druxey and 5 others
-
8
-
Bill, Woody Joe took over the wooden Imai line of kits.
I'm kind of surprised that the Imai kit was also 1/120 though. They had a 1/50 scale Kanrin Maru / Bali kit, but the current version is reduced to 1/75.
I guess your comment about bread-and-butter construction refers to the stern filler. They seem to do this commonly, rather than give you a block of wood and expect you to create the right shape. When they can simplify something with laser-cut parts (bread slices), they tend to.
Edit 2/24: Oops! The Imai Susquehanna was shown in earlier posts above with the scale shows as 1/80. So, that makes more sense now.
-
Now I ASKED you not to ask me that Druxey... 😉
Thanks for the advice on the rubbing alcohol. The water did warp some of the thin wood, but it all straightened out again when dry. So, maybe I just got lucky.
In any case, those should be the only glue joints I needed to undo.
Onward!
- thibaultron, mtaylor, Canute and 1 other
-
4
-
Yesterday, I burned a bridge... I removed the back end of the box structure, which will be replaced by a longer aft structure.
As you can see, the parts are pretty well all intact, thanks to the use of Original Titebond, which softens nicely when wet, allowing me to cut apart the pieces relatively easily.
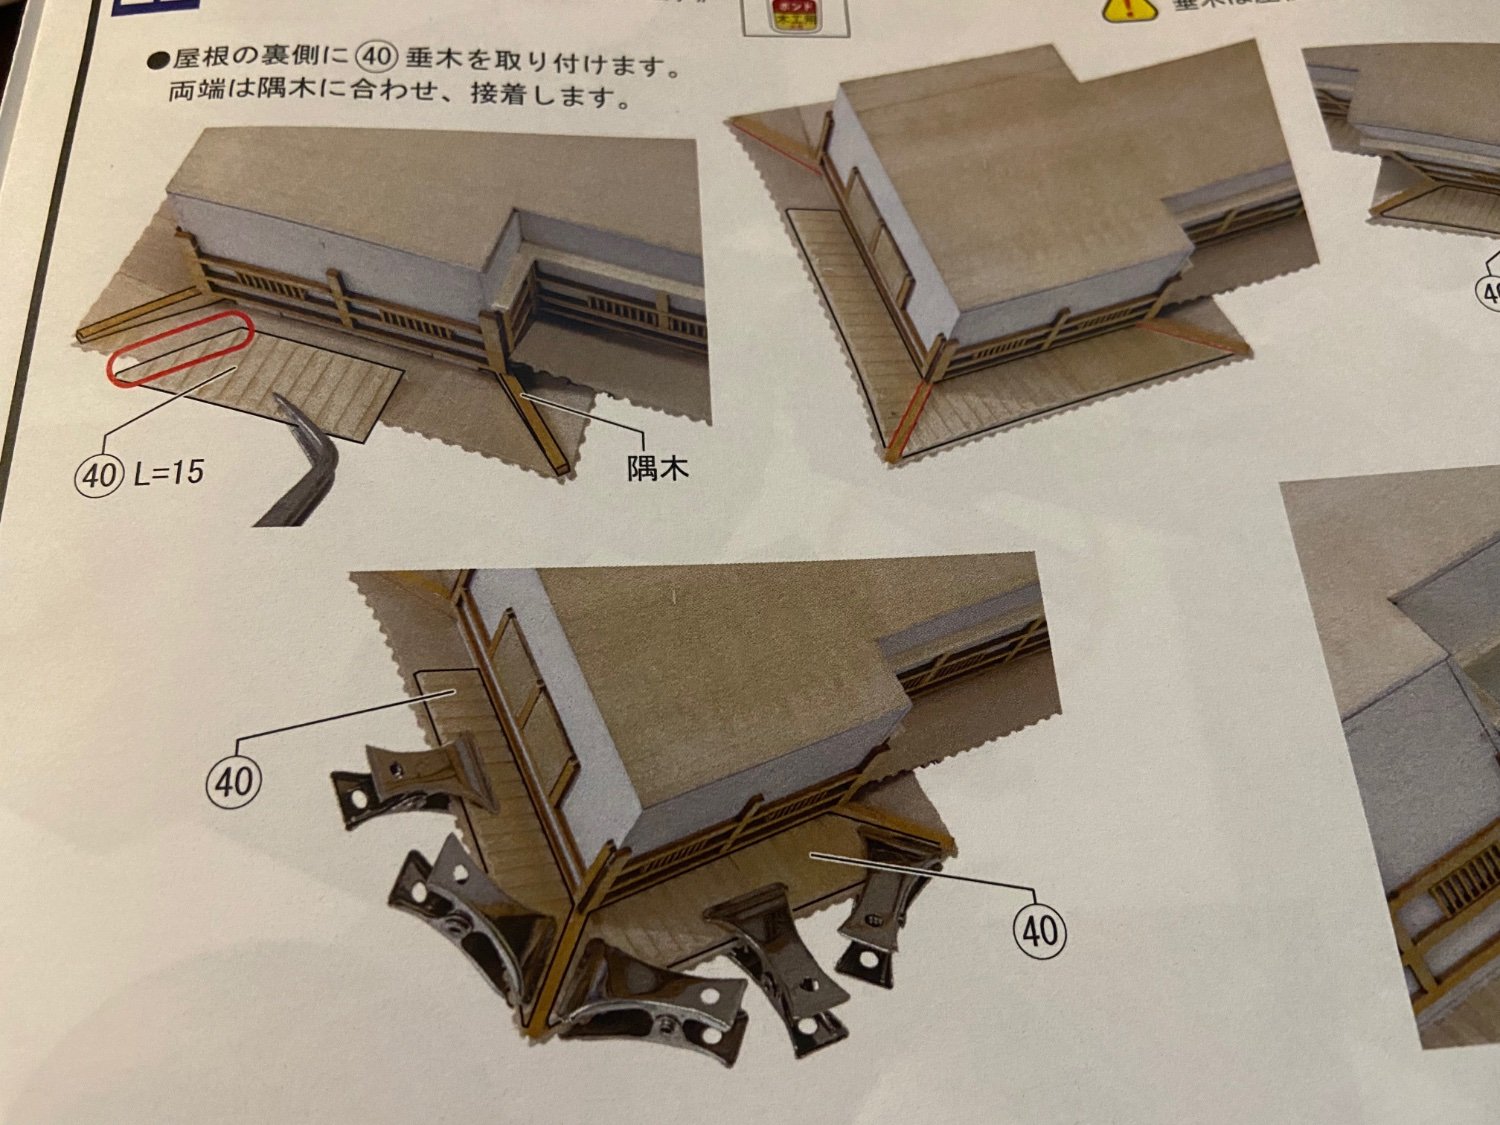
Basically, I will use the existing back piece with some internal bracing to extend the existing bracing by about 15mm. Then, I just need to replace the side panels and deck. Should actually be relatively easy. 🤞
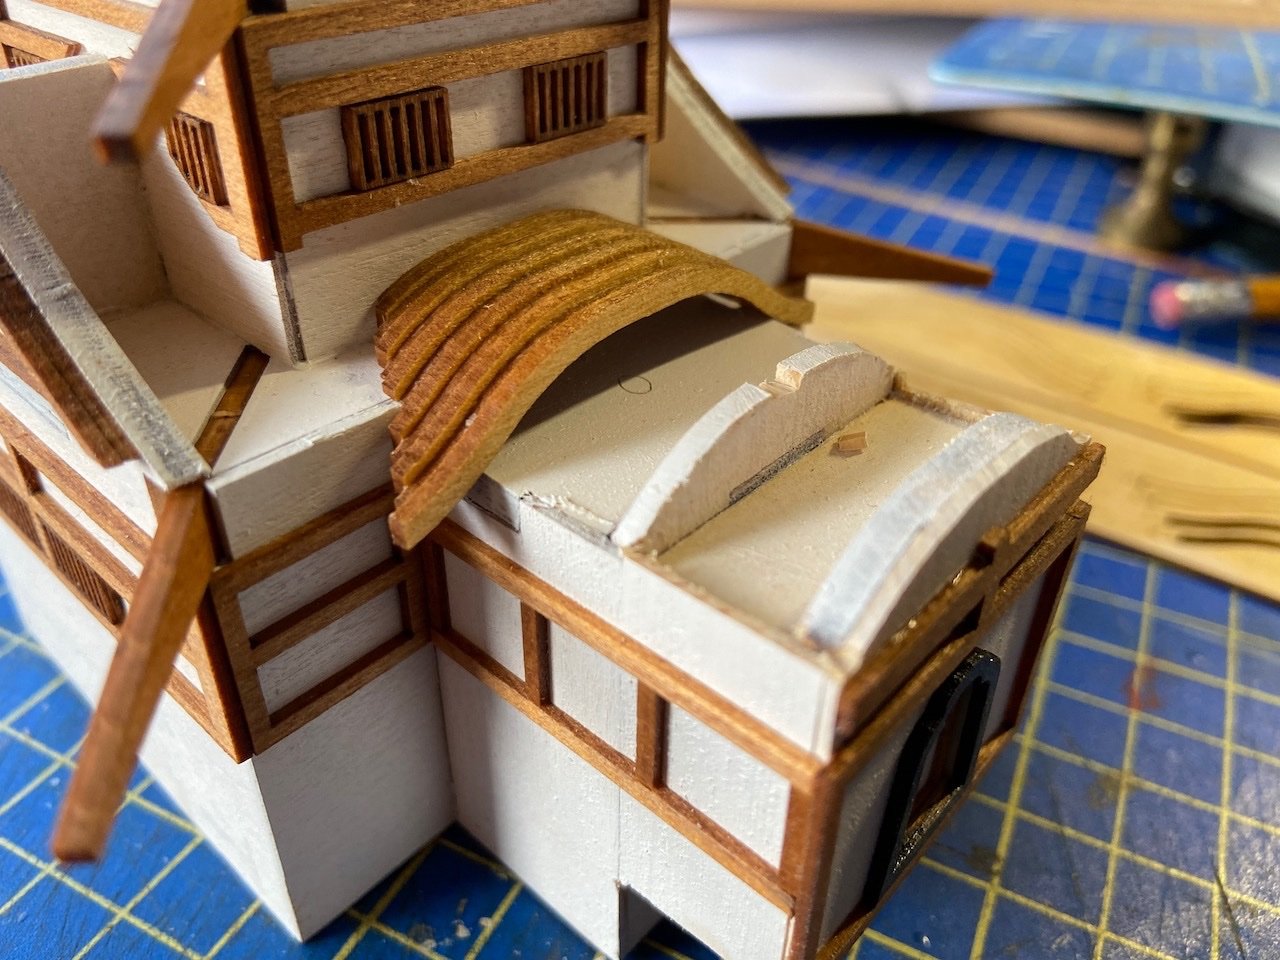
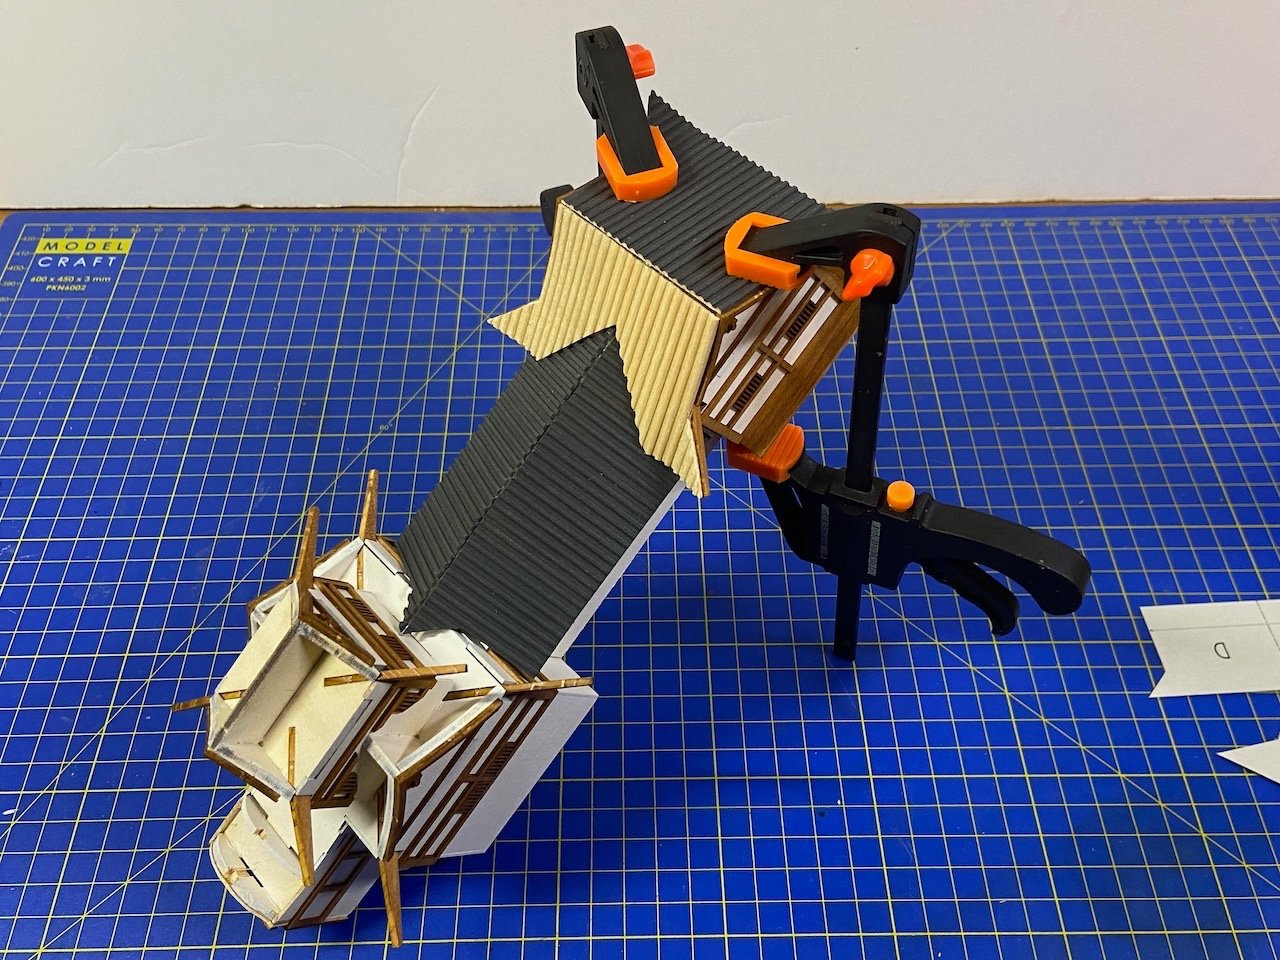
Meanwhile, the castle structure roofing continues. It currently looks like this...

The biggest challenge here is that I extended the forward structure (left end in the photo above), so the kit provided roof no longer covers it. So, I am using the pieces of the provided roof as beams and I plan on covering this with a sheet of pear wood veneer.
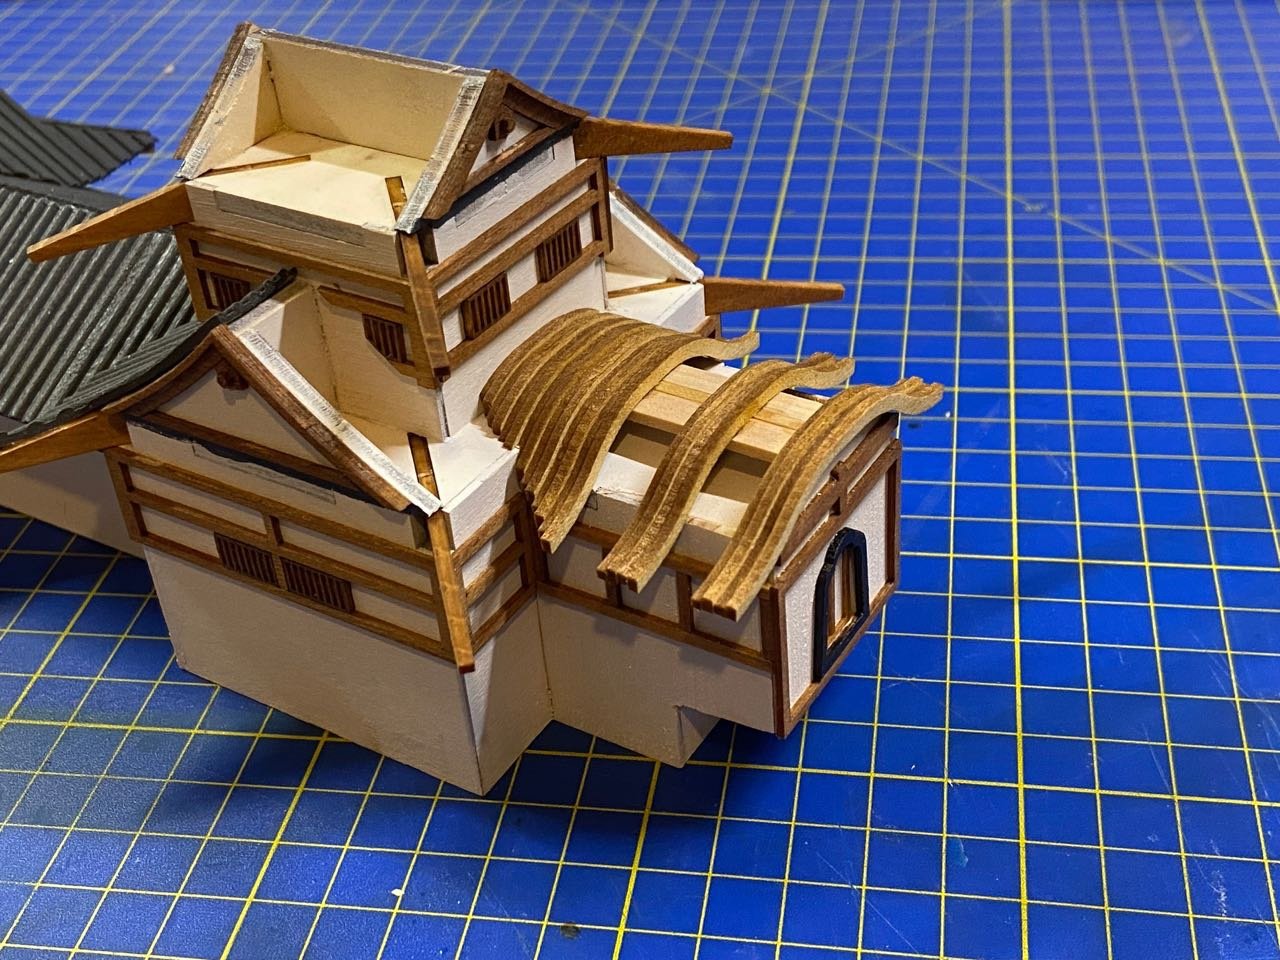
This roof will be left a natural wood color. Don't ask me why it wasn't tiled like the rest of the roof.
- BobG, Canute, thibaultron and 5 others
-
8
-
Thanks, as always Druxey, for your support!
Hi Popeye, on the real castle and temple structures, there are lots of beams. On this small kit, these are just simulated with milled pieces that fit underneath later.
Here's a glimpse of the instructions for the upcoming steps showing the parts labeled 40 that I'm talking about...

-
-
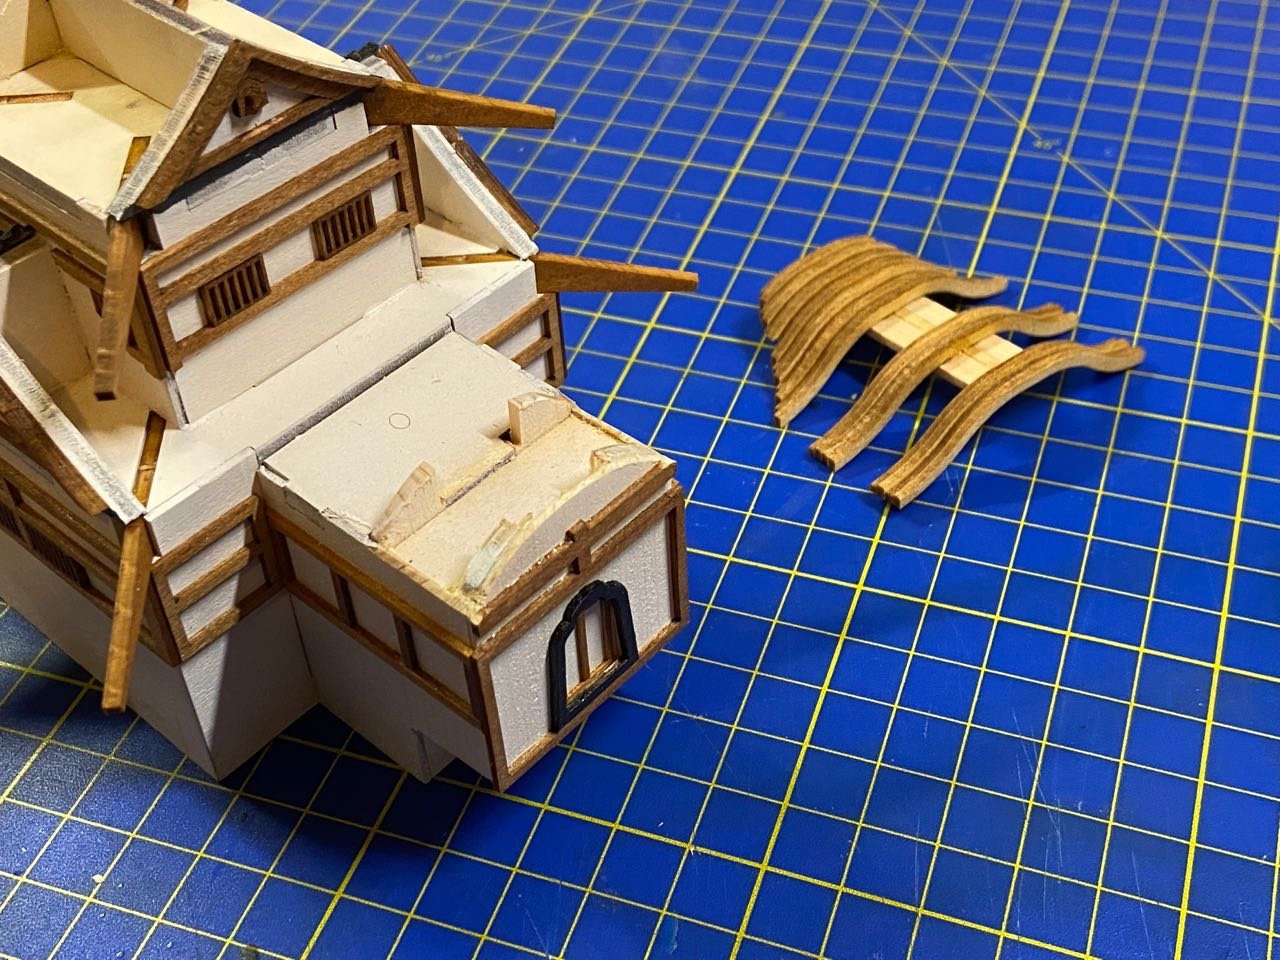
I started on the roof of the castle structure this week.
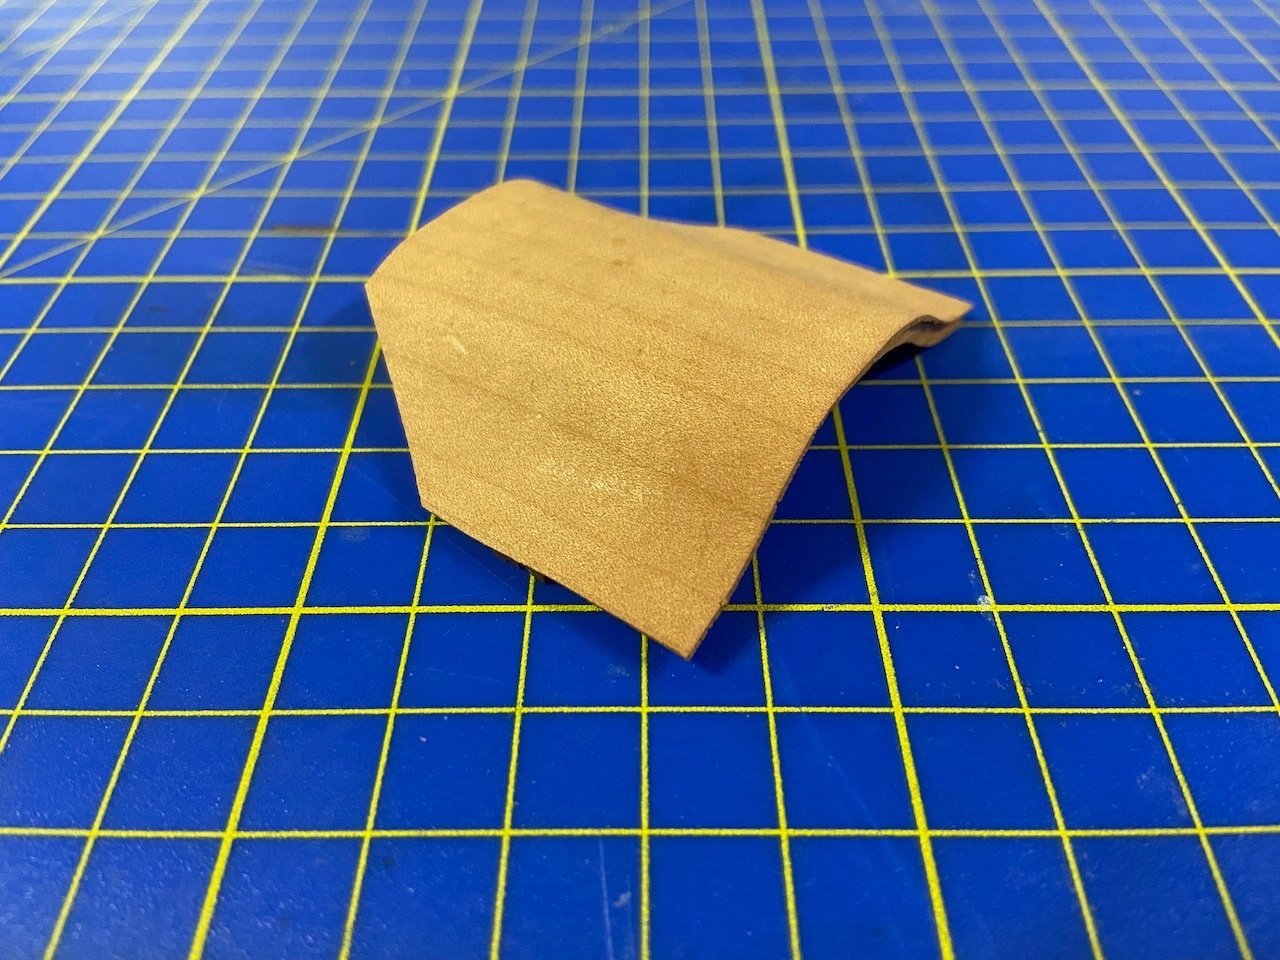
Not much to tell, except that the rounded roof at the front of the castle structure is going to take the most planning. The reason is that I've extended the length of that part of the structure, and the roof was originally designed for a shorter structure. That roof was designed to be made up of a series of arches, laminated together. Now, I'm figuring those arches will form the basis of a simple wooden roof made from thin sheet wood, maybe veneer.
The main roof material is made up of pre-milled wood. Woody Joe actually provides it in several sizes, minimizing the amount of cutting needed. I built a castle model a few years ago, and it included larger milled wood sheets that made for a lot more work. So, this is really a kit design improvement, probably indicative of the contents of their other newer castle kits.
There's still plenty of cutting needed, starting with the cutting out of paper patterns.
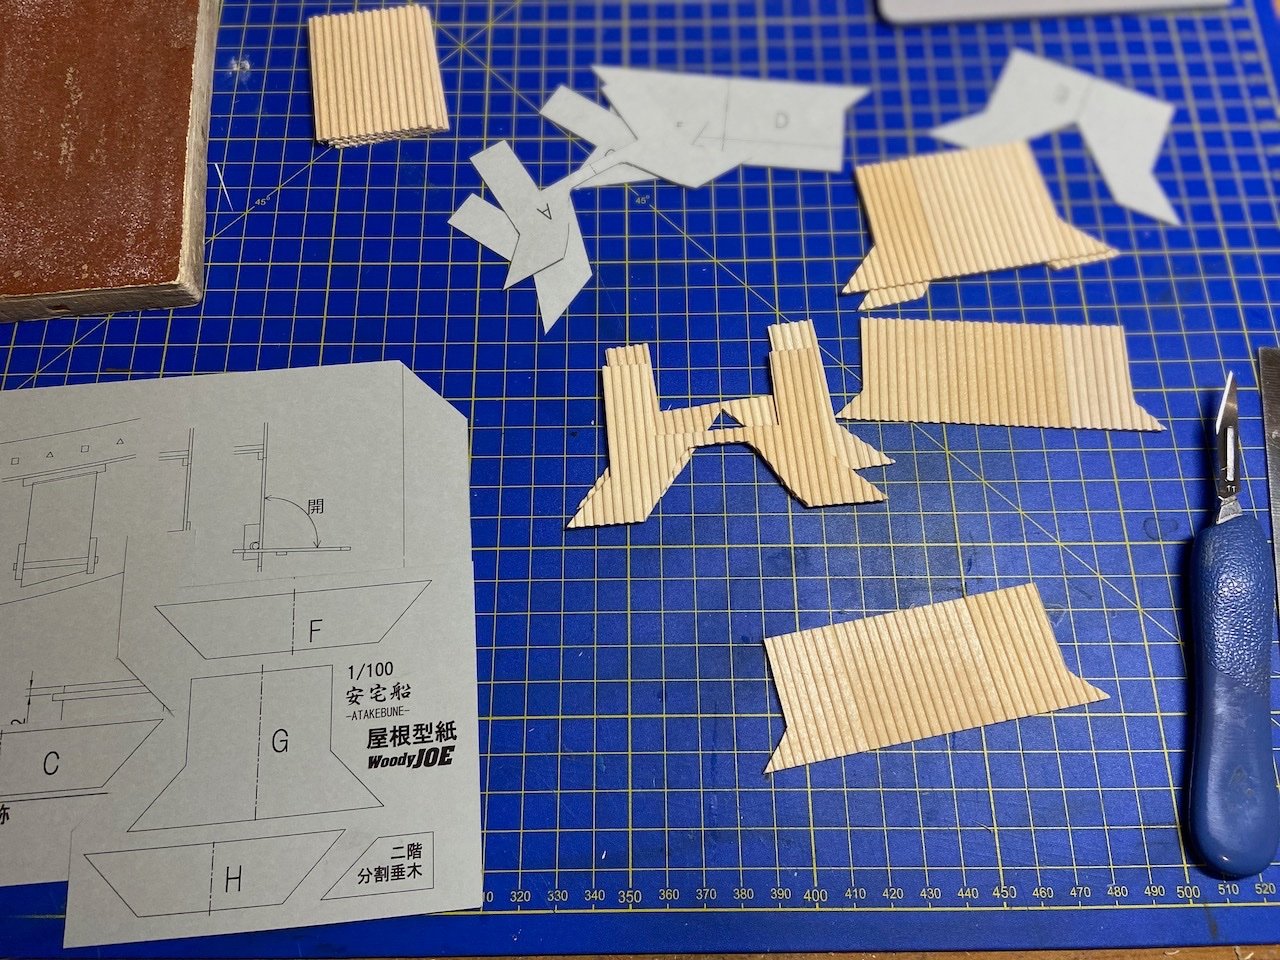
I fully pre-painted the roof pieces prior to installation using a mix of Liquitex acrylic paints black and soft white. The instructions mention using neutral gray. But, I think it looks better to use a darker color, which I will then highlight with a lighter color shade later.
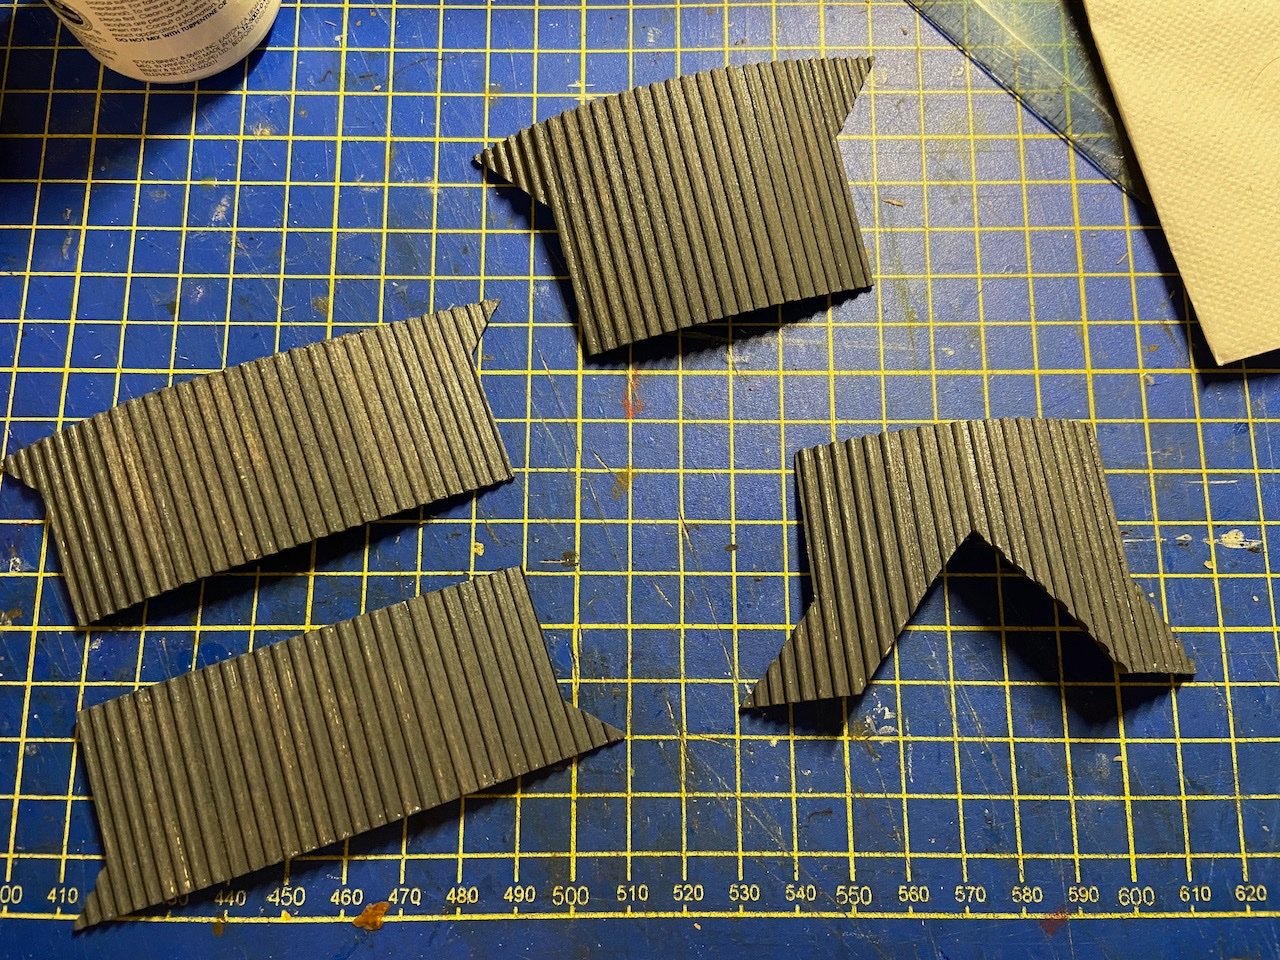

The construction of the roof is actually quite enjoyable, as it's interesting how it all comes together. Plenty more to do!
- thibaultron, mtaylor, baskerbosse and 5 others
-
8
-
Beautiful model, Eric. Congratulations!
Your work reminds me that I have a couple paper model subjects waiting for me to get back to them. You're inspiring me to do just that.
- EricWilliamMarshall, ccoyle, Canute and 1 other
-
4
-
Thanks for the interest baskerbosse. It does seem like something out of a Japanese anime adventure.
This month, I'm definitely back to more ship modeling, and there are a couple other things I'm trying to do some work on. As a result most of my posts here are small updates. This one is no exception...
As I mentioned before, the forward part of the castle structure has been lengthened in the same fashion as Mr. Kazunori Morikawa's model. He and I have shared some ideas, and the other major idea I'm considering is removing the little stern section of the "box" and lengthening it by about 15mm. Morikawa-san did this, and it makes the ship look more balanced. It's also more like the museum model. But, it's a bit structural modification – true kit bashing. So, I've put off thinking about it for a while.
You can see the latest photo of his model here, where he's extended the stern and added some detail inside the stern as I've been doing. https://www.facebook.com/JapanOnlineHobbyStoreZootoyz/photos/pcb.1739880429535493/1739867882870081/
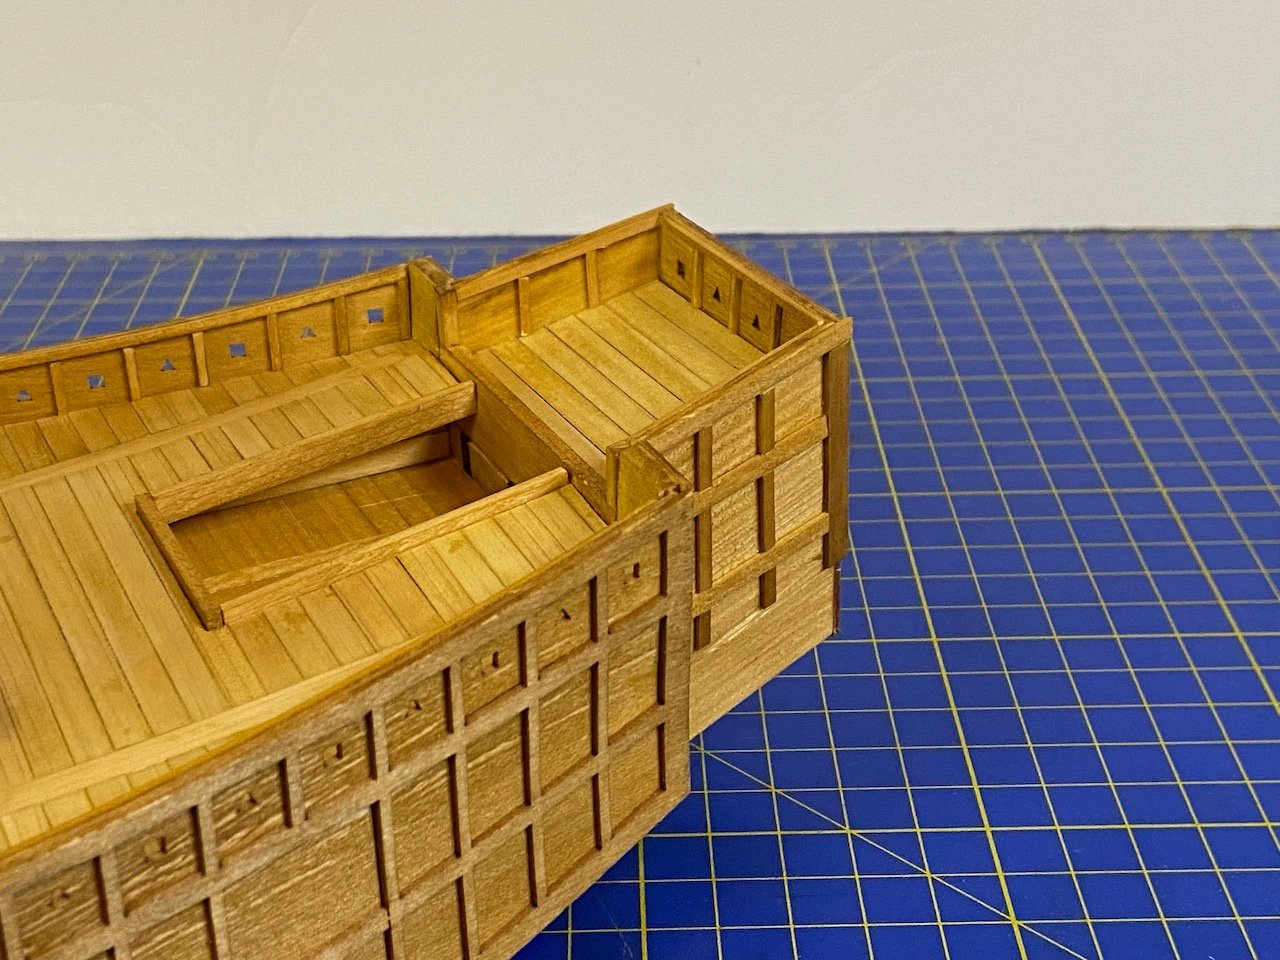
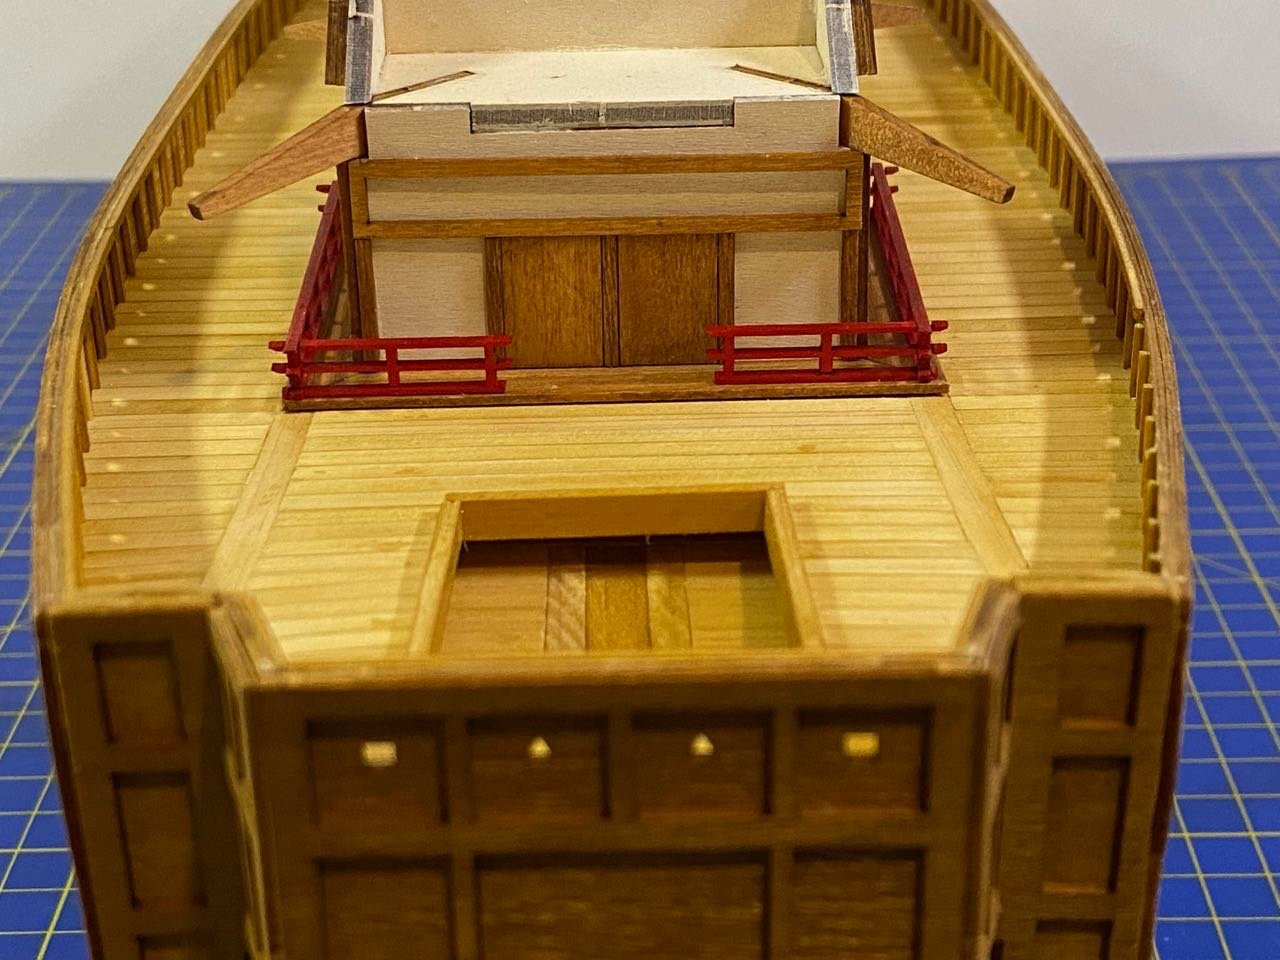
Anyway, I built the temple-style railing for the back end of the castle structure, so I could see how much I could lower the whole structure. I prepainted the railing as much as possible using liquitex acrylic paint. The wooden parts remaining on the sheet below are supposed to be for the walkway. Instead of using these, I just built them up from strips I cut on my table saw.
Using the provided parts as patterns, I cut these assemblies to shape. They still needed a little tweaking to get them to fit squarely, but they worked pretty well.
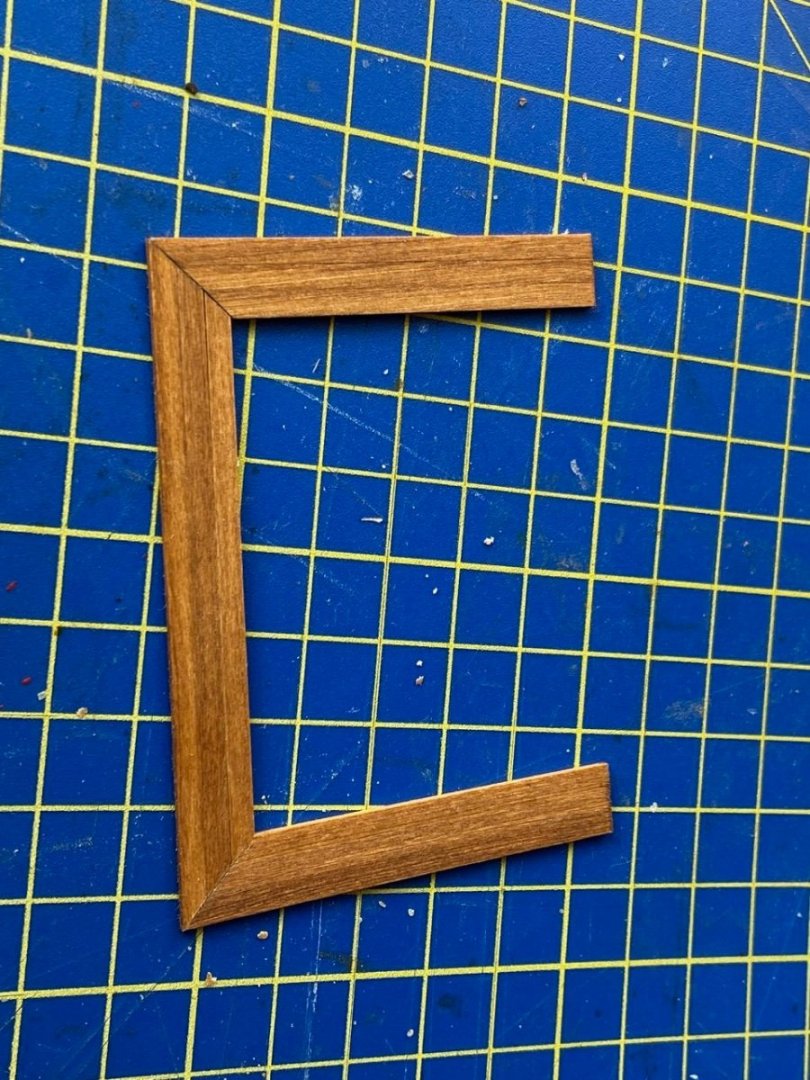
While these are supposed to be added later in the castle structure assembly, I needed them in place at this stage. Since the railing is a fragile assembly, and harder to replace, I only glued the walkway into place and just set the railing on it to show how it will all look later.
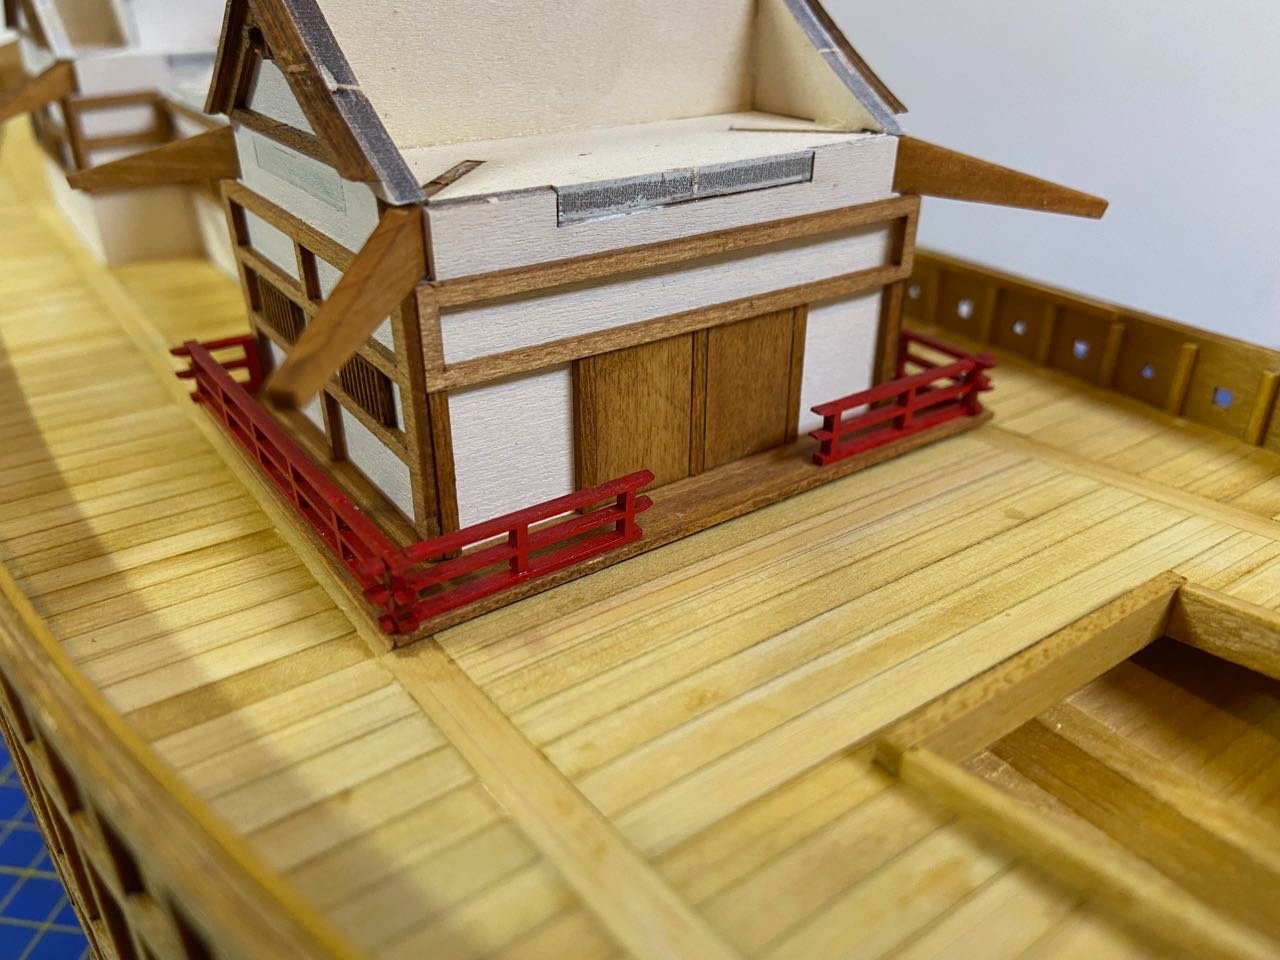
This is the only splash of color the model will get, though I'm considering adding flags at the corners of the box structure and possibly a curtain hanging down from the top edge of the wall. These would be printed with the crest of the clan the ship belongs to. It's not something that would have been added in battle. Still, just thinking...
The walkway gave me the information I needed, and I decided to remove the bottom base of the castle, which is just a 1mm thick piece of hinoki. It's not necessary once the structure is glue together. I was then able to modify the bottom of the extended structure at the front, to make for a better fit.
Next, there will be a kind of coaming around the sides of the castle structure. Now that the castle sits a little bit lower, it's safe to add them. That step is forthcoming. With those in place, I'll be able to finish the wood trim of the castle.
One last thing I'm considering here is to add a 1mm shim under the stern end of the castle structure, which would allow me to add a step under the walkway. Yes, after lowering everything by 1mm, it would raise the back end up again. But, the main reason for the lowering of the structure, was the get the addition at the front end to sit a little lower, which is a better fit. It would give the whole structure just a little forward tilt, which would be unnoticeable.
I any case, part of the newly added walkway sits up off the deck. I will probably add some kind of beams/blocks underneath, just to add the visual detail.
-
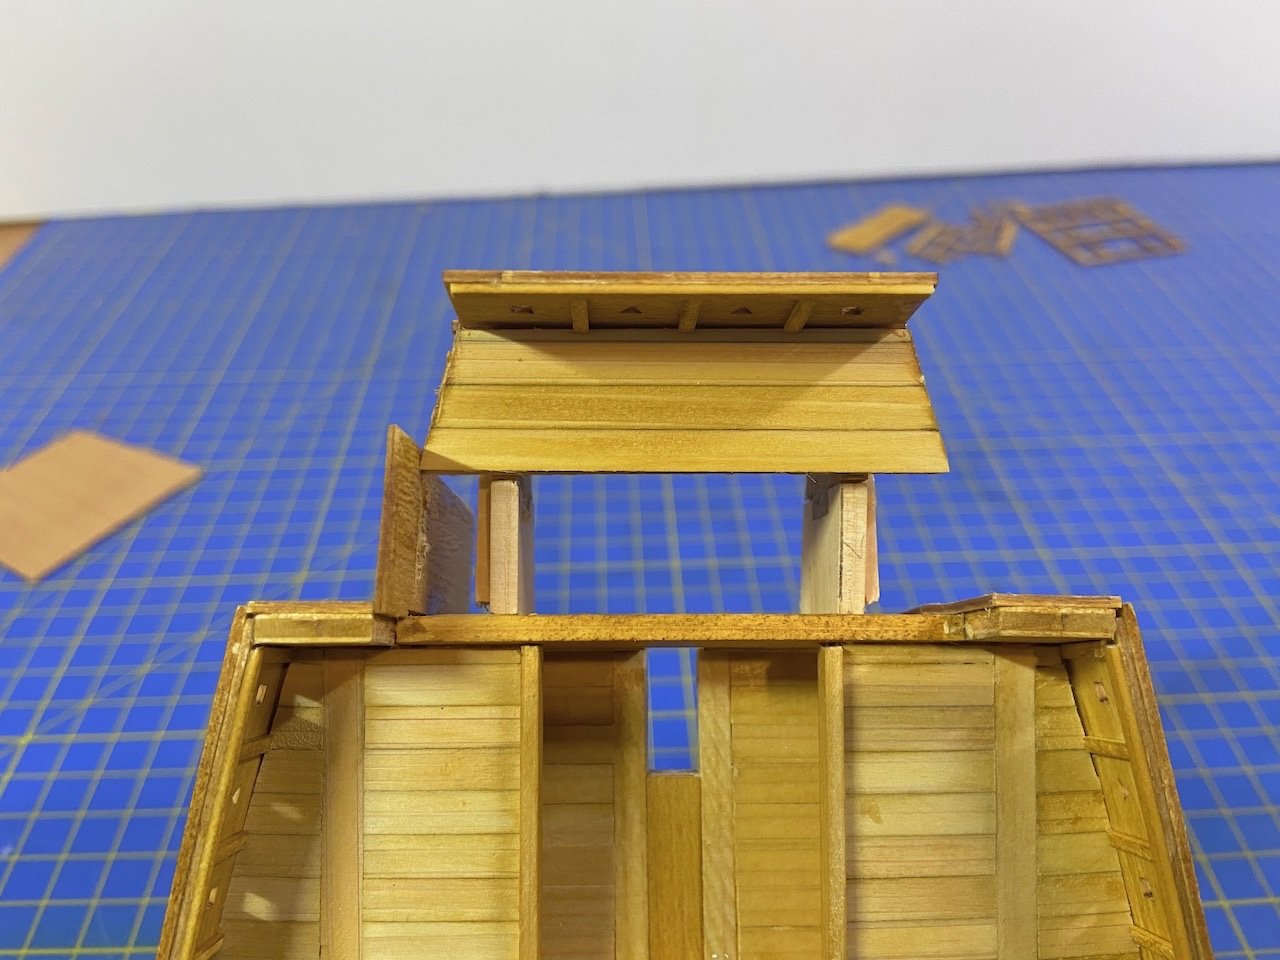
Here's a little more...
I finished the basic trim on the castle structure. All the windows are now in place, as well as the trim detail at each of the roof peaks. At the forward end, I took some scrap wood and built the extended trim along the sides of that forward most room.
If you're wondering about all those visible plywood tabs, they get covered up by the roofing.
The next step here is some trim that runs down to the deck. Since I modified this build a bit, and lowered the deck and the foundation for the castle, I want to make sure I lowered the foundation enough. Might be okay to drop it down by another millimeter or so.
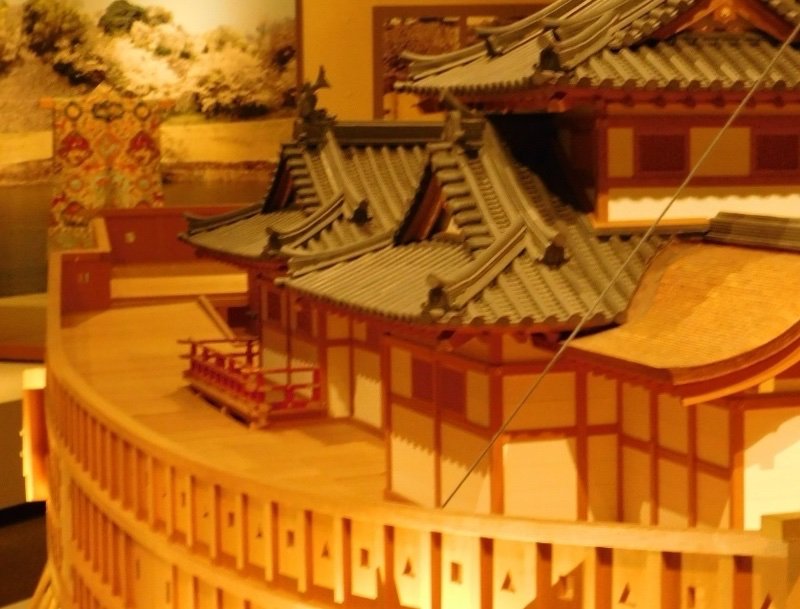
The real limiting factor in the height of the structure is a fenced walkway at the rear of the structure. I don't have any good photos of that part of the museum model, but you can see the feature in the following photo.
Once this is worked out, I can add the lower part of the castle trim and get started on the roofs. I mentioned before that I actually have a second kit. On this model, I'm aiming for replicated the museum model as much as I can. But, on a second model, I will probably try to build it not with a tiled roof, but a wooden style roof.
- baskerbosse, ccoyle, Ian_Grant and 7 others
-
10
-
4 hours ago, druxey said:
My, what big fingers you have! Looking good and I like the milled wood that was supplied with the kit.
LOL, to me when I'm working on models, I think the term is FAT fingers! 😁
The Japanese temple and castle kits that Woody Joe makes are particularly full of milled wood like this. Before laser-cutting, all the parts were milled wood, cast metal, or stamped metal sheet. Their ship models are mostly laser-cut wood now, but I guess there's no good replacement for the milled parts use in many of the other kits.
In this kit, the other main milled wood pieces are for the eaves underneath the ends of the roofs. There, the pieces are more like slatted wood. So, instead of a sine-wave cross-section, it's a square-wave cross-section.
John, you must have been gone for a while! Hoping to make more progress now, so come back sooner! 🙂
- thibaultron, mtaylor, druxey and 2 others
-
5
-
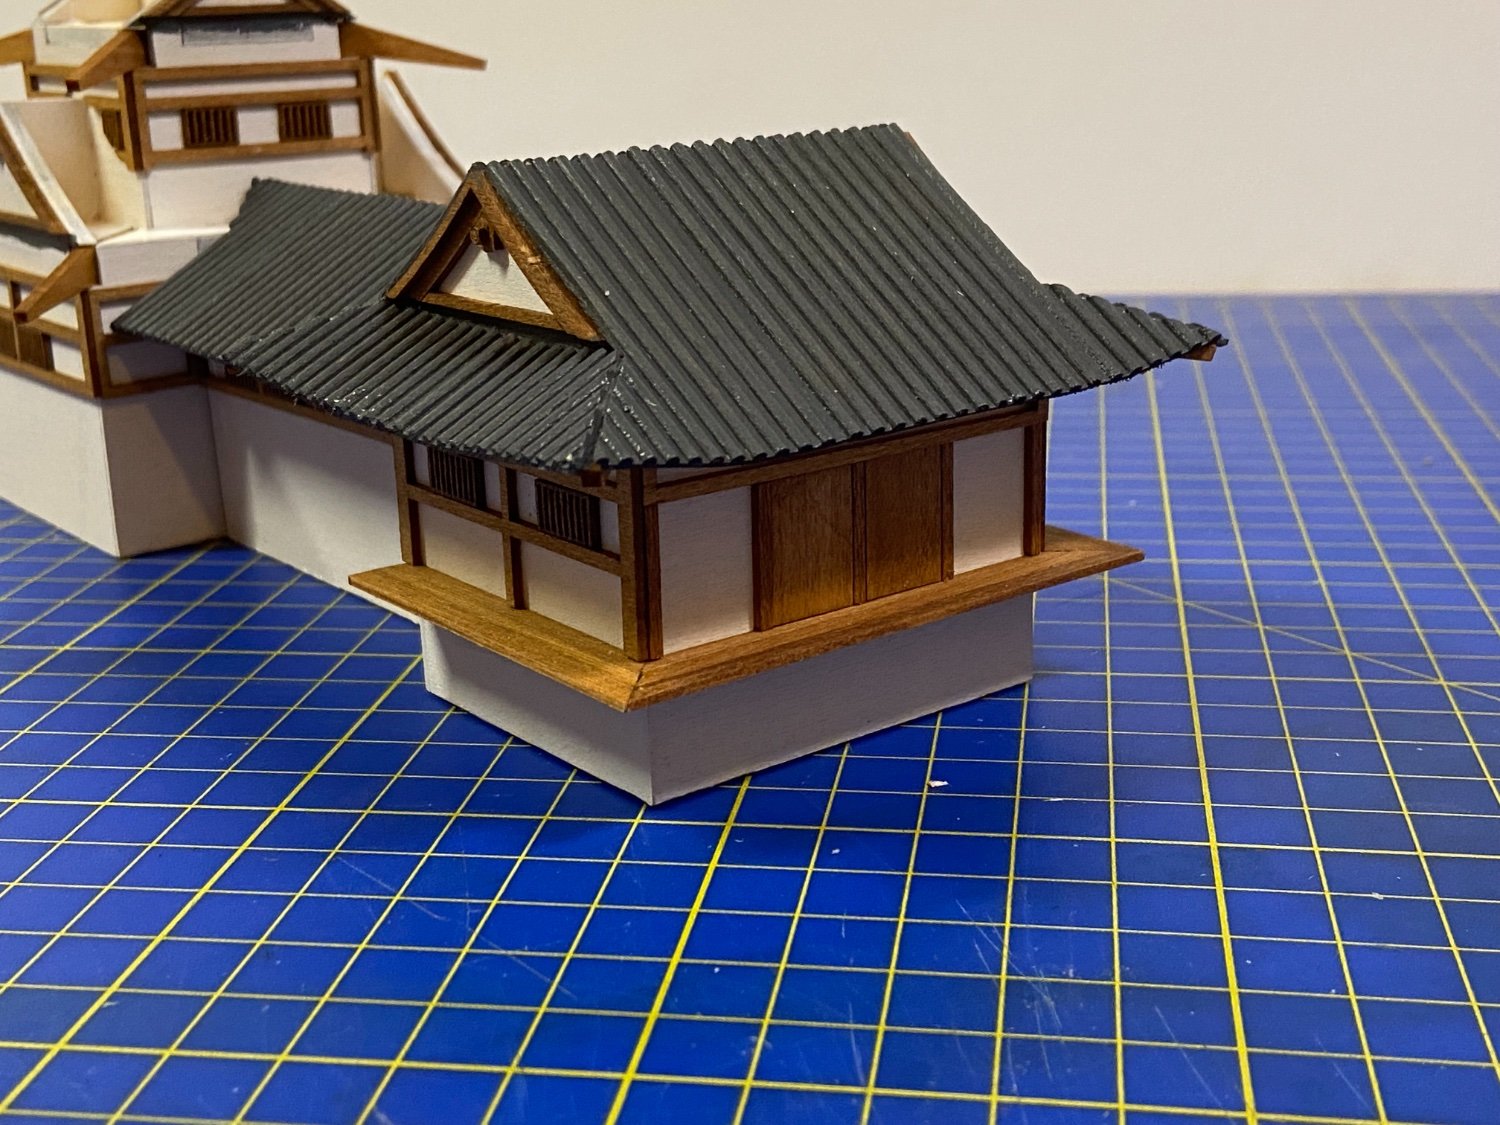
Peter, I forgot to answer your question about the roof. While a tiled roof may not be correct, this kit is based on the museum model, which has a tiled roof over most of the castle structure.
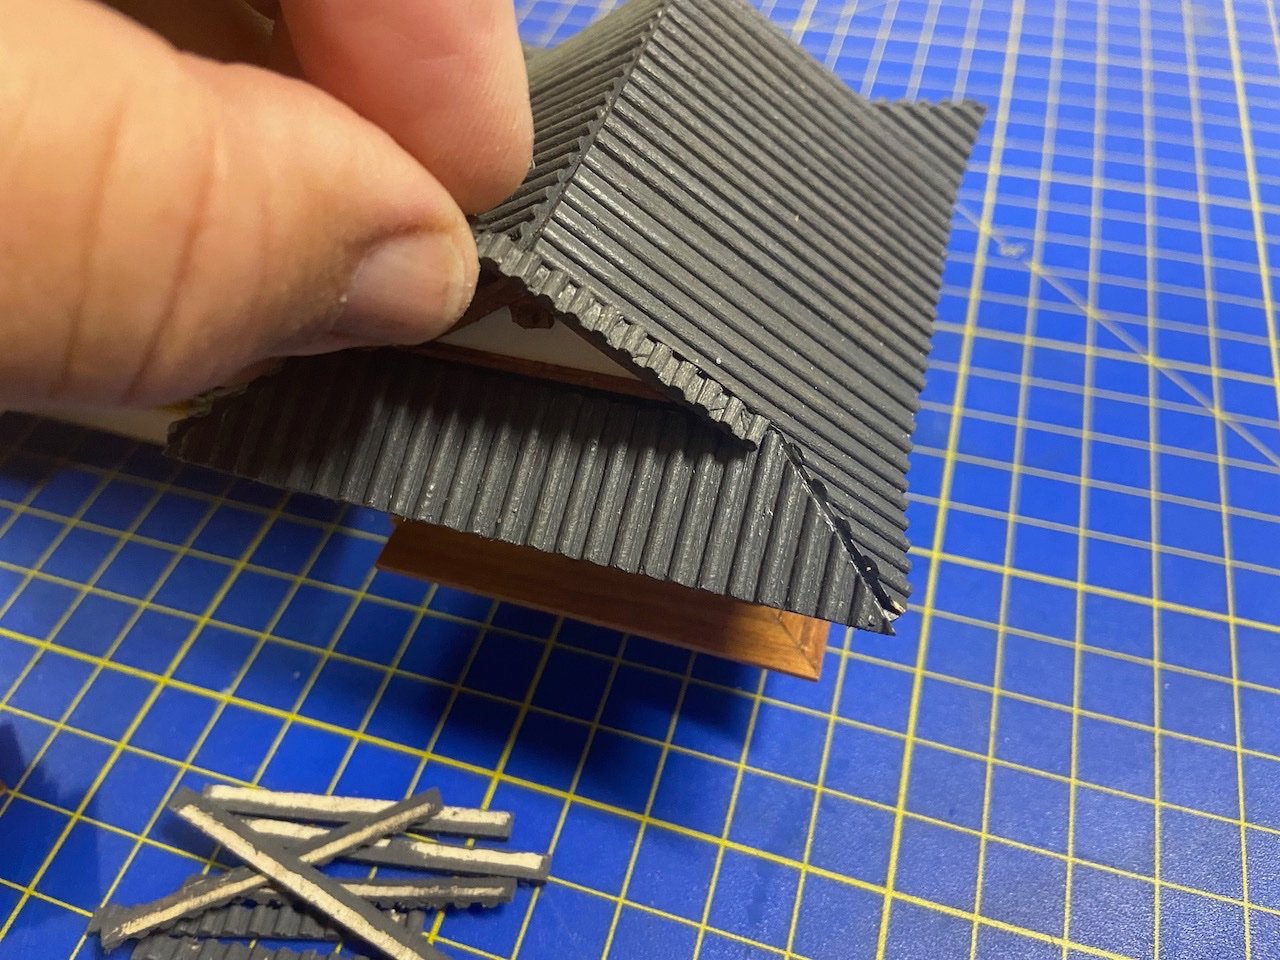
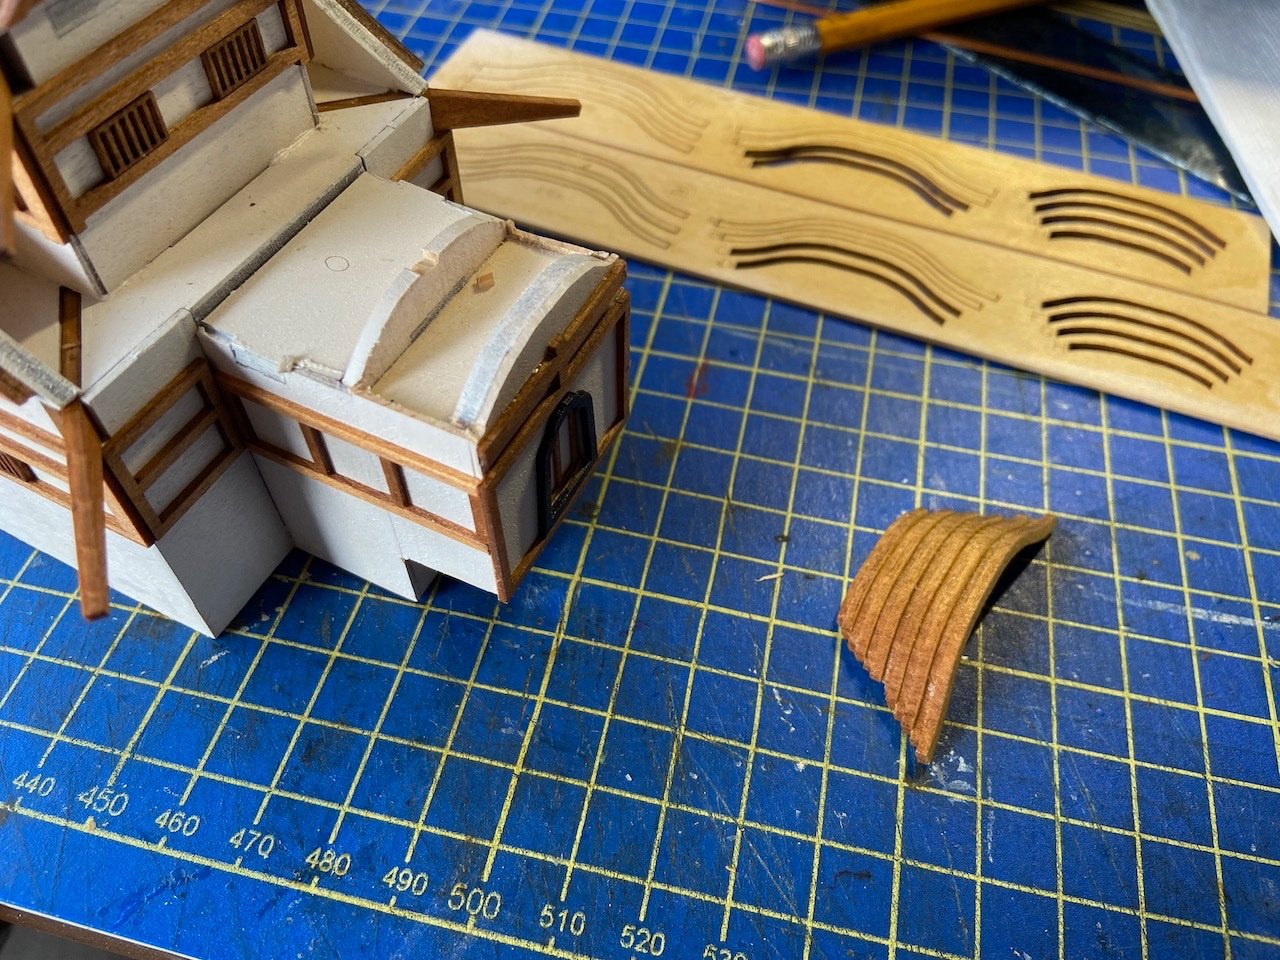
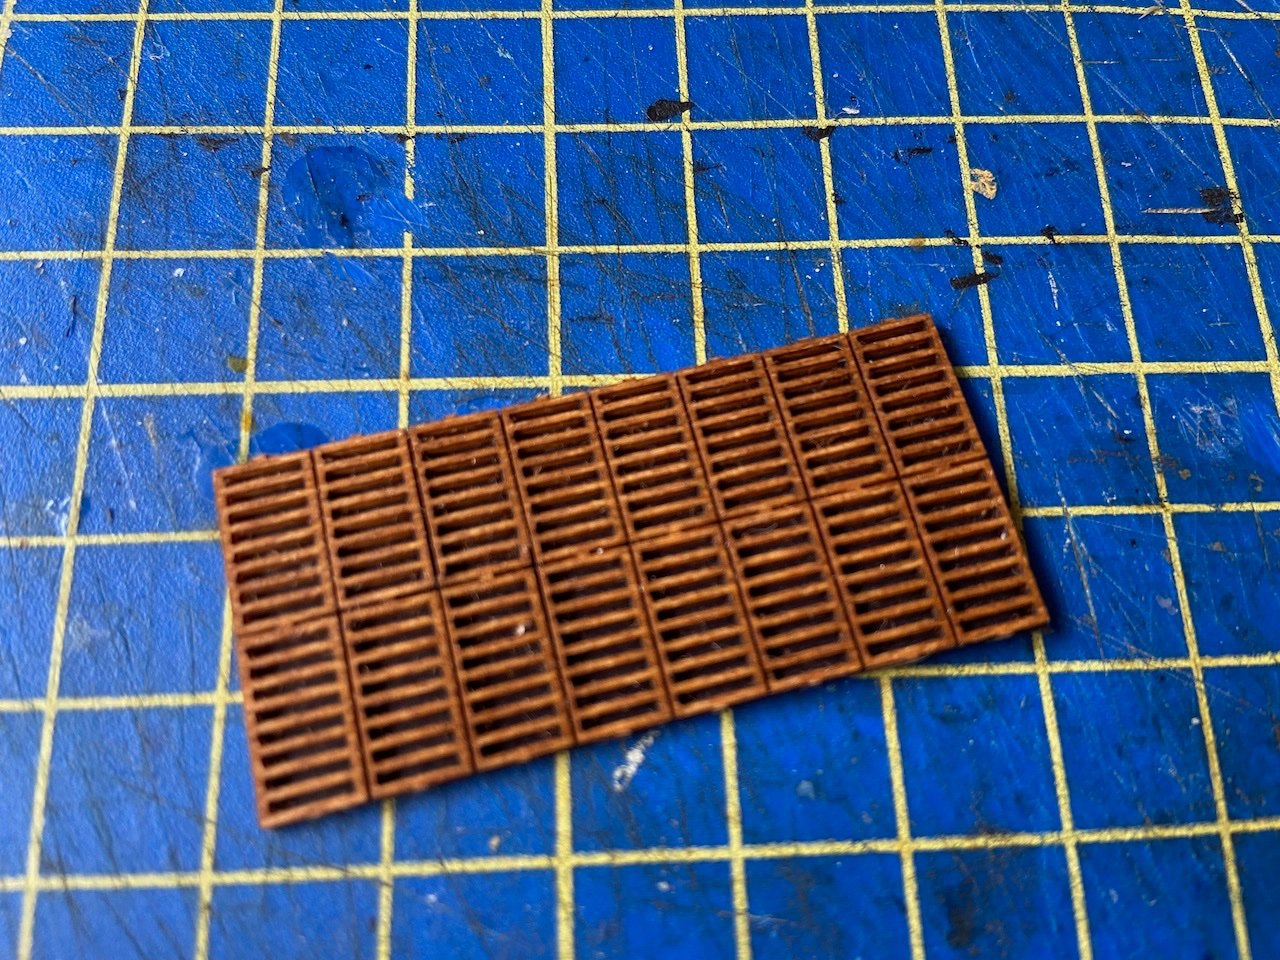
Woody Joe has a history of providing kits containing milled wood shapes. So, in this kit, they provide sheet wood that has a wave pattern on one side. Kind of like Ruffles potato chips.
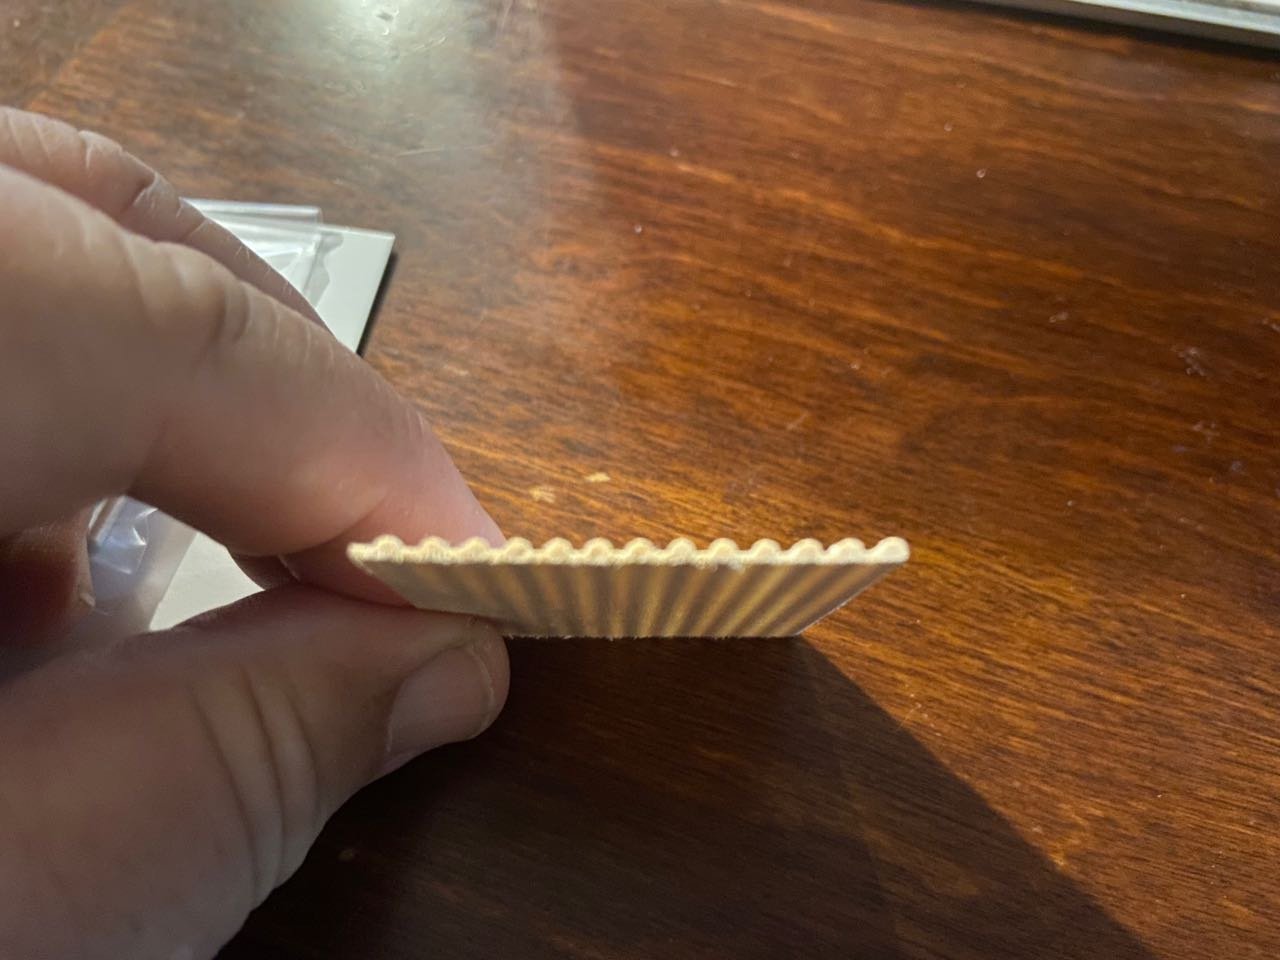
Sorry, it's a little blurrier than I thought it would be. But, should give you the idea.
These pieces work very well for Woody Joe's castle kits, so they should work well here.
-
On 1/13/2022 at 10:03 PM, baskerbosse said:
You could print a bunch of them and crew it Jack Sparrow style with just multiple copies of yourself. 🙂
Hello Peter, don't think I hadn't considered that! But, they'd be too small to be recognizable for this model...
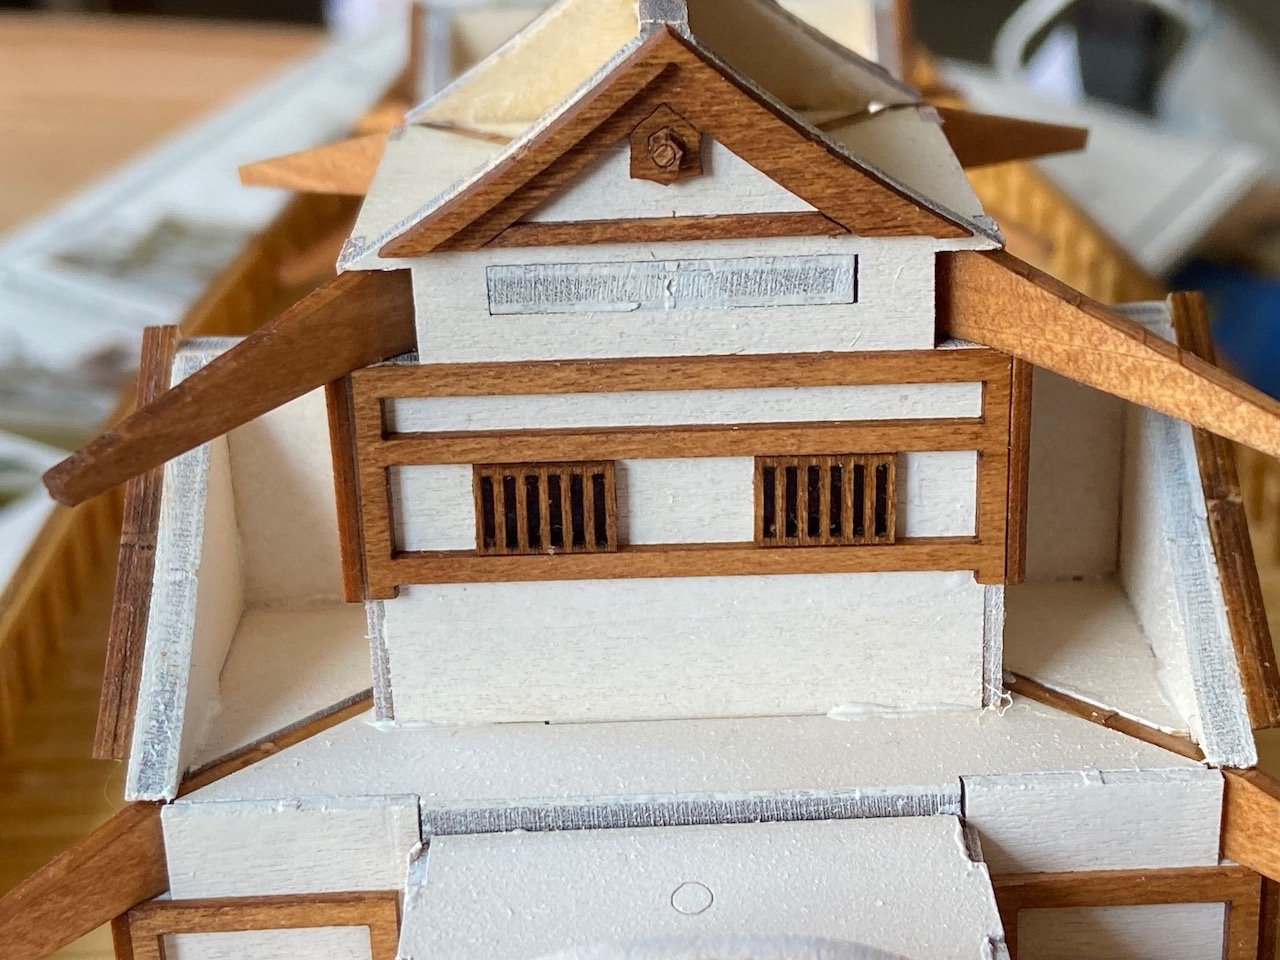
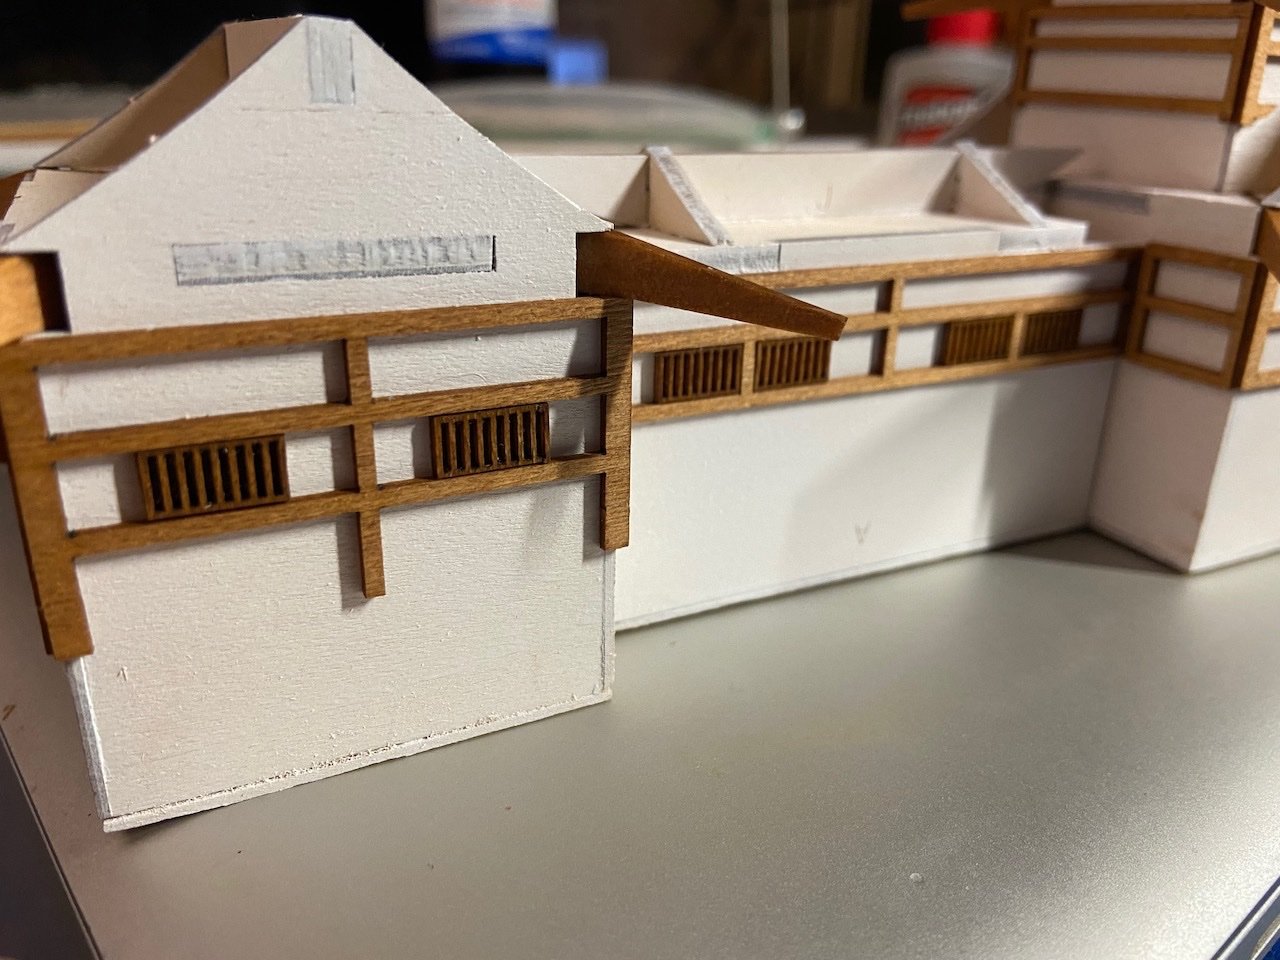
Thanks for the castle comments. Here are a couple more photos after adding some of the trim details.
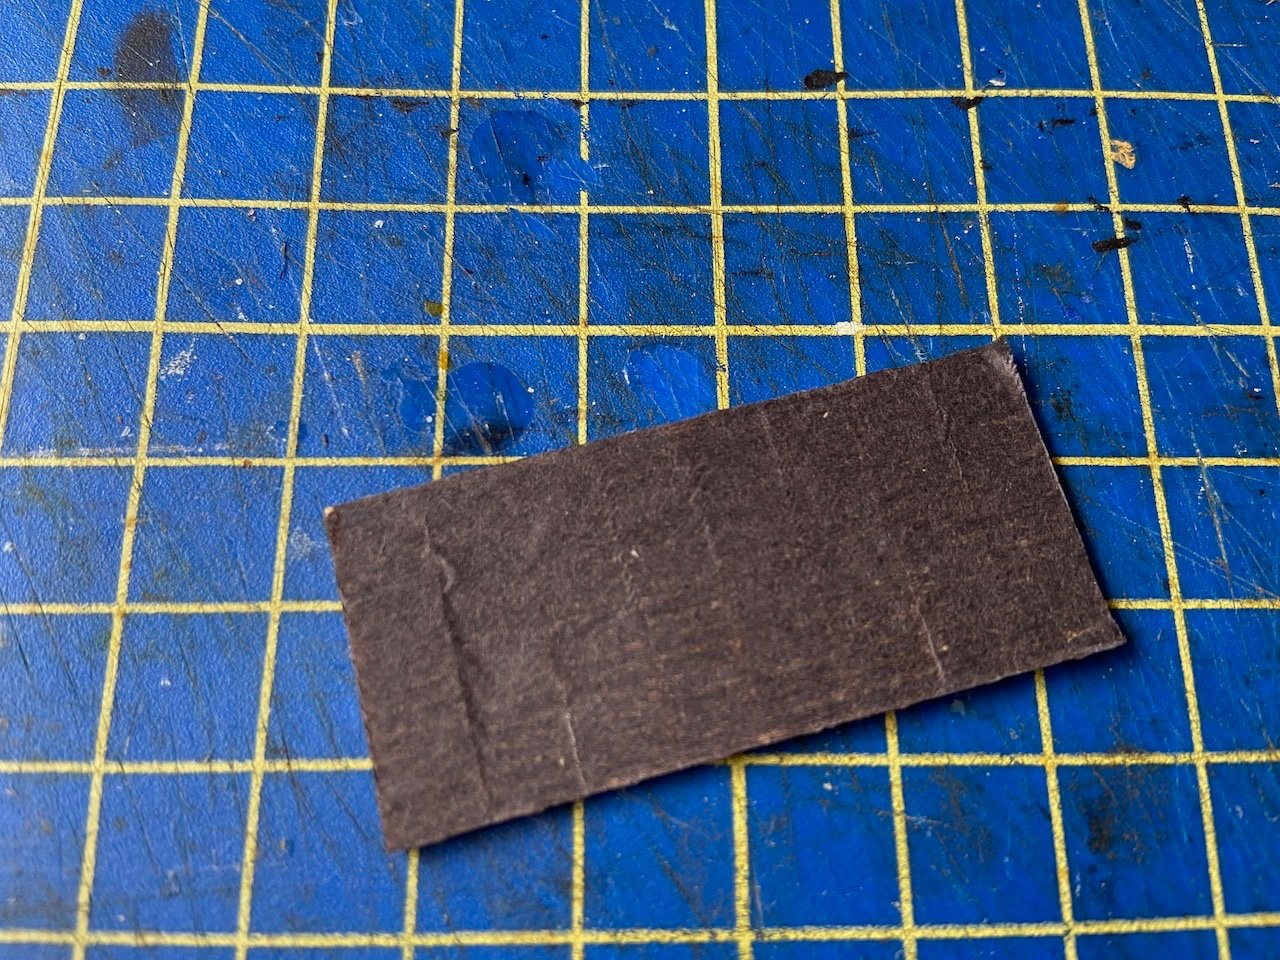
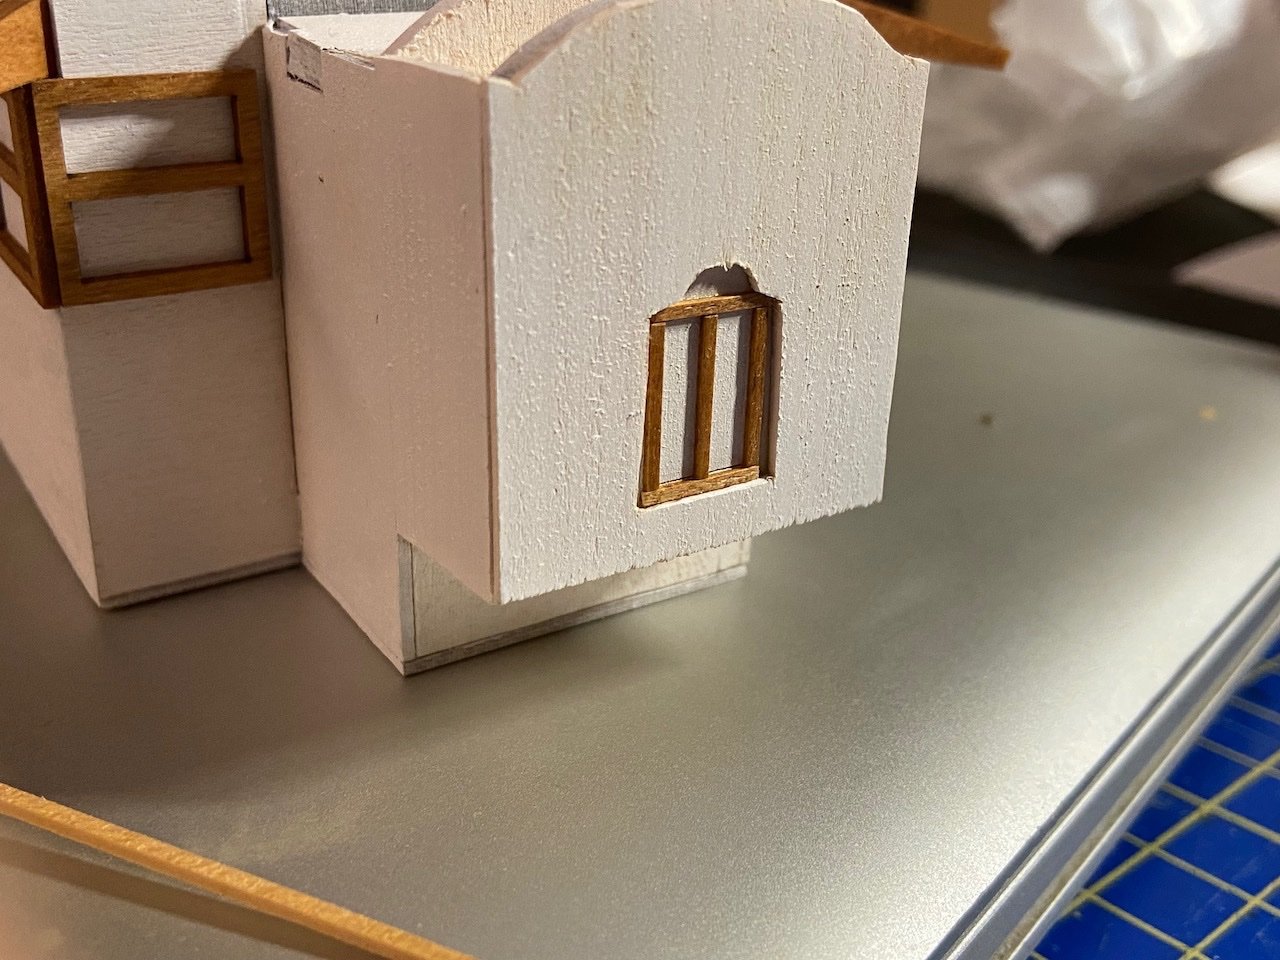
There are some barred windows that are added as well. I decided to try gluing a piece of black tissue paper to the back of these before gluing them into place. You can see the difference is makes below.
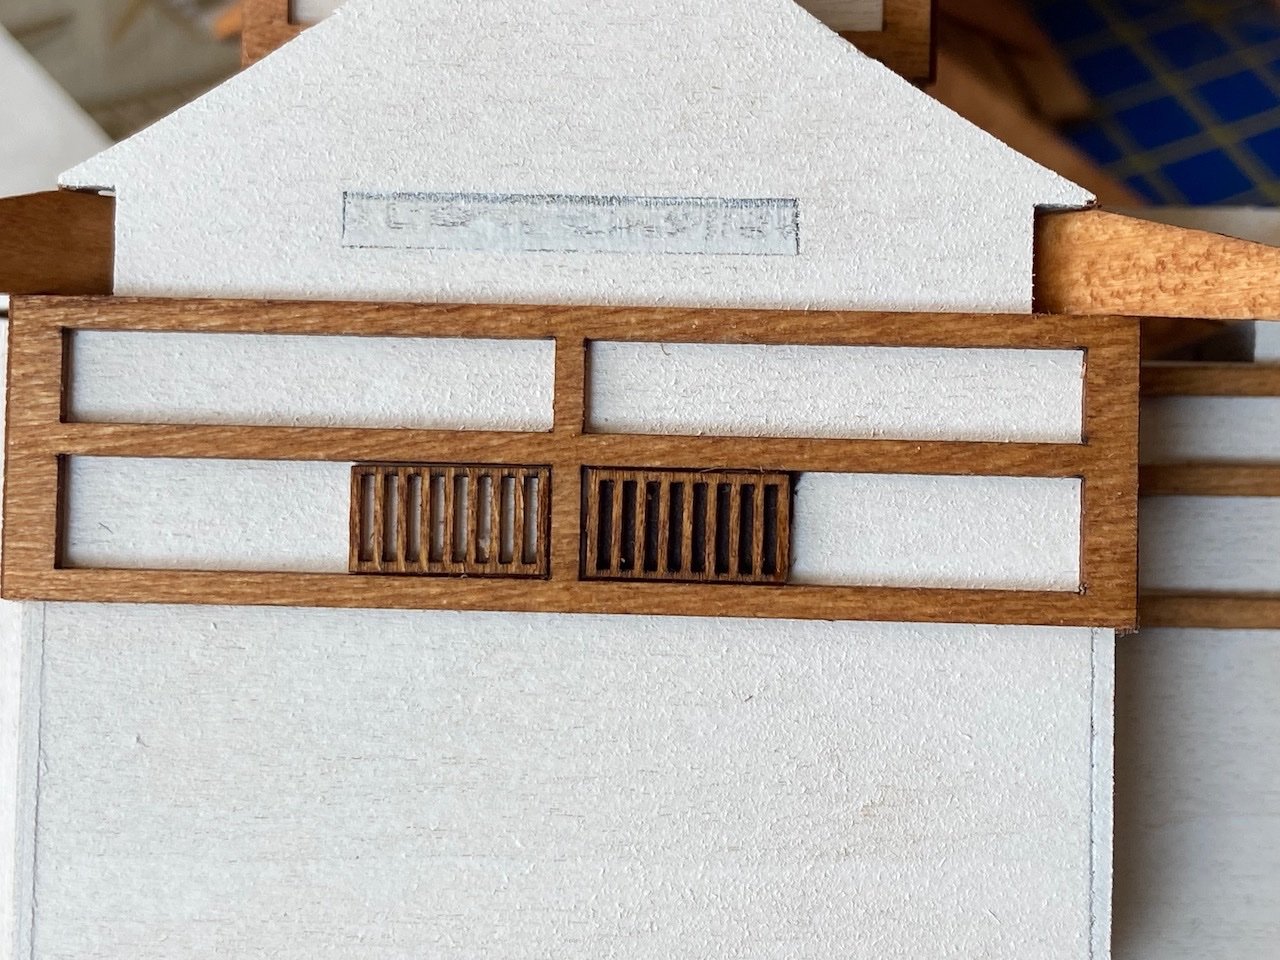
And, finally, when they were all glued into place...
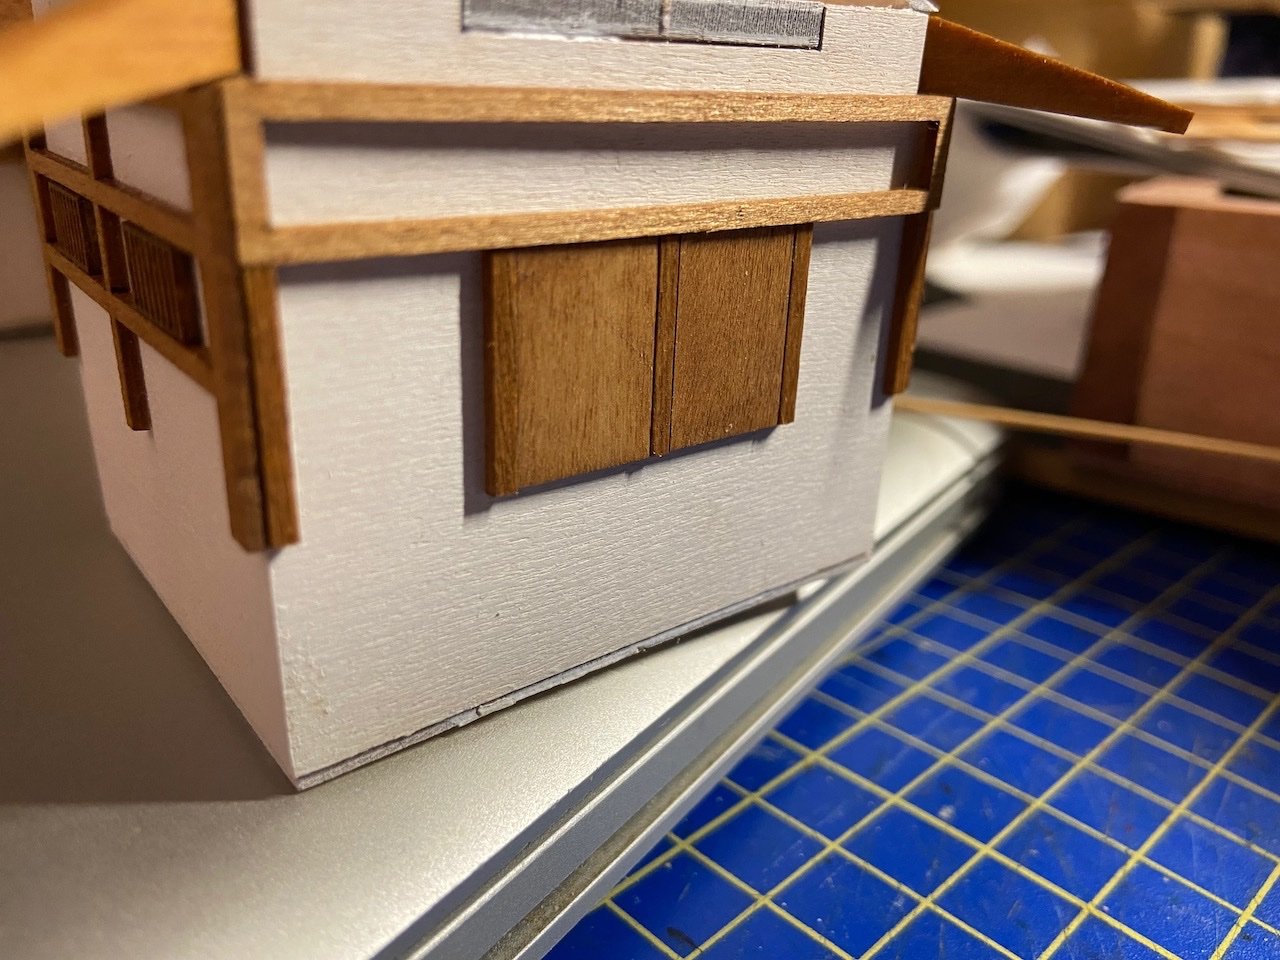
And, finally, I've been working on modifying the forward most building of the castle, from the simple laser-engraved outlines of a door, to something a bit more 3D, with wood trim.
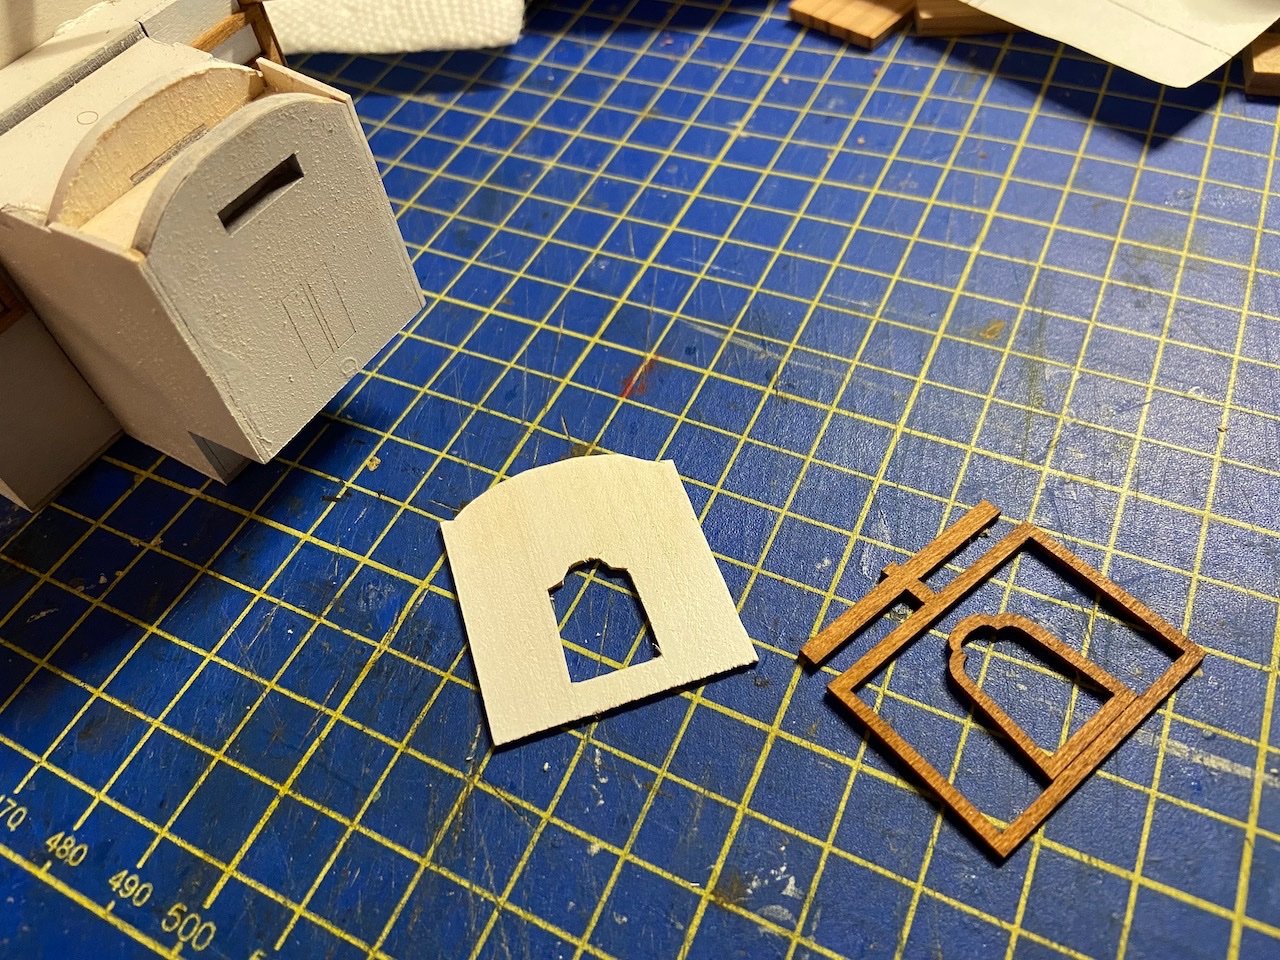
That middle piece with the cutout is my own addition, so that the door is inset from the facing woodwork.
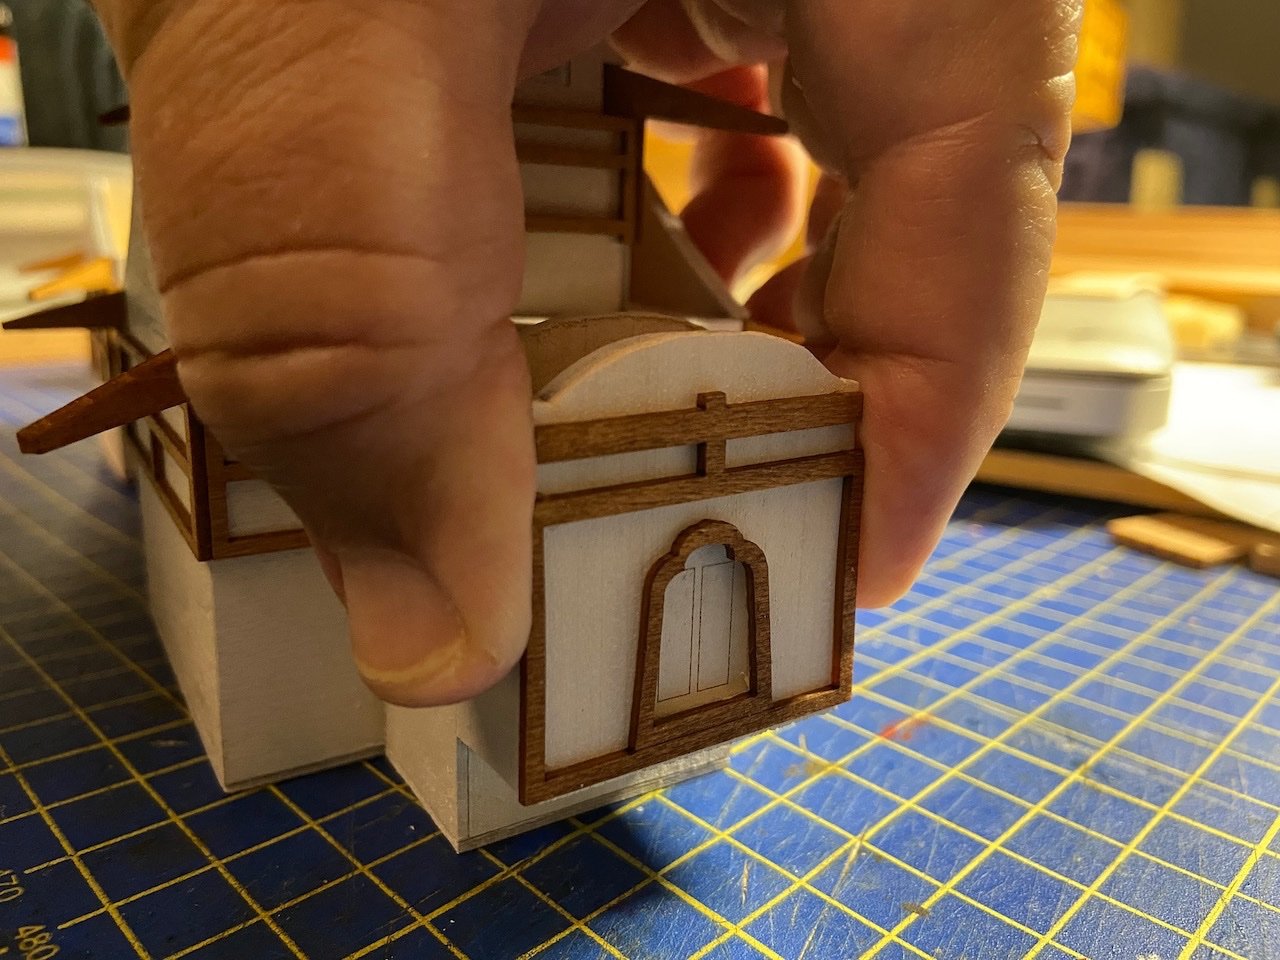
As it still seemed to need some detail, I built a framework around the door panels and then painted the archway around the opening.
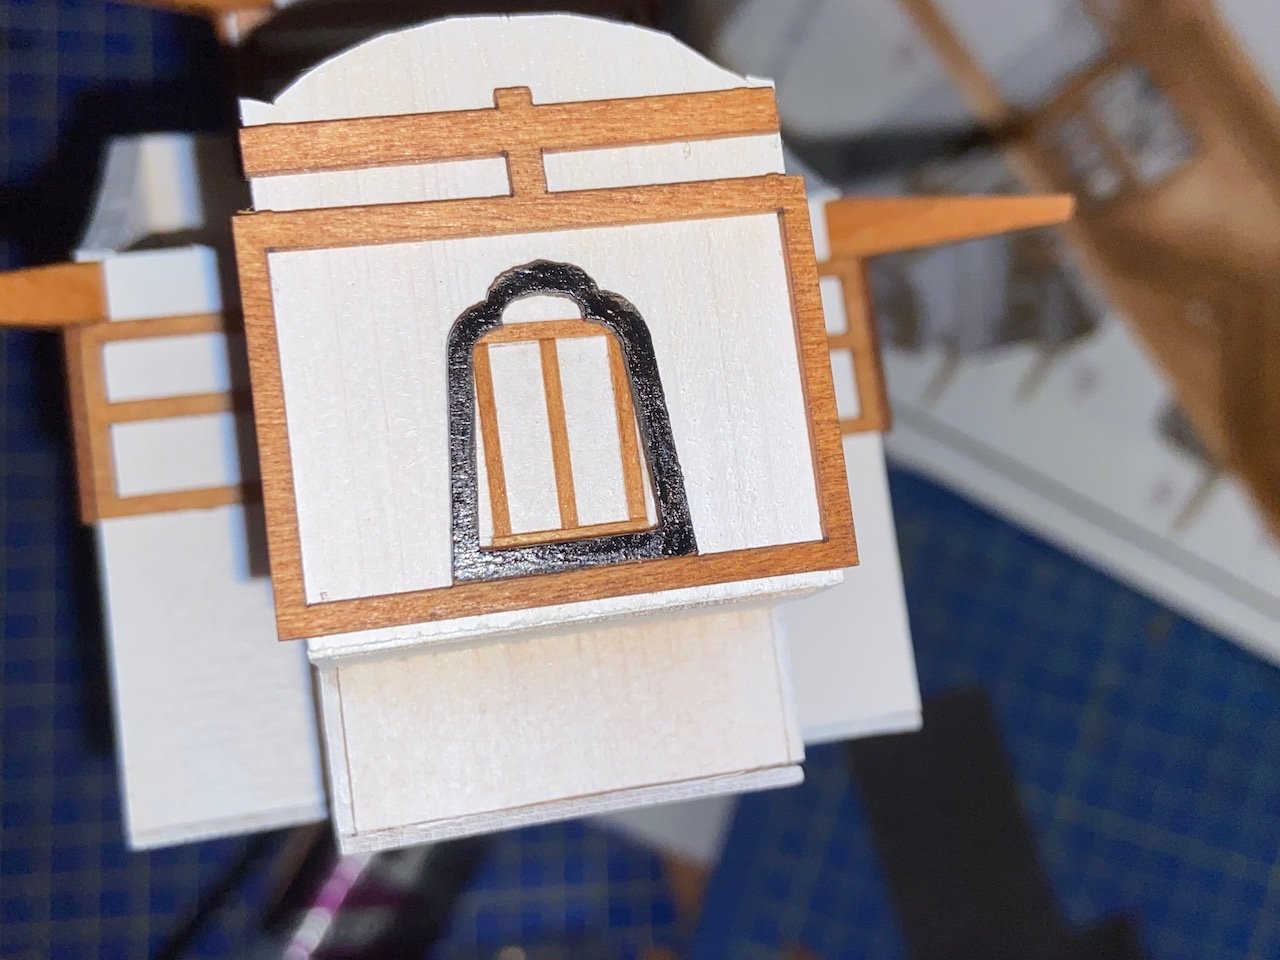
It may not look all straight and centered, as it hasn't been glued together yet. I just wanted to set them all up for the photo here.
- thibaultron, ccoyle, popeye2sea and 4 others
-
7
-
Hello Modeller_Masa, thanks for your posts.
I have a Cameo 3 myself, which I've used to resolve certain masking and template problems, as well as providing a means to create flat decorations to models.
Your posts are giving me some interest in taking another look at trying some creative solutions to work with copper foil with it.
- modeller_masa, Canute and mtaylor
-
3


Greetings from Spain
in New member Introductions
Posted
Welcome Artesania Latina! You made two of the very first wooden ship models I ever built!