
HOLIDAY DONATION DRIVE - SUPPORT MSW - DO YOUR PART TO KEEP THIS GREAT FORUM GOING! (83 donations so far out of 49,000 members - C'mon guys!)
×


Bob Cleek
-
Posts
3,374 -
Joined
-
Last visited
Content Type
Profiles
Forums
Gallery
Events
Everything posted by Bob Cleek
-
New Young Model Builder from Minnesota LOOKING FOR ADVICE
Bob Cleek replied to Kenna's topic in New member Introductions
Hi Ron, Well, I was wondering where you were going to put a six foot model and the thought crossed my mind that maybe she'd want to ride in it and then thought, "Naw. She's talking about kit models." Let me take off my ship modelling hat and put on my boat builder's hat. Was it something like this that she has in mind? It has square sails, too, which aren't rigged in this photo. This is sort of a model, but it's actually one of the class known as "character boats." These are boats designed to appear larger than they are, yet still be navigable, and they come in all shapes and sizes, but are always made to appear as smaller than their prototypes. You're in the wrong forum. (As much fun as this one is.) WoodenBoat Magazine's "WoodenBoat Forum" is where you'll probably get your questions better answered. MSW is great for models, but not so much for boats that carry people. The main issue has to do with things like stability and safety. The boat has to be seaworthy before worrying about it's period character. This thread chronicles a dad and his sons building their "pirate ship" for use on the lake near their home: http://forum.woodenboat.com/showthread.php?163082-Pirate-ship-finally-out-of-the-garage-and-ready-for-rigging&highlight=pirate+ship This one's a tad larger than what you are contemplating, but perhaps a good place to start. These guys built theirs from scratch and wanted it to actually sail, although it does have auxilliary power and doesn't really sail all that well. It sure is an eye-catcher though. (Sails often don't readily translate into smaller scales because there's no way to scale down the wind and the waves.) You should also check out the many posts on the WoodenBoat Forum by a fellow here on the west coast named "Thorne." "Pirate re-enacting" is one of his hobbies. He has a small sailing and rowing boat similar in appearance to what might have been carried on a pirate ship, but smaller. He's got a brass cannon mounted on the bow, just as the pirates and navy did back in the days. These vessels were set up for conducting shore raids. He belongs to a group who have similar boats. They load them up with their camping gear and go on what they call "raids" together, with everybody dressed up like pirates and yelling, "Arrrrrgh!" a lot. I'm sure David (his first name) could suggest several small boats that would serve your purposes if it be pirating your about! As for a character boat pirate ship as is pictured above, it need not be necessary to build the hull from scratch. It would be a lot better to acquire a hull nobody wants, like an old fishing skiff, and then build the "pirate look" on top of that. At least that way, you'll know she will float and not turn turtle if you don't make her top heavy. Whatever you do, make sure she has a real live cannon! It's got to have a real cannon that makes lots of noise and lots of smoke or it just ain't a pirate ship. Hope this helps! (And make sure you build your Golden Hind model. You never have to outgrow building model ships, while dressing up like a pirate isn't as certain in that regard.)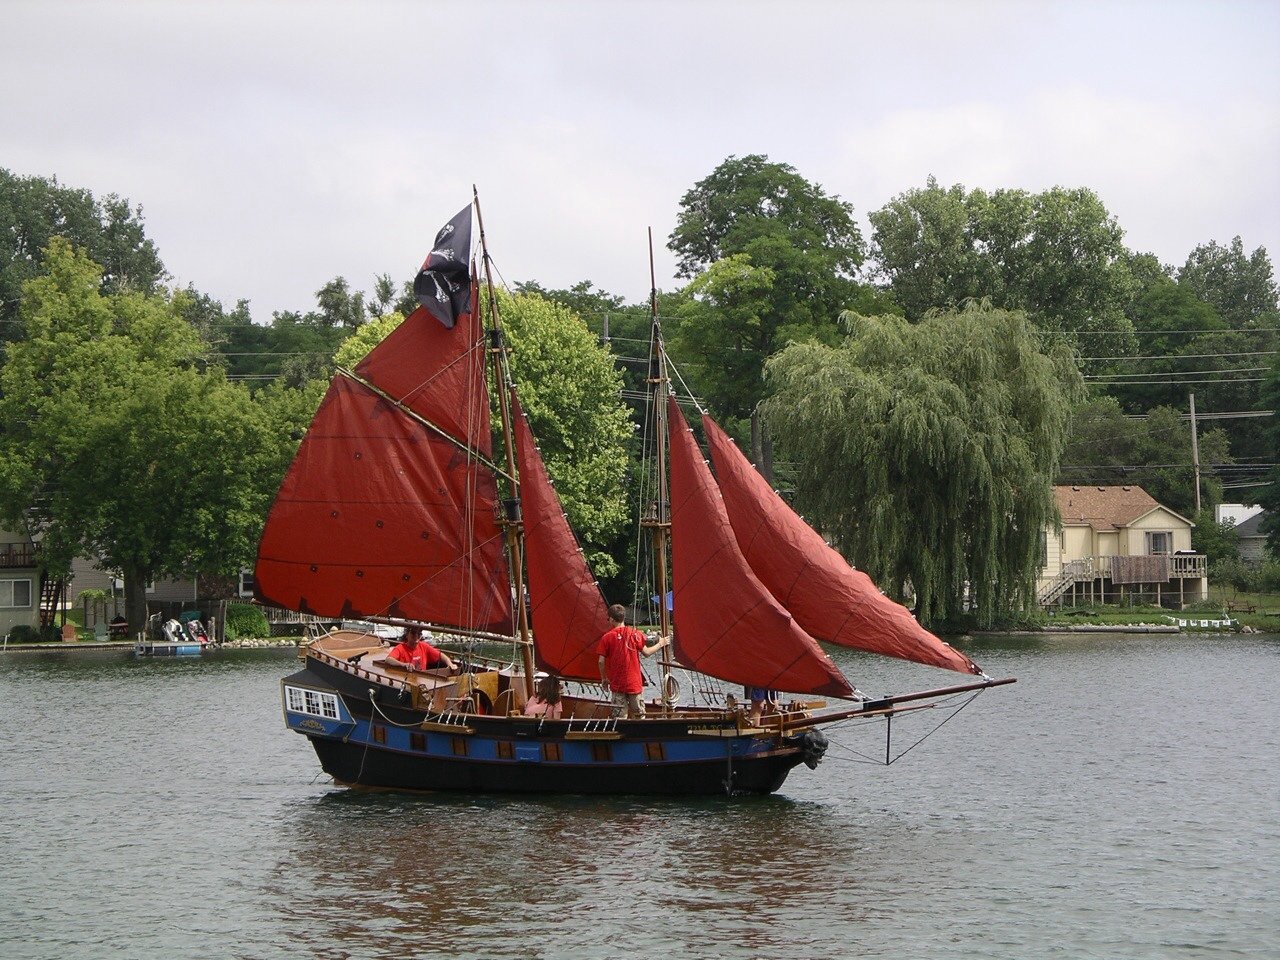
-
Great minds think alike, they say. That one will be a fascinating build, to be sure. Can't wait to watch it.
-
Great explanations. Thanks much! (I was wondering about the chalking black paint on the masts, but didn't mention it. Excellent effect.) The Pacific Northwest salmon fishery preserved a lot of remarkable vessels at the end of the age of sail. We had the Alaska Packers Association sailing fleet here out of Alameda, California, up until the late 1920's. They had the "Star Fleet," old sailing ships like Glory of the Seas, all renamed "Star of ..." Star of India and Star of Alaska (Balclutha) survived as museums ships. Glory of the Seas wasn't so lucky. I think it's a great idea to portray frequently-modeled vessels at various periods in their lives which haven't been portrayed by modelers. It contributes a lot to recording the history of them. There are hundreds, if not thousands, of models of Constitution in her heyday, but, as far as I know, nobody's ever modeled her in her receiving ship days. Well, okay... Constitution is perhaps an extreme example of the concept. (I wonder what the gaff booms on all three masts were all about.) I have had one of the old Marine Models Company Morgan kits, still "mint in the box," sitting on the shelf for about 45 years, but have never started building it. God knows there are enough models of her in the world and no matter how well I built her, it'd just be one more. That said, I've also amassed a pretty extensive research file on her with an eye to modeling her "as launched." I've never seen a model of her at that point in her long life, ship rigged, 1840-period whaleboats, no "shed" built on her poop, windlass aft of the mainmast, no "painted gunports," etc. I imagine she was a better looking boat in her youth.

-
Looking good! Did she not carry stuns'ls?
-
New Young Model Builder from Minnesota LOOKING FOR ADVICE
Bob Cleek replied to Kenna's topic in New member Introductions
In a word, "No." I'm sure the last thing anyone would ever want to do on this forum is dampen the enthusiasm of a beginning modeler. Unfortunately, it sometimes happens that in an effort to avoid doing so, beginners are misled. This is particularly so when their hearts are set on building a gold leaf encrusted gingerbread confection from the Seventeenth Century that an experienced modeler would consider a significant challenge. The responses to their ambitions usually include circumspect advice such as, "You may want to start with a less complicated kit." (Let alone a less complicated scratch-build!) Thereafter, they taper off, leaving the beginning modeler to run hard aground upon the rocky shores of Reality and their enthusiasm for modeling drowned for all eternity. It's not my intention to rain on your parade, but I do believe you deserve some honest and direct answers to your question. 1. San Felipe is a very complex model to build from a kit. Building such a model from scratch is exponentially more complex. What you are contemplating involves years of dedicated craftsmanship of the highest caliber. You may well be capable of that, but it will take you quite some time to acquire those skills and much practice, not to mention money, which may or may not be a consideration for you. The kit costs in the neighborhood of $600 and that's just for the wooden parts. The metal castings set costs an additional $350 or so. If you plan to scratch-build the model, you will have to mill much of your own wood. You will have to turn those hundreds of balusters for the railings on a lathe, each identical to the other. You will have to hand-carve all the intricate carvings that are all over this model. You will have to make the patterns and molds to cast all of the metal castings and you will have to fabricate all the other metal parts from bits of wire and sheet metal silver soldered together and then "blackened" with chemicals. You will have to make your own rigging line in several different scale sizes. If you want the model to actually be capable of sailing in water, you will have to sew your own scale sails, design your own radio control system, and engineer the model to be properly balanced (probably with an auxiliary ballast keel) and decide how to make it watertight and impervious to water damage. (A working model must be much more robustly built than a static model.) 2. The Panart plans are drawn to 1:75 scale, which is itself a somewhat unusual scale here in the States. You propose to double the size of the model, which would mean building to the scale of 1:34.5 scale, which is even more unusual. I'd hazard the guess that there are no fittings or blocks sold anywhere in that exact scale. Your enlarged double-size plans will not contain the details which were impossible to include at the smaller scale. (Sort of like a painting by a near-sighted artist!) You will have to research, identify, and add those details yourself. At the scale you contemplate, you will indeed be doing a total scratch-build because you won't be able to buy ready-made parts in your scale. This means, for instance, that you will have to fabricate some 100 or so cannon. If you want them made of metal, you will have to do that on a metal lathe, or make patterns and molds and cast them yourself. Keep in mind as well that, generally, even the best plans require a considerable amount of knowledge about shipbuilding and rigging to interpret, as so many of the posts in this forum indicate. You will have the forum as a resource, but you must expect that you will encounter errors and omissions in any set of plans that you will have to recognize, correct, and supplement. As for enlarging plans using grid paper, don't even go there. Accurate scale enlargements can be done with specialized engineering drawing copy machines. Otherwise, you will have to redraw the plans yourself, or at least parts of them, using either the skills and instruments of manual drafting or one of the more sophisticated CAD drawing programs... after you've learned to use them. (A skill I've not yet mastered. I'm an old fashioned drawing board jockey.) 3. The model you contemplate will require a huge amount of space to display. Certainly more than the average home can afford. If your model is twice the size of the Panart plans, it will be about 76" long. For a model that size, allow three or four inches all around for "space in the case." (It will require a case for display if it is to survive for any length of time without damage. More than one great model has come to grief from the family cat or the cleaning lady's feather duster!) That comes to a case that's seven feet long. I'm unsure of the other dimensions, but lets estimate those at five feet high and three feet wide. Now take some sticks and a hot glue stick gun and throw together a framed box that's 7'x5'x3' and see how much room it will take up, wherever you plan to put it. Make sure, too, that you are able to even get it inside of a normal room! If you plan to put it in the water, you will have to come up with some sort of trailer to tow and launch it, as well. See where I'm going with this? I could have said, "Gee, that sounds neat!" and gone on to the next post, but would that have been at all helpful to you, really? 4. You will need to invest considerable money into specialized tools. There are those who will point out that many of the great models in museums were made with little more than sailors' pen knives and to a certain extent that is true. In reality, though, if one intends to scratch-build with any degree of accuracy and efficiency, they must acquire a collection of sometimes expensive tools. You will need a micro-table saw, a good quality scroll saw and some sort of mini-lathe. You'll need jewelers' metal working tools. A rope making machine. A rotary tool ("Dermel") and perhaps a drill press. You'll almost certainly have a lot of use for a stationary disk sander and will probably end up wanting a thickness sander, as well. Of course, you'll have to add some tools you've made for yourself along the way because they can't be bought anywhere, and a lot of hand tools. Most of us started with a few tools and buy more as we go along when the need arises. It can add up to a fair bit of change. Even a modest fully-equipped workshop for the sort of serious scratch-building you contemplate will set you back three or four thousand dollars. On the other hand, scratch-building costs relatively little in materials and three or four scratch-built models quickly make up the cost of tools in savings over kits costing hundreds of dollars and quality tools always have a decent resale value if you ever decide you don't need them anymore. So, this is why you hear experienced modelers suggesting you "consider a smaller, simpler model for your first build." My guess would be that maybe one out of ten ship model kits ever get finished because the builders are overwhelmed by them. The pictures on the boxes look great, but they don't tell you how much hard effort lies ahead when you buy the box! Now, most of the modelers on this forum are crusty old curmudgeons of the male persuasion. Modeling takes a lot of time and many defer it until retirement allows them to time to really concentrate on it. Women ship modelers are rather rare, but, perhaps not surprisingly, some of the best of the best were and are women, a phenomenon that may inure to your benefit. There are two women modelers active in this forum whose work you really should study thoroughly and who you should endeavor to connect with and perhaps even convince to mentor you. One is "newbuilder 101," an understatement to be sure! Sherry is an accomplished miniaturist modeling in many subjects, not only ships. About seven years ago, she began her build log for her first scratch-built ship, that being the same San Felipe that has caught your eye. She also is using the Panart plans you've mentioned and she scaled those plans down to 1:96 (1/4"=1') so she could display the finished model in her home. In her case, tackling a complex model like this for her first scratch-built ship model was well within her skill set, since she had been scratch-building models of all sorts of other subjects for many years. Her work is "finestkind." Sherry is still working on her San Felipe now seven years later, although, as do many modelers, she's taken a break from it now and again for a change of pace, such as building a violin for her daughter! Check out her build log at Read Sherry's log carefully to get a sense of what is involved in exactly the same build you are thinking about, albeit at a bit smaller scale. You will learn much. I'm sure if you send her a PM through the forum, she will be happy to answer any questions you have and get you started in the right direction. That probably won't be building a six foot long sailing model right off the bat, but if you listen and learn, I'll bet whatever you do build will be much better for it. The other woman modeler you really ought to "go to school on" is Doris, a school teacher from the Czech Republic. Like Sherry, for the last seven or eight years, Doris has been chronicling her work on her model of the Royal Catherine in 1:40 scale, another "gingerbread fantasy" from the Eighteenth Century. Doris' work is beyond description. She is probably one of the foremost card stock scratch-modelers of ornate period ships in the world today. Doris builds "card stock" models of cardboard and paper, a medium more popular in Eastern Europe than in Western Europe and the Americas and only now becoming more popular here. Notably, this medium requires a lot less in terms of tools and a workshop, but different skills. She creates the carvings for her intricately decorated models from plastic clay (what we call Femo) and achieves amazing realism with this material. Her build log is most entertaining and she gives great explanations of her techniques. (I suppose that's because she's a teacher by profession!) You can find her build log at: Royal Catherine is a similar model to San Felipe in terms of its ornate decoration and general design, although not a "galleon" and built fifty years after San Felipe. Also unlike San Felipe, whose very existence is a matter of some historical controversy, Great Catherine came at a time for which we have much better historical records and we have a much more extensive documentation of her actual appearance and details. Whether or not you find any interest in working in "card" and Femo, you'll certainly learn a lot from Doris' posts and get a good understanding of what it takes to build a highly decorated model from scratch. Doris' is fluent in English and she always seems open to responding to inquiries about her work, although she is so popular and followed by so many throughout the world that she sometimes has to turn off her computer to get any modeling work done! I'm sure you will find her a delightful inspiration as have so many others. One thing that's not mentioned much, particularly by kit manufacturers trying to sell their wares, is that building a model takes as much time doing the research as it does doing the building. A kit provides you with the research already done, such as it may be. Some kits are well-researched and accurate. Some are not. Whether it be a kit or a scratch-built model, all good modelers "build the model in their heads," sometimes several times over, often keeping journals and sketch books, before they ever "lay the keel." This is a very satisfying activity in itself, but it also makes the construction of the model much more efficient and trouble free. You can very easily "paint yourself into a corner" building a model if you don't have it all well planned out ahead of time. Working on your Golden Hind will give you good experience in how and why things are done the way they are. Don't be too eager to start building before you've "done your homework." Read every build log on the forum by people who have built the Golden Hind. Learn from their mistakes and problems solved. You'll be glad you did. So, that's all I have to say in response to your question, "Does this sound like a good approach?" Good luck with your build! And remember, when the going gets tough, "Don't give up the ship!" -
Paper is one of the shortest-lasting materials used in modeling. It's highly susceptible to acidic deterioration, both inherently, as with papers containing acids, and externally, from environmental factors. Adhesives used on paper pose the risk of soaking into the paper and attacking it chemically, as well. Over time, glues can permeate paper and stain and discolor it. Chuck's suggested use of Avery Glue Sticks is probably a good option. Paper conservators use rice and wheat-based pastes. White (clear) shellac is also a good solution, so long as the ink isn't alcohol-soluble. A coat of thin shellac will hold a piece of paper and another on top will seal the paper. This "decoupage" method also works with any clear coating. I've bookmarked this chart on adhesives from the Preservation Self-Assessment Program ("PSAP") and others might find it helpful: https://psap.library.illinois.edu/collection-id-guide/adhesives "The PSAP is a free online tool that helps museum and library collection managers prioritize efforts to improve conditions of collections. Through guided evaluation of materials, storage/exhibit environments, and institutional policies, the PSAP produces reports on the factors that impact the health of cultural heritage materials, and defines the points from which to begin care." The PSAP is chock-full of data on the archival qualities of materials and preservation methods. Anybody who cares about the longevity of their models will probably find it very interesting.
-
Santa Maria Painted Hull?
Bob Cleek replied to Papa's topic in Building, Framing, Planking and plating a ships hull and deck
Actually, I believe they coated the bottoms with pitch (pine tar) and then applied the tallow on top of the pitch. The tallow was mixed with hair from horses or other animals. It was believed the hair deterred marine borers. -
In real life, it's the sail itself that provides the downward tension on the gaff boom. If you want to show the gaff boom raised, you pretty much have to bend a sail onto it. As you mentioned, a wire peg or small nail with the head removed set in a drilled hole between the gaff jaws right where they touch the mast and glued into a corresponding hole on the mast, which will invisibly fasten the gaff to the mast, is a solution. Another approach some take is to tie a line from the end of the gaff to the end of the main boom. That line mirrors what would be the leach of the mainsail, although such a line would never have been used on the real vessel. Alternately, the model can be rigged as if the sail was not bent to the booms and the gaff boom simply lowered to just above the main boom and a lashing made between the end of the gaff boom and around the main boom below. In real life, that keeps the gaff boom from swinging back and forth. The upward tension is provided by the gaff halyard and tackle. Some prefer to show the spars in their positions when sail is raised, but absent the sails. That does give an impression of what the rig looks like, absent the sails, but such an arrangement was never seen on the prototype ships as there wouldn't have ever been any point to it. Presentation is a matter of style and is up to the modeler to determine what looks best to them.
-
New Young Model Builder from Minnesota LOOKING FOR ADVICE
Bob Cleek replied to Kenna's topic in New member Introductions
Hi Kenna, I suggest you pick up a copy of Antonio Mendez C.'s now-very-affordable book, William Frederick's (1874) Scale Journey: A Scratchbuilder's Evolutionary Development available on eBay and Amazon. I wrote a review of it. (Link below.) The late Mr. Mendez was an internationally recognized ship modeler of long standing who specialized in sailing models. His book is full of information on how to build model ships that actually sail. I'm not aware of any other books on that subject. There is, of course, much in his book that applies to static models, as well, but if you are interested in models that actually sail, this is the book that has all that. I'd strongly recommend that you get a copy and read up on the subject before starting to "chop wood." It will likely save you lots of time and frustration and ensure your build is top notch. As I'm sure others will also say to you, start small and work up to something like a Manila galleon. The most common mistake most ship modelers make is biting off more than they can chew on their first attempt. There's a learning curve to it, like anything else. (Don't believe the kit manufacturers' sales hype that "anyone can do it!") Start with a relatively simple fore and aft rigged sailing vessel and get the basics under your belt. Learn to play simple pieces before tackling Bach! -
Not really, if used without a drill press stand. Dremels are great for grinding and cutting, but much less so for drilling. It's not egonomically designed for drilling. The problem becomes more apparent the smaller the drill bit diameter becomes. The weight of the Dremel motor and the way it has to be held makes holding the drill bit at any constant angle (e.g. 90 degrees) difficult. With small bits, a little bit of wobble and the bit is probably going to snap in two. Additionally, given the weight distribution, putting a bit exactly where you want it can be quite difficult for the same reason. The rigidity of the drill press is its greatest value. Even though I have a couple of drill presses, when I'm not drilling repetitive holes in a row or where using a drill press isn't convenient, more often than not I use a pin vise or spiral drill to make small holes. https://www.amazon.com/SE-849PDS-Spiral-Drill-Spring/dp/B001HBY8KE https://www.micromark.com/Pin-Vise-Drill-Bit-Set?gclid=EAIaIQobChMIwbuNtdiv6QIVsiCtBh16Ug0nEAQYAyABEgIuKPD_BwE https://www.grainger.com/product/39EP70?gclid=EAIaIQobChMIwbuNtdiv6QIVsiCtBh16Ug0nEAQYASABEgIoAfD_BwE&cm_mmc=PPC:+Google+PLA&ef_id=EAIaIQobChMIwbuNtdiv6QIVsiCtBh16Ug0nEAQYASABEgIoAfD_BwE:G:s&s_kwcid=AL!2966!3!281698275552!!!g!470847567000! At fifteen or twenty-five bucks, it don't get much cheaper than that. Instead of buying a low-quality Asian mini-drill press, one might also consider buying a decent Dremel motor and a Vanda-Lay Industries drill press or milling machine that holds a Dremel motor. In that fashion, you have a drill press, or a mill, and a separate Dremel motor for other applications. https://www.vanda-layindustries.com/ (Don't buy the Dremel brand drill press holder. It lacks the necessary stability.) Vanda-Lay has recently expanded their product line with their Acra Mill Plus. I just have their drill press, which I often use with the Dremel turned sideways as just a "Dremel holder" so I can have both hands free for polishing and grinding tasks. It's plenty good for small work and quite accurate. (I have a full-size drill press, as well.) The Acra Mill Plus will do milling and now has attachments for use as a lathe and circular saw, although the cost does add up as you add optional attachments. The real limitation of this tool system is the Dremel motor, which depends upon speed rather than torque and therefore has power limitations. These aren't replacements for serious dedicated highly accurate machine tools, but they come close enough for modeling work at a much lower price point. For a few bucks more, forget the Dremel motor and spring for a Foredom flex shaft tool. https://www.foredom.net/product-category/flex-shaft-tools/ (Beware of the Asian knock-offs for a third the price.) These are the "gold standard" for rotary tool systems and, with proper care, will be enjoyed by your grandson long after you're gone. Vanda-Lay tells me they can provide the holder parts which will hold a one-inch diameter Foredom handpiece in their machining systems instead of any of the Dremel and other moto-tool motors. Now, a Foredom flex shaft machine and the Vanda-Lay Acra Mill and all its attachments will set you back somewhere in the neighborhood of a grand, which ain't chump change, but I don't know a less expensive option for a high quality fully-capable modeling machine shop, nor a more compact one. (Their drill press is $134.95) and they have a free shipping deal now, I believe.) There are more powerful and more highly accurate dedicated machines with greater complexity, but in comparison, I think the Vanda-Lay system really does give you the most bang for your buck and you can buy the various attachments over time as you grow into it. Usual disclaimer: I don't have any financial interest in Vanda-Lay. I just have found them to be a high quality product for what they are and their personal service is as close as my keyboard or phone. Nice people. Small family business. A lot like Jim Byrnes' products and service.
-
Well, that explains it all! And all this time, I thought you were just a great ship modeler. It's sort of like picking up a guy at the clubhouse to fill out a foursome and finding out on the fifth hole that he's Tiger Woods in disguise!
-
There is a sound reason why the commissioned model construction standards for most all major museums in the world require all parts on a model to be mechanically fastened and not just glued in place. Mechanical fastenings are far stronger than glue alone. Tiny wooden pegs joining the pieces and ("trunnels") set in glue or shellac will hold well for a long, long time. Adhesives alone, not so much.
-
Jaeger is right. Unlike Jaeger, though, I'll use an imperative verb tense because I'm sure I'm right. Seal your basswood with white shellac, two pound cut or so, right out of the can. (I use Zinsser's Bullseye brand. Shellac is cheap.) It only takes a few minutes to seal with shellac, which is very thin and soaks right into the surface of the basswood. (No worry about brush strokes. It's like painting with water and is invisible when dry, so long as you don't build up a lot of coats, which will then develop a gloss finish as multiple coats are applied.) Then, lighty fine sand your surface smooth as a baby's bottom, or use metal wool or a Scotchbrite pad. (But, perhaps obviously, don't sand so much that you remove all the shellac! If you "break through" the sealing, simply apply some more on top of it.) You will almost certainly not be able to get a perfect fine scale finish on basswood otherwise. The shellac hardens the fibers in the surface of your basswood and prevents "fuzz." If you don't seal your basswood, especially if you are using a water-based paint, the wet paint is going to raise your basswood "fuzz." In that case, at best, you will have to apply many coats of fine paint and sand the paint coating until it fairs the surface. This is tedious and often difficult to do well. As shellac soaks into the wood fibers quite well and doesn't peel or "let go," I see no reason why it should not be used as a sealer beneath adhesives used to attach copper plates, or anything else for that matter. Basswood gets a bad rap as "too soft" for modeling because sanding it "raises fuzz" and it is difficult to obtain fine edges on it. I have found that sealing basswood well with shellac essentially creates a "composite wood product" when the shellac soaks into the wood surface, making the surface much harder than when in its natural state. (The same can be done with CA adhesive, but at an exponentially greater materials cost, not to mention the health risks of large scale CA fume exposure.) In no particular order of importance: Shellac is 1) an archival material that lasts centuries. 2) It's easily "undone" by cleaning off with alcohol. 3) Clean up is easy. 4) It's also an adhesive and very handy in "tacking" rigging knots and "stiffening" rigging line for various purposes. 5) It dries as fast as the alcohol evaporates. 6) It's compatible with all other finishes and adhesives, save, possibly, certain alcohol-based acrylics, which, like all untested proprietary coatings and adhesives, should be tested for compatibility before committing to application on a model. 7) Shellac is one of the best "organic" moisture barriers available. It inhibits rapid humidity cycling and so tends to greatly stabilize wood movement in the model to the great benefit of glue joints and rigging tension over time. For this reason, I generally shellac all wood on a model. 😎 If you are worried about such things, shellac is "organic" and safe for human consumption, not that I'd advise drinking shellac thinned with methanol. Shellac is actually used to put the "shine" on jelly beans and M&M candies so "they melt in your mouth and not in your hand." Shellac is really a material every ship modeler should have on hand and will likely make good use of.
-
Sometimes splitting isn't a bad thing when it comes to modeling wood. A split can ruin a good wide plank, but we're interested in smaller pieces. The split tells you where the grain is weakest. Let nature start the split and then bust the log apart with wedges driven into the split. That should give you a fairly flat side to start slabbing. You can take a plane or draw knife to the flat where it split to level it off for laying on your saw table, if need be. That can save you a lot of possibly dangerous sawing on larger whole logs. While getting the most marketable lumber out of a log is an important financial consideration in commercial production, we have the luxury of using only the choicest portions of our raw timber. Think of a log as a cone, not a cylinder. The trunk or branch is thinner at its extreme end. It tapers. If you slab without regard to that taper, you get "grain runout." You will be cutting across the grain as you square the log. Working with split wood ensures the billet won't have its grain running off at the edges. This causes problems sometimes with warping and always with planing. When working with small pieces, grain runout across a piece of plank stock, for example, can result in the strip snapping where the grain runs clear across the strip. If appearance of the grain is a consideration, it will cause problems if you are really anal about appearances, too. Particularly with masts and spars, it's always best to use a piece that has no significant grain runout.
-
I agree completely. I was intentionally generous, given that the discussion was about an economy-model Asian-built machine. The subject of the discussion, I believe, sells for around $55. The beautiful Cameron machine starts at around $2,000! I had not been aware of the Cameron micro drill press before. It's made about 100 miles from my home. I'd love to have one, not because I actually need its high tolerances, but because it's a work of art! In another life, perhaps. I wonder if they sell "seconds" that only test out at .001" for a lot less money?
-
Iron Band at the Heel of Masts
Bob Cleek replied to Doug McKenzie's topic in Masting, rigging and sails
Balderdash! What does Steel know? Those are called "mast bands," not hoops, west of the Mississippi, at least. I've seen my share of mast heels, a few in larger vessels and I've never seen one with a metal band around them. I've never seen a coaked mast's heel, though, but I'd expect that a mast made up of coaked parts banded together would definitely have a band around the heel and those bands are driven onto the mast like hoops are driven on barrels. I've not found a specific name for this band in the few old nautical dictionaries in my library. In the absence of a specific name (as apposed to a generic one: "mast hoop" or "mast band,") I propose a new name: "mast shoe." Masts have "coats" that seal the hole in the deck they pass through. It follows then that a metal band covering the heel of a mast would be a "shoe," no? Or a "gronicle." -
Sounds like it hasn't come from the factory with any major run out issues. Still, tell your buddy to bring his dial test indicator and you'll bring the bourbon! You may be surprised at the run out readings, though. Anything below around .005" is acceptable, but that's only about twice the diameter of a human hair.
-
Okay, guys. I'm just using lingo I've picked up over the years and may well be misusing it because I'm no machinist. I actually figured you guys would know more about it than I do! Not to worry. I'll explain. Download to RAM, H.A.N.K.: Run-out or runout is an inaccuracy of rotating mechanical systems, specifically that the tool or shaft does not rotate exactly in line with the main axis. ... In the case of bearings, run-out will cause vibration of the machine and increased loads on the bearings. What I want to find out is whether the "quill," which is the spinning shaft part of a drill press that moves up and down as the lever is moved, rotates exactly in line with its main axis. I asked also the same question about a drill bit held in the chuck of the drill press. (The chuck is the thing that holds drill bits in its adjustable jaws.) This is because sometimes run-out is caused separately by inaccuracy of the chuck mounting or adjustable "jaws" mechanism holding the bit (even though they are commonly "self-centering.") Of course, if the quill to which the chuck is attached has run out, it will consequently be apparent in an otherwise perfectly centered bit in the chuck. The combined length of a quill, chuck, and bit amplifies the degree of inaccuracy at the drill bit's point. A very small bit of run out in a chuck taper mounting will be many times as great at the bit's business end. The way run out is commonly tested, we're talking thousandths of an inch here, is with a "dial test indicator," also generally called a "DTI" by folks who use them. A dial test indicator, which I'm sure you'll recognize even if you've never used one, is a tool that measures minute distances by using a plunger that is connected to a "clock face" (or a digital read out) with a needle that indicates the distance the plunger moves. If a DTI were applied to a perfectly cylindrical spinning drill press quill with zero run out, the needle would remain steady at "zero." If there were, say, .005" run out, the needle would move back and forth between "-.005" and "+.005" on either side of zero and would be said to have .005" run out. Below: Testing for run out (quill and chuck) with a DTI measuring against a rotating bit shaft. The silver-colored post at the base of the DTI dial body has a small spring-loaded point at its end which senses the movement the DTI measures. Any new piece of machinery usually requires "tuning" or "set up." (All new machinery made in China seems to require it.) Drill presses particularly need to be set up to minimize run out if small drill bits are used because the small bits will easily break if they wobble when drilling. The table also must be adjusted to be perfectly perpendicular to the quill and bit axis so that the holes drilled will be perfectly round (and cut edges clean and sharp.) This is also easily done with a DTI. While it may seem that, for woodworking, tolerances "tighter than a gnat's butt" are unnecessary, the better a machine is set up, the better it runs and the longer it lasts, regardless of the need for tight tolerances. In modeling, the smaller the job, the more important accuracy becomes. A DTI with its stand is a very handy instrument to have in your shop to keep tools accurately adjusted and set up. (They are also just the ticket for checking to see if a table saw blade is perpendicular to the table top and that your lathe headstock and tailstock are in perfect alignment so you aren't cutting tapers unless you want to.) For the professionals who use them regularly, there are the usual top-of-the-line brands such as Starrett and Mitutoyo, priced accordingly. However, for amateur home shop use, a kit containing a perfectly accurate DTI with a good stand can be had for twenty-five to fifty bucks and even less if you go to the bottom of the price range on eBay. (I wouldn't advise buying a used precision instrument like a DTI sigh t unseen, though.) DTI's aren't much use without a decent stand, as they must be held securely in place to take measurements. I have a $38 Grizzly DTI and magnetic-base stand set that came in a nice fitted case. DTI's are delicate instruments and usually are sold with cases. You don't want them banging around in the bottom of your tool box. See: https://www.grizzly.com/products/iGaging-1-Dial-Indicator-and-Fine-Adjustment-Magnetic-Base/T24804 The difference between a dead accurate drill press and a sloppy one can very often be nothing more than a bit of dirt in the Morse taper socket holding the chuck that the factory didn't clean properly before assembly. (A frequent occurrence with the Sum Ting Wong brand products of the Patriotic Revolutionary People's Drill Press Collective.) A simple cleaning and reassembly is often all it takes to set things right. YouTube is your friend here. There are several videos on "tuning a drill press with a dial test indicator." Here's a good video that explains how to set up a new drill press which you will may find interesting. The use of the dial test indicator begins at 8:30.
-
Iron Band at the Heel of Masts
Bob Cleek replied to Doug McKenzie's topic in Masting, rigging and sails
Mast hoops are the loosely fitting bent wood rings to which the luffs of sails are fastened and which permit the sails to be hoisted up and down the masts. An iron ring around the heel of the mast is properly called "an iron ring around the heel of the mast." However, when speaking to landlubbers, sailors call it a "gronicle." Sailors call anything without a name a "gronicle." Lubbers don't know the difference. -
Right out of the box, I'd be interested in knowing the run out, if any, on the quill and on a bit in the chuck on that machine. That's the measure of accuracy. (The slightest run out will start breaking tiny bits.) Slap a dial test indicator on that puppy and let us know!
-
Aha! That occurred to me, but then I thought, "Naw, they'd never do that in open water. It'd be too cumbersome and "sloppy." However, if the boats were used regularly for shore access, it makes a lot of sense. It also occurred to me that if she were carrying a lot of passengers, would those two gigs be enough to carry them all?" Oh well, ours is not to reason why. I love vessels like these. They have such great character and detail to them.
-
Yes. It was and still is shipyard practice to reserve select wide planking stock for garboard strakes. In some constructions, the garboard and perhaps the broads are also of thicker planking stock than the rest of the hull.
-
She's certainly coming along nicely! The new davits are much better. The old ones wouldn't have allowed bringing the gig inboard up over the railing. Even now, though, it would be difficult to bring the gig inboard between the width between the davits, although that may just be a factor of the photograph's perspective. And happy birthday. My 70th was a few months ago. Kind of scary, isn't it?
-
What a wonderful work of art! The finished model absolutely must have a scale Quasimodo swinging from the bell rope!
-
Show me yours tools !
Bob Cleek replied to agamemnon9's topic in Modeling tools and Workshop Equipment
Spectacular work on your Notre Dame! We need a build log on that one, please! Like many, I'm embarrassed to "show my tools." (Of any kind. ) Because of the virus lock down and the resulting closure of all the storage rental places. I took pity on a friend that was stuck in the middle of a move and allowed him to stuff all his boxes and furniture in my shop. That was when I thought the "lock down" was only going to be for two or three weeks! My workshop isn't a pretty sight at the moment.


