


Bob Cleek
-
Posts
3,374 -
Joined
-
Last visited
Content Type
Profiles
Forums
Gallery
Events
Everything posted by Bob Cleek
-
Now's the time when you might consider fashioning some sort of "prophylactic" for the bowsprit rigging. I usually find or fashion with duct tape something suitably "boxy" out of cardboard that will enclose the bowsprit and bows. It's more for preventing accidents than preventing damage after the accident occurs. Even just a big "box" there is enough to remind the mind that it is to be avoided. Without something of the kind, it is very, very easy in an inattentive moment to collide with, or have something snag onto the bowsprit rigging while reaching across the bench for a tool or walking past in the shop. Bowsprits are really susceptible to such damage and it can often have catastrophic "chain reaction" consequences to other parts of the rig. (Don't ask me how I know this.)
- 204 replies
-
- 1
-

-
- marine model company
- charles w morgan
- (and 1 more)
-
I would definitely coat the wood with a thin coat of shellac to prevent absorption of black paint into the wood. (It would probably be less of a problem if you sprayed the black paint, but why take a chance?)
-
In real life, particularly in the Age of Sail when pine tar was liberally applied to everything, decks ended up black and covered in tow in short order. Even naval vessels minimized holy-stoning to preserve their decks, save for special occasions when an inspection was to occur. (Frequent holy-stoning would wear the decks down to the fastening heads in no time.) Out of scale (color and size) deck seams and black "nails" in deck planks, like protruding out of scale "rivets" on bottom coppering, seem to be faddish affectations of present day modeling, but, as they say, "each to his own." I've found simply laying deck planks, applying a light coat of varnish, and then a light coat of thin stain or paint of the appropriate color, then wiped off, leaves a suitably darkened area between the deck seams that yields a realistic impression of what decks should look like at scale. Your mileage may vary, of course.
-
Thanks! That certainly makes it perfectly clear. I was in chemistry class in 1967, too. Unfortunately, I failed to apply myself the the study of that subject any more than was necessary to achieve a "gentleman's C." I had a bad habit of only studying the subjects in which I had a current interest during my college years and every so often in my later life I've been reminded of the costs of that. I had no appreciation for trigonometry until I had to teach myself celestial navigation, for example!
-
Protective topcoat over blackened brass?
Bob Cleek replied to Mike_In_RI's topic in Metal Work, Soldering and Metal Fittings
Shellac is a decent enough adhesive for such purposes, but I'd opt for a dot or two of Duco or CA adhesive. I would not "drill and pin them." While barrel and bucket hoops were sometimes riveted and then driven on, I believe most were forge-welded hoops. They are driven down onto the barrel or bucket with a mallet and a "hoop driver." If they were nailed into the barrel, the barrel would likely leak in time, or at least have weak spot in the stave. Hoop driver: See: https://cooperstoolmuseum.com/coopers-tool/ While others' mileage may vary, I'm of the opinion that models are better off left with as little coating as possible. Paints and varnishes are necessary, of course, but I prefer a light rubbing with a 50/50 mixture of boiled linseed oil and turpentine or a coating of thin shellac for unpainted wood and a coating of thin shellac and paint for painted areas. Frankly, I think the plethora of proprietary varnishes, clear coats, and other gunk on the market today is really just a lot of marketing hype. At the end of the day, the first thing that seems to "weather" on a model is the paint and varnish and the thicker it's applied, the faster and worse it goes to pot, not to mention that the thicker the coatings applied, the more fine detail is lost. Scale is important in paints and varnishes as much as in anything else, and perhaps even more so. In judging model quality, poor painting and varnishing is perhaps the most frequent demerit. -
What I always wondered, although I took it on faith to be true, is why 90% isopropyl alchohol is prescribed for softening and "unsticking" cured PVA adhesive, but not plain denatured alcohol. It's got an extra carbon atom, but that's about as much as I've been able to figure out about the stuff.
-
Shellac is one of the best water barriers available. It's sold pre-mixed in cans, usually at "two pound cut." The "cut" is how the dilution of the shellac flakes is indicated. "Two pound cut" means "two pounds of shellac flakes to every gallon of alcohol." This is usually fine for sealing wood. It is the consistency of water and won't build up if a single heavy coat is applied. If you want to thin it, simply add more alcohol. The alcohol evaporates quickly. The shellac soaks into bare wood, permeating the surface and hardening it. Sand your wood smooth, shellac it, and when the shellac is dry, you can sand it again with fine sandpaper or buff it with steel wool, and it can easily be smoothed perfectly. Just don't sand so much that you remove the layer of wood on the surface which has been impregnated with the shellac. What raises the grain is the water soaking into the bare wood. Acrylic paints are water-based, generally, so they raise the grain when applied to unsealed wood. (Another reason why oil-based paints are generally preferred by those who know the difference between oil and water based paints.) Shellac is the only sealer you need. It's cheap. There are lots of products on the market sold as "sealers." There's no need to pay more for them. Anything can be applied over shellac. It's compatible with everything. It cleans up easily with alcohol.
-
Even with a lot of winches and wire cable, there were multiple sheave blocks in various applications in a J-boat's rigging, certainly with the earlier models. The story is told that when one of the first J-boats was being outfitted after launch, a painter was in a bosun's chair at the top of the mast, about to lay on a coat of varnish on his way down the mast. His helper sent up a bucket of varnish shackled to the end of a halyard. After the bucket was hoisted a ways up the mast, it suddenly took off, accelerating upward on its own, out of control, when the weight of the fall exceeded the weight of the bucket of varnish and the hoist. When bucket hit the block, it drenched the painter in varnish! Here's Endeavor with Sopwith at the helm. she has a double sheave mainsheet traveler block. The double-ended mainsheet is led forward, port and starboard, presumably to winches, although in the foreground is what appears to be some sort of moveable "nipper" on the mainsheet with two blocks attached which may have provided purchase for the mainsheet. They did carry quite large crews and had a fair amount of manpower available. (Hold down your "control" button and turn the wheel on your mouse to enlarge the photo for detail considerably.) Then, again, with the winches Endeavor carries, a lot of double blocking, and hence weight aloft, is eliminated.
-
I'm surprised none of you eagle-eyed reviewers mentioned that the word, "CAPT" is reversed on his helmet. Somebody must have laid the stencil on it upside down!
-
I am not familiar with Admiralty paints and I'm not aware of any color conversion charts for Model Shipways paints, which I expect are manufactured by one of the other paint companies and simply packaged under the Model Shipways name. There is one color conversion chart for the now-discontinued (but really great... sigh...) Floquil paints and it provides Humbrol equivalents. It may give you a good start. The colors should be close enough. Keep in mind that nothing comes out the same color on a computer screen. https://www.microscale.com/Floquil Color Chart.pdf
-
Allowing for the load of gear aft, she floats on her designed lines very well. That's not an easy trick! Nice job!
- 72 replies
-
- 1
-
-
- fishing boat
- artisanal fishing boat
- (and 1 more)
-
Nice job! Clean work. You're on your way! Thanks for sharing.
-
Lower cost (?) shiny metal parts
Bob Cleek replied to Patrick Matthews's topic in Metal Work, Soldering and Metal Fittings
Thanks, wefalck! That adds some more information to it all. Every bit counts. One of the interesting things about modeling boats, and building full-sized ones, is that so many different crafts and technologies have to be explored and, to one extent or another, mastered. I find it fascinating. (Other's don't and buy kits. There's no accounting for taste.) -
Lower cost (?) shiny metal parts
Bob Cleek replied to Patrick Matthews's topic in Metal Work, Soldering and Metal Fittings
I don't see why one couldn't use the process for brass as well, although I think it might be faster to build up thickness with copper and then brass, nickel, or gold plate the copper. In the days of real chrome trim on autos, I believe they plated the iron with copper and then the copper with chrome. The plating process is the same for any metal, although the electrolyte mixtures may vary, I think. All the brass and copper fixtures on the old "boardroom models" of the great ocean liners were gold plated. It wasn't "realistic," as they were all painted on the prototypes, but it was a style in modeling at the time.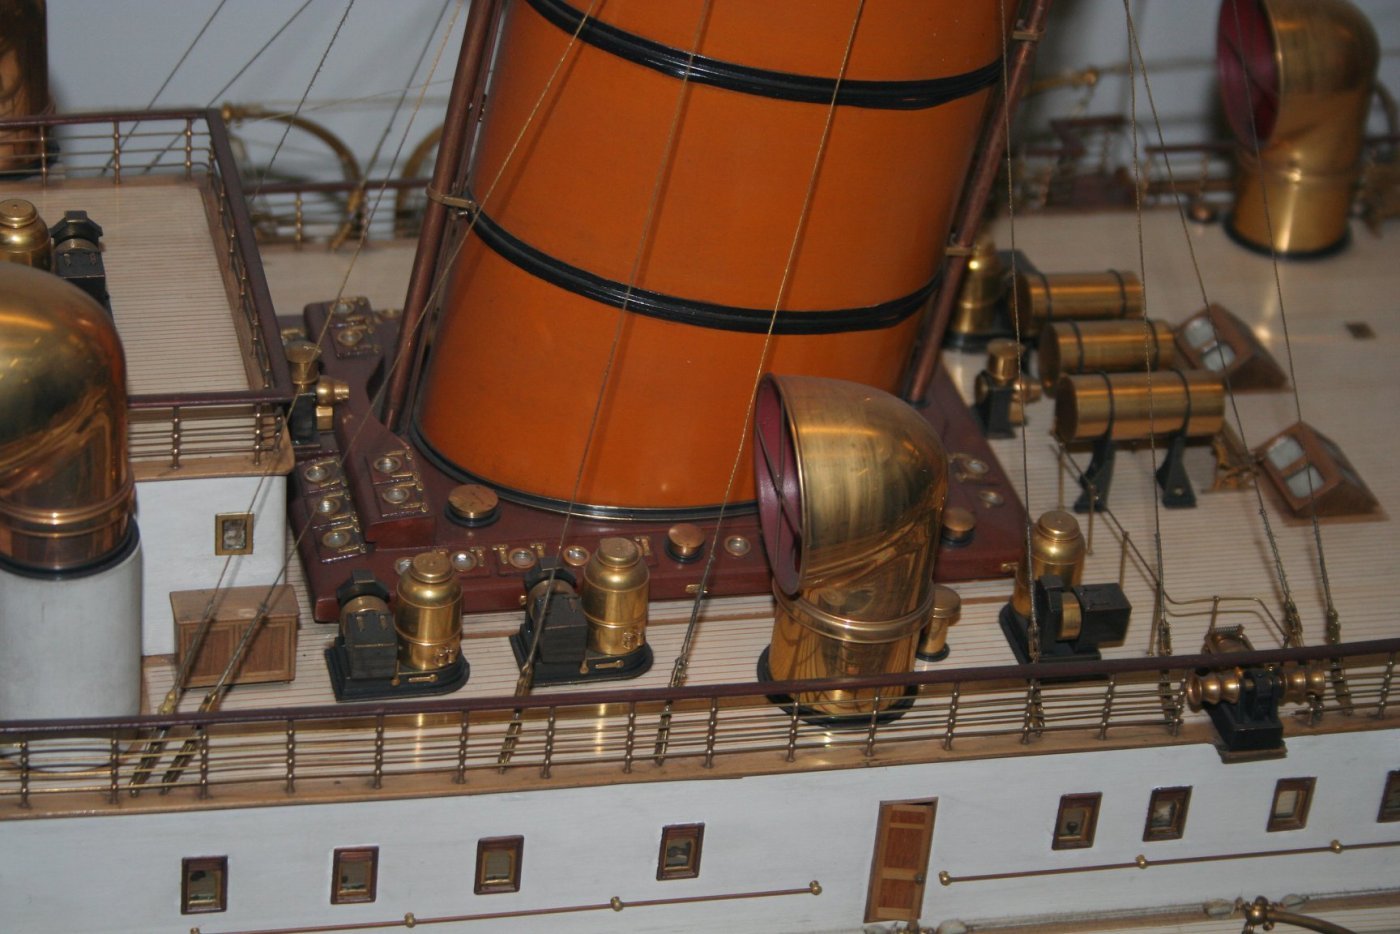
-
Lower cost (?) shiny metal parts
Bob Cleek replied to Patrick Matthews's topic in Metal Work, Soldering and Metal Fittings
3D printing may revolutionize modeling, but it somehow lacks the "organic" qualities of traditional materials and, perhaps, their archival qualities. There does seem to be a way, however, to get the accuracy and detail of 3D printing and the tradition and archival quality of noble metal parts. I think. I'm curious if anybody has ever made metal parts by copper electroplating or electroforming? I've never done it, yet, but I've been checking it out on YouTube, which has a lot of information on what is a common jewelry-making process. Parts can be made with other metals, such as nickel or zinc. It would seem that one could make a part like a ventilator funnel out of dental wax (or a 3D printed part,) or a lot of them out of a mold made from a master pattern, and coat the wax pattern with a metal conductor, such as rattle-can spray zinc paint or India ink and graphite, and let the metal, say copper, build up on the outside. When a desired thickness is achieved, the wax can be melted away in boiling water or however one's creativity dictates and a hollow copper part is yielded. At least that's my fantasy for the moment. If anybody knows anything about the process, I'm all ears. -
Micromark scroll saw?
Bob Cleek replied to jeffBoats's topic in Modeling tools and Workshop Equipment
Truer words were never spoken! Anyone in the market for a scroll saw should google "scroll saw ratings" and read what the woodworking magazines say about what's on the market at the various price points. There are many scroll saws on the market and their quality runs from exquisite to complete junk, but the prices don't always correspond to the quality. Always buy the best tool you can possibly afford unless it's a tool you expect to use but once and forget about. Also, don't over look the used market. Craigslist and the like sometimes have high quality and high priced scroll saws selling for a fraction of the original retail price. -
If I could have given two "thumbs up," I would have. Wood is much more forgiving than metal, but safe procedures should always be followed no matter what. A broken mill bit can be a somewhat costly accident, but a broken piece of bit launched towards the operator's face can result in a problem money can't fix.
-
Wikipedia is your friend. "A thousand words is worth a picture." https://en.wikipedia.org/wiki/Mandrel There are lots of different types of mandrels. What I was talking about was simply a stick mounted between lathe centers, or even held vertically in a drill press chuck. The diameter of the stick would be the same as the inside diameter of the "ring" or hoop you wanted. Once the plane shavings are wrapped around the stick with glue and dry, they make tiny little laminated wood rings, like plywood. You spin the stick and sand the wrapped and glued shavings smooth, then cut them apart to the width you want using a jeweler's saw with the blade pressed against the spinning "stick" to cut a perfect circle around the glued shavings to separate the "rings" or hoops from the larger glued shavings rings on the stick. They you slide the rings off the stick. Make sense? It was in response to a post about making mast hoops, A "mast cap" is the little "button" at the very top of a mast. A mast "boot" is a canvas or leather "skirt" lashed at the top around the mast and at the bottom around a trim ring at the deck which prevents water from running down the mast and leaking below. "A little more ornate mast cap at the base of the mast on the deck" would apparently refer to the trim ring over which the mast boot was lashed, so there wouldn't be a lot of point to an "ornate one." Sometimes, however, the rings have a groove or recessed band around their circumference to permit the lashing to hold better. If you want an easy way to make one, I'd suggest you take a suitably sized square block of wood with the grain running lengthwise and drill a hole the size of the hole you want in the middle of the ring into the middle of the block of wood. then, since you don't have a four jawed chuck, mount the block of wood on your three jawed chuck with the jaws inside the hole you've drilled in the block. Then turn the block to the outside diameter of the entire ring you want, and part off the thickness of the ring you want. If you want it "ornate," you can easily shape the outside edge of the ring however you want before parting it off the block/tube you've got mounted on your chuck. Drill the hole in the center deep enough and you can cut a number of perfectly matching rings from the "tube" you've made. This is entirely a lathe operation, but I think it's a lot faster and easier, and perhaps safer, than doing the job with a mill and certainly requires less expensive tooling. "Anyone have an example or a source/reference I can look to?" "These all sound like nice ideas, but I’m not sure I follow the narrative description." As with most things technical, nomenclature is important. Maritime nomenclature is further complicated by the different names for the same things in different languages, and even in different nations with the same language. (As with an automobile "trunk" and "hood" in American English which are called the "boot" and "bonnet" in British English.) Like any language, you have to spend time around people who speak it in order to learn it. It's true with machining, too. A "chuck" isn't a "holder" and "parting" is cutting off a machined piece from a larger hunk of metal spinning in a lathe. It's quite difficult to write instructions for how to make something when the writer and the reader are using different terms for what is being made and how it is being made! You will find your mill (and lathe, even more so) an amazingly handy machine once you learn how to use it properly. There are many good instructional books and videos available. Here are the public-domain U.S. Army training manuals for lathes and mills. I'd suggest you print them out and put them in a binder for reference. They're very handy and nobody teaches people without any prior knowledge how to do things better than the military. Here's the manual on lathes: https://www.americanmachinetools.com/how_to_use_a_lathe.htm Here's the one on milling machines: https://www.americanmachinetools.com/how_to_use_a_milling_machine.htm These address large machines, but the principles and procedures are the same for machines of any size. Another wonderful resource are the YouTube videos by a fellow who calls himself "Tubalcain" or "Mr.Pete222." He's a retired metal shop teacher who has continued teaching on YouTube. His practical instruction is great and his presentation is entertaining. He's got hundreds of videos on everything under the sun to do with the old-time machinists' craft. I'd offer a word of caution. Even though modelers work with small lathes and mills, these are two of the more dangerous machines in any shop. (The lathe is probably the most dangerous machine tool of all. Table saws account for more visits to the emergency room, but only because there are so many more of them in amateur hands.) If you aren't formally trained in machine shop operational safety, pay particular attention to the safety warnings in the written materials before trying anything on the machines. Rule number one, for drill presses, mills, and lathes: Never, ever, leave a chuck key in a chuck. Make it a habit to keep chuck keys in a separate place and when taken from that place, never let them leave your hand unless you are putting them back in their place. (A flying chuck key is a dangerous missile. ) Rule number two: Always turn the machine or work piece by hand an entire revolution before turning the power on to make sure all work is securely mounted and there are no clearance obstructions. Rule number three: Make sure you have no long sleeves, neck ties or chains, or jewelry of any kind on. (These can become caught up in moving machine parts with catastrophic consequences.) These aren't the sum total of safety rules for machine tools, but they are the ones I've was yelled at the most about before I learned them well!
-
Converting a Backyard Shed into a Model Workshop
Bob Cleek replied to Hank's topic in Modeling tools and Workshop Equipment
It's certainly coming along nicely! It's good you buttoned her up with plenty of insulation and "creature comforts." It always pays to have a workshop that you can use to sleep in on those occasions when you're thrown out of the house. -
Byrne's saw accessories question..
Bob Cleek replied to CPDDET's topic in Modeling tools and Workshop Equipment
See the sticky post at the top of this forum section. It will answer all your saw blade questions. Jim Byrnes can tell you which blades you'll need depending upon what you plan to do with the saw. -
That sounds like a hard way to do it. I take a mandrel ("stick") of the proper inside diameter of the mast hoop I want to make and wrap a piece of plastic kitchen wrap around it so glue won't stick to it. Then I take a nice straight grained piece of wood and plane six or eight inch shavings off the edge of it. Then, applying PVA glue as I go, I wrap the shavings tightly around the mandrel and fasten them with a rubber band and let the glue set. After the glue is dry, I mount the mandrel on my lathe and sand the face of the shavings fair, then I part off the rings with a knife or jeweler's saw, leaving the hoops on the mandrel as I go. I then round the outer edges of the hoops with a file on the lathe if needed or just lightly sand to knock off he corners, depending on what I want it to look like. I then slide the rings off the mandrel and clean up the inner faces and edges with a bit of sandpaper by hand. This method produces hoops made of fine laminations which will not break on the grain, as do hoops cut from any sort of sheet material. They are also made exactly as real mast hoops are made. (In larger scales, small headed brass pins can be used to represent the rivets that hold steam-bent laminated hoops together.)
-
Byrne's saw accessories question..
Bob Cleek replied to CPDDET's topic in Modeling tools and Workshop Equipment
All of those accessories above are very useful. I'd urge anyone to get them all at the time you buy the saw. I expect you'd save a good bit of money on shipping charges if it were all shipped together. The sliding table may seem like a chunk of money, and it is, but it's really worth it. You can build your own, but if you want to replicate the accuracy the saw is capable of with a sliding table, get the factory-made one. It's a beautiful piece of machining, too. -
Mini Lathe recommendations?
Bob Cleek replied to jfinan's topic in Modeling tools and Workshop Equipment
Congratulations! All's well that ends well. Glad it came out. I make it a policy never to leave anything in a taper and to keep them super clean. They can freeze up pretty quickly. Too bad the previous owner didn't take better care of his toys! -
You'll be happy to learn that the Morgan has "rat battens" on her lower shrouds, at least, not ratlines.
-
It's a lot easier to use a drawplate, which will give you a perfectly uniform diameter of whatever size you desire. Byrnes Model Machines (Makers of the Byrnes saw) offers a drawplate which produces very fine round material. They are also available in any number of shapes, such as squares, rectangles, half-rounds, and so on.