HOLIDAY DONATION DRIVE - SUPPORT MSW - DO YOUR PART TO KEEP THIS GREAT FORUM GOING! (Only 53 donations so far out of 49,000 members - C'mon guys!)
×


ianmajor
-
Posts
784 -
Joined
-
Last visited
Content Type
Profiles
Forums
Gallery
Events
Everything posted by ianmajor
-
 Peter, It is looking good. BTW I was admiring those clamps in your previous postings.
 -
Siggi, that is a very nice model well presented. That last picture makes me feel as though I could almost climb in and walk around.
-
Mark, Interesting point you make. It did seem strange to me that Hahn's formula give a simple linear relationship between caliber and all of the carriage dimensions. As you say the gunners would have to be on their hands an knees with my 3 pounder. It also has me wondering about the form of tackle on the much smaller cannon. I found this photo on line <link> which seems to fit your description. The round ports on Lyme and Unicorn seem to be very restrictive. An interesting comparison is with the 1764 Winchelsea ( <link> to NMM model and <link> to NMM held plans) where the quarter deck gun ports are square open frames with a low sill at deck level (presumably to stop the gun and crew going over the side!). If the quarter deck on my model had been at the correct height the circular gun ports would be much closer to the deck allowing the use of smaller guns. I think I will have to go with the bigger guns as supplied.
-
......actually Mike, brave is not the right word. Insane might be a better adjective. My wife was watching me a few days ago and said "Would it not be better to start again?". What answer can be given to a woman's logic that can explain a man's folly?
-
Pat, thank you for your encouraging words. They are greatly appreciated from someone whose skills and knowledge I greatly respect. Your Endeavour is on my "follow" flag list. I fear if you go through my log in full you will only see the bodger's view on life! Mike, the brass rod made a huge difference. I thought 1.0mm diameter rod would just flex around but the result is very strong - like steel reinforcement in concrete I guess. I could have done without the concern that the drill bit would emerge in an embarrassing place - better to do it during initial build! Following our PM discussion where I felt the Corel canon was a 12 pounder (based on Chuck's diagram), I played with my "Hahn" spread sheet - yep, the carriage is spot on for a 12 pounder at 1:75 but the barrel is a little short. Seems like our Unicorn/Lyme has much bigger teeth than the prototype. Be afraid - be very afraid...........of our little boats!
-
Blackening brittiana fittings ?
ianmajor replied to Senior ole salt's topic in Masting, rigging and sails
SOS have you seen the "Blackening Brittania metal" thread started by DocBlake? See <here> -
E.J. I have been building the Corel Unicorn. The illustration of it on the box and the illustration on your box show a family likeness. The hull of my model uses the same or similar types of kit wood. I made the hull and varnished it 40 years ago and the colour has matured. The light wood around the gun ports has gone darker and the darker woods have lightened. Personally I like the resultant unpainted effect. To get the gun port surround colour shown on the box illustration I suspect it was painted. I note you are intending to scratch build replacements for the deck furniture. I agree that is a good idea. I have just "improved" a Corel cannon and managed to get a reasonable result modifying the original parts - doesn't take long. Doing this would make nice little stand alone projects to break up the monotony of planking. I found most bits of furniture, such as the pump, were best replaced totally. Good luck with your build.
- 608 replies
-
- 7
-

-
- la couronne
- corel
- (and 1 more)
-
Very nice work Piet. I don't know about extra hands to hold the camera I find soldering often requires three hands one of which needs asbestos tipped fingers!
-
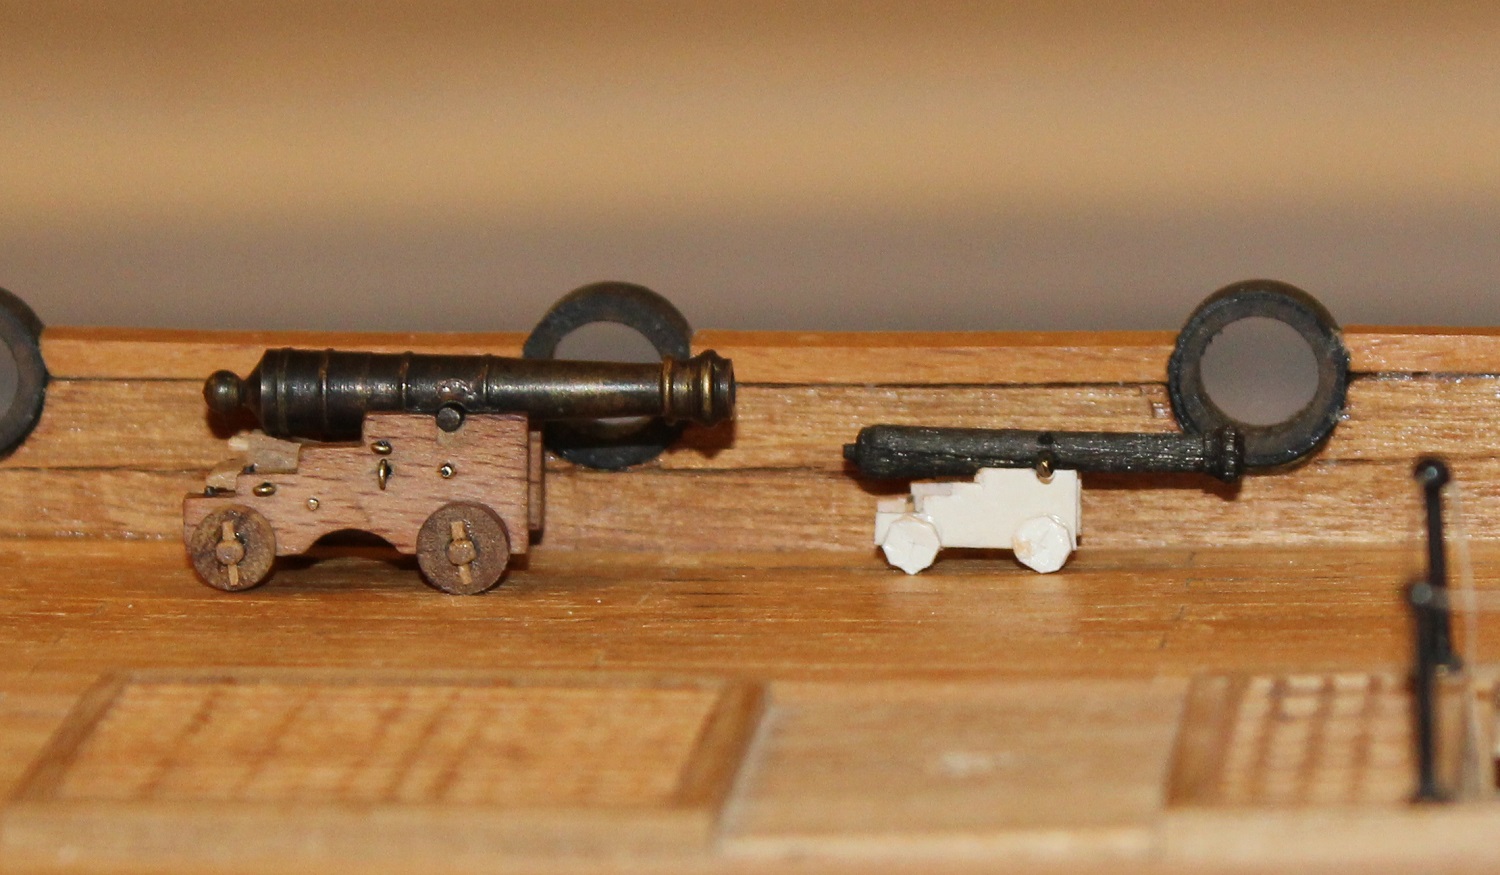
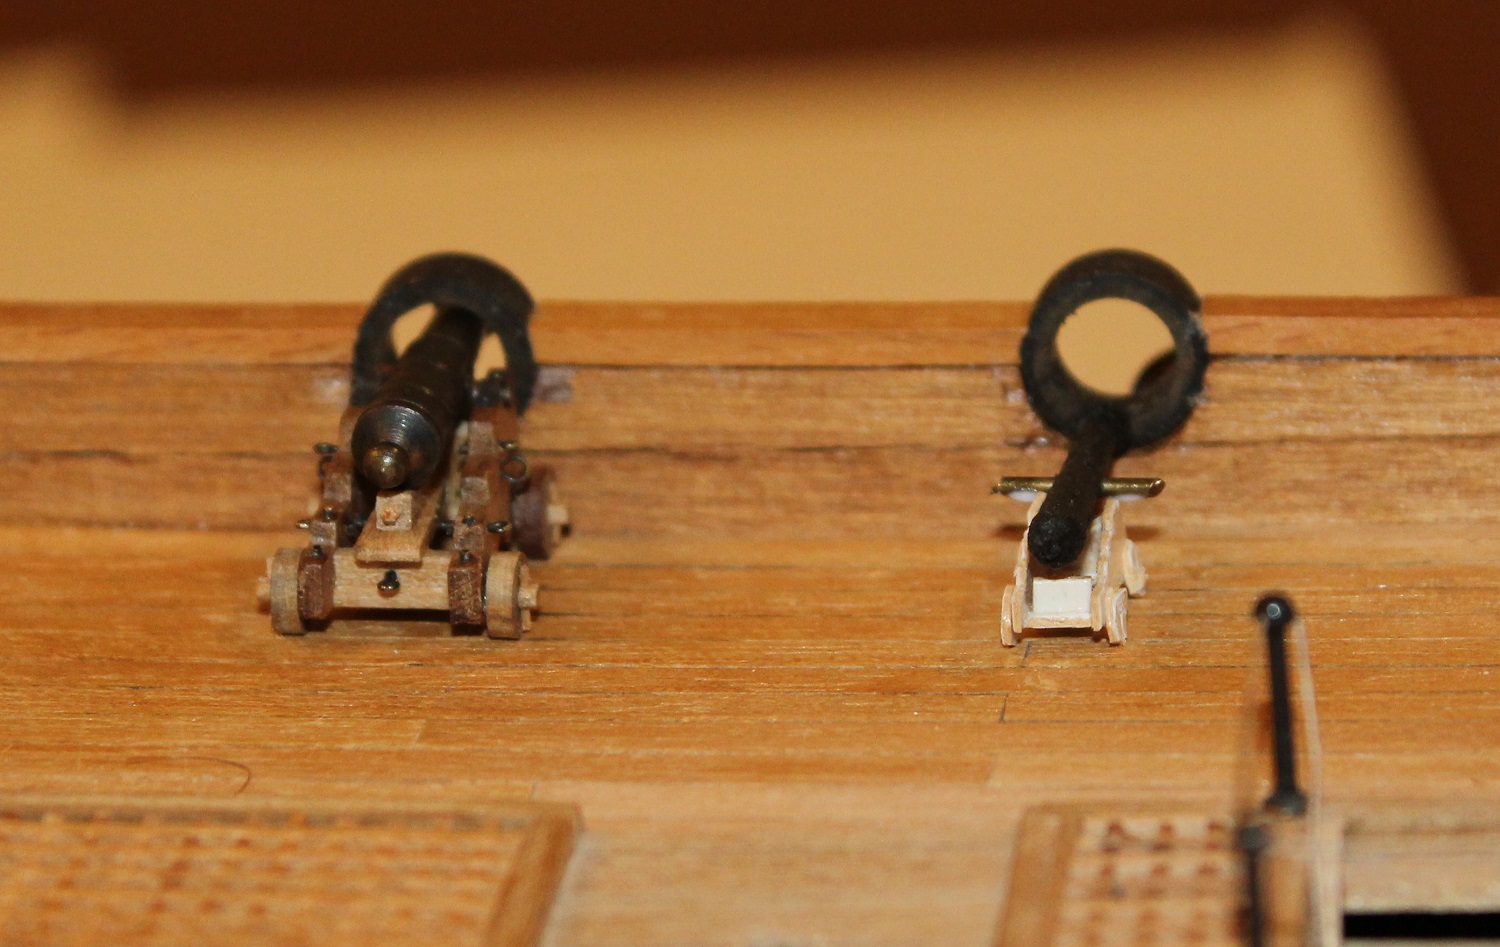
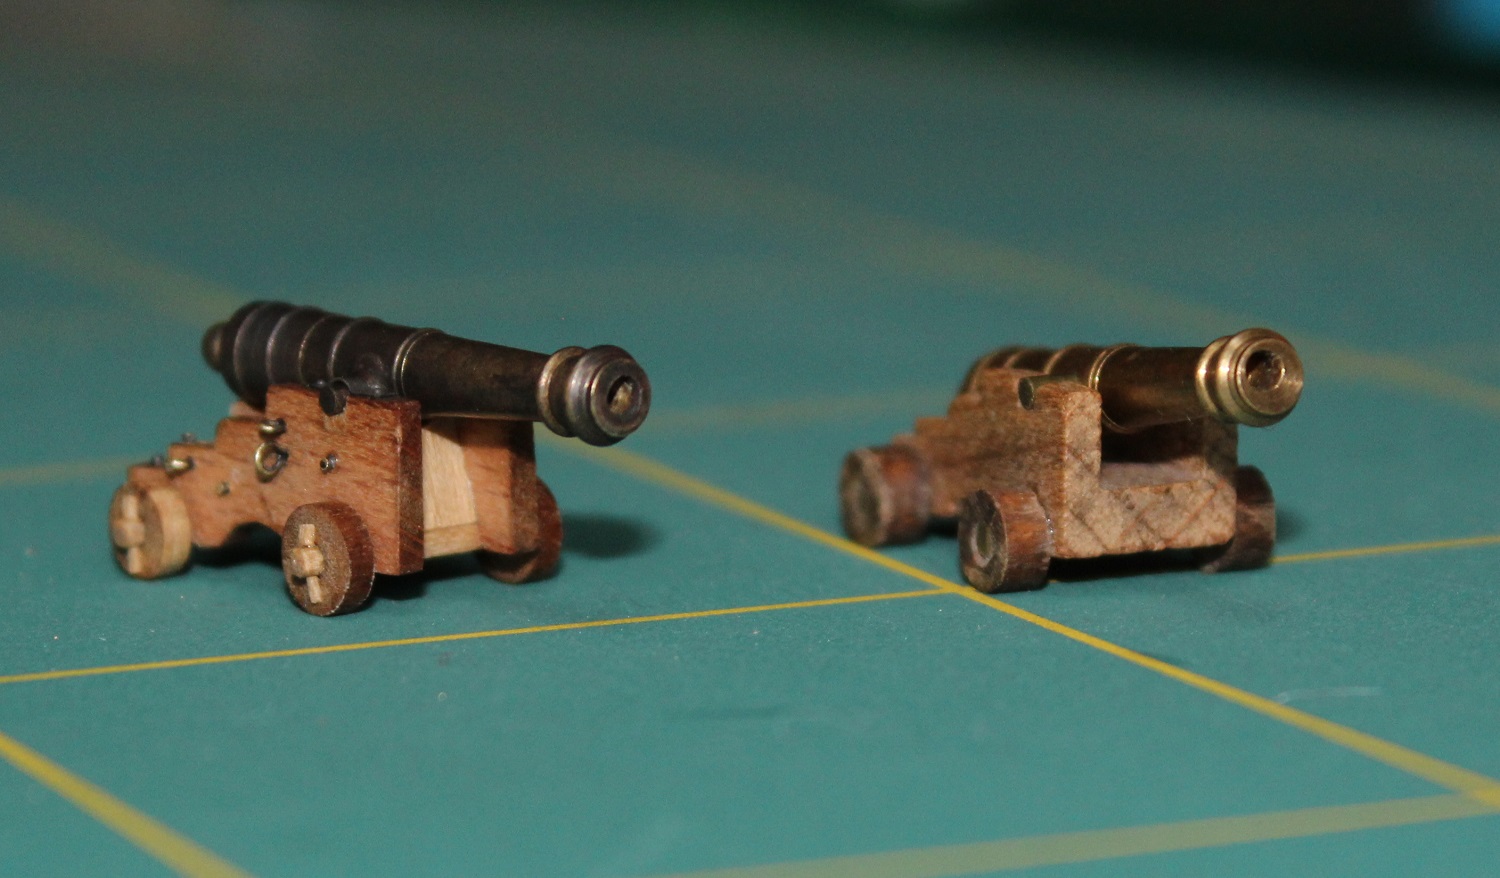
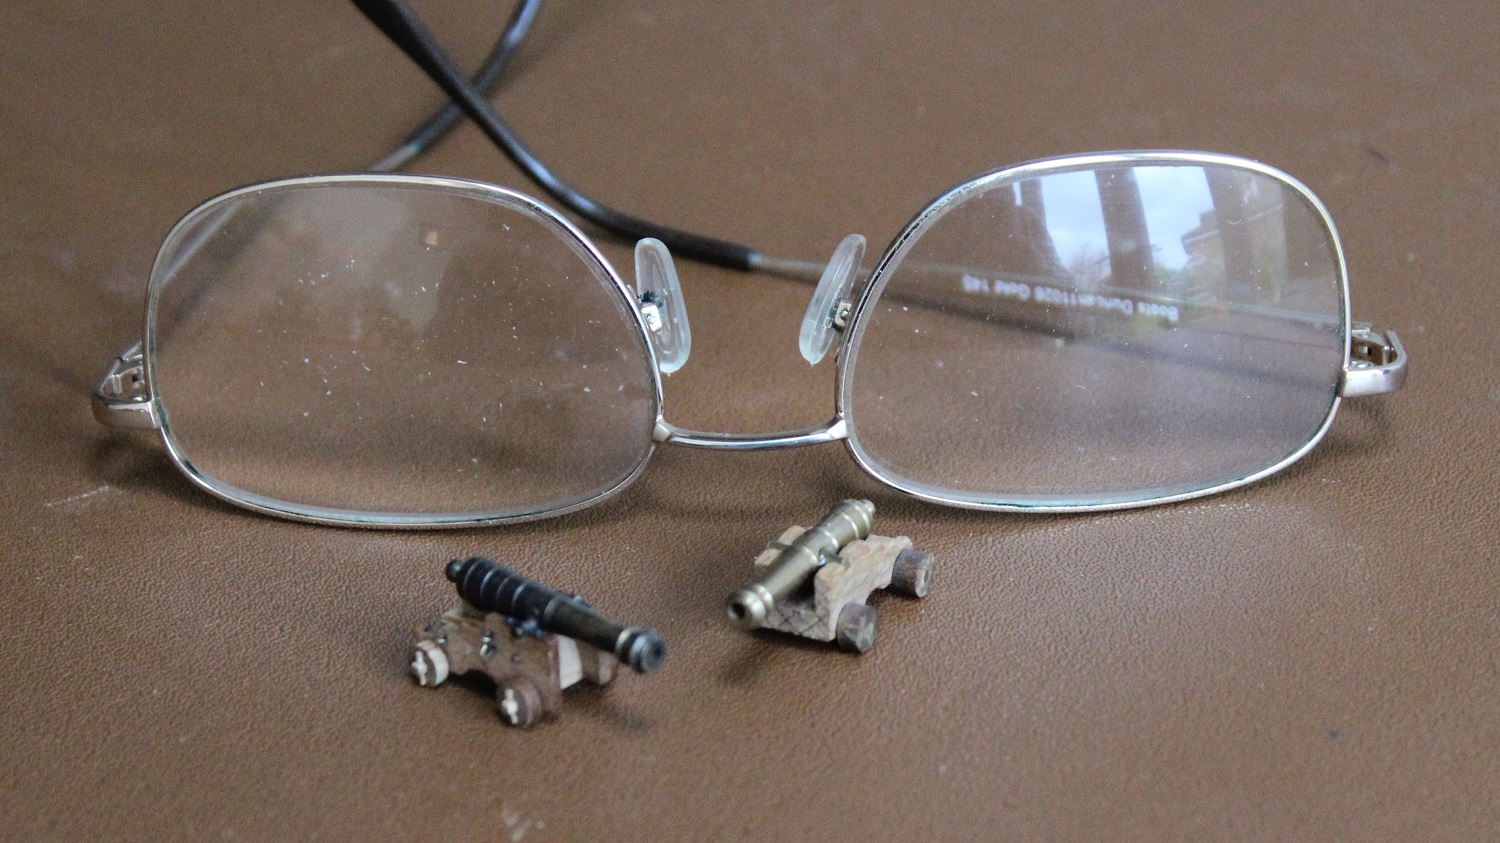
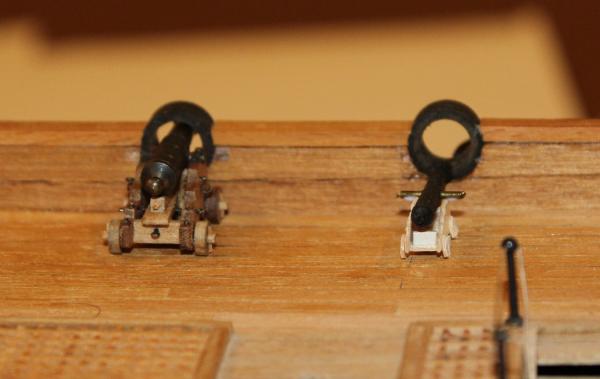
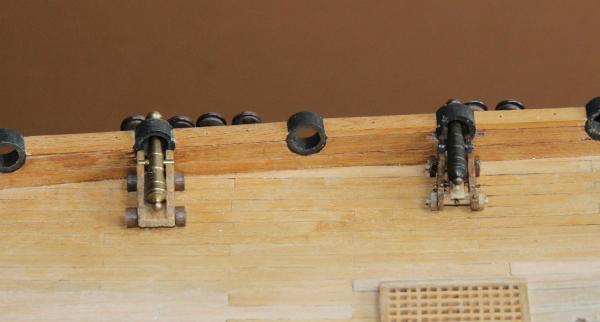
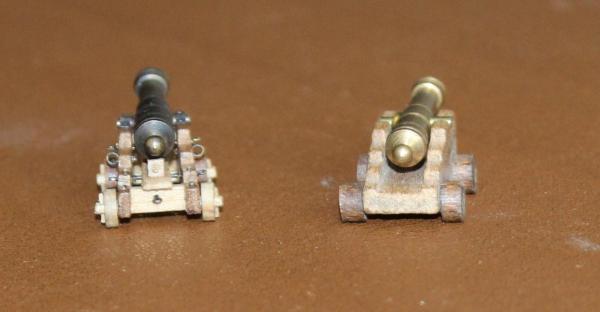
Piet and Martin, thanks for your kind words, and thanks for the likes. I have stripped the cap off the starboard side using Isopropyl. As a break from this nerve wracking activity and whilst the Iso dried up completely I roughed up a 3lb cannon out of wood for the barrel and card for the carriage. I used the spreadsheet with input of 3lb weight and long barrel. The information generated from the Hahn formulae was:- 3 pounder cannon: I blackened the barrel with wood stain for (gratuitous) effect! The exercise showed two things. First - that the barrel was rather long. All the illustrations of very small cannon that I have seen have rather short dumpy barrels. Probably this would have been resolved by using the short barrel 1:15 ratio. Second - as can be seen in the photos below the poor little thing can't "see" over the bottom edge of the circular gun port. When viewed from outside of the hull the round ports appear to be the correct height above the upper deck gun ports. If the quarter deck had been higher (as per the NMM Lyme and Chapman Unicorn plans) the smaller cannon would be OK. As it is it looks like a will have to stick with the modified "9 pounder" Corel version. An entertaining little diversion! When seeing how small the 3 pounder is I am not surprised that they were not regarded as part of the main armoury when Unicorn was built. I have also attached my spreadsheet calculations for a 9 pounder long. So - back to the caps and new rail.


-
Brilliant Igor. I don't think you had to "restore your skills" your skills never went away!
-
I was wondering what size of cannon the Corel offering is at 1:75. The Unicorn had 9 pounders on the upper deck and 3 pounders on the quarter deck. Hahn's cannon diagram contains formulae and tables that allow the dimensional calculations for scales 1:48, 1:64 and 1:96 for weights 4, 6, 9, 12, 18, 24, 32 and 42 pounders. Not initially helpful for 3 pounders or scales 1:75! All of the calculations in Hahn are based on the caliber. With his weight/caliber table, and assuming a spherical projectile I could work out the density of the cast iron. In all cases of his table the density is 0.2686 lbs/cu inch. So knowing the density I can now work out the caliber for a specific weight. I created an Exel spreadsheet using this which enables me to generate all the "Hahn" dimensions for any weight and any scale. One other thing required was the "barrel length to caliber" ratio. Chuck's diagrams of Armstrong long barrels gave me a ratio of 1:21. An entry in Modeler12's thread gave me a ratio of 1:15 for short barrels. I am sure there is more info on this somewhere! So I tried out the spreadsheet using scale 1:75, 9 pounder, long barrel. I got: Length of bracket - Hahn 17mm - Corel 19mm Height of bracket - Hahn 6.3mm - Corel 7.5mm Barrel length - Hahn 31.5mm - Corel 30mm A reasonable match for the barrel but the Corel carriage is a little large. The carriage would be the right size for a 1:64 9 pounder though! I looked at the dimensions for a 1:75, 3 pounder long barrel and got: Length of bracket - 11.8mm Height of bracket - 4.4mm Barrel length - 21.8mm Which got me thinking about mocking up a 3 pounder in card and wood. Will the barrel be too low for the quarter deck gun ports? Lets see. What I currently have is...... Hum.........
-
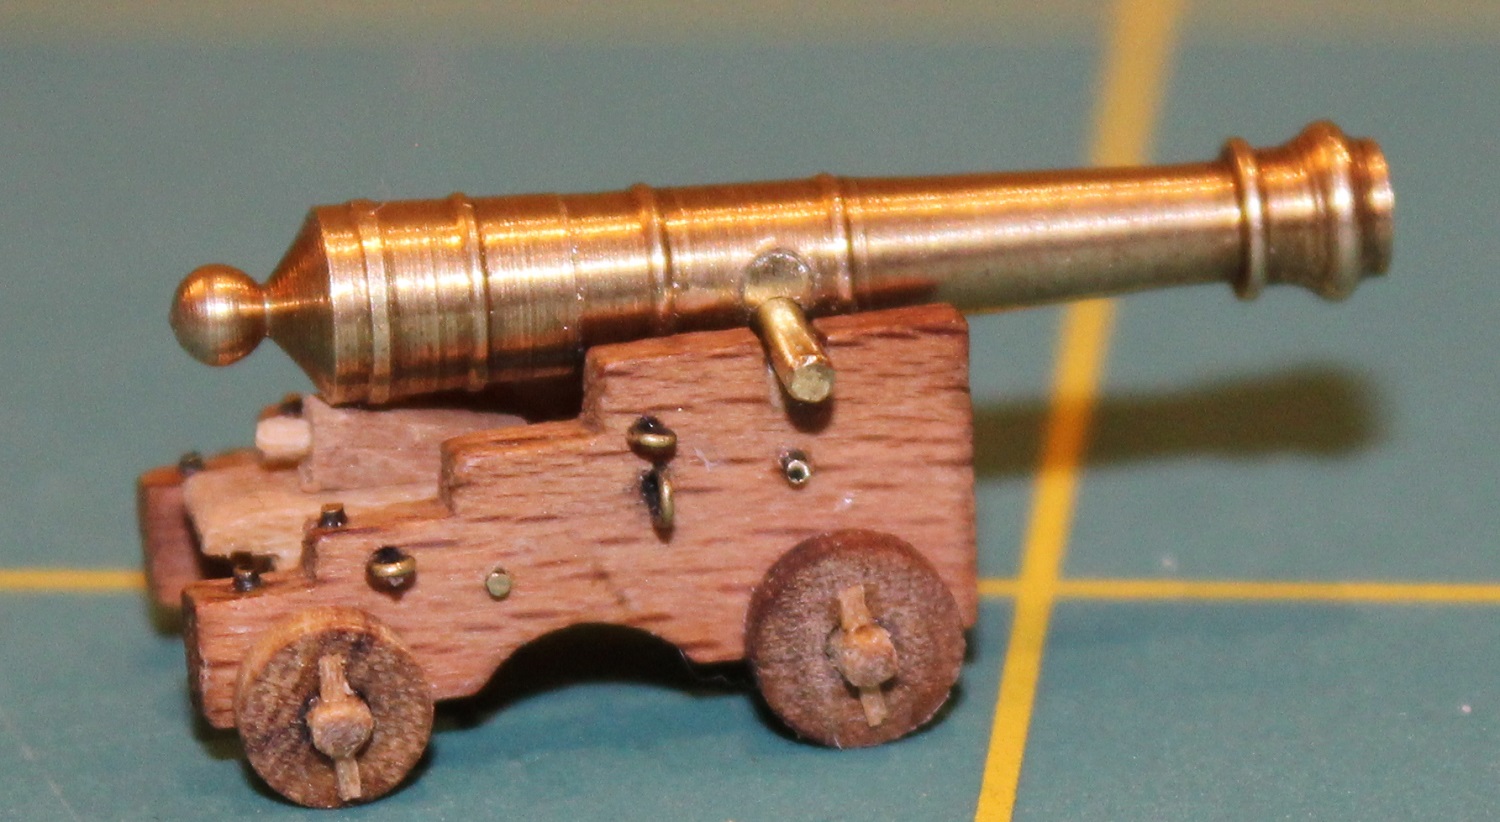
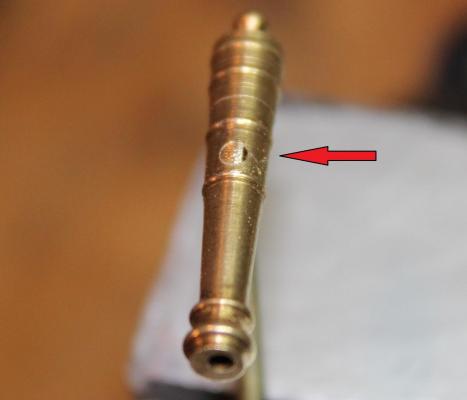
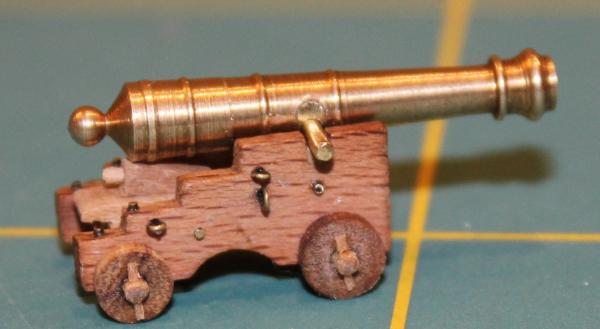
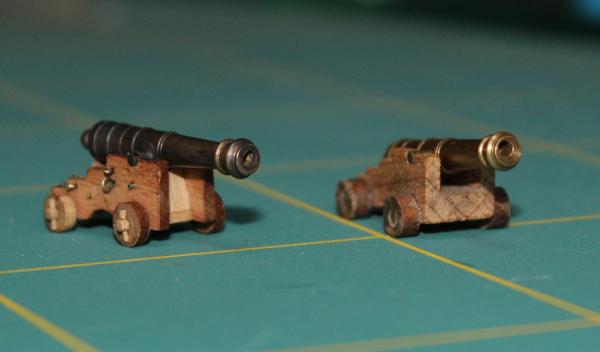
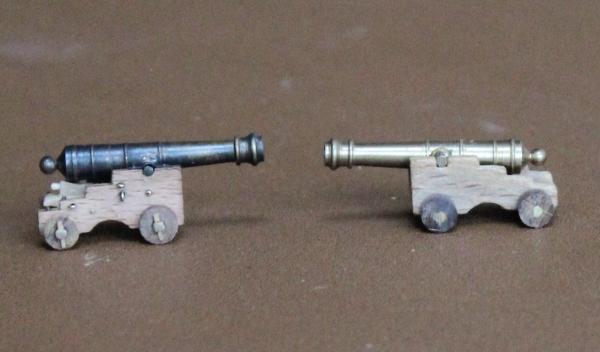
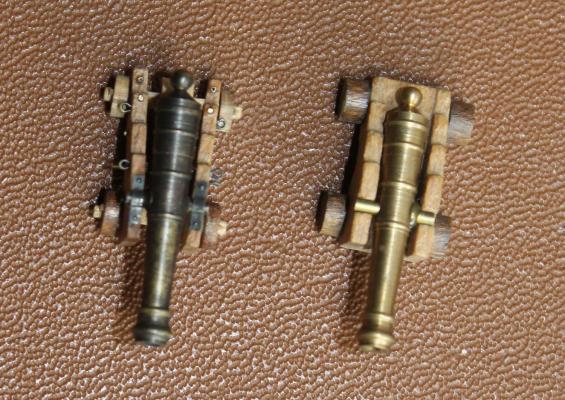
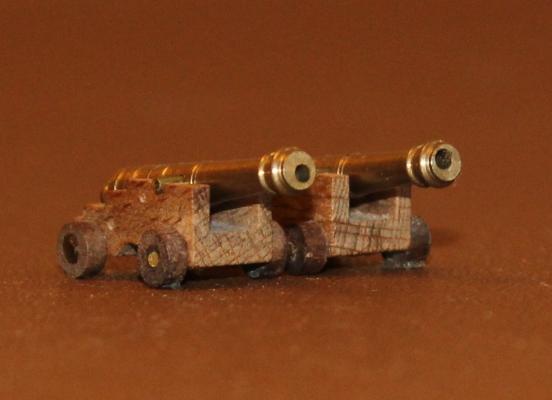
I turned to the barrel. I wanted to move the hole for the trunnion to one side of the barrel centre line. This as per Chuck's diagrams - though Hahn shows them on the centre line. Images of cannon show trunnions in both configurations. I don't know what the rule was! To move this hole is fairly simple and can be done with simple hand tools. First I got a piece of brass rod that was a close fit. I then filed a flat on the side of the rod. The deeper the flat the closer the centre of the new hole will be to the centre of the original hole. In my case I took 0.4mm off to make the flat. I used a small ammount of superglue to secure a length of this rod in the hole. I pointed the flat in the direction that I wanted the hole to go ie in this case to the side of the cannon. This produced a "D" shaped hole as shown in the next photo highlighted by the red arrow. Having taken 0.4mm off the rod a 0.4mm drill bit passed through the centre of the "D". I put a 0.5mm drill bit in a pin vice and very carefully drilled part way in to the "D" and then all the we through from the other side. The "D" guided the bit all the way. I ran steadily bigger bits through the hole which produced the new hole centred on the "D". I was using 1.3mm brass rod for the trunnion. So I took the hole up to 1.2mm then openned the hole with broaches until the trunnion was a snug fit. The next photo shows the old hole plugged and the trunnion pin temporarily fitted in to the new hole. It this point I silver soldered the trunnion in place. Also, since the bore was off centre, I pushed a length of brass rod in to the bore and silver soldered it at the same time. The bore rod was cut off flush than filed and sanded flat and smooth. I then redrilled it with the drill press. The barrel was then fitted to the carriage using caps that I prepared for the earlier cannon. The next photos show the modified cannon next to an original. Hard to believe they are basically the same beast!

-
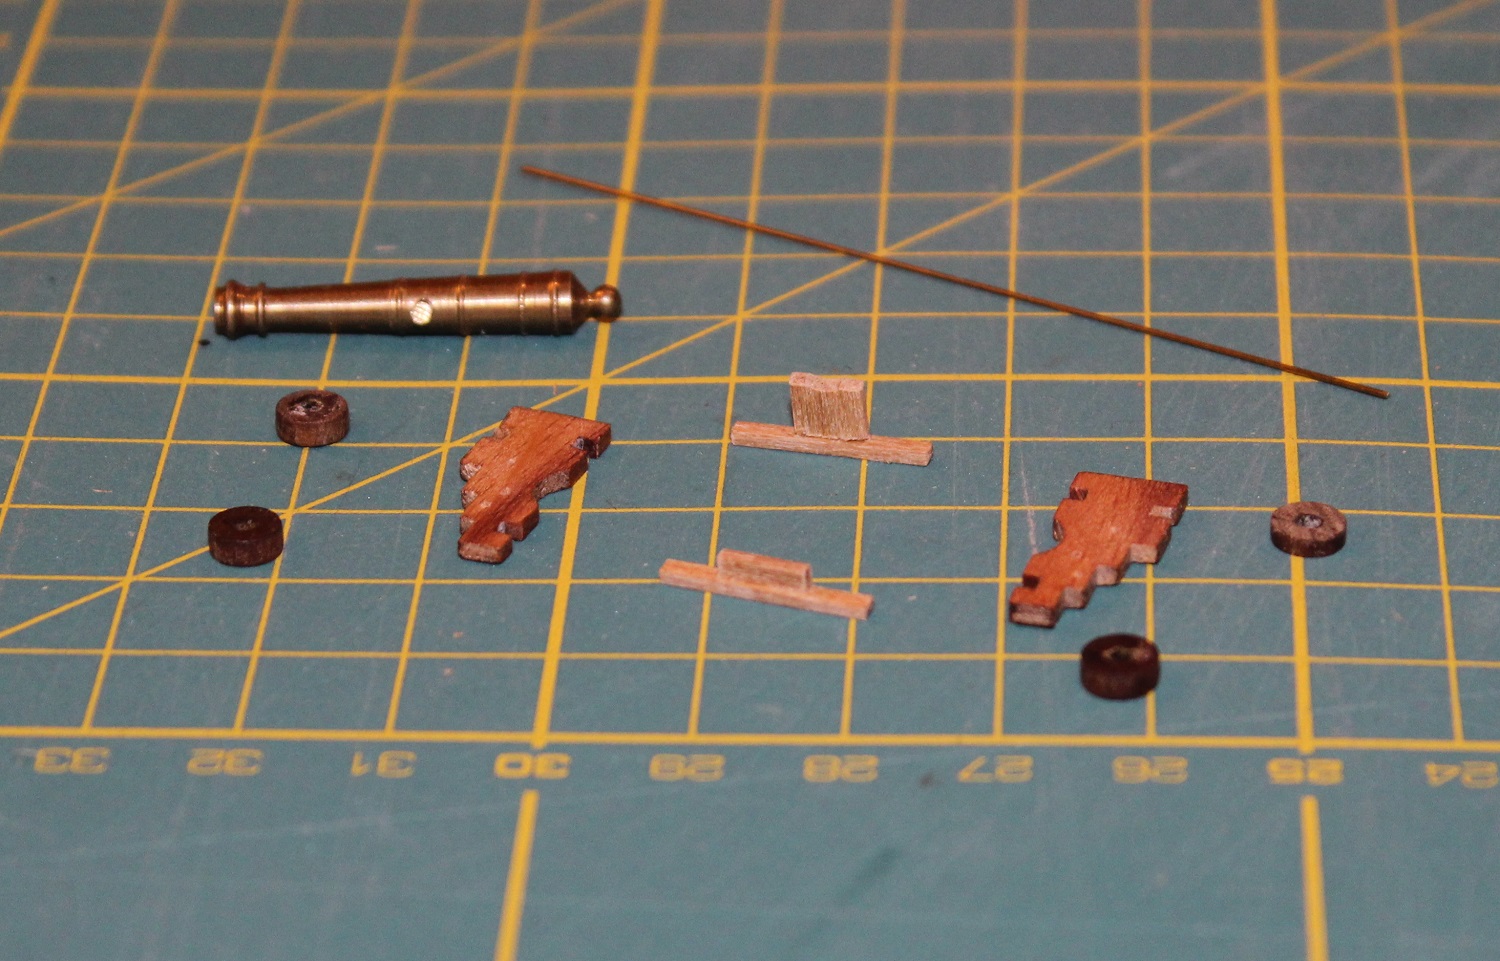
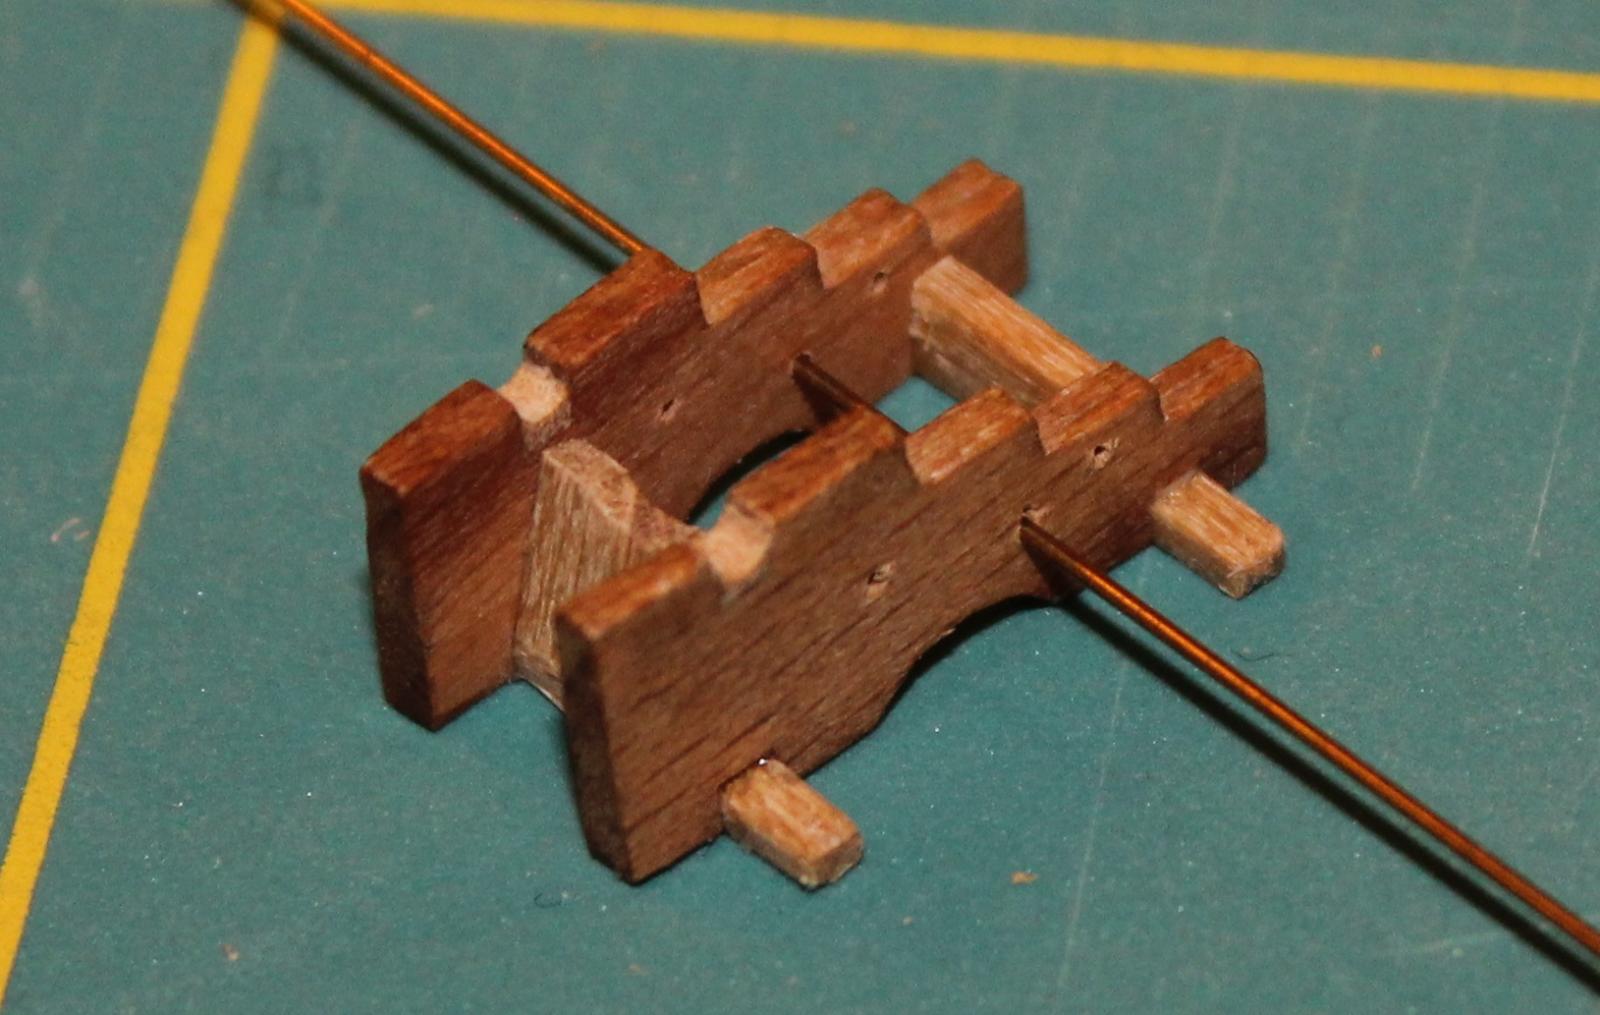
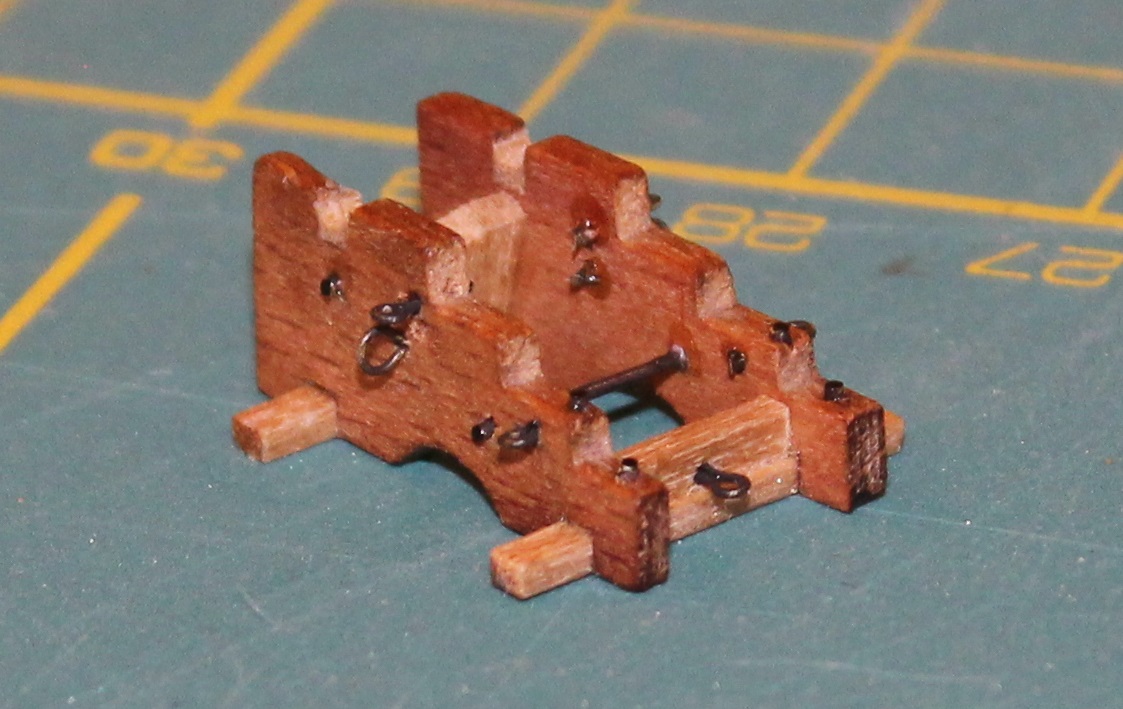
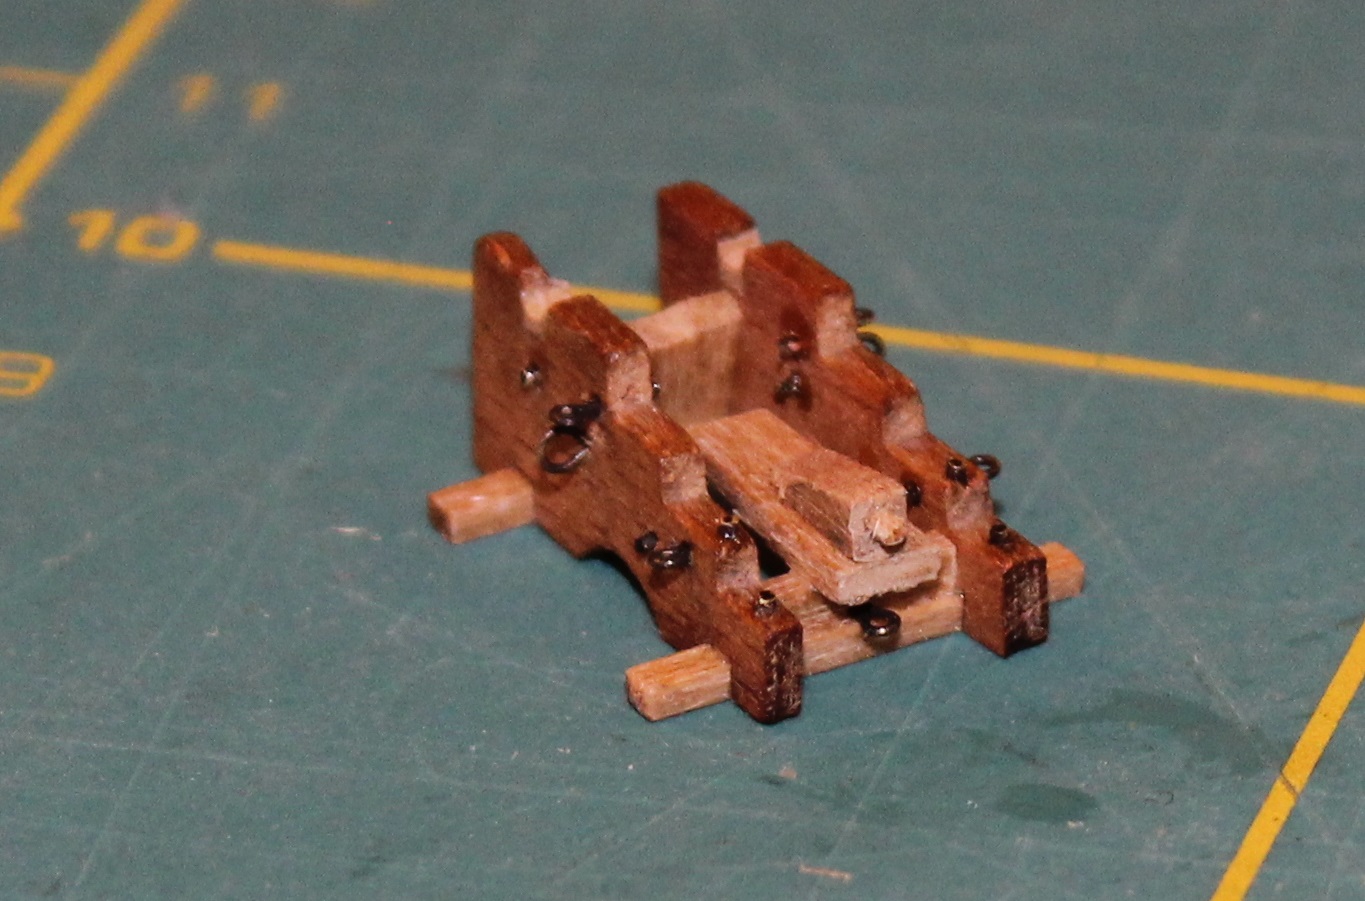
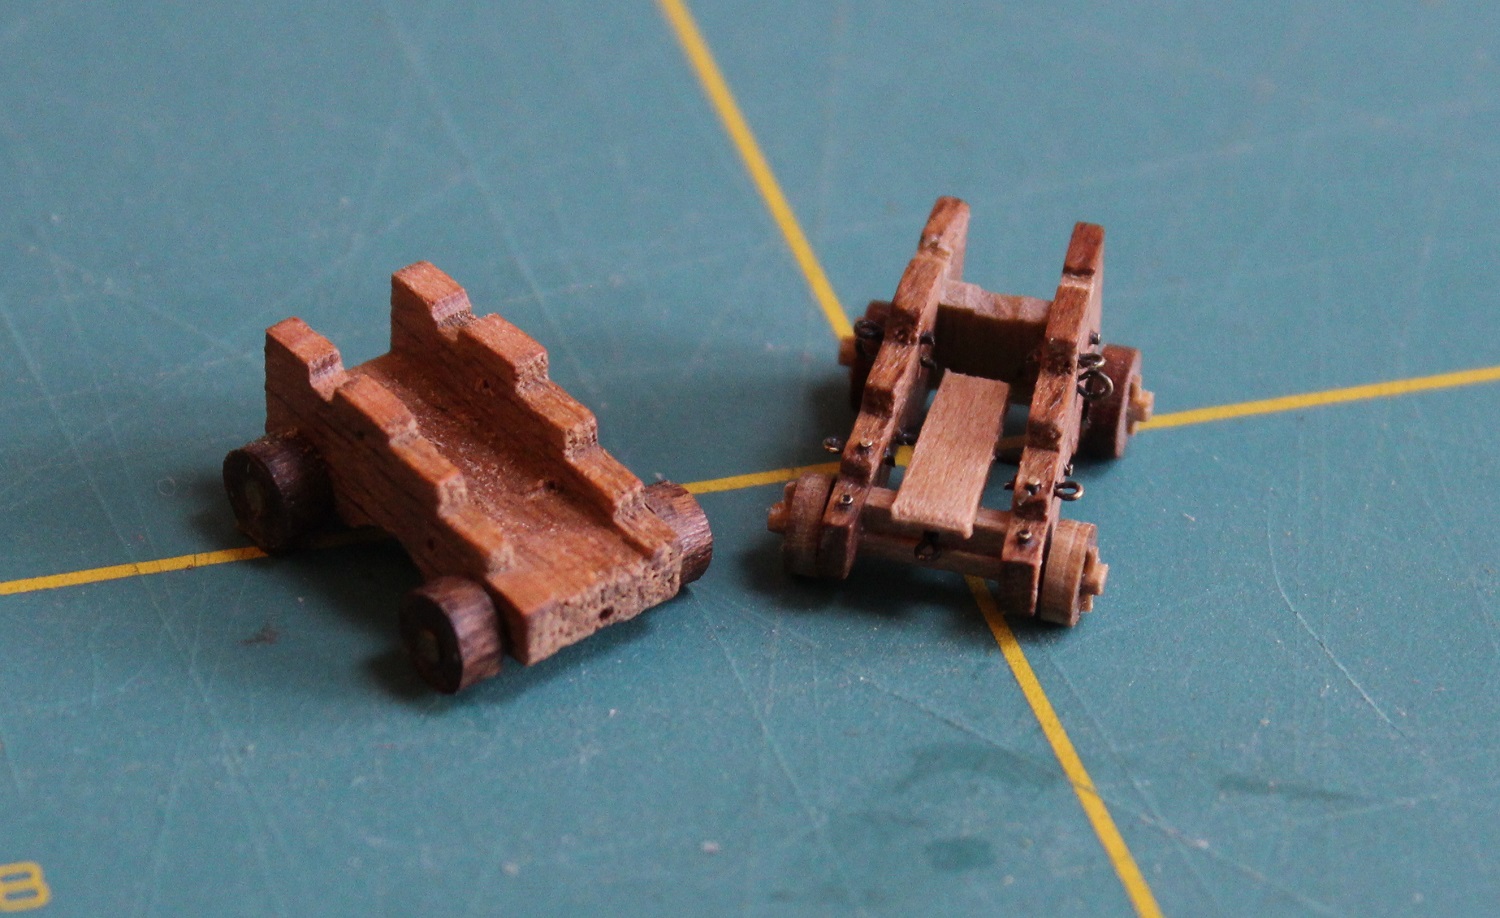
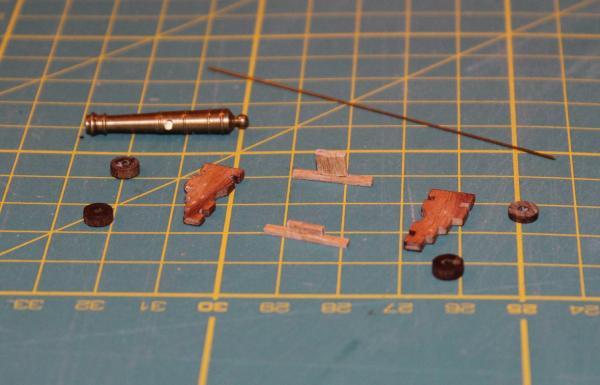
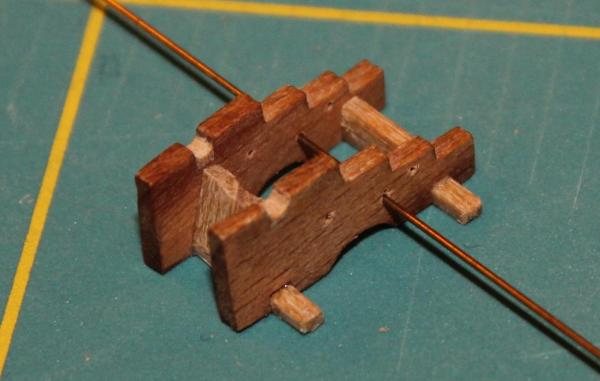
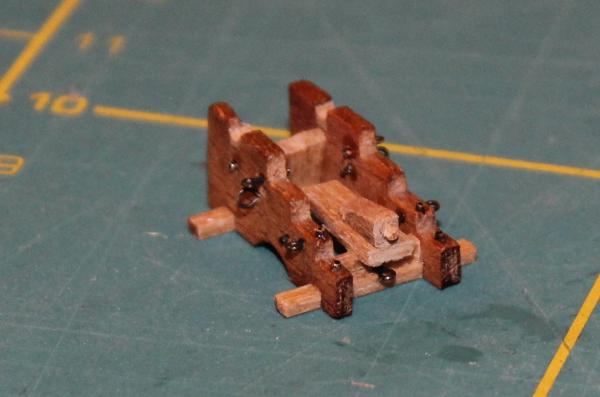
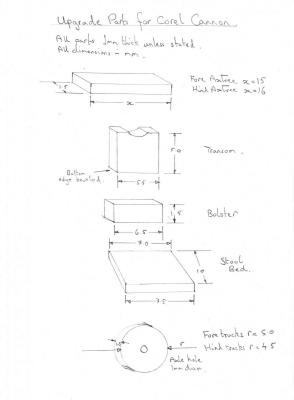
Starting with the carriage..... Using a piercing saw I cut the two brackets off by cutting vertically through the thick base. The two brackets were then sanded down to 1.5mm thickness to make both sides smooth. The next photo shows the result. The piece of 1.0mm walnut in the background is the only other wood used in this rebuild. The axtrees were cut from 1.0 x 1.5mm walnut, the fore 15mm long and the hind 16mm long. The slots on the underside of the brackets were slightly widened so that the axtrees were a snug fit with their wide faces horizontal. The transom was cut from the walnut 5.0mm high by 5.5mm wide. The bottom edge was bevelled and the top edge has a curved cutout to clear the underside of the barrel. This piece was glued on to the middle of the fore axtree flush at the leading edge. The bolster was a piece of 1.0 x 1.5mm walnut 6.5mm long. This was glued to the middle of the hind axtree at the leading edge making an "L" cross section. The brackets were drilled to produce 0.5mm holes (see Chuck's diagram for layout). The front of the stool is supported on 0.5mm rod. The holes for this need to be such that the upper edge of the rod is the same height as the bolster when fitted so that the stool is horizontal. The Corel trucks I sanded down to 1.5mm thick to make them less road roller like. Two of them I mounted in a Black and Decker mini drill arbour, then spinning them in a power drill I reduced their diameter to 4.5mm using a small flat file. The two brackets were glued on to the axtrees, by pushing the axtrees in to the slots then squeezing the brackets on to the transom and bolster to get the correct width, making sure the two brackets were at the same angle. The trunnion slots were partially filled with small offcuts of walnut and rounded so that the centre line of the trunnions were at the same level as the top of the brackets. I then blackened and fitted the loops, simulated bolt heads and support bar for stool. The loops were made as per the earlier cannon. The stool was made from a 10mm length of 1.0mm walnut 7.5mm wide. This was sanded to a taper so that the leading edge was reduced to 7.0mm wide. A quoin was made from a short length of 2.0x2.0mm walnut. The end was drilled to take a short length of bamboo for a handle. The quoin was tapered to a wedge shape. The stool was glued in place but the quoin was not fixed until the barrel was ready for fitting. The ends of the axtrees were carefully carved round so that the trucks fitted on and glued in place. Short lengths of wood splinters were glued above and below each axtree end to represent pegs holding the trucks on. The next photo shows the completed carriage next to an unmodified one.


-
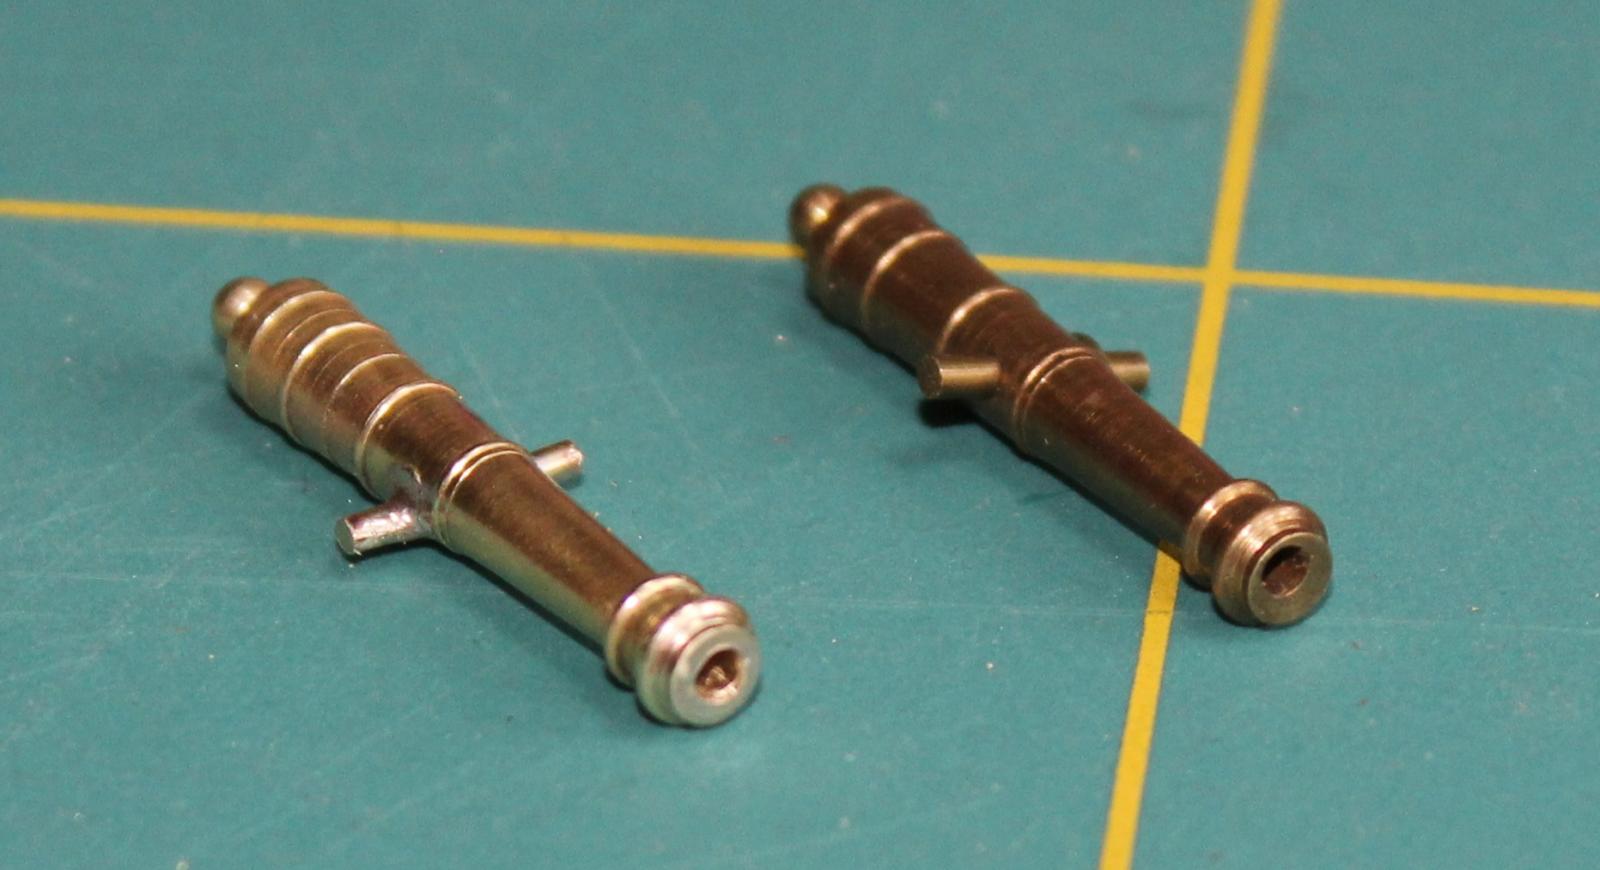
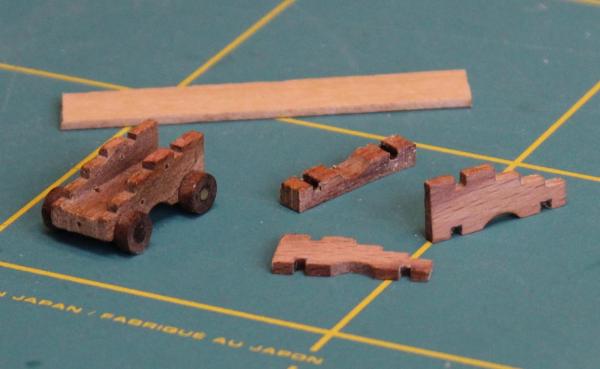
The kit comes with 32 cannon but the 1748 Unicorn only had 28. I therefore have 4 spare. I decided to use the spares to try improving on the Corel offering for the quarter deck. My inspiration was..... Chuck's instructions for the cannon kit, which includes diagrams which are in the Article and Download area <here> Roman Kraska's "Alert 1777" log in the CAD and 3D Modelling forum. It contains some excellent diagrams in pdf files, included exploded diagrams which show how the carriages are assembled. <here> An interesting video by Modeler12 on scratch building carriages <here> (Yet another of his great videos!) I drew some rough working plans for parts to be made.... The next photo shows a pair of the Corel cannon before work began. The outline of the carriage brackets is pretty good but is spoiled by the thick base. For ease of manufacture the Corel carriages have the brackets parallel rather than convergent. The slots for the trunnions are very deep which along with the trunnions being set on the mid line of the barrel means the barrels sit very low. This gives a very squat appearance. My kit is one of the first produced back in 1974 and some of the barrels were distinctly cross eyed.
-
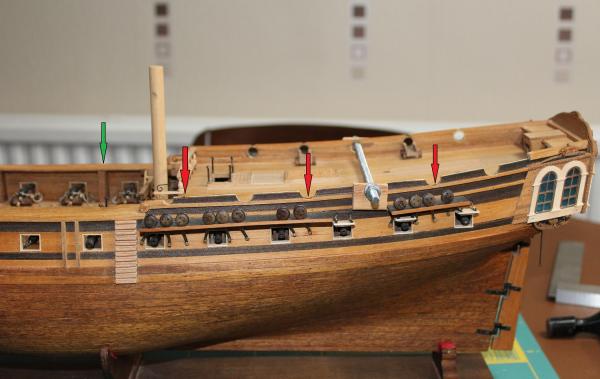
Mark, Thank you for your input. Following our PM exchange I am happy that the tiller of the Unicorn was on the quarter deck but with regards to the sweep the jury is still out. I have a bit of time to think about that because........ ....... what should be last session of destruction begins! Starting with the port side, I removed the cap and brass gun port lineings using Isopropyl to soften the glue. The cap was severed just ahead of the galery top casting. The bulwark was then reduced in height by 2mm. Before refitting the cap I decided to reinforce the bulwarks to stop them splaying out. Using the threaded rod to pull it in to line I drilled 1mm holes down at the points indicated by the red arrows in the next photo. I selected these locations since the bulkhead extensions that support the quarter deck are at these positions and the holes go down in to them. (The green arrow shows a similar bulkhead extension in the waist area). I then drove 1mm rod into each of the holes. I also forced some PWA glue in the crack twixt the bulkhead and deck then tightened up the nuts on the threaded rod a little further. After a few hours I released the clamps and the bulwark stayed put. It is now nice and rigid. Hurrah! I didn't want to reuse the brass gun port rings so I turned some replacements up in boxwood and stained them black. I then fitted these and re-used the old cap pieces that just needed to be shortened slightly. The next photo shows this done. It also shows a slight dip in the cap ahead of gun port 4. When removing this part of the cap the wood immediately below it splintered a little. I thought I could get away with tidying it up - not quite. I fear I will have to live with this. I only noticed the drop after the glue had hardened. To take it back off might make things even worse. I will treat the starboard side in the same way before making the open rail. In parallel I am upgrading(?) some of the cannon....

-
Moony, A fascinating book, thanks for the link. I was interested to note that in the Foreword Edward Reed refers to the writings of John Scott Russell as a source. This got memories moving in the back of my head - so I dug out my copy of L.T.C. Rolt's biography of Isambard Kingdom Brunel. Rolt is a great champion of Brunel's and attributes to Scott Russell many of the problems related to Great Eastern build and in particular the boiler explosion that ended the ship's chances of being an ocean liner. It is interesting that at least two of Brunel's three steel ships are mentioned in this work, but I could find no mention of the man himself. Instead innovative features are credited to Scott Russell. That there was great animosity between Brunel and Scott Russell is without doubt. Whether one or other was the total "bad guy" is open to debate. What is certain is that Brunel had a habit of upsetting those in power (the bureaucracy as he saw them) which may explain his omission from this document!
-
I did some research on surgical spirt. I found an electronic discussion group where the use surgical spirits to clean CDs, read heads etc was not recommended on the basis that it can leave greasy deposits when the alcohol has evaporated. Looking further on the Superdrug web site I found a description of their surgical spirit. The text included: "Benefits Surgical Spirit acts to tighten, harden and disinfect the outer layer of the skin. It also contains castor oil to help prevent dryness and cracking." (my italics). <source> This suggests that using surgical spirits on a wooden ship model would leave a caster oil residue which would probably make further gluing difficult and also affect the finish. So I decided between Amazon and Maplin. The Maplin offering was slightly more expensive but is local. When postage was taken in to account they came out about the same. From Maplin Isopropyl can be bought in a spray can which comes with a fine nozzle to direct it accurately to where you want it. I am now in business. Having Isopropyl in a spray can took me back nearly 50 years to when I worked on some of the early disc drives. One wonderful machine weighing in at a ton and a half held the staggering amount of 30 Megabytes of storage. The active part of the read heads were pads an inch in diameter and the disc platters were 3 feet in diameter and about quarter inch thick. Periodically we had to clean these things using 4 feet long rods sheathed in lint free cloth soaked in "Iso". It was quite exhilarating pushing these rods back and forth, slightly drunk on the "Iso" fumes with the large platters whizzing around at 2400 rpm a couple of inches from our ears. Ah - those were the days! ......... Once again guys, thanks for your help.
-
Thanks Spyglass. I have not come across them. There are none around north east Cheshire or south Manchester that I am aware of. I searched for them on line but only found a rapper, a printer and a single independent chemist in Swansea. Perhaps they are shy! Thinks - I should ask my wife - she will know.
-
Thanks guys for your input. It is most appreciated. I also now know more about Isopropyl alcohol than I did before - fascinating information.
-
Thanks Mike, Actually it is a good excuse for me to go in to Manchester. Process being: Go to library - consult Lavery - meet up with my old technical lead (who is still working) - get drunk - put the world to rights - go home - forget what I read - start again.
-
I wish to remove some wood planking from my ship which is fixed using PVA. I understand isopropyl alcohol aka rubbing alcohol does the trick. Can anyone in the UK suggest a way of getting small supplies of this liquid locally? For such items in the past I always went to a well known High Street chemist chain but latterly they only seem to be interested in selling aromatic liquids sold under the brand name of brain dead "celebrities". I tried last week to buy Iso but was meet with looks from the staff that suggested that they believed I was either i) planning some sort of terrorist atrocity, ii) a certifiable alcoholic or iii) both. So they all moved away from me...... Actually I suspect some of their aromatic products could strip the paint and glue off a battleship at 50 paces. (I hope I have submitted this thread in the right category).
-
Ed, Beautiful work. The brass bands are superb. Interesting that milling mortises in the cherry did not produce good results. What type of cutter did you use? I did the same operation on a 1:75 capstan using a home made keyway cutter which produced (to me ) good results on some distinctly average walnut.
- 3,618 replies
-
- 5
-
-
- young america
- clipper
- (and 1 more)