-
Posts
12,104 -
Joined
-
Last visited
Content Type
Profiles
Forums
Gallery
Events
Everything posted by Old Collingwood
-
Thats a great save mate, I wouldn't have thought of that I would have been fiddling with the planks. OC.
-
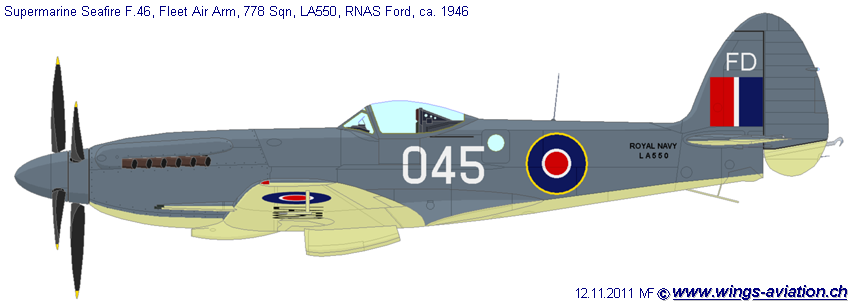
After my little challenge with the canopy (whats it with me and canopies - remember my mossie?????) so I decided to have a gentle go at decaling....no troubles from decals (yeah right famous last words) I started with the wing roundals top and bottom, no real issue here as I was using a trial version where they were between the older pattern large Blue/Red ones - moving over to the smaller versions, as this is a trials Seafire I went with the later decals. Next was to fit the side roundals, the first one went on ok without any issues but - on the other side "boy was it deciding to give me grief" it decided to split - thankfully I was able to push the two halves together - then a small piece towards the top broke away, I did not have a spare so I decided to just put a service decal over it as there is supposed to be one in that rough area. So that brought to an end my relaxing couple of hours at the table. OC.
-
Evening all, firstly thanks to all the followers and likes - really appreciate it, right some more progress - I fitted the Right side MG cover and smaller one, and after gave them a quick paint over and light high lighting, then I decided to have a go at the cockpit door - this was to be in the open position and show the inside, simple attachment them paint folowed by shading/highlighting, and it was done. Then it was time to fit the sliding part of the canopy, firstly it needed painting - this was a straight forward operation and didn't need masking, I used a stick and tack to hold it from inside , then I just followed the frame around with a fine brush. I then offered it in place and checked it "all seems fine" so I glued it in place, to speed up the drying/setting process I decided to hit it with the hairdryer - (upssss.........bad idea)😞😞The dryer had made the end of the canopy melt and curl upwards. So it was time to look for a substitute - in the kit as well as the other Spit kit there is also the enclosed one piece canopy, so I decided to try to trim off the smaller window unit part - "Issue number two" it cracked, so third time lucky - try the one remaining completed canopy part, but this time sand the small window unit away - ten minutes later and sucess job done, next was to paint it the same way I had done the original. When dry I put it in place - idea was to have it open, but it was two small and would not sit over the rear window, only option to fit it in the closed position, so I pushed it in place then spot glued it with some CA and touched up where any residue glue was, it hasn't turned out too bad I think and you can still see part of the inside. OC.
-
Very nice work - she is really coming together. OC.
- 436 replies
-
- vanguard models
- alert
-
(and 1 more)
Tagged with:
-
Hi all, some more progress on this tonight - not a lot of content but time consuming, I have been panel marking using my adjustable draftsmans pencil (the type with the led you push out when the end breaks) anyway the system was to run the pencil then using a wet finger and a cloth clean as I go - seems to work quite well and is a tidy way of doing it. OC.
-
Evening all, I got round to de-masking the IX today - it didn't turn out too bad, the green areas are now ok, as I want to shown a well used version with ware patches and paint fading - I decided to add these areas now, the Grey also needed touching up but first I had to mix up a shade as close to the rattle can Grey as possible (this isn't easy as we know) I reached a shade as close as possible, when this has fully hardened I will buff the finish to get a satin scheen. OC.
About us
Modelshipworld - Advancing Ship Modeling through Research
SSL Secured
Your security is important for us so this Website is SSL-Secured
NRG Mailing Address
Nautical Research Guild
237 South Lincoln Street
Westmont IL, 60559-1917
Model Ship World ® and the MSW logo are Registered Trademarks, and belong to the Nautical Research Guild (United States Patent and Trademark Office: No. 6,929,264 & No. 6,929,274, registered Dec. 20, 2022)
Helpful Links
About the NRG
If you enjoy building ship models that are historically accurate as well as beautiful, then The Nautical Research Guild (NRG) is just right for you.
The Guild is a non-profit educational organization whose mission is to “Advance Ship Modeling Through Research”. We provide support to our members in their efforts to raise the quality of their model ships.
The Nautical Research Guild has published our world-renowned quarterly magazine, The Nautical Research Journal, since 1955. The pages of the Journal are full of articles by accomplished ship modelers who show you how they create those exquisite details on their models, and by maritime historians who show you the correct details to build. The Journal is available in both print and digital editions. Go to the NRG web site (www.thenrg.org) to download a complimentary digital copy of the Journal. The NRG also publishes plan sets, books and compilations of back issues of the Journal and the former Ships in Scale and Model Ship Builder magazines.


