Old Collingwood
-
Posts
11,619 -
Joined
-
Last visited
Content Type
Profiles
Forums
Gallery
Events
Everything posted by Old Collingwood
-
 I was under the impression that the White Ensign was still carried but moved to the boom as Nelson wanted to make a clear indicator for the British and also a little bit of making a point at the opposition. OC.
 -
Wasn't the flag carried between the Gaff and the Boom on the Mizzen mast, I have seen it like this on Turners Trafalger painting. OC.
-
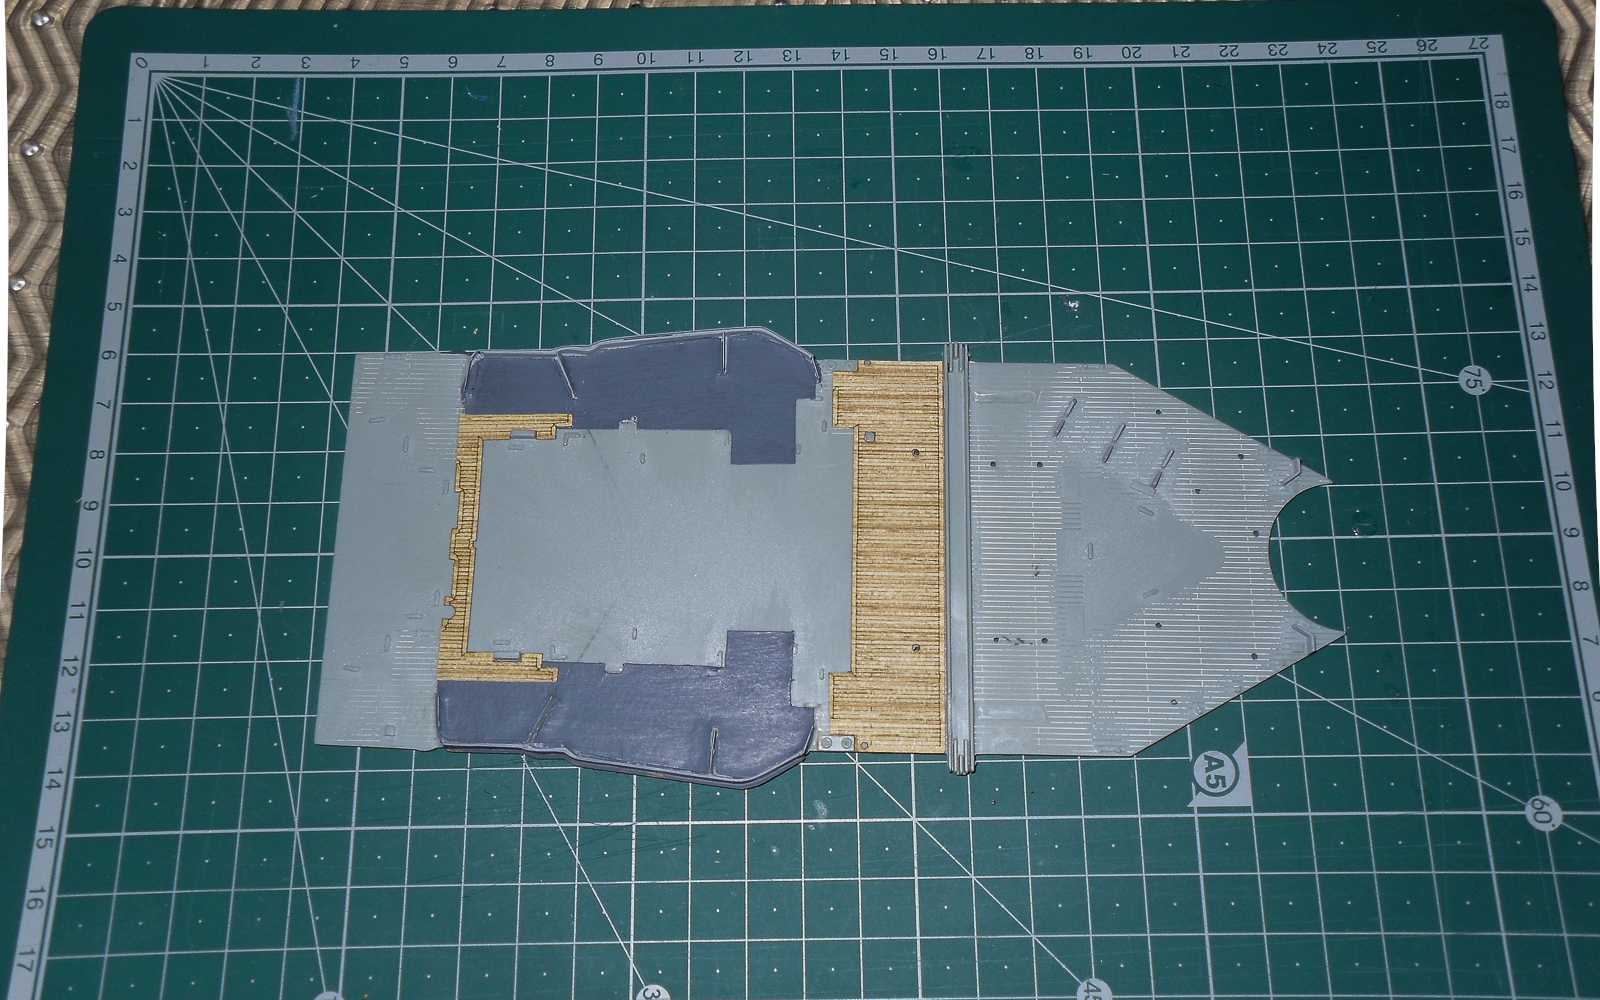
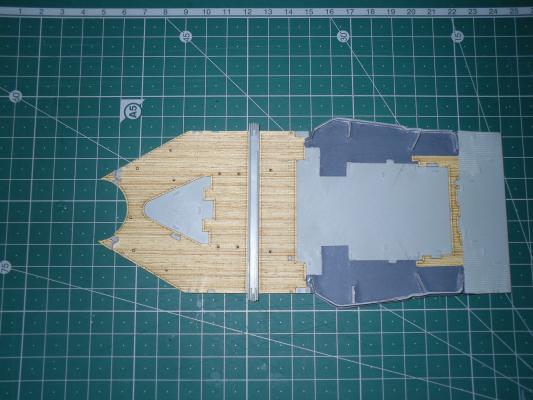
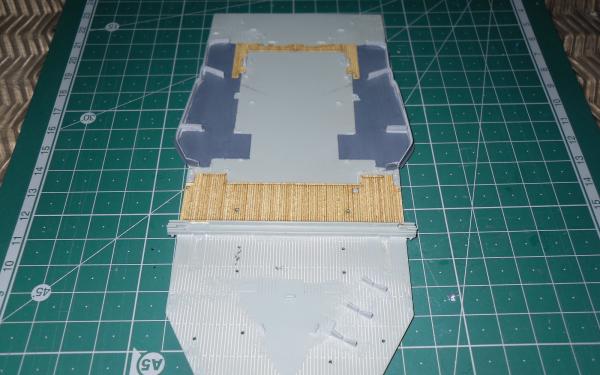
More progress to day folks - as I posted above I continued with the mid ship section on the other side of the runway strip, this was cut away quite easy with a nice sharp fine blade but the pointed ends that part wrap around the turret were very very fragile, to the extent that they broke off when I tried to fix the deck down B)i was able to fix them back down after the carpet munster gave them back . Anyway in the end after a bit of adjustment and gentle knife work around a few of the fittings, it settled down and I am quite pleased with it so far. OC.
-
We need away to make them ourselves possibly by bending some plastic strip to shape :o OC.
-
Hi there, After doing a bit of net bashing I came across this - its a well established company here in the UK, they are called Cornwall Model Boats, and the individual maker in that site is called Amati Ship Fittings, they have several Fairleads in different sizes. OC.
-
Next section to go down that I will hopefully be doing tomorrow - OC.
-
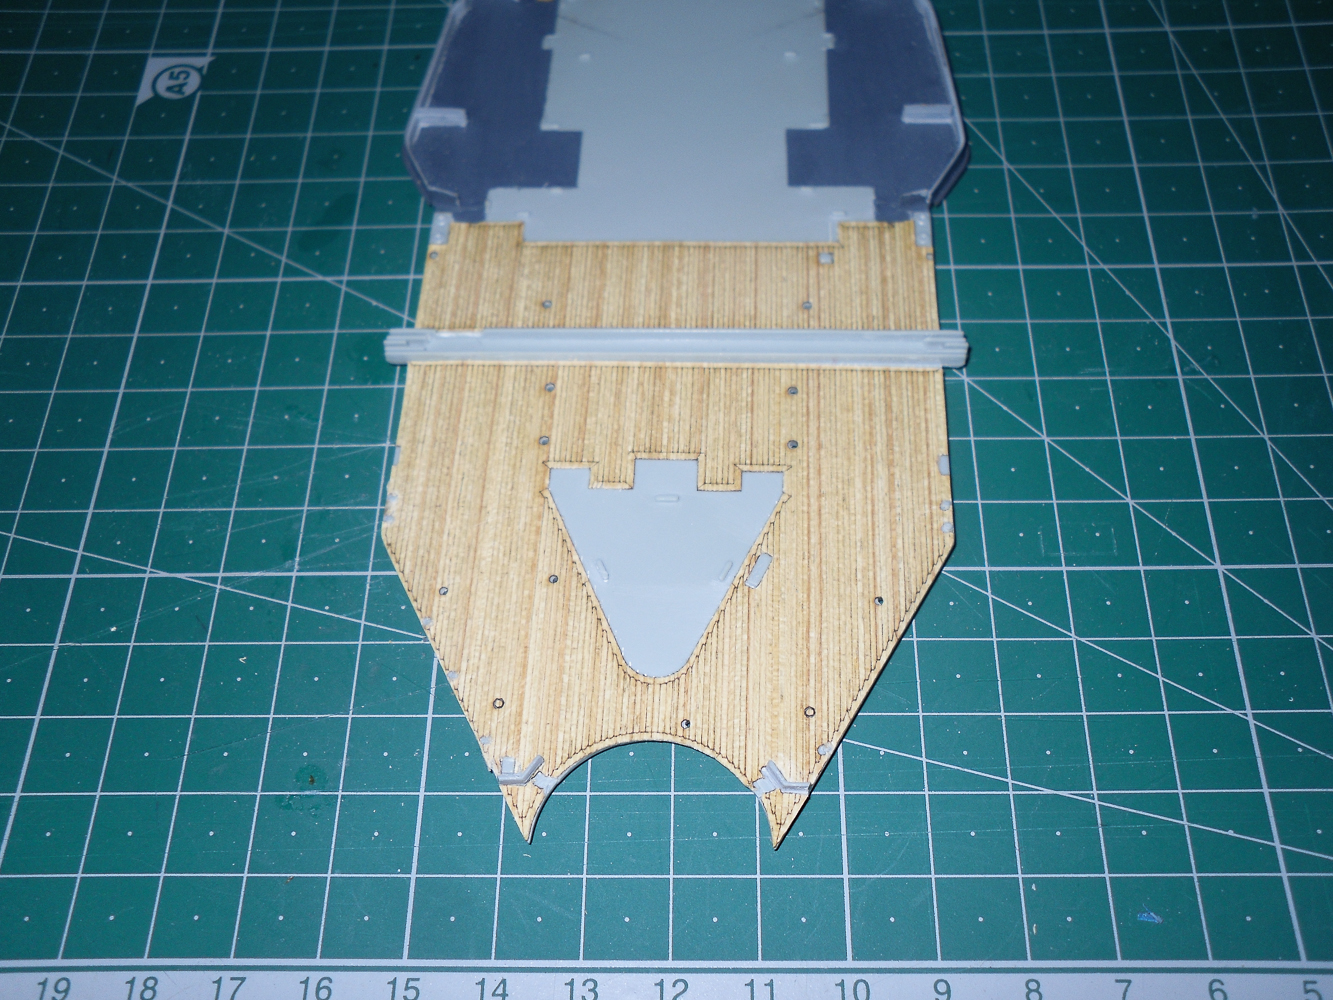
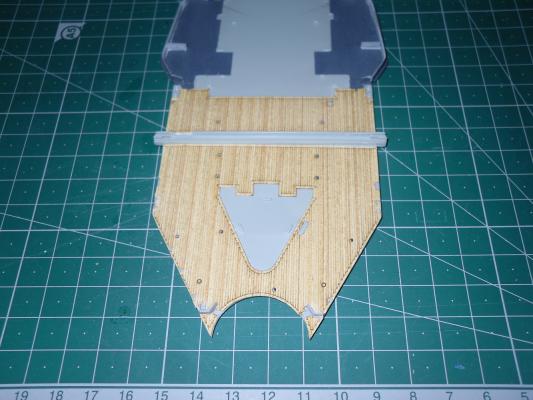
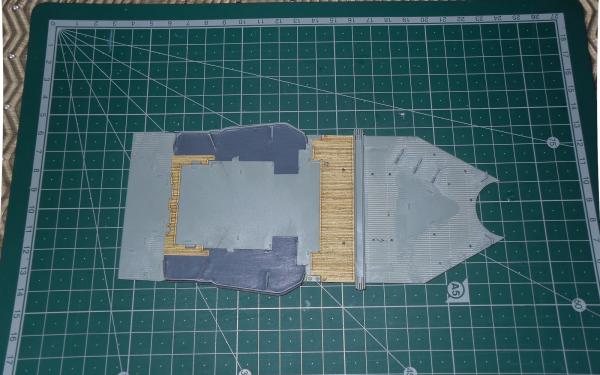
I got round today to laying the dark grey painted areas I had made from paper sheet, I test fitted them a few more times before painting on some white glue then fixing them down, they settled quite well, next I turned my attention to the wood decking strip - as I have decided to tackle small areas at a time, I cut the relevant section and then I cut around the details till I had two nice small areas to work with, as they were so small I placed them and pushed them strait down into place without wetting the surface. I am quite impressed so far and the wood deck really looks the part. Here is two pictures I shot after fitting the above. OC.
-
More tiny parts for me to add when I start on the guns OC.
-
What I will have to try to source is the Fairlead's as a few of mine have broken due to heavy handling when I was working on the hull OC.
-
Thanks for that Frank great looking pictures my friend, I am basing a lot of my work on the excellent Very Large scale Warspite that a fellow builder on here was building, a lot of his pics show some excellent detail and what I would consider reference material as the build is an engineering model built by the Ship builders. OC.
-
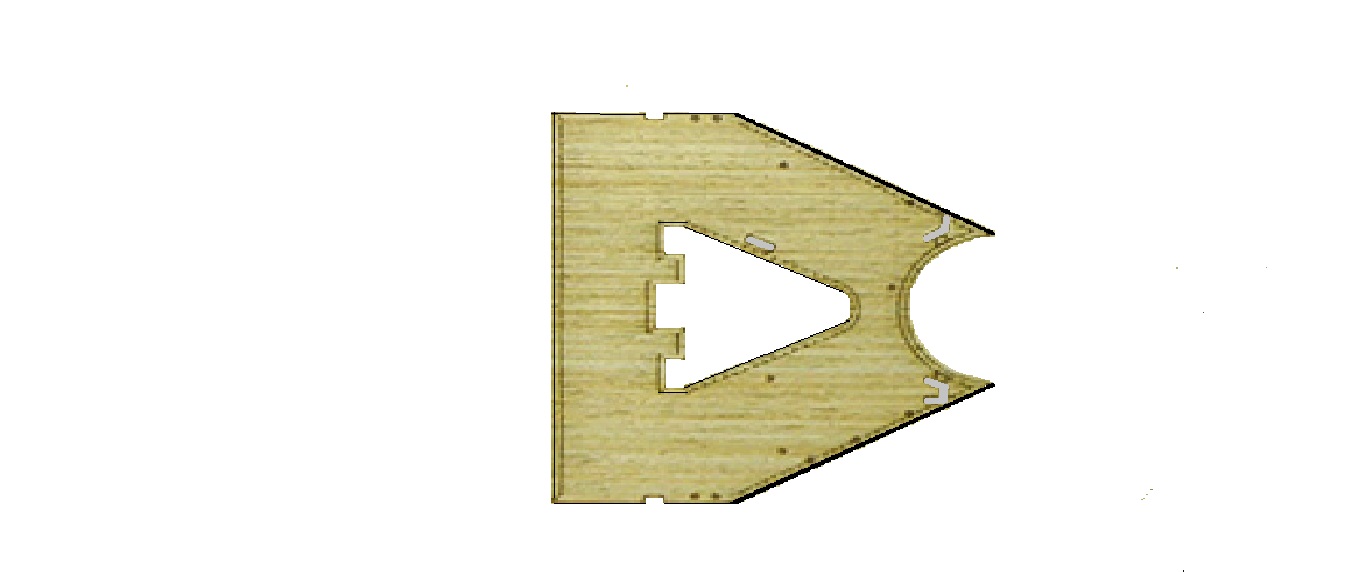
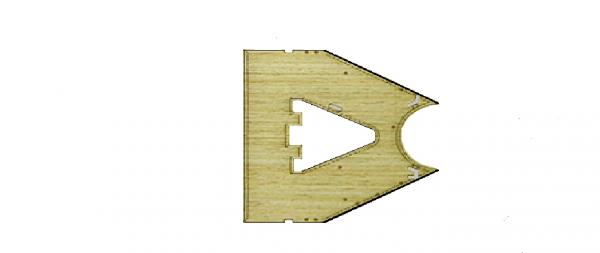
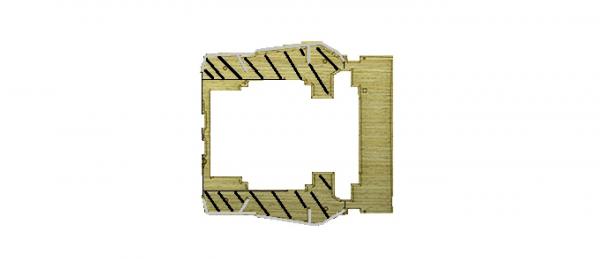
This will be my first section of decking, the shaded area each side is for the dark grey painted areas. OC.
-
More work today on the mid ship section I applied a few thin coats of Admiralty light grey to the inside of the armour bulwarks around the 4inch mounts, and while these were drying I changed colour and applied a few more dark grey coats to the paper floor sections I made to fit around the the 4 inch mounts. When these are dry I will be able to glue down with some PVA the paper flooring, then the next stage will be study the wood decking sheets as I intend to do them in smaller sections and possibly apply some appropriate weathering to them? OC.
-
That sail in the last pic looks really good, it looks about right with the slightly off white colour as I believe obtaining pure white cotton was very hard, someone told me they used to try to bleach them in salt water to keep them as white as possible? Great work there. OC.
-
Really nice work there with so much attention to detail not to mention steady hands and great eyesight, you are creating a masterpiece Regards OC
-
Thank you Ken, I am hoping to improve things by doing controlled areas - say the bow to the breakwater as one section, the breakwater to the obstructions either side of turret no2, from there to the break between the main superstructure block and the A/c Hanger block, from there (allowing for my 4inch cut outs) to the runway cover, then from there to the V section around turret 3, and finally the aft section towards the stern. I had read and also had a bit of feed back from Pontos that you can spray a light film of water before placing the decking, as it slows the tacking process a bit, not sure how accurate that is but it did come from the horses mouth so to speak. OC
-
More work on the mid section today by tidying up the plate sections then a coat od grey primer, next will be the light grey inside paint to be applied, then I will be able to lay down my first section of wood decking, I will aim to do this in smaller sections than on the sheets to aid positioning. Here is a pic of the wood decking to go down, its shows the sections to be cut out around the 4inch mountings that will be metal deck with a dark grey finish. OC
-
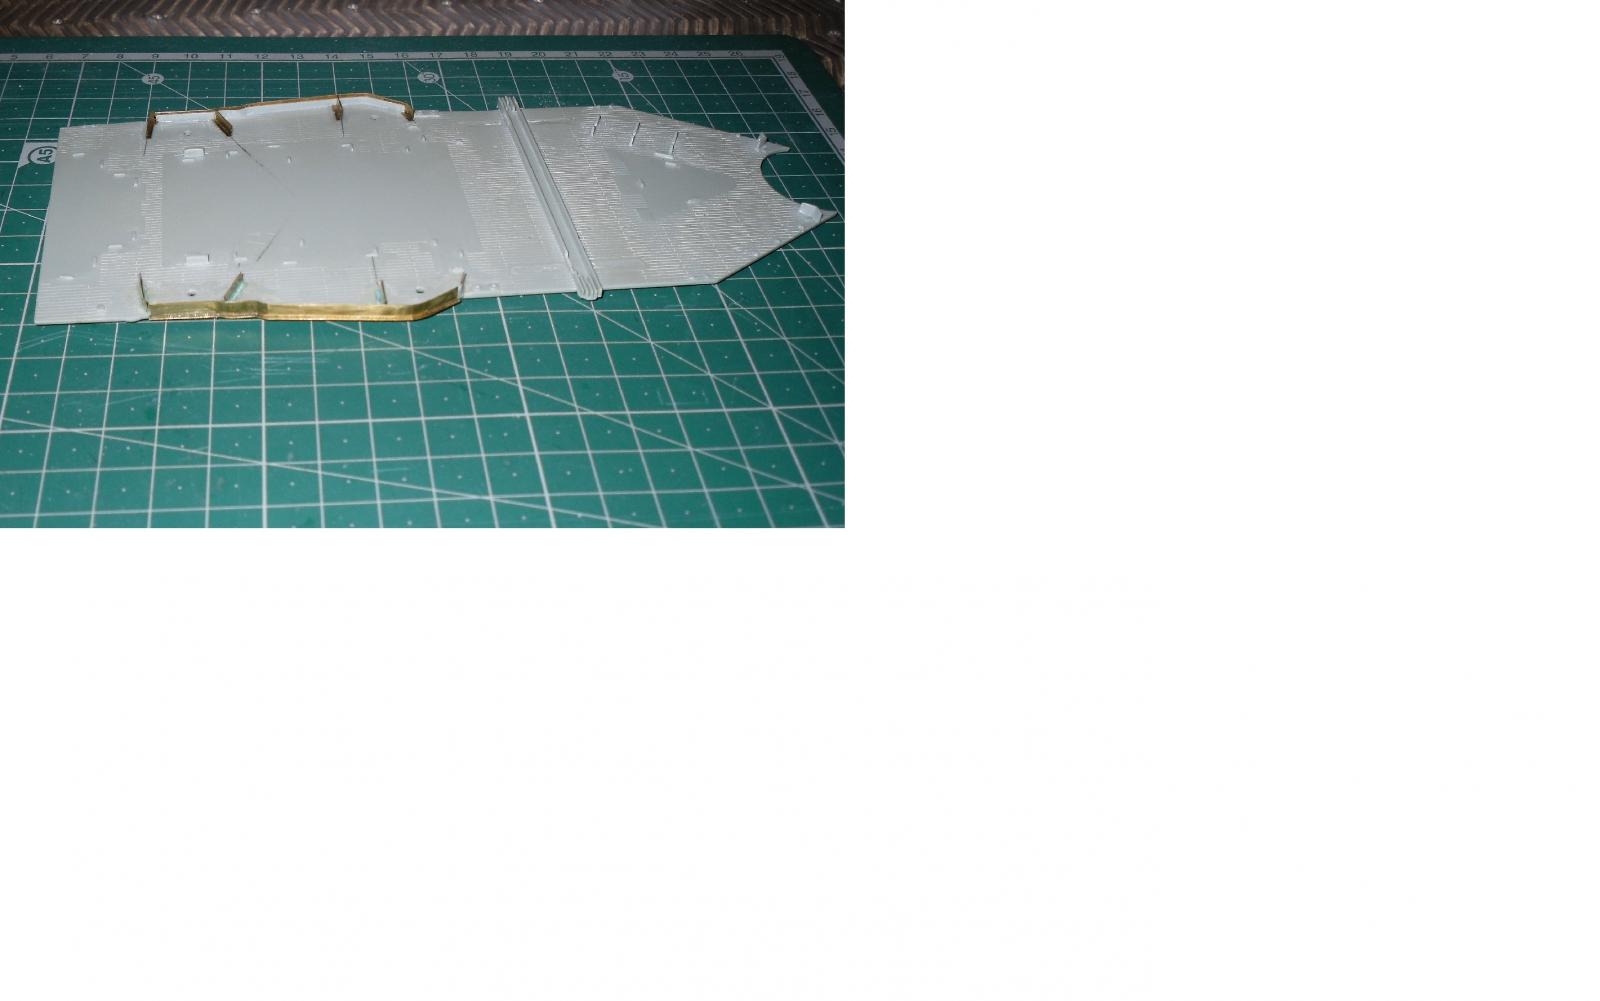
I was again at the table yesterday doing a bit more work on the mid ship section, concentrating on the other armour plate sections where the 4inch mounts go, I also fitted another Spurnwater that was with my brass update set - this was tricky as it had to sit in a very narrow section and required just a thin layer of super glue applied with a fine ended brush handle. The plan is to sand the inside edges of the plate down and the deck area ready for a light grey paint, then I will lay down the semtex coloured sheets that I have made out of paper and painted, these were in the general area around the 4inch guns, but with the planking running behind and in front of this section, it will then be ready for the wood decking sheet I have - I would have liked to have worked fitting this on each separate piece of the plastic kits deck, but the join with the wooden sheet would look a bit false in a strait line, and I can not leave anything overhanging as the wood decking sheets are way too delicate, otherwise I would have staggered them like I have real deck planking. OC.
-
That sounds like a plan frank, the idea with placing the cloth on top of the plastic ones should work well as they should provide a good mask type thing, are you going to age the sail cloth with tea or vinegar etc? OC
-
I sure would follow that and offer any help I could from my previous De Ag Victory build and from the times I visited Victory at Portsmouth. OC
-
This is the friendliest, most helpful site I have ever used so you will only ever get help on here not abuse... OC
-
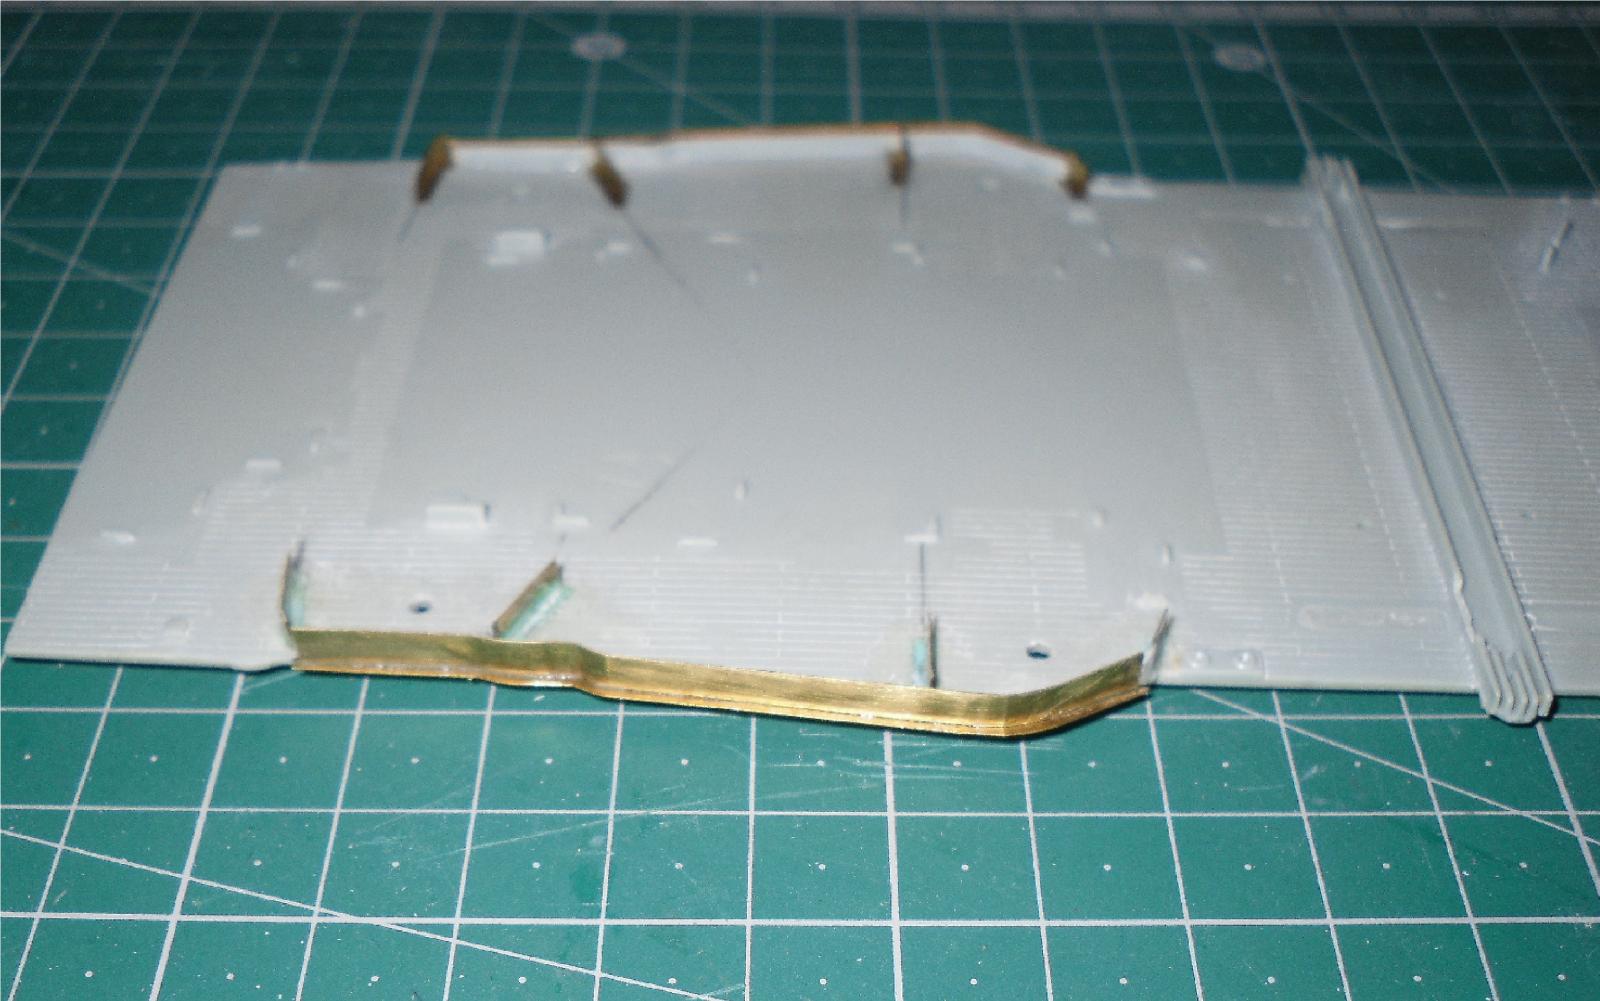
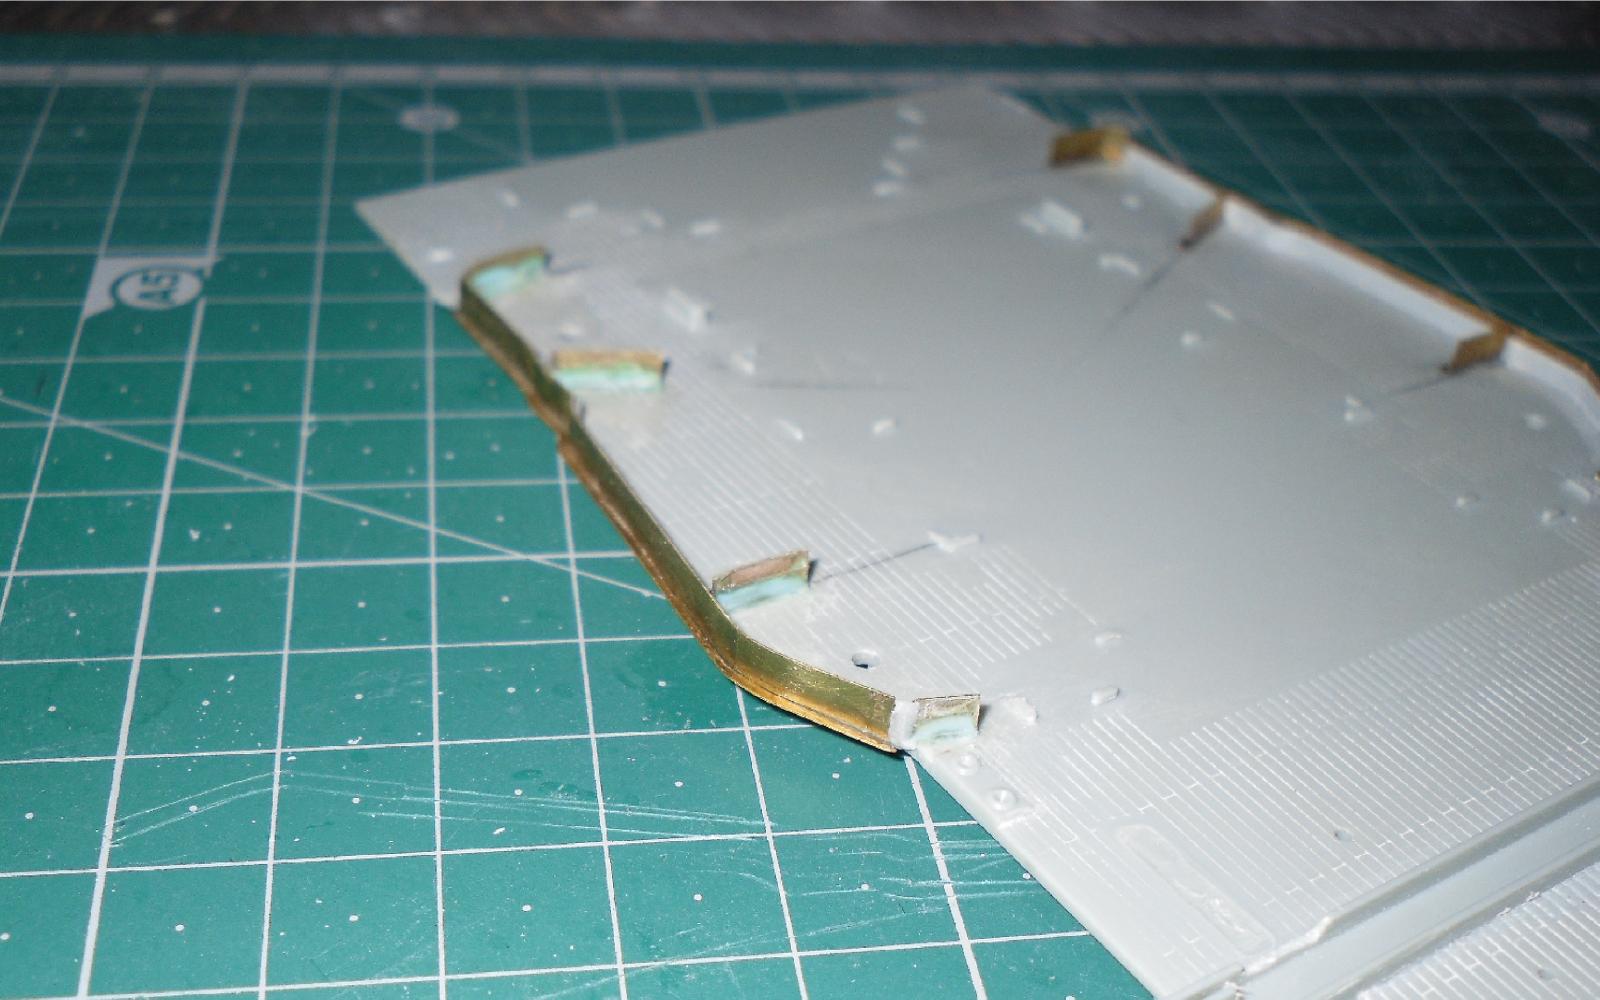
More progress with the ole girl - I have been working on the mid ship section refining the bulwark armour plate sections around the 4Inch mounts, this involved thinning the fixed plastic plate down as there scale thickness was around a foot :obut after getting some brass etch detail bits and pieces that included the correct scale thickness plate sections, the nest job was to offer them up and attach the sides to the thinned down plastic plate. I have also had the separate smaller plate sections in brass etch, so I cut away the small plastic sections, then fitted the brass after bending the bottom ridges to aid seating correctly, afterwards a stern walk strip was fitted to the completed side again with a small amount of super glue from a stick with a fine point. Here are a few pics -


-
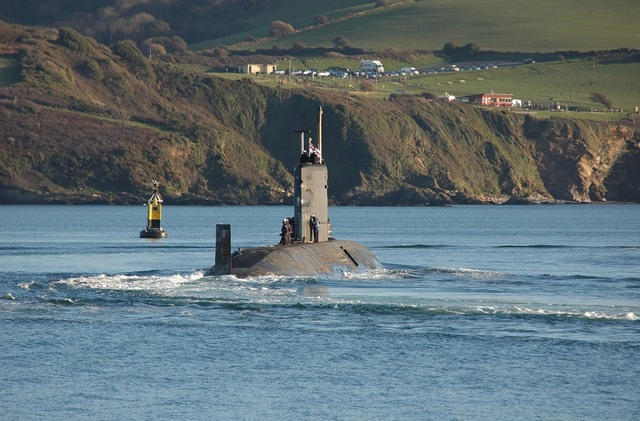
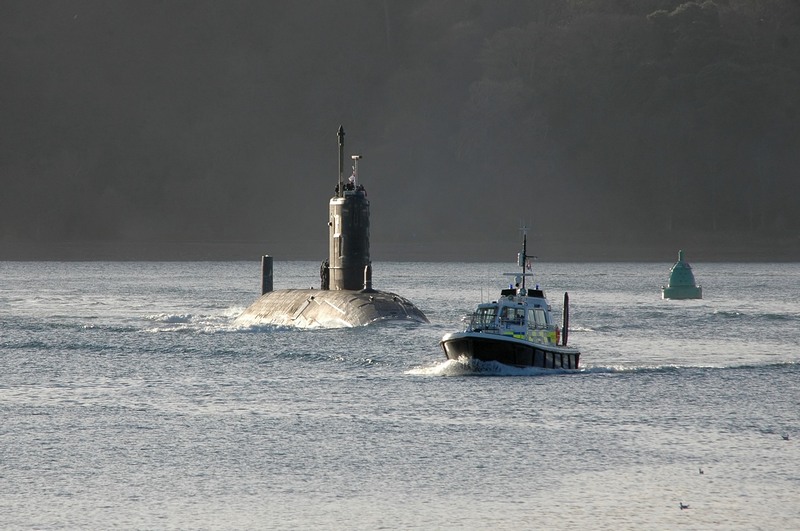
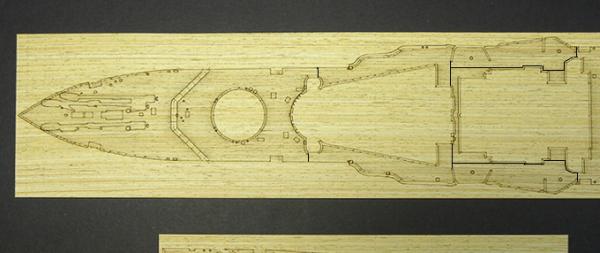
Right then folks - she has arrived and on first inspection all I can say is how small she is when compared to my Warspite there are not many parts to her so less work I guess Warspite is my on-going long term extra careful build, but this one should be a month or so Here are a few pics I took of the version I want to build, she will be a later version than HMS Trafalger with the :Djet propulsion system instead of the conventional screw. On the real subs they have roughly one foot square thermal tiles, but how on earth could I replicate them, at a scale size of less than a millimetre..... OC.


- 1 reply
-
- 3
-

-
- trafalger class
- airfix
- (and 2 more)
-
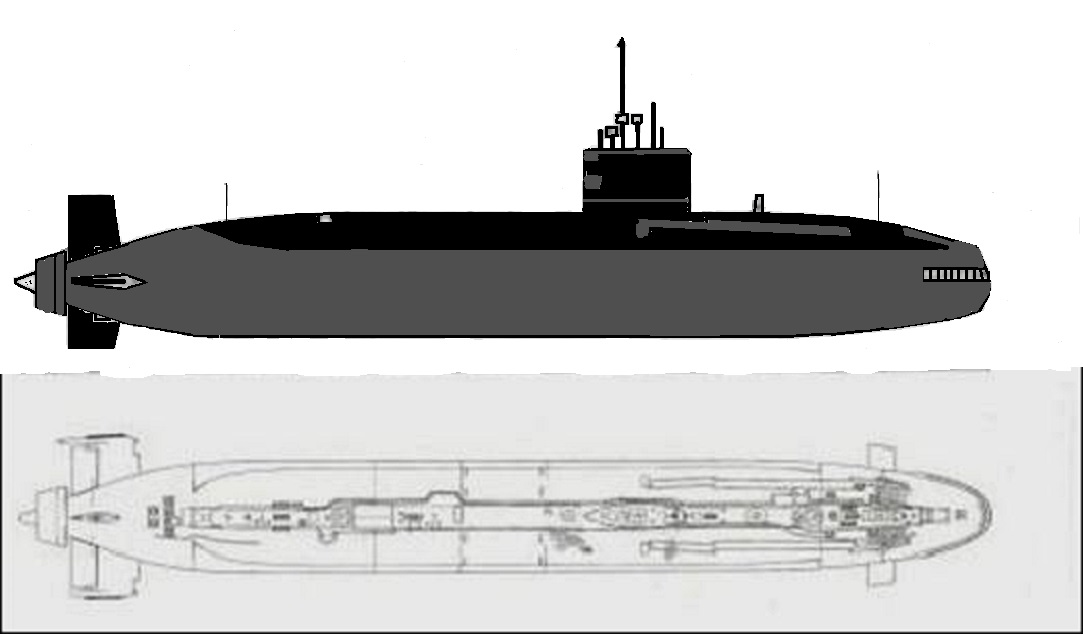
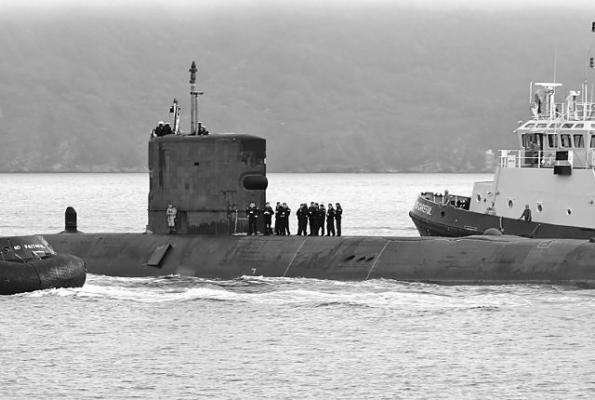
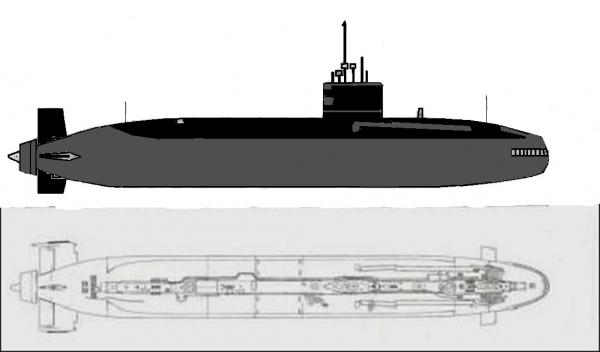
I am awaiting a new project to arrive soon in the shape of an Airfix Trafalger class RN attack submarine, it is in 1 350 scale and will be based on one of those that was based at Plymouth Dockyard UK. I have worked on a quick drawing here it is not colour accurate as the real ones are generally a combination of very dark greys and different black colours. OC
- 1 reply
-
- 3
-
-
- trafalger class
- airfix
- (and 2 more)