DONATION DRIVE - SUPPORT MSW - DO YOUR PART TO KEEP THIS GREAT FORUM GOING!
×

Karleop
-
Posts
500 -
Joined
-
Last visited
Content Type
Profiles
Forums
Gallery
Events
Everything posted by Karleop
-
 Rich, Beware of the Black Pearl !! Saludos, Karl
- 1,756 replies
-
- 1
-

-
- constitution
- constructo
- (and 1 more)
-
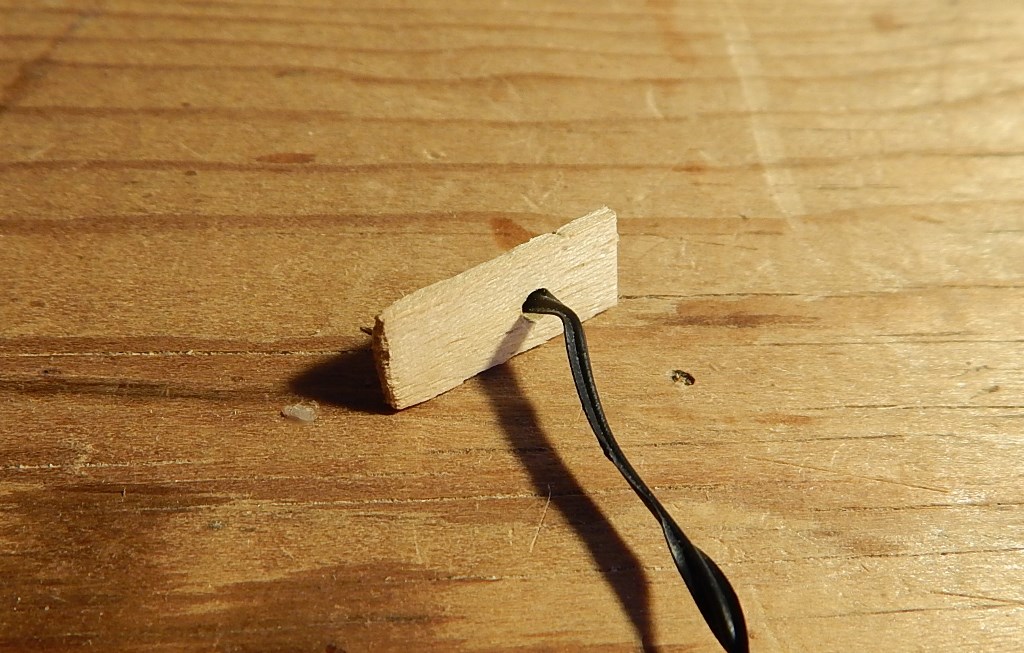
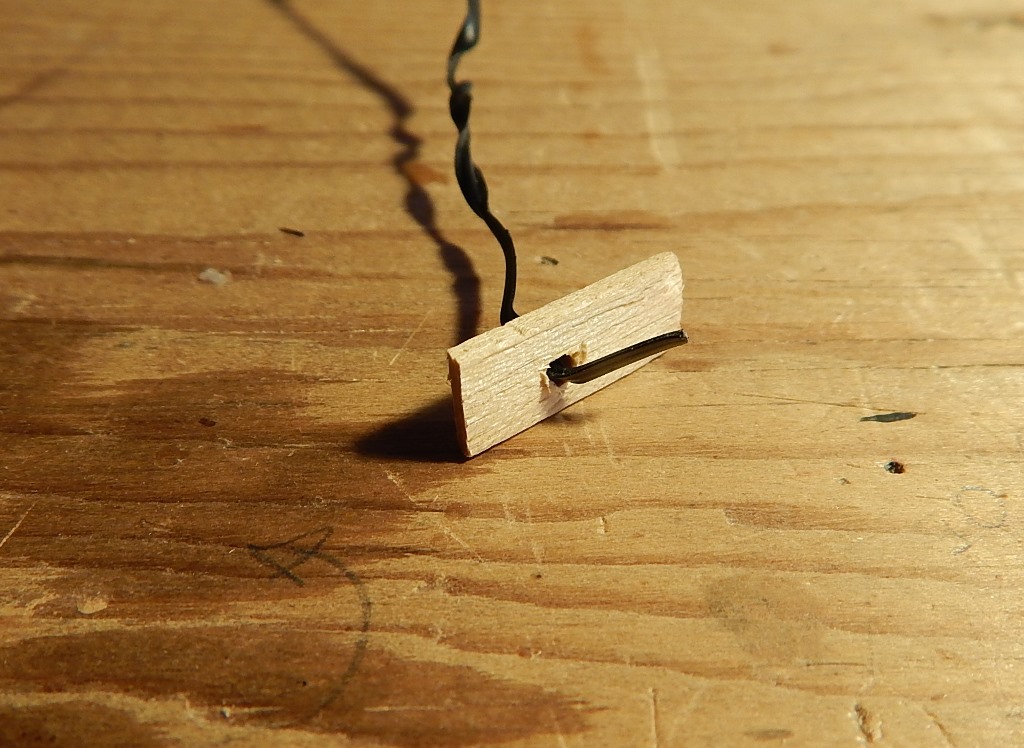
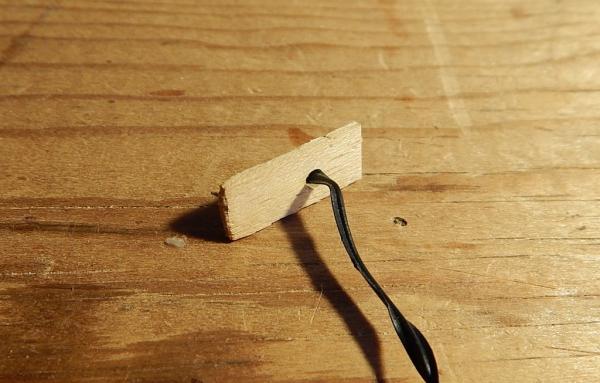
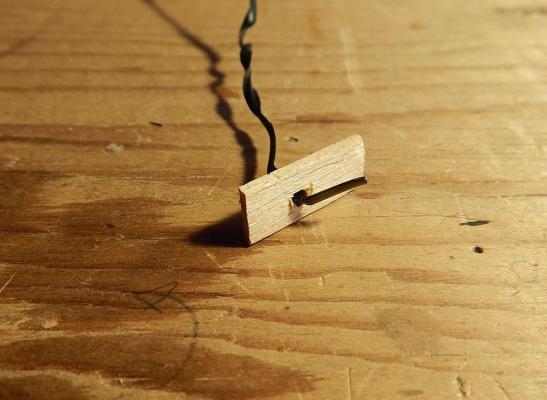
Hola Rich. one thing I made for those cases is to fix two strips of wood leaving the exact size of the strip I want to drill, this prevents the wood to open with the drill. Saludos, Karl
- 1,756 replies
-
- 1
-
-
- constitution
- constructo
- (and 1 more)
-
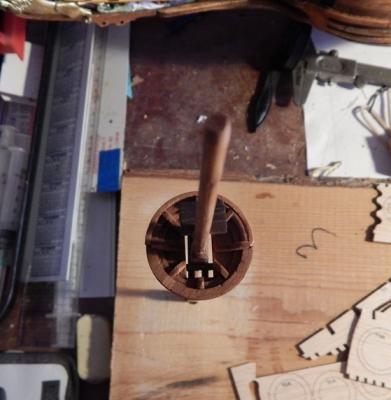
Hola TomJonas I did not have the intention to stain the blocks but as you mention could be a good idea. About the masts, if you have a Dremel and something like my base it is really easy. (see post #49) First you begin with one side and lowering the sanding roll very carefully until you get the desired height, then you have a flat surface so you can work the opposite side without problem. But be careful, you must to begin just touching it with the sanding roll and then lowering the roll step by step. Finally take a little piece of wood that has square section and use it as a guide to sand the adjacent side and proceed as before to have the opposite side. The interior of the gunports was indeed some problem at first but then it was really easy. Of course it could be much more easy if I do that before the planking, but I did´t. Saludos, Karl
-
Hola Rich, I agree with you, having enough spares and keeping them is essential to this hobby. In any of my models it was necessary to have replacements of planks, deadeyes, blocks, etc. Fortunately in the Constructo and Artesania Latina they give you some extras of everything, I already used some of them for the Vasa building. Now I have 3 boxes full of spares, and counting!! Saludos, Karl
- 1,756 replies
-
- 1
-
-
- constitution
- constructo
- (and 1 more)
-
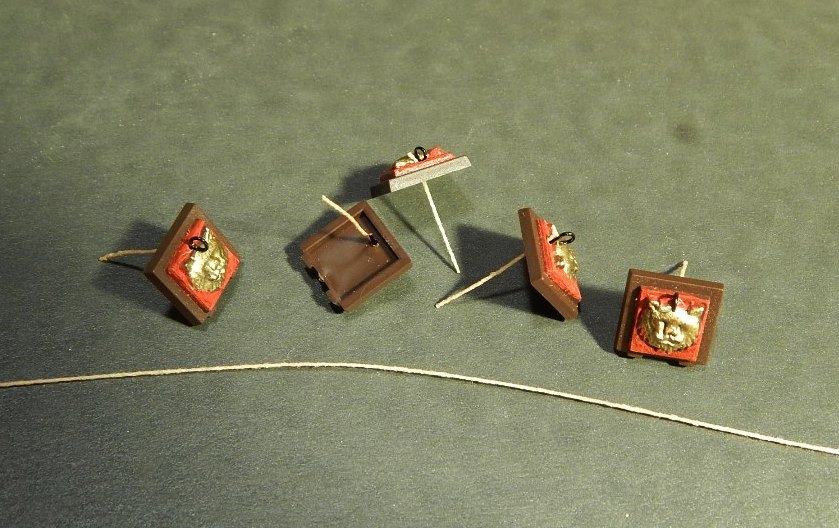
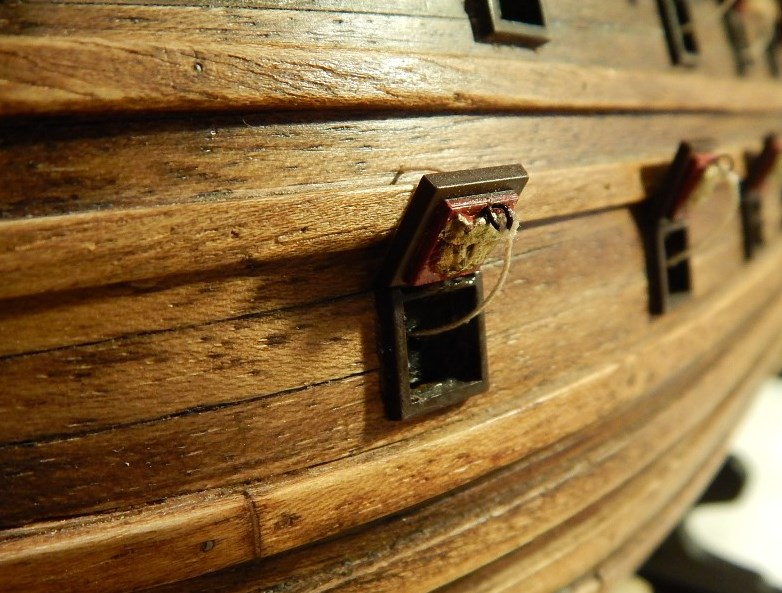
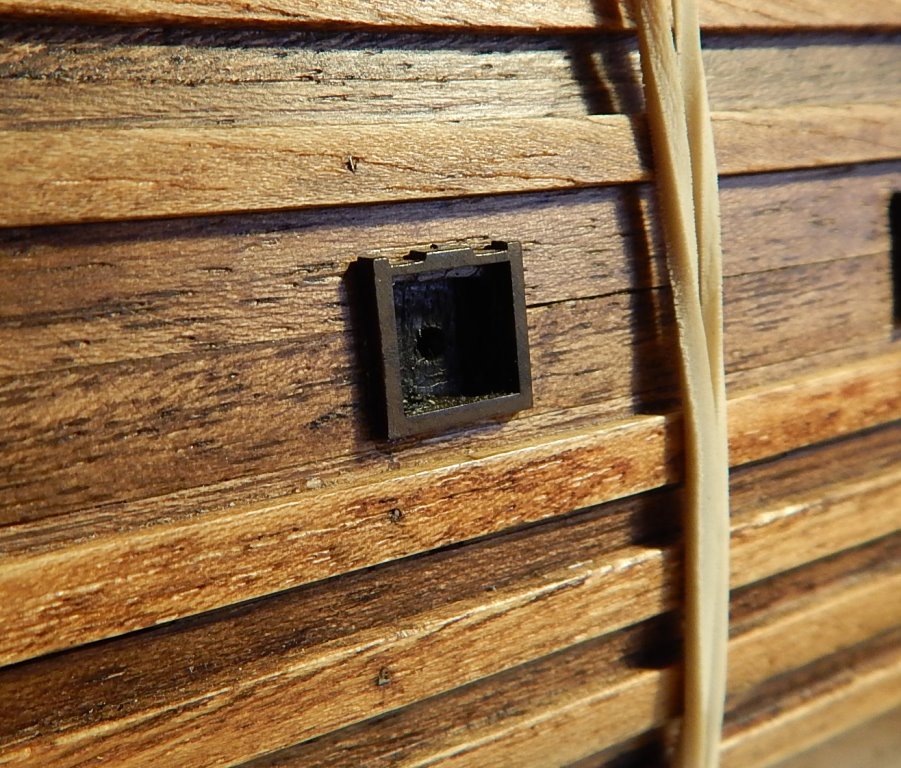
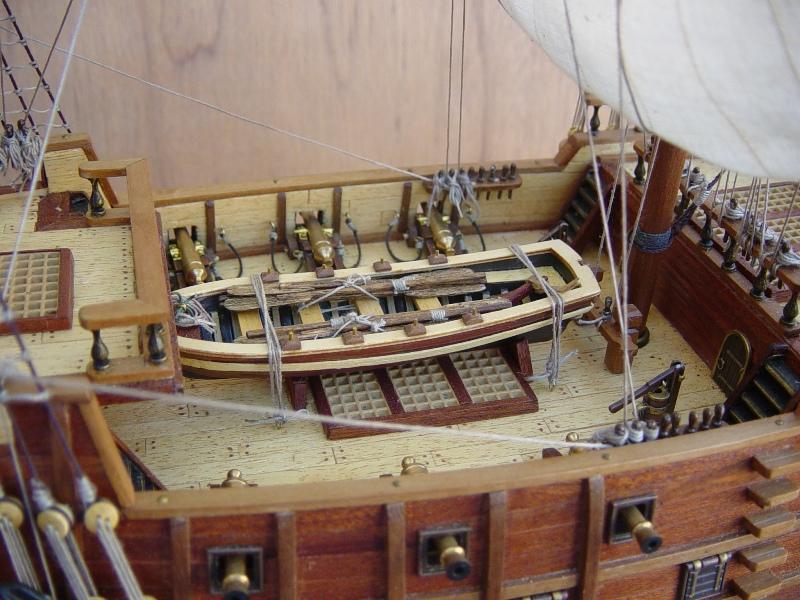
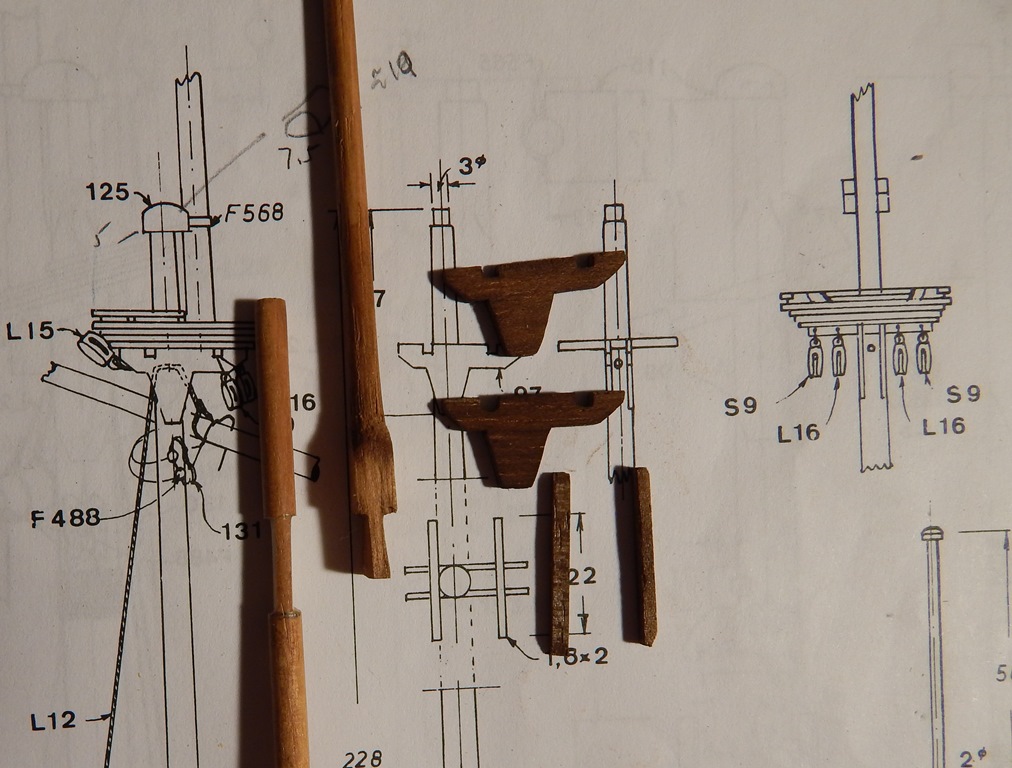
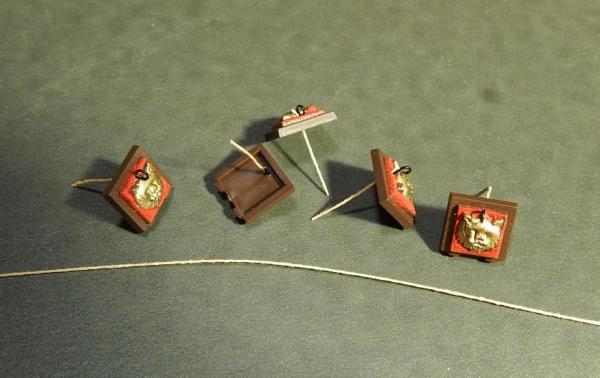
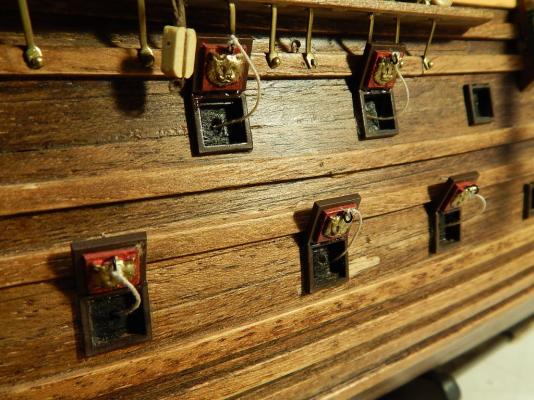
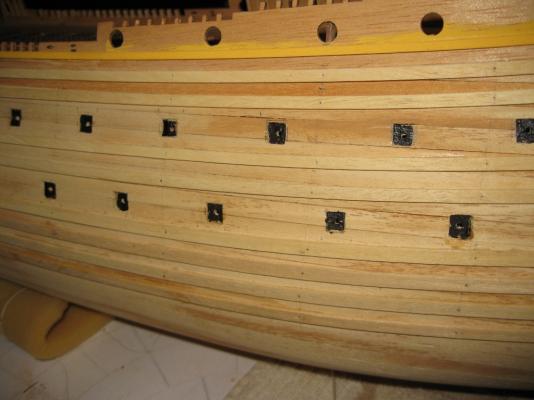
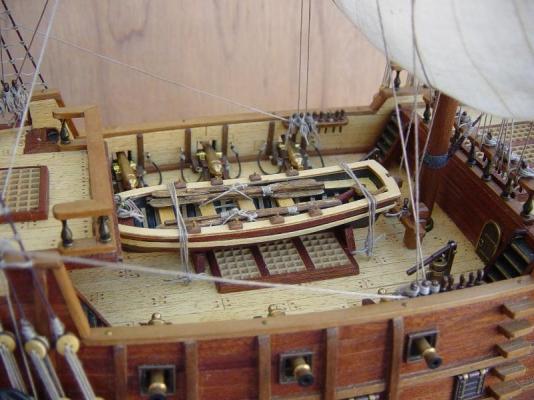
Hola a todos: Finally I decided to place the gunports for the cannons. Initially I had no plan to add the rear (holding) ropes and put only the ones that are in the front, because I had not a clear idea how to do it. The solution was to dip the yarn in diluted white glue and dry it vertically until hardened. To put the door in place, and having the hole for the yarn ready, the operation was very simple. Saludos

-
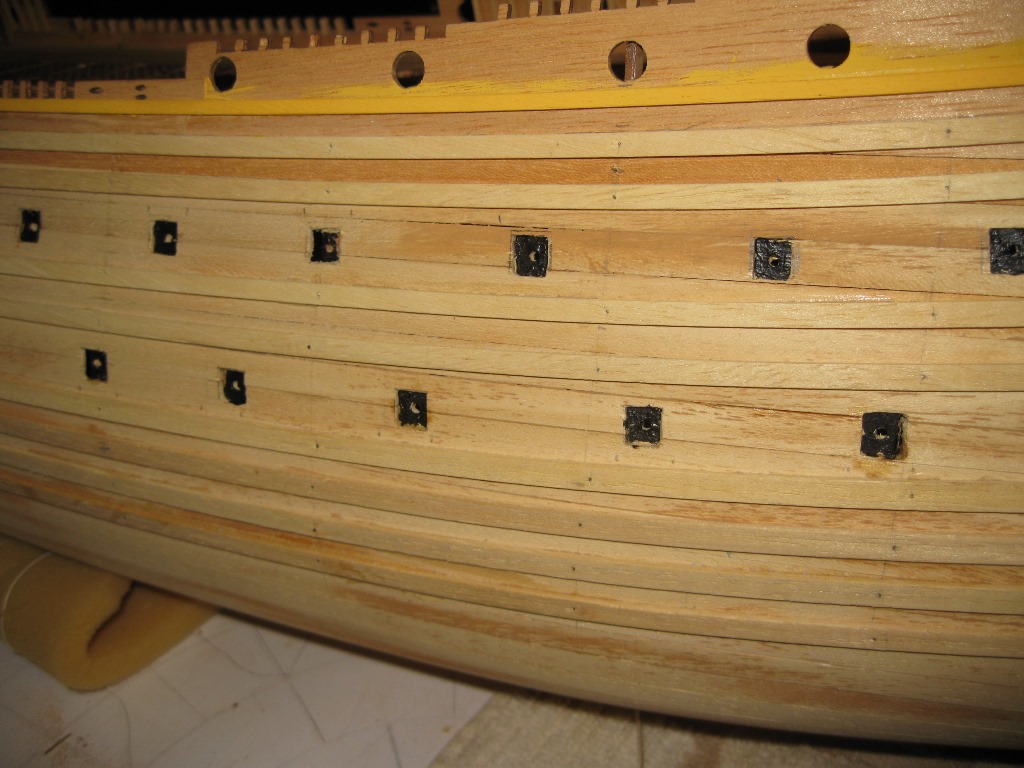
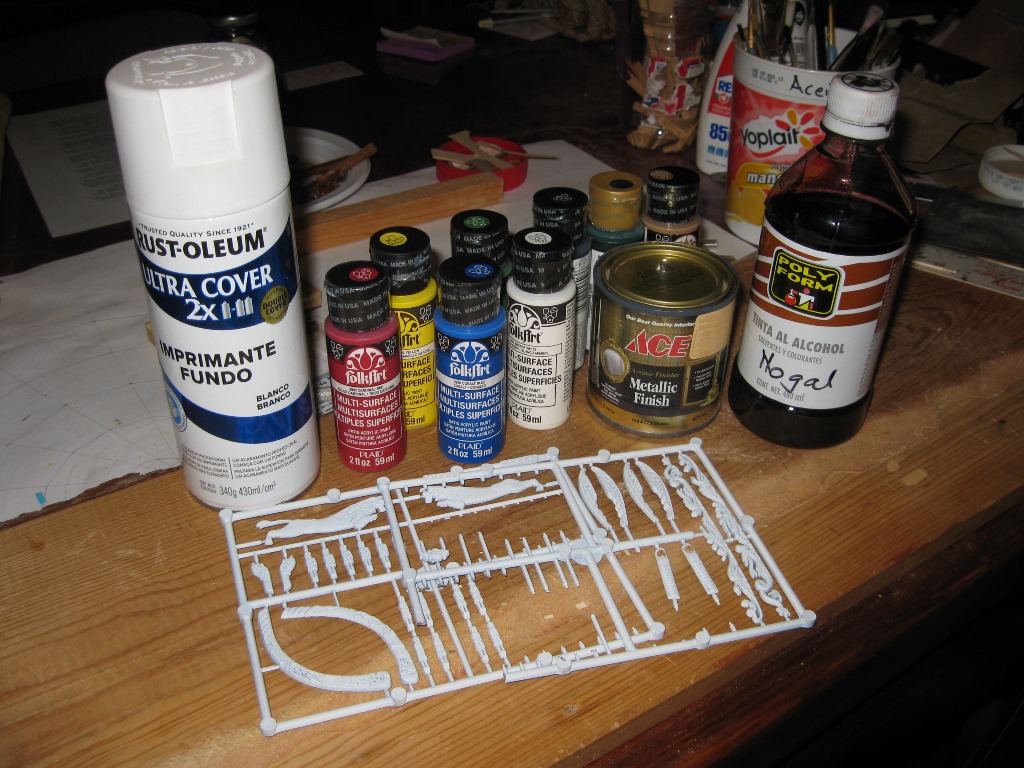
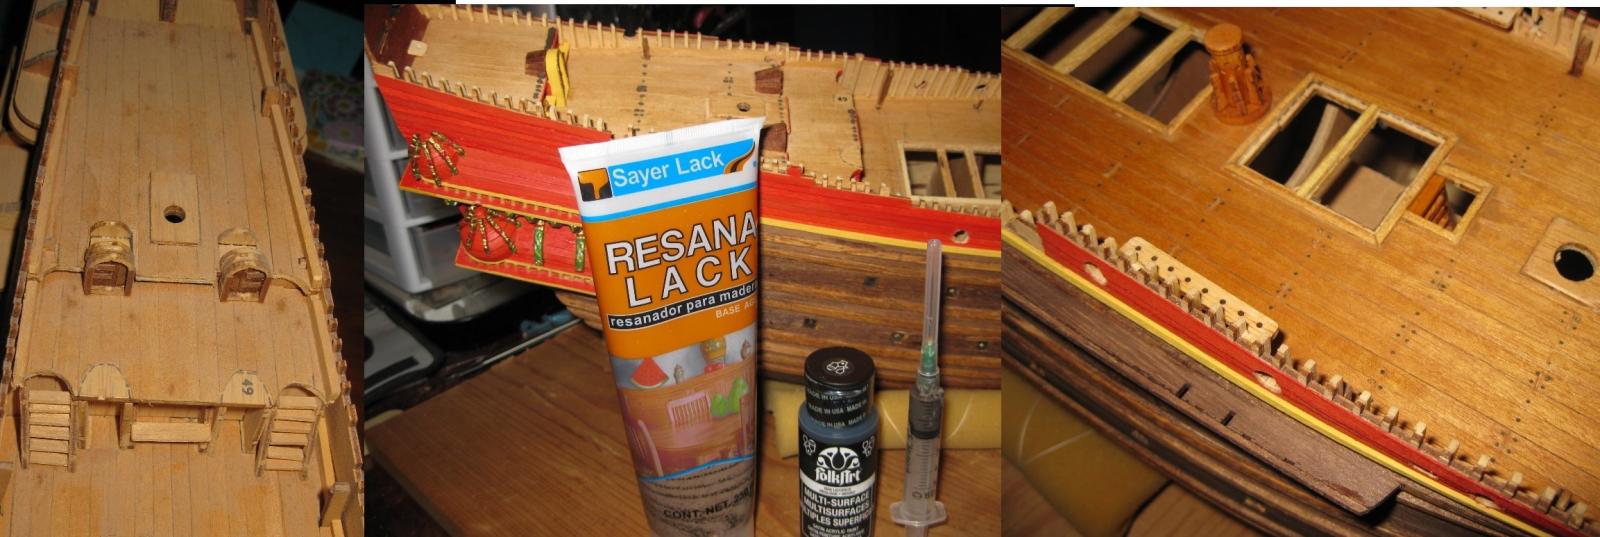
Hola TomJonas Welcome to another BB Vasa builder!! Answering you questions: To stain the hull I used an alcohol based Oak stain and for the masts and spars a mix of Magnolia (more yellowish and clearer color) and Walnut, both alcohol based wood stain. After 24 hr I used #600 sandpaper and then varnished it with Poliurethane clear SATIN varnish. Finally I made a last sanding with very fine sandpaper (#1500) and then rub the pieces with a clotton cloth. About your question to Frank "I missed making the interior of the gunports before planking". At first I didn´t do them because I wasn´t sure if it was worth all that work for a boat that was in bad shape when I acquired it. But when I finished the planking I decided to do the the interior of the gunports, not in a perfect and regular way, but only doing the holes, then squared them with a file and finally introducing little pieces of planks with the hole the size of the cannons base and the width of the gunport, add some white glue and holding them with a plastic coated wire (the one used to close the bread bags). The results were quite acceptable. Here some pictures: To paint the plastic figures first I sprayed with white undercoat and for the colors I used "Multisurface" Acrylic pain: For the hull I didn´t use wood fillers but I used one to simulate the treenails (that were not done in the model when I acquired it), make the holes and use a syringe to introduce the filler (combined with a small quantity of black acrylic paint to make it darker and more fluid) Saludos, Karl


-
Hola Rich, I completely agree with Augie about the little things that makes the whole wonderful and mainly the self satisfaction for a job well done. By the other side I remember a comment that Ulises made some time ago in this forum: is very frustrating when a person come to my house, see one of my models, and after a glance made the comment "very nice" for a work that take me months to build!!! Saludos and continue with your very nice work, Karl
- 1,756 replies
-
- 1
-
-
- constitution
- constructo
- (and 1 more)
-
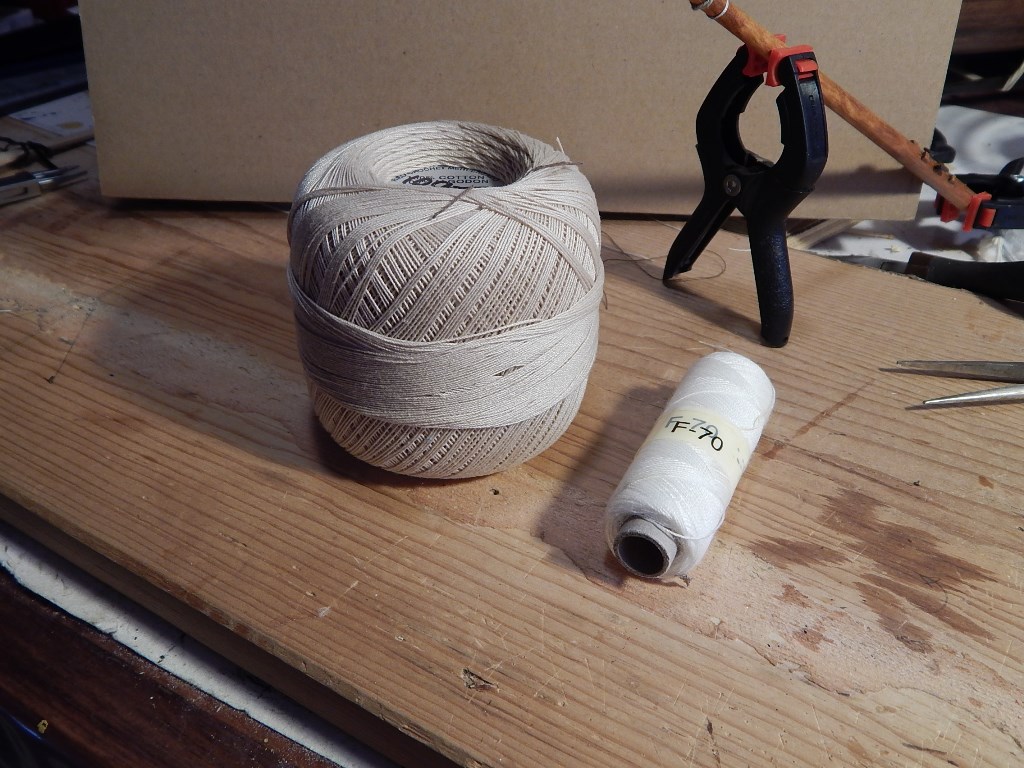
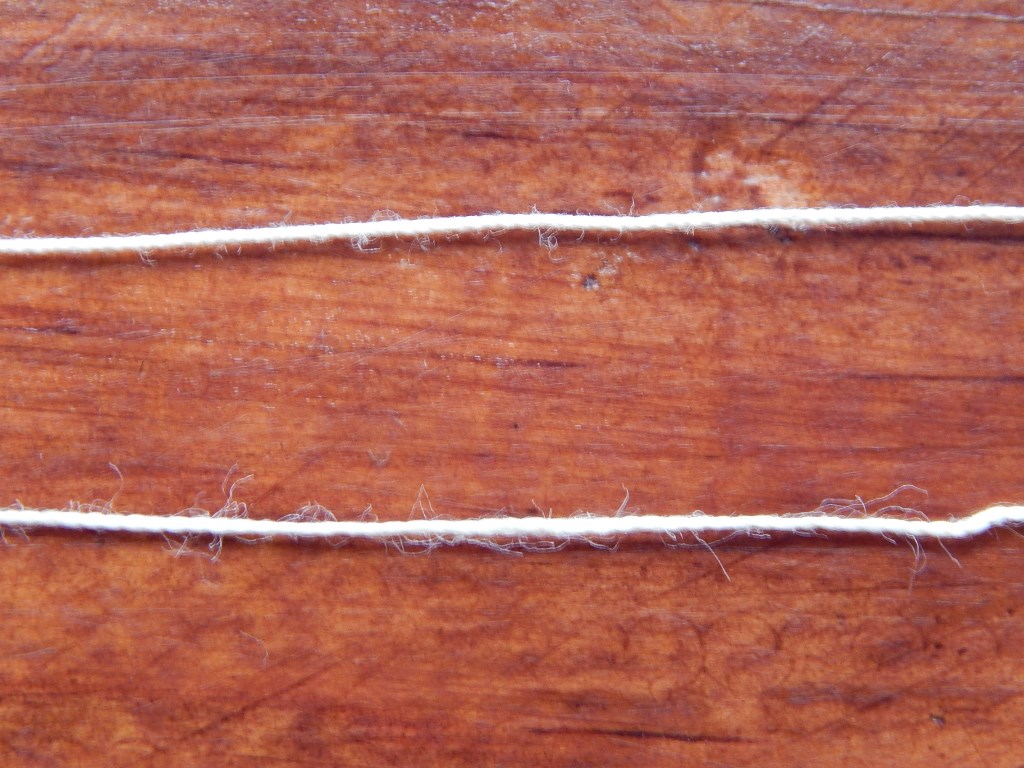
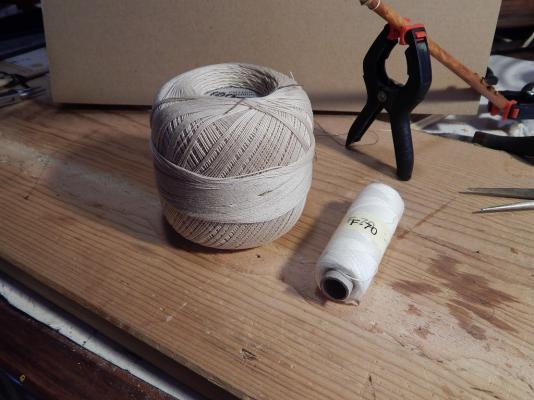
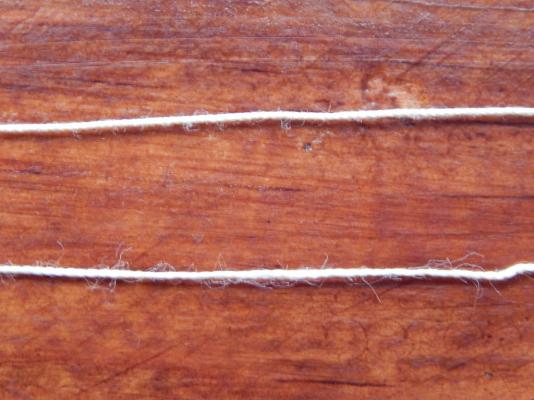
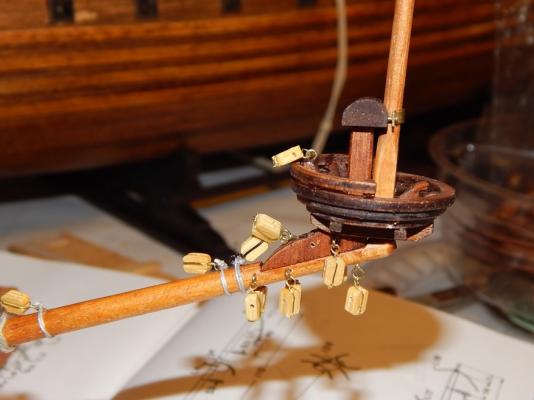
Hi guys, a little update. I finished with the bowsprit shrouds. I must say that instead of using the white thread that comes with the kit to make the ratlines I substitute it with a light brown or beige color cotton thread. This was acquired in a fabric store and is named as "crochet thread" that comes in three thicknesses: 10, 20 or 30. I used number 30 that is the thinner one. By the way, it is less fuzzy (?) than the one that comes with the kit. (lower one in the next picture) Saludos, Karl
-
Thanks for your comments David and Matti. By the way Matti, I am waiting to see your pictures of masts and rigging. Saludos, Karl
-
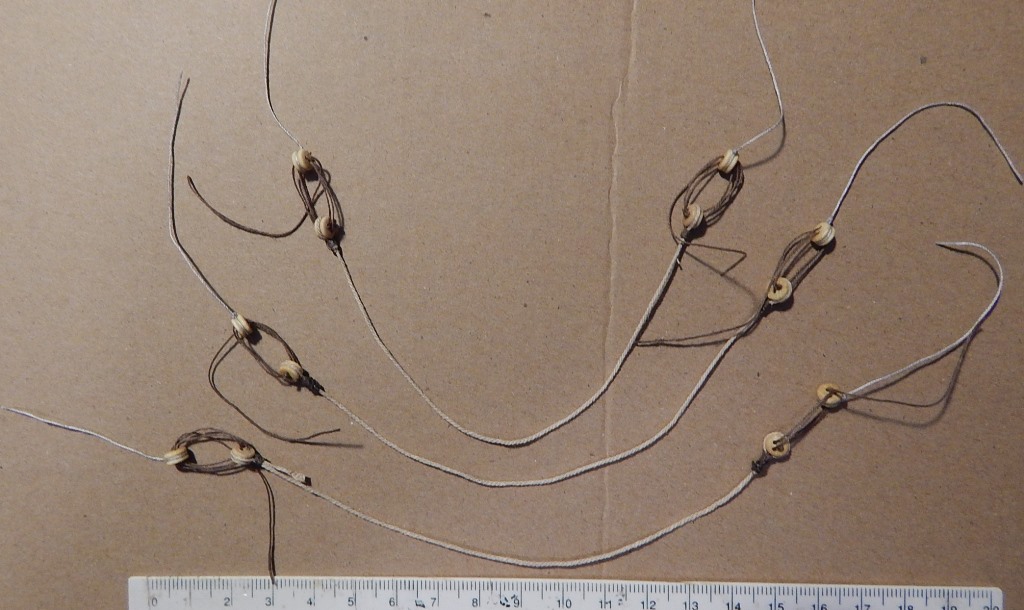
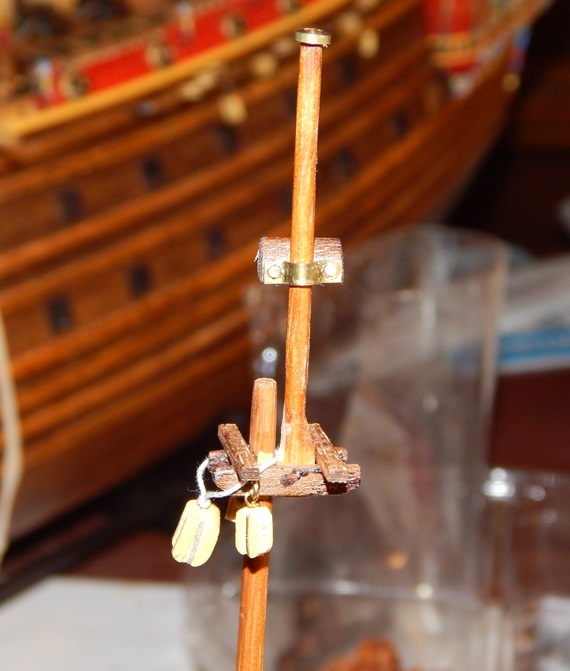
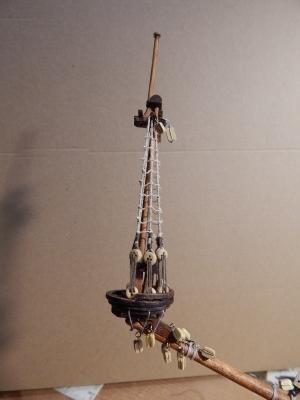
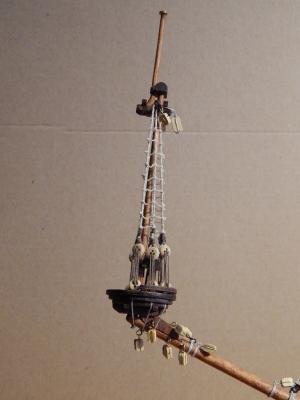
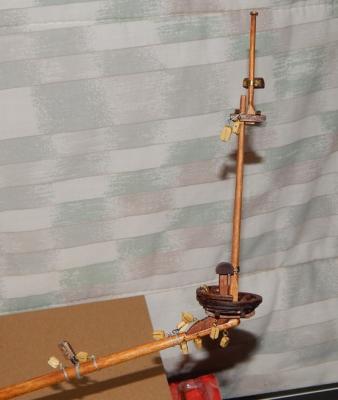
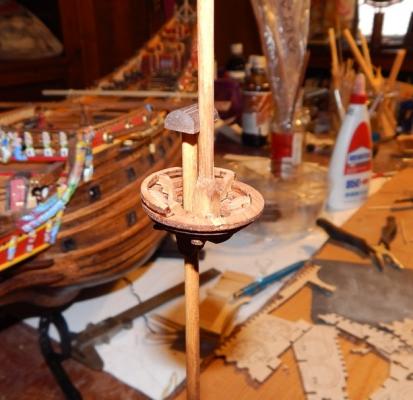
Hola amigos: After sanding, staining and varnishing the masts and spars I started to assemble the bowsprit placing the topmast, masts, blocks and tops. , , Because deadeyes are partially tucked into the top I decided to make the shrouds separately because otherwise it would be more difficult to hold them. To put the shrouds between the masts I leave unglued the topmast cap. This operation is contrary to the normal way of doing it. Saludos, Karl


-
Hola Steve, very nice work. The anchors looks great. Saludos, Karl
-
Hola Jan, I am just in the process to adding the gunports and your idea of rigging the line to the cannons looks great. Saludos, Karl
-
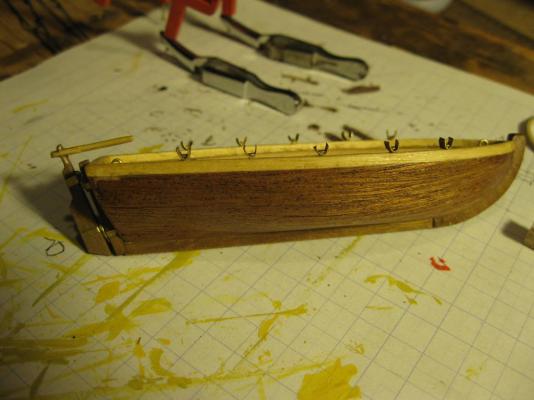
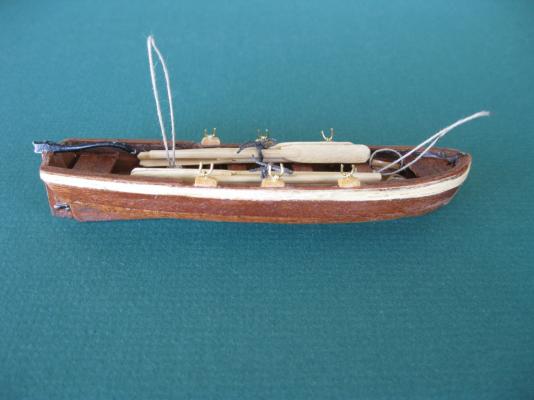
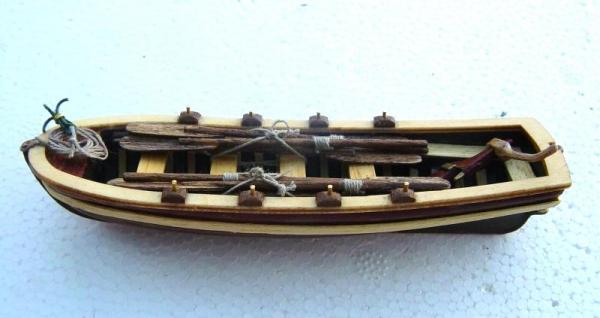
Hola Schnu, one thing you can do with the metal boat is cover it with wood. I made that in three of the kits : San Francisco, Endeavour and Pandora and the result is very acceptable as you can see in the pictures: Saludos, Karl
- 58 replies
-
- 10
-
-
- la candelaria
- occre
- (and 1 more)
-
Yes David, and I feel that the rigging will be a real challenge Saludos, Karl
-
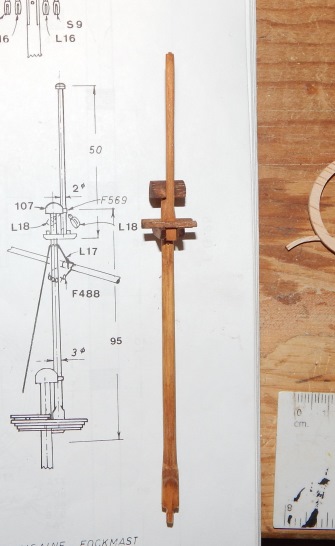
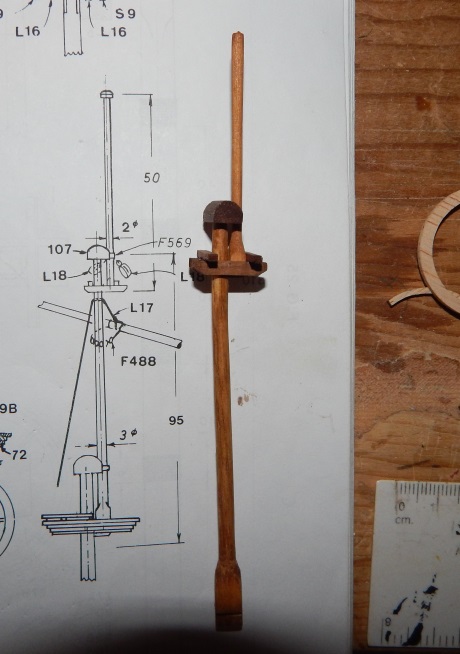
Hi guys. Update: I continued with the upper part of the foremast and begin the parts of the mainmast. (As you notice, I must do a little sanding because the higher extreme of the mast is wider than the base) Saludos Karl


-
Hola olliechristo, I made the (AL) HMS Endeavour a couple of years ago and it is a good kit. As you already now there a lots of information about this bark and also many pictures of the replica, so you can do a great model. Saludos from the Gulf of California, Karl
-
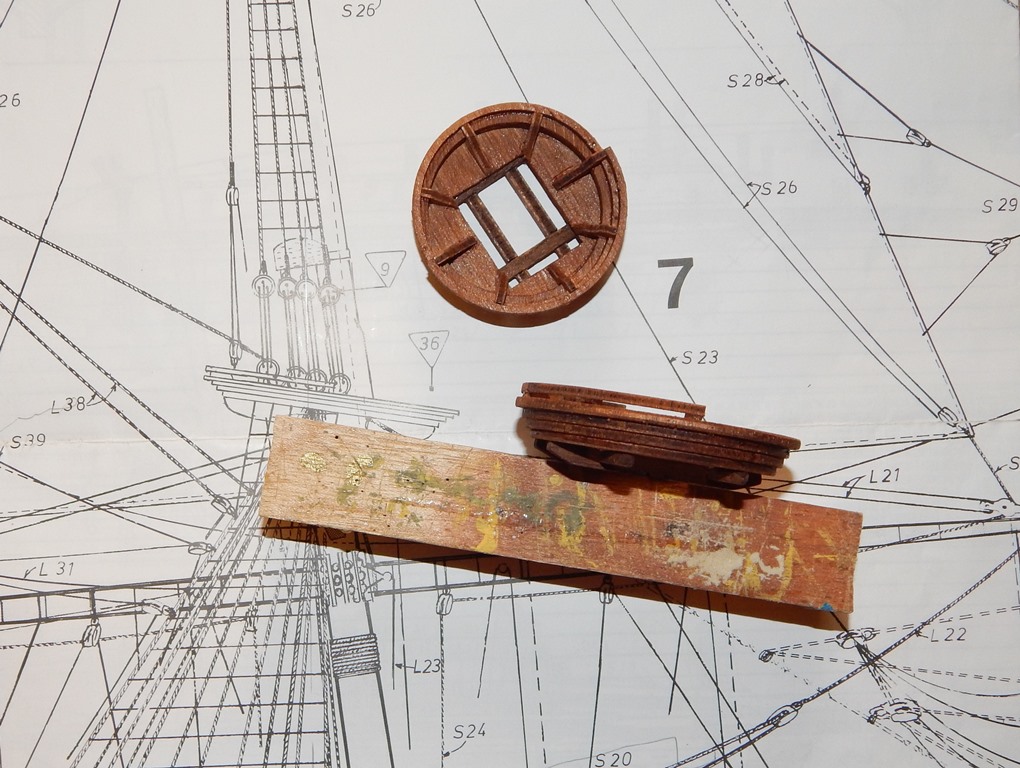
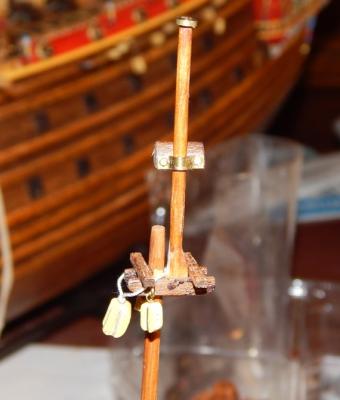
Thanks for your comments Mark, David and Matti. As I already mention in some place, all kits I built had some imperfections, some in materials, some on instructions, or both, and this is part of the game. In reference to the BB Vasa I must say, that comparing with the original, is the more accurate kit of the ship and in general the materials are very good. My complaint is for the lack of clarity in instructions and mainly because the drawings included in the booklet show differences to the plans(e.g. positions and number of deadeyes on the chainboards, scale of topmasts) Update: I made the first upper topmast leaving space for the shrouds and with only 2 instead of 3 rings: Saludos

-
All depends Frank, if you want to be a purist dont put the railings, otherwise is your model and make what you think looks better. Saludos, Karl
-
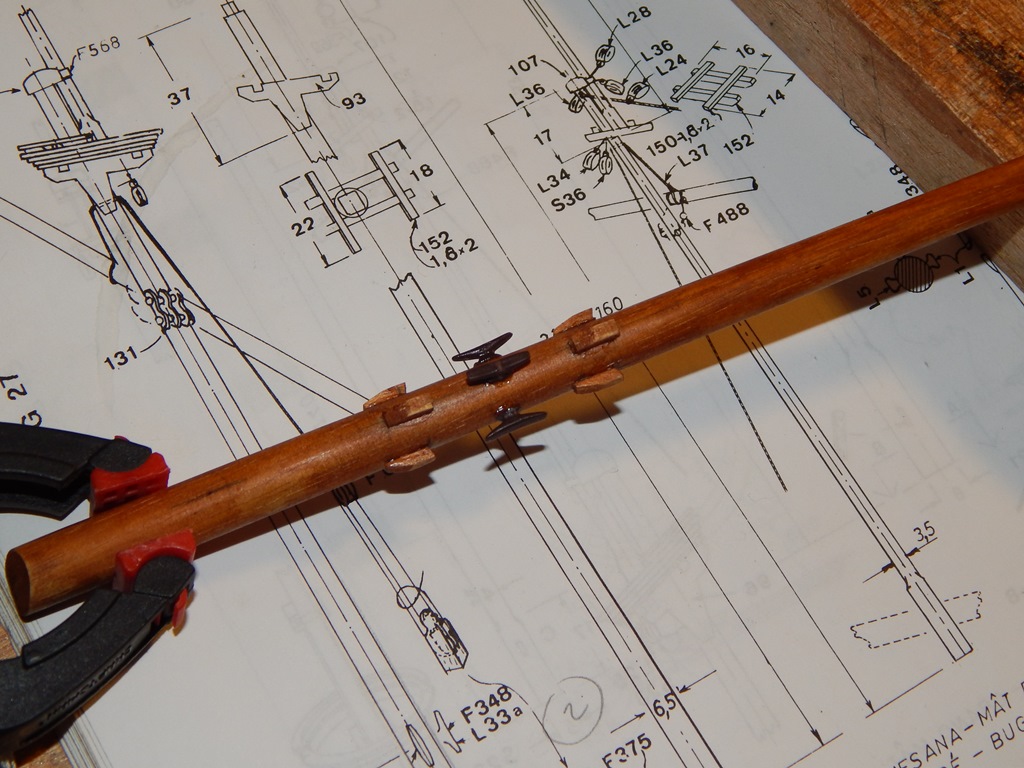
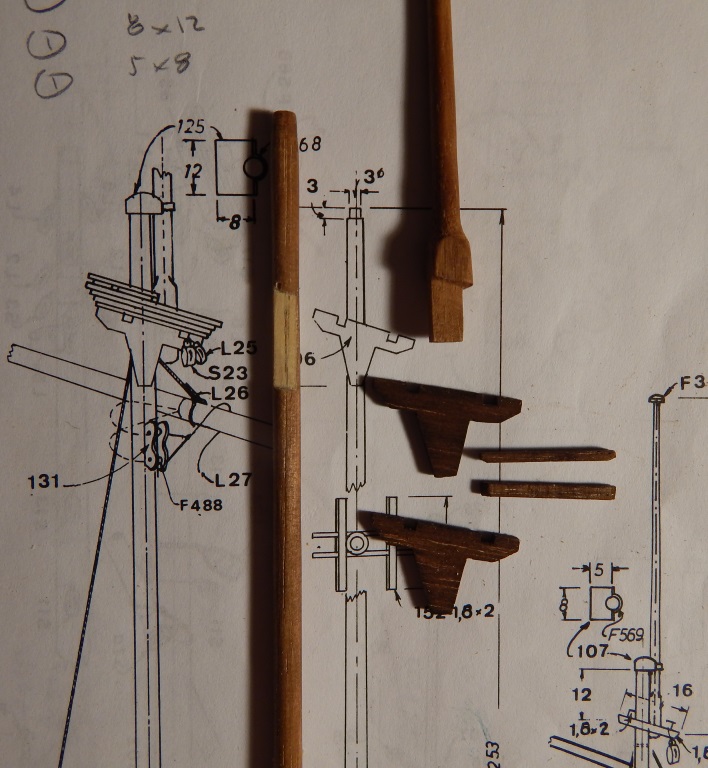
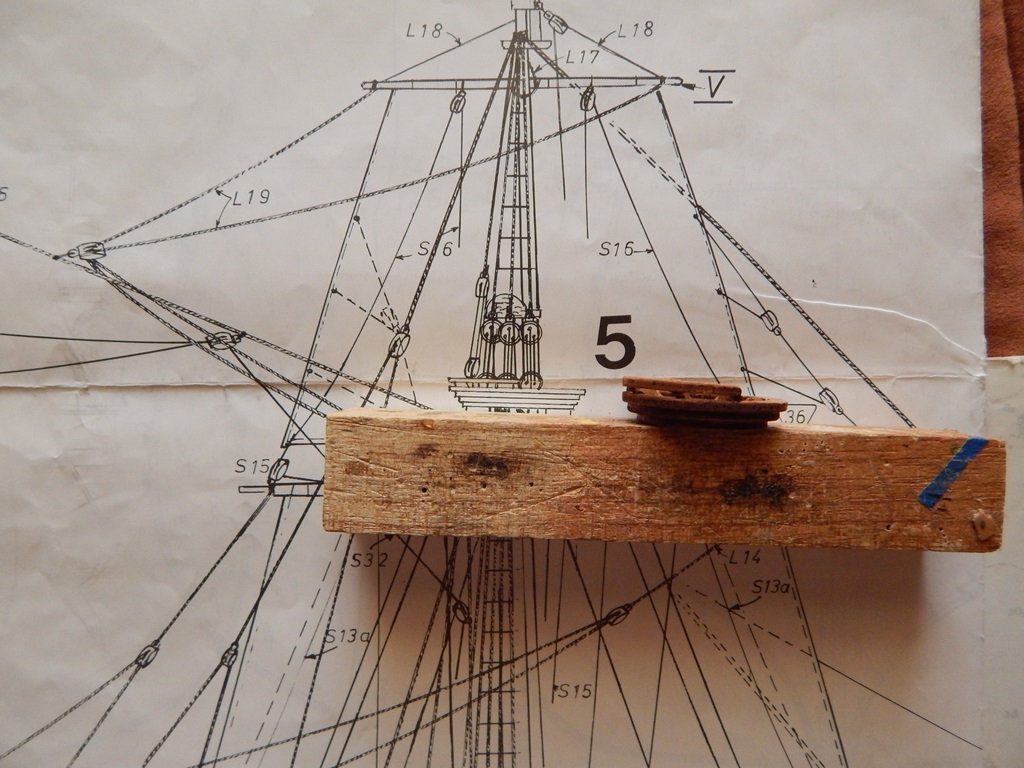
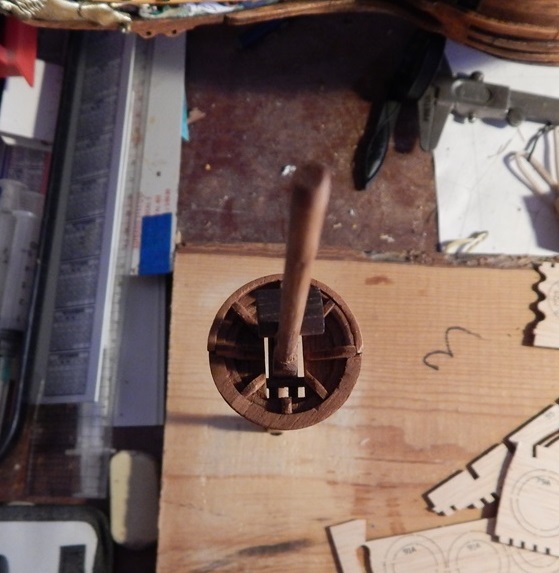
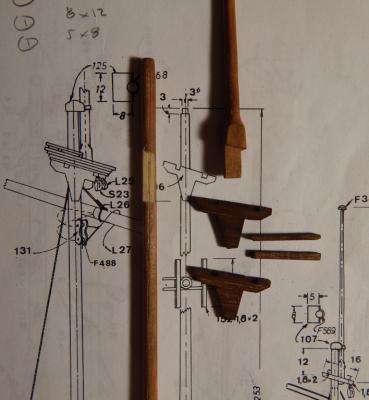
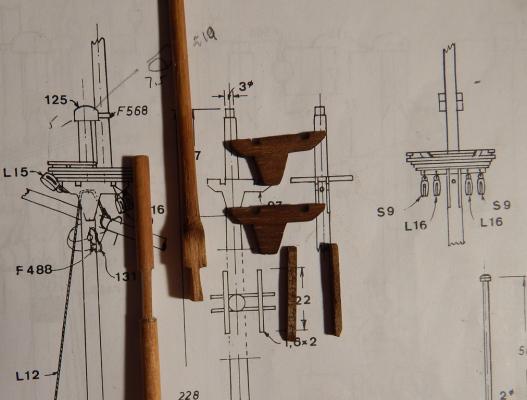
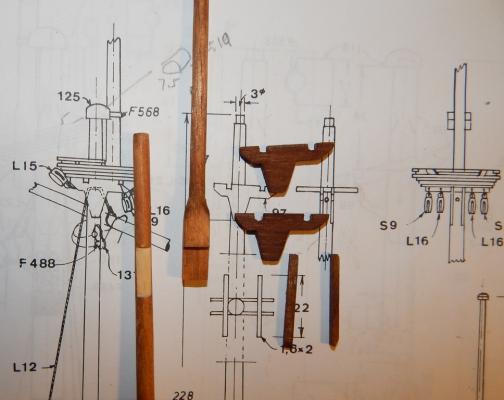
Hola amigos! After a week out of town I resume my building. First of all, thanks to Matti because he confirms that the instructions Manual is wrong (again) in respect of the topmasts because the thickness of them does not correspond to the scale of the real ship. Curiously in the plans appear correct and is easy to see that the plans do not correspond to the kit. Unfortunately I already made the lower topmasts of the foremast and the main mast according the Manual but I will follow Matti in putting only 2 instead of the 3 rings that come in the kit to the other topmasts. It will be necessary to make and adjust the size of all the pieces that hold the rings but I don´t think will be a problem. Knowing the above I proceed to make sure if the other topmasts fits properly to the masts. And the first thing to notice was that there were not enough space to enter the shrouds and it was necessary to lime the pieces as shown in the next pictures: Saludos, Karl
-
Really nice cannons Michael Karl
-
Hola Matti, seeing your topmasts I confirm that the instructions in the Manual are wrong (not so in the plans that the high appear correct). Unfortunately I already made the lower topmasts of the foremast and the main mast according the Manual but I will follow your idea of putting only 2 instead of the 3 rings in the other topmasts. It will be necessary to make and adjust the size of all the pieces that hold the rings but I don´t think will be a problem. From now on I will wait your building progress before continuing!! Saludos, Karl
-
Hola Jcoby I already bought the same kit but havn't started it yet because now I am involved in the building of BB Vasa. But I´m sure your log will be very useful for me in the next future. By the way, your building looks very nice, congratulations. Saludos from the Gulf of California, Karl
-
Hola Matti, really nice masts and your tip for making groves is excellent. I will follow your pictures to learn how to make the rigging, for sure they will far better than the instructions plans. Saludos, Karl
-
Thanks Frank. Indeed the BB lantern looks much better than the Corel one, and besides the upper part of the lantern I think the rest can be done with no problem. If I can help you don´t hesitate to ask. Saludos, Karl
-
Hola Frank, you really made a good job with the cannon and carriages, they look very nice. By the way I use the Patina product that are sold for stained glass to make the bronze cannons look older and it works pretty well. Saludos, Karl