HOLIDAY DONATION DRIVE - SUPPORT MSW - DO YOUR PART TO KEEP THIS GREAT FORUM GOING! (83 donations so far out of 49,000 members - C'mon guys!)
×


scrubbyj427
-
Posts
1,690 -
Joined
-
Last visited
Content Type
Profiles
Forums
Gallery
Events
Everything posted by scrubbyj427
-
 Looking good Ben, moving along at a good pace.
 -
Looking very nice Dusan. Looking forward to seeing some frames on that thing.
-
That looks great Frank! Definitely do not paint it. Pear is lovely.
-
Nicely done Ben, everything looks like it’s fitting very well. That jig should set down in the bulkheads nice and snug without needing any glue.
-
Beautiful work Dusan! I would go ahead and add them. I think I’m going to implement them into the cut files here forward.
-
I like the red as well Kevin, I’m going to do the same on mine. It shows the panel definition really well
-
Great progress Ben, everything looks perfectly straight. Well done!
-
Looking great Ben! She’s starting to take shape and space!
-
Great job on the guns! The real gratification comes when you get to install them!
-
Very nice Ben! She’s looking great!
-
Looks wonderful Dusan! Glad you’re finally on your way! JJ
-
Nicely done Ben! Can’t wait to see some poly on that.
-
Looking Good Ben, yours is the first one to have this feature.
-
Beautiful work Yves!
-
Thank you Alan, it’s been a lot of work and it’s nice to finally see it get off the ground. It appears you’re just down the road from me.
-
Looks awesome Chris. I’m really curious about using the hornbeam on the wales as well. Will be following this one.
-
Looking good!
-
Thank you PAckerman, I’m very excited to follow Bens progress on Portland, probably more so than my own lol.
-
Hi Greg, I’m currently getting going on a website, as soon as I have something I will post a link. Ben and Dusan are building two prototypes to prove the structural design and provide input while I build ahead and I’m still writing instructions. This is a massive model and the instructions are very long for chapter one.
-
Beautiful work Tiziano! Very inspiring! JJ
-
Thank you Ben, it’s coming along. Going to finish up the vertical fillers today and move onto the final port forward frames.
-
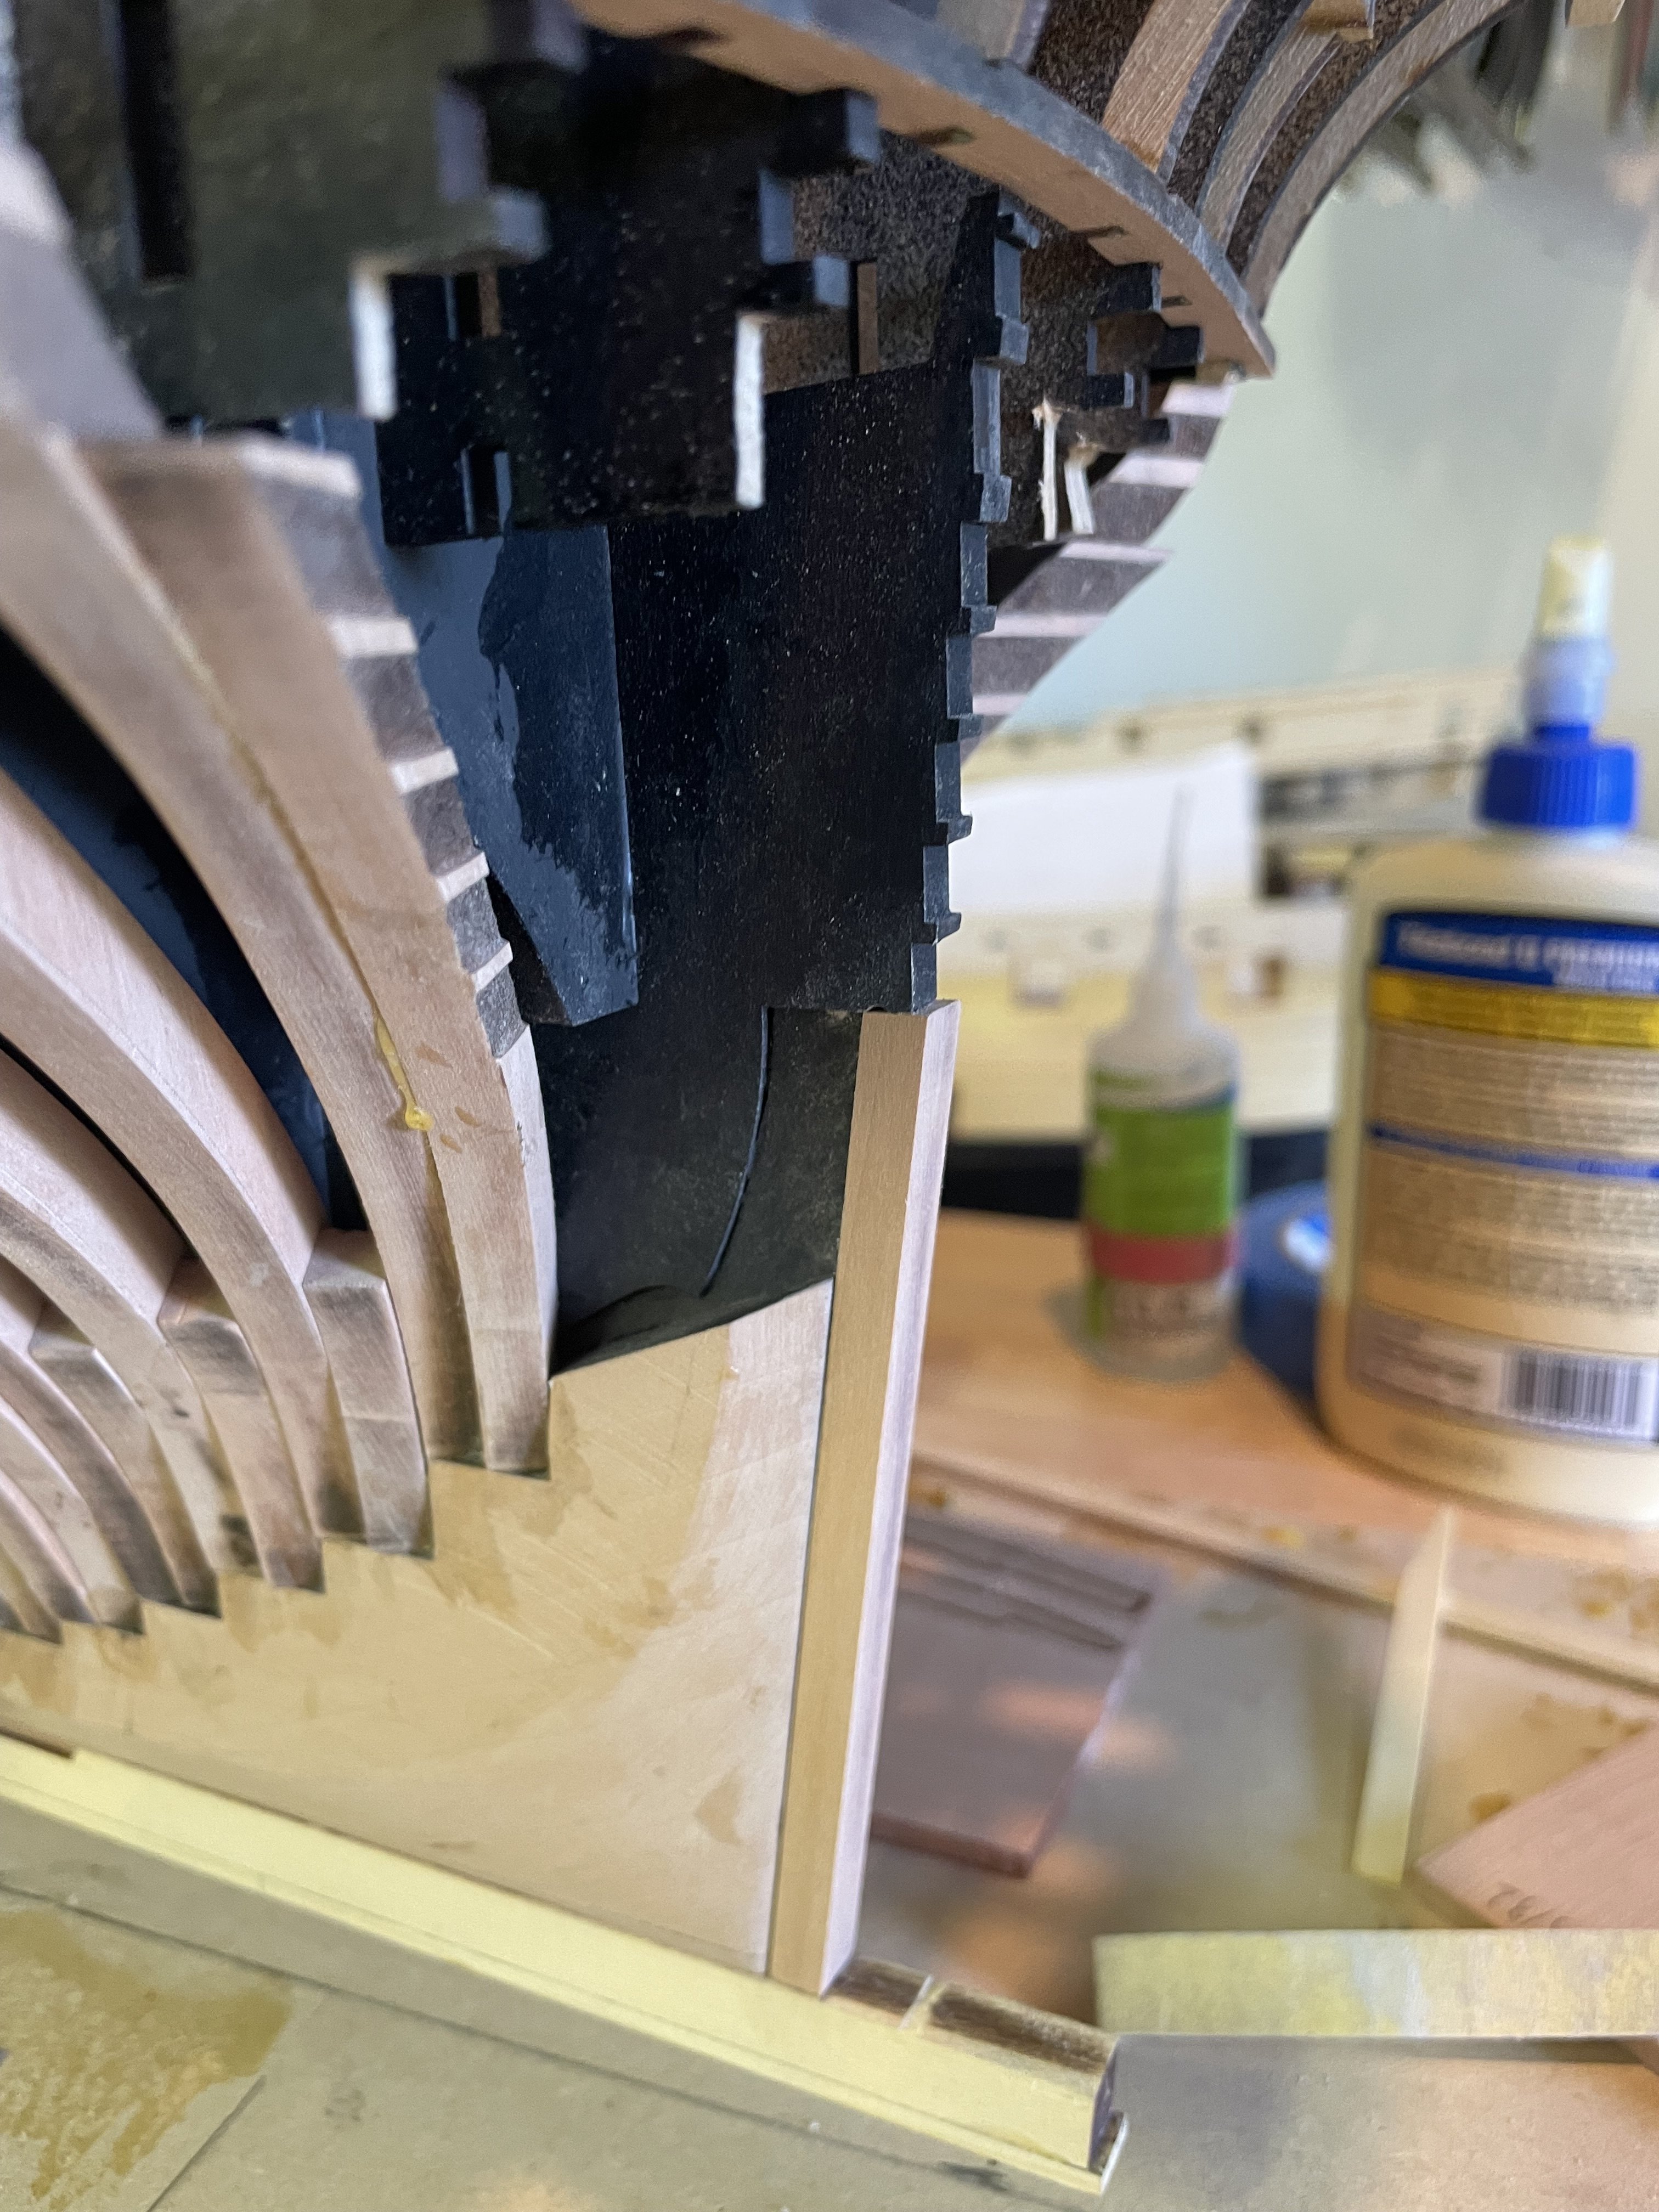
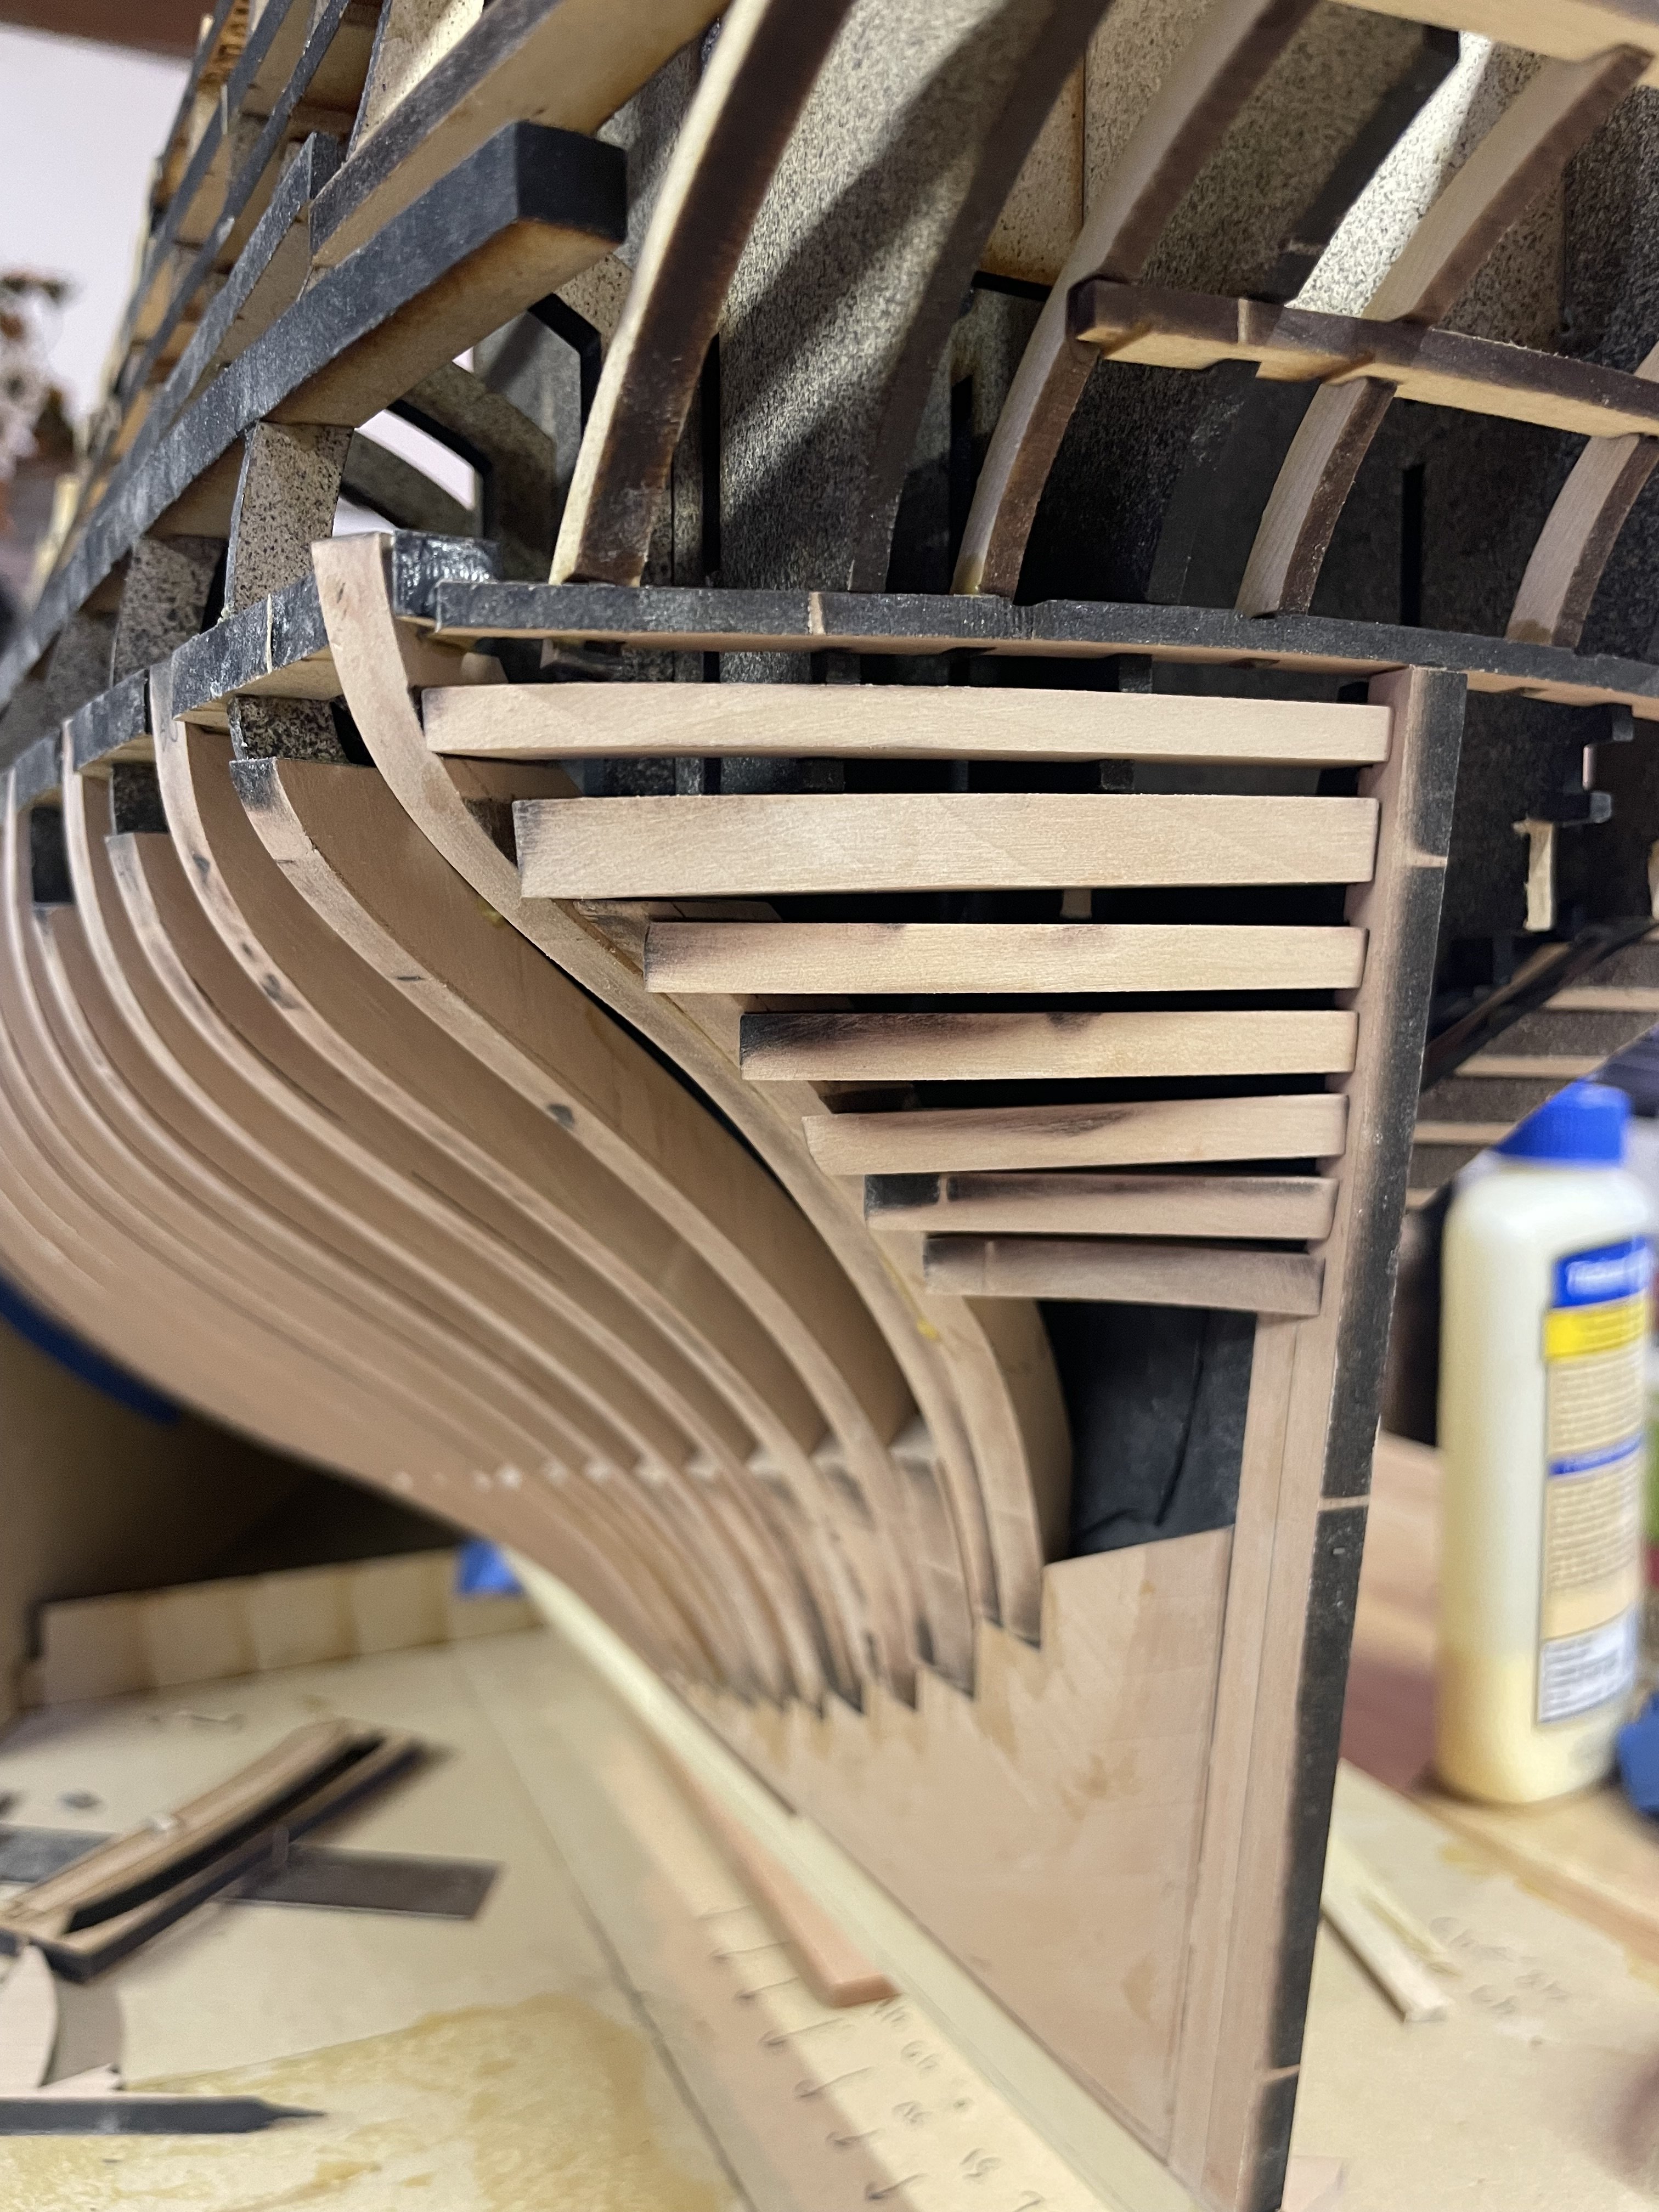
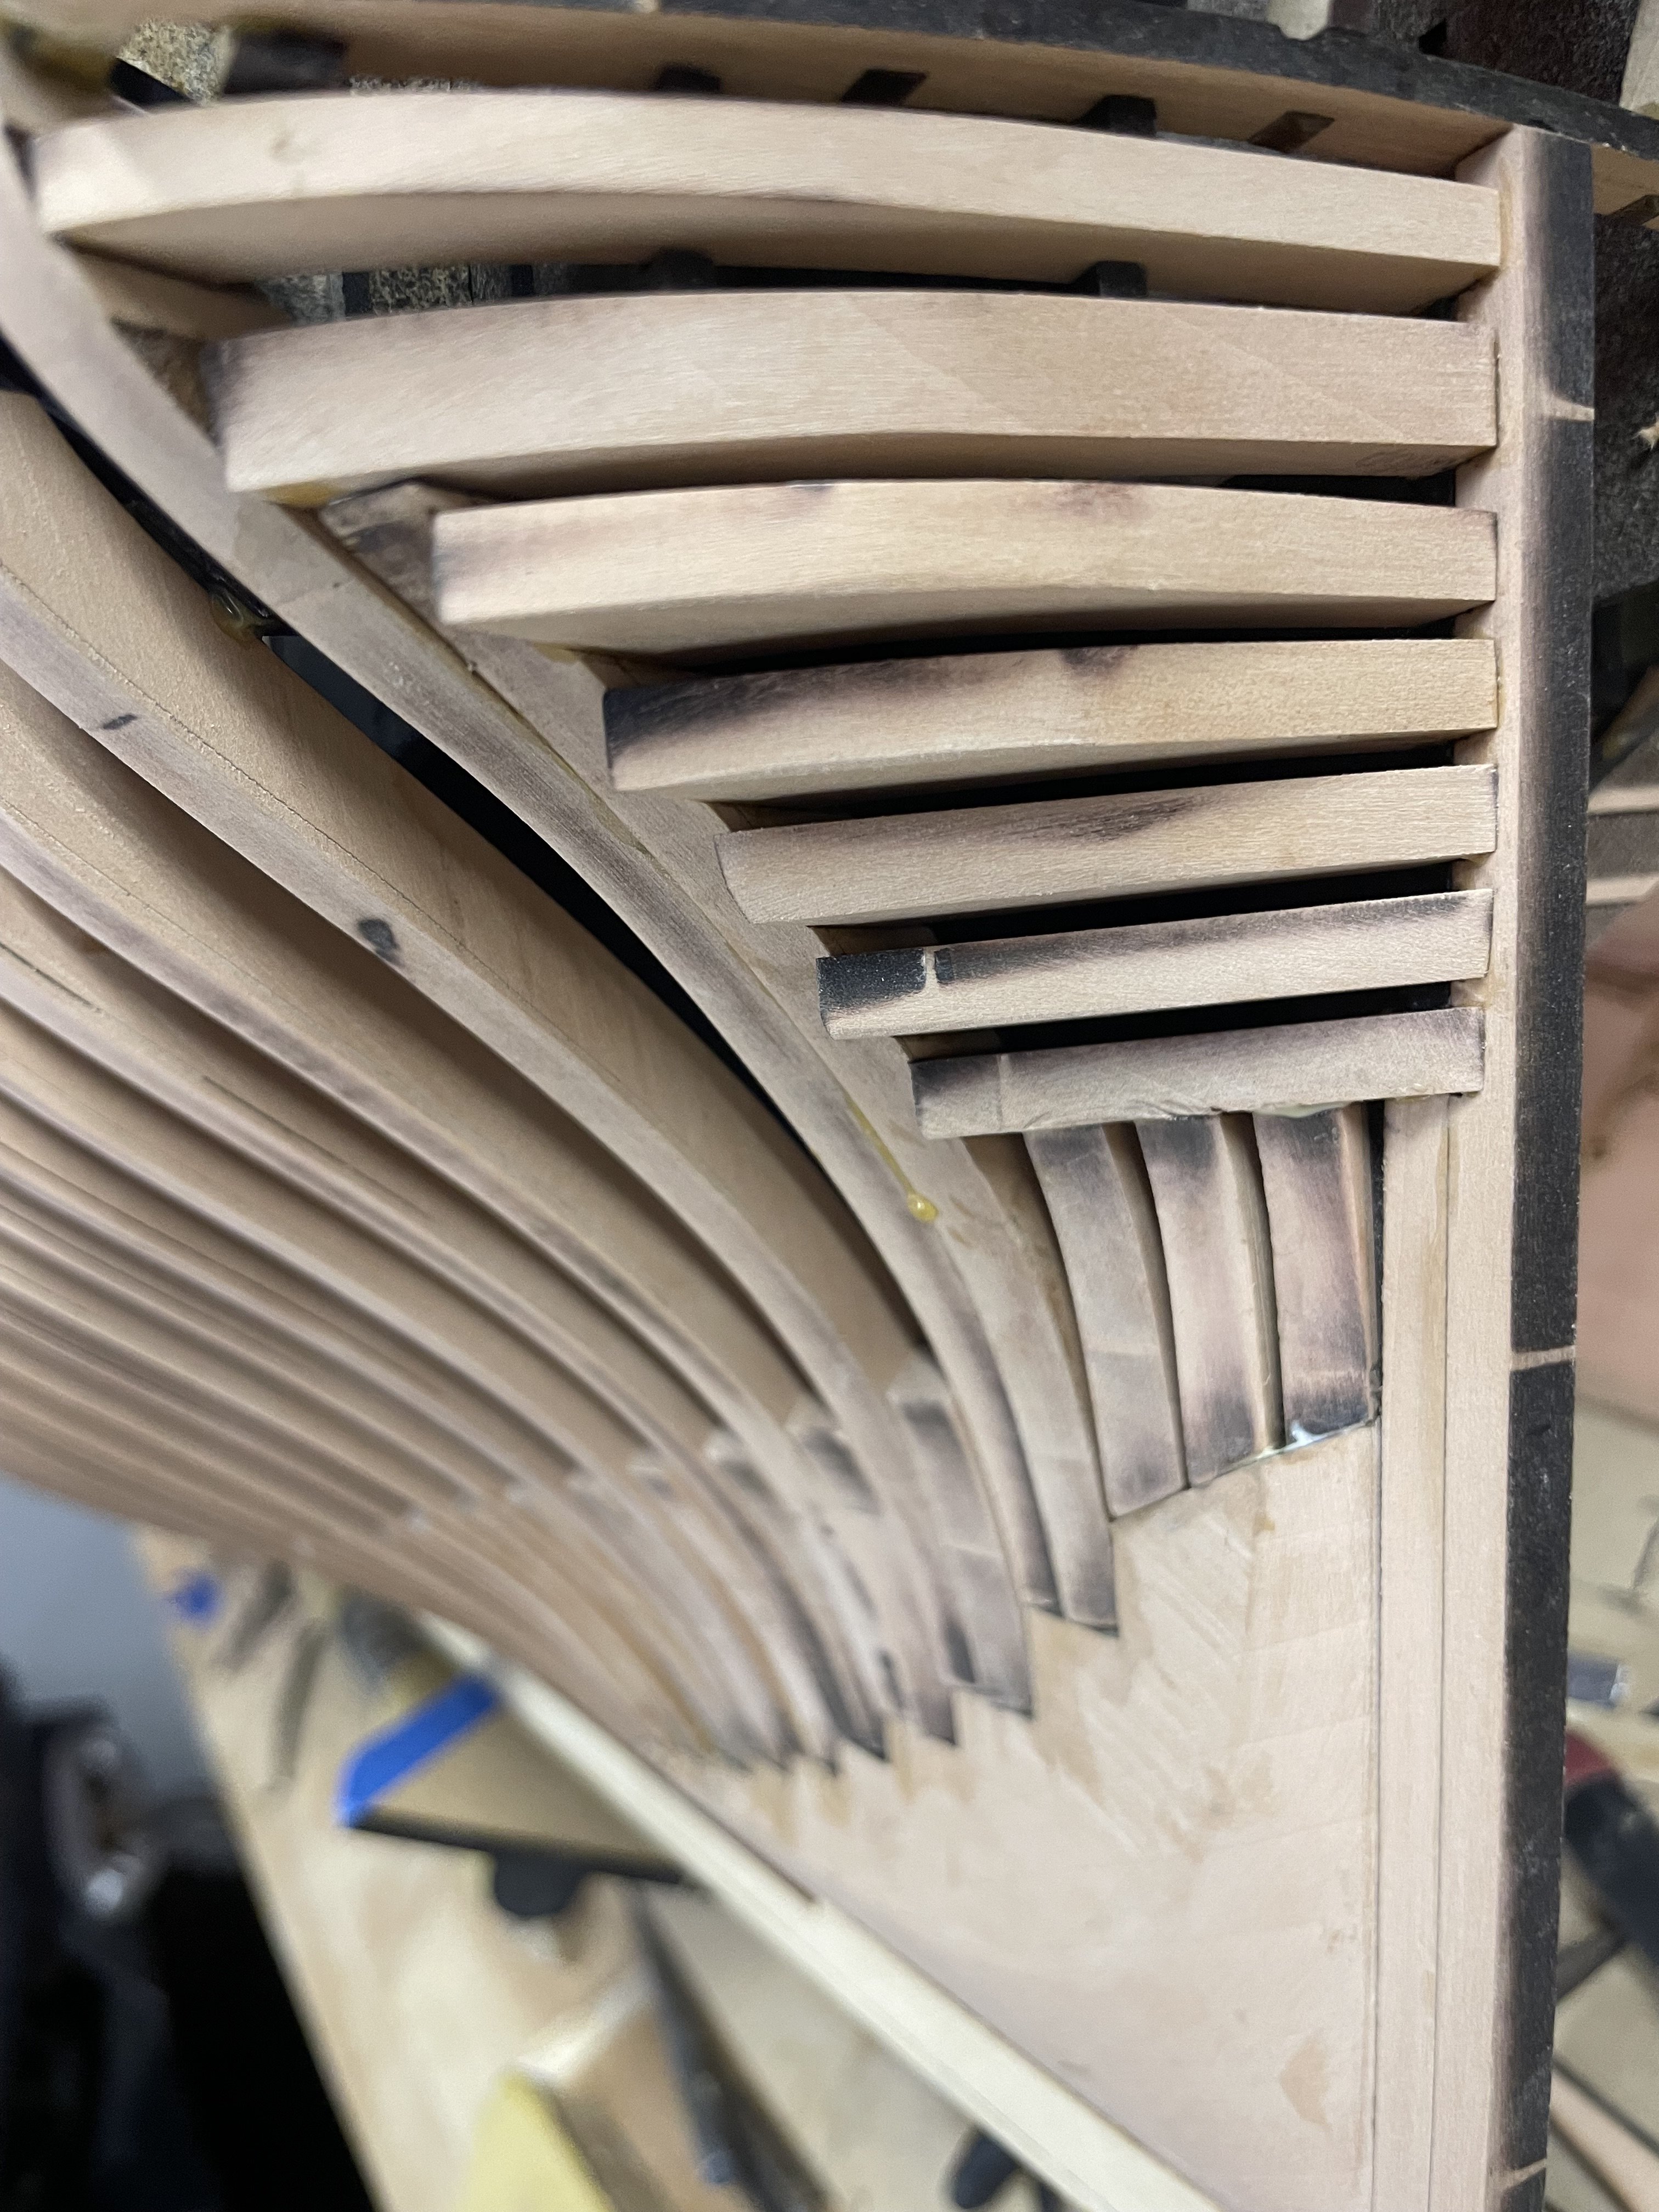
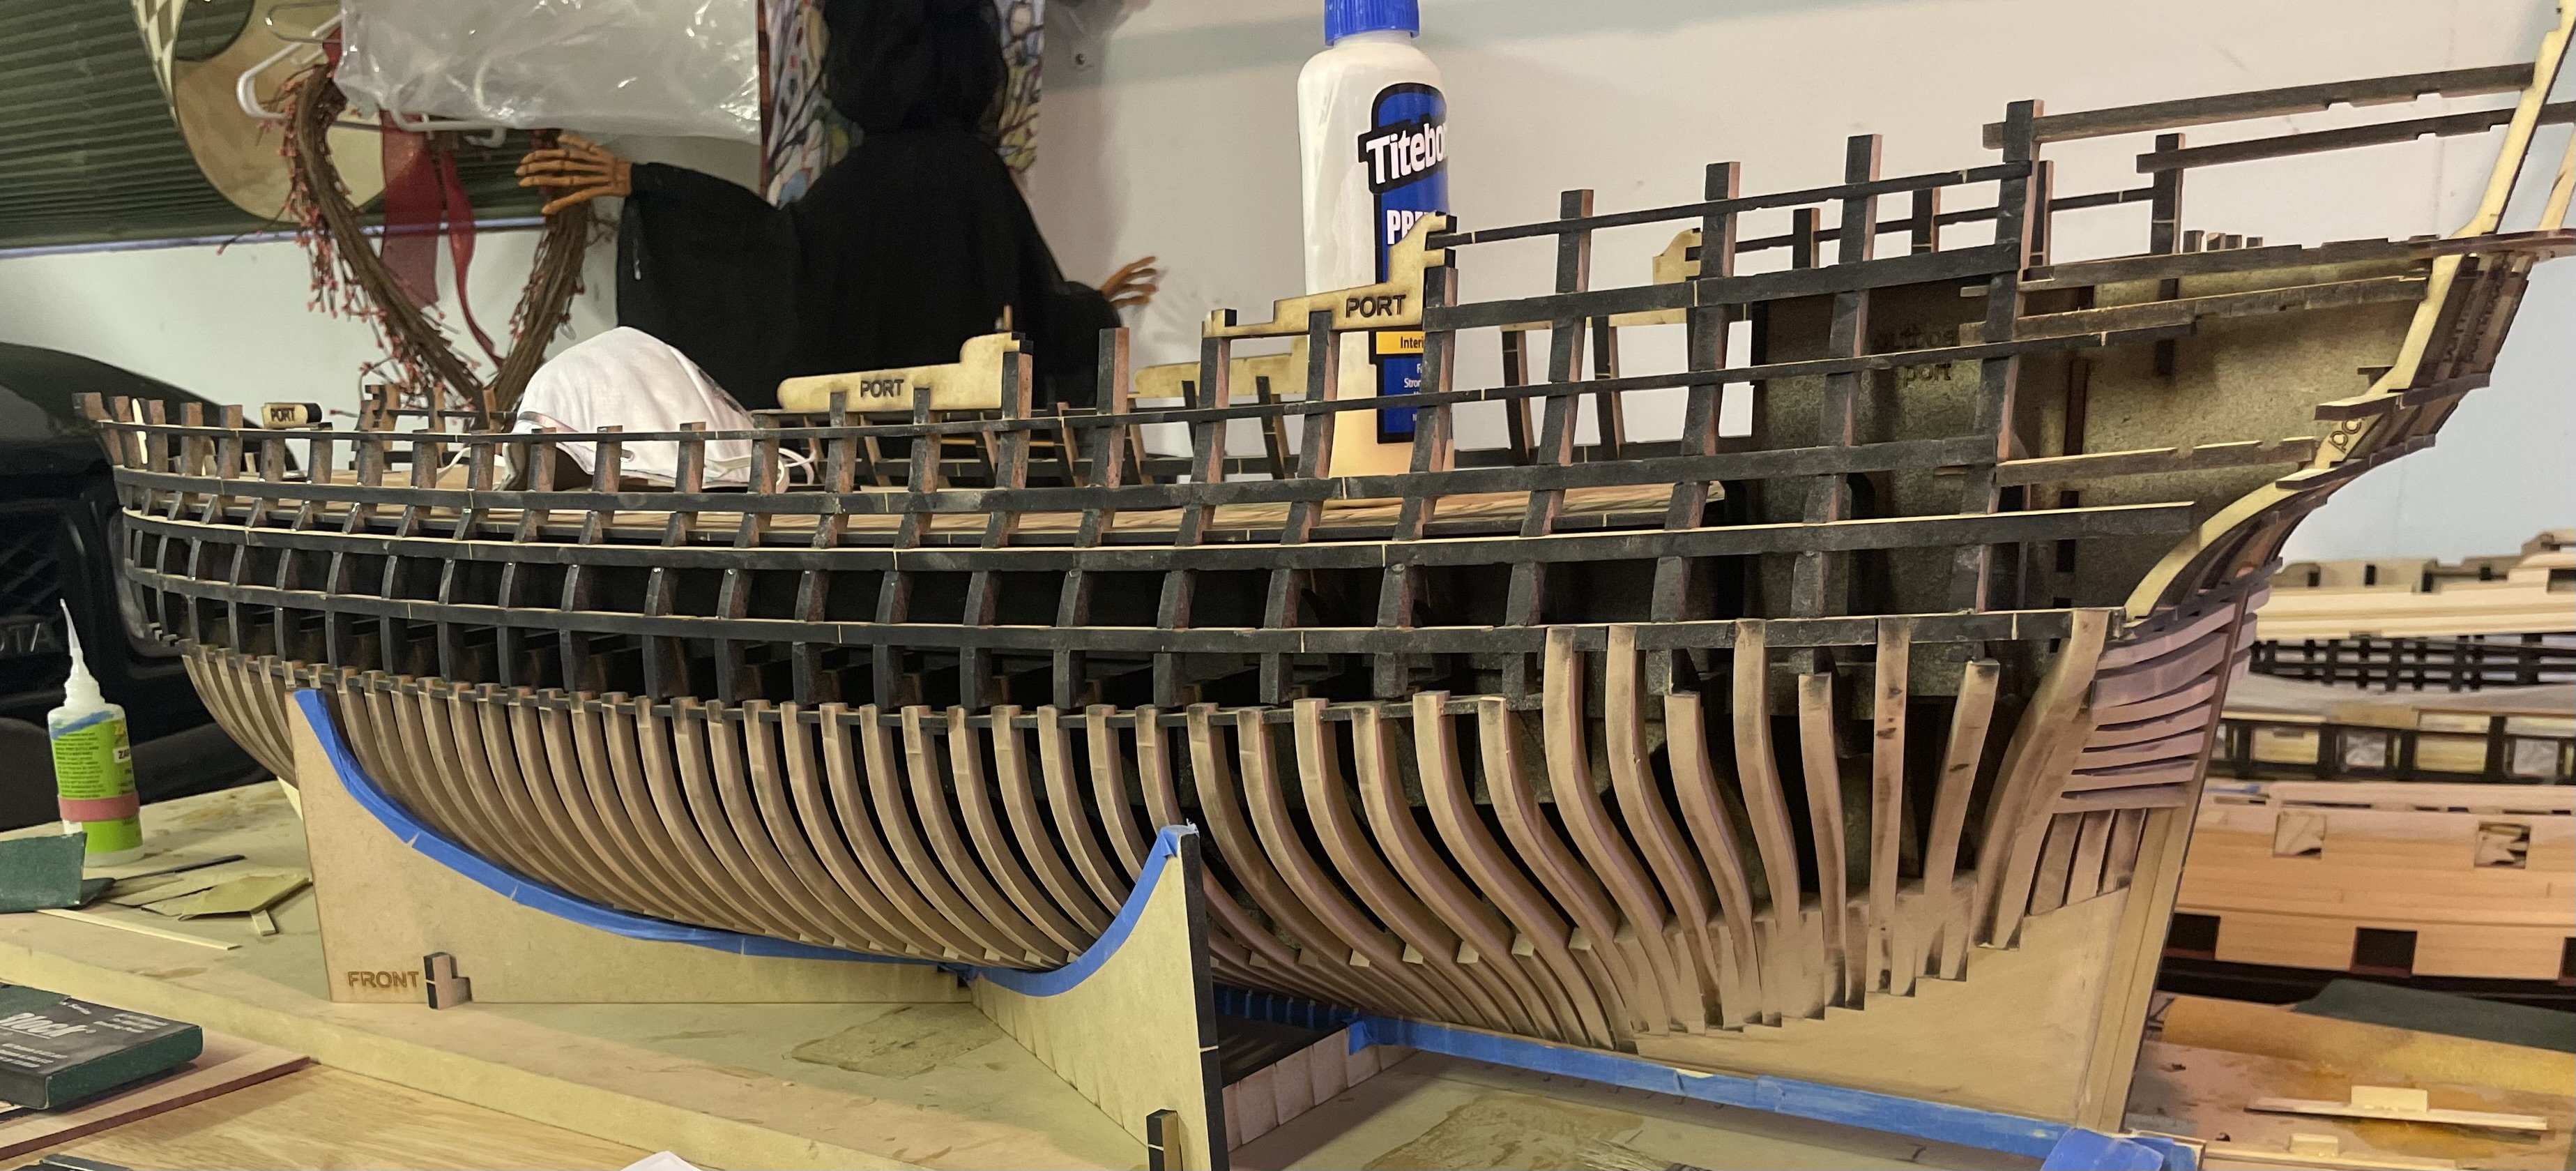
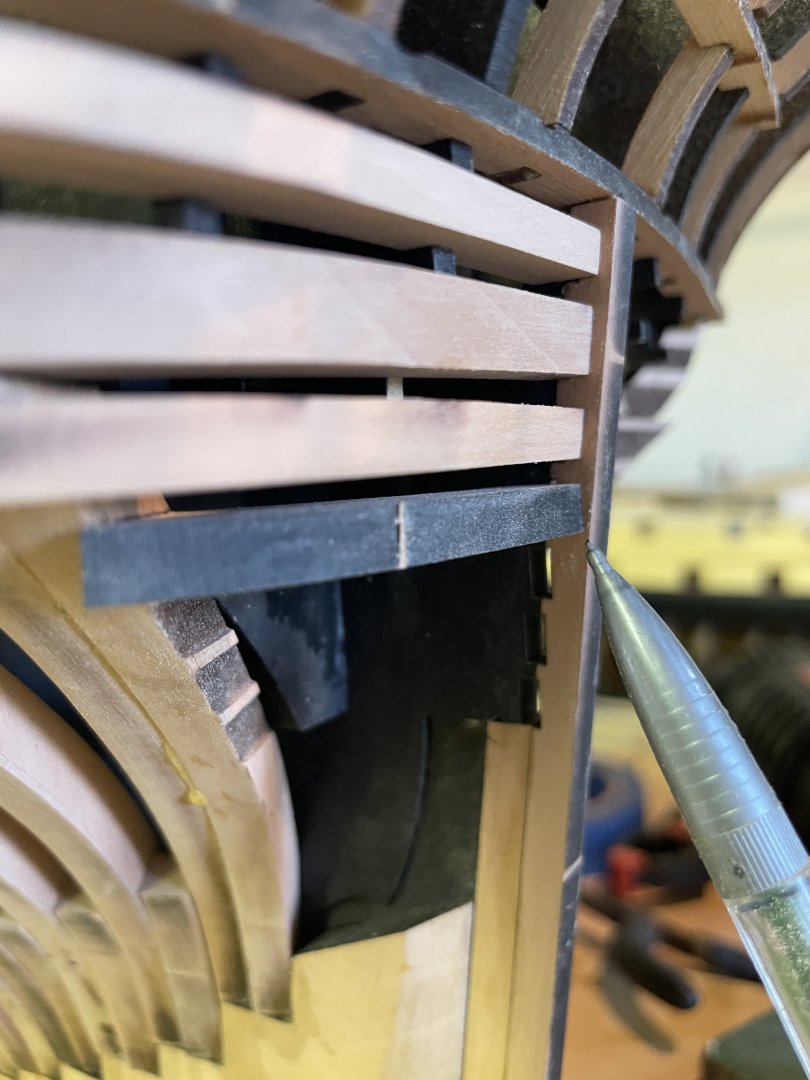
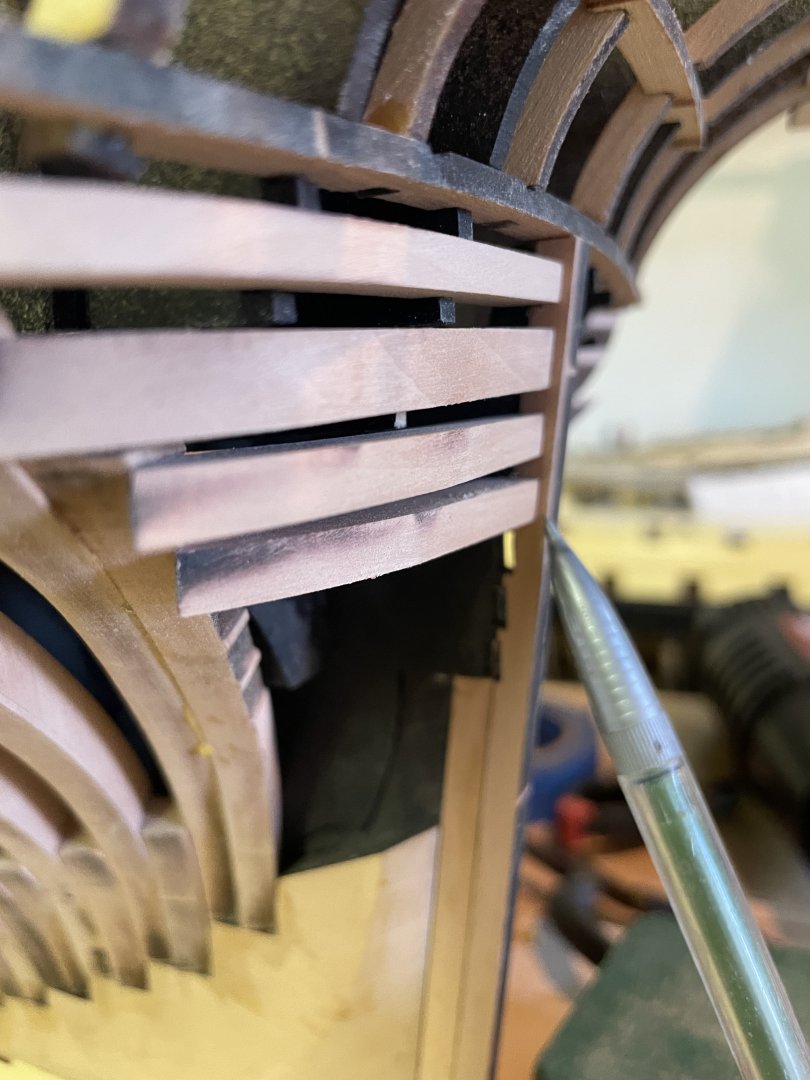
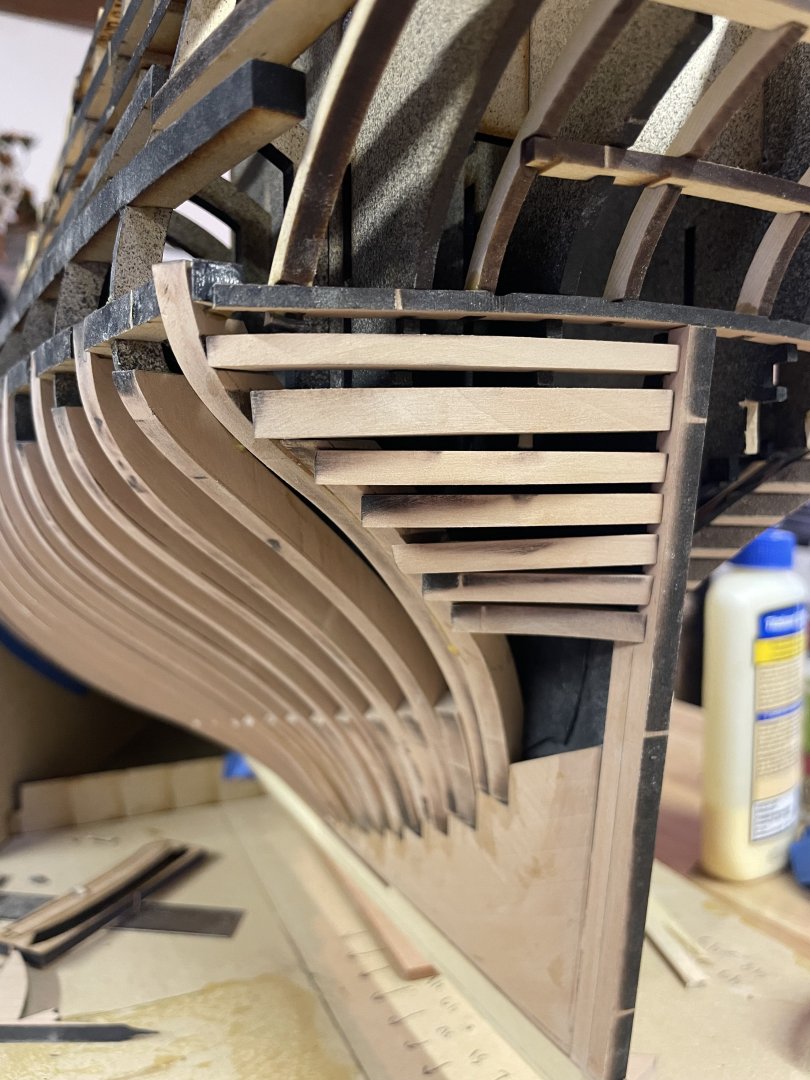
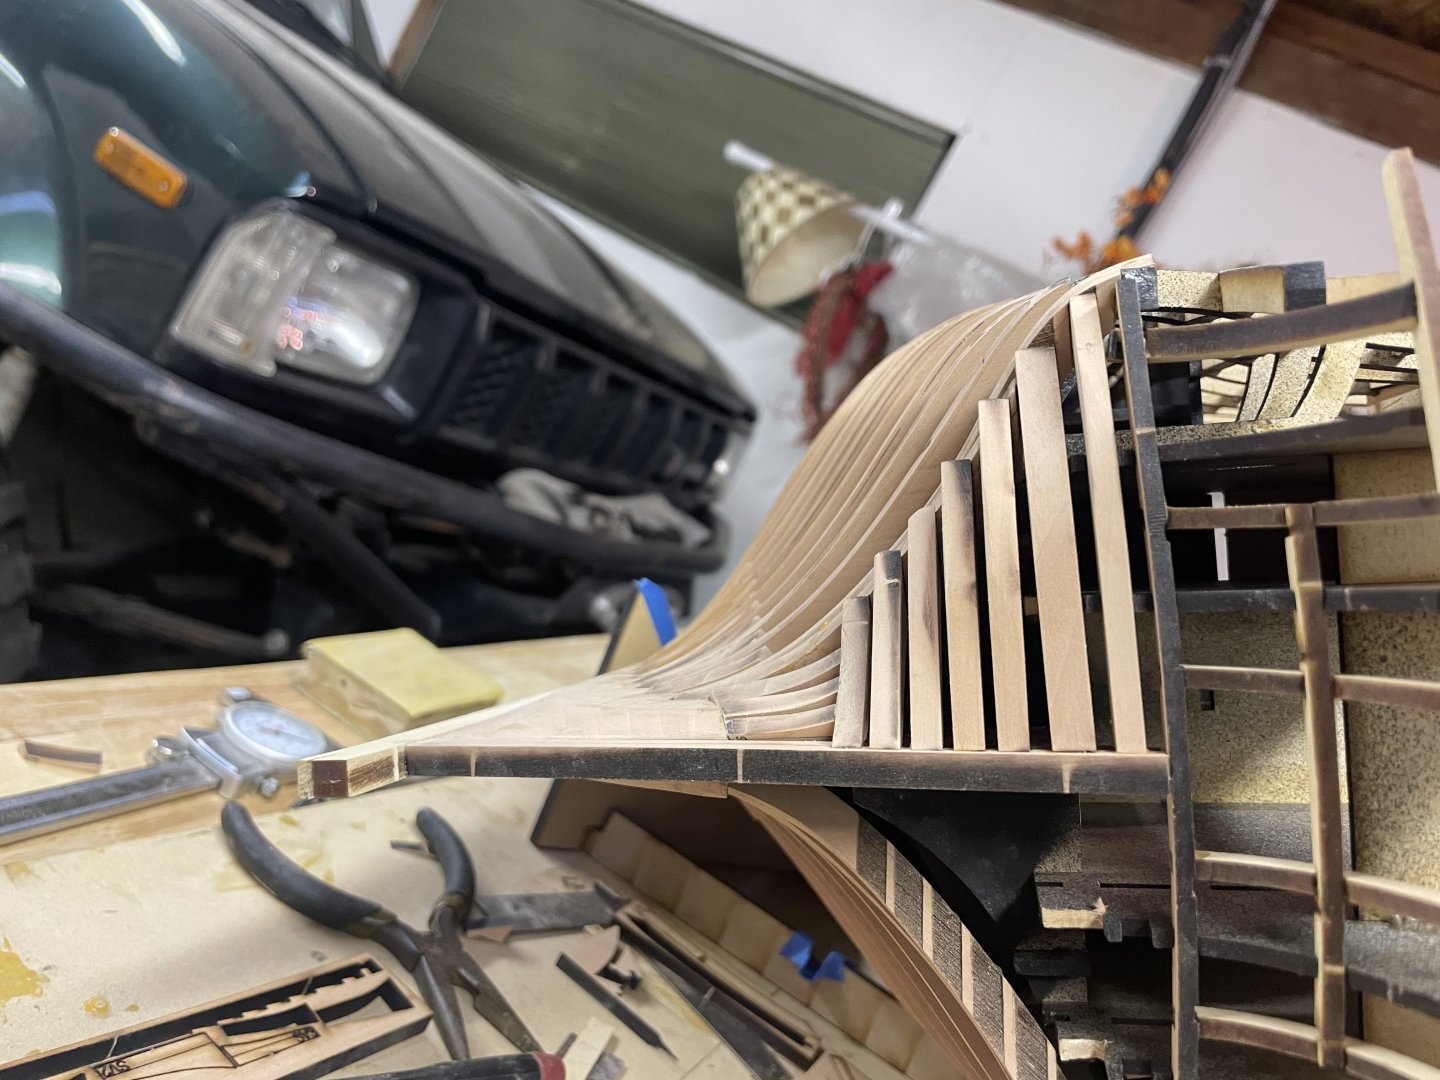
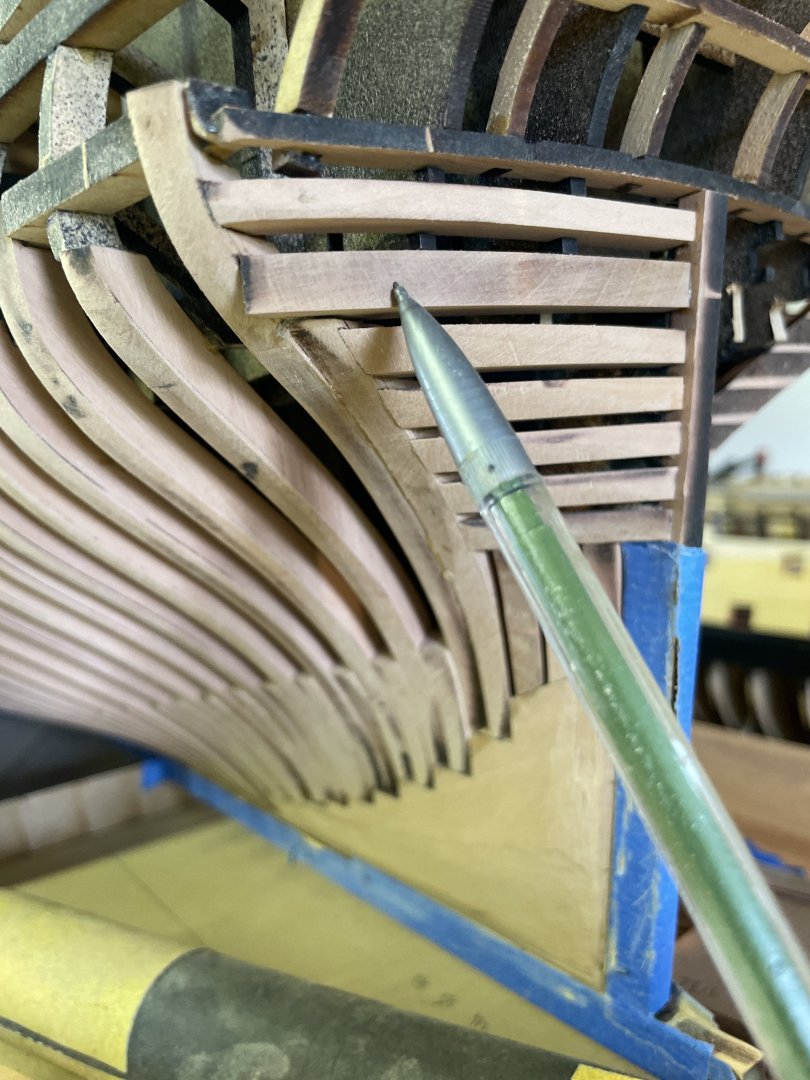
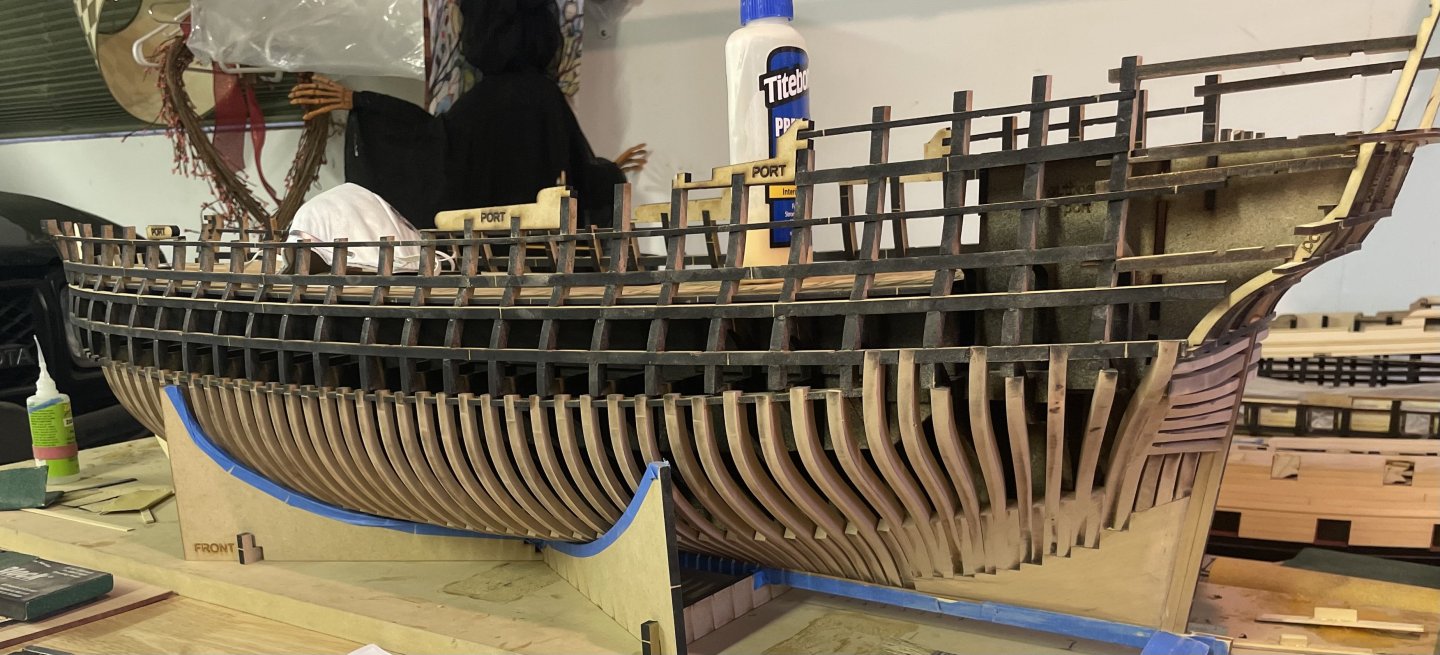
Hey guys, I’ve been working on the wing transoms today and I have both sides complete, a few revisions were required but it all went together pretty well except for the vertical fillers, they are a pain but they turned out decent. first we start with the inner post as seen below. It should fit nice and tight up to the deadwood, keel and the top of the bulkhead former. Note that it is .25” and is supposed to be thinner than the keel next is the second inner post piece, again same deal as the first one but also double check that it aligns with the wing transom cut outs on the former. Production model kits will be different than mine at the top of this piece as I revised that uppermost wing transom to have receivers for the post and the former. you can now start with the upper most wing transom which is .1875” and requires a slight bend, so use a heat gun and give it a little arc. Please pay attention when you glue it, that it’s not glued to the transom jig, there are receivers in the jig to hold this piece in place but only glue it to frames 52 and the inner post slots. Also note that you will need to bevel the transoms to run parallel with the angle of the inner post above you can see one of them in place before i beveled it. Also note that I dry fit them all before glueing and actually installed from the bottom up that way I could see the fit from the top. after they are all dry fit and in place you can begin glueing. once they are all solid you can work on the vertical fillers. I’ve given you an angle indicator line but there’s also the angle of the deadwood. This is a big sand and test and sand and test again job until you get them right. after this is all dry we are going to sand the bejesus out of this part so fair everything up. There’s a ton of extra material on those wings so you have room to work. the 5 lower wings are all parallel but the upper three, two have a bend in the top and the third one down (#6) angles down. This is shown in the painting and the framing plan. You can see it in this last photo. Now that the stern frames all work I can move on and finish the port forward frames, from there I can begin fairing up the hull which will be a monumental task, pear certainly doesn’t sand like AYC. Once the hull is faired I will run two strakes from the garboard up and two from the main wale down. Once the ports are framed and the planking from the wales up are complete this will pretty much conclude the first chapter of the build. JJ Quote Quote selection


- 396 replies
-
- 30
-

-

-
HMS RESOLUTION 1667 by KarenM - 1:48
scrubbyj427 replied to KarenM's topic in - Build logs for subjects built 1501 - 1750
Your figurehead turned out amazing, I’m curious to what machine you used to cut this? 4 axis? -
Very nice work! This is a wonderful build and very inspiring.
-
kit review Kit Review - HMS ENTERPRIZE (1774) by CAF MODELS
scrubbyj427 replied to kljang's topic in REVIEWS: Model kits
I wonder how this actually happens, are they buying his kits and reverse engineering them or somehow getting into his design files? I can’t imagine the quality and fit of a reverse engineered kit is worth anything unless it’s completely copied/redesigned with some software… otherwise it would take less time and effort for one to just design their own.