KenW
-
Posts
1,232 -
Joined
-
Last visited
Content Type
Profiles
Forums
Gallery
Events
Everything posted by KenW
-
 Hey Ed: I will try to answer your questions; but keep in mind that I've never read the Lauck Street instructions, nor do I use Bob Hunt's practicum. My main source for rigging, in addition to the plans and the Syren documentation, is Peterseen's book. (And I use some guess work.) 1. I used the plans to determine the size of the wood strips. I ended up using 1/16 x 1/8 for both the trestle trees and cross trees. However, the cross tress ended up being 1/16 x 1/16 after whittling and sanding since they are angled aft, as per the plans. 2. The only bees I know about are those on the bowsprit used for the fore top stay and preventer stay. The very top of the top gallant masts have a thin slice of 1/8 dowel, cut as thin as I could by hand. It is pinned and glued to the mast. I didn't put holes in it since I don't plan on having a flag or banner on the masts. 3. As for the blocks up there: There are two 1/8 inch blocks attached to the end of the trestle trees for top gallant braces. There were seized with black line to eye bolts inserted into holes in the trestles. There are two 1/8 inch blocks seized to the middle cross trees for topsail bunt lines. And there are also two blocks seized between the first two shrouds for top sail yard lifts. I hope I'm being of some help to you. Good luck on your build.
 -
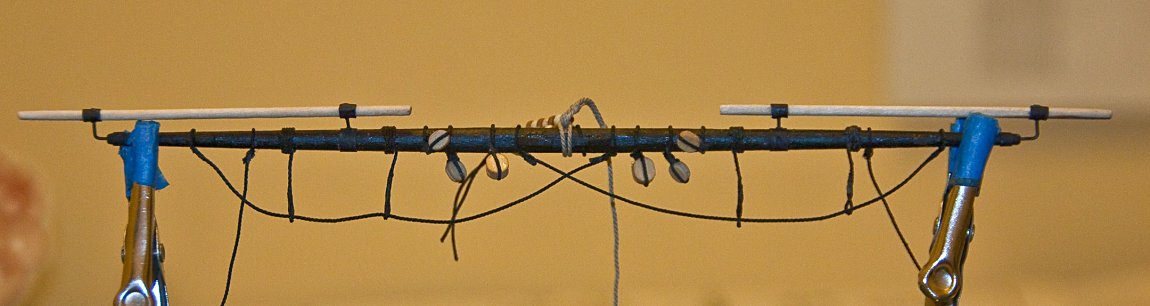
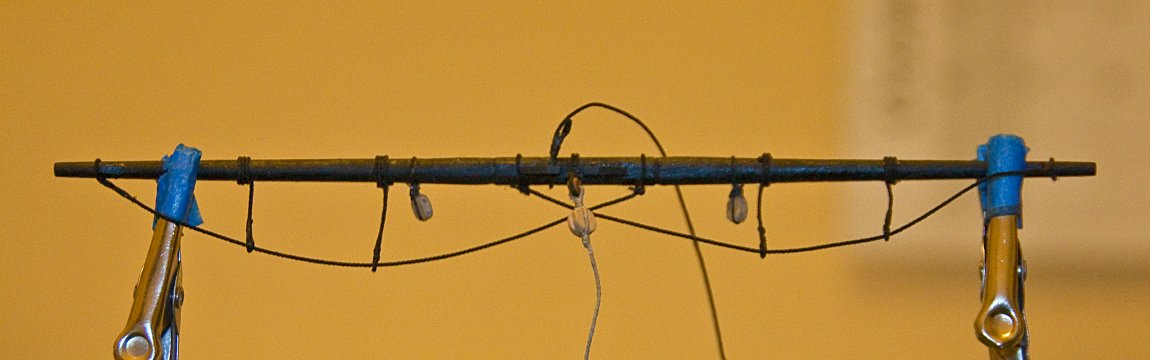
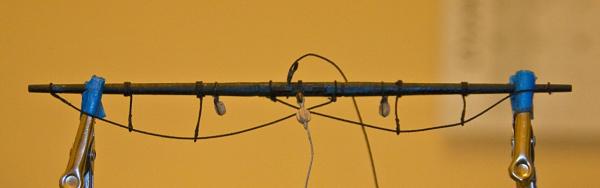
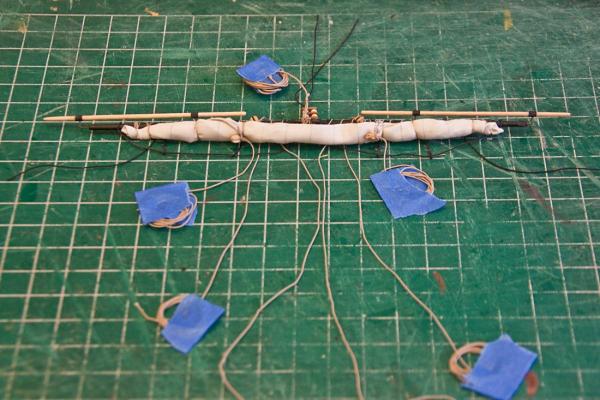
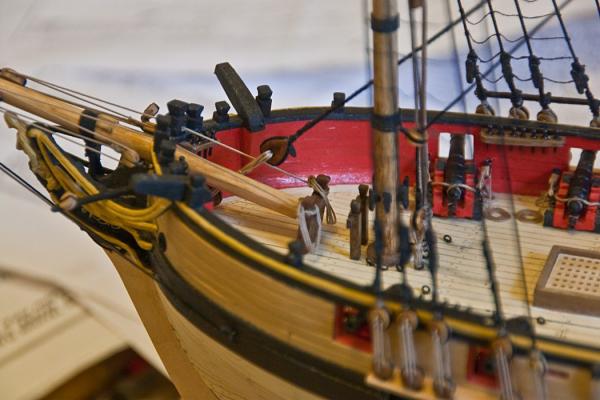
I completed the fore topsail yard and the spritsail yard. I thought I would show them without the sails. You can get a better look at the blocks and lines this way. The fore topsail yard is, I believe, pretty standard. I followed Peterseen’s book. You can see the buntline, clue and sheet blocks as well as the sling/halliard and the parrels. The hanging line is for the Flemish horse, which will be completed when the braces and lifts are attached. The spritsail has only the block for the clue line. The sheet goes directly to its tying off point and the buntline goes through a thimble seized to the fore stay’s collar. The sling/halliard and one end of the truss are also attached. The FA plans don’t show tying off points for the sheet, buntlines and halliard, so I will have to use Peterseen and my best guess. I will probably attach the sheet to the same pin as the clue line, and the halliard to the starboard knightshead (a.la. rafine). I’m still thinking about the buntlines. Peterseen’s ship has more belaying pins and bits than the FA. Advice/comments are welcome.

- 455 replies
-
- 2
-

-
- fair american
- model shipways
- (and 1 more)
-
I also just found this build and am totally impressed. I think this model, when ready, will be a good way to get into scratch builds. I also agree with Alistair that a scroll saw would be a good investment. Can you recommend a brand/model? Thanks.
-
Thanks Ed. The down side with furled sails is they cover up a lot of the work on the yards - blocks, etc. Also, the FA documentation is not entirely helpful. I'm relying on Peterseen's book a lot, but sometimes it feels like guess work as to where all the lines are attached. I'll have to wait and see what the final product looks like. Fair American is my second ship as well. So good luck and let me know how you're progressing. Cheers.
-
The main topsail yard is constructed and the sail furled. There are more lines to keep track of – buntlines in addition to sheets and clue lines. I also added stud sail booms which are not glued in place yet. I used paper for the iron bands and they are attached to the boom with 28 gauge wire. So the booms will be attached to the yard by the wire. I realized that I made a mistake with the top gallant yards in that the clue line must pull the sail clue up behind the sail, not in front; so I fixed both top gallants. Looking ahead, I am very confused about how to tie the main (spanker) sheet to a cleat attached to a block. I have looked at both Lees’ and Peterseen’s book, but neither shows how to do that. The FA documentation is no help either. If someone knows, I wish they would explain it to me. I have plenty of time to figure it out, however.
- 455 replies
-
- 2
-
-
- fair american
- model shipways
- (and 1 more)
-
Looking good Bob. I always try to turn the ship with the bowsprit away from me. Of course, I often forget; but no breakage so far. Great model. Cheers.
-
Thanks Vince and Rob D. Vince: Now that I look at the photo, I realize that the Radio Shack clamps are not what you were asking about. While I like the RS clamps, the clamps in the photo with the furled sail is part of a 'third hand' tool that I got from Model Expo. Also, like you say, at my smaller scale, and with just showing furled sails, I don't think I need to use the process you describe. The sail probably look good, though. Do you have a build log? And Rob D.: I have scroll work on the transom. I made a scan from the plan sheets and used my PC to size it properly and glued the paper onto the ship. I even have scroll work on the bow - which I drew and then again used the PC to get the colors and size and then glued it into the boat. Cheers.
-
Thanks Dave and Vince and the 'likes'. The clips came from Radio Shack and are called, 'Micro 1-1/8" Smooth Clips'. I got them on line since my local store didn't have them in stock. Cheers.
- 455 replies
-
- 1
-
-
- fair american
- model shipways
- (and 1 more)
-
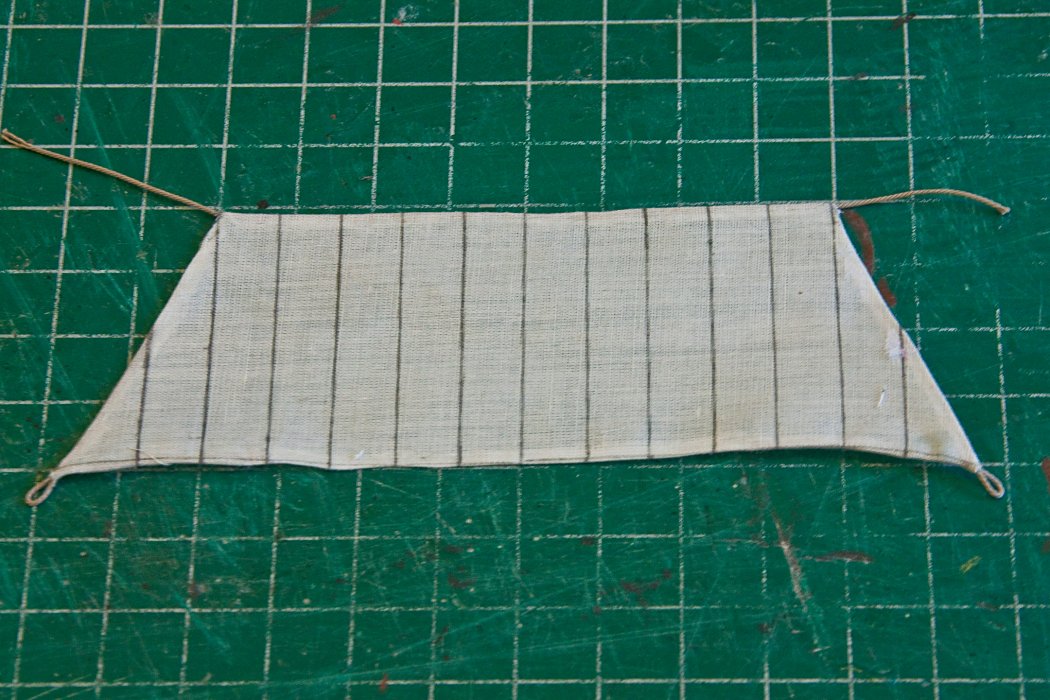
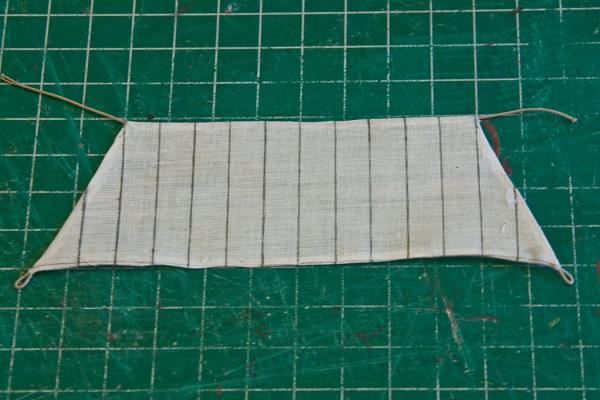
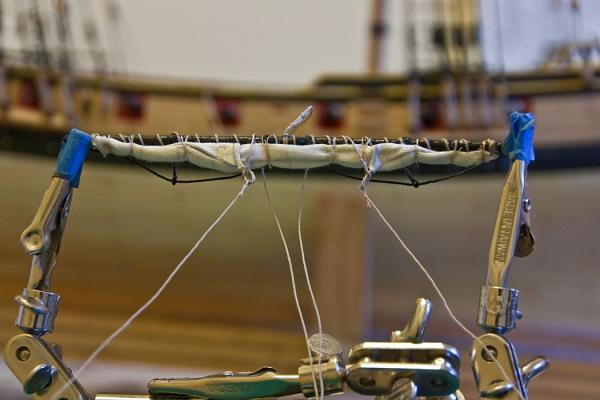
I finished my first furled sail. I started with the main top gallant yard, since it seemed to be the easiest. I will, however, install the completed yards in the order used in the Syren documentation. I used Amati sail cloth. After doing some research, I followed the procedure that ‘flyer’ describes in this HMS Pegasus build log (entry # 307, 310, 315 and 316). I feel I didn’t need the Stop Fraying product since Aleene’s Tacky Glue, which I used to glue the hems, prevented fraying. Also, since Peterseen’s book and the Syren documentation didn’t show buntlines on the top gallant yards, I left them off. The completed top gallant sail: And the sail bound and furled on the yard:
- 455 replies
-
- 6
-
-
- fair american
- model shipways
- (and 1 more)
-
Just thought I'd let you know that using your furling method, I actually got a almost presentable furled sail. Still more practice to go; and I think I used too much Tacky Glue. The sail is stiffer than when I started. But I am encouraged. Many thanks to your site for all the help. Cheers.
-
You are building a great model. No need to hurry, as your posts always say.
-
Thanks Gunther and Bob and to all the 'likes'. The tension on the lines are border-line, but I think on the right side of the border.
-
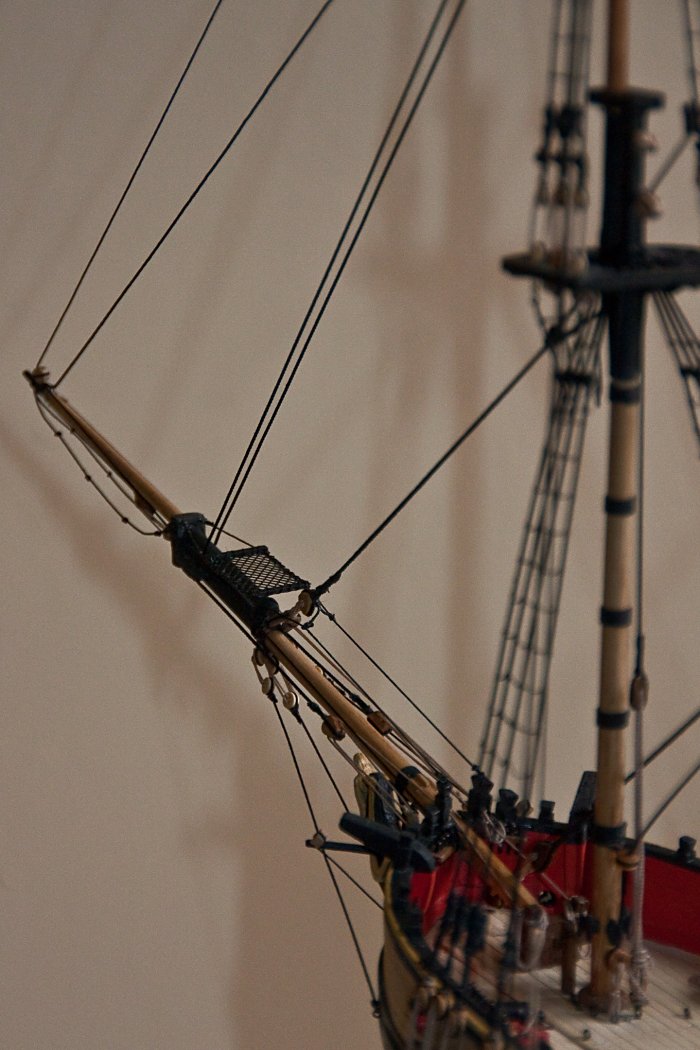
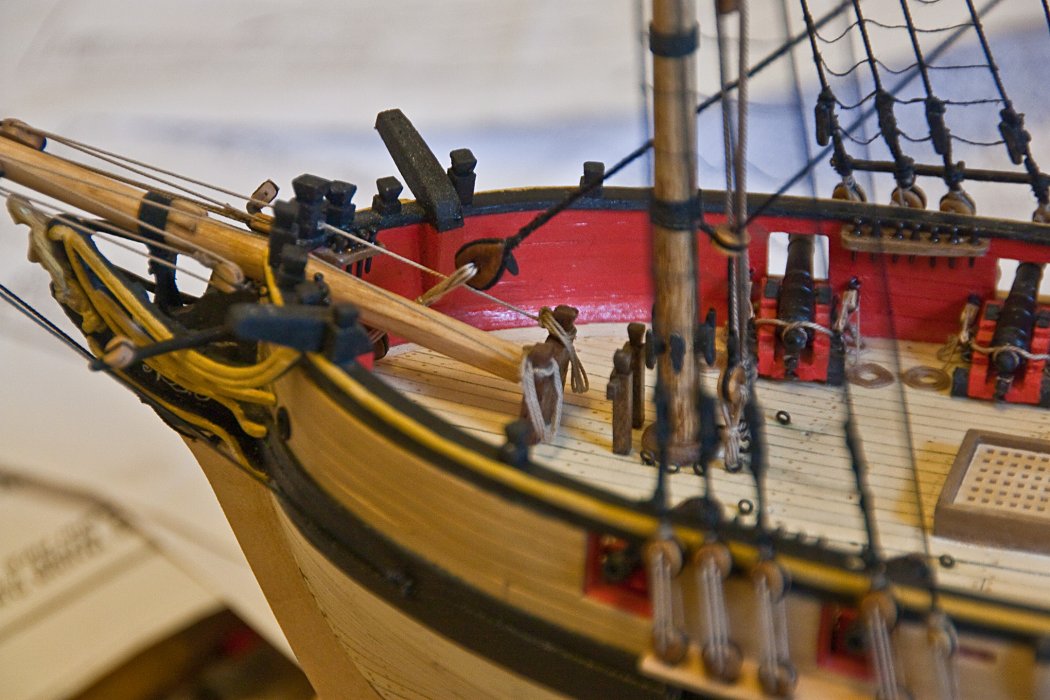
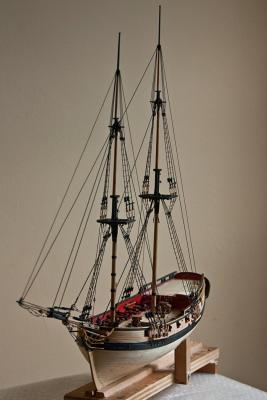
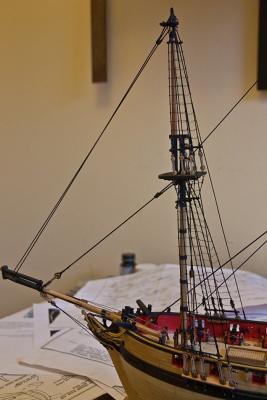
I have completed the standing rigging. All the masts are installed along with shrouds, stays and back stays. For the bowsprit horse netting, I used a cutting of black vinyl window screen. I worry that the lines are not tight enough, but none are sagging and making them too tight is probably much worse.

- 455 replies
-
- 8
-
-
- fair american
- model shipways
- (and 1 more)
-
Thanks. I do know that Dremel makes a scroll saw, but am not sure if there are any other options. Cheers.
-
Thanks for your quick reply. I was wondering if you use a scroll saw, or if you manage with just the Byrnes table saw. My interest is due to my looking forward to my next build, which I think will be the Rattlesnake. Cheers.
-
Thanks for the information. I will check out that site. Have fun.
-
I like your work and the hearts look great. What model of Byrnes saw do you use? I will also be interested to see how the crow's feet turn out. Cheers.
-
Just went through this log and was extremely impressed. One request: On pages 52-55, the photos are not viewable. I think this was a bug in MSW. I'm interested in the planking process with or without spiling. Would it be possible to fill in those photos? Great job! Enjoy your vacation.
- 2,191 replies
-
- 1
-
-
- confederacy
- Model Shipways
- (and 1 more)
-
Impressive as always. Can't wait for the finished result. Cheers.
-
Thanks Ed. I will check NRG out. Thanks for the 'likes' as well. Cheers.
-
Thanks Bob. Your blog is still a major reference point for my build.
- 455 replies
-
- 1
-
-
- fair american
- model shipways
- (and 1 more)
-
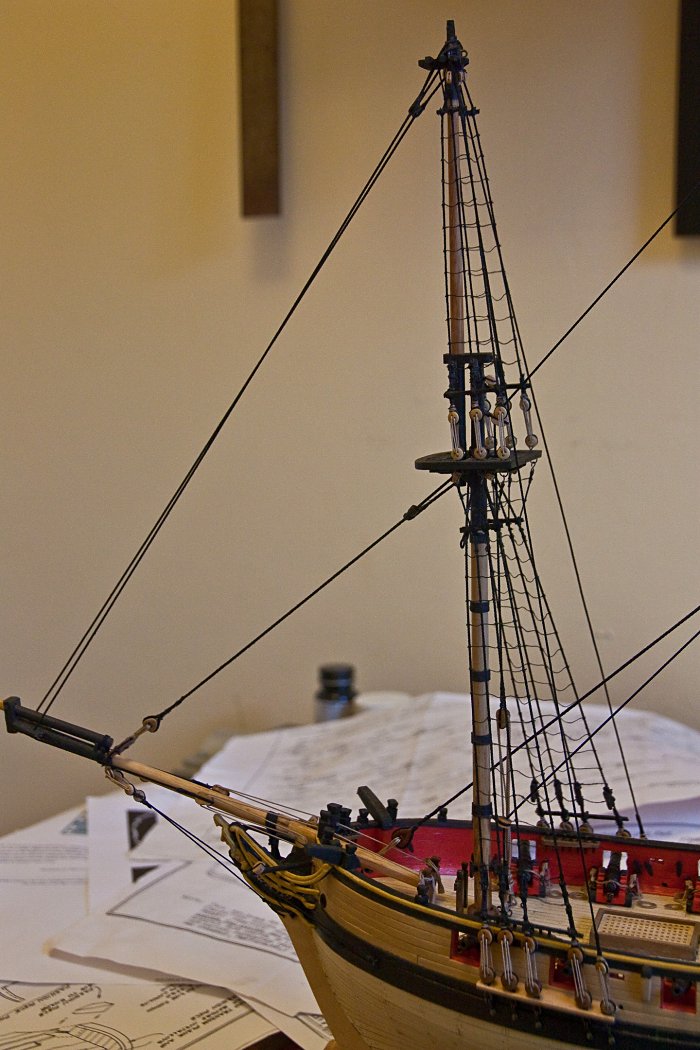
The fore topmast is installed with its standing rigging. I like the placement of the fore topmast backstay much better than the main topmast backstay. Everything went like it was supposed to. The only hard thing was drilling the fairlead holes in the knightheads. I plan to install the topgallant masts next, and then work on the jib stay and bowsprit horse.
- 455 replies
-
- 10
-
-
- fair american
- model shipways
- (and 1 more)
-
All the documentation I have seen does have the lower yards attached to slings with thimbles. It looks like whenever these yards were lowered, the lanyards between the sling's thimbles would have to be untied. Of course, I believe that the lower yards were only lowered to make repairs that couldn't be done by seamen aloft. I will use the slings, etc. as per the Syren doc. when I get to that point. Cheers.
-
Thanks Russ. Gary: I also note that on my previous model (an Armed Virginia Sloop), the slings were seized to double blocks rather than thimbles. I don't see how the lower yards could be raised/lowered with the configuration as shown in the plans. I'm not too pleased with the rigging plan of the kit/Rodgers model.
-
Gary: I'm also interested in hearing what the 'experts' say. Keep in mind that on Sheet 2 that shows each mast and yard, there are 4 eye bolts under each cap. I don't see any lines attached to them on the rigging plan, so these may be perfect places for blocks, etc., needed to rig the lower yards. Hopefully, we will get some answers before I'm ready to install and rig the yards.