

Diver
-
Posts
341 -
Joined
-
Last visited
Content Type
Profiles
Forums
Gallery
Events
Posts posted by Diver
-
-
12 hours ago, Ryland Craze said:
A fantastic job on this beautiful model. It is a well designed kit with excellent instructions. You will be proud of this build for many years to come.
Ryland, your support and help with this build is what kept me going at times. The gift of the black mono was greatly appreciated.
- Ryland Craze and BobG
-
 2
2
-
43 minutes ago, BobG said:
Congratulations, Bob, on completing your beautiful Medway longboat! It's a wonderful model and you've done a great job on her.
Mine is displayed prominently in our small home and it still makes me feel good every time I look at it because it was a challenging build for me and I'm proud to have completed it. I know you did the same. Give her a good place where she can be proudly seen!
'
Thanks for the comments Bob. Your build was inspirational to me as well as your continued support throughout the build.
- BobG and Ryland Craze
-
2
-
2 hours ago, Chuck said:
That is a beautiful model. If you can tackle that kit you will have no issues with any other. That is a first-class model.
Thanks Chuck. It was the excellent design and instructions of your kit that made it possible.
- Ryland Craze, Chuck and Freebird
-
3
-
If I have forgotten anything or if you see something that can be improved, please let me know
-
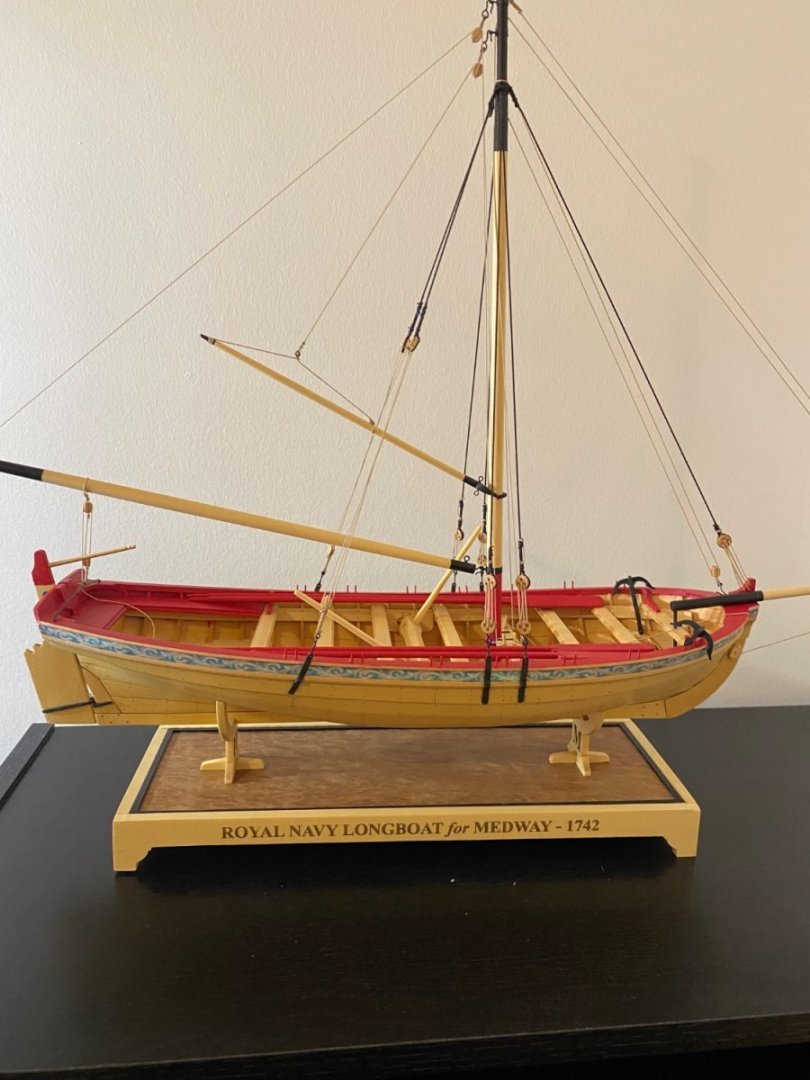
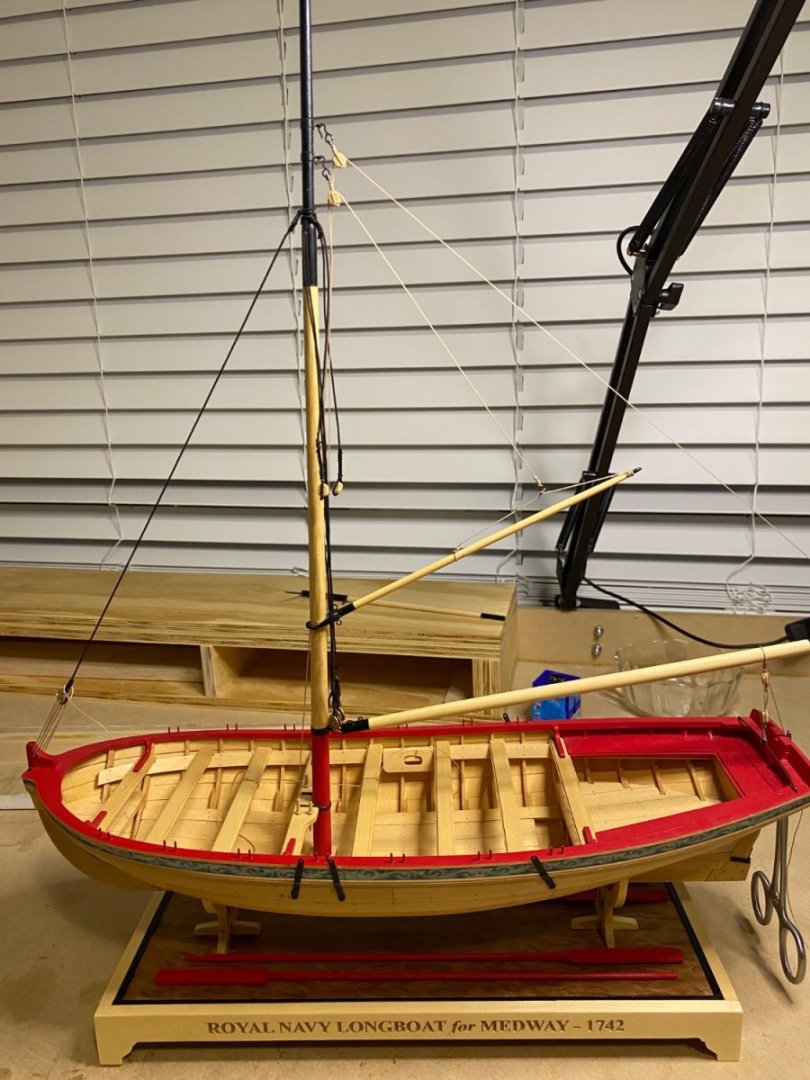
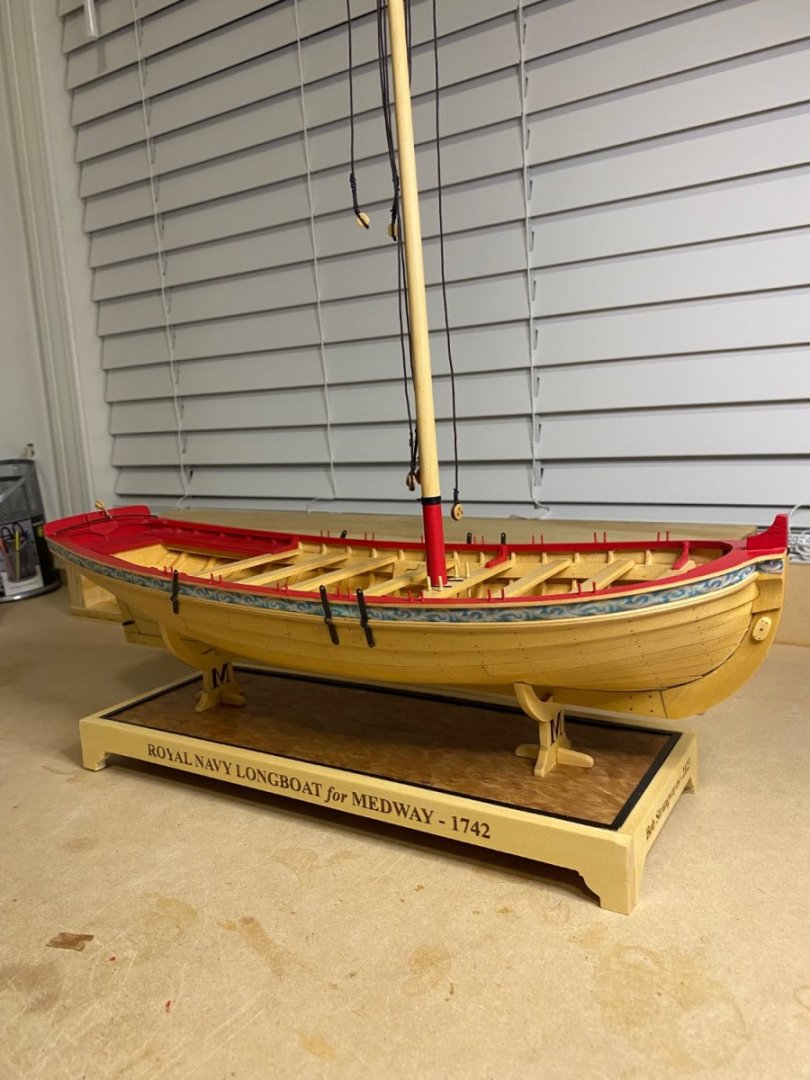
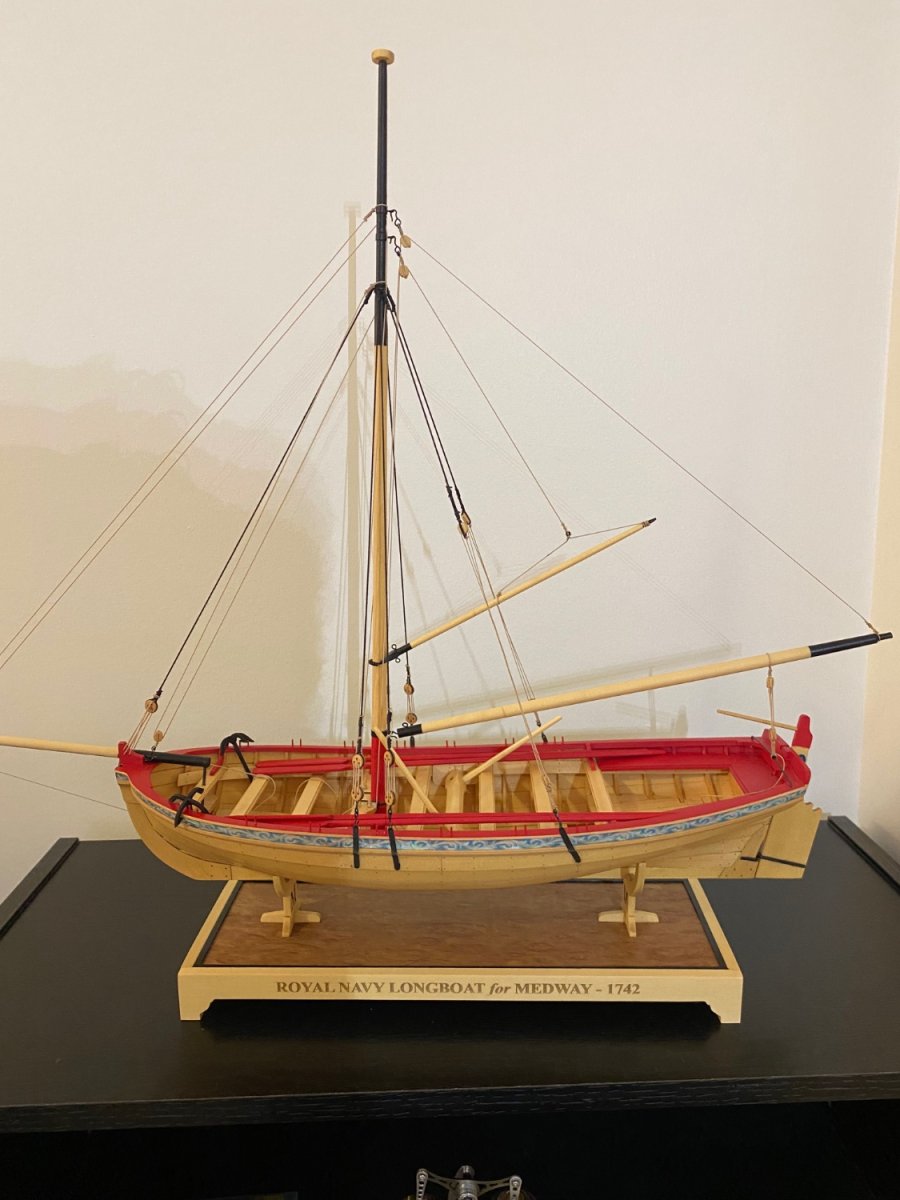
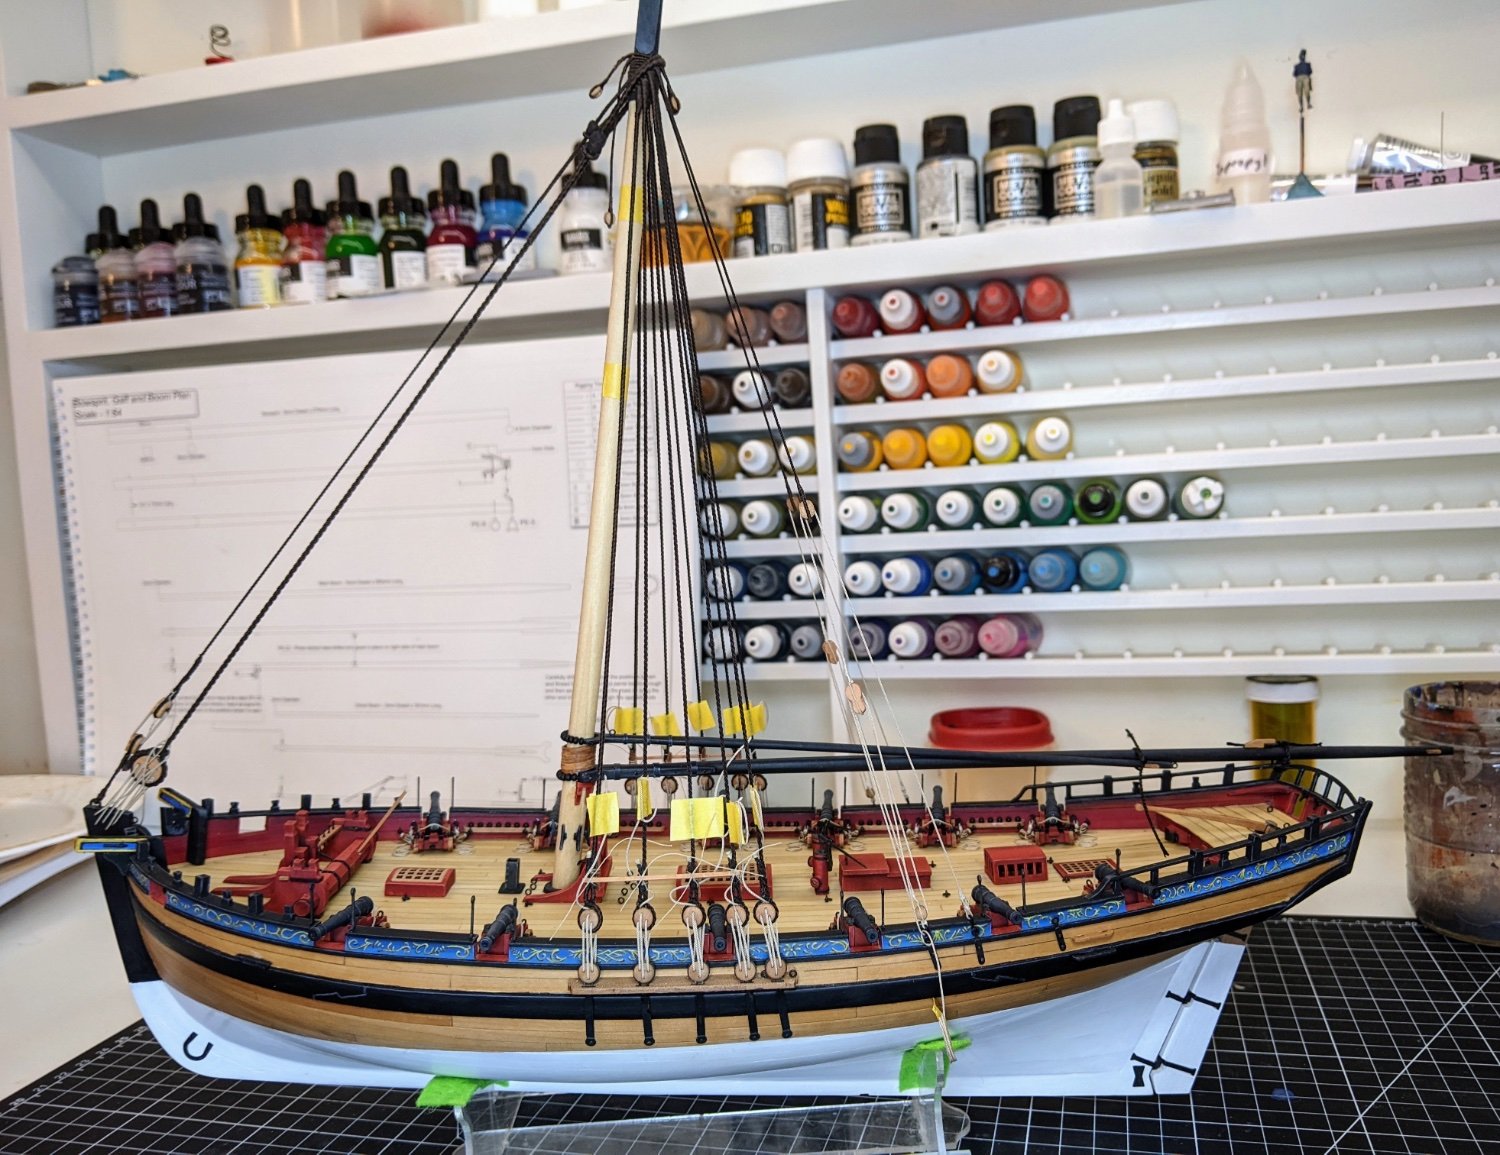
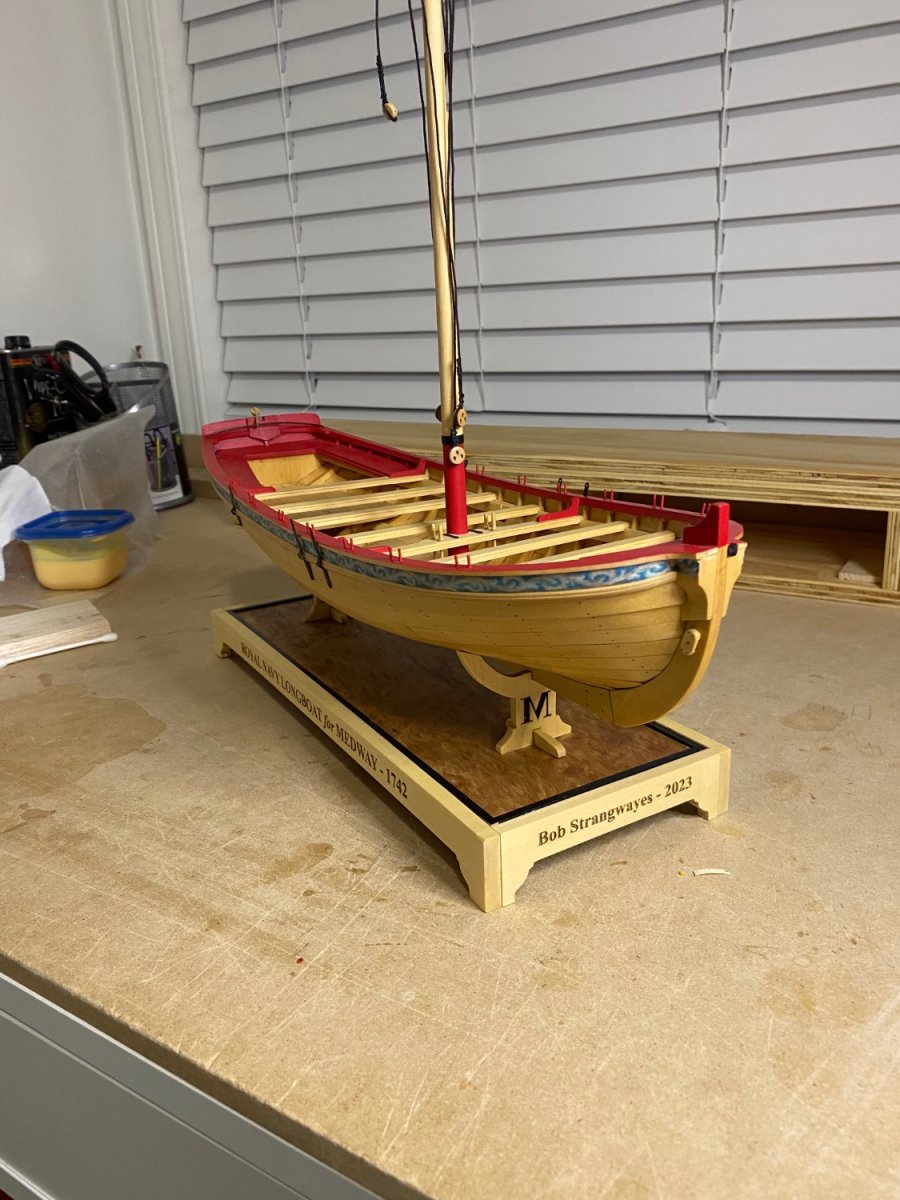
I have reached a mile stone. The only things left are the ensign halliard and the coils of rope. There have been times that I did not think I would get this far. Thanks to Chuck, Ryland and all others who have offered advice and support. There are areas that I wish were better but overall I am pleased with the outcome. Still lots to learn and lots of room for improvements.


-
-
13 minutes ago, TJM said:
Log entry 6
The first planking is now completed.
Not as pretty as I had initially hoped, but with sanding and a bit of filler, I am satisfied that it will be a good enough base for the second planking (which I am dreading a bit, with my experience with the first layer in mind - I like the work, but it is much harder to do well than I thought it would be!).
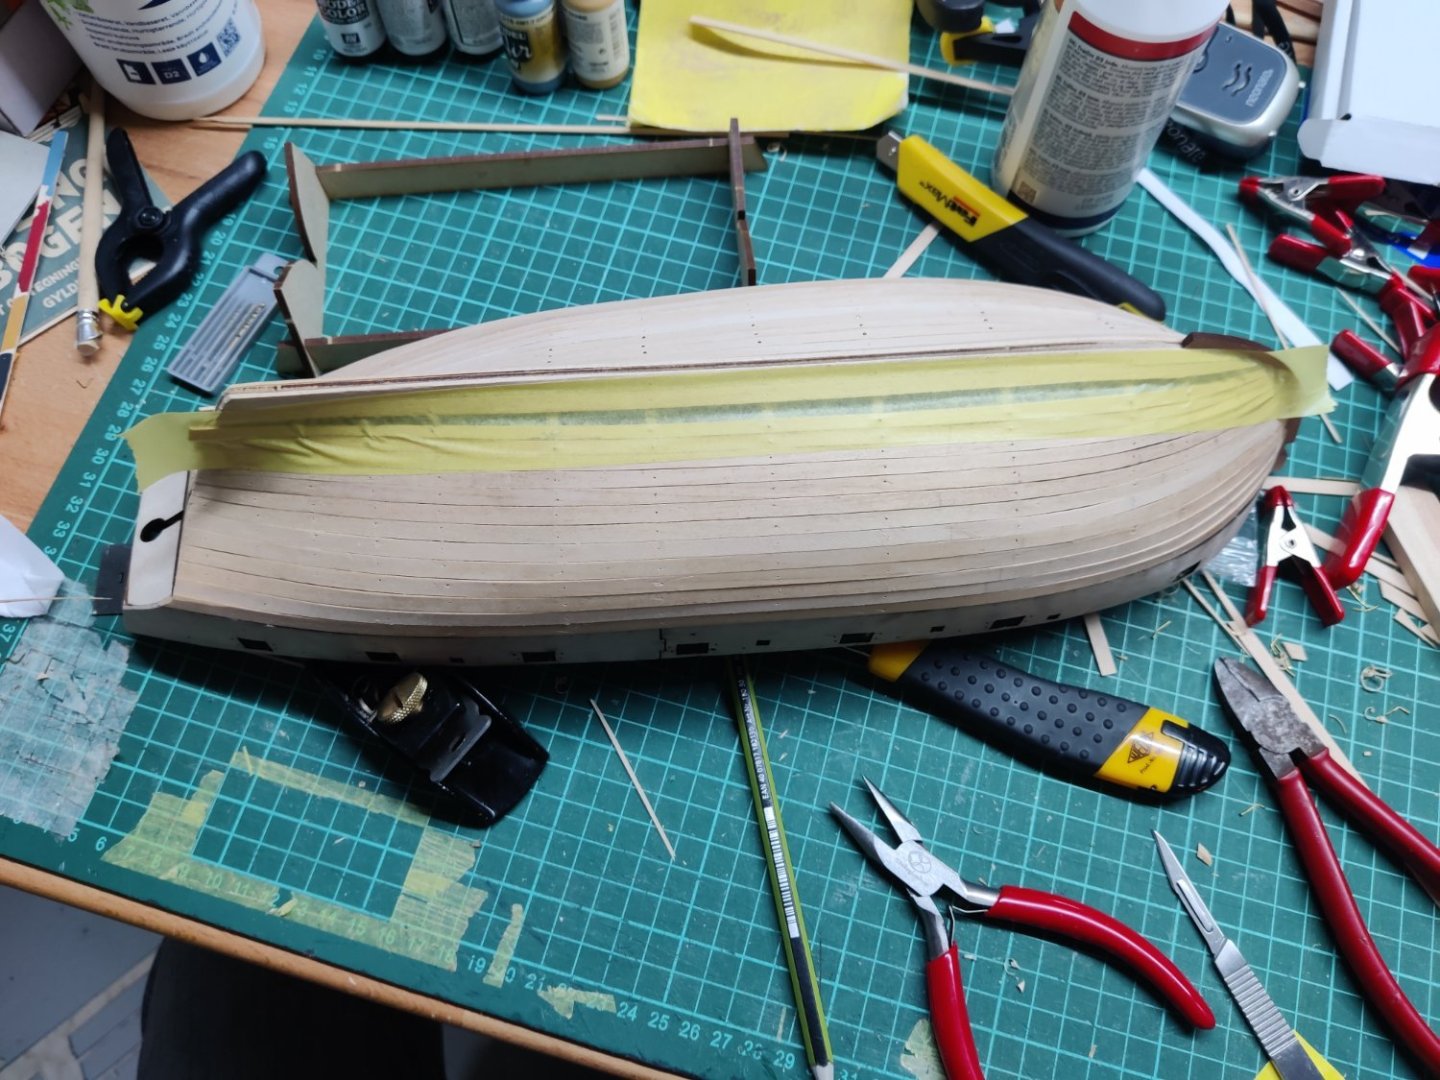
Making for the final plank
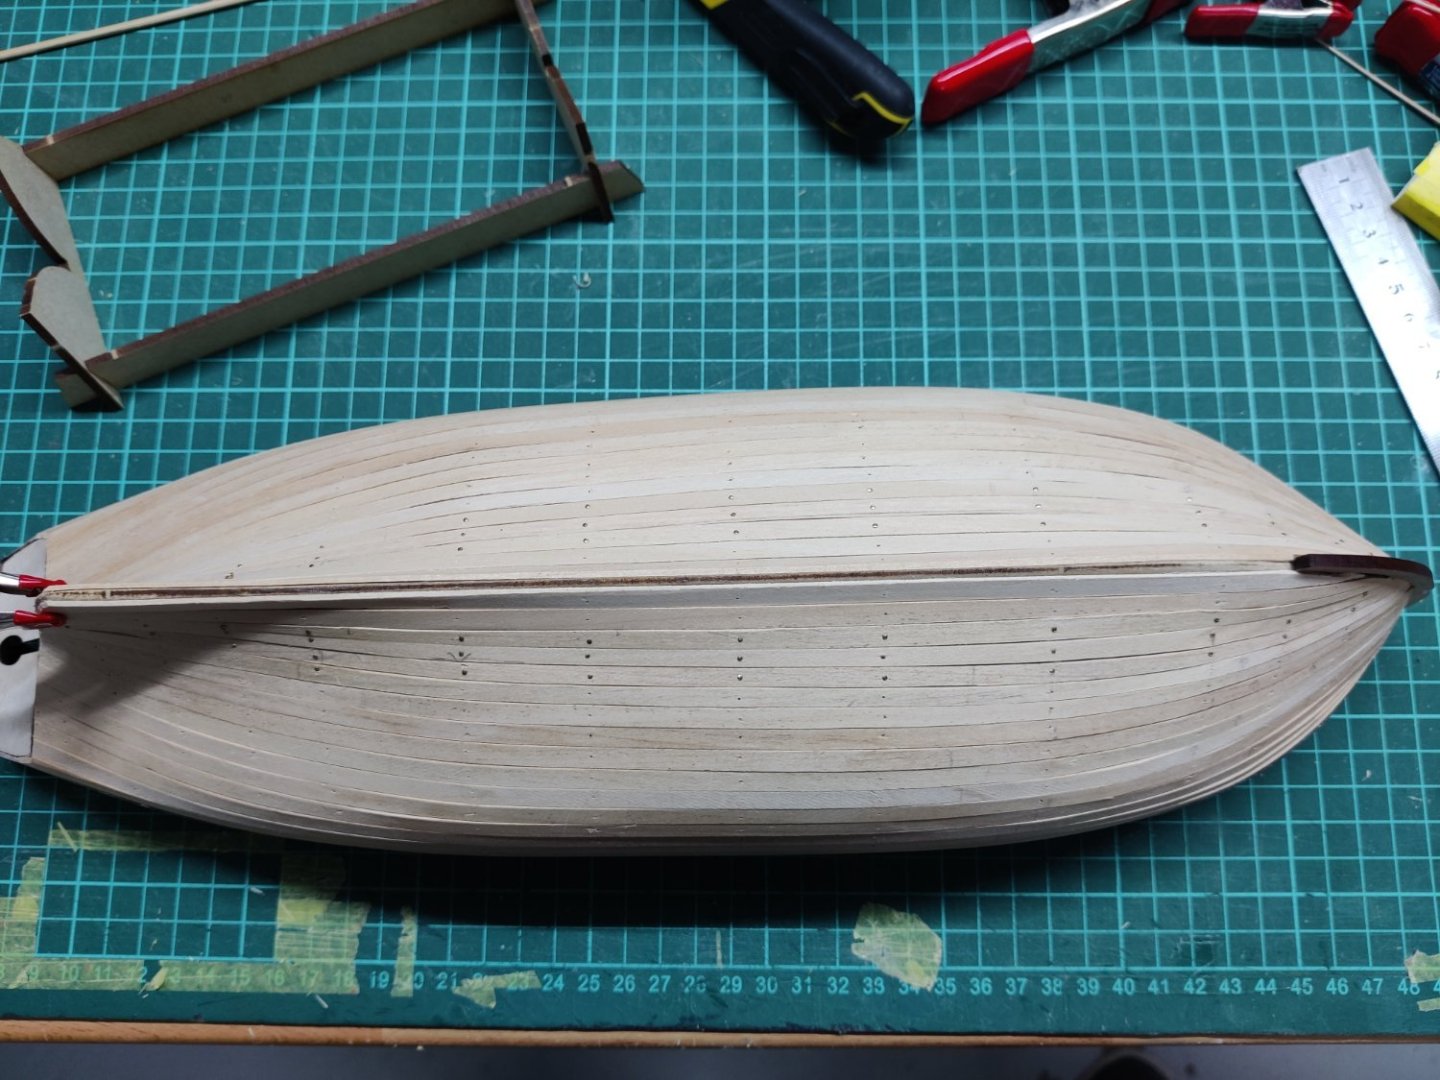
It has taken me 17.5 hours to get to this point, with the work being spread over 9 evenings. 11.5 hours was the first planking.
I don't know if this is slow or fast, but I wil not be able to keep up this pace for the whole build. But for now, I will try to use at least 3-4 evenings a week on the projet.
TJM
I am buy no means an expert, but that planking looks pretty good to me. A little sanding and you should be OK for the second layer
- TJM, rcweir, JacquesCousteau and 1 other
-
4
-
Very sad news. My condolences to the family.
- Ryland Craze, Canute and thibaultron
-
1
-
 2
2
-
Welcome to the site. Be sure to start a build log on your next build.
- JeffT, Keith Black and mtaylor
-
3
-
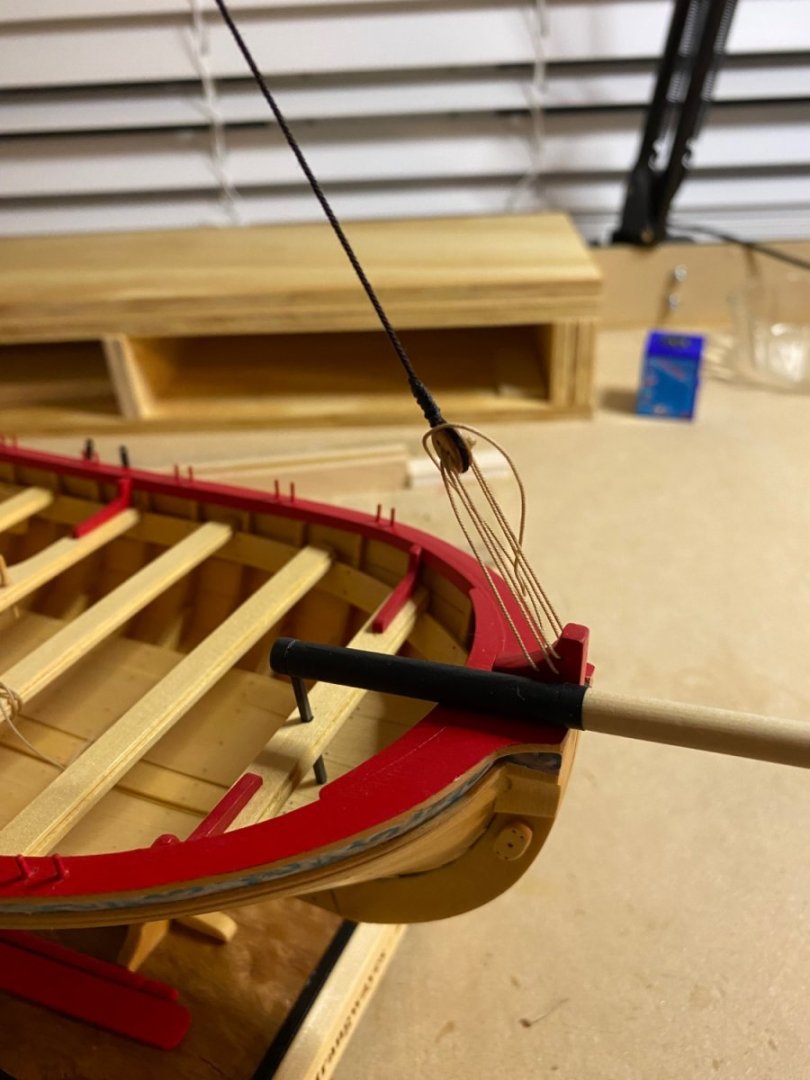
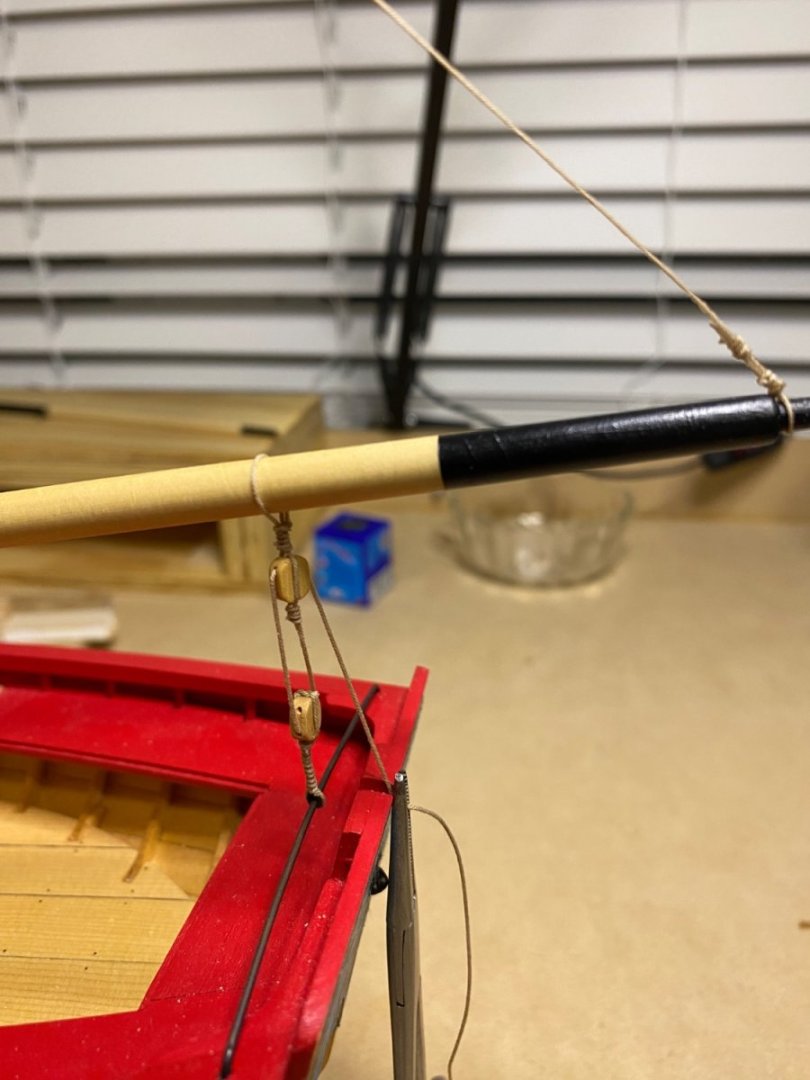
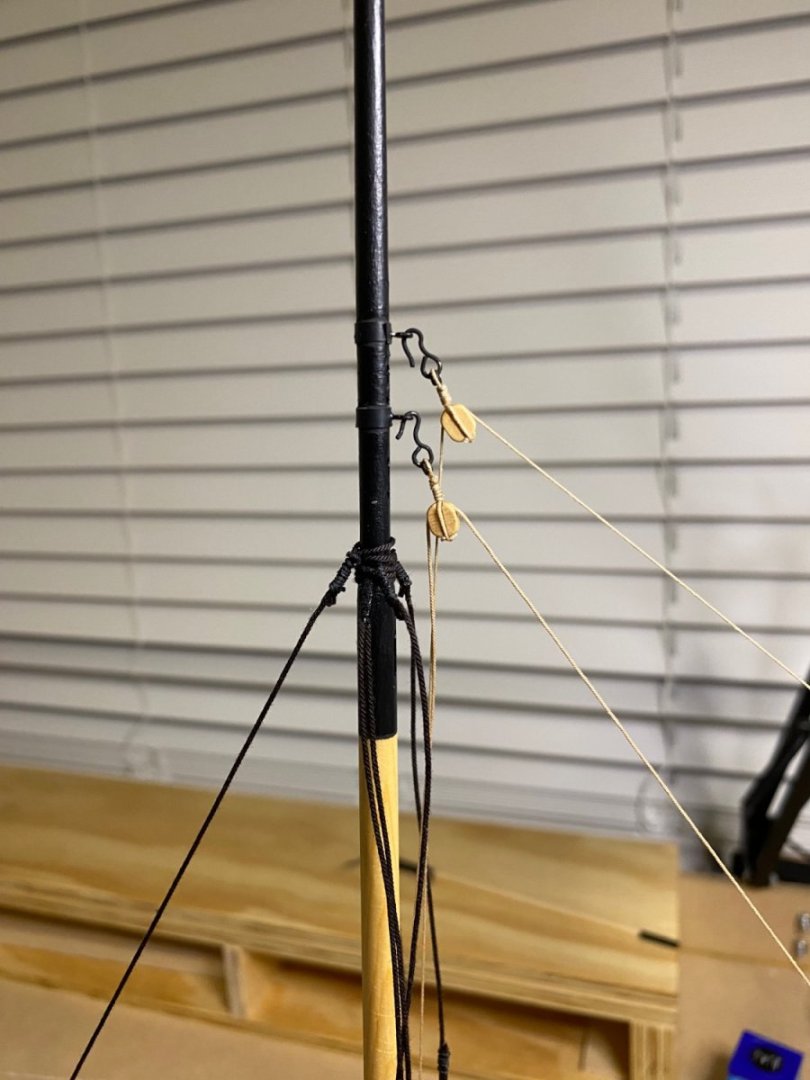
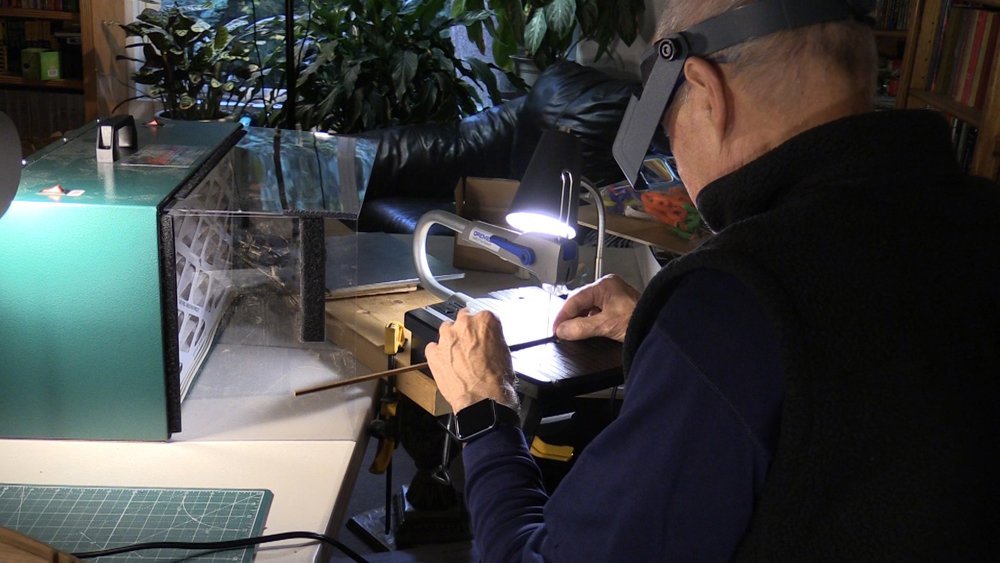
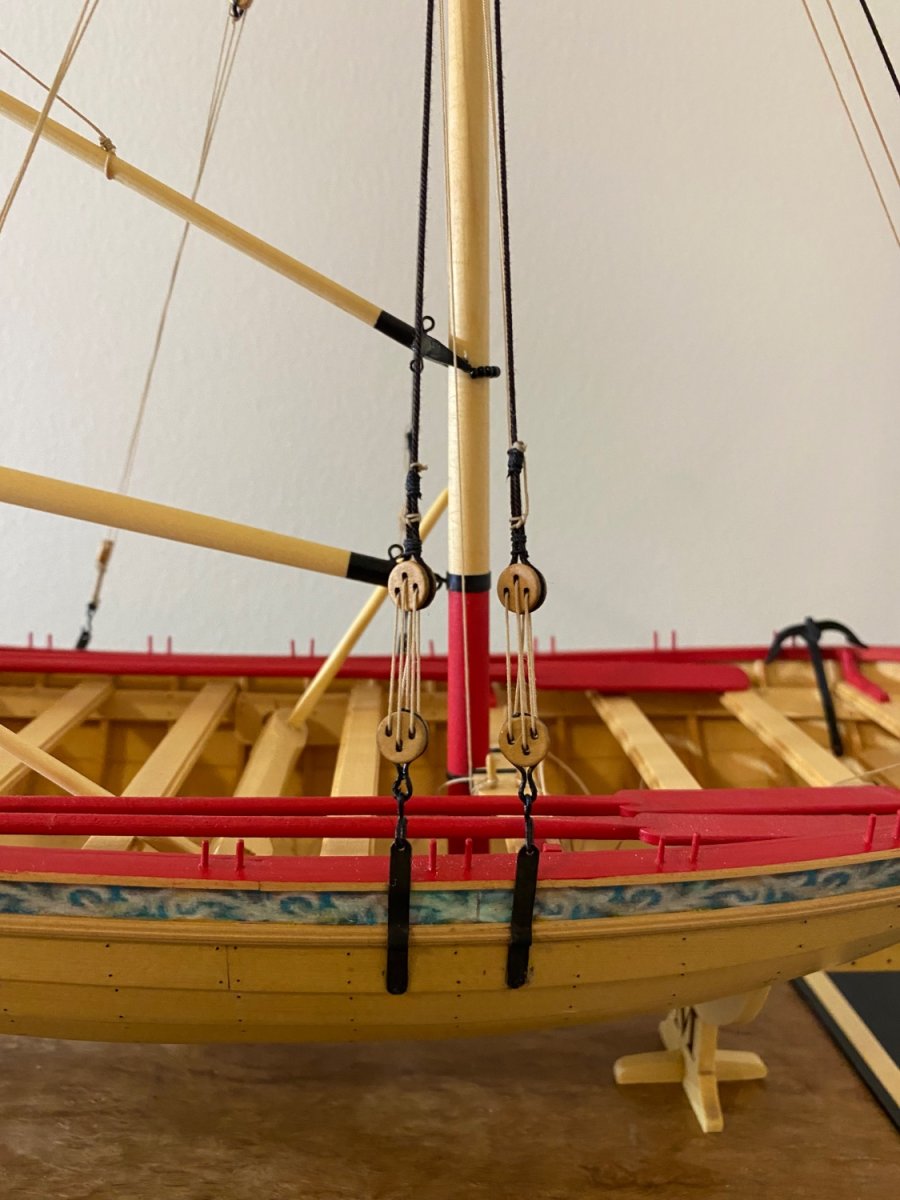
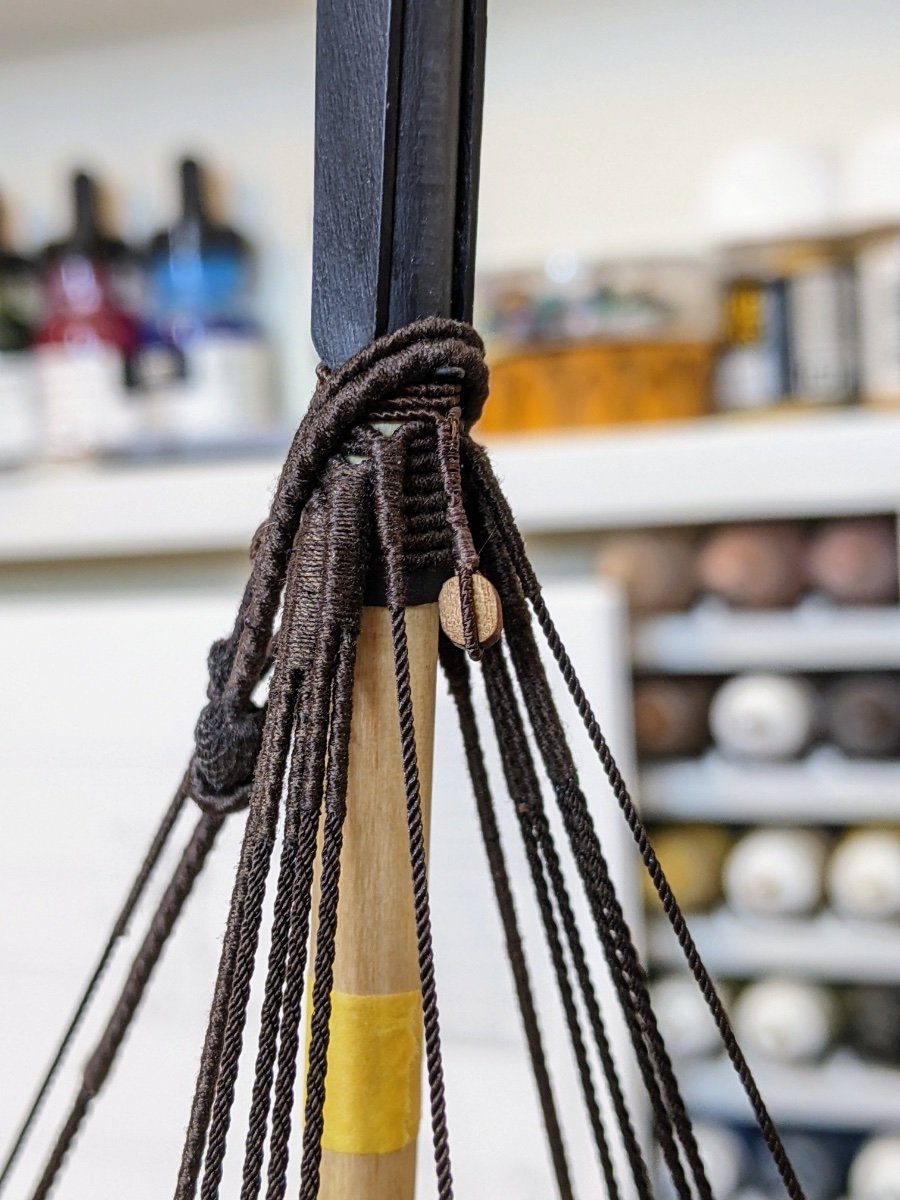
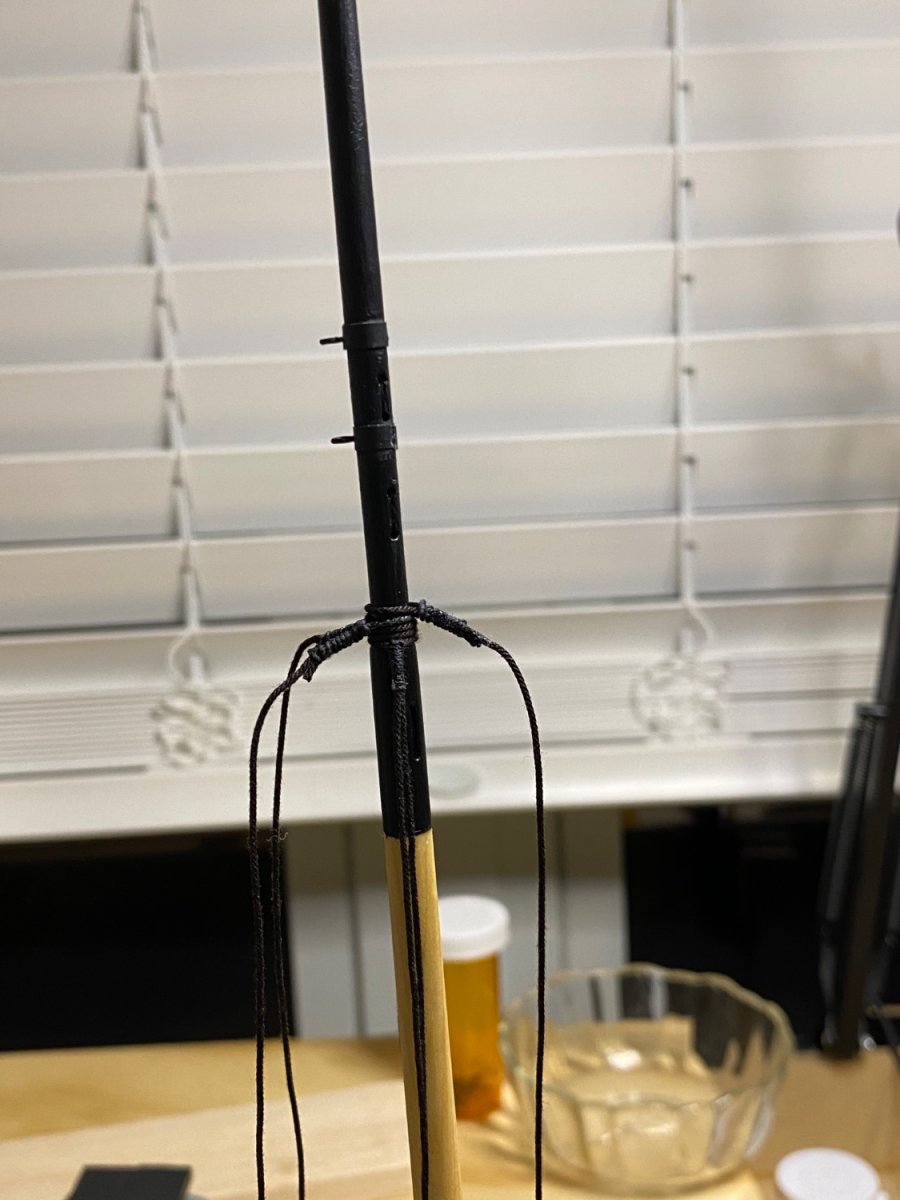
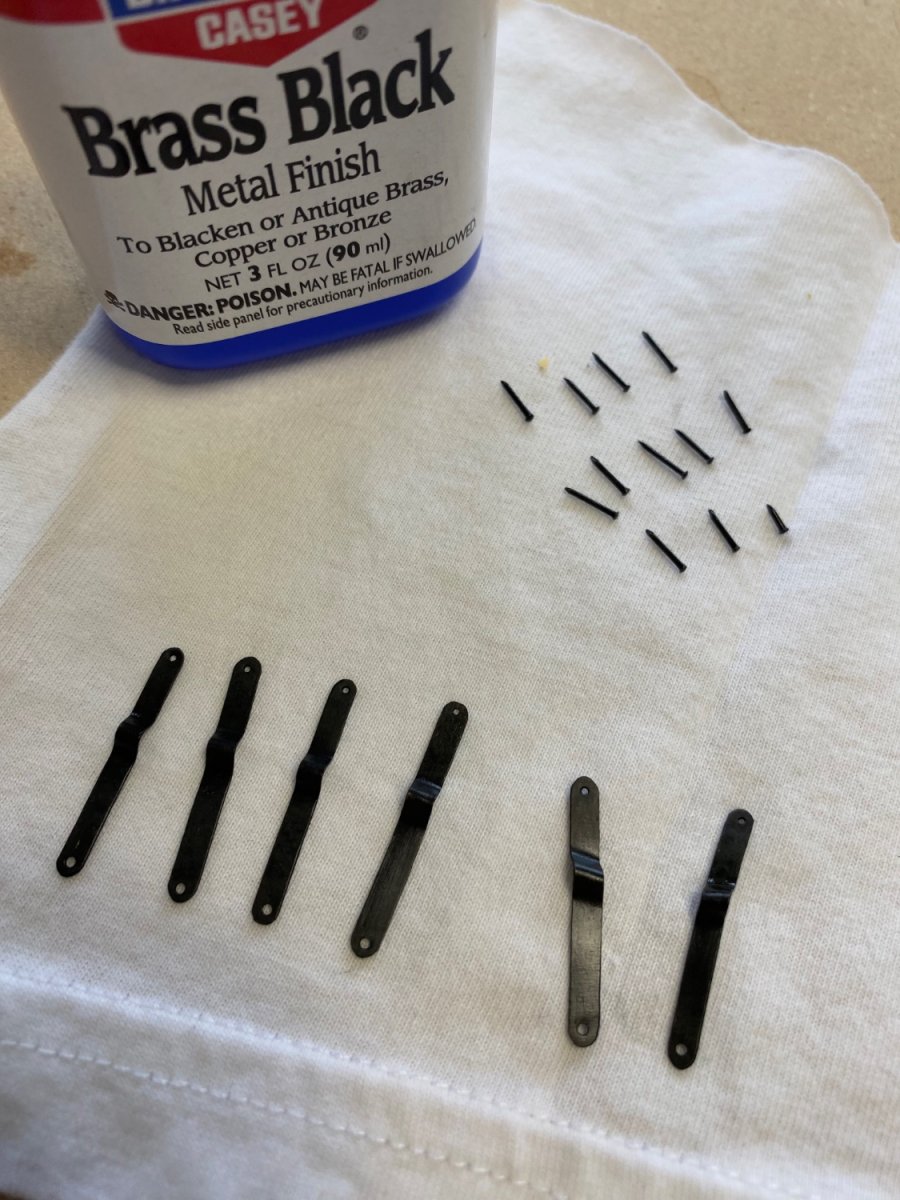
Managed some more rigging. I do wish that I still had feelings in my fingers, might be easier to do these fiddely bits. I still have to blacken some parts, retention and tie off.


- Thukydides, BobG, bruce d and 6 others
-
9
-
40 minutes ago, Thukydides said:
Log #63: Rigging the Preventer Stay
Thank you to everyone who has stopped by and commented and given encouragement.
With the Mainstay done, I moved on to looking at the Preventer Stay. Here there is even more variety than with the Mainstay.
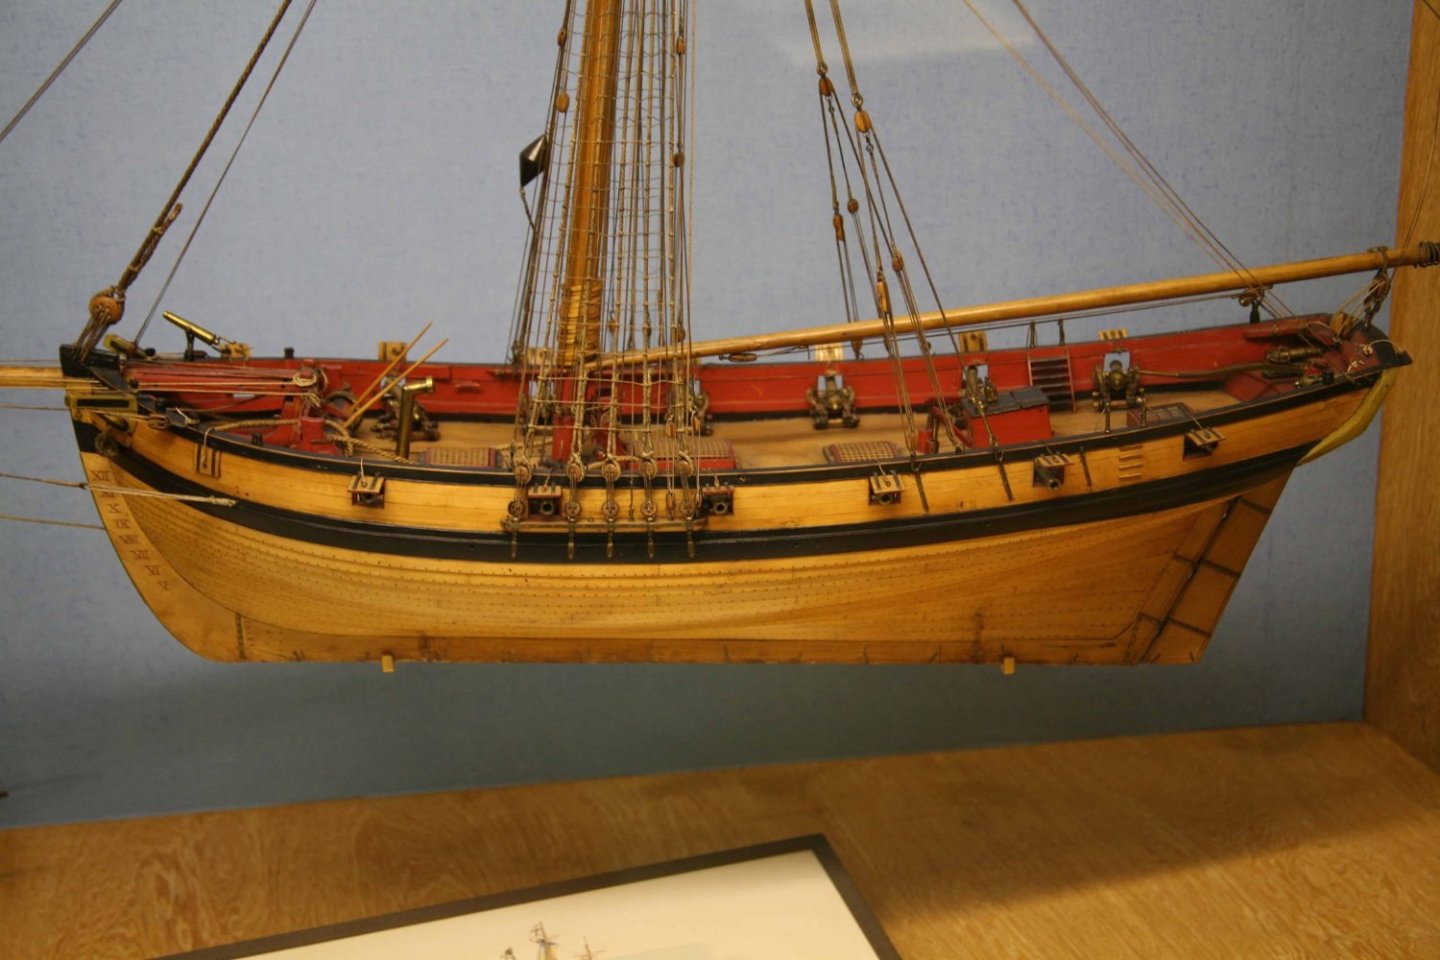
Goodwin depicts Alert with two closed hearts. The odd thing about his depiction of this arrangement is that the line connecting the heart to the stem is thinner than the preventer stay. This does not make a lot of sense to me as it is a single line and so why have a heavier line at other parts when the thinner one will be the weak point.
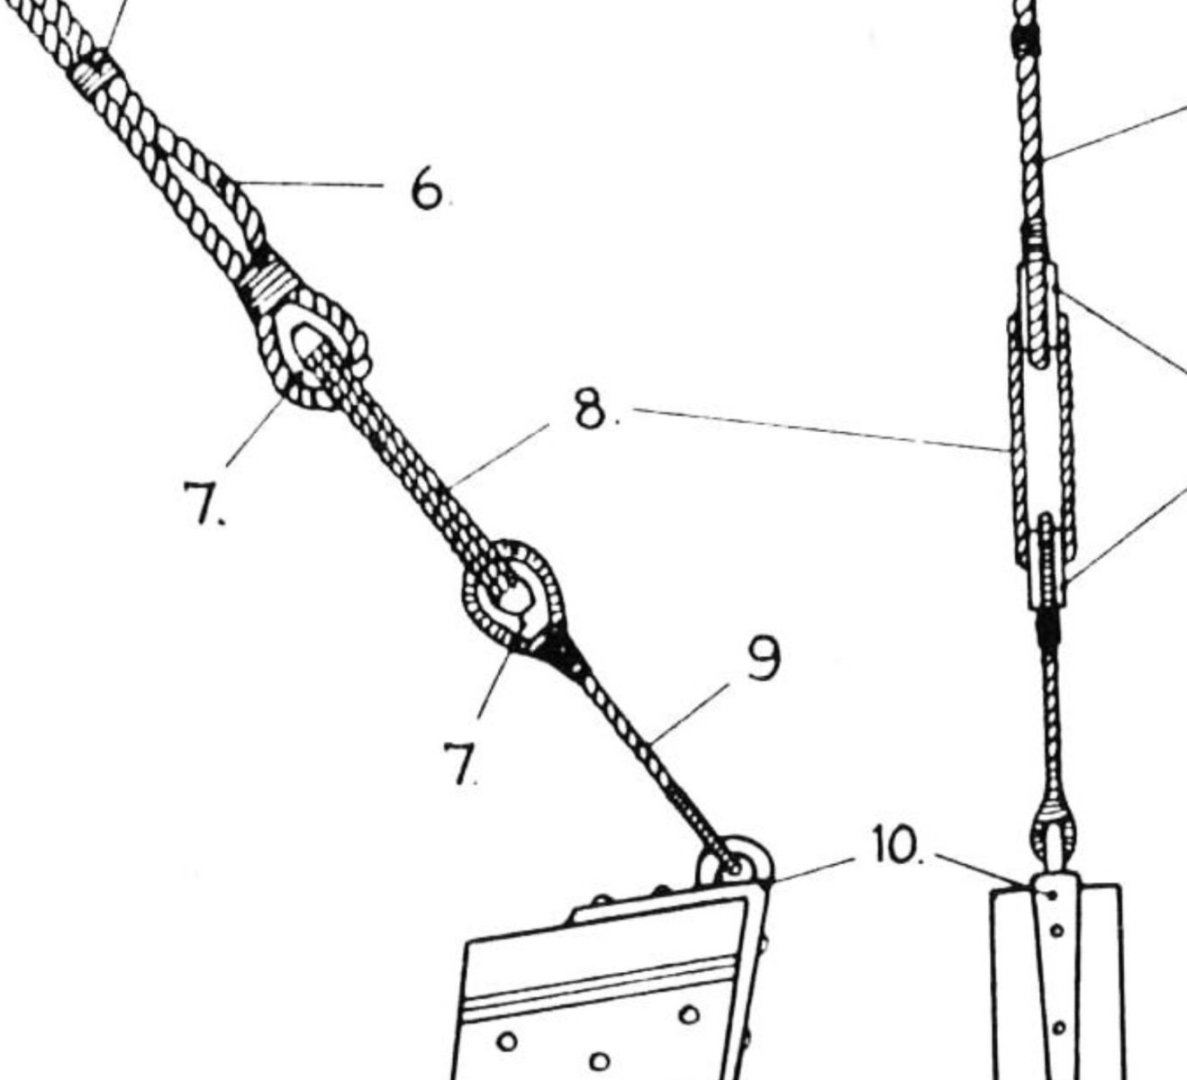
The Hawk model simply depicts the preventer stay attaching to the stem using a single thimble.

The science museum model shows the preventer stay below the mainstay or possibly this is another line and there is no preventer stay.
The kit goes with two thimble sized together and Chuck’s Cheerful has no preventer stay.
When it comes to other builds on MSW, most have gone with the kit arrangement, but Blue Ensign decided to go with the Goodwin arrangement using the closed hearts. This latter arrangement consistent with Goodwin is what I decided to go with in the end. In this case I don’t really have a good reason for picking this over the others apart from I liked the look of it the best.

The one change from Goodwin I made as to use the same 0.8mm cable for the section attached to the stem as I felt this made more logical sense than using a lighter line. If I was being strictly correct I should probably have had a metal bit inside the served loop that attaches to the stem. However, I felt it wouldn’t really be visible and so I just stuck with serving the area.
I also made a small adjustment to the masthead as I was having problems with the stays slipping down. I added an eyebolt just above the last of the pendants to keep the stay from slipping down the mast. Even if not strictly correct it is barely noticable.

And with that the main standing rigging is done. In my previous log I mentioned that I was planning on next adjusting the tension on all the lines, but looking at a few other logs and thinking some more I think that I first need to get the bowsprit on the model. This may just be me trying to procrastinate on the ratlines :), but as much as I have enjoyed the rigging, it is very fiddly work and I like the idea of doing a slightly different type of task for a bit.
Thanks for stopping by and here is a shot of the current status of things.
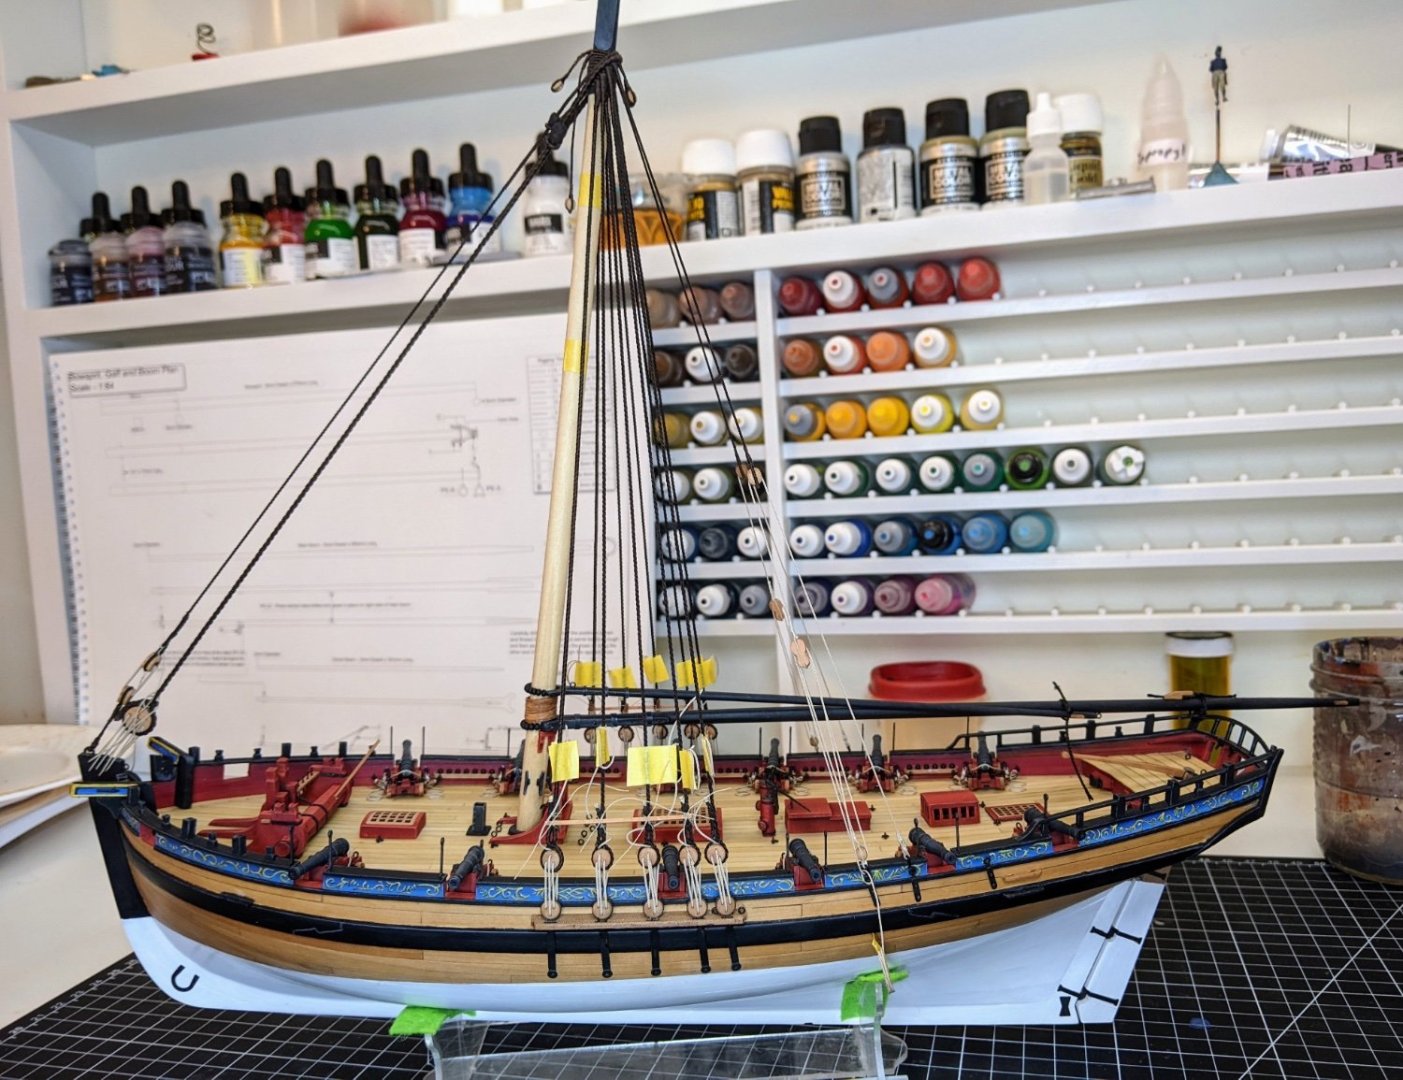
beautiful build. I love your tidy work station, although I do not consider it work.
- AJohnson, Glen McGuire and Thukydides
-
2
-
 1
1
-
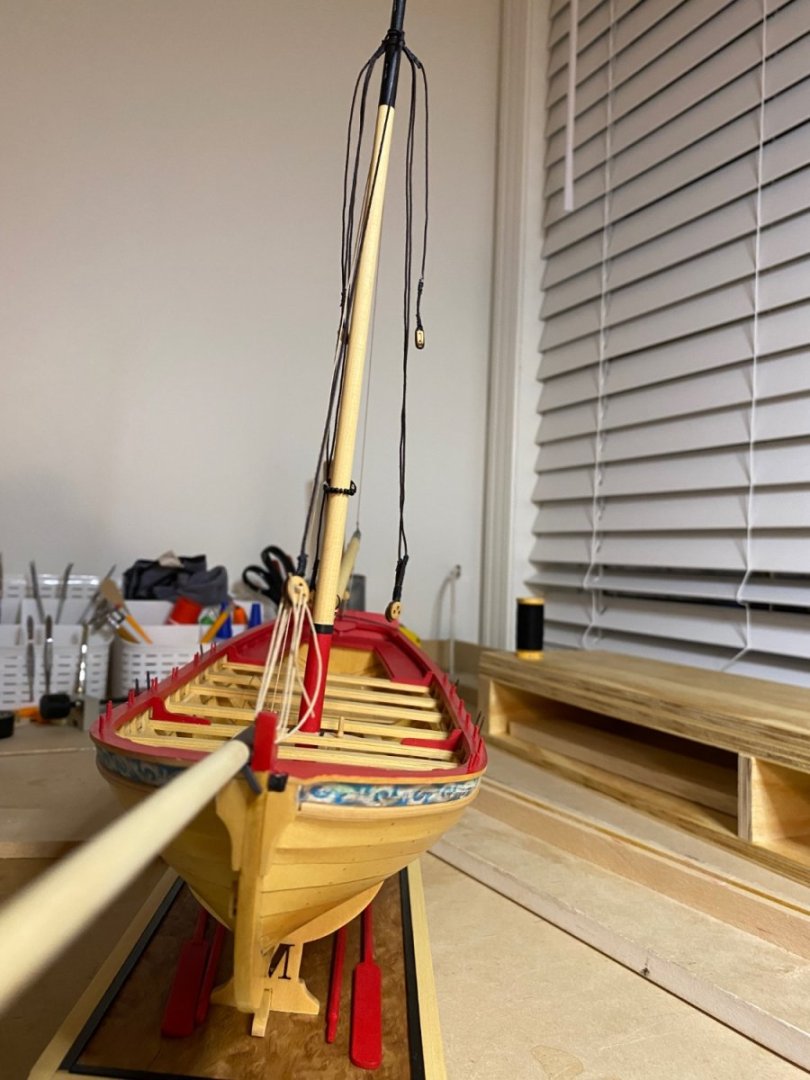
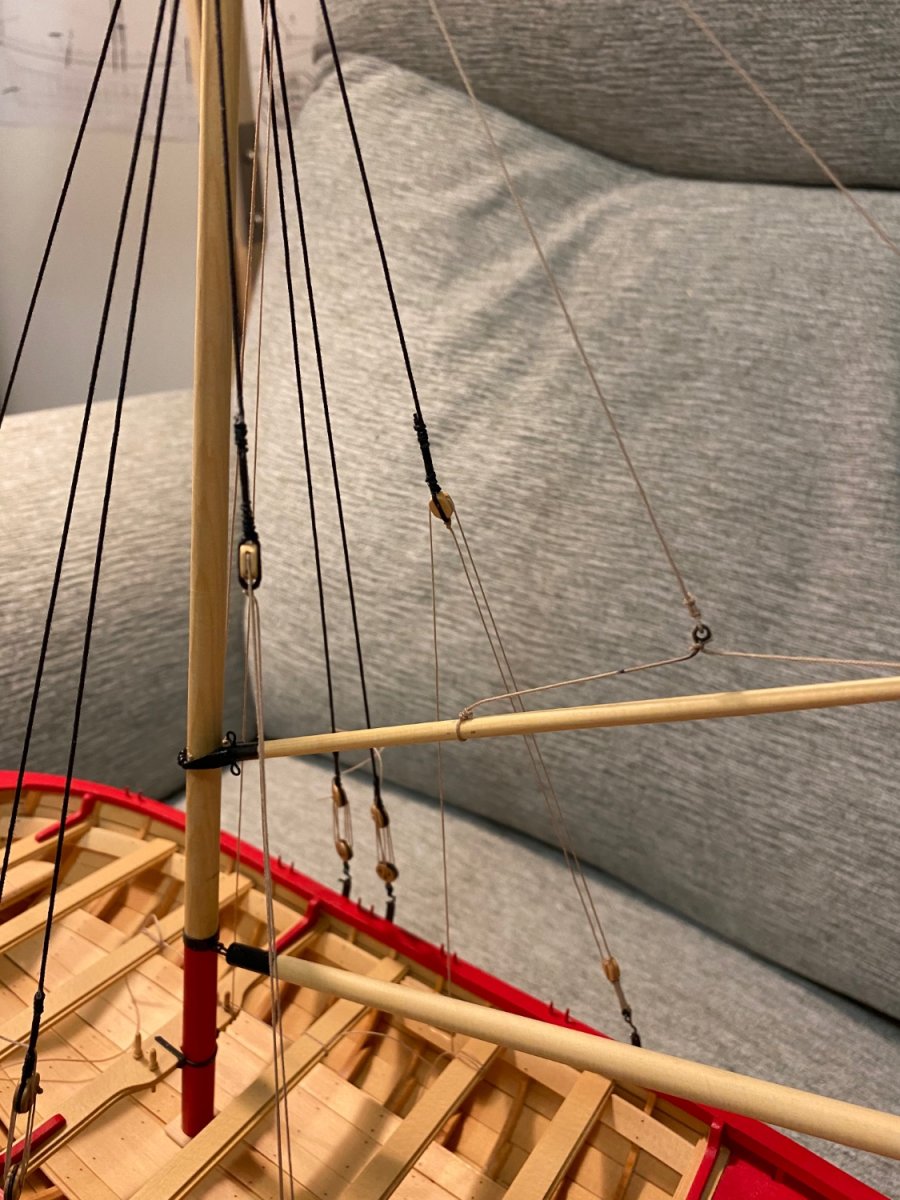
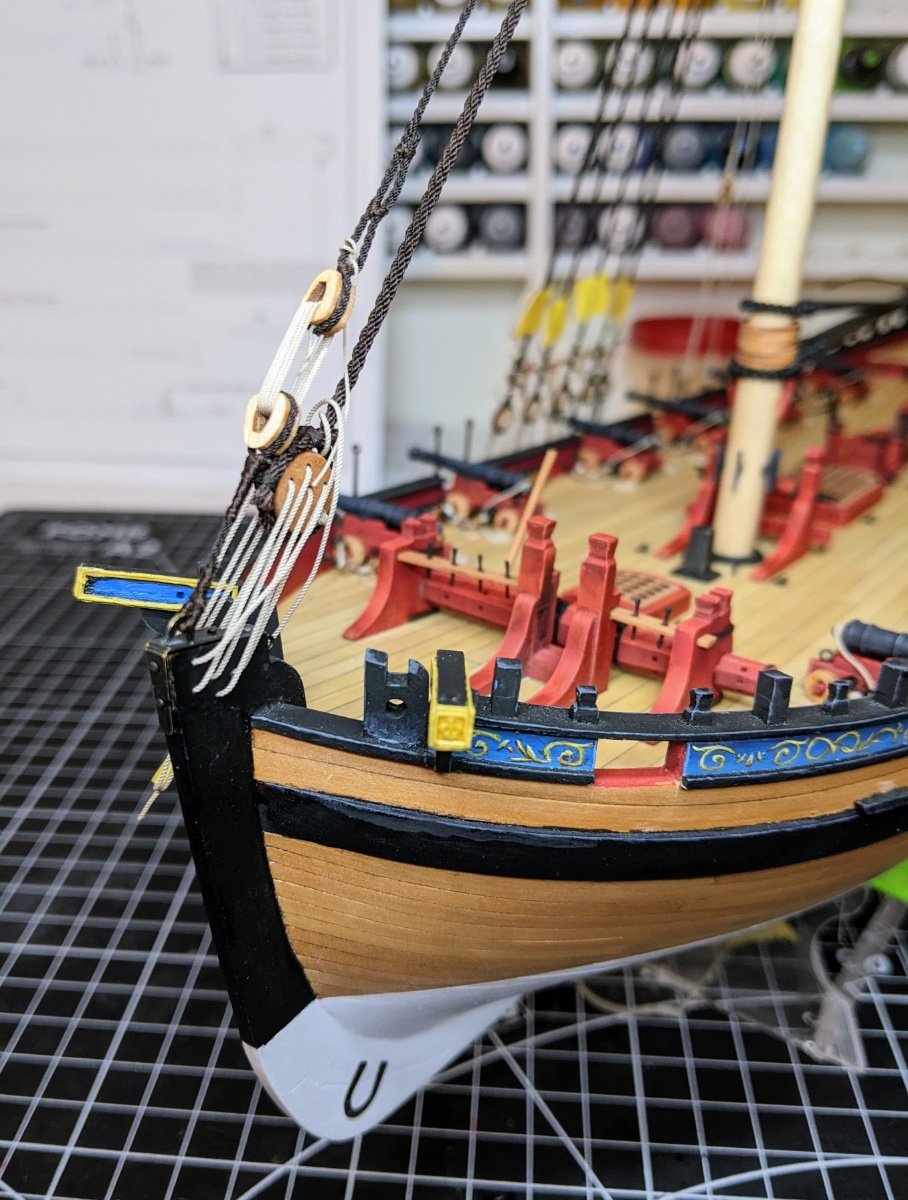
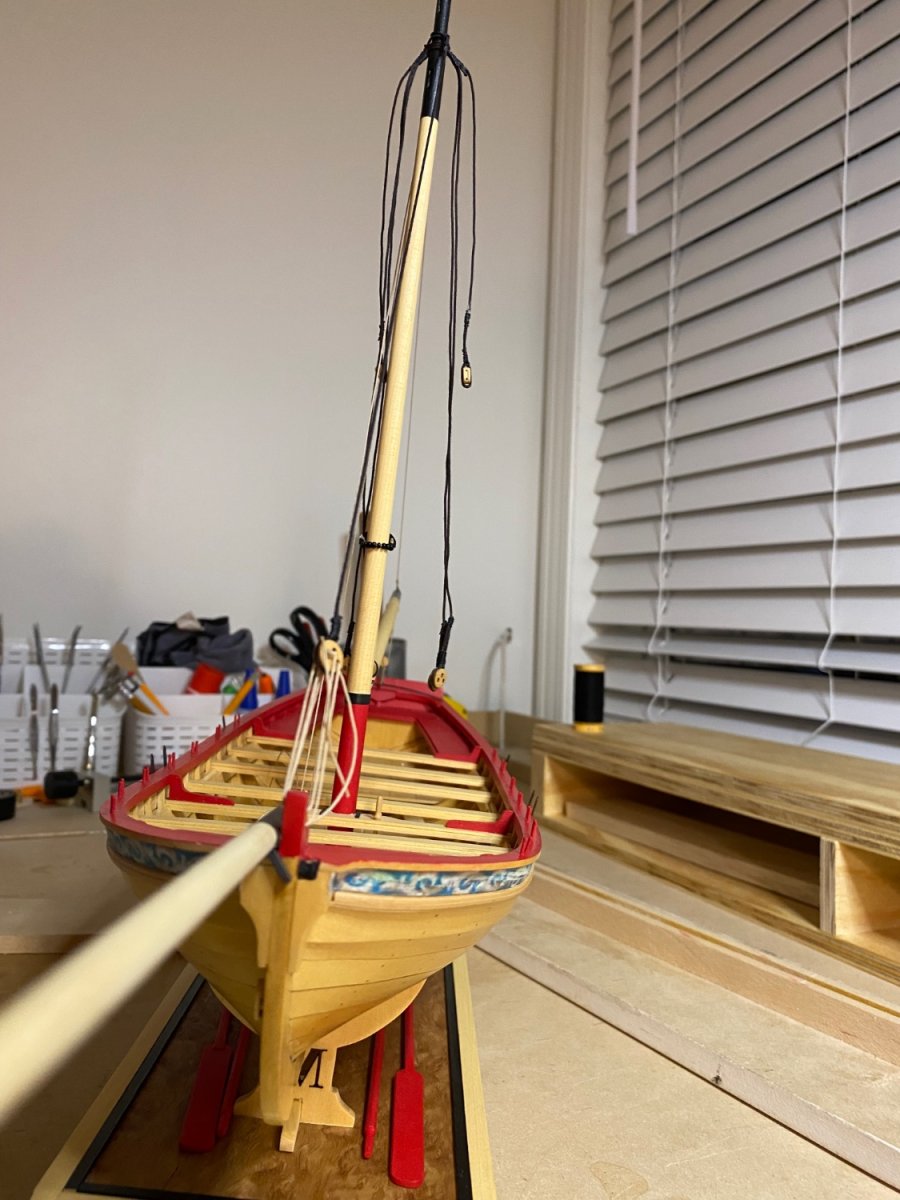
I did make the brass pieces for the bow sprit. They turned our OK. It is not secured yet, I will wait till everything else is completed
-
I am struggling to do the rigging. Being a mechanic all my life,50 plus years, my hands have no feeling. I am progressing and some bits will be re done, but it’s tough. Rules out ever doing a fully rigged warship.
- bruce d, Ryland Craze, BobG and 2 others
-
5
-
I look forward to following your build. My first build is the Syren Medway longboat and it has been a very challenging build. I wish I had started a build like yours to learn the skill set this hobby requires.
-
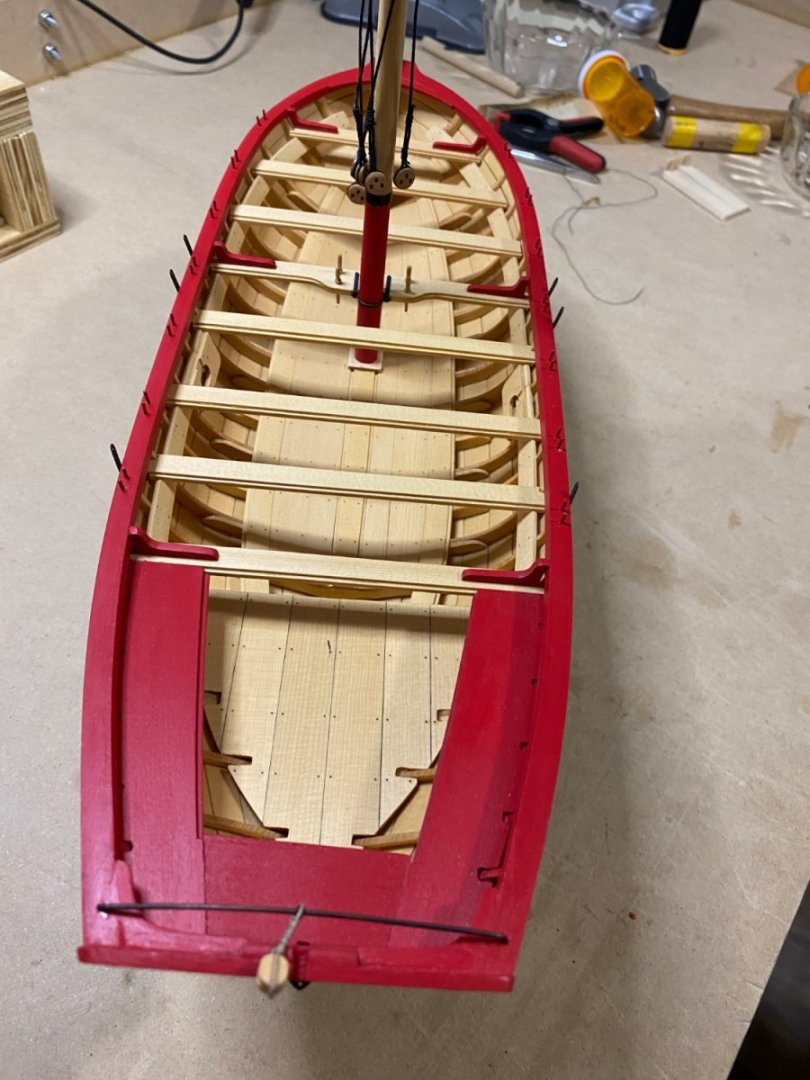
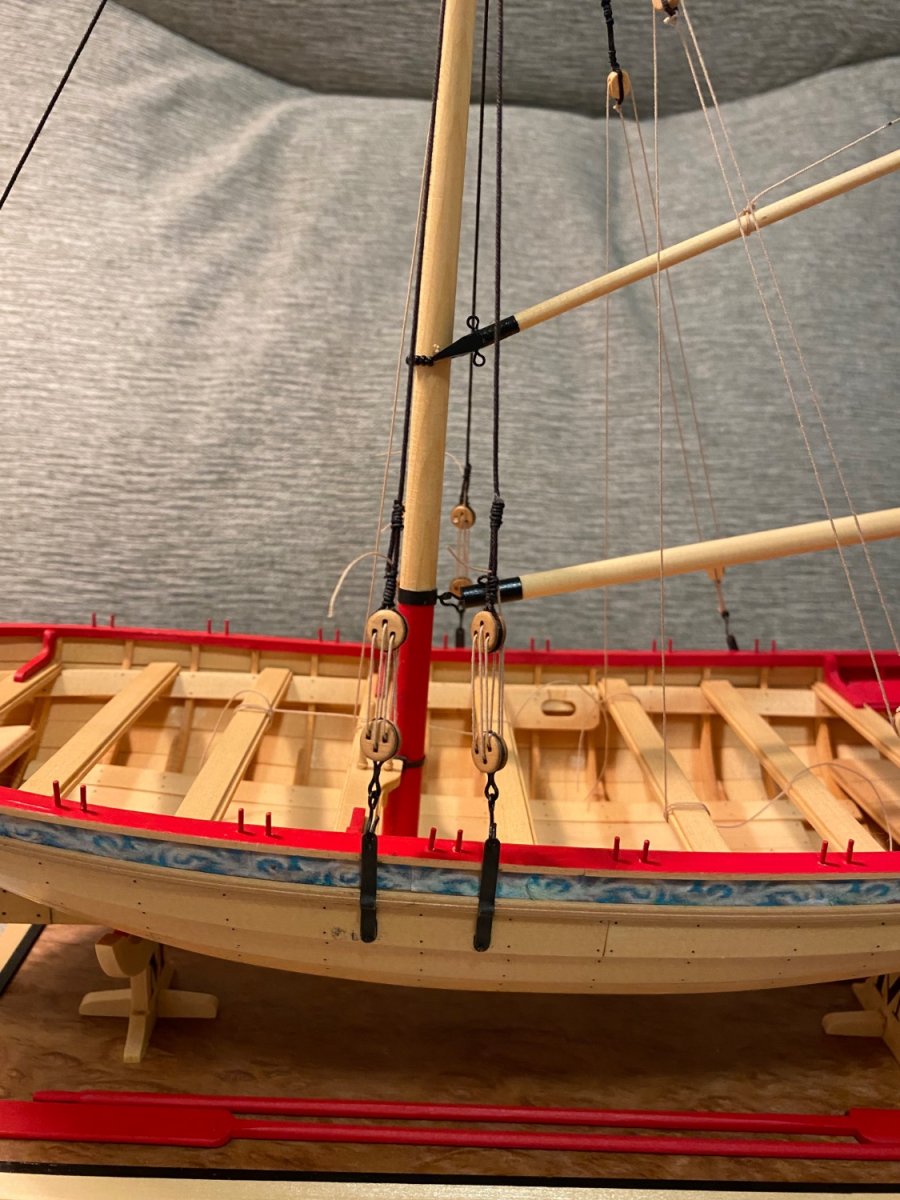
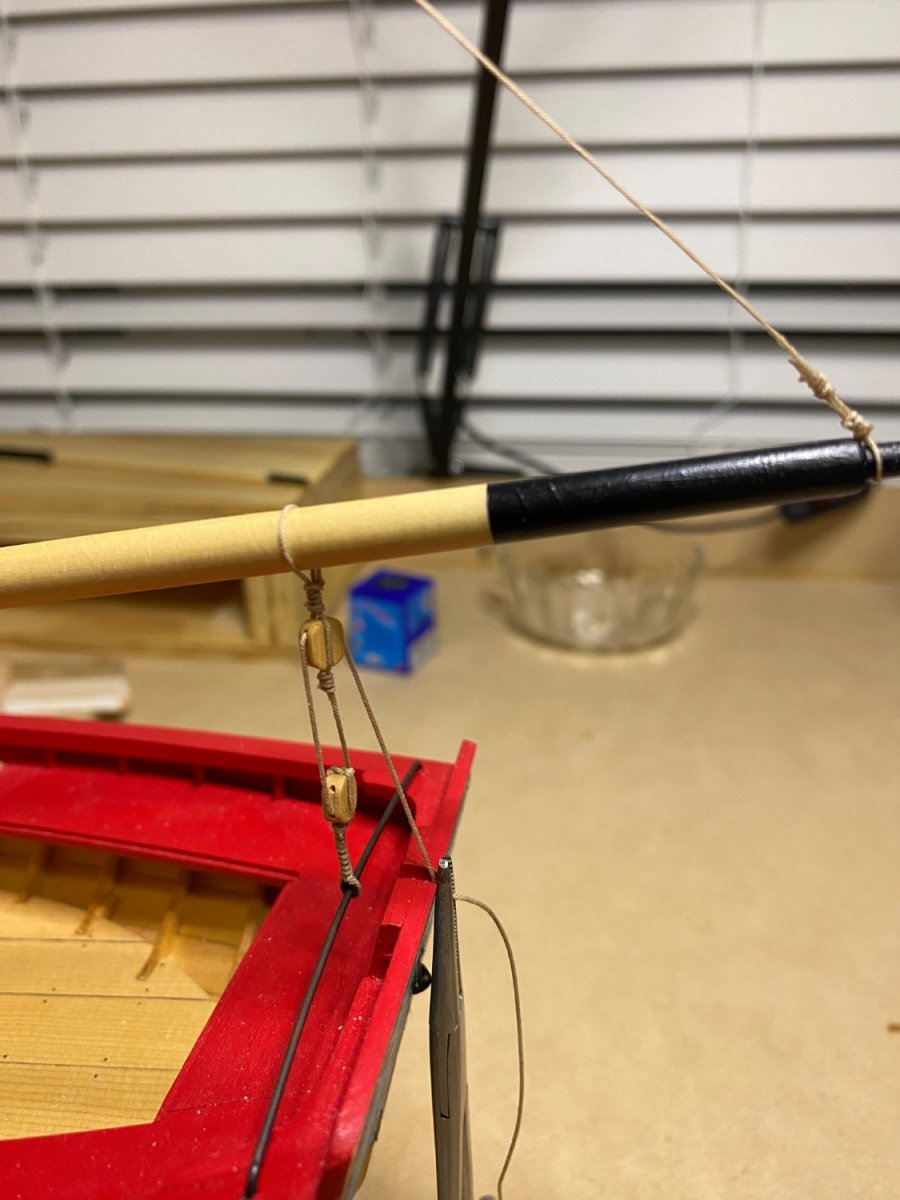
Small amount of progress today. The thole pins were reinstalled with glue, and the chain plates added. All the rigging bits are complete ie blocks etc. Just have to fabricate some hooks and I can do the rigging. The only parts not made are the bow sprit mounting pieces.
- JpR62, aaronc, JacquesCousteau and 6 others
-
9
-
-
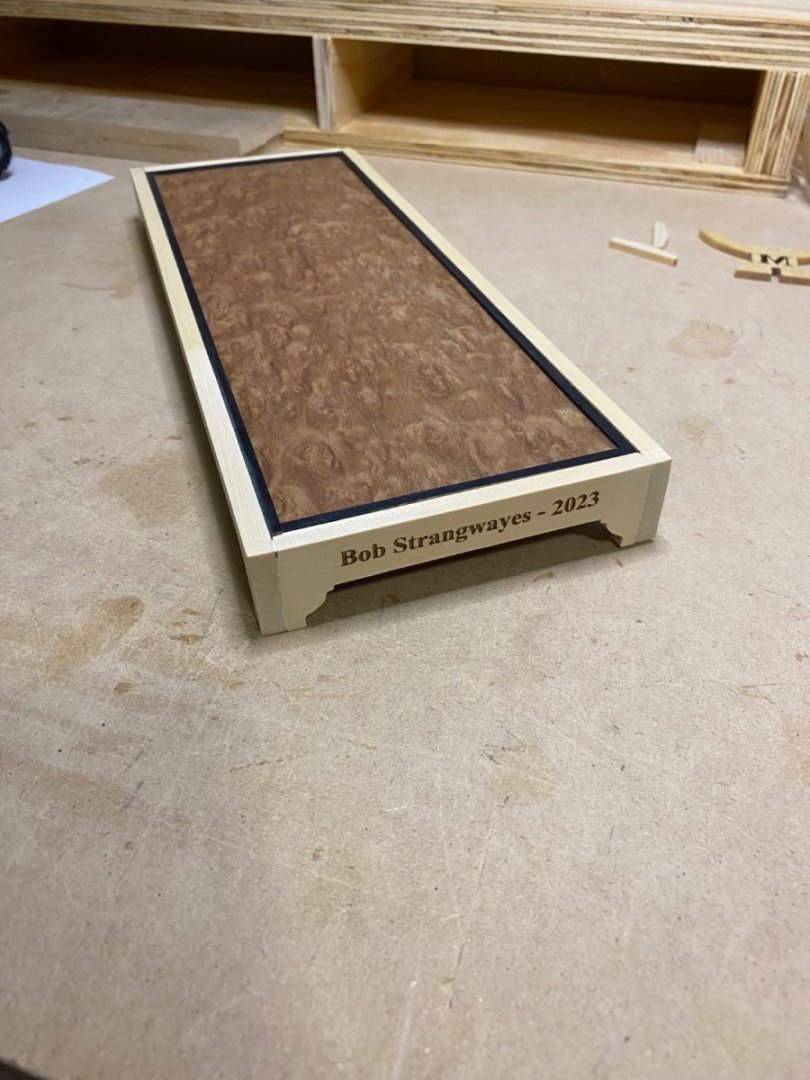
I still have to do some touch up sanding, then apply some WOP.
-
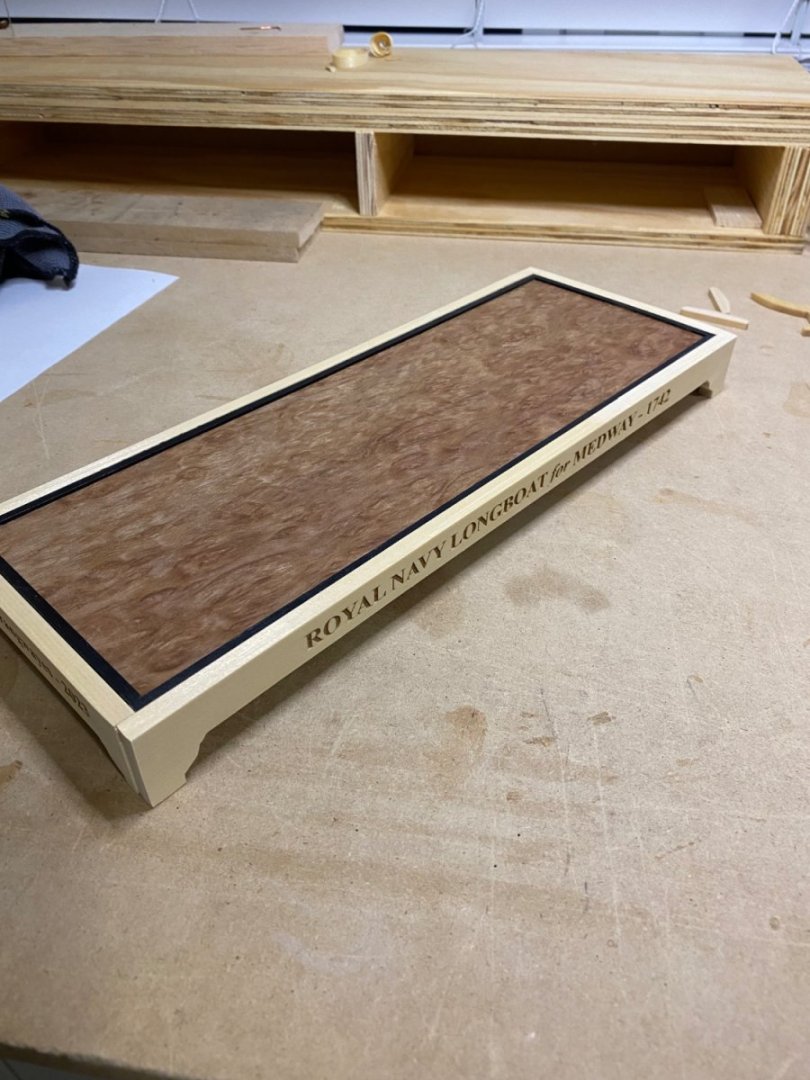
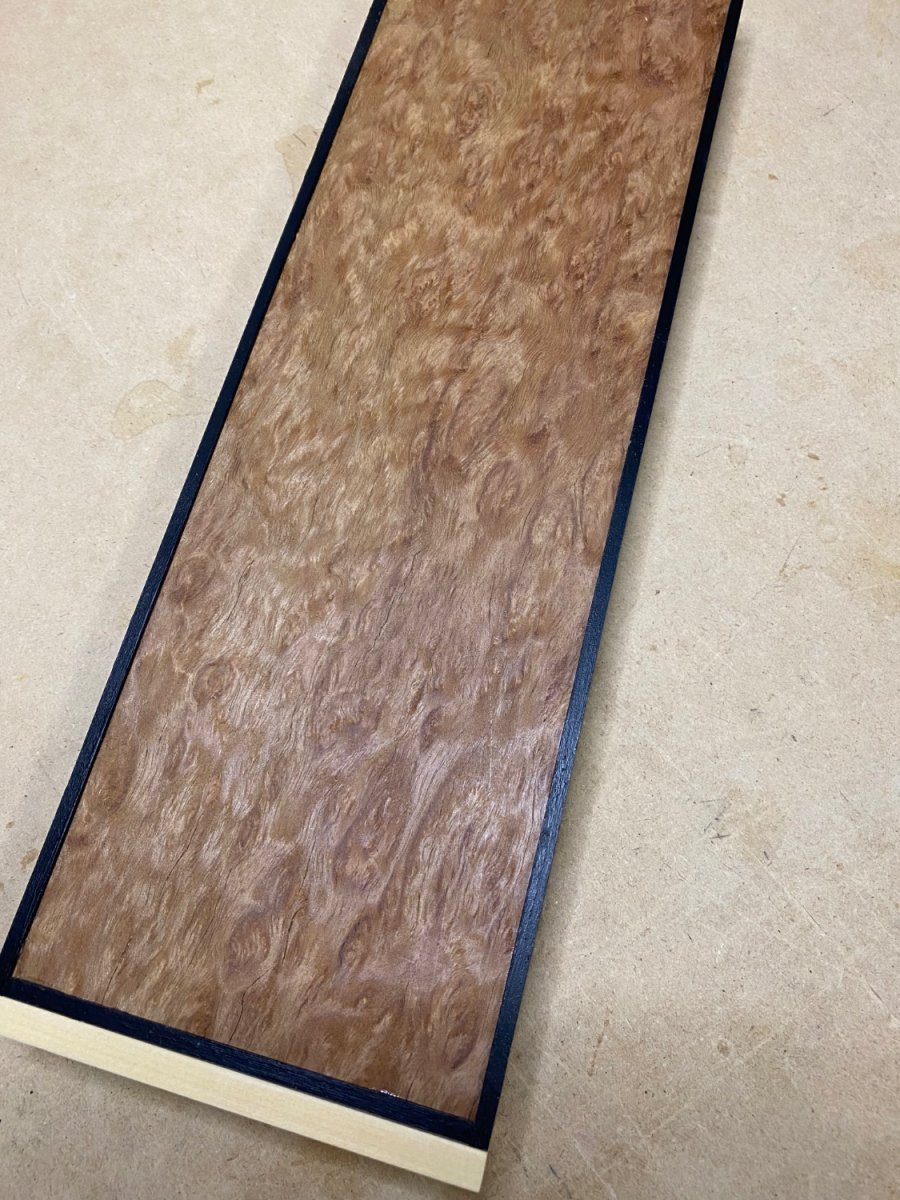
I have assembled my base as per instructions. I had a small oops and chipped the edge of the vaneer so I came up with this fix

- Thukydides, gjdale, bruce d and 5 others
-
8
-
Welcome to the site. I would be lost without it.
- TJM, mtaylor and Keith Black
-
3
-
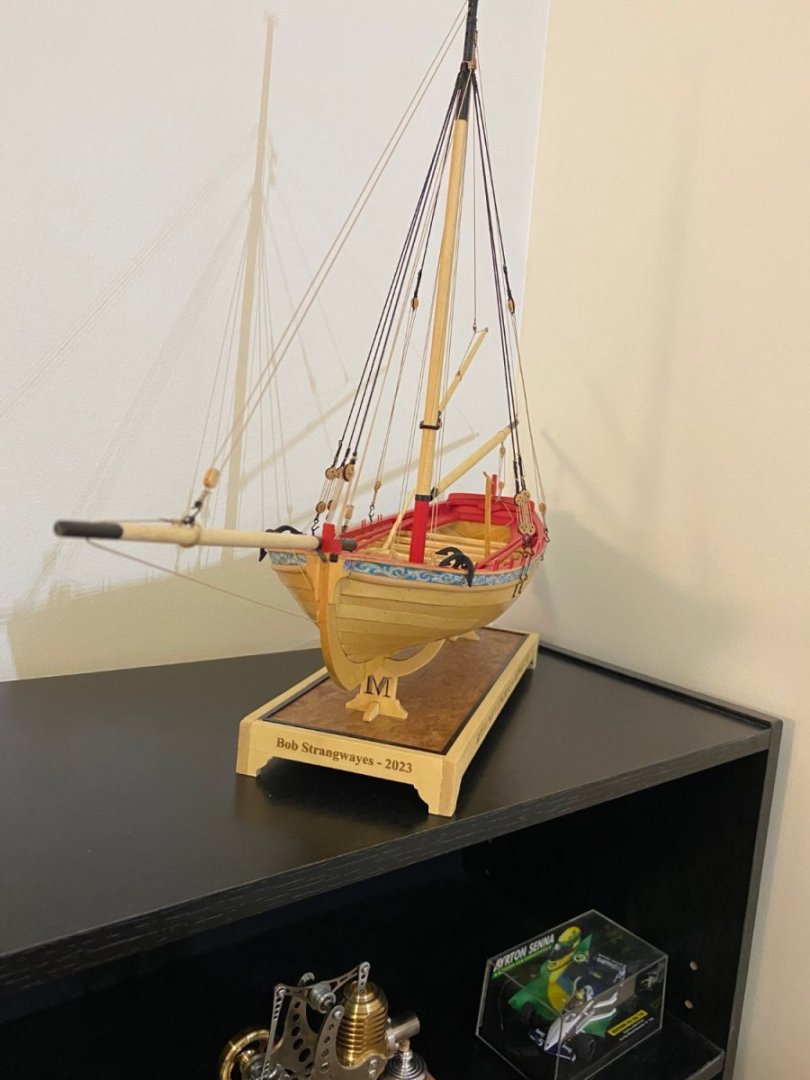
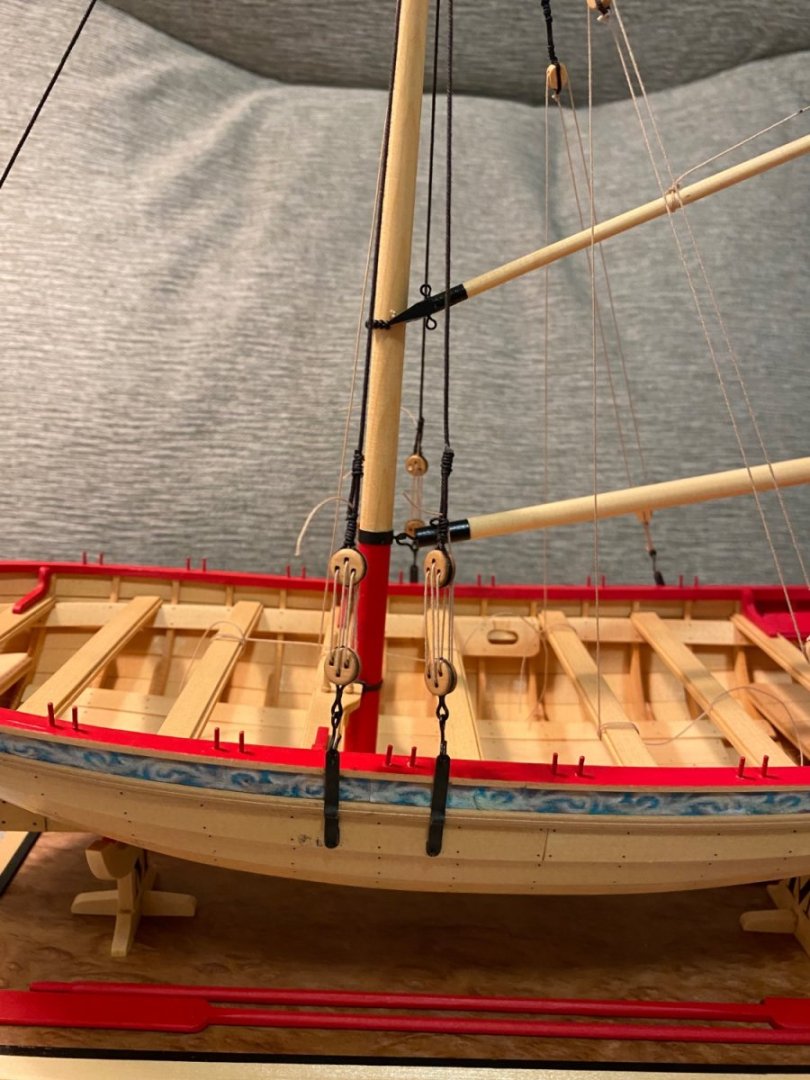
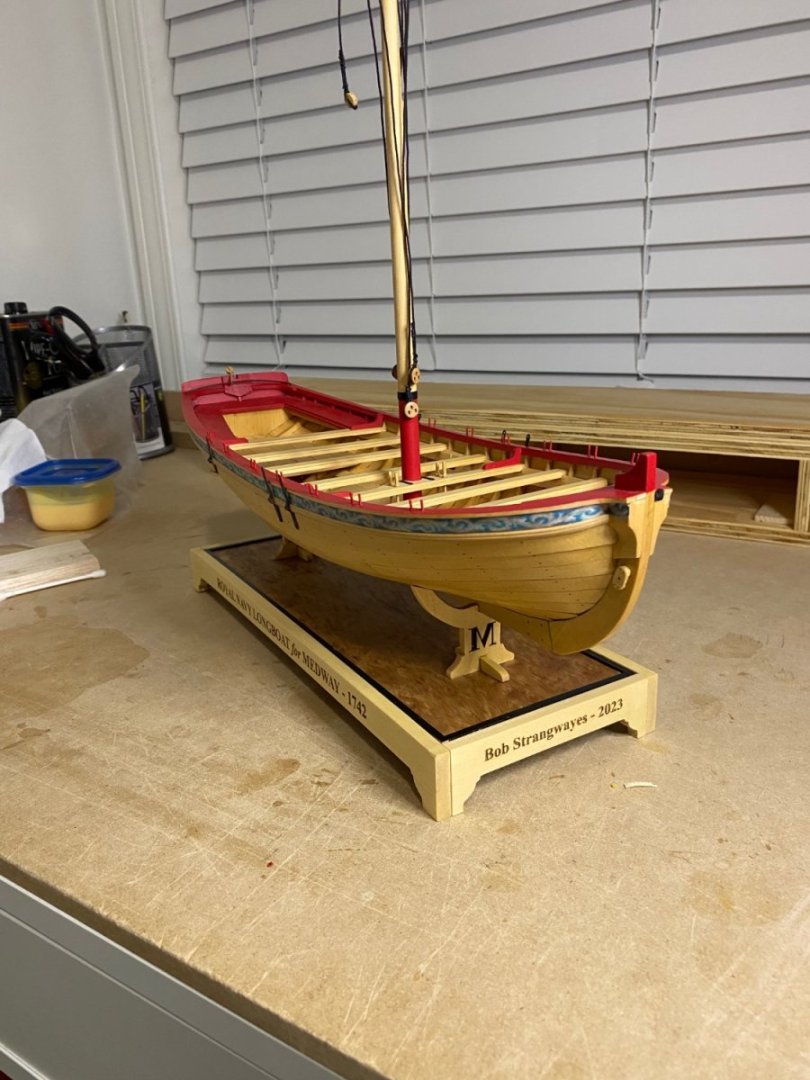
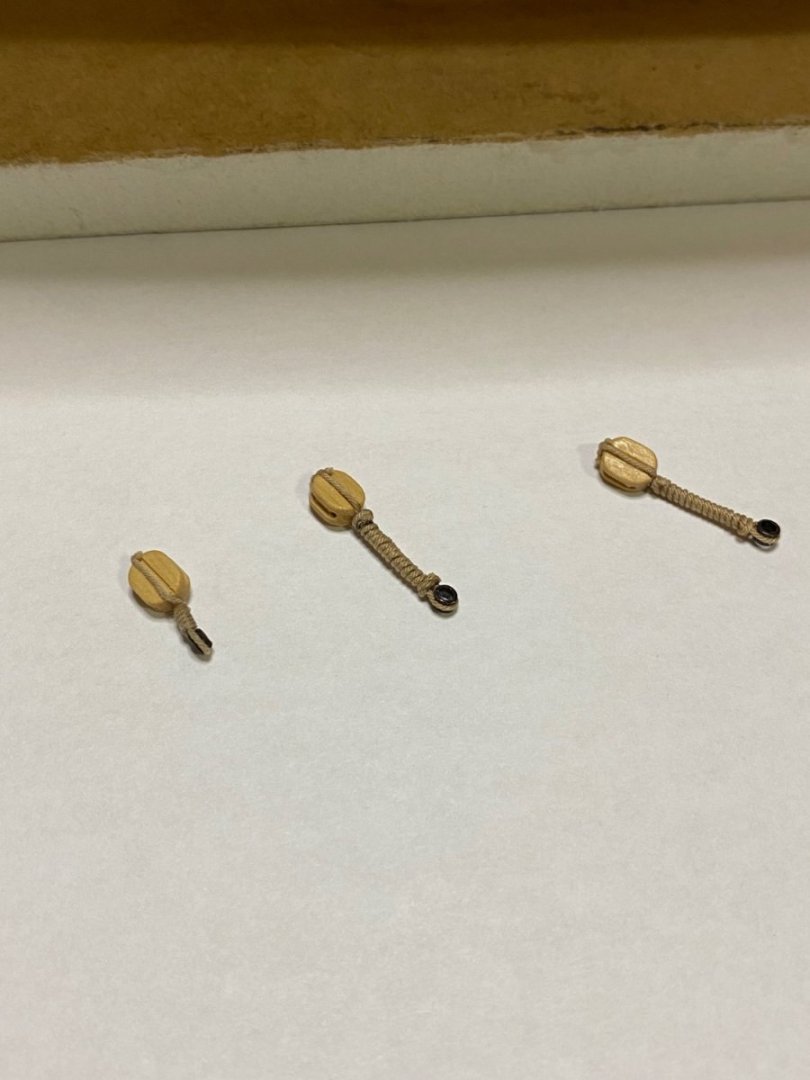
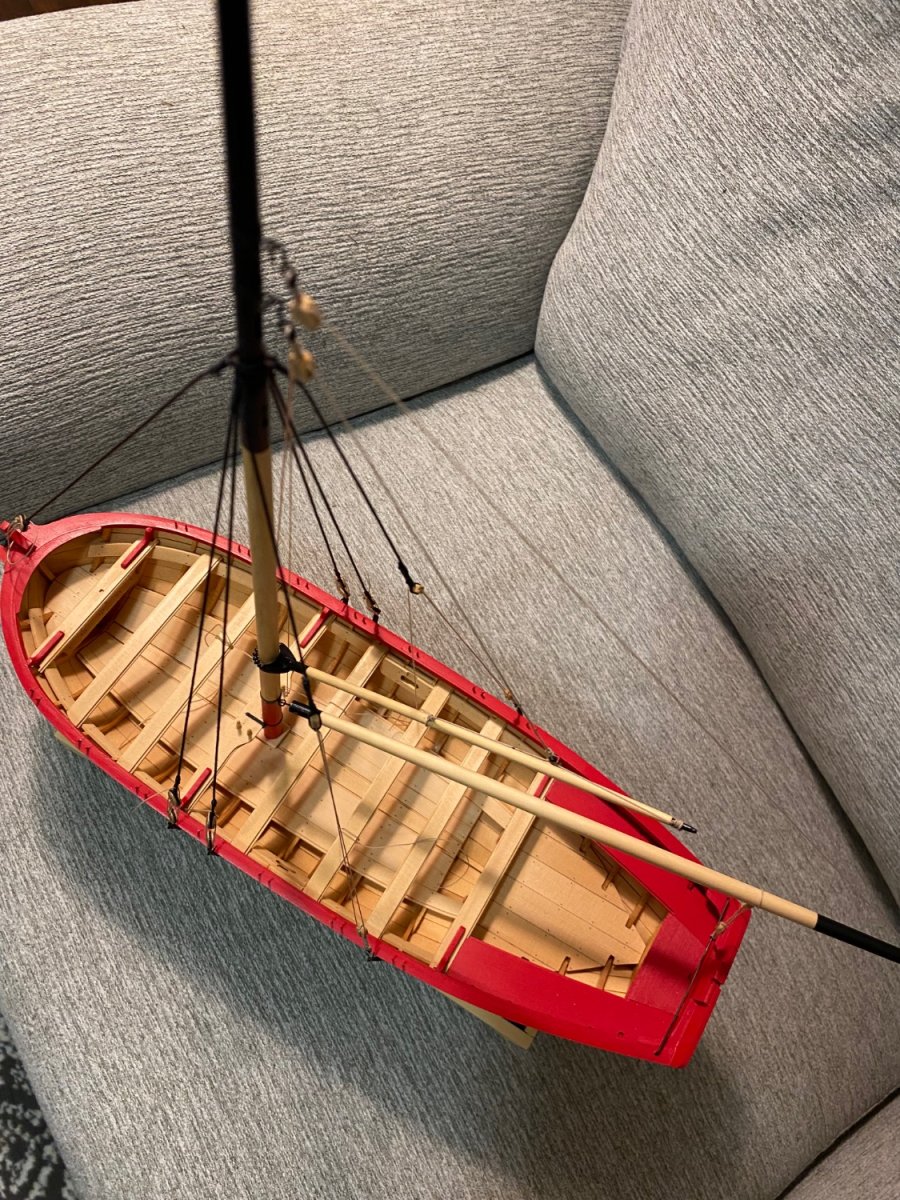
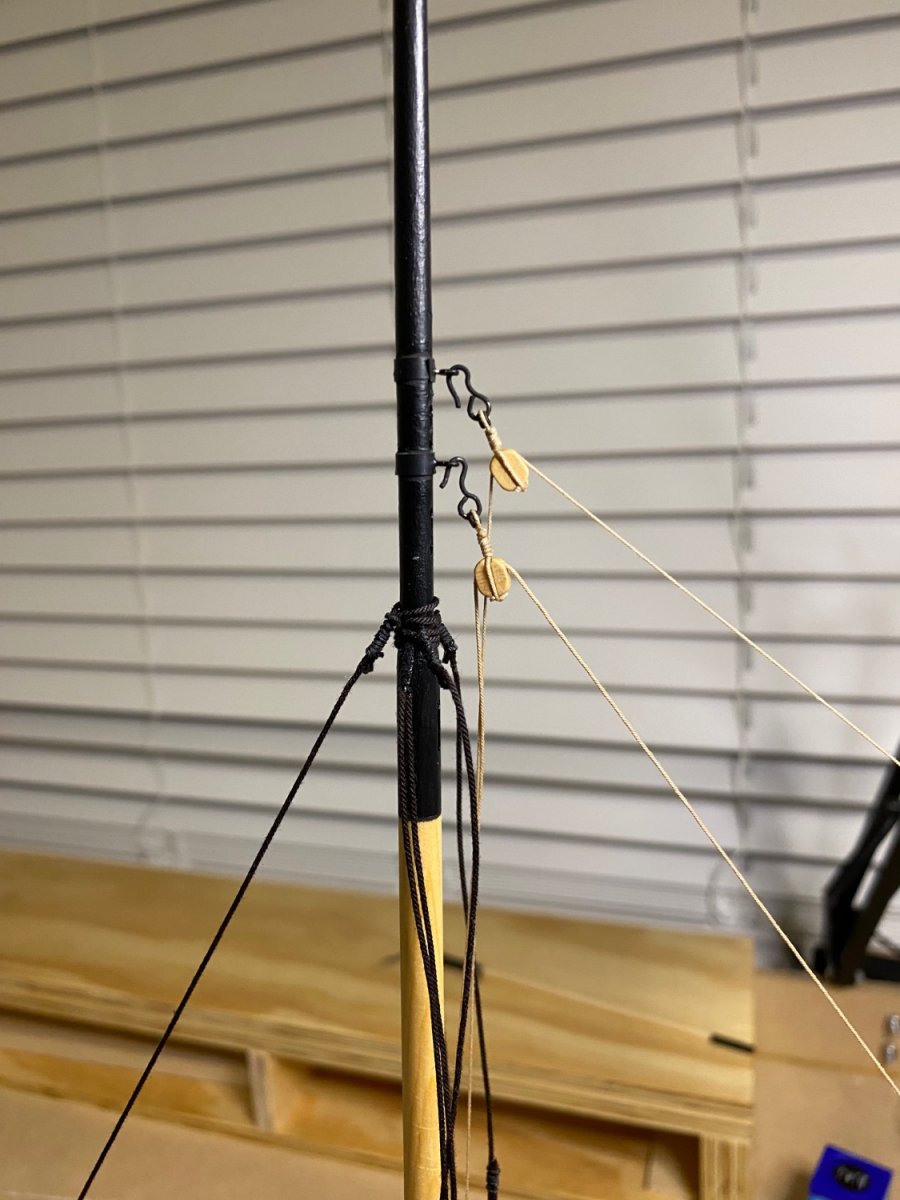
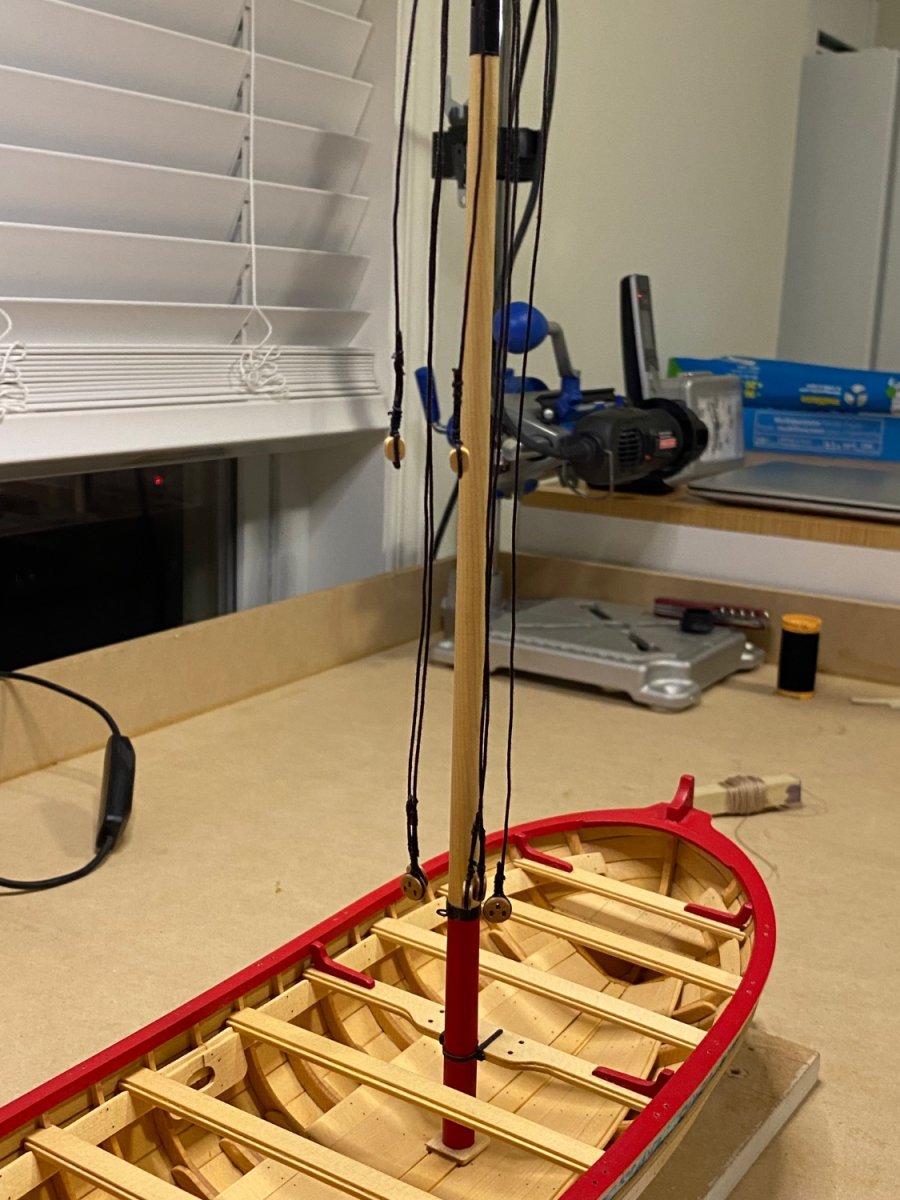
I have ordered the base from Chuck, and while I wait for its arrival some rigging was attempted. The mast is not glued yet but I thought it might be a good idea to fit the shrouds. This is my first attempt at rigging and some of it is a bit sloppy and will be redone. I could not do the thimbles with a punch so they were turned in my Dremel and then blackened. When the base arrives I hope to have everything ready so this build can be completed. A satisfying trip with a lot learned.


- BobG, aaronc, JacquesCousteau and 7 others
-
10
-
39 minutes ago, Ken_2 said:
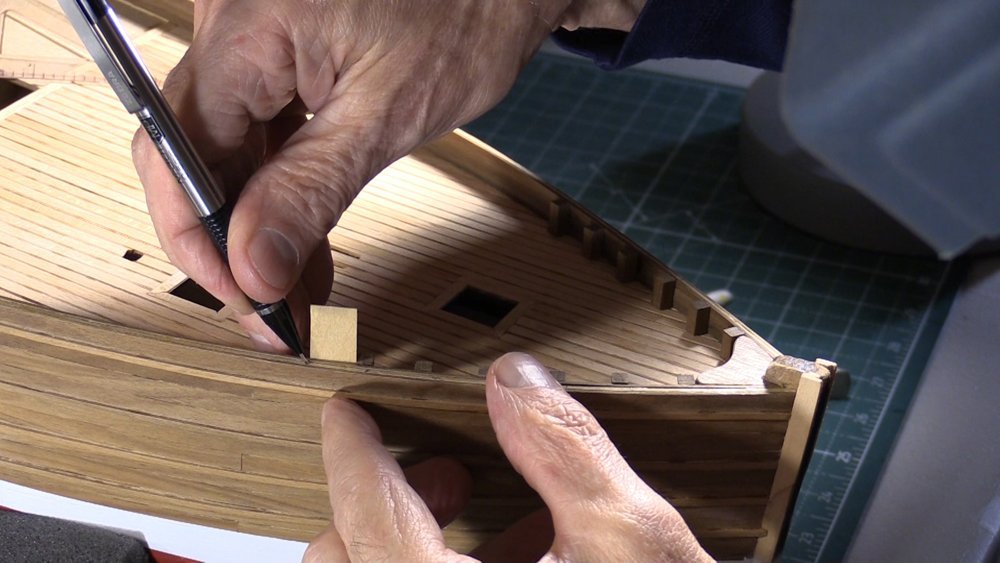
Next, I cut and placed the timbers. There were many timbers, each at a different height. I created a 12 mm spacer to mark distance between the timbers and cut each one to the correct height. 80 timbers later I am ready for the next task.
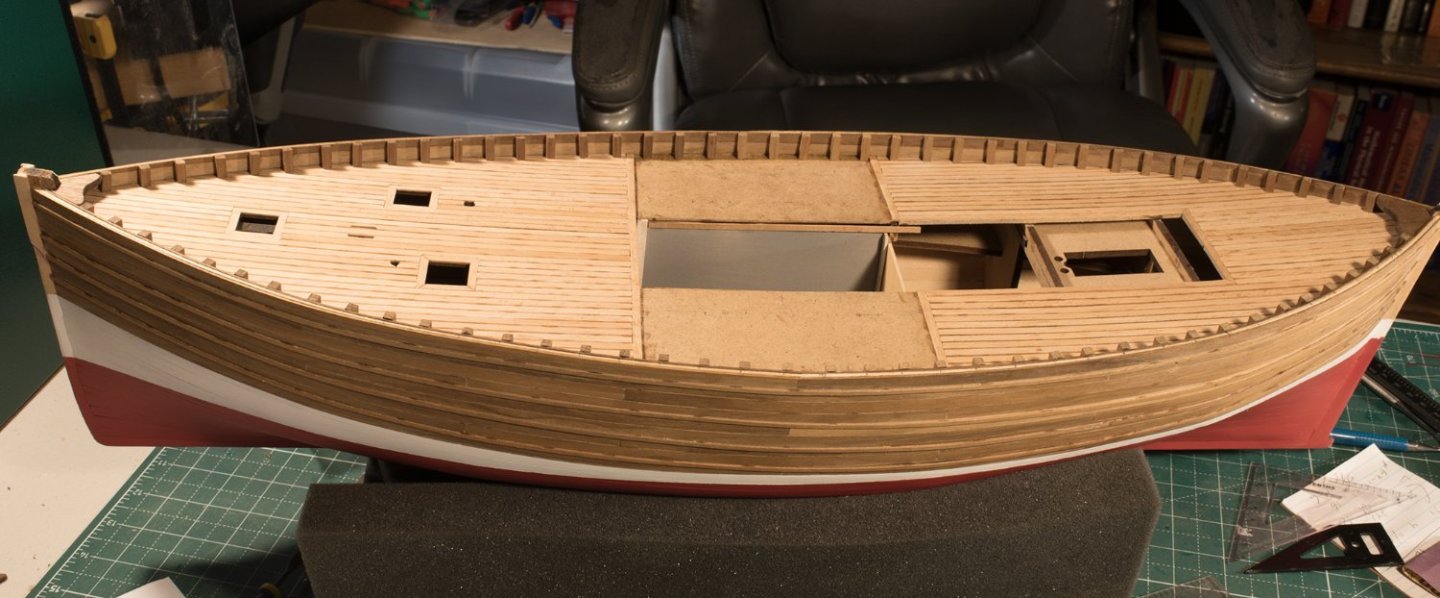
I am enjoying your build of this kit. I wanted to do either this kit or the Sanson tug from AL, my supplier had the tug so that what I got. When it is done the Fifie will be next
-
-
On 10/25/2023 at 8:24 PM, ESF said:
To those who dropped in or gave likes, thank you for your interest and support.
Planking is proceeding at a leisurely pace, a cross between watching grass grow and the old Three Stooges bit (“slowly I turned, step by step…”). I’ve been letting damp, twisted, tapered and bent planks dry on the ship before gluing them in place, and family activities have taken precedence. Actually, sitting through a five hour swim meet to watch 5 minutes of a loved one’s competition is great practice for improving patience.
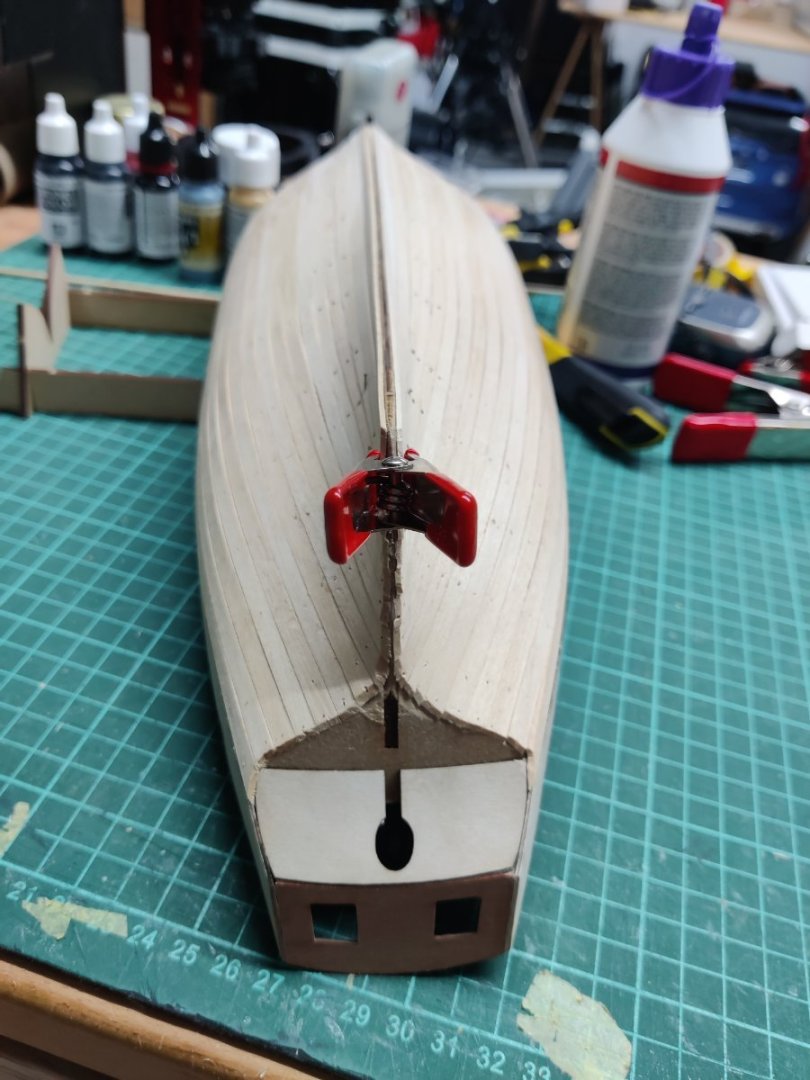
The planking process for me starts with the fore and aft curved pieces followed by the straighter middle planks. Lining off and transferring tick marks help immensely in keeping things orderly. Aft planks have been the most challenging, partly due to compensating for overly aggressive fairing of the last bulkhead. The good news is the bow and stern blocks have proven their value as a place to anchor the plank curves.
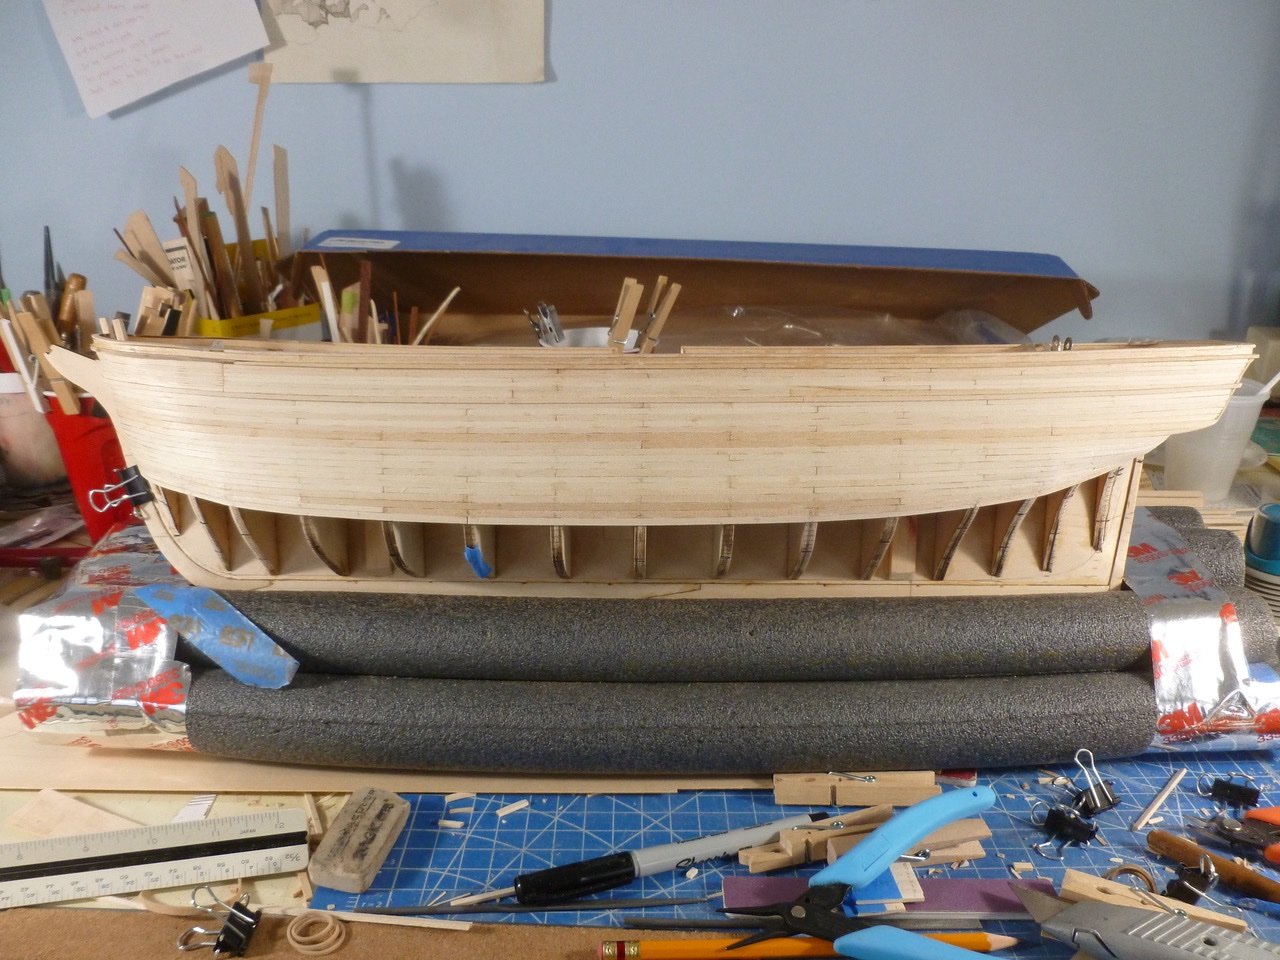
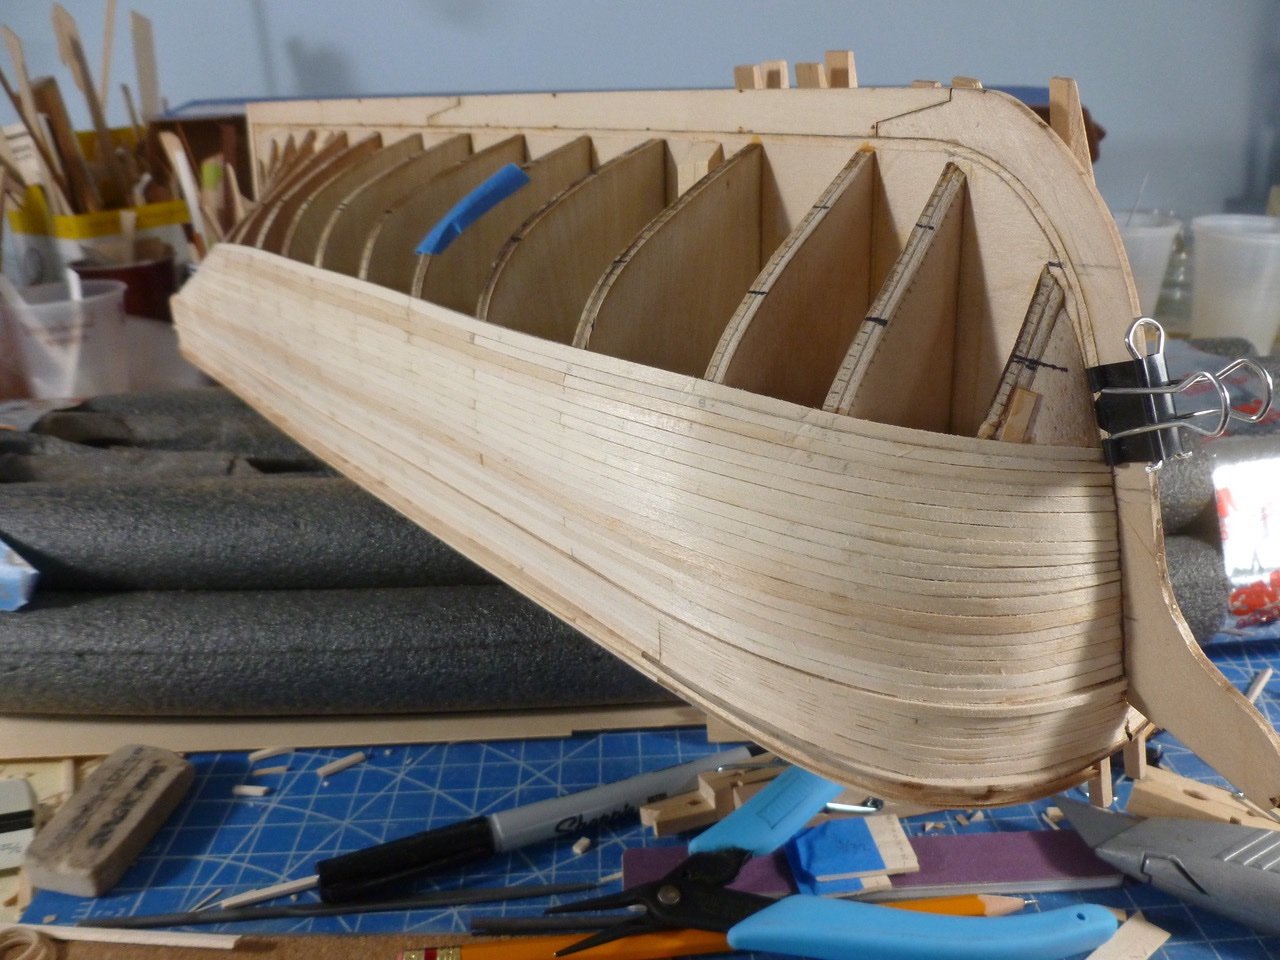 The planks are going in with a minimum of unwanted dips.
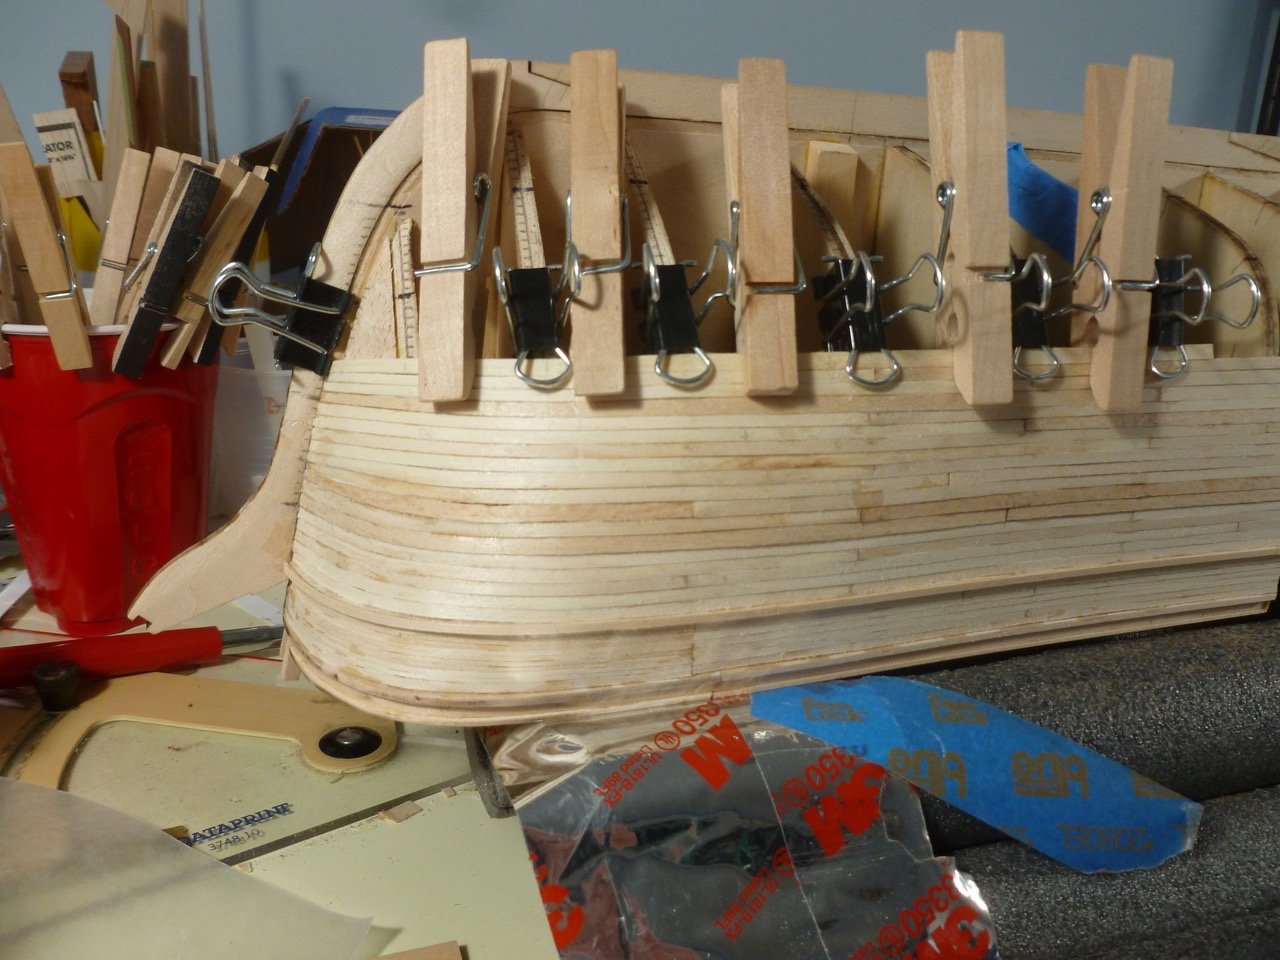
My cheap and cheesy pipe foam insulation support, which has been used on previous builds, gives a protective base for working and allows a quick transition of the ship from upright to upside down, either parallel or perpendicular to the foam strips. Just pick the ship up and put it down. I carved out the center section of foam to allow the ship to settle in when upright; the foam has enough flexibility that I can tilt the ship at several angles.
I expect to be moving to a more rigid base for deck and rigging. I bought some brass pedestals and a mounting board from Bluejacket. The long screws that came with the pedestals look to be a tight fit widthwise, but workable since I added supplementary blocking at each location.
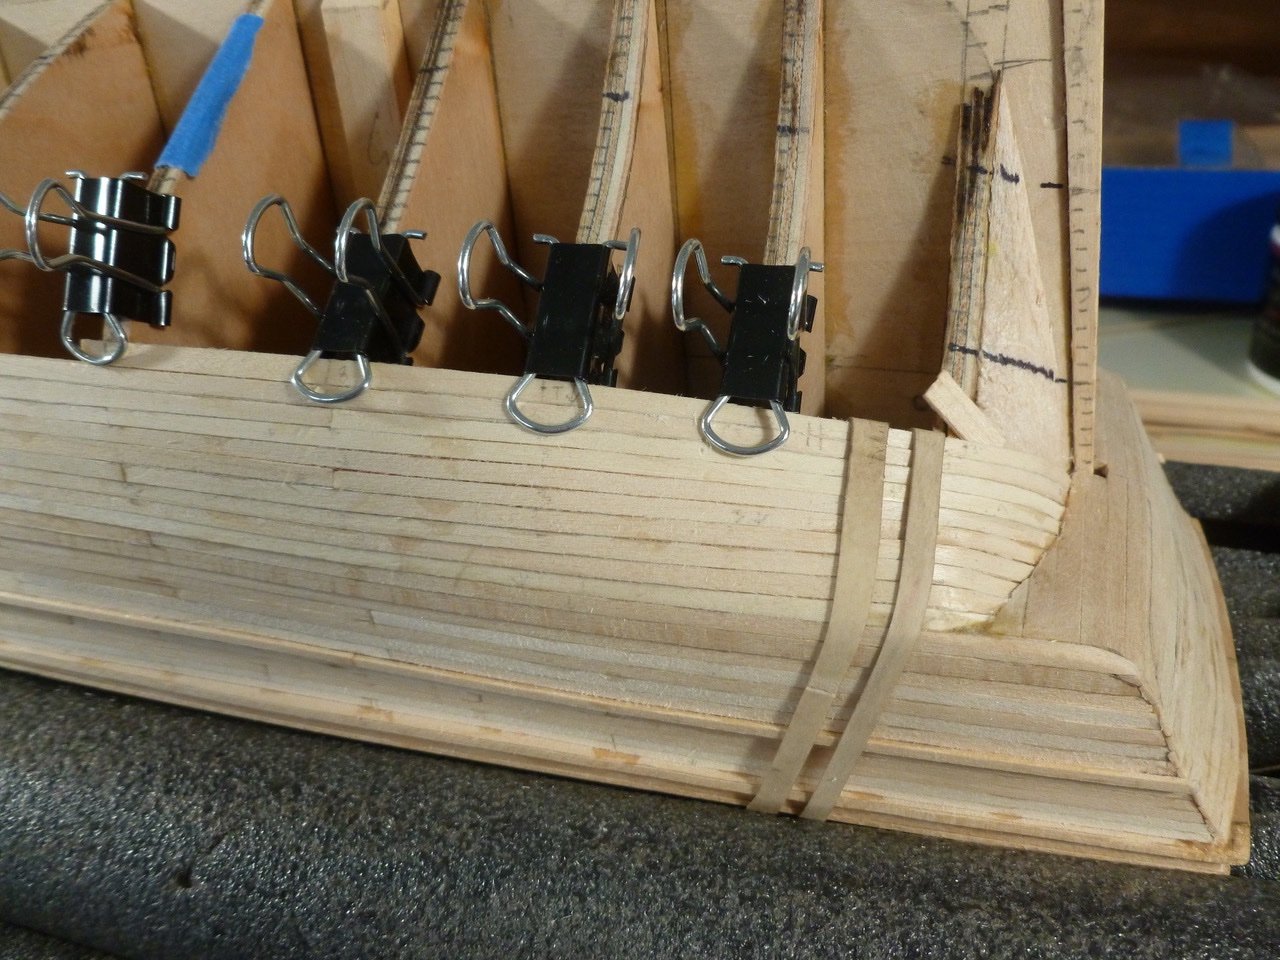 Rubber bands are helpful at awkward clamp angles. I found that stretching the band on one side or the other allows some fine tuning of the clamping force direction. Lift the band, pull one way or the other and set it back down.
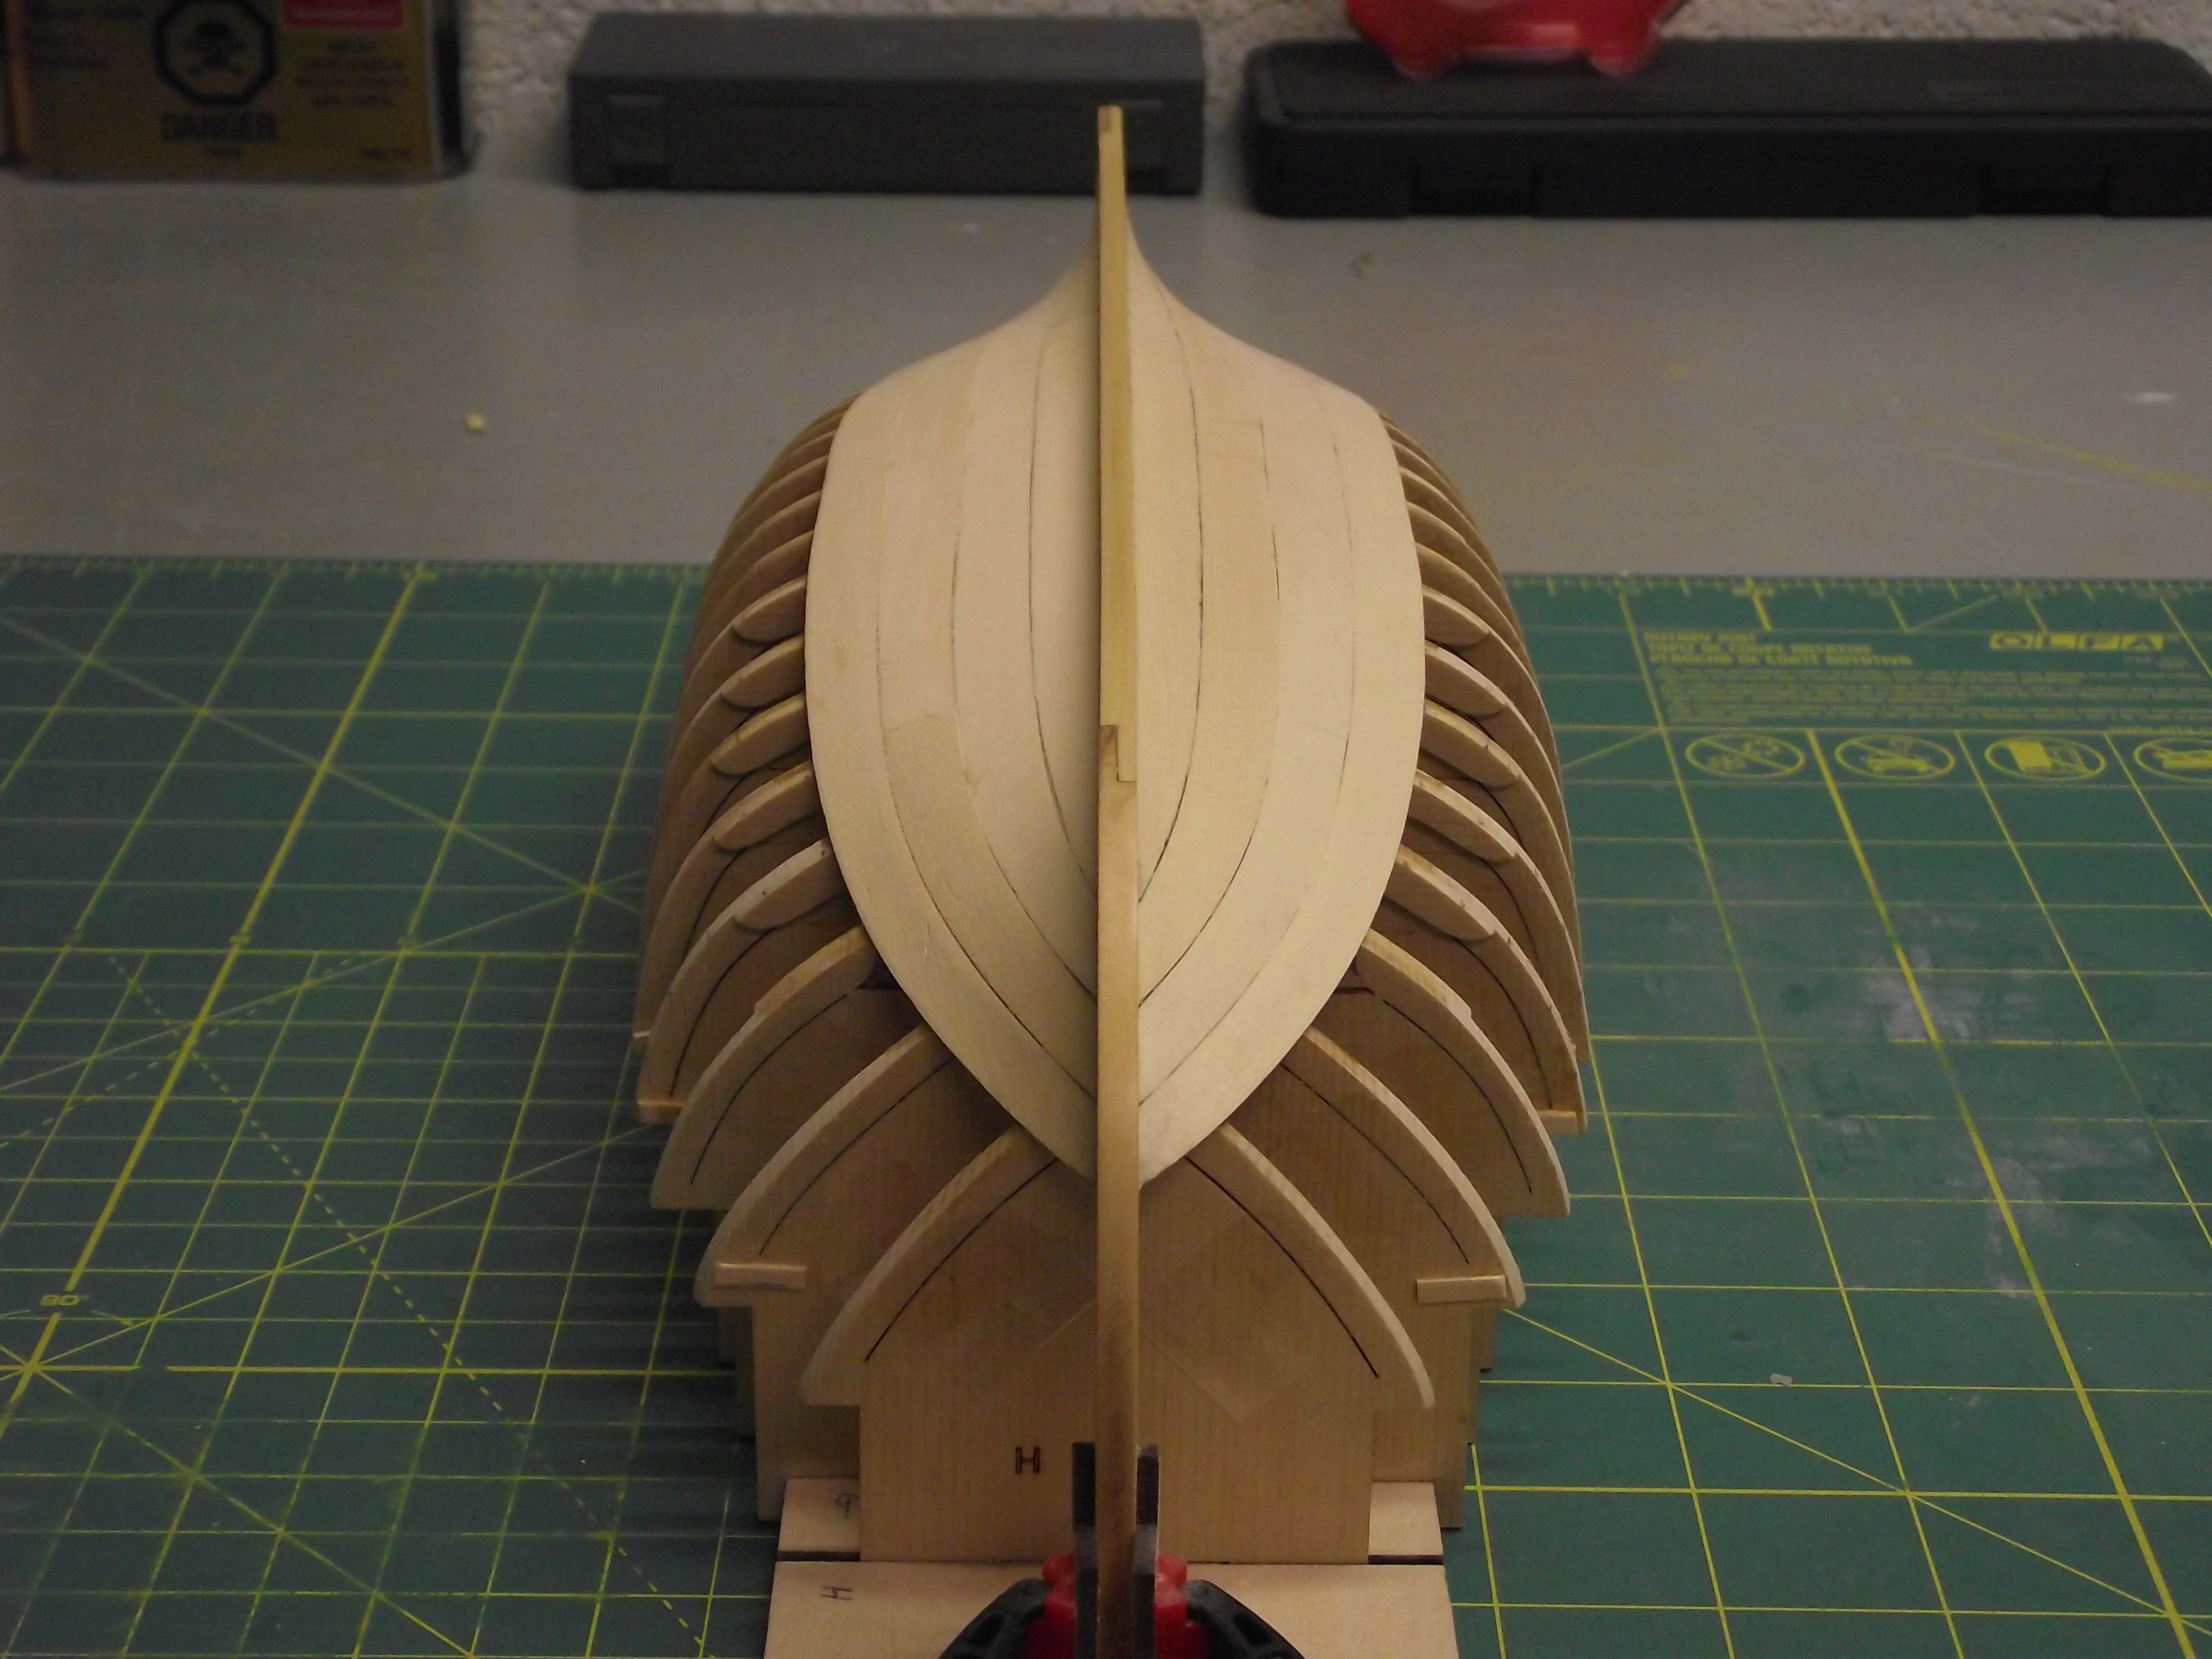
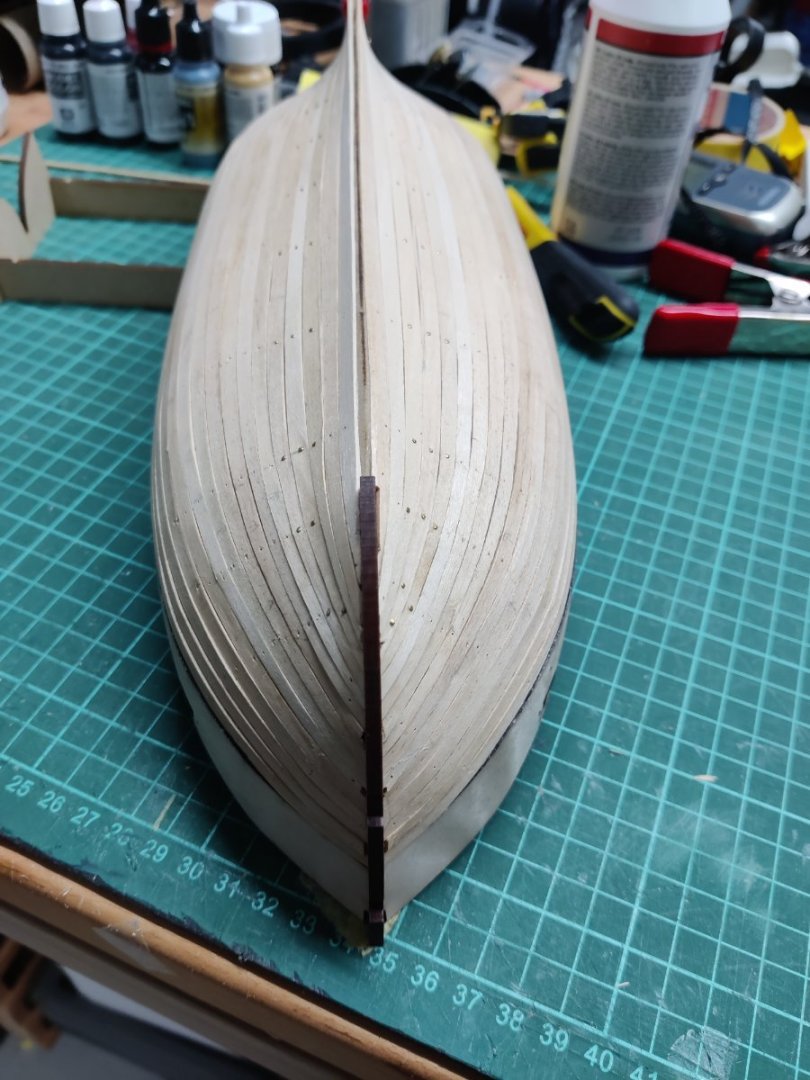
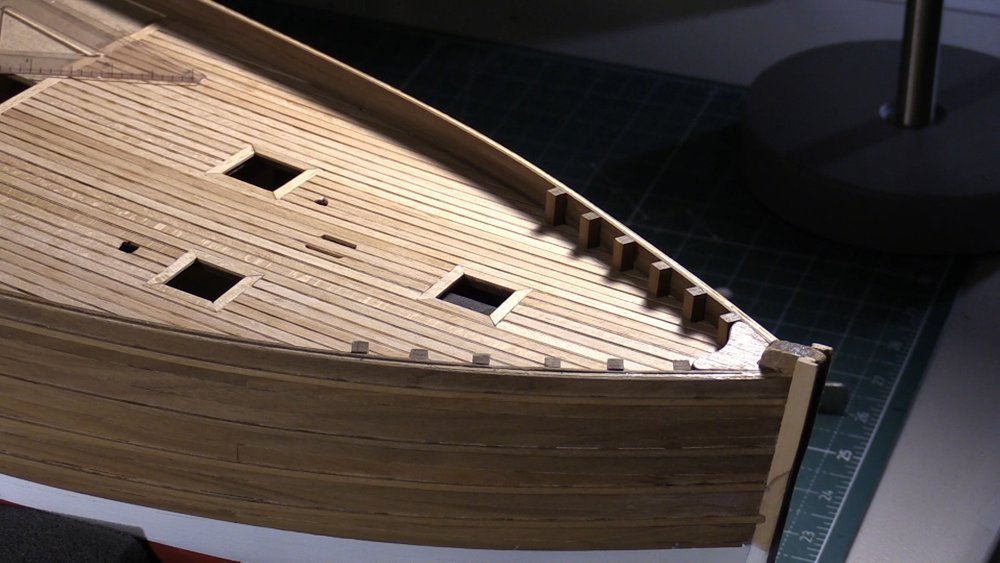
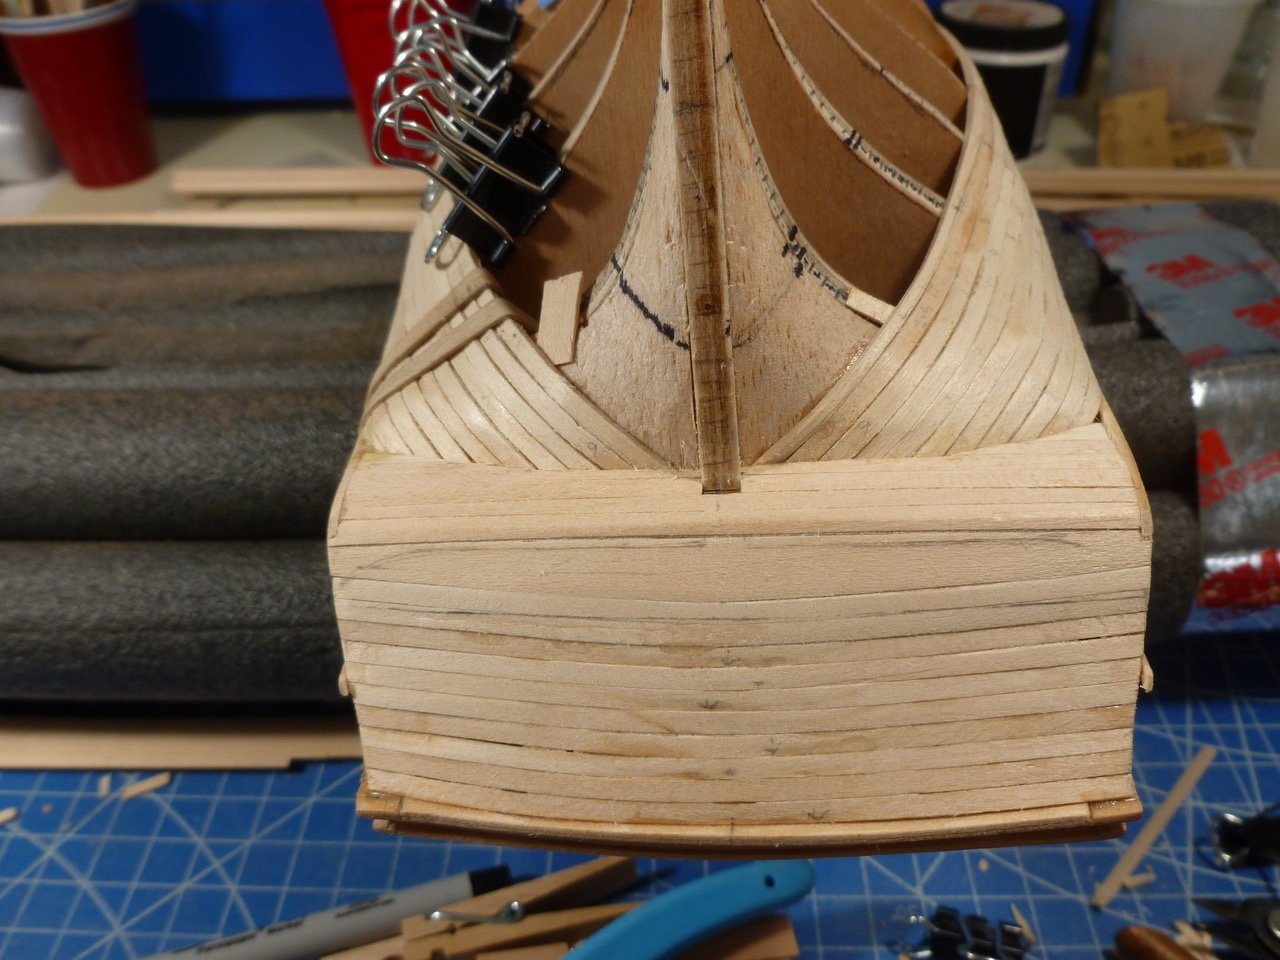 At the tuck the symmetry is holding pretty well through plank 10 (in the picture plank 9 is marked on each side). Looks like I may need some filler in this area if I can’t even out the clinkering with sanding.
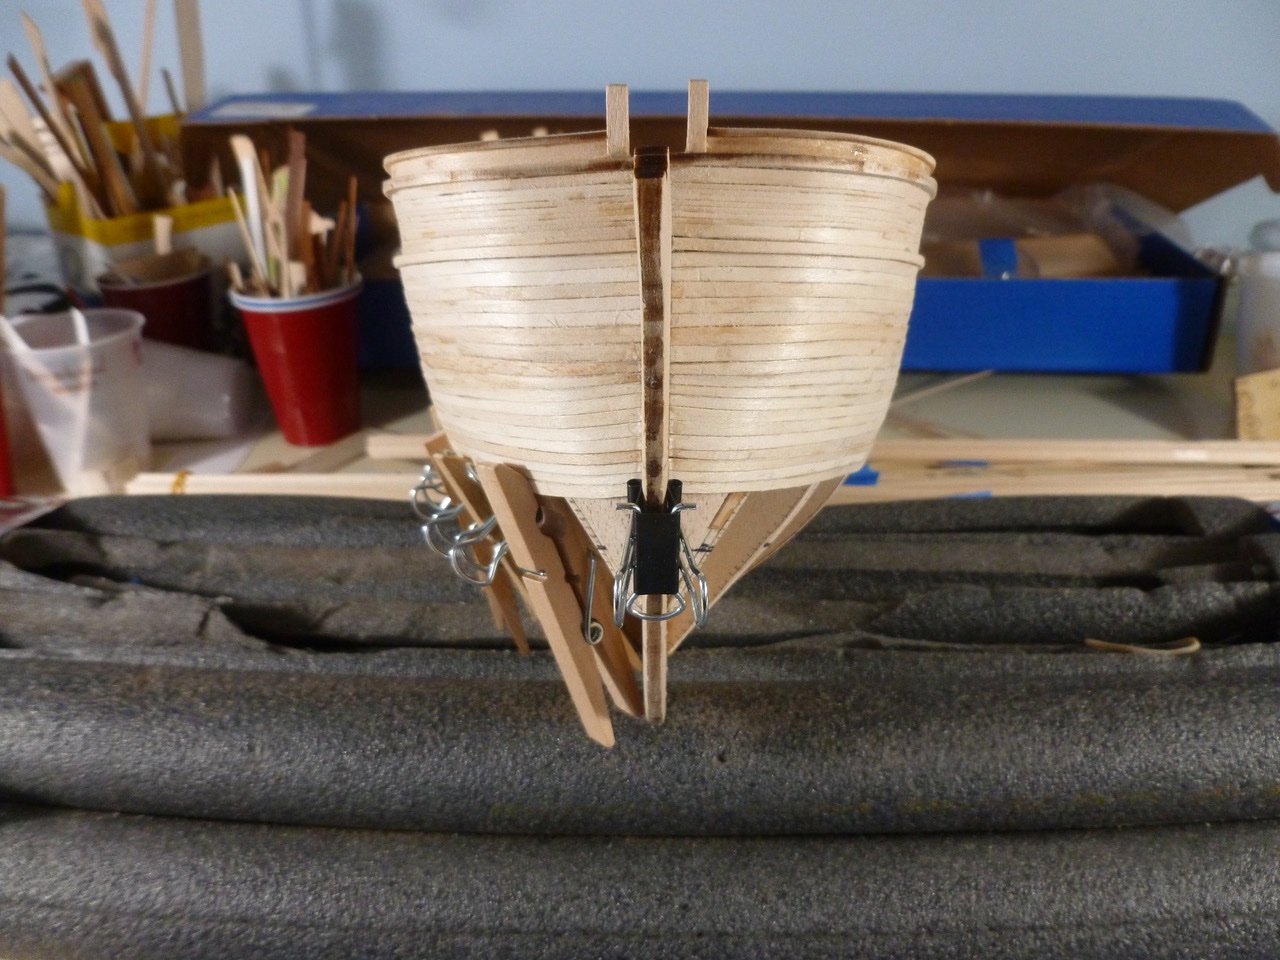
I’m trying to keep things aligned at the bow. It’s interesting that the plank upsweep at the stem, which is a function of aligning planks with the tick marks, is more pronounced in a head-on view than in views off axis.
As my Dad said years ago whenever I was going through a challenging time, “This too shall pass.” But the funny thing is that I like planking. Go figure.
Thanks for viewing.
Steve
I like the look of your planking job. May I ask what width those planks are. I will be planking my up dated AL Sanson tug in the near future and plan on using a planking fan and tick marks. The Sanson is a single plank build, the planks are 5.10mm wide x 2.10mm thick.
-
On 9/28/2023 at 12:56 AM, Ryland Craze said:
Glad to see your progress. It is looking great. Rigging was my favorite part of my build.
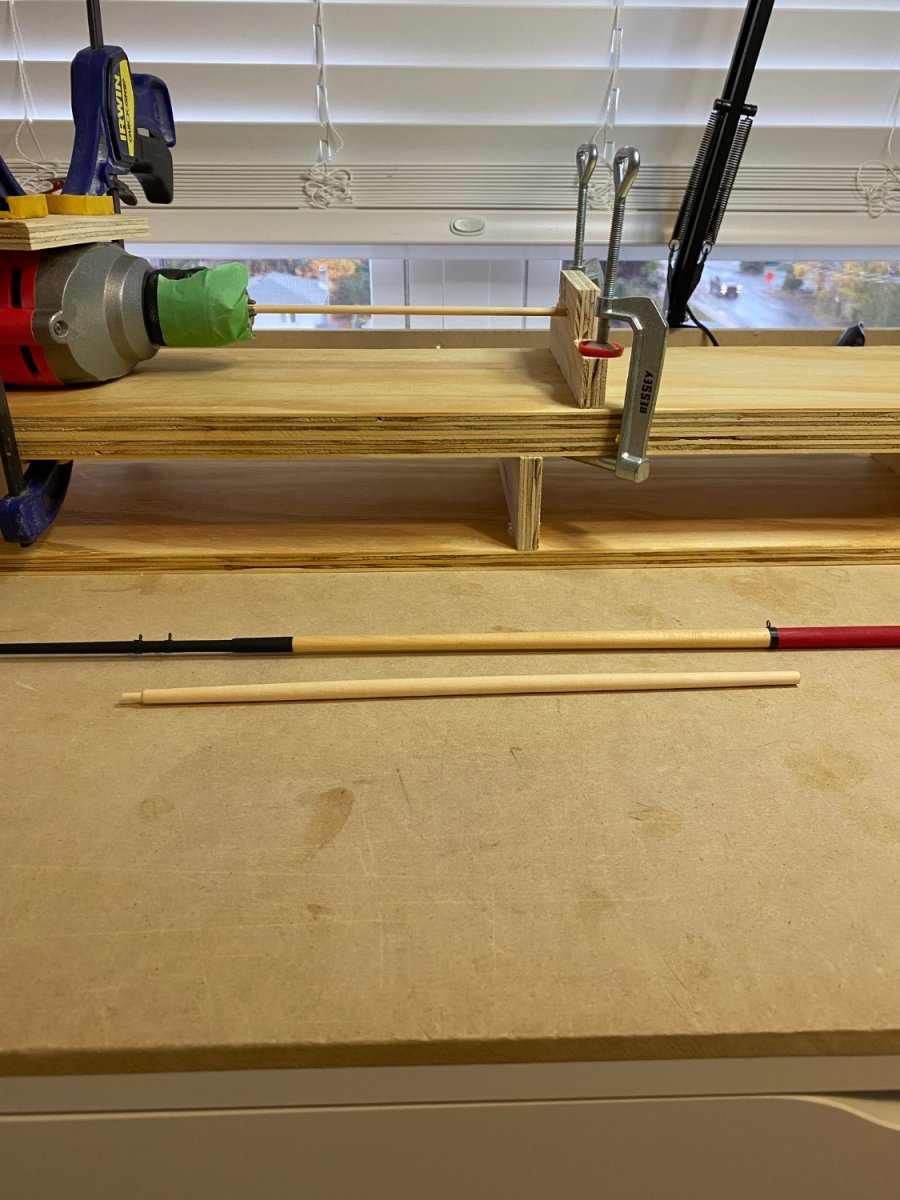
Slowly getting on with the rigging bits. The mast is complete,the boom is turned and the gaff will be done today. The bow sprit will be done while I have may contraption set up. Do not want to upset the settings.


Sanson by Diver - Artesania Latina - 1:50 - Tugboat - Updated Version
in - Kit build logs for subjects built from 1901 - Present Day
Posted
I took some time off from Sanson to complete my Syren Medway longboat. I have installed the bulwarks and the curved bit around the stern. This piece was heated with steam and shaped around a can of tomatoes. To hold its shape while it cooled a rubber band was put between the two holes with scrap wood to hold it.. Shaping the stern was a lot of sanding and dry fitting, and I still had to do some carving after it was glued in place. The tabs that are built into the deck to position this piece are more hazard than help. I just ordered the paint kit and LED light kits from Ages of Sail so I will be able to proceed.