


Gahm
-
Posts
1,217 -
Joined
-
Last visited
Content Type
Profiles
Forums
Gallery
Events
Posts posted by Gahm
-
-
-
-
Just for completeness – I added the handles for the pump . . . the pump looks more impressive that way

Thomas
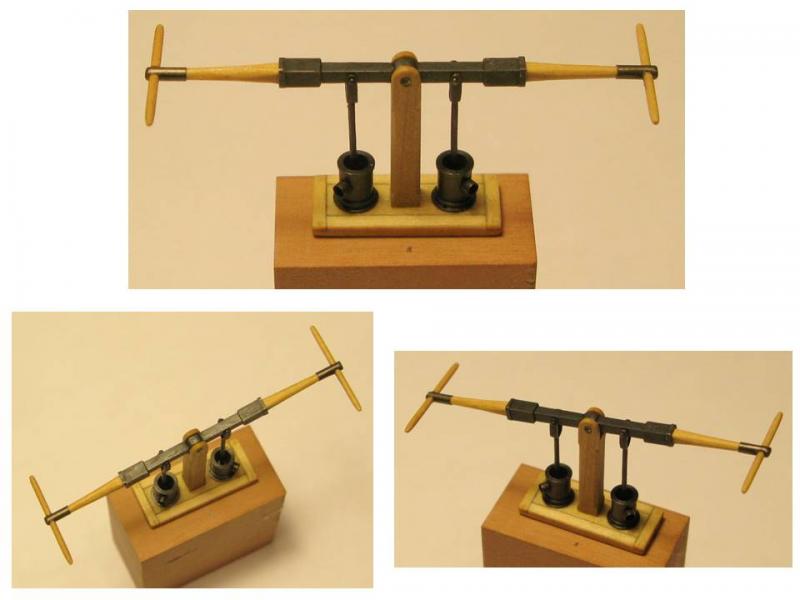
Image 1
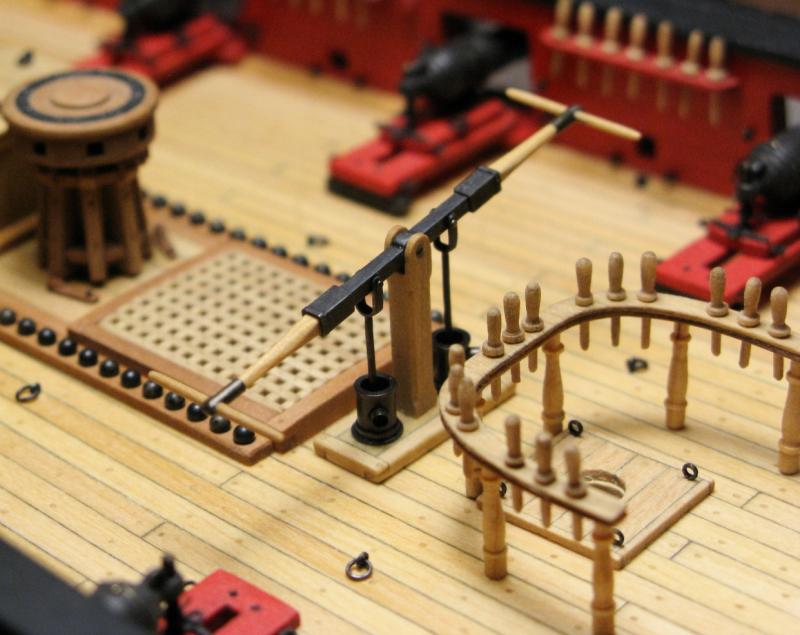
Image 2
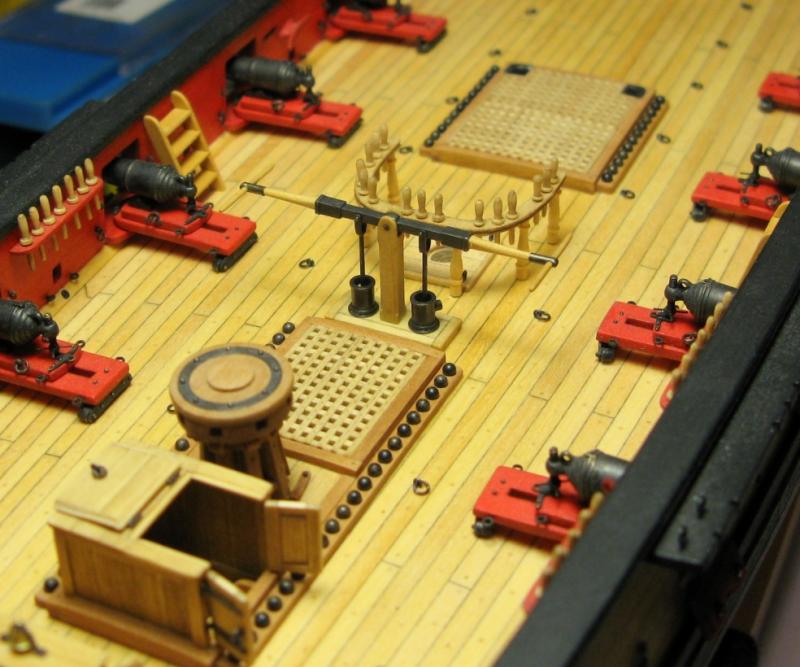
Image 3
-
Your pump is coming along very nicely! And great progress! Your Syren is the next one leaving me in your wake
Thomas
- Canute, JesseLee, CaptainSteve and 3 others
-
 6
6
-
-
Thank you, Hervie and Gary!
Gary, thank you for your advice! Your points are well taken! I was already wondering which might be the best way to proceed once I am finished with the deck details. Of course there is still the rigging of the carronades, which probably will take for ever at my snails pace

Thomas
- CaptainSteve, JesseLee, Elijah and 1 other
-
4
-
Thank you so much for your generous comments! And thanks for all the likes! I know it probably was a waste of time to make all the pump parts working - looking at the model nobody but me will notice anyway . . . but I had a lot of fun doing it and that is what I want to get out of this hobby - to have fun
Thomas
- Elijah, CaptainSteve, JesseLee and 1 other
-
4
-
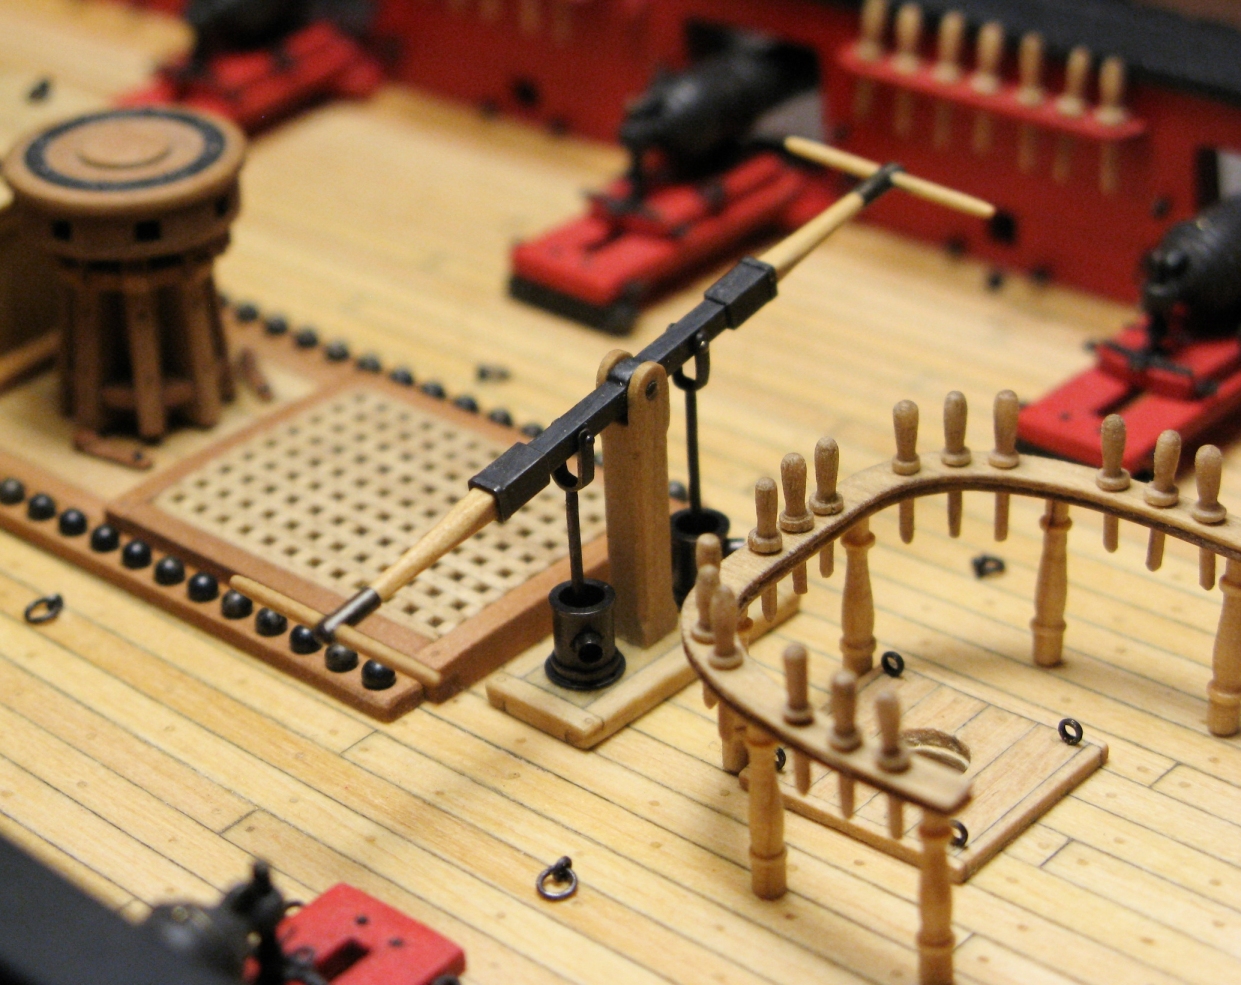
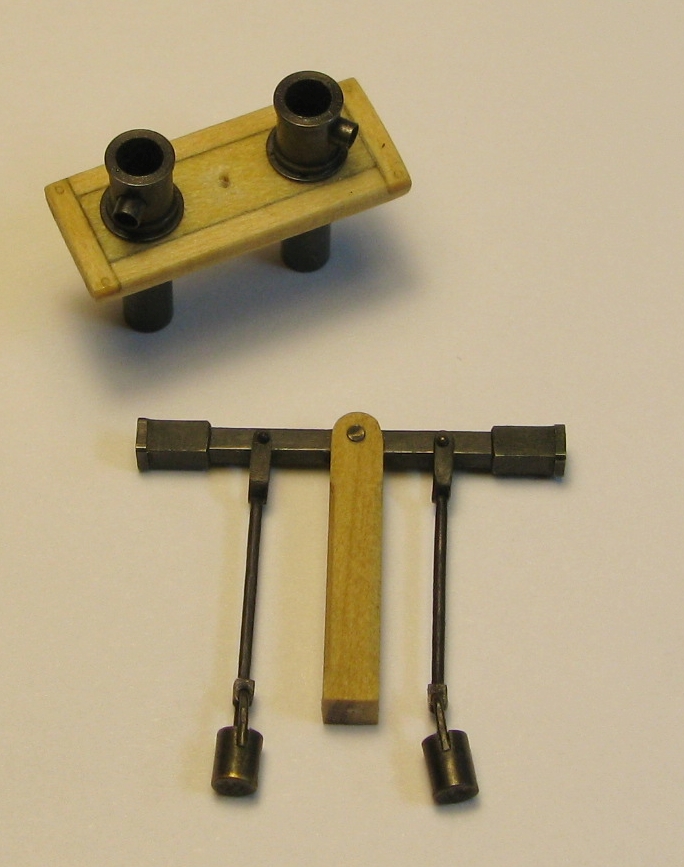
One of the last “deck furnitures” on my Syren model was the pump. To build it I followed Chuck’s plans enhanced by some additional details found in other descriptions of how the pump worked (Charles Davis, Mondfeld).
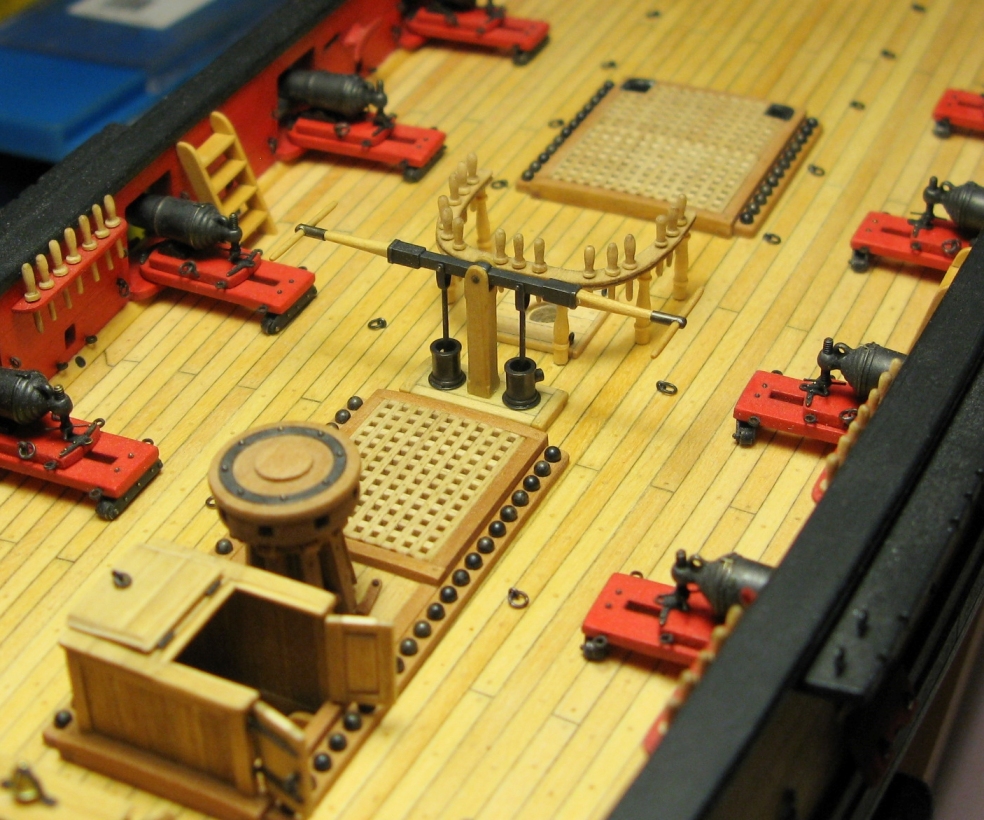
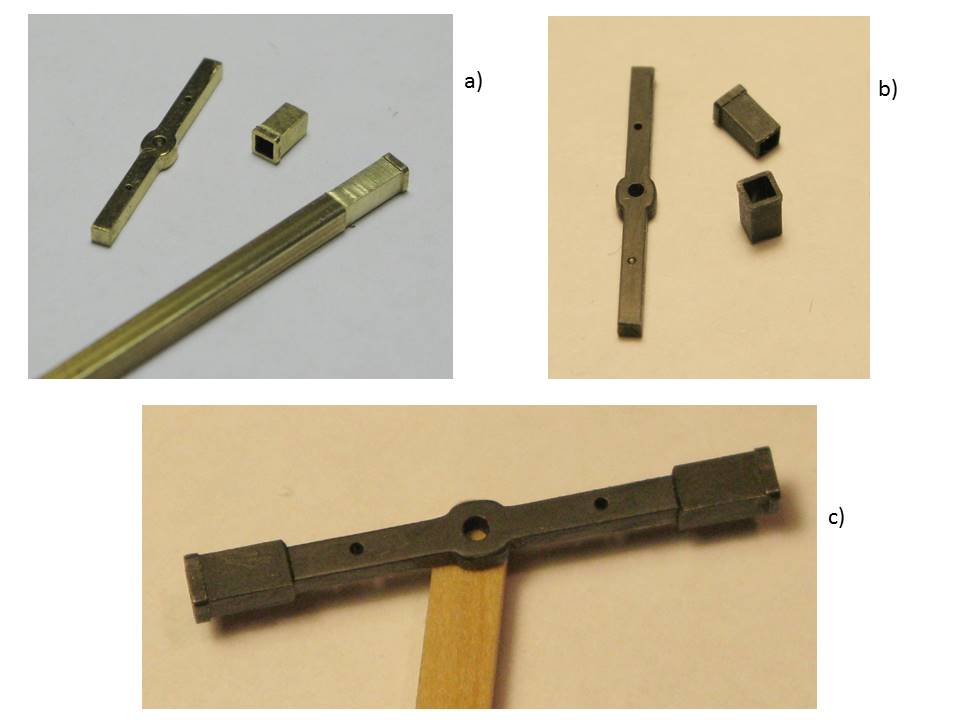
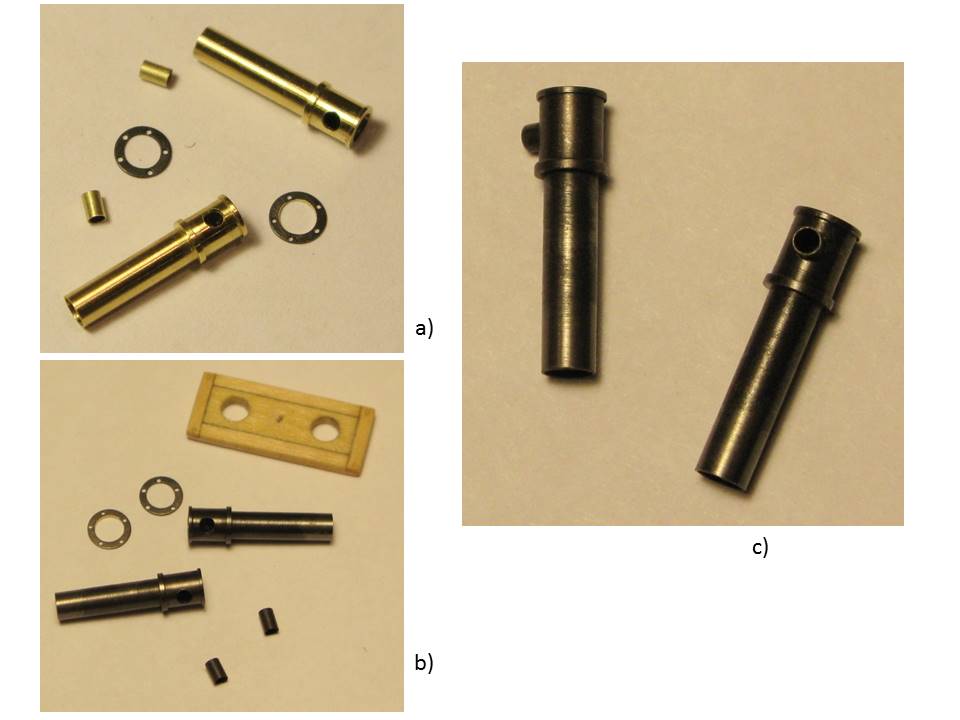
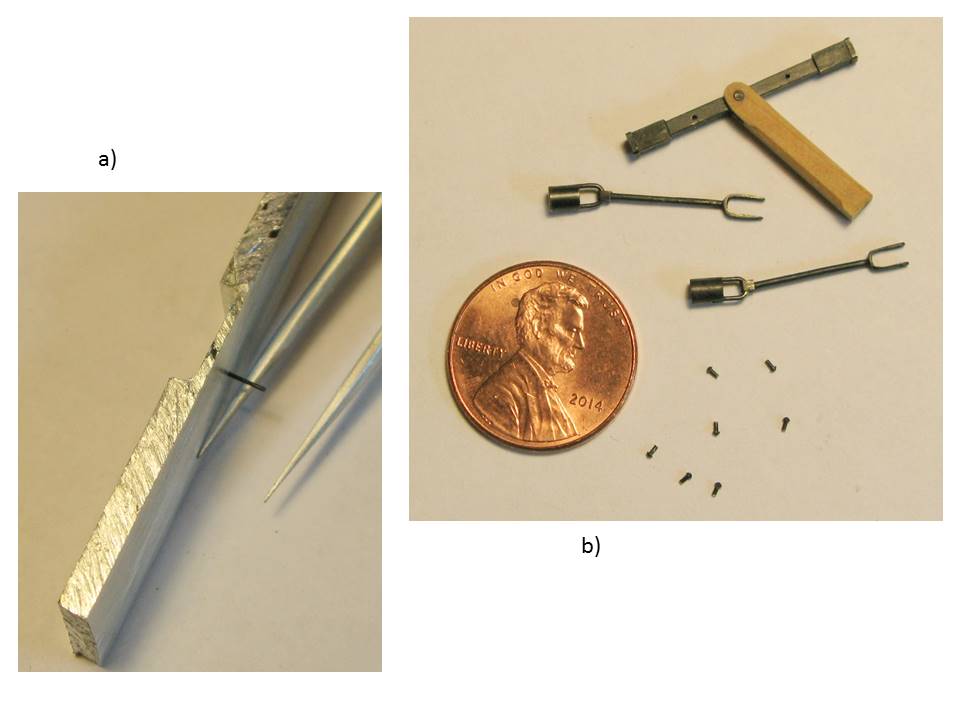
The major part of the pump cross bar was milled out of a brass sheet of appropriate thickness. The two end pieces consist of parts of a square brass tube, shaped according to plan and fitted on the ends of the cross bar as adapters for the handles (image 1). The platform and the stand were built out of basswood and pear (image 2). I keep using this wood combination because I want to have the advantage of pear for shaping the details, but as I initially started out with basswood I need to keep the overall appearance of the model consistent. Image 3 shows the parts which make up the pump drums. As I had decided to model the upper pump valves as well each drum is connected to a part of the pipe in which the upper valve will be moving. In image 4a the finished drums can be seen. I used a technique already described earlier in this build log (mast holes) to drill two holes in the Syren deck to receive the pipes attached to the pump (image 4b). Image 5 shows the parts and construction of the connecting arms between the pump cross bar and the upper valves. These hinged connectors are made out of brass pieces shaped according to plan and silver soldered together. In image 6 the cross bar – valve assembly can be seen before the valves are finally inserted in the pump drums. As hinge bolts I used two 0.7mm nails (Scale Hardware) per hinge, cut to correct length, one bolt inserted from each side and glued together within the middle of the hinge hole in the cross bar. That probably was the most challenging part of the whole assembly
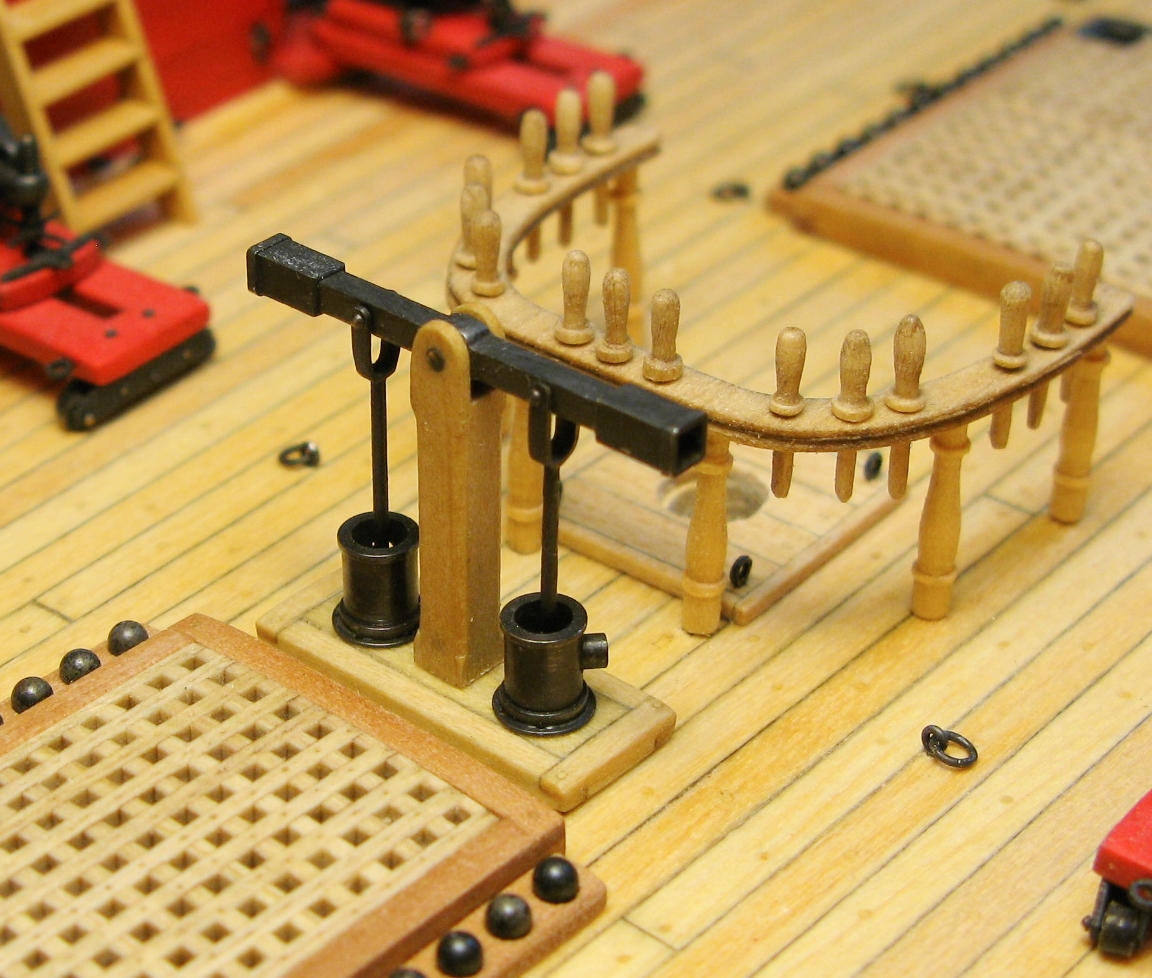
. To insure correct and consistent length of the bolts I milled the thickness of a piece of aluminum to match the bolts’ length (image 7), inserted the bolts one after the other in a predrilled hole and cut and filed down the bolts to be flush with the metal surface. Images 8 and 9 show the assembled pump.Thomas

Image 1
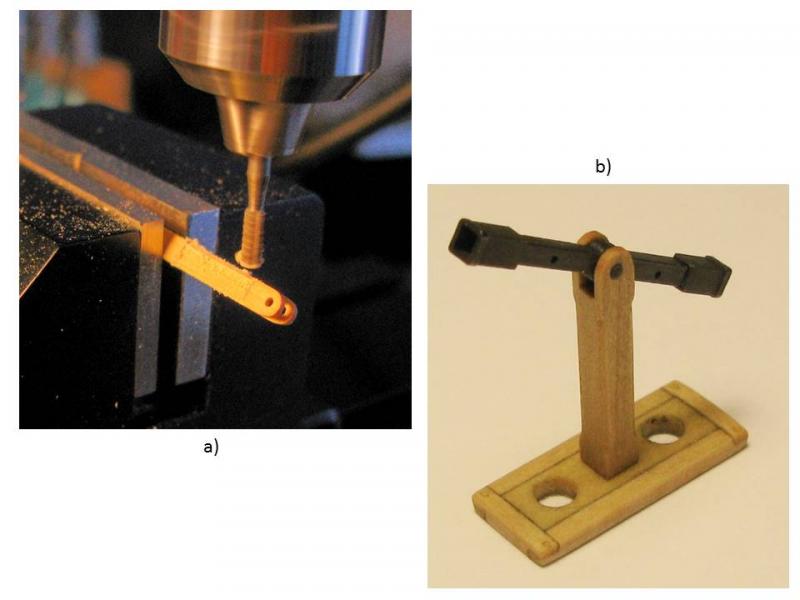
Image 2

Image 3
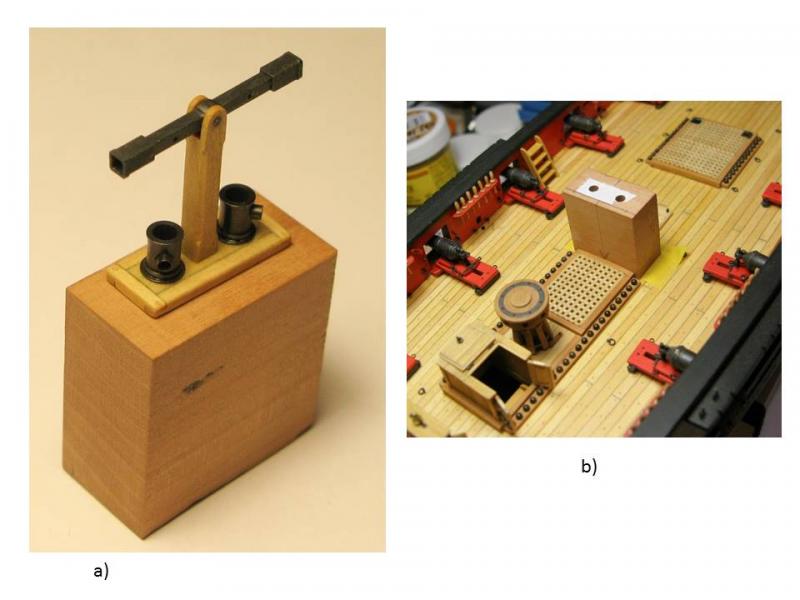
Image 4
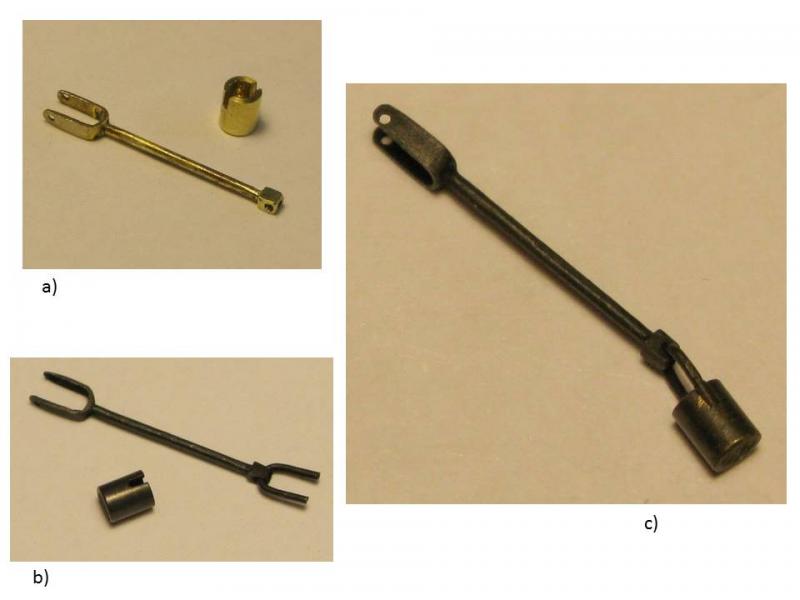
Image 5
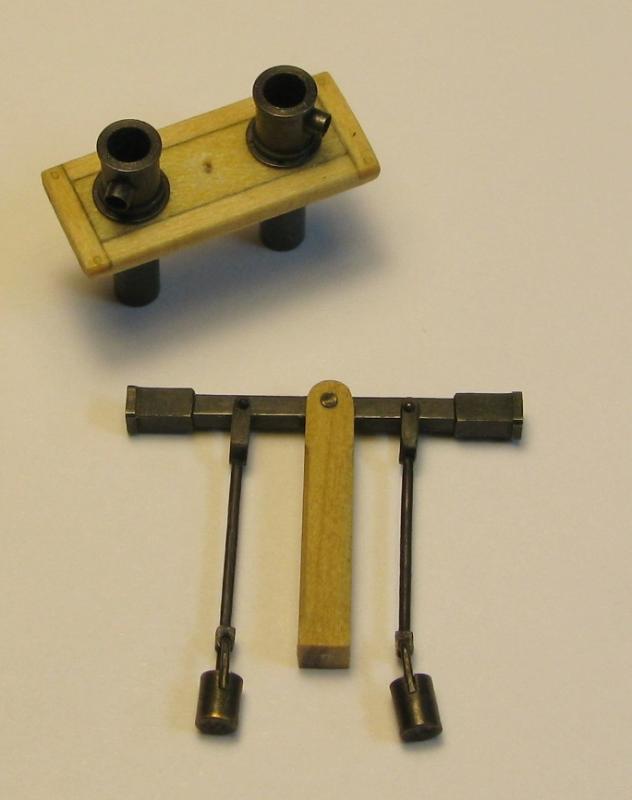
Image 6

Image 7
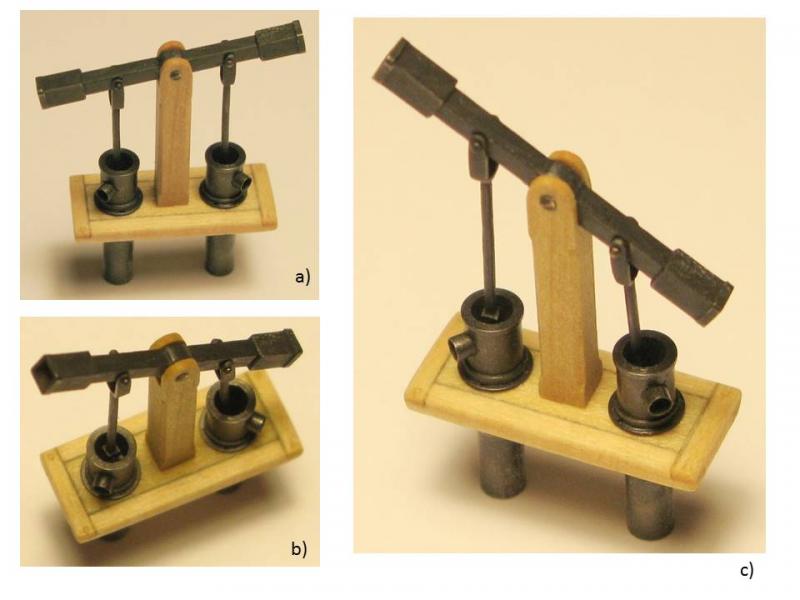
Image 8

Image 9
-
-
-
Great job on the cannons, Jesse! All those added details make a lot of difference.
Thomas
- Piet, CaptainSteve, mtaylor and 4 others
-
7
-
Nice progress with the planking!
Thomas
-
-
-
-
-
-
-
-
Jesse, Dirk, Bob, Nils, thank you so much for your nice comments! As usual they are highly appreciated! And thanks for all the likes!
Thomas
- JesseLee, egkb and Mirabell61
-
3
-
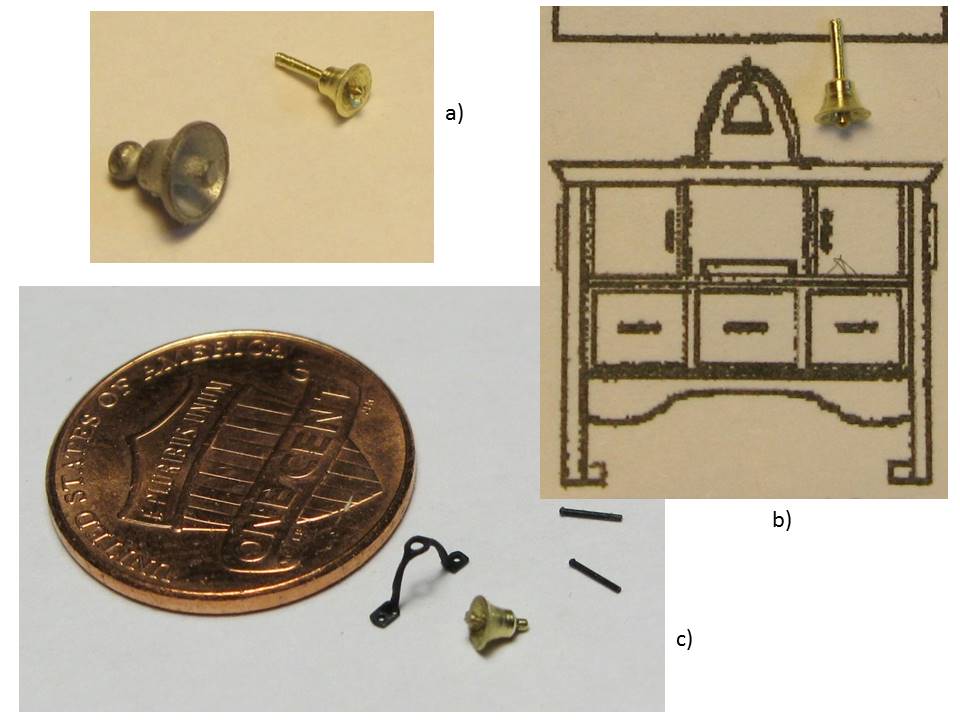
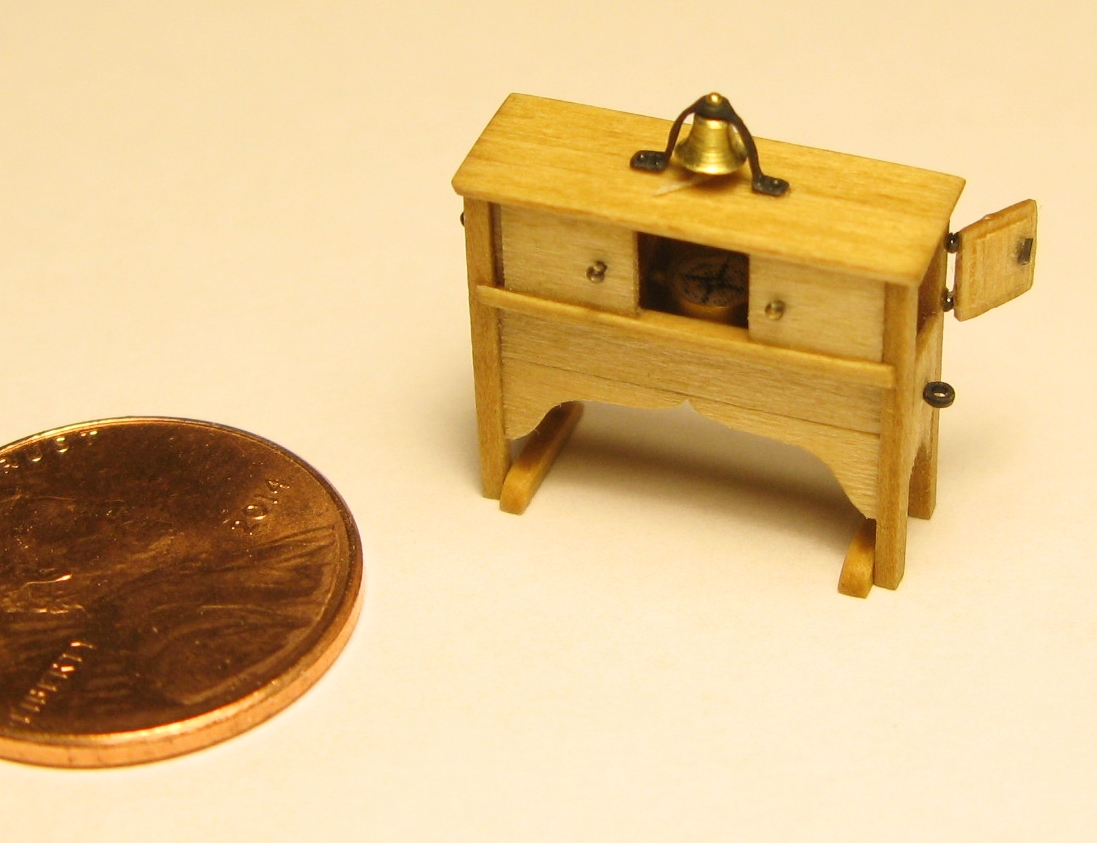
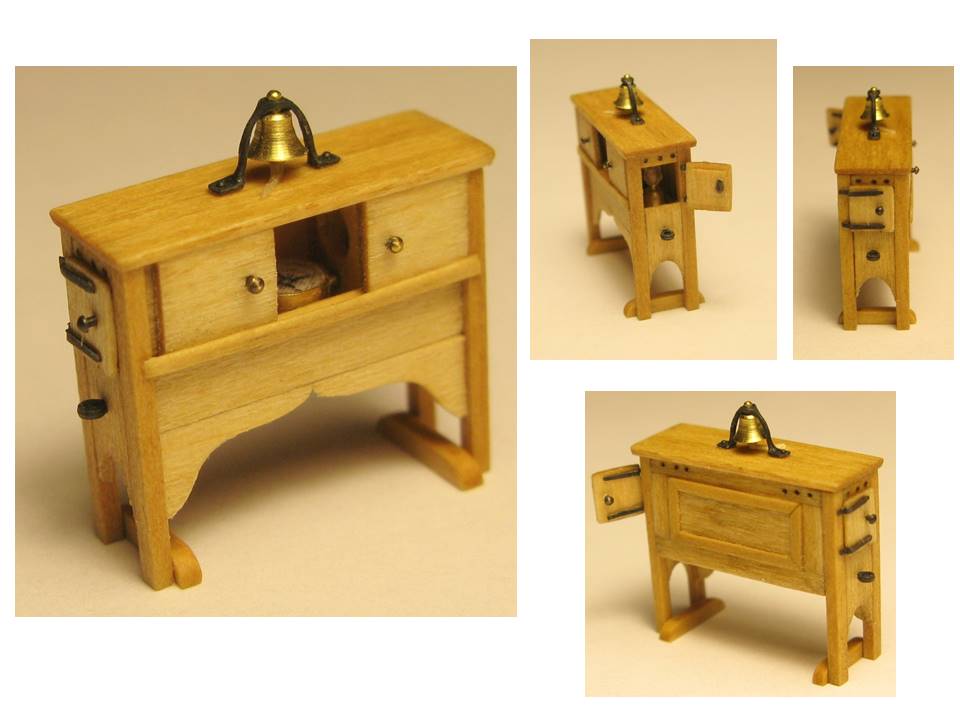
After the galley stack the binnacle was the next deck furniture in line. I chose a simpler design than what Chuck shows on his Syren plans. It only consists of the basic binnacle elements: the usual box design with 2 compartments for the petroleum lamps on the left and right side and the compass in the middle. For indirect illumination of the compass the light chambers have little windows towards the compass. Sliding doors allow closing off the compass. 2 outside doors give access to the petroleum lamps. The ship’s bell is mounted on top of the binnacle.
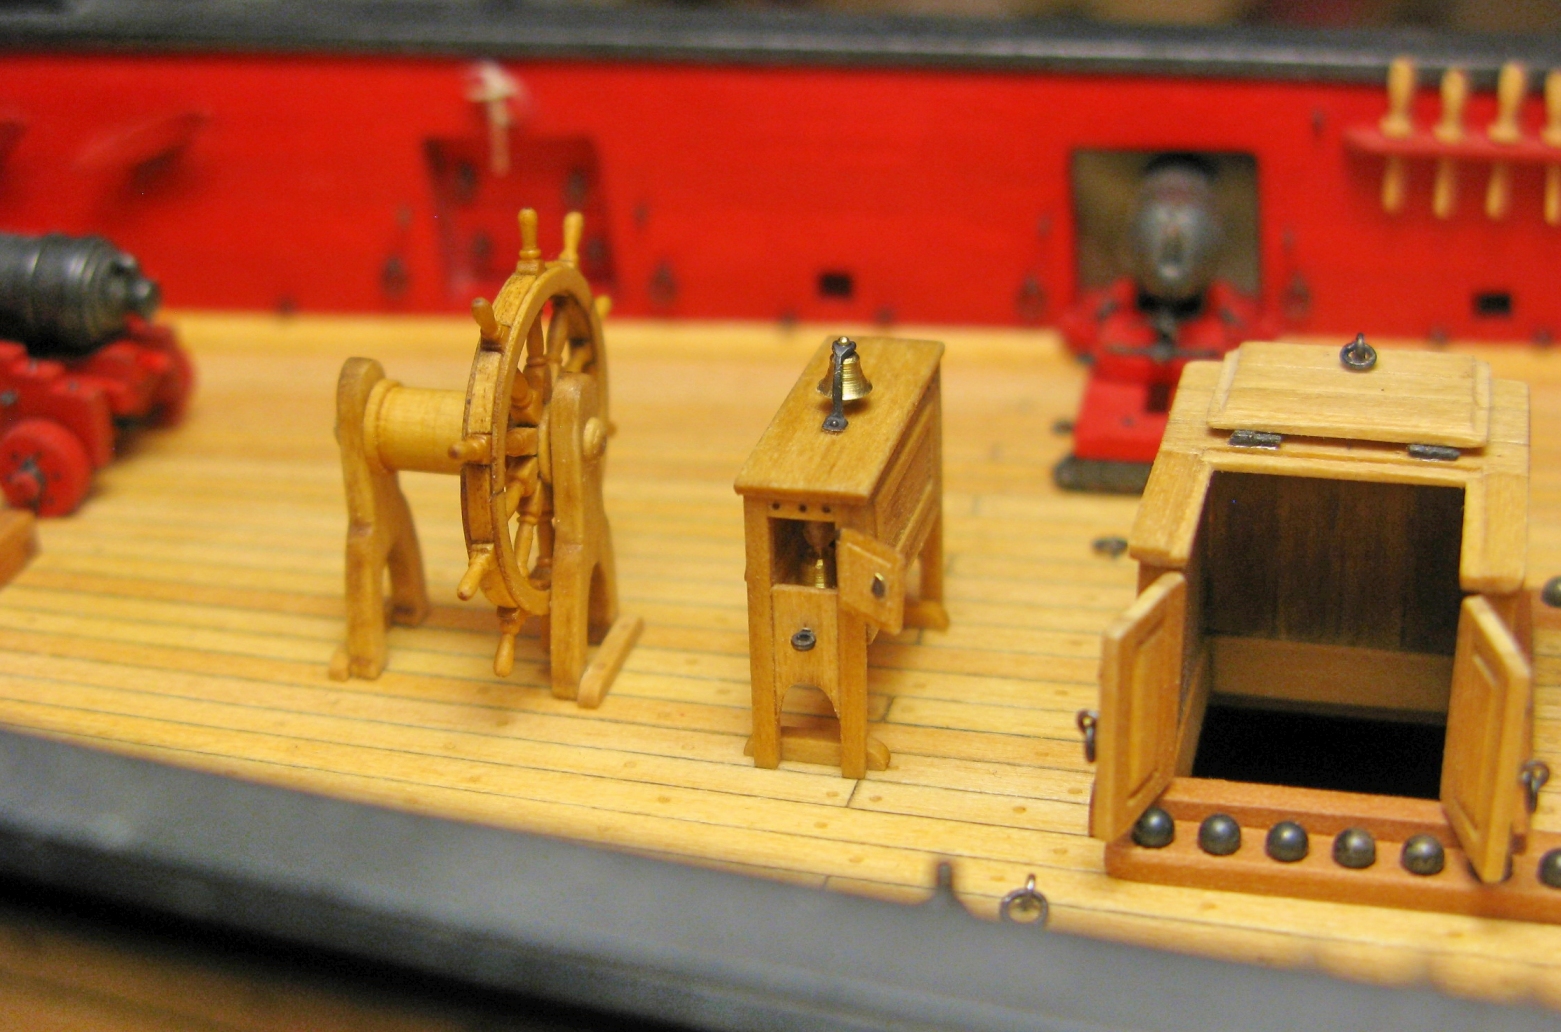
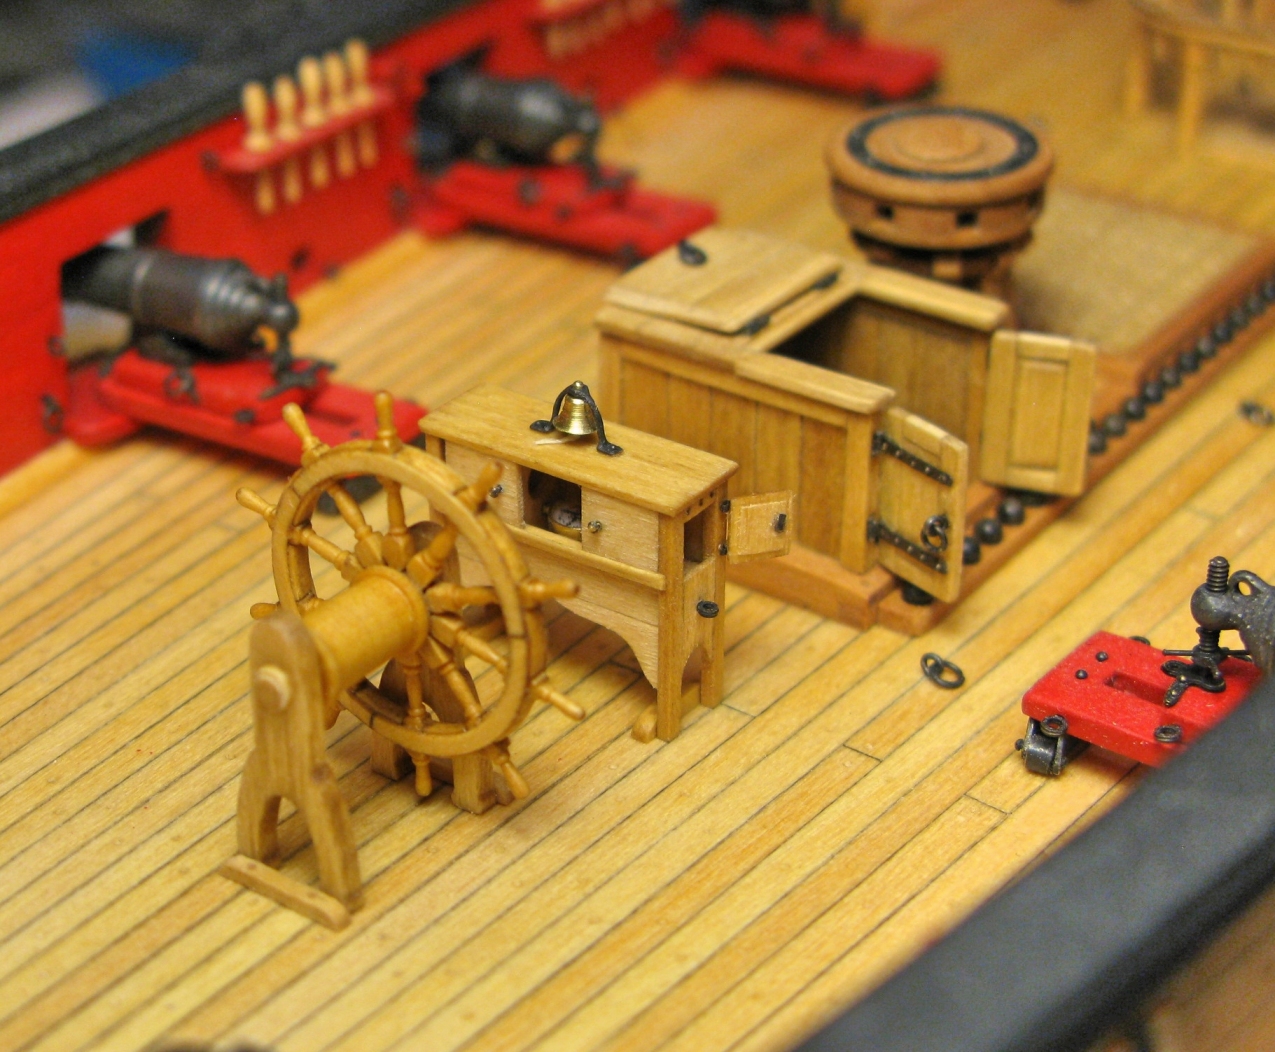
Image 1 shows the construction of the binnacle box (using a combination of bass- and boxwood) and various components of the binnacle design such as the middle compartment walls with the windows, and the rail for the sliding doors out of boxwood. The windows were made using ‘Testors Clear Part Cement and Window Maker’. The compass (image 2) was built out of a piece of brass tube with the wall thickness turned down to scale proportions and a pear wood kernel turned to appropriate size so that it fit into the brass tube. I selected a compass rose image in the internet, used MS PowerPoint to scale it down to a suitable size, printed it with a Laser printer on white paper, and glued the printed picture on top of the wood kernel in the ‘compass’. The whole design was finished off with a layer of high gloss clear lacquer to simulate the glass on top of the compass. The finished compass is seen in image 2c. The pixilation of the compass rose is only visible in the macro images shown in the build log; otherwise the overall effect is acceptable. In image 3 different assembly steps of the binnacle can be seen. In image 4 the front molding is mounted and one petroleum lamp is displayed on the binnacle (image 4a) and in its final place in the light compartment (images 4b – d). The kit-provided ship’s bell seemed a bit on the large side. So I made a bell out of brass more in line with Chuck’s plans (image 5). Images 6 and 7 show the assembled bell mounted on the binnacle and the side doors in place. At that scale some of the details look a bit ‘oversized’ in those macro images, but the overall effect of the binnacle in its final place on the Syren deck seems to be fine (images 8 – 10).
Thomas
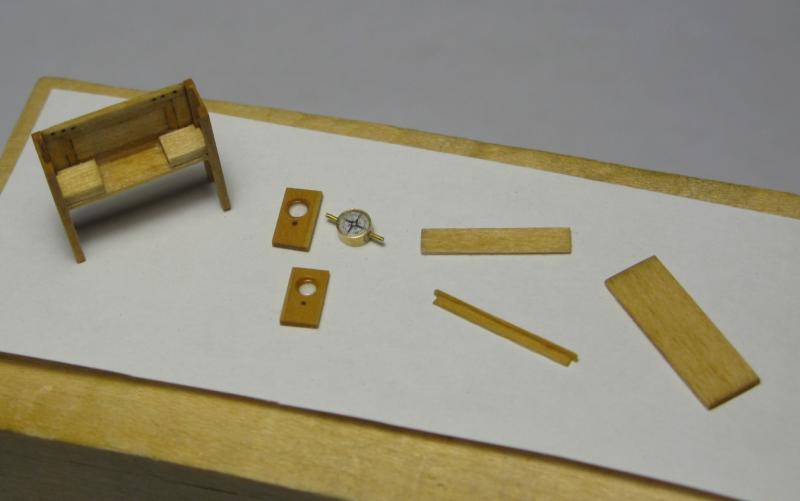
Image 1
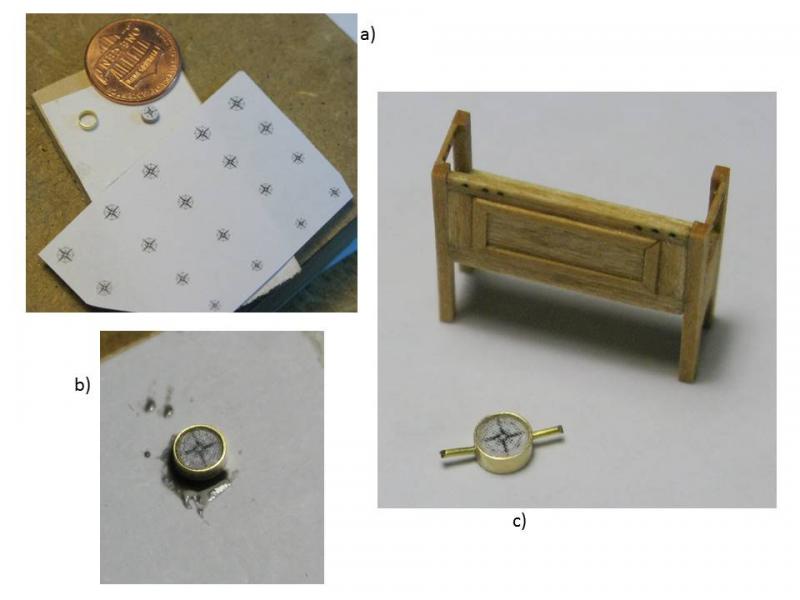
Image 2
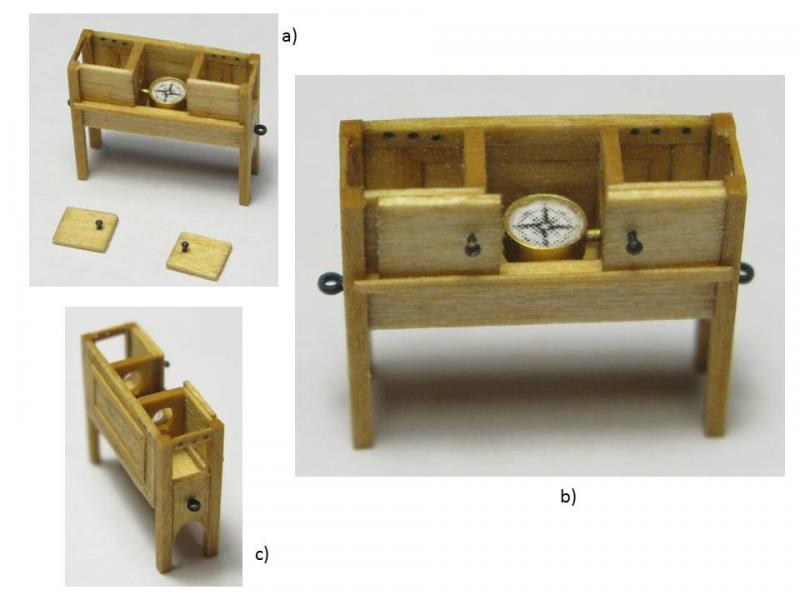
Image 3
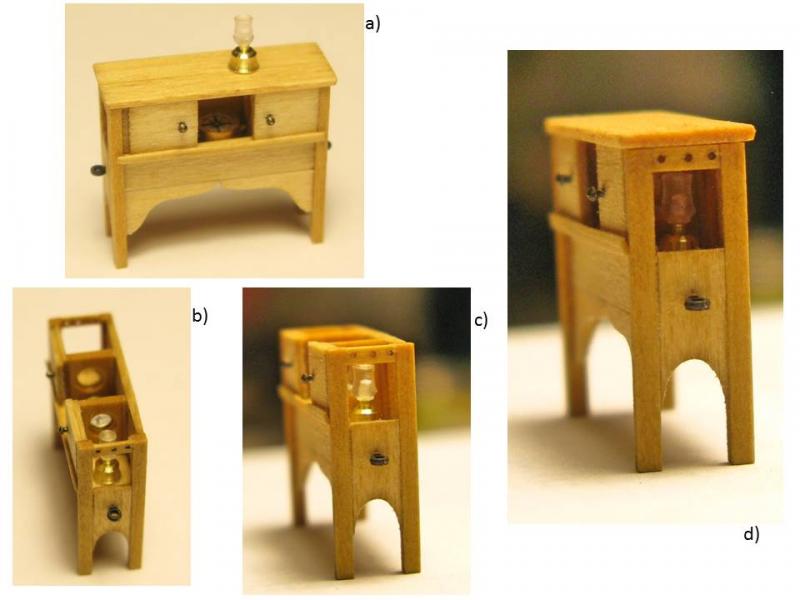
Image 4
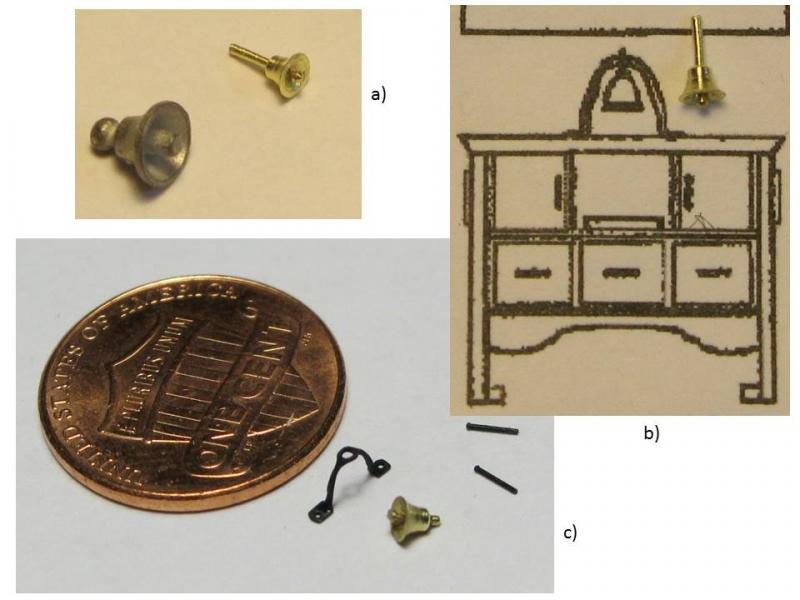
Image 5

Image 6

Image 7
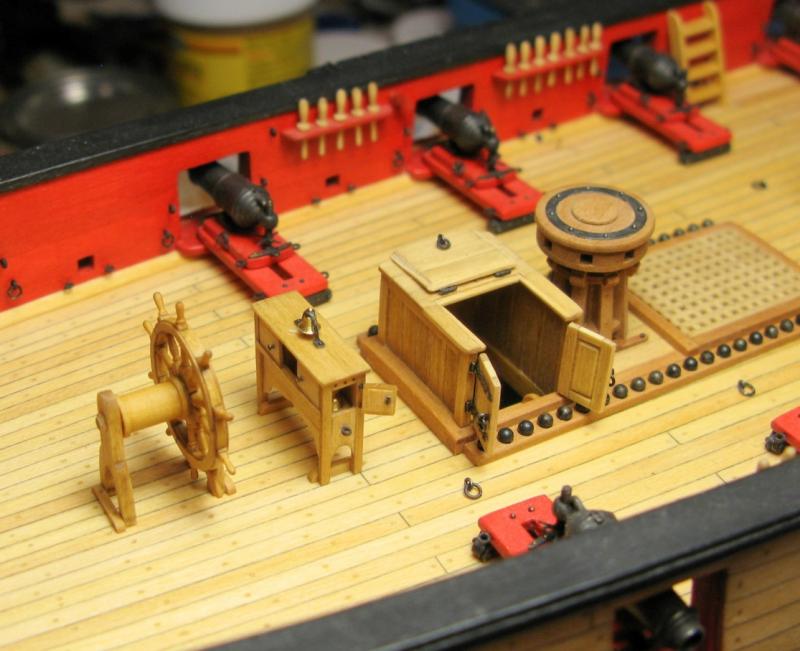
Image 8
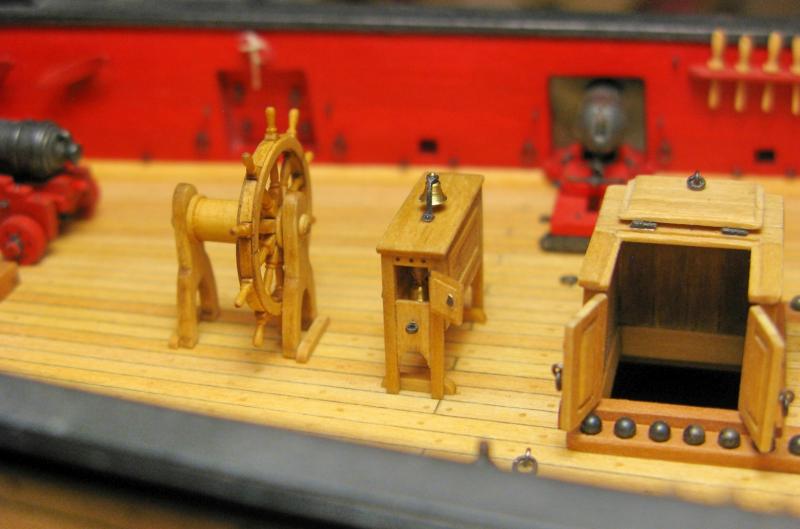
Image 9

Image 10
-
-
These are some very nice looking gratings! Just check on the positions of the openings for the anker cables. I think they need to point towards the bow.
Thomas
- CaptainSteve, Elijah and Piet
-
3
-


Syren by JesseLee - FINISHED - Model Shipways - scale: 1:64
in - Kit build logs for subjects built from 1801 - 1850
Posted
Well done, Jesse! Your pump looks really good!
Thomas