


Gahm
-
Posts
1,217 -
Joined
-
Last visited
Content Type
Profiles
Forums
Gallery
Events
Posts posted by Gahm
-
-
Thank you,Bob, for the detailed answer! Like a lot of other fellow ship model builders I am quite intrigued by scratch and especially POF building. If I ever get finished with Syren probably a POF scratch built model will be my next goal. Besides simply enjoying your build log that is one additional reason to watch the progress on your Halifax with great interest!
Thomas
-
-
That looks really good, Bob! How is the quality of this framing kit . . . is everything fitting well or do you have to correct a lot?
Thomas
- Elijah, Mirabell61, Martin W and 1 other
-
 4
4
-
-
-
-
Michael, Doug, Rich, Dirk, Steve, thank you for your kind comments! And thanks for all the likes!
- Doug, I really like the Syren Servomatic. It took me a while to get it fine tuned to a point where it ran very smoothly. The brass tube design makes it easy to fabricate all kinds of inserts which allow the serving of special parts such as seized eyes, blocks, etc. Once I get to that point it will be interesting to design a 'mouse maker'
")
Thomas
- JesseLee, CaptainSteve, Heronguy and 2 others
-
5
-
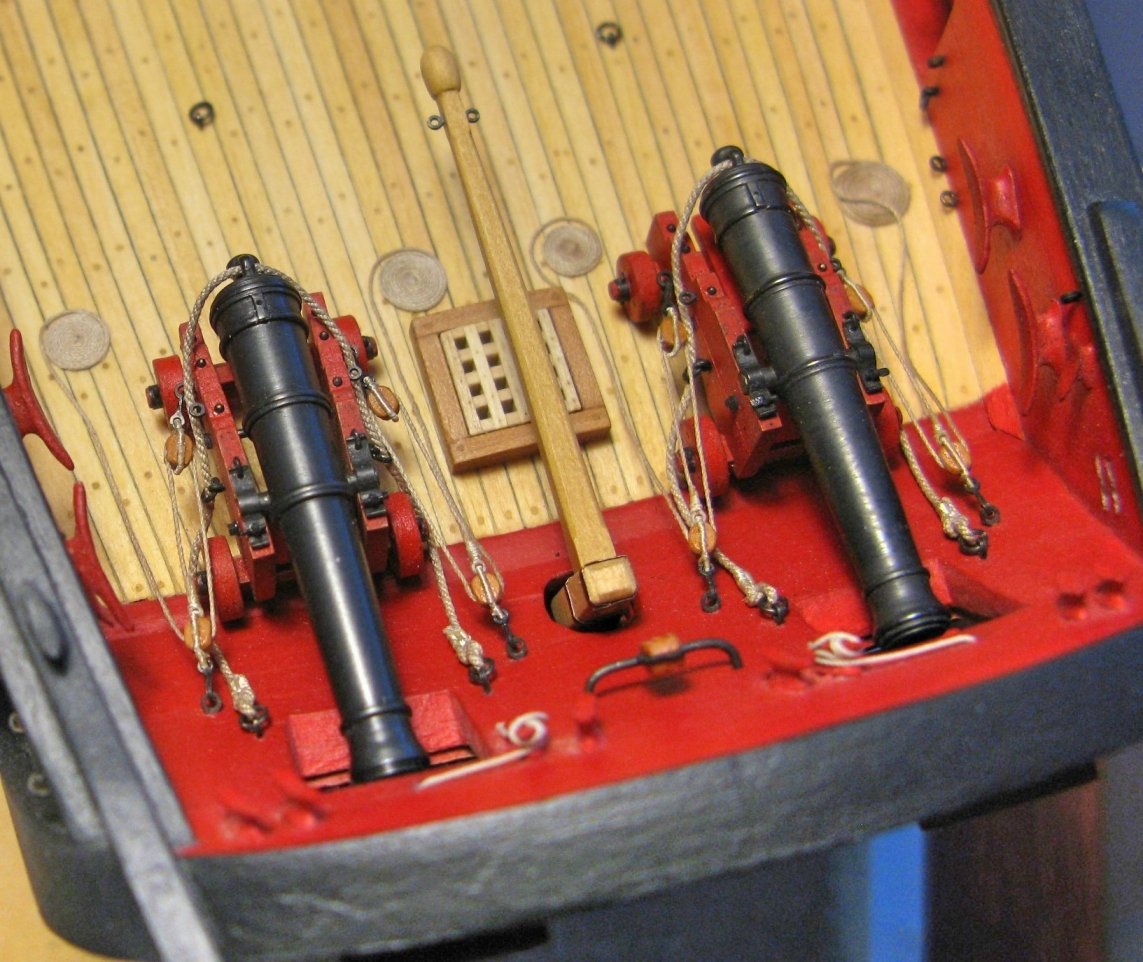
Gun rigging continued . . . 7 down and 11 to go
.
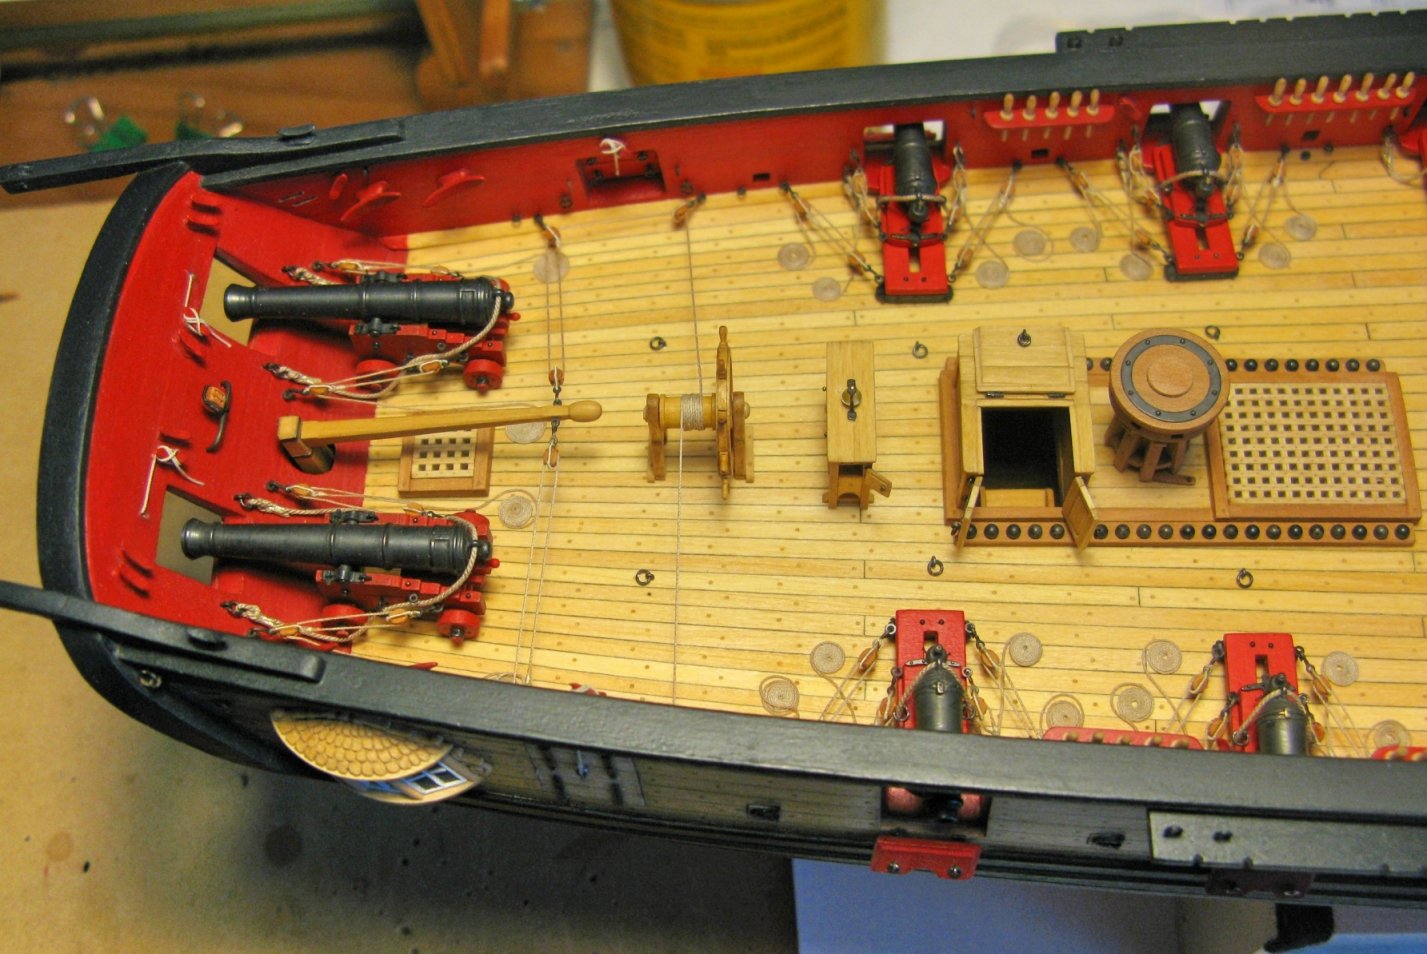
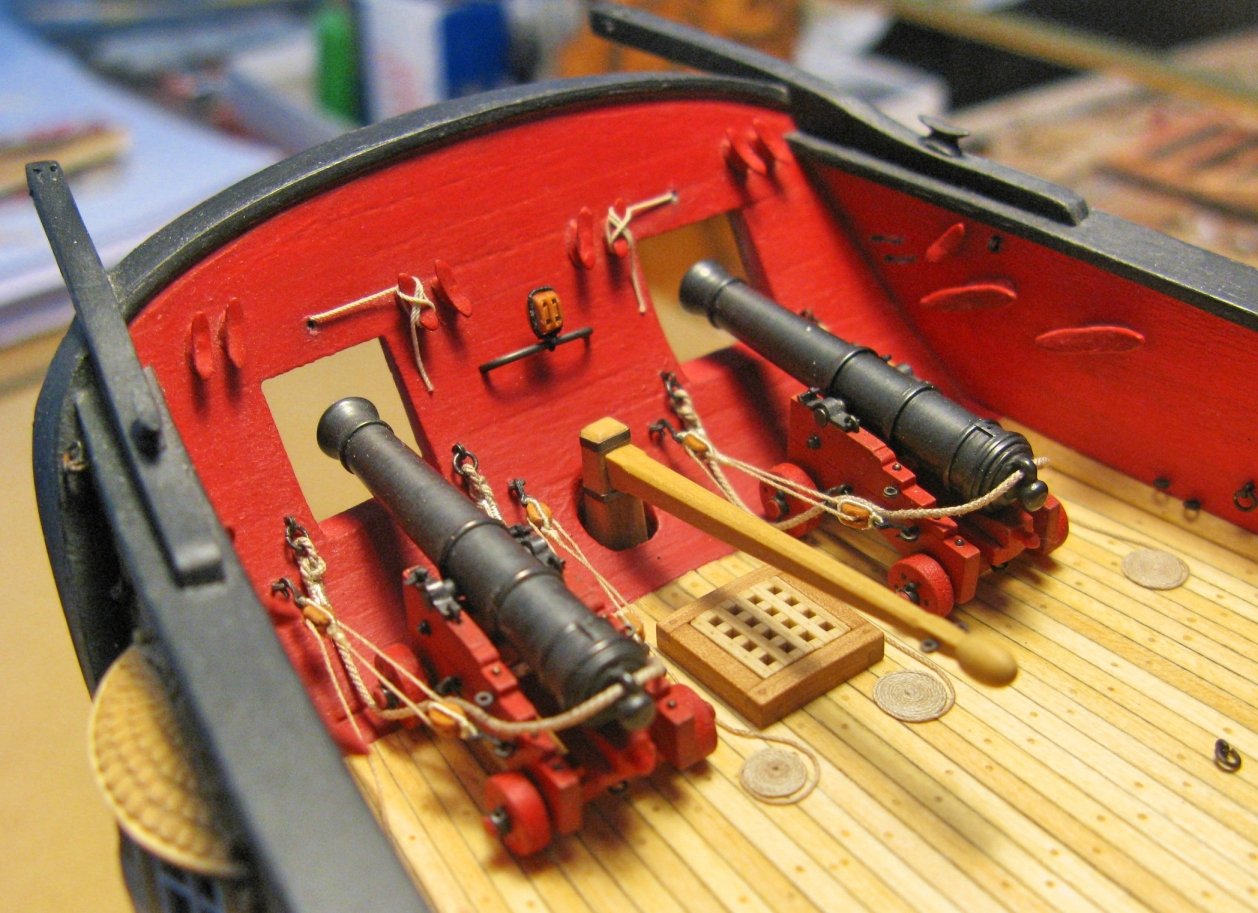
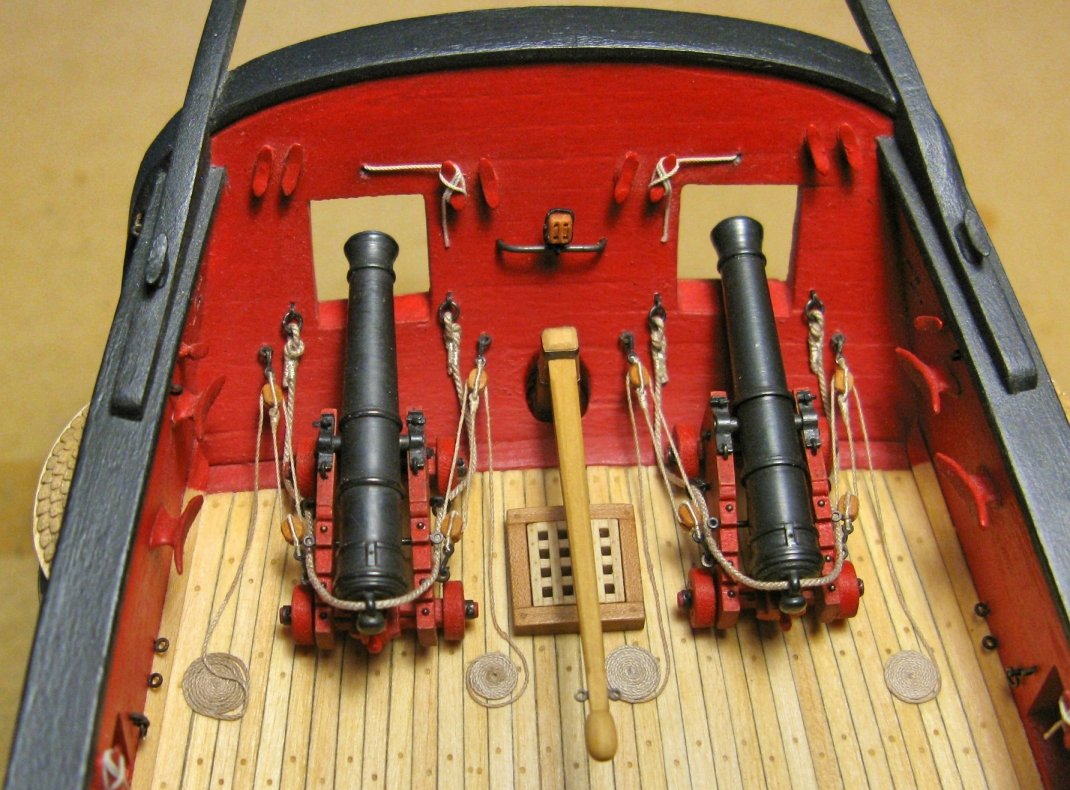
I am proceeding with the gun rigging in steps of 4 guns each to keep things interesting. Starting from the stern of the model it also allows to permanently mount all the deck furniture which will no longer be impacted by the rigging of the carronades, e.g. at the current stage the steering wheel with tackles, binnacle, and capstan (image 1). Image 2 shows the rigging of the steering tackles. I chose the method where both sides are rigged and the 2 ends of the rope combined underneath the steering wheel drum (see images 2 and 3). And to answer the obvious question of how these guns could be operated in such a confined space: in case of operation the tackles for the steering wheel were unhooked and the rudder operated via the tiller without wheel. That is also the reason for the shape of the tiller which has the length and the round end typical for direct manual operation. Image 4 shows some little add-ons to my Syren serving machine. It allows seizing very small eyes but also shows the potential for other simple modifications which will come in handy when I move into the rigging phase of my model. Images 5 and 6 are some additional views of the current state of the model.
Thomas
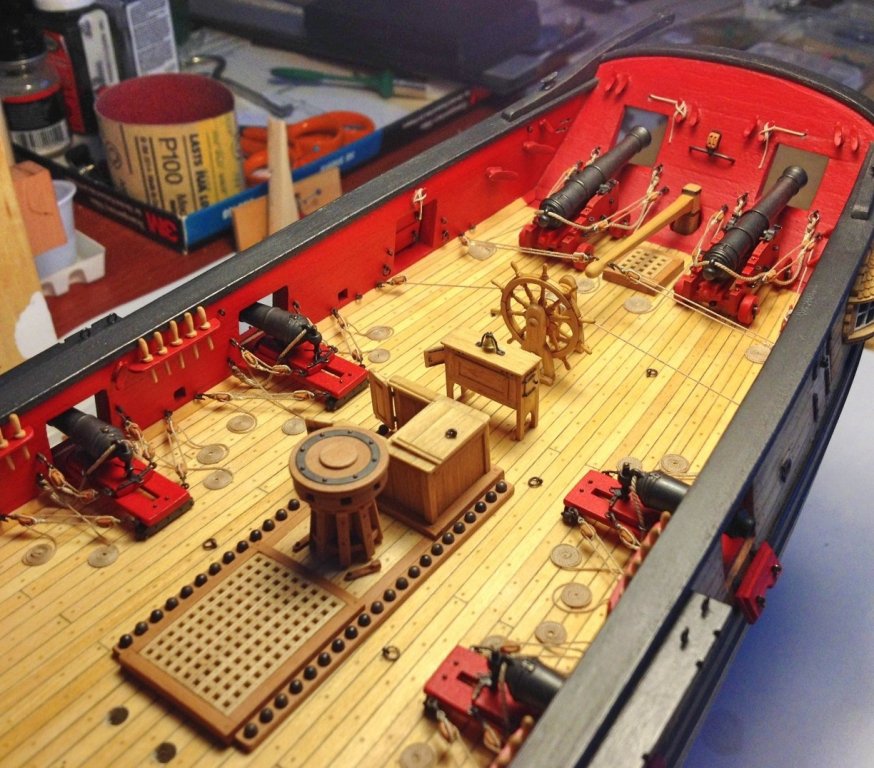
Image 1
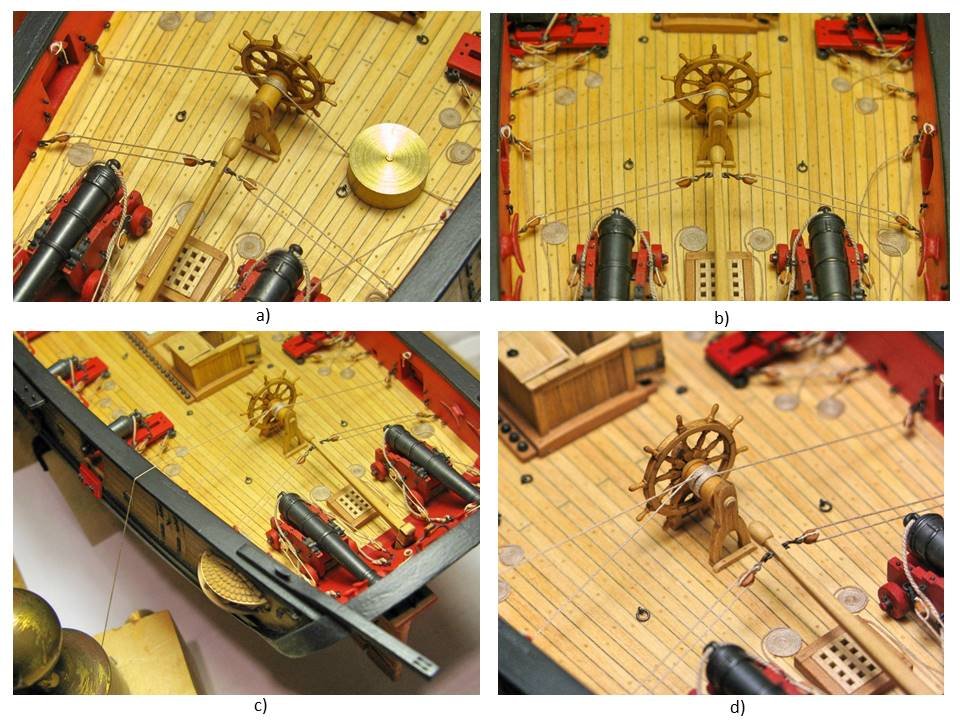
Image 2
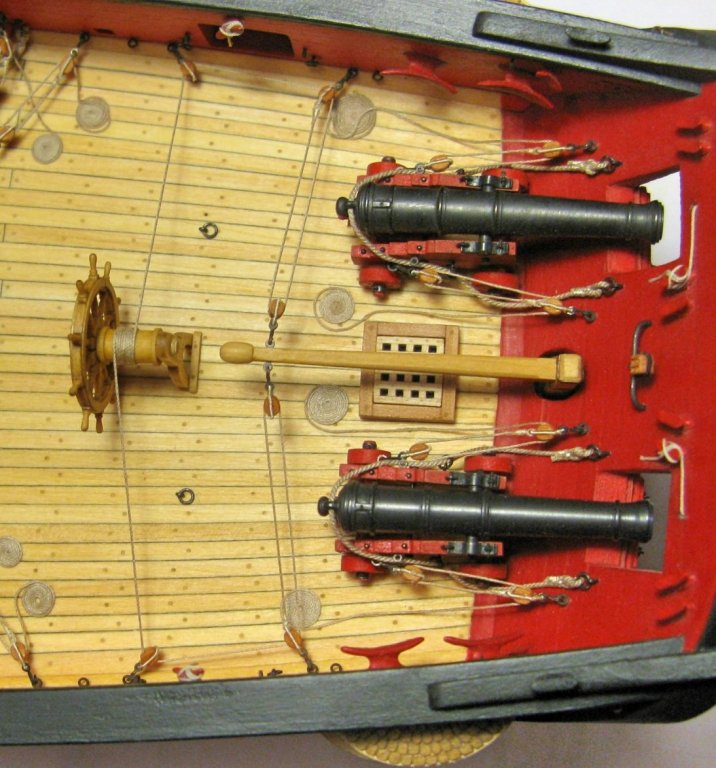
Image 3
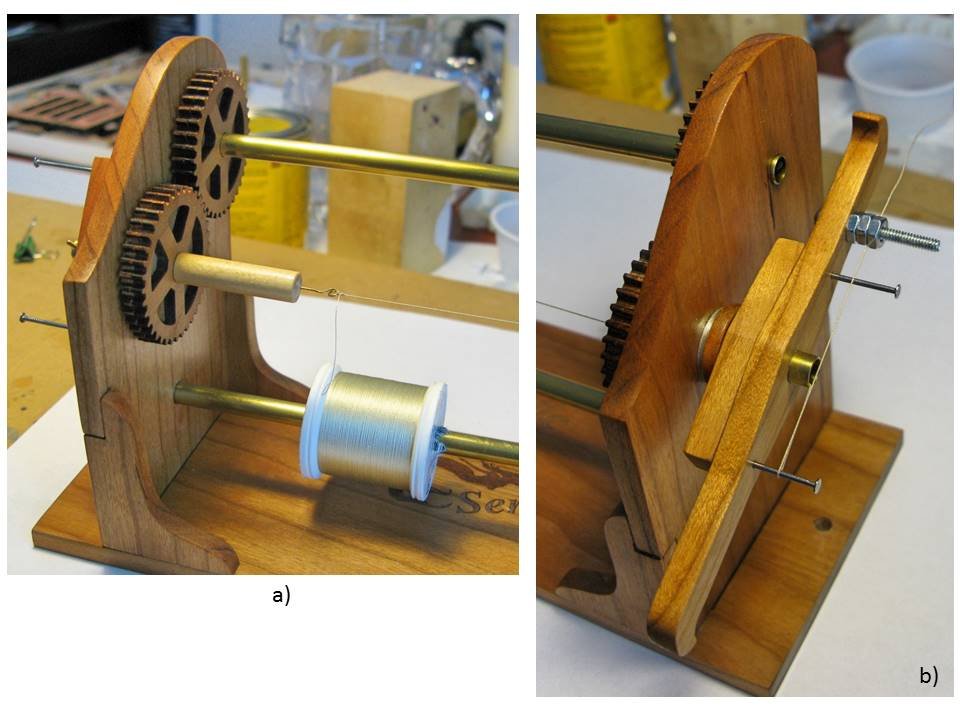
Image 4

Image 5
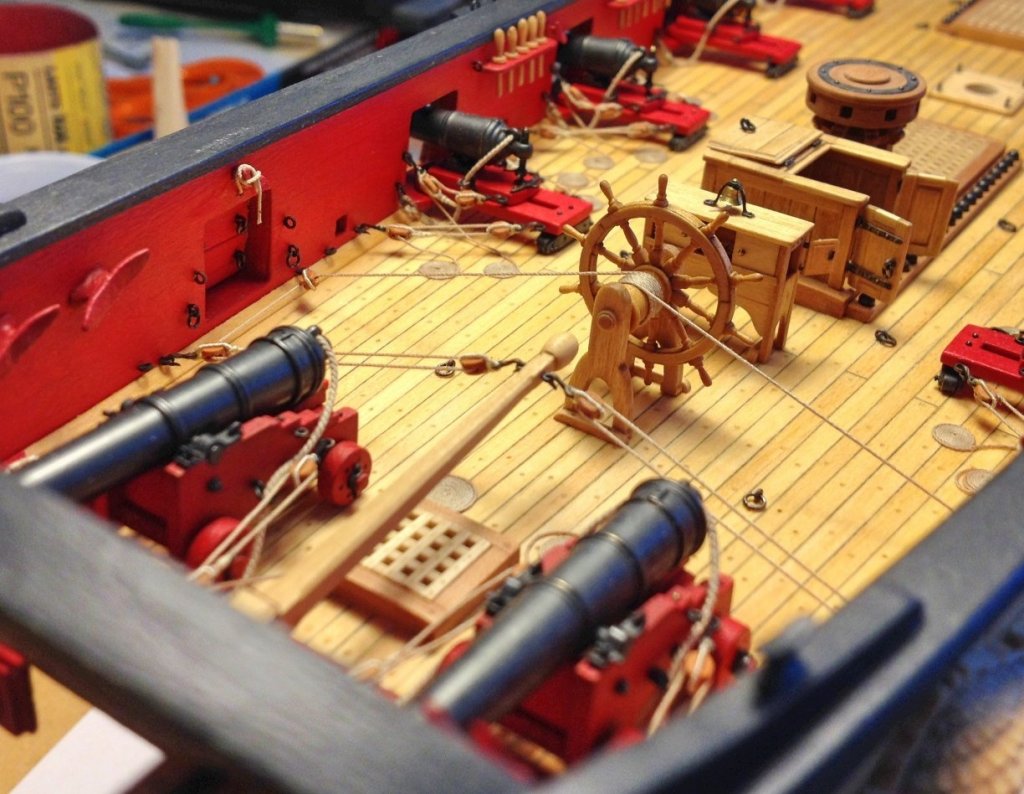
Image 6
- CaptMorgan, Stubby, Stuntflyer and 32 others
-
34
-
 1
1
-
B.E., I did not have the time to look in for a while, so I just realized that your Pegasus is finished. Congratulations! What a fantastic model! You did an outstanding job! And the same is true for your build log. It will serve a lot of modelers as a guide when building their own models. At least I know it is and will be true for me. Thank you!
Best regards,
Thomas
- mtaylor, Blue Ensign, Martin W and 1 other
-
4
-
-
Hi Jesse, I am really sorry to hear about your declining health! But in spite of this your carronades look really good! And as I am currently also in the process of rigging the guns on my Syren model I can tell you that your progress seems to be quite a bit faster than mine
.
All the best!
Thomas
- Omega1234, CaptainSteve, cog and 6 others
-
9
-
-
-
-
-
-
Congratulations, Bob! You did it again! What a beautiful model! And a wonderful build log as well. Thank you for sharing all this information! Can't wait to see your next project
Thomas
-
Thank you, John and Steve, for your kind comments! And thanks for all the likes!
John, yes I glue the cannons to the deck. For this I use a little droplet of Elmer's yellow wood glue underneath each wheel, and if some glue should show I clean it away with a wet paintbrush. As I glue wood to wood it actually bonds pretty strongly. I involuntarily had to test this bond when I had to remove one of the cannons to correct a little mistake after I had already glued it to the deck. It was surprisingly difficult
.
- Tigersteve, Ryland Craze, JesseLee and 2 others
-
5
-
-
A wonderful model, Bob! I admire the craftsmanship and precision you always display in your models! It is just a joy to watch!
Thomas
-
-
-
B.E., Thank you for doing all the work and getting a replacement log up! Your build log was such a treasure of information . . . and besides that just a pleasure to browse through due to all those wonderful, highly detailed pictures and descriptions of your marvelous model!
Thomas
- Mirabell61, Blue Ensign and mtaylor
-
3
-
Eddie, Dirk, Bob, B.E., thank you for your kind comments! Especially considering the outstanding rigging results on your own models your feedback is highly appreciated! And thanks for all the likes!
Dirk, I know . . . one down, 17 to go

Thomas
- Nirvana, Dubz and Tigersteve
-
3


La Créole 1827 by archjofo - Scale 1/48 - French corvette
in - Build logs for subjects built 1801 - 1850
Posted
Super work, Johann! It looks fantastic!
Thomas