


Gahm
-
Posts
1,217 -
Joined
-
Last visited
Content Type
Profiles
Forums
Gallery
Events
Posts posted by Gahm
-
-
-
As usual, absolutely beautiful work, Bob! What kind of wood are your blocks made of? Were they provided by the kit or did you buy them from another source? They also have nicely rounded edges . . . is this the result of a block tumbler or do you treat them in some other way? I know you probably have already published all these details somewhere in your amazing build log . . . but my memory sometimes suffers from overload and certain details escape
")
Thomas
-
-
-
Thank you, Rich, for this comment! I have learned so much from this forum since I joined that I am glad if I can contribute a little myself.
Thomas
- Stuntflyer, CaptMorgan, JesseLee and 3 others
-
 6
6
-
Thank you, B.E.!
Thomas
-
Thank you Dirk and Tigersteve for your great feedback! And thanks for all the likes!
Dirk, with my first attempt of the long gun breech rope I acted on the assumption that the tiller was unhooked and used directly to steer the ship when the guns were operated. The length and shape of the Syren tiller would support that assumption. However, I have seen by now several models with shorter breech ropes (like you also suggest) and clearly need to revisit the length of that rope

Thomas
-
It has been a while since my last update (too many other projects going on
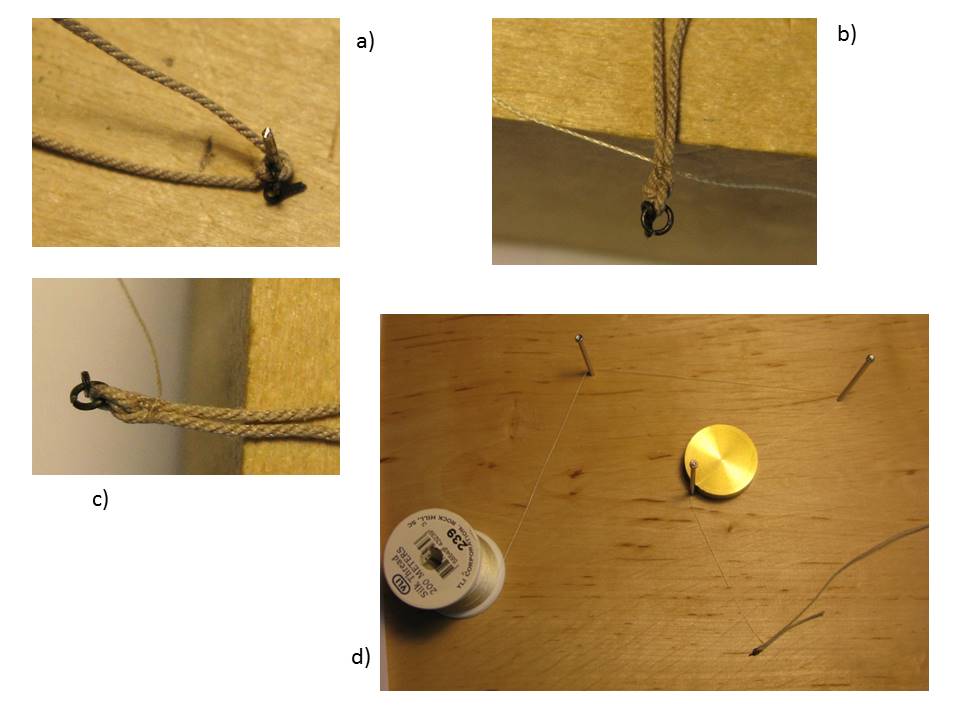
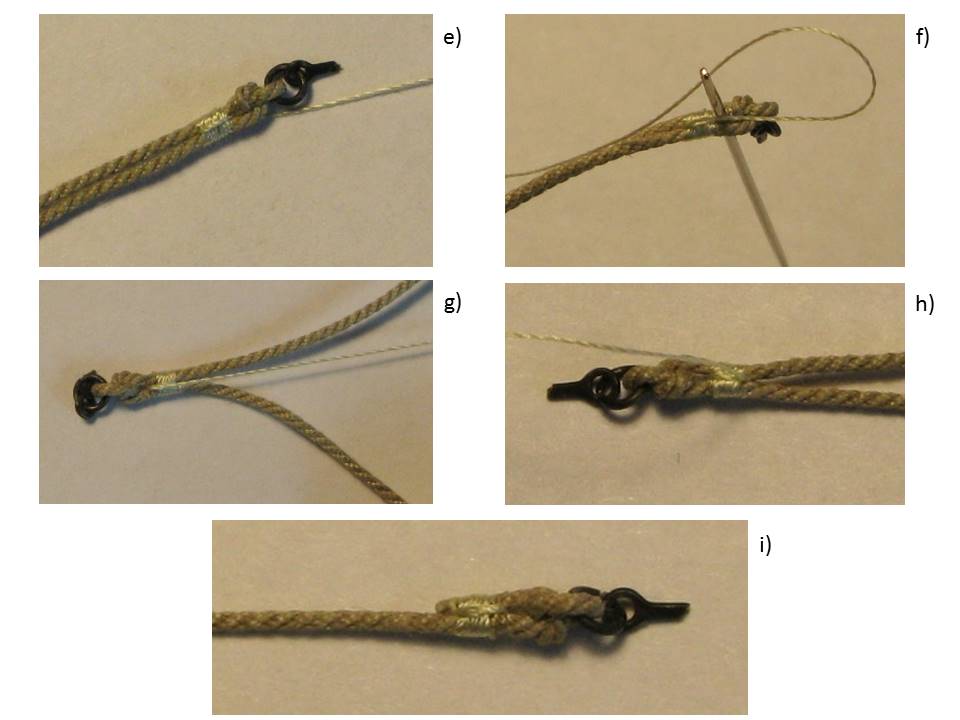
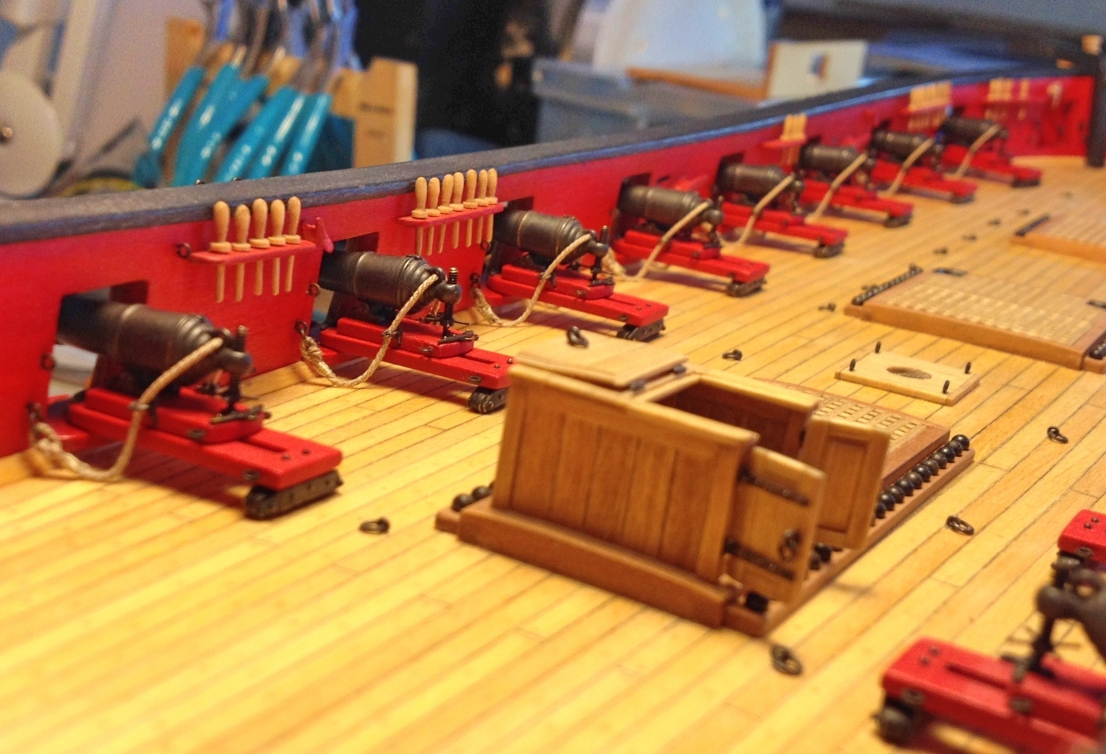
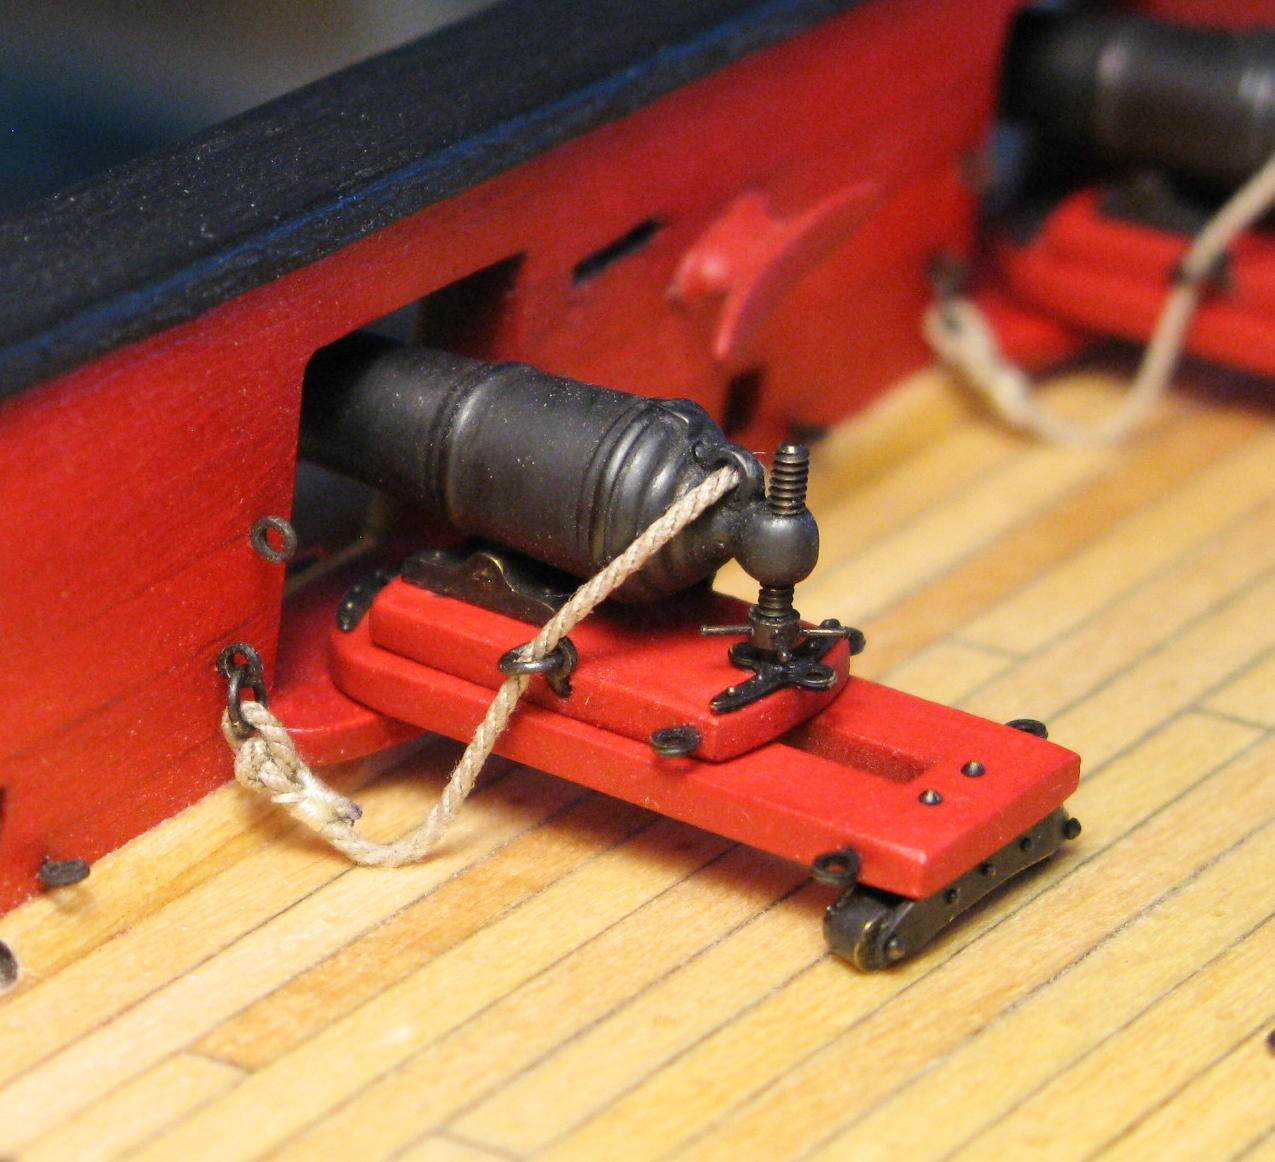
). I finally started with the rigging of the guns – first step the breech lines. After experimenting a little with different breech knots (img 1c) and different materials using a simple gun station jig (img 1a) I decided to go with the Syren rigging rope 0.025, a 100wt silk thread (img 1b), and the 3rd breech knot from the left in img 1c. It seems to be one of the most commonly used breech knots which I could find on images from carronades and naval guns of that period. Images 2 and 3 show the detailed steps of how to make the breech knot. In img 2d my ‘manual serving station’ can be seen. It comes in handy for small tasks. The finished knot is shown in img 3i. Img 4 lists the different steps for the 2nd knot of the breech line. The length of the line needs to be marked (img 4j) and the whole process described in img 2 and 3 repeated, only now with a gun ‘dangling’ on one end of the rope. The finished breech line is shown in img 5. Images 6-9 depict one half of the guns with breech lines – the other half still needs to be done . Img 10 shows the breech line for one of the long guns.Thomas

Image 1
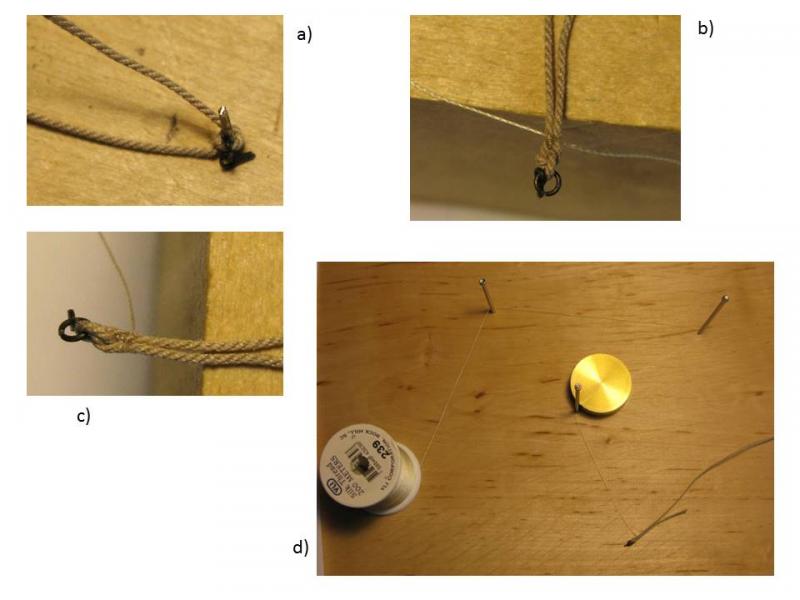
Image 2
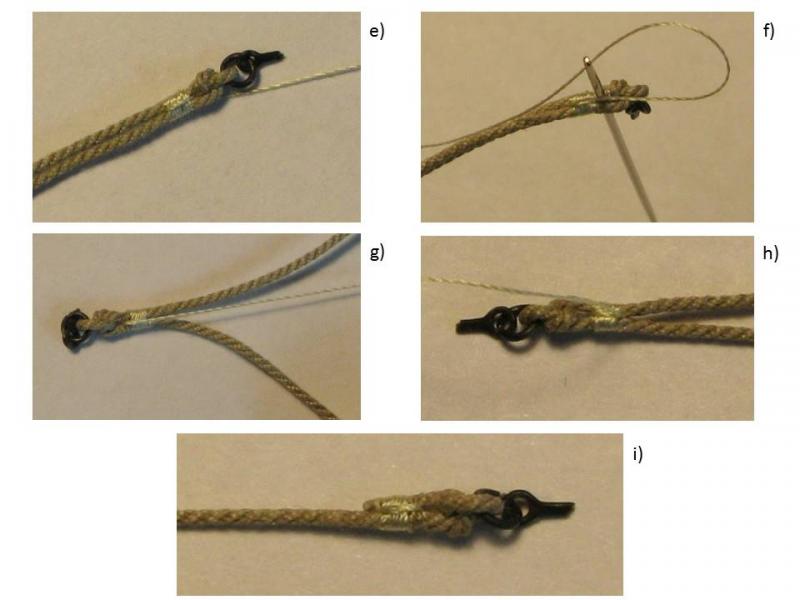
Image 3
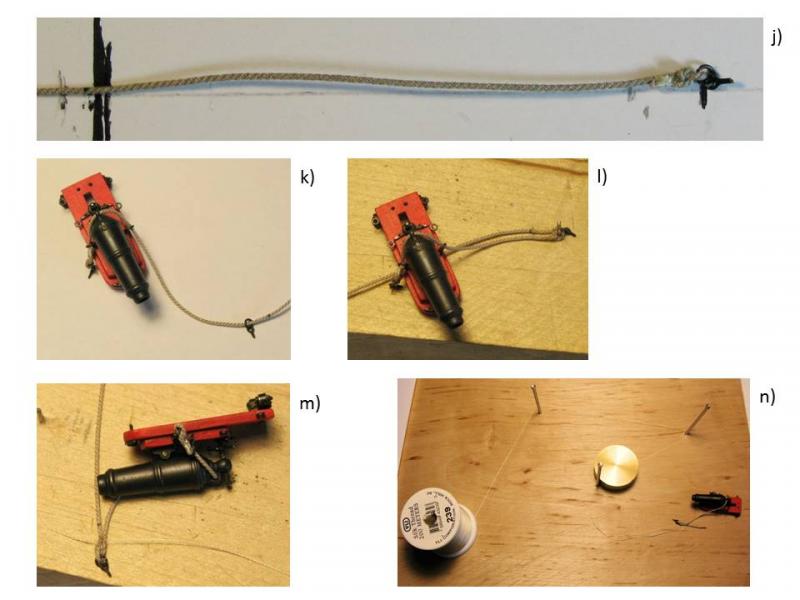
Image 4
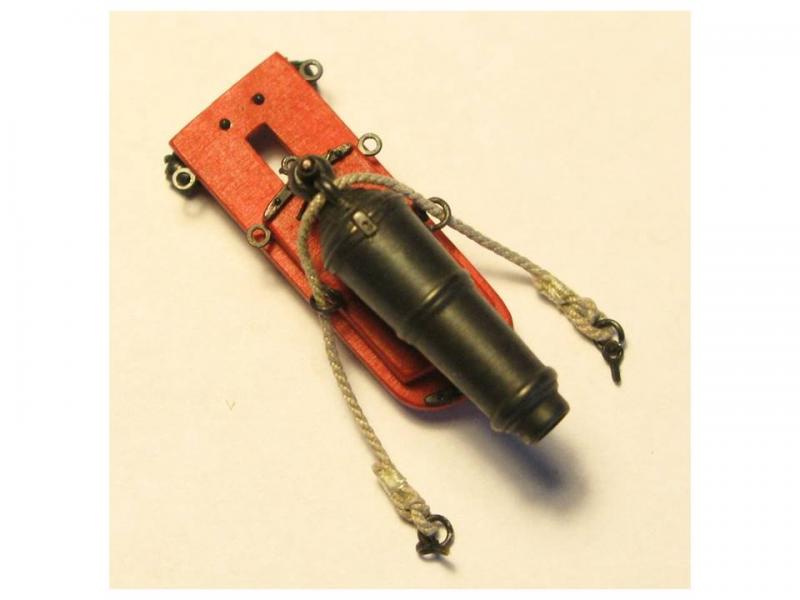
Image 5
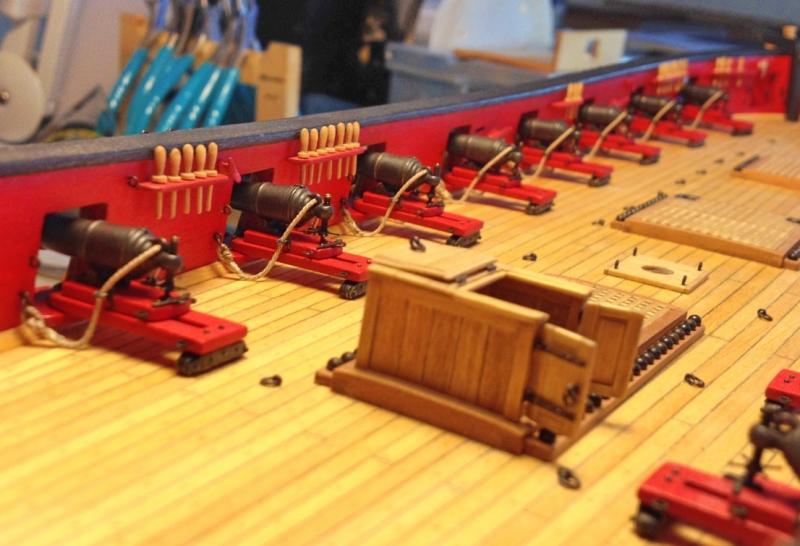
Image 6
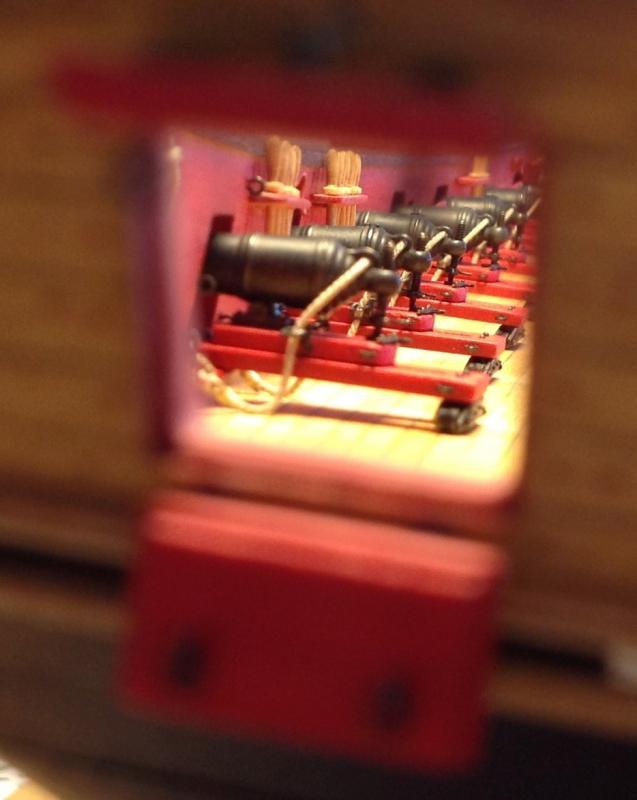
Image 7
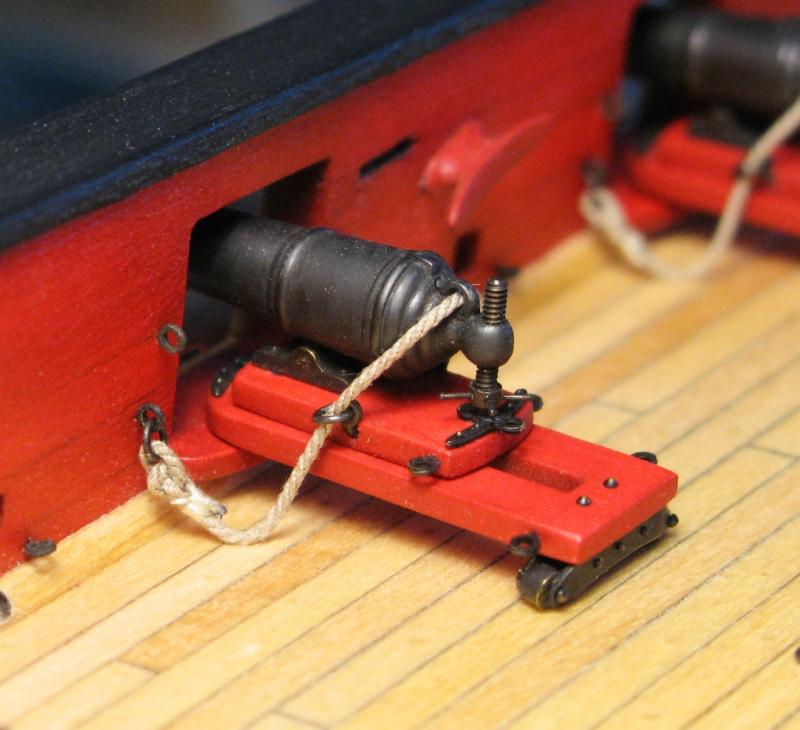
Image 8
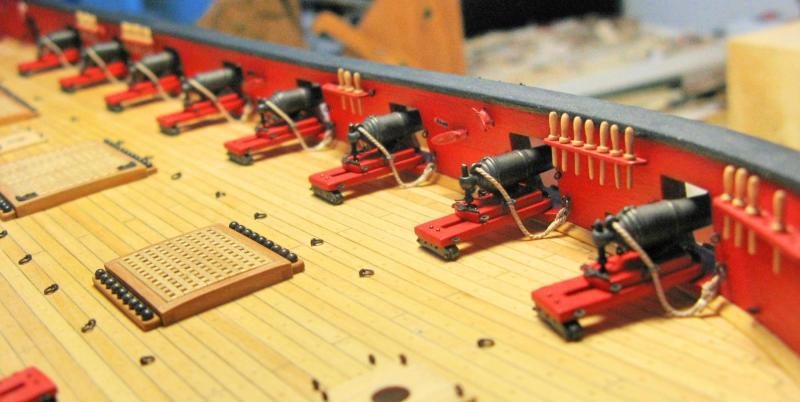
Image 9
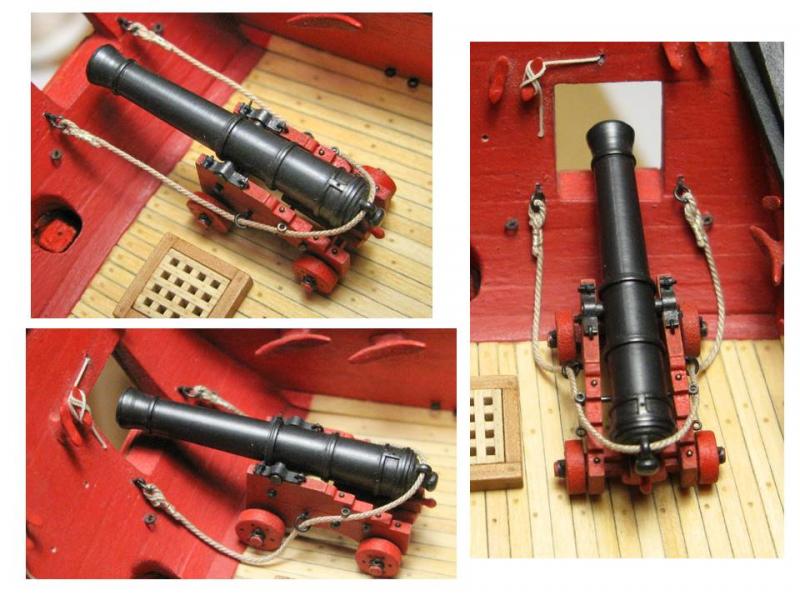
Image 10
-
-
-
-
-
-
Dirk, Bob, and Mike, thank you for your supportive comments! It looks like you know the 'peace of mind' story yourself quite well
. And thanks for all the likes!Dirk, seeing your actions on the Confederacy I start to believe that you really mean it when you say that you are going to wait!? But you may need to finish your whole fleet before I may reach the status which your Syren already has

Thomas
- JesseLee, Stuntflyer, Dubz and 1 other
-
4
-
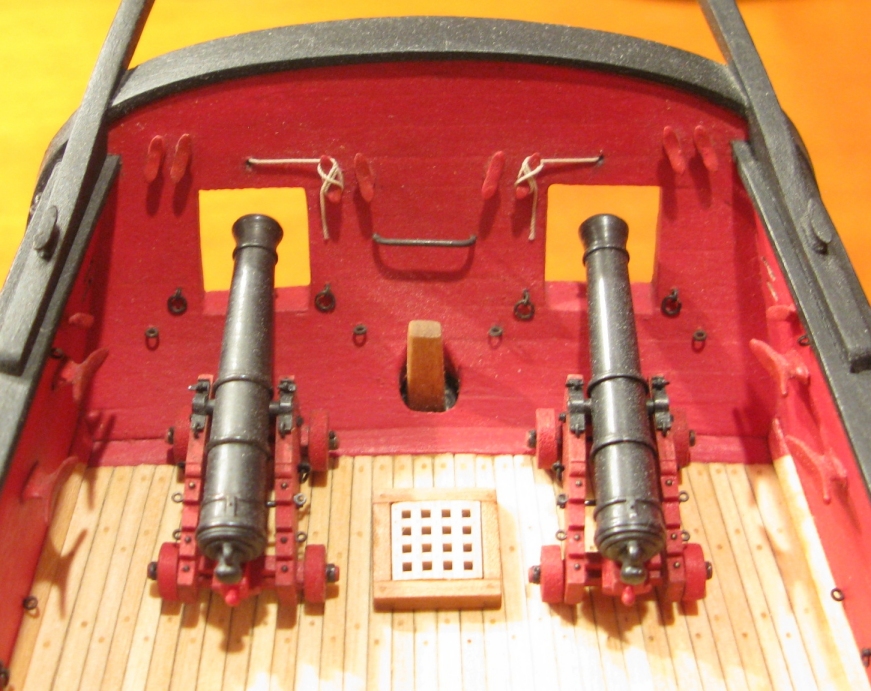
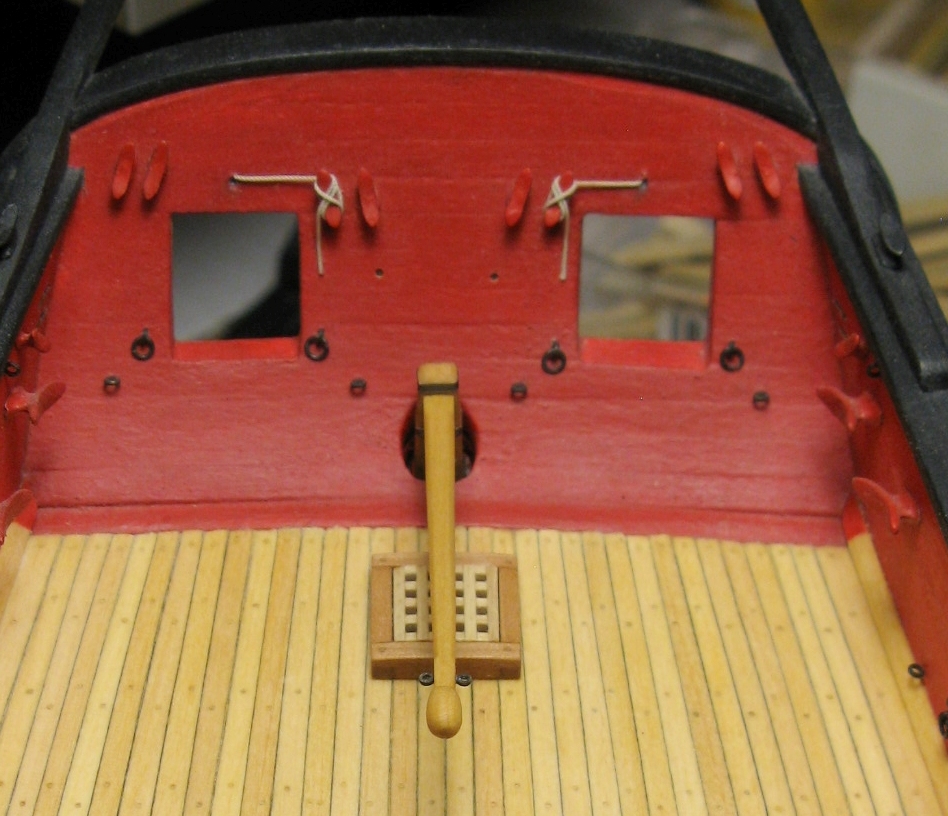
I finished the tiller. Normally this should be a relatively simple piece to make. However, on my model when I initially built the rudder coat the rudder unfortunately was fixed in place in such a way that its upper end was no longer in the center of the rudder hole but was leaning to starboard (img. 1). I only noticed that several months later when it was already too late. So this needed fixing before the tiller could be mounted. I removed the upper part of the rudder with my rotary tool equipped with a diamond bur (img. 2), rebuilt the upper rudder part and added the tiller (img. 3). Now rudder and tiller are sitting in the center of the rudder hole (img. 4 – 5) and I have my peace of mind again
.Thomas

Image 1
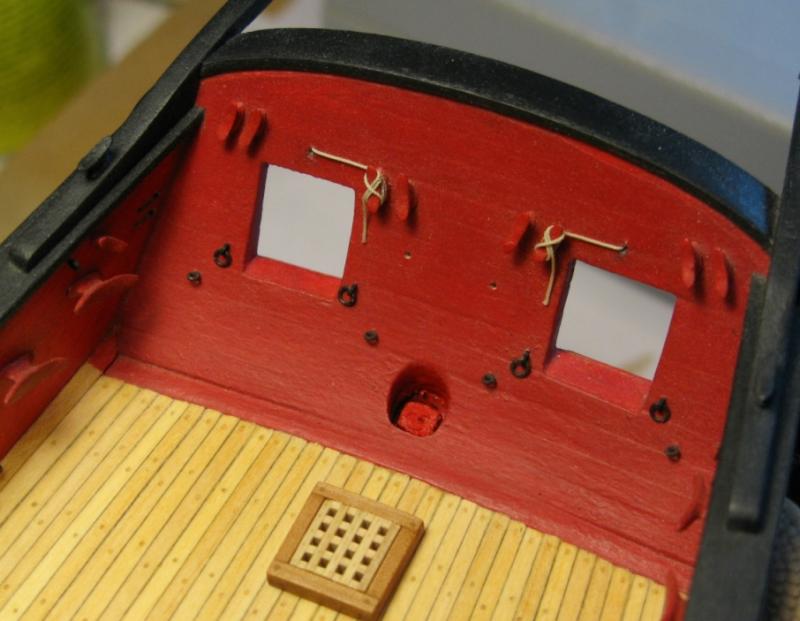
Image 2
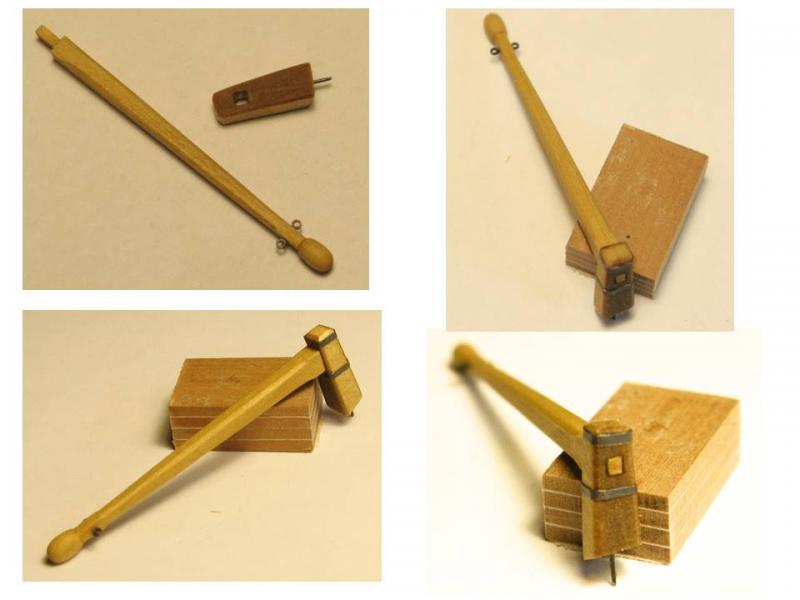
Image 3

Image 4
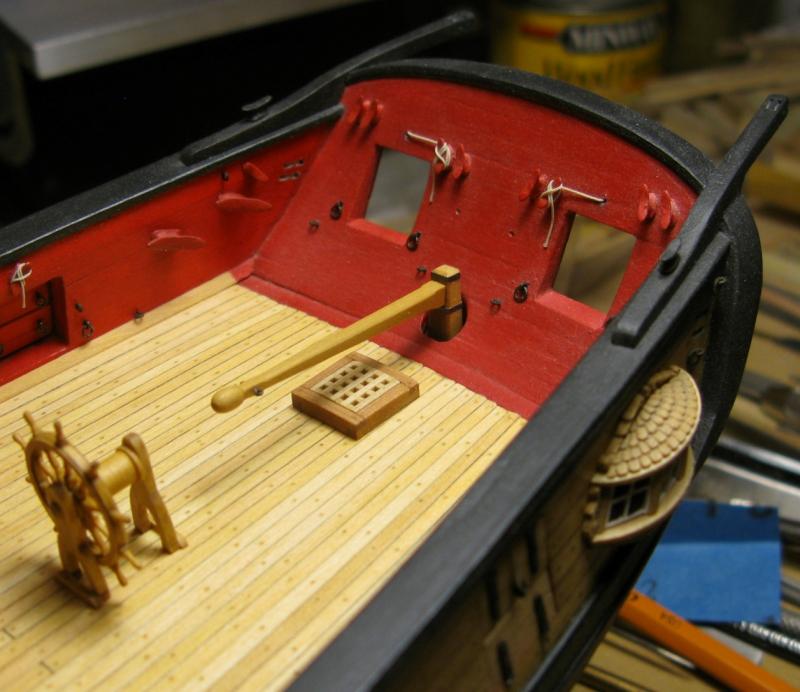
Image 5
- rafine, Captain Poison, JesseLee and 10 others
-
13
-
-
-
-
Beautiful work, Jesse! I love your wheel! It is a wonderful detail in a great model!
Thomas
- CaptainSteve, cog, JesseLee and 4 others
-
7
-
-
Your Syren really looks good! It makes such a difference having the contrast between the black wales and the ocher color of the hull. Btw, I have the same problem. The bigger part of my workshop is located in the garage, which is a really cold place in winter
 . So during the year I postpone tasks for which I do not need the equipment located in the garage. Rigging the carronades is the task for this winter .
Enjoy your "winter break".
Thomas
-
-
-


US Brig Syren by Gahm - Model Shipways
in - Kit build logs for subjects built from 1801 - 1850
Posted
I finished all breech lines and started with the gun tackles. For these I am using the 0.008’’ line from Chuck’s Syren company, served with a 100wt beige silk thread (image 1a), and the Syren 2mm single sheave boxwood rigging blocks. I opened up the holes in the blocks a little (77 drill), sanded the corners slightly with a fine sand paper and mounted each block on a wire loop to facilitate the handling of these tiny objects (image 1b). For hooks I went with the photoetched 3mm hooks from Dafi (http://www.dafinismus.de/plates_en.html#anker7). All parts needed for a hook-block assembly are shown in image 2c. Images 2 and 3 present the assembly sequence for a tackle and image 4 shows the finished result. For rope coils I used a variation of an idea from Richard (kscadman). Image 5 shows my jig which allows making rope coils right beside the gun. It also allows varying size and shape of these coils. I want to avoid for these coils to look all identical and ‘too perfect’. The first completely rigged carronade is shown in images 6 – 8. I still have to see whether I stick with this process for the remaining 17 guns . . .")
Thomas
Image 1
Image 2
Image 3
Image 4
Image 5
Image 6
Image 7
Image 8