HOLIDAY DONATION DRIVE - SUPPORT MSW - DO YOUR PART TO KEEP THIS GREAT FORUM GOING!
×


Gahm
-
Posts
1,217 -
Joined
-
Last visited
Content Type
Profiles
Forums
Gallery
Events
Everything posted by Gahm
-
 Beautiful work, Bob! A pleasure to watch! Thomas
 -
US Brig Syren by Gahm - Model Shipways
Gahm replied to Gahm's topic in - Kit build logs for subjects built from 1801 - 1850
Thank you, Johann! Your kind remark means a lot to me! Thomas -
US Brig Syren by Gahm - Model Shipways
Gahm replied to Gahm's topic in - Kit build logs for subjects built from 1801 - 1850
Oh Steve, I overlooked your question. The case design is not yet clear. Currently I am collecting images of all case ideas, which I like. I should have a pretty good collection once I will need to answer this question 😊 Thomas -
US Brig Syren by Gahm - Model Shipways
Gahm replied to Gahm's topic in - Kit build logs for subjects built from 1801 - 1850
Steve and Andrew, thank you for your kind remarks! And again, thanks for all the 'Likes'! Gulfmedic1, I apologize for the late reply. I did not have access to the internet for several days and therefore did not see your question. The rivets are imprinted the usual way, i.e. the result are really rivets which are not 'outward' rivets but 'inward' rivets. Amazingly due to their small size it is difficult to distinguish - like an optical illusion. To achieve this size - also to stay somewhat within the correct scale - I used diabetes needles for the inprint. Thomas -
US Brig Syren by Gahm - Model Shipways
Gahm replied to Gahm's topic in - Kit build logs for subjects built from 1801 - 1850
Thank you, B.E. and Glenn! This kind of feedback is always highly motivational and appreciated! Thomas -
Beautiful work, Bob! It is a continuation of the high level of craftsmanship which you are displaying in all your models and specifically in your Winnie. Good to see that you are back in the shop! Thomas
-
Fantastic work, Mike! What a beautiful model! Thomas
- 607 replies
-
- 2
-

-
- winchelsea
- Syren Ship Model Company
- (and 1 more)
-
I am always in awe when I see the outstanding detailed work as result of your fantastic craftsmanship, which is the standard on your model! Thomas
-
US Brig Syren by Gahm - Model Shipways
Gahm replied to Gahm's topic in - Kit build logs for subjects built from 1801 - 1850
Bob and Stuntflyer, thank you for your kind remarks! And thanks for all the likes! They are all highly appreciated. Thomas -
US Brig Syren by Gahm - Model Shipways
Gahm replied to Gahm's topic in - Kit build logs for subjects built from 1801 - 1850
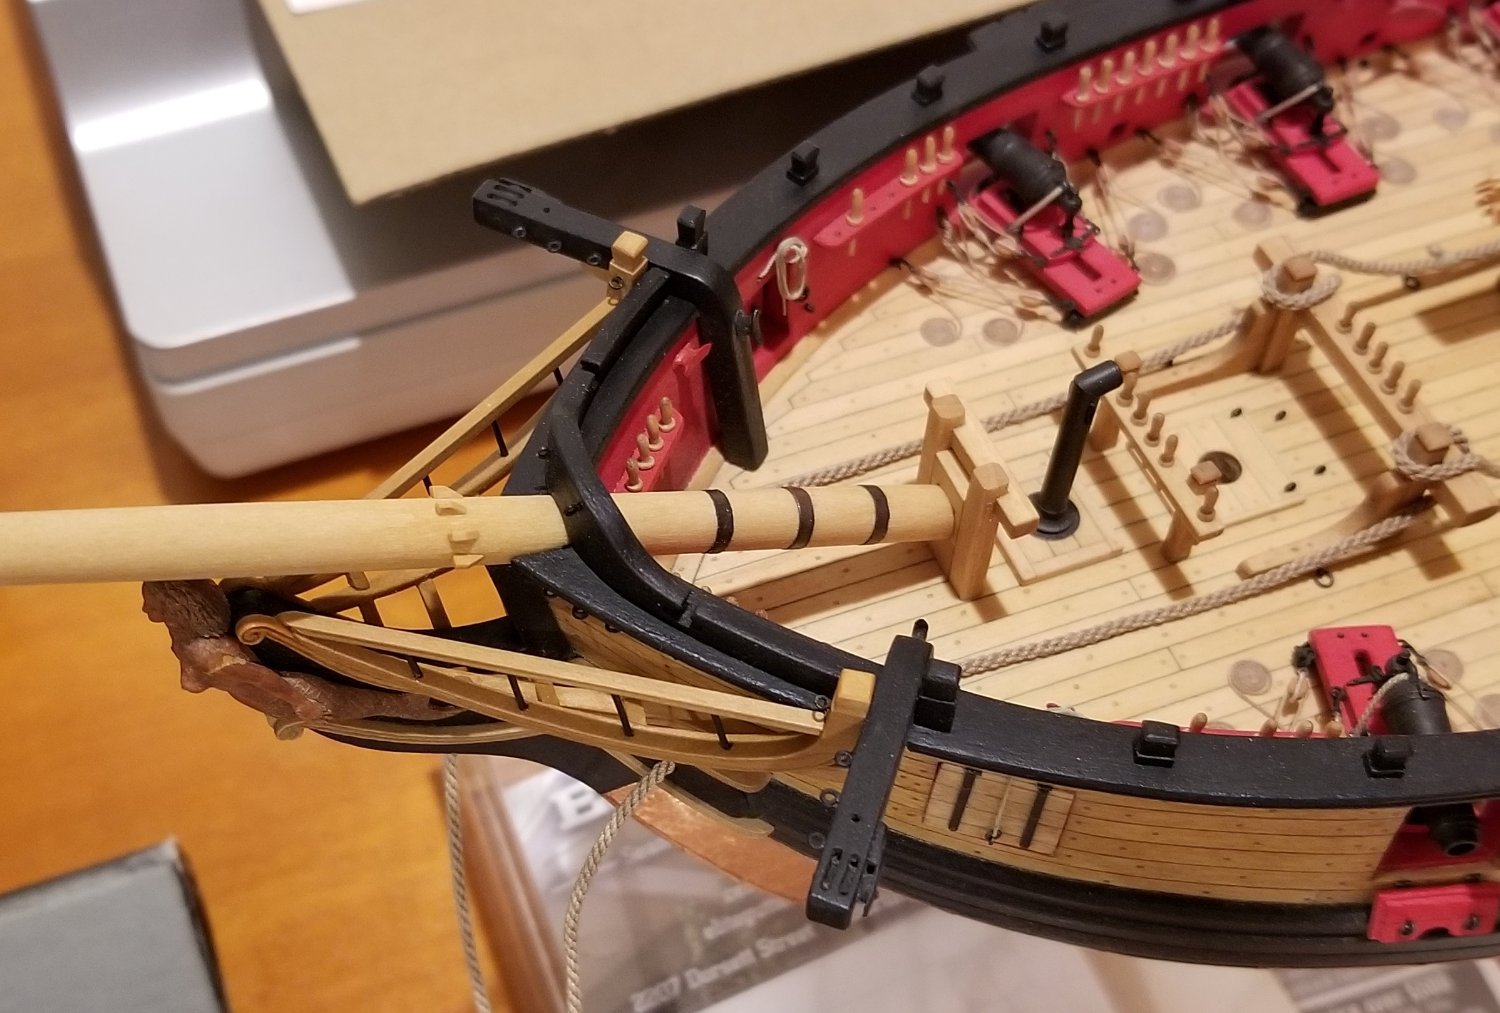
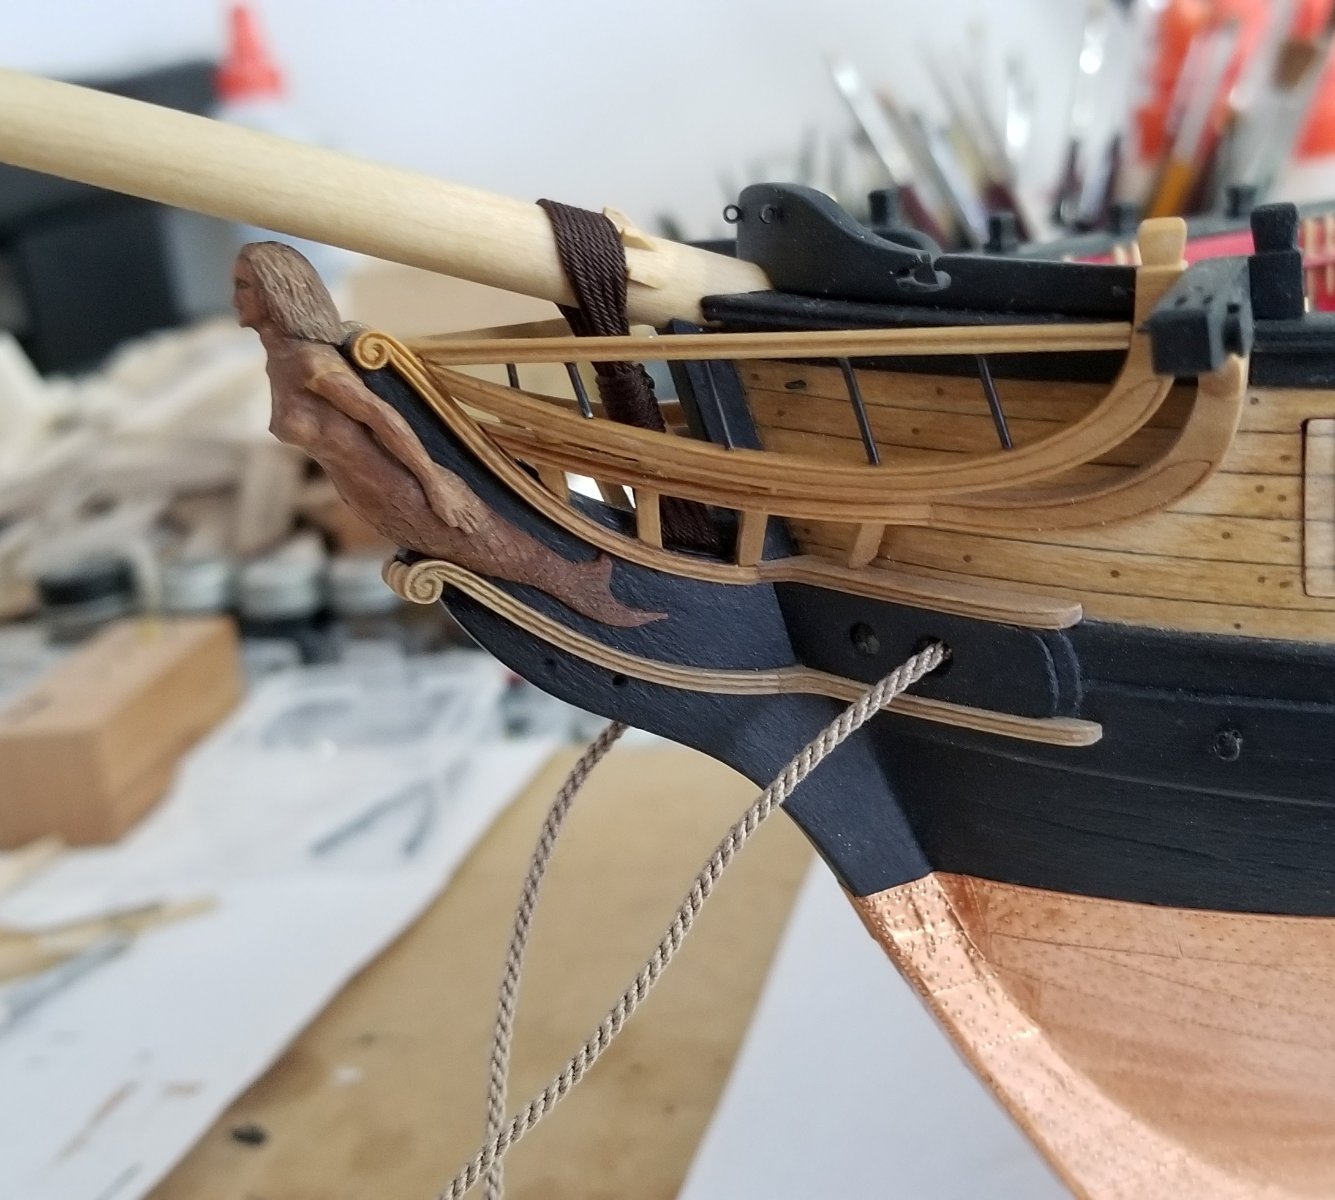
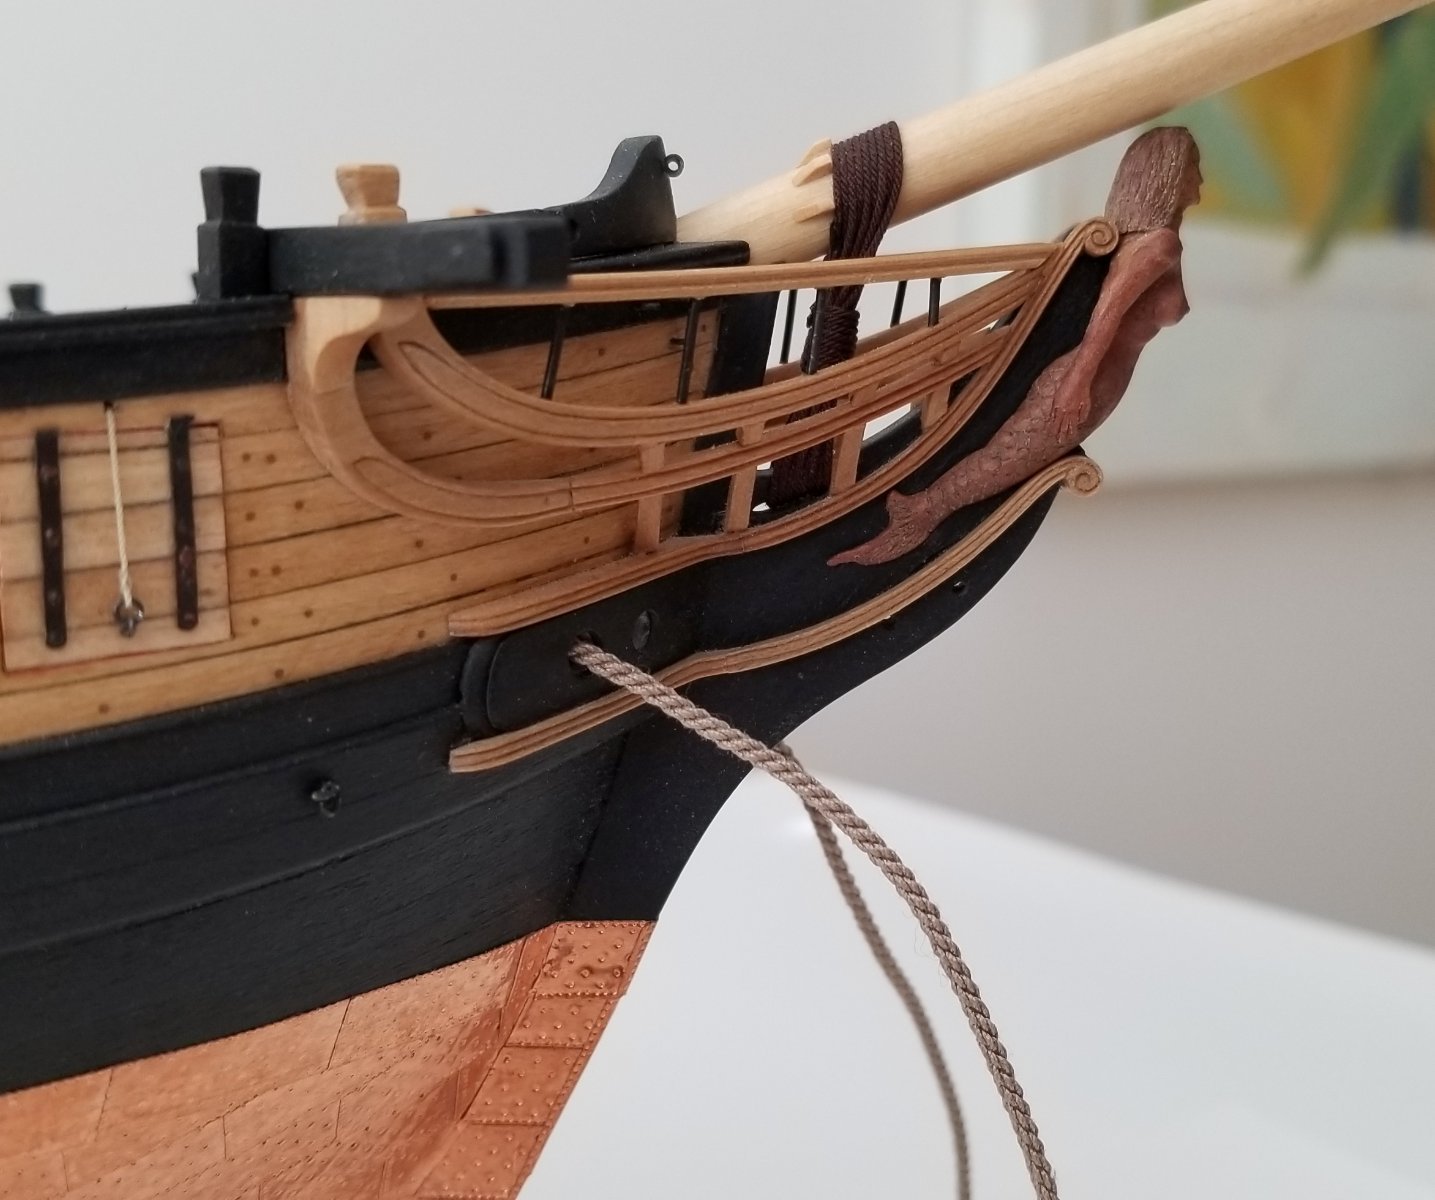
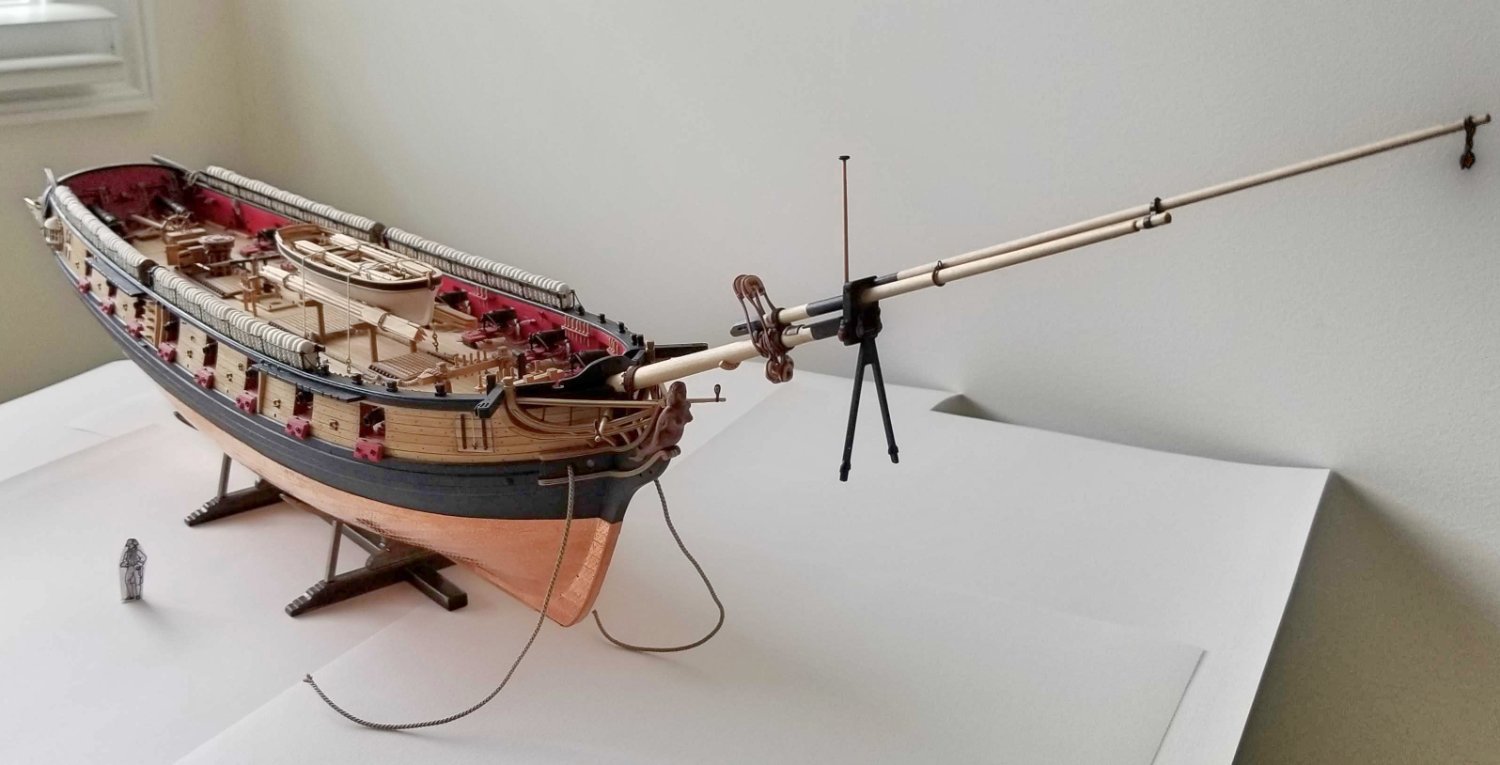
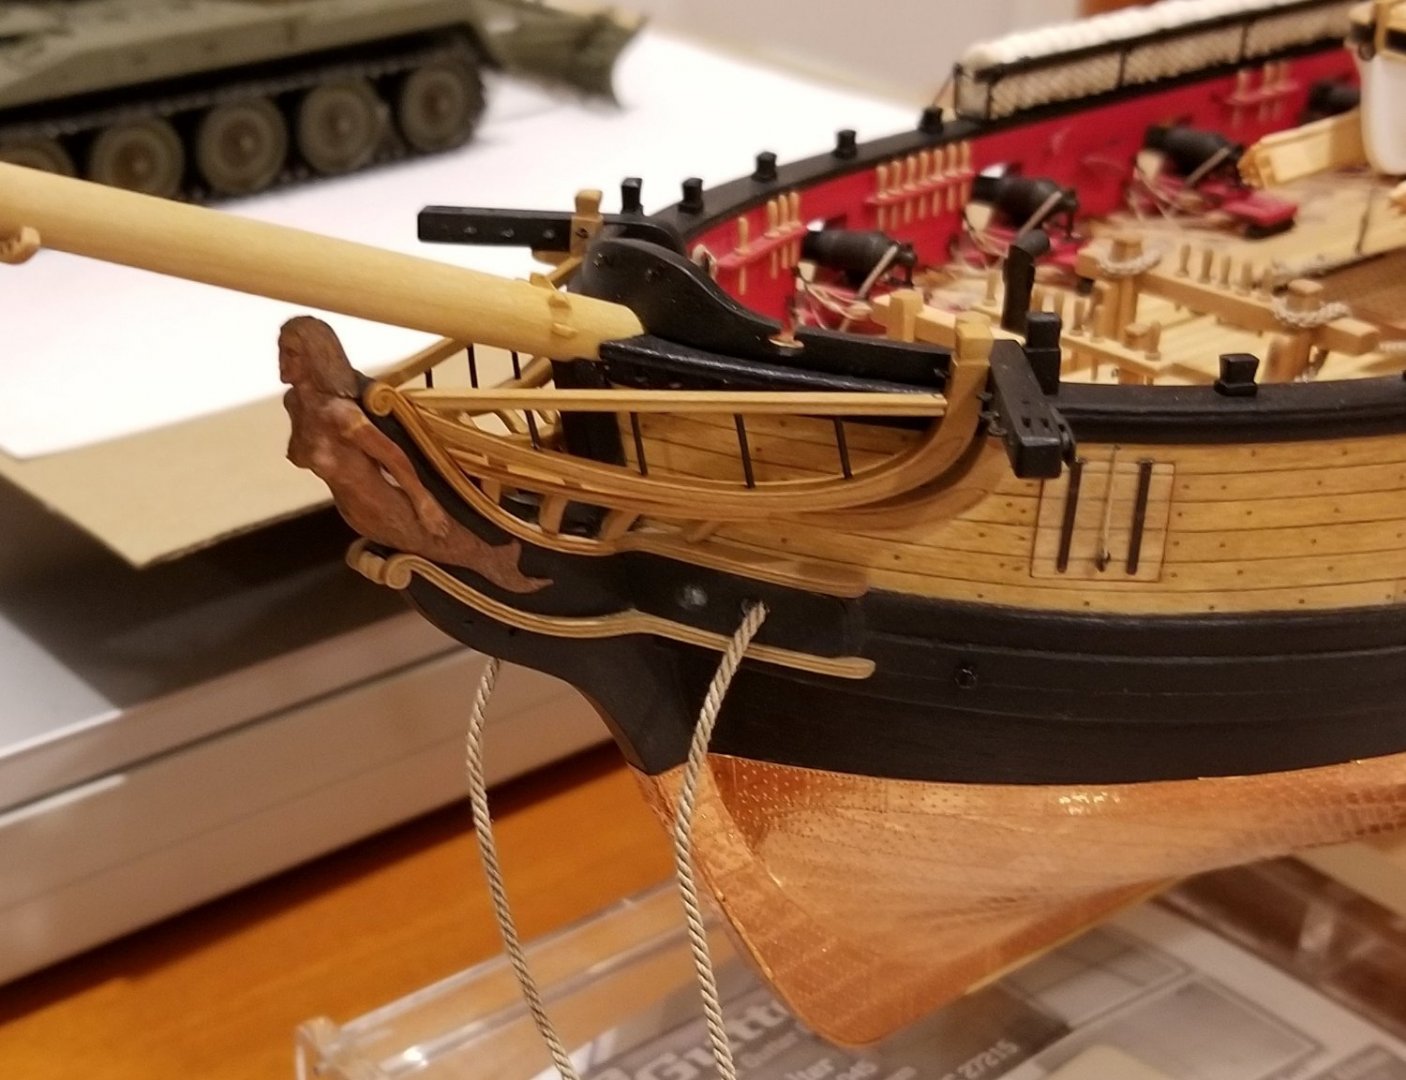
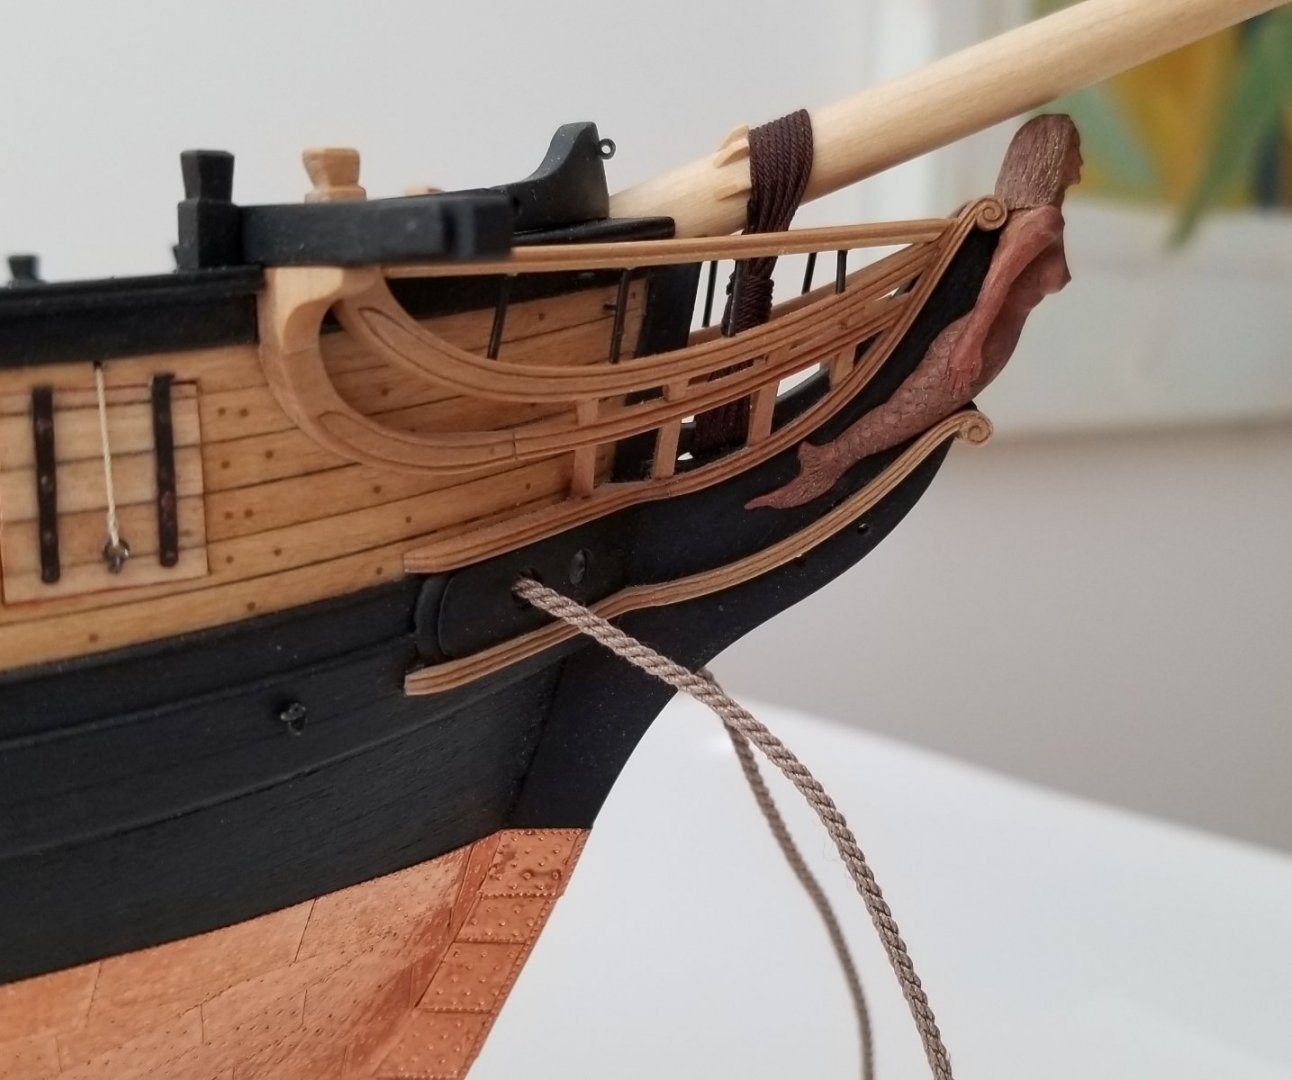
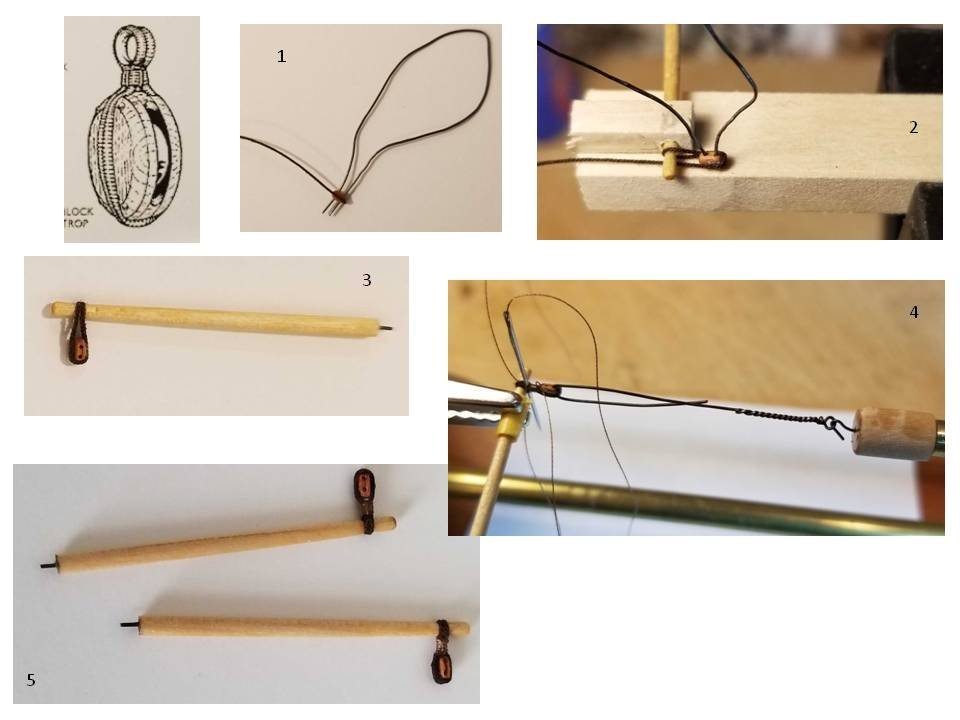
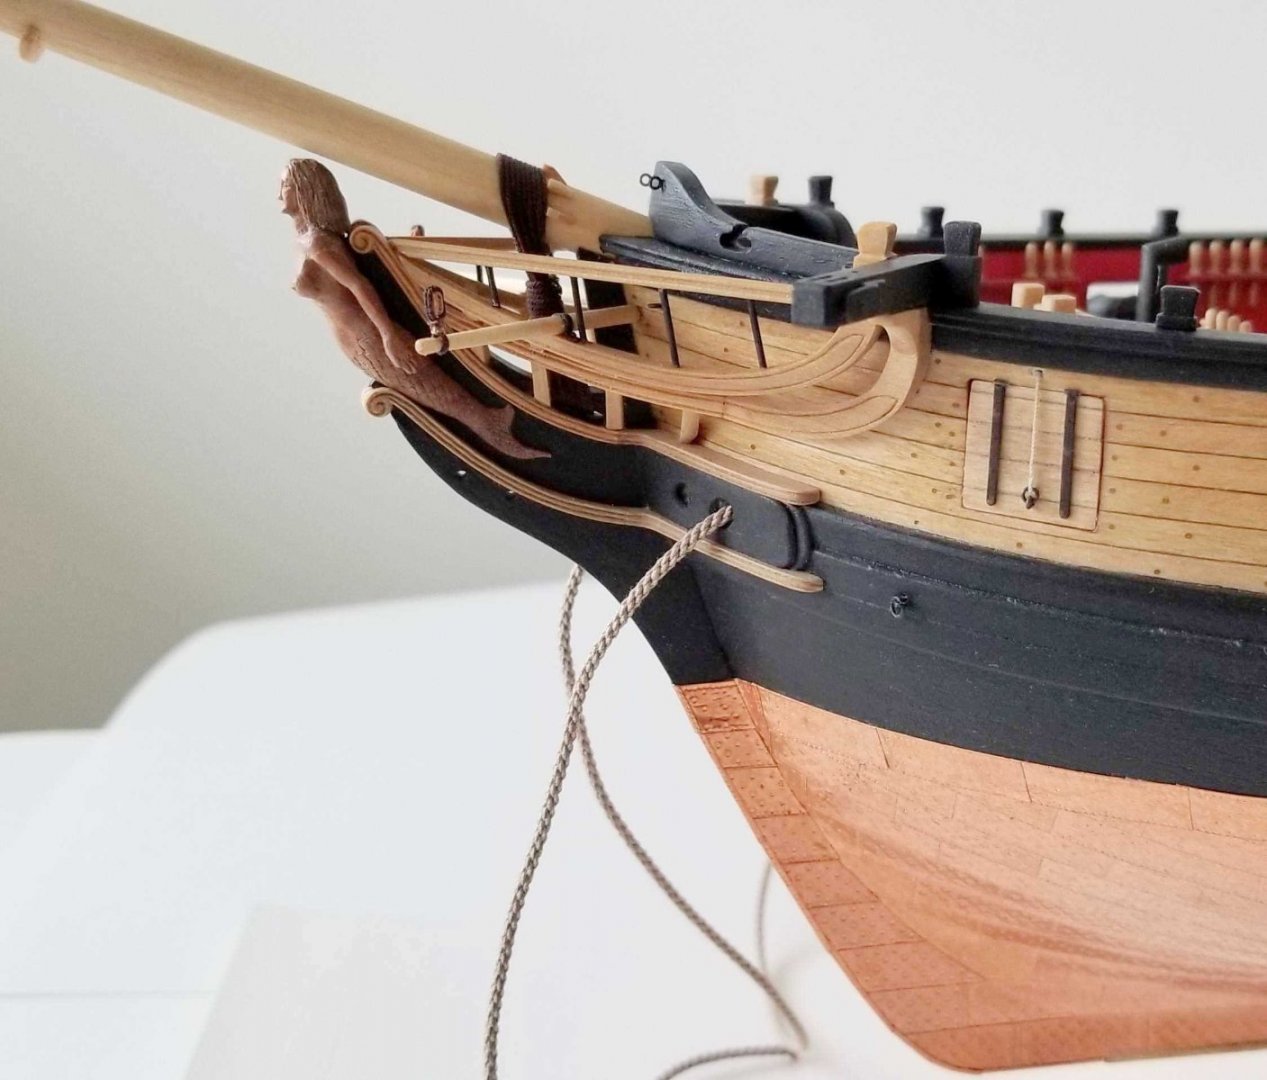
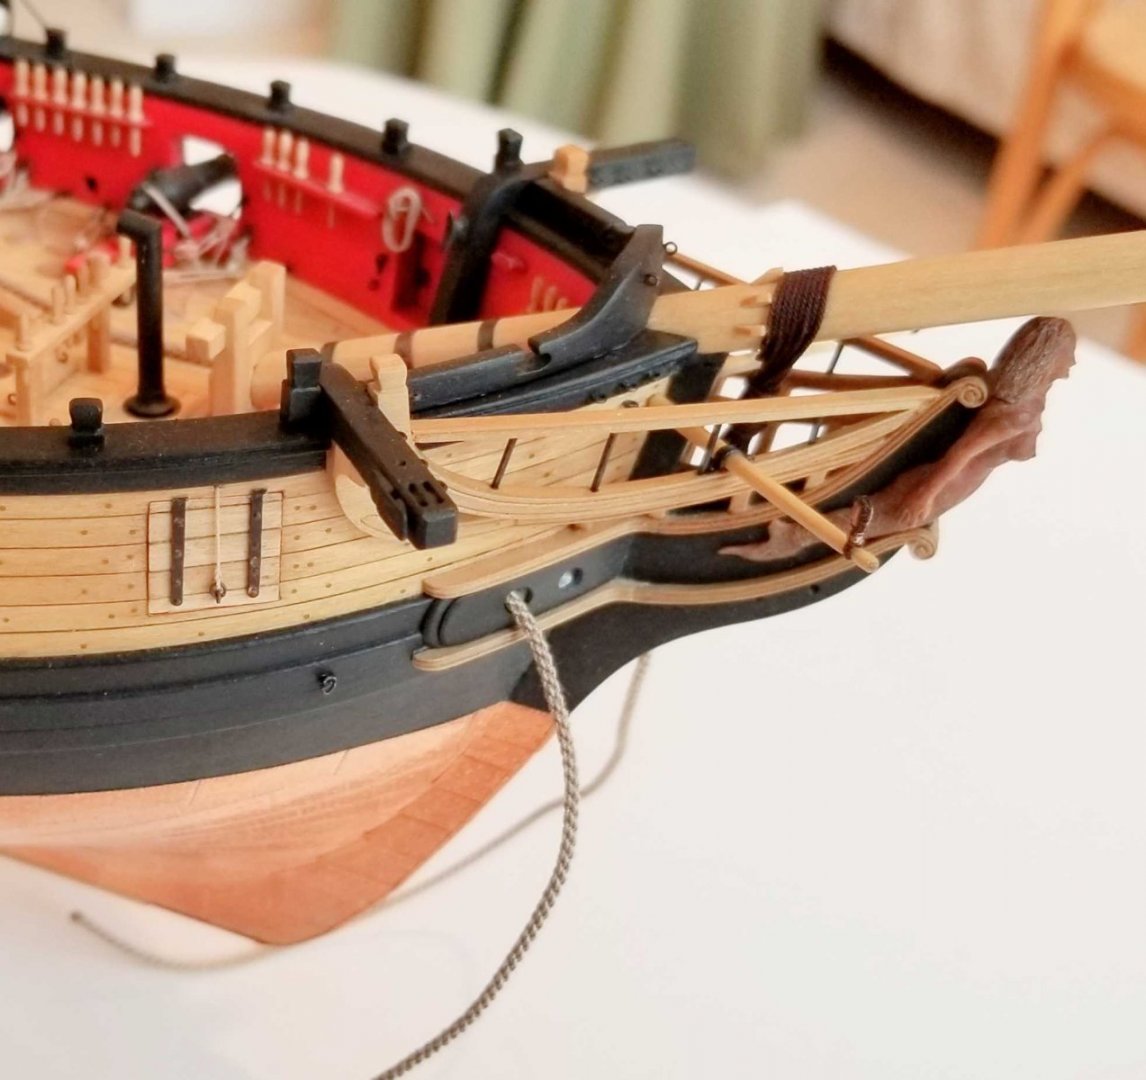
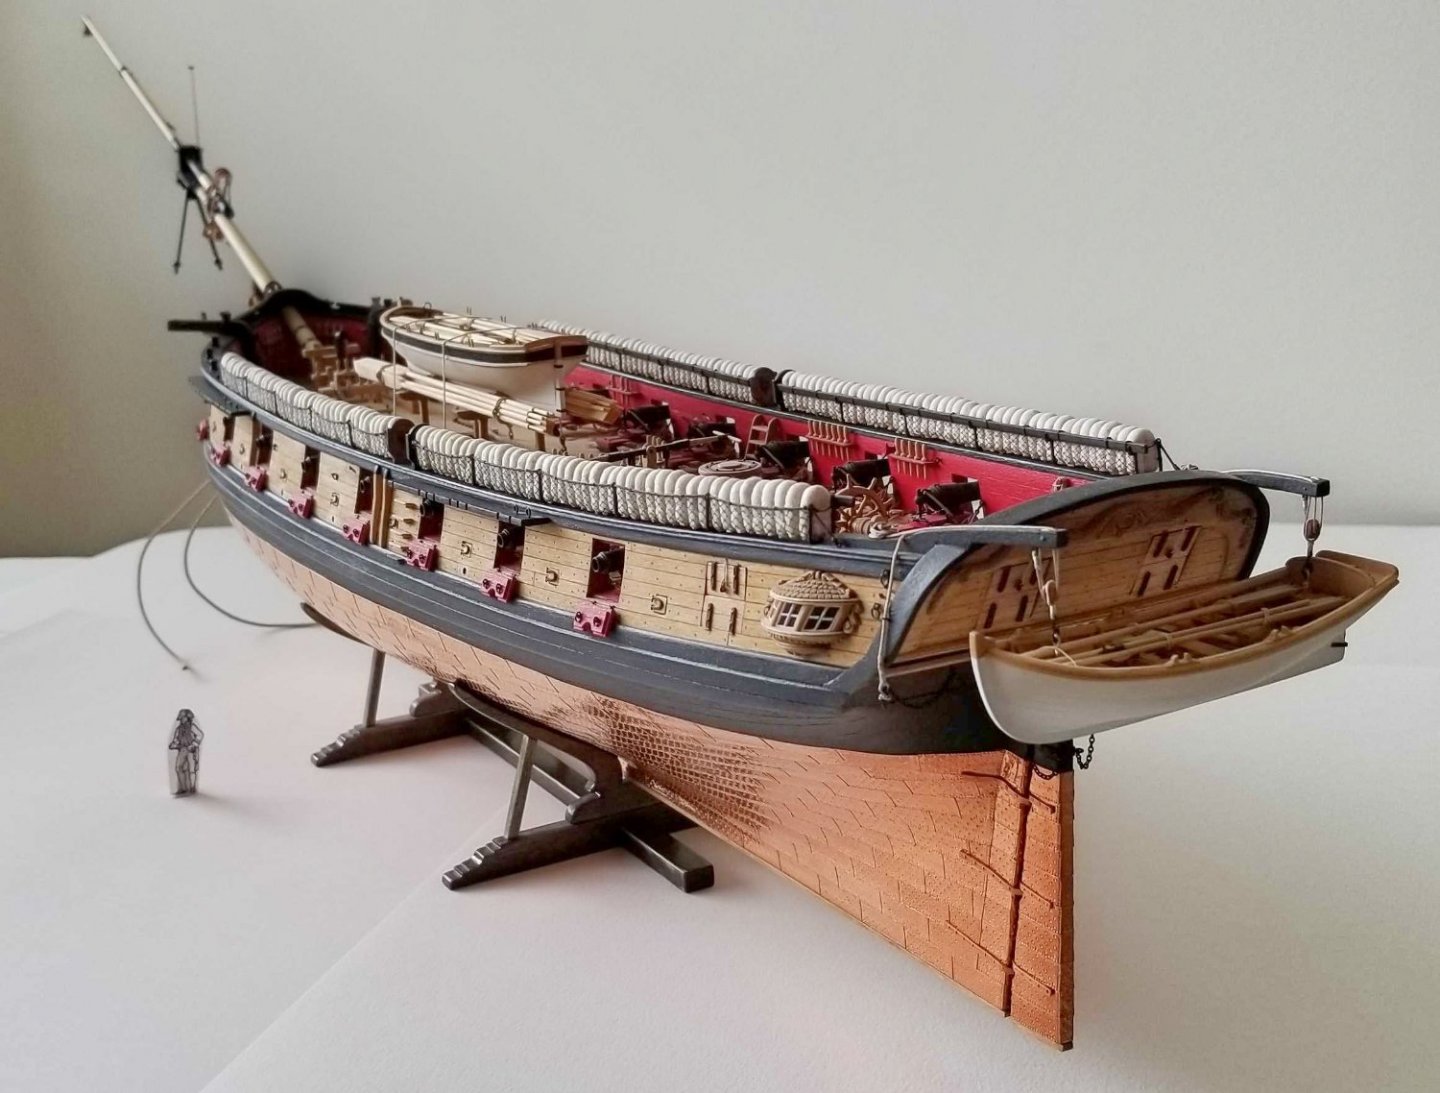
A little progress . . . the bowsprit is now permanently mounted. The splashguard was made out of three 1/32” layers of boxwood, sequentially wetted, the first layer bent around a jig, the following layers around the existing preceding one (or two), and glued together. This layer technique resulted in a very stable design, which held the shape and also presented no problems when cutting the fairleads (img. 1 – 3). The gammoning can be seen in img. 4 – 5. And finally I added the bumkins shown in img. 6 - 8 with double stropped blocks (img. 6). Double stropping nicely allows for the 90° between the block and the lashing to the bumkin. It also shows again how universally the Syren serving machine can be applied. Img. 9 and 10 give an impression of the current state of the model. Thomas Img_1 Img_2 Img_3 Img_4 Img_5 Img_6 Img_7 Img_8 Img_9 Img_10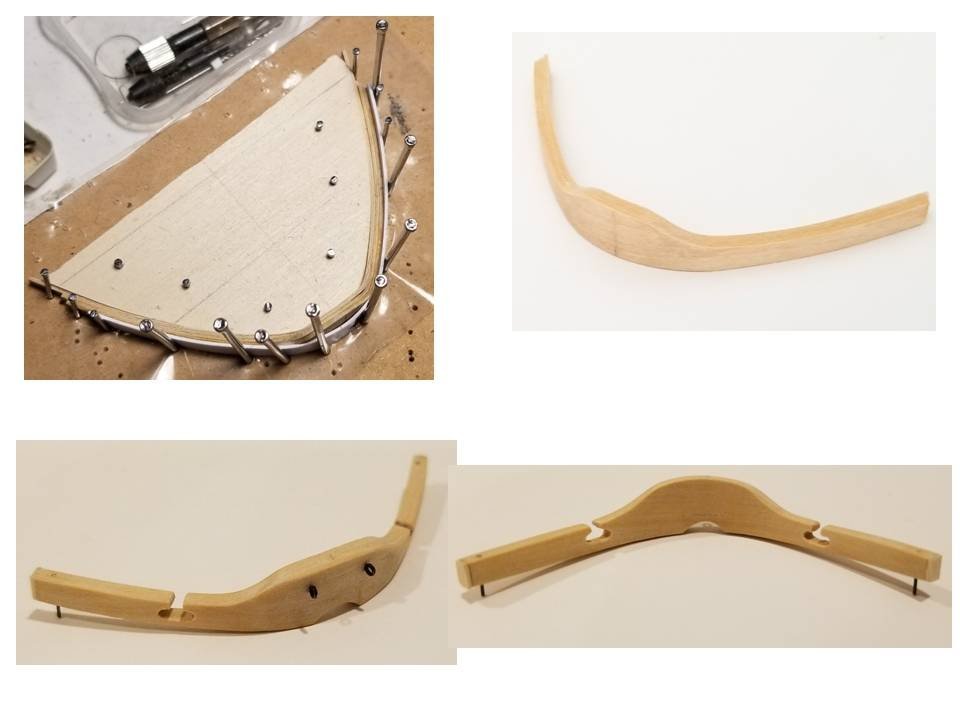


-
I am sorry to hear about your health issues. I wish you a fast recovery, and all of us that we can soon see again updates of the excellent build log of your beautiful Winnie! Thomas
-
Wonderful work, Johann! Thomas
-
Wonderful job, Mike! Your craftsmanship is outstanding! Thomas
- 607 replies
-
- 1
-
-
- winchelsea
- Syren Ship Model Company
- (and 1 more)
-
Well done, that's an excellent paint job! Thomas
-
What superb craftsmanship! Thomas
-
Your head rail construction is really impressive! Thomas
- 1,784 replies
-
- 2
-
-
- winchelsea
- Syren Ship Model Company
- (and 1 more)
-
You did it! Congratulations! She is a beautiful model! I am always amazed how complex the finished Syren is once the whole rigging is in place. Thomas
- 157 replies
-
- 1
-
-
- model shipways
- syren
- (and 1 more)
-
Gorgeous work, Mike! I love the fish ornaments on your binnacle! Thomas
- 607 replies
-
- 2
-
-
- winchelsea
- Syren Ship Model Company
- (and 1 more)
-
The lantern is a masterpiece of its own! You have a wonderful model there . . . ! Thomas
- 1,784 replies
-
- 3
-
-
- winchelsea
- Syren Ship Model Company
- (and 1 more)
-
Your focus on detail combined with your excellent craftsmanship really pays off! You have a wonderful model! Thomas
- 857 replies
-
- 2
-
-

-
- Sphinx
- Vanguard Models
- (and 1 more)