Gahm
-
Posts
1,217 -
Joined
-
Last visited
Content Type
Profiles
Forums
Gallery
Events
Everything posted by Gahm
-
 I just stumbled over your build log of the Sphinx. I don't know how I could miss it so long. As usual, wonderful work and great presentation of all the essential steps in your log! I will happily follow along from now on 🙂 Thomas
- 857 replies
-
- 3
-

-
- Sphinx
- Vanguard Models
- (and 1 more)
-
US Brig Syren by Gahm - Model Shipways
Gahm replied to Gahm's topic in - Kit build logs for subjects built from 1801 - 1850
Thank you Mike, Chuck, and Glenn. Your kind comments are highly appreciated! Thomas -
US Brig Syren by Gahm - Model Shipways
Gahm replied to Gahm's topic in - Kit build logs for subjects built from 1801 - 1850
Thank you Harshil for your kind comment, and thanks for all the likes! Feedback and encouragement are always highly appreciated 🙂. Thomas -
US Brig Syren by Gahm - Model Shipways
Gahm replied to Gahm's topic in - Kit build logs for subjects built from 1801 - 1850
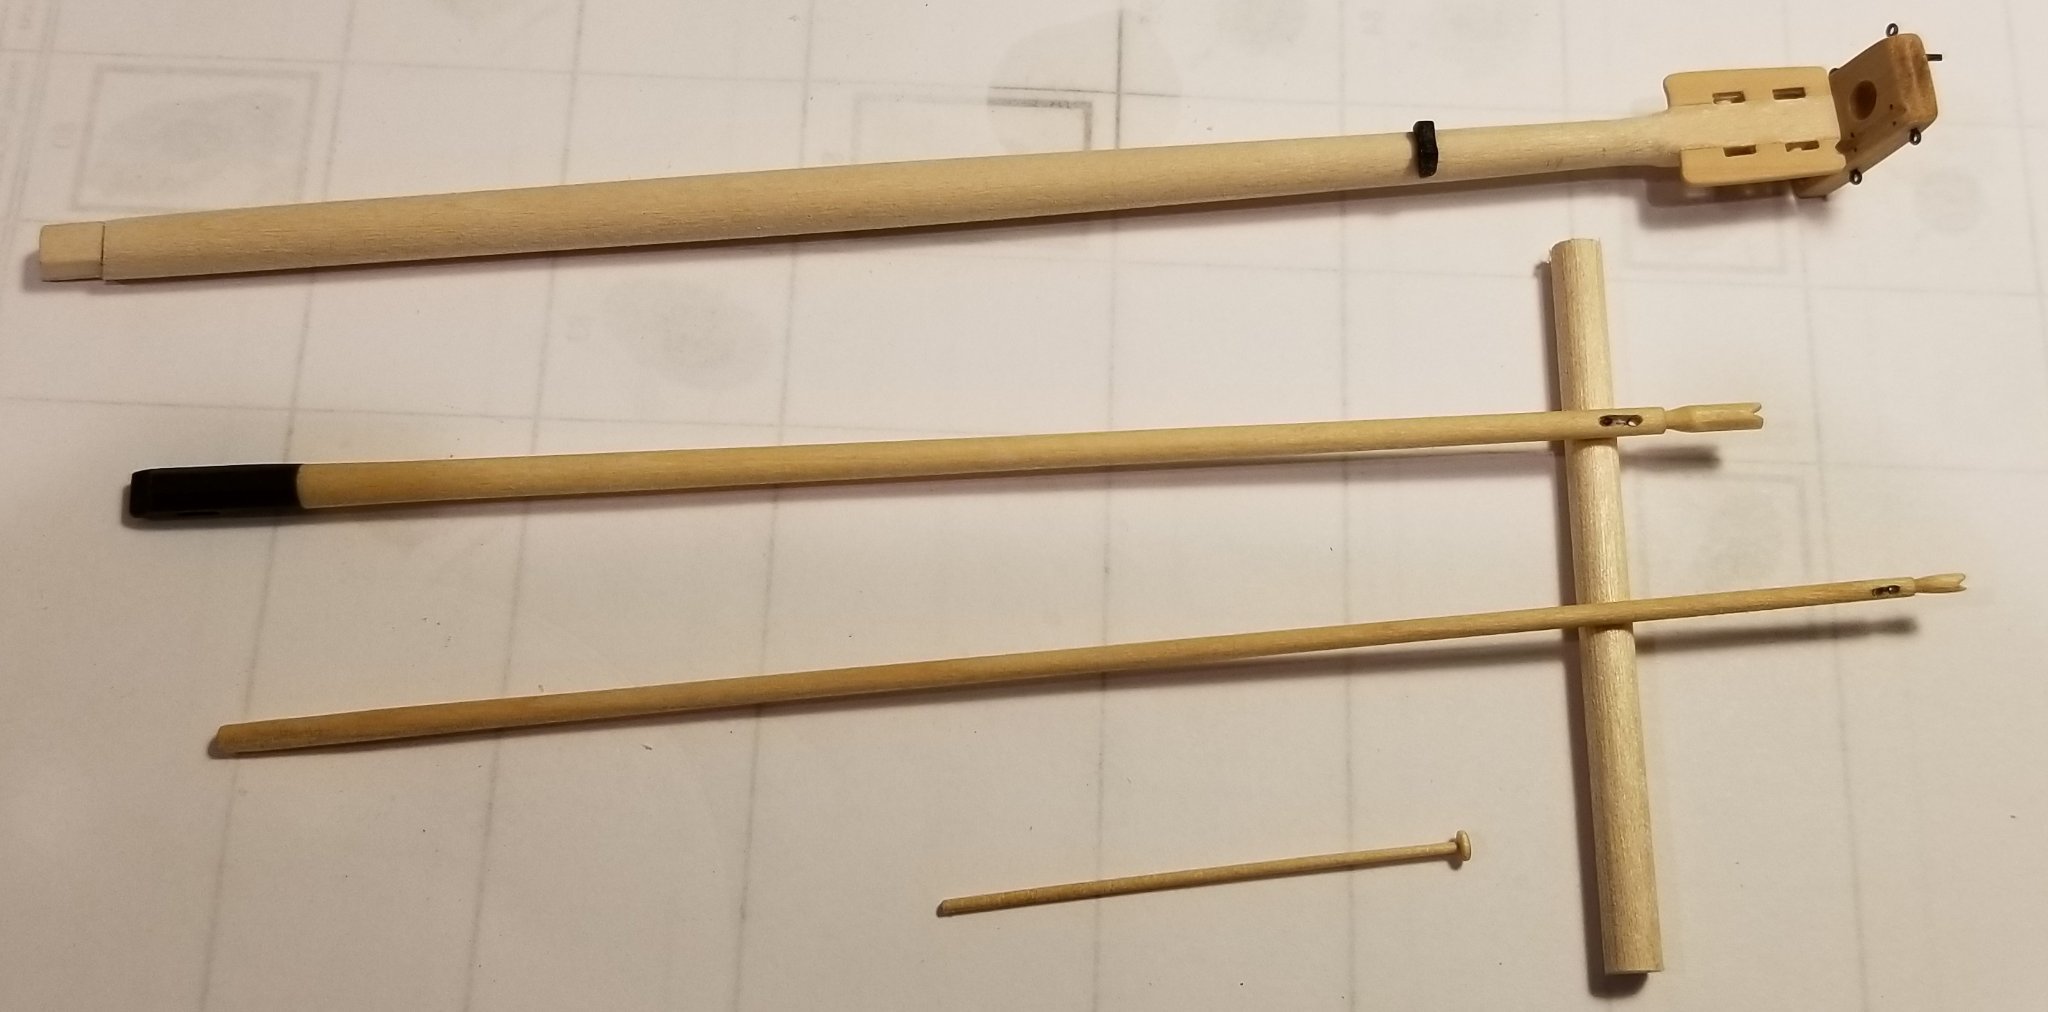
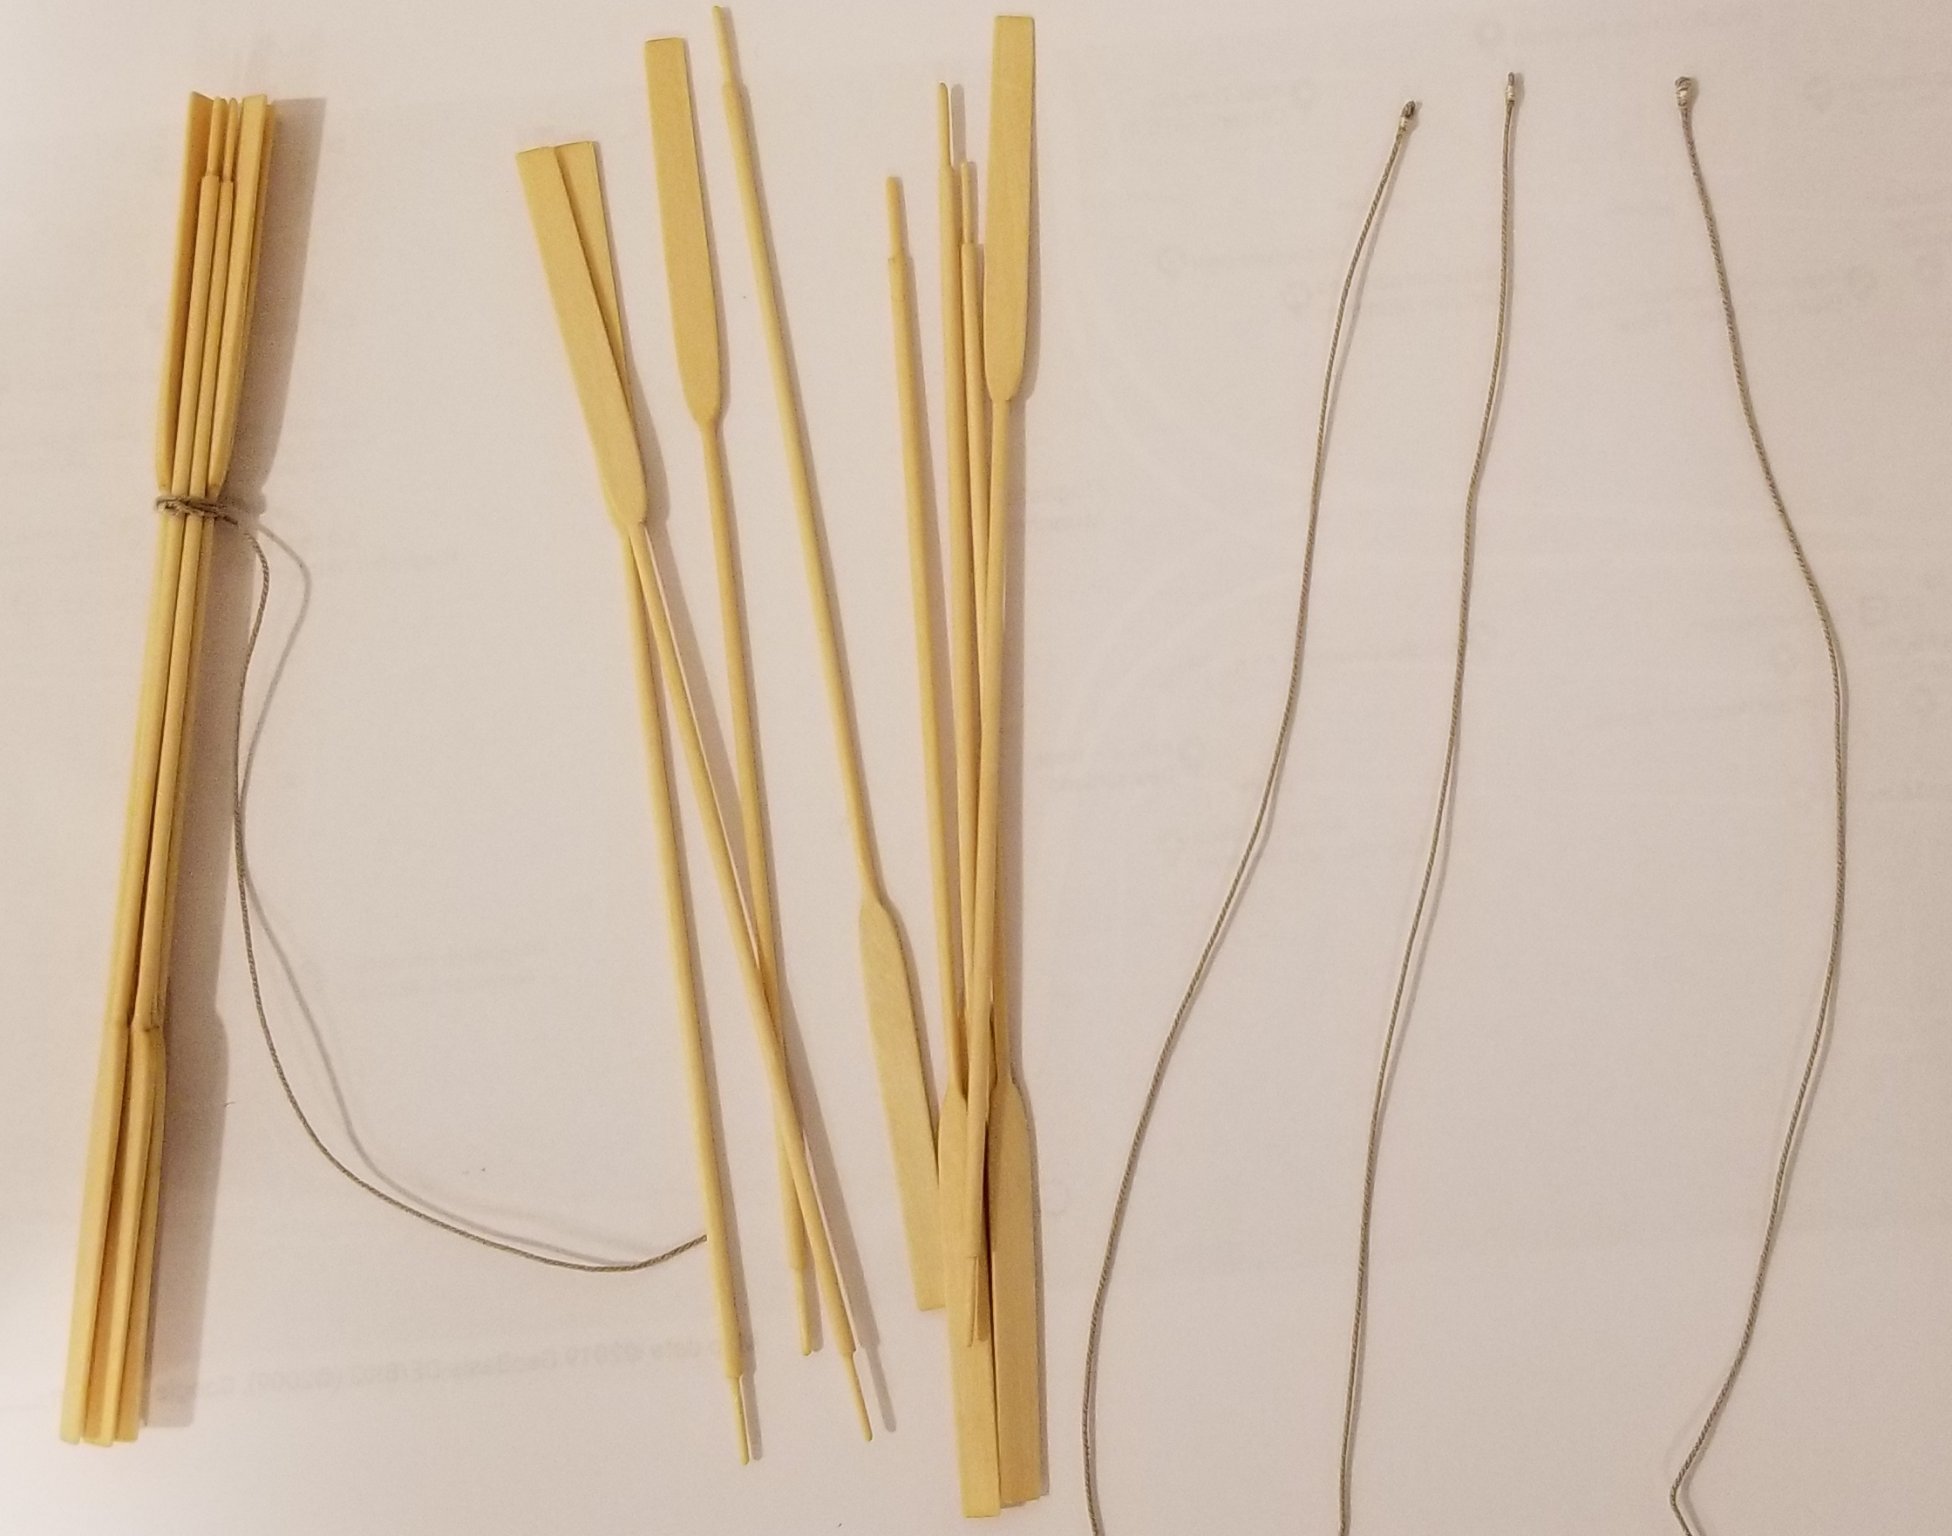
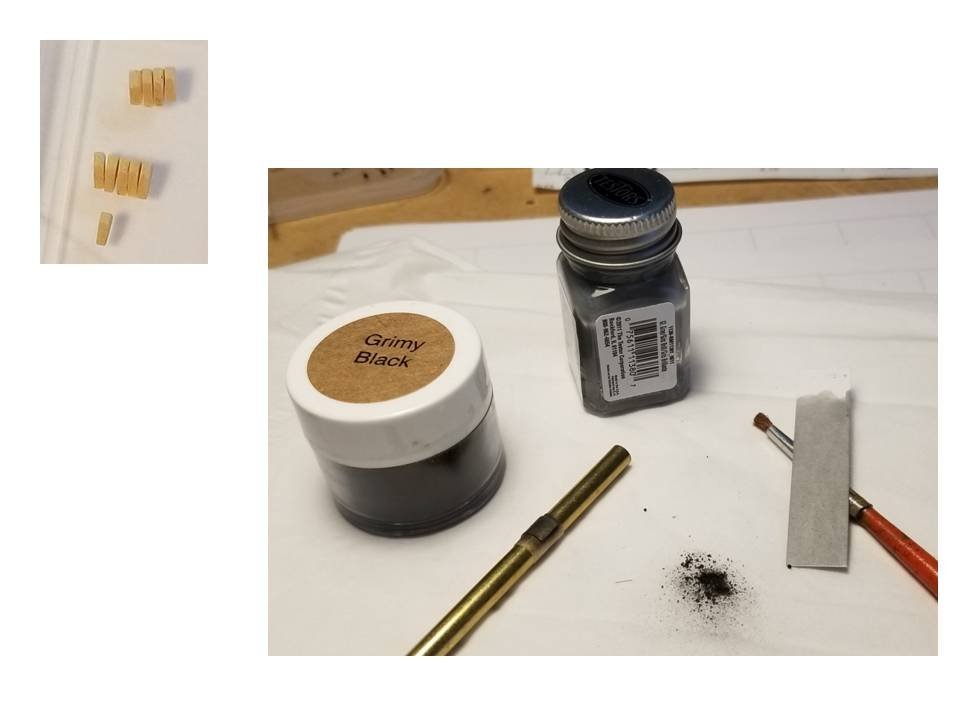
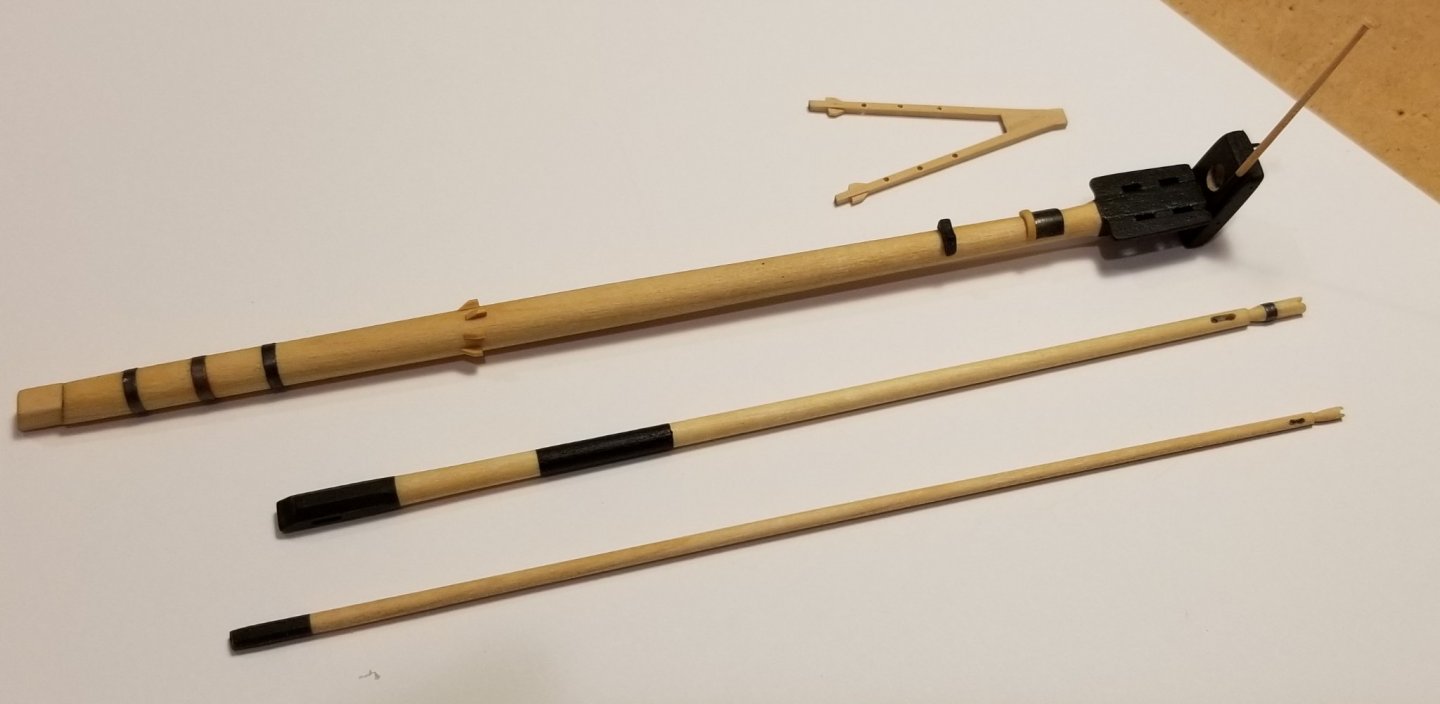
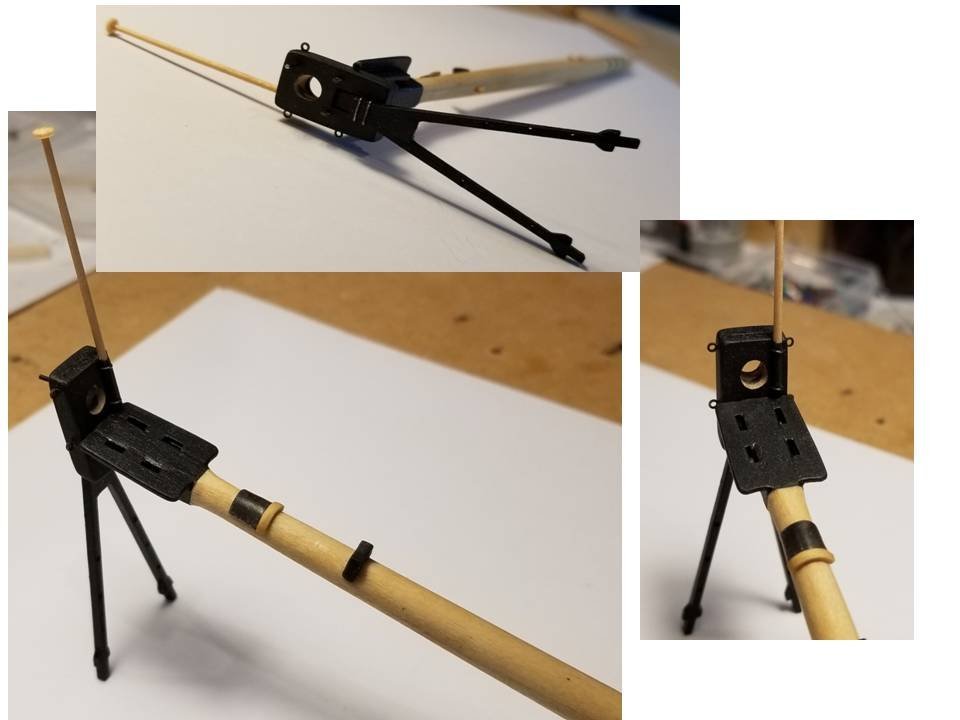
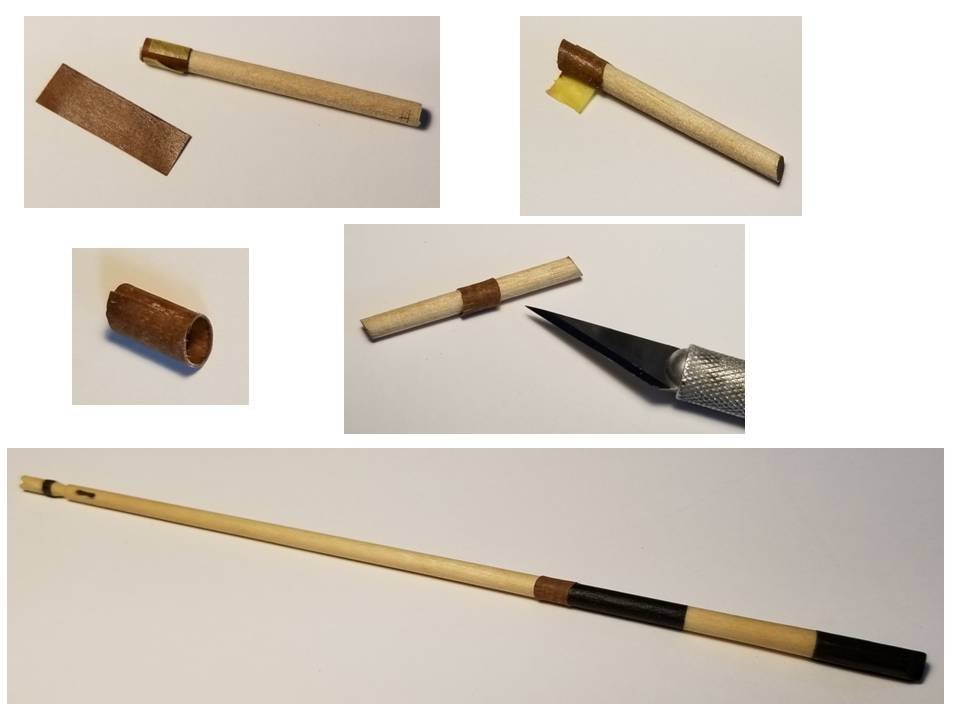
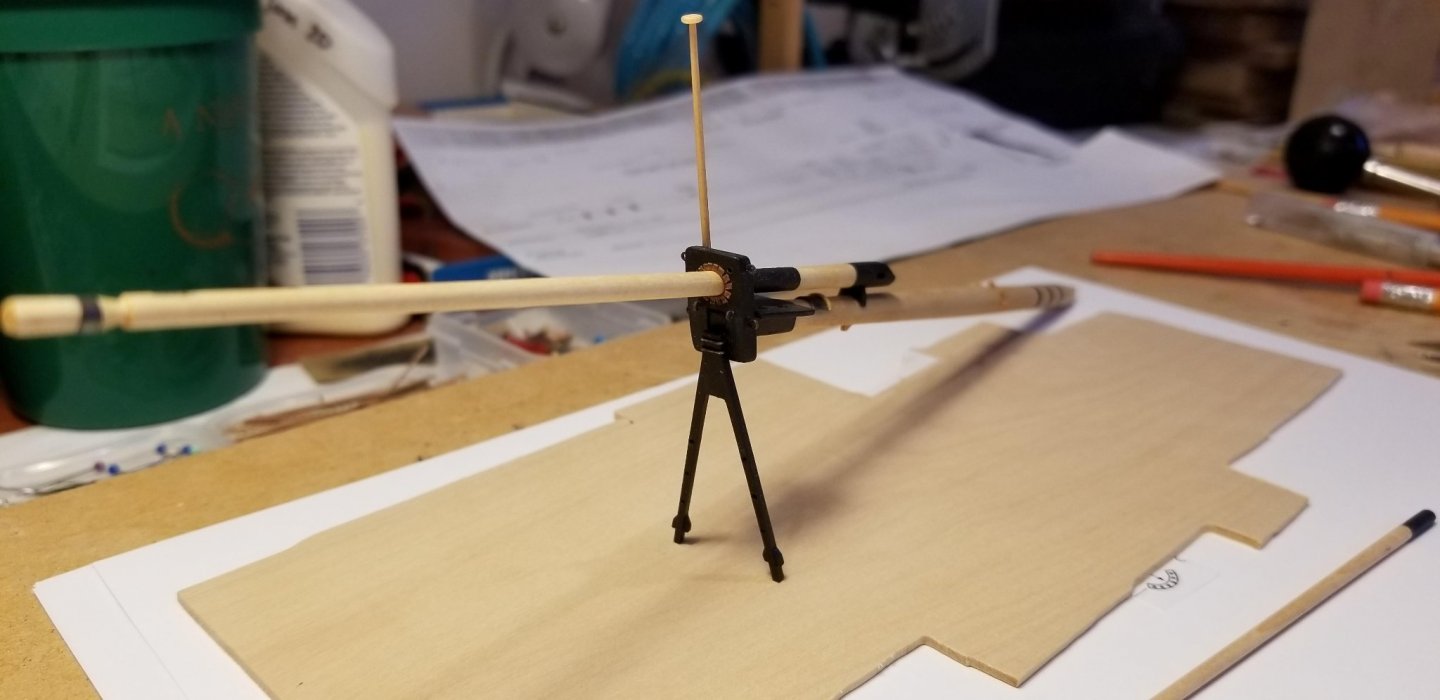
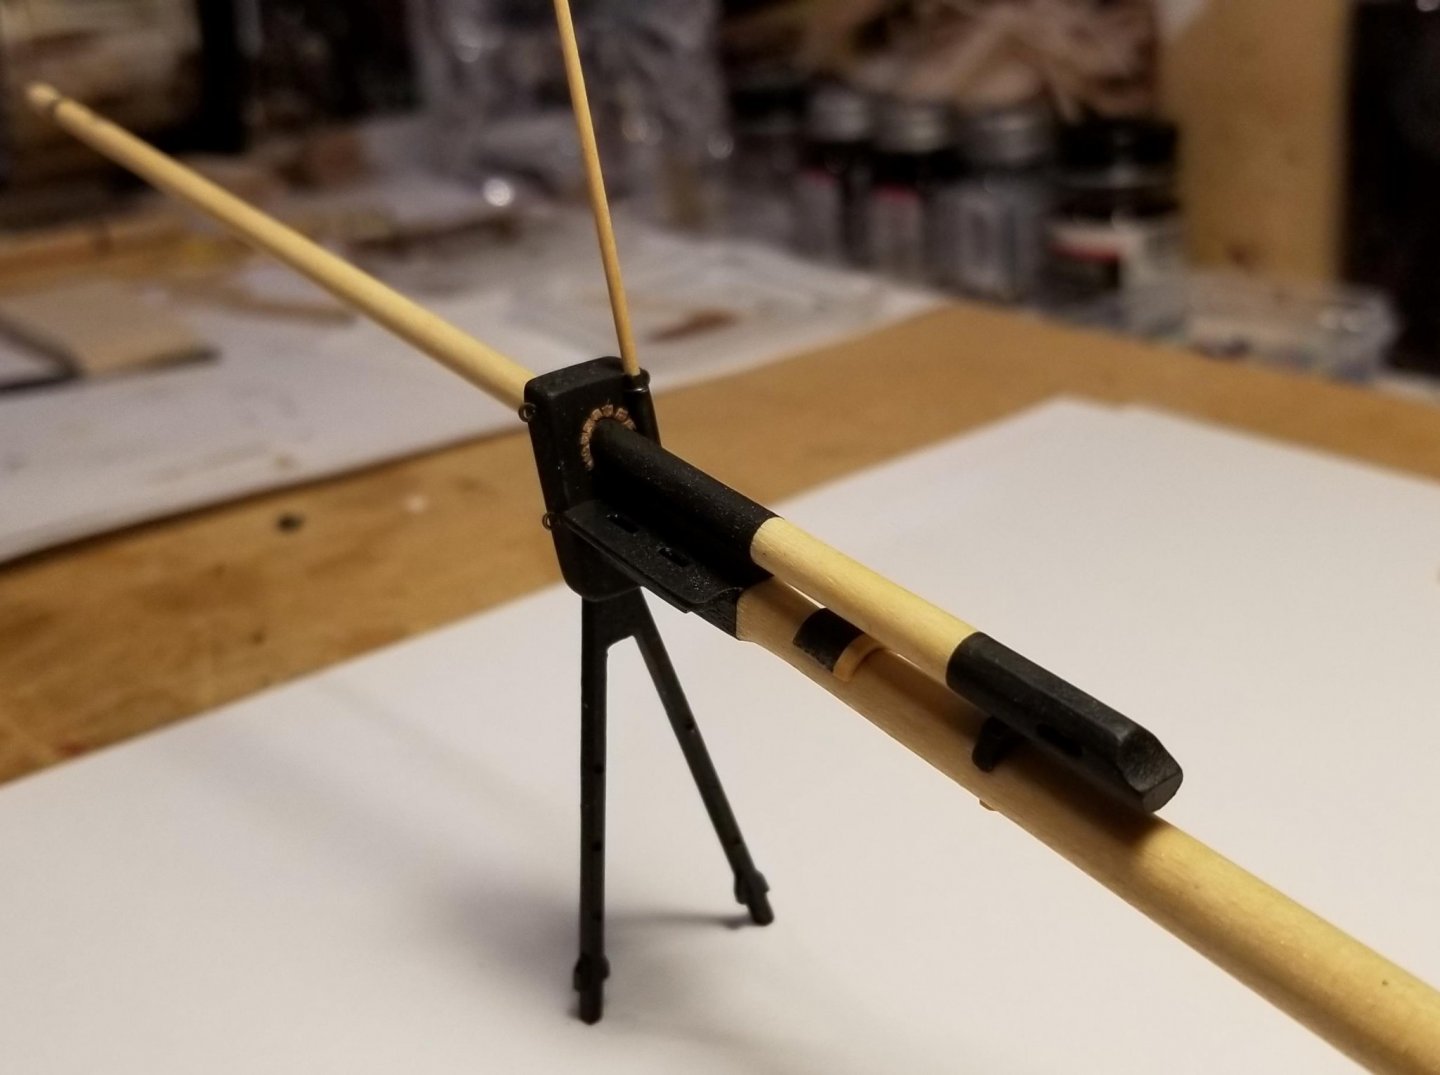
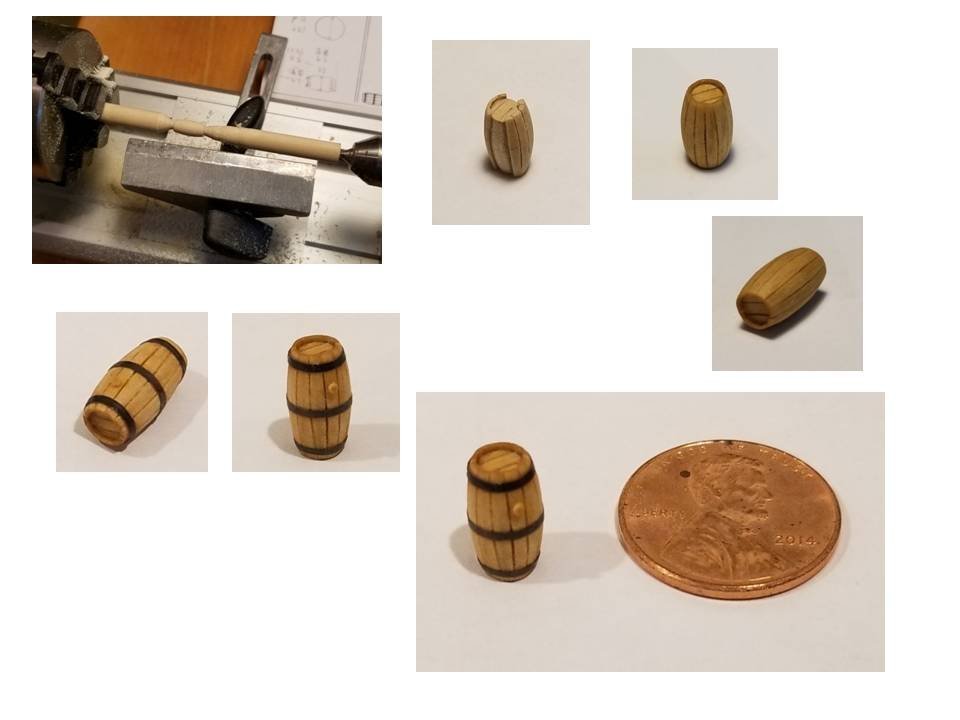
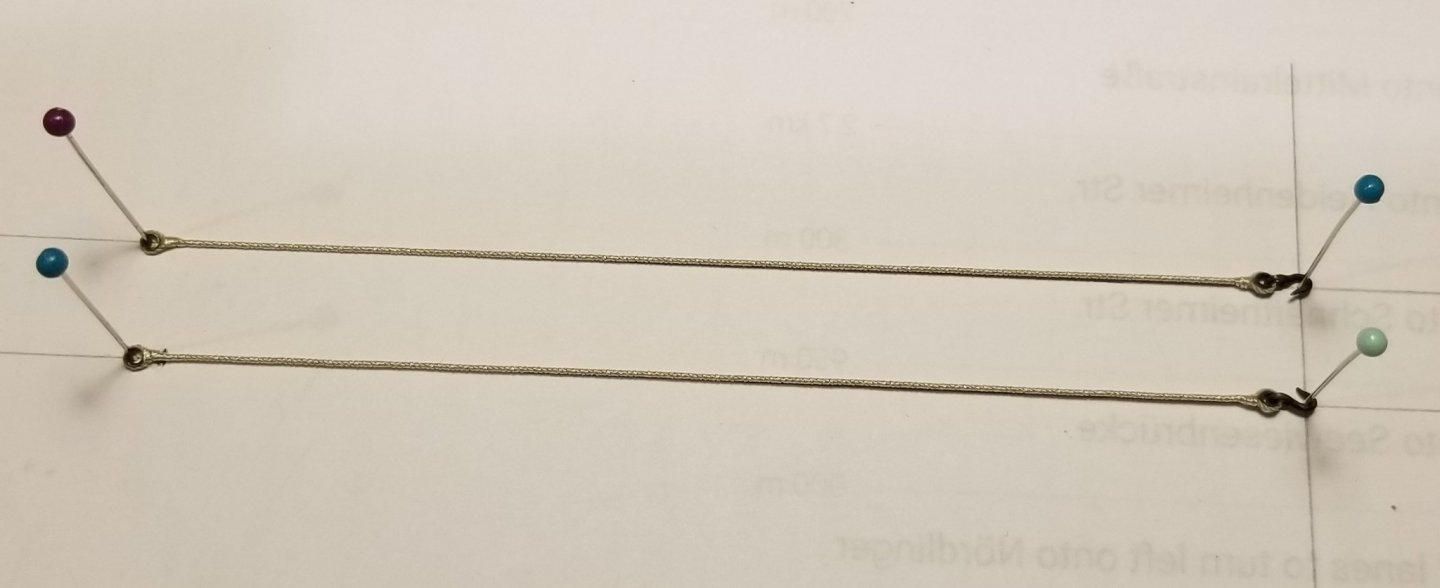
I made some progress on the bowsprit assembly. I turned bowsprit, jibboom and flying jibboom out of bass wood, which was especially selected for very little grain. As all pieces are pretty fragile the shaping on the lathe was done with sand paper held between two fingers to apply equal pressure from both sides (image 1). The result is shown in image 2. The details like sheaves, bee blocks, cleats were done following the Syren instruction book. The lead plate for the sling saddle (image 3) was simulated with a piece of photo paper painted lead gray and ‘metalized’ by buffing it with ‘Grimy Black’ from ‘Doc O’Brian’s’ weathering powders (Micro-Mark). Image 4 shows most of the details in place as well as the dolphin striker. The latter was made out of box wood for stability. Image 5 shows the dolphin striker and the Jack staff mounted and painted. I used the staples for both parts to fix them in their place. I also made the bowsprit cap out of box wood. The holes in the bass wood version included in the kit were too large for my jibboom, and they did not take the angle of about 20° into account. Image 6 presents how I simulated the leather lining for the jibboom. A piece of paper was painted with several coats of enamel leather color and fixed around a wooden dowel turned to the diameter of the jibboom at the location where it crossed the bowsprit cap. This arrangement was sanded to an angle of 20° on both sides, slotted on both ends with an Exacto knife, and mounted on the jibboom at the appropriate location. This of course was a bit tricky 😉. Once the jibboom was glued in place, the little pieces resulting from the slotting were bent upwards and glued to the bowsprit cap with white glue, which could be cleaned up with water (hence the enamel leather color in order to prevent the paper from dissolving). The result is shown in images 7 and 8. Thomas Image 1 Image 2 Image 3 Image 4 Image 5 Image 6 Image 7 Image 8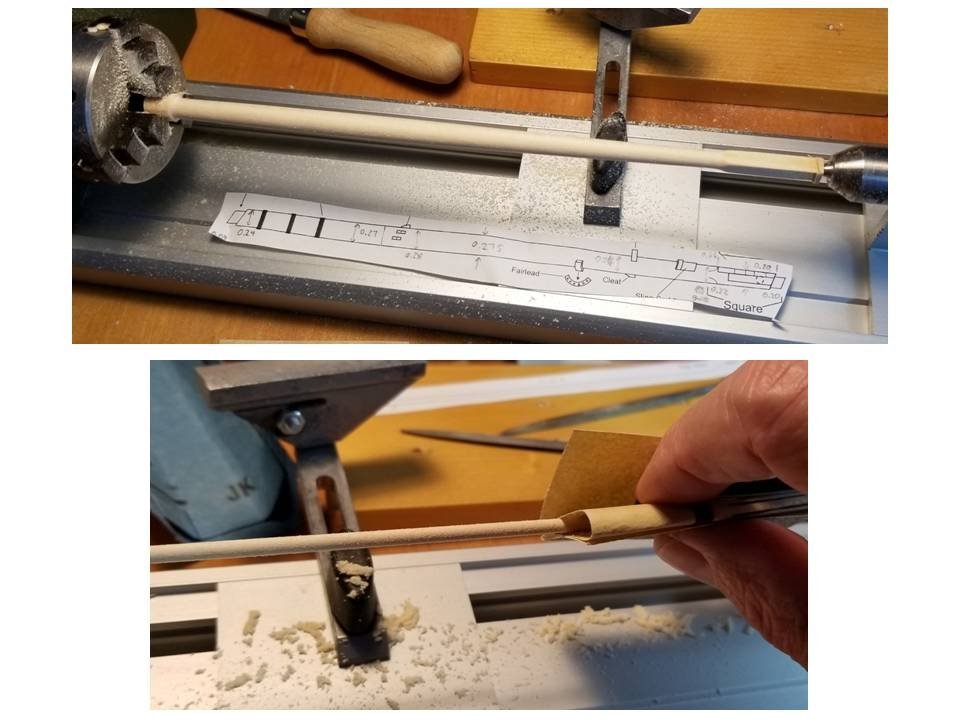

-
That is quite an impressive model - and a lot of treenails! 😉 Thomas
-
Excellent planking job! This will be a magnificent model! Thomas
-
They look fantastic! It must be a lot of fun to build those pumps! Thomas
- 607 replies
-
- 2
-
-
- winchelsea
- Syren Ship Model Company
- (and 1 more)
-
Wonderful work! It is so realistic that there is no way of telling it apart from the real thing. Thomas
-
That looks amazing! What a beautiful model! Thomas
-
Your framing and planking looks really good to me. And I fully agree with Vahur - the little difference in symmetry is neither noticeable nor do I think that it will matter. Thomas
-
US Brig Syren by Gahm - Model Shipways
Gahm replied to Gahm's topic in - Kit build logs for subjects built from 1801 - 1850
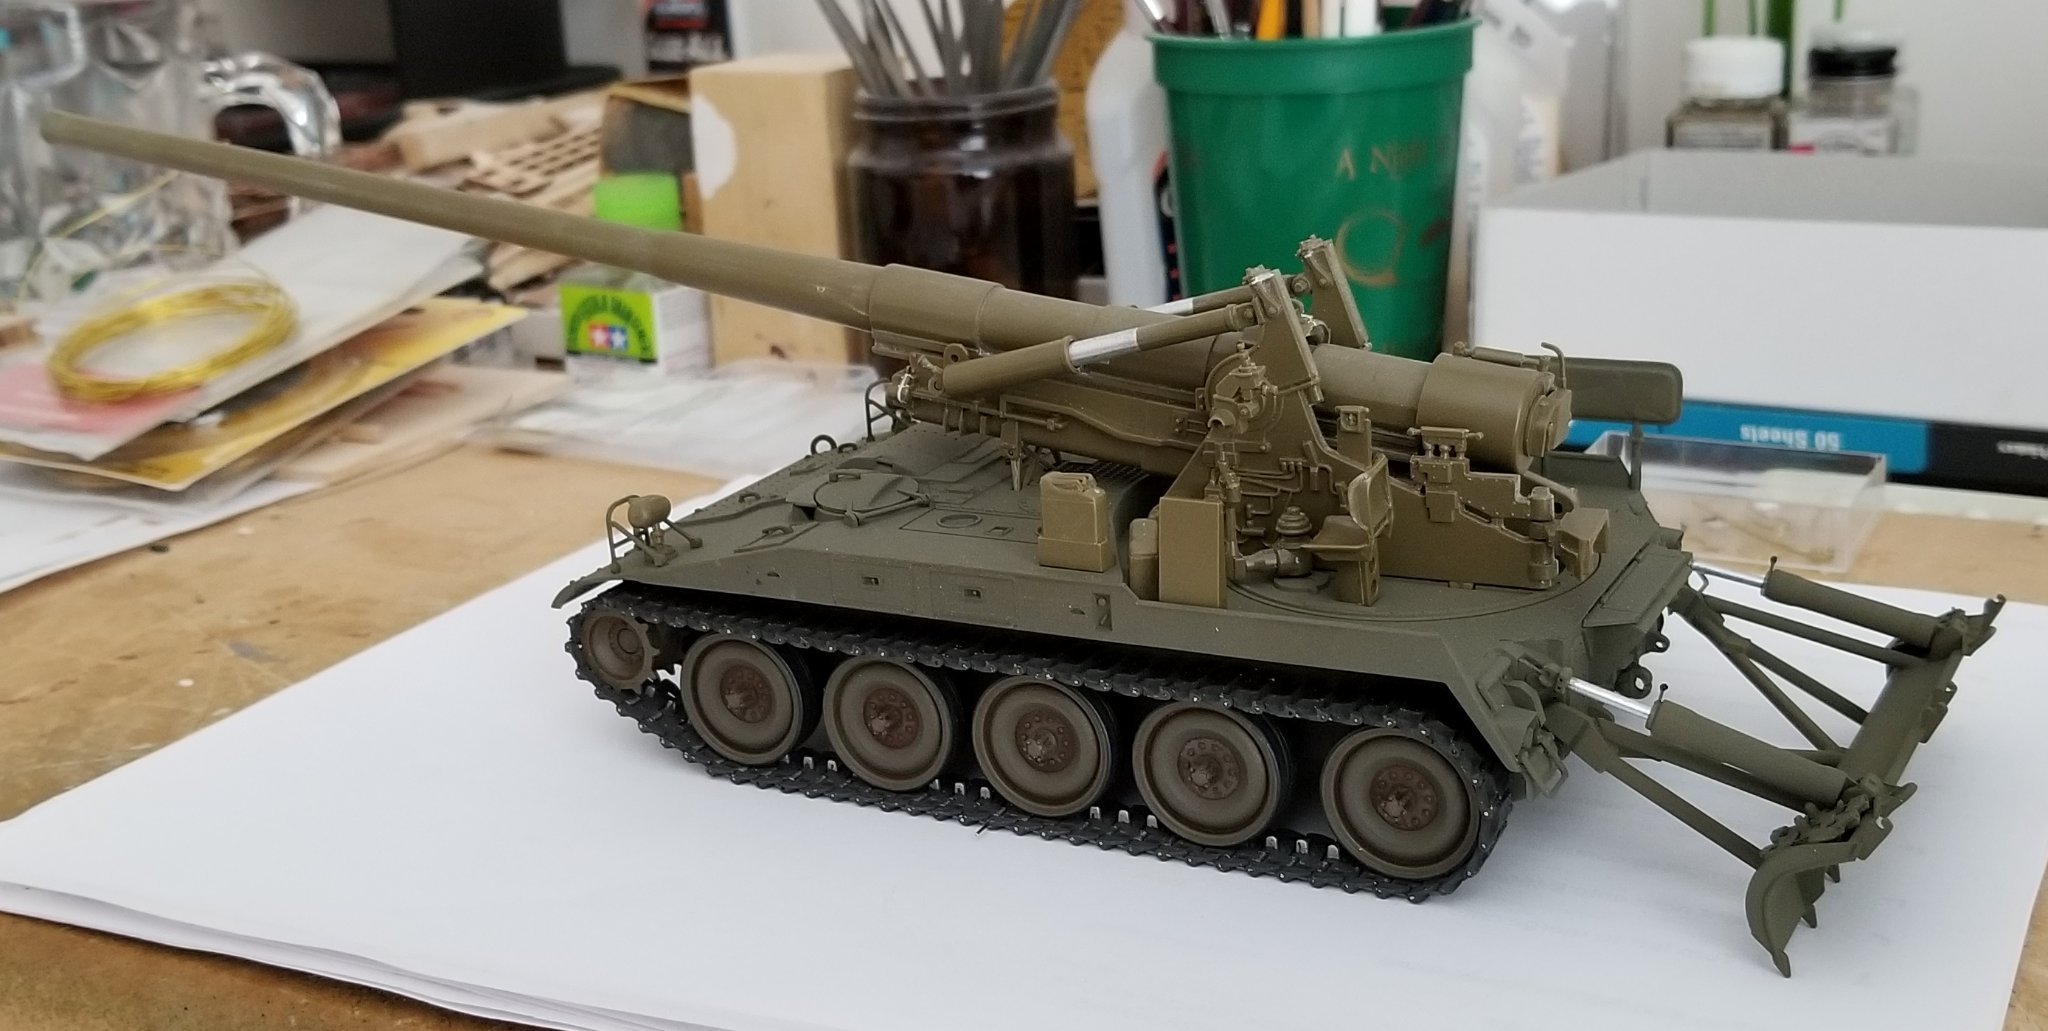
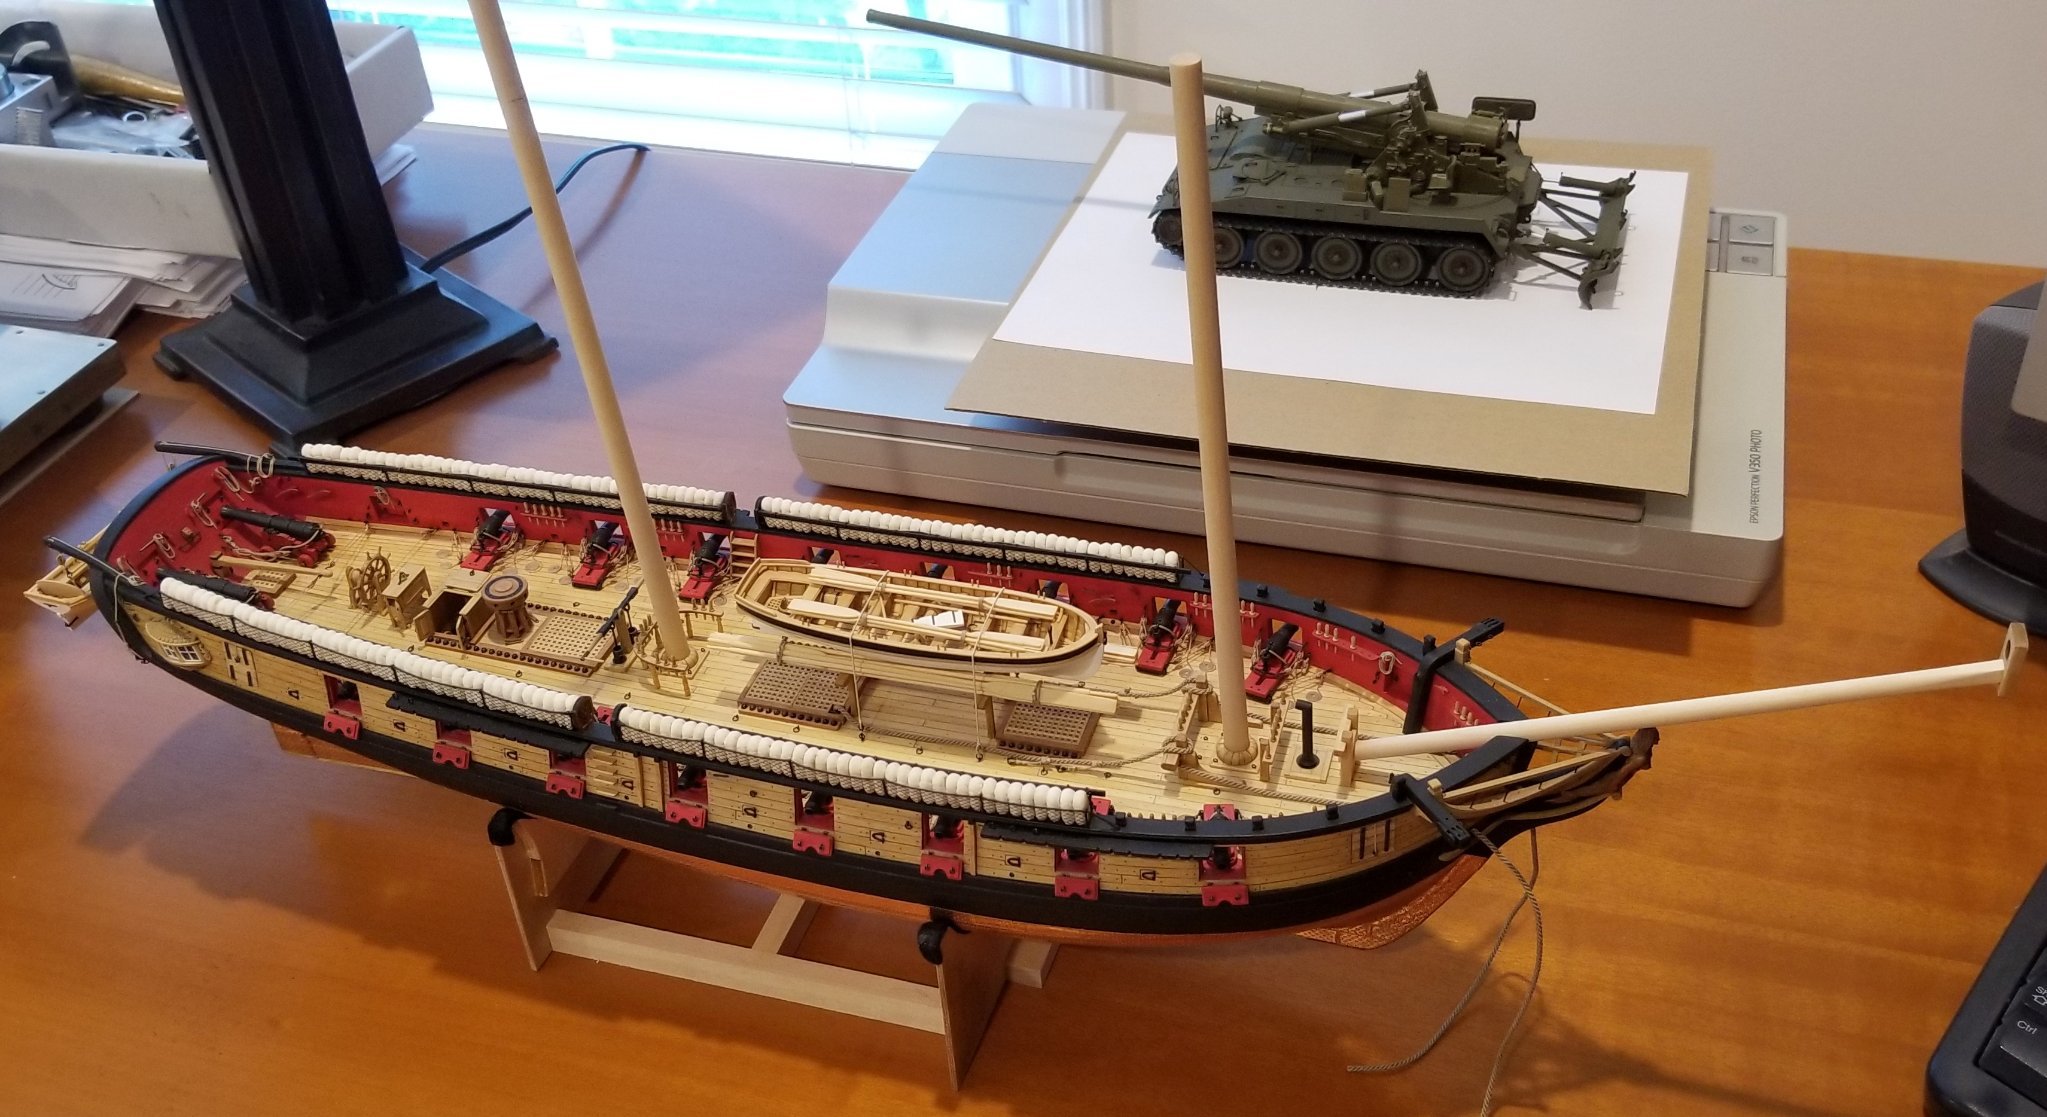
Harshil and Steve, thank you for your kind comments! They are much appreciated. And thanks for all the likes. Harshil, the tank in the background is the beginning of a model of the self-propelled field howitzer M107. It is based on the Tamiya kit, which again goes back to the old Italeri kit. I got it as a birthday present from my son. What I like about the kit is that it got the big dimensions right, but there is a lot of room for improvement where all the details are concerned. So the modeling challenge and fun is to build and replace/add all the coarse/missing details. With my chronic lack of modeling time it will take me several months to do so, but once finished it will be a worthwhile model. And as you know by now, I like details 😉 On your request I am going to add one picture of the current state of the model. Only the self-propelled gun carriage has a first coat of paint, and a big part of the gun is not even glued together. Thomas
-
US Brig Syren by Gahm - Model Shipways
Gahm replied to Gahm's topic in - Kit build logs for subjects built from 1801 - 1850
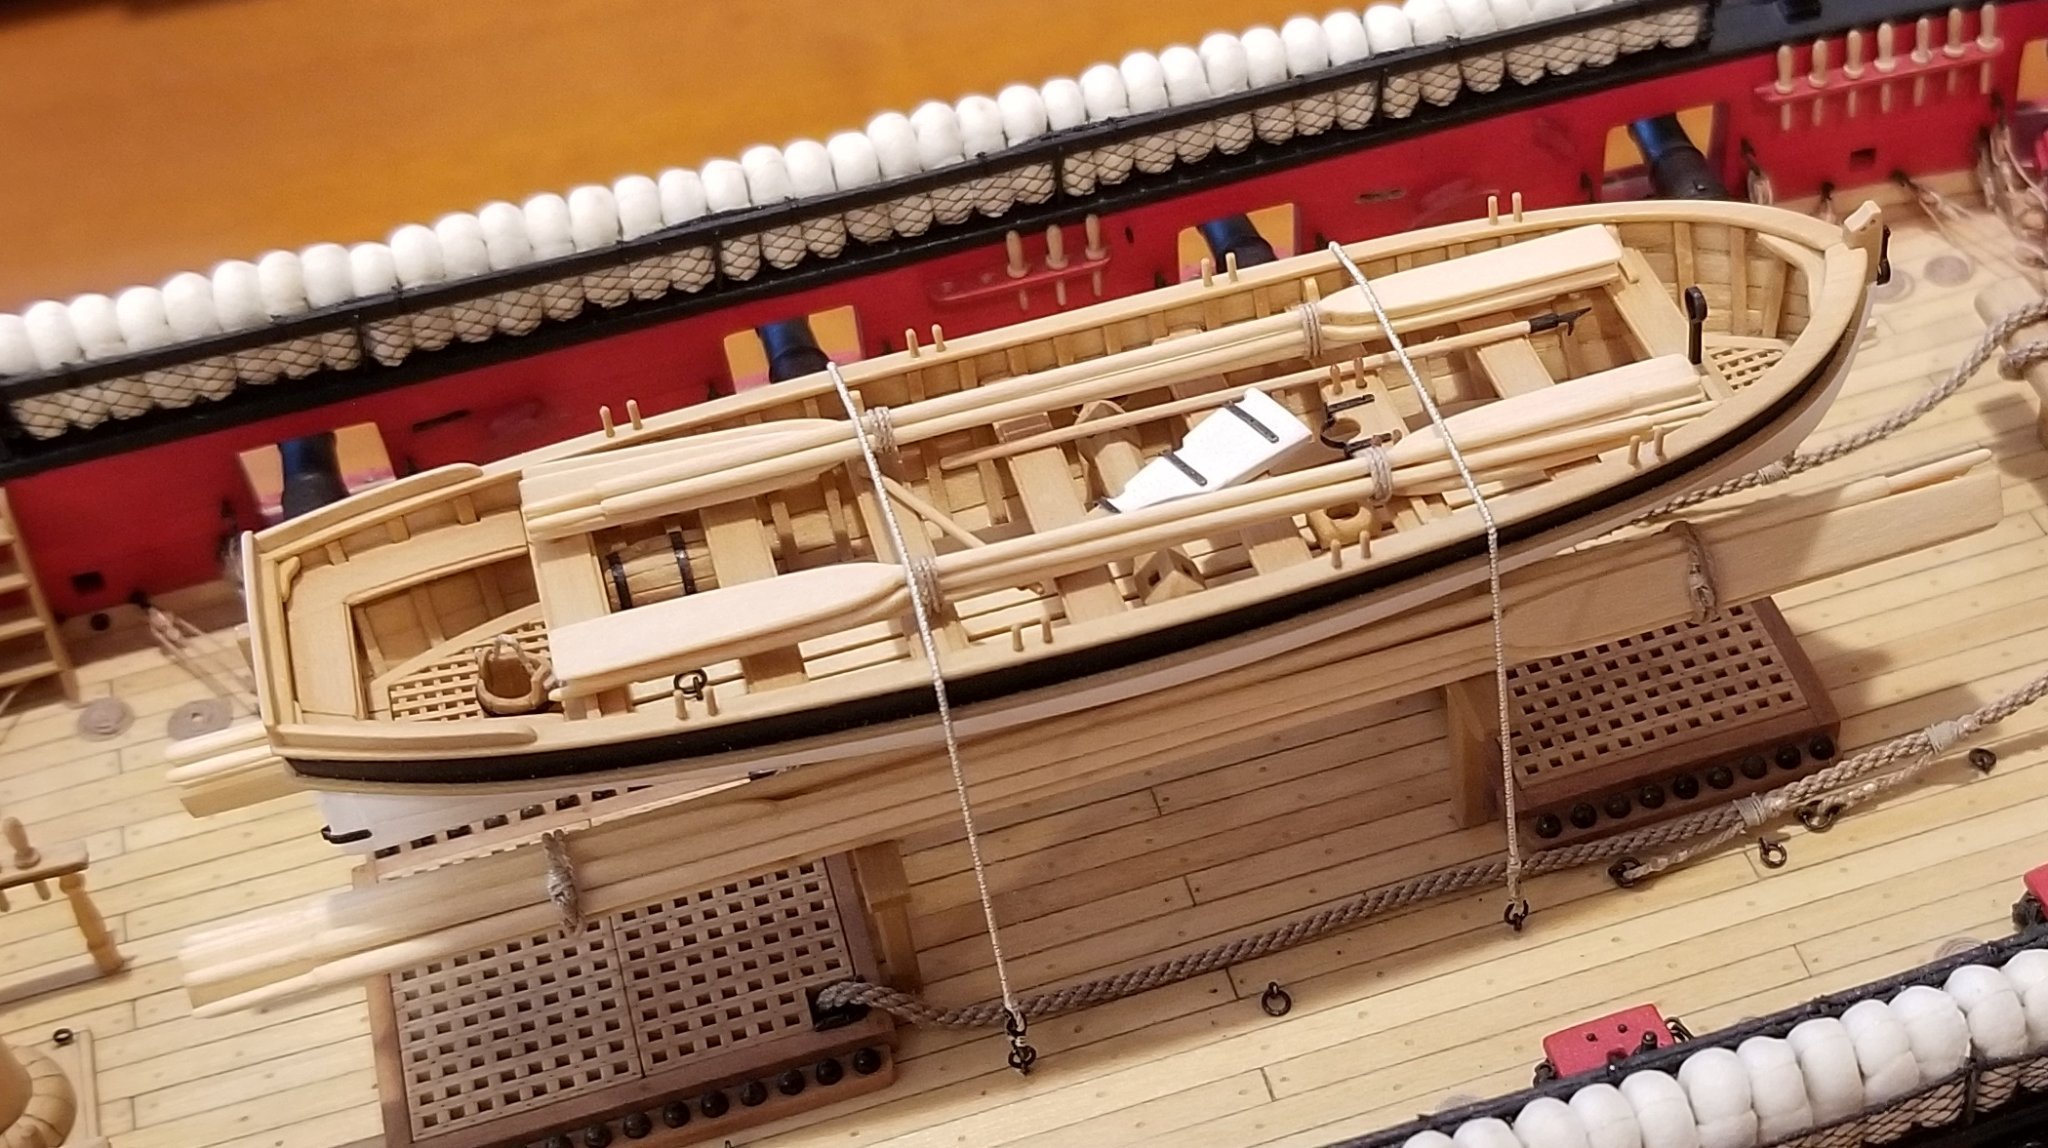
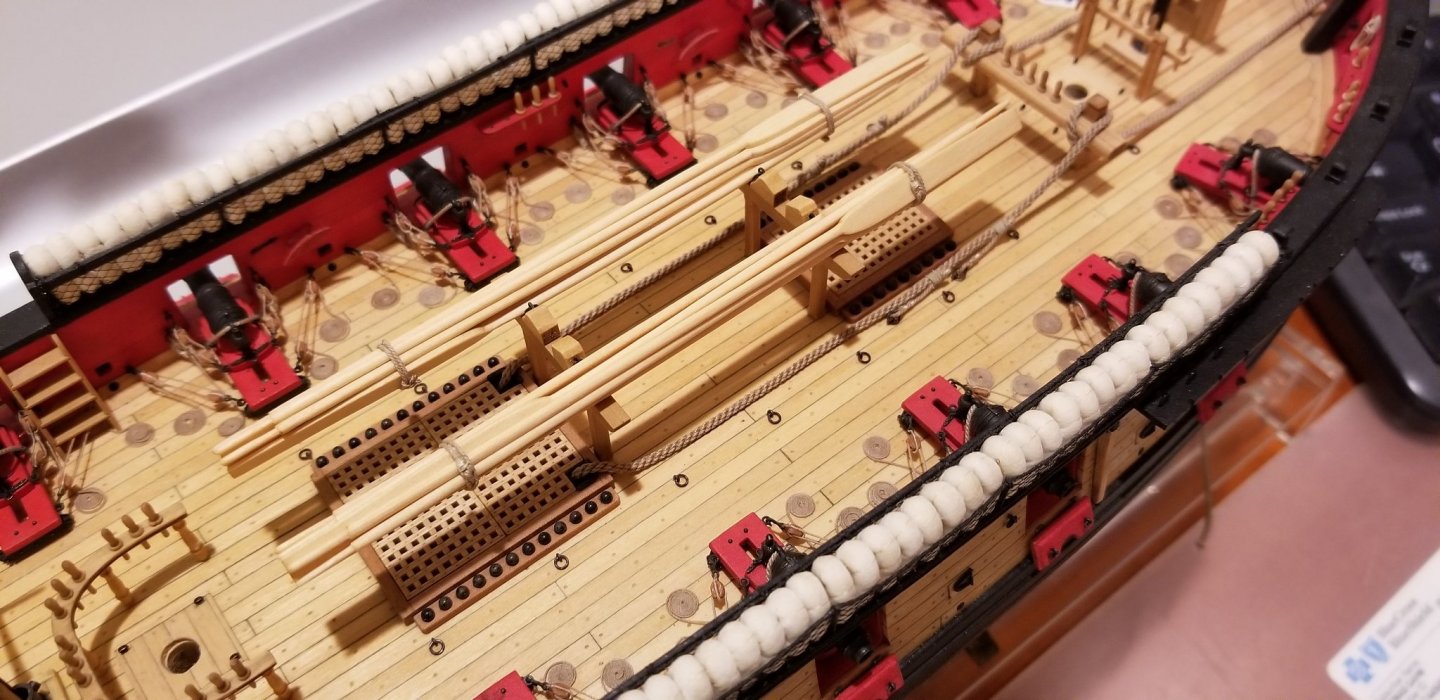
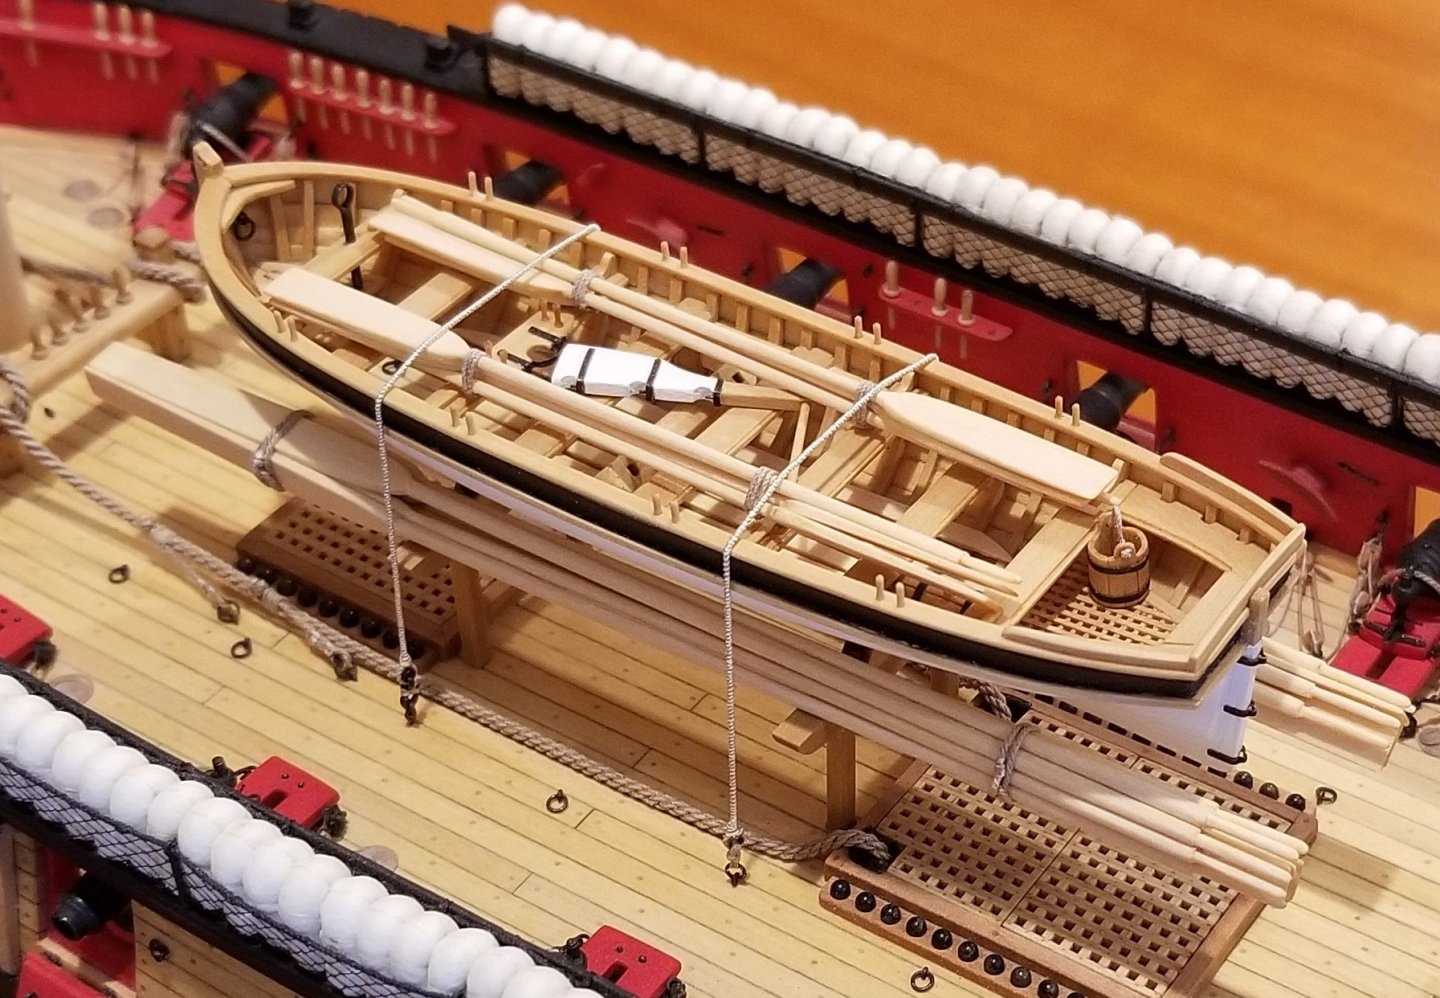
After a little break the longboat is finally at its place, and I can start with the rigging. Thomas Img_1 Img_2 Img_3 Img_4 Img_5 Img_6 Img_7 Img_8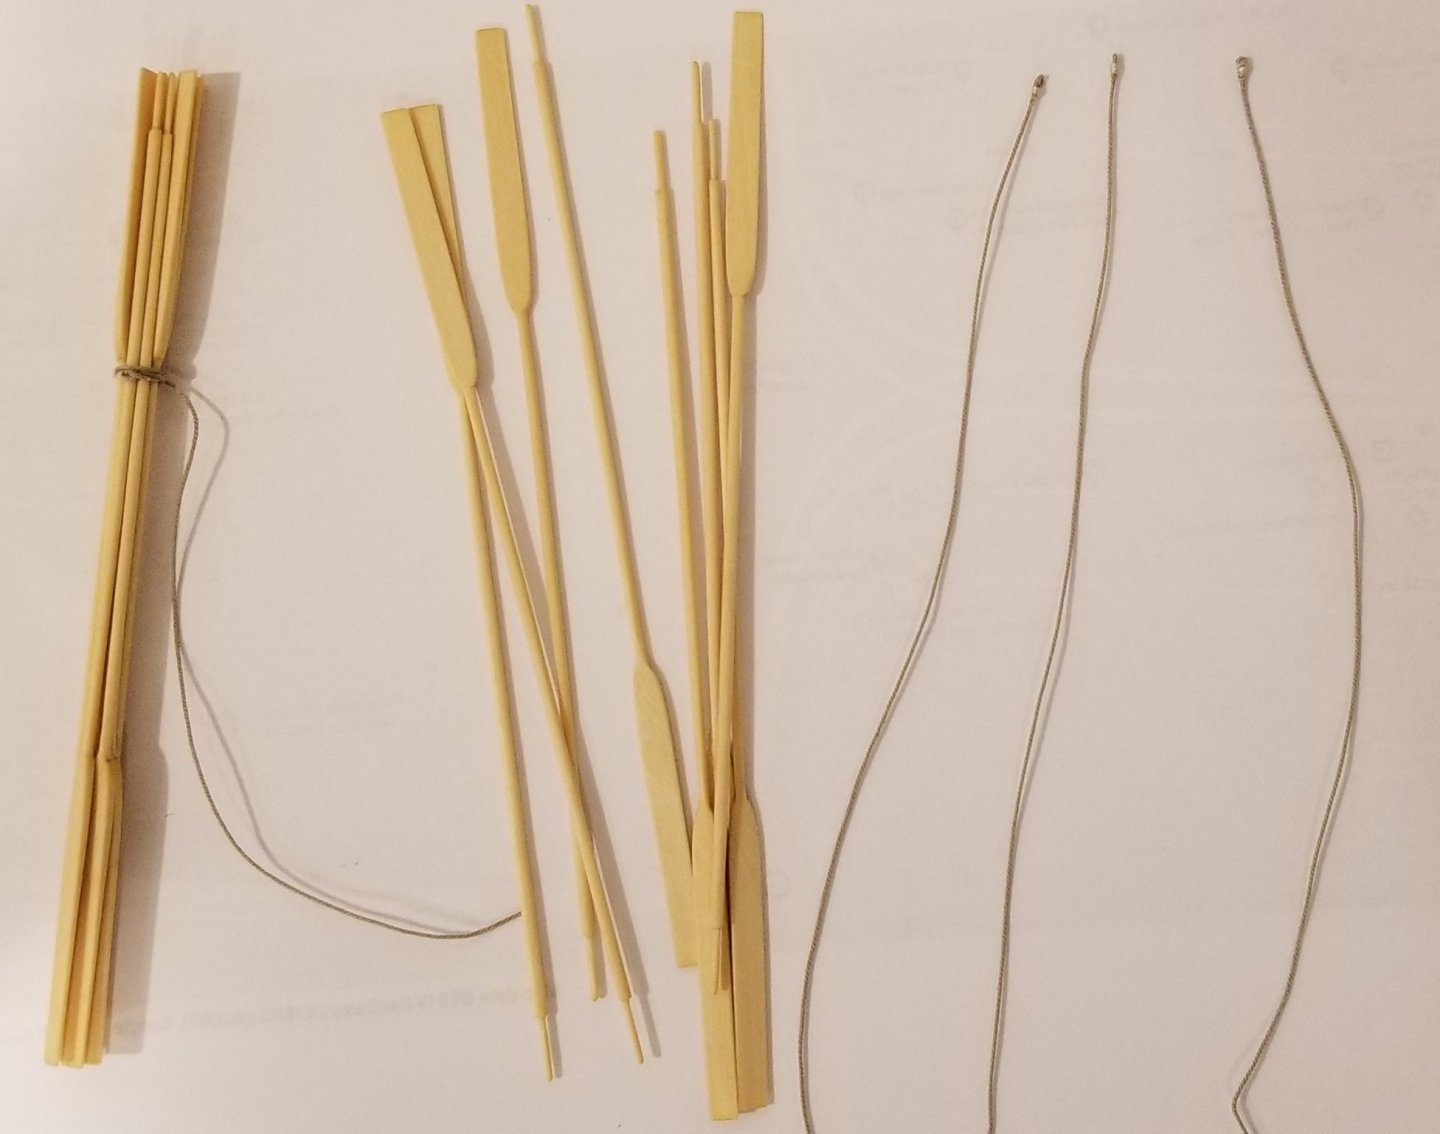


-
Wonderful deck details, Bob! This is such a beautiful model! Thomas
-
Your framing looks really good! You are well under way for another beautiful model 👍 Thomas
-
Johann, your ropework like everything else you do on this model is breathtaking! Thomas
-
Your model is really amazing - just outstanding craftsmanship! Thomas
- 607 replies
-
- 2
-
-
- winchelsea
- Syren Ship Model Company
- (and 1 more)
-
Beautiful work, Bob! It is always a pleasure following your build log! Thomas
-
This looks fantastic! I have to keep your display case in mind once I am finished 🙂 Thomas
-
Gorgeous!! Thomas
-
Great carronades! They are very well done! Thomas
-
Congratulations on finishing a great model! I can't wait to see your Syren in her display case 🙂 Thomas