


kpnuts
-
Posts
1,034 -
Joined
-
Last visited
Content Type
Profiles
Forums
Gallery
Events
Posts posted by kpnuts
-
-
-
-
-
Yes I figured there would be a reason for such loose fitting parts.
- mtaylor, Canute, popeye the sailor and 3 others
-
 6
6
-
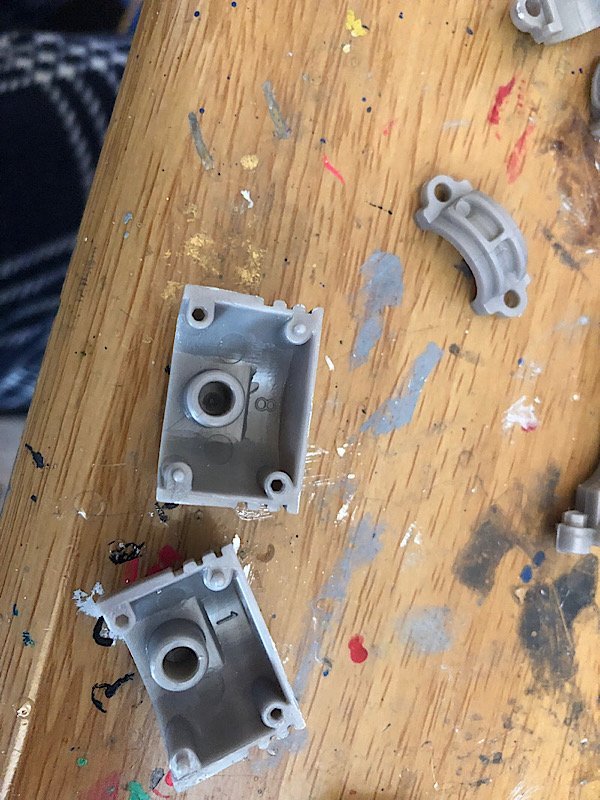
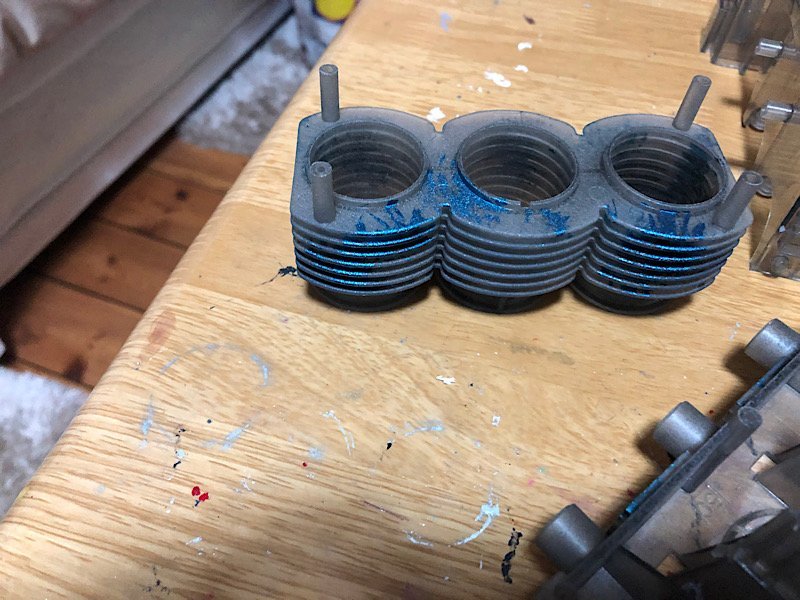
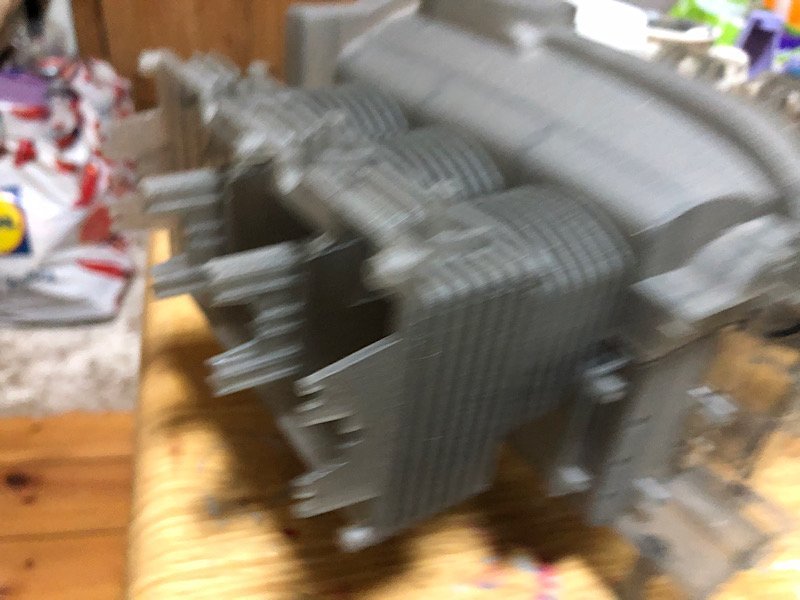
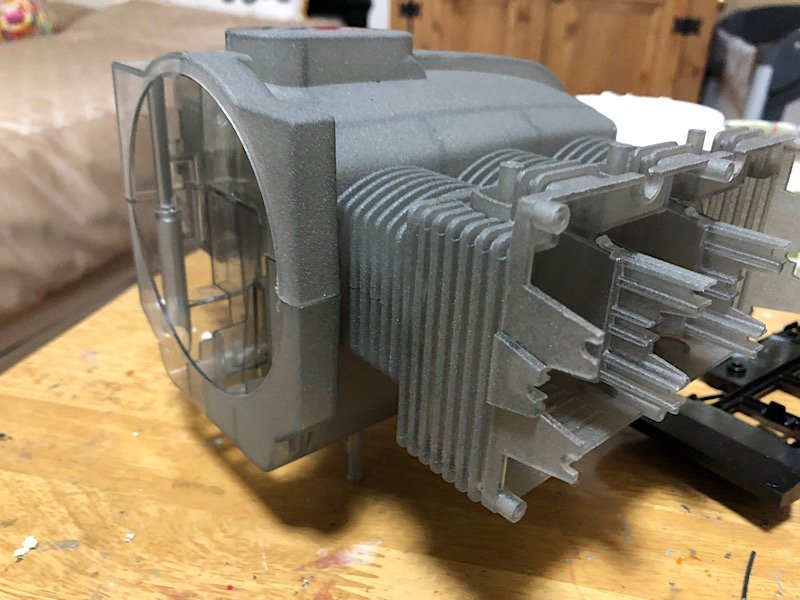
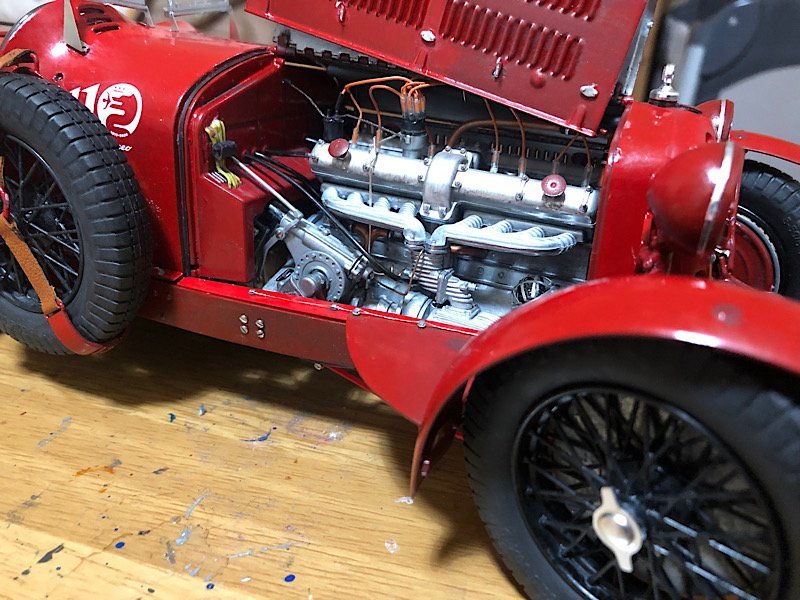
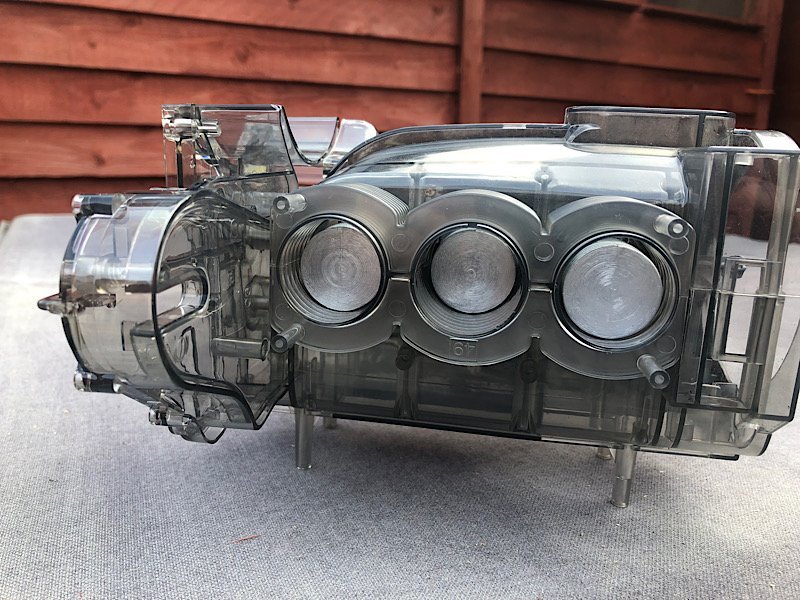
Hi all next update the crank shaft is poorly represented
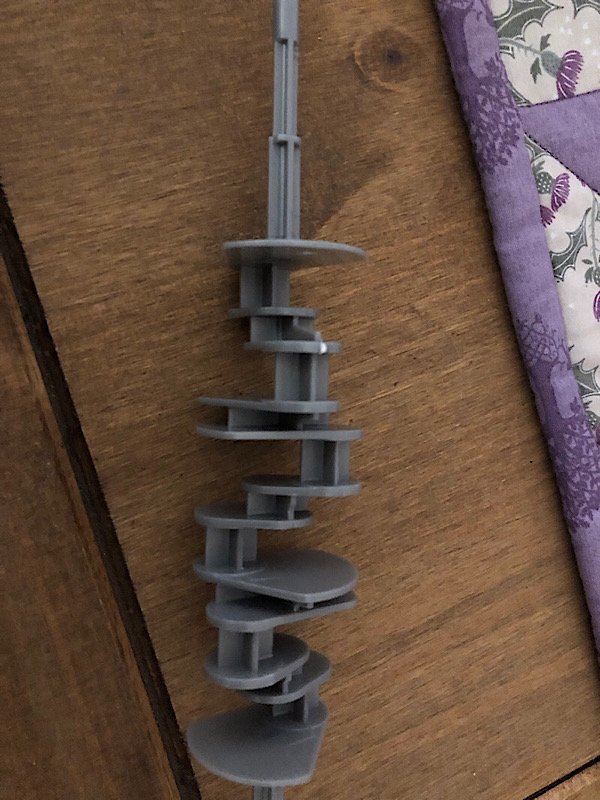
So I filled the gaps (I hope it still works it's so heavy now
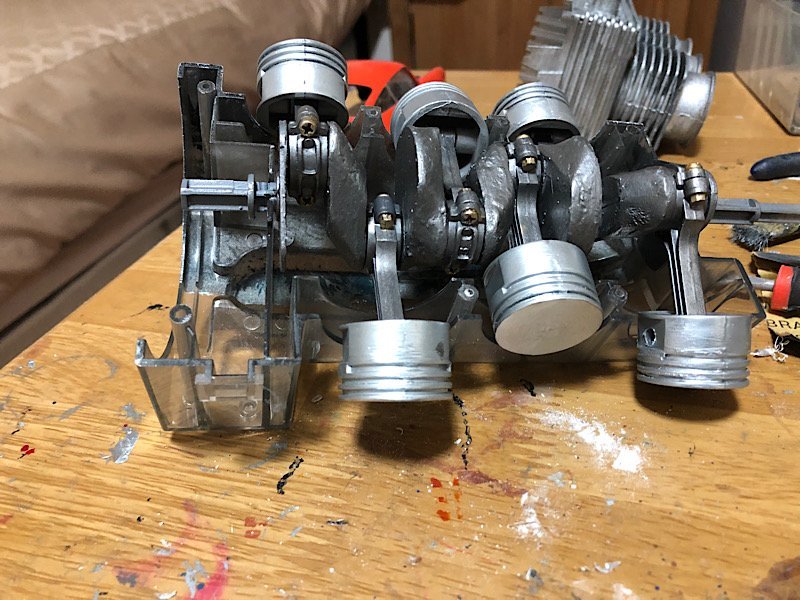
I realise it a plastic kit but look at the huge tolerances,
I may have to add some piston rings.
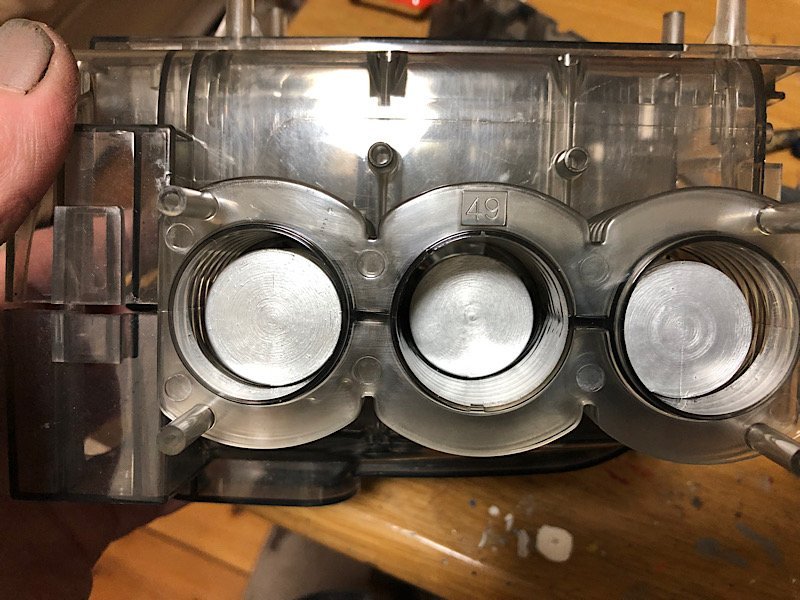
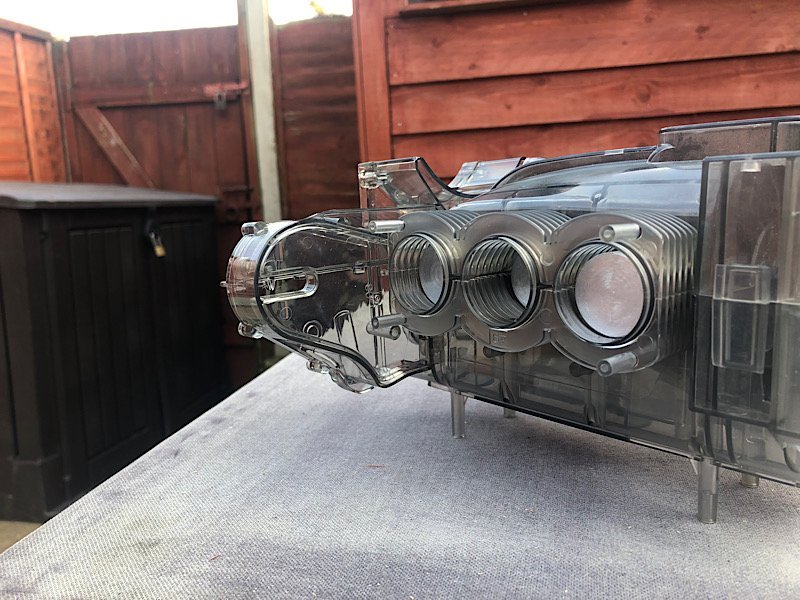
This is how they would have you put the pistons together
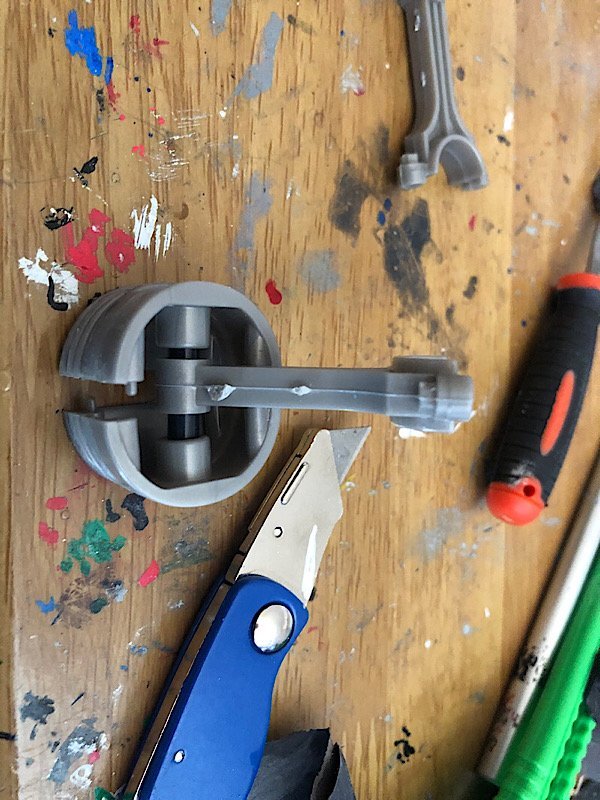
It would be impossible to remove the seam line like that, so I decided to drill the hole for the gudgeon pin out of one side.
-
I give up trying to work out how to put pics where you want them, I hope you can work out what I mean


-
Hi all well started painting the casings, these are the paints I used
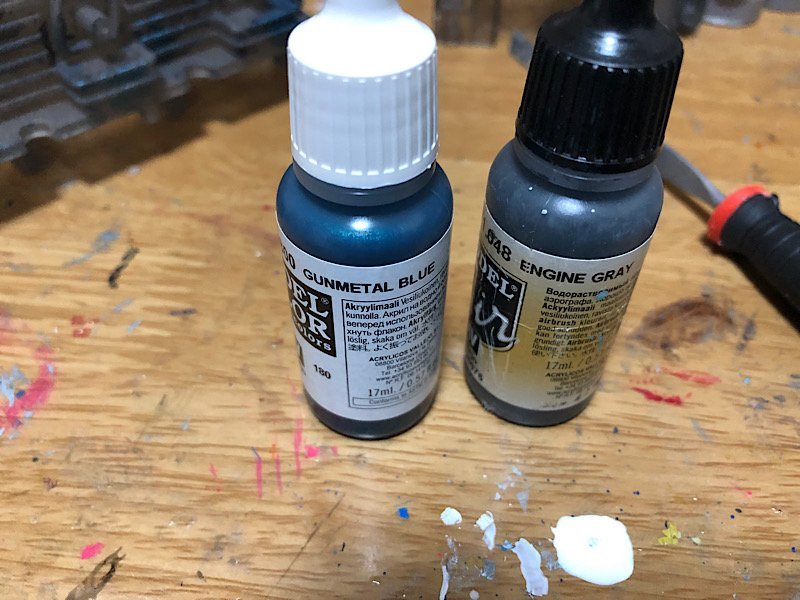
I don't always use these, I depends on the effect I want to achieve.
So I randomly stipple it on


Then I use

I stipple it on randomly
- Canute, Egilman, Old Collingwood and 5 others
-
8
-
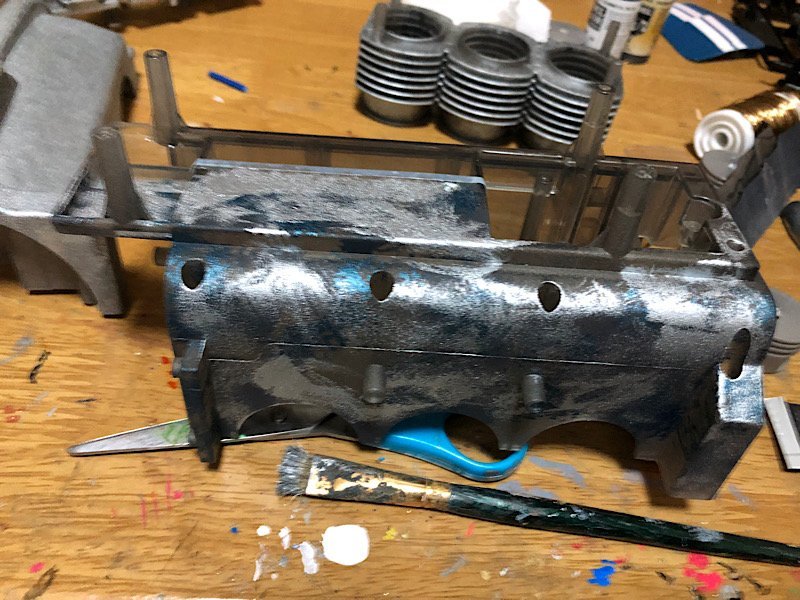
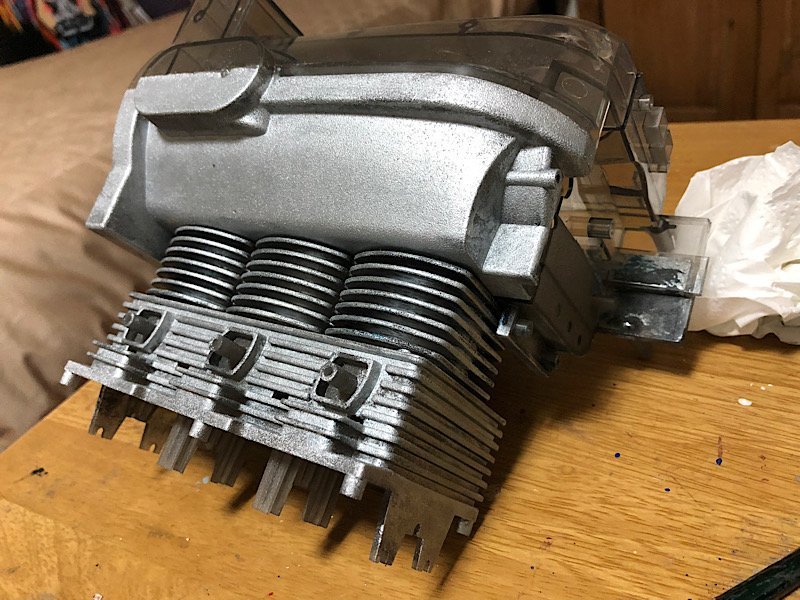
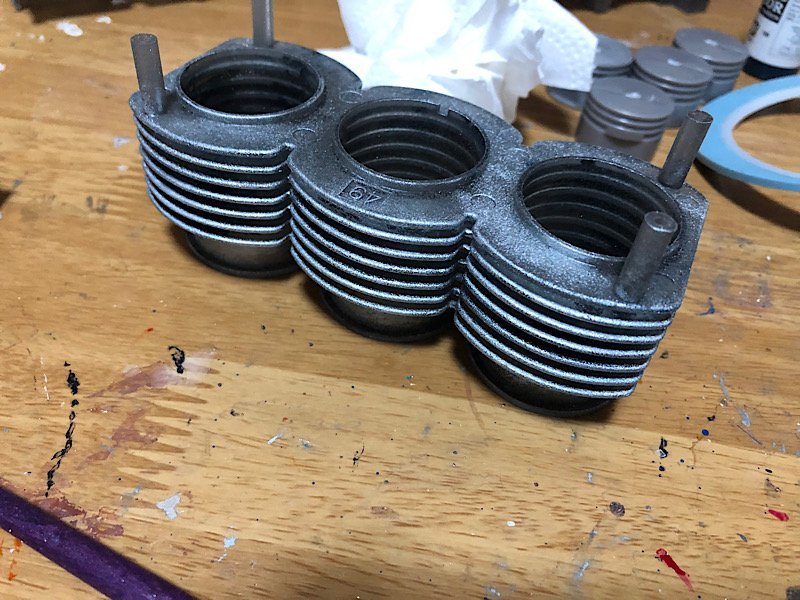
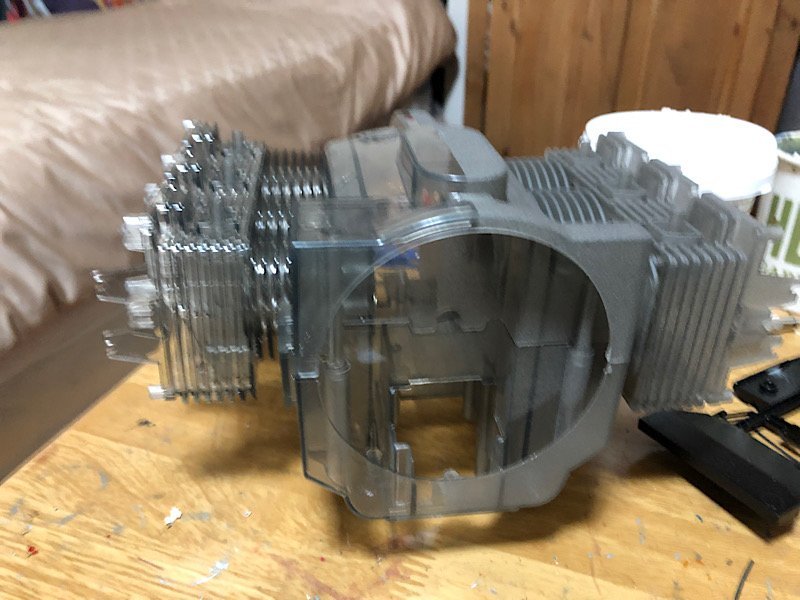
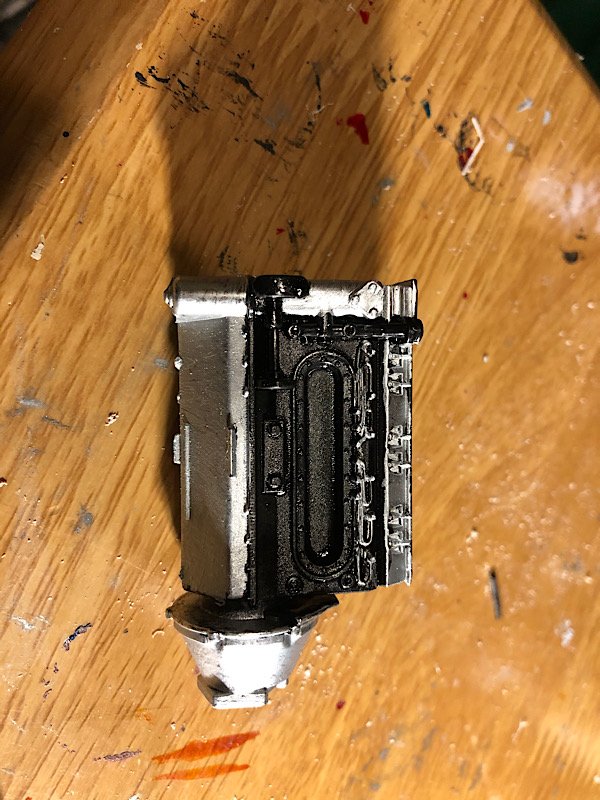
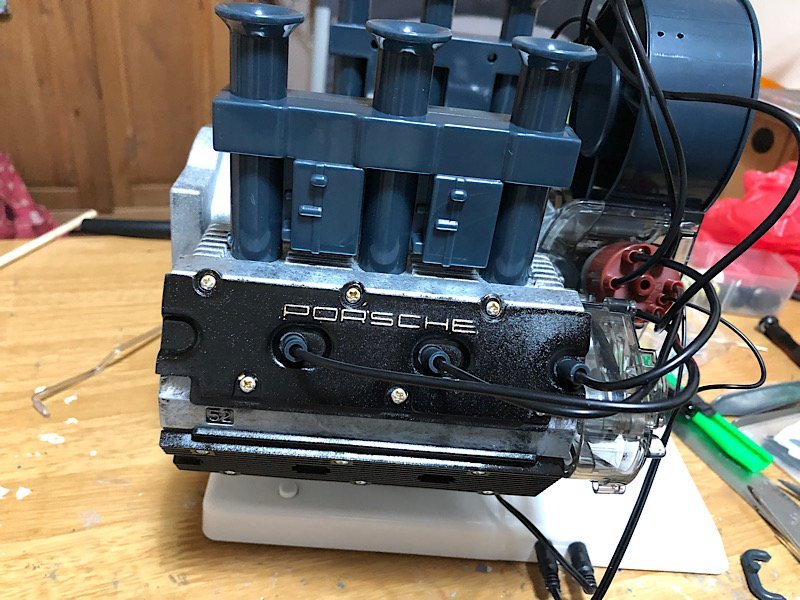
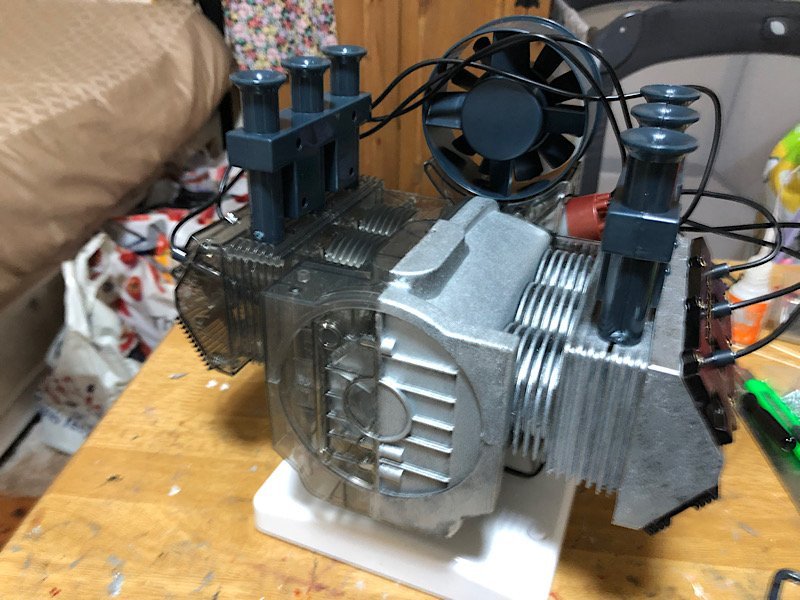
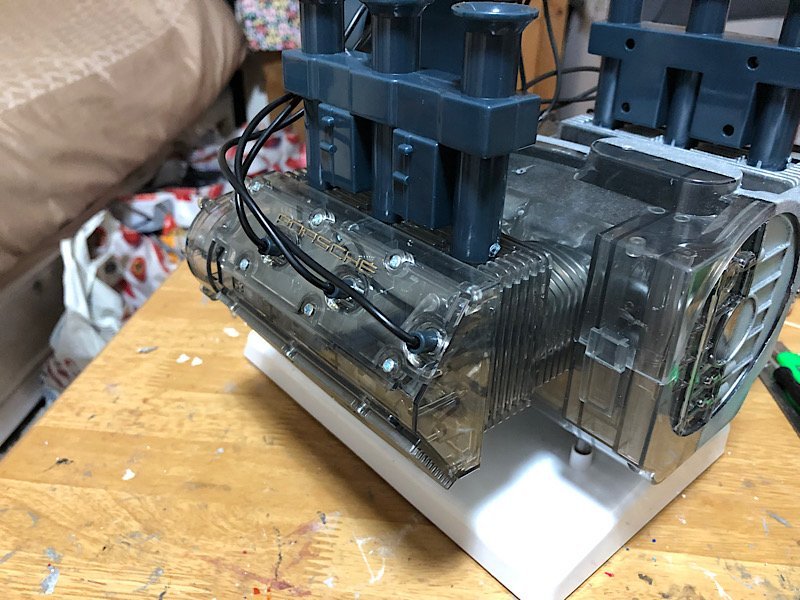
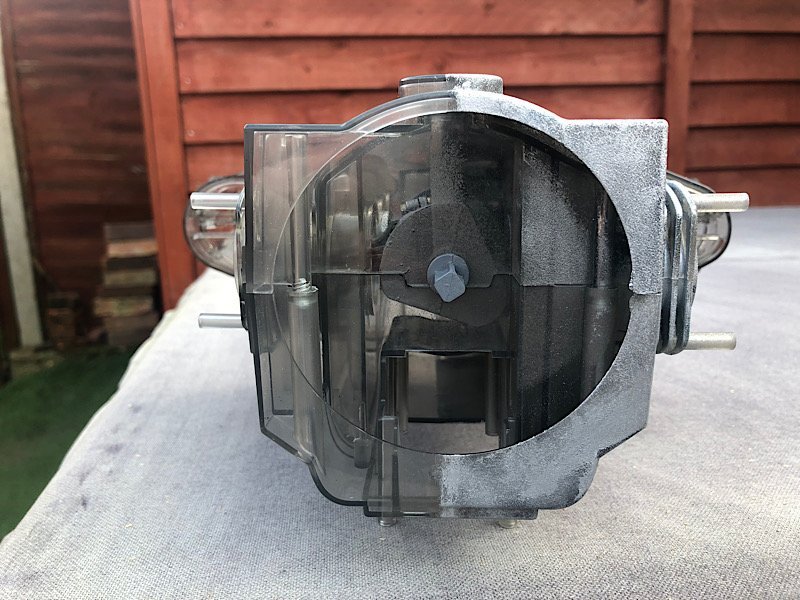
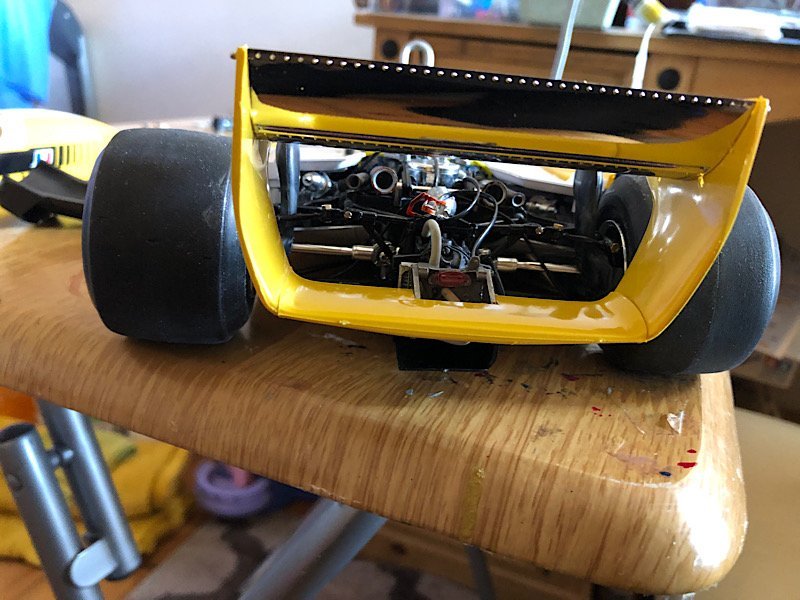
Hi all well I'm quite pleased with the cast effect on the half of the engine I'm painting (did it with the shot blaster at work)


-
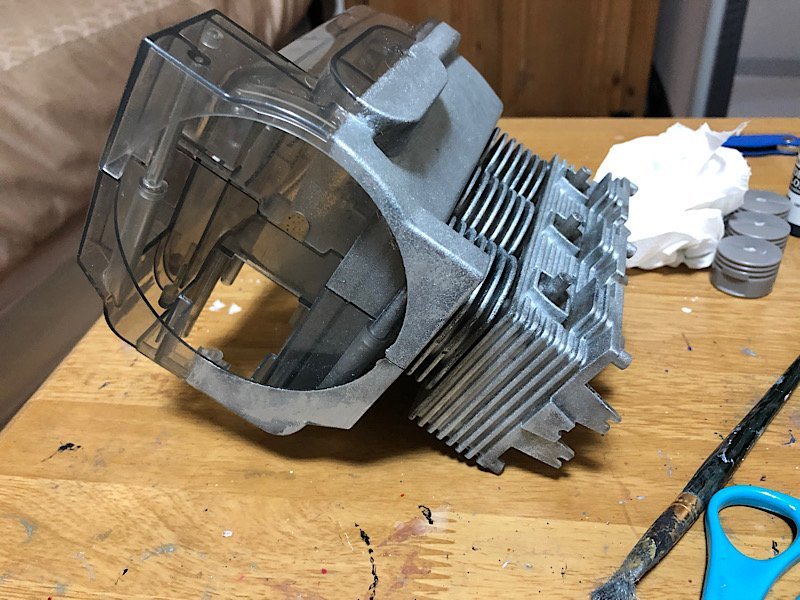
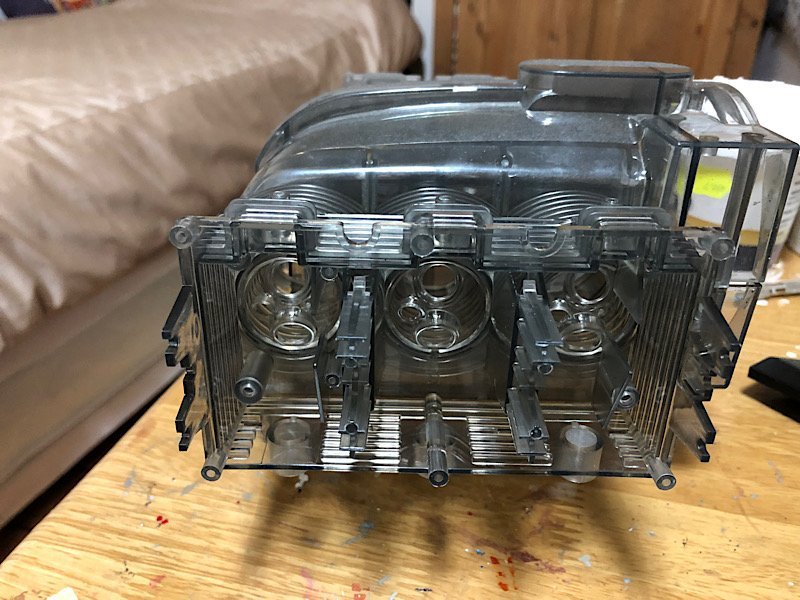
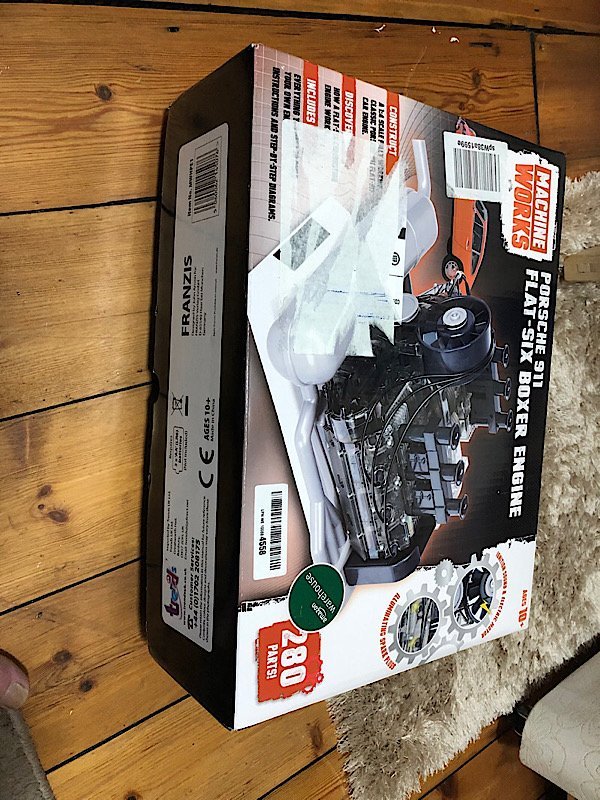
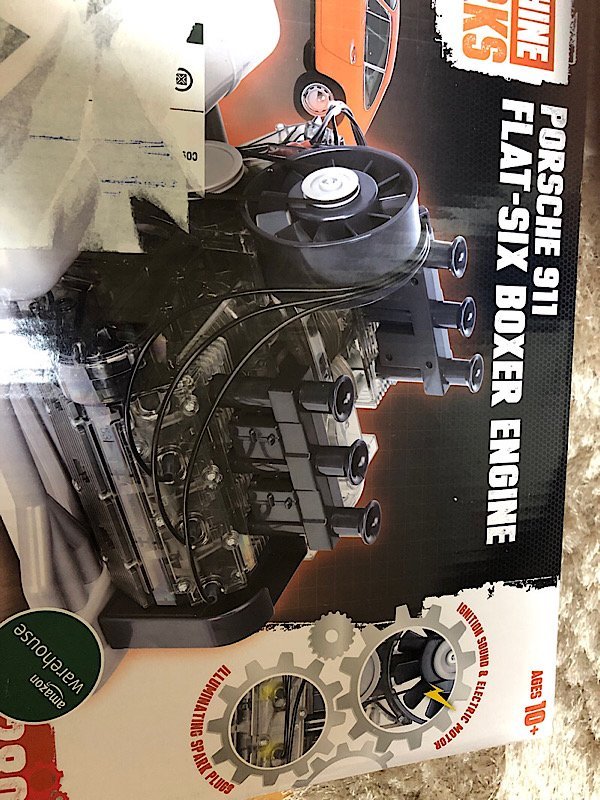
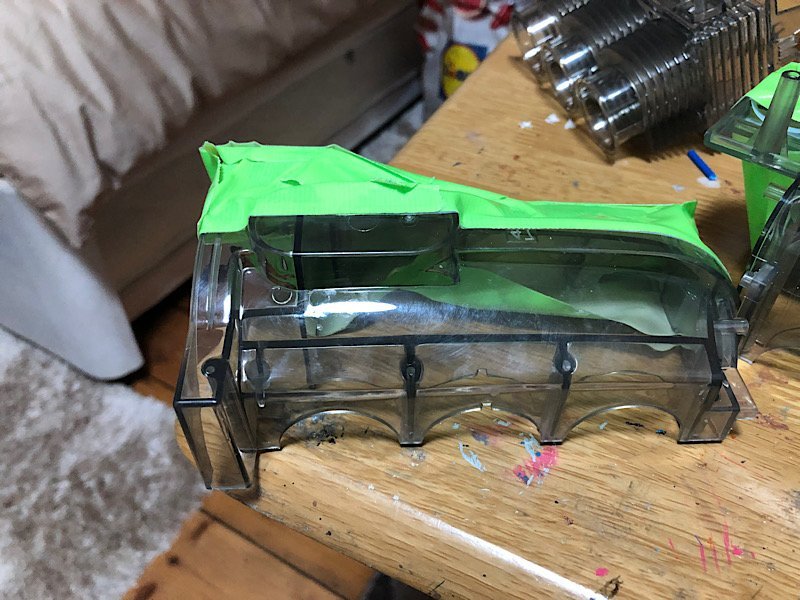
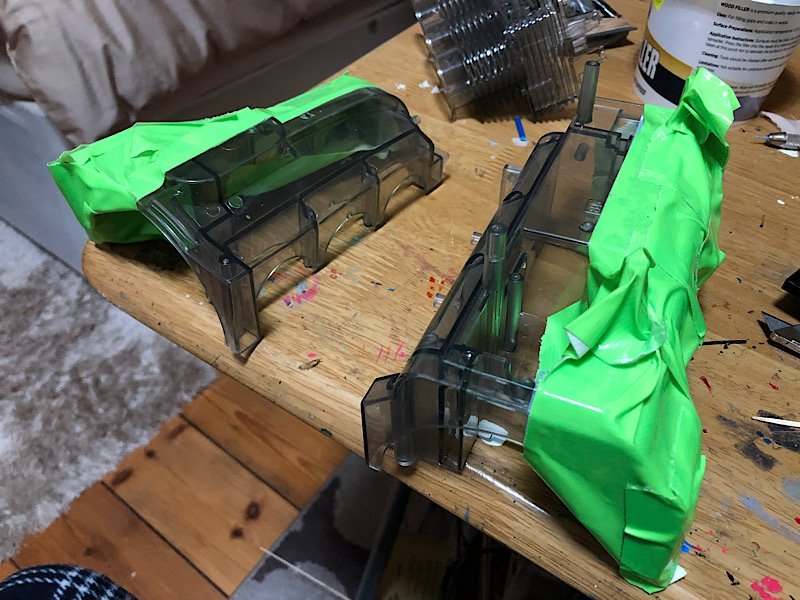
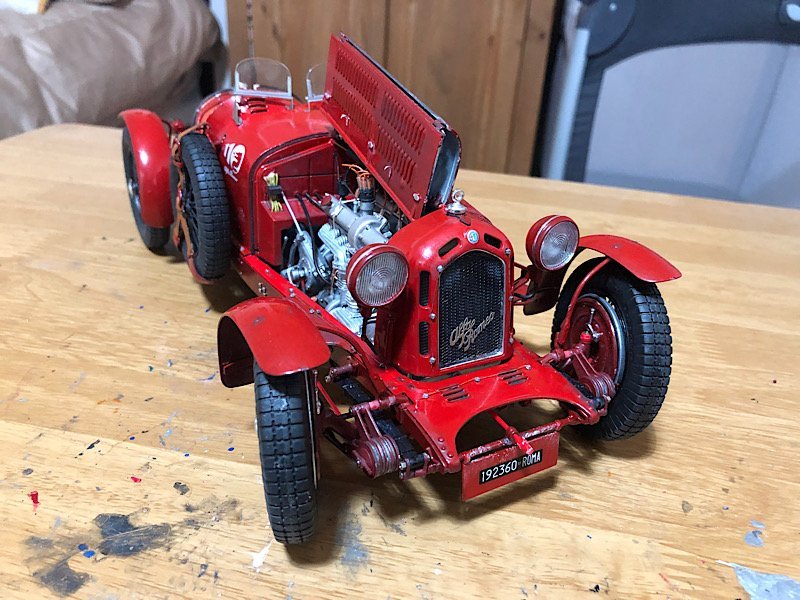
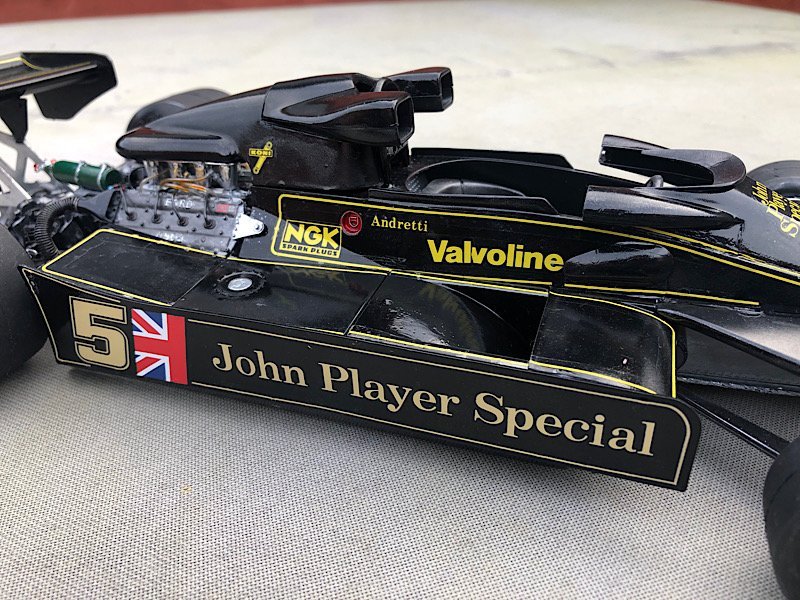
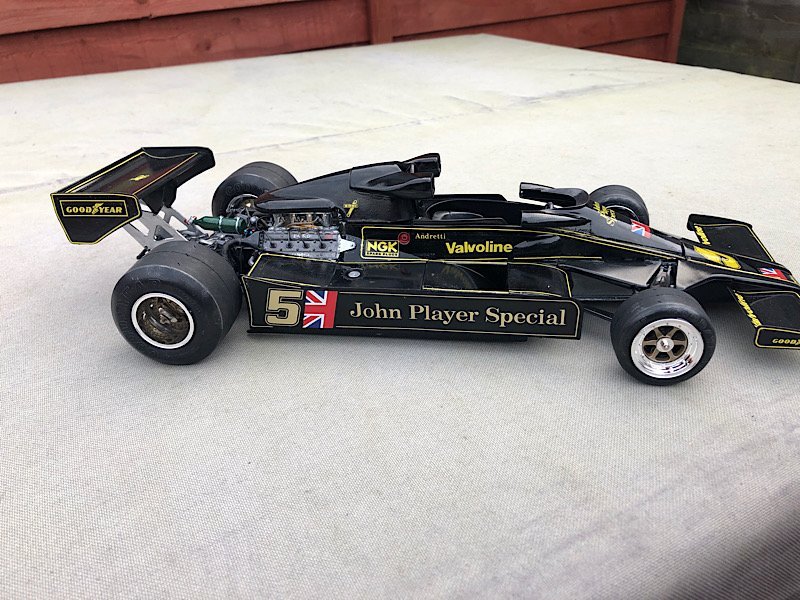
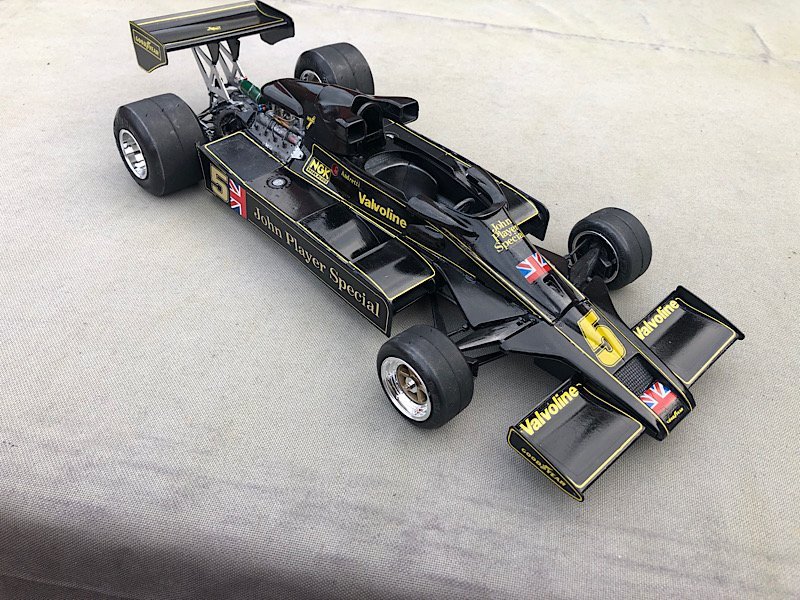
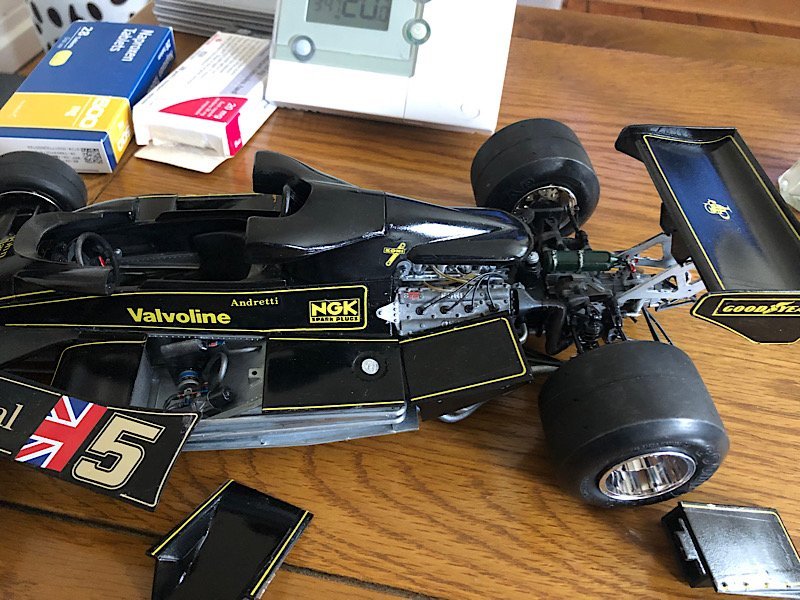
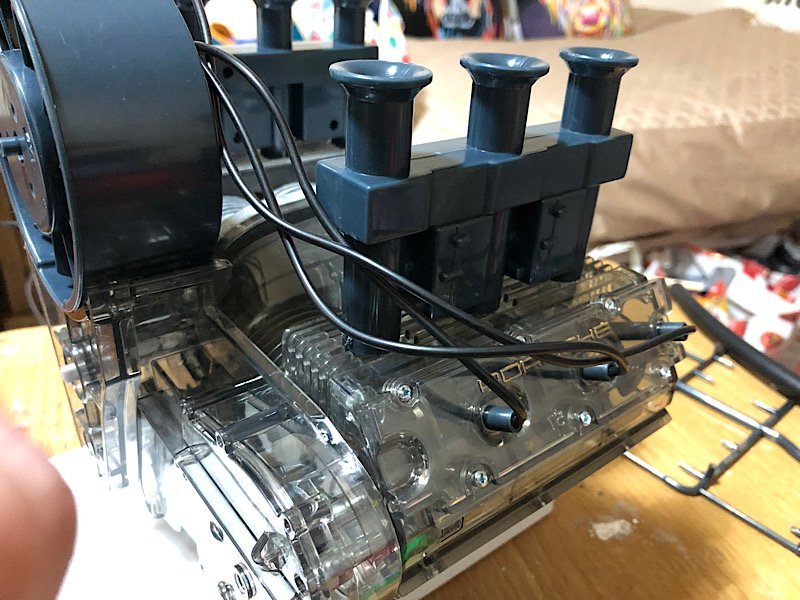
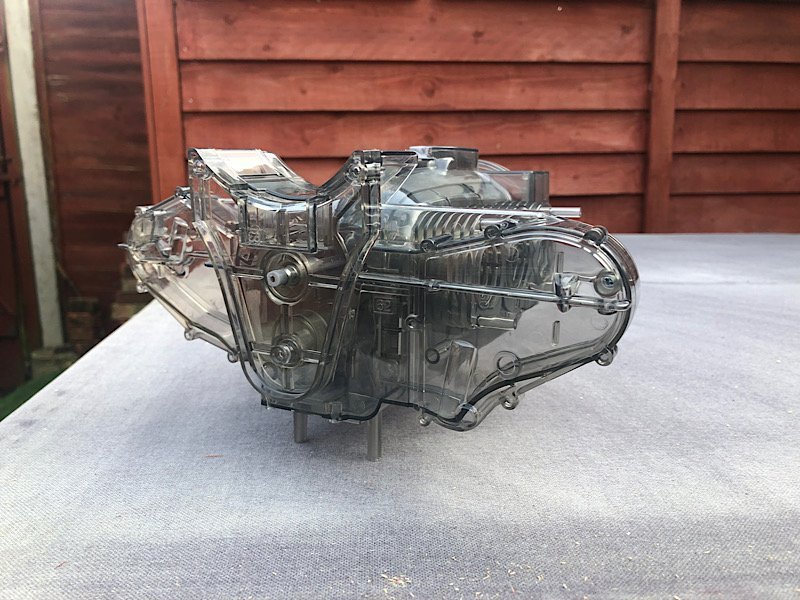
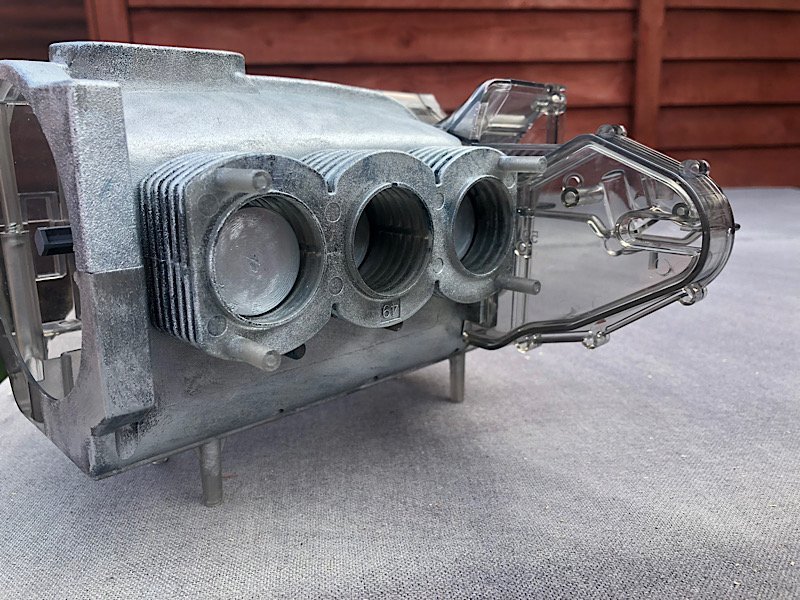
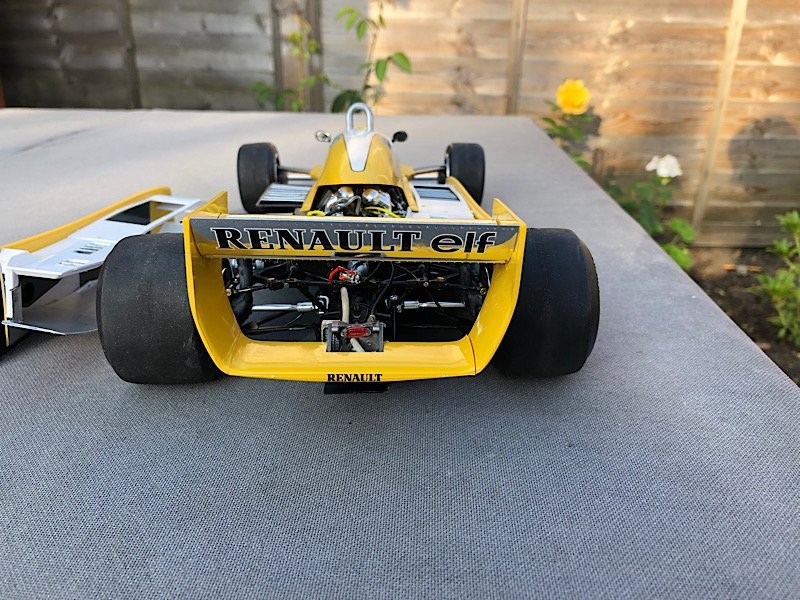
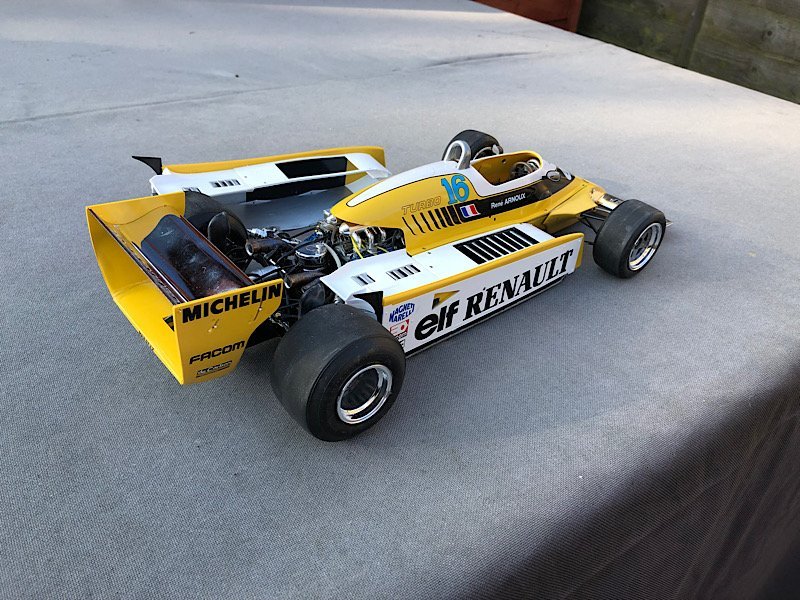
Hi all I got this today its actually a Franzis kit released under licence at a 3/4 the price of a Franzis kit, yes the instructions are not as glossy and there are no beautiful pics of the engine, and yes the box is not all luxury and flashy but the rest of the kit is exactly what you get from Franzis.
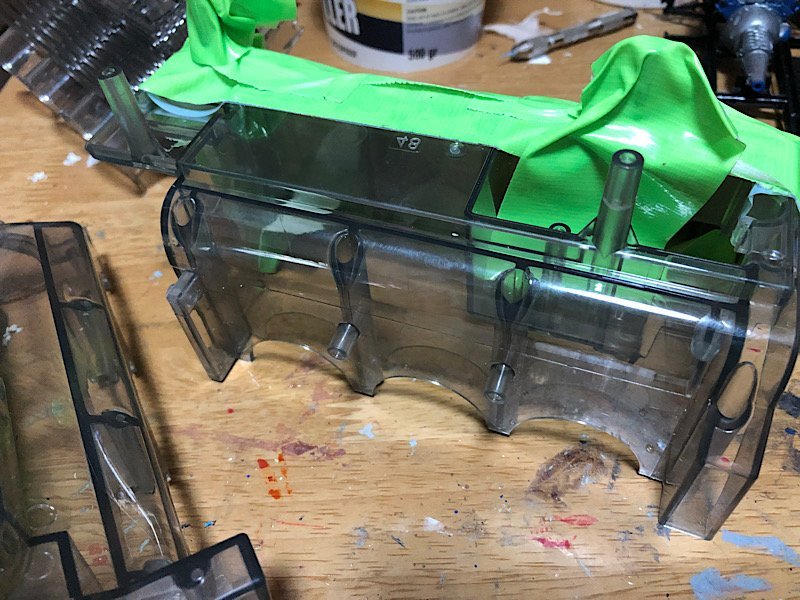
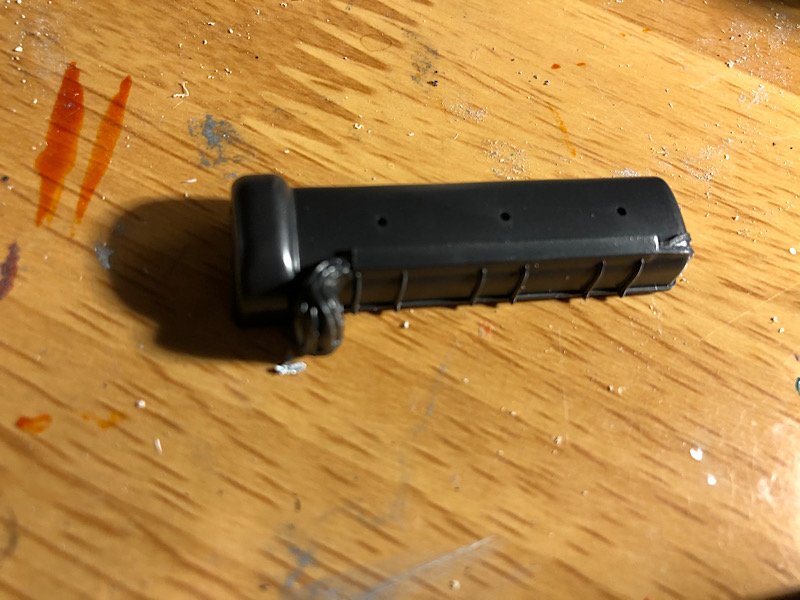
First thing I will have to deal with are those god awful carburettors.
I intend to show exactly how I do each bit of this, painting and such.
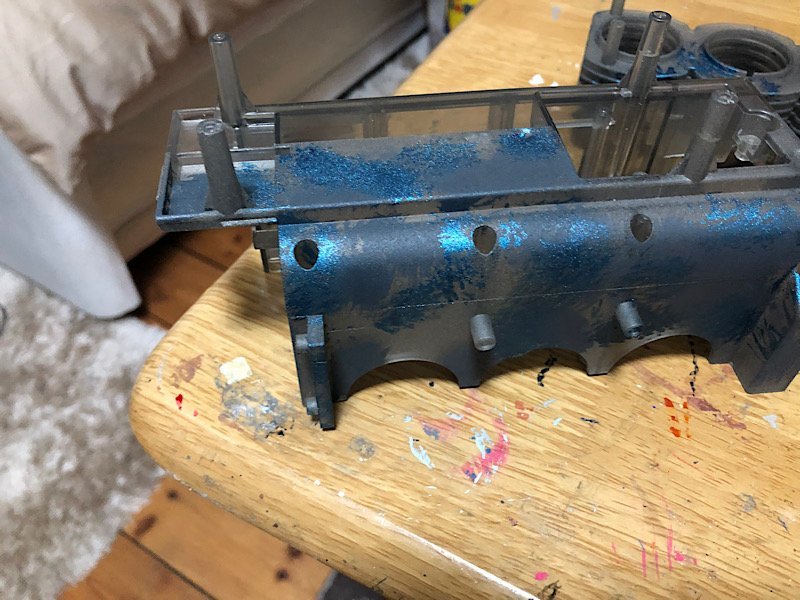
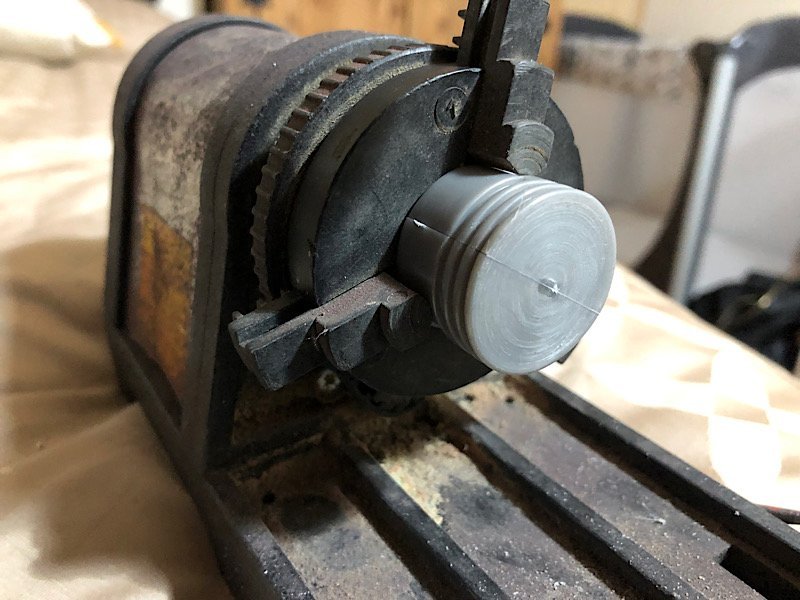
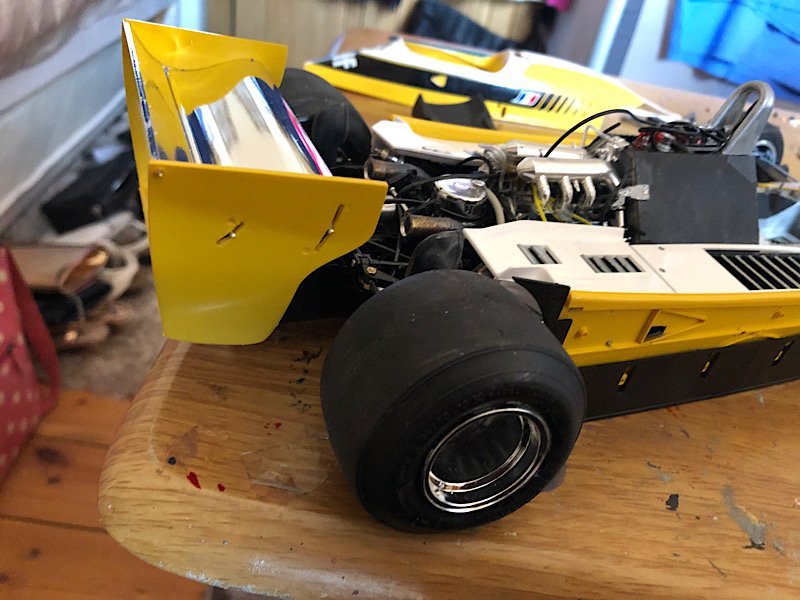
I have masked the engine in half (as I intend to do it half see through and half not) we have a machine at work which will add a cast effect to the half that is not going to be see through. The metalizing technique I use need the parts to have a metallic appearance so to get that on the top of the pistons I use my mini lathe and just hold a file over the part whilst it's on (you could do the same with a dremel)
-
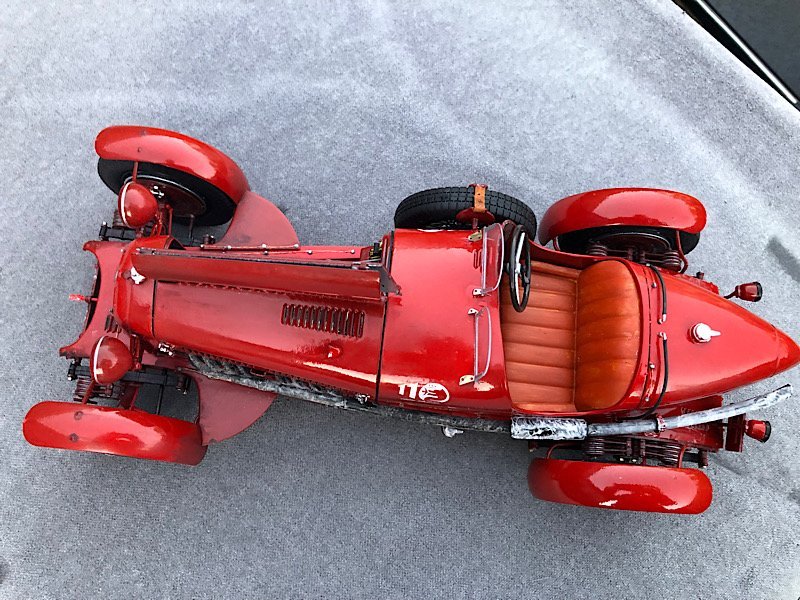
Hi thanks Yves I do like a big kit.
Dan I use cheap paint from cheapo shops like b and m or q d I decant it into my airbrush and spray from there ( I sometime use a shading colour underneath to enhance the shape or add age)
-
-
-
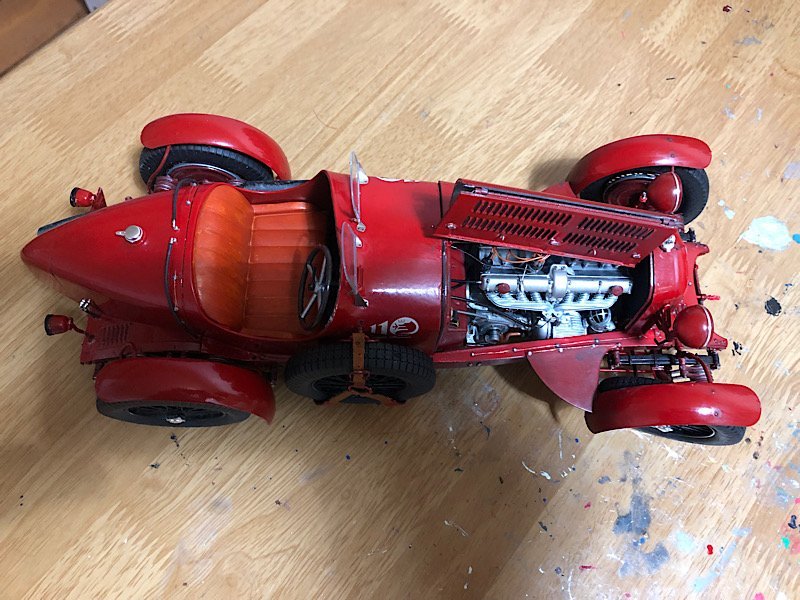
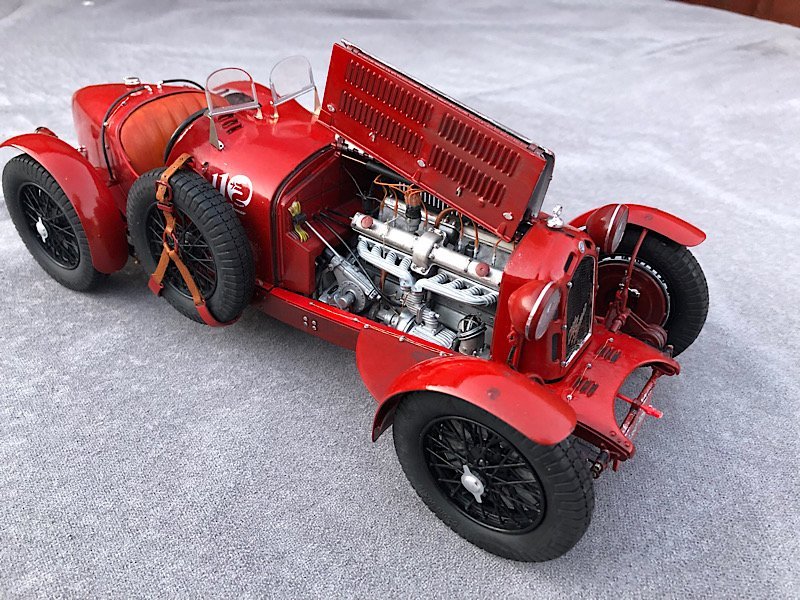
This won model of the month on de agostini when I posted it there.
- mtaylor, Old Collingwood, Canute and 3 others
-
6
-
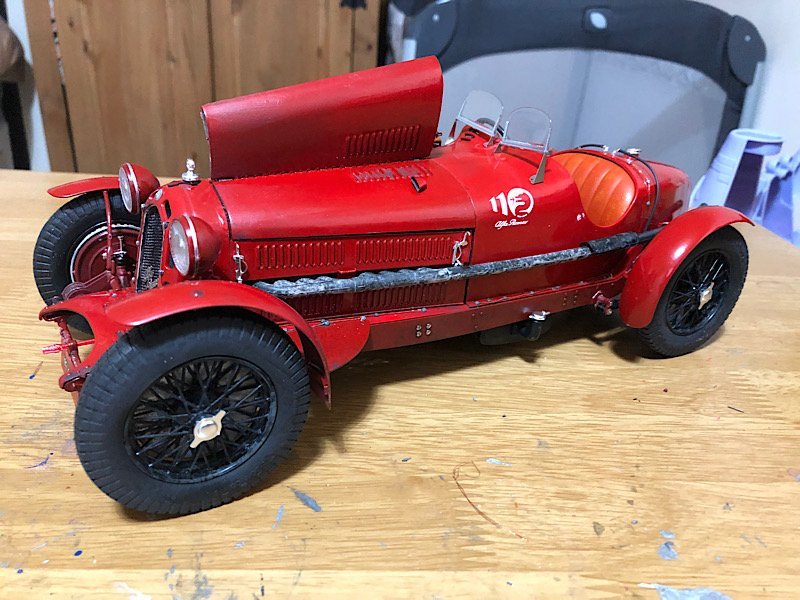
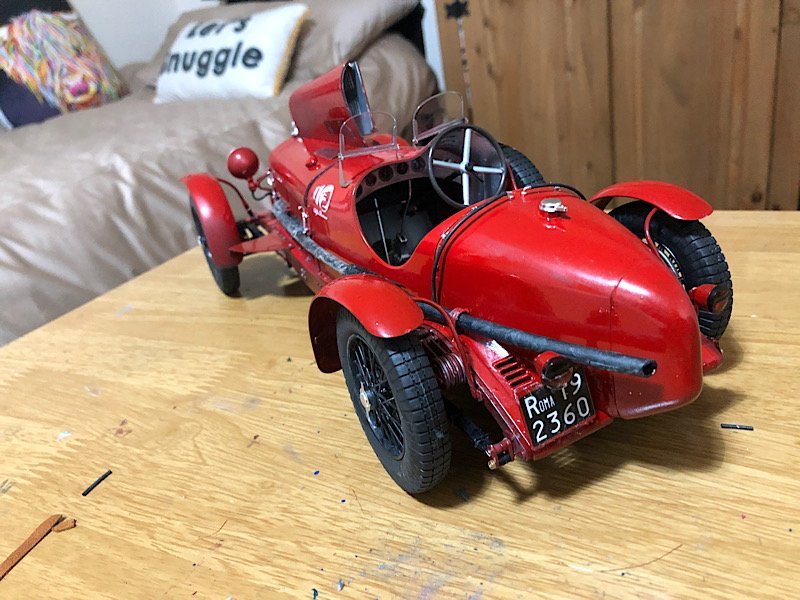
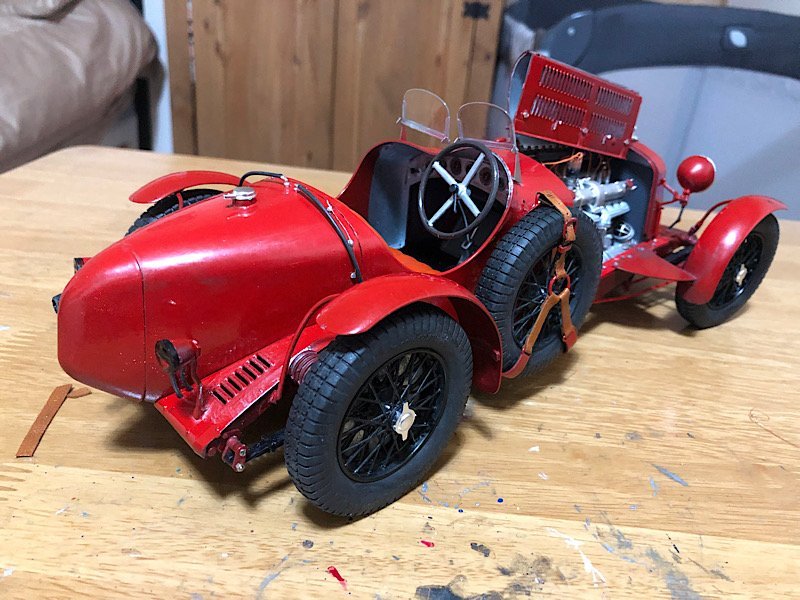
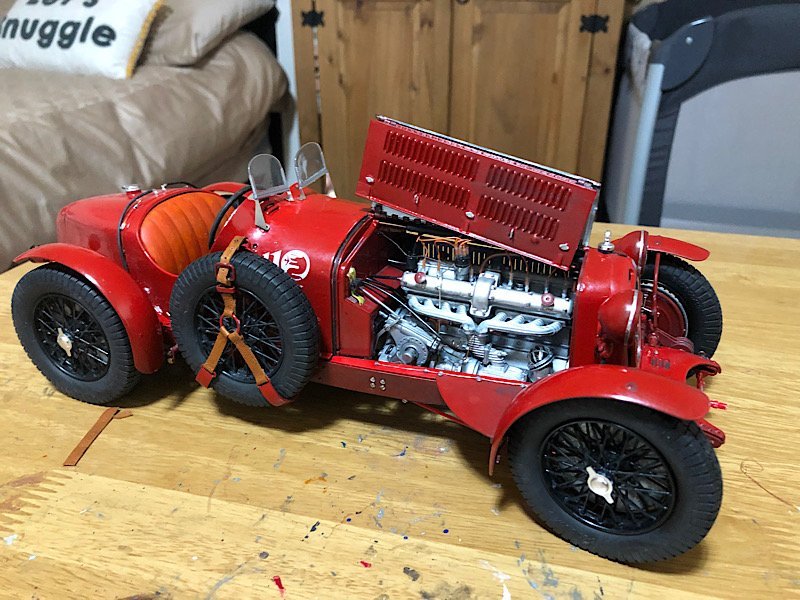
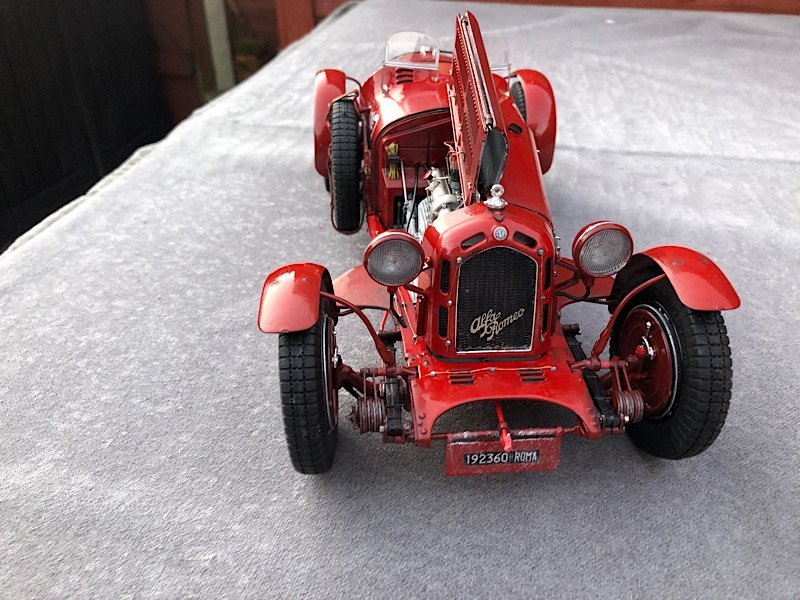
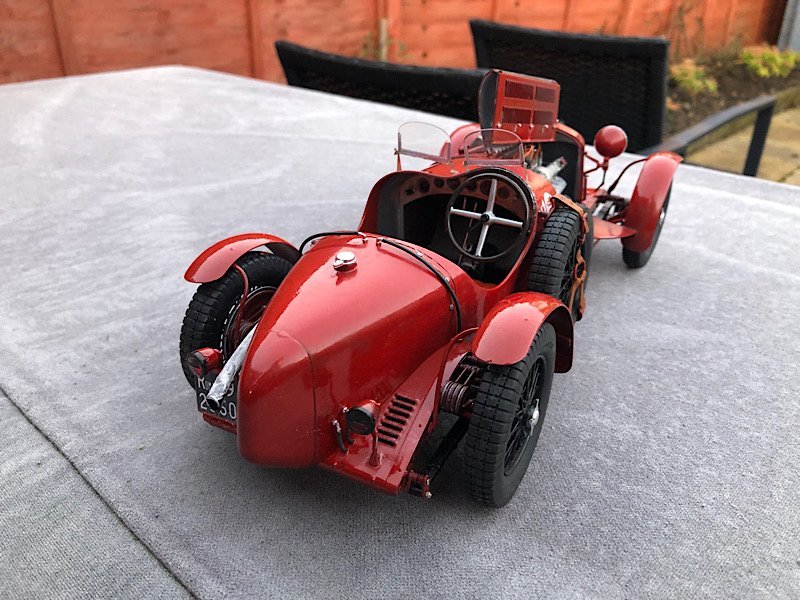
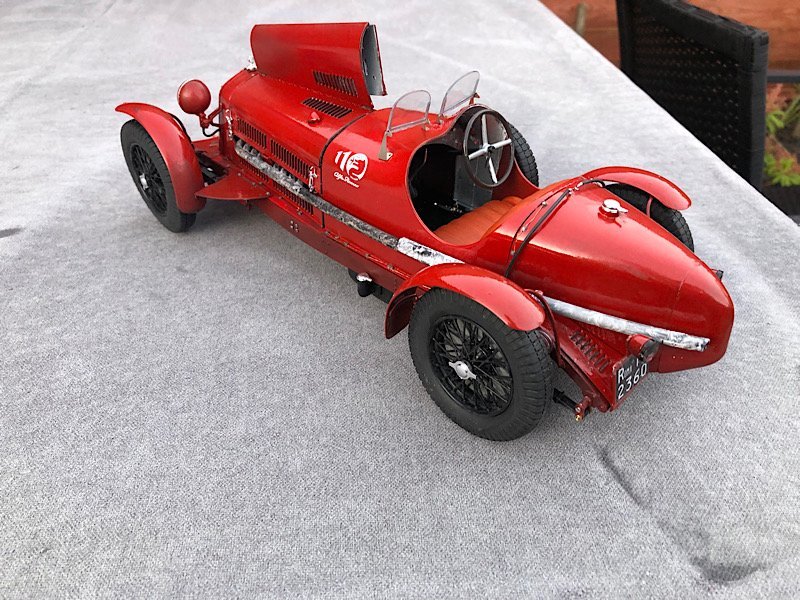
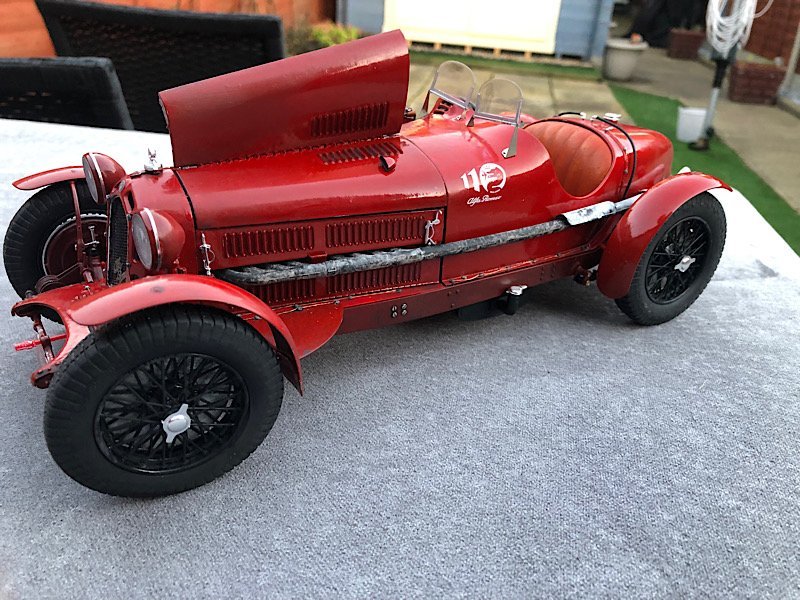
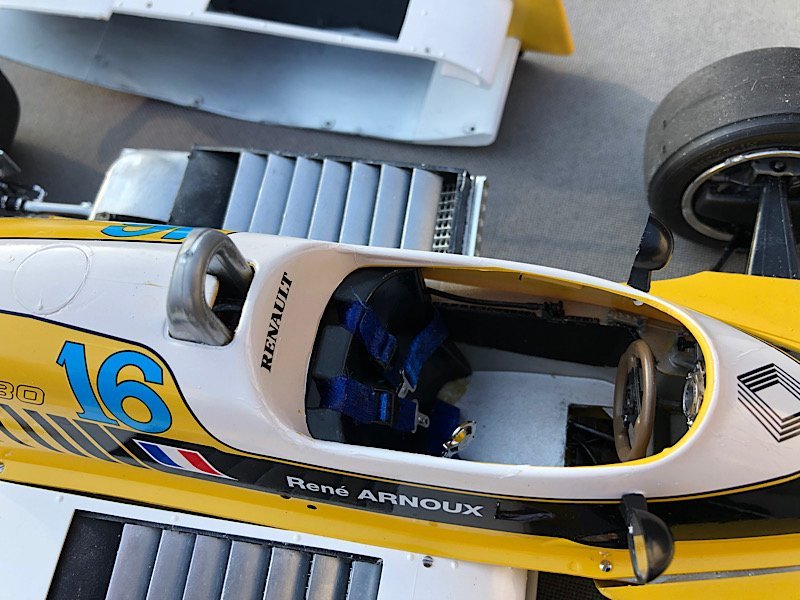
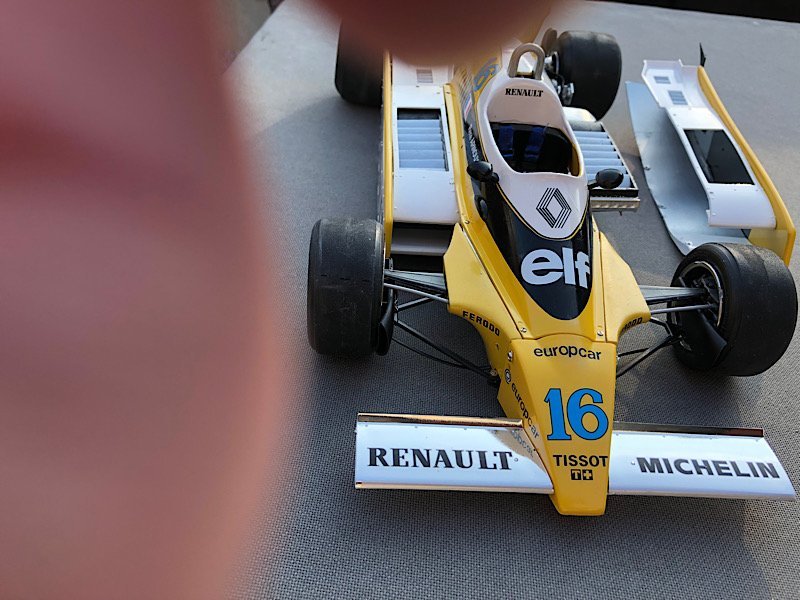
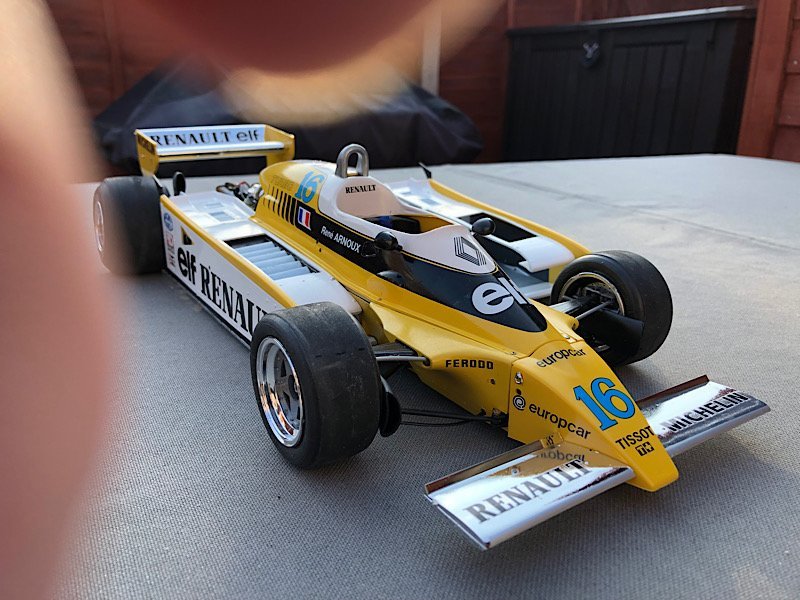
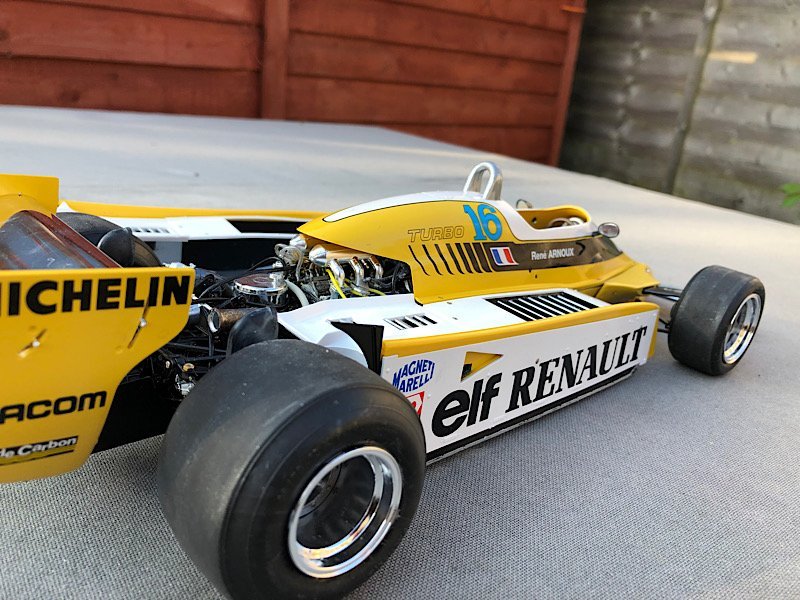
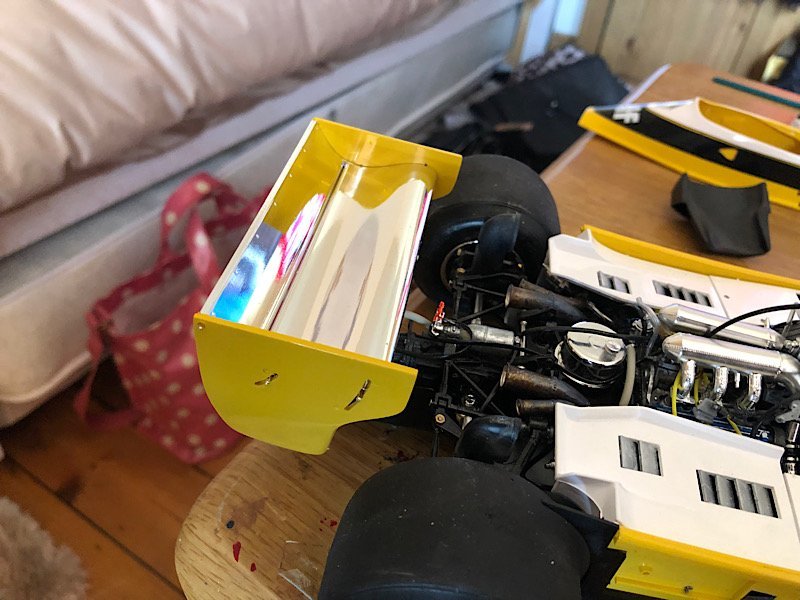
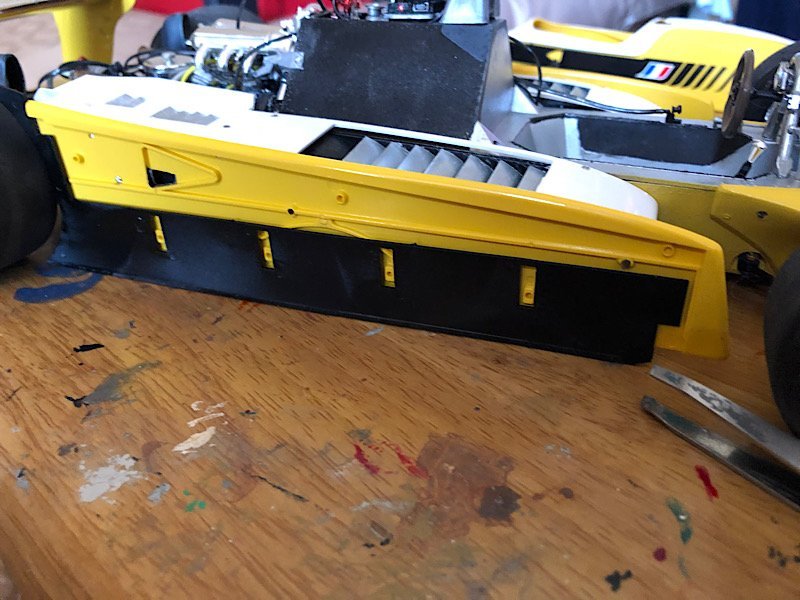
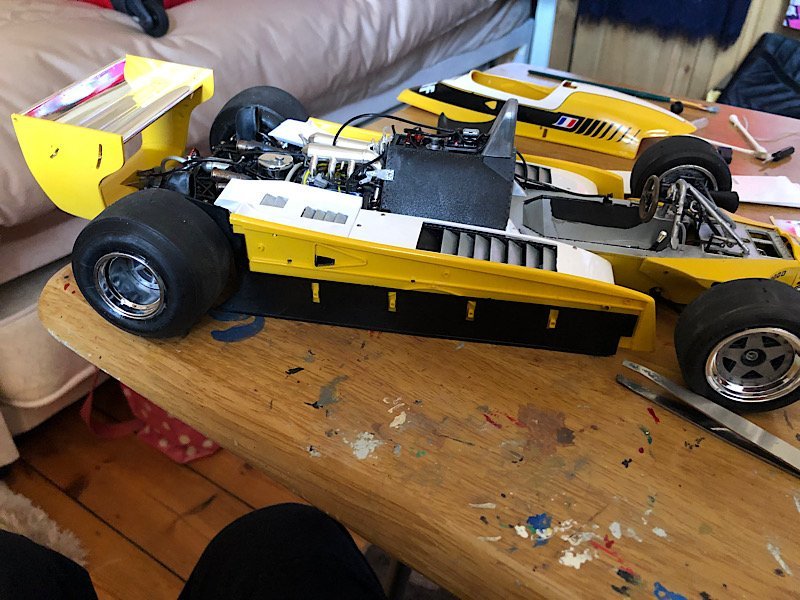
Hi all recently finished this.
It's a great kit (I wish I hadn't added the lock wire detail drilling the 0.3 mill hole was easy, threading the wire through not so)
- GrandpaPhil, Jack12477, Paul Le Wol and 14 others
-
11
-
 6
6
-
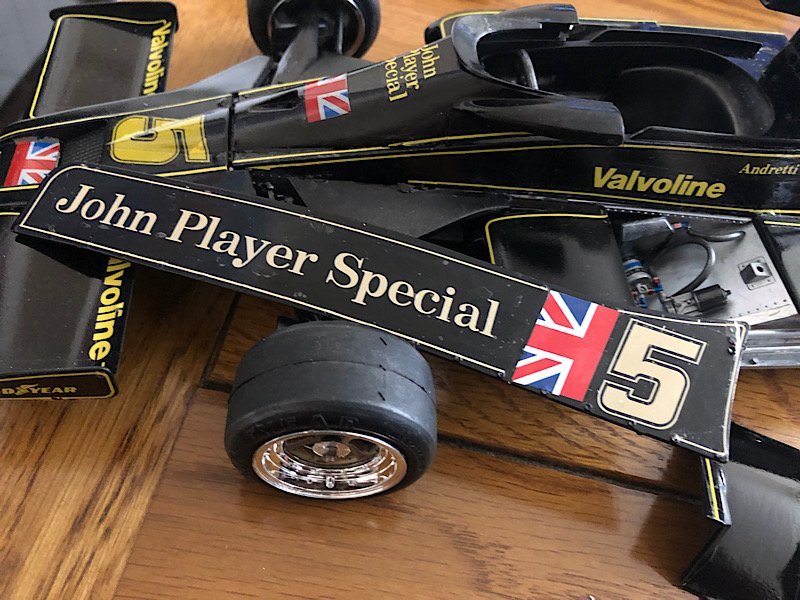
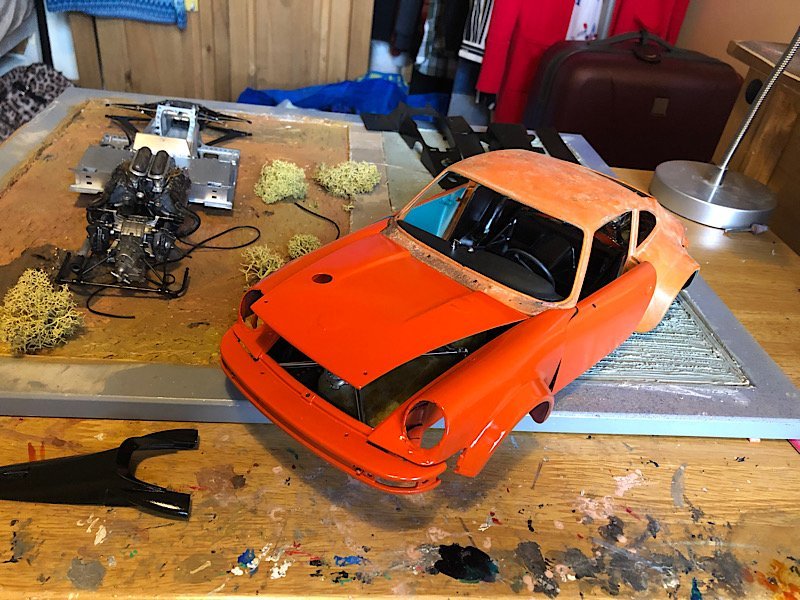
Hi all I was given this by someone I thought a friend (came from America)
Decals fell apart so I bought some new ones hence the colour change.
-
-
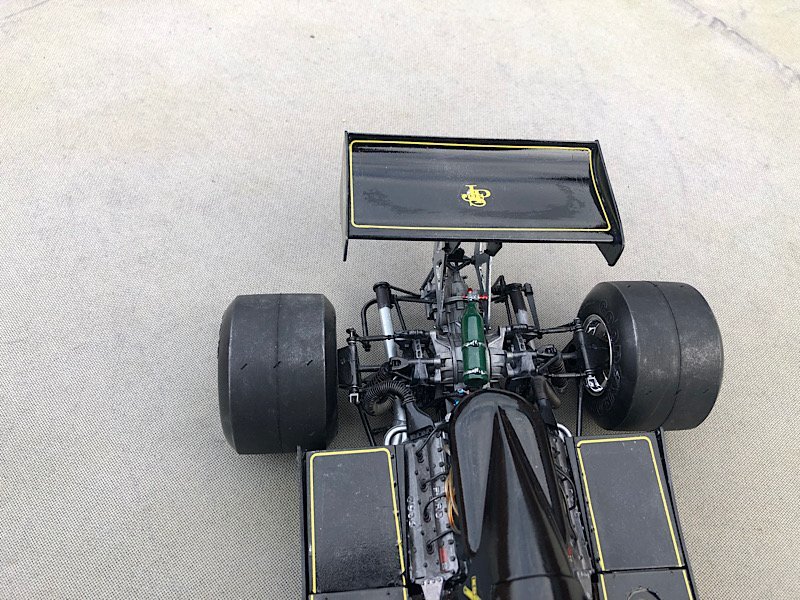
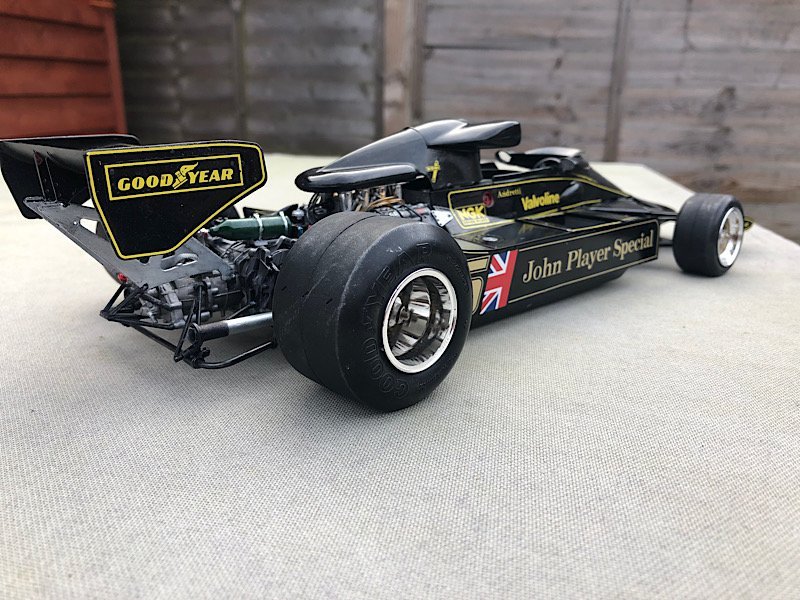
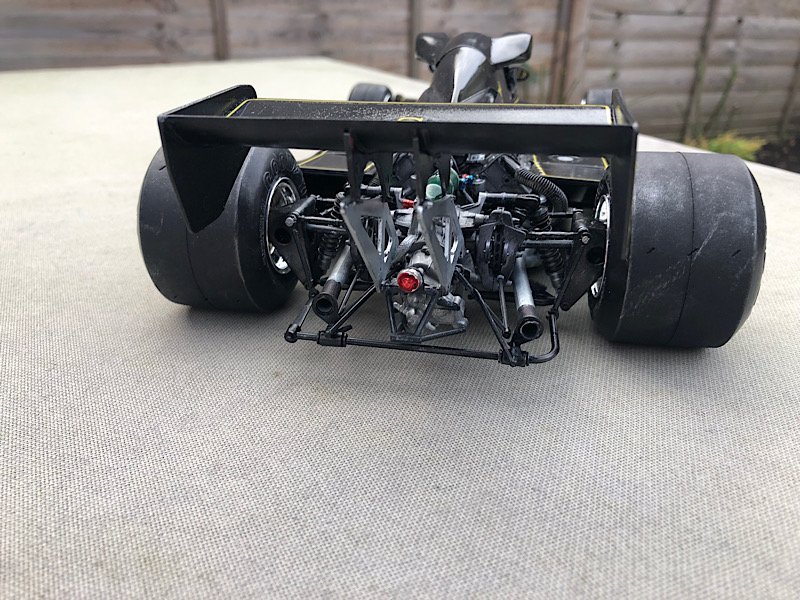
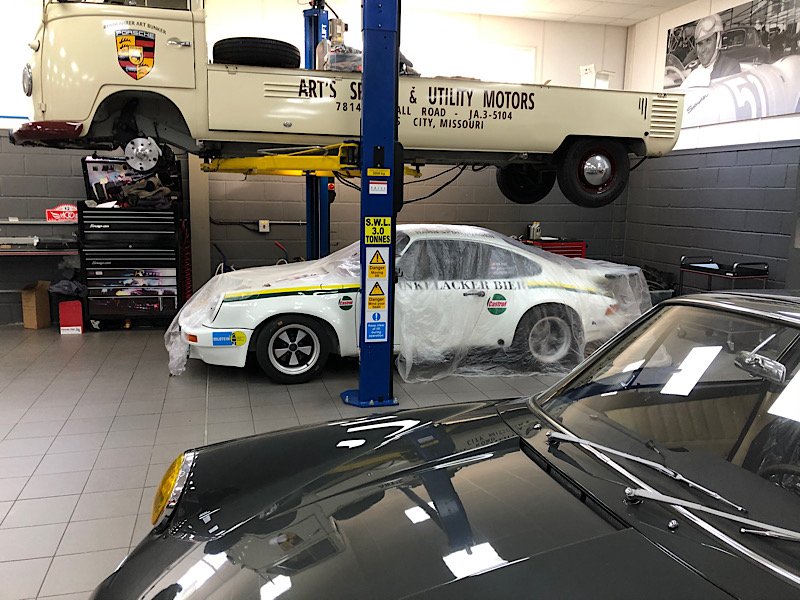
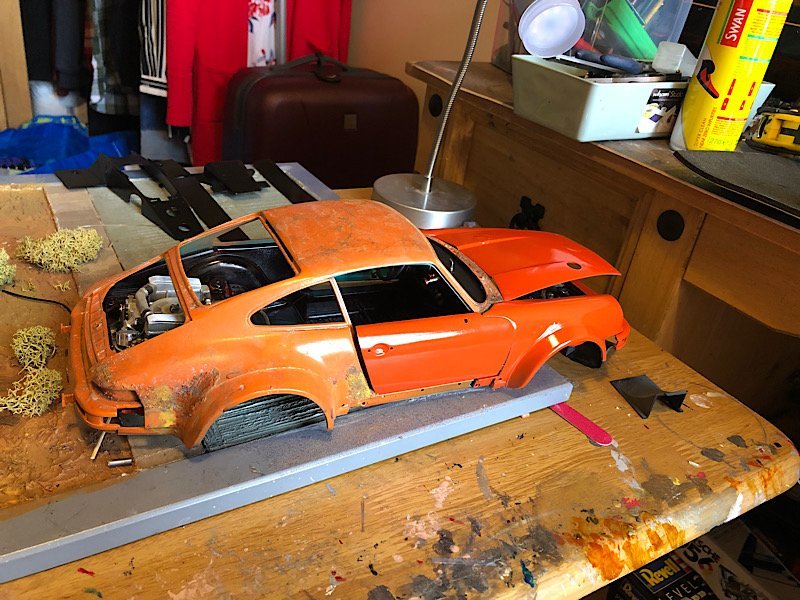
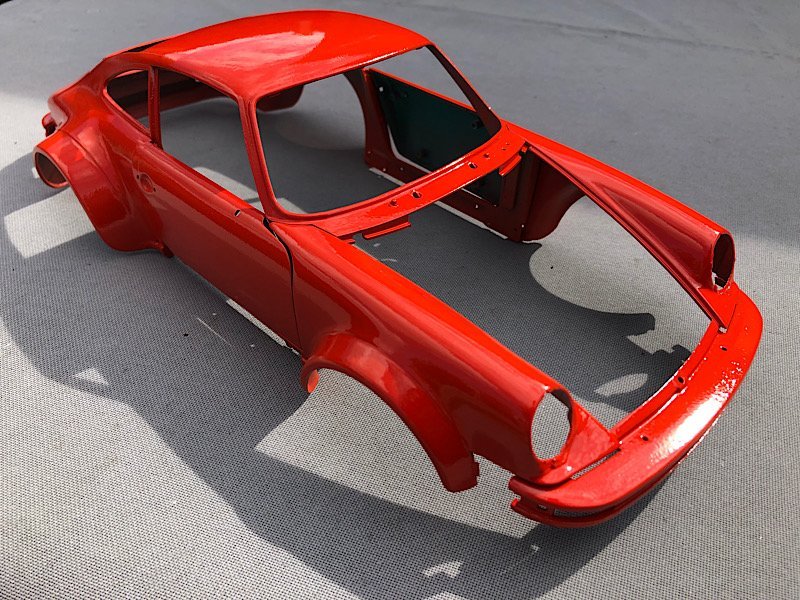
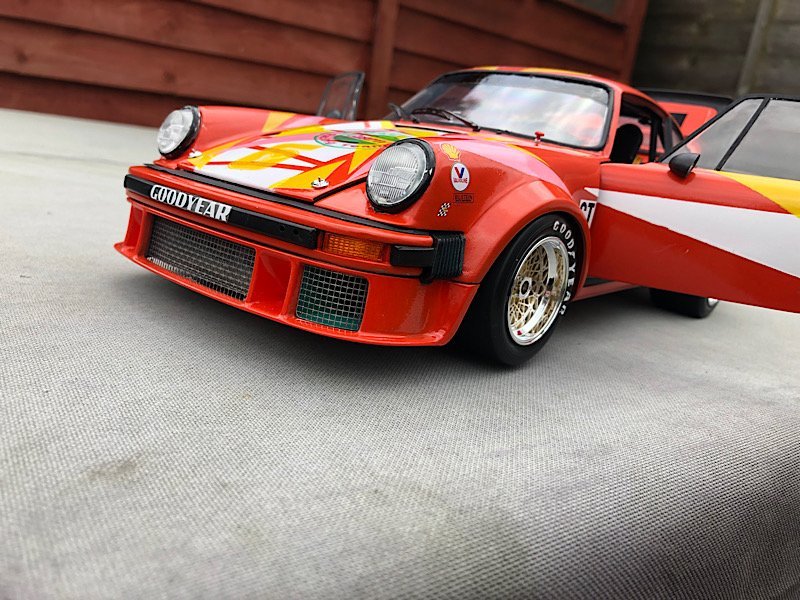
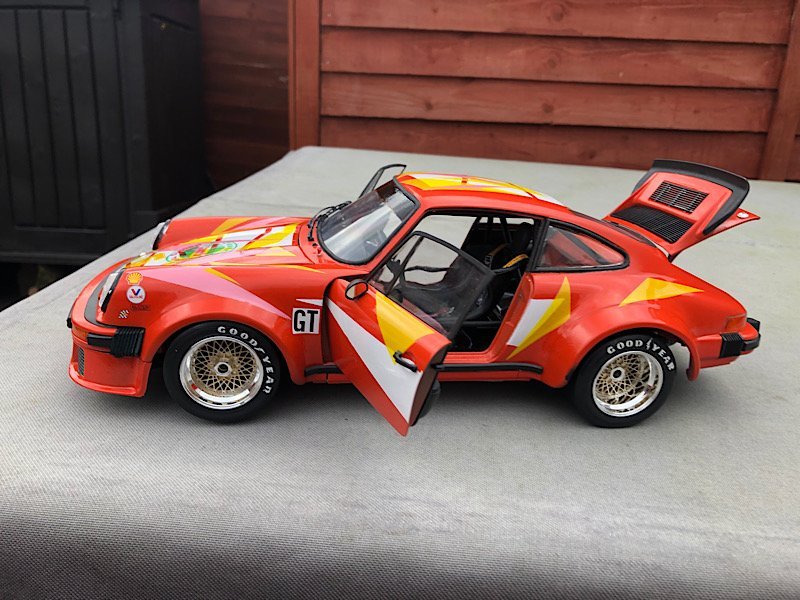
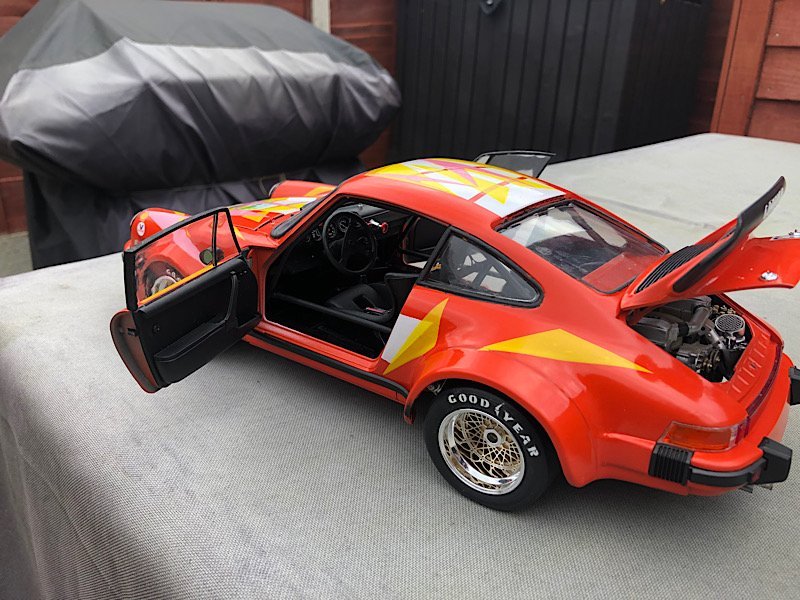
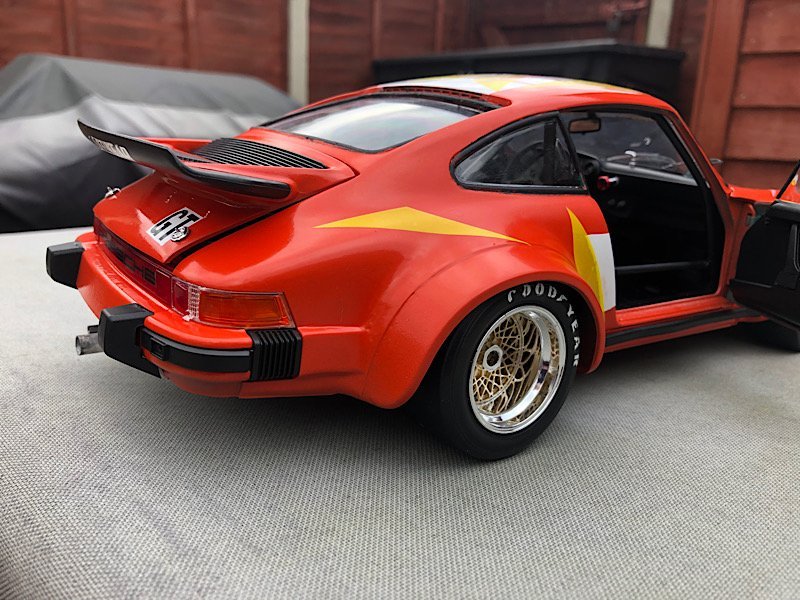
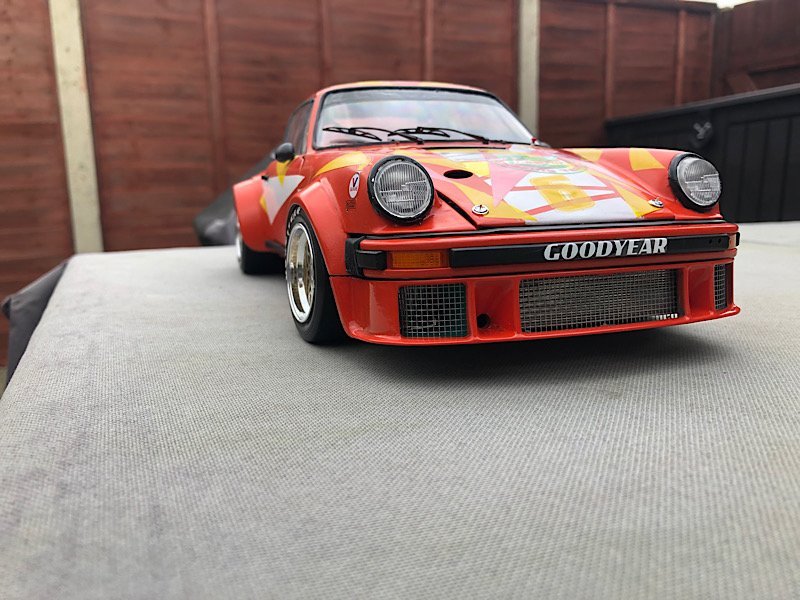
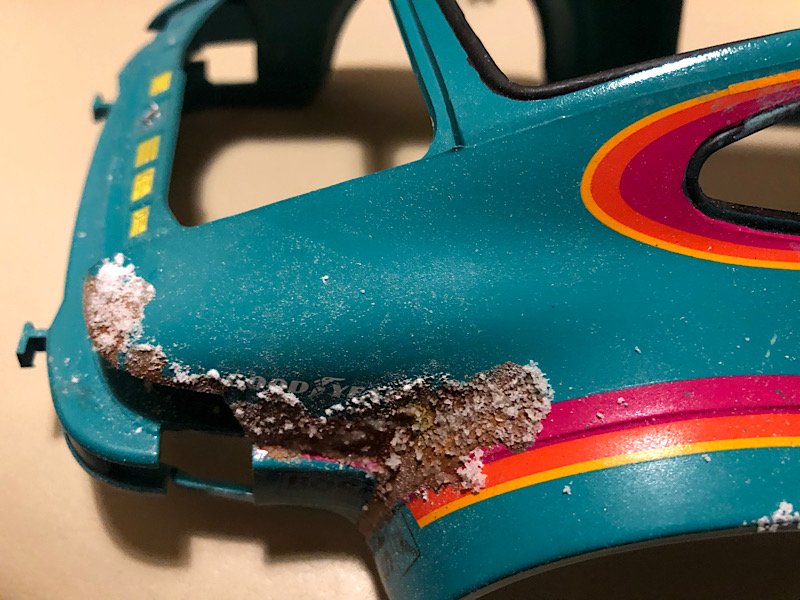
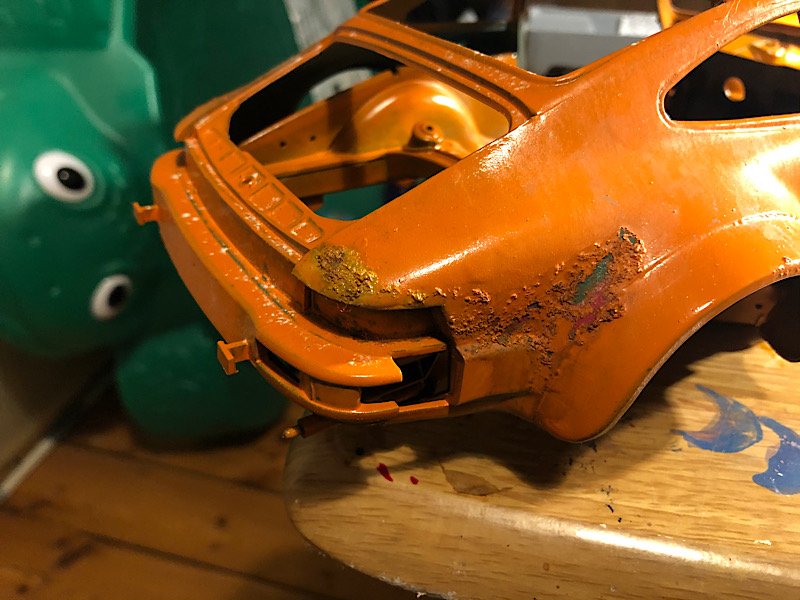
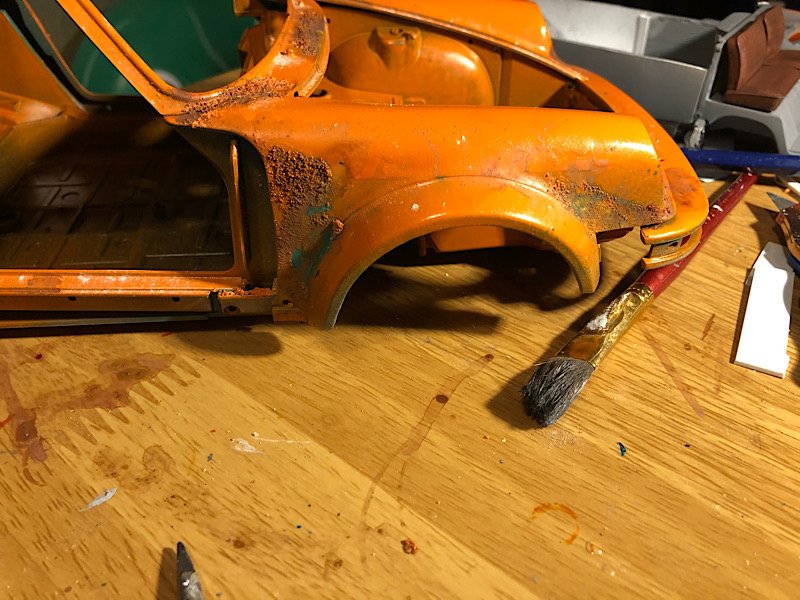
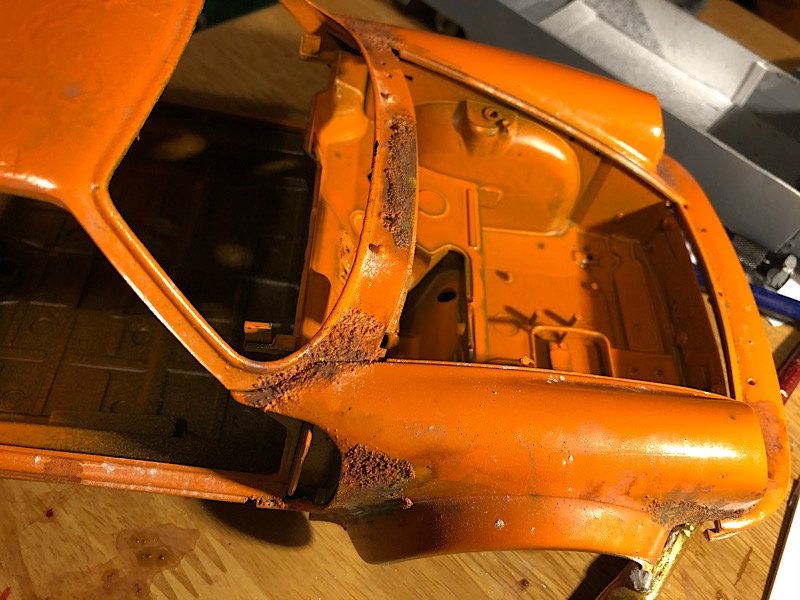
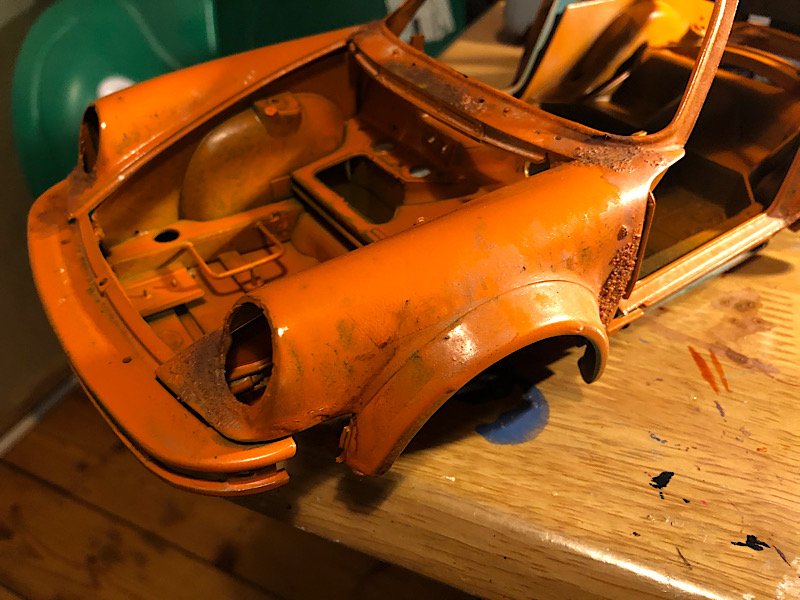
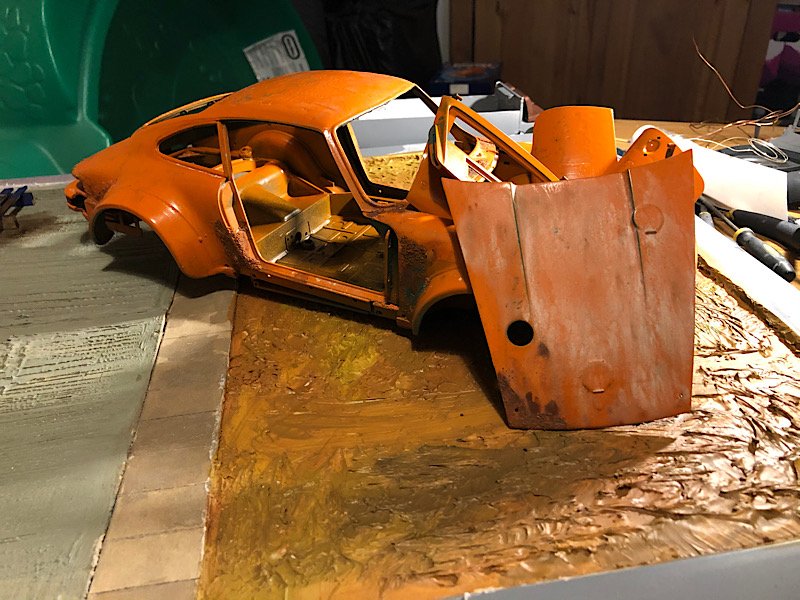
Hi all I work at a porsche classic racing car restorers and I managed to win this on ebay so I decided to build it to our customers car ( unfortunately we will never see it again as he sold it to someone in the USA.
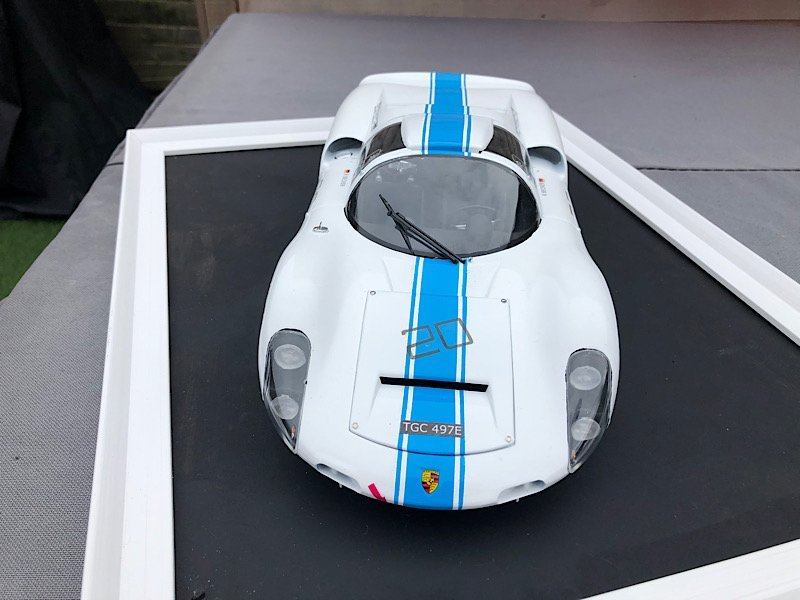
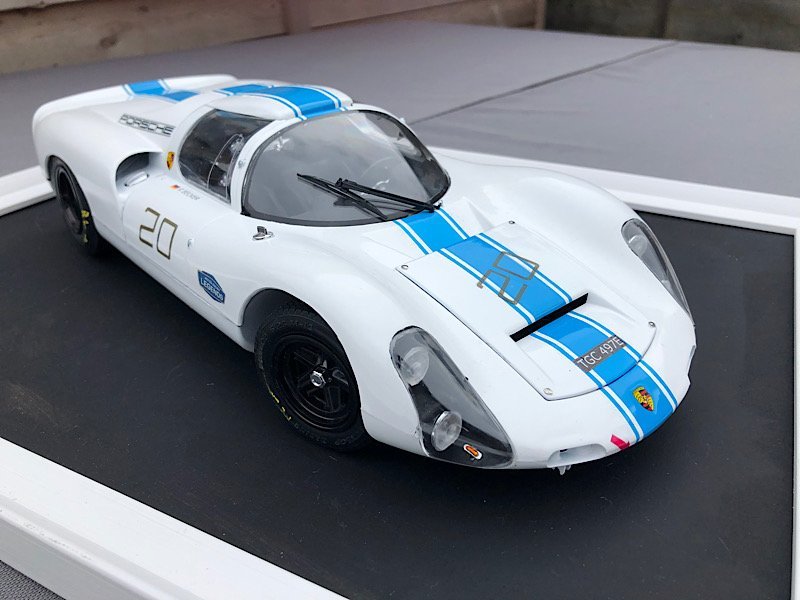
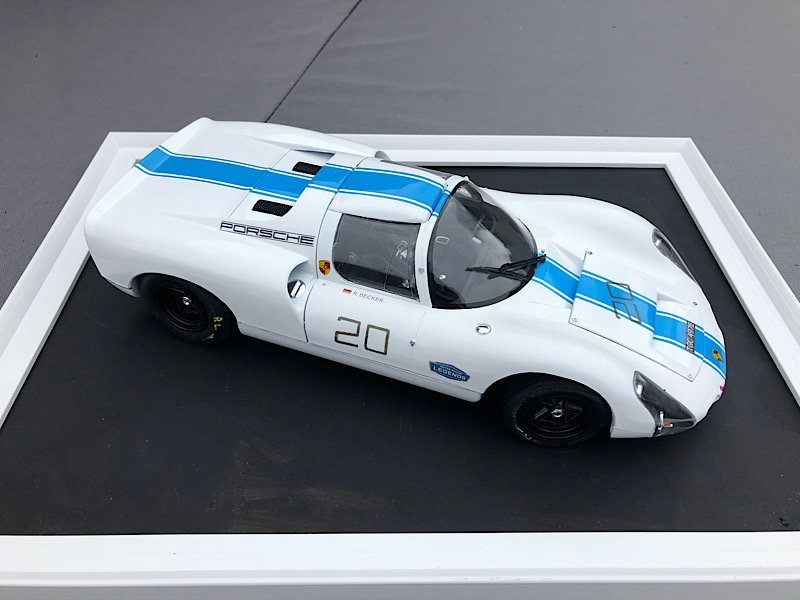
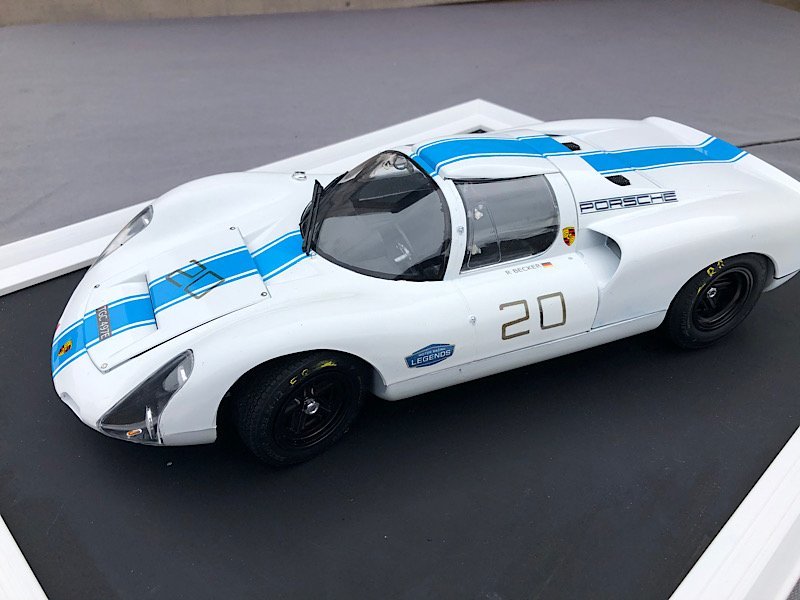
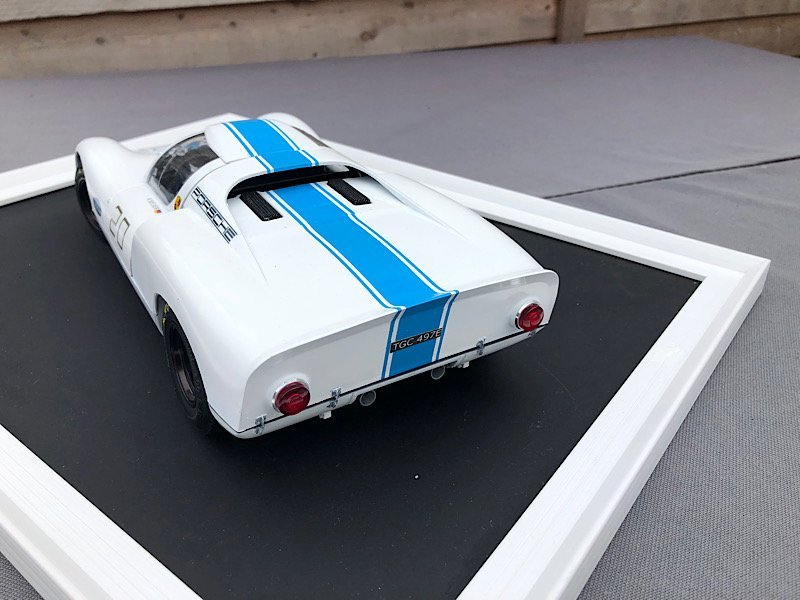
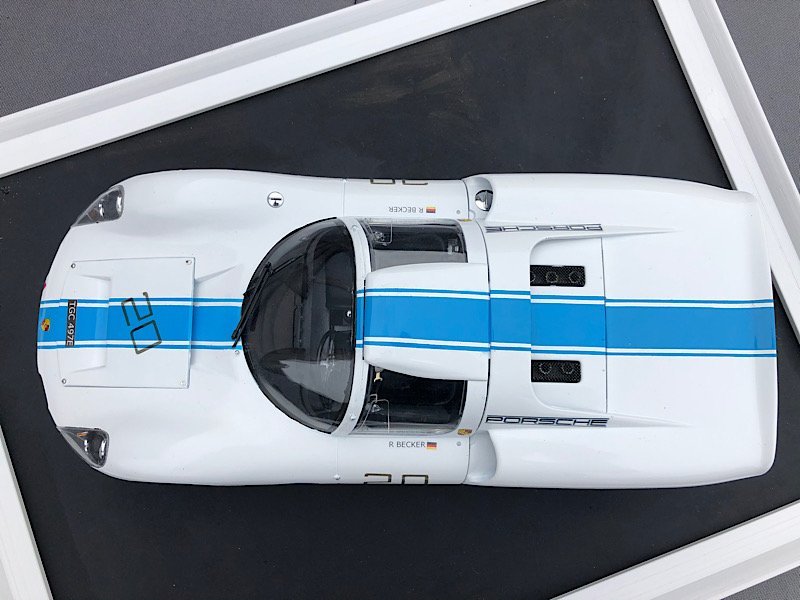
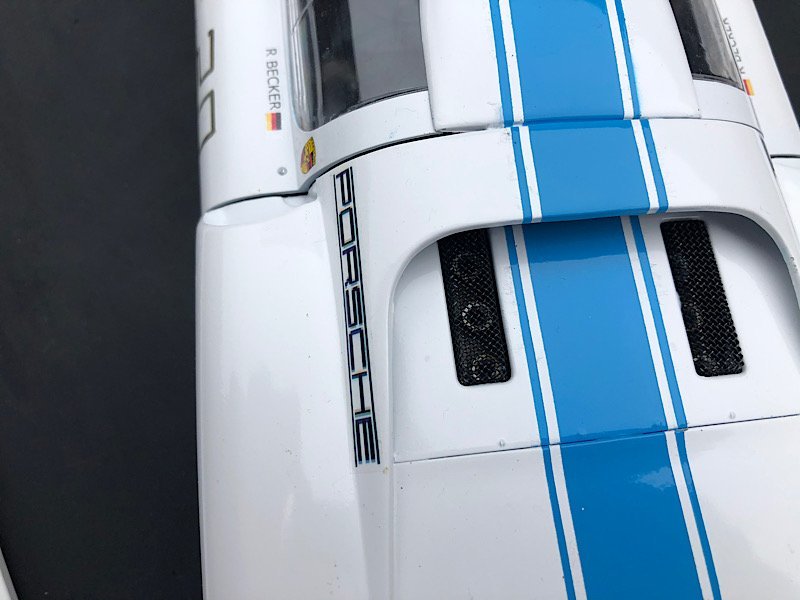
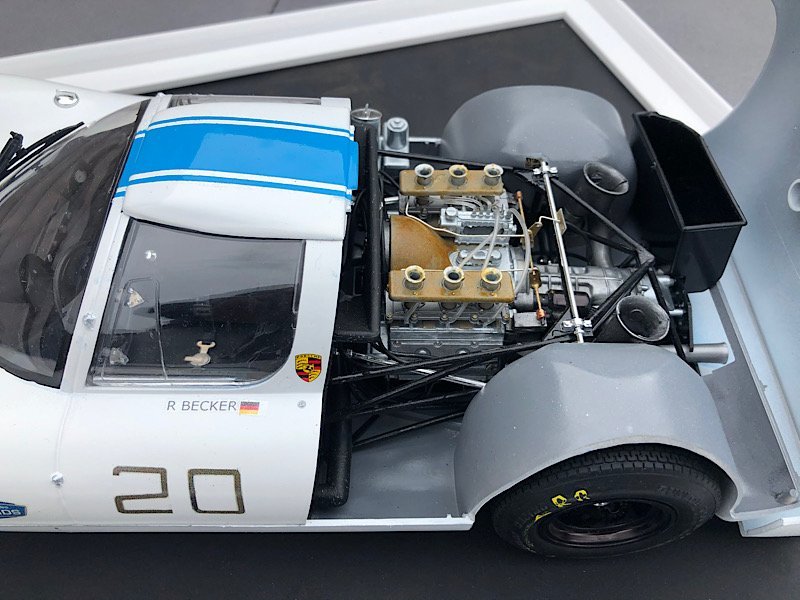
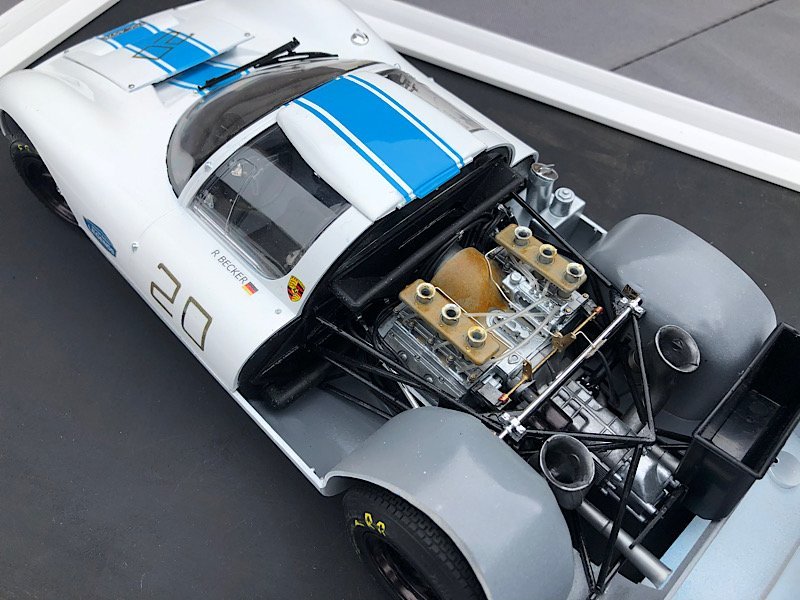
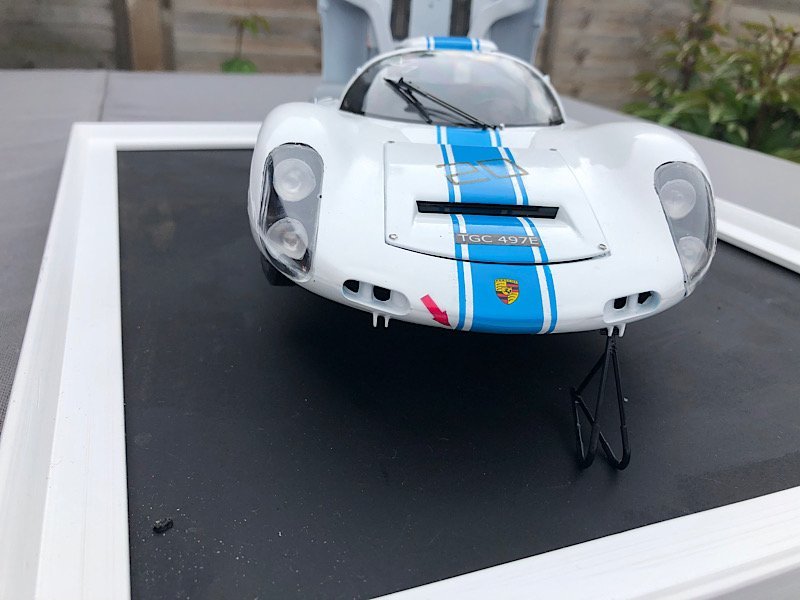
- Canute, Landlubber Mike, Old Collingwood and 7 others
-
7
-
 1
1
-
2
-
-
-
-
-
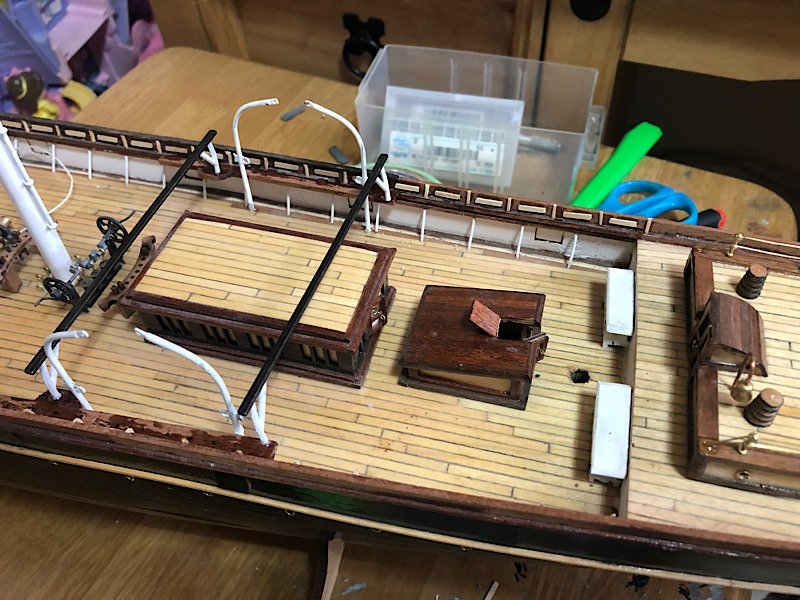
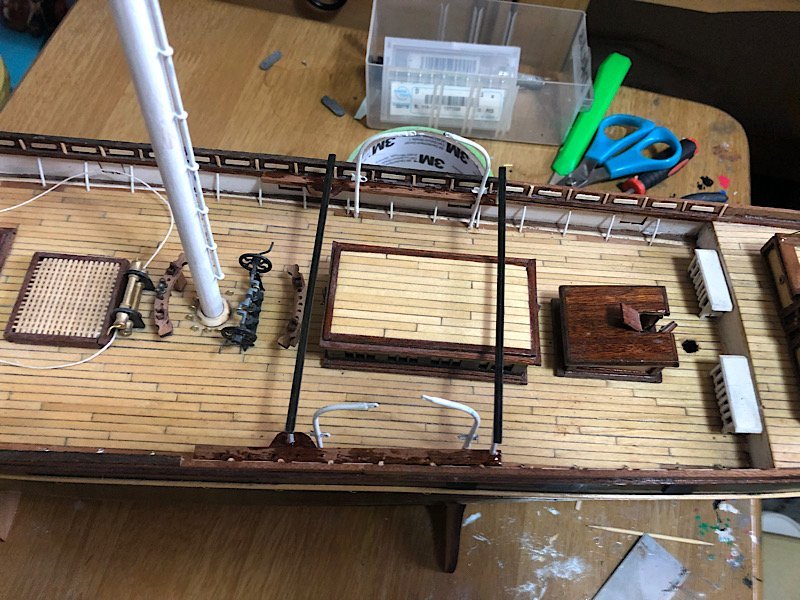
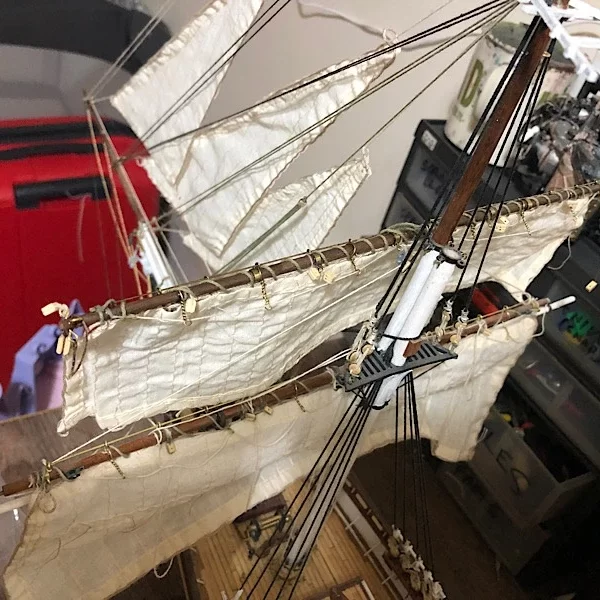
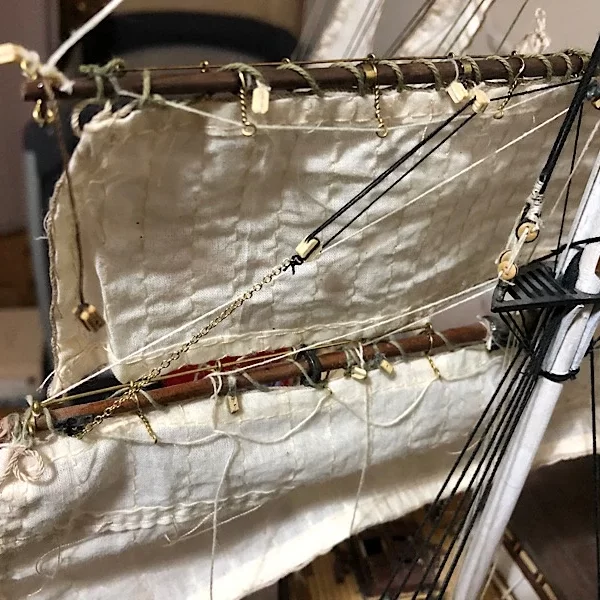
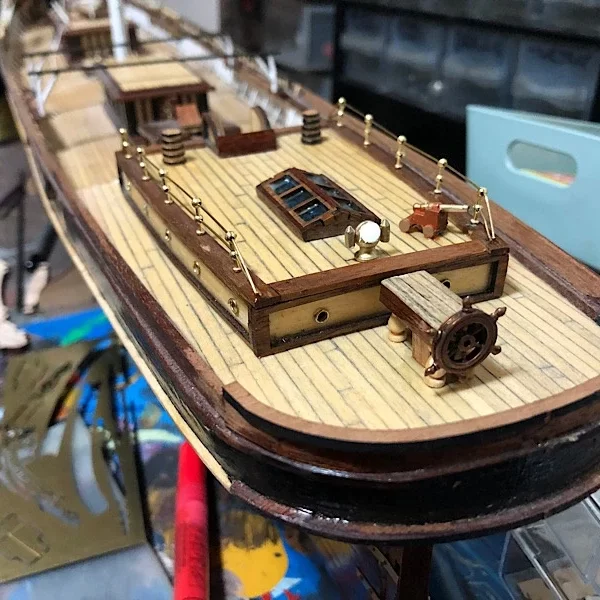
Hi Bill I forgot about this build (its probably in a bin somewhere)
I used clear bathroom sealant for the sea, its actually a very accurate kit for its time (ok they got the colours completely wrong) that said i really like the blue and gold colour scheme.
There are a couple of things wrong with the kit (its missing a couple of cannon placements and if I remember correctly some of the transom detail is wrong. As a kit it goes together quite well the detail is not that clear on the moldings but for kit of its age and price at the time I think airfix did a Stirling job.
-
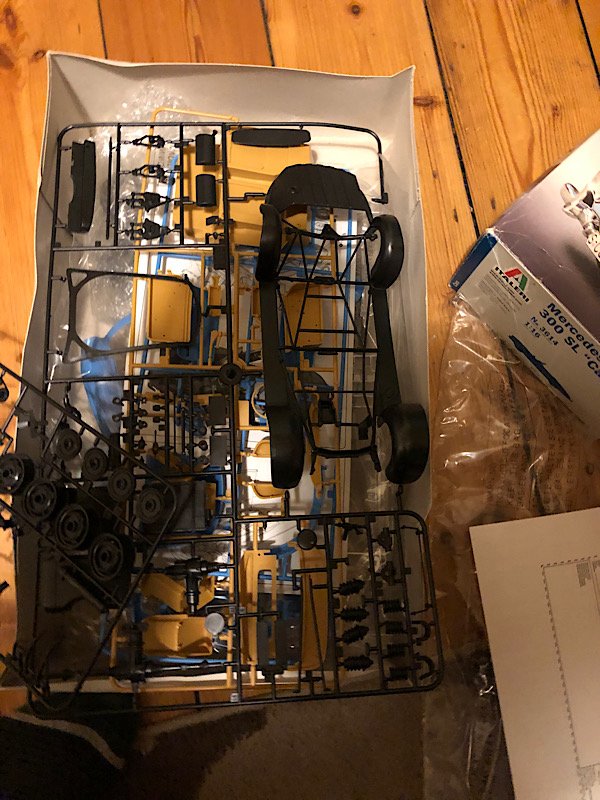
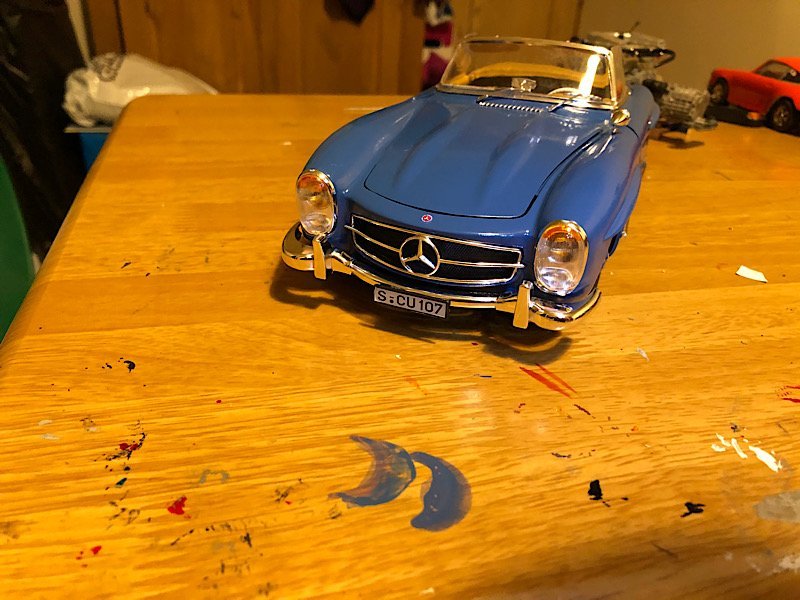
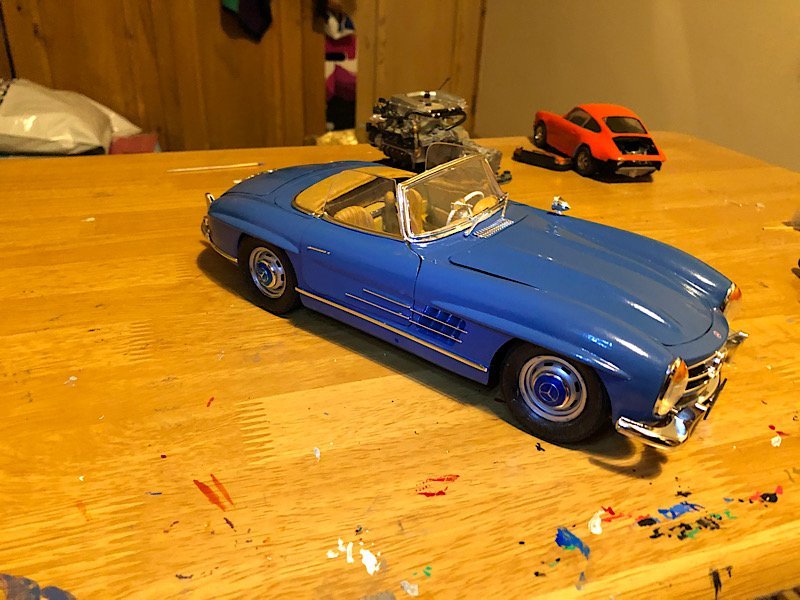
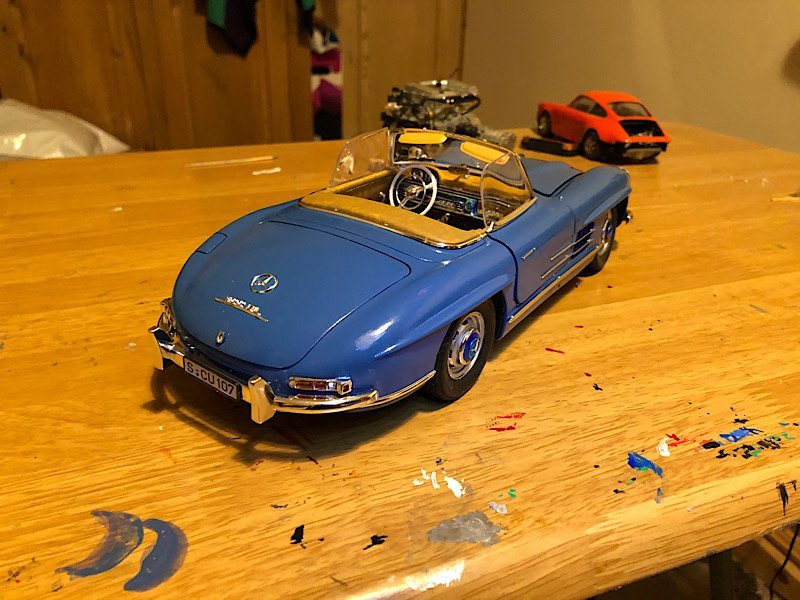
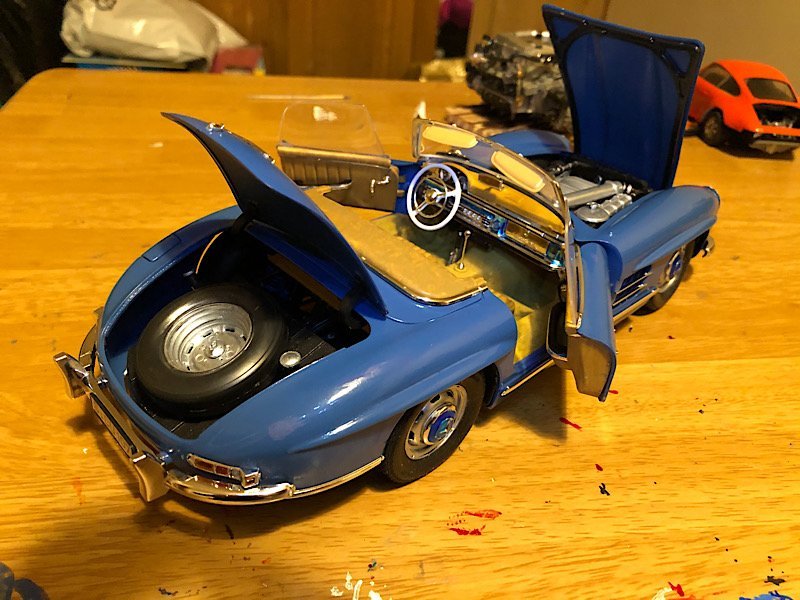
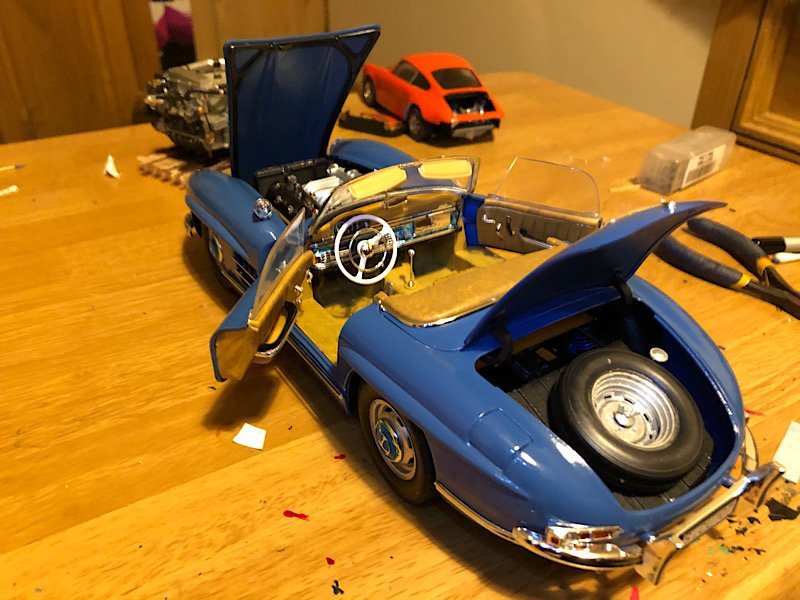
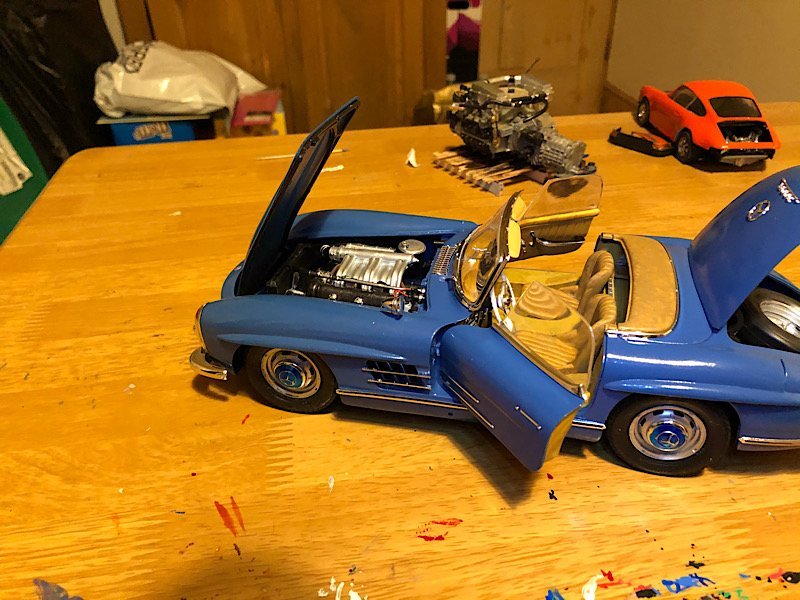
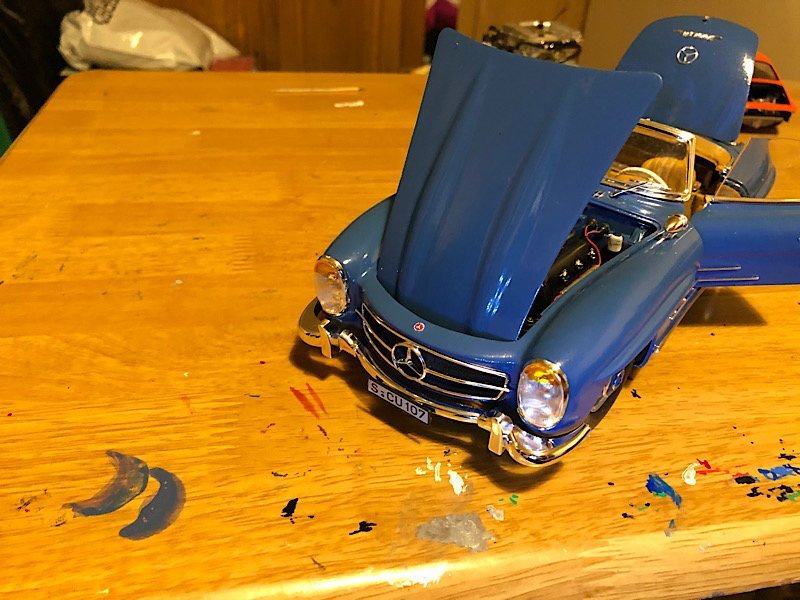
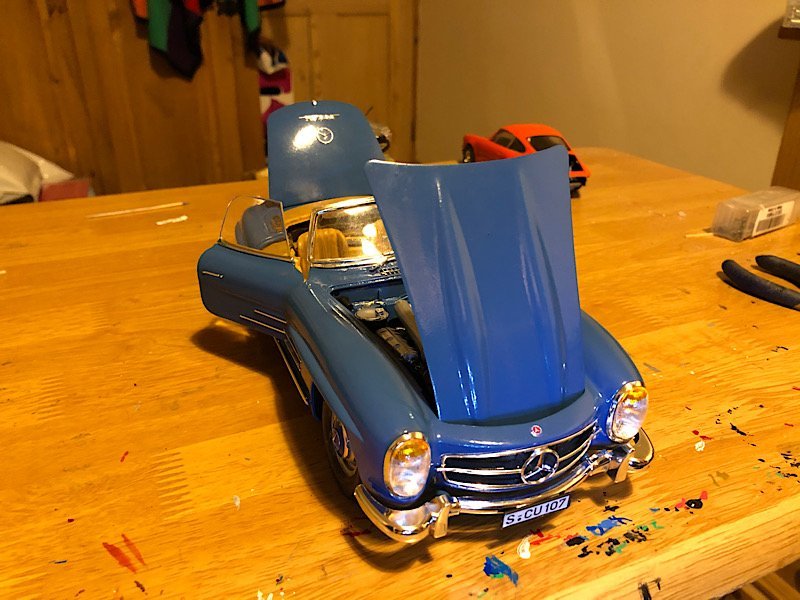
Hi all next victim is the italari 1/16 Mercedes 300 SL, first thing I don't like is the distributor and plug leads are molded as part of the rocker cover (I don't even know why they would do that at this scale)
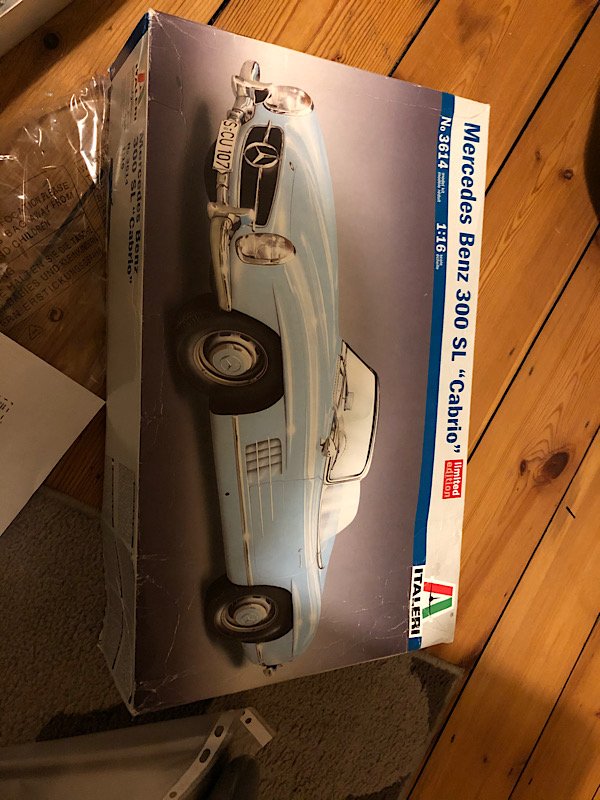
- mtaylor, Canute, Landlubber Mike and 6 others
-
9
-
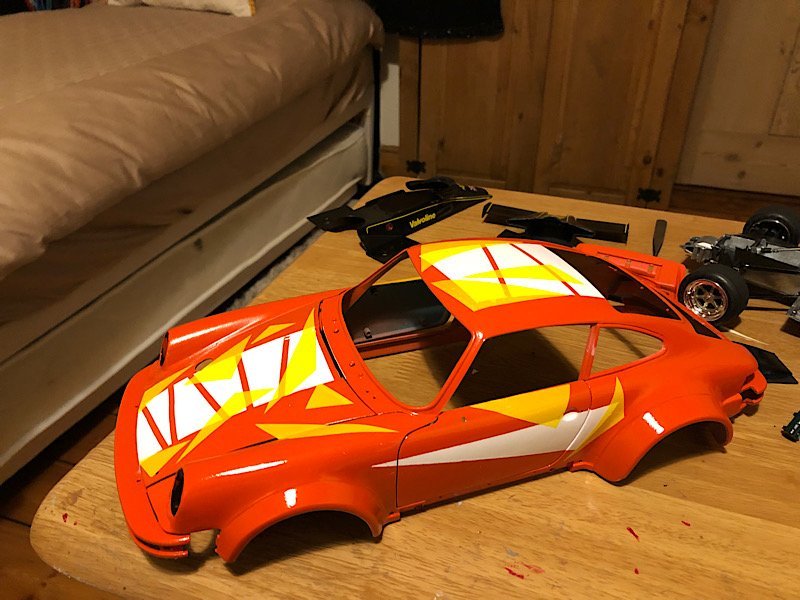
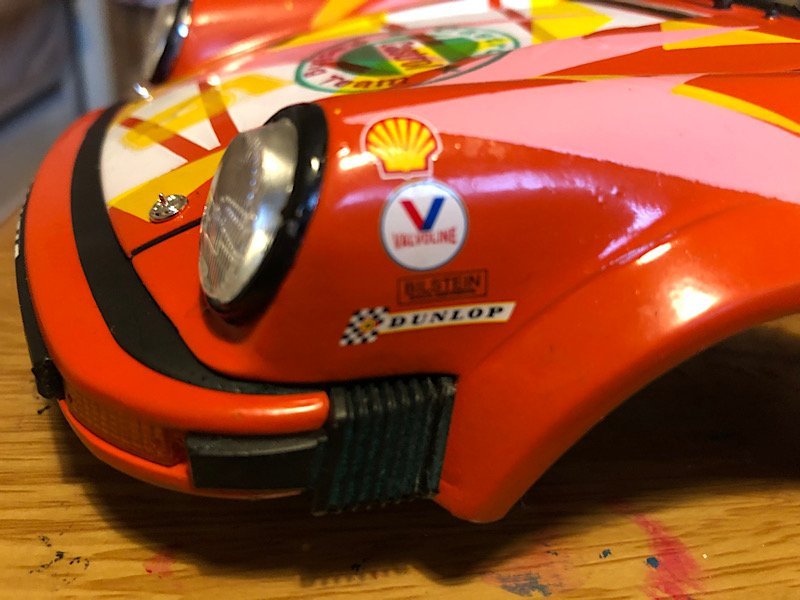
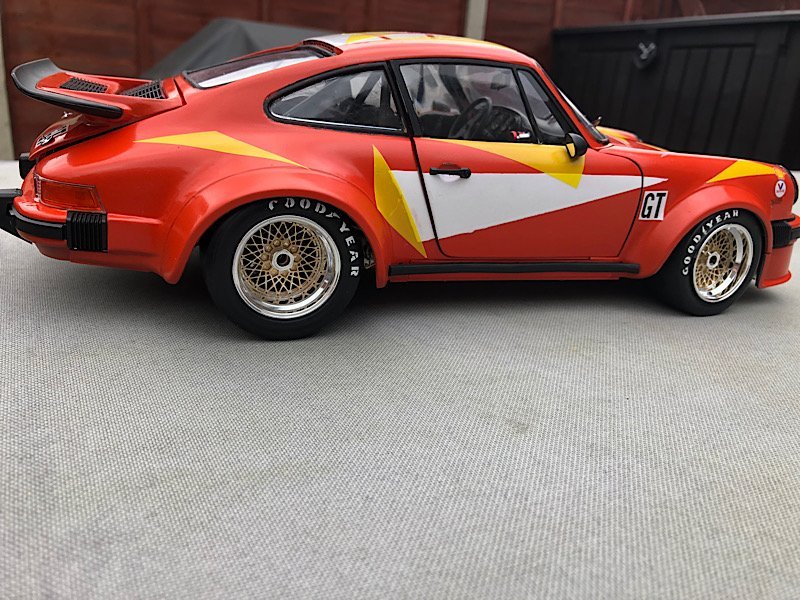
Here is one of the cars it usually carries (it also carries a 904 a 910 and another rsr cafe mexicano)
- Canute, popeye the sailor, Egilman and 5 others
-
8

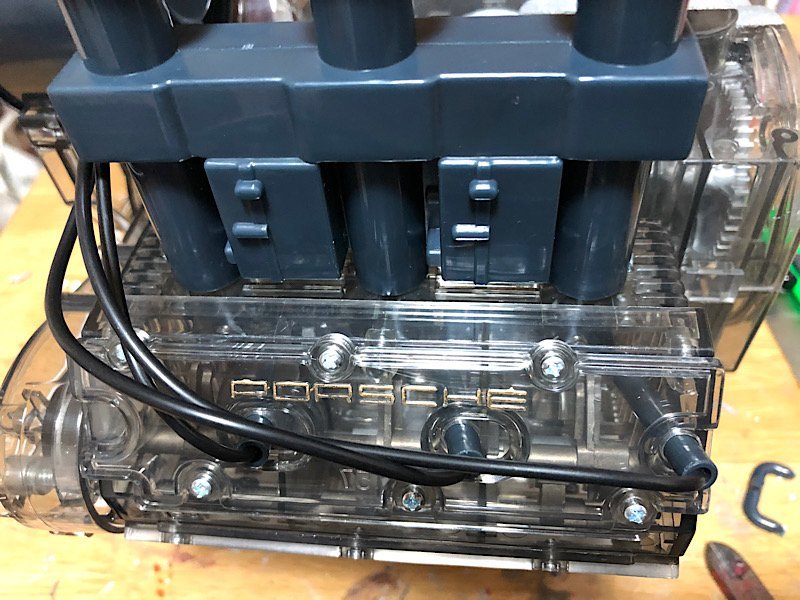


Porsche flat 6 boxer engine by kpnuts 1/4 machine works
in Non-ship/categorised builds
Posted
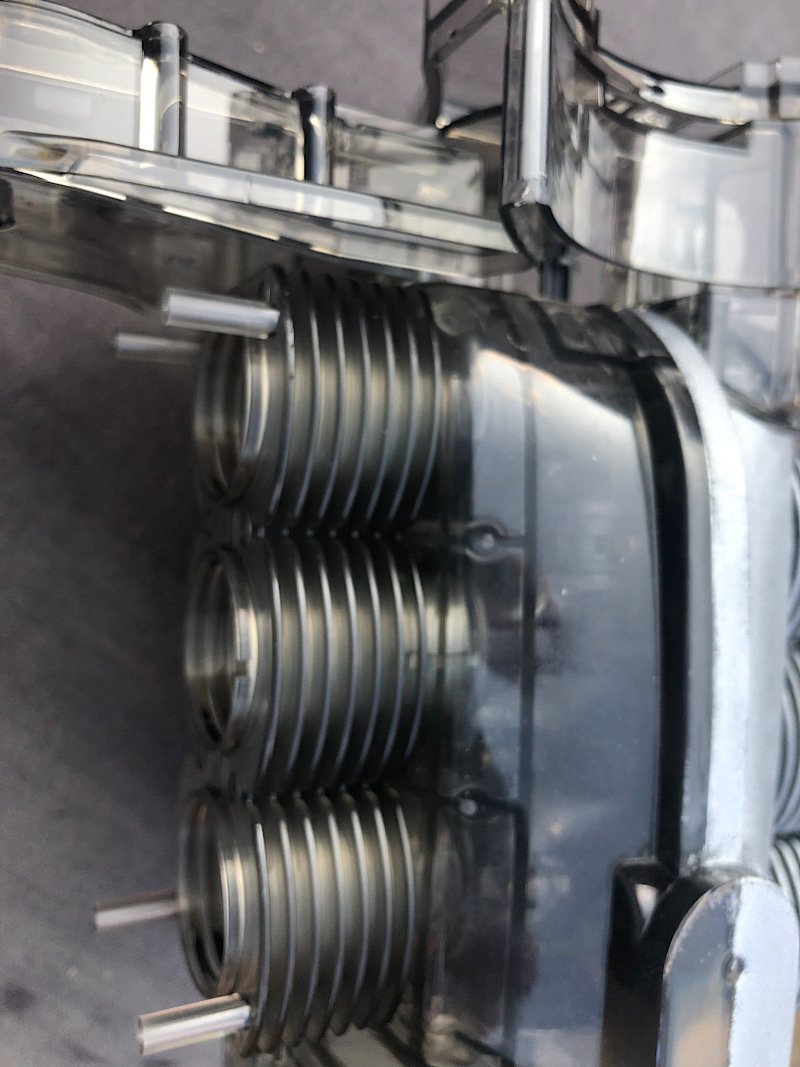
OK so this is how the carbs should look
Here's my start, yes it needs loads more detail