MORE HANDBOOKS ARE ON THEIR WAY! We will let you know when they get here.
×


vossiewulf
-
Posts
1,477 -
Joined
-
Last visited
Content Type
Profiles
Forums
Gallery
Events
Everything posted by vossiewulf
-
 I forgot to answer, it depends on what you're calling Damascus steel. The traditional historical Damascus steel would be close to white steel, they didn't know anything about alloying small amounts of chrome and molybdenum, etc. into their steel. Also the idea they used, of folding bars together that had differing amounts of carbon, wasn't unusual- the Japanese not only did that also but controlled it very finely to produce particular patterns on the sides of the blades. The Saxons were the "people of the seax" and they also pattern-welded their knives. The problem is that despite being pretty, pattern-welding steel doesn't make it better, in fact it's inferior to modern solid steels. The reason being that those patterns are made by folding bars together that have significantly different carbon content and therefore hardness. The reason they did this is they just weren't very good at controlling the carbon content of their source bars, and some would come out with too little and some too much- the solution was to fold them together into very fine layers, this minimizes the differences and allows the low-carbon steel to provide flexibility, while the high-carbon steel provided a good edge. Today's modern knives are basically made solid out of high-carbon steel so they're a bit less flexible than Damascus steel but have no soft/hard layers. The original Damascus steel makers were more concerned with making swords, which have to be very flexible, but if you make them entirely out of flexible low-carbon steel, you don't get a good edge. By layering their steel they were able to produce swords that were flexible and wouldn't break in combat, but had edges that could be made much sharper than standard swords. As such they developed a reputation for sharpness, but that's a very different kind of sharpness than that required by a small knife. Today "Damascus steel" can mean almost anything. Many Japanese makers use very dramatic Damascus patterns on their knives, but those patterns are just in the soft steel on either side of a solid cutting edge - it's purely aesthetic, it has nothing to do with the cutting edge. And even if you could get someone to make a real Damascus knife for you, it still wouldn't be better than a knife blade you can order from Mr. Hock at much less cost.
 -
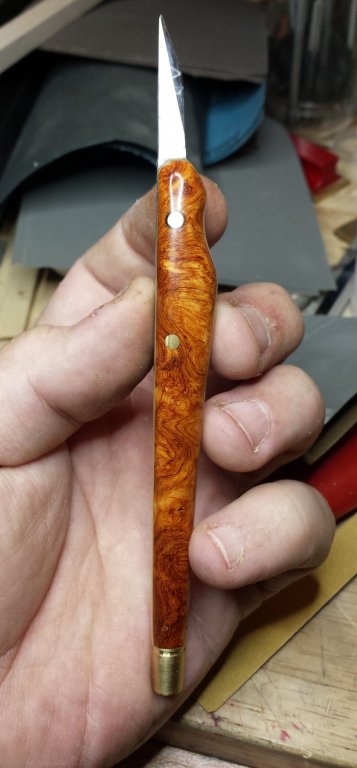
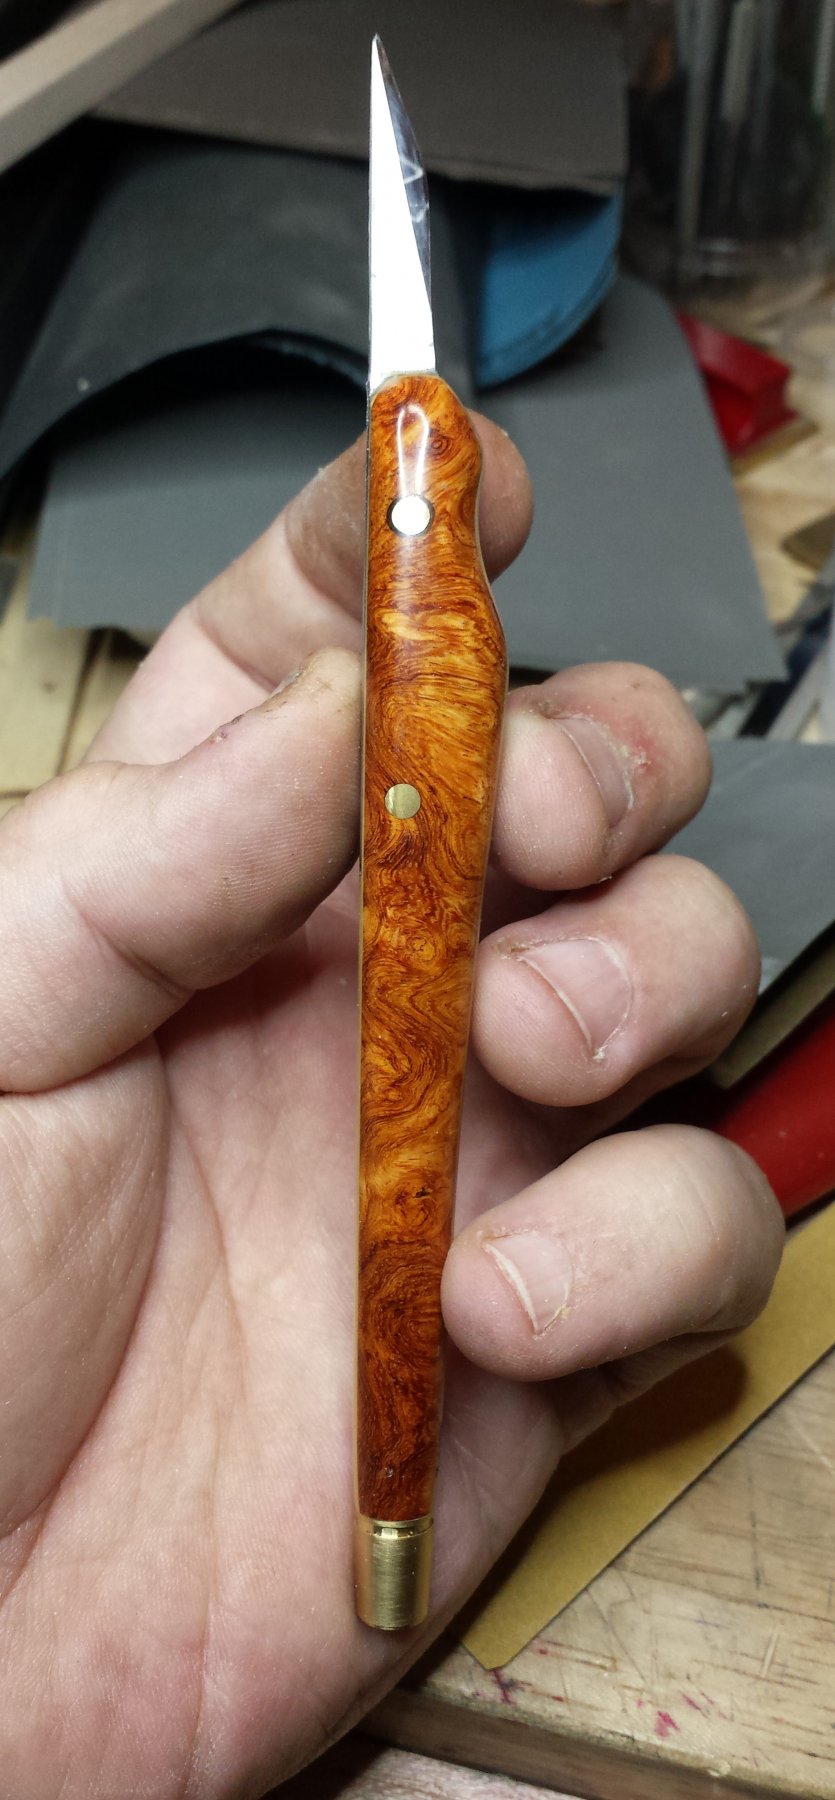
You're welcome Gaetan, anything I can contribute to your work is worthwhile. With your perfect knife, what you're talking about is a standard detail knife but much bigger, because you're building much bigger, and I understand that's hard to find because most people don't need giant detail knives Your best choice is to draw what you want, including a tang locating 3/16" holes for the brass reinforcing pins, and send that drawing to Ron Hock and ask for a quote. I'd be very surprised if it came back more than $60, as he's made several custom blades for me and it's never cost me more than that. Then all you need is a piece of wood (lathe pen blanks are usually good) for a handle, you rip that in half, mortise each side half the blade's depth, and then assemble it with epoxy. As noted all you need extra is some 3/16" brass rod to go in the reinforcing holes. I then usually do a CA glue finish on the whole knife because 1) it's indestructible, 2) it's very pretty, 3) I actually feel like my best grip is on CA glue rather than wood, my hand never slips on the knife.
-
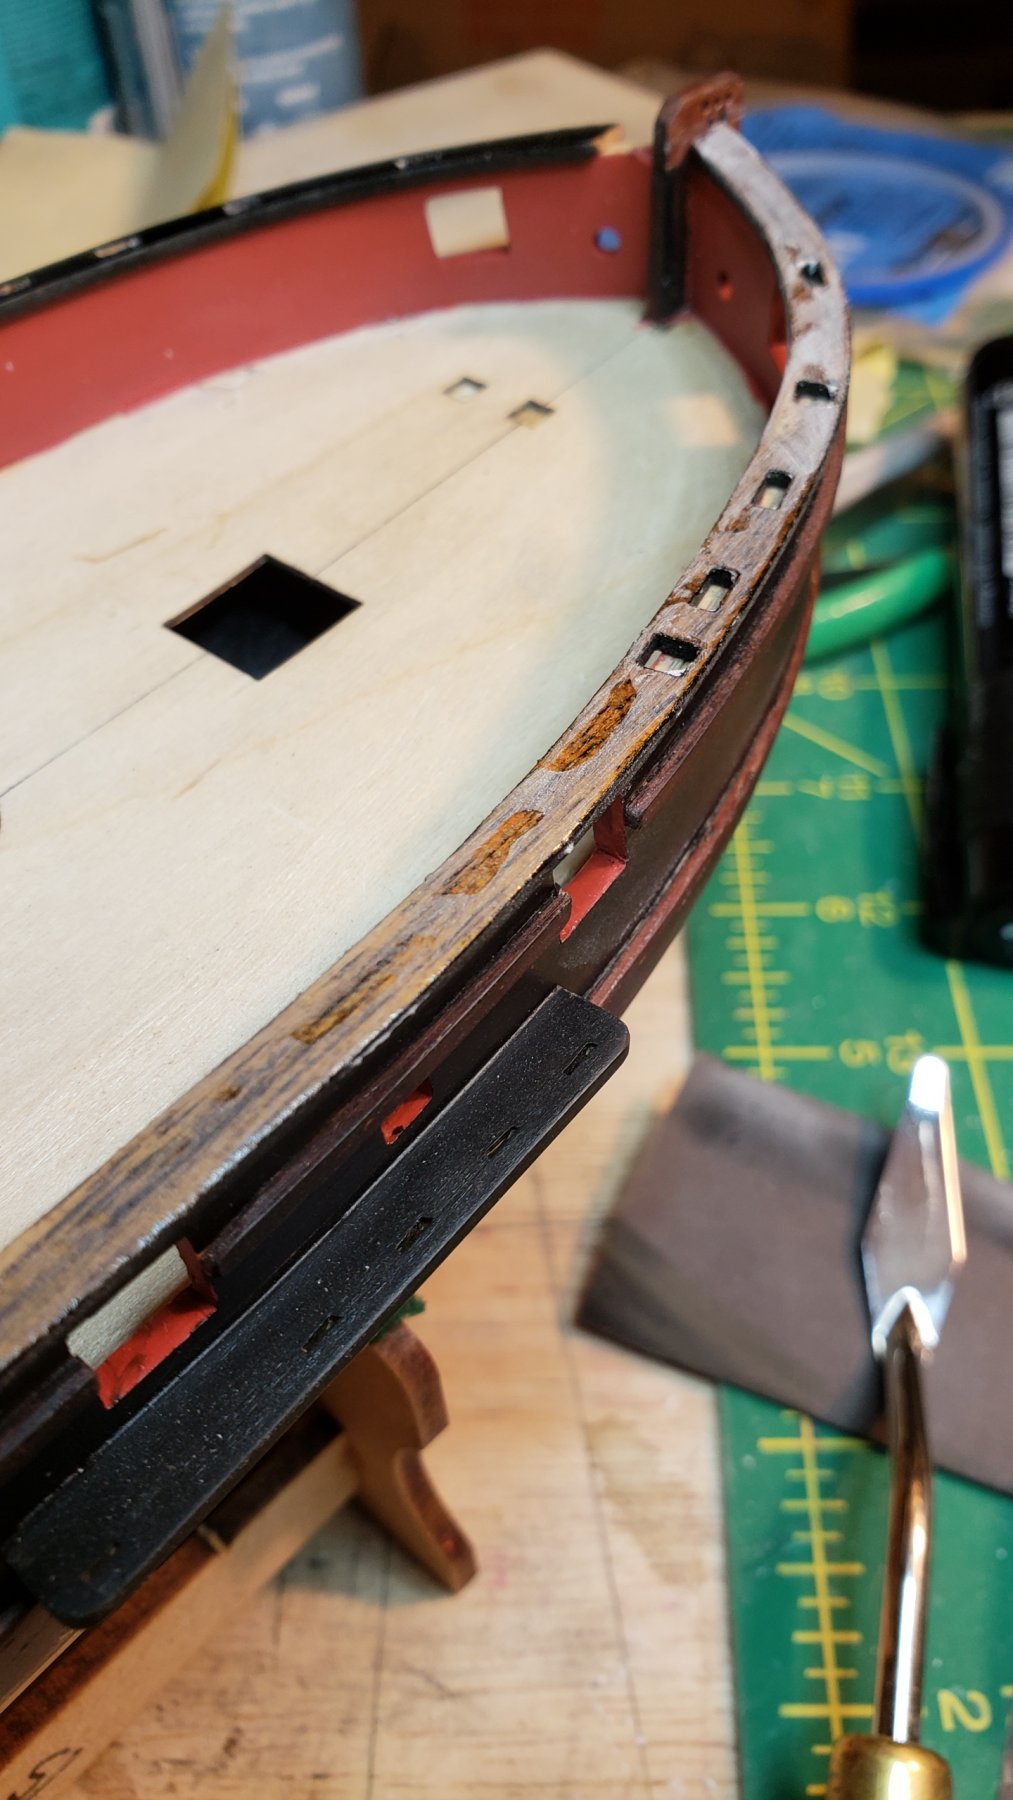
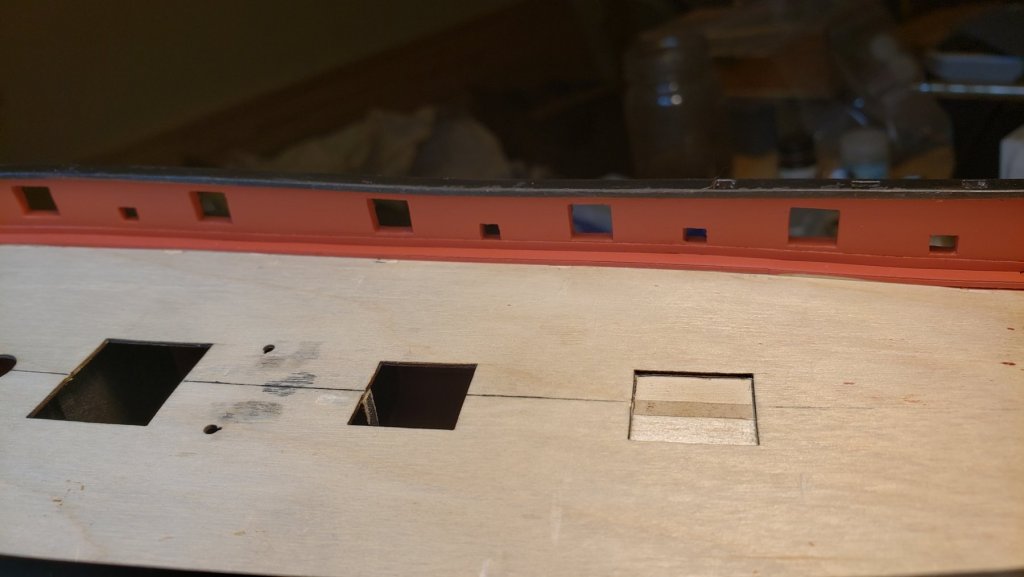
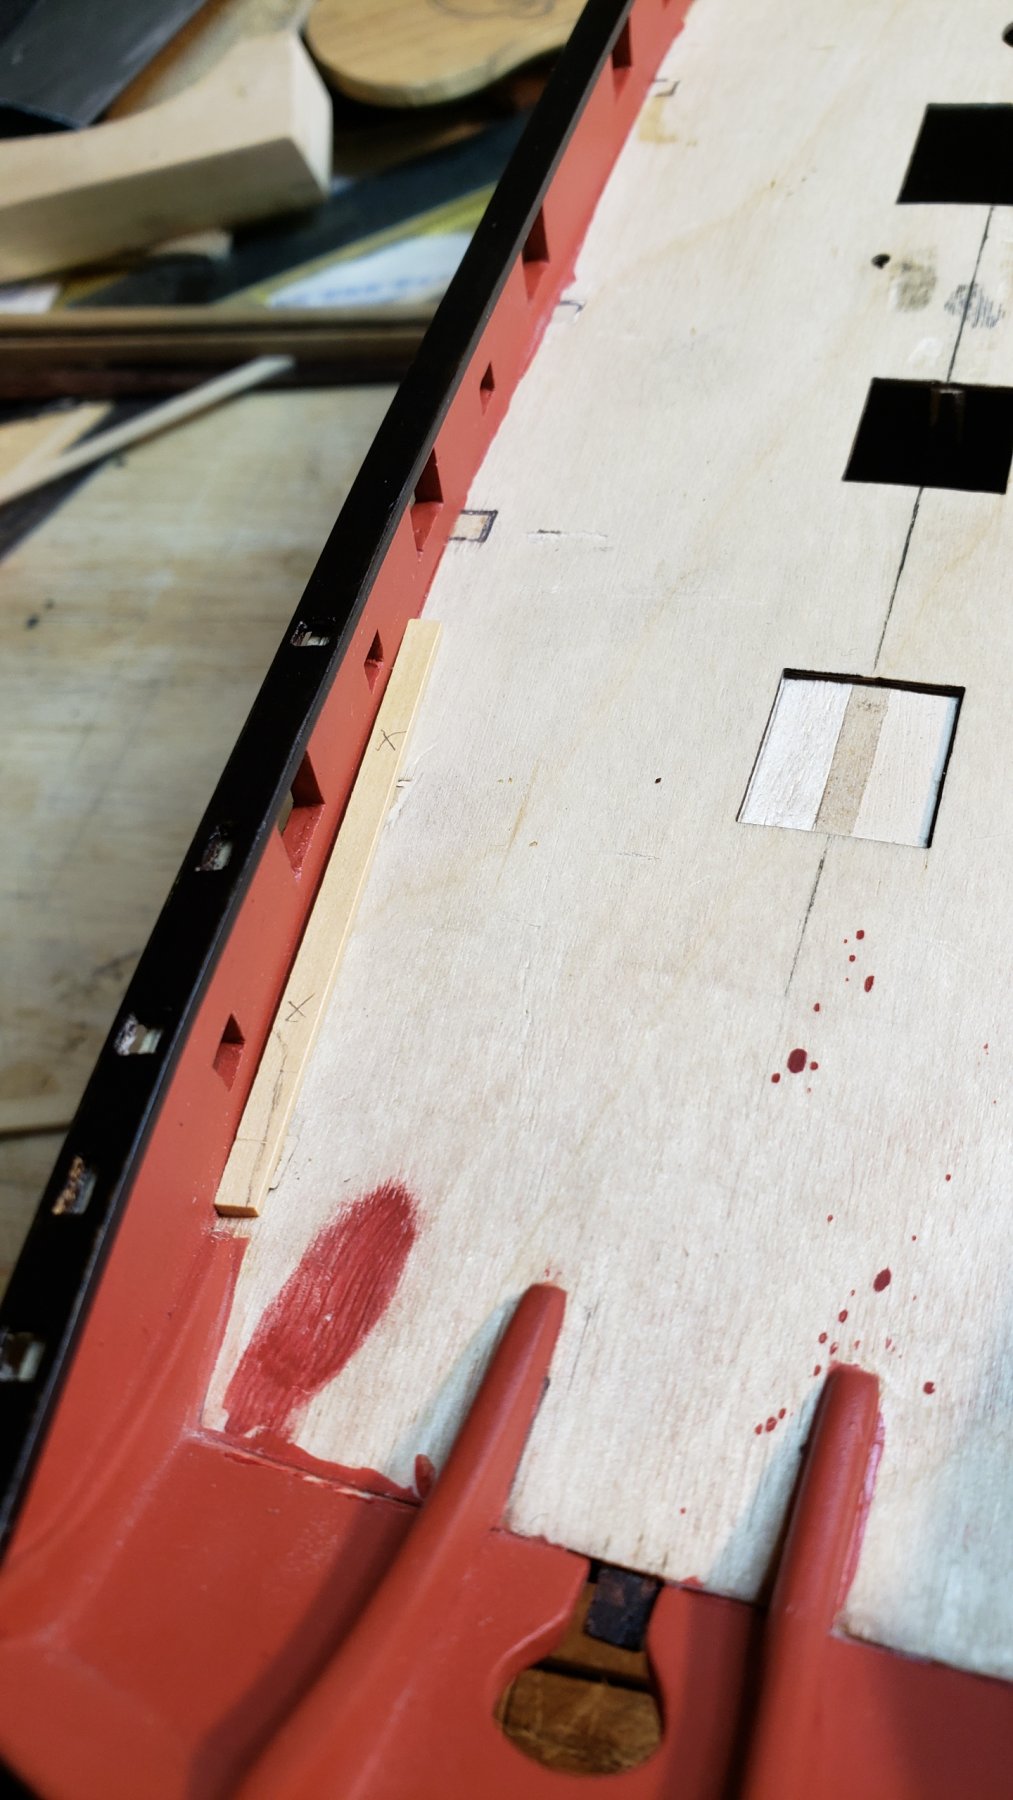
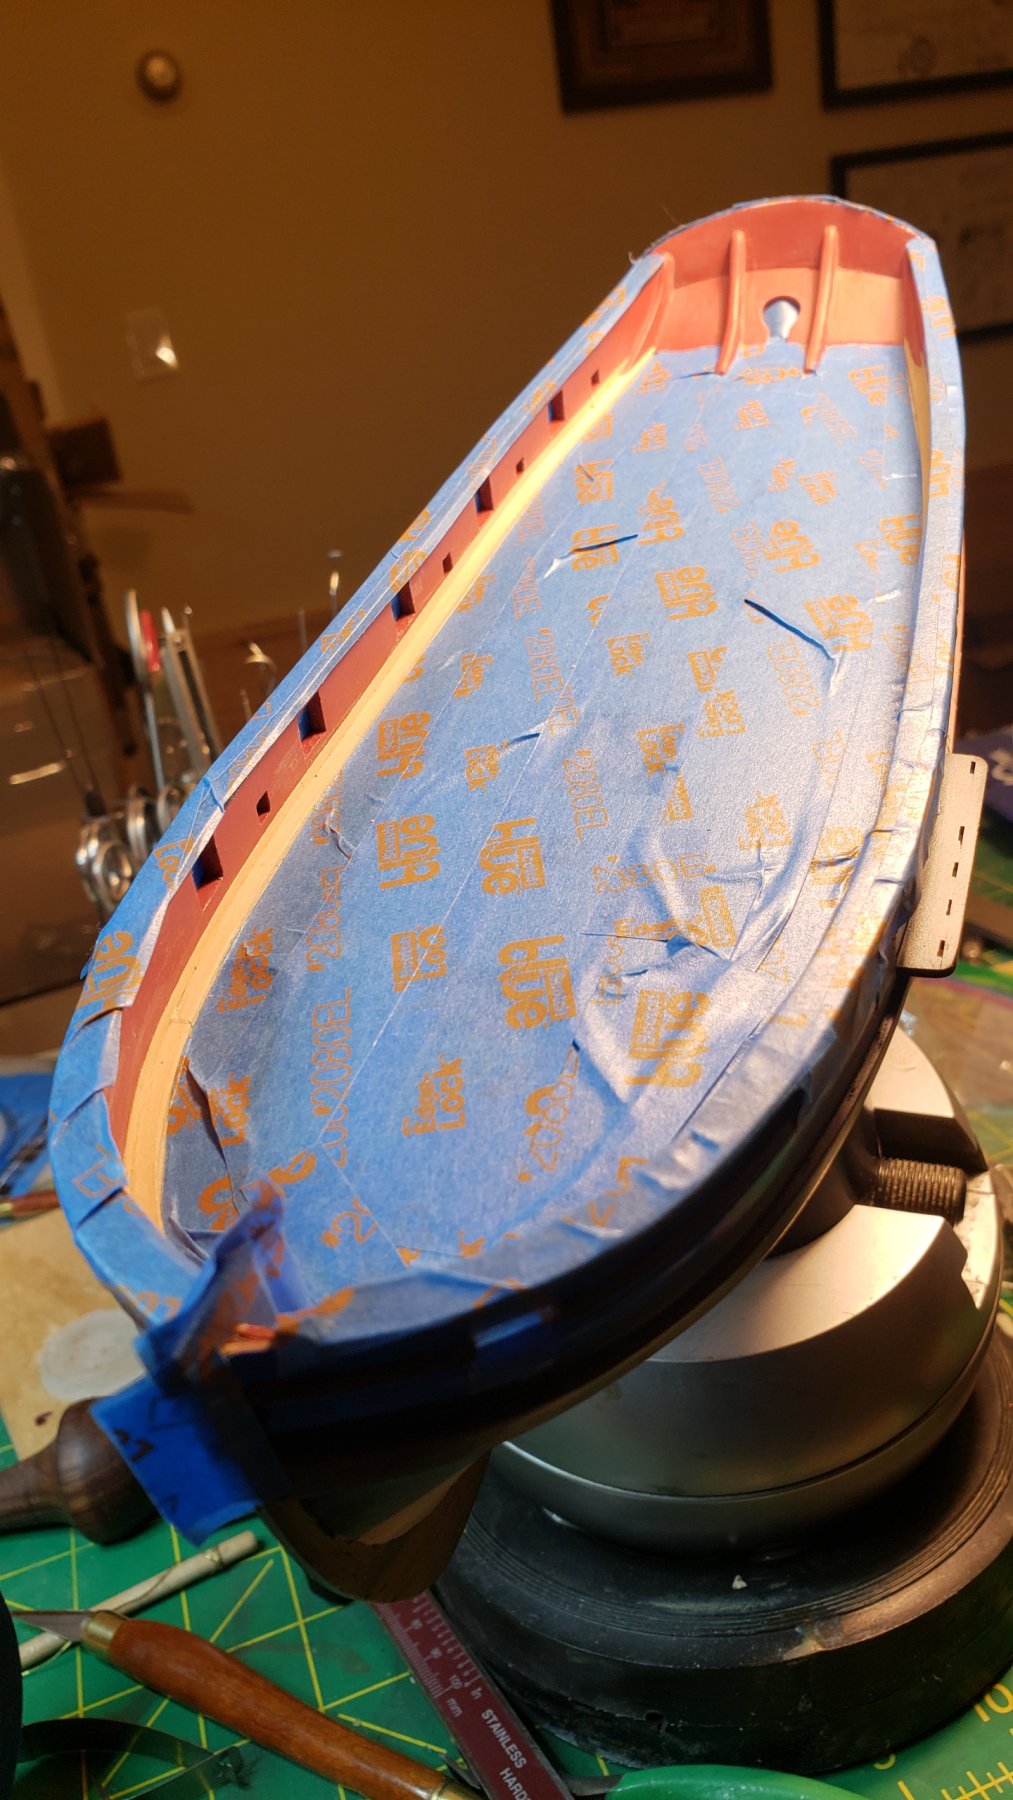
A few more strakes on including the tricky first nibbed one. This wasn't easy as most of the plank is a cutout into the margin plank. Now had I planked a deck before, especially including straight-run nibbed plank ends on bow and stern I might have noticed that there was a chance that the nibs would interfere with the scarfs. But I hadn't so I didn't and we have a less than perfect location for the scarfs considering where the first nibbed plank ended up. And overall.
- 714 replies
-
- 11
-

-
- lady nelson
- victory models
- (and 1 more)
-
Doris, just spent some time catching up and I've reached one conclusion: I will marry you if you teach me how to build models like that. Seriously, you don't need to feed me or take care of the house, just teach me the ship modeling. I'll handle the bills and teach you how to use power tools. It will be beautiful 😉 Truly amazing work. If you wrote a well-documented book with lots of photos on the process, you'd make a goodly amount of money on Amazon.
- 1,035 replies
-
- 5
-
-
- royal katherine
- ship of the line
- (and 1 more)
-
I didn't nail the hull, so probably not on the decking either although I haven't totally ruled it out. I will have to go look at Bob's Prince deck to see what he did as I'm not even sure what wood or color would work well with holly. Speaking of holly, it cuts easily but is somewhat fuzzy- edges coming off the saw and any edge that is sanded will generate some fuzz on the edges that has to be carefully cleaned away prior to gluing. Not a major problem but a bit of an annoyance if you're going to use holly planking.
- 714 replies
-
- 1
-
-
- lady nelson
- victory models
- (and 1 more)
-
I should have known you have given this considerable thought First of all Japanese steel will be referred to as white steel or blue steel. This has nothing to do with the color of the steel but rather the color of the wrappings of the bars as they leave the steel foundry, traditionally pure unalloyed steel (Fe + C) has white wrappings, while alloyed steel (some combination of Fe + C + chrome + molybdenum + vanadium) comes in blue wrappings. Many argue that nothing can be made as sharp as white steel, however it's also the most fragile and also loses its edge quickly since the alloys are all designed to add resistance to loss of the edge (particularly vanadium) plus heat and stress resistance. In general a blue steel blade will hold an edge longer than white steel and will take more stress (twisting cuts) without the edge fracturing as compared to white steel. With western steel we have primarily O-1 and A-2 steels, both are alloys with the first being quenched in oil, and the second being left to cool in ambient air (hence the O and A respectively). O-1 is easy to sharpen but doesn't hold an edge very well, whereas A-2 holds an edge better but is difficult and time-consuming to sharpen. In better quality steel there is also a cryogenic process that helps sort the molecules properly, leading to greater edge toughness. Also for the first time in a while there's a newcomer, powdered sintered steels. These get around limitations in standard alloying practices by never completely melting the steel, instead the powdered ingredients in the desired ratios are mixed and placed in a form and a hydraulic die press basically squashes them into a solid steel bar in one quick shot. This is important because high vanadium in steel leads to much longer edge life, but in traditional alloying the amount of vanadium that could be added was very limited since vanadium will quickly grow into much too large crystals. With powdered steel, you can put in much more vanadium since the sintering process doesn't allow it time to grow large crystals. As such, the most sophisticated (and best IMO) steel available to woodworkers right now is the PM-V11 steel that Lee Valley uses for many of its tools. It holds an edge for insanely long periods (I have jack and smoothing planes with PM-V11 irons) but is at least as easy to sharpen as O-1 steel. Unfortunately they haven't made any knives yet with it, just plane irons and chisels. A couple of suggestions. One is Shapton Glass Stones. They're ceramic waterstones and 1) remain almost perfectly flat and 2) remove steel faster than anything I've ever used, and I've used all sorts of waterstones (including natural stones) and diamond and other ceramics- none of them come close to how fast Shapton stones remove steel. This means much less sharpening time and much more working time. I use 220 for shaping bevels, 1000/4000/8000 for sharpening and a strop. Another is to try a knife or two from Ron Hock. He's the best of the western blade makers (IMO) and makes excellent plane irons and knives. He stops at Rc62 to provide somewhat better edge strength under stress, and he also cryogenically treats all his steel. You're also right that you basically need blades with an edges parallel to the knife handle (straight blade), beveled at an angle (skew blade) and perpendicular to the handle (chisel). All are needed for good woodworking. For the chisels, I recommend the Lee Valley PM-V11 bench chisels, and you should also look at Japanese dovetail chisels and also shoji chisels (used for making the mortise cuts in Japanese shoji screens) since you are constantly working into tight spaces.
-
I forgot to say thanks Dan, that helped me a bunch in getting past the decision block.
- 714 replies
-
- 2
-
-
- lady nelson
- victory models
- (and 1 more)
-
You know I seem to remember an argument some time back where you insisted nothing was as sharp as a scalpel I'm glad you've seen the light (and the metallurgy). The only downside to Japanese knives is they push the hardness to Rc63-64 and therefore the edges can be brittle, don't try many twisting cuts with your new knife. And I agree with you about the weight, that's why I add the brass weights to my knives, to move the balance point to just ahead of center and to give them more mass for control.
-
When you're amazing Amalio, you're hovering somewhere above Valhalla in model ship-building skill. Truly stunning work.
-
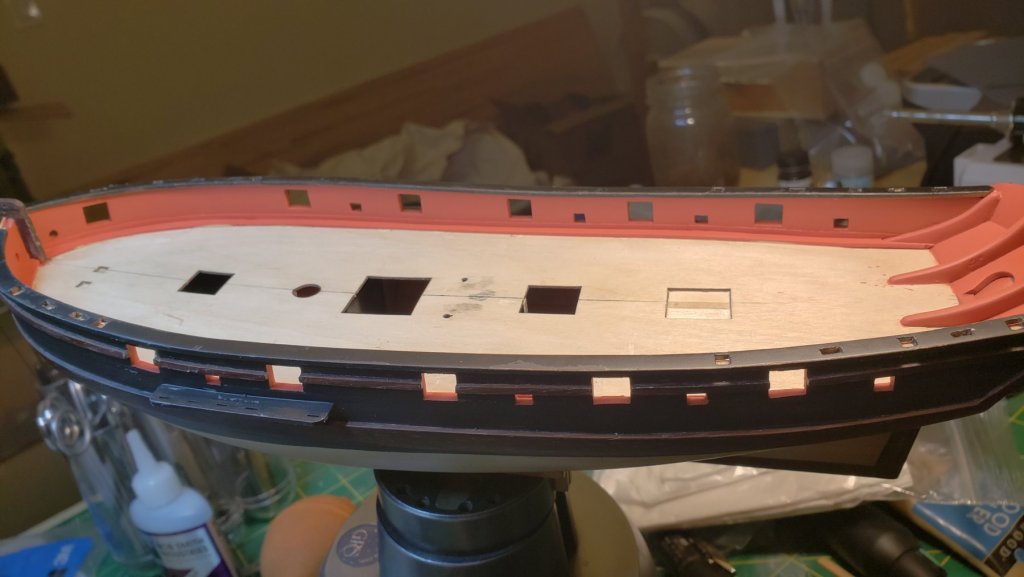
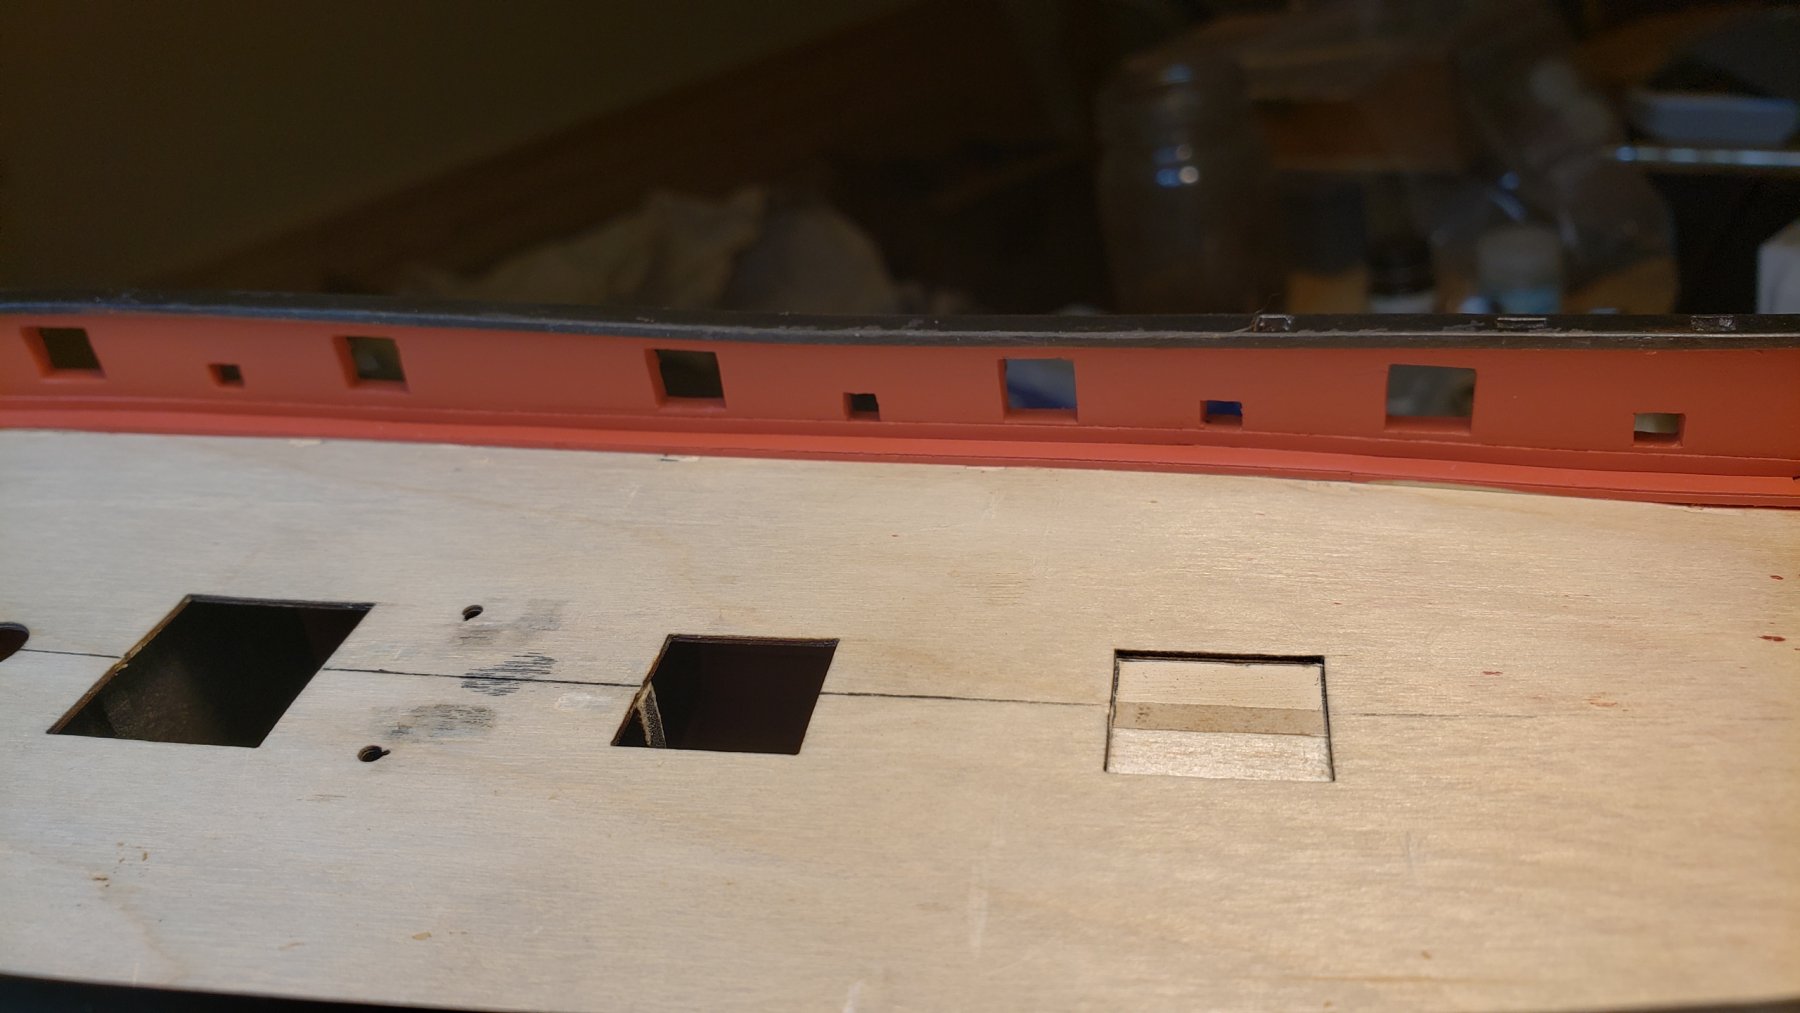
So I spent a long time staring and figuring out how to do this and having it being super complicated until I finally made the executive decision that the damned deck furniture was just going to sit on the planked surface and I wasn't going to plank around them. Three out of four of the furniture elements extended slightly width-wise across a plank line, which would have required... I don't know what they call it but instead of having a thin plank section they bevel that back and extend the next plank width-wise to cover the space. Almost half the planks would either be beveled short sections or planks with extended width, and honestly I wasn't sure I could make those accurately enough at this point. So for once, I'm not taking the double black diamond slope for this section and am simplifying a bit. As for nibbing, I decided the planks will be straight run, no tapering and nibbed at both ends. Here we're finally all marked up ready to go. During the process of doing the marking I made more executive decisions about whether to cut planks and have them follow the four-plank shift or let them run long, there are several places where it makes more sense to let them run. I then made a big pile of holly planking that is exactly 4.04mm wide on the Byrnes saw. To make the lines between planks consistently visible, I found I had to blacken both sides of the plank joints, and run CA glue down between the planks to enhance the line. Exactly four planks between the stanchion thingies. Speaking of which, why are those not glued on last? They're in the way the whole build and you end up dinging them and retouching them a number of times. And when it comes to deck planking, it leaves a very fiddly fitting process. Coming along now.
- 714 replies
-
- 13
-
-
- lady nelson
- victory models
- (and 1 more)
-
I am confused about the deck planking. I though nibbed plank ends were only on the bow, while on the stern the planks tapered as long as they didn't taper to less than half their widest width. However I have a drawing of nibbed plank ends showing it done on both bow and stern of what looks like a cutter, with the planks running dead straight and no taper. Can someone explain what is correct?
- 714 replies
-
- 1
-
-
- lady nelson
- victory models
- (and 1 more)
-
I used the polycrylic on my LN, and just found it doesn't adhere well to anything- I had to mask off the ship to spray the bulwarks and it came off in many places with the tape, even over bare wood. Hopefully you have better luck.
-
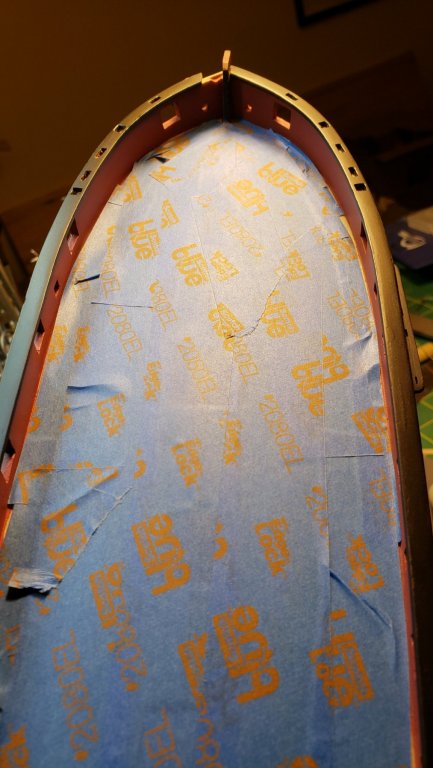
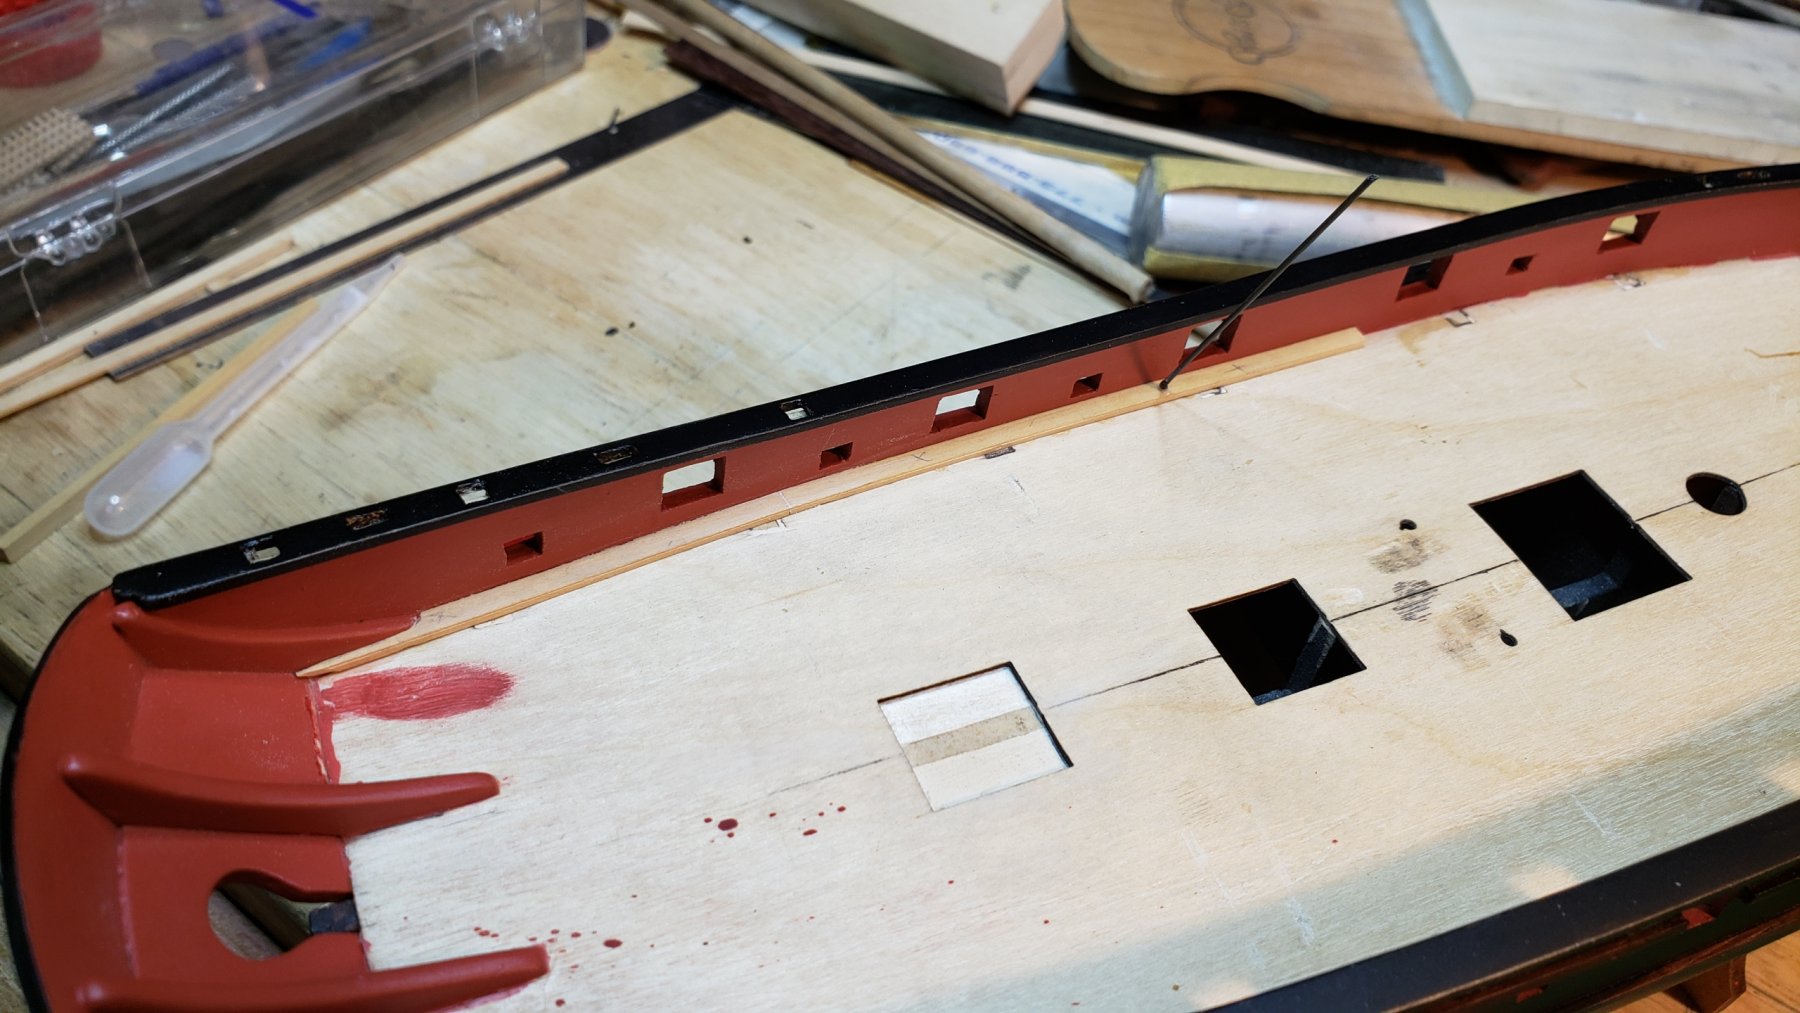
Work crises interrupted the shipyard for a couple days, but I did get the margin planks finished last night. Picking up where we left off, I had the outer curve on the bow margin plank. To get the inside curve, I used my digital calipers as a marking gauge again, something I do regularly- in this case set it to 6mm, lock it, and run one jaw along the outer curve while the other scribes a fine line. I then run a pencil down said line to make it easy to see, and a few light passes with a knife and we're done with just a few seconds of sanding the inside edge required. This is where we enter a good lesson on how not to think your way through a process. On the first side, I started by gluing the stern piece in first, but as I later realized this was the wrong end to start with. By doing it this way I ended up with no "out" on the final joint between the middle plank and the bow plank- the far end of the bow plank was already done so I had to mark the last joint and cut to those markings with no second chance. Here are the three port planks dry fit and glued- I got ok close with the final joint but not better than that, which didn't make me happy. So for the starboard side, I started on the bow end and that was better, but unfortunately I had faced the scarf joints in the direction that made sense starting from the stern, and I couldn't reverse them since the port side was already done. The problem was that the joints faced the waterway, rather than facing the center of the deck- so for the starboard side I had multiple tries, but dry fitting and especially gluing were made much more tricky by having to fit the new piece in between the waterway and the previous piece. If I'd thought this out right, I would have started at the stern and reversed the direction of the scarf joints, that would have made this process MUCH easier. Done now. And as noted, the joints are ok but not nearly as precise as I would like. The first one was perfect: But the rest weren't so perfect due to my poor planning. Now I'm trying to think my way through the rest of the deck planking. Hopefully I will do a better job of that than I did here.
- 714 replies
-
- 10
-
-
- lady nelson
- victory models
- (and 1 more)
-
Bob is disgustingly good at rigging, I realized that with his Granado which was before the Prince and the Essex. He makes it look very easy and straightforward, like he throws a pile of line at the ship and they all magically orient themselves and suddenly the standing rigging is done. I figure I'll ship my Lady Nelson to him because he could do in four days what would take me 6 weeks to figure out, and his version would be better.
- 359 replies
-
- 6
-
-
- prince de neufchatel
- model shipways
- (and 1 more)
-
The standard Evolution handpieces have a lever lock, but the 90 degree attachment does not. It uses a collet key thing which is the only drawback to the tool I'm aware of, it's slow changing burs but I have a second Evolution handpiece that I use for burs, so this one at least for now stays in this configuration as I use the sander constantly. I shop at Artco Tools because they're a professional supply shop for die sinkers and patternmakers and engine guys who do porting and they have everything to do with rotary tools. If you already have a micromotor and a 90 degree attachment, all you need are the disk sander mandrels and the PSA sandpaper circles. You can find the mandrels here and the sanding disks here. Artco also makes their own sanding disks that last longer than the NSK ones that can be found here. They don't quite fit the NSK mandrel sizes, but not enough to be problematic. I suggest you poke around their store, they have lots of things interesting to ship modelers. Another one you should have in your arsenal if you don't already is rubberized abrasives in at least 1/8" size so you can chuck them in the micromotor. Think pencil erasers with abrasive grit embedded in them, they're extremely useful for removing metal and polishing metal pieces, they're used very commonly by jewelers polishing jewelry after it comes out of the mold. Since they're like pencil erasers, you can also shape them pretty easily, I just run them against a piece of sandpaper. Otto Frei has a pretty big selection also. When using my mini disk sander, I brace my elbows either on my knees or the benchtop with the handpiece in my right hand and the work piece in my left. I then brace the heels of my hands together, leaving only the fingers holding the work piece moving, and I look at the disk from the side with it slightly off-axis from my eyes for obvious reasons. When braced this way, it's amazing how much fine control you have and it does feel like you could just strip a few molecules if you wanted to. Every one of the hull plank ends that all turned out near perfect were done this way, and it really isn't all that difficult.
- 714 replies
-
- 2
-
-
- lady nelson
- victory models
- (and 1 more)
-
Get some files, and you're going to need wood carving gouges to thin out the gunwales, generally that is done by cutting straight down with a shallow-curve gouge. Same gouges would be helpful carving down the hull also. If you want to be successful you'll need to invest in at least some of the tools you see people using here- ship modeling can be accessible or it can be extremely difficult depending on what tools you have.
-
You should also read the build log of an active Sultana build:
- 36 replies
-
- 1
-
-
- sultana
- model shipways
- (and 1 more)
-
What tools are you using? Some aggressive files or rasps are good for removing most of the waste. You should also check out the new build log from Mr. Bluejacket himself of Red Jacket. He just started a few days ago and is busy carving down a much bigger hull than you have, and it would be a very good idea to ask him the exact process he follows while doing so.
-
Some progress on the margin planks. First, guess how wide the margin planks are. While I'm at it, I know it's quite expensive but the NSK Evolution micromotor with the 90 degree attachment is something you really want if you build ships- it's a handheld disk sander and you can chew through half an inch of endgrain wood on a plank or remove a few molecules to refine a fit. It lets you set two angles at once and the output is a perfectly straight edge. It's pretty much the perfect tool for fitting the ends of planks on ships, so if you can somehow get it on a Christmas list, do so. It will speed your work considerably. It makes getting a fit like this a lot easier than it looks. I decided on a 6mm margin plank as that leaves me exactly 36mm on each side, so I can make my planks 4mm-4.01mm with 9 a side. It might have been 5mm but I really didn't want to make 4.138932mm planks. Also decided on three planks for the margin with scarf joints. I blackened the edge with a 4B solid-graphite pencil. Test fitting the first scarf. The middle plank. I see no way to bend these planks for the bow so I'm spiling the bow plank. I started with a paper template. And transferred that to a piece of holly, some disk sander work and hand sanding, we have a pretty good fit. I knocked off there, tomorrow I scribe the other edge and cut the scarf and then move to the other side.
- 714 replies
-
- 12
-
-
- lady nelson
- victory models
- (and 1 more)
-
Good luck Andrea, you're in the right place to ask questions, there is tremendous knowledge in this community. As for your stern, I assume you need to work the hull down until your template fits. That will mean removing some material from the sternpost area.
-
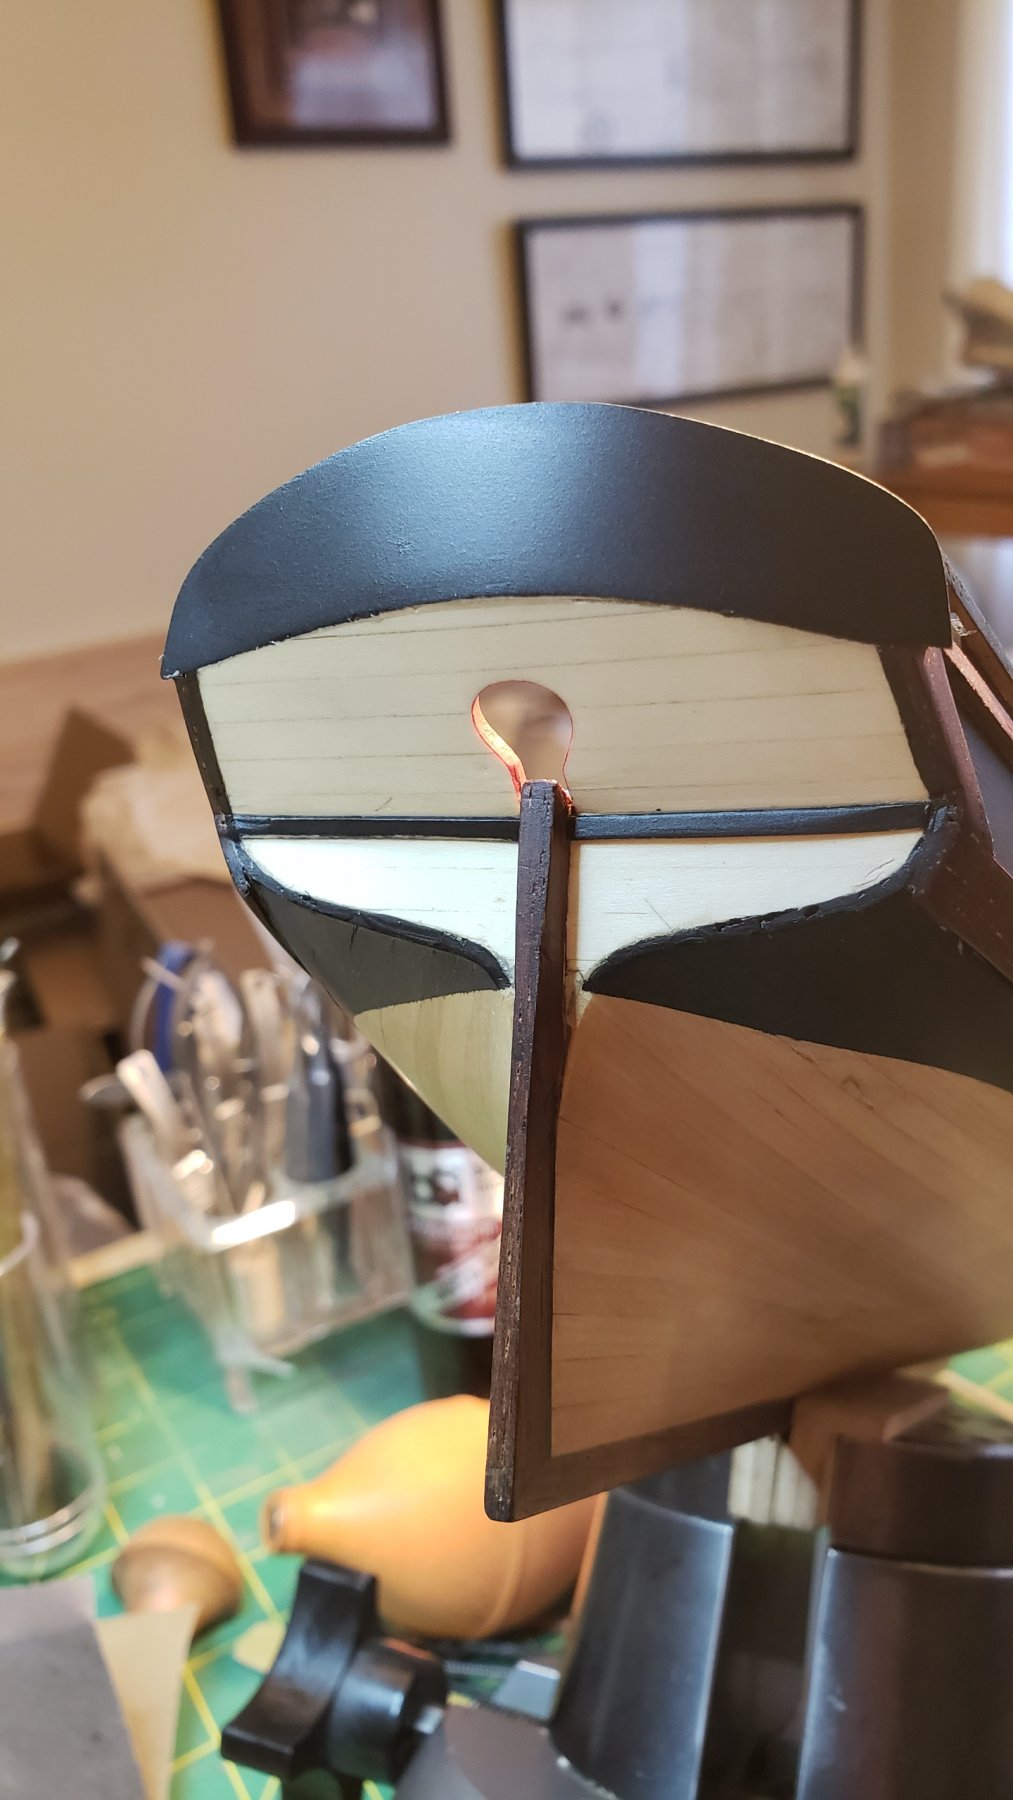
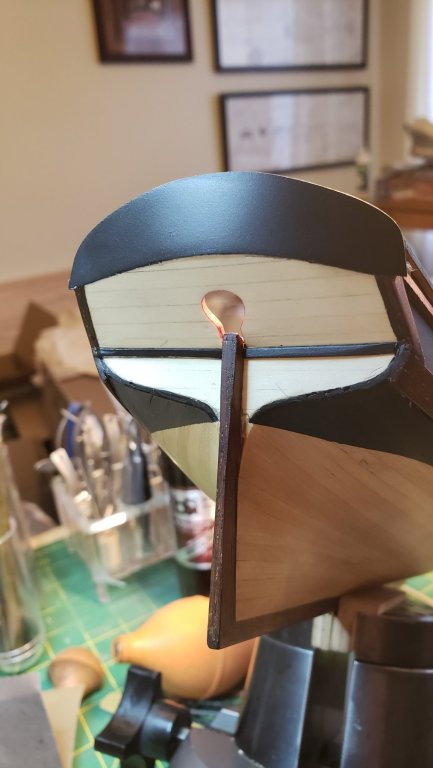
Of course I would have, it should have the proper planking. But that wasn't going to stop me from looking for scapegoats when something went wrong! I put five holes in the stem, I think the first thing you told me a year and a half ago was that the stem needed five holes and that meant a five-hole deadeye and for some reason I haven't fathomed yet, you think making the deadeye is going to be super tricky. Generally small is not a problem for me. I remember making a 1/48 Albatros D.III, about six inches long, and I rigged it so the control column actually worked and moved the control surfaces. And then there were the 1/32 cockpits with every knob and switch and indicator light. I can't see that well anymore without help, but I have lots of experience with small and fiddly. In fact I'm very likely here to build some 1/200-1/600 ships, and if I scratchbuild a ship it's also likely to be small. I may get one of those engraver's microscopes with the 10" working distance to facilitate that work if I do go that direction.
- 714 replies
-
- 2
-
-
- lady nelson
- victory models
- (and 1 more)
-
Four months... are you sure you're not an alien with say three extra arms growing out of your back? Either that or you didn't sleep for four months? I'd love to see a video of you working on it, there would have been just a blur of arms and tools and flying wood chips It's beautiful, have never seen that quality achieved with such incredible speed.
-
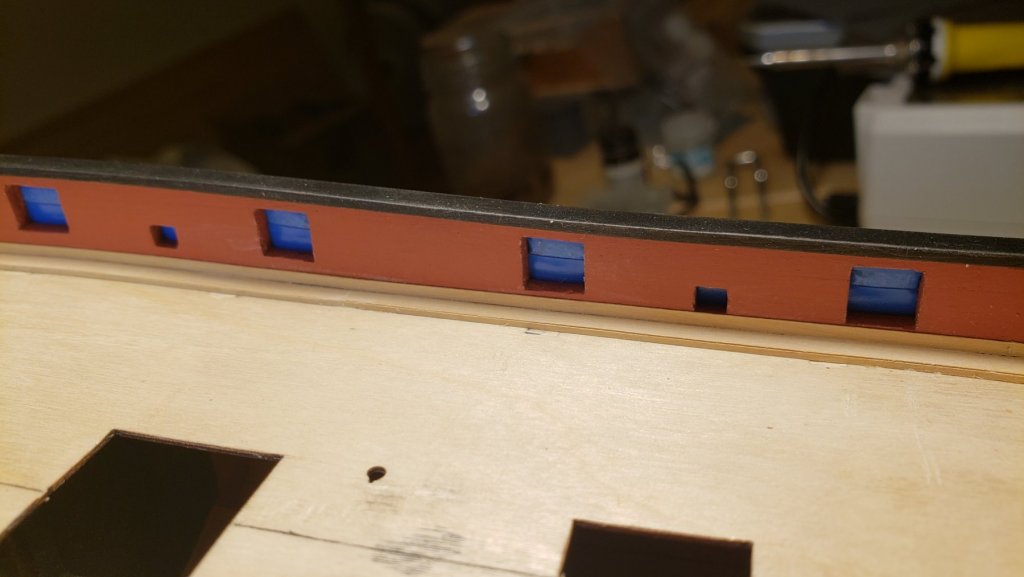
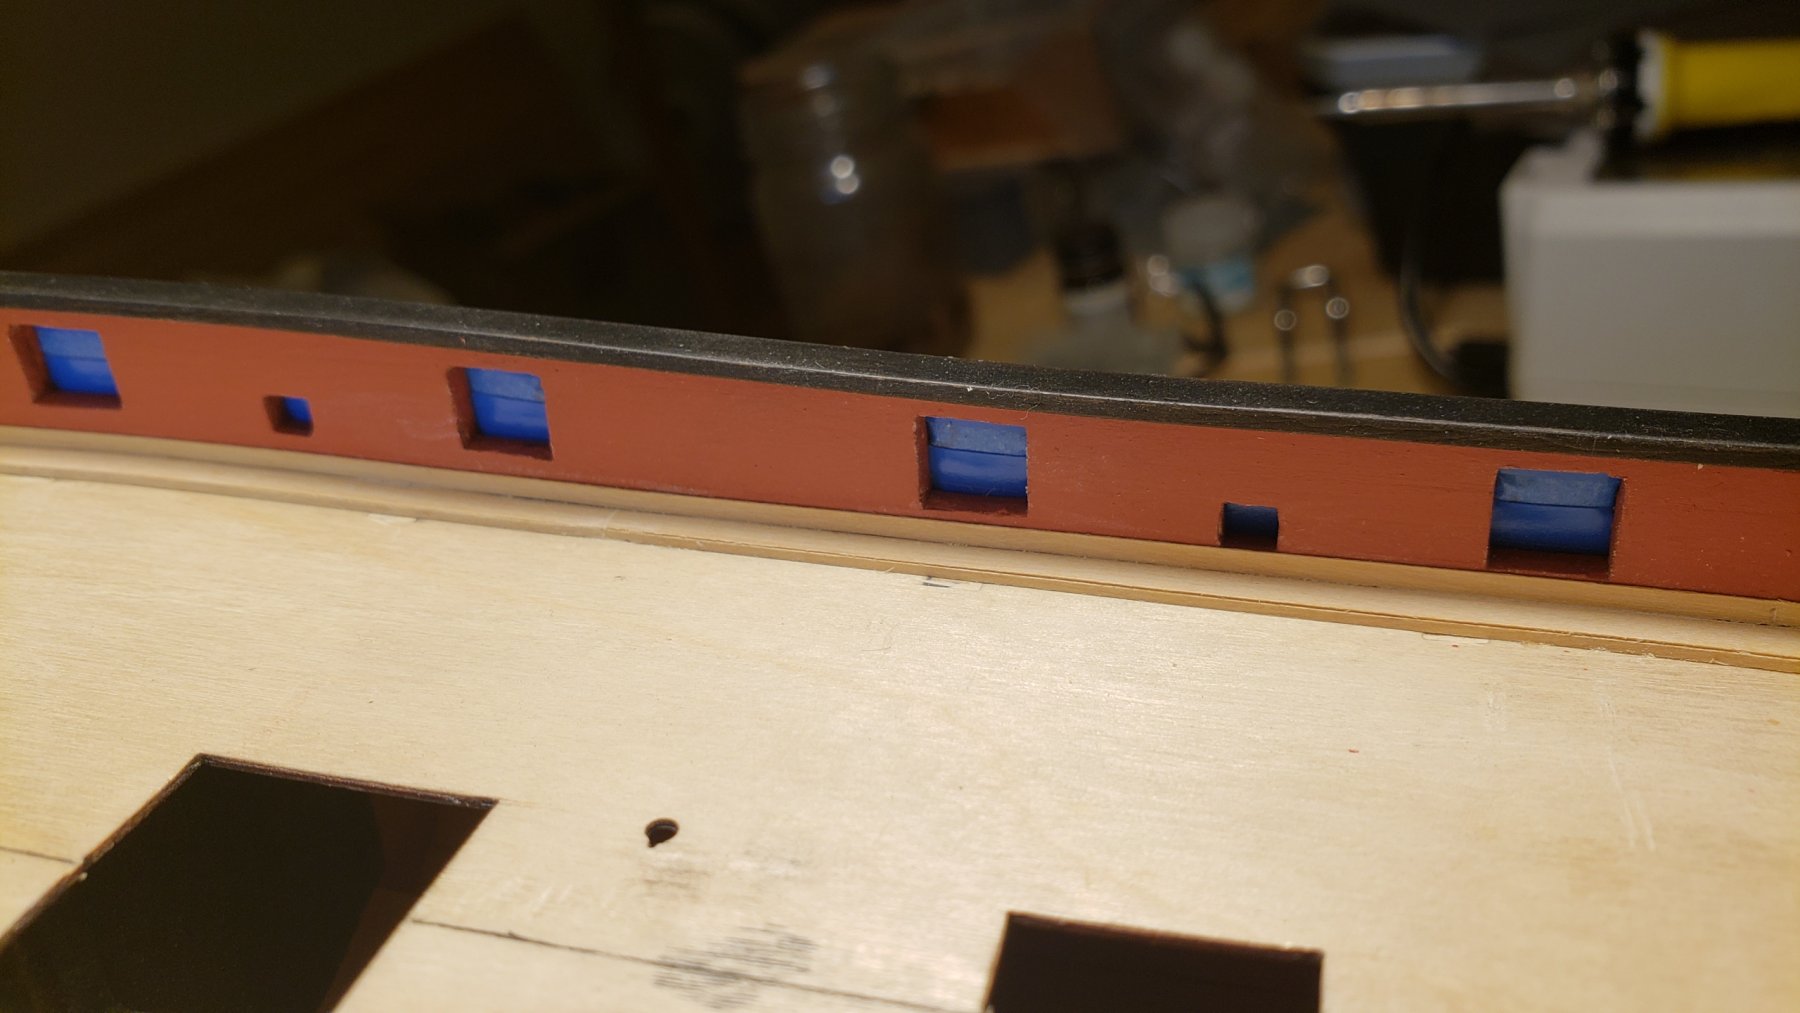
Then the next steps forward and back are all Rick's fault, because he totally twisted my arm and forced me to put in the waterway and spirketting before going ahead with deck planking. My arm is barely attached to the socket from all the twisting. And it went basically fine, except my spirketting strip turned out to be thinner than I really wanted, but it still looks ok. The problem occurred when I masked everything to spray the red- it turns out this clear finish is adhering none too strongly to anything. It's not the black, it lifted from the raw cocobolo too. Not really sure what to do. Switching finishes won't help much at this point as it's still the bottom coat everywhere and may induce compatibility issues. All I can really do is remove all the lifted sections and spray more coats until it disappears, and then know this finish will fall off if you look at it sideways. Regardless it will be a lengthy process to fix the damage.


- 714 replies
-
- 8
-
-
- lady nelson
- victory models
- (and 1 more)
-
Thanks Rick, that is noted and will help me as I have no idea how to tell if a pin rail has the pins too close. I see several variations on pin rails also so I assume it's ok to have more than one. Thanks Popeye Two steps forward and at least two steps back. Starting with forward, I spent a couple evenings fixing some things I wasn't happy with. One was the cap rail, I thought the open grain of the walnut would be ok along with the open grain of the cocobolo, but under black it looked terrible, like the sailors wasted time by carving huge gouges out of the rail. So I sanded it down, squeegeed a couple coats of CA, sanded down, re-blacked and resprayed the top coat. The stern just got sanded down quite a bit before refinished.
.thumb.jpg.982ef2b3ed6077a4fda3f75db868cdb5.jpg)

- 714 replies
-
- 2
-
-
- lady nelson
- victory models
- (and 1 more)

.jpg.4cc98d6f9eb9bba36d2b4acae9472789.jpg)