vossiewulf
-
Posts
1,477 -
Joined
-
Last visited
Content Type
Profiles
Forums
Gallery
Events
Everything posted by vossiewulf
-
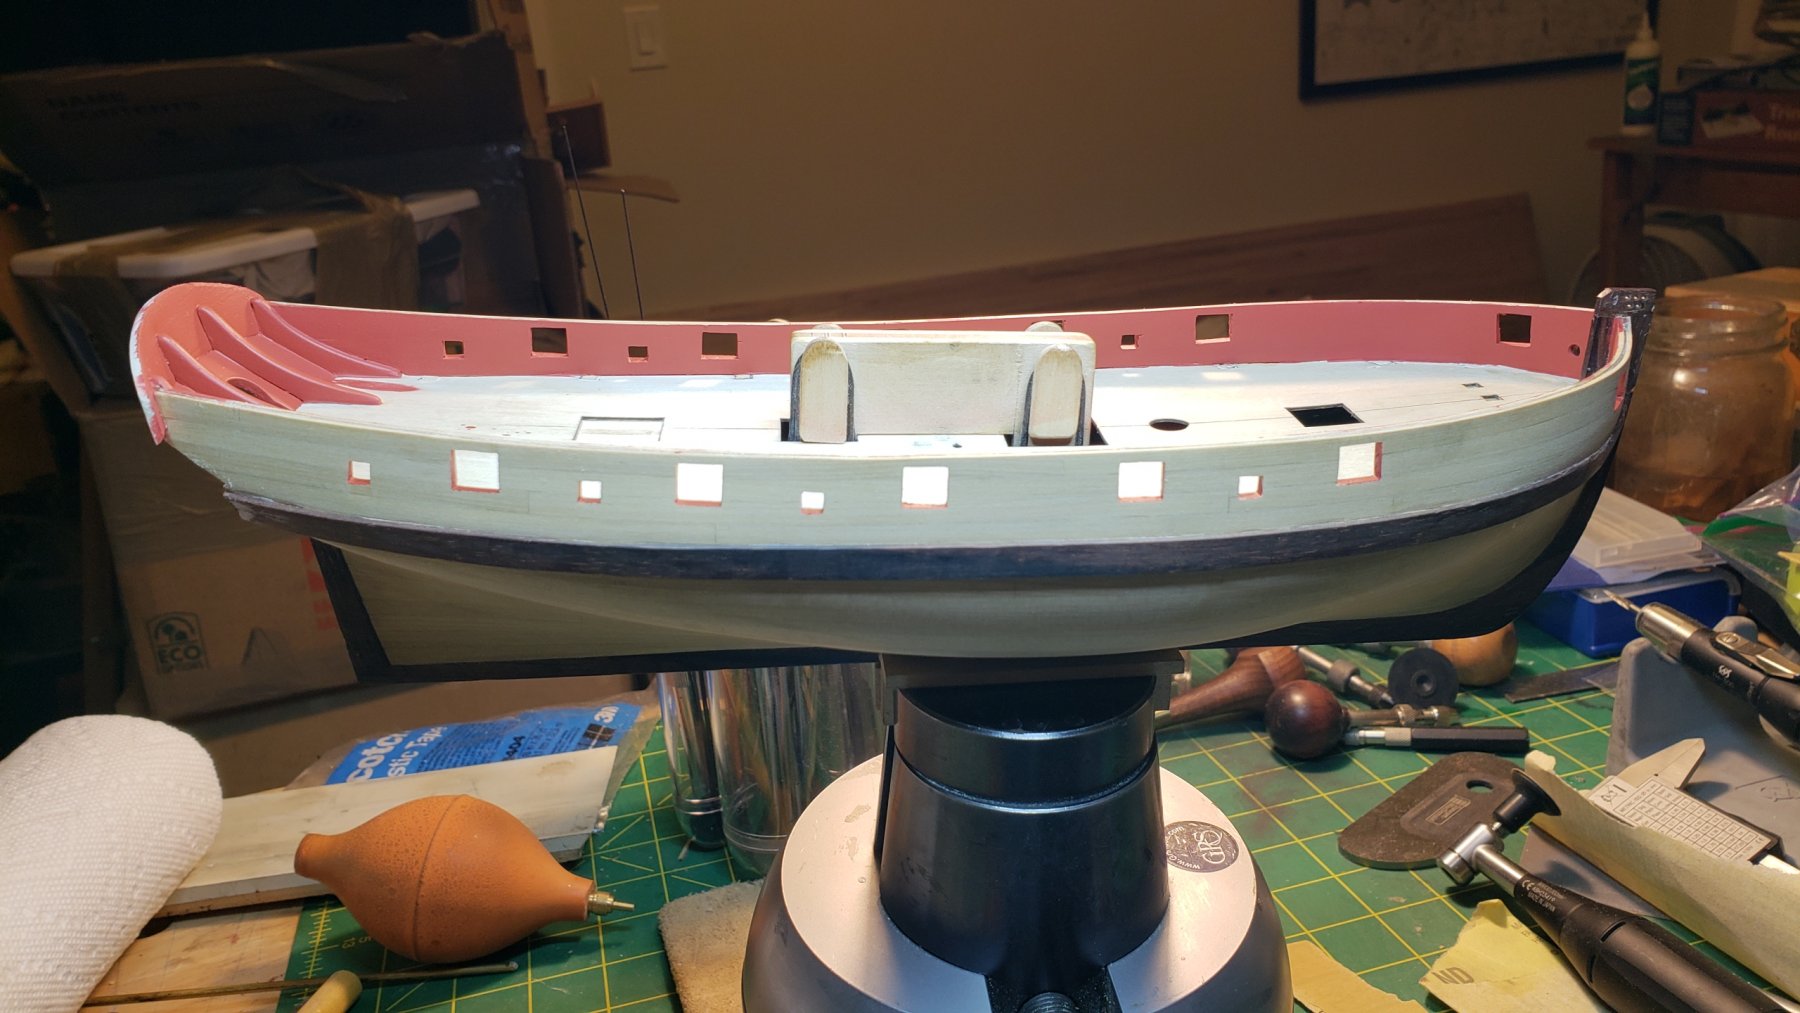
 Good to see you're still building like four ships at once Smaller wale and cap rail installed and first of the black sections colored in. It was done before the cap rail was installed, and the cap rails themselves were blackened before install as both would be hard to reach easily once the cap rail was in place. Now working on channels, I am making a single one for each side using five deadeyes per the fore and aft book, although Tony's pics all seem to show them with four. They will go below the gunports, again like the book, with a gap for one gunport. Well harrumph pic I uploaded is blurry. Trying again...
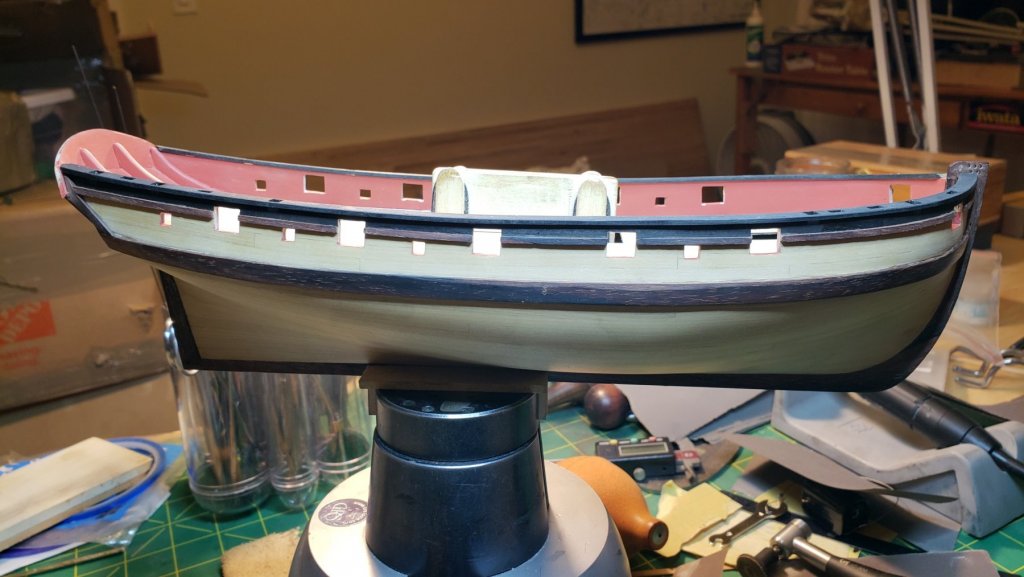
- 714 replies
-
- 7
-

-
- lady nelson
- victory models
- (and 1 more)
-
Probably after, I should have put one in first but I forgot and went ahead and painted the gunwales, which I did with airbrush after masking everything. I may try to add a small strip after the deck planking is in and hand paint it. For anyone who has the Rigging Period Fore and Aft Ships or whatever the title is, the first section is of course basically this ship. I'm confused however by the shrouds he shows. On one page he shows five deadeyes per side with one paired with a burton pendant, all six pairs going to the mainmast. But then on the next page he shows two deadeyes per side running to the topmast through spreaders. Seven per side seems a lot of deadeyes for a cutter, but the vice versa is two per side going to the top leaving only three shroud stays per side going to the mainmast, and that doesn't seem right either. If someone can clarify it would be much appreciated.
- 714 replies
-
- 2
-
-
- lady nelson
- victory models
- (and 1 more)
-
Thanks everyone. Things seem good and stable for now so hopefully progress will continue Rick, especially glad to see you around still. Thanks, I think that is what I will do, that's a good compromise.
- 714 replies
-
- 1
-
-
- lady nelson
- victory models
- (and 1 more)
-
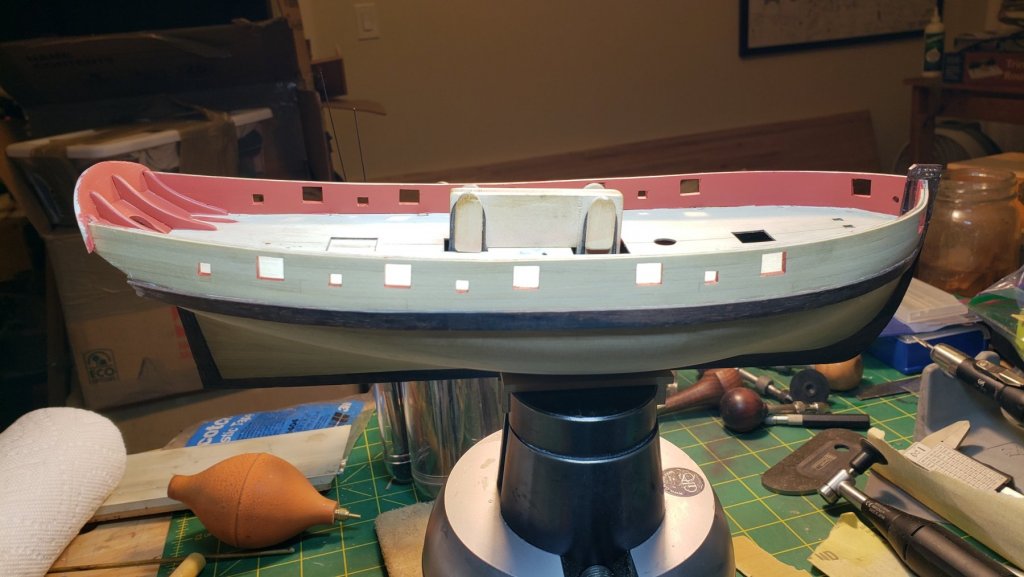
Thanks Tony. It's been a long time with many challenges, most of them bad, so it's nice to be sitting at workbench again making progress. Last evening and today I made the gratings, cut my small wales pieces and the external stern counter reinforcement pieces (I'm sure there's a specific name for those pieces but can't remember) from cocobolo and dry fit them, and also picked up Faber Castell india ink art markers at the local art supply store as they're the only art markers I've seen that are actually black. Prismacolor, Tomboy, Sharpie, all are dark purple, not black and that clashes with my cocobolo pieces. And if you're wondering why I'm using art markers, the answer is because they're the best way to do the next step in the way I'd like it done. India ink markers, even if pigment-based, leave a much thinner film than does paint and I really didn't want to lose the texture of the wood under paint layers. Being india ink they'll be light fast, and also make it much easier to apply the black than masking everything for an airbrush or brush painting everything. I'm going to play ship coloring book and color in the black with my markers
- 714 replies
-
- 4
-
-
- lady nelson
- victory models
- (and 1 more)
-
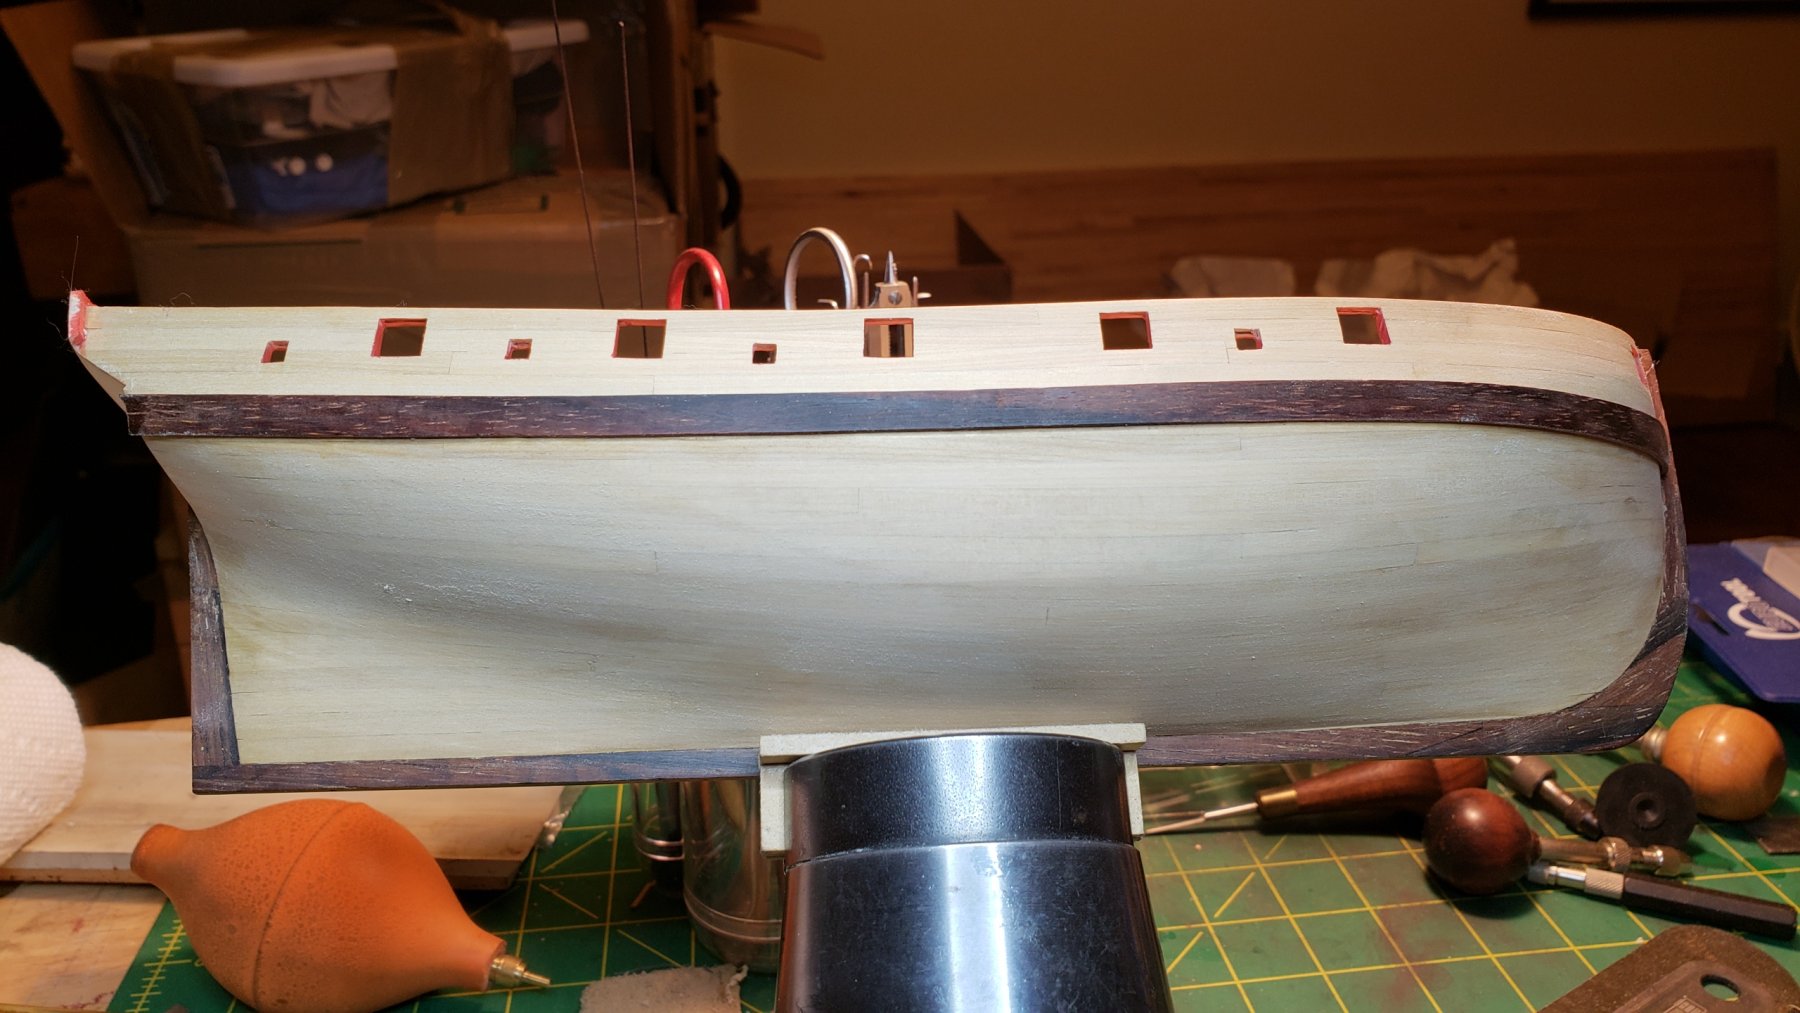
So I've been away for a while much longer than intended, life, health, work, yadda yadda boring stuff. Apologies to those who were following. I finished the planking, have the main wale on, and have painted the interior gunwales and stern red ochre or at least my version of red ochre. Main question I have now is should I place the deck fixtures and plank around them, or glue them on post-deck planking? The instructions recommend the latter while I think the former is more accurate. I think I'm going to paint it black topsides except for the stern (holly) and the wales (cocobolo) and below the waterline, all of which I'll leave natural. The lighter color of the boxwood can represent the white lead paint without covering over all the planking.

- 714 replies
-
- 12
-
-
- lady nelson
- victory models
- (and 1 more)
-
Fokker Dr.I by Torbogdan - FINISHED - Model Airways
vossiewulf replied to Torbogdan's topic in Non-ship/categorised builds
The way to avoid that problem is to build the wings and tails over the plans, that is what I have always done. Tape plans or a copy of them to your building board taut and flat, repeat with some plastic wrap over top to prevent any problems with glue sticking to plans, pin or clamp spars in the correct place and off you go. No way to have a problem unless the plans themselves are wrong. Andrew, I recommend you contact Model Expo, they have a free replacement for broken/missing parts policy. I cannot see any reasonable way to fix what you have or use it in the finished model as is - explain to them what happened and see if you can get replacement parts for the wooden parts of the top wing. -
Thanks Rob I've been thinking about selling a range of tools for modelers that are a considerable step up from hobby shop tools, just don't know where the time is supposed to come from. I'd have to find someone who can totally manufacture what I want to my standards, no way with the job I have to do another job on top.
- 714 replies
-
- 4
-
-
- lady nelson
- victory models
- (and 1 more)
-
Miniature Russian carving tools
vossiewulf replied to druxey's topic in Modeling tools and Workshop Equipment
First I found a watchmaker's screw driver sharpener that was just the right size for the straight chisels, so I can sharpen those easily. Otherwise I am using waterstone slips, although I'm thinking of using sanding film stuck to a brass backing. In the long run I'm making myself a brass jig with wheels that can handle all of them, including the gouges where you have to turn the tool as you move forward and back. I've designed it and drawn it out and have the brass and other bits I need, just haven't sat down to do it yet. -
There should be special "Victory Builder" license plates for people who complete quality Victories, and this is definitely one of them. Congratulations!
- 85 replies
-
- 2
-
-
- finished
- caldercraft
- (and 1 more)
-
Fokker Dr.I by Torbogdan - FINISHED - Model Airways
vossiewulf replied to Torbogdan's topic in Non-ship/categorised builds
And BTW, very active forum just for WWI aircraft modelers. -
Fokker Dr.I by Torbogdan - FINISHED - Model Airways
vossiewulf replied to Torbogdan's topic in Non-ship/categorised builds
You guys should check this out, 1/32 meant to work with the Wingnut Wings kit(s)? WNW have most of the D.VII versions out already and at least in the fuselage there were definite differences, not sure what version(s) it's meant to work with.- 250 replies
-
- 11
-
-
MONTAÑES by Amalio
vossiewulf replied to Amalio's topic in - Build logs for subjects built 1751 - 1800
Some thoughts on potential responses: That's like being told that behind Darth Vader is the Emperor, so weep even further for your pitiable ship-building skills It seems like I will need to kick Spain in the shin for being an entire country of better ship-builders than me I don't want to see Baldomero's models, I'm afraid I would be driven mad, mad I tell you, by the endlessly repeating "HOW DID HE DO THAT?!?" question spinning through my mind -
Danny is part of the goal to only use the kit materials? Because I've never built anything out of the box, I always replace things, usually many things. I ask as that if I was doing that particular kit I probably would have done the bows with a couple pieces of balsa with some 1/64" plywood over it, and then just paint the whole hull. Which wouldn't be a bad thing, I'm impressed with the engineering of the kit but not how they're printing the colors.
- 295 replies
-
- 4
-
-
- amatsukaze
- halinski
- (and 2 more)
-
Not sure what you guys are talking about, sanding sealer is just a standard clear lacquer/varnish/poly with a high percentage of solids. As such, once applied, the strength of any glue bond you get is (depending on finish thickness) mostly or entirely limited to the strength of the finish's adherence to the wood, which is always going to be MUCH less than that of glue bonding with wood. In some cases with thin CA and a light coat of sealer you'll still get a semi-strong bond as the glue sinks into still-open grain and that creates a mechanical hold, but it's still not going to be as strong as it should be bonding with plain wood. I almost never do that, I will remove any finish including sanding sealer from a surface before gluing. Anyone who wants to really understand what all these finishes really are and the basic chemistry of how they work should read Understanding Wood Finishing: How to Select and Apply the Right Finish, it's about the most advanced finishing book I've found in terms of explaining all the source materials of finishes and how/why they work the way they do. You'll learn that much of what you think you know is wrong and that much of what manufacturers say about their finishes is complete nonsense, but other info on the can that you're not really paying attention to now is very important and will tell you exactly how that finish will behave. It's from American Woodworker which I normally don't associate with highly technical woodworking (like Fine Woodworking) but this really is the best book I've found, and I probably have 15 or 20 books on different types of finishing.
-
Fokker Dr.I by Torbogdan - FINISHED - Model Airways
vossiewulf replied to Torbogdan's topic in Non-ship/categorised builds
Plastic small scale: http://www.arcforums.com/forums/air/index.php?/forum/59-aircraft-modeling-forums/ http://cs.finescale.com/f/ RC aircraft: https://www.rcgroups.com/forums/index.php http://www.rcuniverse.com/forum/rc-airplanes-226/ -
Miniature Russian carving tools
vossiewulf replied to druxey's topic in Modeling tools and Workshop Equipment
The only caveat about these tools if you need to know how to sharpen tools pretty well, they're not easy to sharpen while keeping the bevels flat, especially the very tiny spoon gouges. -
Miniature Russian carving tools
vossiewulf replied to druxey's topic in Modeling tools and Workshop Equipment
I sent adrian contact info BTW in case no one else did. -
My first wife was Polish, her parents are immigrants who settled in Torrington CT, when I visited there entire sections of the town were Polish. I liked that there was a bar on the corner of about every block, right in the middle of the housing neighborhoods, so no one has to drive Arriving at their house was a caricature with like 42 pounds of hot food ready to eat with her mother saying eat! Eat more! Try this! over and over, it's amazing how many pirogi you can eat when the Polish lady who made them is staring at you Another thing I like is that although they haven't had exactly the best experiences in wars, they contribute hugely to the field of military history, completely out of scale of their population. I don't understand that but am extremely appreciative and there are many books by Polish authors and publishers around this house.
- 295 replies
-
- 5
-
-
- amatsukaze
- halinski
- (and 2 more)
-
Painting Wales
vossiewulf replied to JohnB40's topic in Painting, finishing and weathering products and techniques
BTW the sponge eye makeup brushes worked extremely well for India ink. And in fact since they leave no brush marks at all, I'm going to try using them for non-precision hand-painting, looks to me like they will leave very flat coats in about any brushable liquid paint/dye. -
Painting Wales
vossiewulf replied to JohnB40's topic in Painting, finishing and weathering products and techniques
No way to tell what it is with that small image. But short version is if it has some lighter creamy streaks and feels like cutting sandstone with an edge tool, it's probably real ebony. If not, it's just one of many species that can be "ebonized" or dyed black, but I've never been certain what they use. But it goes all the way through solid black everywhere so I assume real dye and soaked in said dye for a long time. -
MONTAÑES by Amalio
vossiewulf replied to Amalio's topic in - Build logs for subjects built 1751 - 1800
Your sarcasm detector seems to be malfunctioning, Carl. -
Fokker Dr.I by Torbogdan - FINISHED - Model Airways
vossiewulf replied to Torbogdan's topic in Non-ship/categorised builds
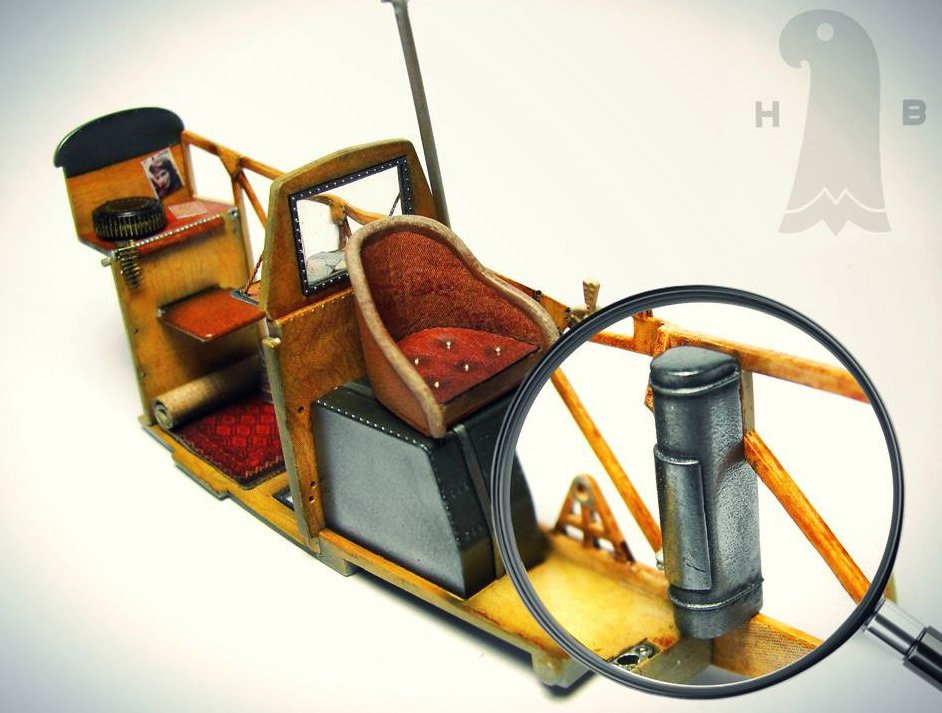
Make sure you check out Uschi's metal powder offerings, those kits are perfect applications for them. They are actually quite easy to use and can produce metal finishes that are exceptionally realistic. This one shows off some of his leather decals and wood paints/decals. Note both of these show a Mercedes D.IIIa/au engine as used by the Albatrosen and early Fokker D.VIIs And here's a guy doing a terrible job of using them on your 80hp Le Rhone kit, rough sanded with no undercoat and it still looks pretty good. The only downside is metal finishes like this are the least forgiving in existence, and in fact if you had a need to find every single scratch on a surface down to near atomic levels, rub some metal powder on and you can see them pretty easily. It's not quite that bad of course but you get the point, best results will be to use the same undercoats he recommends on a surface that's been sanded/polished to the highest grit you can stand. Novus Plastic Polish works very well here, you sand to maybe 1200/1500 and the #2 fine scratch remover will take out all of those scratches and leave you with a glass finish and can be done by hand but felt points of various shapes for your rotary tool can help speed up things considerably. This is a glider I made painted Tamiya flat black and rubbed over with one of the powders. Tragically, being made of balsa, it moved way too much and the finish got all wrinkled a few months later. So not recommended over wood.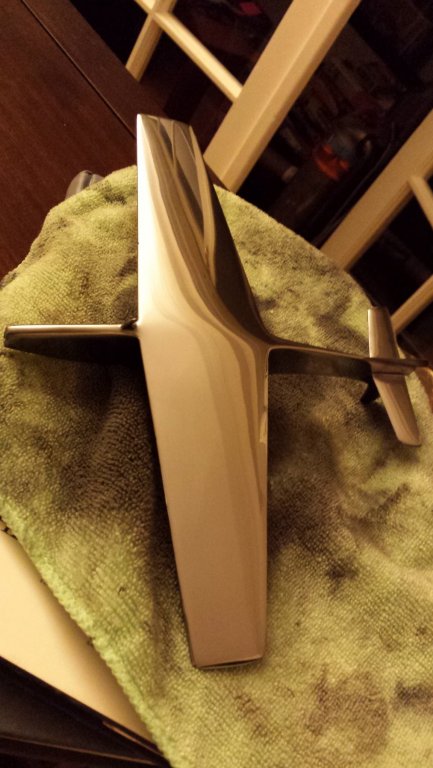

- 250 replies
-
- 11
-
-
Fokker Dr.I by Torbogdan - FINISHED - Model Airways
vossiewulf replied to Torbogdan's topic in Non-ship/categorised builds
Just make sure you have some of the thin sanding film that can be creased really sharply, best thing I've found for hitting both sides of the eleventy thousand cooling fin seams to make them as invisible as possible. The fit should be good but if you get lots of squeezeout or empty seams... think of an old salt squinting and shaking his pipe at you while saying "give up on perfection now boy, for that way lies death. Death... and MADNESS!" -
Was thinking about asking because normally I can't post "purple monkey dishwasher" with it being liked by MTaylor 10 minutes later, but I've been only seeing sporadic activity. Hope the recovery continues quickly!