MORE HANDBOOKS ARE ON THEIR WAY! We will let you know when they get here.
×


vossiewulf
-
Posts
1,477 -
Joined
-
Last visited
Content Type
Profiles
Forums
Gallery
Events
Everything posted by vossiewulf
-
 Apparently I am not a scientician.
 -
Miniature Hand Tools
vossiewulf replied to Julie Mo's topic in Modeling tools and Workshop Equipment
Grobet and Glardon-Vallorbe Corradi US, France, and Italy respectively. Don't spend $200, get their medium-range needle/riffler file sets in the $30-$60 range, their value line products are much better than the hobby store sets and are good enough for what you need unless you intend to do lots of metal work. Cuts 0 and 2 are best for wood, the higher the number the finer the cut. For metal it's good to finish with cut 4. Waterstones will keep anything made of steel sharp. The downside is they're messy and soft, so it's difficult to keep them flat, and you have to keep them flat for good sharpening. I don't like the cut of diamond as it cuts deep scratches, I find you have to remove lots of metal to get out the scratches of a 1000 grit diamond cut. The best option are the good ceramic stones, but they are expensive and only worth it if you intend to use lots of edge tools that you sharpen regularly. -
Miniature Hand Tools
vossiewulf replied to Julie Mo's topic in Modeling tools and Workshop Equipment
The waterstone files are intended for sharpening gouges/V-gouges, I thought you were saying you purchased their micro carving tools, not just the tiny chisels. You can sharpen those chisels with a watchmaker's screwdriver sharpener and the waterstones you already have. You should return the Veritas jig unless you're going to get full-sized chisels and planes, which are of limited use in ship modeling. With the turning tools, yes you can use your waterstones on those as well. WRT more tools, invest in good needle files and riffler files, don't buy the $9.99 set at the hobby store. Good files work much, much better and working mostly on wood, will last forever so they're a good investment. The other major one is a micromotor, they are much handier with much more torque compared to Dremels. -
You're basically running a mass spectroscopy test of the paints with that "palette" arrangement. I'd be more surprised at an acrylic hobby paint that didn't separate. That said, I've seen Vallejo paints act weird with any solvent other than their "high compatibility" solvent, that only really works with their paints.
-
Miniature Hand Tools
vossiewulf replied to Julie Mo's topic in Modeling tools and Workshop Equipment
The Mk.II honing guide is brilliant for sharpening full-sized plane irons, it's not much good for your small chisels. A preferred option is waterstone files, these are only about 1.5" long and can be easily shaped to fit inside and outside profiles, just use an old metal file you don't care about to shape them. https://www.japanwoodworker.com/products/set-of-four-1000-file-stones-king (you need at least 1000 + 4000). And for straight chisels you use a watchmaker's screwdriver sharpener. https://www.google.com/search?q=screwdriver+sharpener&rlz=1C1CHZL_enUS736US736&source=univ&tbm=shop&tbo=u&sa=X&ved=0ahUKEwjOmpOshuLfAhXWHTQIHdxPCAoQsxgIKw&biw=1414&bih=746&dpr=1.25 -
My suggestion is to as much as possible not need to sand into tight corners by pre-sanding and pre-finishing anything that's going to go into a tight corner. If I need to sand into a tight corner I feel like I didn't think something through correctly.
-
Danny, very nice job once again. But if you're a stickler for accuracy, the winterketten track extensions on your track should bend inward toward the bogies a bit. See pic below for an example.
-
Per the contemporary model I'm most closely following, I spent some time soldering rings for the eyebolts, do they have a specific name? And what is the purpose, only thing I can see is they might let a rope twist freely a little bit as compared to going straight to the eyebolt.
- 714 replies
-
- 1
-

-
- lady nelson
- victory models
- (and 1 more)
-
Metal, except for a couple weird alloys, will always bounce back after being bent. So if you want to bend it to closely follow a curve, you have to bend it farther than that either by hand or by using a form with a smaller radius than the intended final curve.
-
That sounds like a good guess, but one wonders why they couldn't just say StuG III ausf G and use its proper name. With the tracks, the cover art shows Winterketten. Don't tell me you're trying to do Winterketten with paper also, that would qualify as cruel and unusual punishment of customers by a publisher.
-
Very nice job, Danny. BTW I don't know where the 40 comes from, since this is a standard SturmGeschutz (StuG) III. It took its designation from the fact that it was built on the Panzer III hull, and eventually Panzer III production stopped entirely in favor of the StuG- as the war turned against Germany they needed more and more AT assets to deal with the Soviet T-34 hordes, and the StuG III G and later were quite effective tank killers with a good 75mm/L48 gun. Without turrets they were also cheaper and faster to build, and the StuG III was the most-produced armored vehicle built by Germany in WWII, with somewhere around 10,000 being built. The StuGs were Von Manstein's idea, the early versions had a short-barreled 75MM gun intended to fire primarily HE in support of infantry attacks, hence its name which literally means assault gun. They often operated as single platoons parcelled out across an infantry battalion to support the infantry assaults, and were quite successful in this role. However, as noted their role changed during the war to basically exactly the same as a Pz-IV or -V, primarily a tank hunter and only secondarily supporting infantry. Interestingly, the crews of StuGs were not part of the Panzerwaffe, they were artillery soldiers since their first role supporting infantry envisaged considerable use of the short-barrel 75mm in the indirect role. With respect to the numbers you see on the side of German StuGs/tanks, they are usually company/platoon/vehicle, so if you see 321 that's the command tank of the second platoon of third company. Two-digit numbers were not at all typical, so not sure what the 40 is meant to be.
-
Between that and Tony's pics, I get the idea, thanks. It would be easy enough to turn the center section of the windlass with the holes into a ratchet mechanism, but I'm not sure where the holes go to operate it. I guess I could put them outboard like this one, but in fact the best plan is probably just to throw away the kit windlass and make one like the windlass on that model as it looks like the kit designer took the whole boom and its rig straight from this model, and the kit-supplied windlass doesn't match the style.
- 714 replies
-
- 1
-
-
- lady nelson
- victory models
- (and 1 more)
-
Any recommendations for a supplier with a better windlass? I looked on Ages of Sail and the only one that would be appropriate is the exact same one that is in the kit. If not, is there somewhere with good photos? The only contemporary model with photos close enough is one of Tony's, but I still can't get a good view of what the mechanism looked like.
- 714 replies
-
- 1
-
-
- lady nelson
- victory models
- (and 1 more)
-
Rick, I don't understand the windlass at all. What exactly operates it? We have nothing but a little flap of wood that's just pointed at holes in the center of the big windlass, only way to operate it that I see is with some lever going in those holes and something that goes in the holes to catch that flimsy piece of wood? It's not making much sense to me.
- 714 replies
-
- 1
-
-
- lady nelson
- victory models
- (and 1 more)
-
On the other hand I use CA for almost everything and have no problems with it. I recommend you apply CA in dots instead of spreading it to keep it neat, this also increases its open time by an order of magnitude over trying to smear it over the surface of a joint. If any squeezes out you used too much.
-
I'm not sure that Victory kit is actually buildable, the plans are wildly in disagreement with each other and it will at least require a significant amount of kit-bashing to come out with something workable. I started it at one point, but found the plans so far out of agreement and fairly nonsensical that I ended up putting it back on the shelf. There are much better kits to start with for your first ship, from Model Shipways' long boat and pinnace to the various cutter kits available (Sherbourne from Caldercraft, Lady Nelson from Victory models, and the new Avos from Master Korabel). Besides the very poor plans, Victory is a three-masted full ship rig, pretty much as complex as it gets.
-
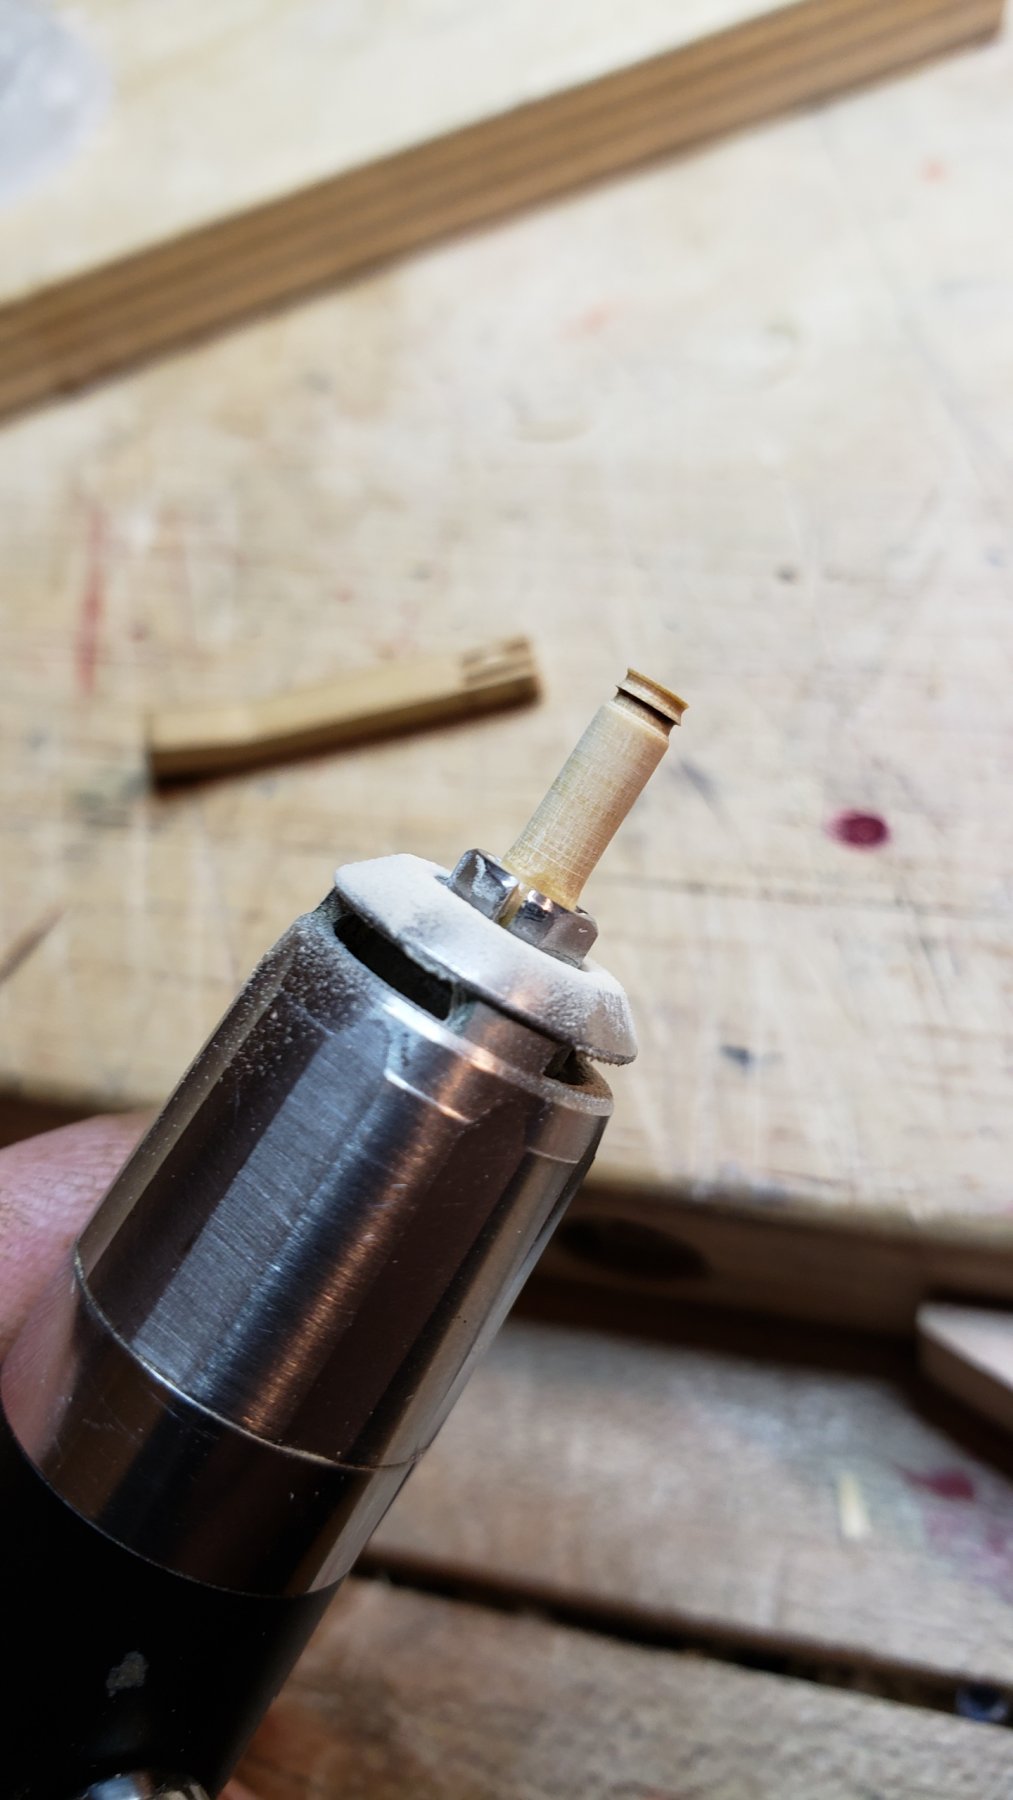
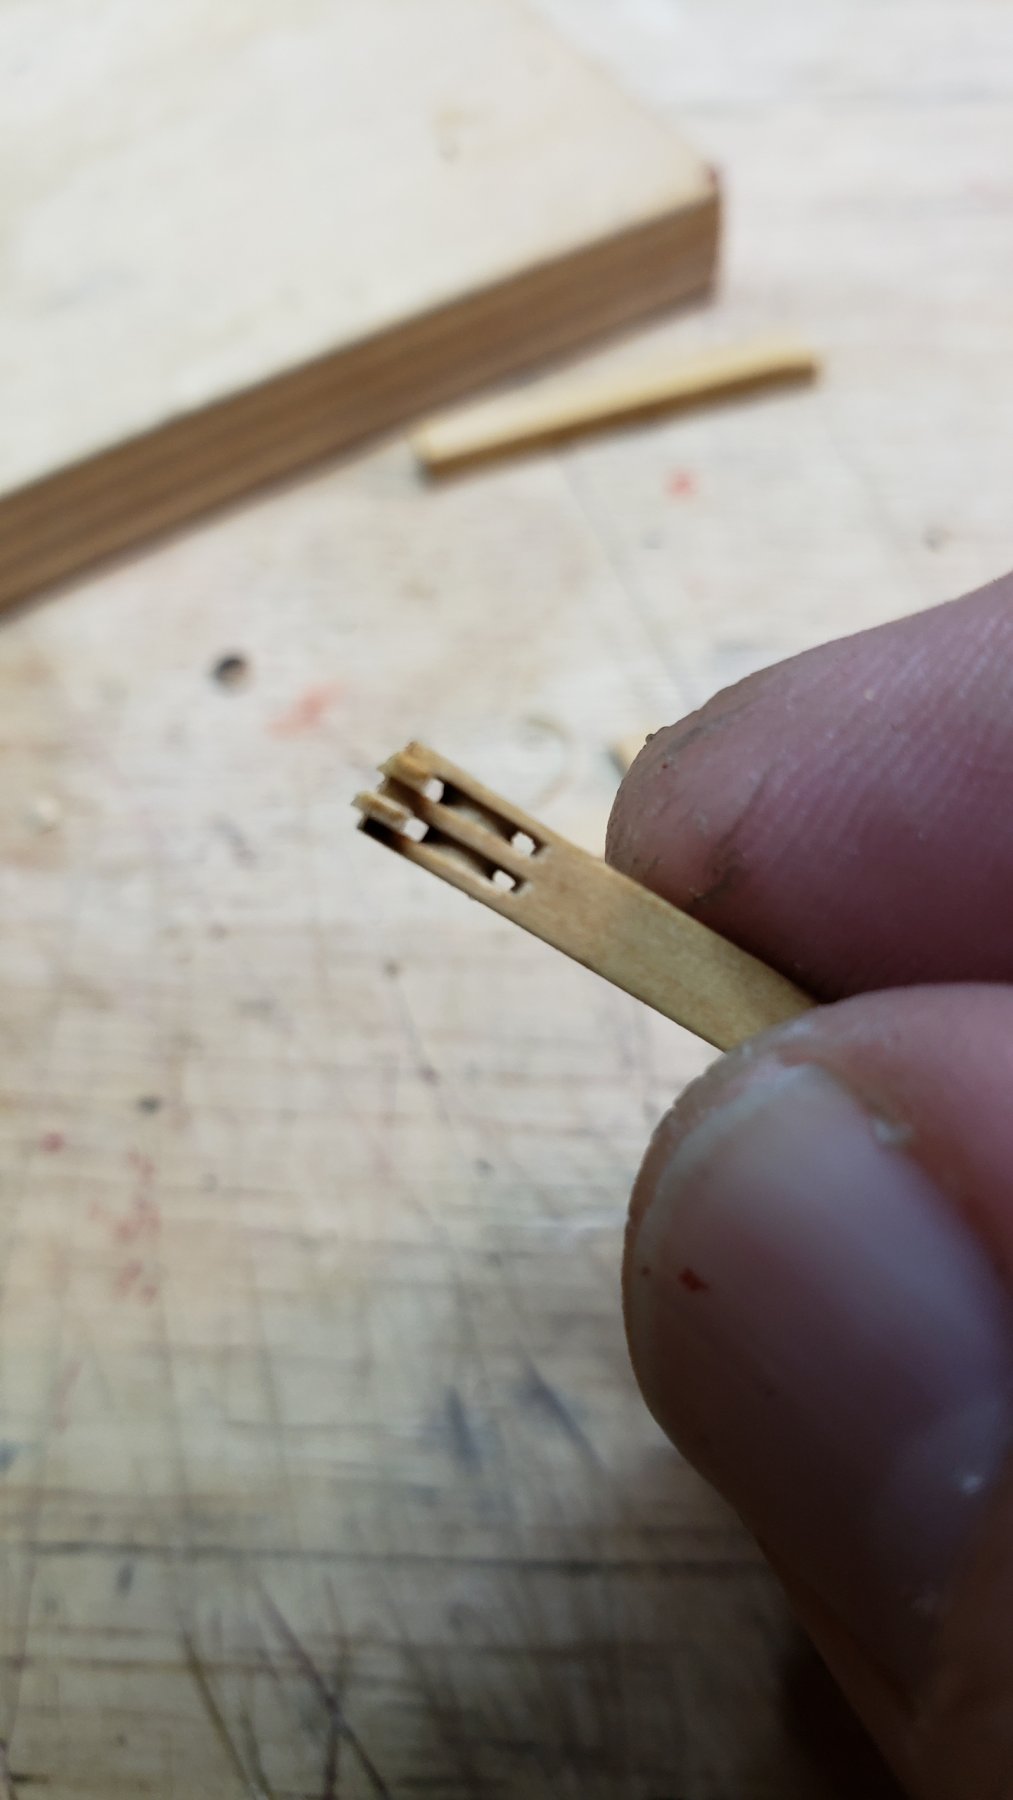
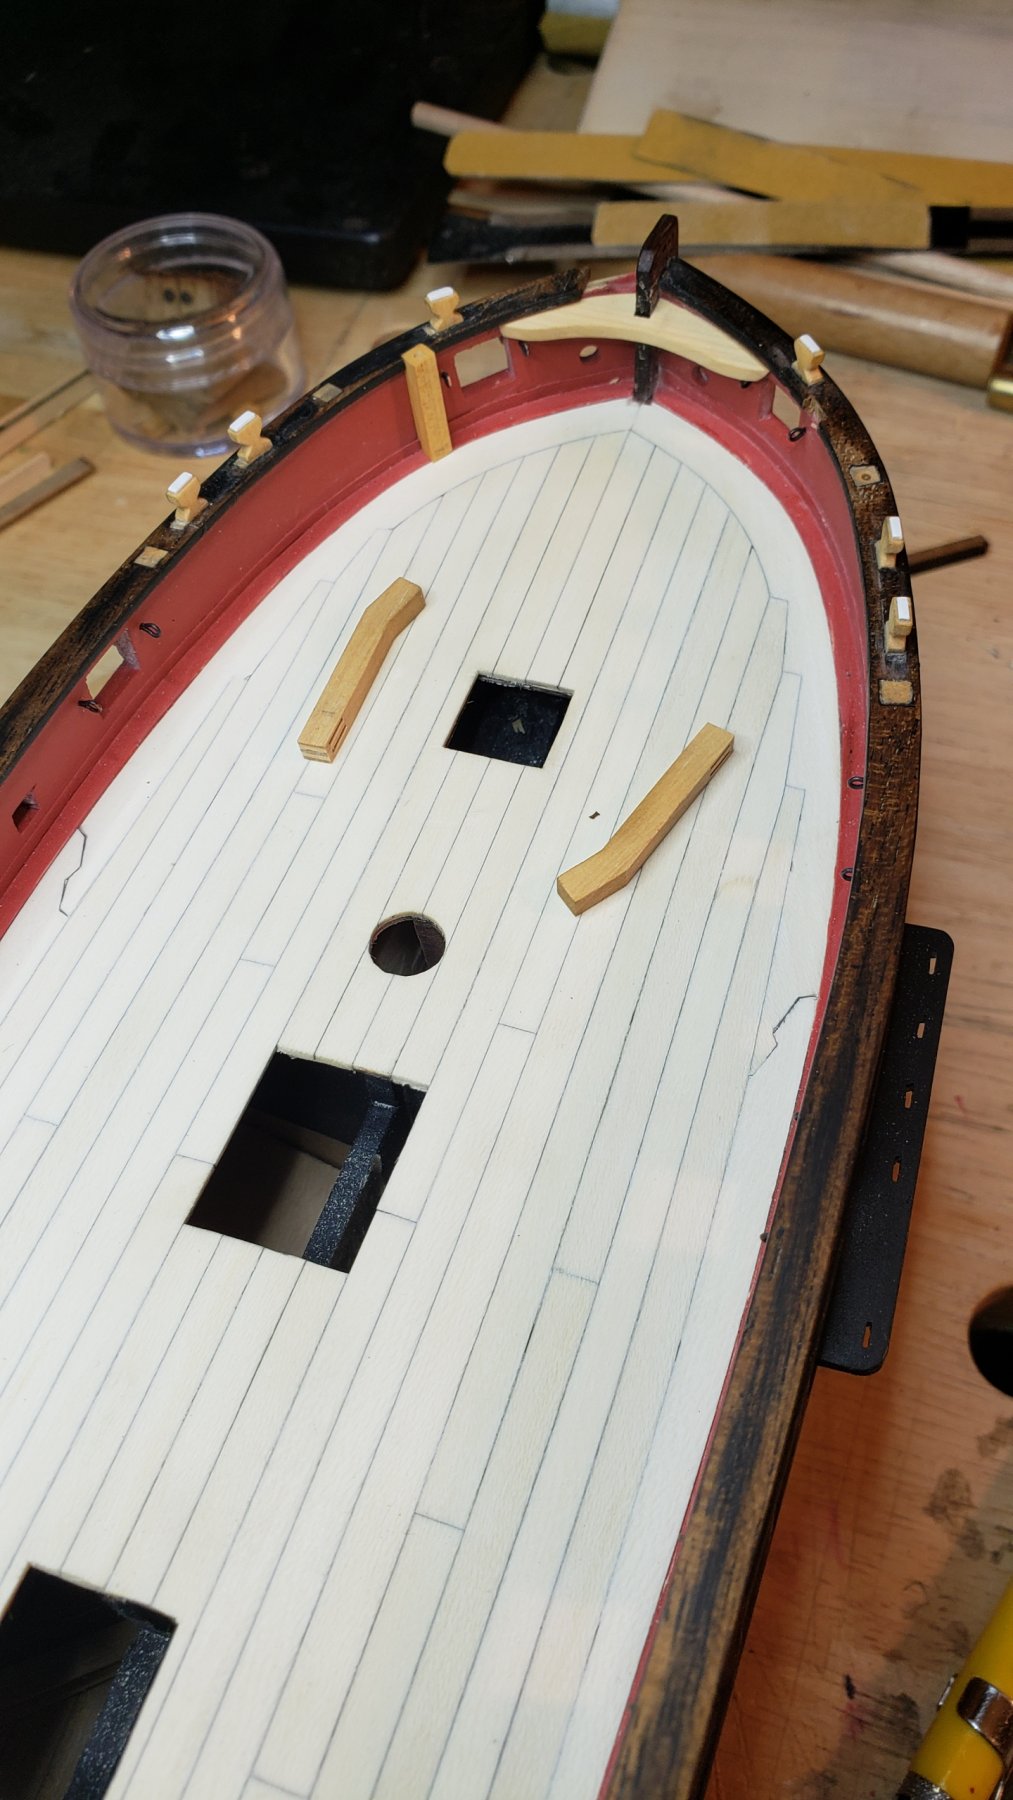
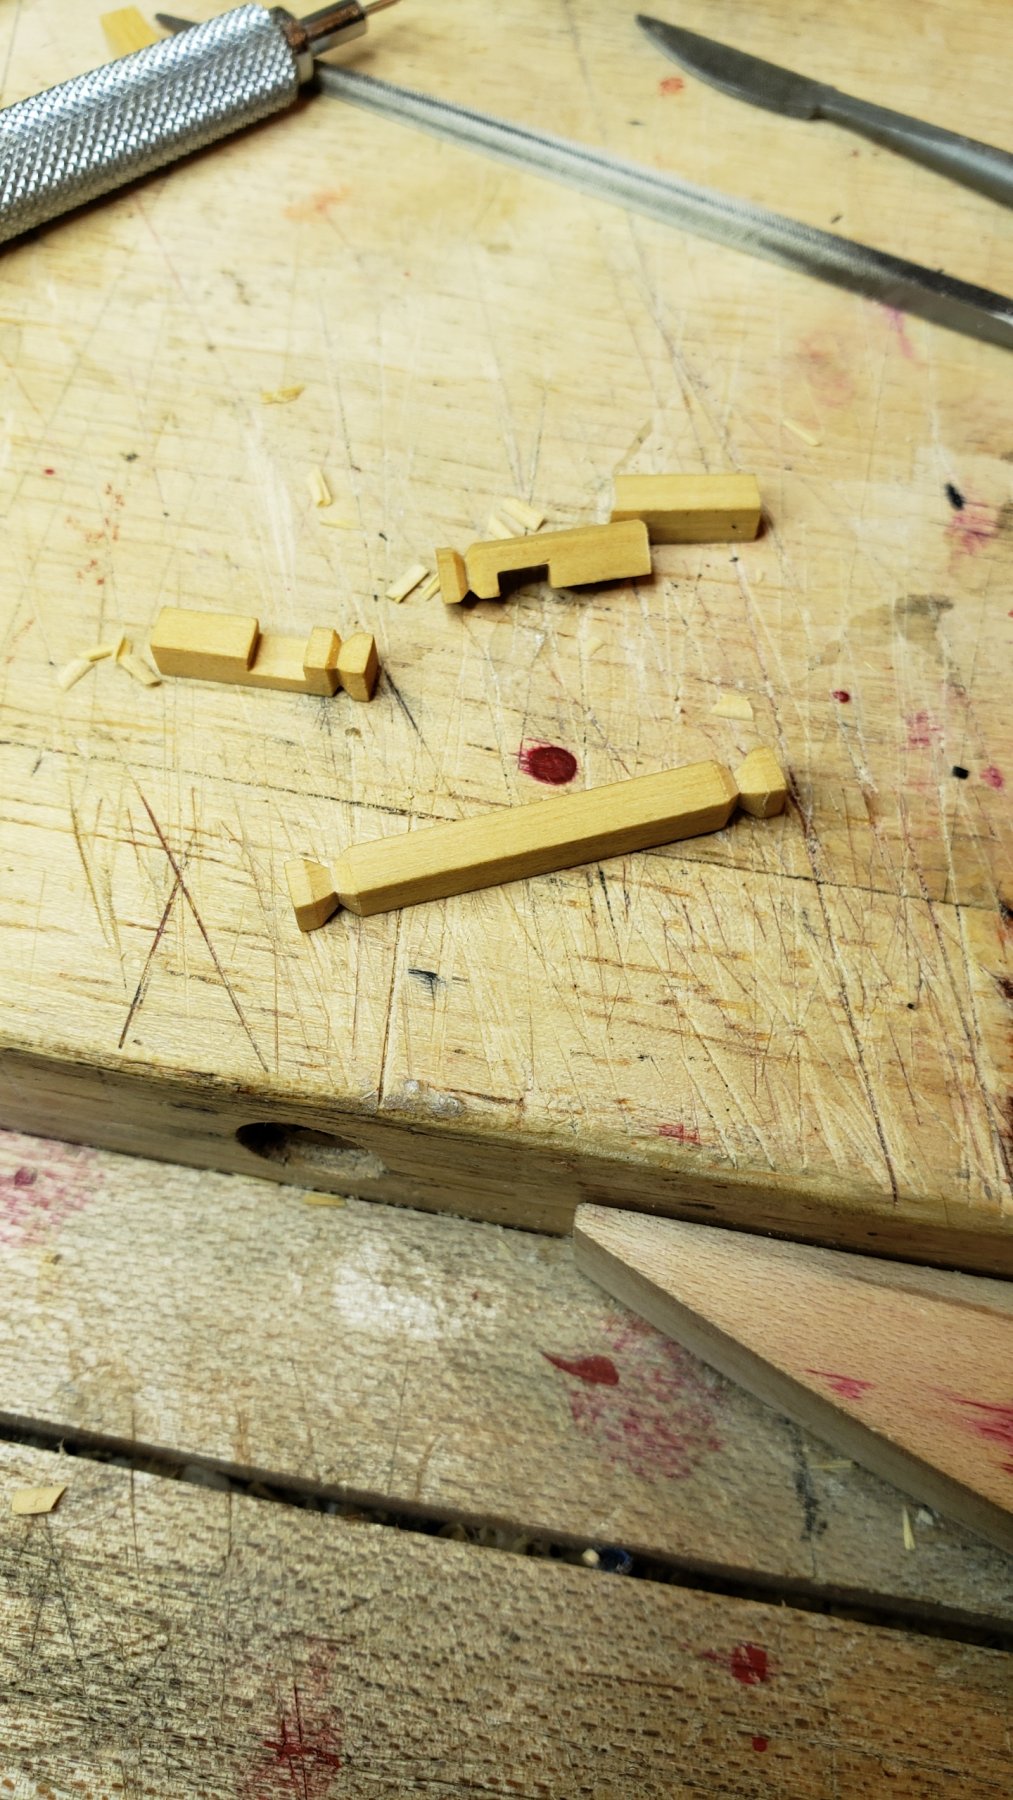
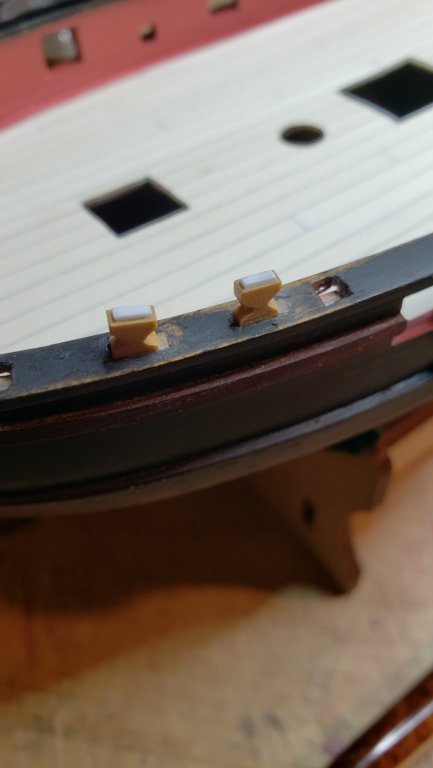
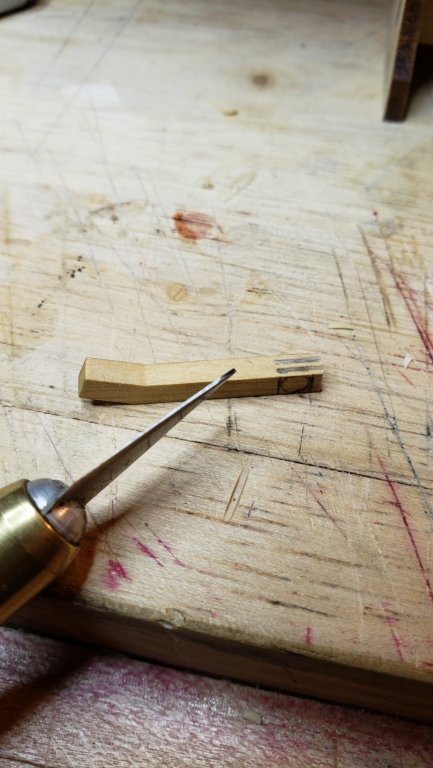
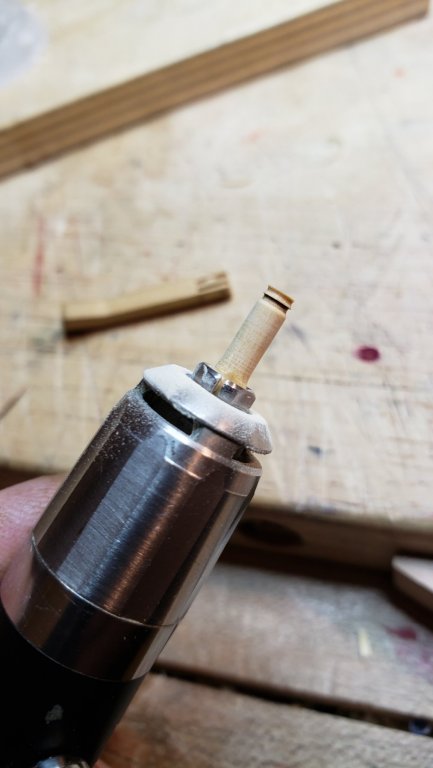
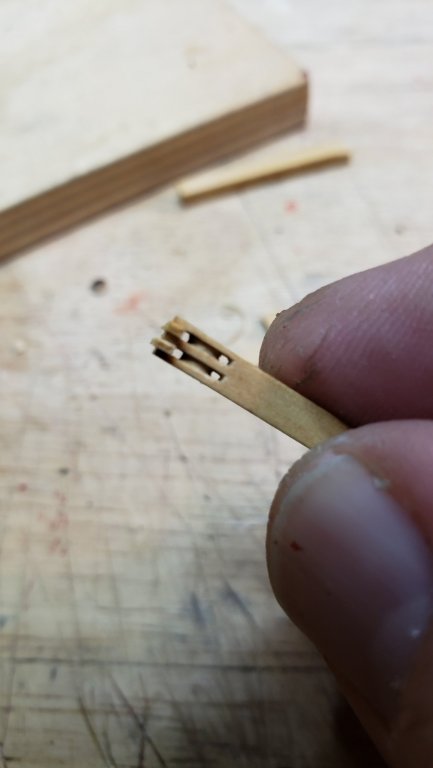
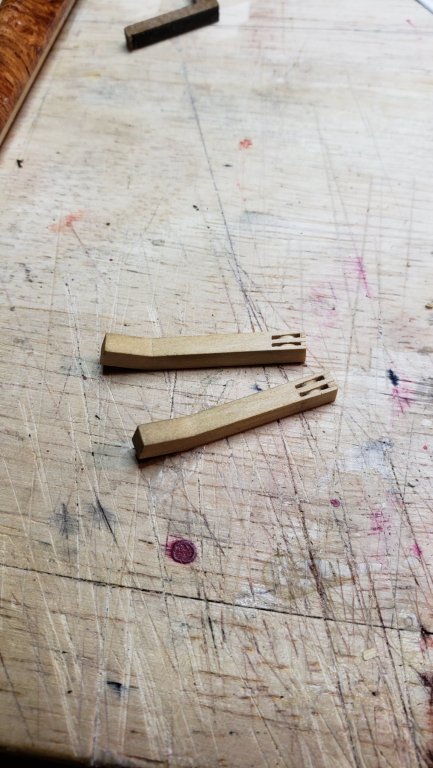
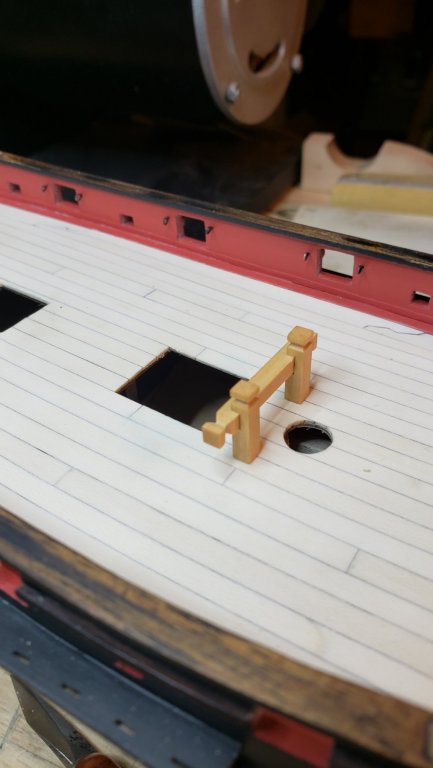
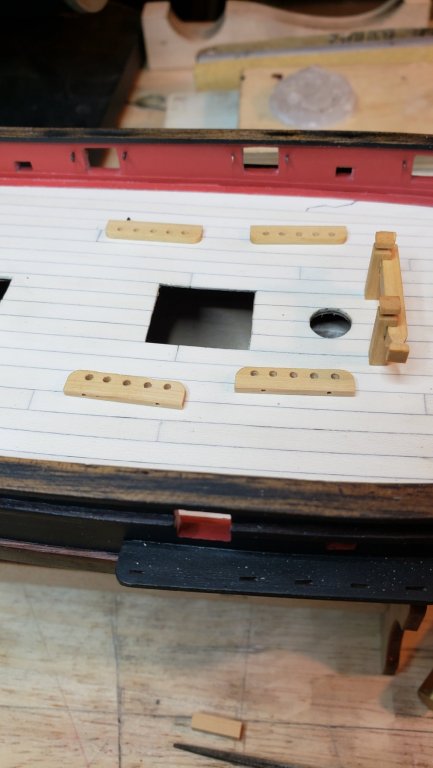
Various deck bits. I made two pin rails with 5 holes each per Rick, so hopefully will have enough belaying points. For the catheads, the mortise needed was narrower even than Mikhail's narrowest tool so I made an xacto blade into a chisel on the disk sander. In one of the pics you can see the falconet mounts are all filled in, the eyebolts blackened and installed for the guns, lower cathead parts and the bow knee are done. Just have to do the windlass and knees for the stern and the deck furniture will all be done. I haven't glued in most of them for the simple reason that I don't have to yet, I will finalize all the parts first. I think I've changed my mind and am probably going to paint the furniture red, it doesn't make much sense to have the bulwarks and pin rails and catheads all painted with the rest of the furniture stained- I should either have everything bare wood (too late) or correctly painted.


- 714 replies
-
- 10
-
-
- lady nelson
- victory models
- (and 1 more)
-
Leave it to the Russians to face the companion sideways. Thanks for the link, that is cool and it looks like an extremely good kit. That looks like a good one for you considering your interest in cutters. I may pick that up also, it's overall much more accurate and representative of the cutter design I've seen. Except for maybe the jib boom embedded in the bulwarks narwhal-style, that seems to have been not very common.
- 714 replies
-
- 2
-
-
- lady nelson
- victory models
- (and 1 more)
-
Not sure how tape would stick to wood throughout all the handling required to build the hull. I'd either do the pinstripe with paint, or place the tape just before the hull gets its finish. Otherwise I have a feeling you're going to be constantly fiddling with that tape and replacing it several times due to lack of adhesion before you get a finish on the hull.
-
Not sure I follow You're saying you're going to outlast any silk rigging, meaning it will come apart in your lifetime and you'll be faced with re-rigging the whole thing at some point. I really like the look of the silk also, but I doubt I like it enough to be willing to completely re-rig models in 15-20 years.
-
Thanks Rick I'll see if I can add knees to the stern. Also, I'm going to add knees to the catheads, that makes much more sense to me and there's a good model in the NMM collection showing knees on the catheads. Also I checked and yes even for small boats like these the catheads had twin sheeves, so I'm making them that way. Why didn't you put um.. the gaff jaws on the stern? Some kind of jaws, most of the cutters have cradle jaws there for stowing the gaff boom, I assume when at anchor. Even though this stern is pretty thin I was thinking to install something on mine. BTW, you did what seems to be the most popular color scheme, did you stain the areas of the yellow/orange visible wood? I thought everything that didn't move for more than three hours on a ship going to sea was painted, like today. But the models seem to show an unpainted varnished surface with black rails and wales. I wish I had seen even two models with somewhat similar furniture and rig for the jib boom, it appears they never closed in on a common working system- every designer had their own try at it.
- 714 replies
-
- 1
-
-
- lady nelson
- victory models
- (and 1 more)
-
Rick, what did you do for part #25, the bow knee? It does not appear on the side view so I'm not sure whether it should be level with the deck or canted upward to follow the cap rail. If it cants upward it makes a little more visual sense but then it would need to be grooved slightly for the jib boom. I spent some time looking at cutter models at the UK National Maritime Museum for details. One interesting thing is I cannot find a contemporary model with a stern anything like that of this kit- all have reinforcing knees on the bulwark/stern joint and/or storage/seats of various designs around the tiller. And to facilitate that, it looks like the cap rail didn't extend inboard at all but was flush with the inner surface of the bulwarks, unlike the overhanging rail of the kit. There seems to be no commonality at all on deck furniture, number and placement of windlasses, whether the jib boom is on the port or starboard side, the design of the jib boom (some are square inboard, some not), etc. and it's surprising how many were clinker-built. Does anyone know why? I wouldn't think there is any hydrodynamic advantage and it's an oddity when as far as I know just about everything bigger than ship's boats were typically carvel-built. By the way, look at this monstrosity, a circular ship, it must have been all sorts of fun to try and steer a straight course, and I can't for the life of me think of what the heck they thought they were gaining from such a design. The mirrored half-model is an interesting presentation too. http://collections.rmg.co.uk/collections/objects/67012.html
- 714 replies
-
- 1
-
-
- lady nelson
- victory models
- (and 1 more)
-
Mikhail's sets are the best choice but also the most expensive of the options discussed. My set was ~$500, which is even more than the Lee Valley set I mentioned above. Yes, it's the best option and honestly a steal for the number of tools you get, but it's a premium expenditure. And then there's the problem of getting in Mikhail's queue, and also sometimes he decides he's not going to make anything for a while, so I wouldn't hold my breath for quick shipping if you go that route.
-
That's probably what I'm going to do, I just wish I'd thought a bit more before mounting those pieces. Well at least they make good plugs for the holes
- 714 replies
-
- 1
-
-
- lady nelson
- victory models
- (and 1 more)