vossiewulf
-
Posts
1,477 -
Joined
-
Last visited
Content Type
Profiles
Forums
Gallery
Events
Everything posted by vossiewulf
-
 This knife from that site is 20cm. Since you only need about 5cm for a knife you might get 4 out of that $30AUD, at least three. But they'd all be single bevel. I'd make skew like mine left and right and two more with a skew angle of only 20 degrees or so, that geometry is really good for cleaning out corners of things. That's what I'm going to do with the other two pieces I have. BTW, don't buy a Japanese pocket knife if you ever let anyone else especially children use it. For reasons not clear to me even their pocket knives are insanely sharp Rc63 steel.
- 714 replies
-
- 2
-

-
- lady nelson
- victory models
- (and 1 more)
-
Oh yeah I've used Japanese marking knives before, many (many) years ago when I spent five years as a custom furniture maker before going back and finishing school, so I knew any reasonable one is going to be typical Japanese quality and Rc63/64. There is no people with greater obsession about steel and sharp steel implements as the Japanese, so there really is no such thing as poor steel from any reputable seller, they range from really good to amazing. Also the only western knives I use are from Ron Hock, the rest are all Japanese and much like the above were not terribly expensive, I buy them as kind of raw kits and then finish them into something much better. The $25 or so Japanese knives from Japan Woodworker that I posted in my tools thread and above I think are also good examples. Regrind blade, take handle to mill and mill half of each side off, glue on $2 of fancy wood, shape it like you want it and then finish it in solid CA glue. Almost all my tool handles get that finish because it provides really excellent grip, the shinier it gets the better the grip gets, and it's almost bulletproof. Look at my wenge knife that's been rolling around on my bench for at least a year since I last shined it up a little and it almost looks new. Back to marking knives and steel tools in general, in an intelligent approach to lowering costs, generally the mid-cost tools will still have very good steel, but not nearly as perfect preparation; you saw there was a fair amount of work to get the backs and bevels on these flat, if I'd spent another $25 on them there would have nothing required but the steel wouldn't be any better. So if you have a bench grinder and a good array of sharpening tools and a willingness to spend two or three evenings working on knives, you can make yourself beautiful knives that will last forever and do exactly what you want them to do really well for maybe $15 in blade and wood. Remember that Japan Woodworker sells them in "western pattern" double-bevel style with the good steel in the center. You will want to get those unless you want single bevel like mine. The reason the standard versions are left/right single bevel and made to be extremely sharp is these make not just a "mark", but their cut is the actual visible edge of the joint (in traditional joinery at least), and considering that Japanese woodworkers are pathological about perfection, that means those knives have to be very sharp. And to ensure that perfection, they are single bevel and in pairs so no matter which side of the ruler you're cutting on, the cut is dead on that ruler edge, straight and perfectly perpendicular to the wood's surface.
- 714 replies
-
- 1
-
-
- lady nelson
- victory models
- (and 1 more)
-
Painting Wales
vossiewulf replied to JohnB40's topic in Painting, finishing and weathering products and techniques
Thanks wefalk. It seemed likely they'd use what they called lamp black and we call carbon black today with buckyballs and nanotubes and graphene. I ordered some eye-shadow application sponge brushes for makeup yesterday, I think those might make good india ink applicators, and I guess am going to continue to experiment. I'm still a ways from needing to make a decision. But the Faber-Castell pens are pretty black, people should really consider having a couple on hand for very small areas or hard to reach spots at least, they're an order of magnitude easier to use than anything involving a brush and the ink should last fine. -
Painting Wales
vossiewulf replied to JohnB40's topic in Painting, finishing and weathering products and techniques
I had forgotten about artist's markers. These are acid-free archival ink and should last at least as long as paint and I very much like the thinness of the coating- much much more in-scale than any paint or finish we typically use. This isn't quite as black as india ink, but would be super-easy to do. BTW, what was the contemporary black pigment? If they used carbon black like india ink then that would be the accurate choice, as wefalk said, india ink doesn't fade.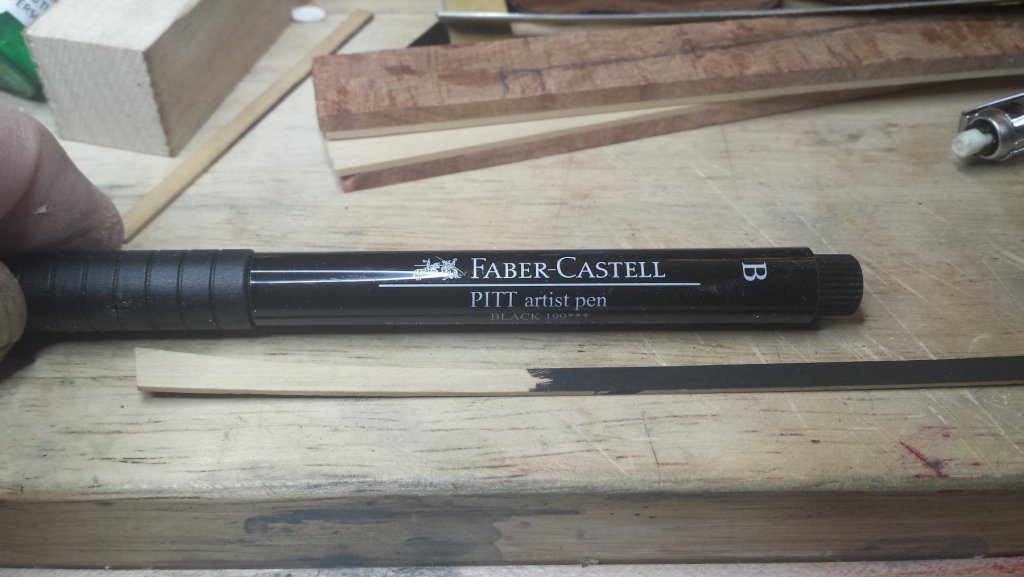
-
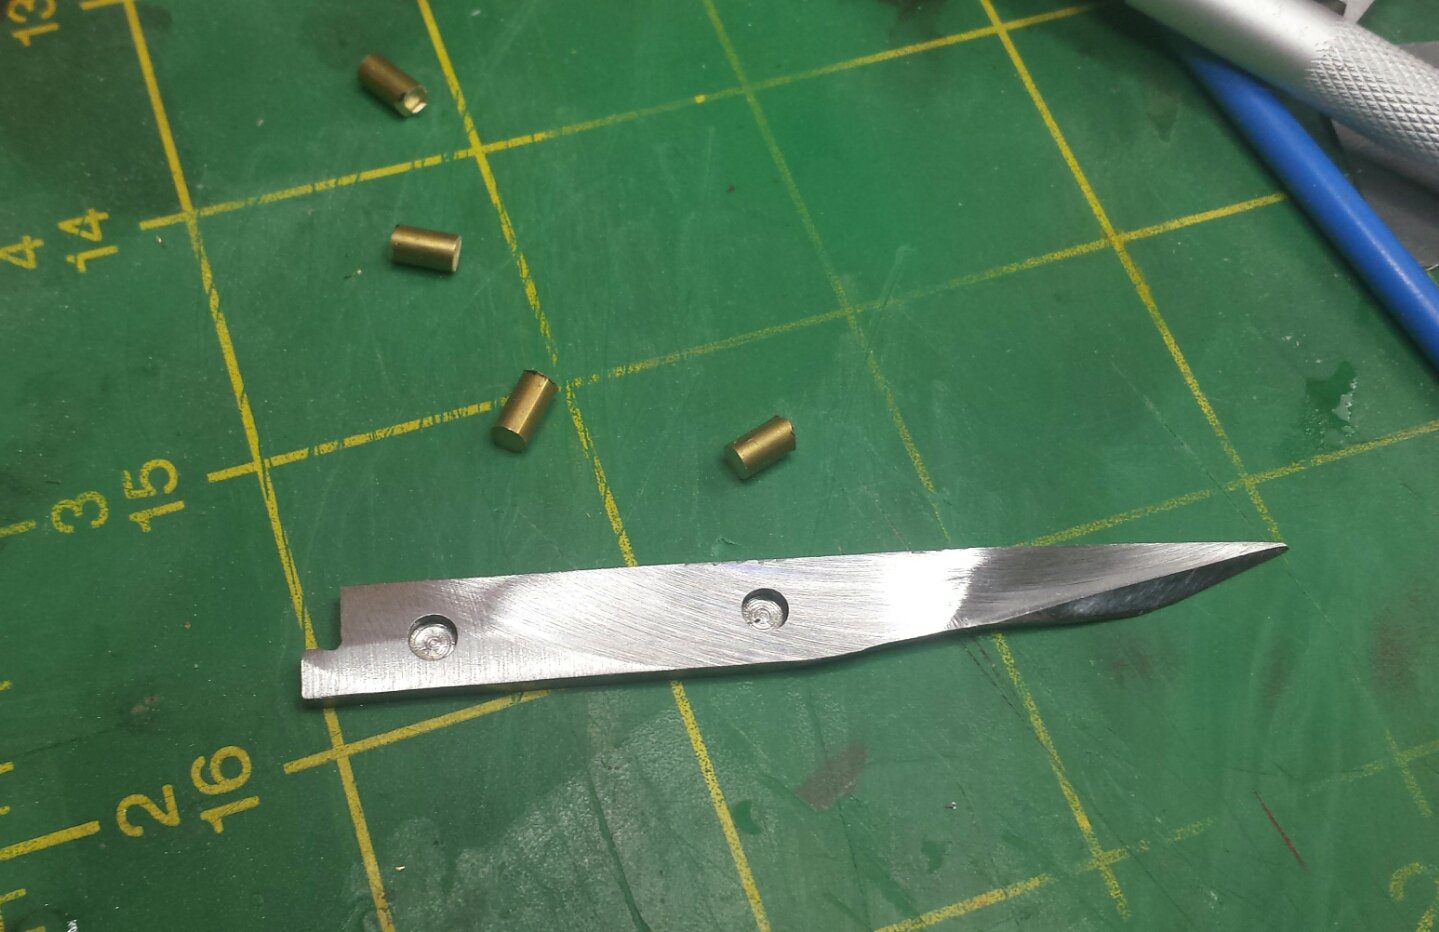
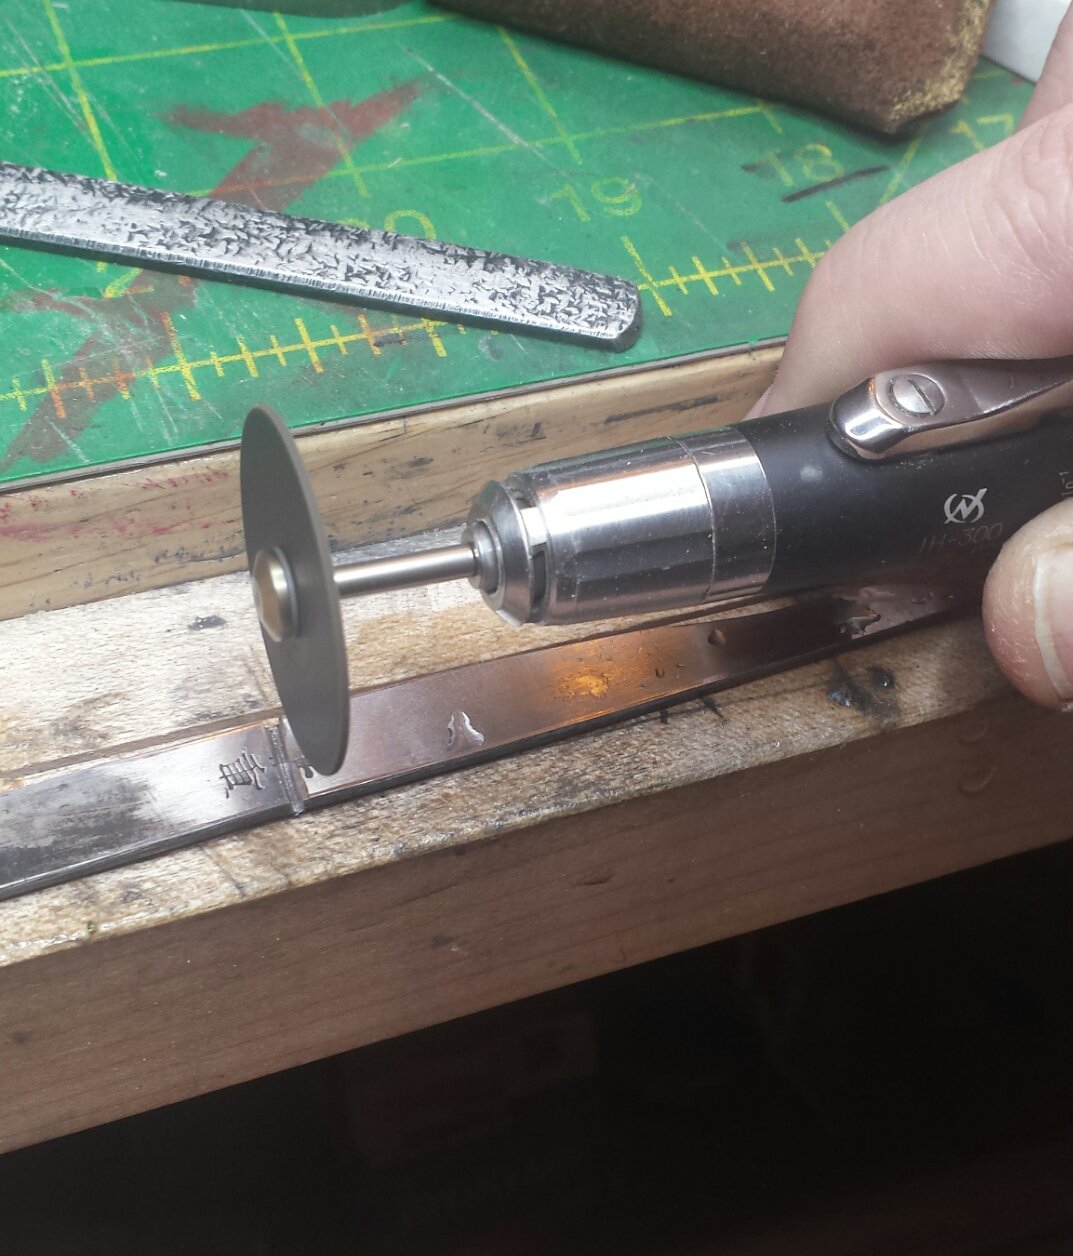
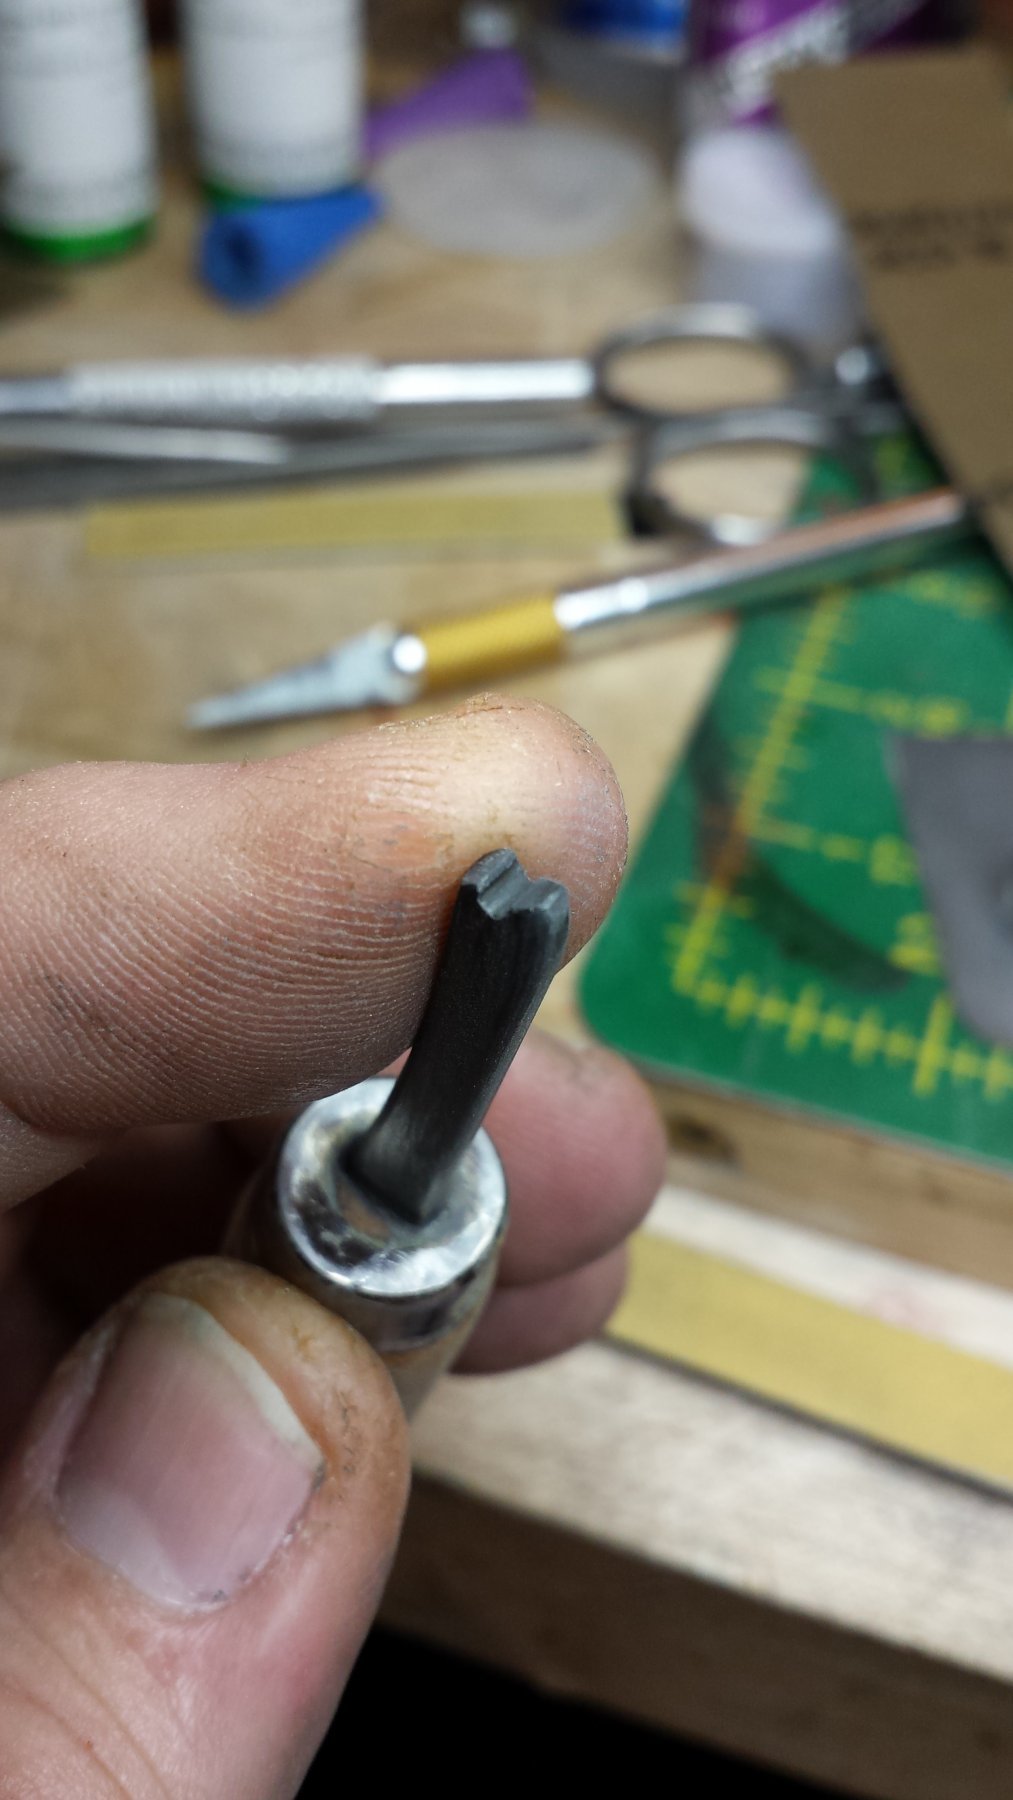
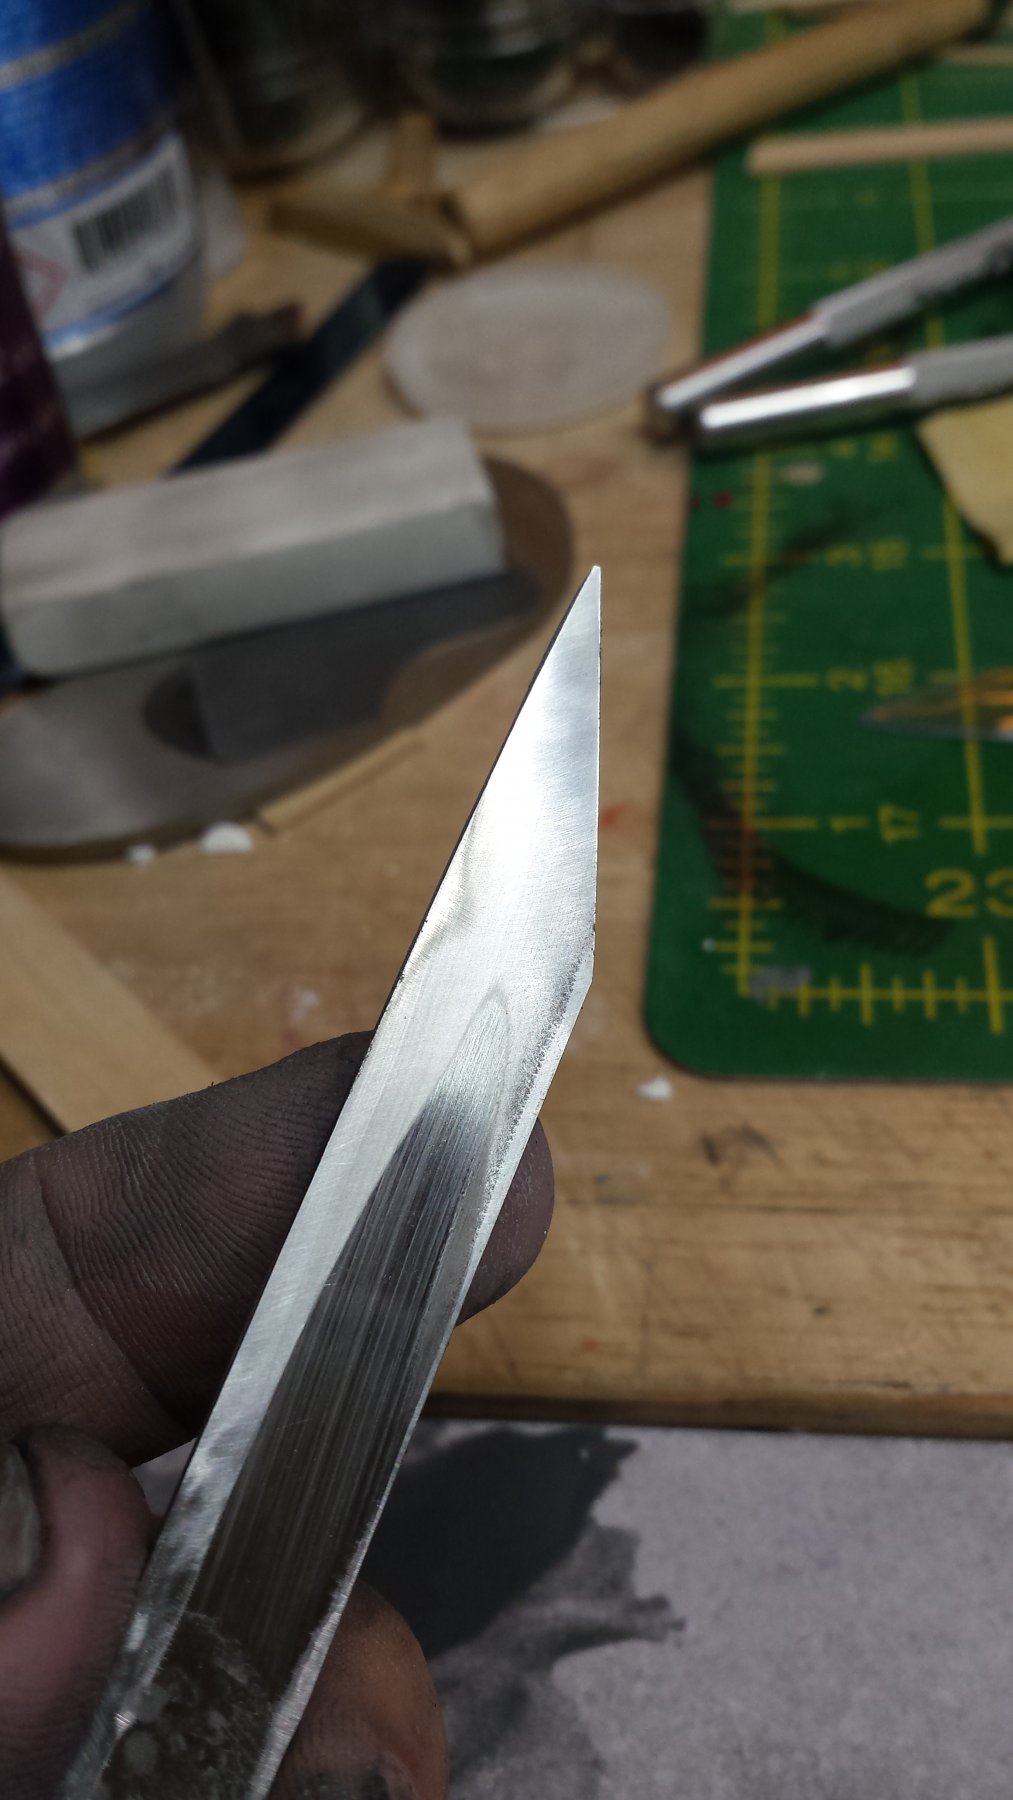
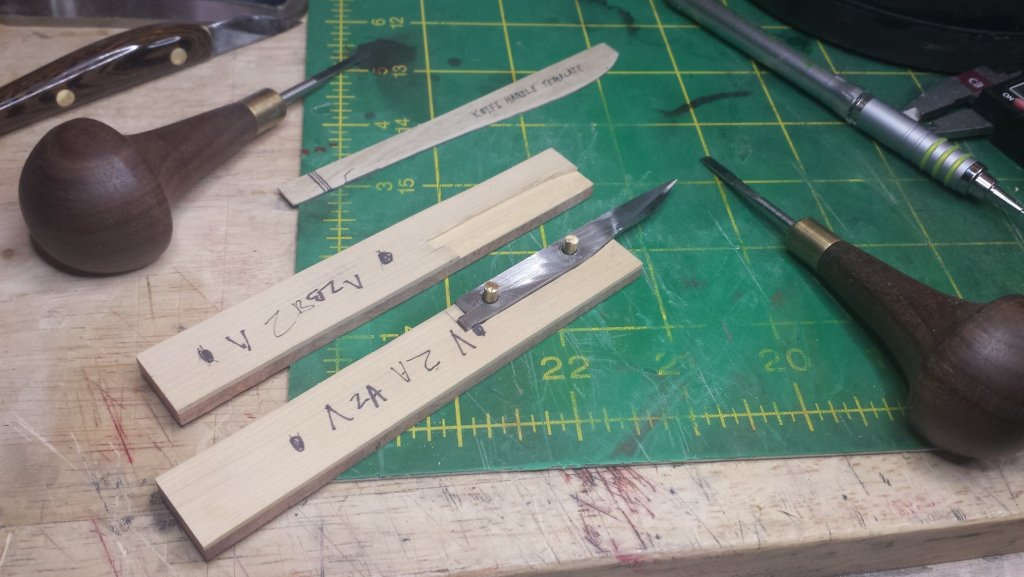
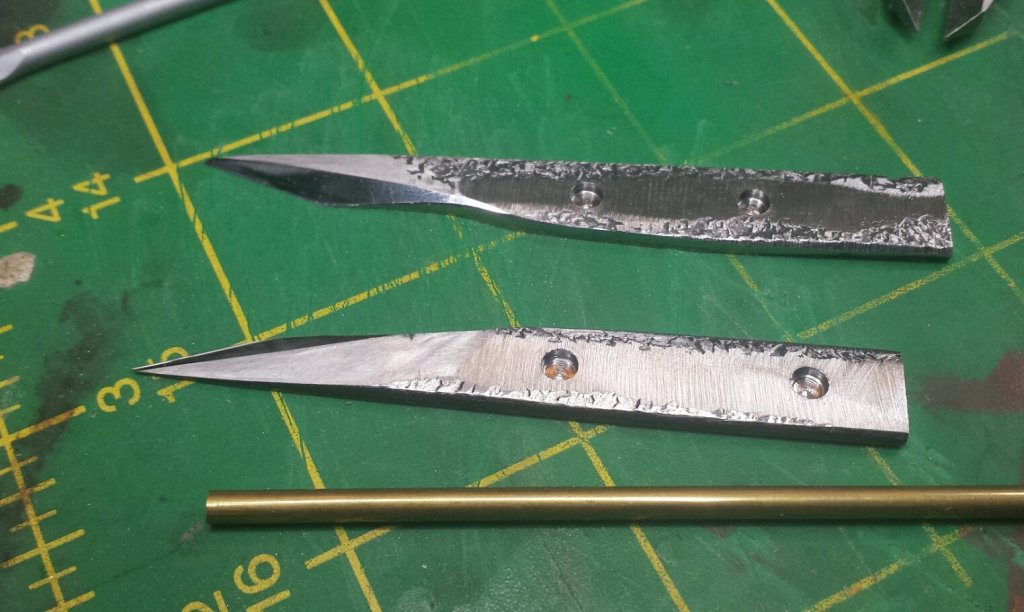
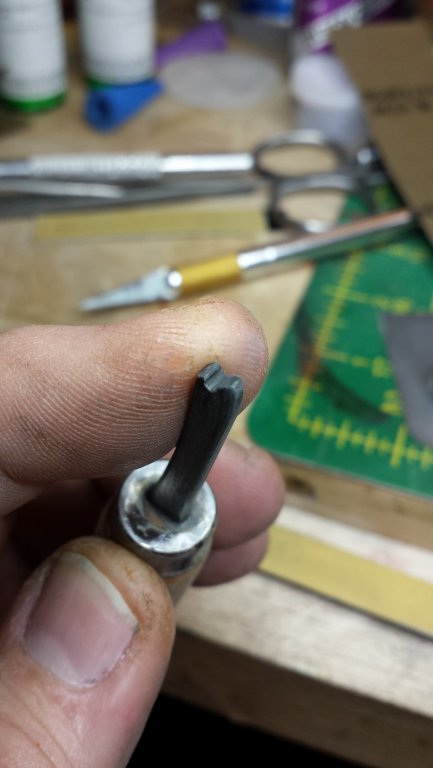
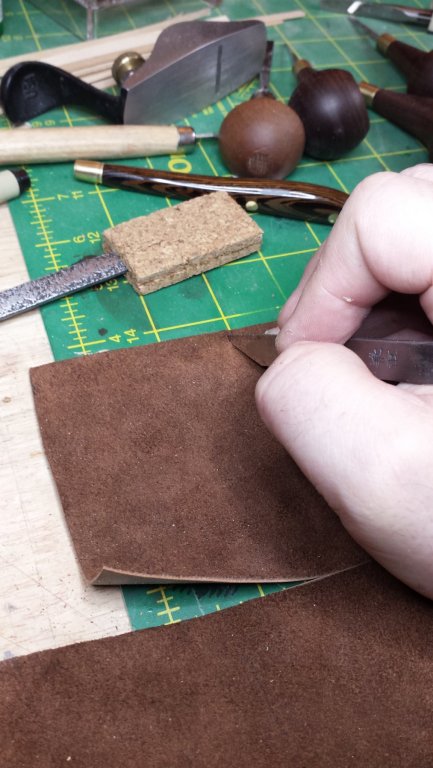
Trying to finish the knives, included here for those interested in the process. I don't think it's particularly difficult if you have a bench grinder and a drill press, but grinding already hardened and tempered steel without damaging the temper is not a super-swift process. I make it go as fast as possible by using icewater, cool the blade way down between grinding passes, that way you can get in more before it has to go back into the water. Also always try to hold it up near the cutting edge, that way you know for certain when it's time for it to go back in the icewater bath. First we don't need all that length in the handle, so I cut them in half with a larger cut-off wheel in my rotary tool. This process is more about good cut-off wheel and linear speed of said wheel's edge than it is about torque, Dremel tool could easily do this too. Since the linear speed makes a difference, a larger cut-off wheel like this helps, especially as cut-off wheels are usually restricted to 15k RPM or less. And now we have two for the price of one, and those $22 knives are now $11. I already know what I'm going to grind these new blanks into, but not right away. They got waxed and tossed in my knife drawer. As mentioned this side of the knives is very low-carbon steel and is barely hard, and therefore files easily. This is just establishing a flat to help with the grinding. There was no way I was going to be able to drill through Rc64 hardened tool steel, but I still want mechanical blade retention, although these will be light duty knives you never know, and I never make anything flimsy. So I took a 1/8" end mill and made holes as deep as I could, which was basically zip through the low-carbon steel and then hit a solid wall of the bottom Rc64 strip. I will glue in brass rods that will pass through one side of the handle. I definitely totally meant to have one with a 3/4" separation and the other 1", that's my story and I'm sticking to it. I then took them to bench grinder and narrowed them down and made the top and bottom edges parallel. I also ground in a notch as you see here so the wood of the handle will also be mechanically resisting the torsion stresses of cutting. And here we are cutting the rabbets, blade is fitted into its rabbet on one side. This is best done with a mill, but also can be done with a drill press set up for milling, a small router, or a Dremel with a router base. I used the latter here. I should be able to glue them up and mostly finish them tomorrow.


- 714 replies
-
- 6
-
-
- lady nelson
- victory models
- (and 1 more)
-
Planking in particular looks great and that is not an easy hull to plank. What are the plans for finish/paint? One thing I'd suggest is filling the grain, this wood has a pretty open grain structure for this scale, two or three sanding sealer coats would do it.
-
And by the way at this rate you're going to finish like three ships before I finish LN, and it all looks good.
-
What the hell, didn't I reply to this a long time ago? For some reason not showing up in the topics I have replied to activity list I use to track things, I've been wondering why you weren't doing anything. Sigh.
-
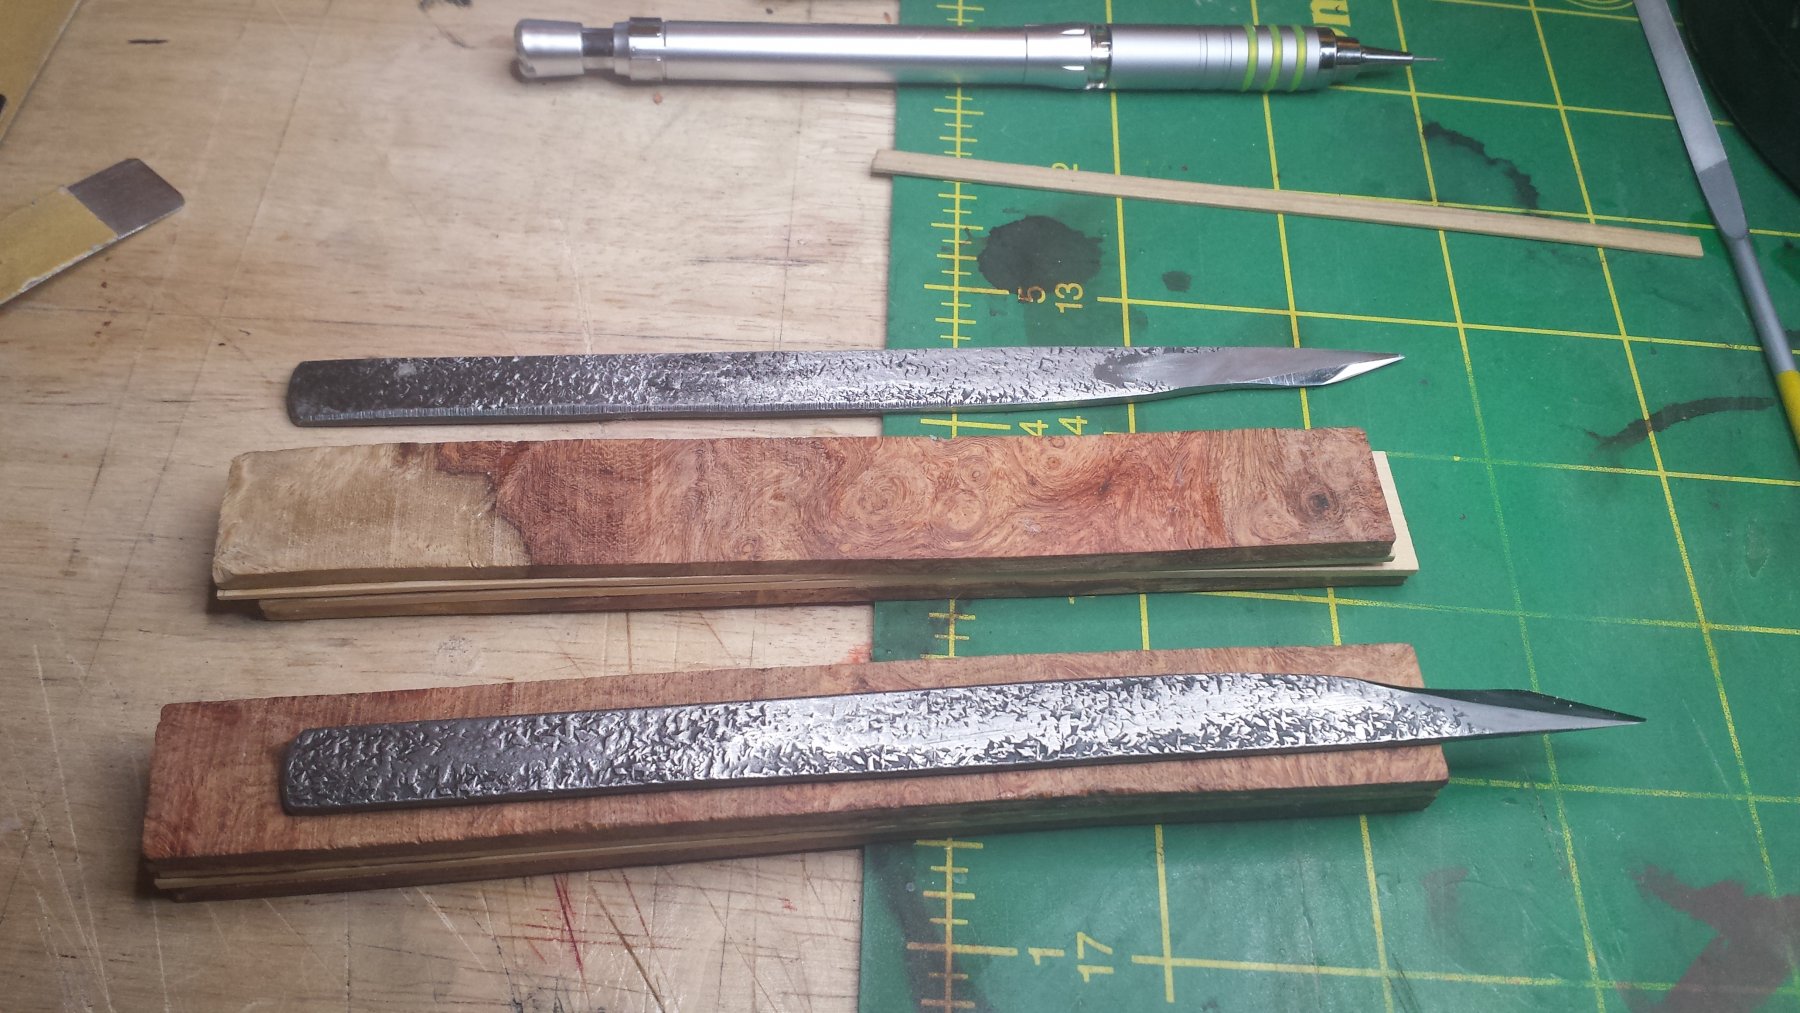
For those who don't read the what you got today thread, here is progress on the planking. Also I've finally found my black color, it's a warm and rich black with a very thin coat that doesn't hide the wood texture. Cell phone camera makes it look somewhat gray but trust me it's black and will be uber black with a satin clear coat. And boy it's going to be easy. Archival, acid-free artist's ink that should last just as long as any paint, if not longer. Also, continuing to work on the new knives towards bringing them to full operational status. First step was to grind away all that cutting edge I didn't need for this purpose. And here are the handles, they're made from an amboyna burl pen blank I had that I cut into four strips and then planed the inner surfaces to glue them to pieces of boxwood sheet that has a perfectly complementary color. It will also provide strength, burl of any species is very brittle and no matter which way it's cut it has short grain sections that will snap with very little pressure. It will also be reinforced by a good soaking in thin CA followed by medium for the outer finish, like my wenge knife or my cherry xacto replacement. What was very odd about this amboyna was that it planed with zero tearout from any direction. I keep my plane irons pretty sharp of course but still it planed easily to a glass surface and I've never seen burl from any other species be that easy to work with. So if you want some fancy wood that is apparently pretty easy to to work with, try this. Every time I stop by Woodcraft I'll walk out with a few small wood pieces, I think this piece was < $5 and will make two nice knife handles.


- 714 replies
-
- 5
-
-
- lady nelson
- victory models
- (and 1 more)
-
Fokker Dr.I by Torbogdan - FINISHED - Model Airways
vossiewulf replied to Torbogdan's topic in Non-ship/categorised builds
I think I may have made you aware of it and that it's THE book to have for building Dr.I models, but it was Ron Thibault who saw that they were in stock again and pointed that out. Thank him for continuing to check -
Probably the kind of thing that started barfights at ship builder conventions.
-
Painting Wales
vossiewulf replied to JohnB40's topic in Painting, finishing and weathering products and techniques
Yes, called glaze coats (you're painting like Da Vinci when you do) and I do the same brush painting, as you say it leaves zero brush marks. If you decide to brush paint your model, this is really the way to go. Thin the paint much more than usual, so the coats you put on are translucent and have enough thinner that it's more like pushing some liquid around with your brush. The coats dry very quickly, you can paint coats this way every couple of minutes and once you're up to 4-5 coats you'll have an excellent painted surface. -
The ship's longboat would be longer than my ship.
-
Are you using brad point drill bits for wood? They cut much cleaner holes than standard pilot points.
-
Fokker Dr.I by Torbogdan - FINISHED - Model Airways
vossiewulf replied to Torbogdan's topic in Non-ship/categorised builds
I understand Tor, I got halfway through an Alb. D.V before it got killed in a move and I decided not to re-try as they are just not that great kits and even someone just trying to build something reasonably good out of the box has problems, as you have had. The up side (which is pretty big) is no one offers anything like it. But they've always looked like airplane models designed by ship modelers who don't know much about flying and they would do themselves a big favor by hiring an experienced RC aircraft designer to redo them for higher accuracy. Then there is the inexplicable obsession with white metal, it's inexplicable as you can see the masters were reasonably good, so if they'd just taken that master and cast the part in resin it would have looked nice and been easy to work with if you want to add detail. Instead they use white metal and it's pitted and bumps are everywhere and they take a ton of effort just to get in basically usable state. But I doubt they have much impetus to do a redesign when no one else is competing, so there's room for someone to step in and do better. -
Don't give him any ideas. Trust me he's been trying to figure out how much house modification would be required to fit a 1:12 Commerce de Marseille
-
Painting Wales
vossiewulf replied to JohnB40's topic in Painting, finishing and weathering products and techniques
What he said. India inks work great and will give you the blackest black that ever blacked a totally black thing. It builds a slight film, thinner than paint, is almost unnoticeable with one coat. Alcohol-soluble aniline dyes can be bought at Woodcraft or any luthier supply place. I've been somewhat disappointed in the blacks as so far they have a purplish tint to me, but all other colors are great, they dry instantly, and they don't raise grain so you can wipe on your stain and then spray a clear finish one minute later. Best of all to me, since they're molecular color and NOT pigment, they in no way obscure the underlying grain. This is how guitar makers create bright green curly maple guitars: Permanent black markers are usually a form of lacquer and work fine too. I haven't seen anything about how permanent those permanent colors are though. -
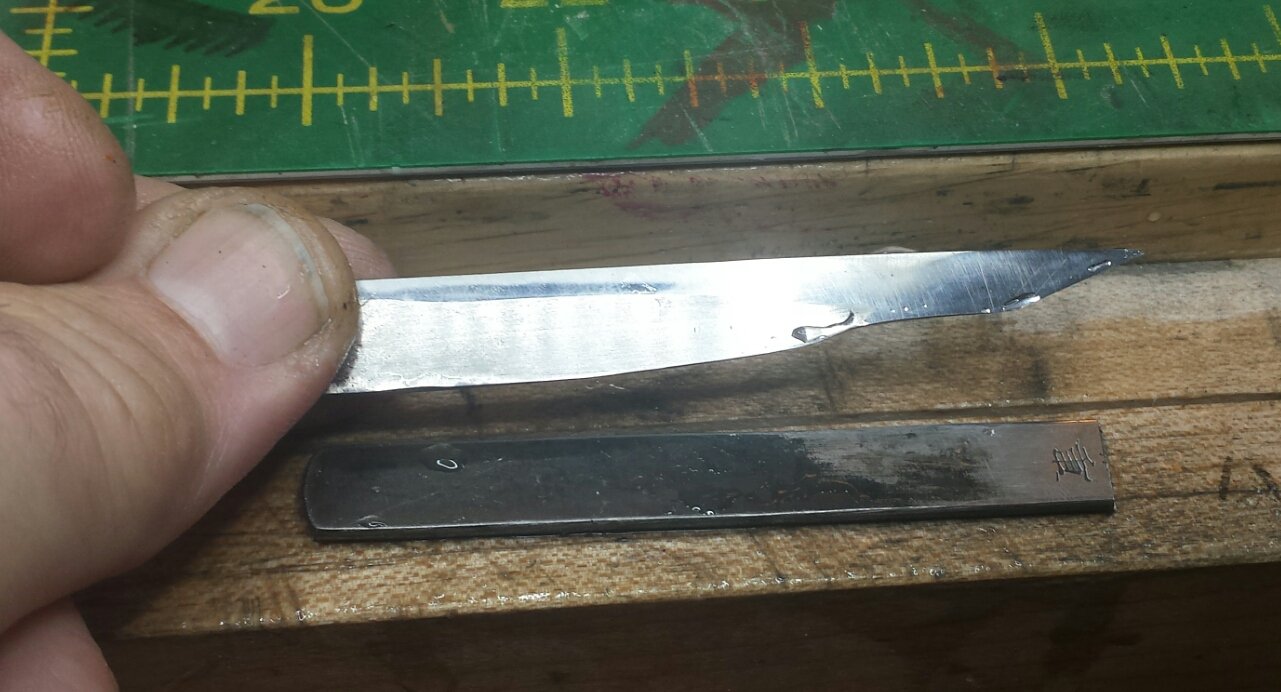
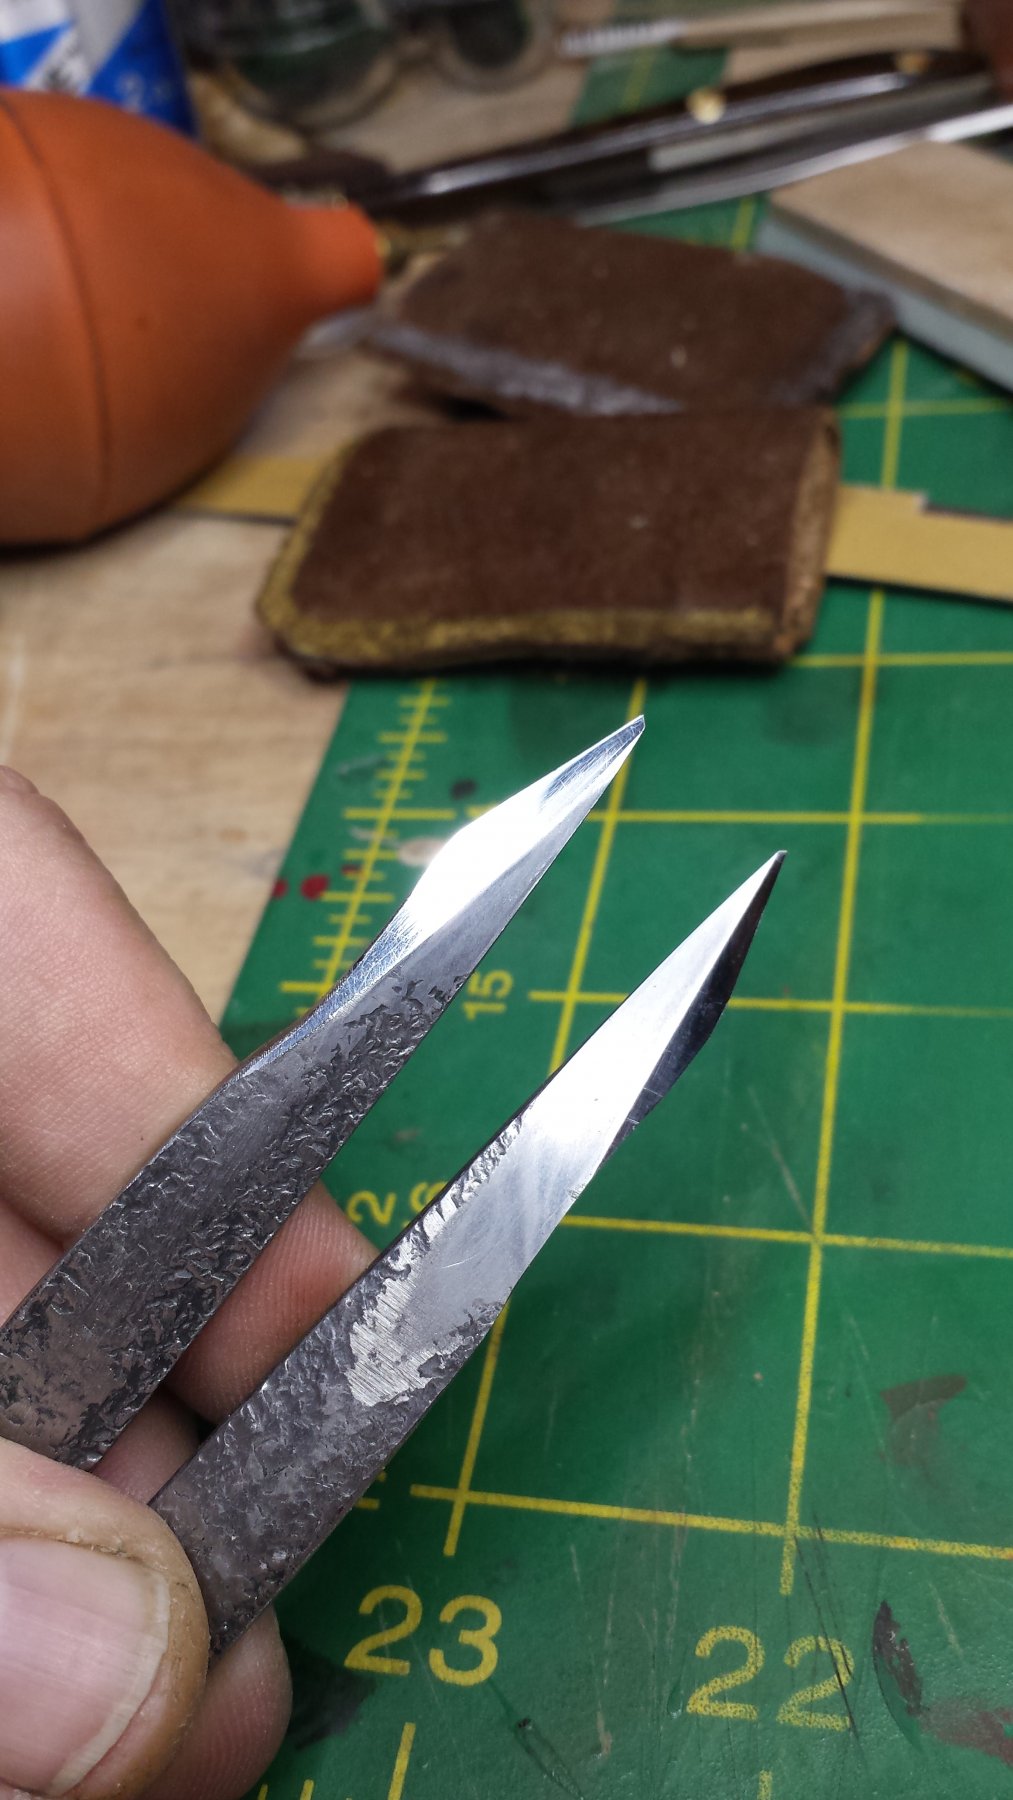
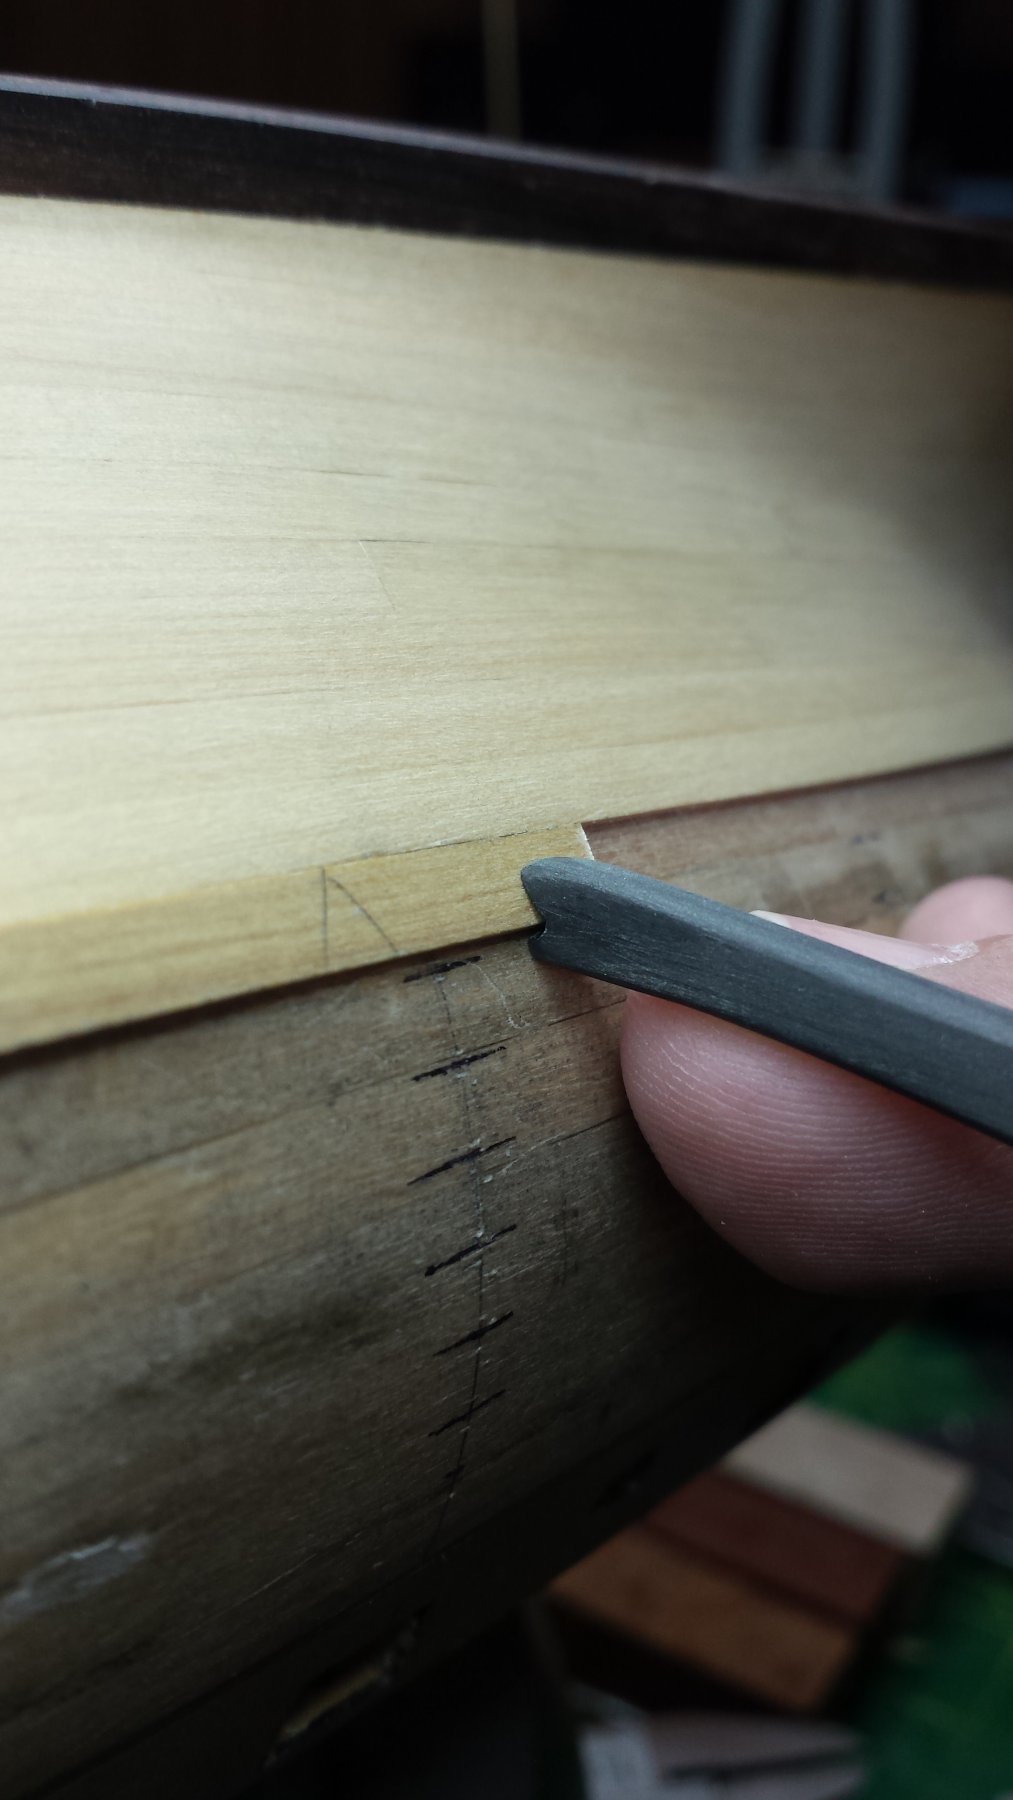
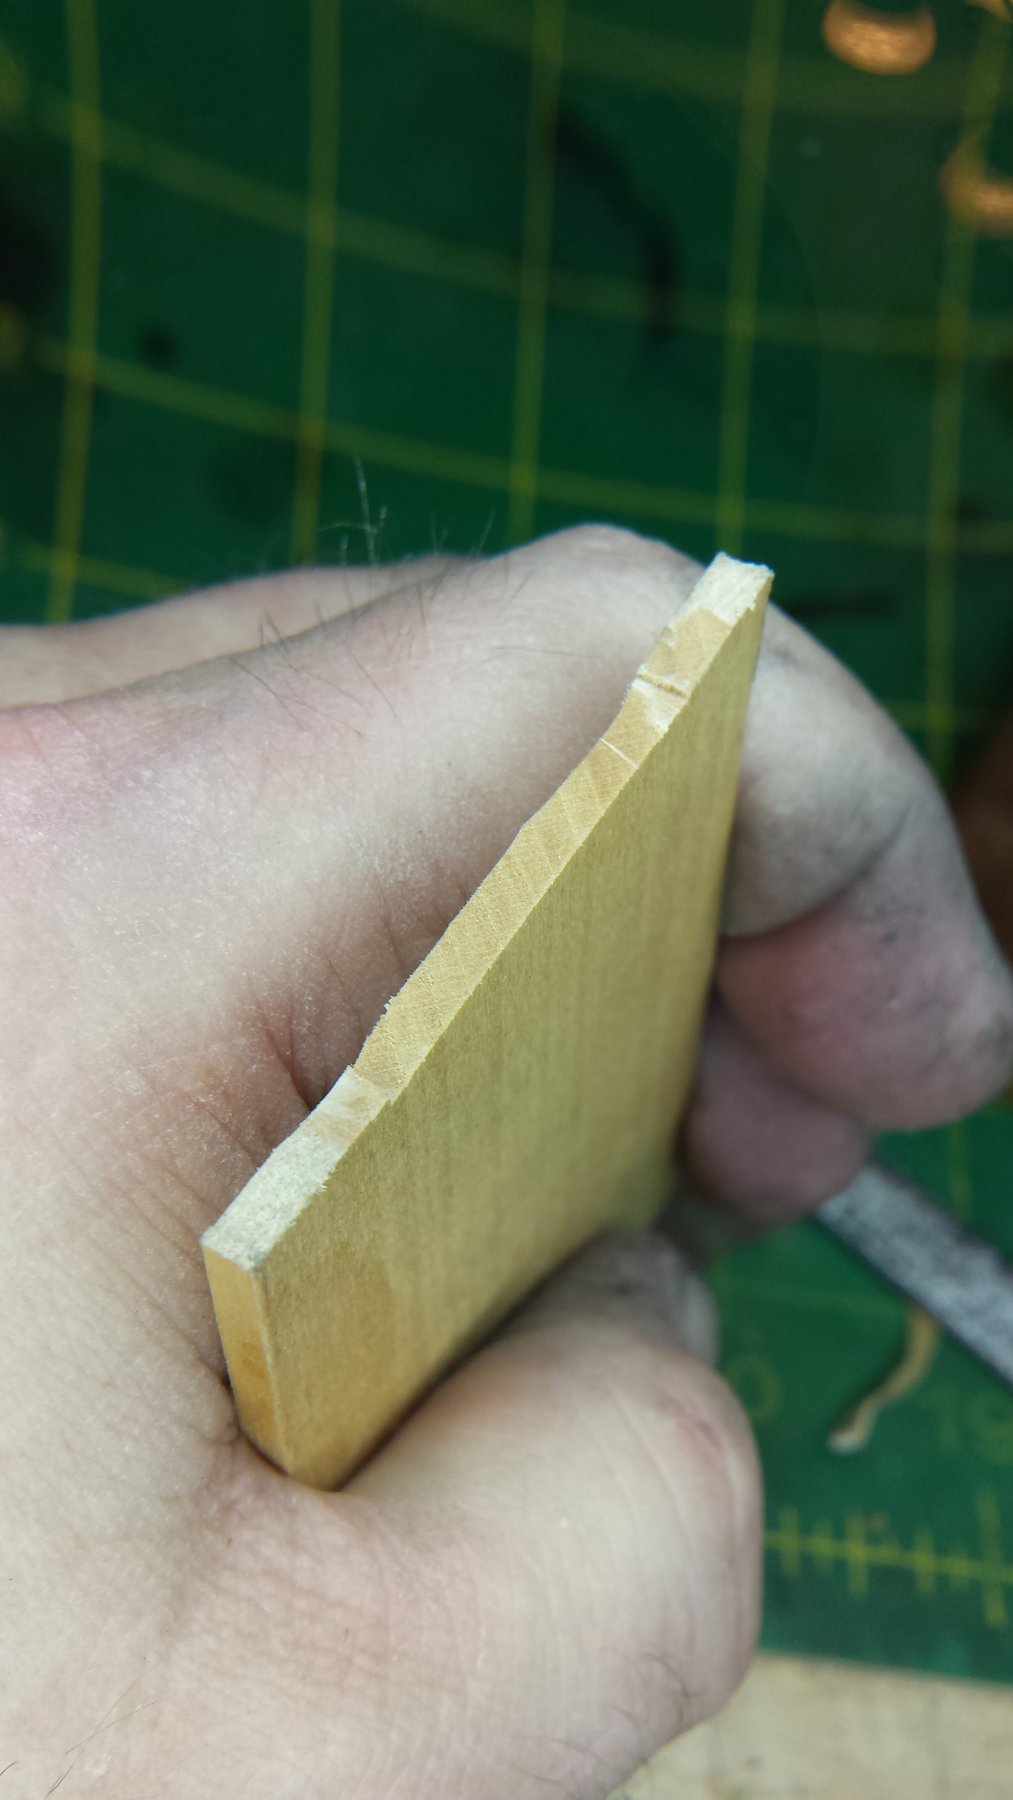
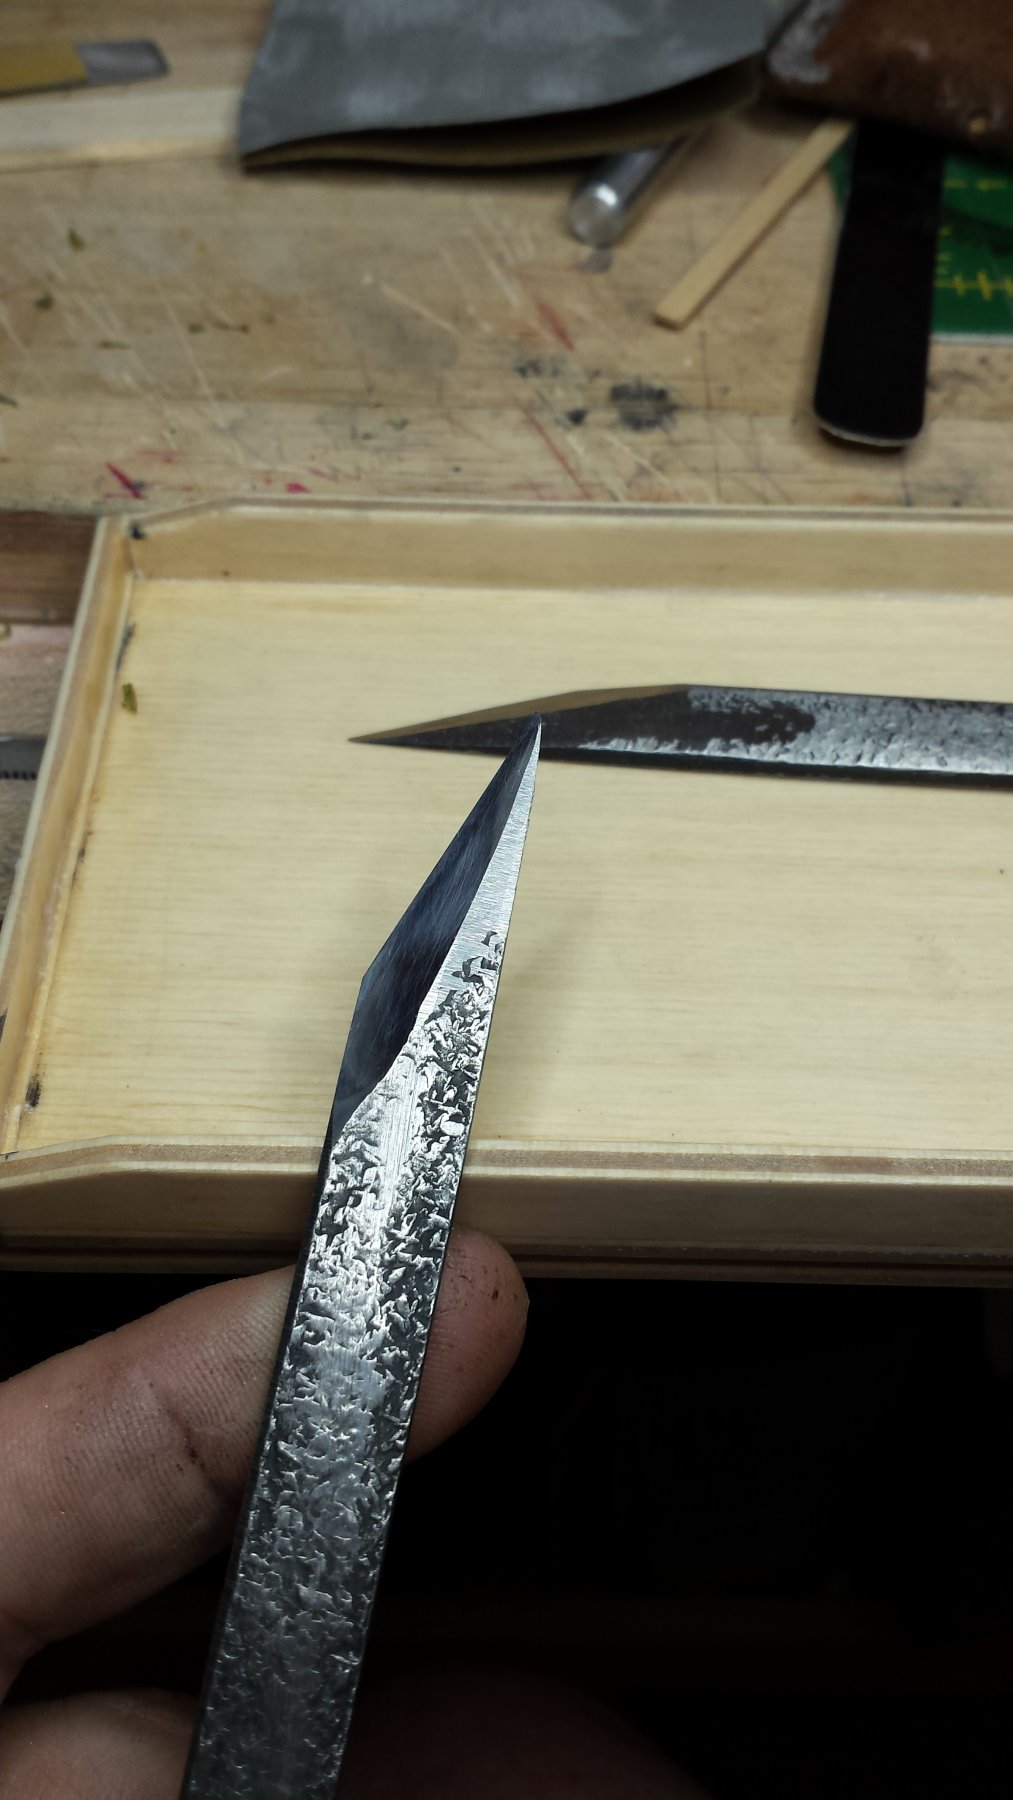
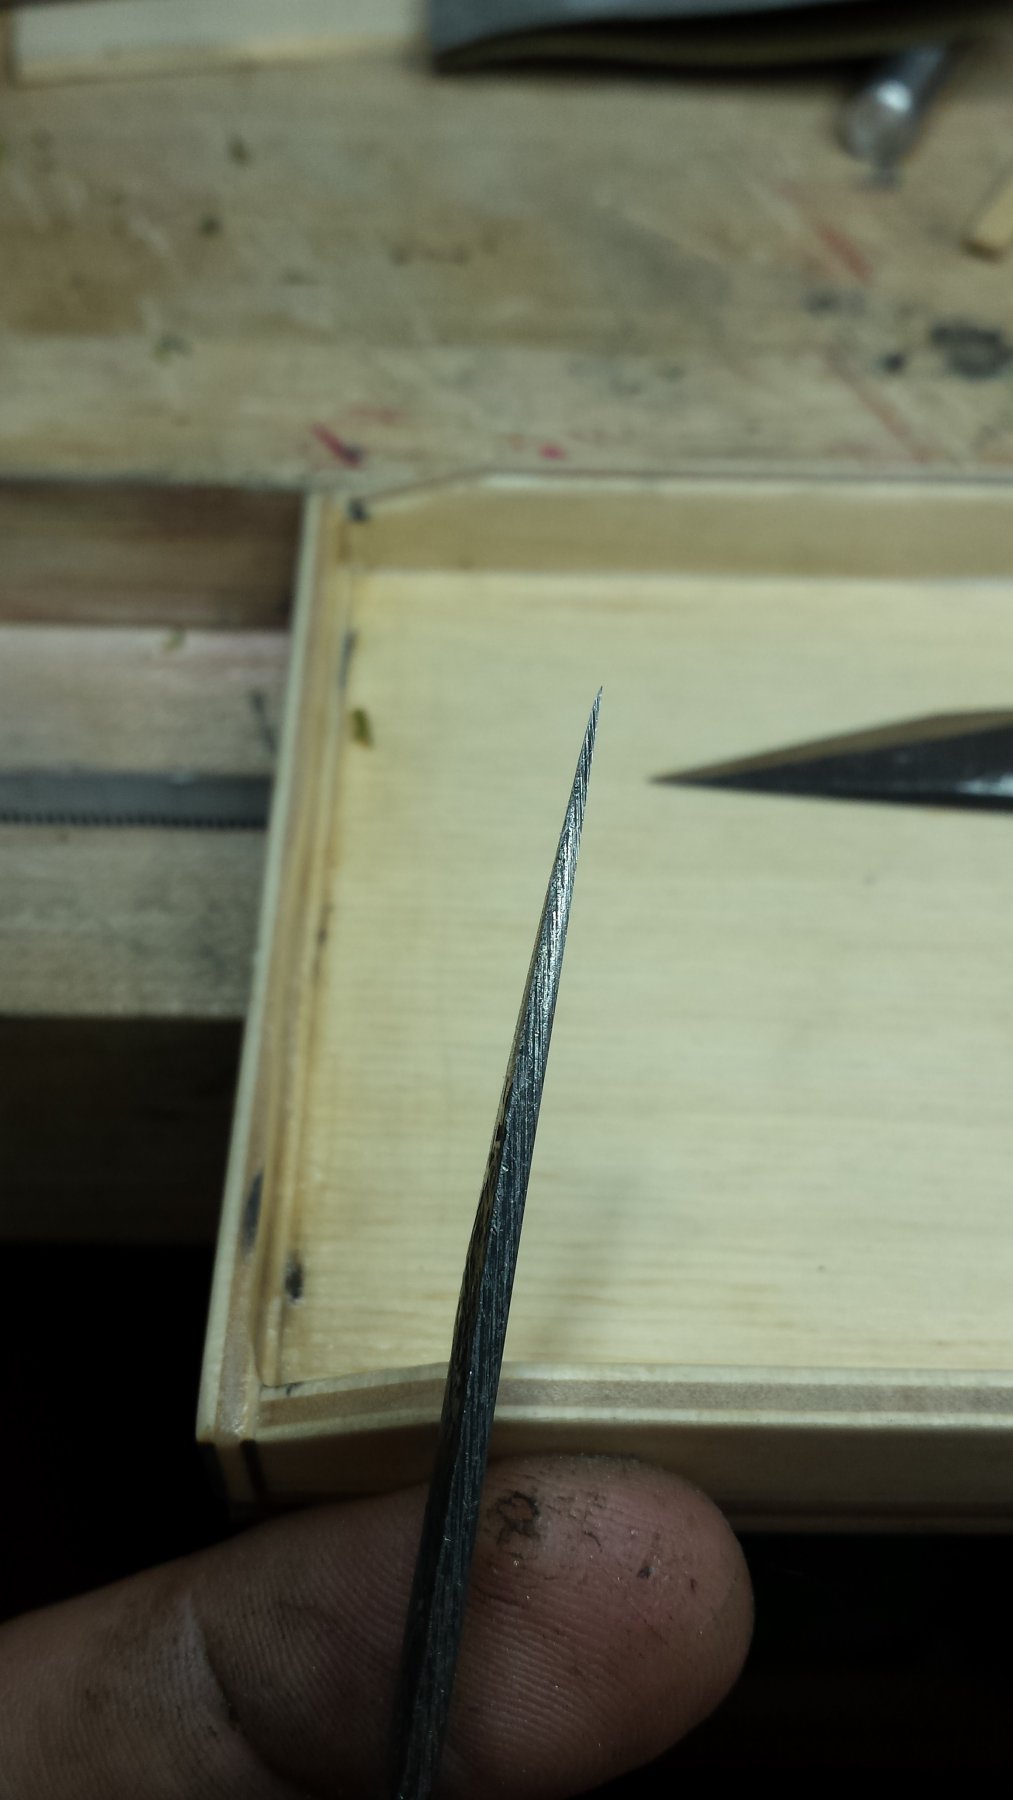
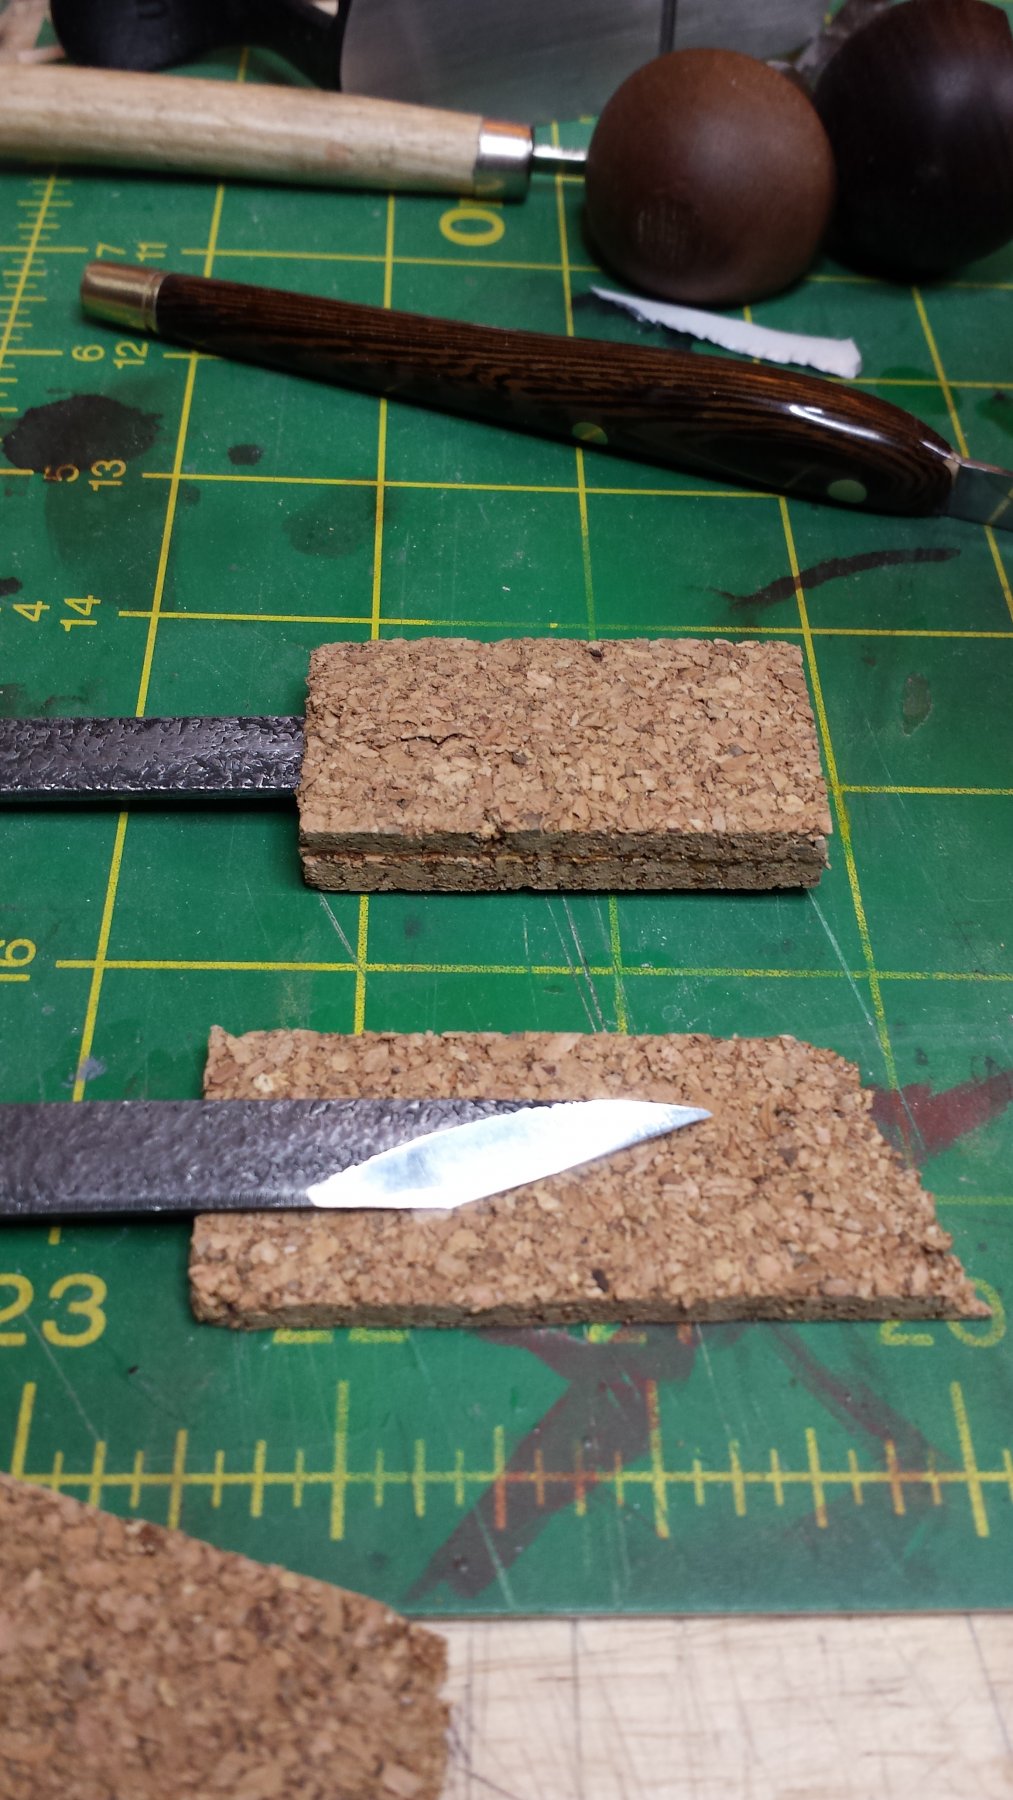
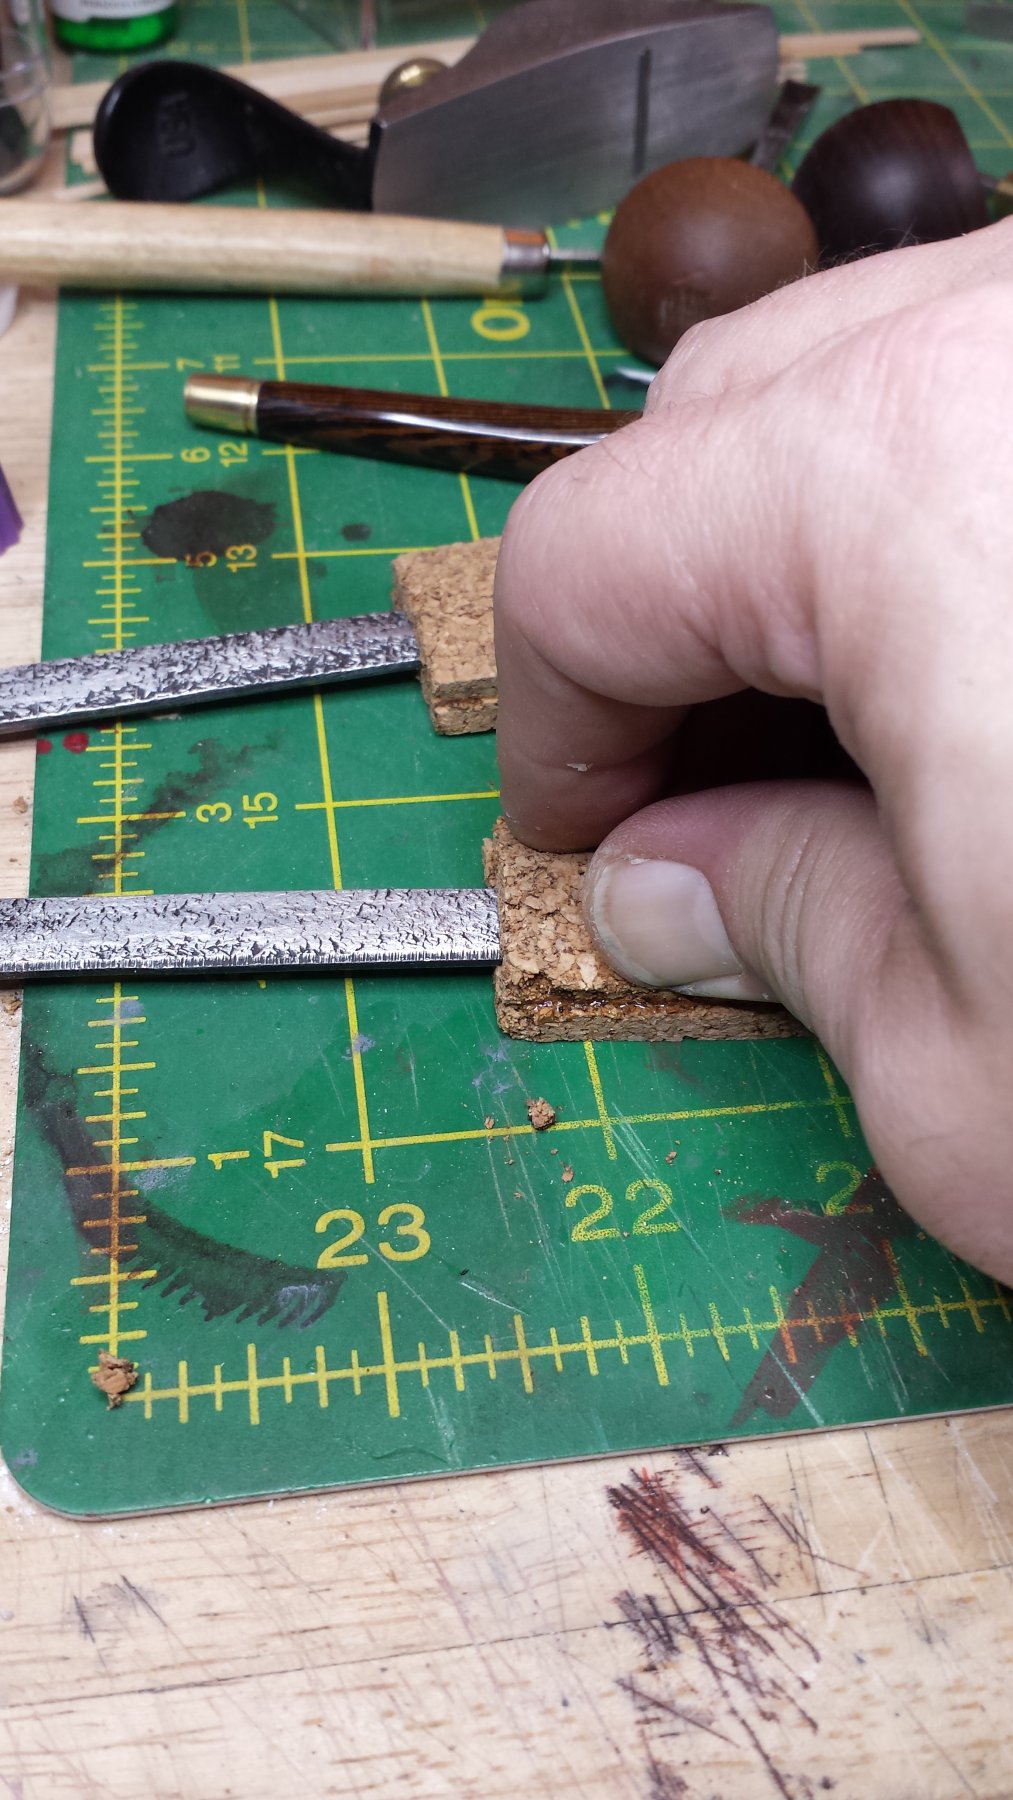
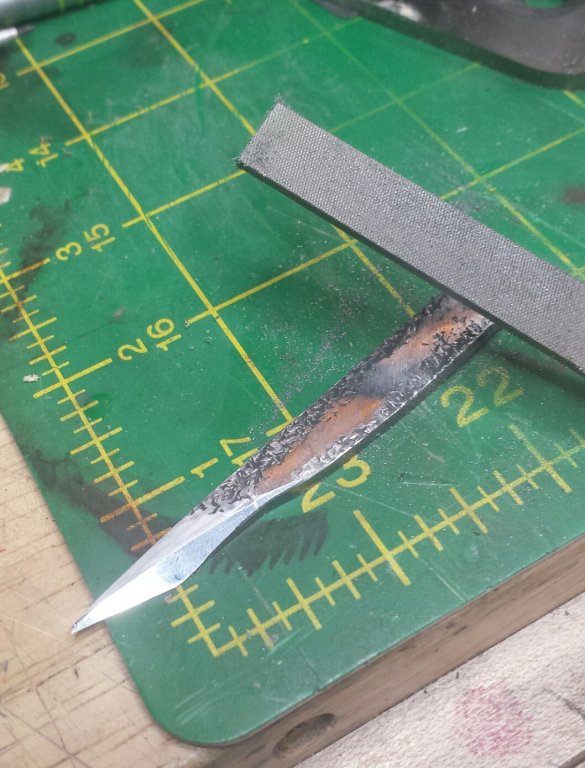
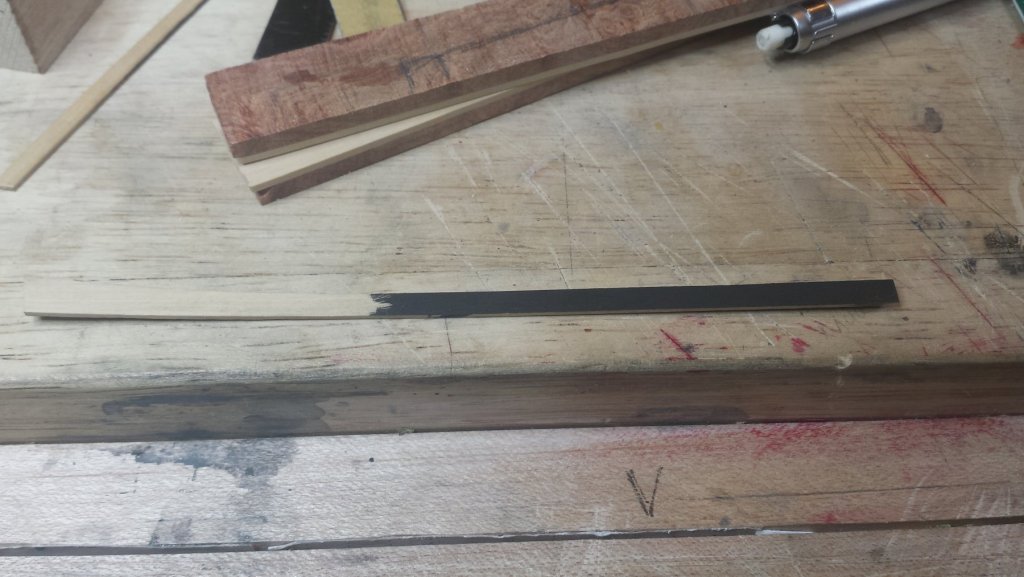
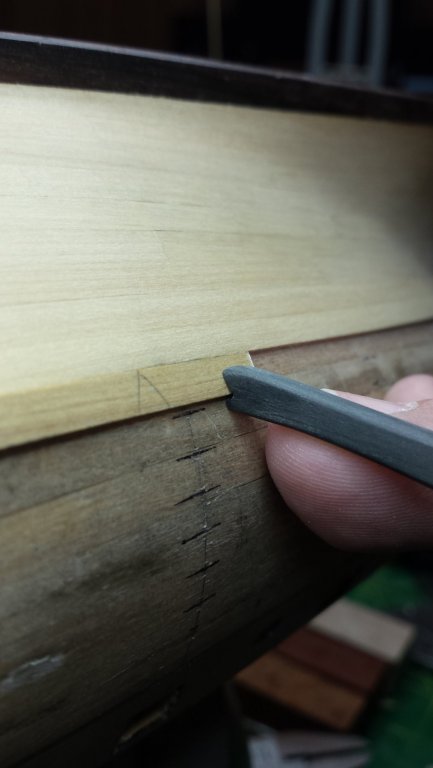
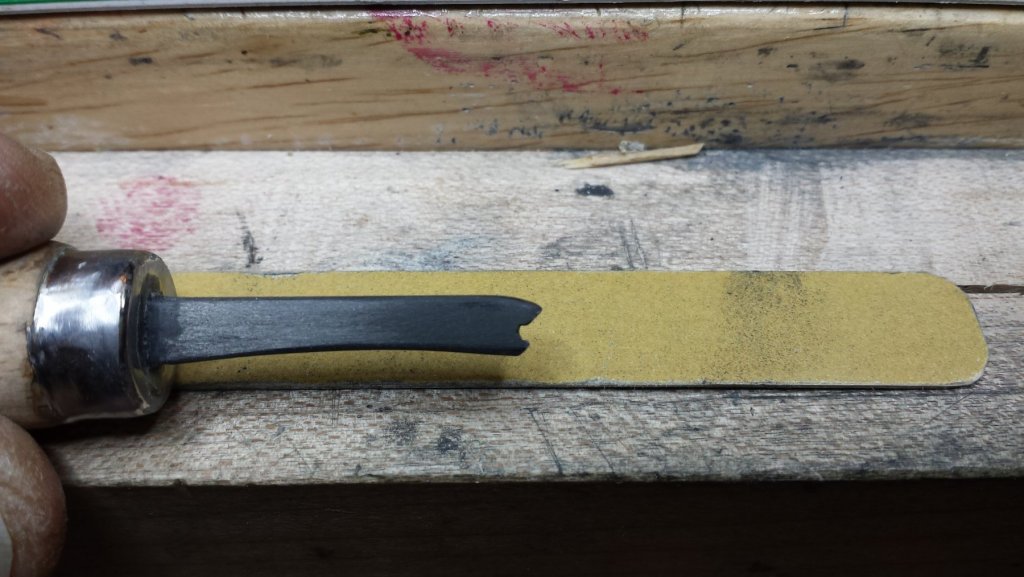
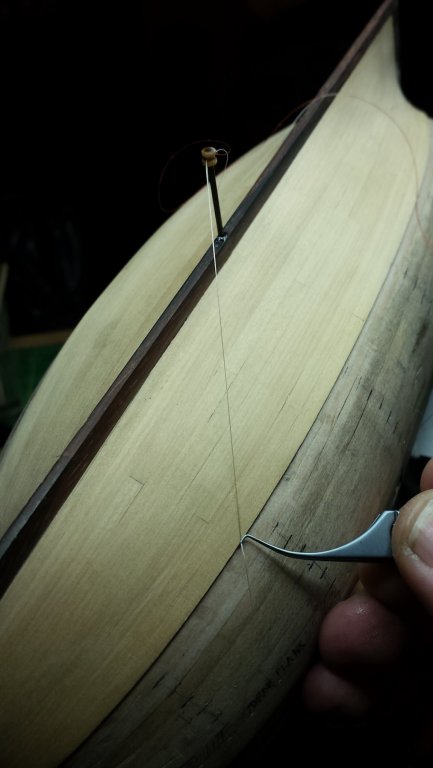
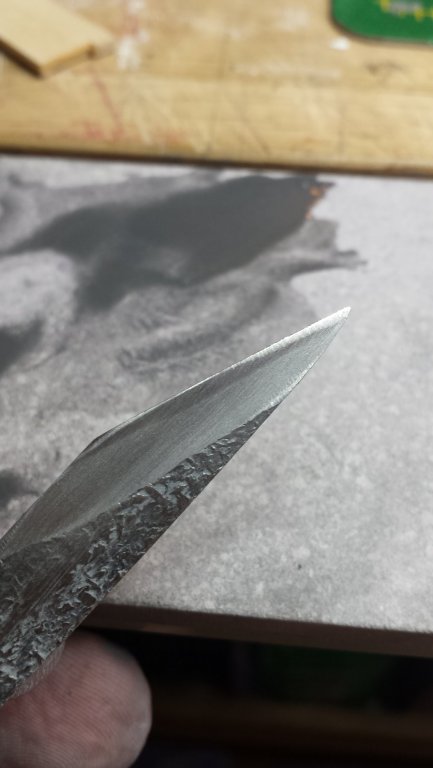
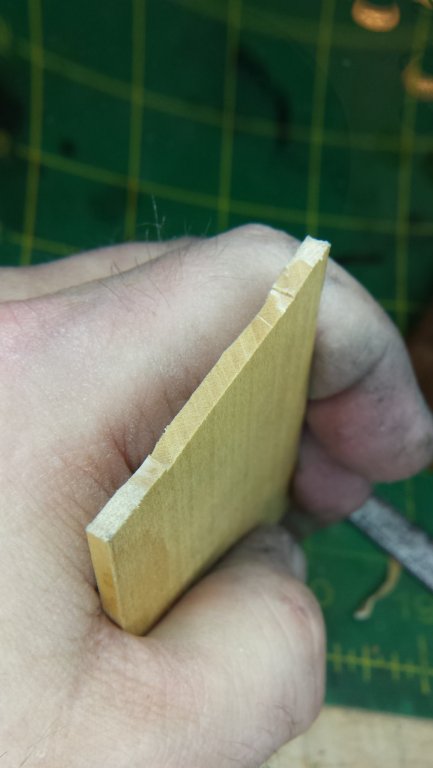
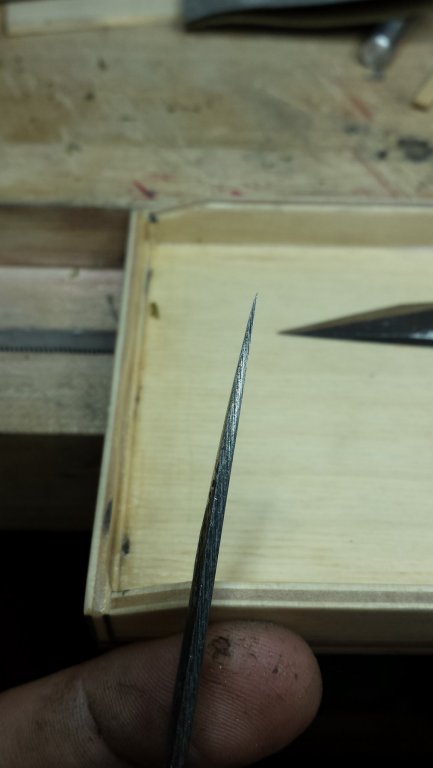
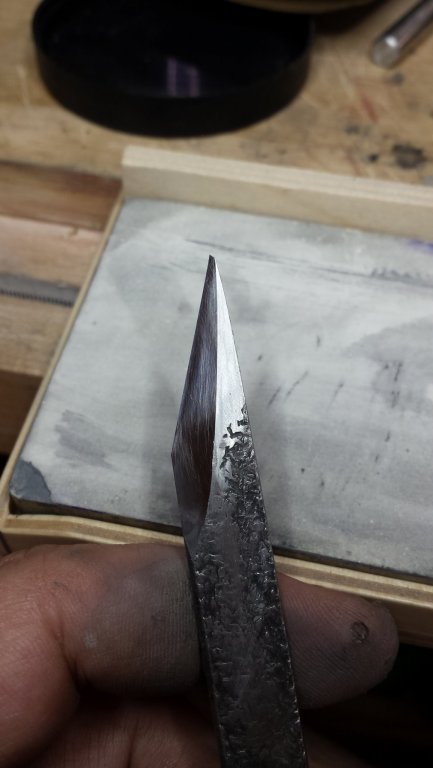
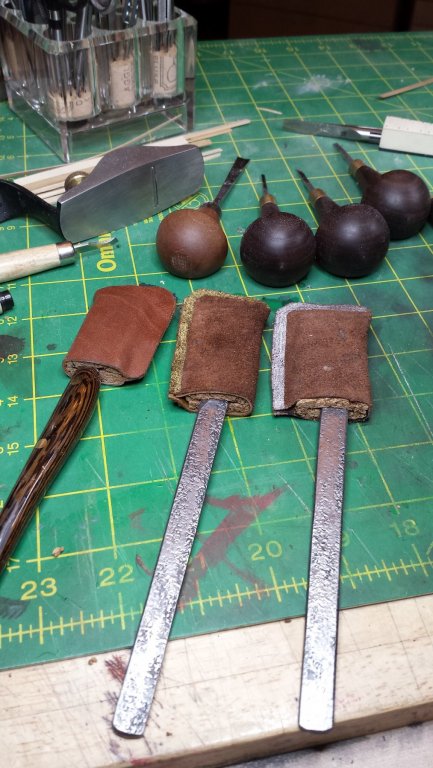
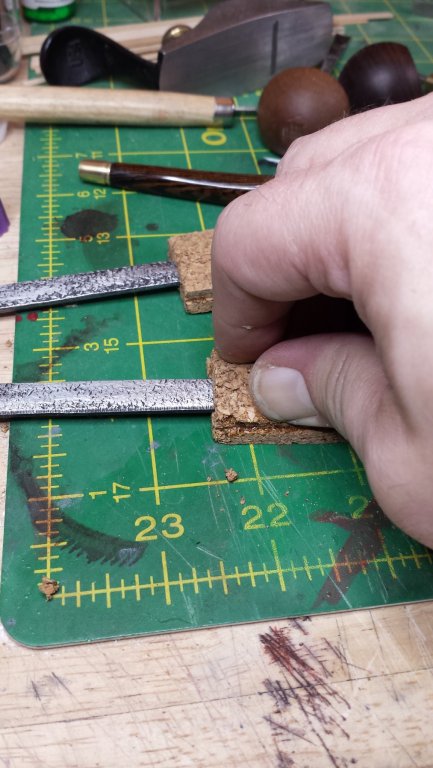
BTW, when did the 2MB image limit go away? I just noticed I'm uploading 3.9MB images with no errors. Couple of updates on the planking method. First I was having a problem with plank ends particularly under significant bending, so I decided to make myself something to provide the required leverage. I had some handles sitting around (you can get them from jeweler supply for like $1.50/handle) so I made it out of a piece of 1/8" thick carbon fiber, but you could make a fully effective one out of wood, just reinforce the tip by soaking in some thin CA. It's designed to put pressure low down on the side of the plank to not mar the future gluing surface, and on the center top of the plank. It's working very well and is just as handy on the bow and stern plank ends. Next is my Advanced Planking Symmetricizer. It's worked quite well in speeding up the mirroring of the starboard side to the port and ensuring we're staying aligned on both sides. Position and height are arbitrary but it is a requirement that it be exactly aligned vertically with the ship's center line as seen from either end. Also the threads can't rotate, they should measure from a fixed point so I super glued in ones aligned with the rear and front centerline of the APS to check points aft and foreward of the APS respectively. After I trim and sand and fully finalize the starboard side, I can quickly transfer that line to the port side with as many marks as I want. As I mentioned I wanted to try single-bevel knives for trimming, so I got a L/R pair from Japan Woodworker. They aren't very expensive ($27 I think) and I knew the steel would be good but the inexpensiveness means they won't be terribly flat. So first step was flattening the back and bevels, you can see the back was less than flat. They're typical Japanese design with a thin very high carbon piece forge-welded to a lower carbon piece for flexibility. Working bevel with 220 coarse stone. Here they are after 4000, I worked through 8000 and the strop before they were done. And oh yeah sharp. The basswood endgrain test, clean enough to be an identification sample. After initial use though I realize the tips were too thick, too much cutting resistance. So I took them to the bench grinder to taper the blade. Cleaned up. Then blade protectors that aren't so much to protect the blades as to protect the rest of the world FROM the blades. I make these protectors for my knives, putting pressure down on the second piece of cork with the knife in place while gluing makes the perfect fit - they will NOT come off unless you pull them off. Shake them all you want, they stay in place and are perfect in that respect. I'm not done though, they need handles. In Japan these are mostly marking knives and are therefore held lightly. For any carving/cutting purpose like I am putting them to, they MUST have thicker more rounded handle. The reason is flat pieces like this when squeezed vertically, just like you'd do trying to make a careful cut, have a very alarming tendency to twist suddenly in your hand, and blood and bad things can result.


- 714 replies
-
- 5
-
-
- lady nelson
- victory models
- (and 1 more)
-
Bending with steam easily
vossiewulf replied to a topic in Building, Framing, Planking and plating a ships hull and deck
Just google plank bender, there are many. Cornwall Hobbies (closer than US) has two electric benders and several crimpers. But if you buy a crimper you should feel bad as that's an awful thing to do to wood. -
Fokker Dr.I by Torbogdan - FINISHED - Model Airways
vossiewulf replied to Torbogdan's topic in Non-ship/categorised builds
For future reference, Micro Krystal Clear is made to do glass for instruments (on larger scales) and windows (smaller scales), and works pretty well. -
Fokker Dr.I by Torbogdan - FINISHED - Model Airways
vossiewulf replied to Torbogdan's topic in Non-ship/categorised builds
Remember to hook up spark plug wires! That's not hard to do. Plugs at top left of cylinder, wires were bare wire going down to a distributor at the rear center hub. Pushrods are hard enough to see under a cowl to skip, but they're also not hard to add.- 250 replies
-
- 10
-
-
In general there are many build logs and also many people who get started but never go beyond that. Add the fact that yes there is a bias for military vessels, and you're not going to have lots of people visiting right at the beginning. But if you keep going, people like Michael and Nils will find you and other people will see you're sticking with it and decide it's worth following along. So I think you'll find it worth it to keep taking those photos and posting them. Also, look around for other similar builds and stop by and say hi. And have a link to your build log in your sig. Lots of people don't have time to do lots of build log searching but they'll notice something waved around in front of them. You already have people here very much worth having available to answer questions, look at some of their builds if you want an instant fit of jealousy Or you just wait for Keith to post a pic of insanely nice little lathe. I'll be growing up next to Michael on the watchmaker life path next time around.
-
Micro Drill Press
vossiewulf replied to michael mott's topic in Modeling tools and Workshop Equipment
And yeah, post those notes, I'm sure there are a few dozen people like me who would like to vicariously own that piece of equipment with you through a diary of its ups and downs -
It's like sanding a big chest of drawers that started out really rough, it's going to create enough sawdust to require several floor sweepings at least. I like the positive-pressure face mask Gaetan, I might look into that. Looks much more comfortable than a cartridge mask.