vossiewulf
-
Posts
1,477 -
Joined
-
Last visited
Content Type
Profiles
Forums
Gallery
Events
Everything posted by vossiewulf
-
 Then you'll definitely fall in love with aniline dyes, it's what guitar companies use to dye their guitars because it doesn't obscure the pretty grain of their quilted tops at all. Another thing I like is that although it looks like it penetrates, it doesn't- the color is right there on the surface. So if you dye something and you don't like the output, a couple of minutes with sandpaper and it's all gone and you can try again. If nothing else it saves on test pieces. I generally apply with a rag, wait for 30 seconds or so (with alcohol solvent things move quickly), and then wipe excess, I find you can get some weird surface effects if you just spread and leave it on. Repeat until you get the tone you want. You can even generally go back lighter by wetting the surface again and rubbing it immediately and if you do get some undesired effect it's also solved by rewetting and wiping. Below is a neck radius sander on which I used aniline dye.
-
If you're using stains to avoid the grain obscuration of paint, you might want to try aniline dyes for their much improved clarity over pigment-based stains, and with a kit of the basic primary colors you can make any shade you need. I use alcohol-based so grain isn't raised. And by the way, your ship is stunning
-
Need help with saw blade output
vossiewulf replied to bigcreekdad's topic in Modeling tools and Workshop Equipment
Ditto, but the other comments here are all requirements for good sawing too. -
Polar bears on the icebergs!
-
Tools, tools and more tools....
vossiewulf replied to CPDDET's topic in Modeling tools and Workshop Equipment
I have an NSK but I looked at the Artco page and it says 1/8" standard with a 3/32" reducing sleeve. Usually 3/32" is standard as most burs are 3/32", 1/8" is considered heavy duty for serious wood removal. It looks like it has some kind of keyless collet. That's one thing I like about the NSK's lever collet- flip a lever one way and the bur drops out, drop in new one and flip lever and it's good to go. -
My top 4 most useful tools
vossiewulf replied to Tim Moore's topic in Modeling tools and Workshop Equipment
Honing is just refining an already-sharp edge, and generally speaking you use a strop or a high-grit polishing stone. The idea is sharpen once, keep it sharp many times with the strop until the edge starts to get dubbed over, then you go back and sharpen again and reestablish the bevel. So if I started from a dull edge I would use my 1000/4000/8000 stones to resharpen and then a strop for the final polish. I'd then just use the strop on the edge for several weeks until the edge starts to get rounded over, at which point I sharpen again. Strops are made from many materials, one is leather. My favorite is an artificial pad that uses aluminum oxide powder, but most people use leather strops with chromium green stropping paste. Just go to Lee Valley or Woodcraft (or a good similar retailer on that side of the pond) and search on strops, you'll find both the strops themselves and the recommended paste. Also not sure whether you're talking small planes and small blades or full-sized ones. Full-sized plane irons generally are sharpened with a slight curve across the edge, so the corners are maybe .003" curved back from the center of the cutting edge. This feathers the edge of the cut of the plane and prevents marks made by sharp plane iron corners. The best way to do that correctly is to use the Veritas Mk.II sharpening system from Lee Valley with the barrel-shaped roller, that makes it easy to rock the iron slightly as you're sharpening, relieving the corners. -
My top 4 most useful tools
vossiewulf replied to Tim Moore's topic in Modeling tools and Workshop Equipment
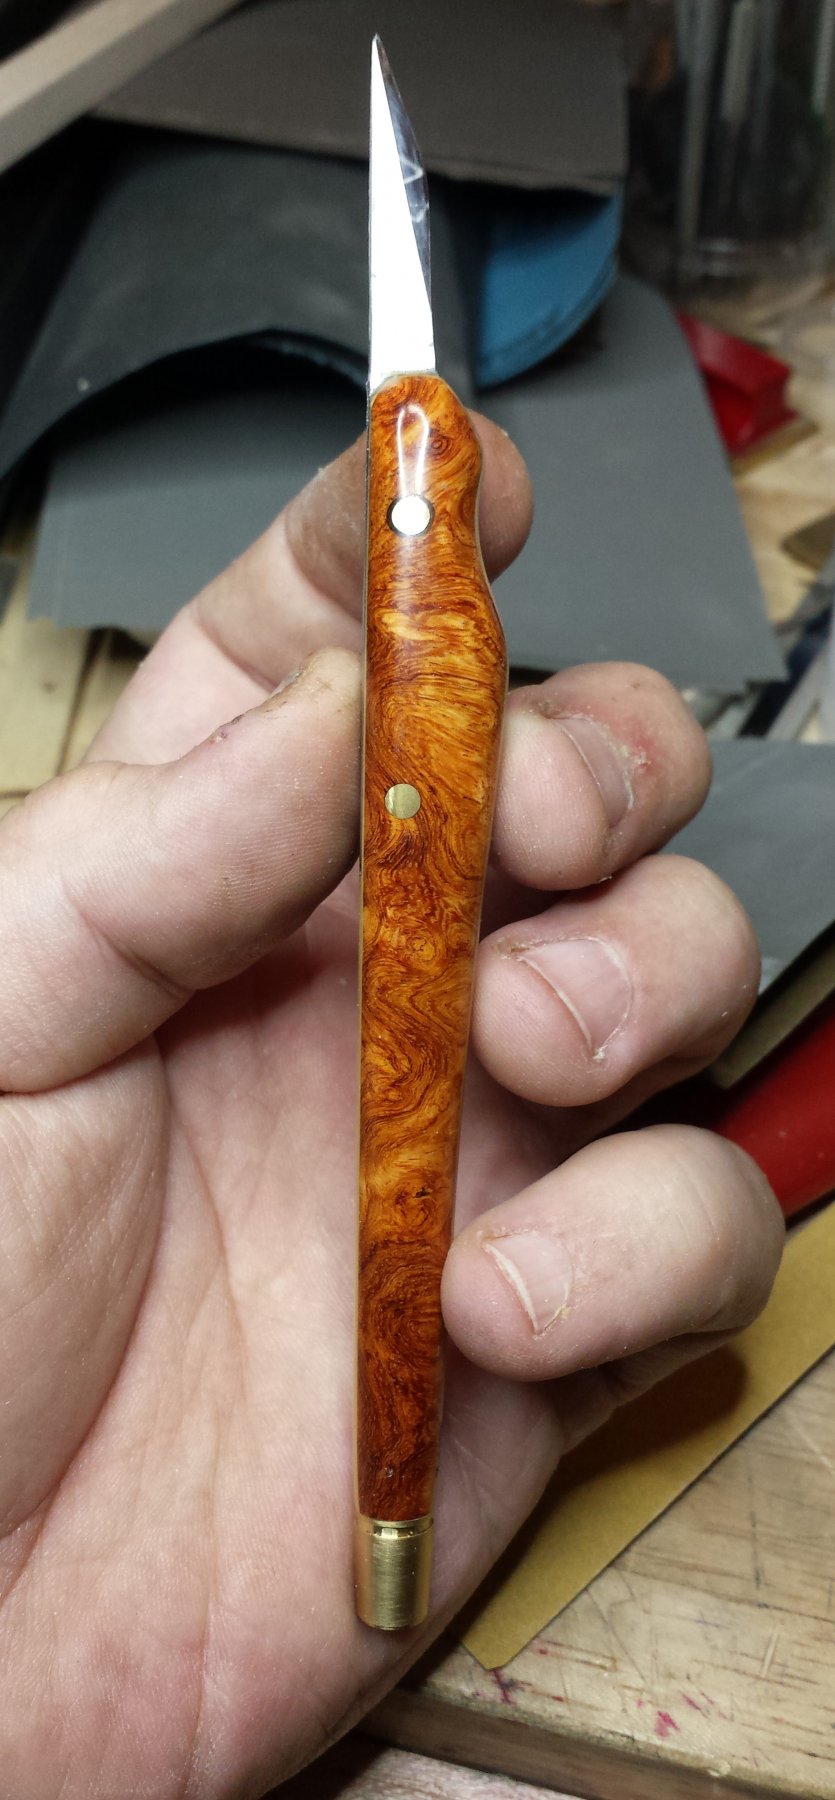
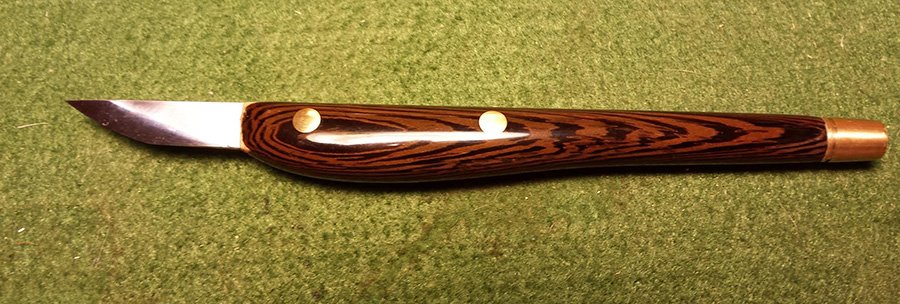
The thing is, sharpening my knife up there takes me a good solid 15 minutes, and I only have to do it about once a month because it's a Ron Hock blade that holds an edge forever. Only steel I know that holds an edge longer is the PM-V11 steel from Lee Valley. Sharpening small plane irons takes no time at all, either. I would recommend people get Shapton Glass Stones in 1000 and 4000 grit plus a strop of their choice and they're set for life sharpening everything from full-sized plane irons down to little carving knives. I've been using some Shapton stones regularly for over 5 years and I see no meaningful change in flatness and they still remove steel faster than anything I've ever seen, including diamond, so I'm thinking they're going to be still working fine 20 years from now. Anyone here who can build a ship can make a pretty knife. All you need is: a drill press that can drill a 3/16" hole accurately some 3/16 brass rod Epoxy Knife and sandpaper Large bottle of thin CA glue Blade with pre-drilled holes Check link below, scroll down to Violin Knife Blades. Buy the middle one. Take a piece of nice-looking wood and machine it down to handle-size and then rip it in half. Mortise each side of the handle to 1/2 the depth of the knife blade, with the back of the knife edge lining up with one edge of the handle. Basically you want the knife's "back" to be one straight line from handle to point. http://www.hocktools.com/products/knives.html The tip angle is a bit less than typical X-Acto, if you want to refine that, just use a bench grinder, regularly dipping the blade in ice water. You don't want any part of the blade to get warmer than warm to the touch or the temper will be ruined. Cut brass rod pieces that are just a tad too long, drill the holes, and test the fit. Epoxy everything, tap the rods through the holes in handle and blade, and clamp the hell out of it. After however long, declamp and start shaping the handle. If you have an oscillating spindle sander, that works well here. I don't, and what I do is take out one of my other knives and I just start carving the handle down. Round it fully with files and rotary tools and sandpaper, and then sand the handle out to 1500 grit or so so it's very, very clear and clean. This controls how pretty the grain looks under the crystal-clear CA glue, so it's worth it to spend a few more minutes and take it out to 2000 grit so the wood looks polished before the finish goes on. Take a tube of some kind that's a bit bigger than the knife handle and attach it to a base, then mostly fill it with thin super glue. Most of this glue can be recovered if you're worried about using that much glue. Tape a crosspiece on the blade so the handle will be suspended in the thin super glue tube, and dunk it in there, ensuring all the wood is under glue. After 10 minutes or so, take it out and let it dry, but do NOT set it aside- you have to work the finish right now before the CA glue fully hardens. If you do it now, you can work down the super glue to a smooth finish in little time, working from 320 grit up to 2000. If you let it fully harden, it will take quite a while and you'll go through lots of sandpaper getting there. If you want super-bright gloss finish, take some Novus Plastic Polish Fine Scratch Remover and buff the handle. Once the glue fully hardens, the handle and its finish are almost indestructible. Mine have been rolling around on my bench for years and hardly show a scratch, the biggest "dings" come from accidentally spilling CA on them, I then have to sand them down again. The brass end-pieces I add are there not just for looks, but to move the knife's balance point back to just ahead of center, and to increase its mass a bit. This improves control and feel. If you want something similar, you'll need a lathe and some 3/8 or so brass rod. I just Mark One Eyeball them, face the end and use files to taper them. Once tapered, I use a parting tool to add the little reveals. Feel free to be creative, all you need is about the right weight in brass, the shape can be whatever you like. All in all, several orders of magnitude less tricky than planking a hull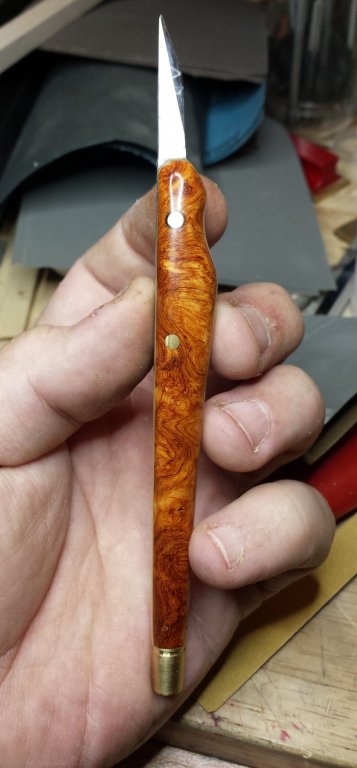
- 27 replies
-
- 12
-

-
My top 4 most useful tools
vossiewulf replied to Tim Moore's topic in Modeling tools and Workshop Equipment
I wish I could get more people to convert over to using real knives with Rc62 blades and learning how to sharpen them instead of using X-Acto X-Acto blades aren't very sharp by knife sharpening standards, their steel isn't very good and probably Rc55 or so (so they lose an edge very quickly), and they're very thin and weak and as such can only handle very low-stress cuts. A real knife is so much more capable. There are many makers of carving knives, just buy one that is in the $25-$35 range and you'll stop using Xacto. Well that's not quite accurate, I still use an X-Acto knife (a replacement I made), but it's only there for cleaning out glue and scraping things, the tasks I would rather not use my good knives for. Below is my X-Acto and my main knife.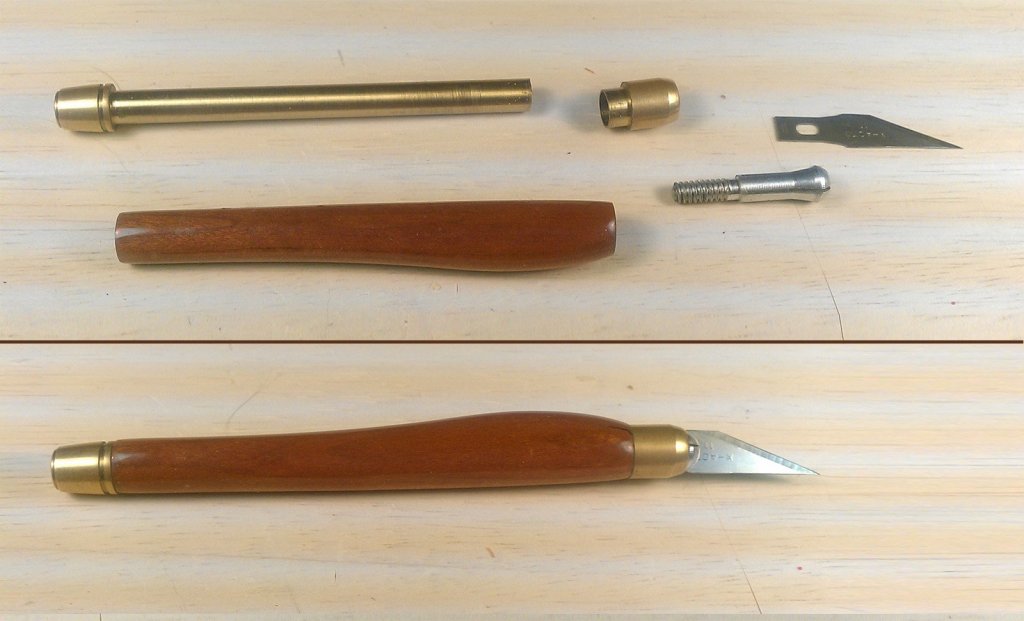
-
My top 4 most useful tools
vossiewulf replied to Tim Moore's topic in Modeling tools and Workshop Equipment
Much narrower kerf than Zona saws, hold an edge much longer. -
Oh and a gratuitous stern shot, haven't showed that. I think this cutter was owned by a smuggler, who blinged-out the stern. And then named it White Tail.

- 714 replies
-
- 6
-
-
- lady nelson
- victory models
- (and 1 more)
-
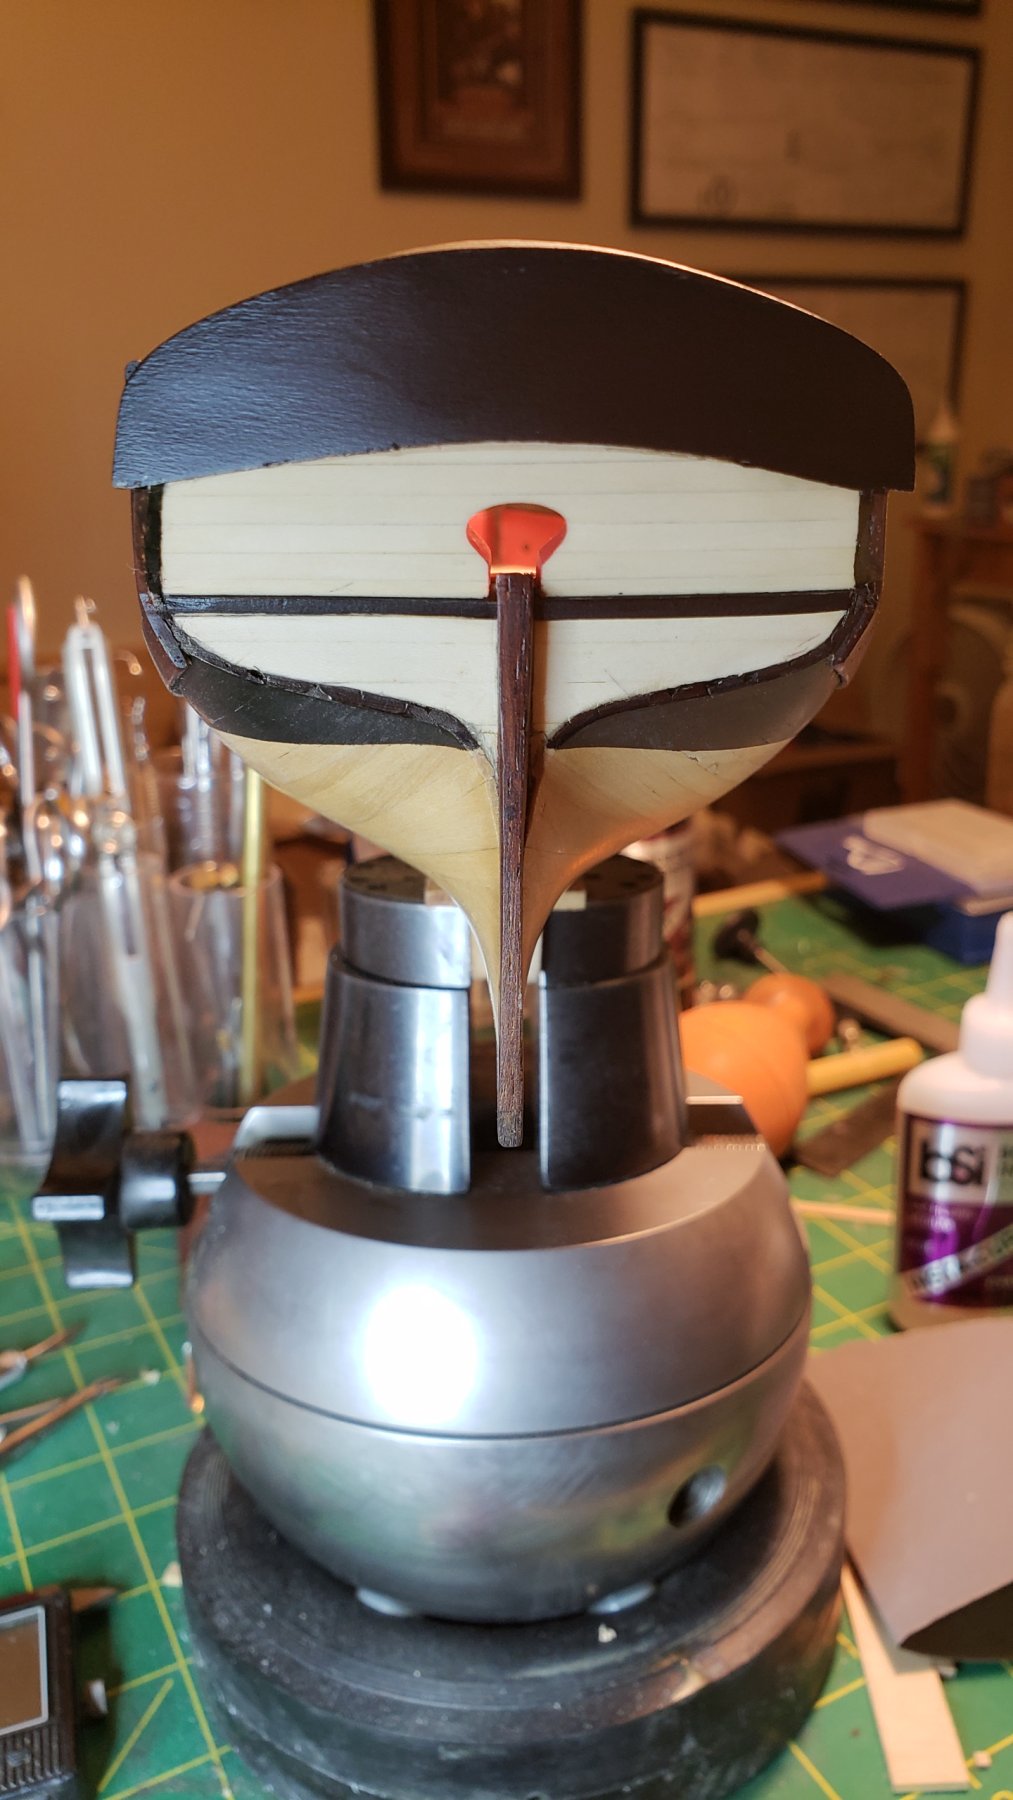
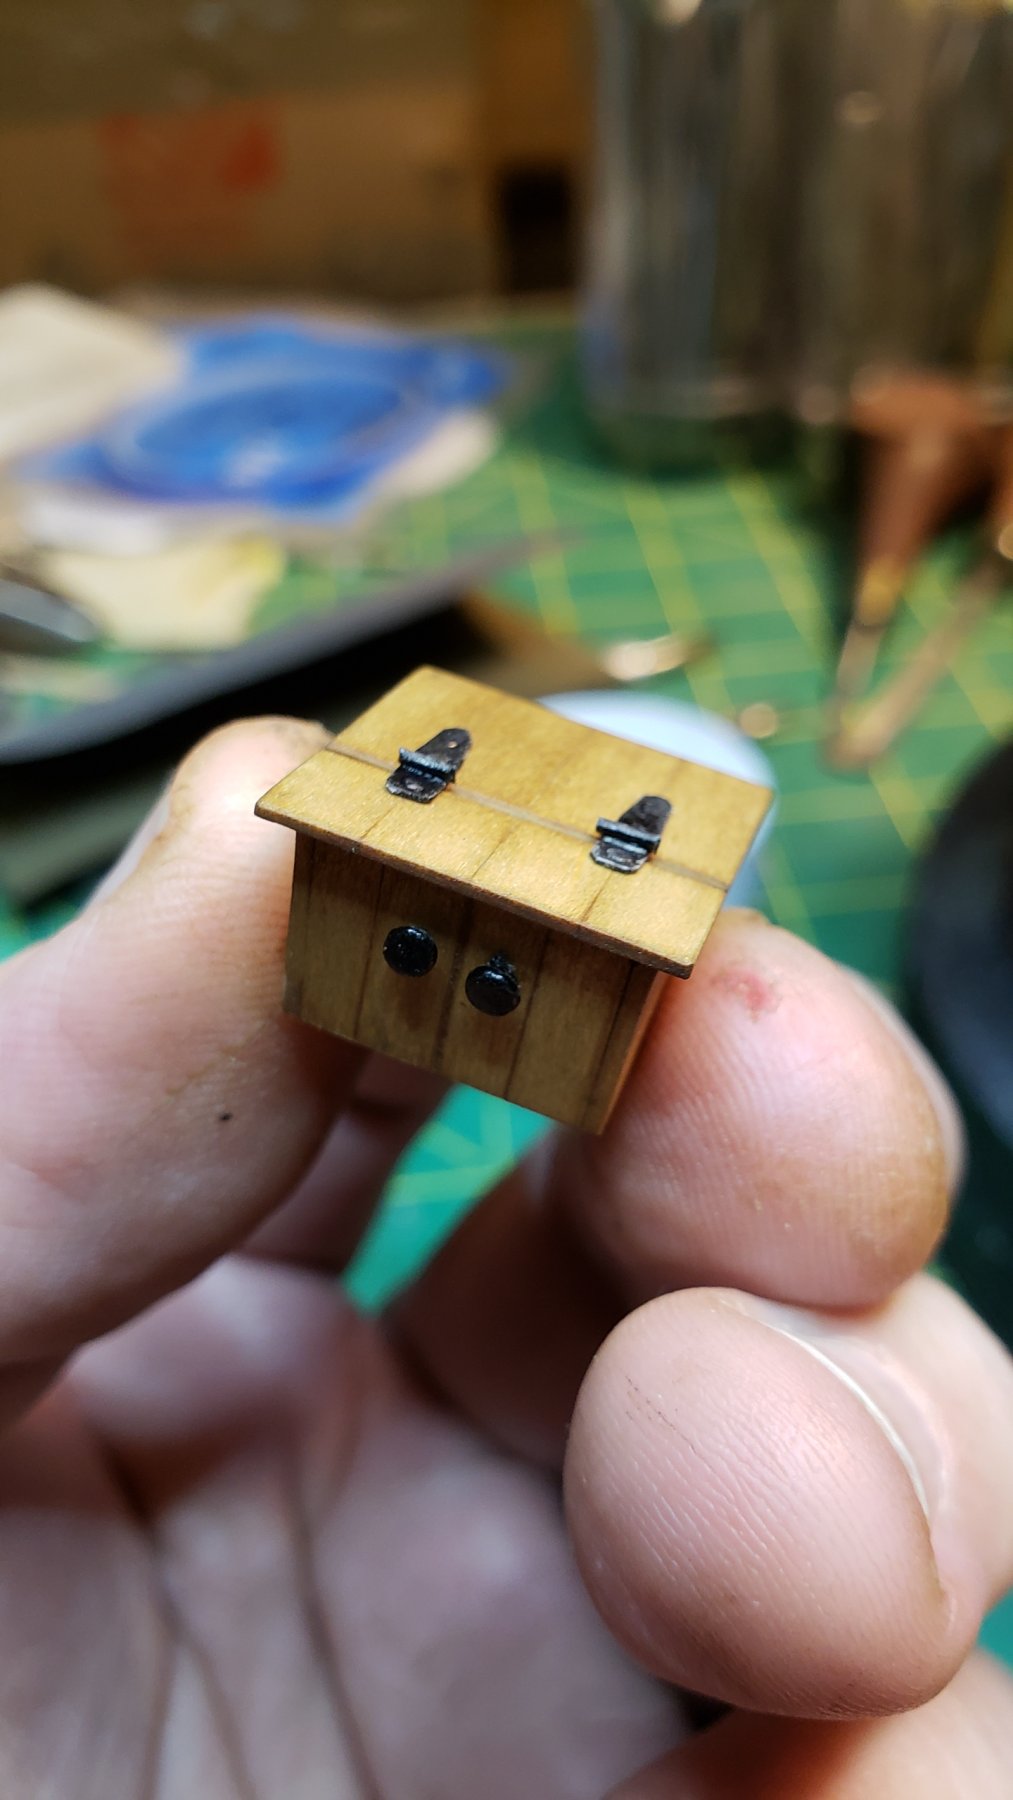
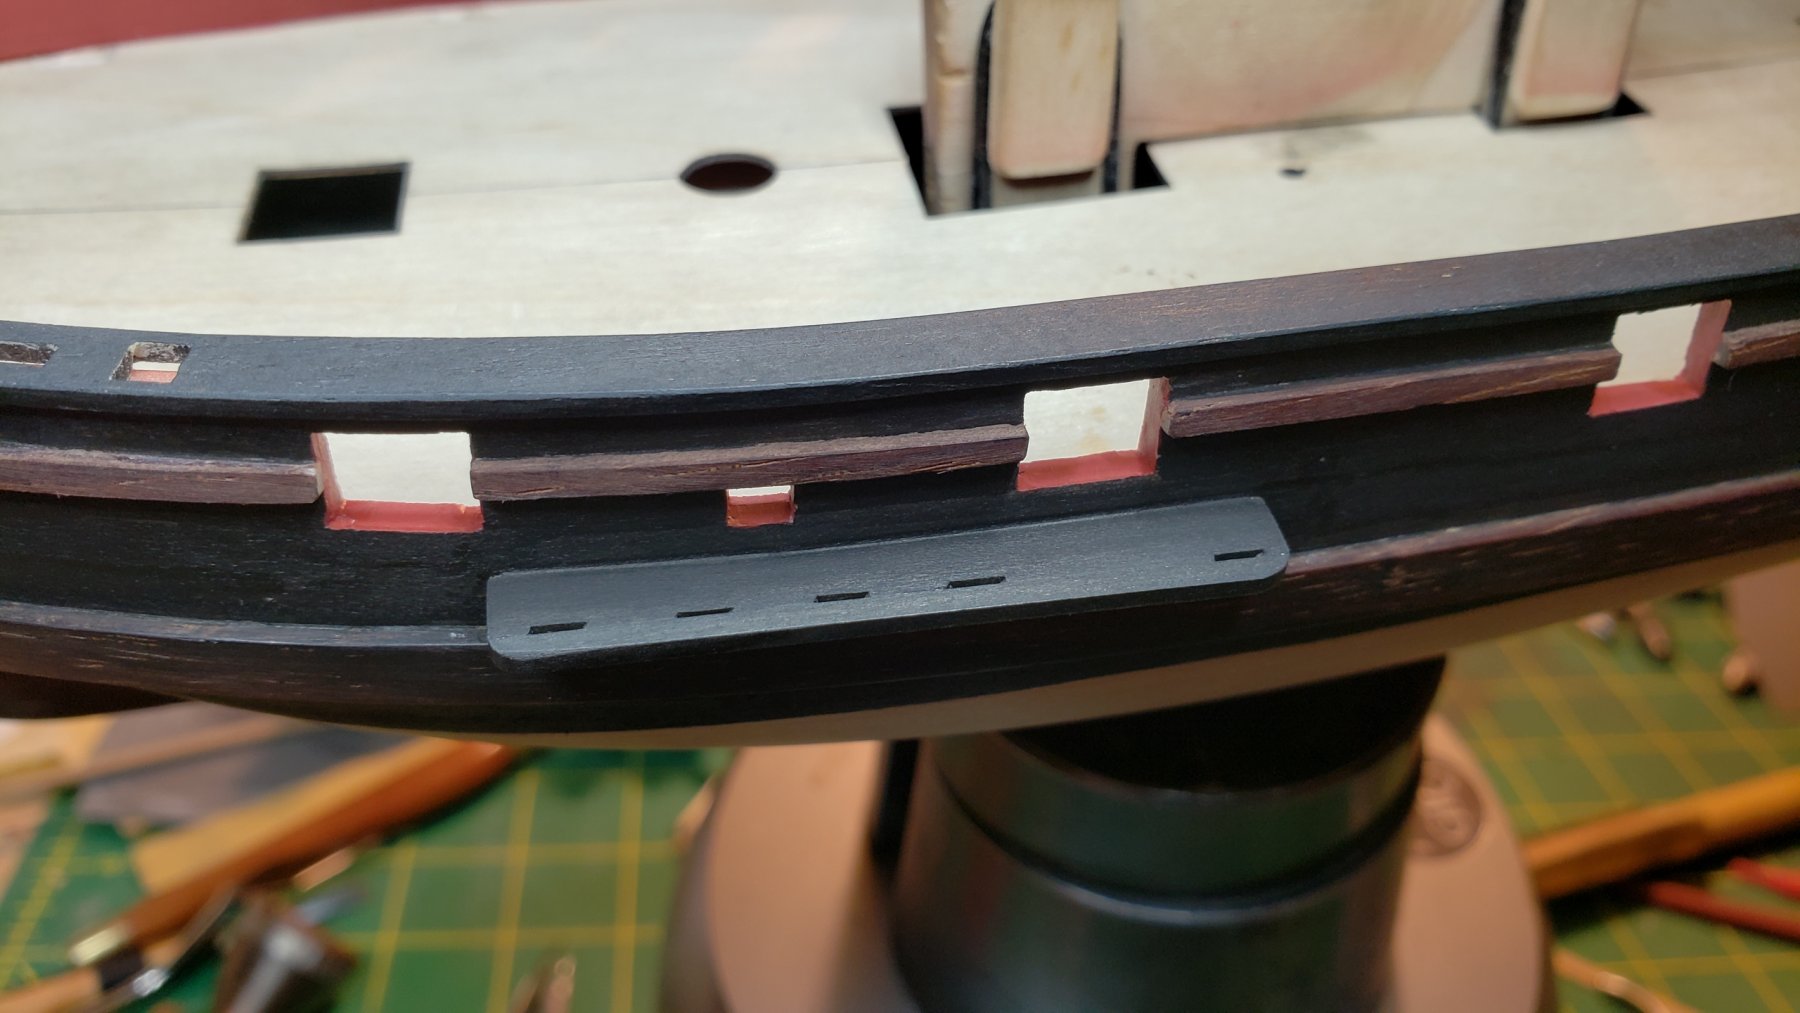
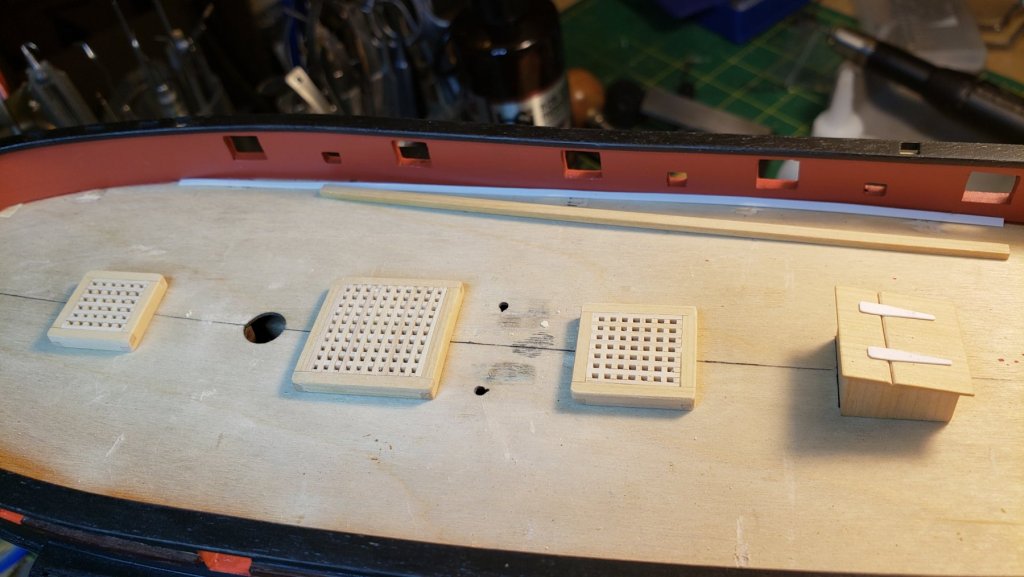
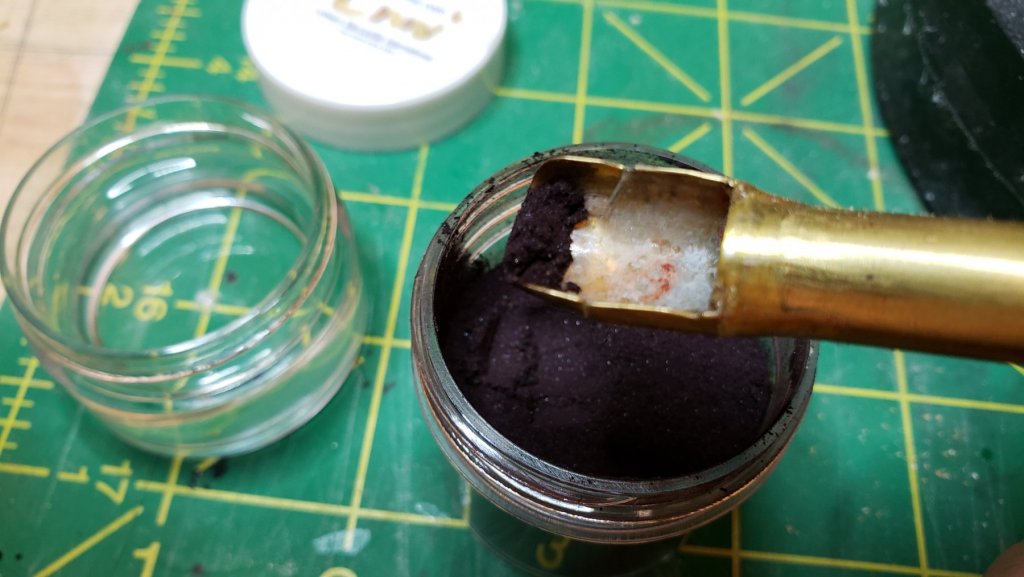
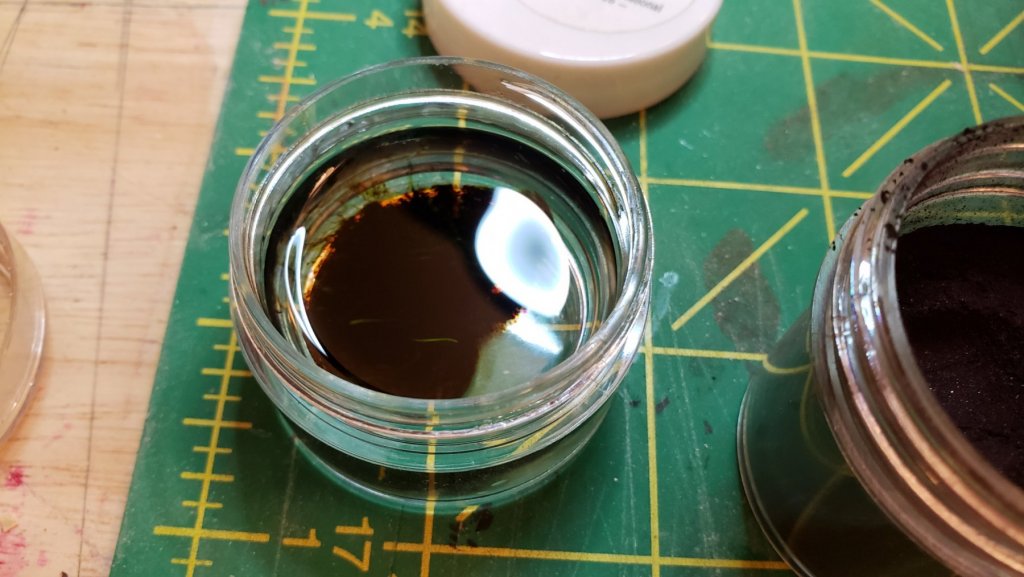
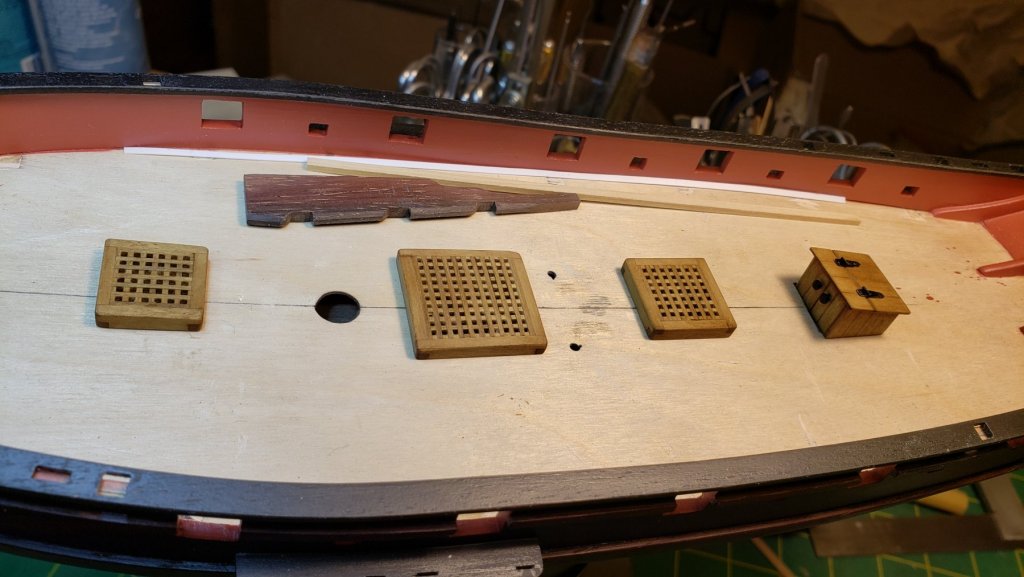
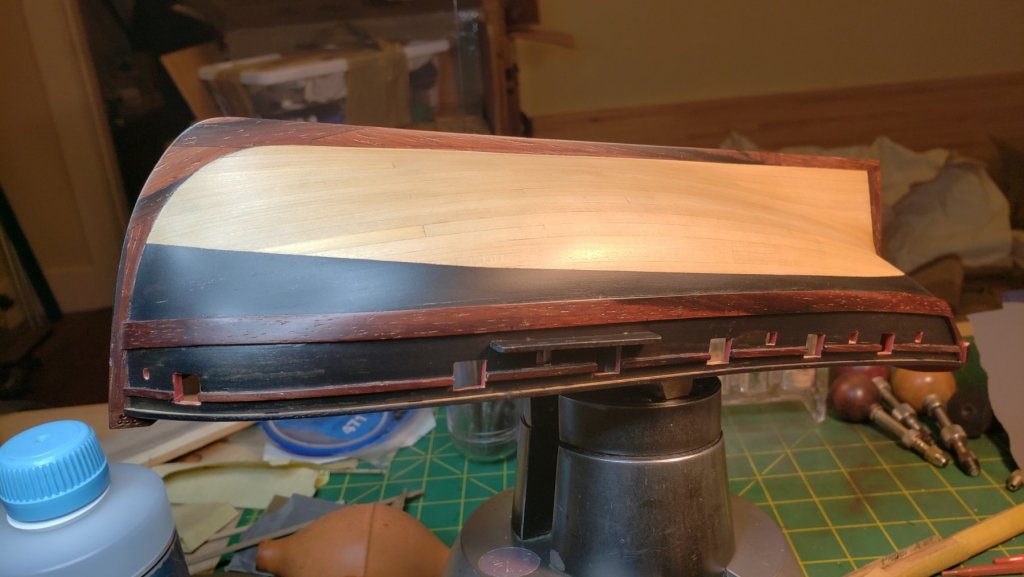
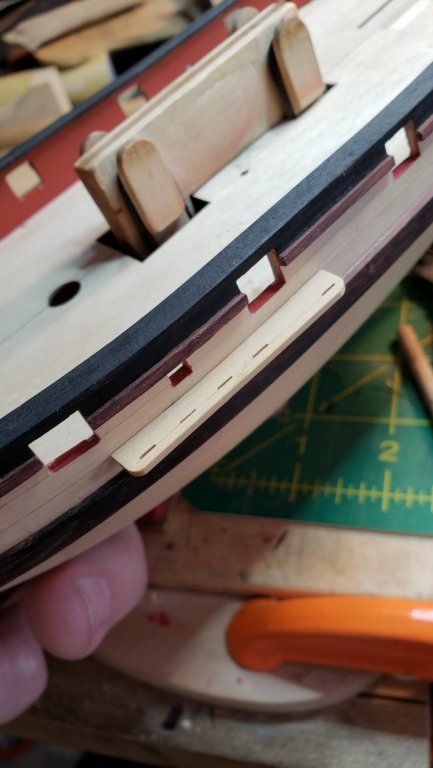
Rudder machined out, deck furniture manufactured. You know the only parts from this kit I've used so far are the bulkheads, keel, sub-deck and now the grates. Do I get credit for a scratchbuild? Maybe I should request a new semi-scratchbuilt category. The grate frames are boxwood in the right size as far as I can tell, with lap joints at the corner which I understand is the correct joinery. The companion was planked vertically with boxwood and then given hinges out of bits of styrene and door knobs made from squishing the melted end of a piece of stretched sprue. I would have turned them out of wood but my dowel stock seems MIA (I had to move out and back into my house over the summer). As you can see in the pics, I used alcohol-based aniline dye. You can mix any color, there's no pigment to obscure grain, and even though it looks like it penetrates deeply, it doesn't; don't like this color, get out 400 grit and in five minutes your piece has no color and you're ready to try again. They're also very efficient, as you see a very little goes a long way- get a set of dye powders and you have stain for ships for forever. The downside is that they'll stain anything, I treat them like nitro glycerine in terms of safe handling. I also sat staring at the rudder for about two hours before I came up with what I think is a good way to make something that looks realistic while also having some strength. But I will probably set it aside for the time being to focus on deck planking.


- 714 replies
-
- 6
-
-
- lady nelson
- victory models
- (and 1 more)
-
You know I was thinking of doing Cruizer next but how am I supposed to beat this? Very nice work Joe.
- 136 replies
-
- 1
-
-
- caldercraft
- Cruiser
- (and 2 more)
-
Depending on the angle at which the plank is intersecting the stem/stern/keel the bulkheads can stop anywhere from on the bearding line for planks coming in at almost 90 degrees (e.g. center of garboard) to well short of the bearding line for planks coming in at an acute angle (like those going into the sternpost).
-
Yeah, you can't go wrong with pretty much anything sold by Little Machine Shop. At least I haven't received anything but quality tools and equipment buying from them. Their suped-up versions of the Sieg mini lathe and mini mill definitely own the top end corner of the market, I'm jealous
-
The standard Sieg 7x14 Mini-Lathe has been around for many years now and is a very accurate machine with which you can do very fine work. I bought mine from Micro-Mark under their brand, same machine. But Little Machine Shop is the best place for you to spend time if you're considering getting a small lathe or milling machine. You can give them a call and they'll talk you through all the options. https://littlemachineshop.com/products/product_view.php?ProductID=4959&category=1271799306 Attached are 1/16th Le Rhone 9J cylinders that I turned on my standard Sieg lathe. The cooling fins are .006".
-
Tools, tools and more tools....
vossiewulf replied to CPDDET's topic in Modeling tools and Workshop Equipment
If you're willing to spend the money, what you're looking for is called a micromotor. Brushless, small, high torque, but not cheap - probably $500 minimum and the better ones are up to $1500 or more. But if you get one, you'll never look at a Dremel tool again. The most reasonably-priced one I am aware of is the Marathon: https://www.artcotools.com/marathon-micromotor/ -
Tools, tools and more tools....
vossiewulf replied to CPDDET's topic in Modeling tools and Workshop Equipment
Here's a good example, a couple years ago I went through surgical supply places and bought some professional medical and dental tools. One of them that you couldn't pry out of my dead hands is called a Barraquer Needle Holder. It sits in a happy place between pliers and tweezers and has taken over much of the duty from both of those. If you go to Ebay and just type that name in, you get this: https://www.ebay.com/sch/i.html?_from=R40&_nkw=barraquer+needle+holder&_sacat=0&_fsrp=1 A zillion Barraquer needle holders for $15 or less, made in China or Indonesia by god knows who. These would be what Micro-Mark would sell, and they probably don't work super well. However if you hit the "over $35" button you get this: https://www.ebay.com/sch/i.html?_from=R40&_nkw=barraquer+needle+holder&_sacat=0&_fsrp=1&_udlo=35 If you bought one of the Storz or V. Mueller or Accutome ones you'd get an instrument that's at the top level of world instrument quality in any field, and you'd use it constantly and be very happy every time you did so. I know they're expensive but I really think the return on investment makes it worth it every time. Another good one is called Colibri Forceps, they're for opthalmic surgery and they're by far the best tweezers I've ever used. One, good ones are very finely engineered so that the harder you press, the more force is put on what you're holding until it bottoms out. You can lift surprisingly heavy things with them. Two, the L-shaped jaws are genius. Instead of holding something at points like with most tweezers, you're holding with these L shapes and they are an order of magnitude more resistant to having the object you're holding twist than any tweezers I've used. You can lift bottles of paint with them, and with perfect control place tiniest piece you need to attach to something. Just be careful as some come with teeth. They're big sharp stabby teeth that are exactly what you don't want. So make sure with pics or text that you're looking at ones with no teeth. Here's a competent example: https://www.ebay.com/itm/Asico-Colibri-Forceps-0-12mm-AE-4030/362497499945?hash=item546688e329:g:y80AAOSwc-tY1CAI:rk:20:pf:0 -
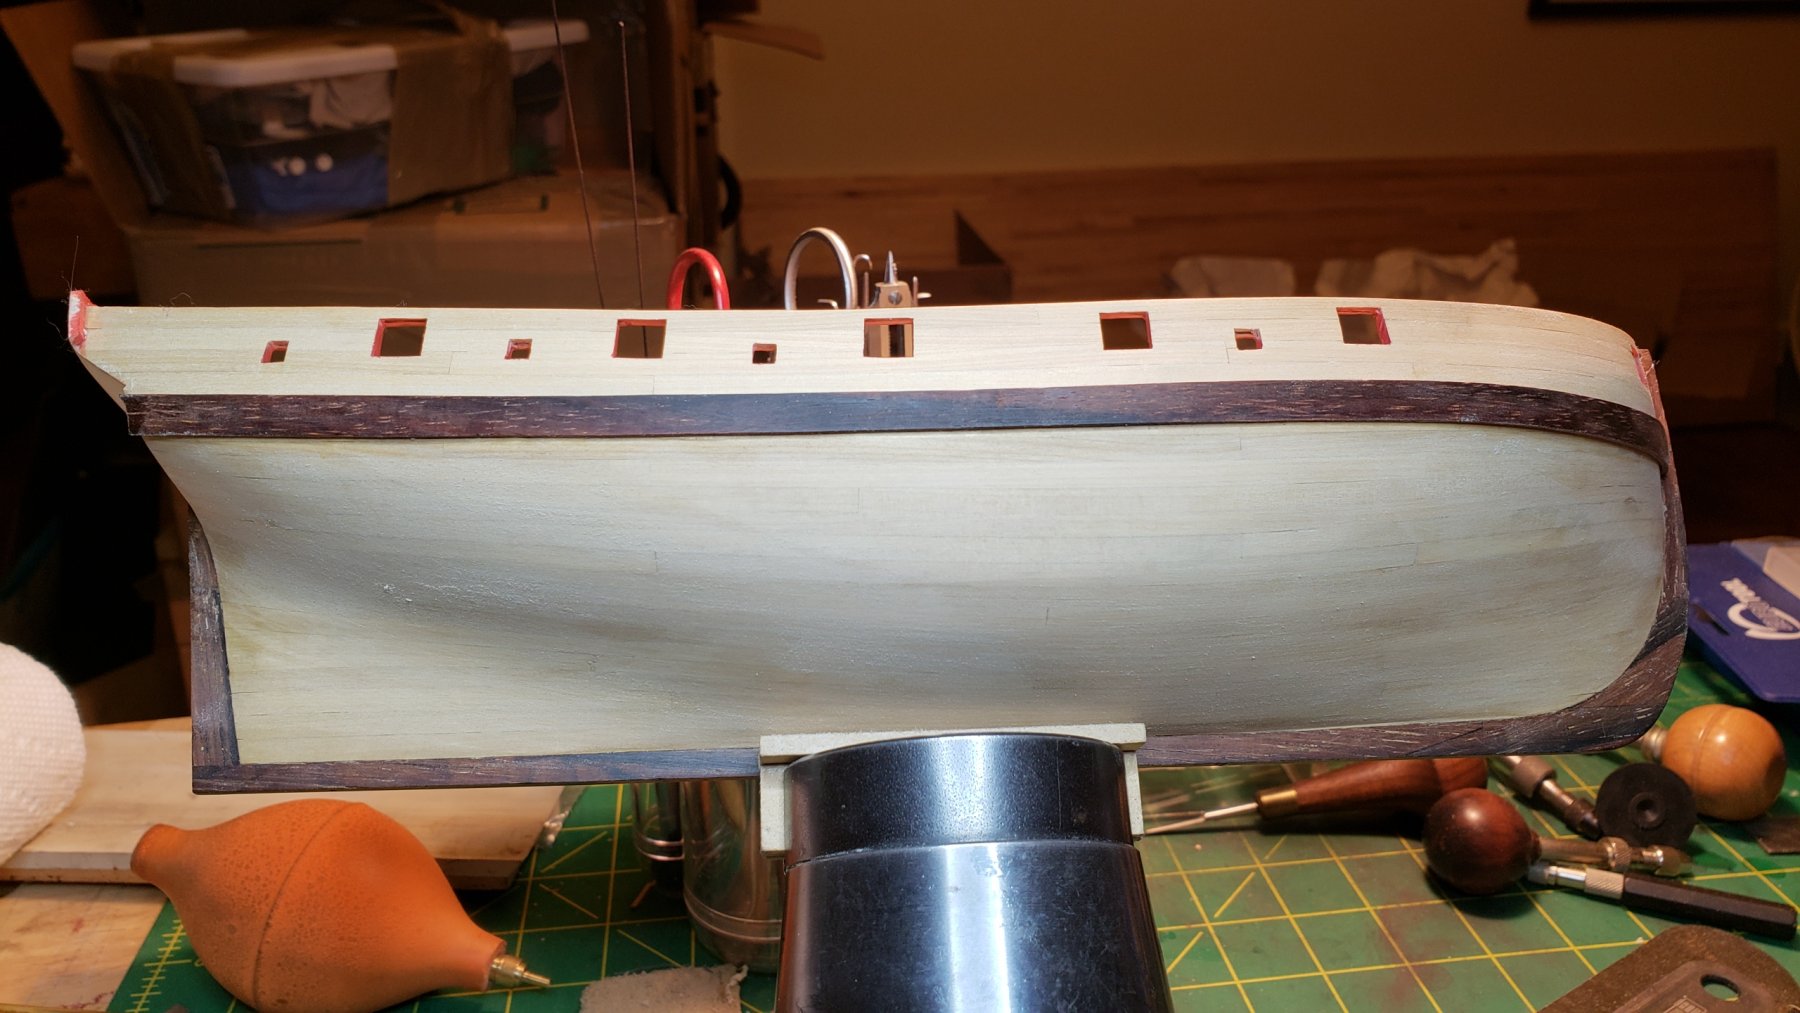
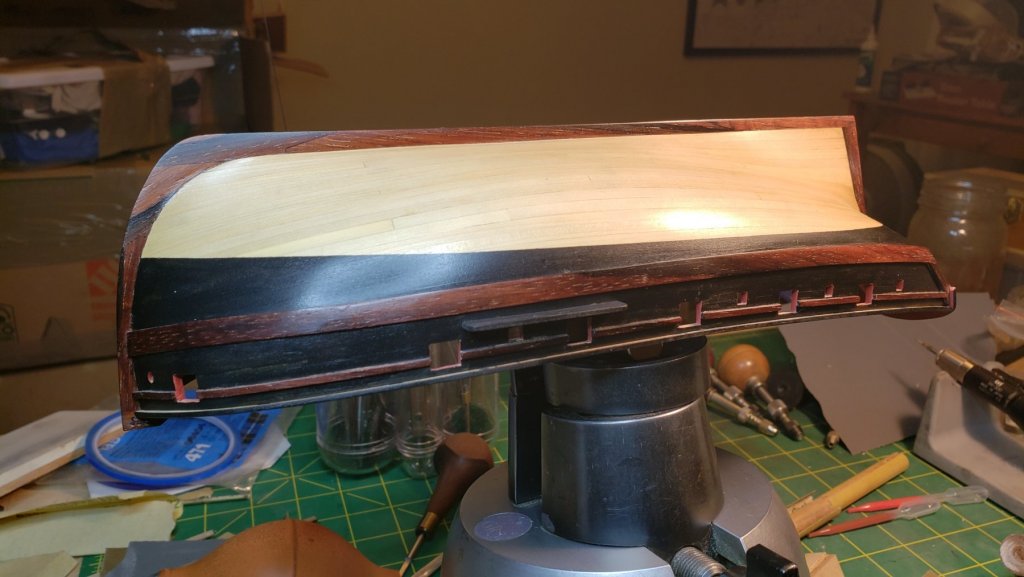
This evening I sanded her all over with 2000 grit to knock down all the fuzz and to flatten the finish a bit, then she got two more coats of a different more satin clear acrylic. I'll do a light final sanding with 2500 tomorrow and she'lll have a nice smooth finish. The black is slightly variable, but I've decided I like it, or at least am doing a good job of talking myself into it. The markers worked well over all but had two problems I didn't anticipate: one, it reacts to dry CA glue, forming a halo around it. I had to resand things even more carefully before putting the final coat on. And two, I didn't anticipate the effects of having to go over and over in certain hard to reach areas, which is pretty much everywhere but the turn of the bilge downward. However, the resulting effect looks almost like scale paint brushes to me, and there is a little bit of variability that I'd expect on a real ship. It also covered with a much thinner film than paint, leaving the woodgrain still visible. Hopefully tomorrow I will unmask the deck and start looking at the deck planking. Since I am using holly, I am not wasting a ton of wood with hooked planks, it's after 1800 so it's legal for me to do nibs. I have a good drawing of a nibbed deck that seems straightforward. Easy, no, straightforward, yes. Making the outer plank is going to be an adventure. I plan to do it similarly to how I did the rest of the planking, making the nib cuts in the outer plank in situ. I think.
- 714 replies
-
- 8
-
-
- lady nelson
- victory models
- (and 1 more)
-
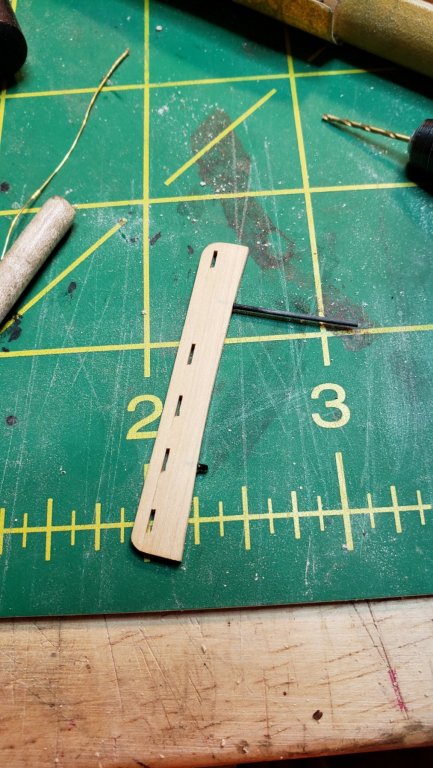
Thanks Tony, have bookmarked that for later I'll let it sit and I will stare at it a while before deciding to do anything. But if I do want to switch, I have at least three other compatible satin clearcoat options in the closet, so it won't be any big deal. I thought about that while making them- and went back and deepened them a couple times before I felt double extra sure that any brass strip of correct size will easily fit through
- 714 replies
-
- 2
-
-
- lady nelson
- victory models
- (and 1 more)
-
Tools, tools and more tools....
vossiewulf replied to CPDDET's topic in Modeling tools and Workshop Equipment
I use Renaissance Wax. Used by the royal museums in England to protect their collections, of course no silicone. A very thin coating keeps my planes and chisels and carving tools (I have up to jack planes so not all small) rust-free. -
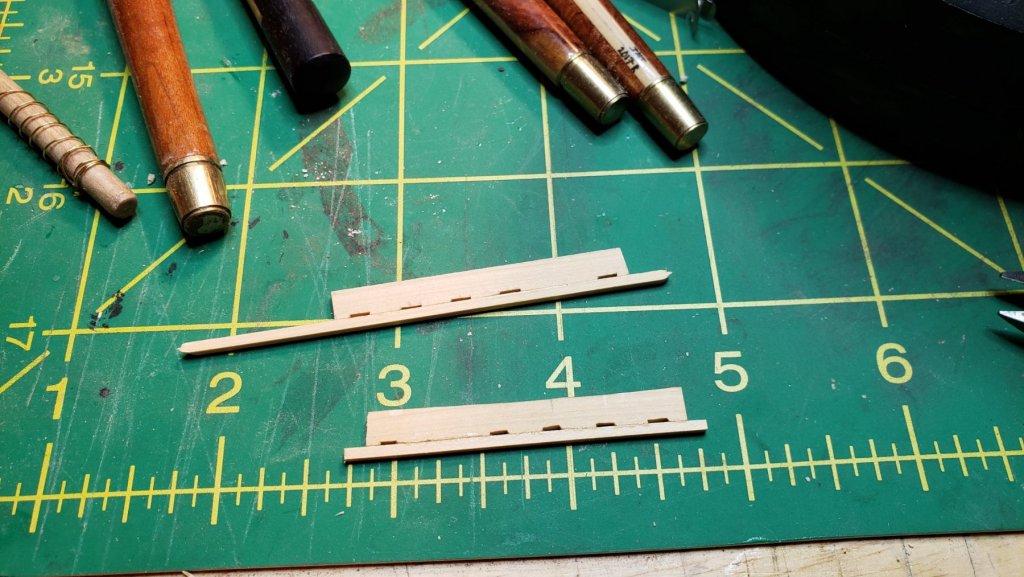
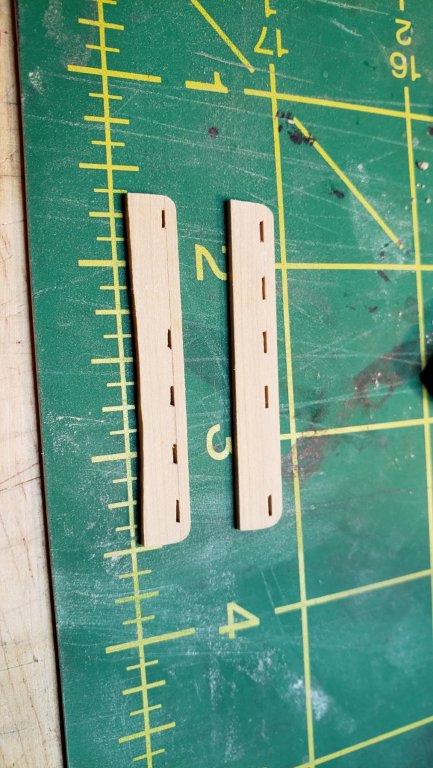
One for the beginners, if you need a bunch of very narrow mortises in something, cheat and make it out of two pieces. And at the bottom, how she stands as of this evening, with two supposedly satin clear coats but it looks pretty glossy to me, will have to see how it looks tomorrow. May need to switch to something more satiny. But the clear coats do finally bring the cocobolo to life, it's one of those woods that looks good unfinished but finished it's whoa... Bummer of the channels is that the oar port there no longer makes sense, but I didn't think far enough ahead. If done over, I'd plank over the oar ports, I see several models showing none.

- 714 replies
-
- 10
-
-
- lady nelson
- victory models
- (and 1 more)
-
Tools, tools and more tools....
vossiewulf replied to CPDDET's topic in Modeling tools and Workshop Equipment
Keep in mind that the quality of tools from Micro-Mark varies quite a bit. Some are pretty good, but many are cheap knock-offs of professional tools, mostly jeweler's tools. I long since stopped buying from Micro-Mark and I go straight to professional jeweler and watchmaker and machinist supply places, this is very much a you get what you pay for thing - if you buy a set of needle files for $10, don't expect them to work real well, it's far better to save your money and spend $50 on a professional set that are dead straight and extremely sharp and will last many years. Start here: http://www.ottofrei.com/ -
I sanded mine to 800 grit, but no filler used. Below it was at the 400 grit stage.

-
cutting out the gunports
vossiewulf replied to ronald305's topic in Modeling tools and Workshop Equipment
http://www.hocktools.com/products/knives.html http://www.hocktools.com/products/perfectedge.html https://www.amazon.com/Sharp-Pebble-Sharpening-Waterstone-Whetstone/dp/B01FZZUL30/ref=sr_1_1_sspa?ie=UTF8&qid=1543524111&sr=8-1-spons&keywords=combo+water+stone&psc=1 -
cutting out the gunports
vossiewulf replied to ronald305's topic in Modeling tools and Workshop Equipment
The best solution because you use it everywhere is a better option than X-Acto. That's a real knife with an Rockwell hardness of 62+ and proper sharpening stones and then you have something that can be made much sharper than X-Acto blades and it will hold that edge orders of magnitude longer. And sharpening blades is neither that difficult nor very time-consuming once you get the hang of it. Pick up a copy of The Perfect Edge by Ron Hock if you don't already know how to sharpen things. And then go to his store and buy a good detail knife, in my opinion he makes the best blades outside Japan.