vossiewulf
-
Posts
1,477 -
Joined
-
Last visited
Content Type
Profiles
Forums
Gallery
Events
Everything posted by vossiewulf
-

MONTAÑES by Amalio
vossiewulf replied to Amalio's topic in - Build logs for subjects built 1751 - 1800
No idea how you keep the grate glue joints invisible when you flex it like that. I'm going to have to buy a Spanish thesaurus, I've run out of English superlatives. -
Oh no, not for Themopylae, just planting a seed for you maybe to think about for later (because it would be awesome).
- 453 replies
-
- 5
-

-
- thermopylae
- sergal
- (and 1 more)
-
Woohoo! The answer is carefully! (ducks) Take a look here. I pinged them to see what AU shipping rates would be, here it's free shipping. They seem to carry a pretty large range of mid-price Japanese carving tools, which means like the ones I bought the steel will be very good but you may need to do some reshaping of bevels and flattening backs etc. Look at this specifically. If you look at the people who viewed this also viewed list you'll see they have a series of knives like this, from mid-length to pencil handles with blades of varying shape and length, find the one(s) that work best for you. Best case you have at least three, one with the cutting edge aligned to the handle's long axis (straight blade) a skew like your marking knife, and something that faces more or less forward. The best I think is curved edge with tip almost facing pure forward, but keep in mind that sharpening curved edges is considerably trickier than straight edges. There are at least a half-dozen basic ways to sharpen knives in terms of the kinds of stones. The performance/cost sweet spot IMO is Japanese water stones, good quality stones can be had for not much.
-
I was just thinking that Popeye could probably make an awesome steampunk clipper. No really, that would be awesome. We just need to explain what steampunk is I think the best simple explanation though is imagine that H.G. Wells thought up jet engines and all sorts of powerful machines (that would be powered by steam, since those were the engines of his time) and flying vehicles and what they would look like and how they would work if that were the case. Re-imagine what followed Victorian/Edwardian England if Nautilus became the pattern for an amazing range of new machines. Generally good fun right up to the point where they start taking themselves a tad too seriously, but that could be said about almost anyone. Including ship modelers
- 453 replies
-
- 10
-
-
- thermopylae
- sergal
- (and 1 more)
-
And one more before I go try to finish these, remember a goodly portion of the ooh ah factor here is just the wood, and buying a nice piece of wood requires no skill If you have a local Woodcraft store or a lumber supply place that carries supplies for wood turners and especially pen turners, stop by semi-regularly and poke around what they have. Even the most stringent admirals generally don't complain about buying a $5 piece of wood that will make a very nice knife. This is as expensive as it gets, snakewood. Very dramatic, $10 for one piece. Although I made two handles out of one blank I wouldn't recommend trying that unless you have a very good scroll saw, you need to cut it with the thinness of a scroll saw blade if you're going to get enough material. Here's cocobolo and you get 5 pieces for $10. A total of $2 per knife handle or $1 if you quarter it like I did. Really, the wood cost is very little, so no excuse for not having your own knives have really nice handles
- 714 replies
-
- 3
-
-
- lady nelson
- victory models
- (and 1 more)
-
Oh also, I should have remembered to clearly explain that the only reason the holes are really necessary is if you have the blade top line be the same as the handle top line, giving you an open-topped rabbet/mortise for the blades. When you do that the handle wood isn't going to provide meaningful resistance to the torsion moment it feels during cutting, so you run these pins through and through to provide the necessary retention. If you have handle wood on both sides of the blade, there is no need for the pins and you can make a knife with a blade like these with none of that hassle. I just prefer the point to be dead on the handle top line, I think that helps me locate the point more easily, but it's hardly required. Here are some examples of no-pins buried-blade knives with very simple handles to make.
- 714 replies
-
- 4
-
-
- lady nelson
- victory models
- (and 1 more)
-
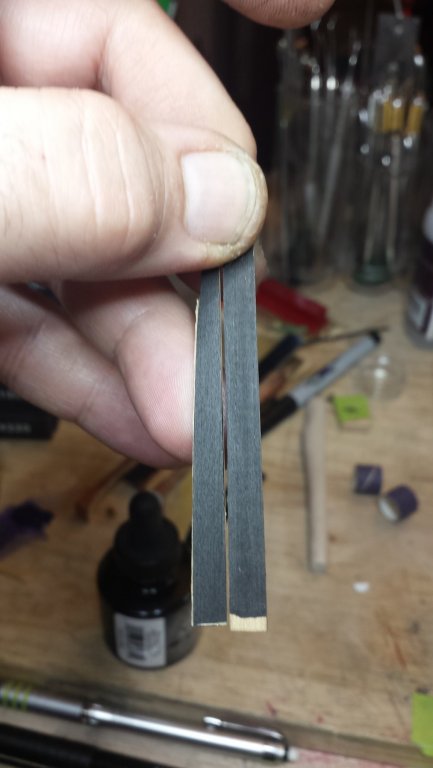
Both Popeye and Rick were ahead of us already Popeye's point about some of them being good paint applicators and some leaving bubbles is worth remembering, and it might make a difference depending on the viscosity of the paint/ink. So my purchase of the 100 cheaper ones may not have been a great idea. Popeye, I promise to be careful, but remember these are not the first but like the 27th and 28th lethally sharp knives I own I also prefer it when they bite you a little early, the ones that make me nervous are the ones that are saving it up for one big shot. Thanks Sam. Yes a transfer punch would have worked great had the holes in the blade gone all the way through as they usually do, that would be the right way to mark the hole locations on the handles for a normal blade. But here they only went 3/4 through as I drilled them but didn't have anything that could have drilled through the Rc63 layer on the back side of each blade, so I had to get creative to figure out a way to transfer them. What I should have done is been a tad more patient and sent a drawing to Ron Hock as to what I wanted, he does custom work at very reasonable cost. That's what I did for my wenge knife among others, I recall the blade for that knife was just $25 or $30, but I did have to wait a couple weeks. And it was one small blade instead of effectively the two I got out of each of those $22 marking knives. I'd recommend anyone wanting to make knives similar to the above who are not cost-limited to do the same and contact Ron at Hocktools.com with a clear drawing with measurements of what you need, he will quickly respond with a price. With nice normal through holes, the only tricky part is the rabbets. If you have a mill or a Dremel router base similar to mine, no problem, very easy to do. But you can also do it accurately with a knife and/or paring chisel if you're good with those tools, that's how they used to do it. I should draw something here, there's a three-step process to doing something that like quickly and accurately with a knife, if you follow those steps it really is quite plausible to cut those rabbets well with no power tools.
- 714 replies
-
- 3
-
-
- lady nelson
- victory models
- (and 1 more)
-
More tools - Luthier, jeweler, fly-tying
vossiewulf replied to vossiewulf's topic in Modeling tools and Workshop Equipment
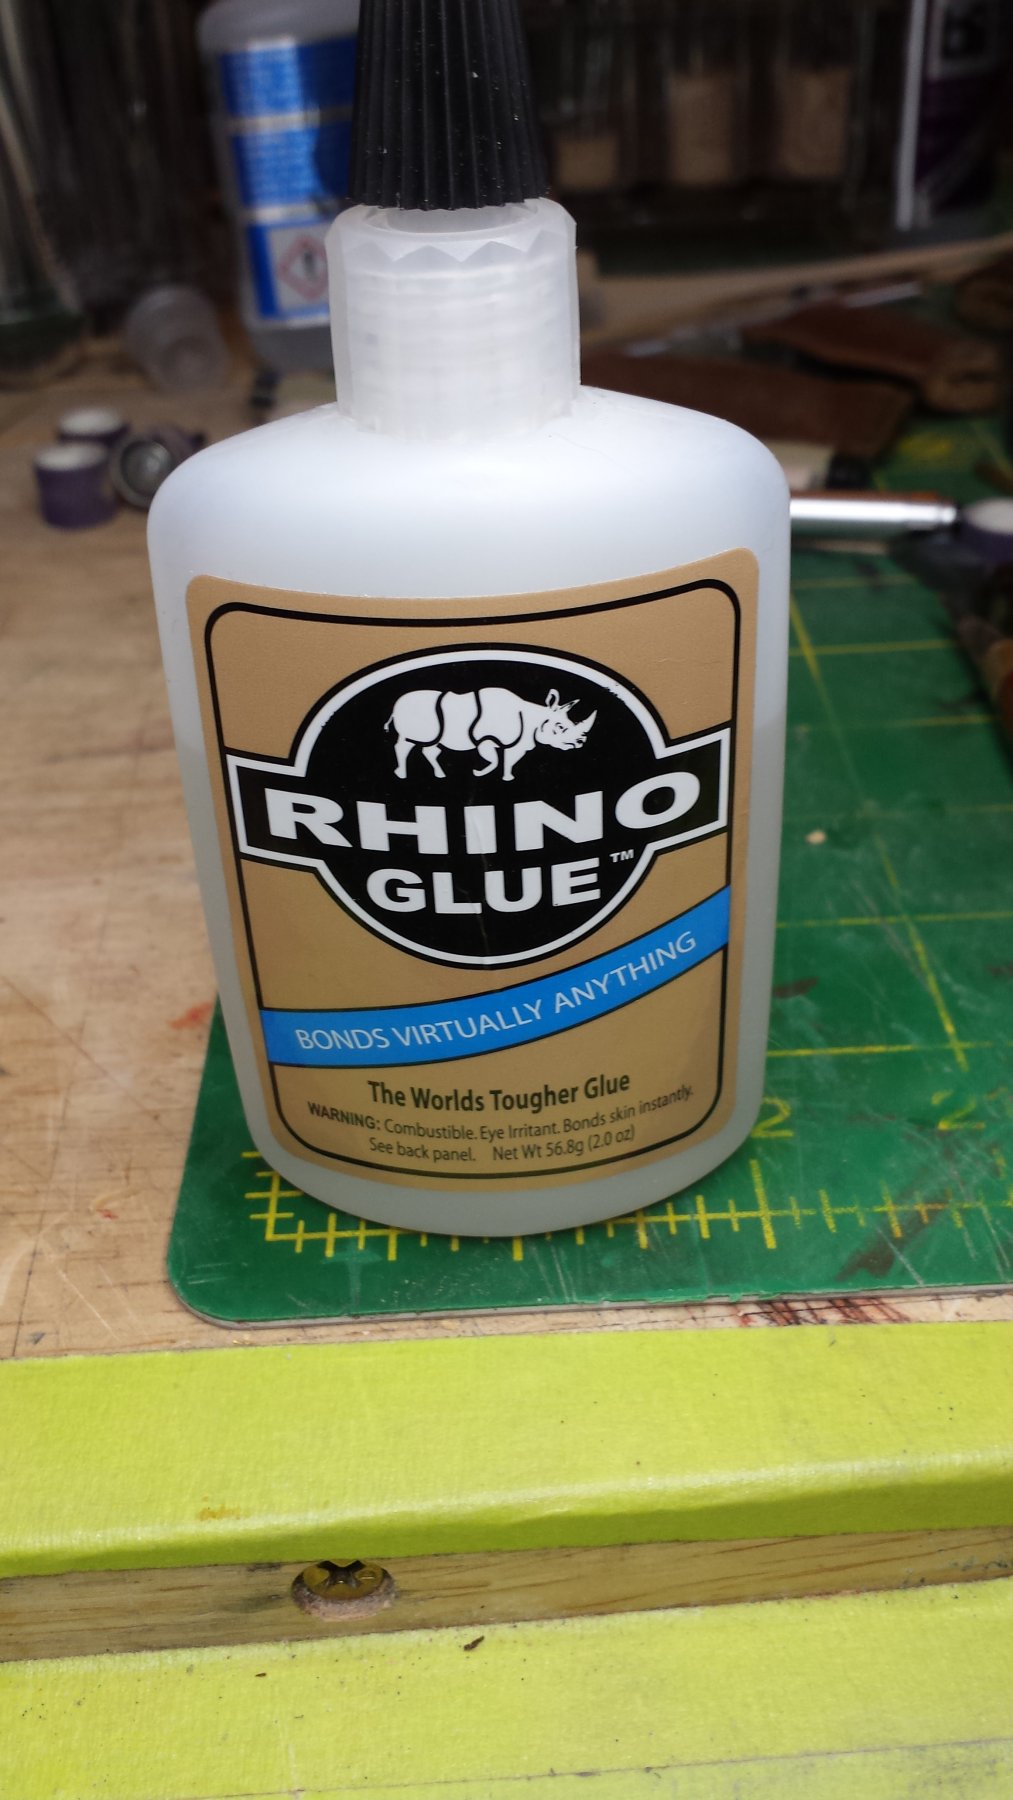
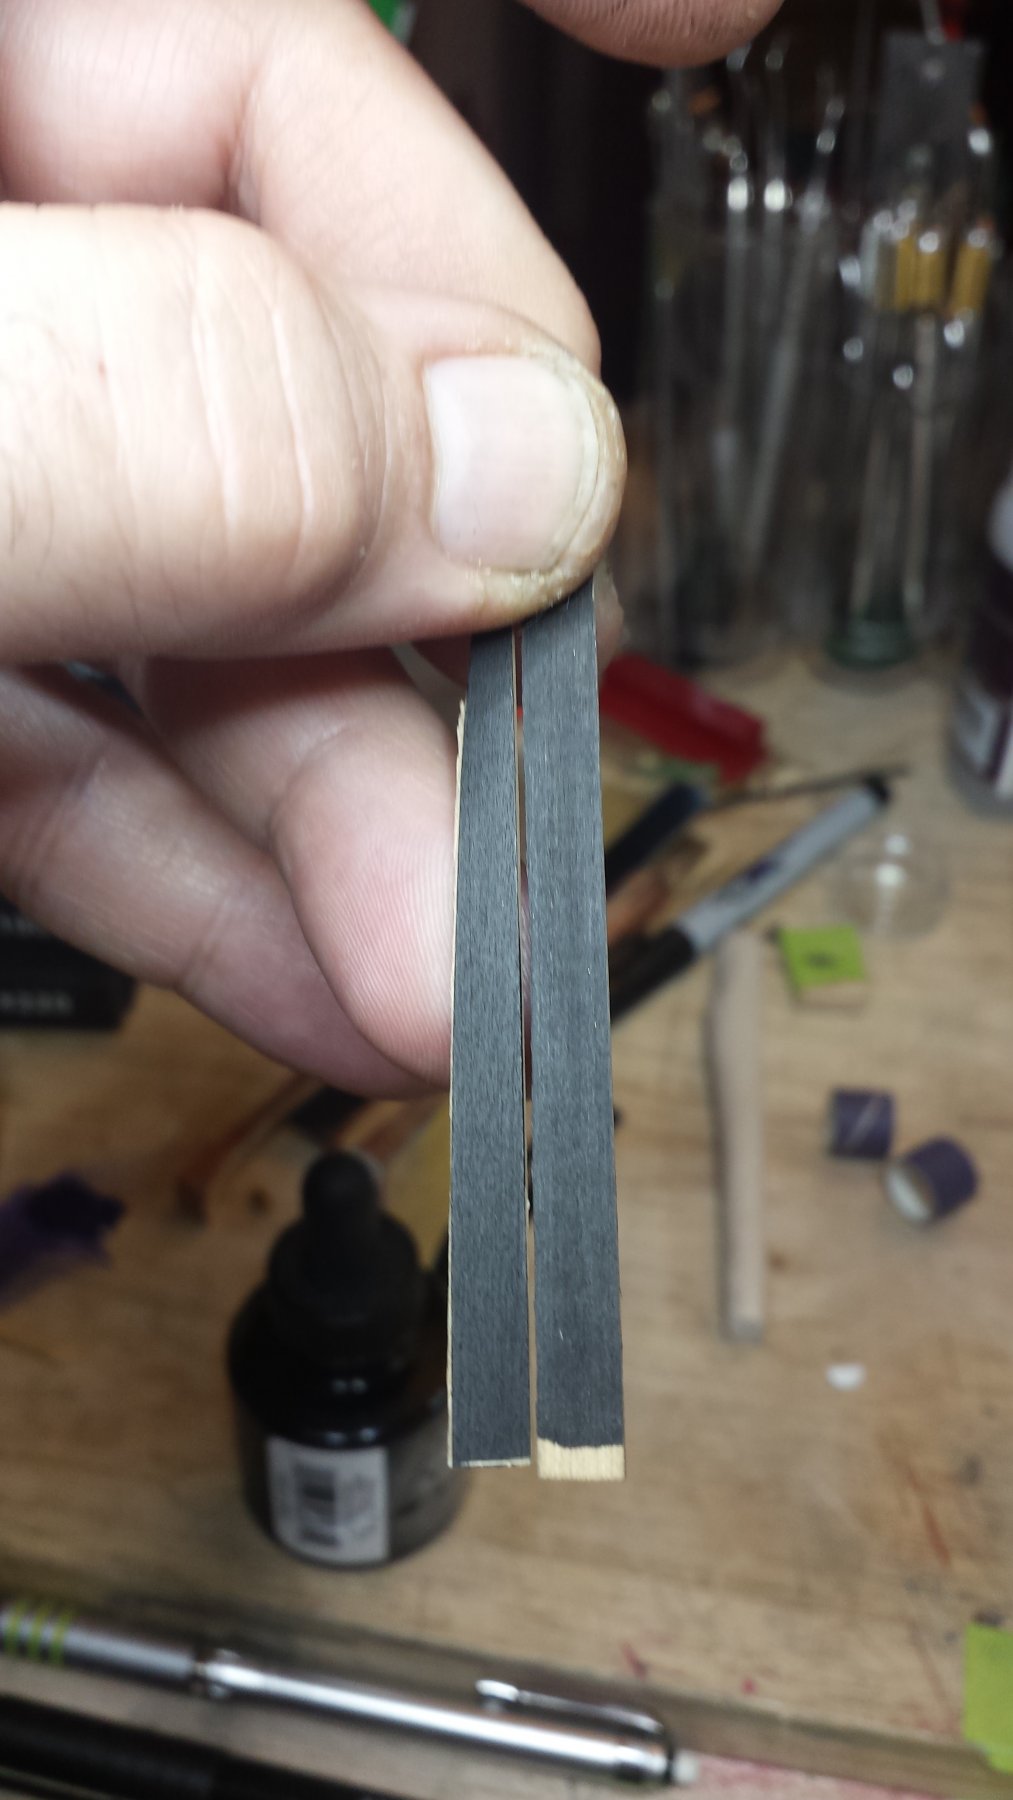
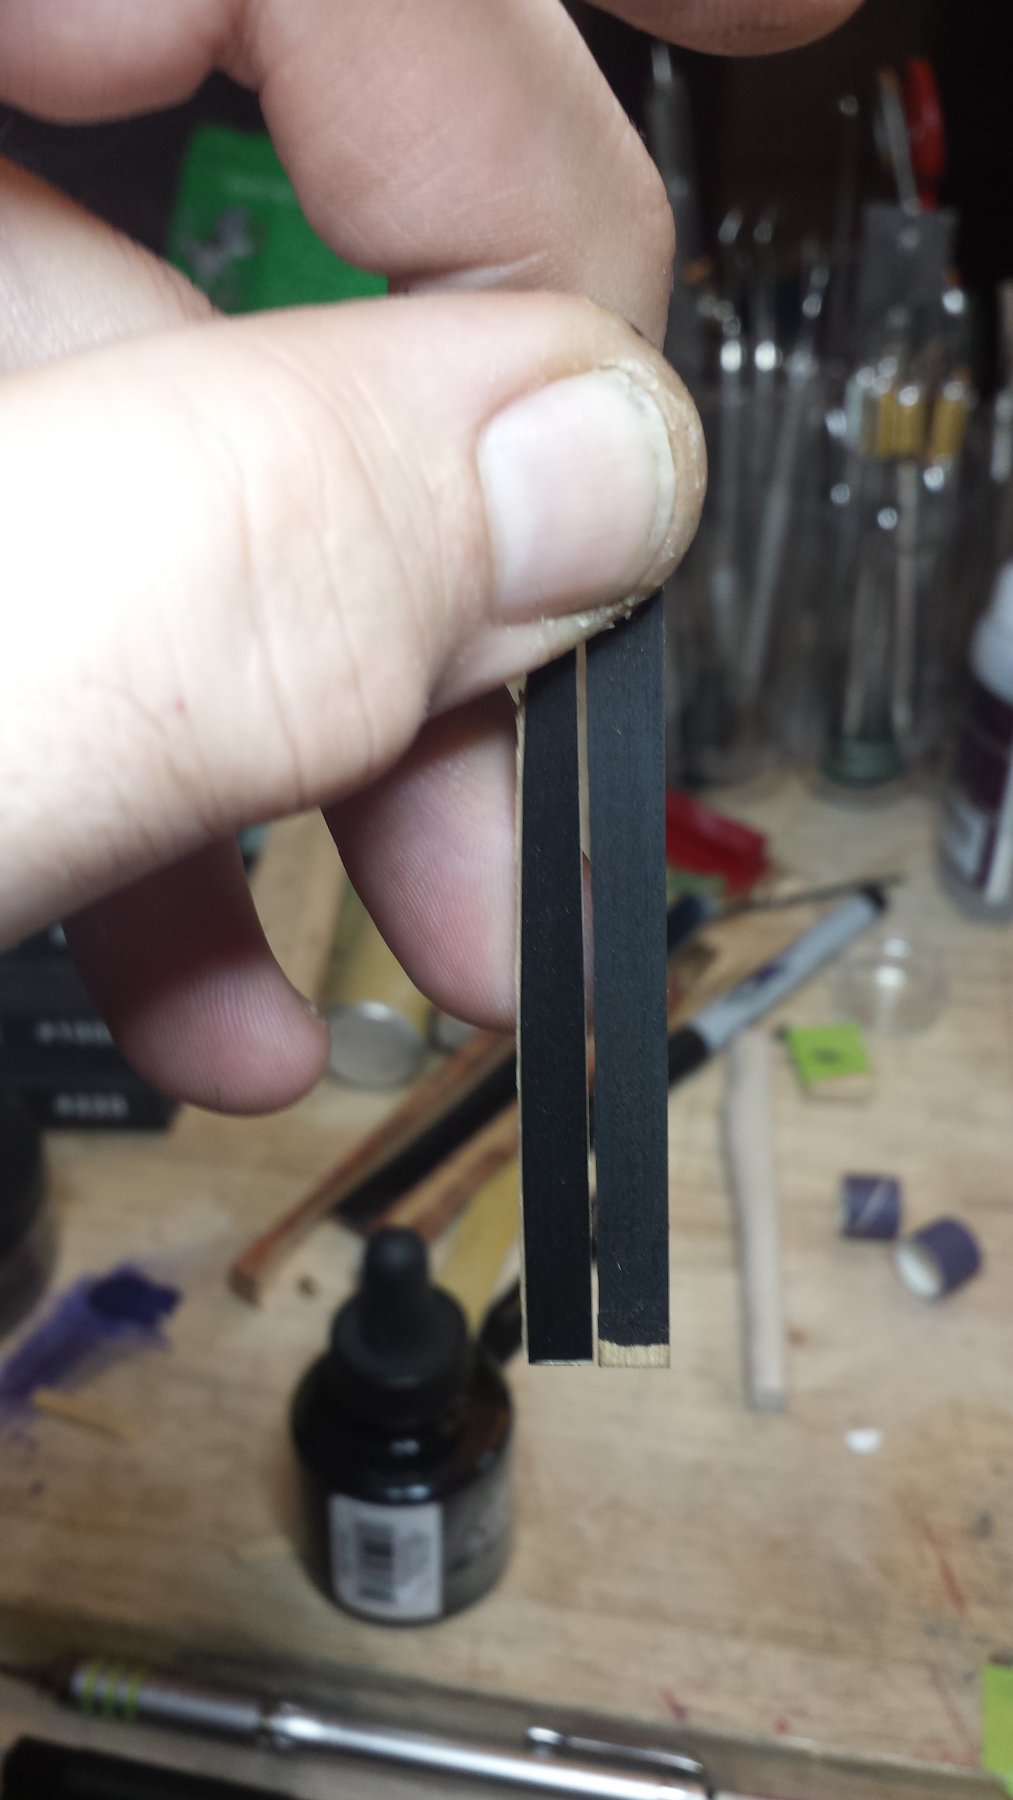
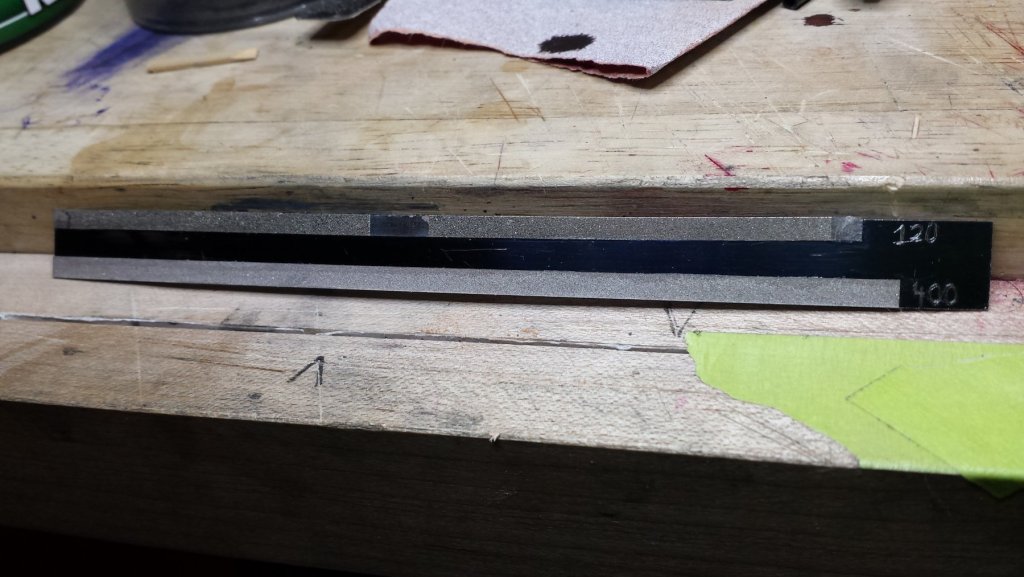
Looping back to this subject - some time ago I received coarse grit full-diamond strips, and I put them together with the earlier Horico medium-grit strips (I hate it when companies use meaningless generic terms like that; I'm guessing the coarse is ~100 grit and the medium 320-400 grit). I've glued them to a piece of .018" spring-temper steel. I've been using an identical tool for my planking covered in various grits of PSA, I'm going to try this version as soon as I finish the knives I'm working on. I used this glue - anyone know about it? Besides scoring the "typo our own slogan on the bottle" achievement, as you see they claim to do better on unfriendly materials and combinations. However it seems to me to be just low-odor CA, although nowhere on the bottle or anything else I've seen have they said this is CA glue.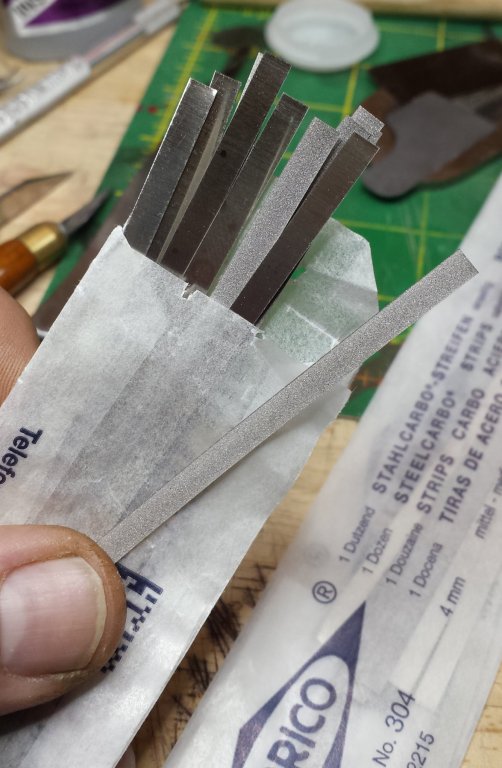

-
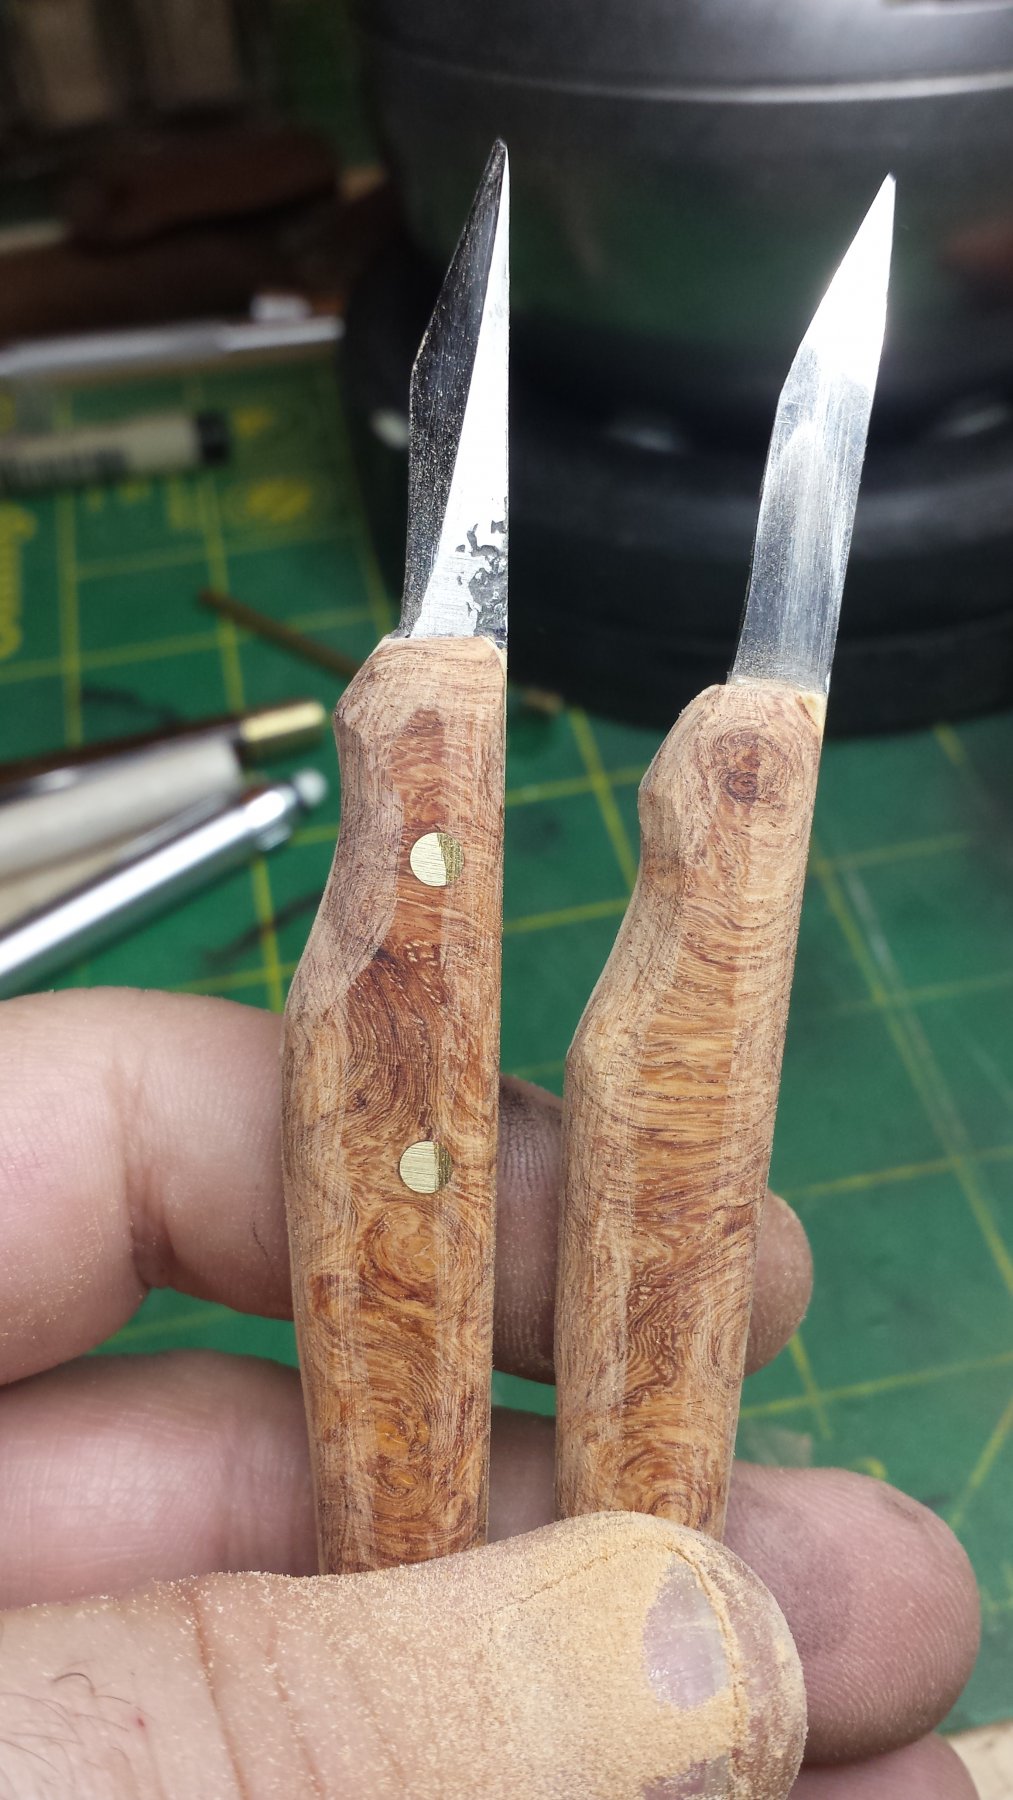
Thanks Don If you can get to a point where you have a blade that just needs a handle, let me know ;-) It's the couple hours of icewater grinding that I'd be perfectly happy to not do again for a couple weeks. I never mind making the handles, it's a bit of precision joinery that I like. And also as you start sanding them out to final appearance you get the reward of seeing wood like this all nice and shiny for the first time, that's always fun. I've used them before, I agree it works but this is where form goes up against function for me and form wins And if you hold these the way I do, it really can't get much more stable. BTW these knives are ambidextrous, I find myself using my left hand to do things often enough these days that I decided to make them left-friendly too.
- 714 replies
-
- 2
-
-
- lady nelson
- victory models
- (and 1 more)
-
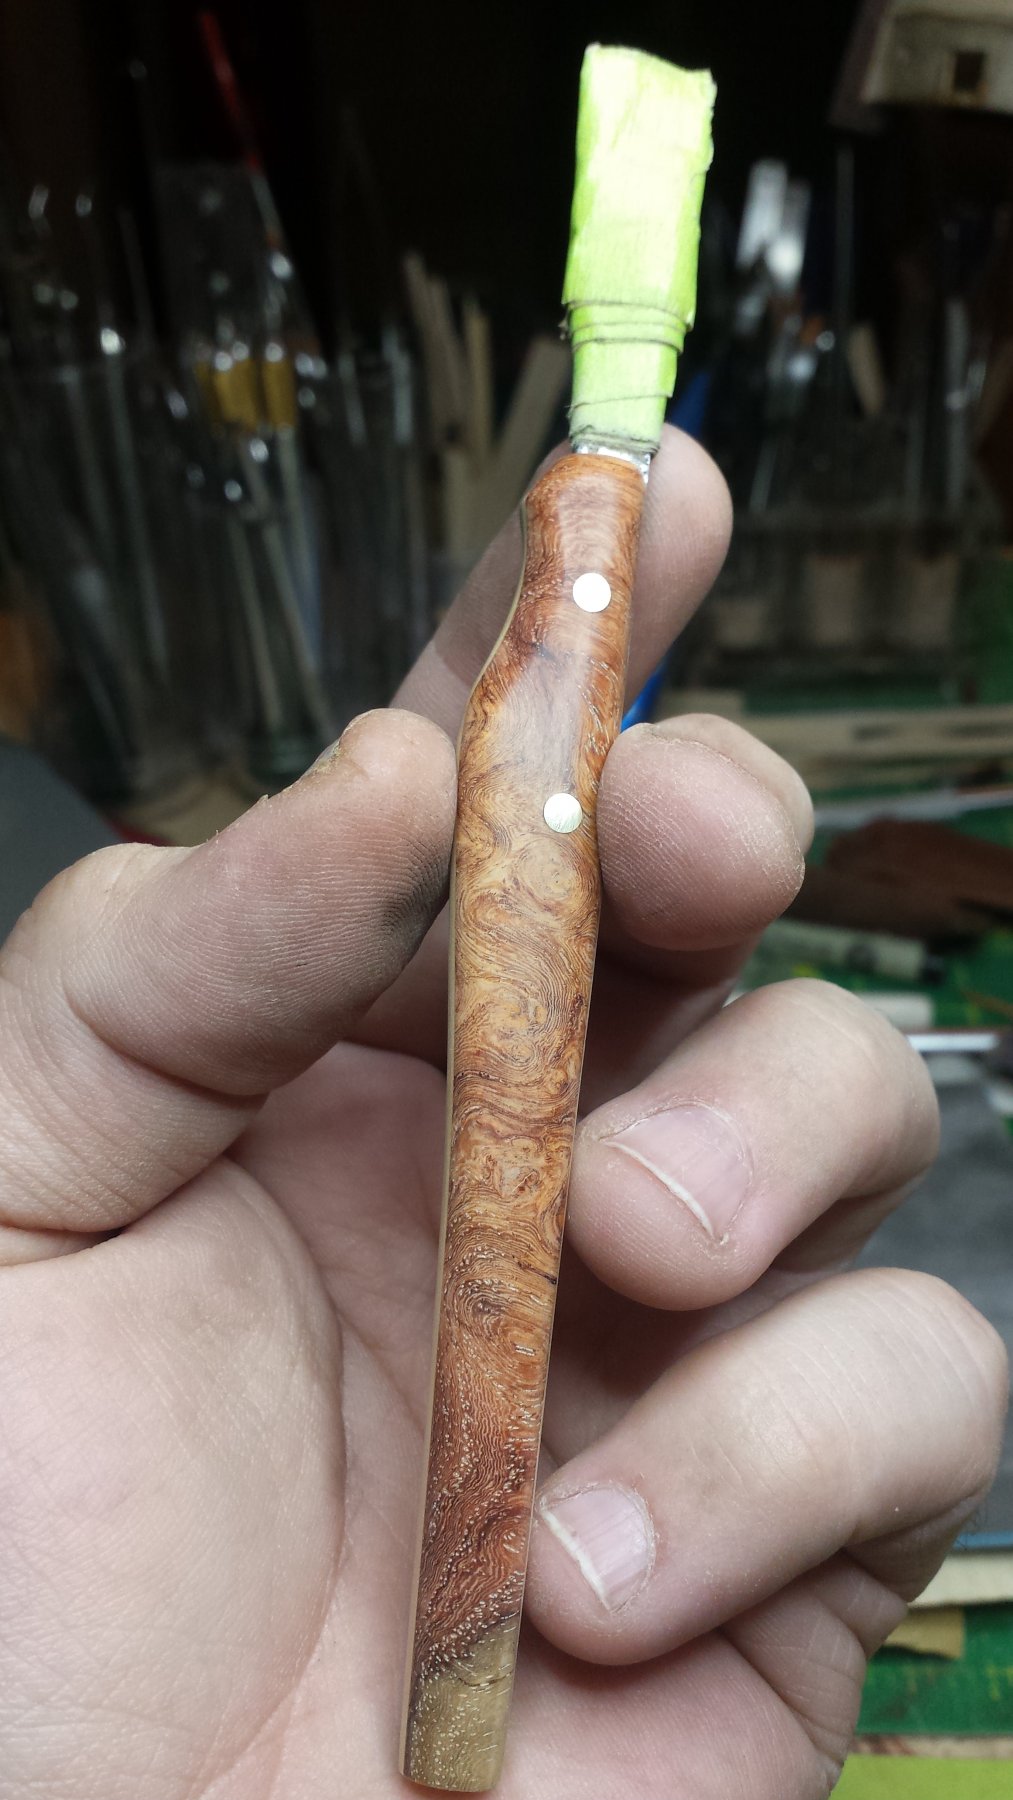
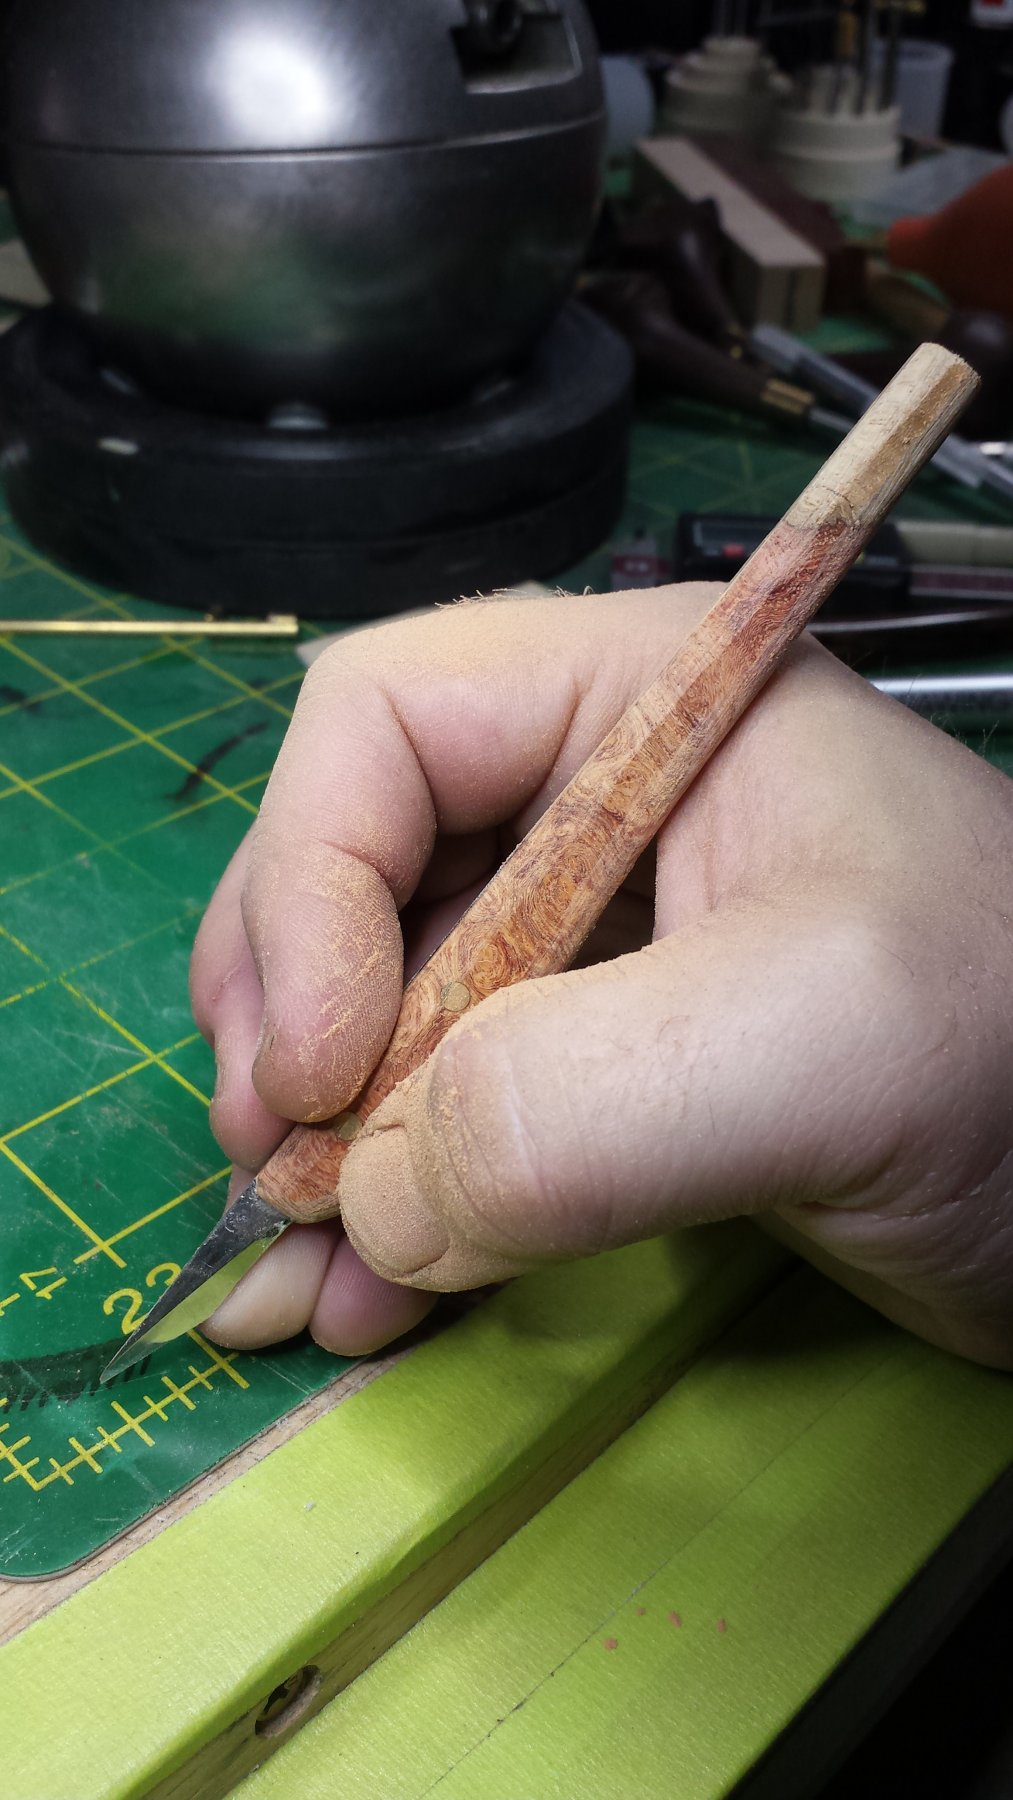
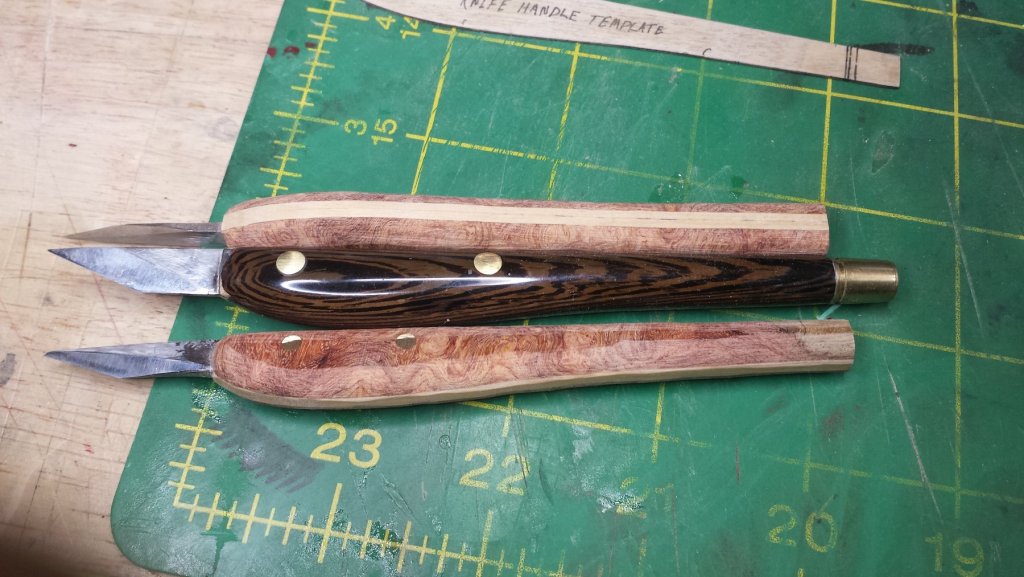
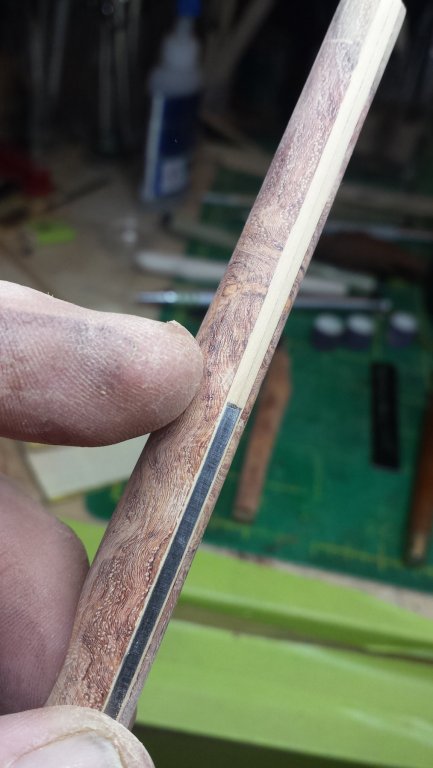
First, india ink vs. Faber-Castell Pitt pens. One of these is india ink and the other is the Pitt pen. Looks identical right? Now let's change the orientation a bit so we're not getting direct specular reflections and we just see what their ambient color is. Not quite so identical. The one on the left is india ink, and has as close as we get to a pure black ambient color, while the Pitt pen is dark grey. And this is not surprising when you think about it, I'm sure the ink in the Pitt pens started with a foundation of india ink, but pen inks are highly engineered substances at this point- they probably added flow enhancers and drying retarders and who knows what else to give the pens a long life and proper function. And if you have something that's pure black and you do anything to it other than add more pure black, it's going to change it to a grey color. So I'm going to hang onto these pens, but probably use them the same way Popeye does - for small areas and deck plank caulking. I experimented with using makeup application sponge brushes applying india ink last night, and it worked extremely well. In fact I'm wondering why I don't use these for any non-laquer finish, there are no brush marks and it can carry more paint without dumping it all in one spot, only smoother way to apply something is by airbrush. This "brush" is what I was experimenting with. However I also bought these, much cheaper and a long term supply, haven't tried them yet but see no reason why they won't work fine. I'll just cut them in half and stick them on a dowel to use. While I was at it I also bought this, not for brushes, but as liquid application/cleanup swabs, was a shot in the dark but turned out to be a good choice - these are a good size and the swab material stood up to some pretty heavy scrubbing (I used one with some acetone to clean out tape gunk from one of my new knives). As in it wasn't damaged at all and was ready for scrubbing round 2. They also have a strong plastic piece inside the swab as reinforcement, which really helps if you're using swabs for cleanup. And best of all, ZERO lint. Anyway, for 6 cents a piece this seems a good purchase. Now back to the knives - don't worry Rick, we're almost done First, another tip - this applies to cleaning up any surface actually, but is REALLY important shaping something roundish like these handles: you want to be positioned under good light, but at a very oblique angle. This enhances the surface detail and makes it much easier to see the bumps and recesses that you need to see to produce a smooth final result. In fact if you don't get yourself under light like this, you might as well close your eyes and go with touch as your main sensor to tell you where you need to sand and where to stop, because direct light hides all this information from you. Along in here I also crosscut them to their final length. This pic should explain why And here is my new grip type, I'm going to call it a dromedary handle. Test-driving strongly suggests it has some advantages control-wise over the pregnant snake design. That works very well also, but I think the dromedary might be the superior of the two, will see if that holds true once we get some real cutting miles under the dromedary knife tread, to horribly mix several metaphors. Also, it should be obvious that an important part of the reason to make non-round handles like this is so they stay where I put them on my bench. No rolling for you, Tom and Jerry planking knives. This is also the point at which we stop with the power tools and from here it's all hand-sanding. As Popeye would say, there are a couple of knives in there and we're getting pretty close to finding them We want to go slow here and be quite careful about what we are doing, it would be painful to screw them up at this point. So we work our way through the grits, regularly comparing the two and using our oblique light to help us get nice smooth continuous curves with a round (from end-on) tail. And we look very carefully for those little scratches that like to hide until we have our CA finish on when it's a major pain to fix, see the spot I'm pointing to. The transverse scratch near the end won't come out, that is where the burl snapped in handling early on. I'm hoping that the CA finish hides it to some degree. I won't mention how high we go in grit, because Popeye, who is guest-starring in tonight's episode, would have his eyeballs emulate his handle and pop out and do a full 360 before popping back in. All I can say is those who say there's no advantage to sanding to a high grit are somewhat less than 100% correct IMO it makes a very significant and positive difference in the appearance of wood to have the fibers be cut as cleanly as possible. On holly, with nearly invisible grain, it is in fact probably not worth it - there's no grain to show to advantage. But if the wood has a dramatic coloring or grain pattern, it will be considerably enhanced by sanding out to Popeye eye-popping numbers. Just need to drill out the tails for their brass balance pieces and they can go in their thin CA bath to start the finishing process. Here is where I do wish they were round - round handles can be chucked in the lathe and then the CA coats can be applied with a pad while moving down the spinning piece, leaving a nice smooth base for final sanding. Without that, getting a level CA finish on the whole handle takes a while and a goodly pile of sandpaper.


- 714 replies
-
- 5
-
-
- lady nelson
- victory models
- (and 1 more)
-
Fokker Dr.I by Torbogdan - FINISHED - Model Airways
vossiewulf replied to Torbogdan's topic in Non-ship/categorised builds
That's all standard 3d printing stuff, there are multiple packages designed specifically to set up a model for 3d printing with the appropriate supports and orientation and they check minimum feature size. The latter you have to check and know before you begin modeling, you can't just model whatever and expect it to 3d print at any scale. You have to plan for and create different versions of your models at various scales as the minimum feature size shrinks relative to the size of the model as you go up in scale. None of them are insurmountable, but it's also something unlikely to be navigated by someone who is not a very experienced modeler. Once I get my desktop up and running again I plan to work on printing some of my work through Shapeways and maybe offering some models useful to people here and in other (physical) modeling areas, I'll let folks know what I learn. -
Mast-mounted laser blasters! An electrified ram for taking out other tea clippers! TEA TORPEDOES!!
- 453 replies
-
- 7
-
-
- thermopylae
- sergal
- (and 1 more)
-
Great! Am honestly very happy anytime my experimentation and efforts can be be used by and help other people who perhaps don't have some of the opportunities I do to try all this stuff out.
- 714 replies
-
- 3
-
-
- lady nelson
- victory models
- (and 1 more)
-
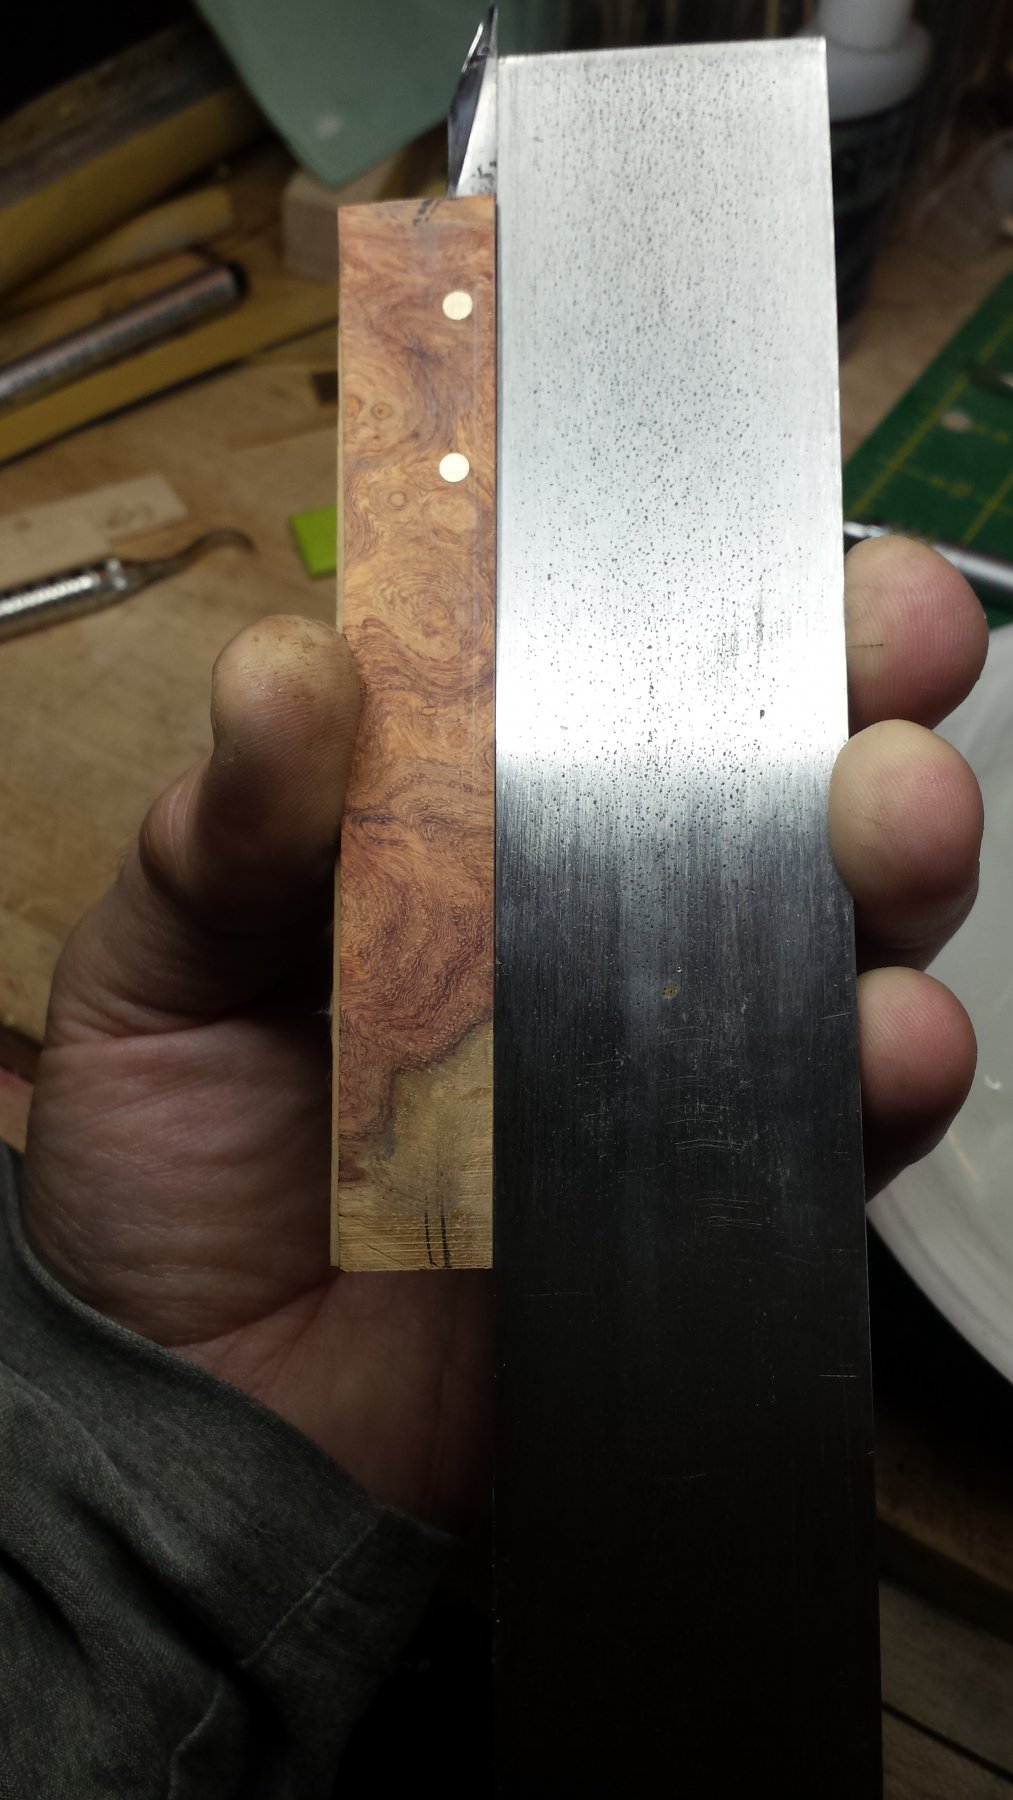
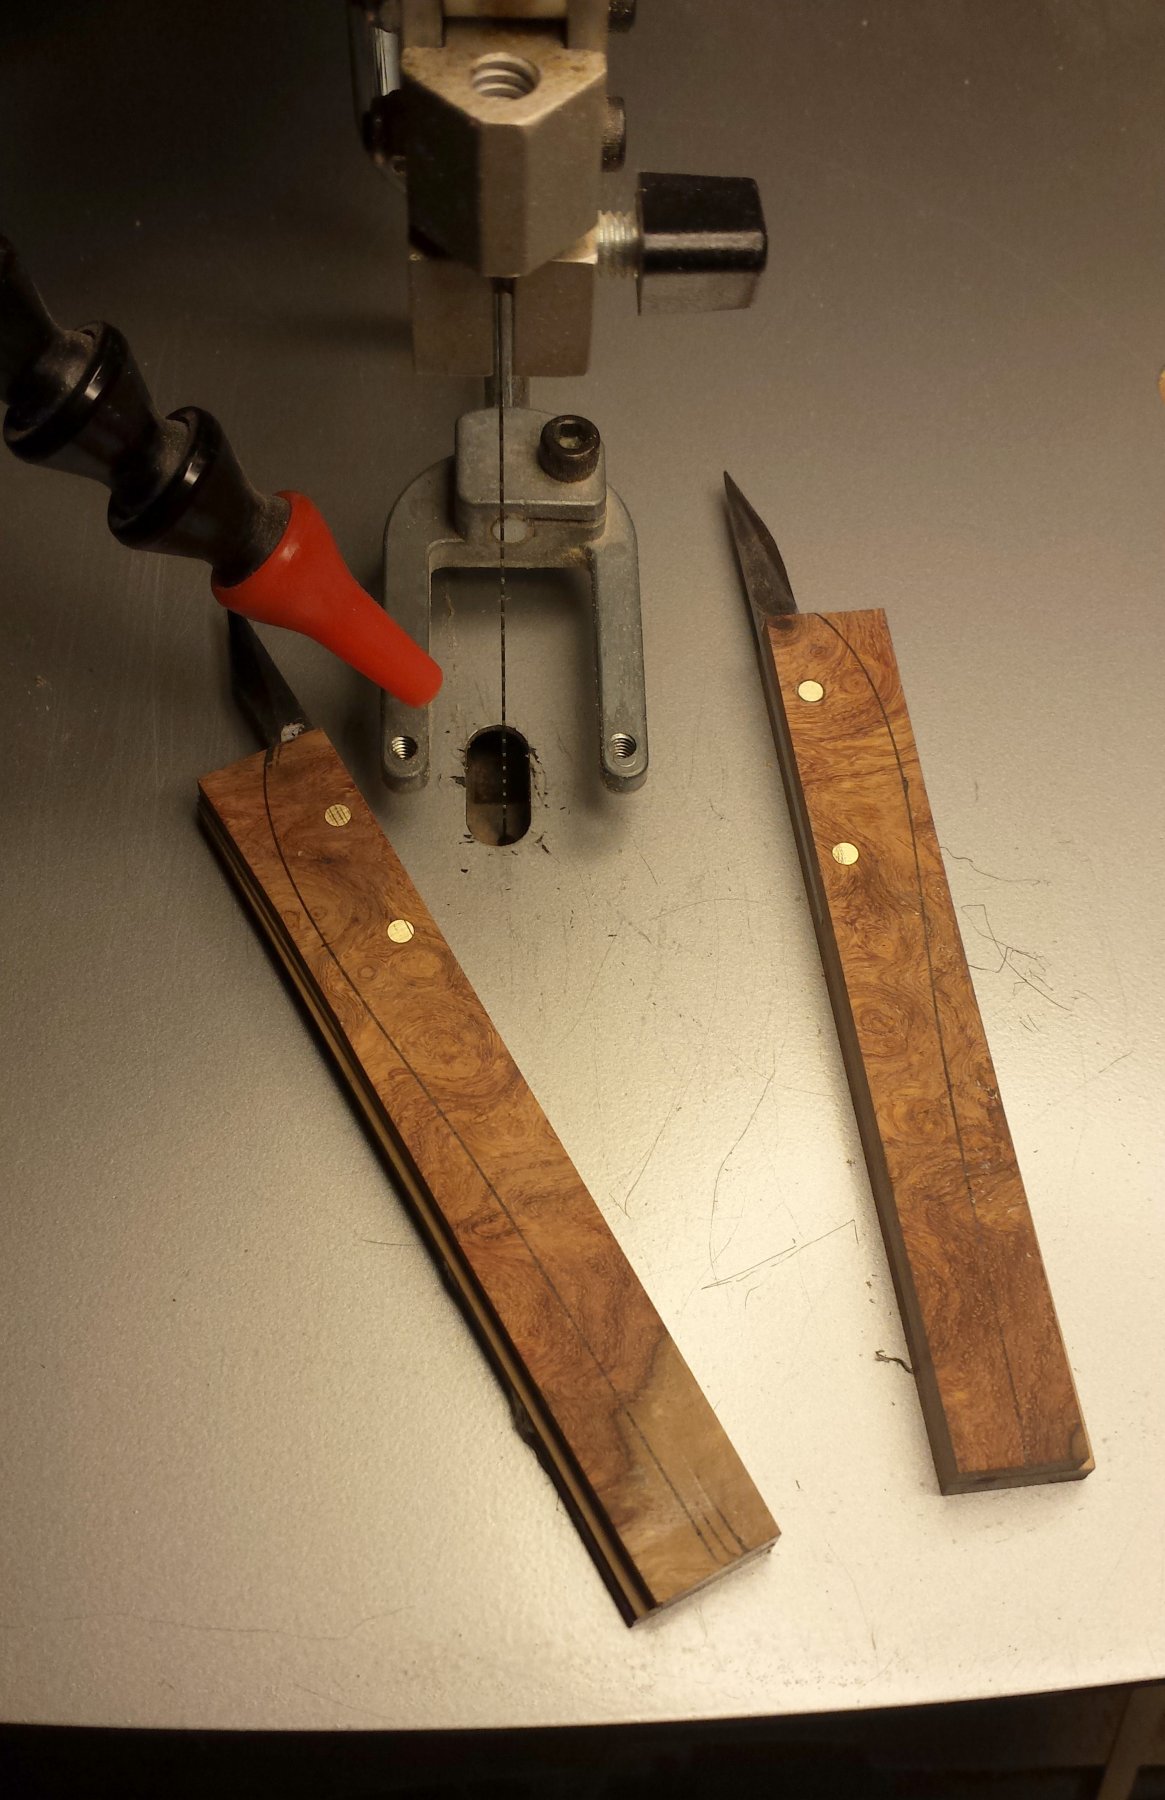
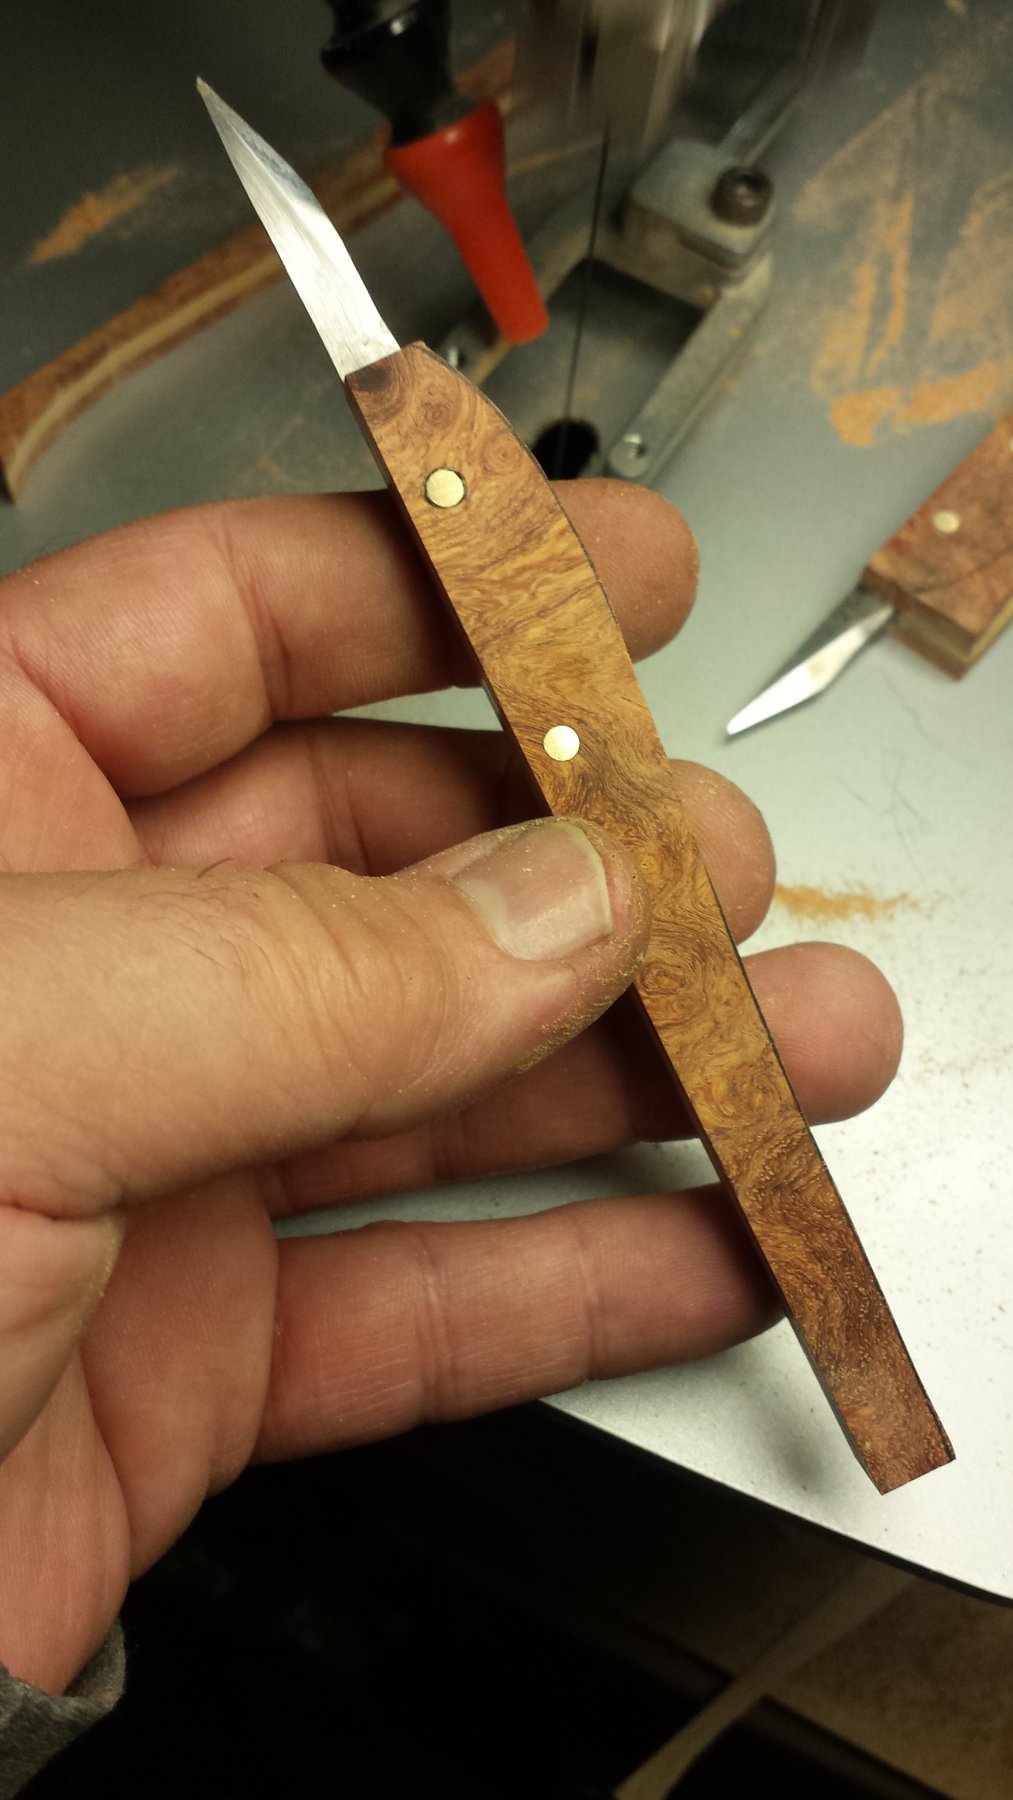
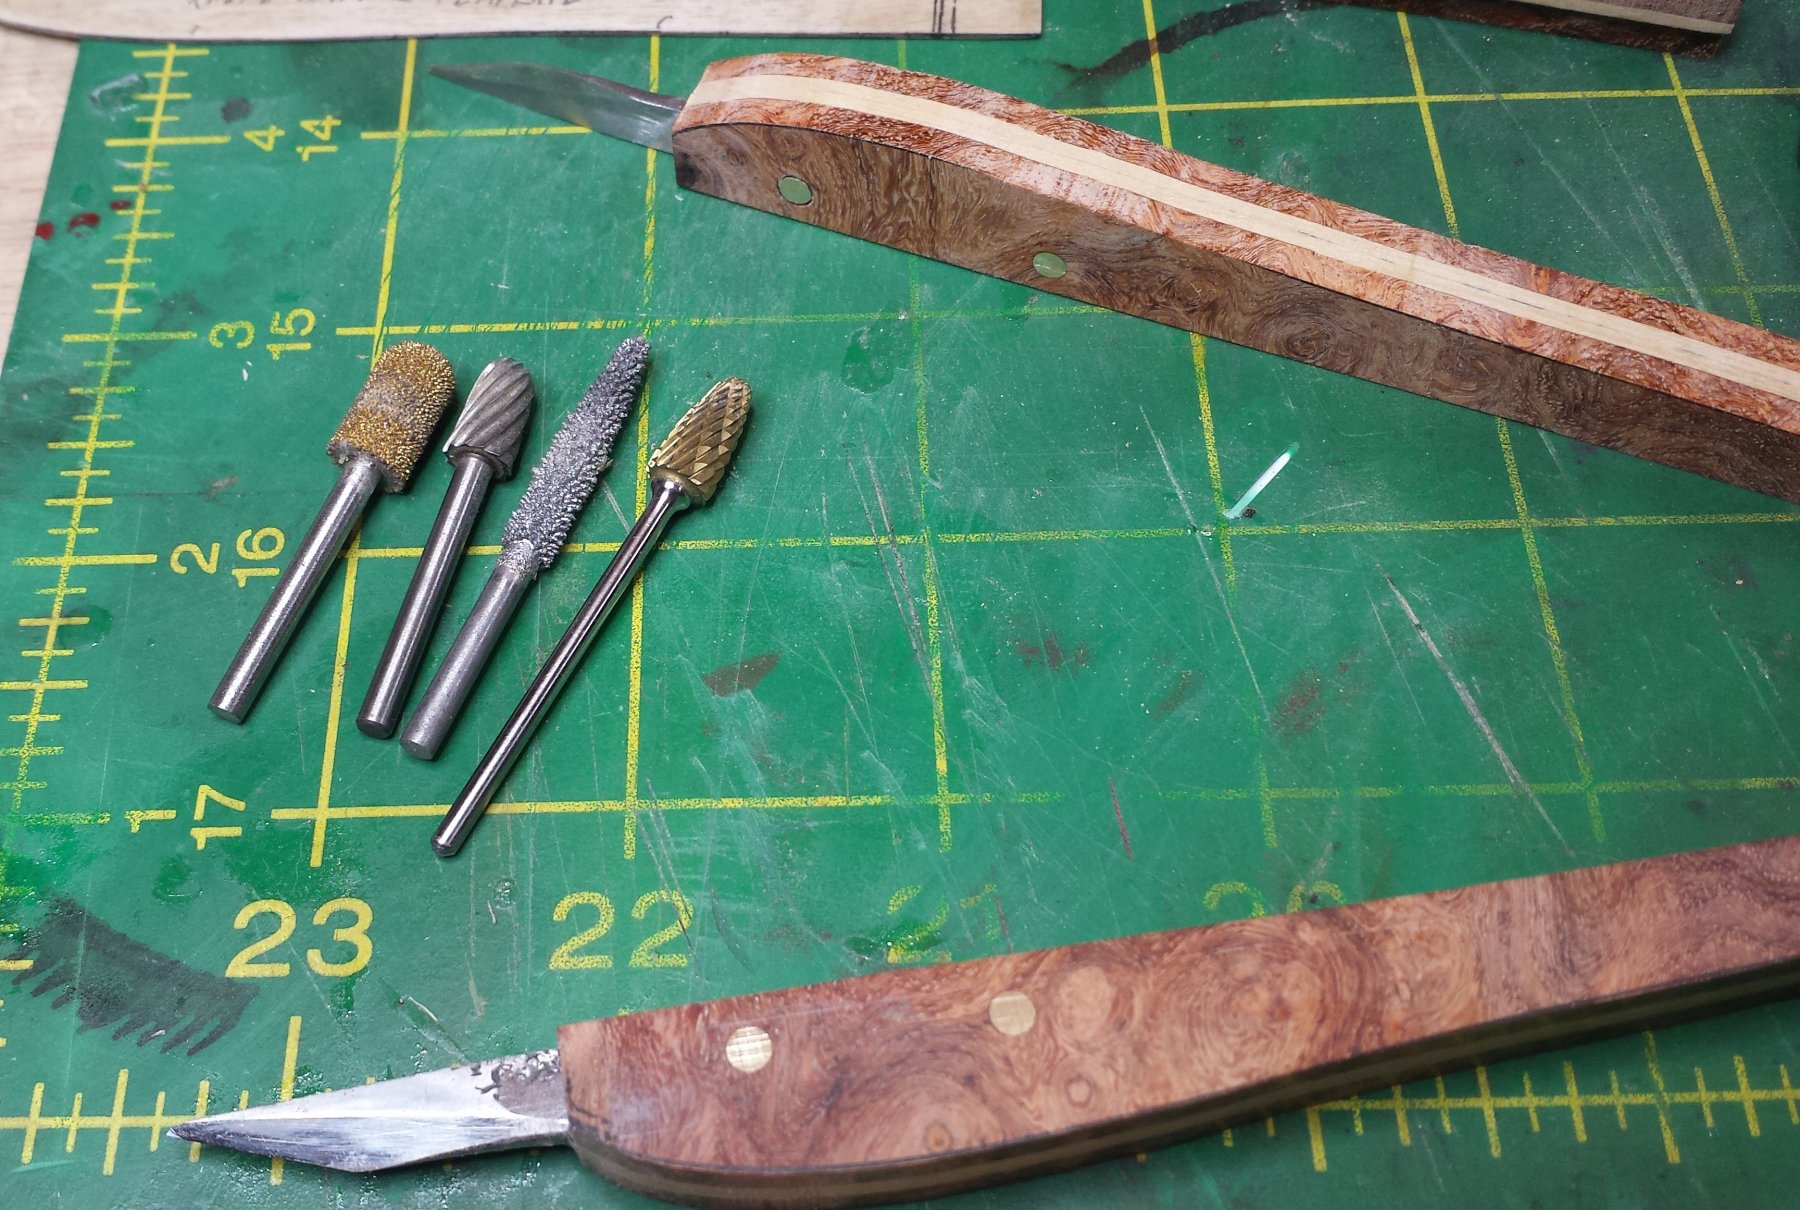
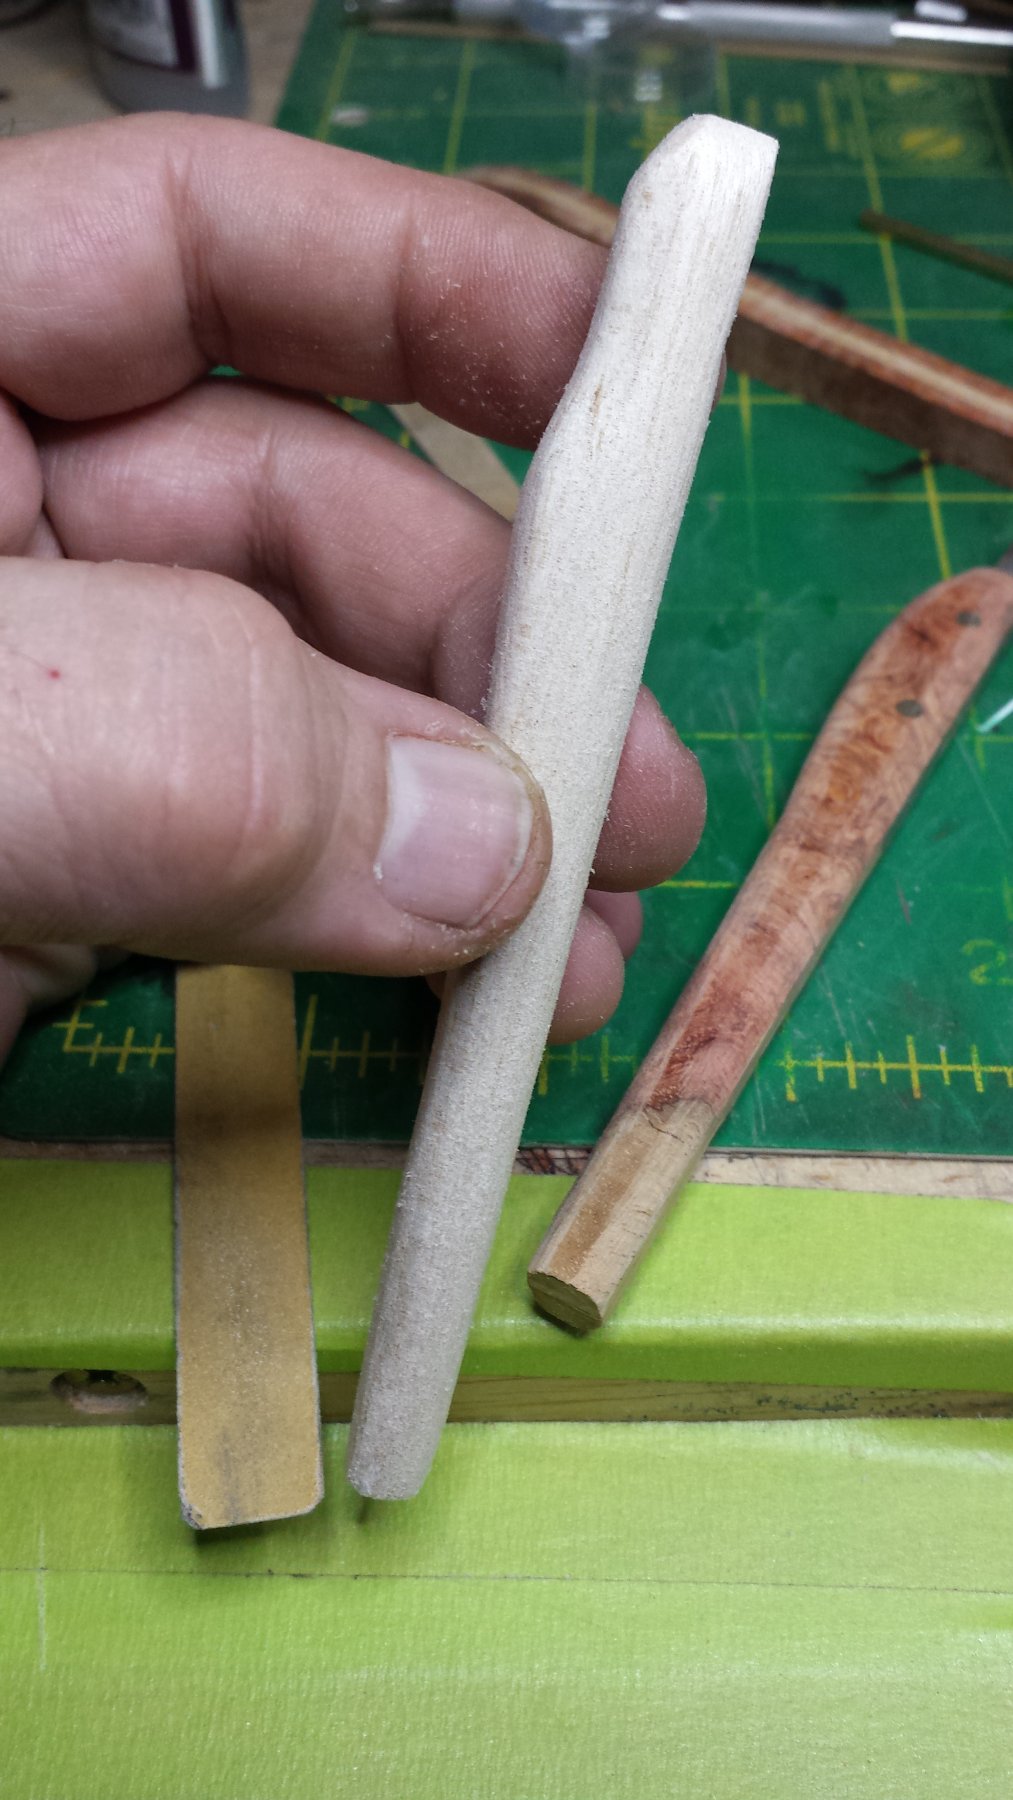
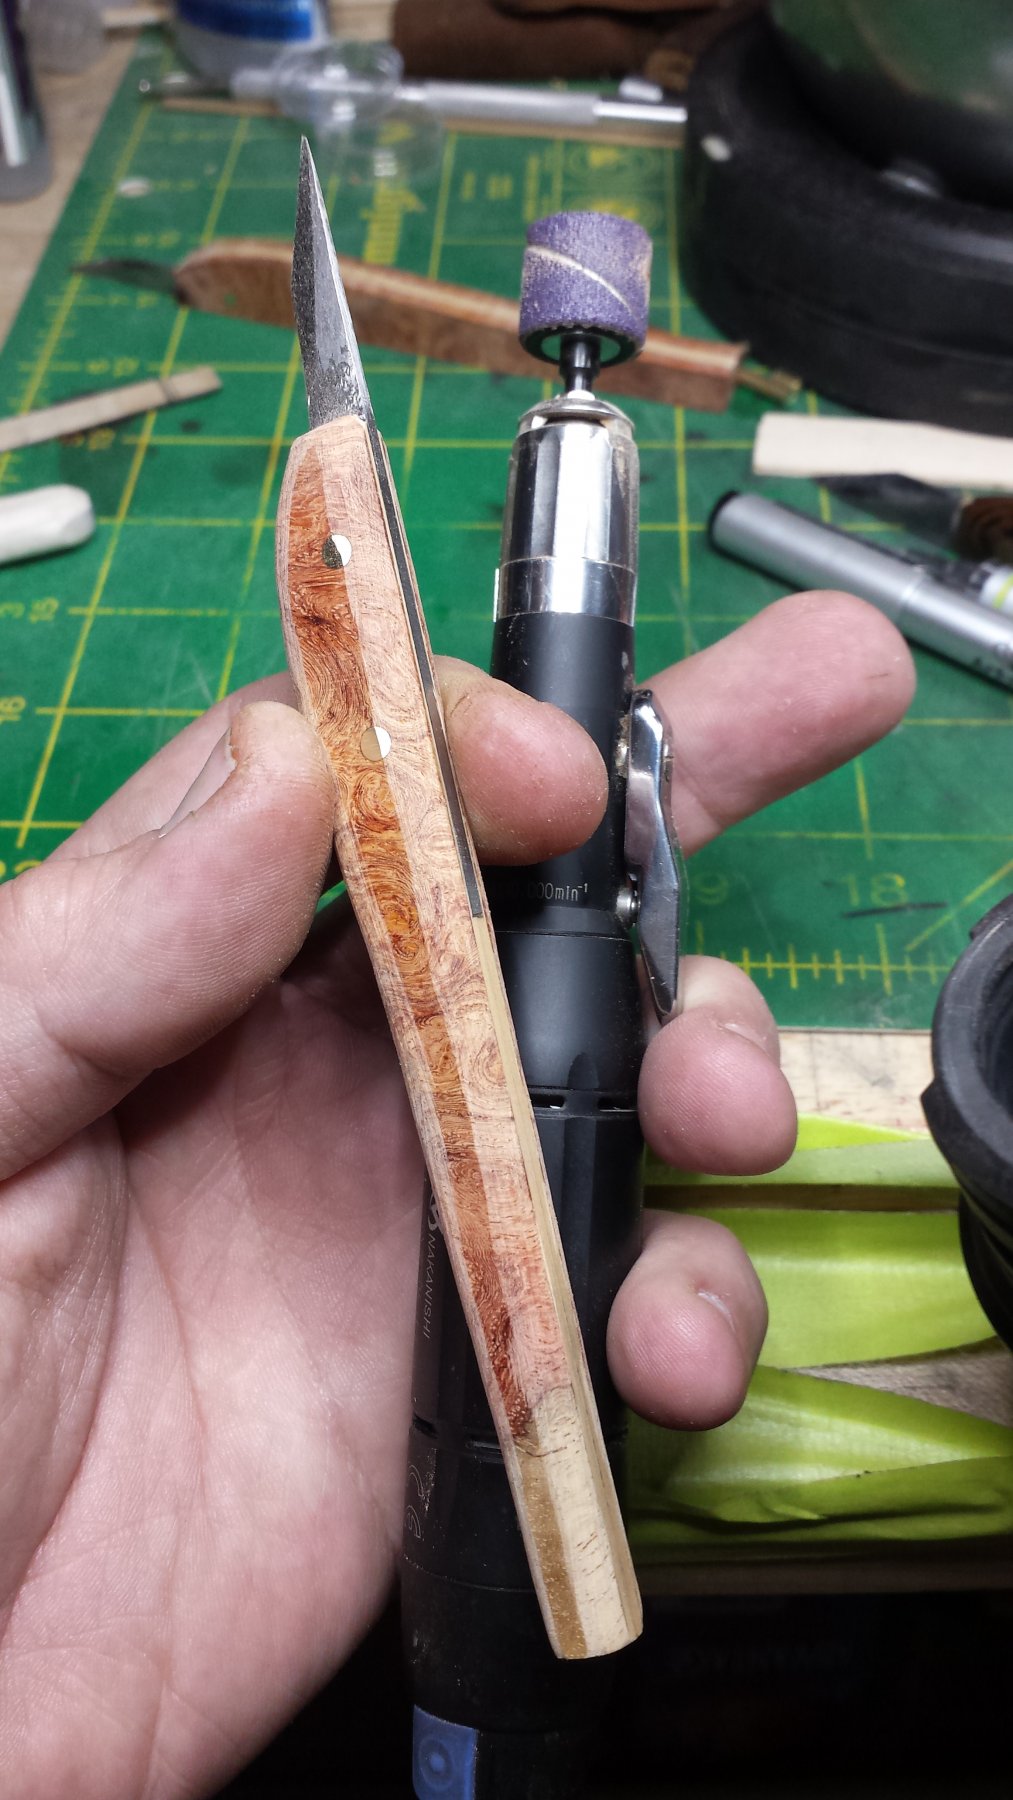
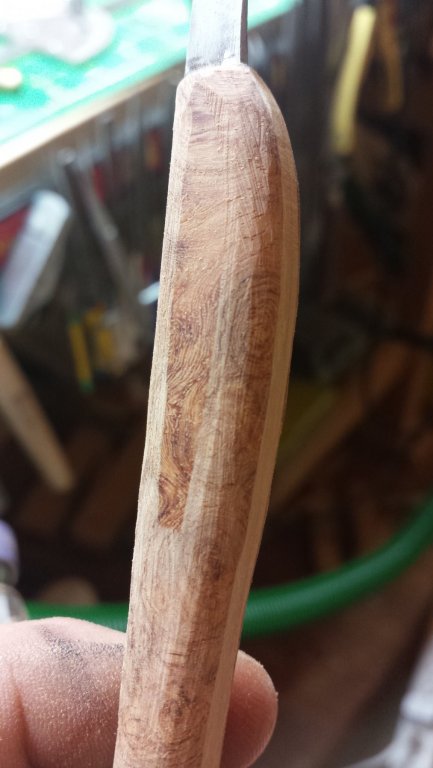
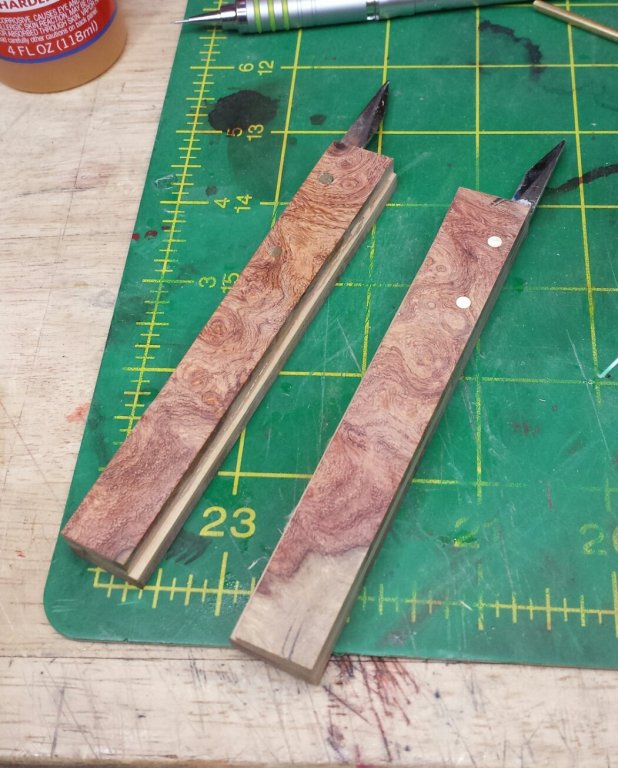
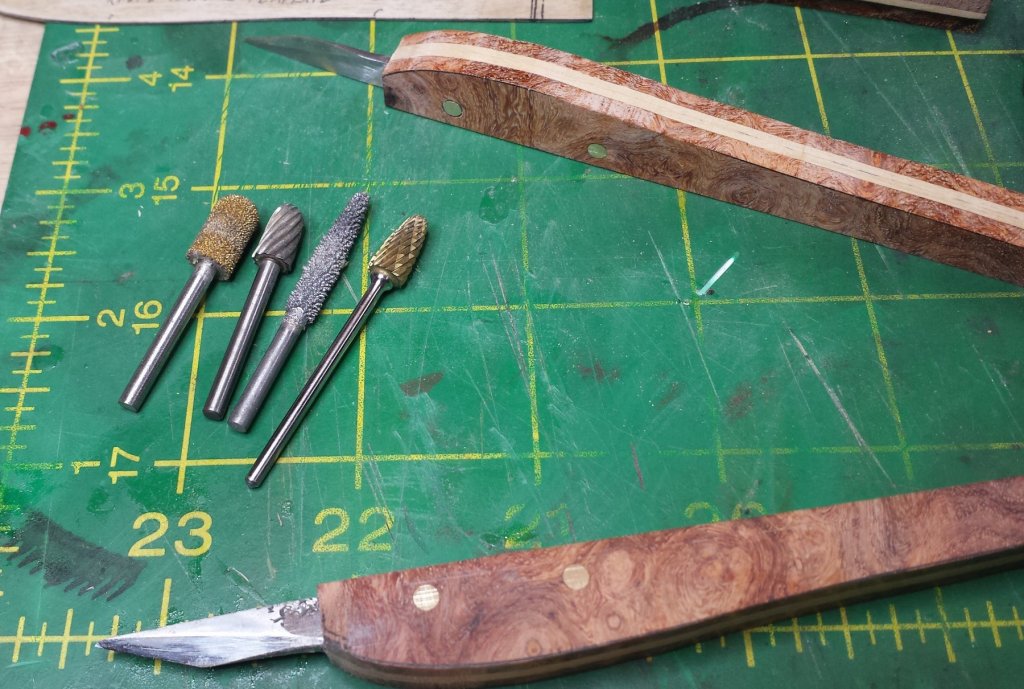
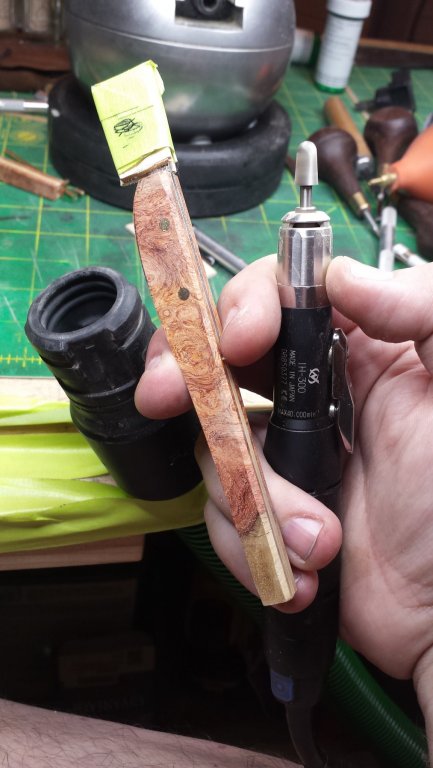
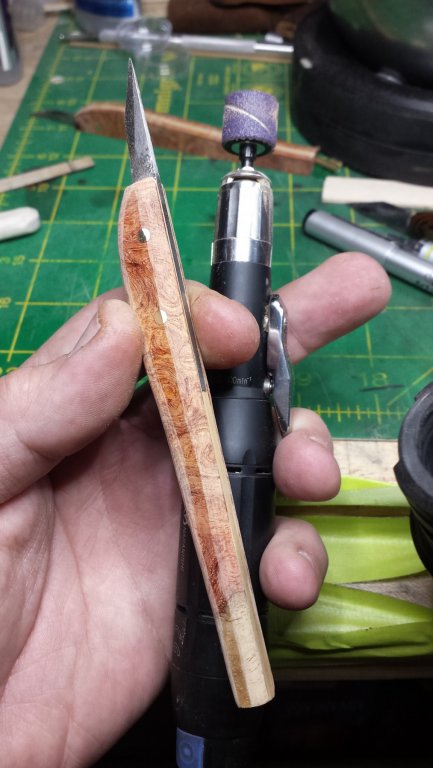
Short update, work and other issues have kept me awake and busy for almost all of the last three days. Picking up where we left off, I de-clamped the two knives and then spent the next 30 minutes on the Byrnes disc sander leveling and squaring the blade-side vertical face with the two sides. Using my big straightedge to check that the faces are flat and straight. Not really required, it's just a handle, but if I go to this effort I like to make sure it's exactly what I intended. And then we redraw the outlines of the final handle shapes and it's ready to dance on the scroll saw with an 8tpi/6R blade. I've forgotten what the 6 means but the R means the blade teeth pattern reverse below the cut. Finally looking sorta like a knife! When it comes to shaping handle, I grabbed several choices, never quite sure which will work the best. I ended up using the carbide single-cut bur. This is my sophisticated rotary-tool carving setup where I take my Festool dust extractor intake and tape it to my bench. Place it between you and what you're rotary carving and almost all the dust will go down the vacuum. If I'm working on something small I'll put a mesh over the end of the vac tube. However after doing the initial bevels I wasn't happy as even the nice sharp carbide bit was causing some minor tearing of the grain, which I didn't anticipate since the burl planed so well but there it is. So I had to switch to straight abrasives. And I decided I wanted to do a slightly different grip from my normal "pregnant snake" handle pattern, so I quickly made one out of balsa to test before committing to the real handles. And here a little test-driving. Whenever I catch up on sleep and I get a chance to work on them again I hope to get to the initial finish stage, which will be soaking the handles in thin CA.


- 714 replies
-
- 11
-
-
- lady nelson
- victory models
- (and 1 more)
-
Wood I guess on the handle? Because the usual is rattan wrapping and that takes zero time to remove. I've seen some with wood handles similar in shape to their sword grips, fairly large handle that is elliptical from the top view but straight from the side view. It should be easy to remove, the handles of Japanese tools are considered temporary, to be replaced whenever needed/wanted.
- 714 replies
-
- 1
-
-
- lady nelson
- victory models
- (and 1 more)
-
More tools - Luthier, jeweler, fly-tying
vossiewulf replied to vossiewulf's topic in Modeling tools and Workshop Equipment
Although there are larger more expensive sets, in this case you should be completely covered by a 9 piece $15 Swiss set that is .9mm - 2.3mm. So this is more of a minor flesh wound However since they're only $3-$5, I'd also add a couple bigger ones between 4mm and 10mm so you can rapidly finish even 1/4" ends -
Steps of the build where you have to fit and trim the same pieces a zillion times can be very tedious, or at least I think so. So I might need to take a couple of days of BTO (Build Time Off) while you finish this part. I'm pretty sure I've accrued enough days, last time I checked my contract says I get 20 days of BTO per year plus all the standard holidays- navy day, national wood day, the festival of St. Redleaf, patron saint of oaks, etc.
-
More tools - Luthier, jeweler, fly-tying
vossiewulf replied to vossiewulf's topic in Modeling tools and Workshop Equipment
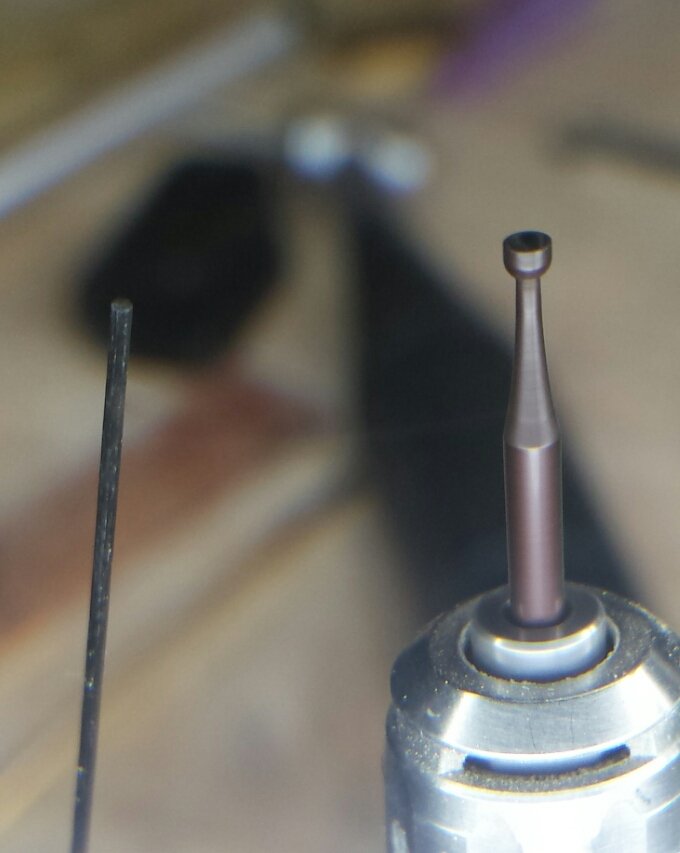
Today's episode of Tools You Need That You Didn't Know You Needed.... CUP BURS! Here's a quick description of their "official" purpose, that of deburring, rounding, and finishing soft wire ends in jewelry. However, they work just as well on wood dowels, carbon fiber, plastic, polycarbonate, pretty much anything but hardened steel piano wire. And for that, you can find cup-shaped grinding burs in many types of grit. Standard cutting-type cup burs look like this, this is on a 3/32" shank, I don't think I've seen them on 1/8" shanks but they probably exist for larger sizes. Here I will demonstrate with a piece of (I think) .035" carbon fiber rod. I've intentionally cut it leaving a sloppy bad edge. Hit it for like half a second with the cup bur though, and now it looks like this. Square, clean, with a lightly beveled edge. Perfect! Of course you can also do this with sandpaper or files, but nowhere near as consistently and ten times slower, at least. If you're cutting a wire or a dowel once a week you don't need cup burs, files and sandpaper will handle that. However, if you have eleventy thousand treenail ends to prep for insertion or you're cutting lots of wires, go get yourself a cup bur or two. Best results are with a bur only slightly larger than the work piece but in my experience you can get by with just two or three sizes, buy a set of 8 if you want full coverage, or just one that's a bit larger than the largest size wire/dowel you typically work with and make do, it will still work much better than sandpaper and files.
-
Also FYI I edited the knife process post above to add info about marking with machinists' dye and why you want to use brad points and not pilot point drill bits in wood, and added some text formatting that hopefully helps with readability. Probably not of much use to the people replying here, it's there for the less experienced people. Also also FYI, I edited this post to add more information about the more information that I added to the other post I edited.
- 714 replies
-
- 2
-
-
- lady nelson
- victory models
- (and 1 more)
-
Pthhhttthtthtttttt! I'm going to my woodworking bench, collecting all 8 sets of scissors, and then I'm going to run around the house with four in each hand!
- 714 replies
-
- 3
-
-
- lady nelson
- victory models
- (and 1 more)
-
Very nice and straight and aligned, that's a very good start, looking around its surprising how little attention some people put to this crucial step. Making sure everything is aligned right at the beginning means everything else will go on without any gymnastics.
-
Oh it was just a 1/16" little hole in my fingertip, but with the fineness of the points that was reasonably deep and so at the time it was dripping all over but 30 seconds of pressure and a bit of superglue and it was all fixed. You should try your hand at it some time, making things with tools you made yourself is particularly rewarding, or at least I think so.
- 714 replies
-
- 2
-
-
- lady nelson
- victory models
- (and 1 more)
-
You're probably right. I've been discussing it with wefalk in another thread, and ordered some eye shadow application sponge makeup brushes and am going to try that to apply India ink. We'll see how that works.
- 714 replies
-
- 2
-
-
- lady nelson
- victory models
- (and 1 more)
-
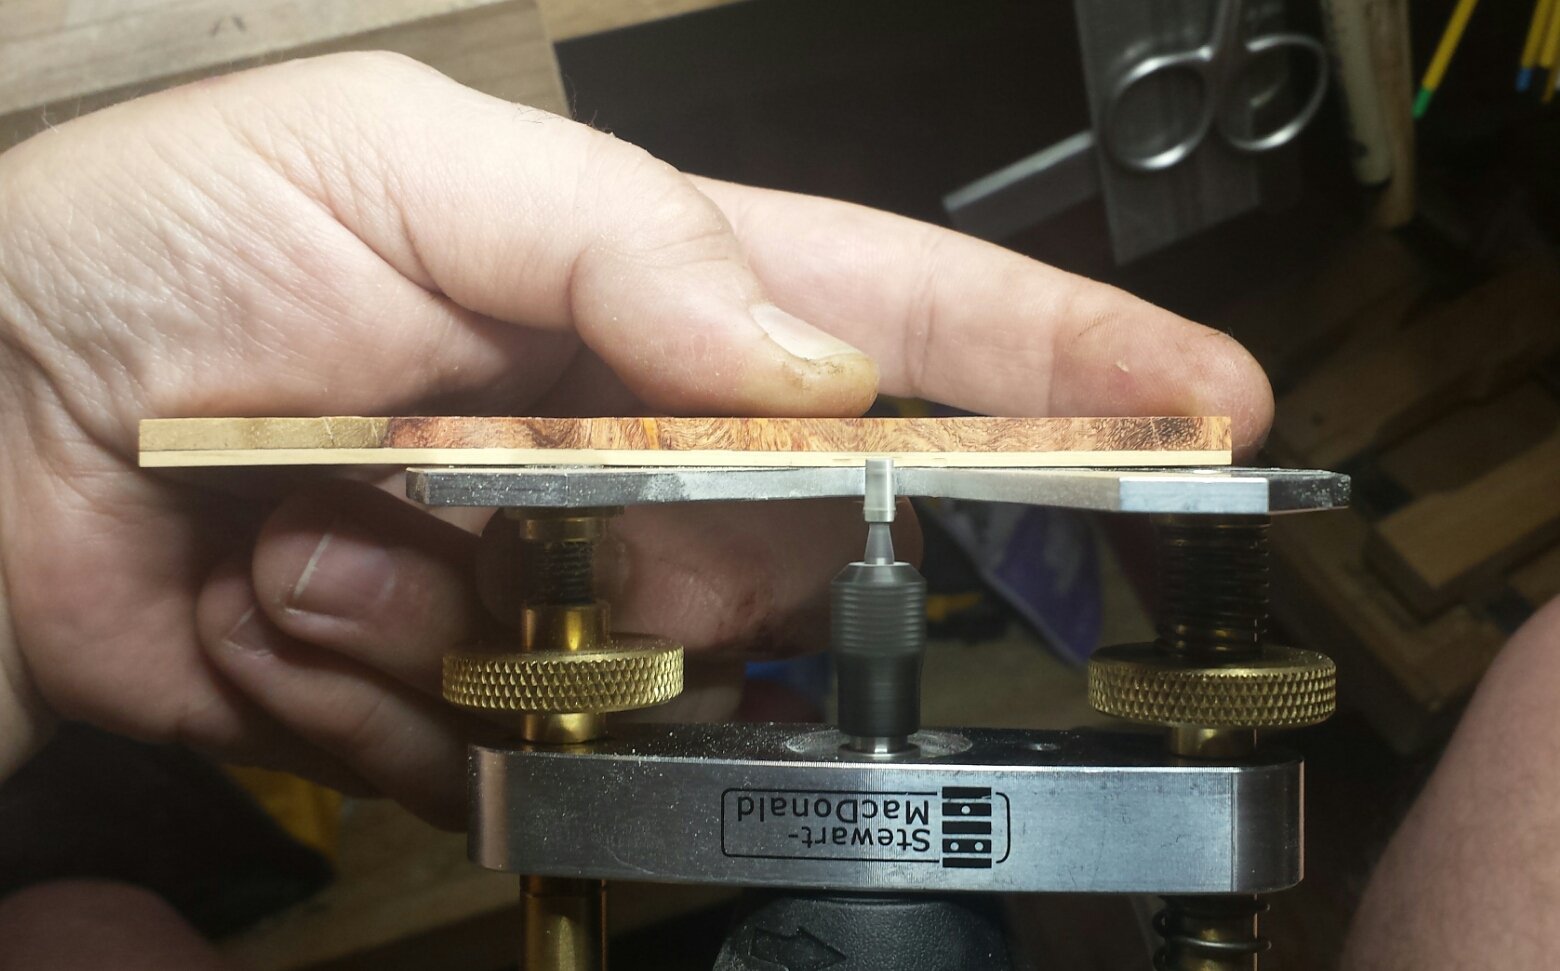
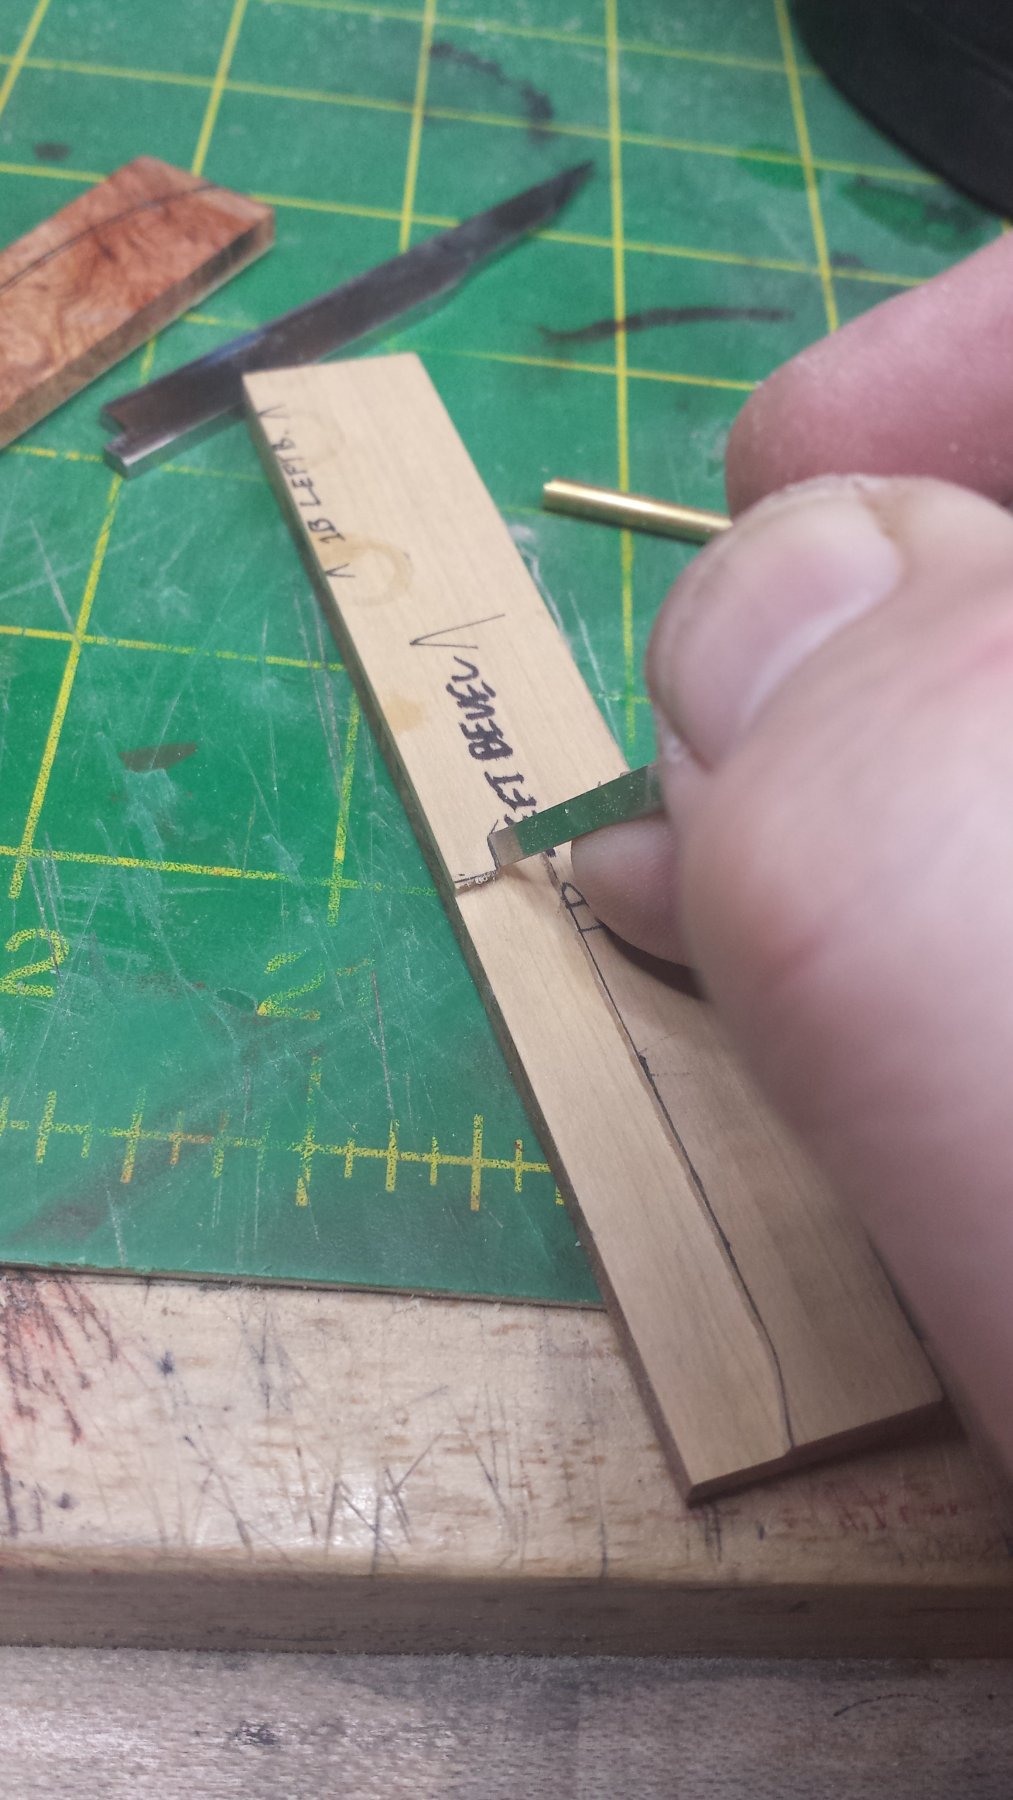
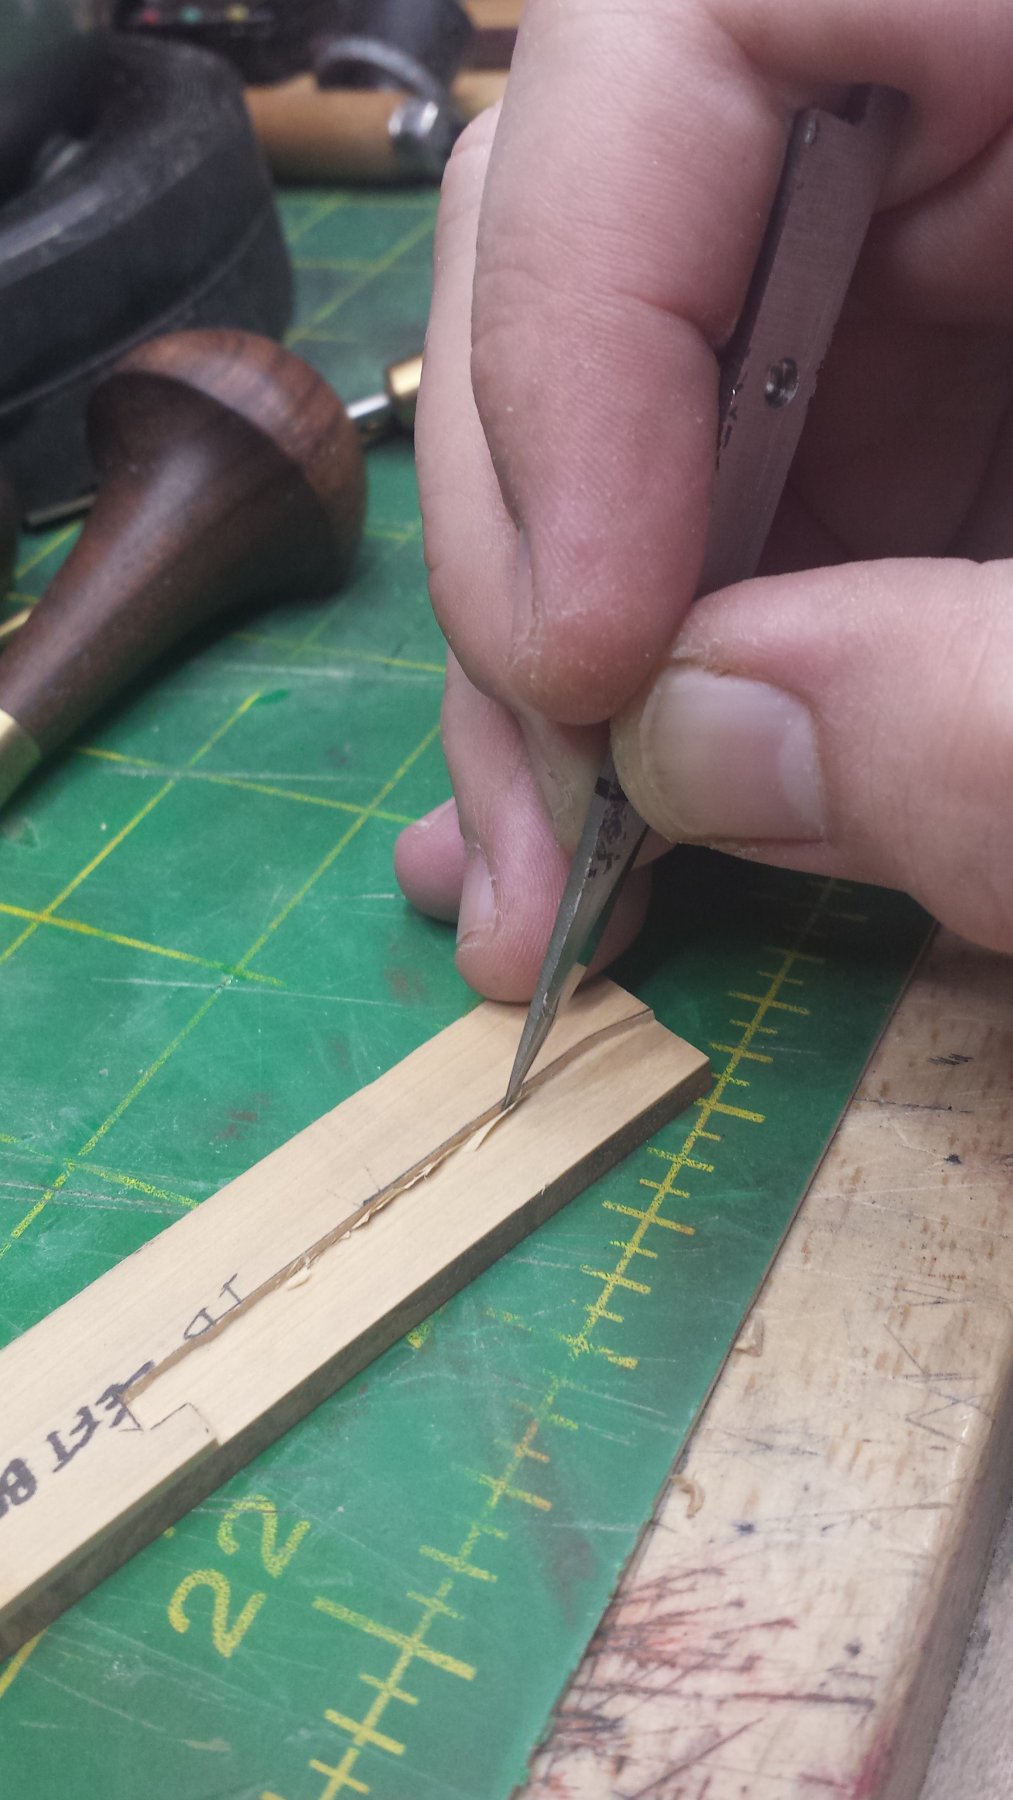
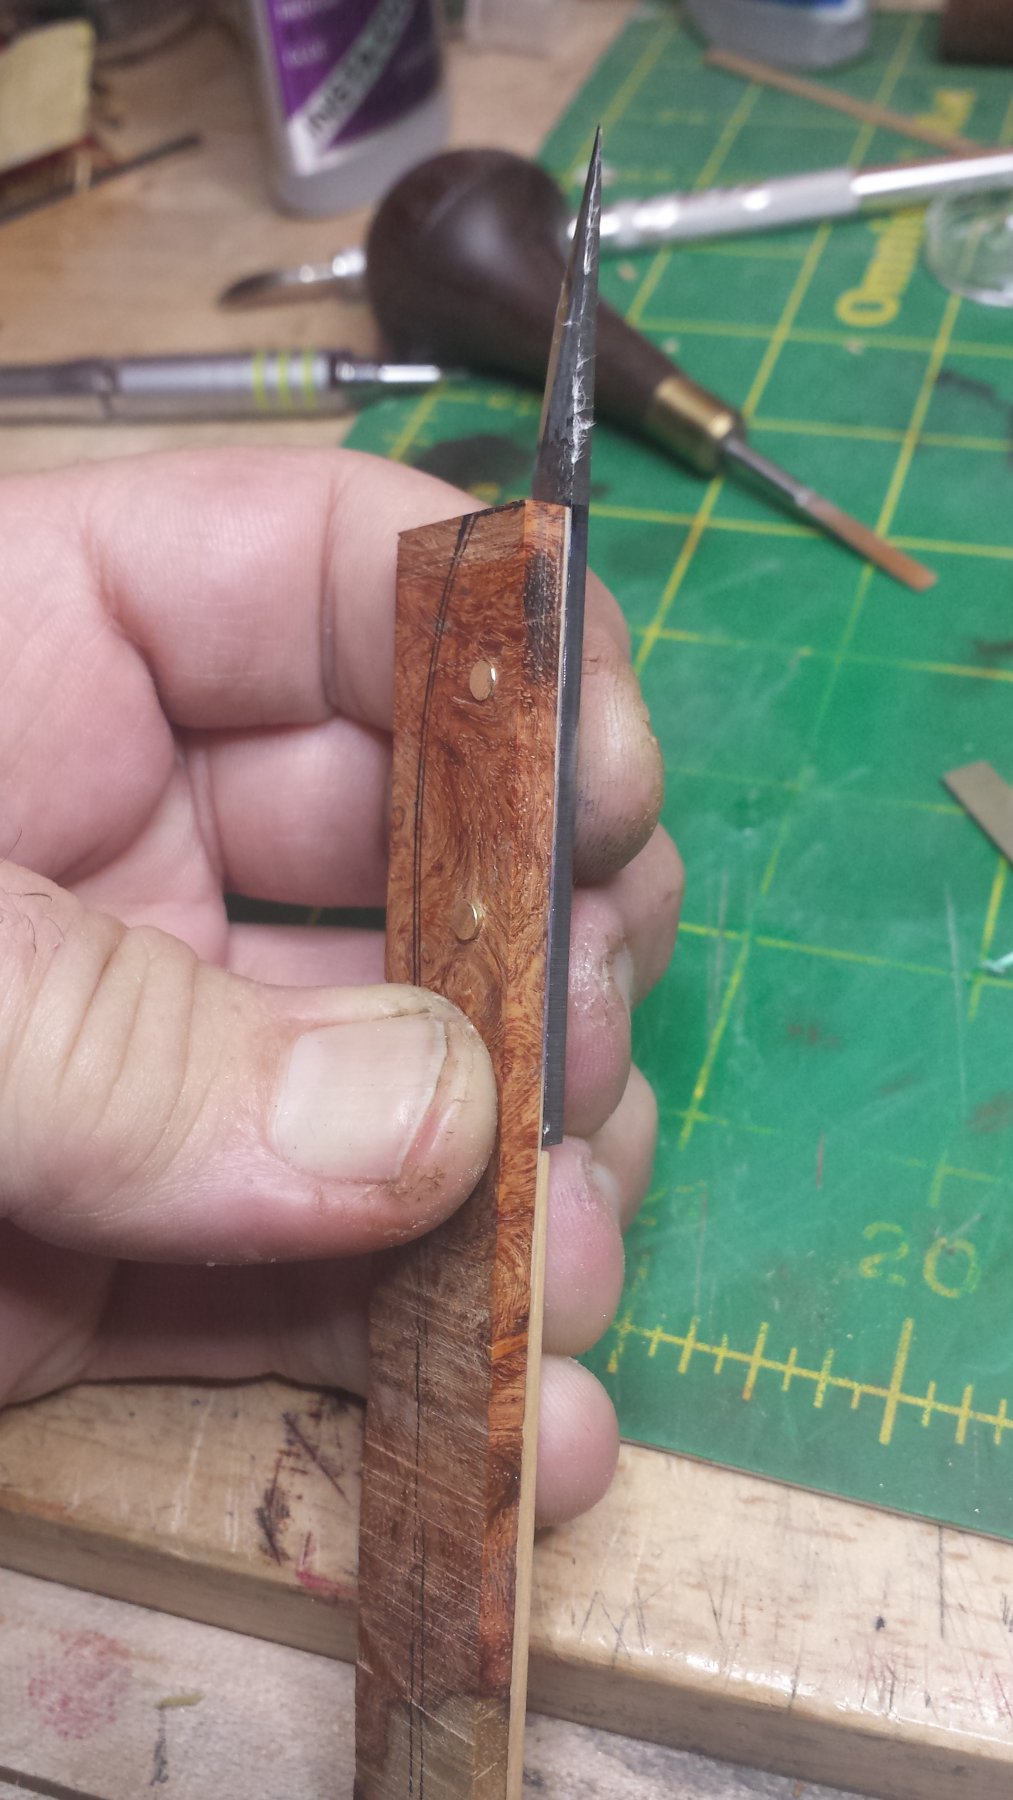
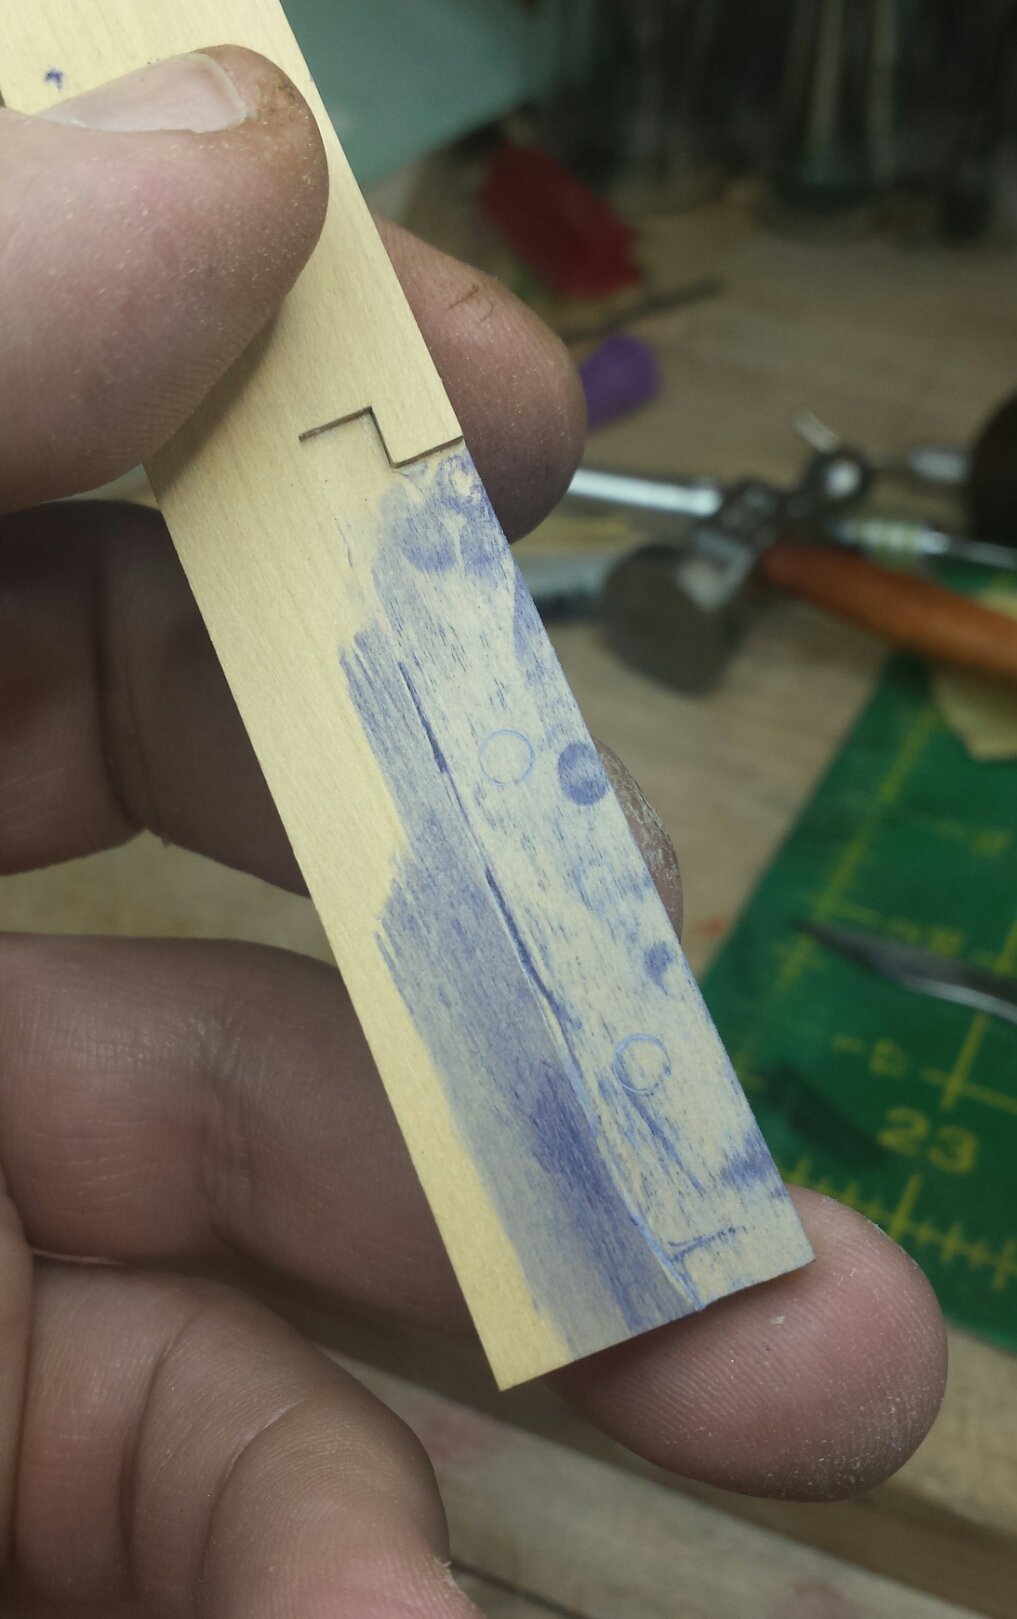
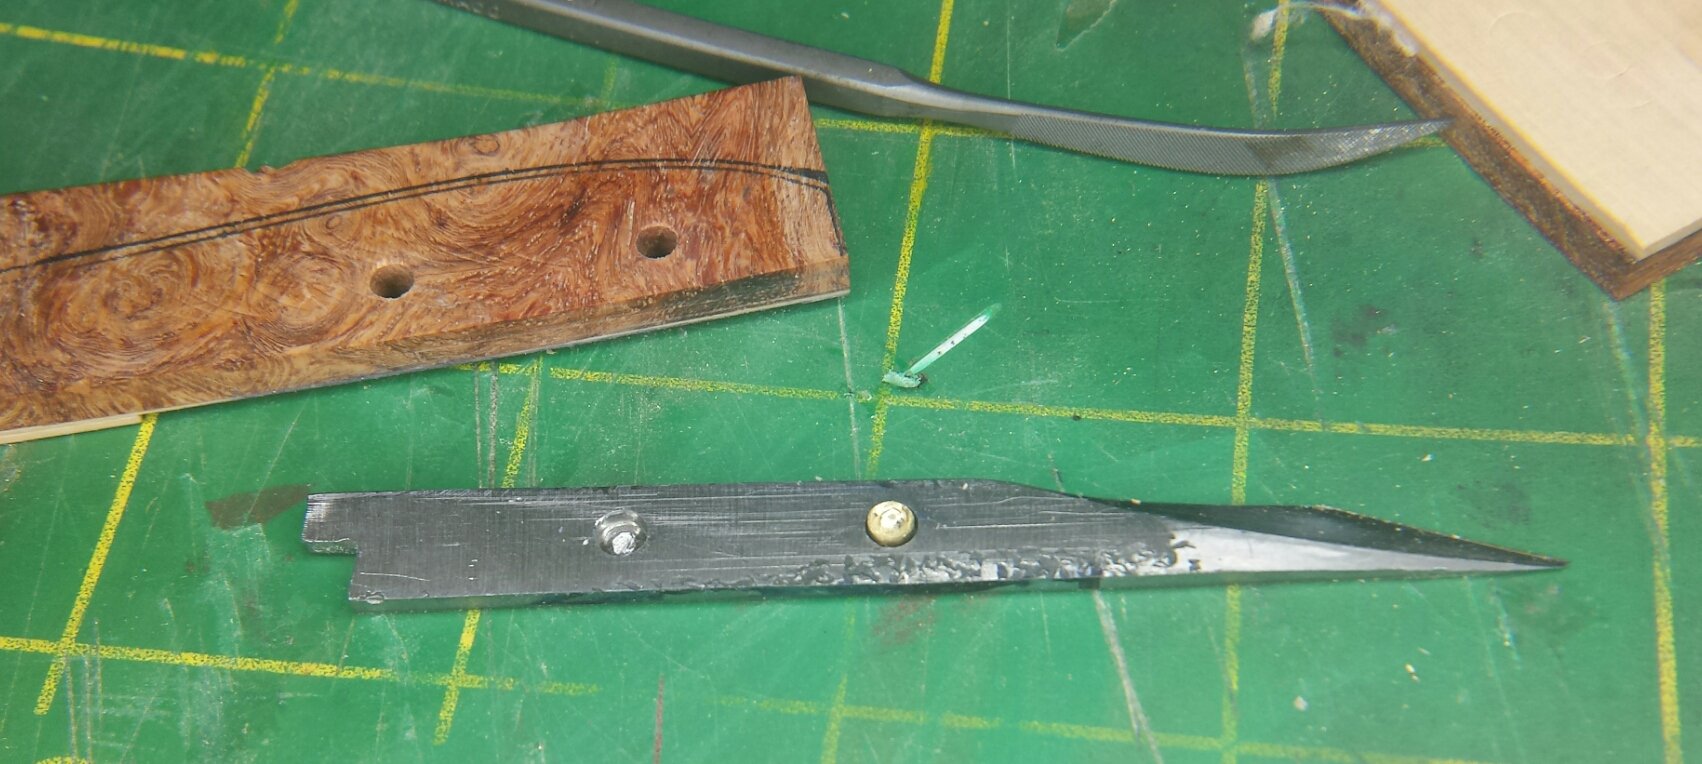
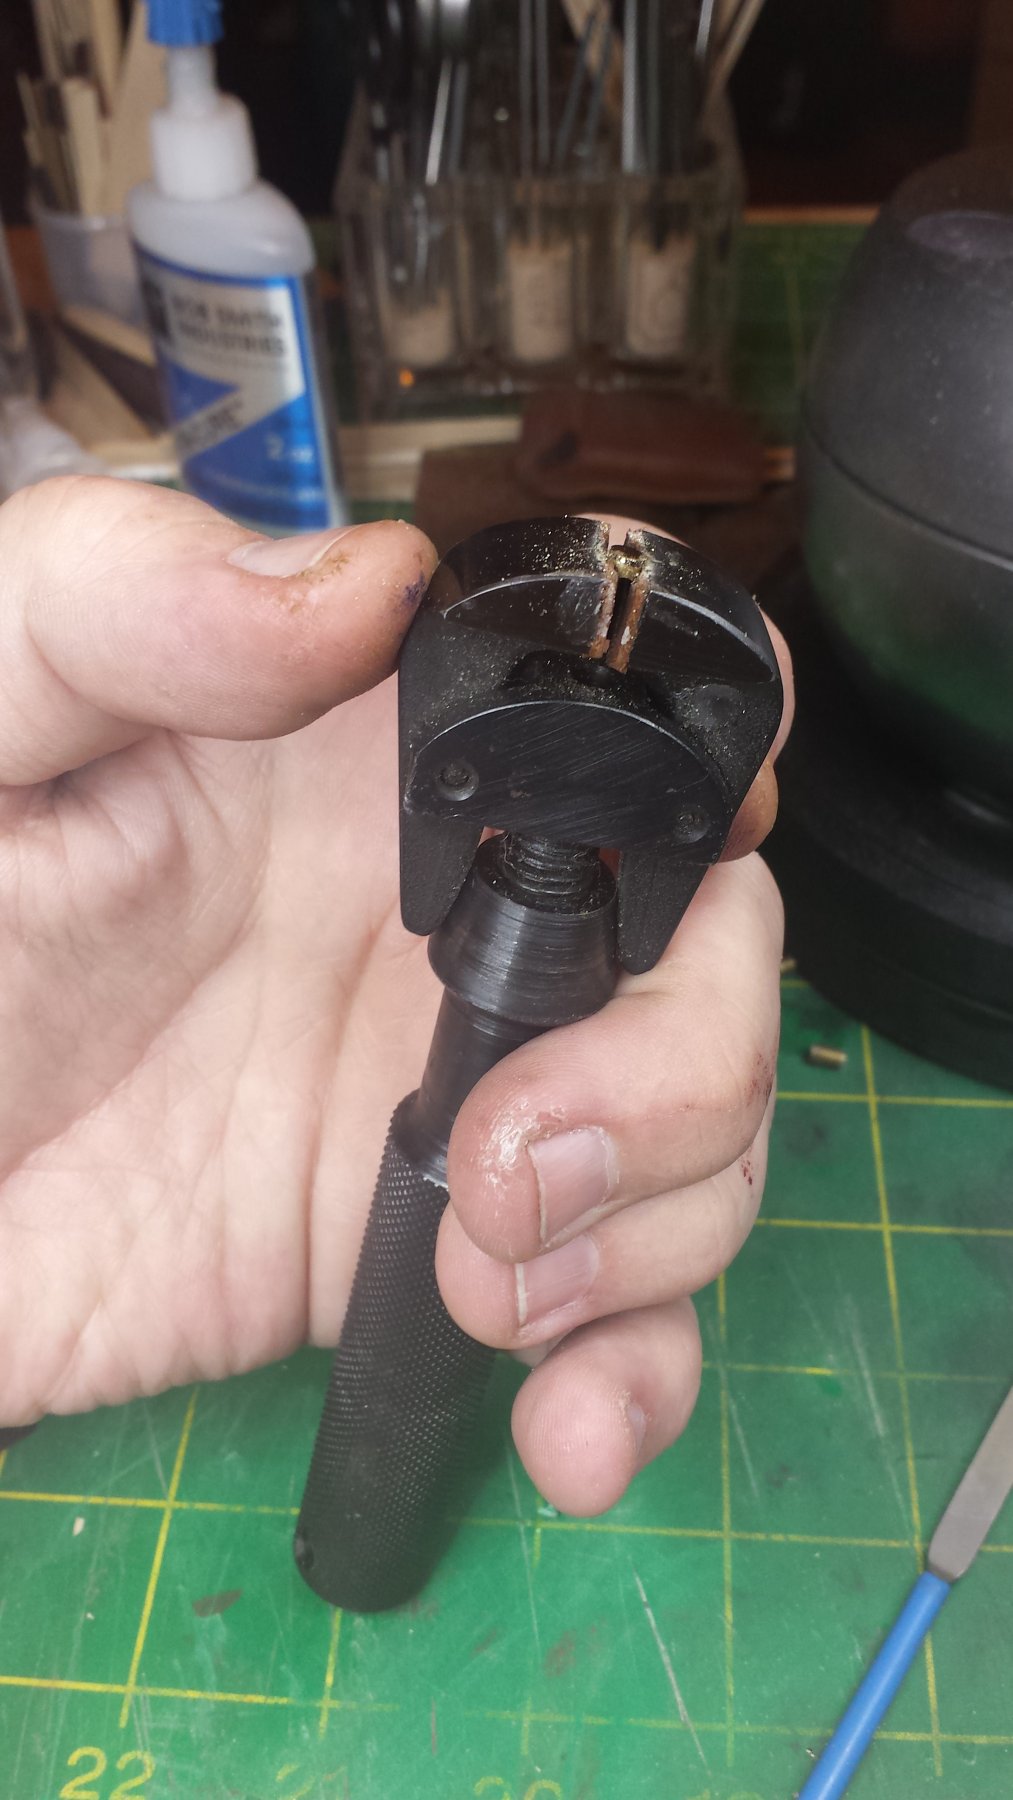
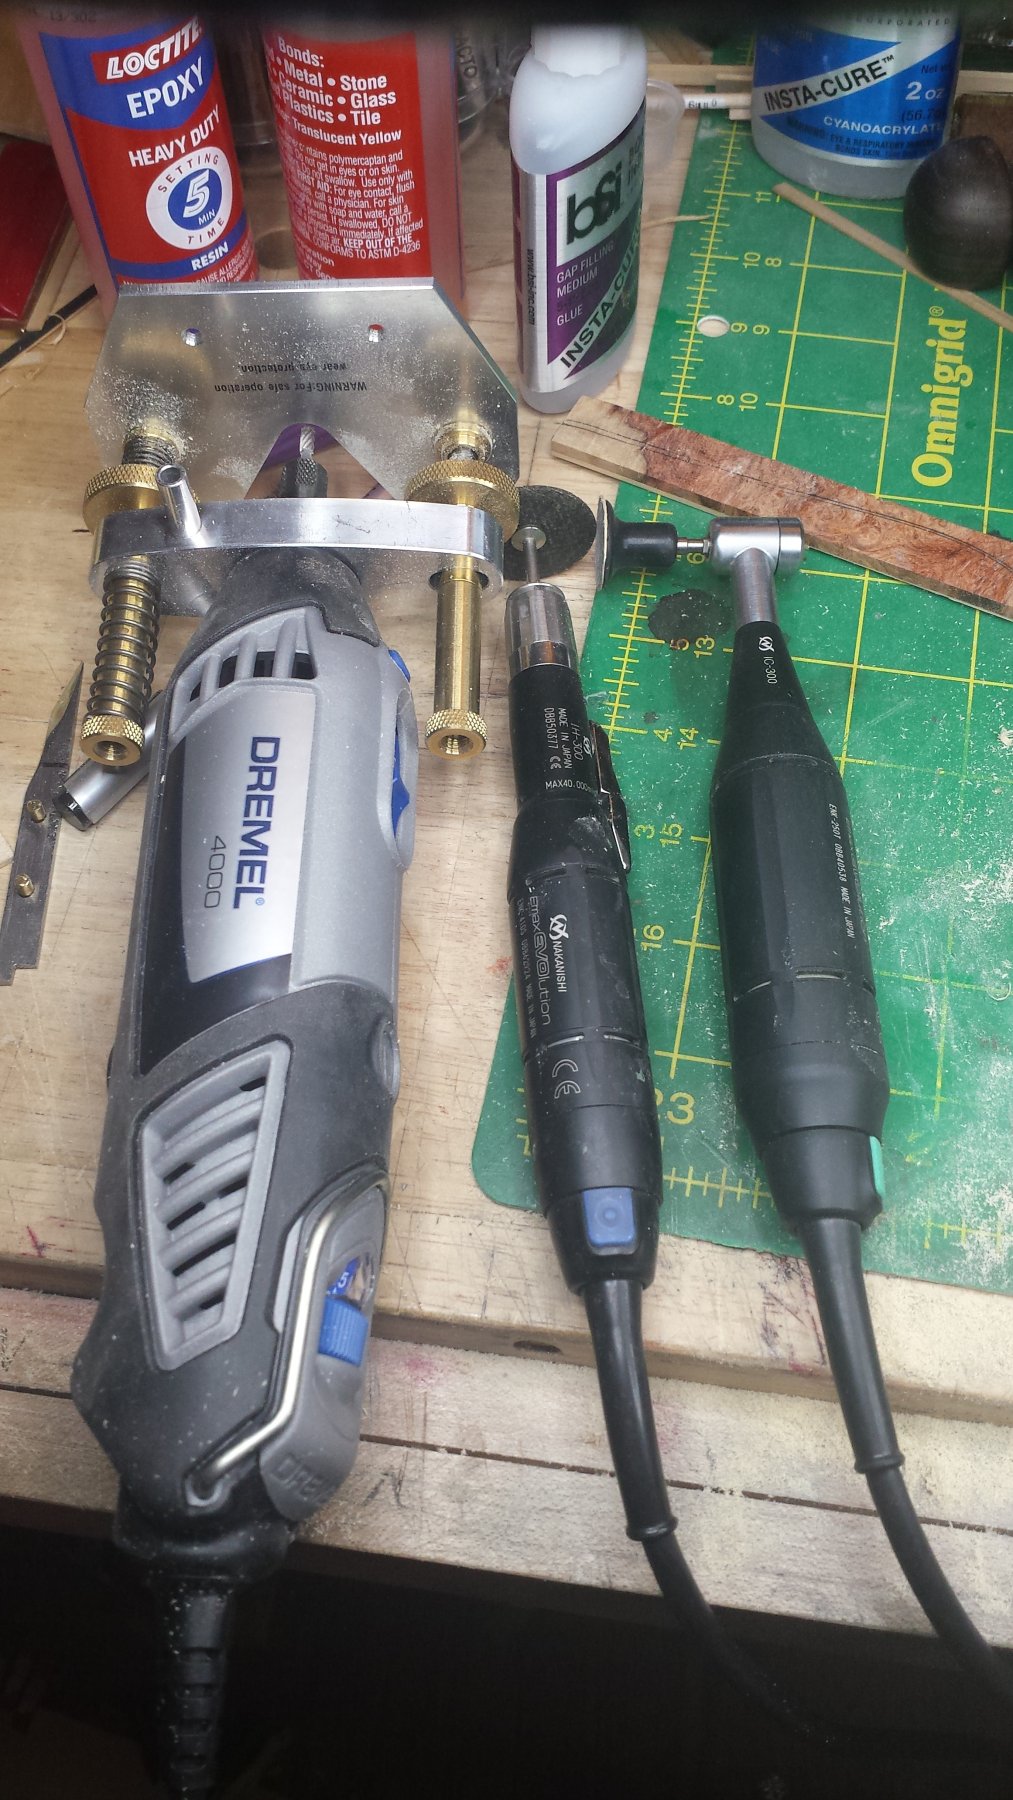
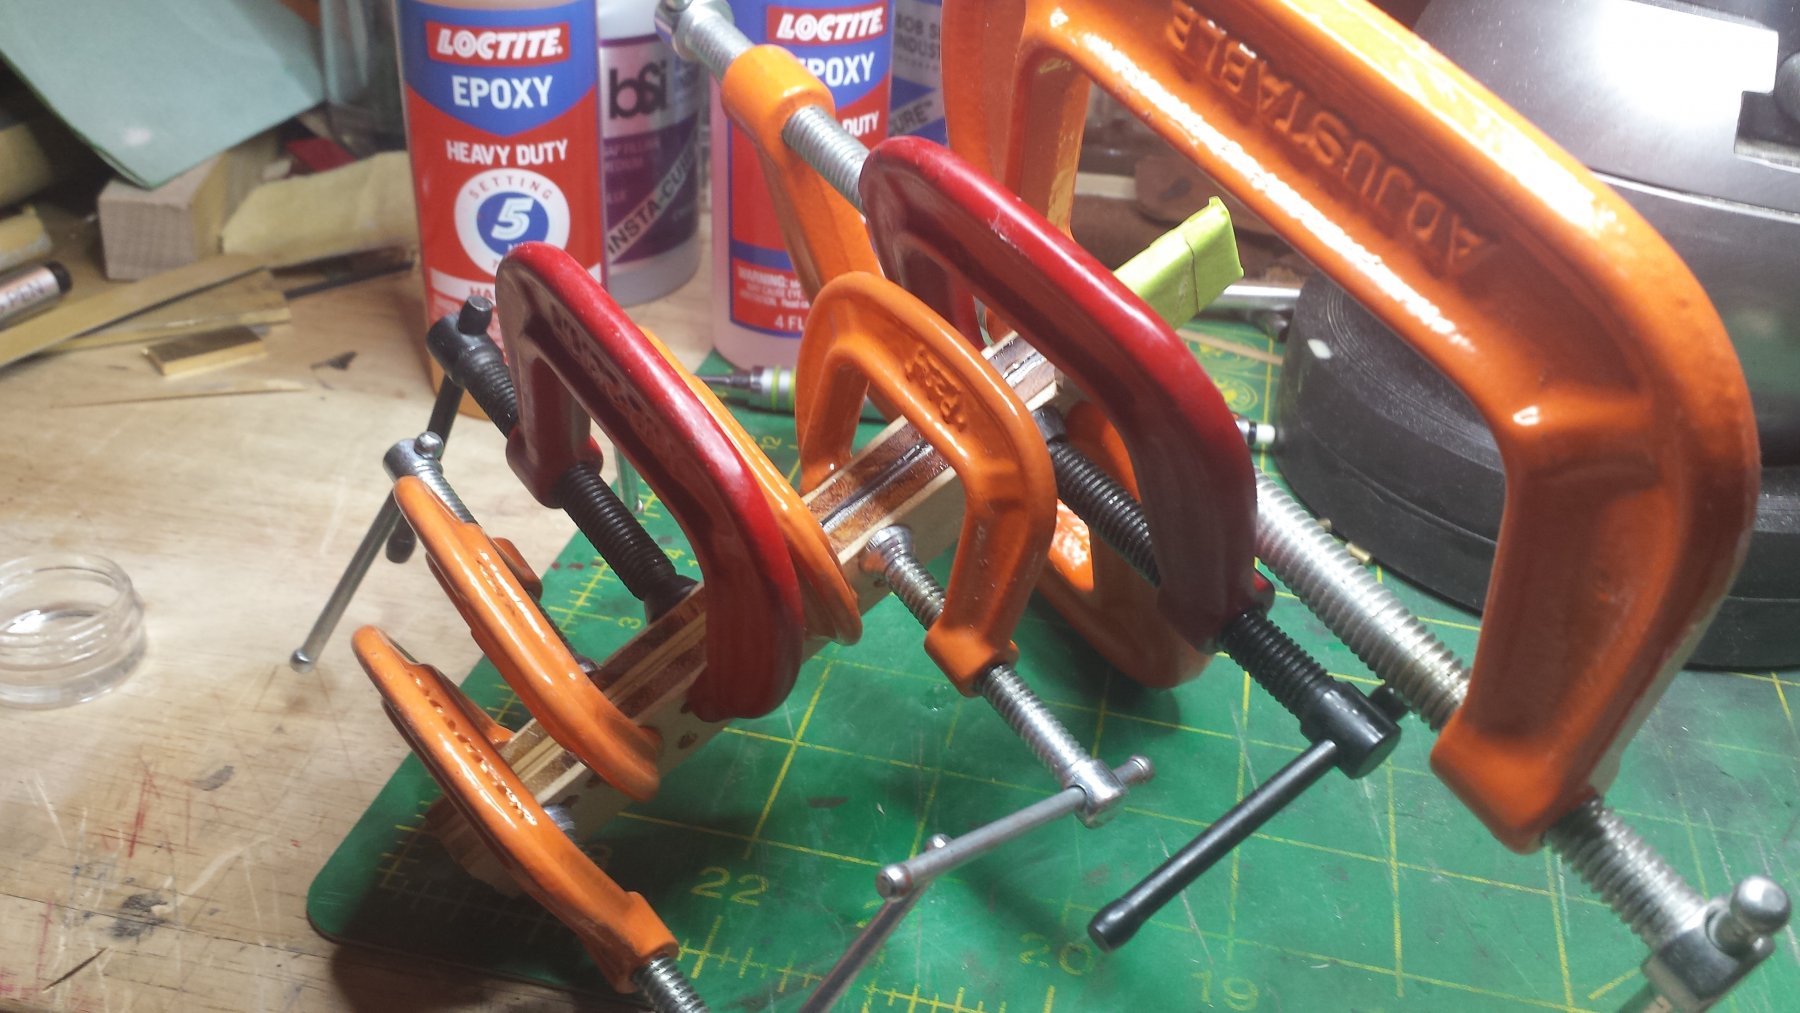
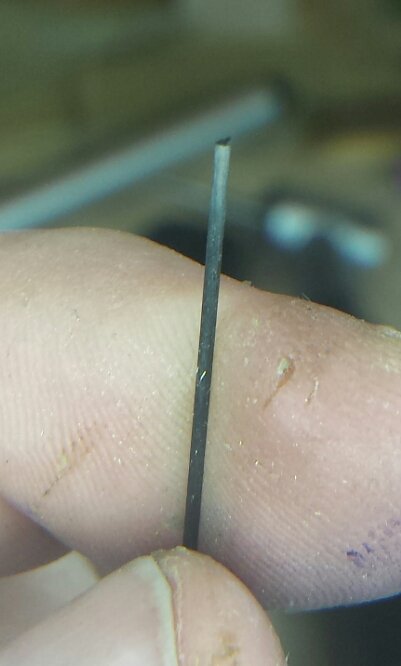
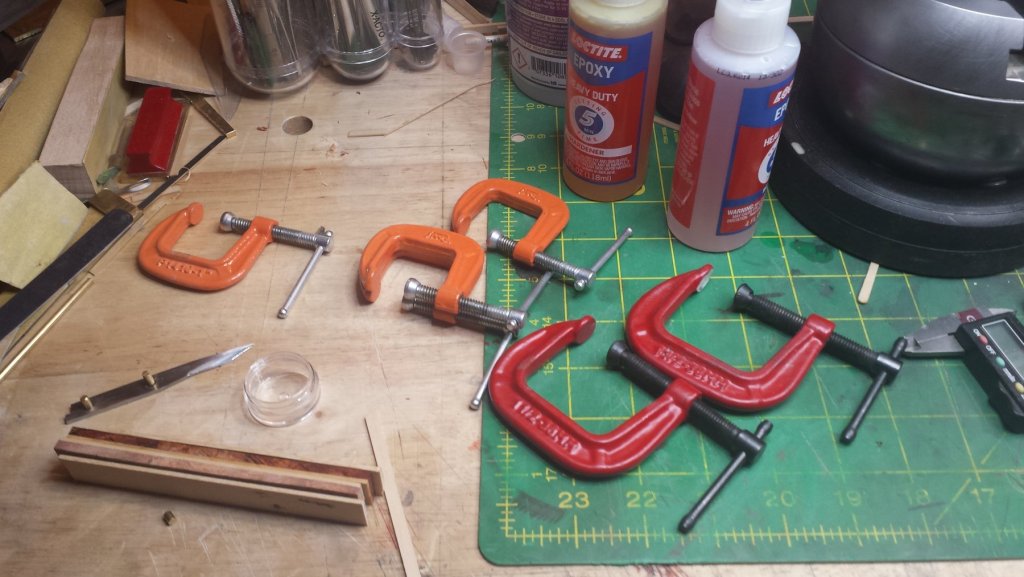
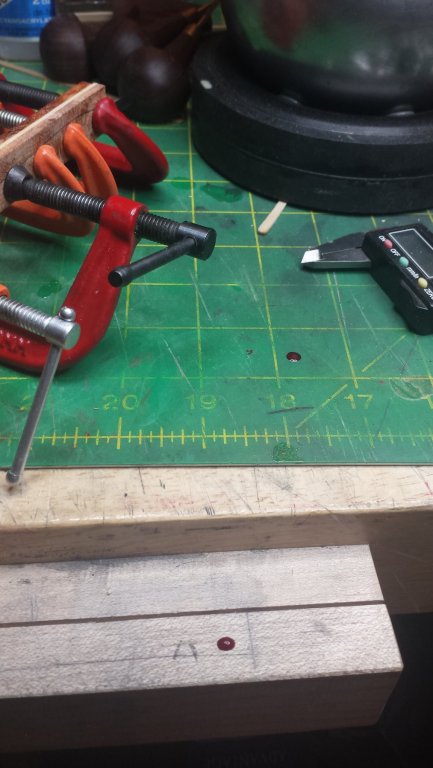
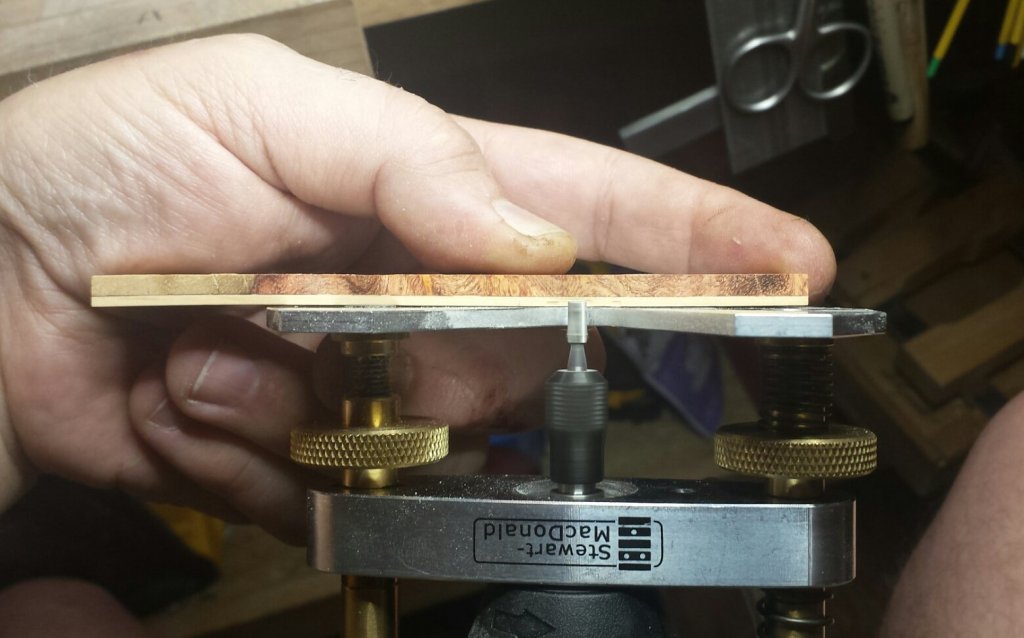
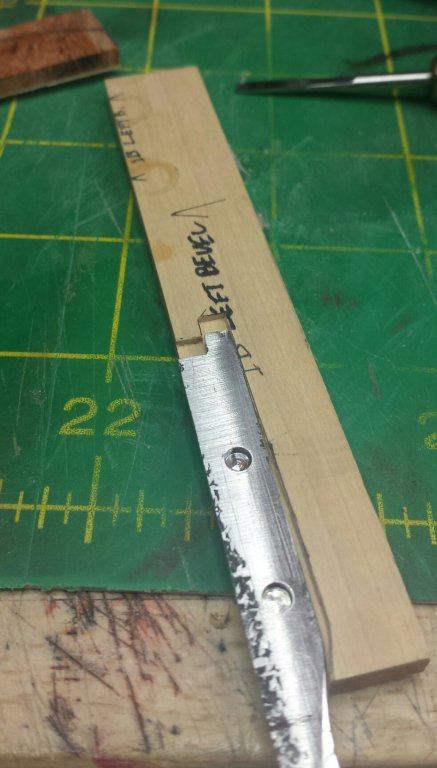
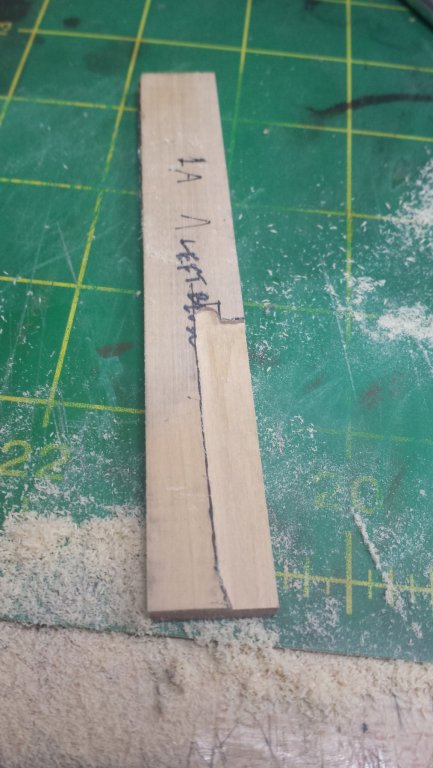
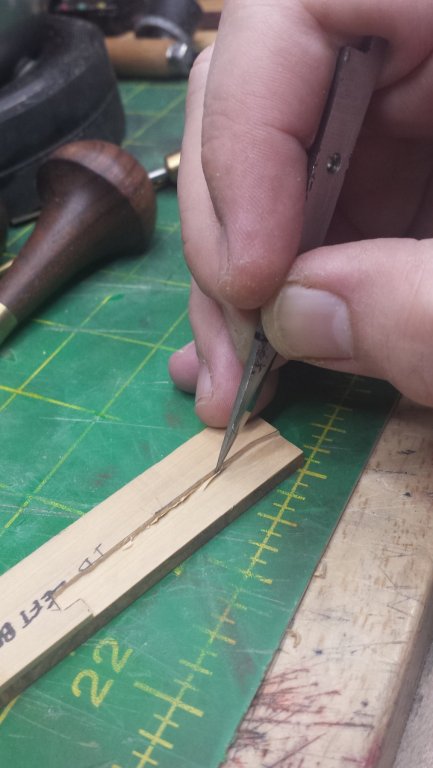
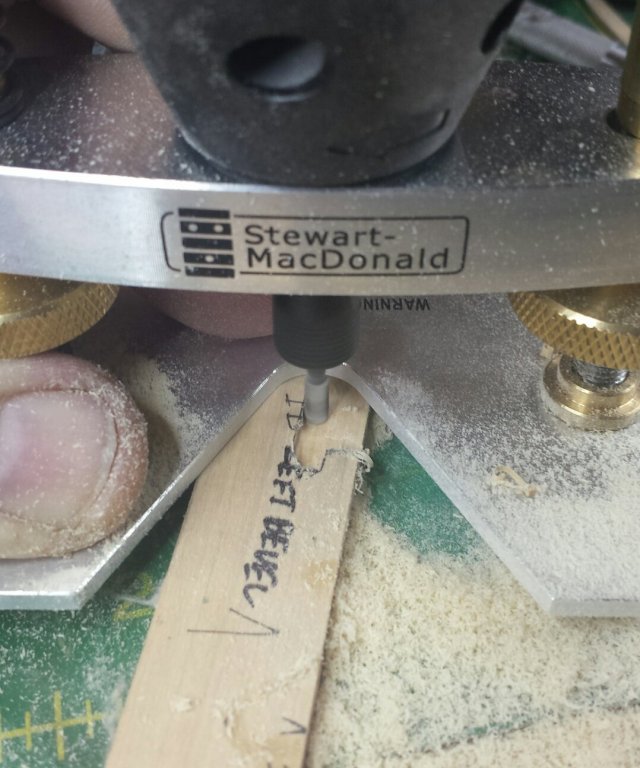
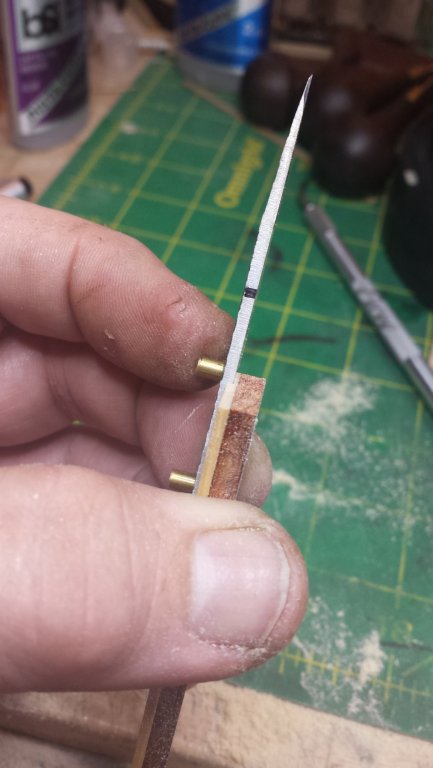
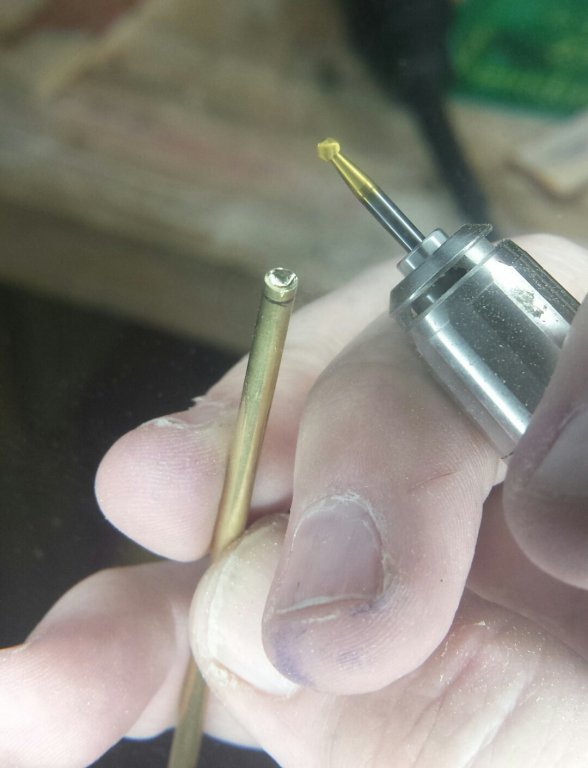
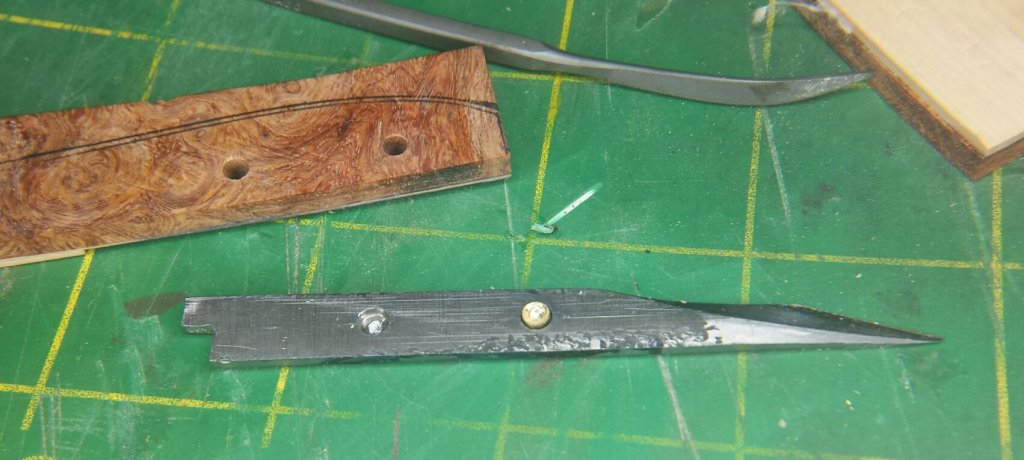
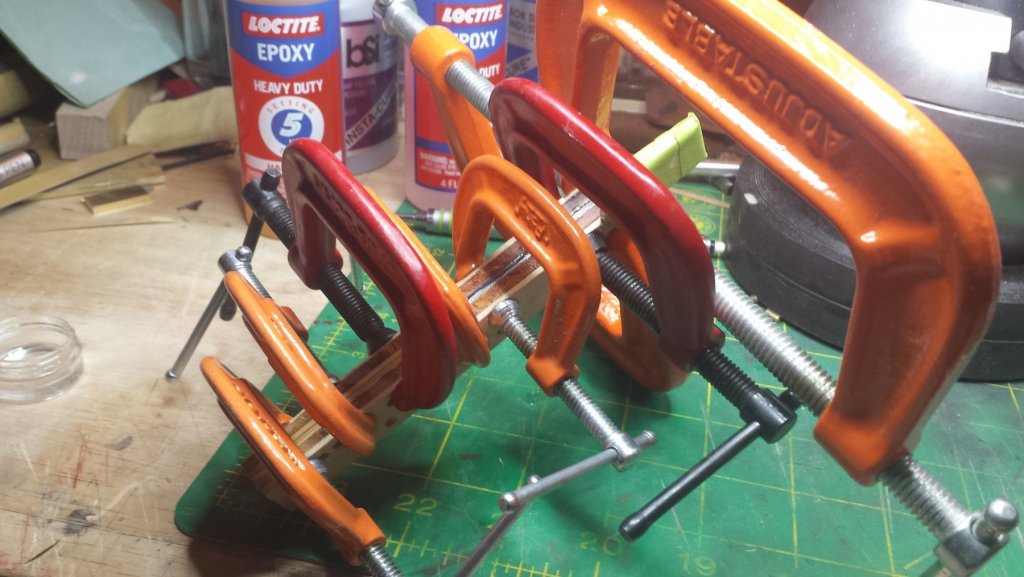
I'm sure I'm understating a little when I say that must be frustrating. And odd, here shipping costs worldwide have become so low that I order from all over, only rarely do I see shipping costs that make a purchase not worthwhile. That's a huge disparity and I don't know why it would be so different. So we have everything ready to go, clamping pads and all the clamps laid out and set to require just a half turn to tighten, epoxy and mixing sticks, nice and orderly like it should be before gluing up something like this. Note that this is not something for spring clamps. Something that will be stressed like a knife needs totally reliable glue joints and that means epoxy and serious squishing pressure. So everything goes smoothly right? Yeah, not so much. I should be using nice slow 60 minute epoxy but didn't have any on hand and I was too impatient to wait, figuring I'm a super cool knife making kind of guy and it'll be fine. But it makes you move fast and that's never a good thing with knives. Second, I had an oversight as to how these are different from other knives I've made. In those cases, you make the handles slightly too wide for obvious reasons, and therefore the brass pins which go all the way through in those cases can be slightly recessed, and clamping is straightforward. Because the pins on these knives are only on one side, I had left them long. And I didn't want to cut them down at that point because there is no extra width on the handles, the piece of amboyna burl I had was just barely enough. So I get glue on and the knife assembled and reach for the clamping pad, a piece of basswood same size as the handle, and #%#^$#$^ well that won't work, great, ok remove the one on that side and then just use one but wait while thrashing with moving it around let's stab our finger reeeel good on the super sharp point and start dripping blood all over. Well that's just oodles of help. Dealing with that the other clamping pad fell off the bench and I said screw it and just clamped straight on the handles. That won't make the no extra material problem any easier. So anyway here's the process with the other knife, which went slightly better. I'm using this precision Dremel router base to do the rabbets. You could do it on a mill or even a drill press considering you're taking off .040" on each side. I decided to use this as I bought it to do inlay but haven't done any with it yet so wanted to fiddle around with it and figure it out. It works fine, it's a bit fiddly but you can control depth down to thousandths of an inch without too much difficulty and I managed to keep it stable on these narrow handles, although the size of the Dremel didn't help. Being used to micromotors it's like having some finish nails to tap in and someone hands you a giant cartoon hammer. They've actually gotten bulkier AND louder, that's some fine rotary tool engineering there, Lou. Look at the Otto Frei basic micromotor kit. At $180 it's not much more than one of the big Dremel packages. Sigh. Actually not sure that's a good idea, it's not even brushless. The Marathon is probably the best entry level choice but it's $330 for the kit, hardly a minor investment. Demonstration of the point. Besides the size, the other huge advantages are they are an order of magnitude quieter with a similar reduction in vibration. Here I am testing the depth. BTW, Important Point, this is not a plunge router it's an inlay router. That means for best results the depth of cut shouldn't be more than half the bit diameter and you should be going at max RPM for the Dremel. For those who've never done something like this, you first remove the waste, not coming too near the edges, leave no more than half the bit's diameter. Then go back with the bit not working nearly as hard which means you don't have to push as hard, and therefore it's easy to trim right up to the edges. Another Important Point is to always cut against the rotation of the bit. The other way is called climb cutting and it is not good for accuracy. And we end up with something like this. Just need to clean out corners and trim the lines just a bit. And it's fitting to use him to make his new home. And we end up with this. And looks good depth-wise. Next I made this, because another thing that didn't go well on the first knife was the front brass pin hole was quite a bit off. It's much easier when the holes go through the blade, I had tried to just measure positions and got the back one exactly right but was off on the front one by more than 1/64", it will require fixing. So that wasn't accurate enough. Any guesses? I then cut it off at the line you see above, and needed to file the cut line flat. This is my hand vise, it's as the Brits say a bog-standard set of draw tongs for pulling wire through drawplates. I love the tightening mechanism, because of the cam curve you have very fine control of the pressure, although I'm not sure why considering draw tongs only need one pressure, mega-squish, but there ya go. They have a very smooth action and very fine control and can smoosh the hell out of something if you want to. And they are hefty steel, nothing flimsy here. Only thing I did was epoxy leather on either side, looking pretty worn out, need to replace them. Oh and they were like $15-$20 at Otto Frei I think. = It was so I could use the brass piece to do this- mark the two rings that are blue outlines. The blue is another good trick, I use machinist's layout dye, it comes in blue and red and they are both full-nuclear stainers. Don't get it on anything you don't want it on, only metal will survive un-blue, they are lacquers and come off metal easily with lacquer thinner. On cloth thinner just spreads it. For wood though, you can do this with any marker, although you don't want to use anything that penetrates deeply. Machinists swab it on a surface - it dries in seconds - and then use a hardened scribe to draw lines, the bright metal contrasts extremely well with both the blue and red dyes and good scribes cut very very fine lines. On wood I do the exact opposite, I wiped it on, used my little brass piece as described below to punch the circles in the two correct spots, and then I sand off the dye. It's unlikely you will lose more than .001" to do this, as long as you're reasonable and use 220 or 320 grit. And it doesn't need to be perfect or complete, as you can see with just a bit of sanding what you end up with are perfect little thin-line circles that make it extremely easy to center your bit. Also, if you're drilling wood, use the correct bits that are carefully engineered to cut the best and cleanest holes in wood - brad point bits. Pilot point drill bits are specifically designed to cut metal. They'll drill wood of course, but require a center punch to keep them from wandering, tearout more, and generally cut much less clean and very un-round holes than brad points. Buying a set is a one-time purchase, ship modelers don't drill anywhere close to enough holes to dull them. Well except for member Gaetan maybe, the size he uses for treenails probably has been replaced once or fourteen times. That's the one disadvantage of brad points, good luck resharpening them, whereas pilot points are pretty easy to sharpen. Dull brad points get recycled or made into something else. The center point will not wander, is easy to locate, and the side spurs cleanly sever the wood fibers at the edge of the hole before the drill edges proper remove the waste. So my little brass piece is a transfer punch, used to copy a hole's location to another piece to be drilled. The ones you can buy transfer the center point of the hole; since making that kind required firing up the mini-lathe I opted for the inverse, and have it transfer the full circle. Here's how I did it although this is post facto as you can see I've already drilled the resulting holes. It is just tall enough to make the mark but short enough that I could assemble that side of the handle with the blade to ensure correct positioning. I then rapped it a few times with a small chasing hammer. And this time thankfully it was perfect, dead on. It looks like something from John Carpenter's The Thing. But this time all went smoothly. A measure of the clamping pressure is that on most of the clamps the basswood is crushed down to less than 1/32". As long as you're not damaging the wood of the handle there's no such thing as too much clamping pressure here.


- 714 replies
-
- 6
-
-
- lady nelson
- victory models
- (and 1 more)
-
This knife from that site is 20cm. Since you only need about 5cm for a knife you might get 4 out of that $30AUD, at least three. But they'd all be single bevel. I'd make skew like mine left and right and two more with a skew angle of only 20 degrees or so, that geometry is really good for cleaning out corners of things. That's what I'm going to do with the other two pieces I have. BTW, don't buy a Japanese pocket knife if you ever let anyone else especially children use it. For reasons not clear to me even their pocket knives are insanely sharp Rc63 steel.
- 714 replies
-
- 2
-
-
- lady nelson
- victory models
- (and 1 more)