Javlin
-
Posts
1,681 -
Joined
-
Last visited
Content Type
Profiles
Forums
Gallery
Events
Everything posted by Javlin
-
B-25 Mitchell "Meet Miss Runyon" by Javlin-HK-1/32
Javlin replied to Javlin's topic in Non-ship/categorised builds
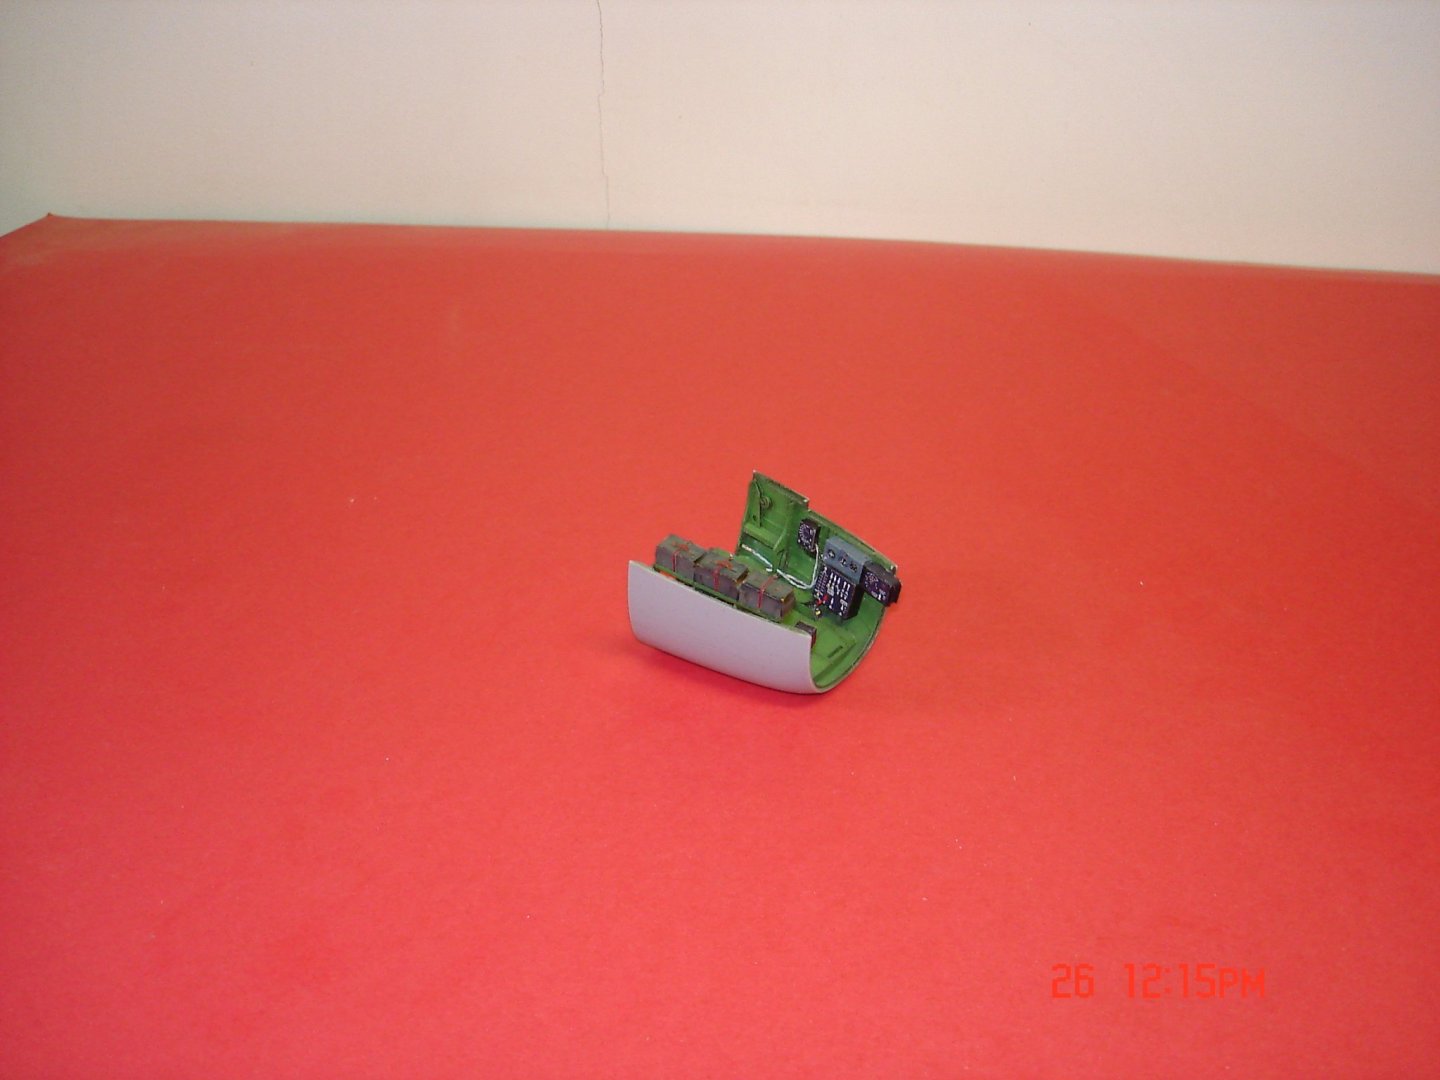
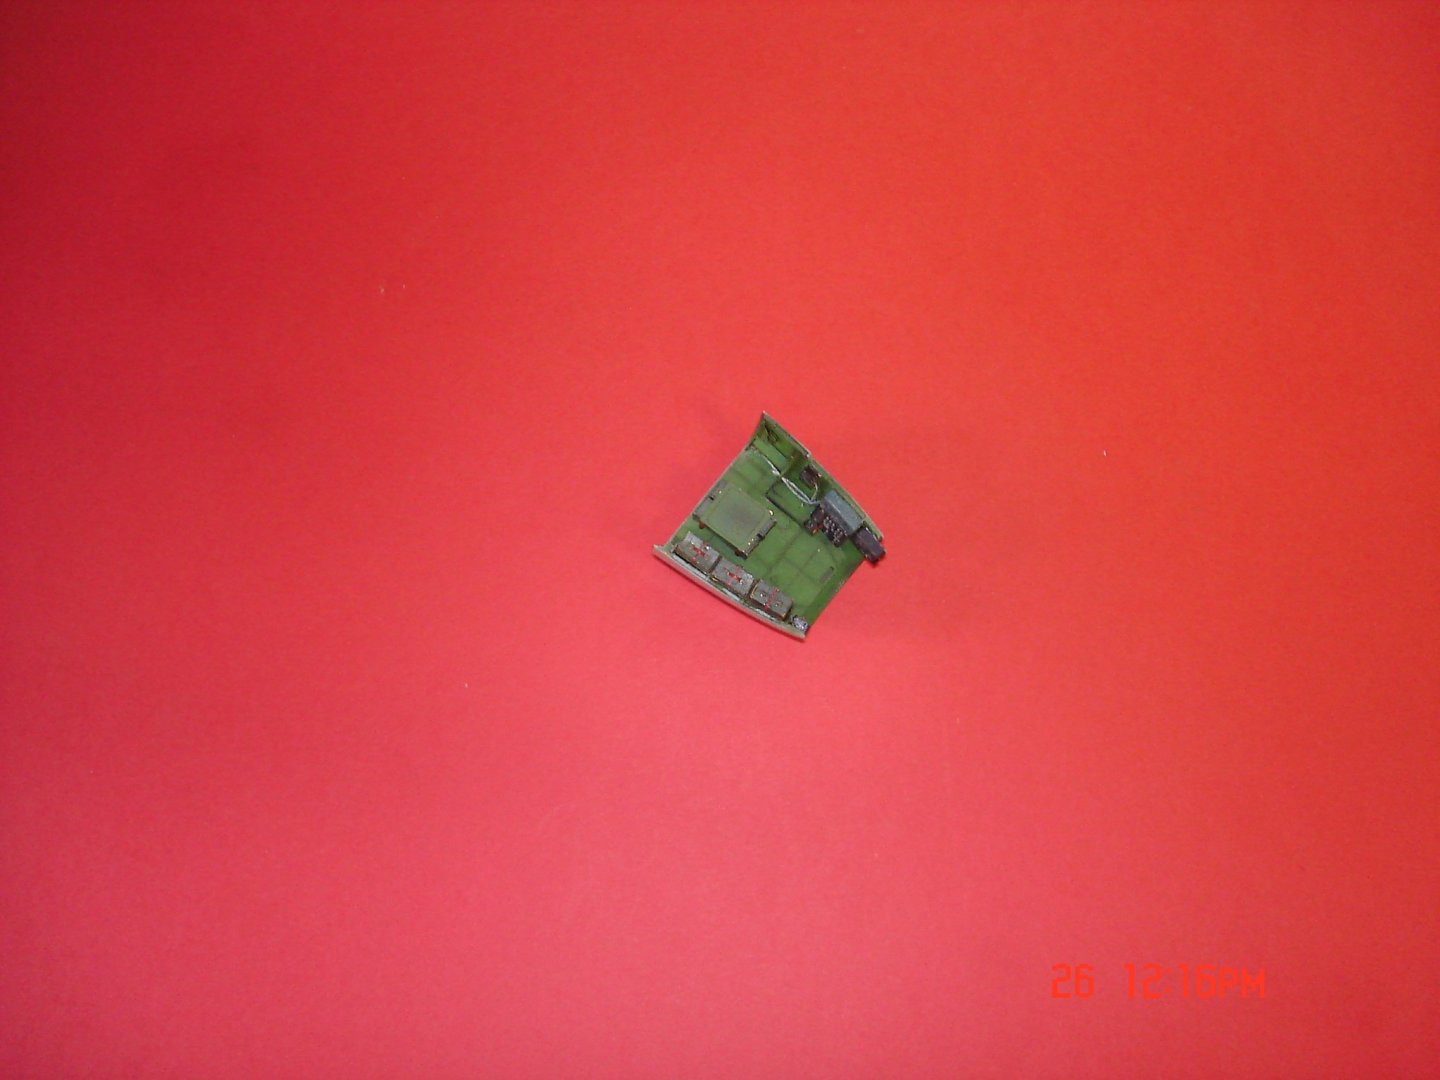
Bombardier section is complete added to ammo belts and three MG's and added cables through the pulleys for the center MG.The upper glass is glue in place while I wait for the AM mg barrels making sure all lines up properly Kevin
- 209 replies
-
- 12
-

-
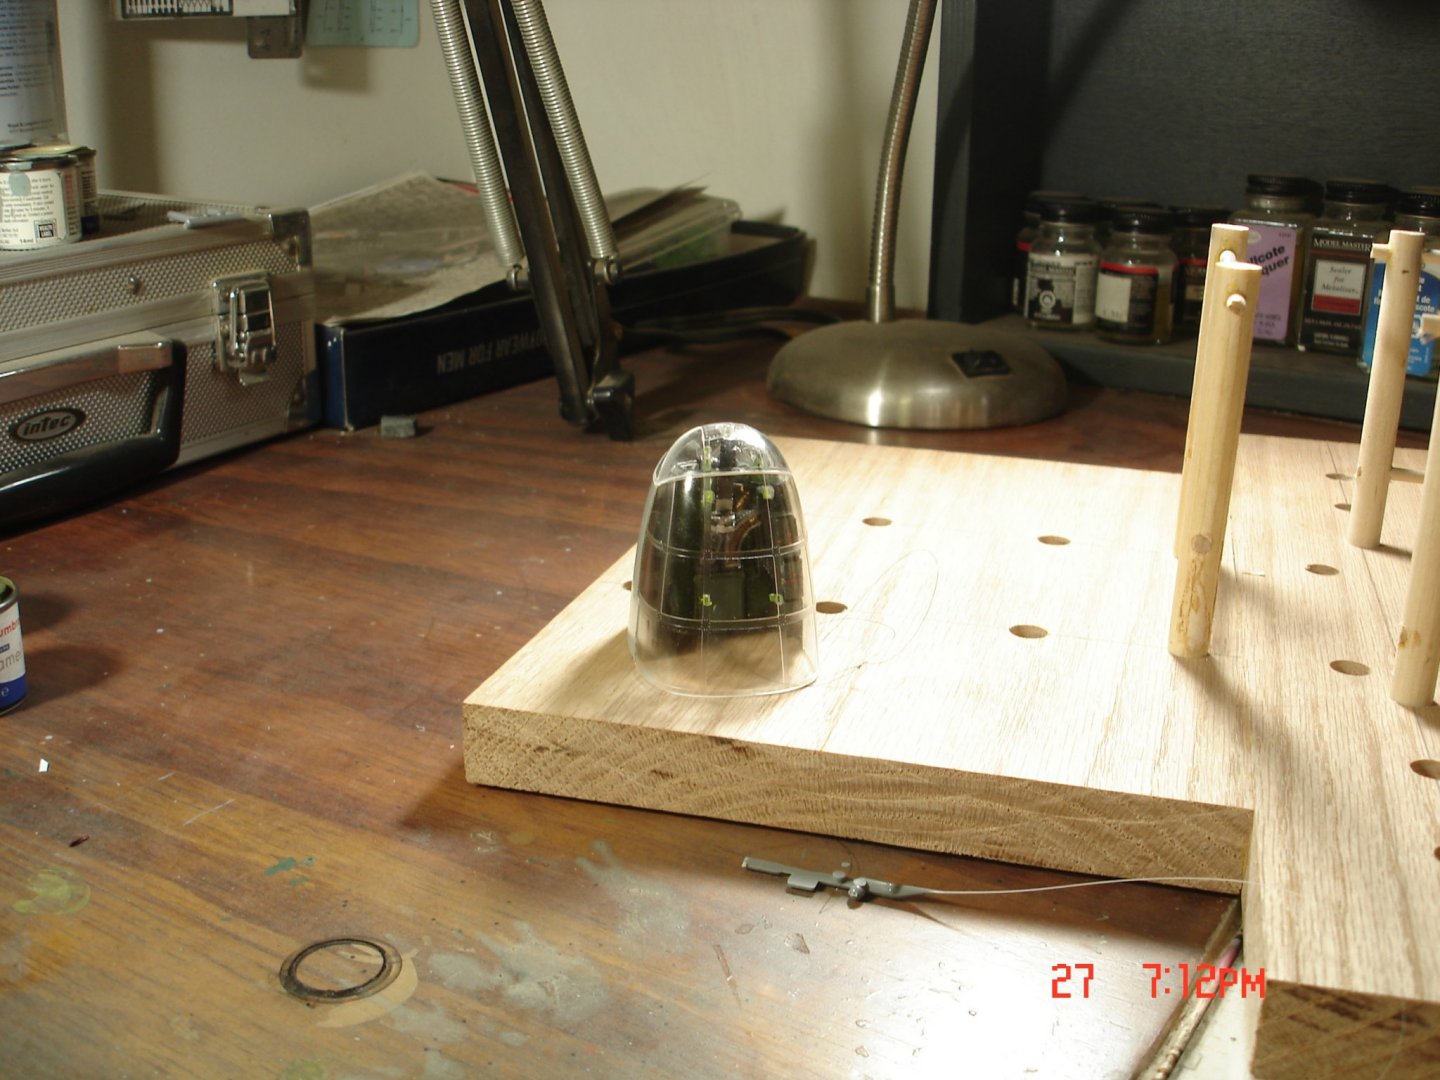
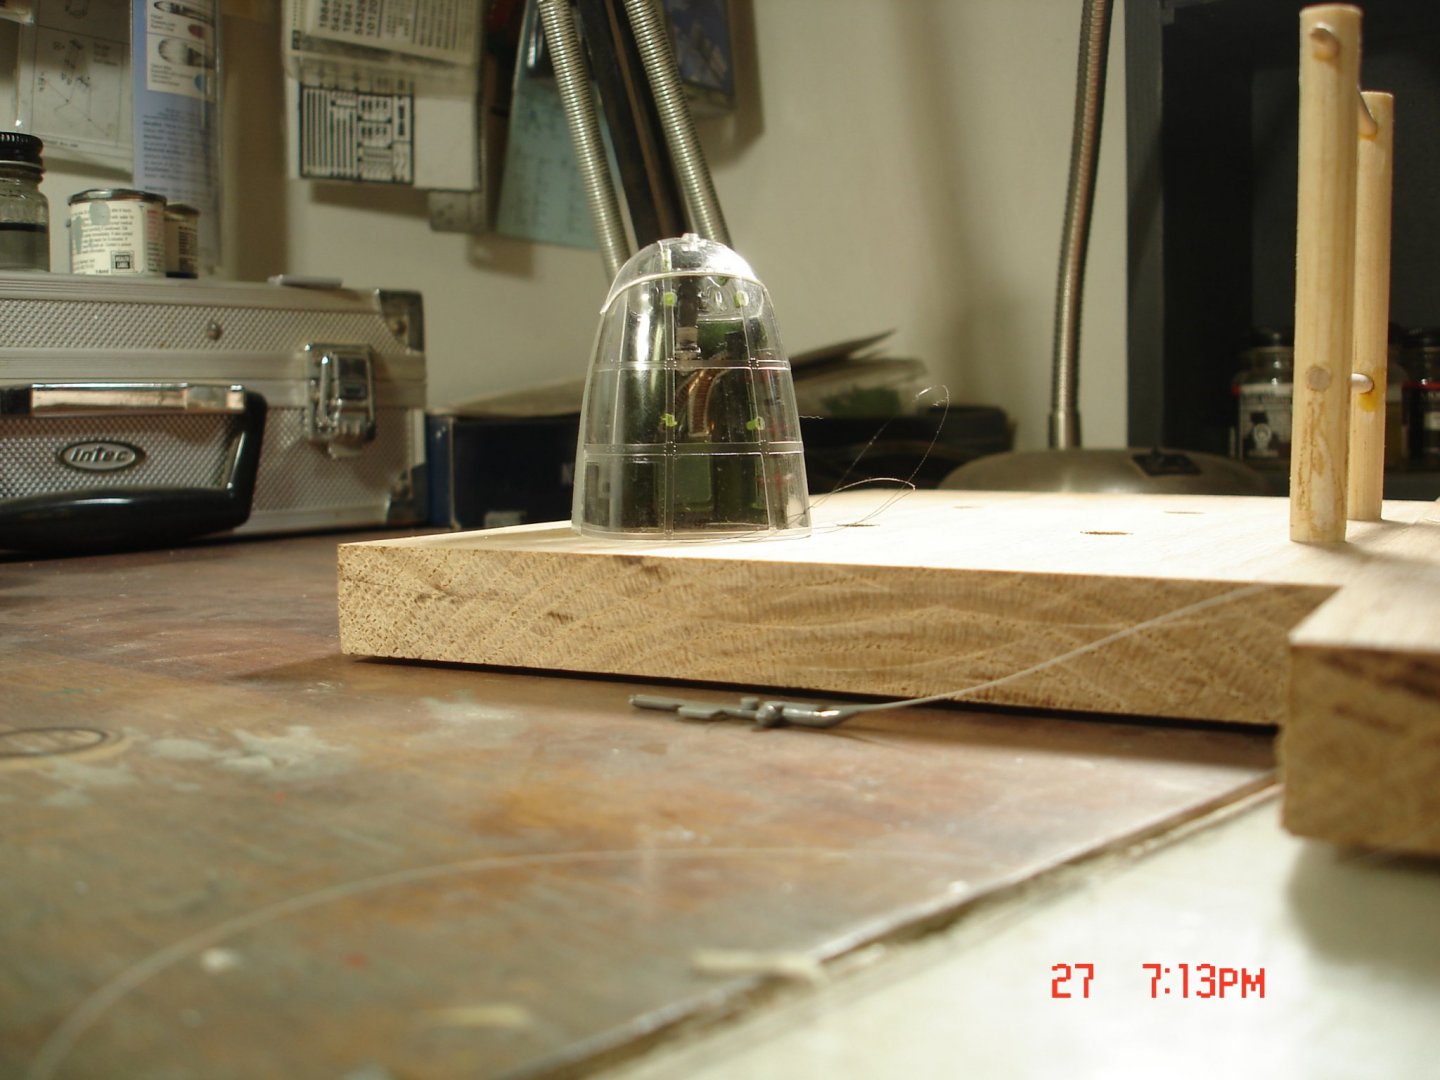
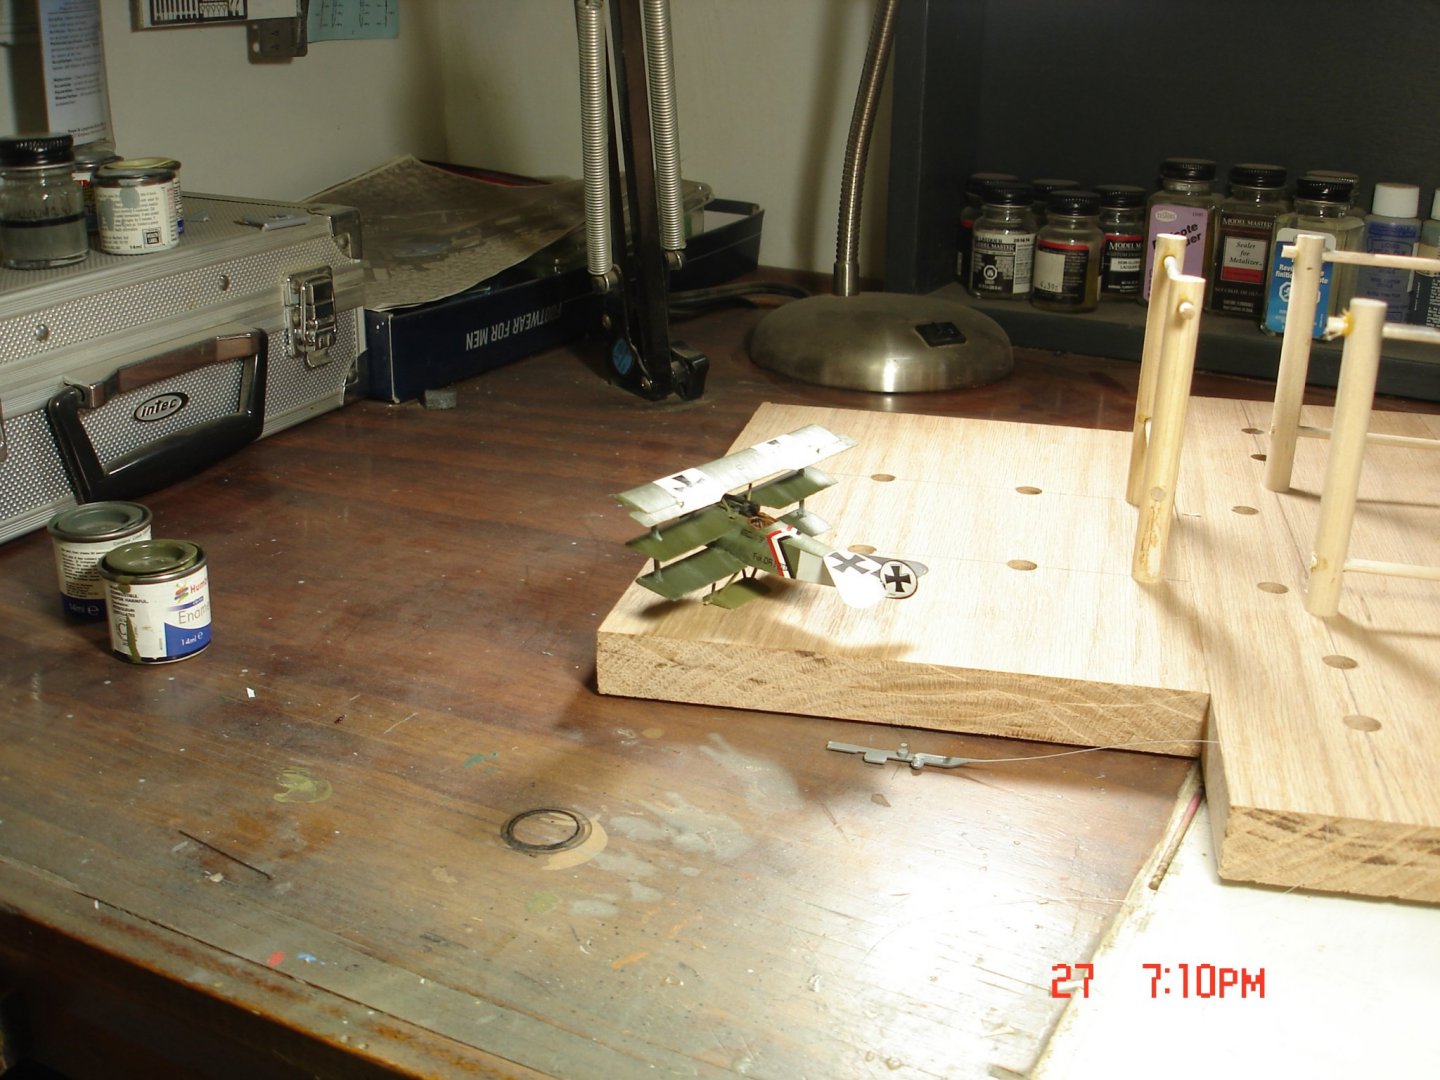
Fokker Dr.I by Javlin - FINISHED - Eduard - 1/72 - PLASTIC
Javlin replied to Javlin's topic in Non-ship/categorised builds
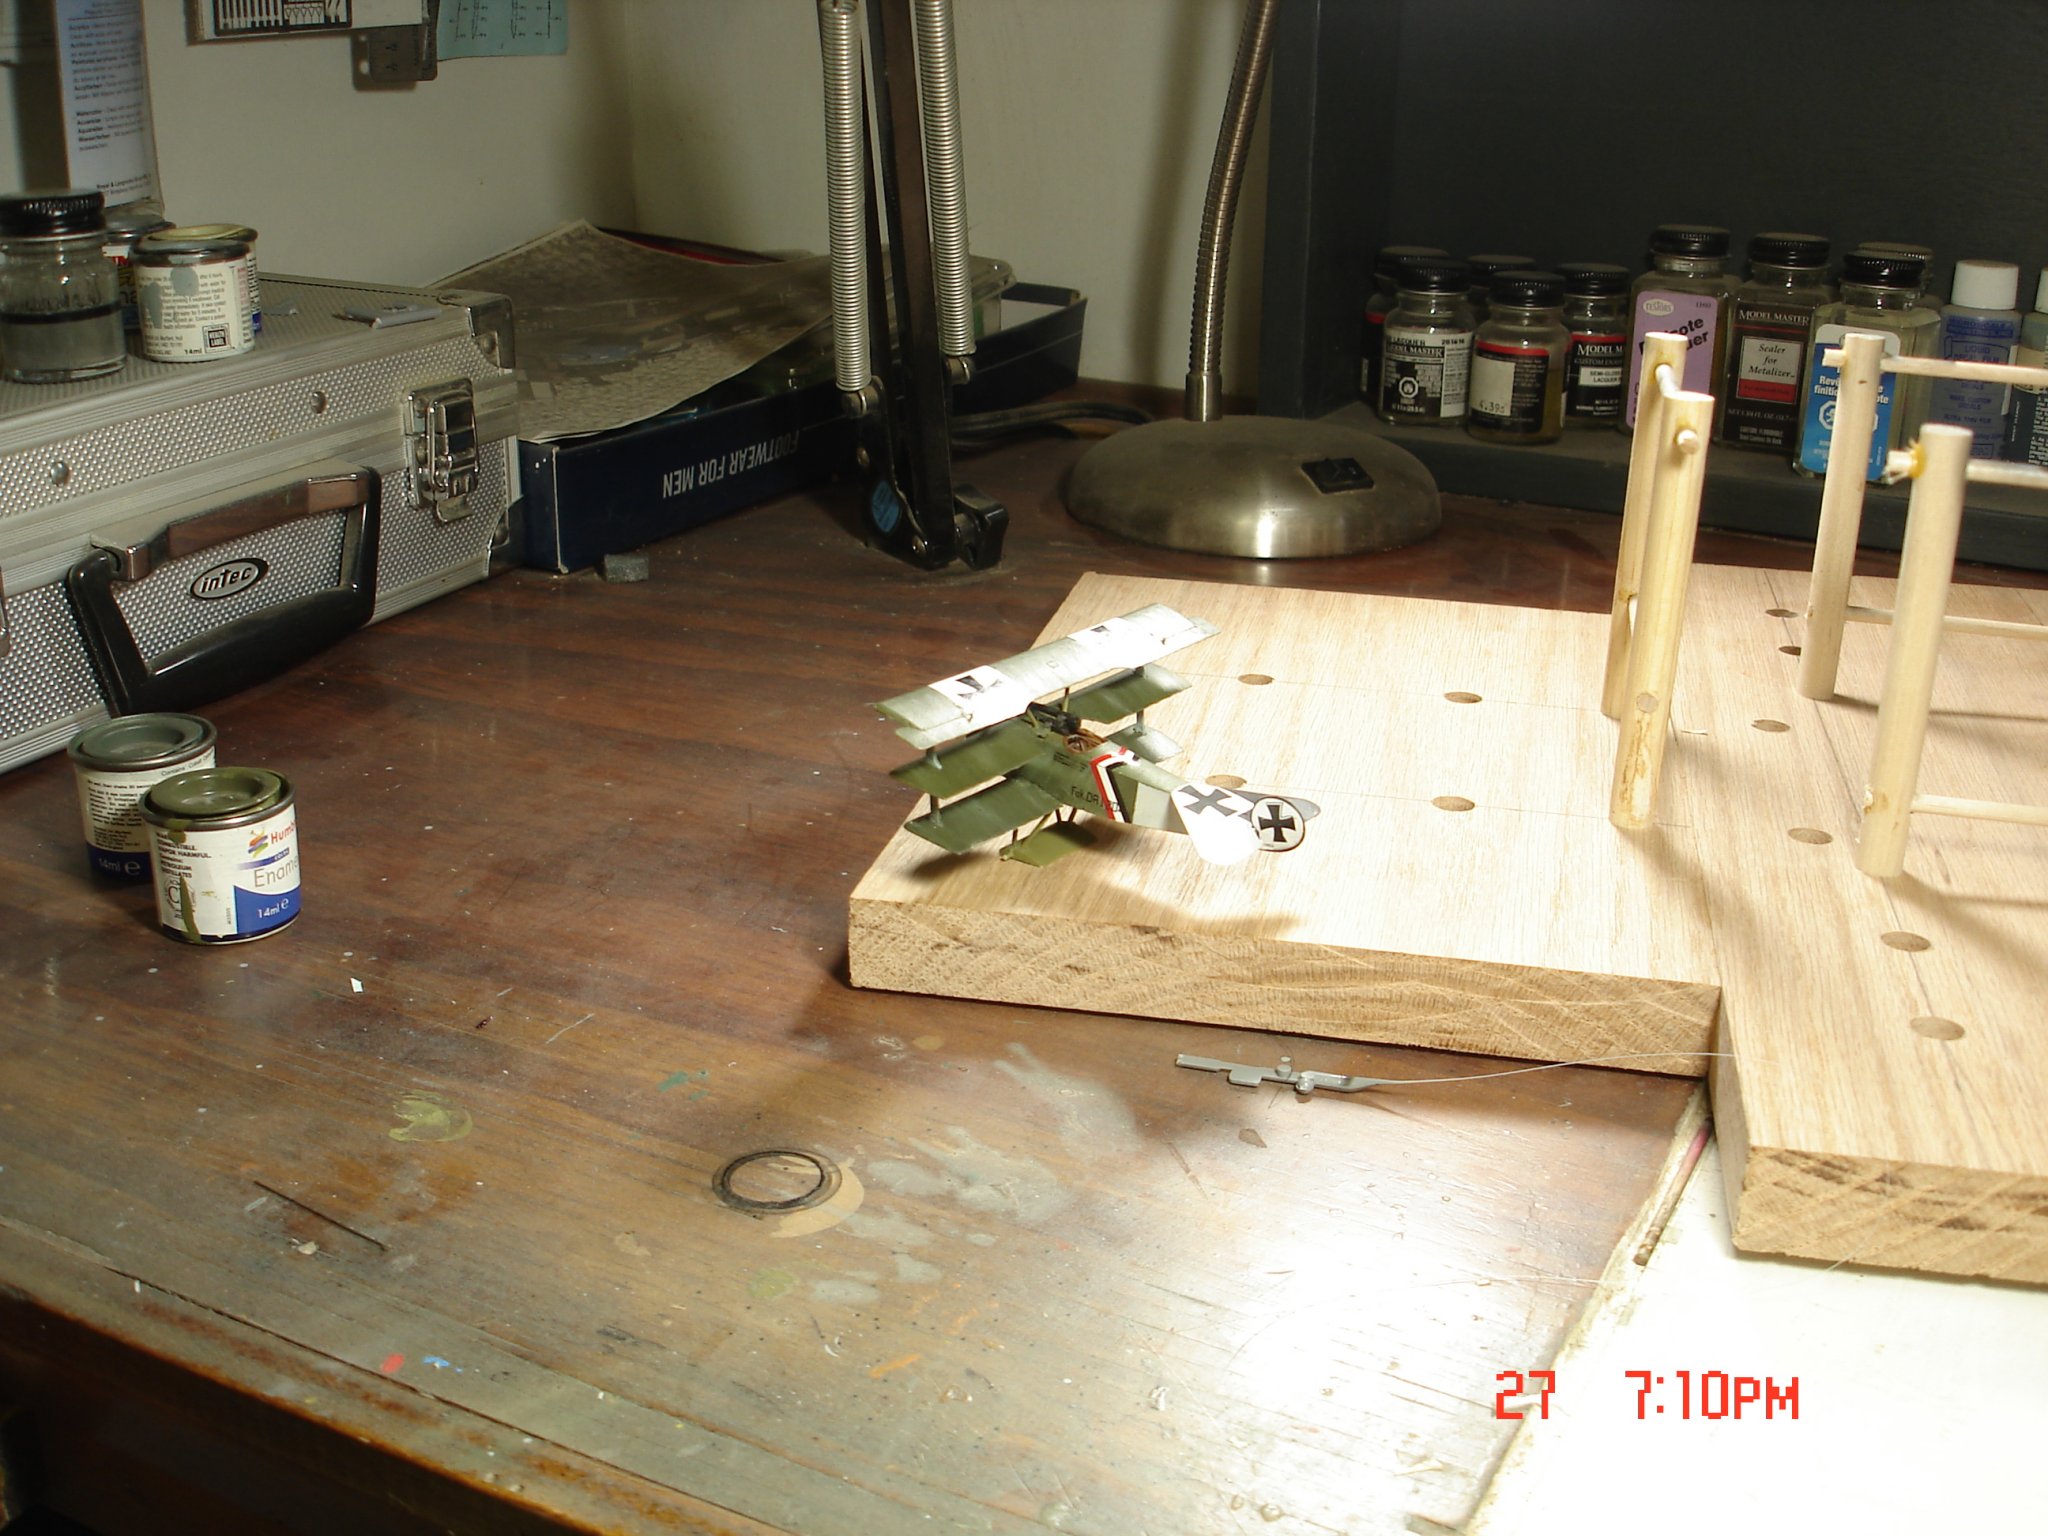
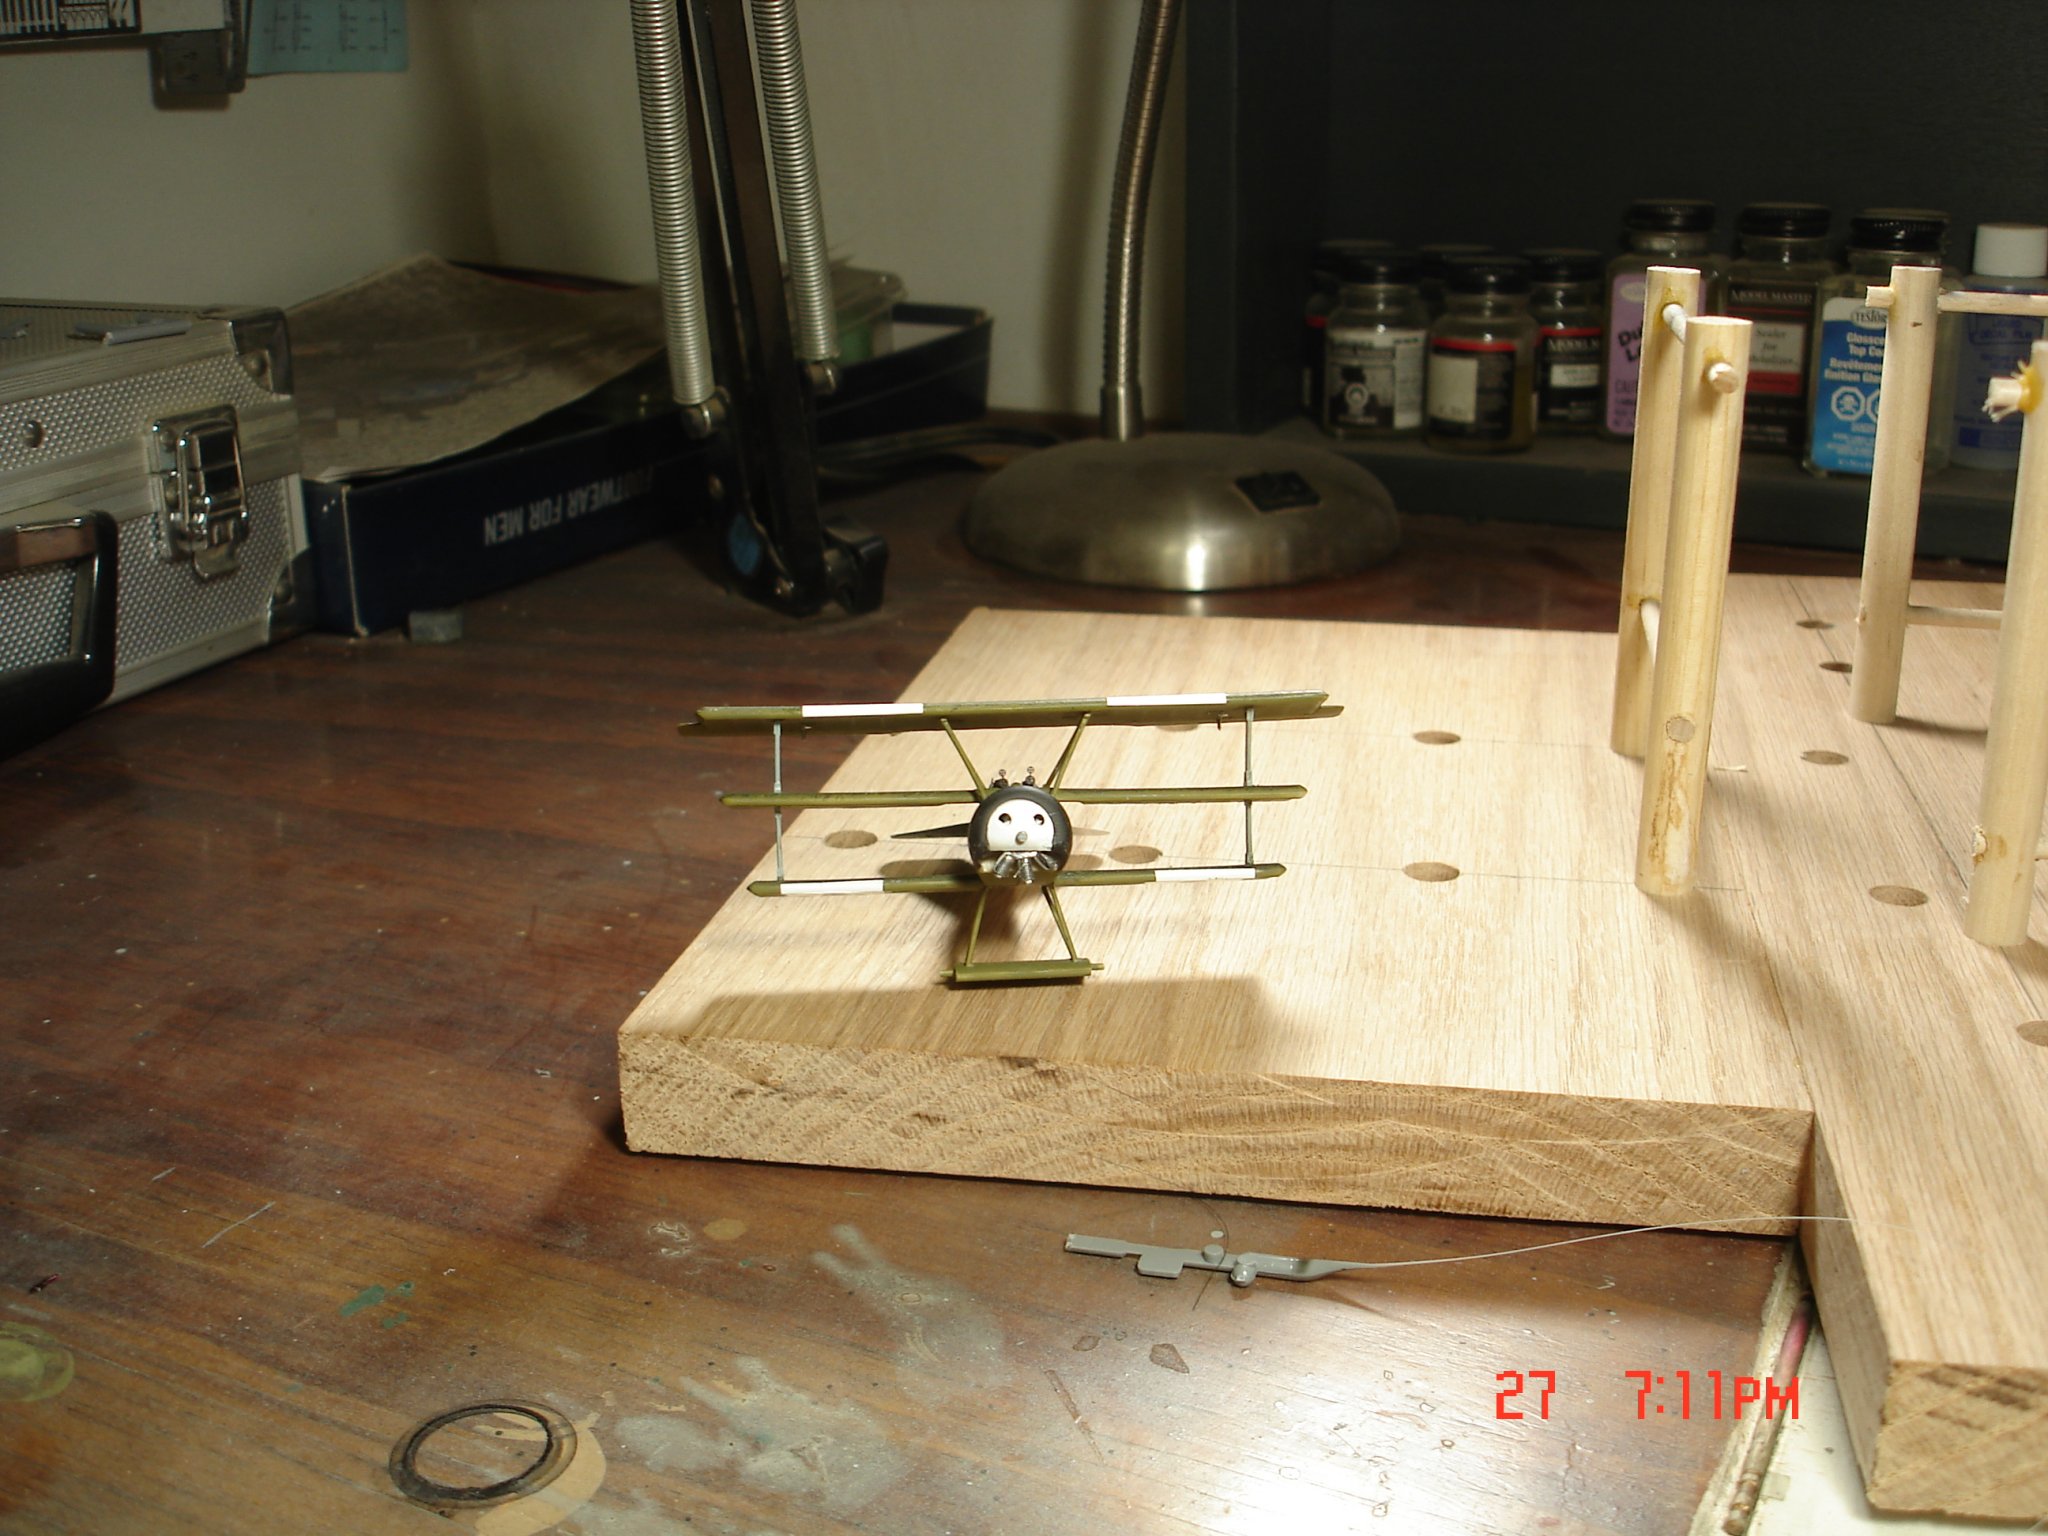
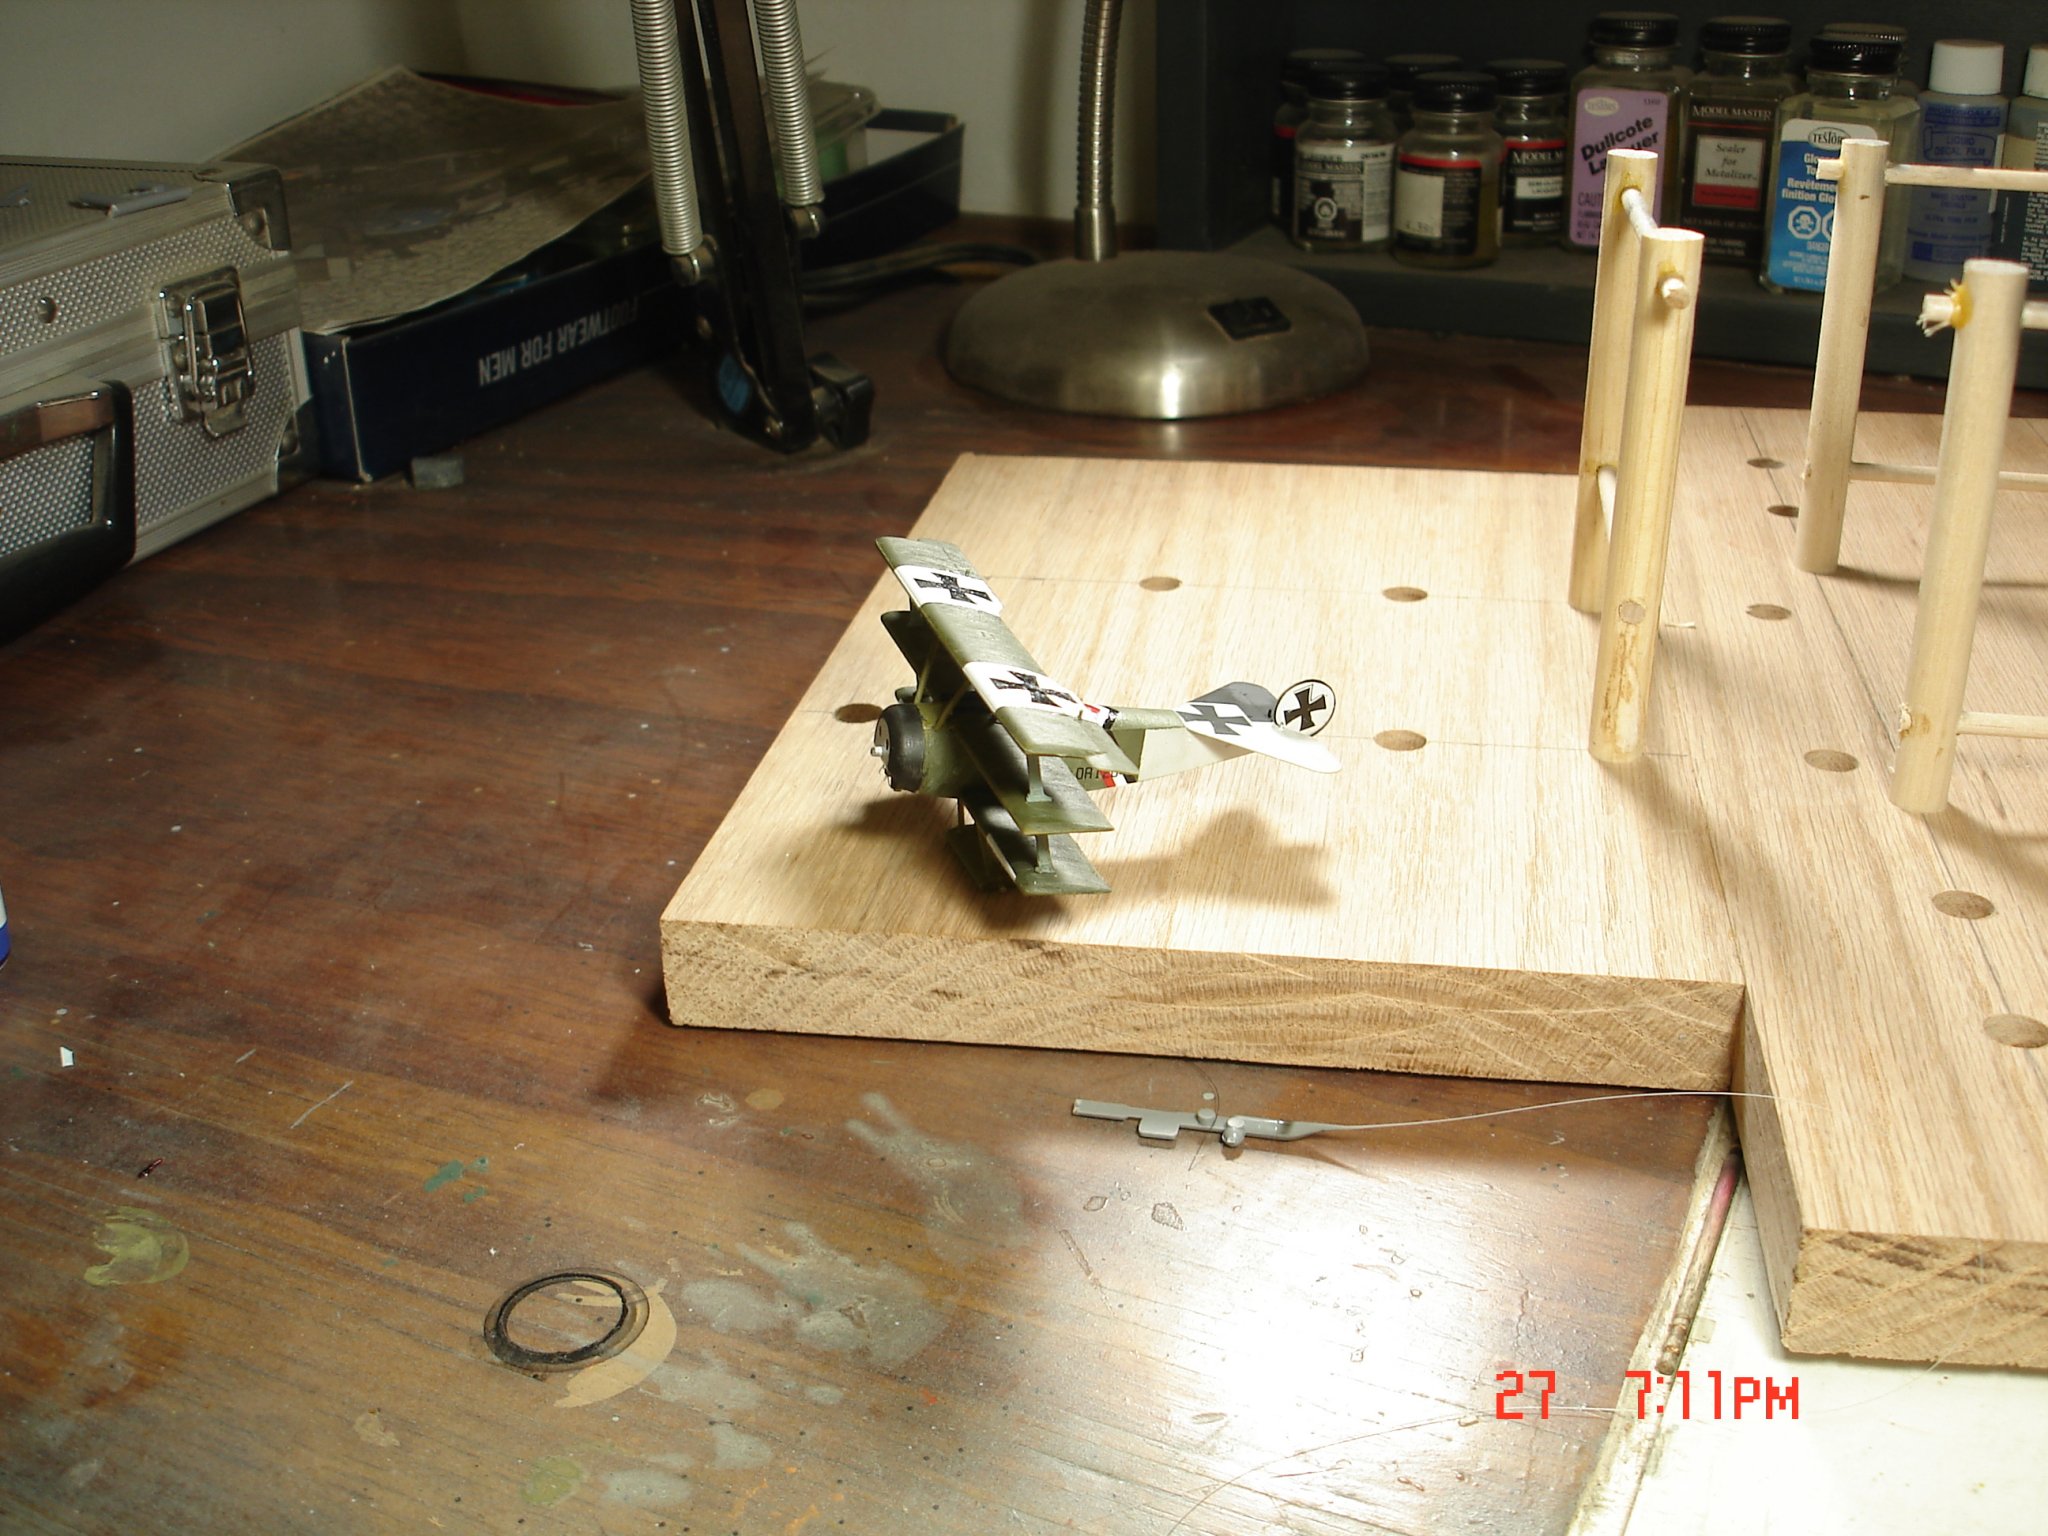
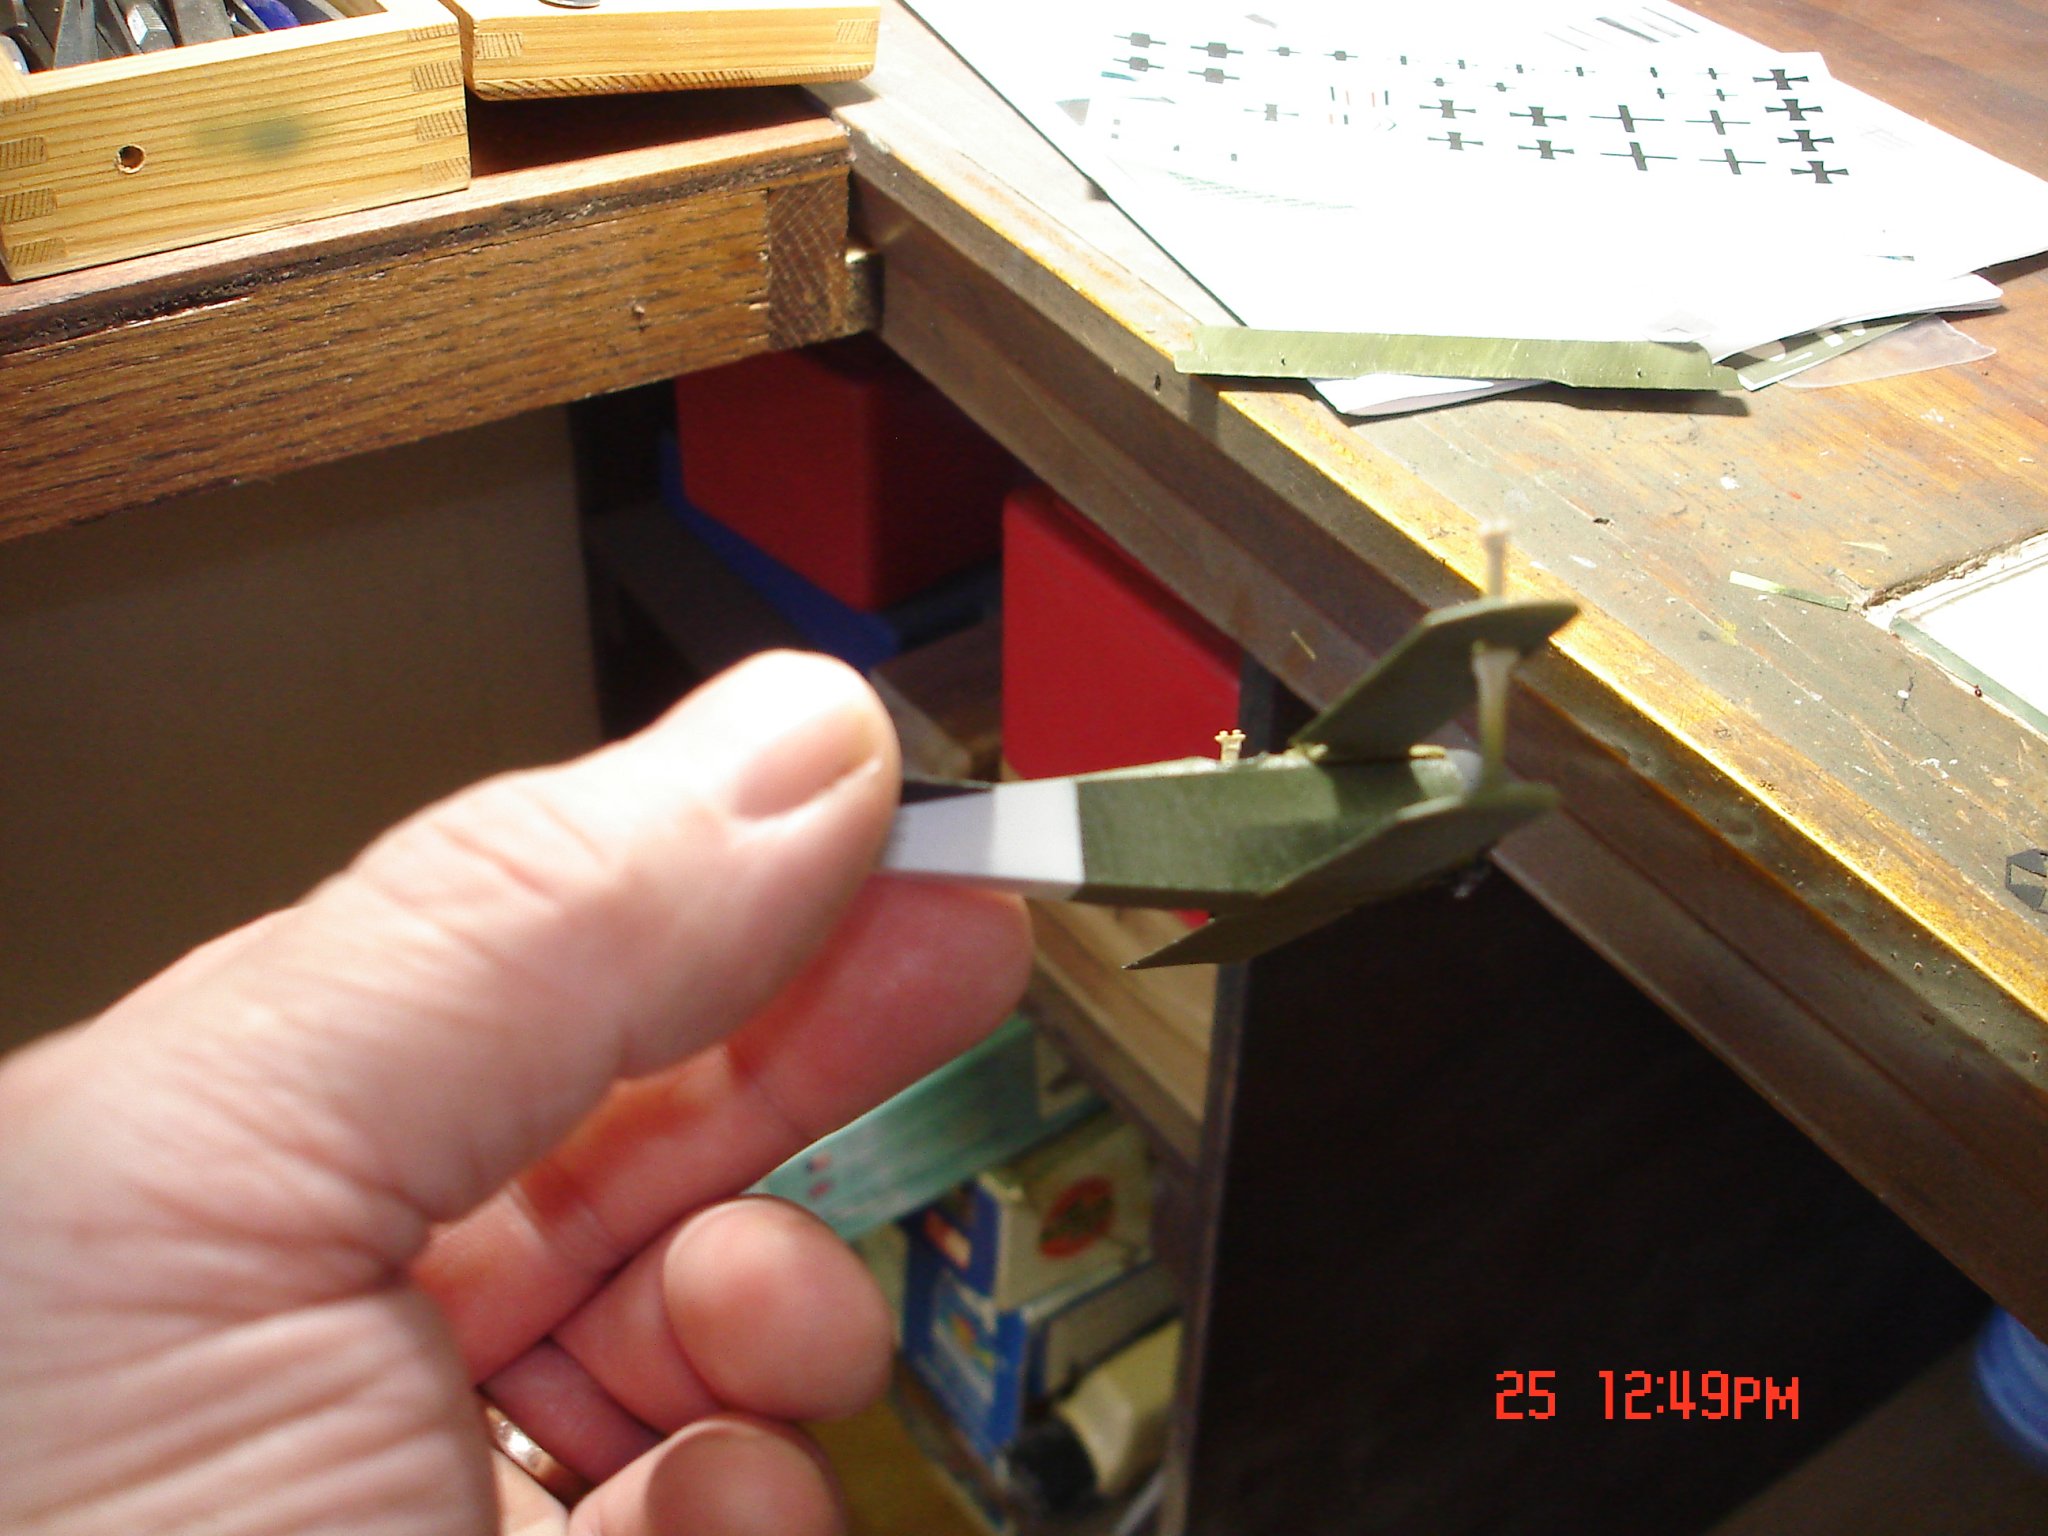
This one is getting close to finish another 1-2 hrs.The decal are giving me fits most of it is my fault the cross on the tail is crooked tried re-soften it almost lost it said the heck with it.I would not mind building a few more of these of Jasta 18.You can see the gunsight rings in the front pic.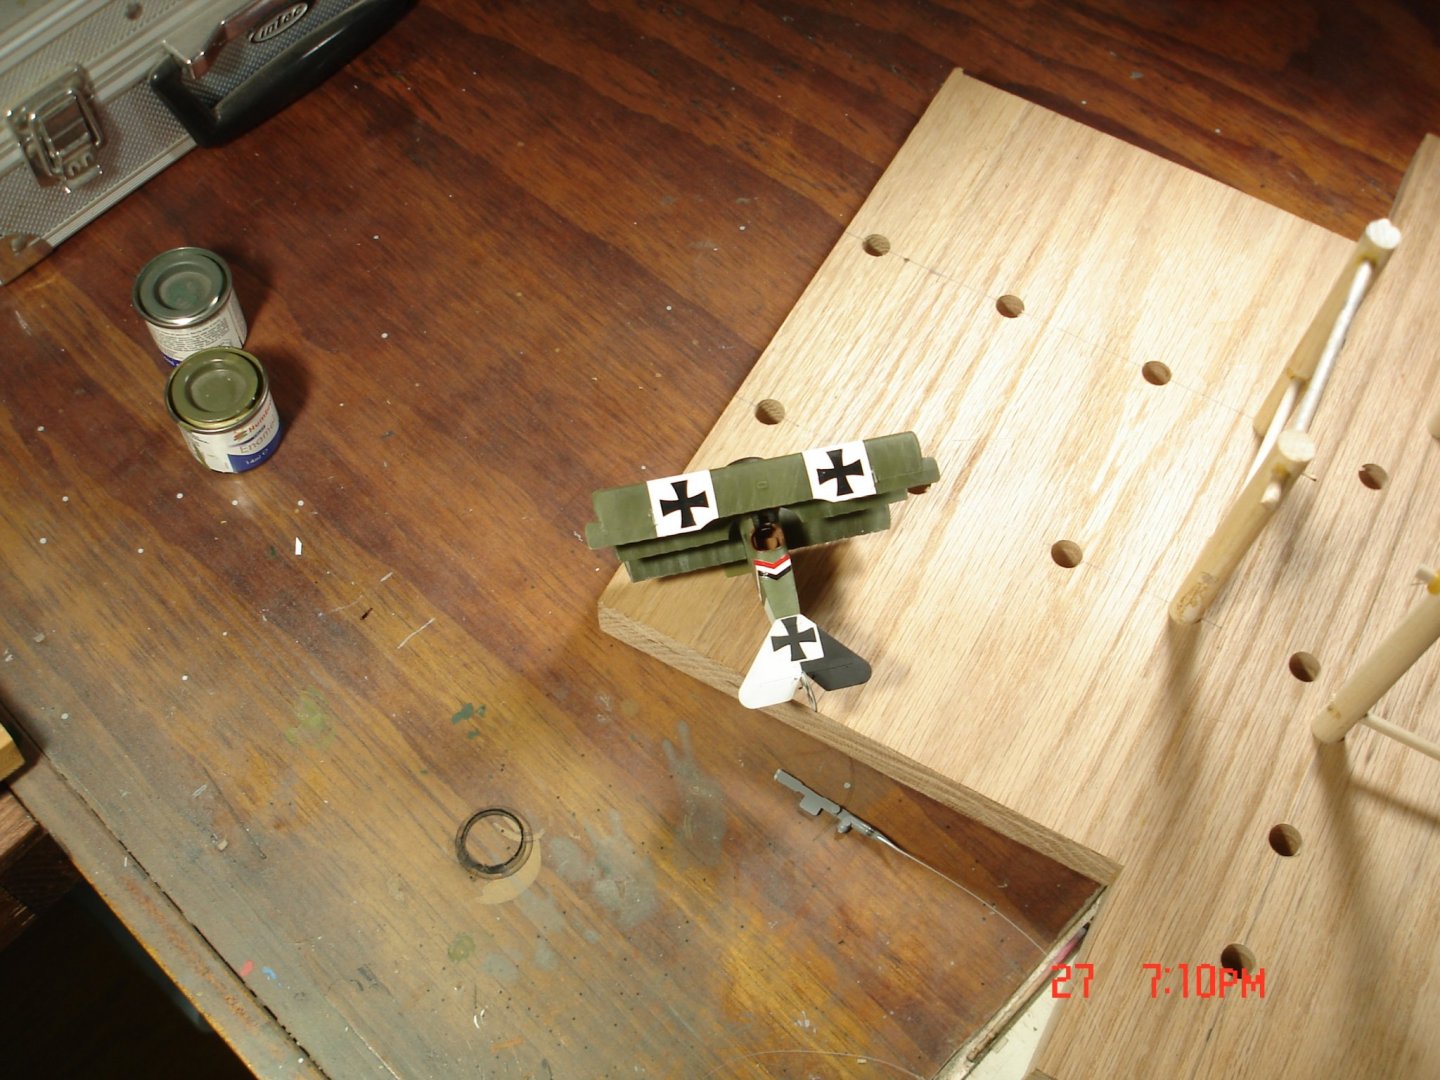


-
CDW they have been flying a little different the last few months I mean hard,fast,nice banks almost looked like a Hot Rod way they been flying like watching it. Kevin
-
Gene my Father retired after 42 years in 1979 20 active (joined 37) and 22years Civil Service instructor at KAFB may of served under your Brother?:dontknow: Kevin
-
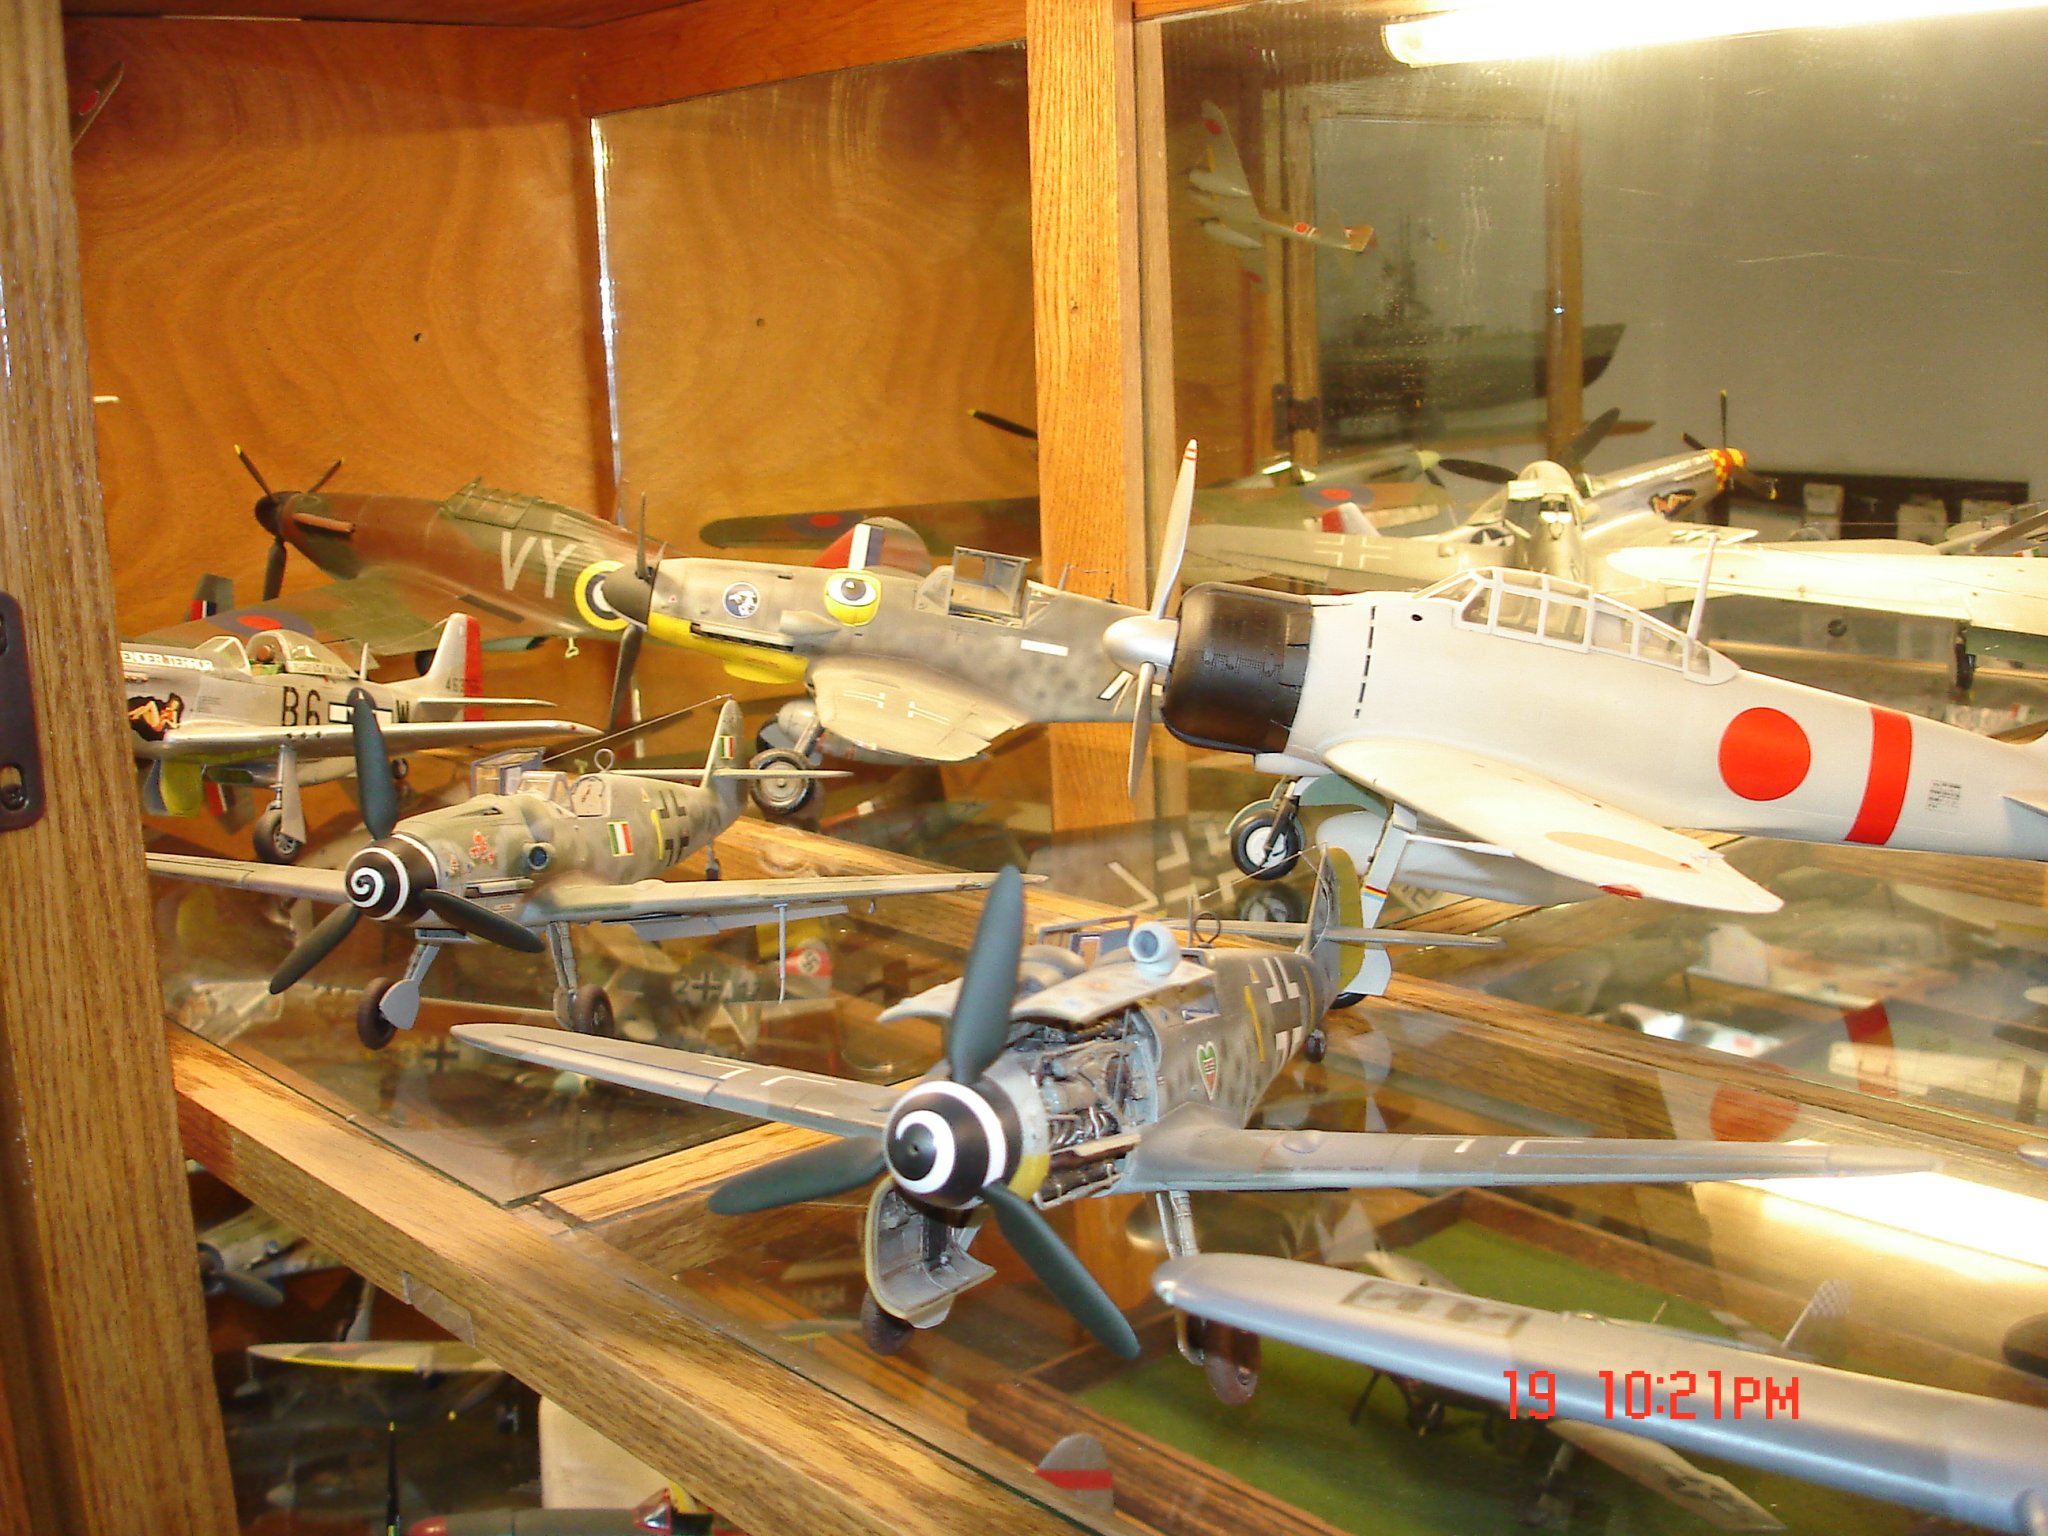
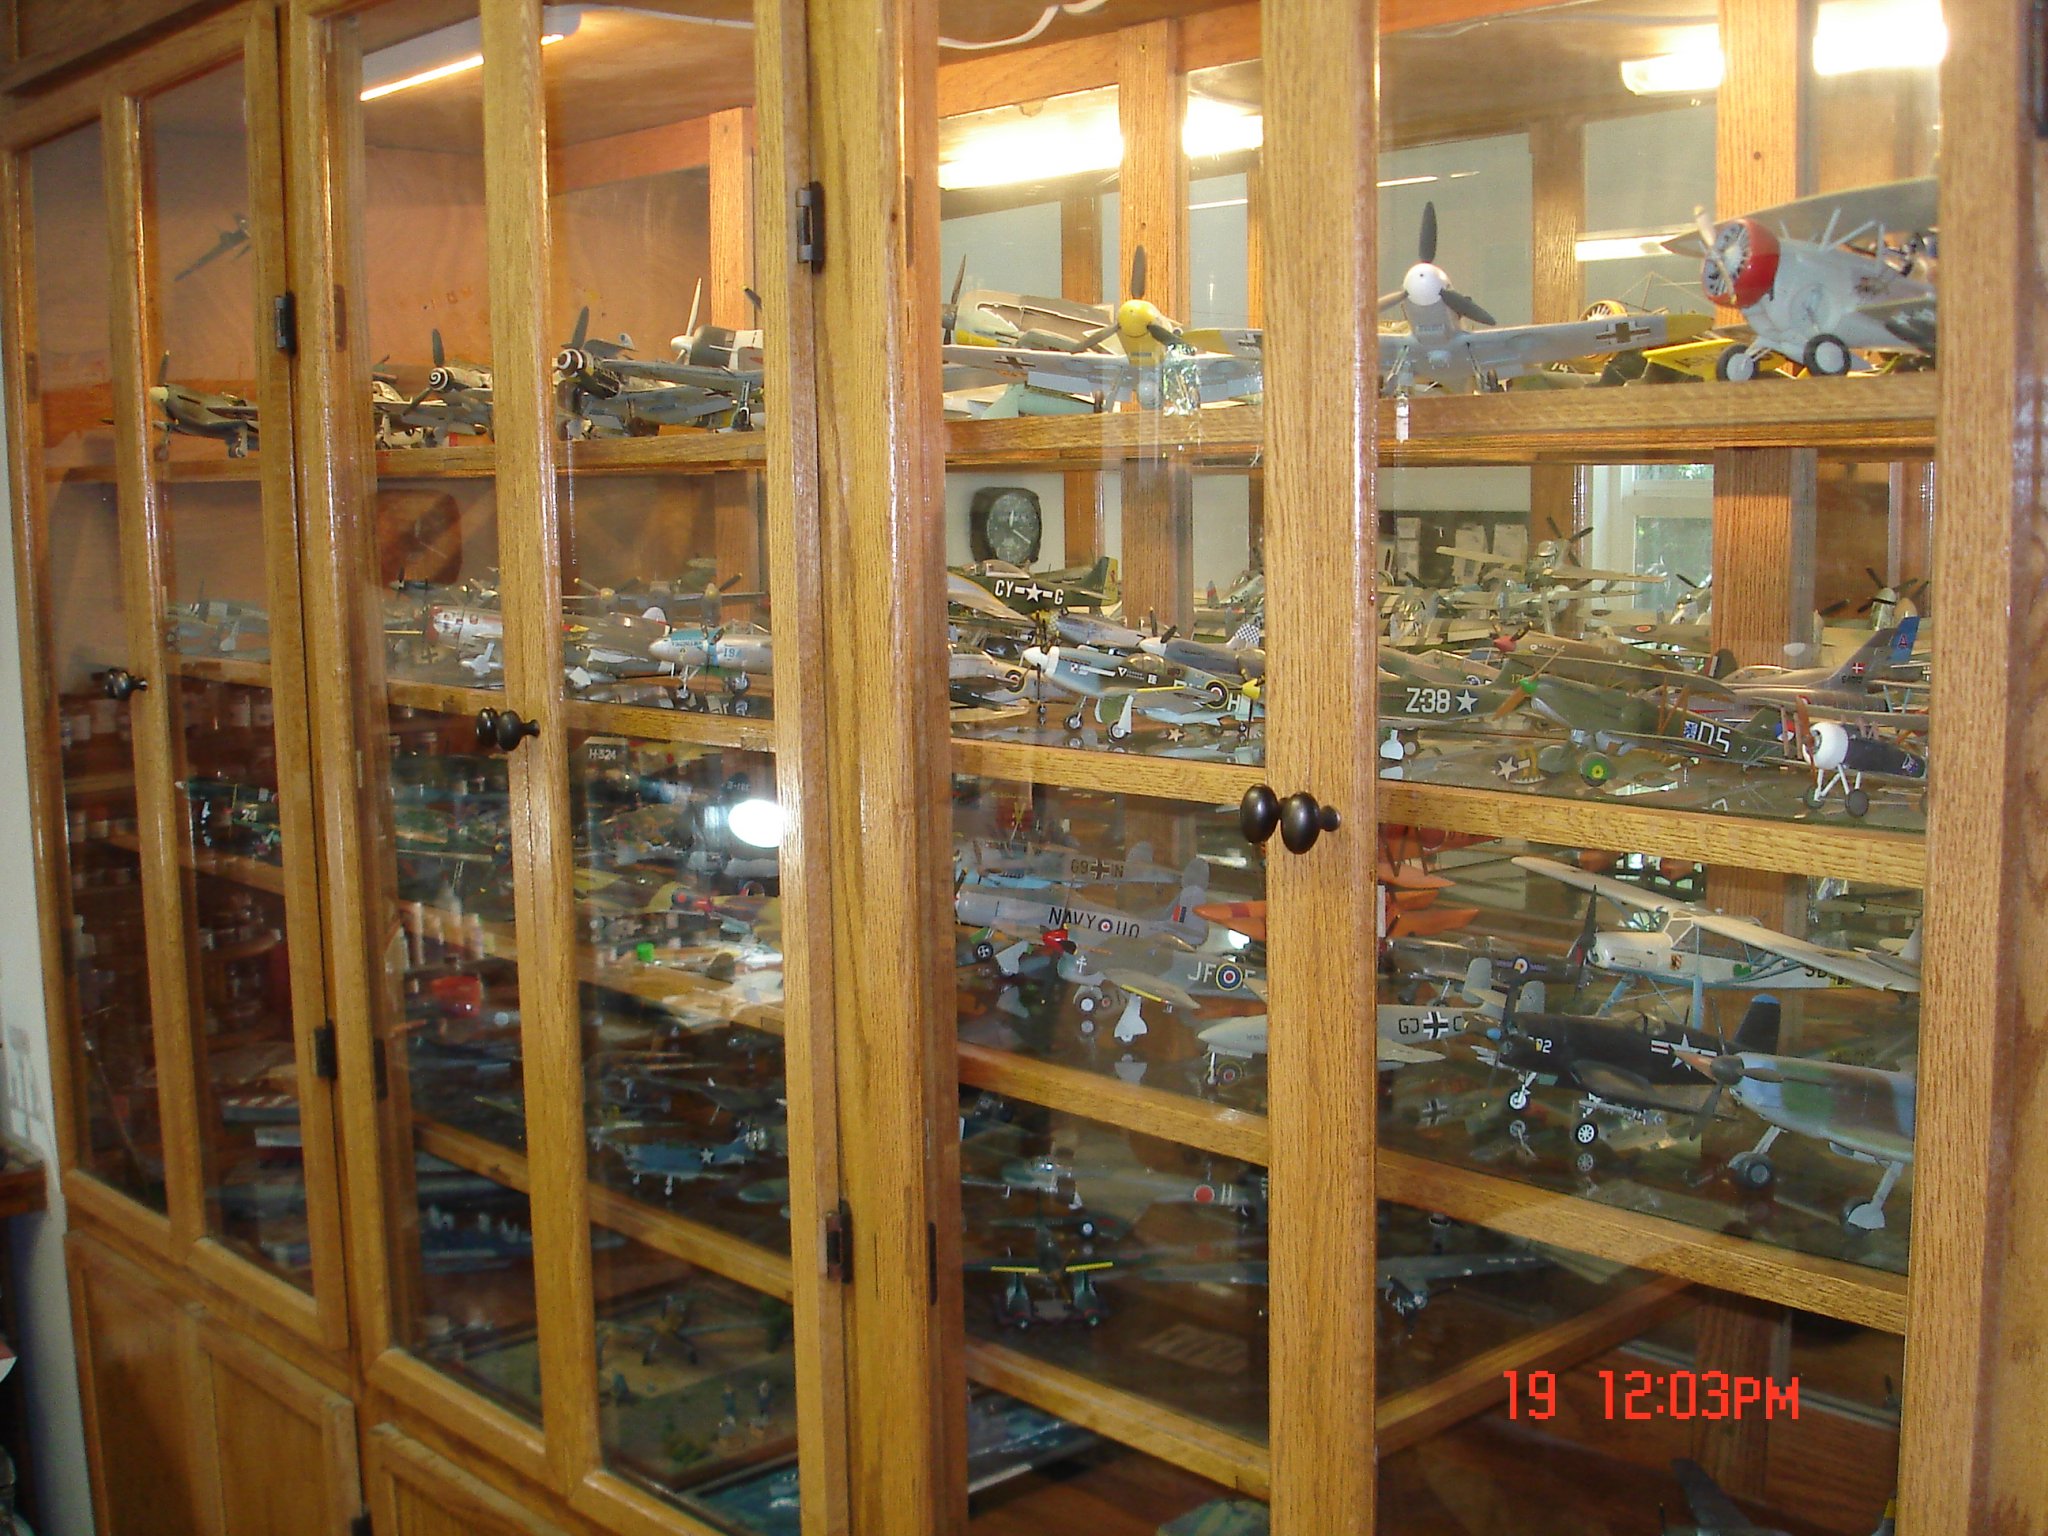
That's alot of ship there!! Kevin
-
Phil she keeps going up first thought 4/5 layers Lasagna seriously! lots of decks Nice moulding on the sides!! Kevin
-
I am watching David and now you are the teacher I have the Baltimore II framed and faired and got scared Kevin
-
Fokker Dr.I by Javlin - FINISHED - Eduard - 1/72 - PLASTIC
Javlin replied to Javlin's topic in Non-ship/categorised builds
The tail is black/white and so is the engine cowl.That will be a hard scheme in enamels or acrylics the oils gives you time to layer it.If you want the site with I think some of the most serious way out of my league look here home page https://ww1aircraftmodels.com/index.html nice hints for WWI A/C and the forum of the builds https://forum.ww1aircraftmodels.com/index.php?board=3.0 -
Thanks Denis it had it's own learning curve and removed some fears in the process. Kevin
-
I bet that's one of those you could have back?My son is in now he's in Misawa Japan he's moving up pretty quick went in E-3 because of JROTC now E-5 3 1/2 years later.Here's a clip I should of not really posted in another thread but the base has freestyle Fridays and they highlighted him theirs more of an interview somewhere in there system but can't find it.
-
B-25 Mitchell "Meet Miss Runyon" by Javlin-HK-1/32
Javlin replied to Javlin's topic in Non-ship/categorised builds
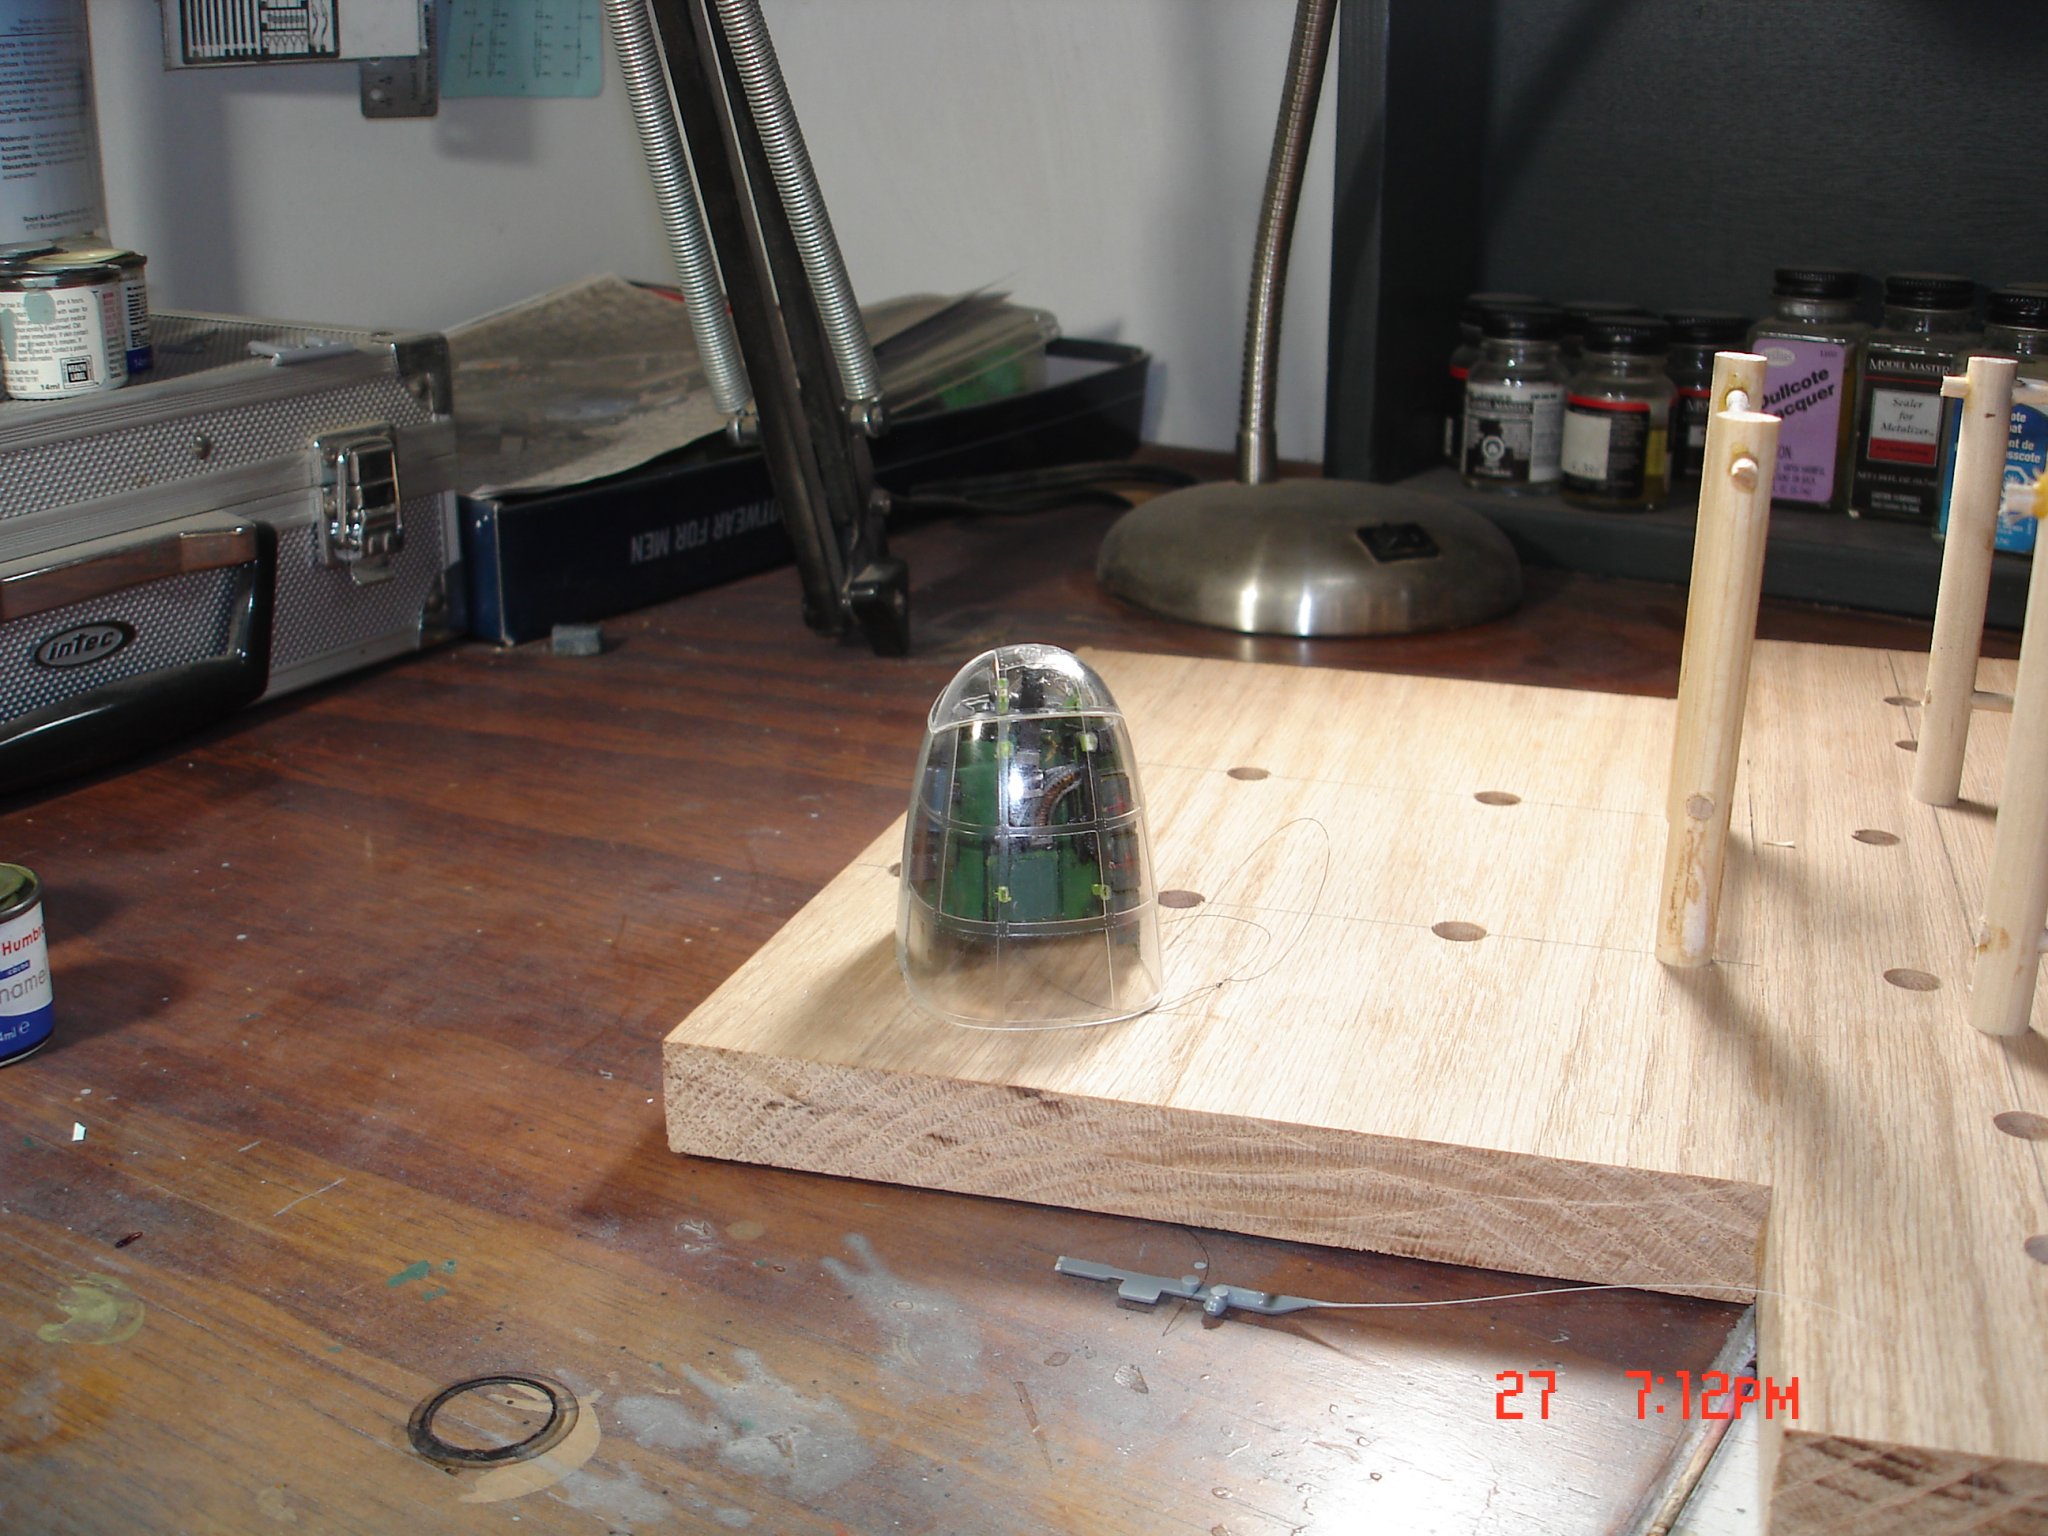
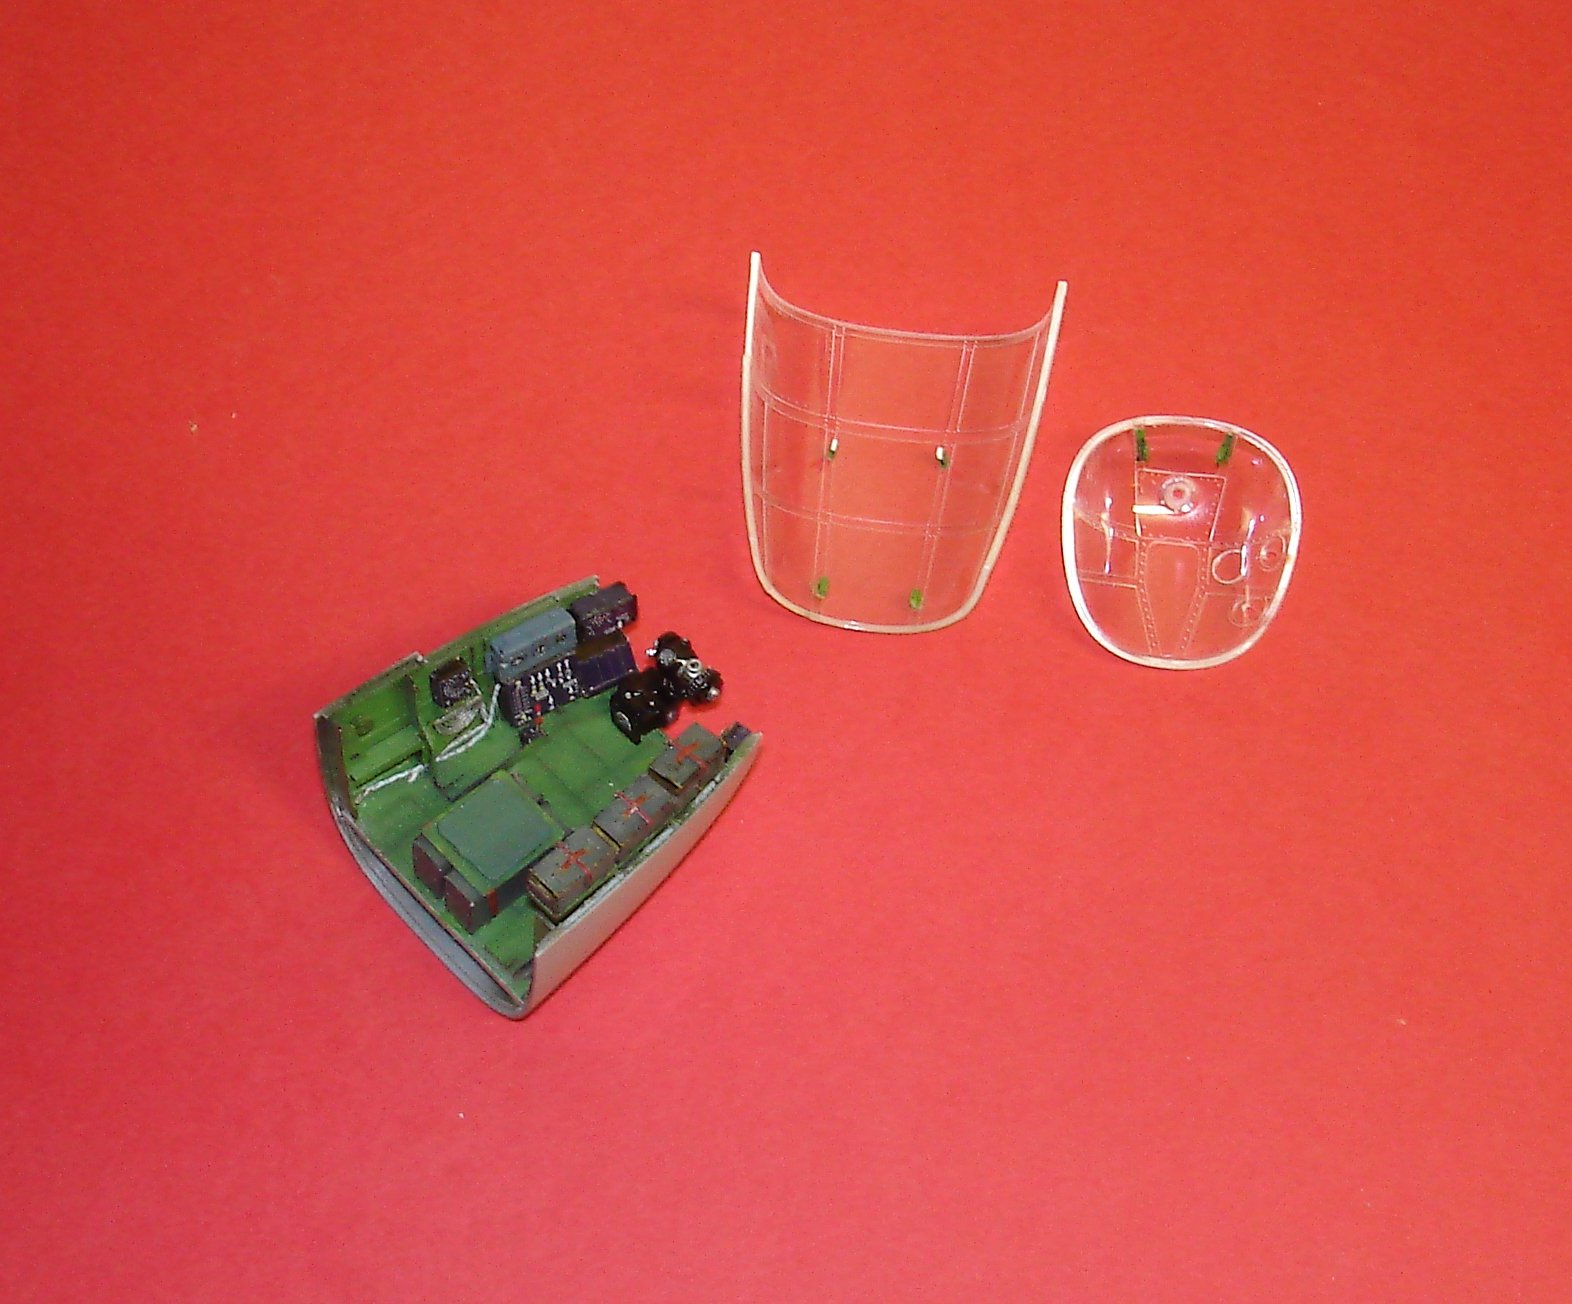
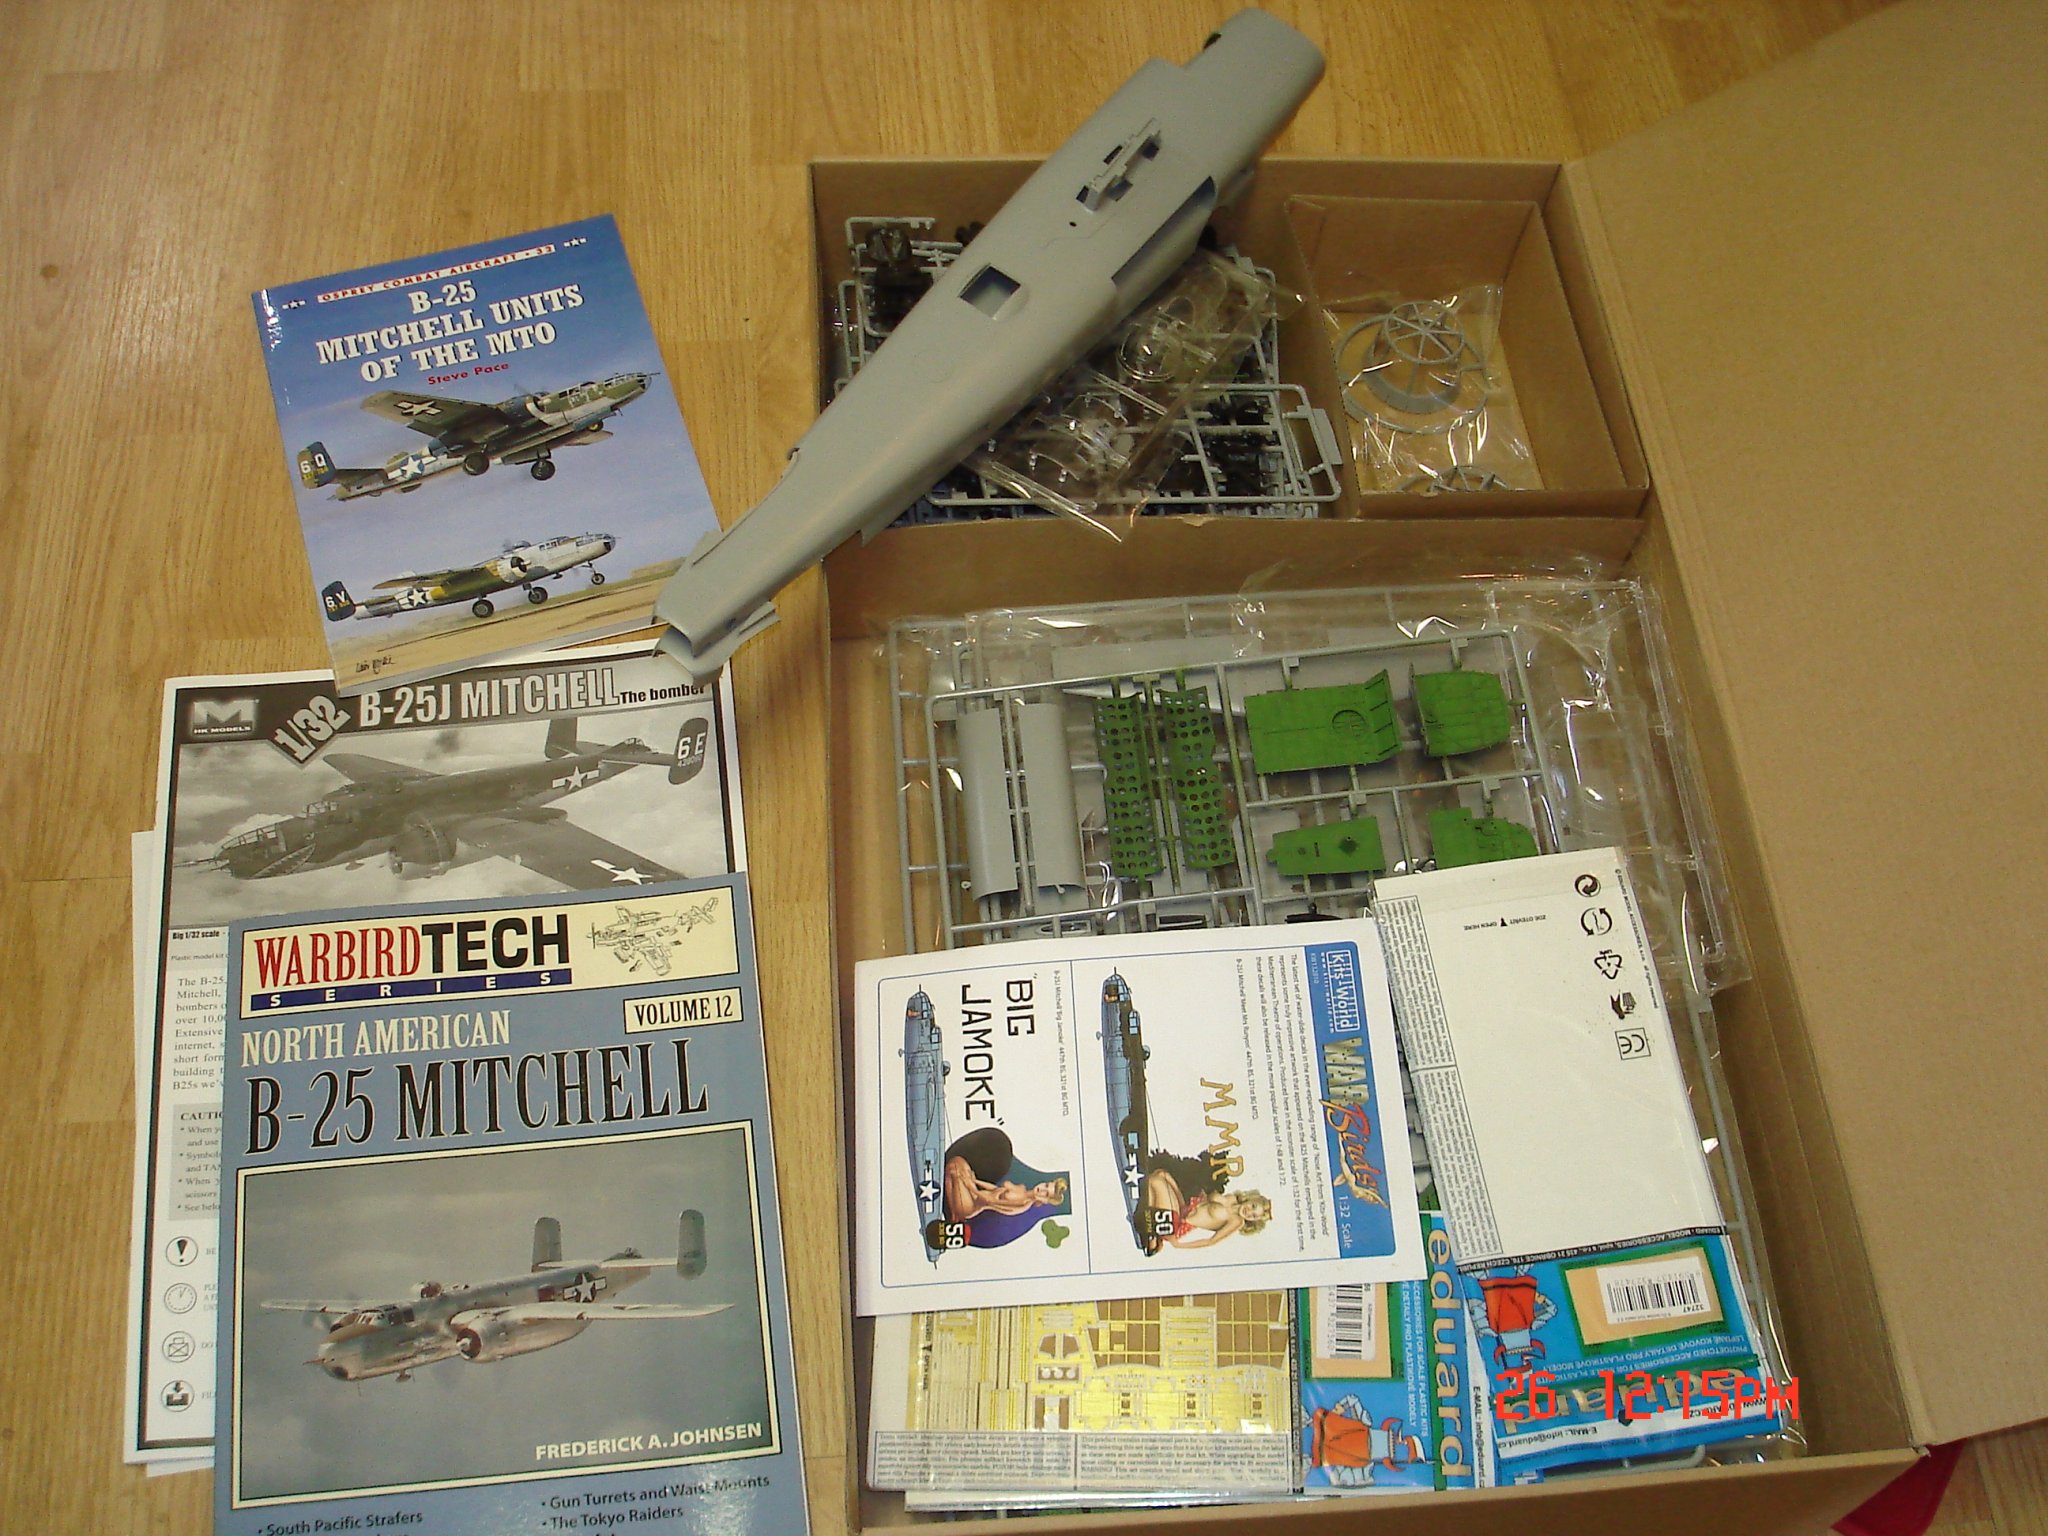
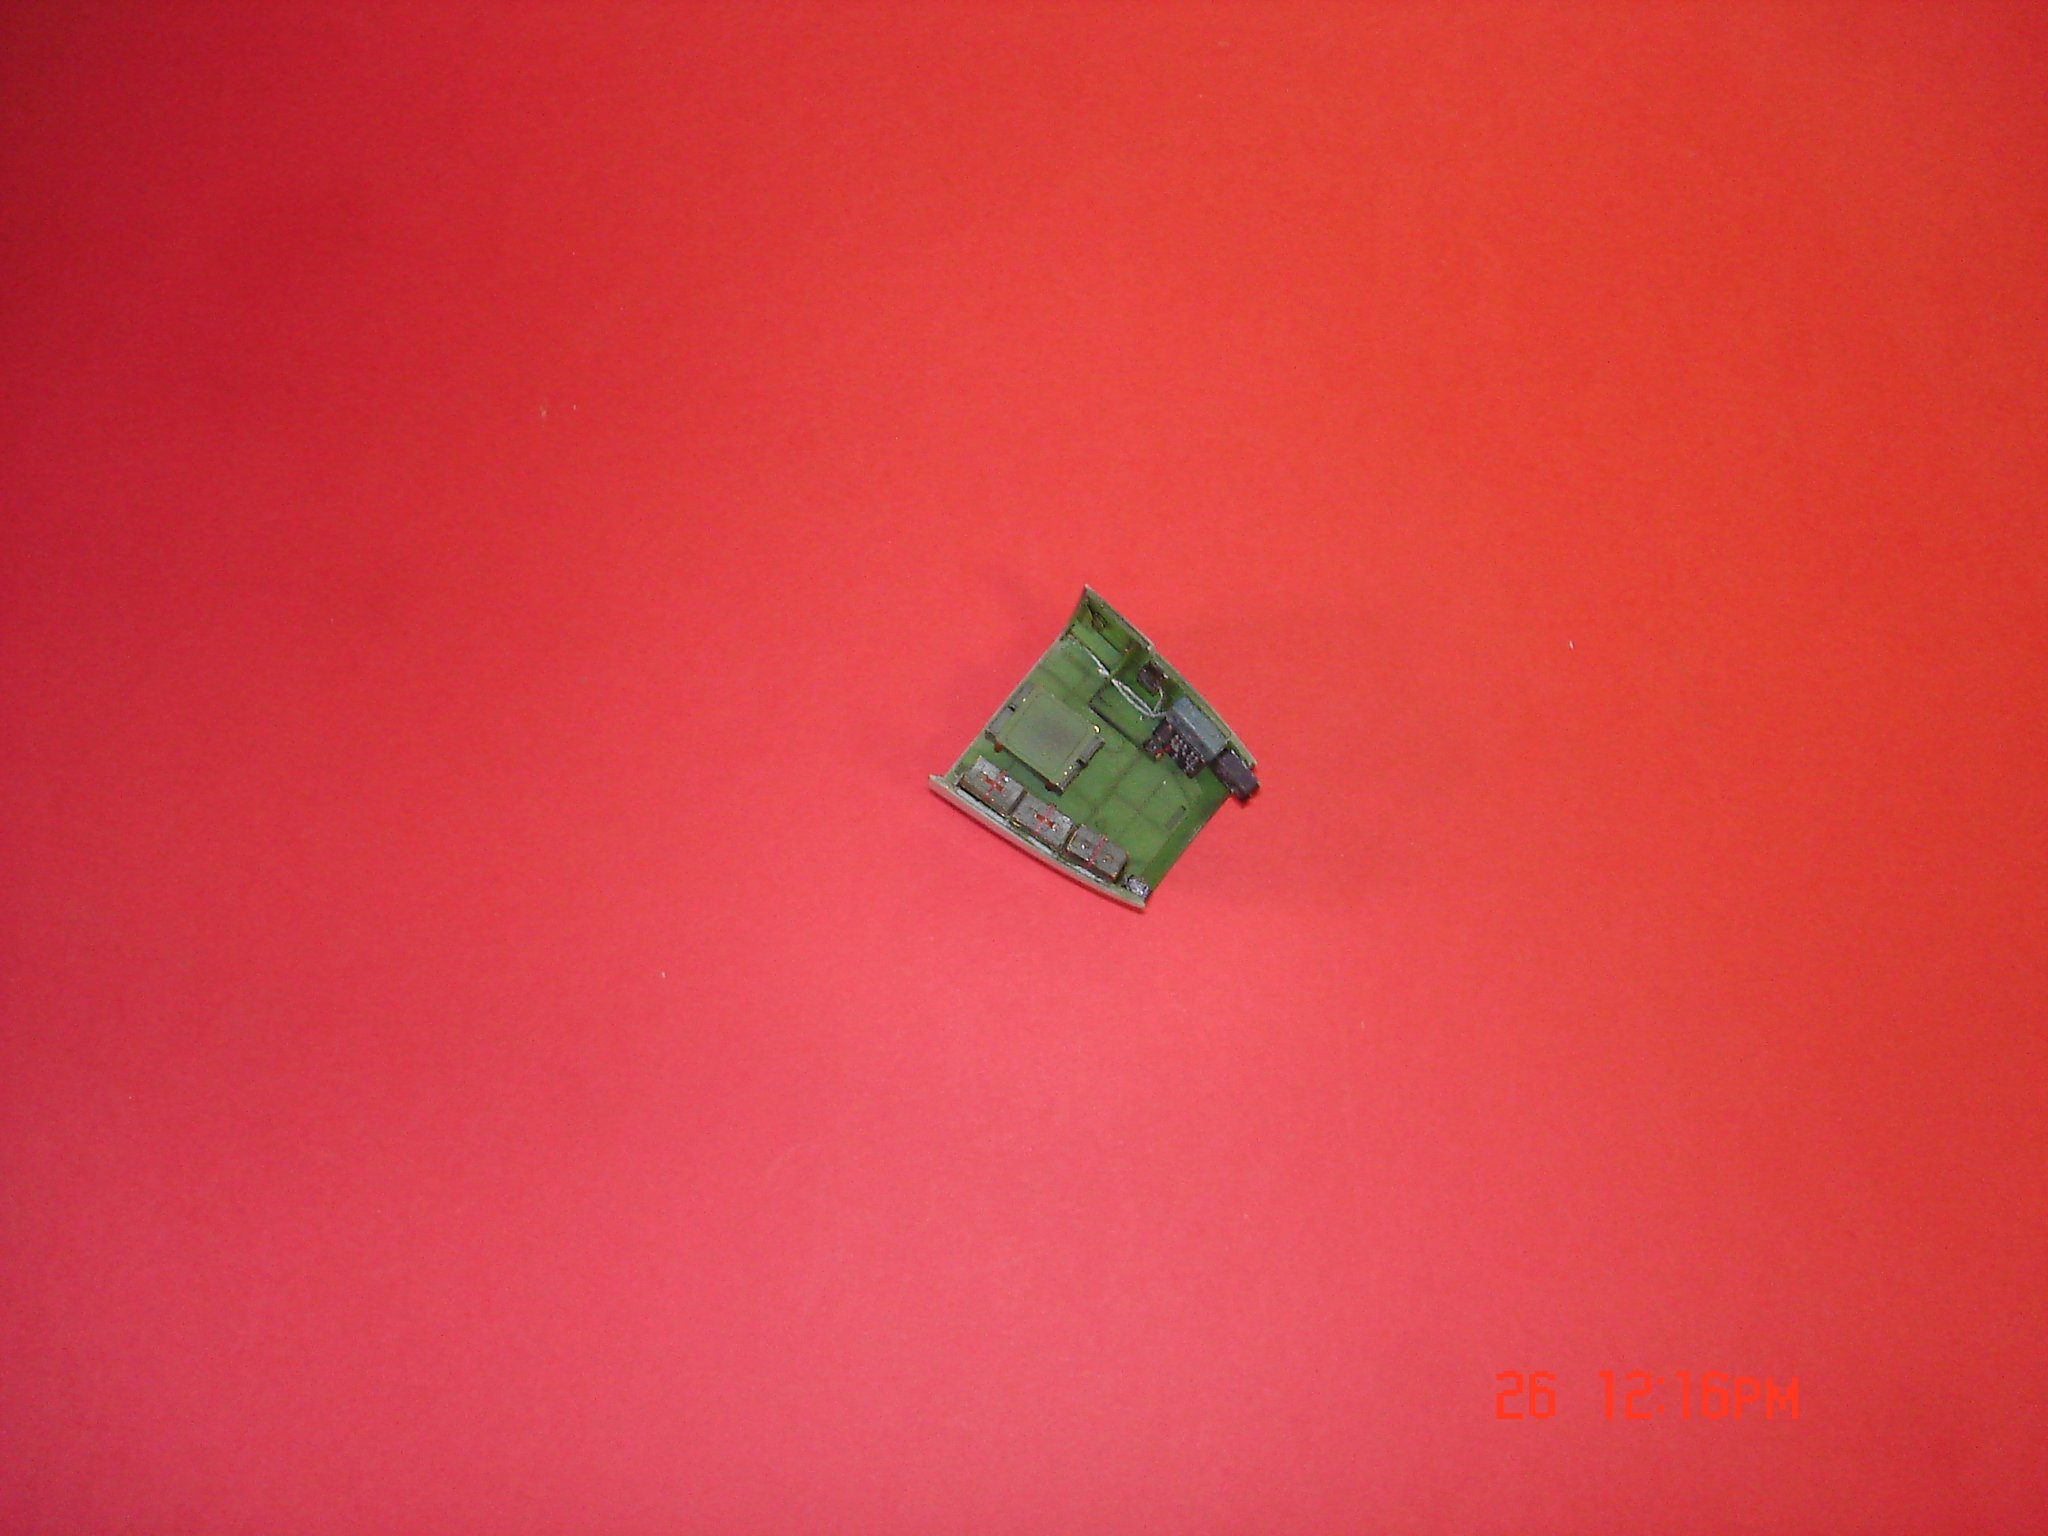
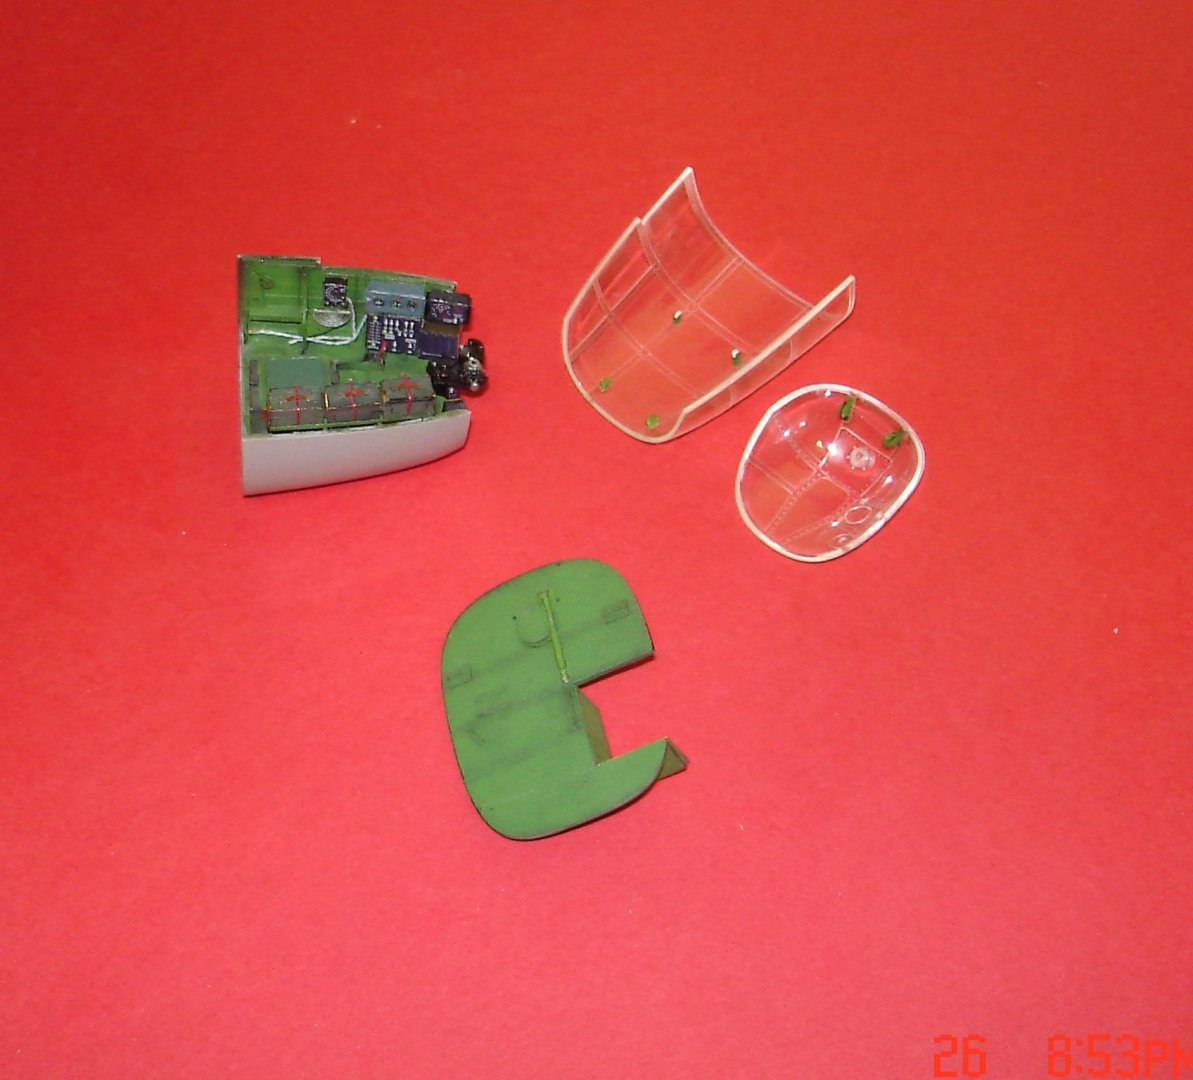
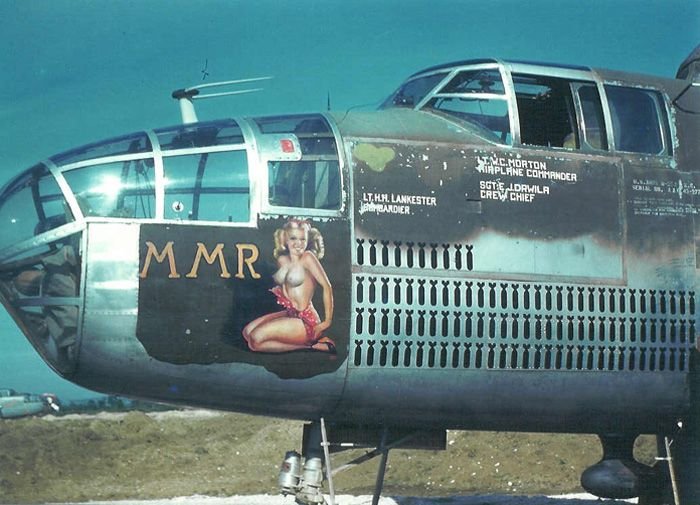
Denis they produce some of the 1/32 scale bombers no else wants to do B-17,B-25,B-24,Mosquito and the Lancaster and when Tamiya does the same kit HK's are about 60% the cost of a Tamy kit.I got the Norden bomb sight in,pulleys installed to the glass for the center MG and repaired the ammo boxes on the right.I hope to finish the bombardier section tomorrow installing all three MG's.This kit is a long time com'in needs to be built.
- 209 replies
-
- 12
-
-
She's coming along Nicely !! Kevin
-
That's alot of pieces Sir!Now did they sort the blocks for you by building?Cool project/build! Kevin
-
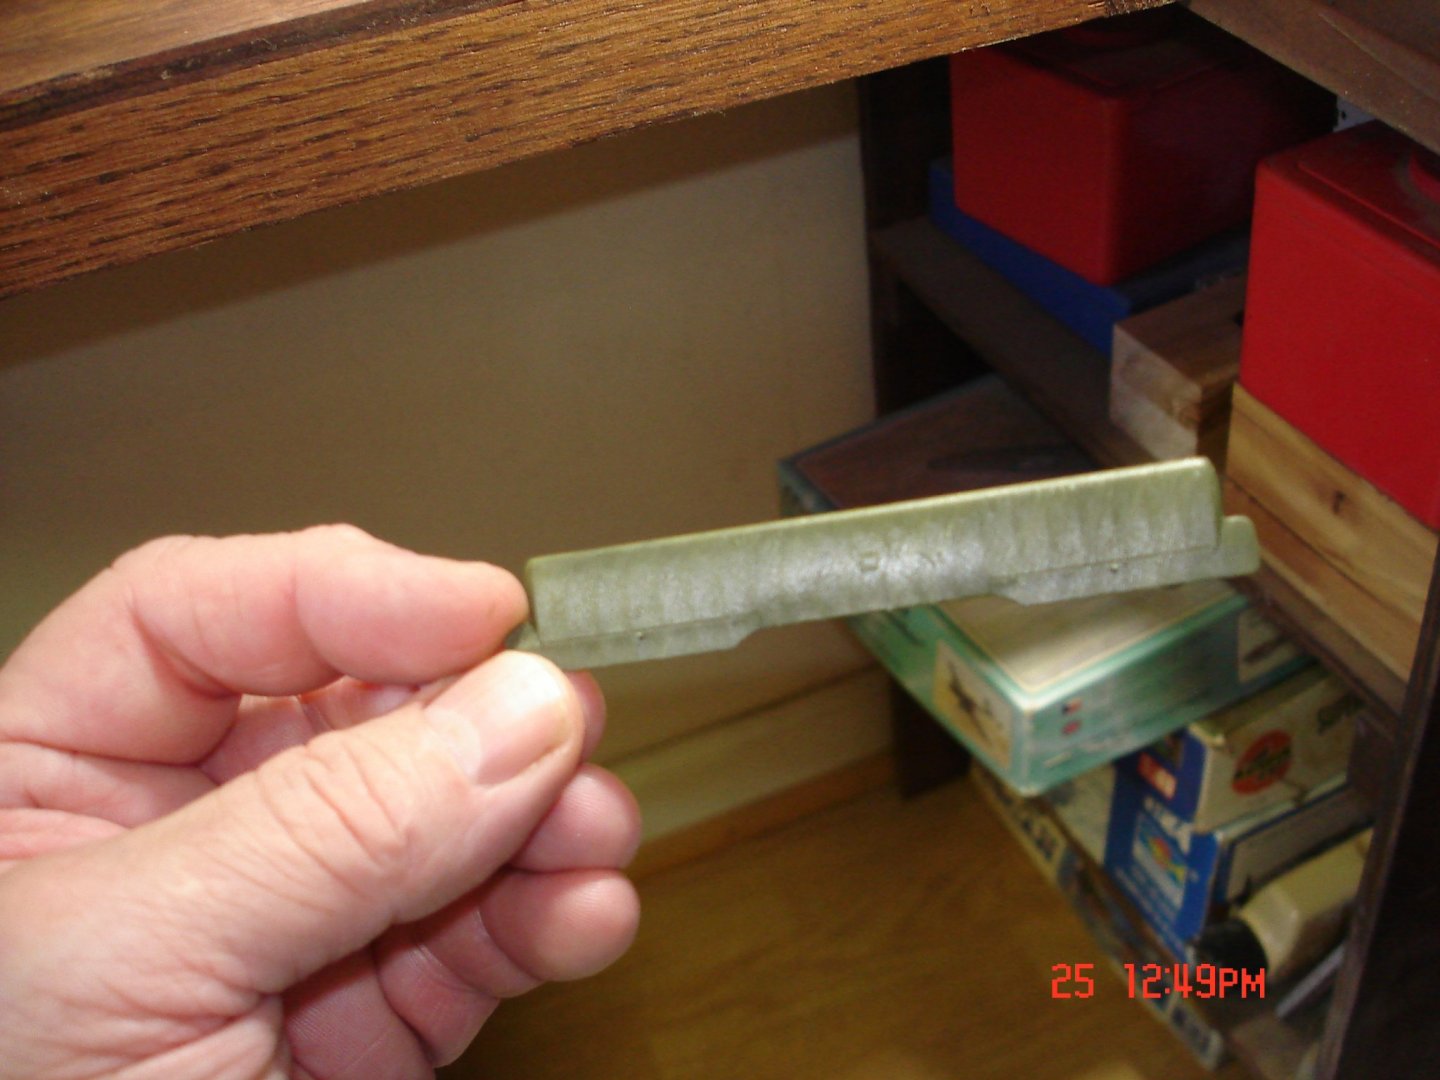
I started this build some time back starting from the front and working my way back.The build will be done in sub-assemblies with so much PE on hand I believe the only area I did not add PE was the bomb bay area.In the beginning I had the bombardier's ammo cans to far pushed to the glass and to break them free and reglued last night with the nose glass as a check for fit.The norden bomb sight has a few pieces on PE to be added.As I said sub-assemblies builds time off makes for a long build but the B-25 is one of my favorite bombers. Kevin PS: I needed to add the paint is a black base with a light coat of the main color leaving the corners/crevasses darker


- 209 replies
-
- 13
-
-
Another one bites the dust.The worst thing I did with this build was the amateur work on the canopy paint other than that lessons learned.


-
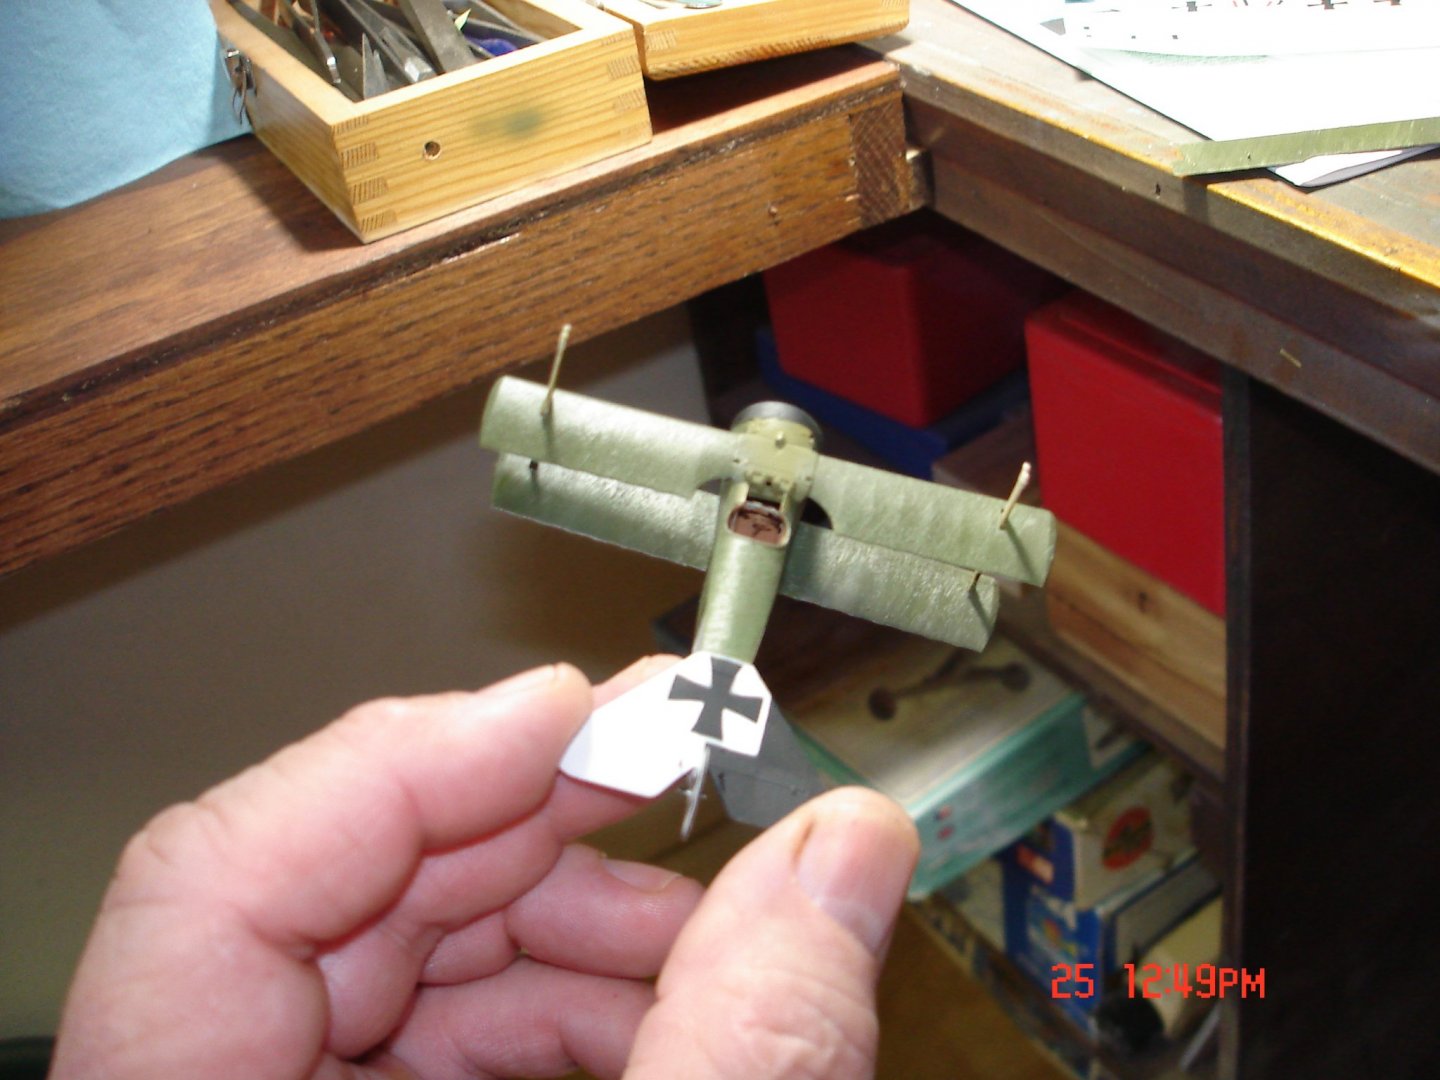
Fokker Dr.I by Javlin - FINISHED - Eduard - 1/72 - PLASTIC
Javlin replied to Javlin's topic in Non-ship/categorised builds
Well I went at this some more concerned about the texture and found I could smooth it out for the most part flat soft brush with a light touch added some more white and blue into the mix once it cures good a couple of days throw out some pics.Thanks for the interest. Kevin -
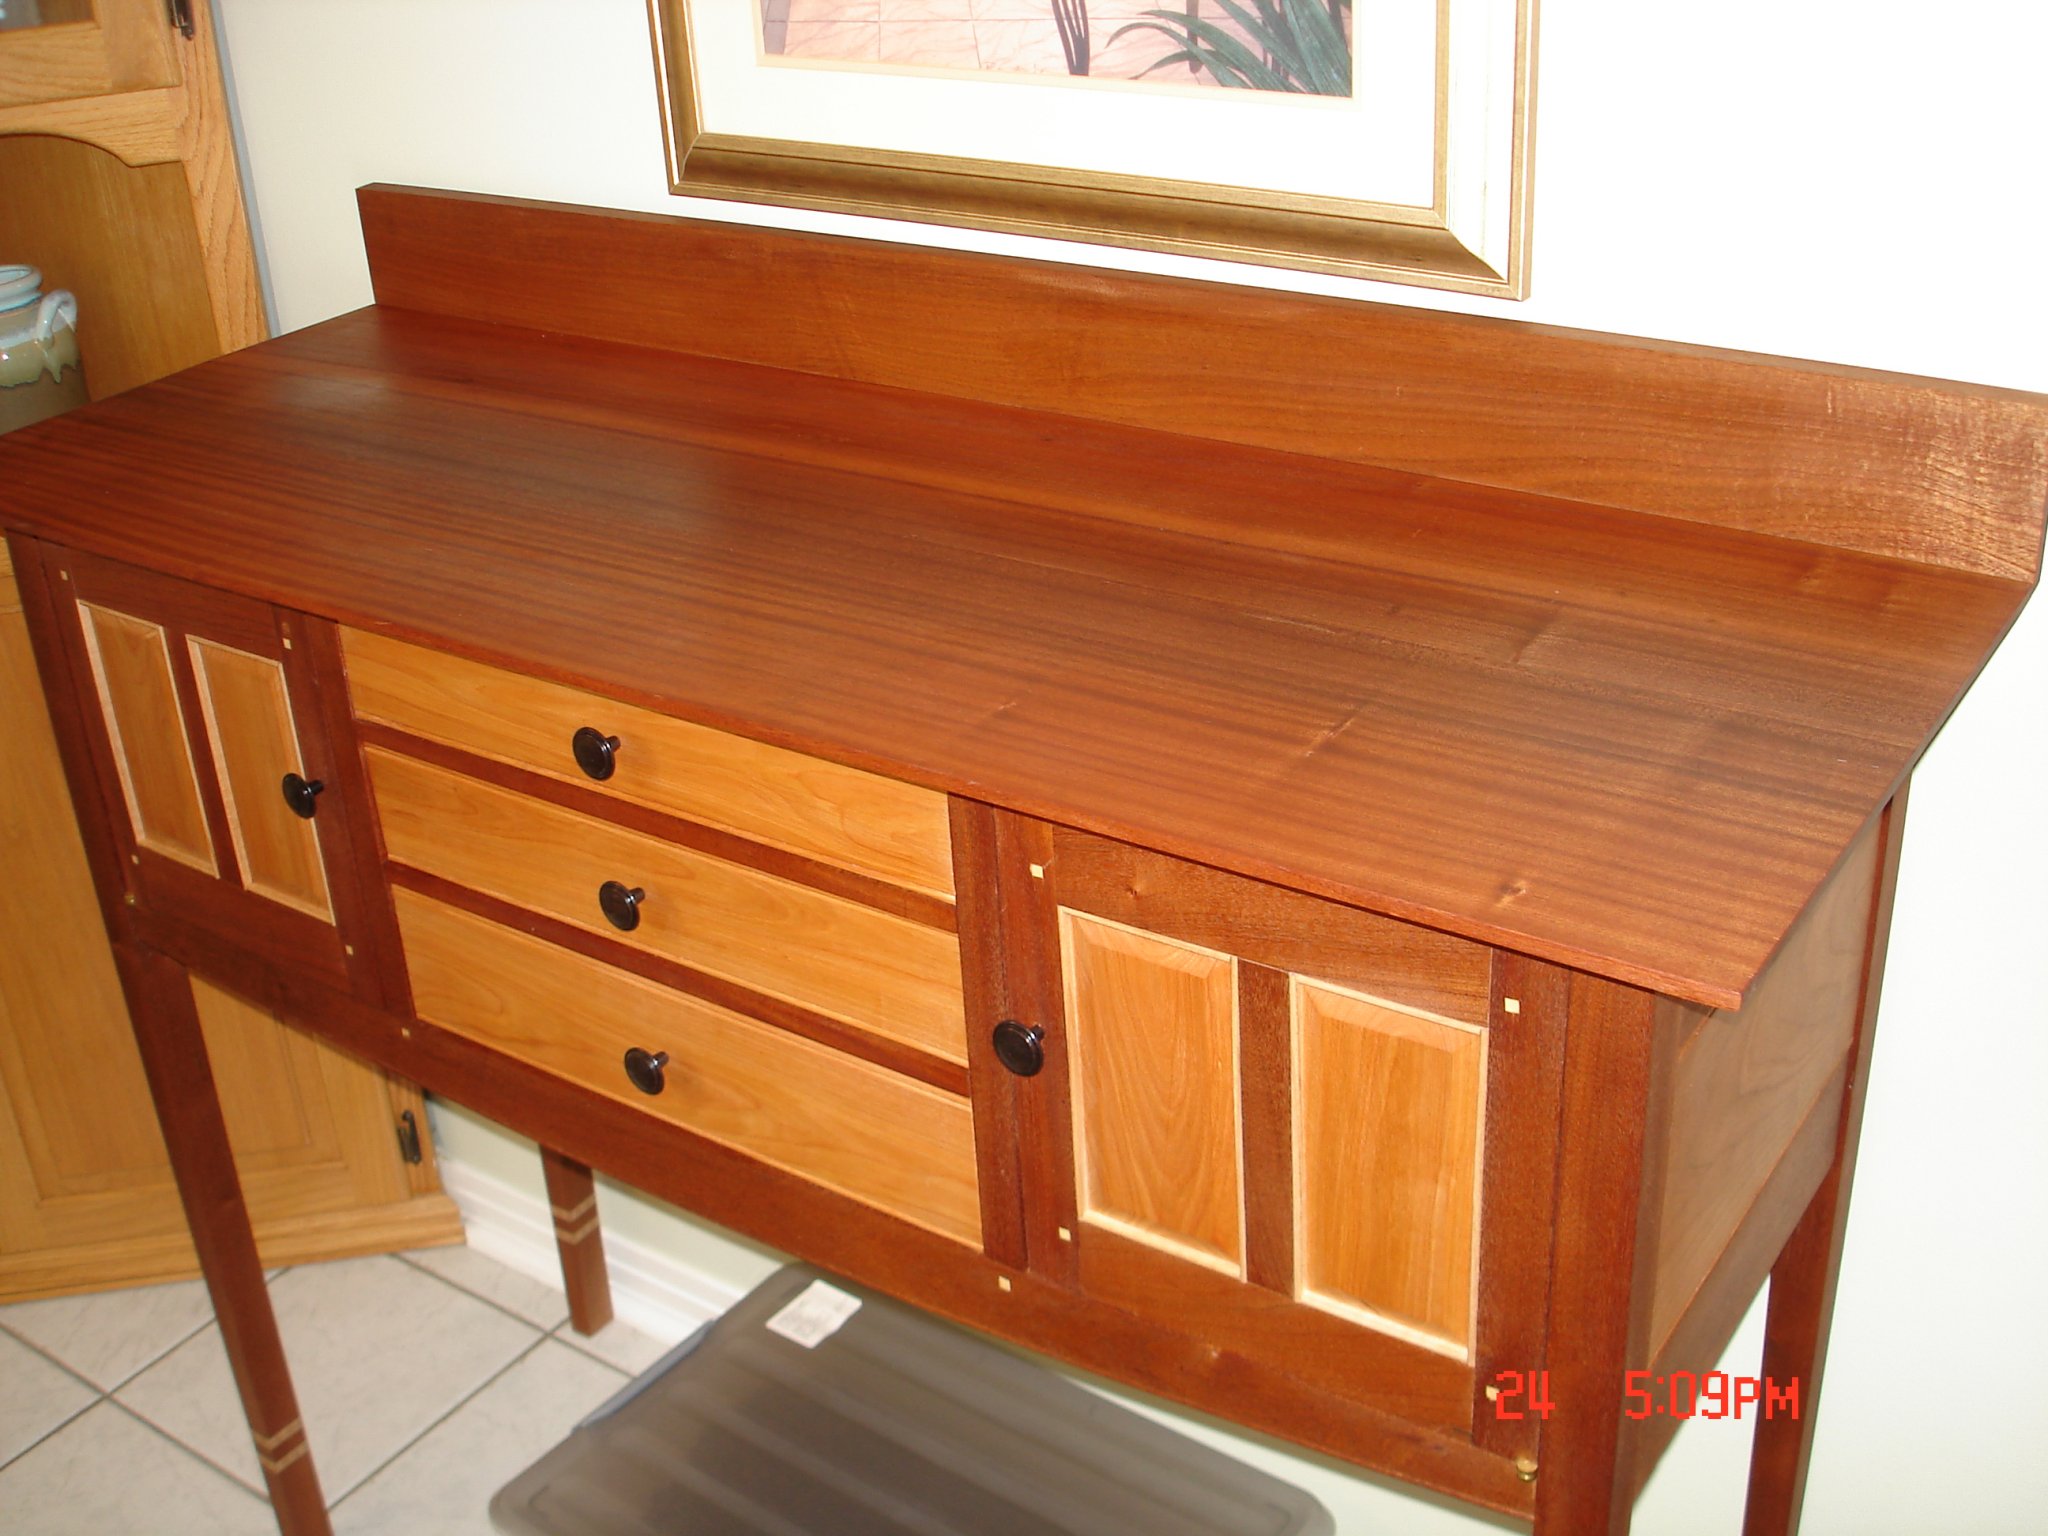
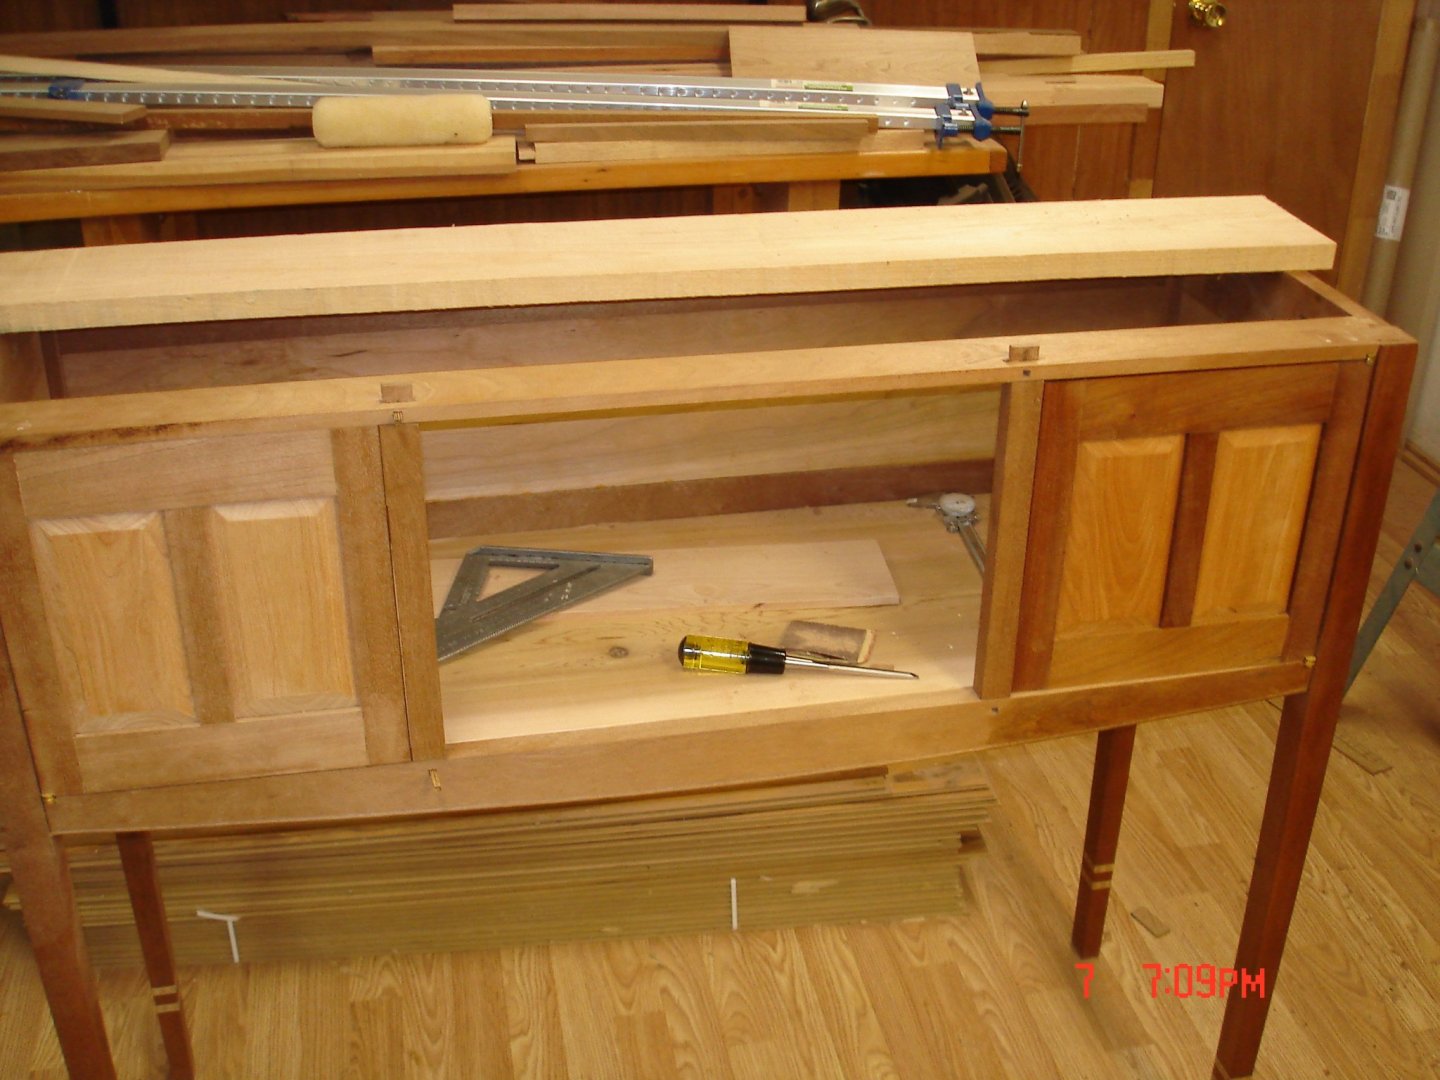
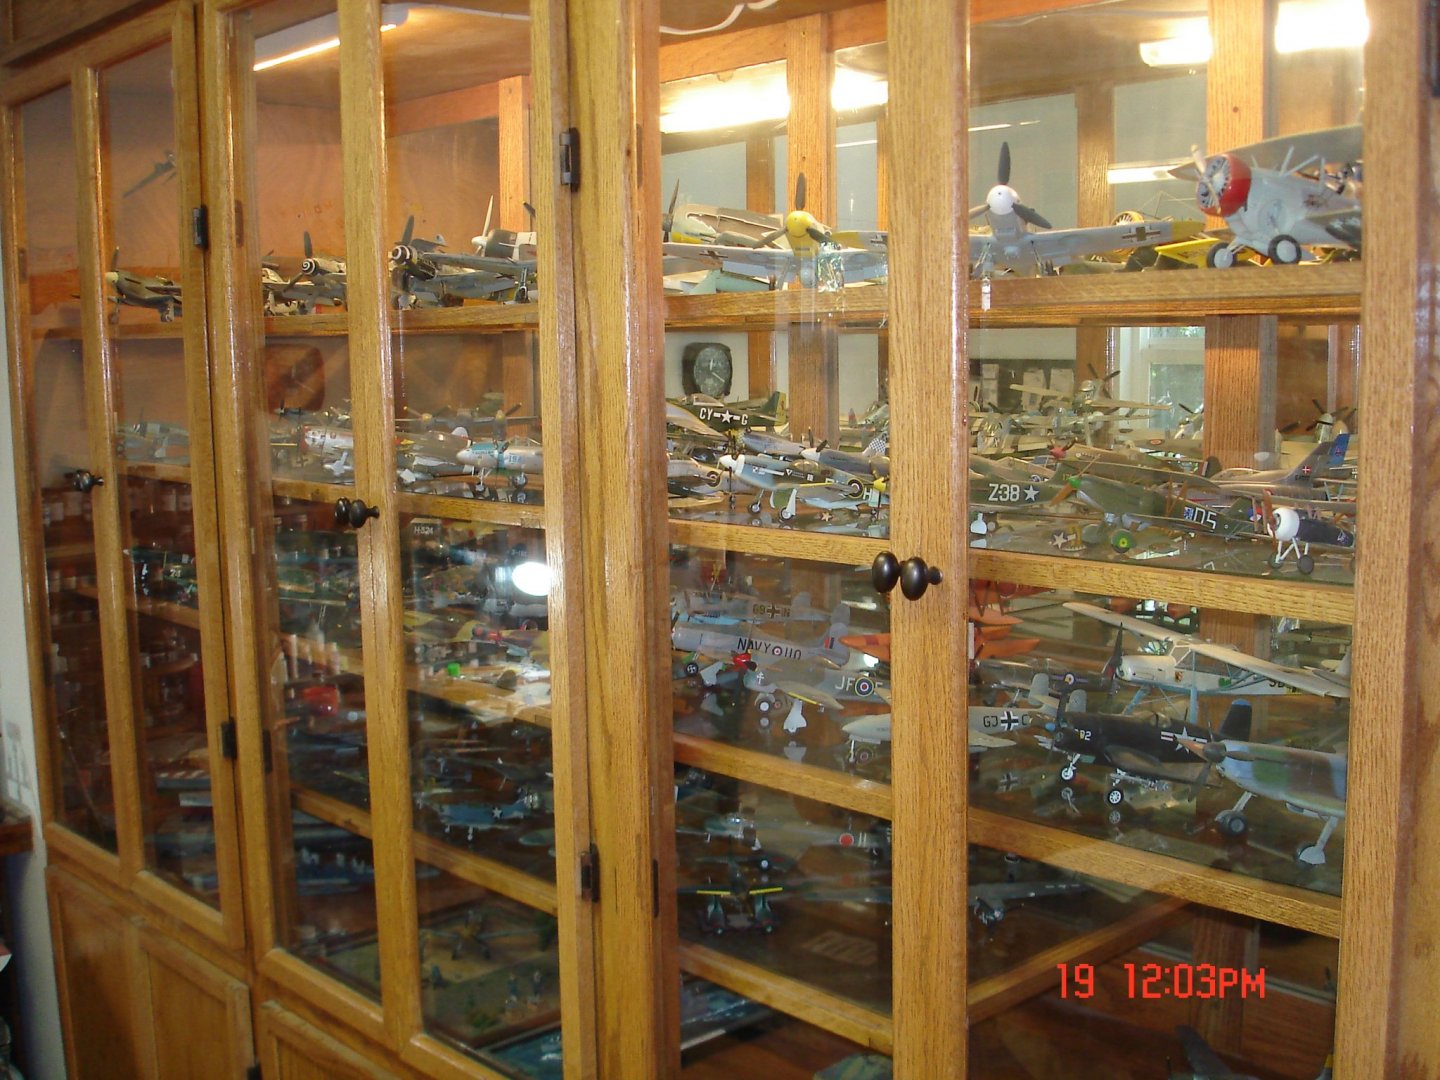
Thank You CDW for the kind words I say that piece is about 50/50 machine and hand tools I learned pretty much how to use and sharpen chisels I wish I could master my hand planers though.This piece I have 80-100 hrs involved in it and about $300-400 of wood I sometimes made a piece 3X to be just right if you look at the upper right above the door you see a double dove at the end of the stretcher.Thanks again for high fives and comments. Kevin
-
Yes there is Gene in all forms and styles I don't know what it is but I got to keep my hands busy and it follows with a lot of us in that regards.I am trying to work on this for retirement if people are interested in this kind of stuff anymore it's all mortise/tenon only screws hold the top in play.Gene you got to be getting up there in your years if you were flying P-51's I asked a fella from Korea action and before I could get the words out he said"no never got to sit in a P-51" it sounded like something he wished had happen.

-
Yeah with the history my father had and being an AF brat saw a lot of planes growing up and I am really not that old being born in 61 but I come from a large family Yves been twelve of us if they all survived birth ended up with seven.I like ships to they just take so much time I live 1/3 mile from the Gulf of Mexico as the crow flies.I learned from a fella Bill Runnels who was a Bombardier in the 303rd we use to communicate on another forum in private chat he reminded alot of my father in some ways in how life was simple back then anyway he mentioned how they had to practice in Gulfport's Backbay in winter survival ditching for in the ocean.Bill passed away not to long ago about a year or so a good man.A short story of his...... Short Burst On days when our squadron did not fly a mission proficiency checks, both squadron and individual, flights were ordered. We hated these feeling we should have the day off. On such a day our crew was assigned a "bombing" check flight. I was to drop five 100 lb practice bombs from 10,000 ft. We were standing by the aircraft when a jeep pulled up to the hard stand. Out stepped Col, William C. Sipes, 303rd Bomb Group Commander. He informed us he was going to ride along. That made this 19 year old 2LT a little nervous to say the least. The Col. occupied the co-pilot seat. We took off, made the five bomb runs. I folded up shop and stretched out on the floor. A few minutes later I heard "co-pilot to bombardier, what is our location". I had no idea as I had been relaxing. I took a quick look and didn't see a thing I recognized so replied "Sir, I don't know". He said if you will look straight down you will see our base and the intercom went silent. I thought, boy am I in trouble and expected to receive some rather firm comments from the Col. after landing. I dropped out of the nose hatch of the B-17 when on the ground and waited. Col. Sipes deplaned and headed strait for me. I came to attention and when he got about ten feet from me, he pointed his finger and with a smile said "Gotcha". He then complimented me on the accuracy of my five bomb runs, got in his jeep and drove off. Boy was I relieved. A week or so later I was assigned Lead Bombardier status. It’s nice to have a boss with a sense of humour and understanding. He was a great pilot. Had access to one of the newest spitfires. If you were lucky enough to see him take off you set down and watched the show. I had one other personal encounter with him that speaks well of his character. Following VE-Day he decided The Group under his command should have a formal Victory Parade, class A uniforms and a band. He rounded up a bunch of band instruments and called for volunteers. I played baritone and Col. Sipes played tuba in the band rather than being on the review stand. I have searched for footage of this band passing in review without success until a month ago. One of our Sons found it on You Tube. What a wonderful momento to have. 2/
-
Fokker Dr.I by Javlin - FINISHED - Eduard - 1/72 - PLASTIC
Javlin replied to Javlin's topic in Non-ship/categorised builds
I used oils over an enamel olive base I selected white,blue,light olive and dark olive in the oils using a fan brush.The only thing I do not like about using oils is the texture left behind I tried to level it some with spirits but it was blending to much.I will get better pics later in the sunlight once this is all dry.I am glad I don't do this for a living now in 1/32 it might work better.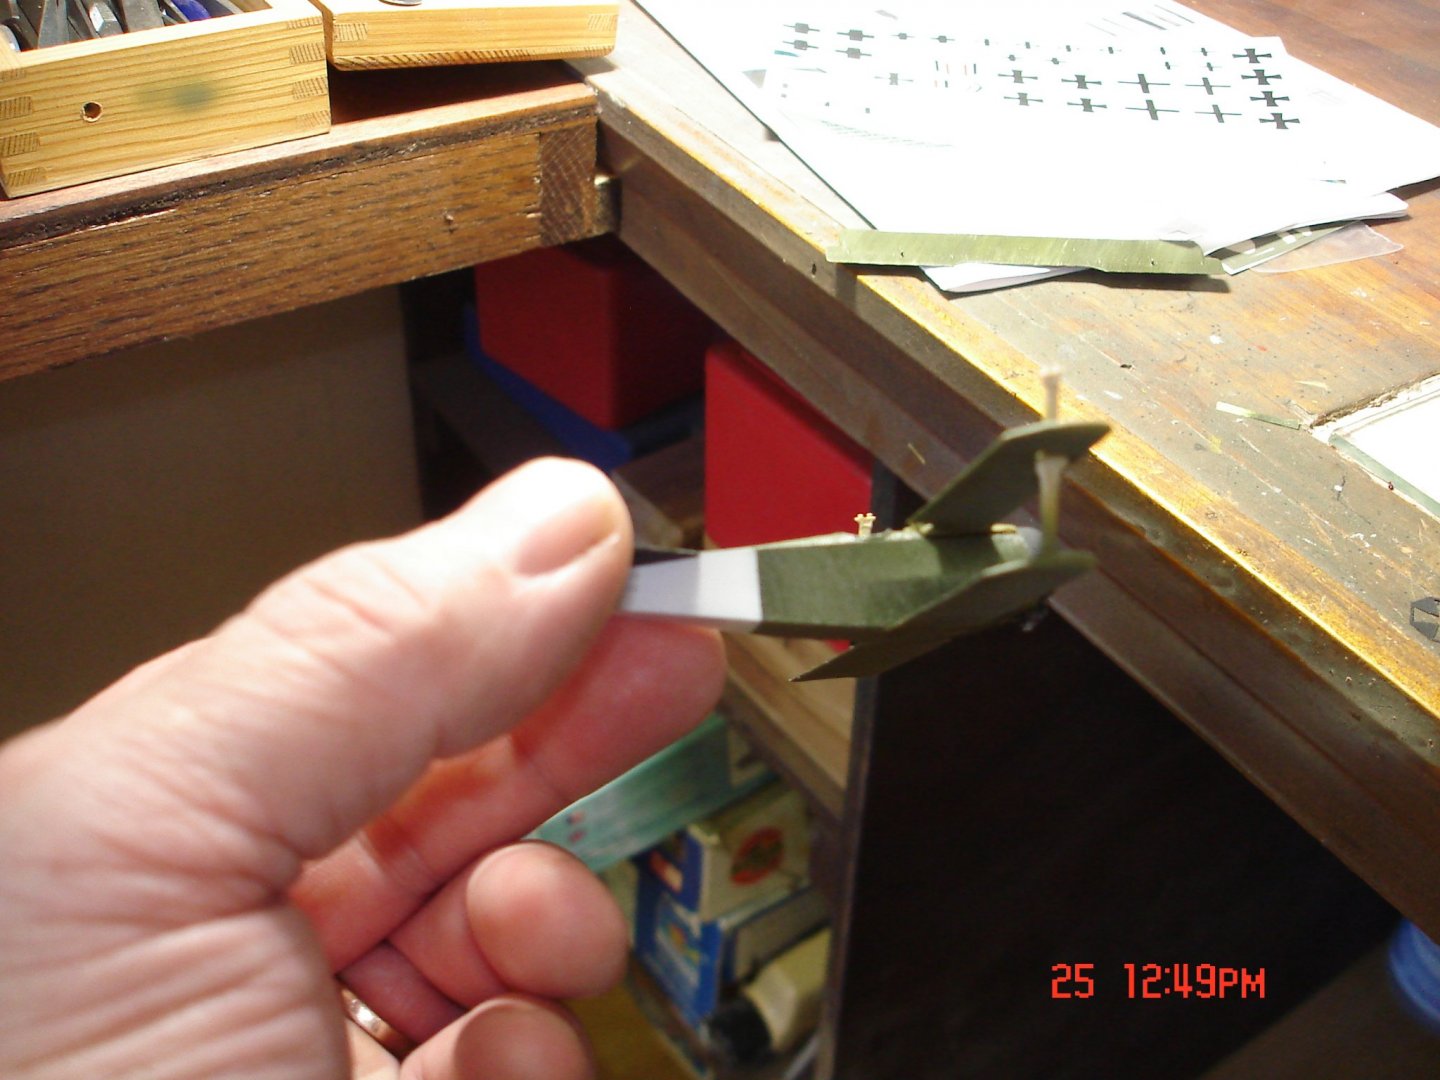
-
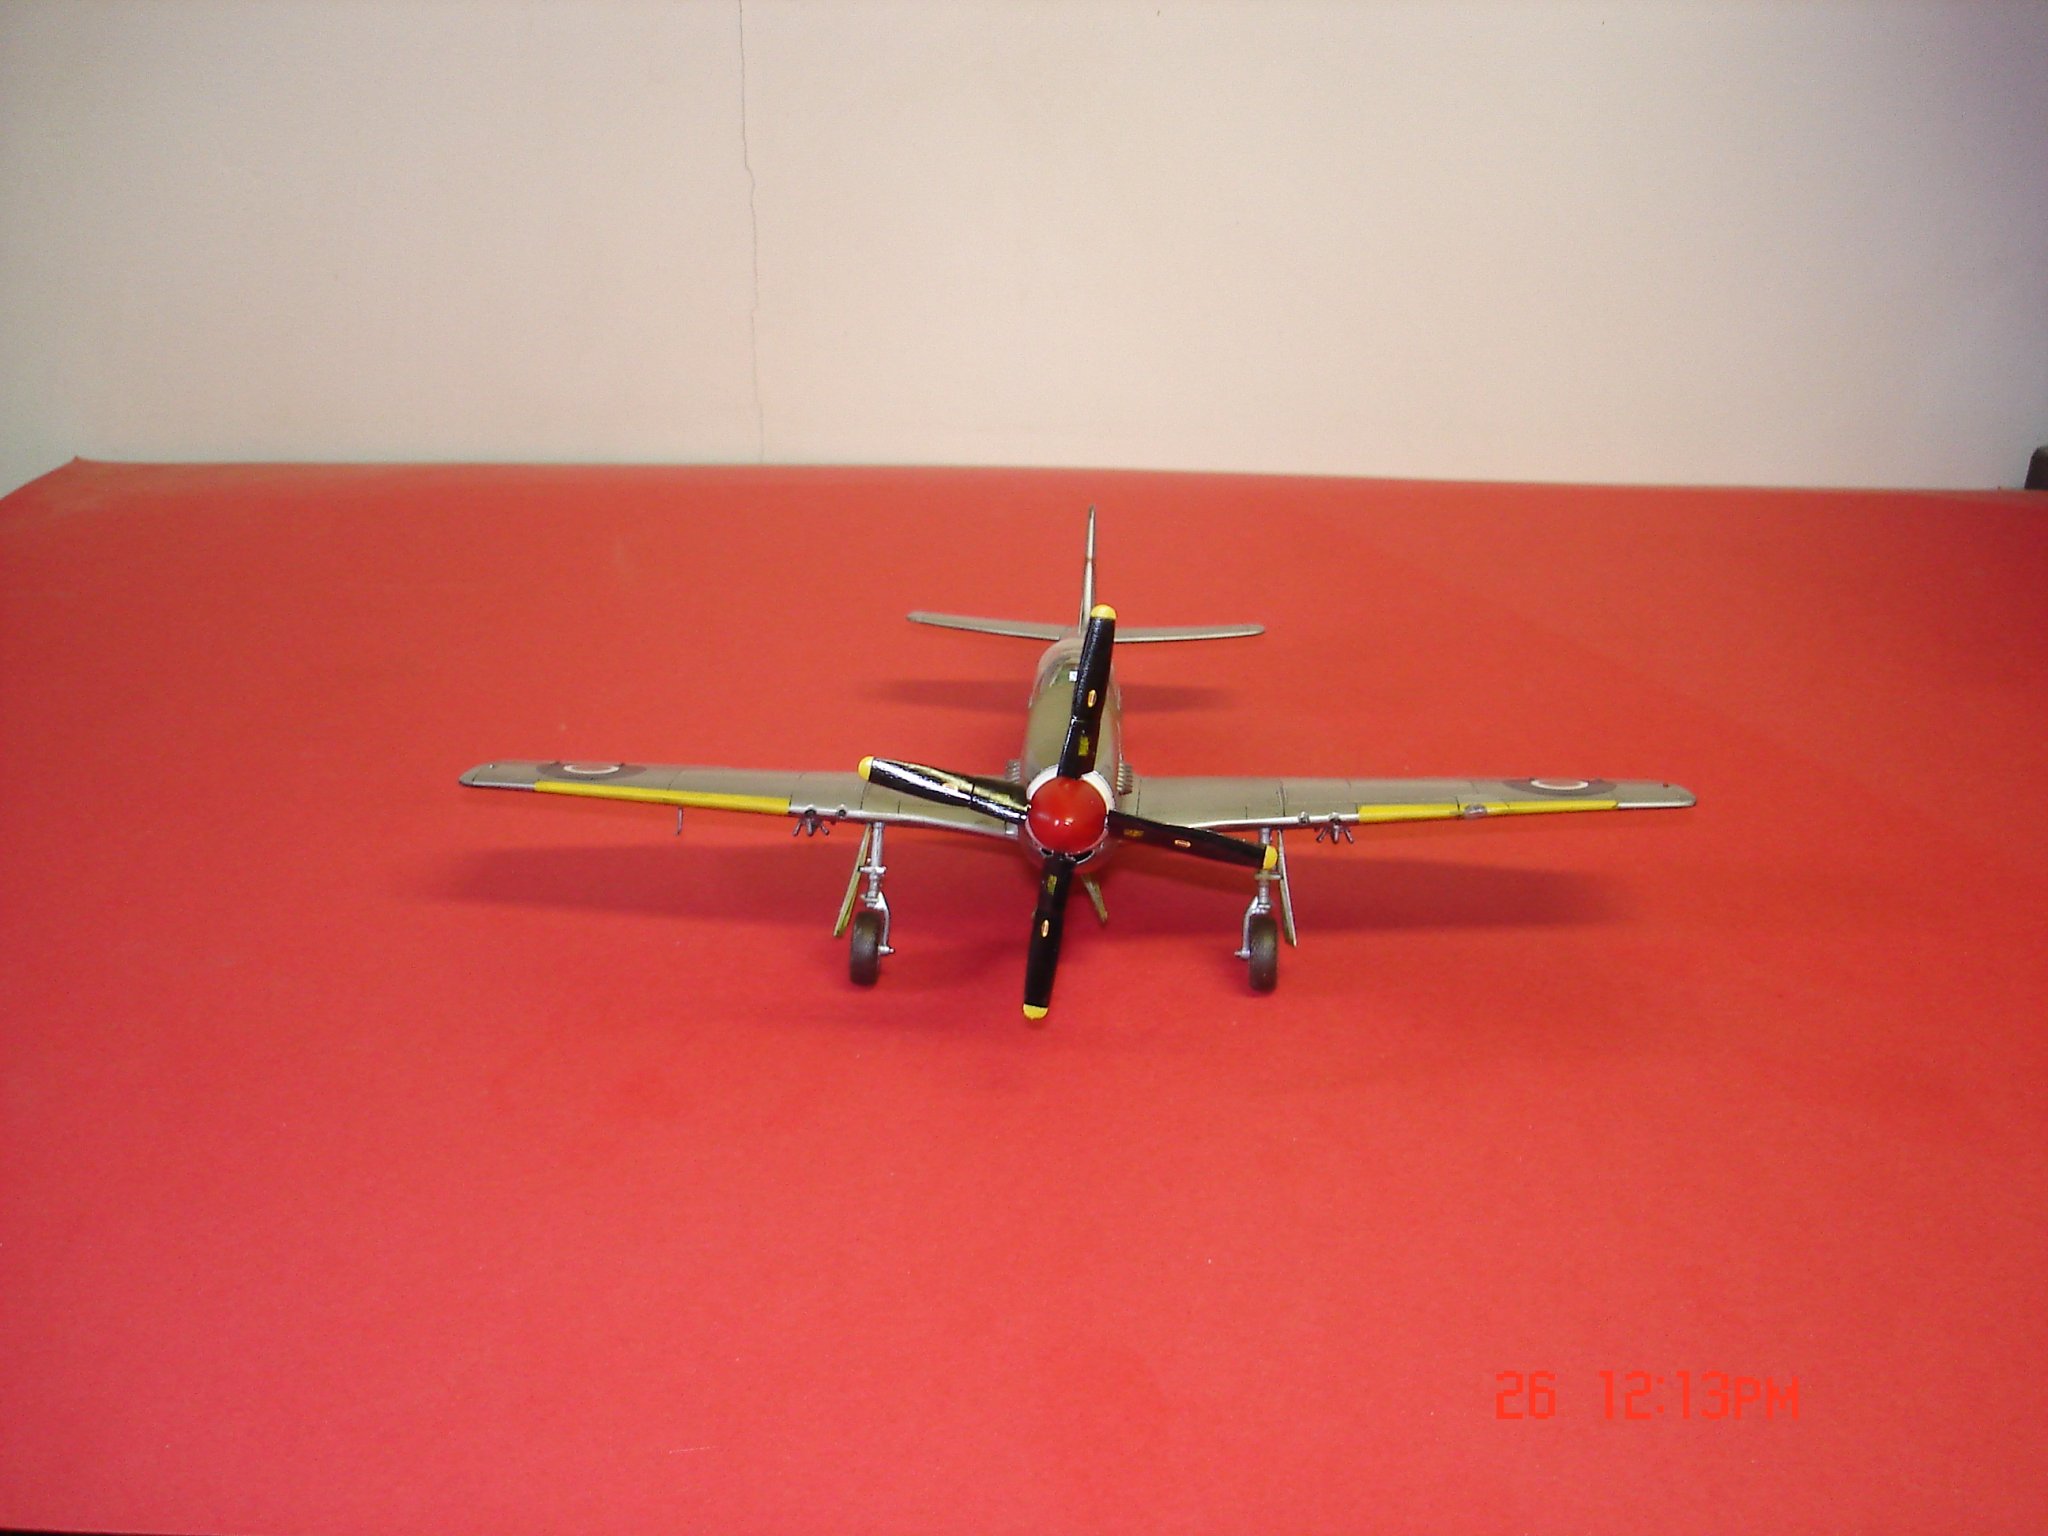
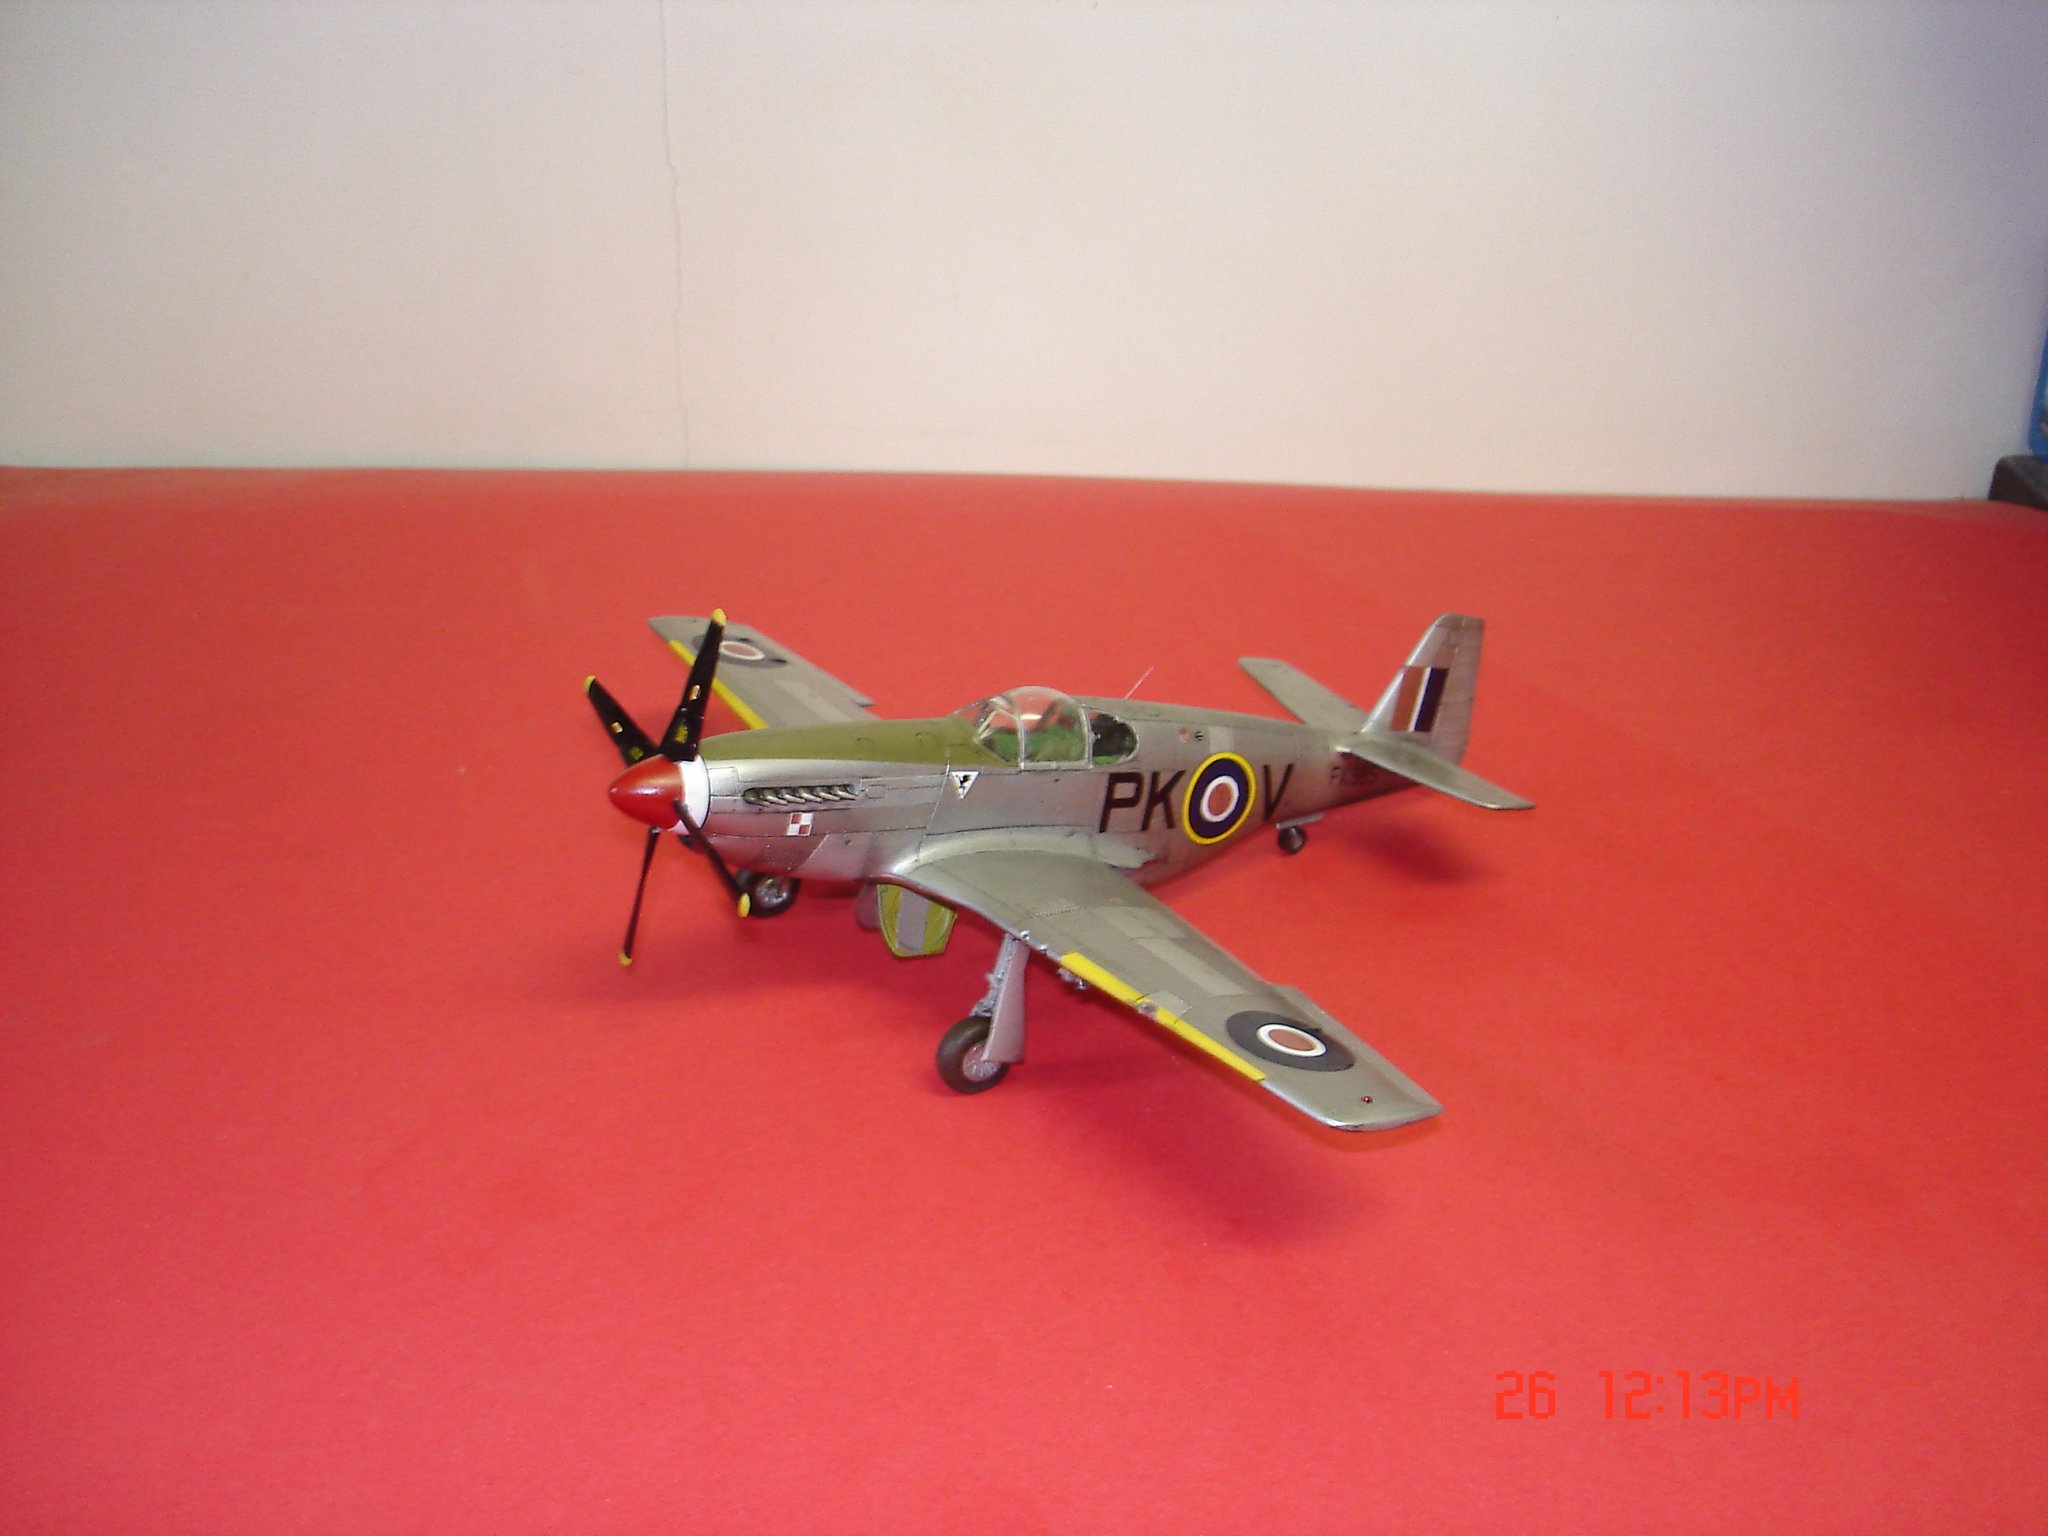
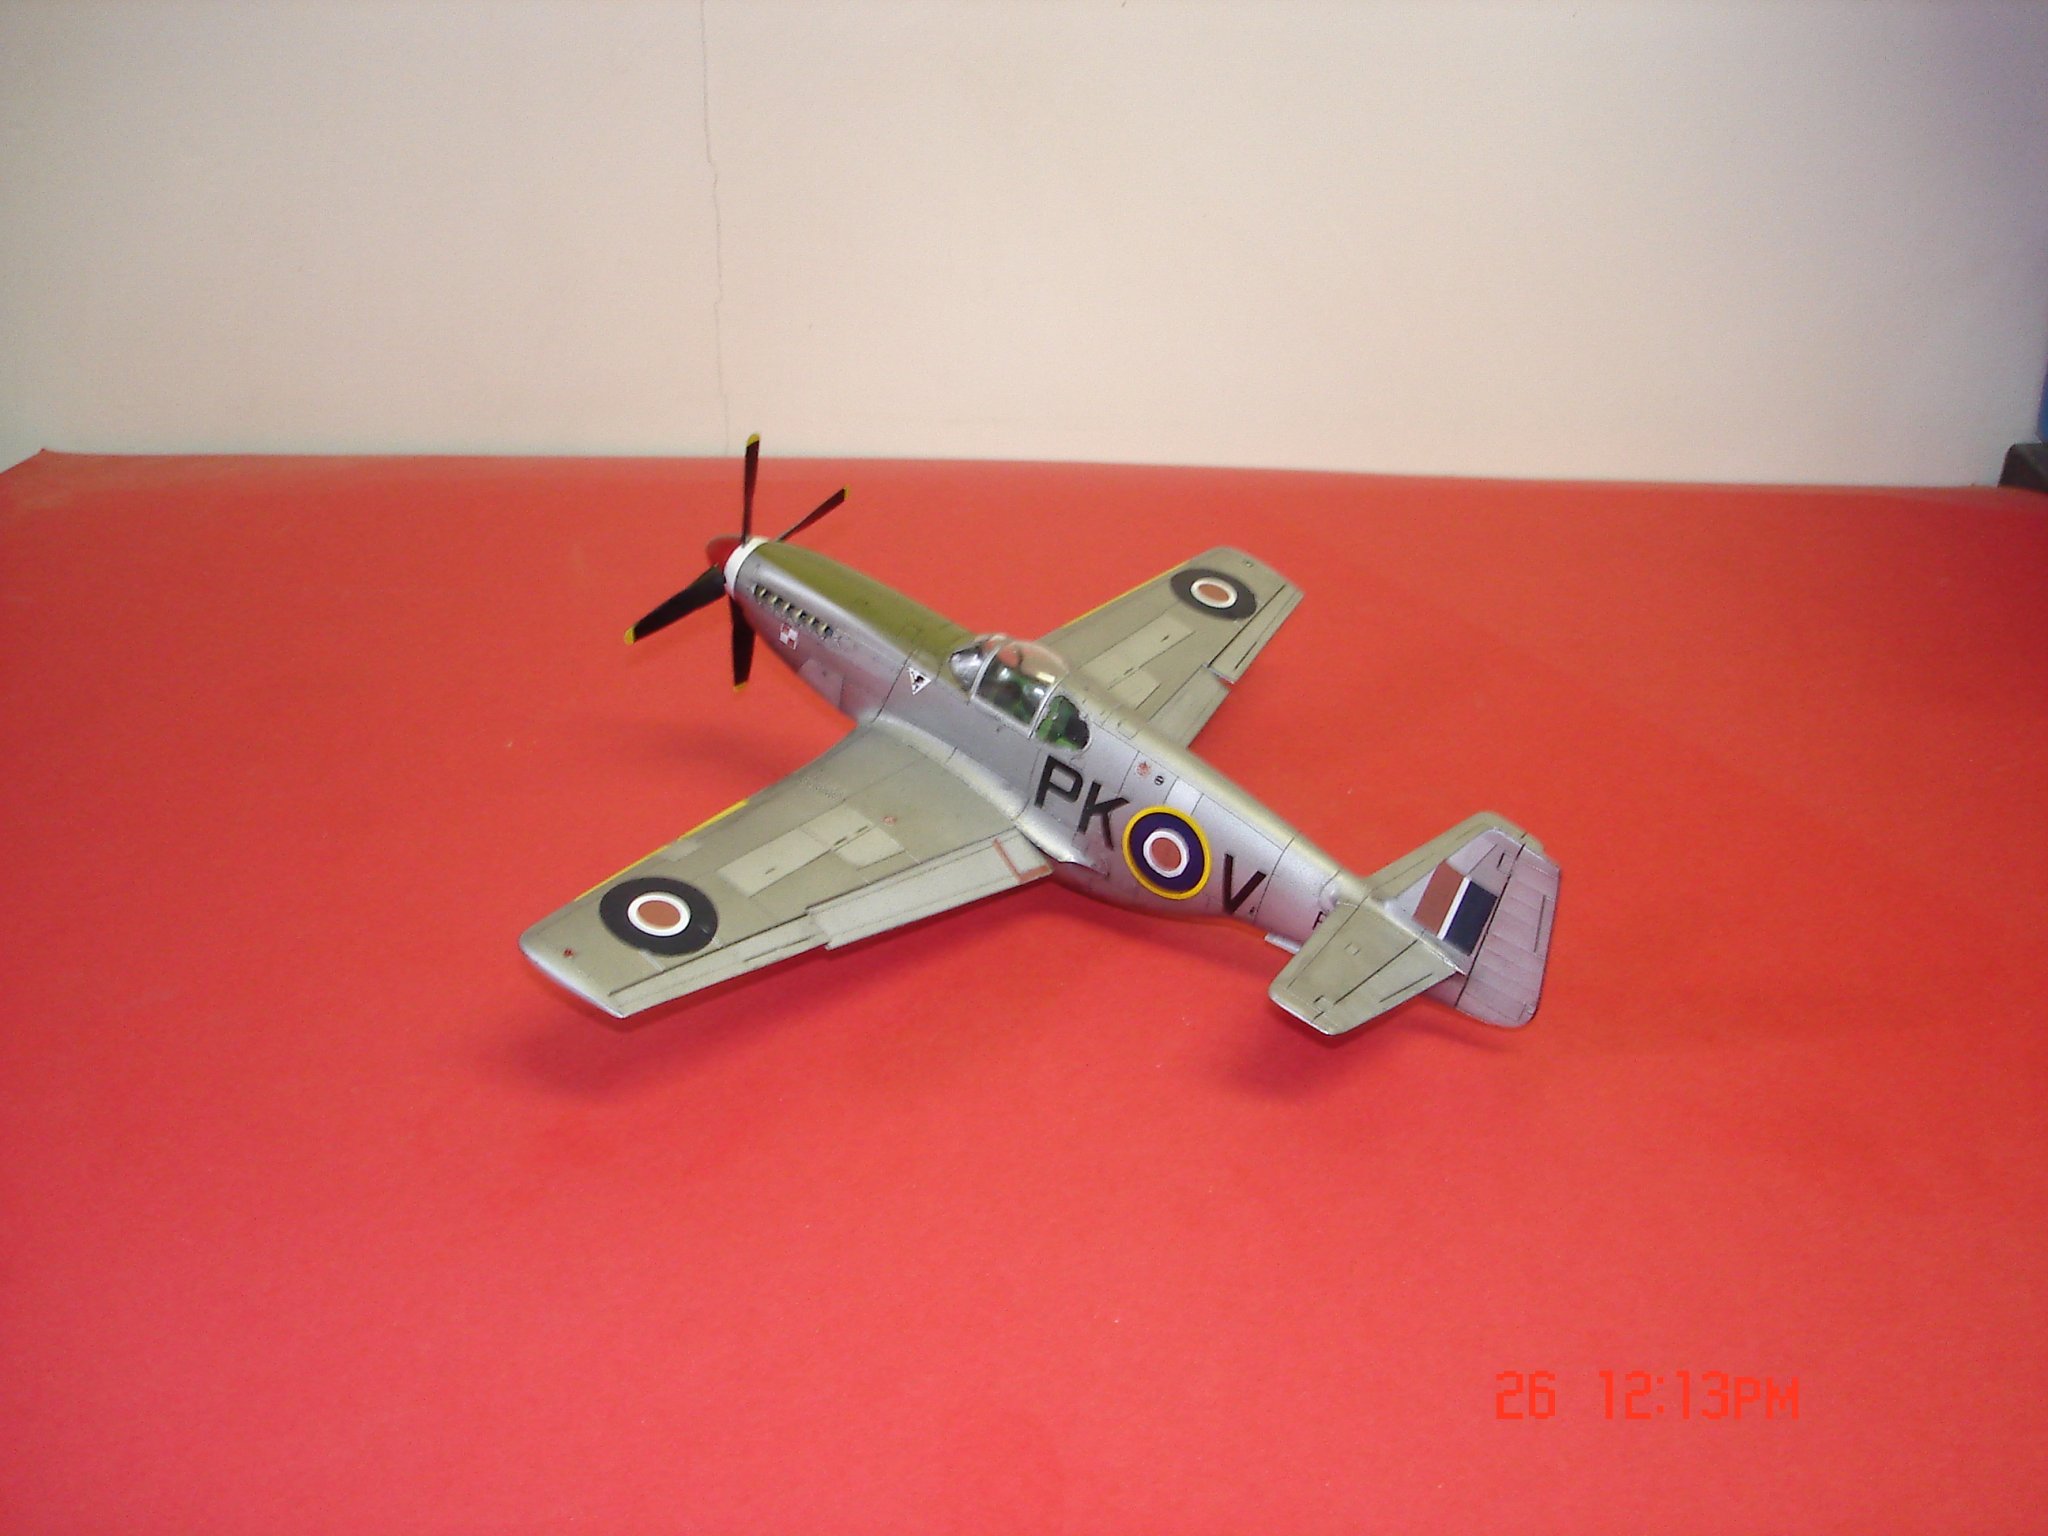
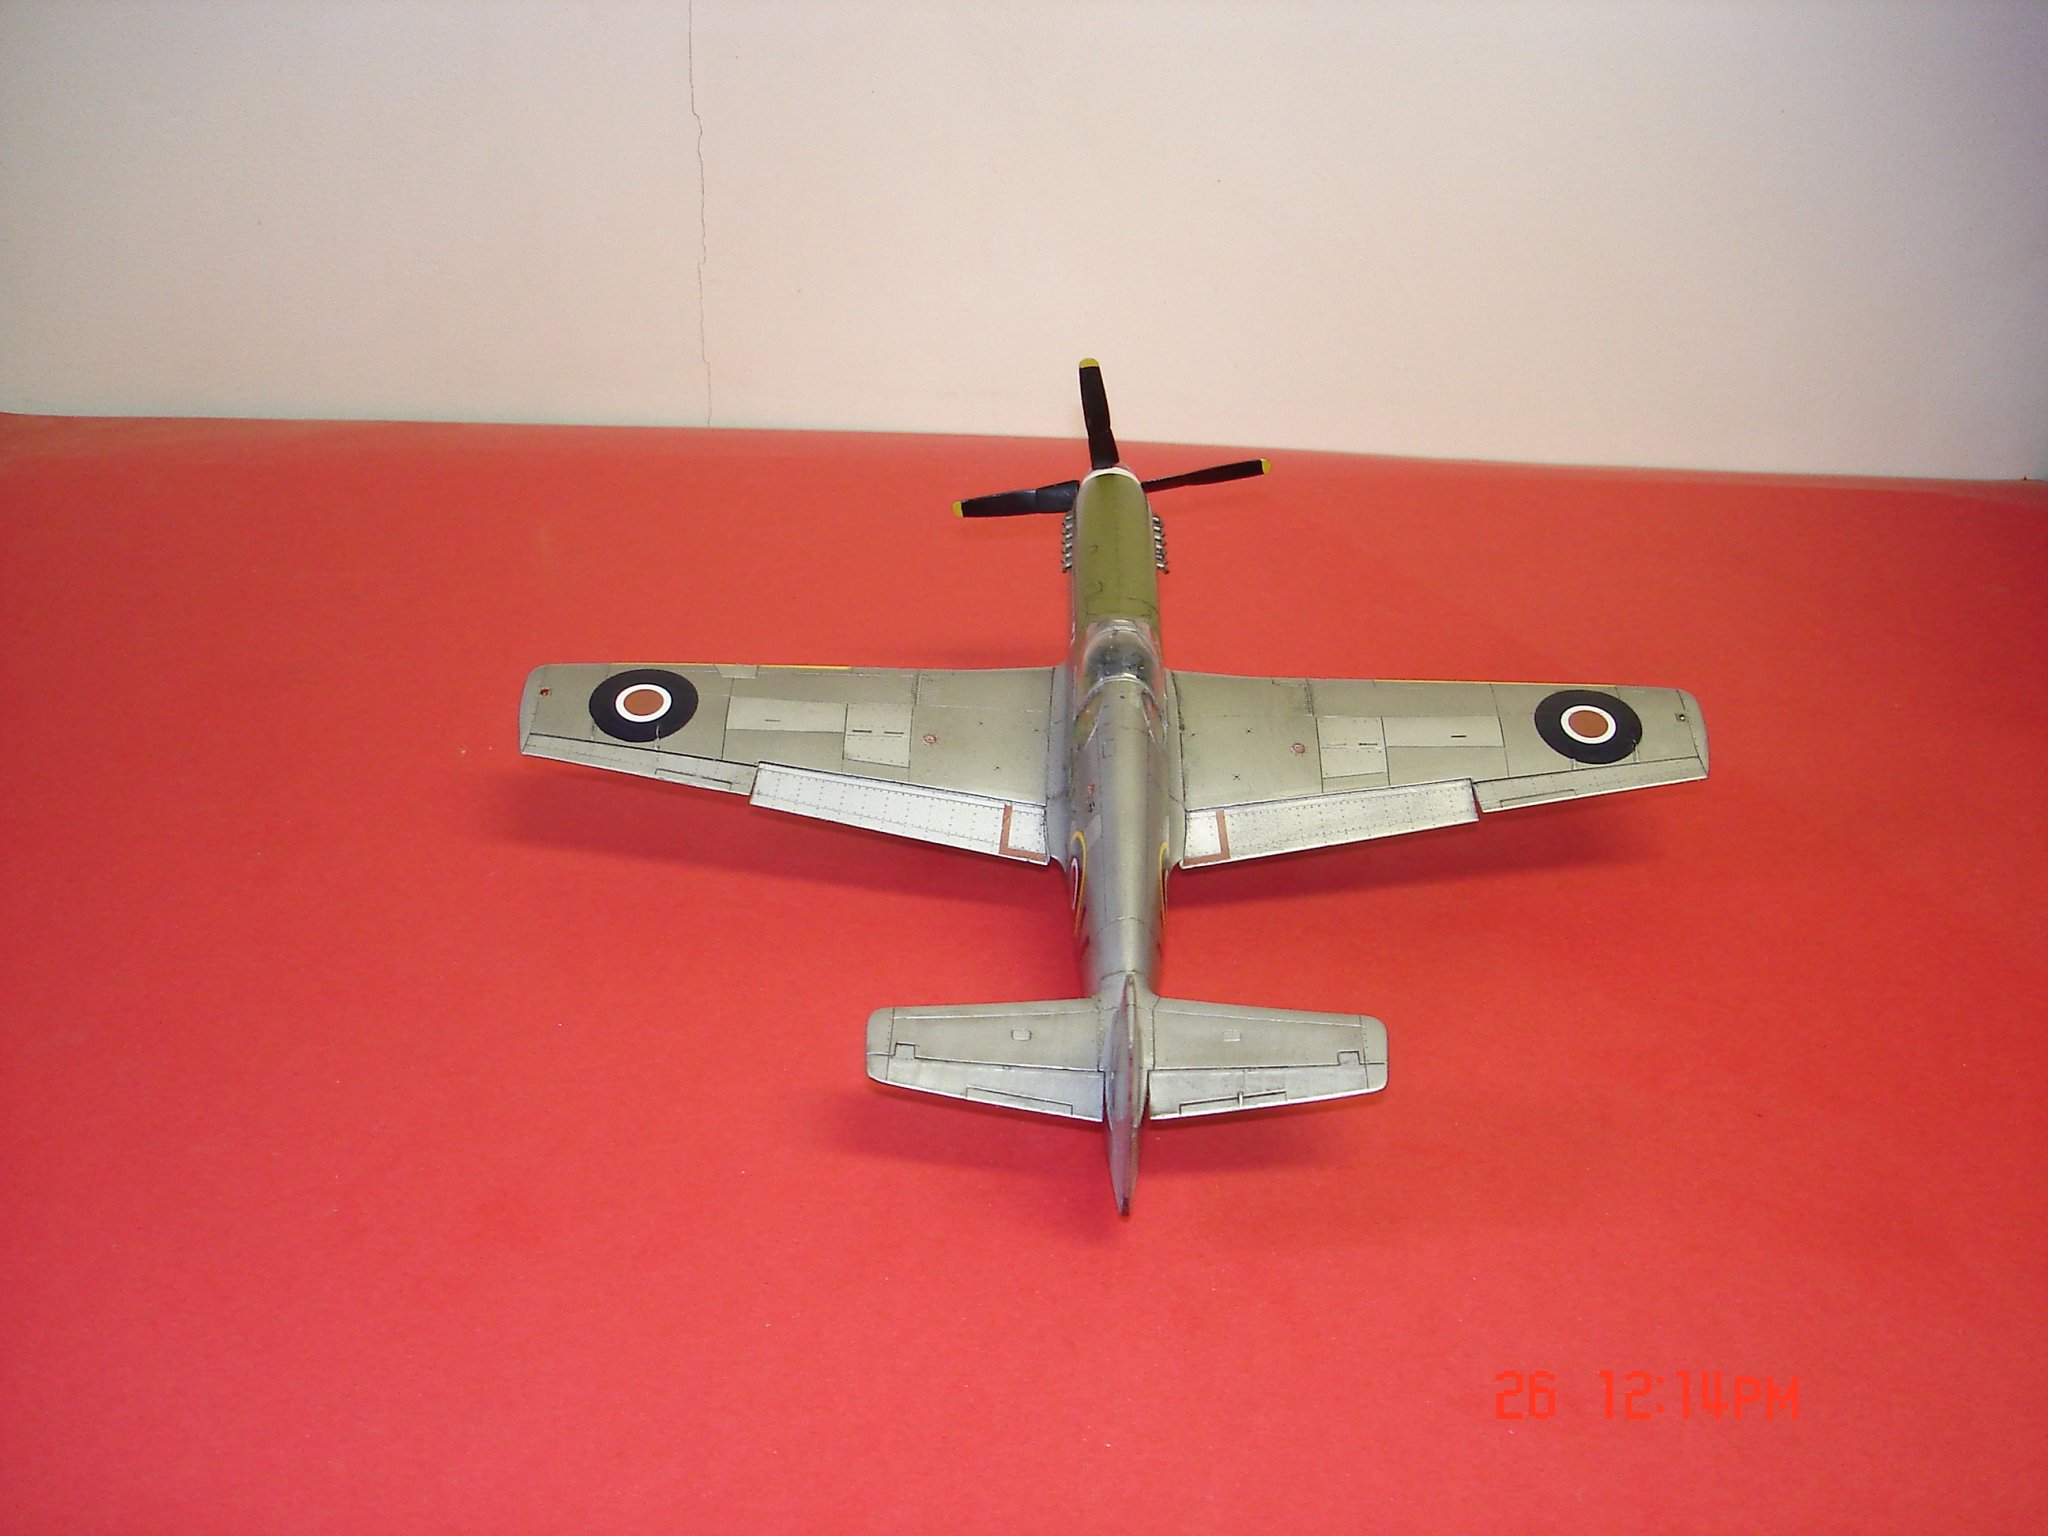
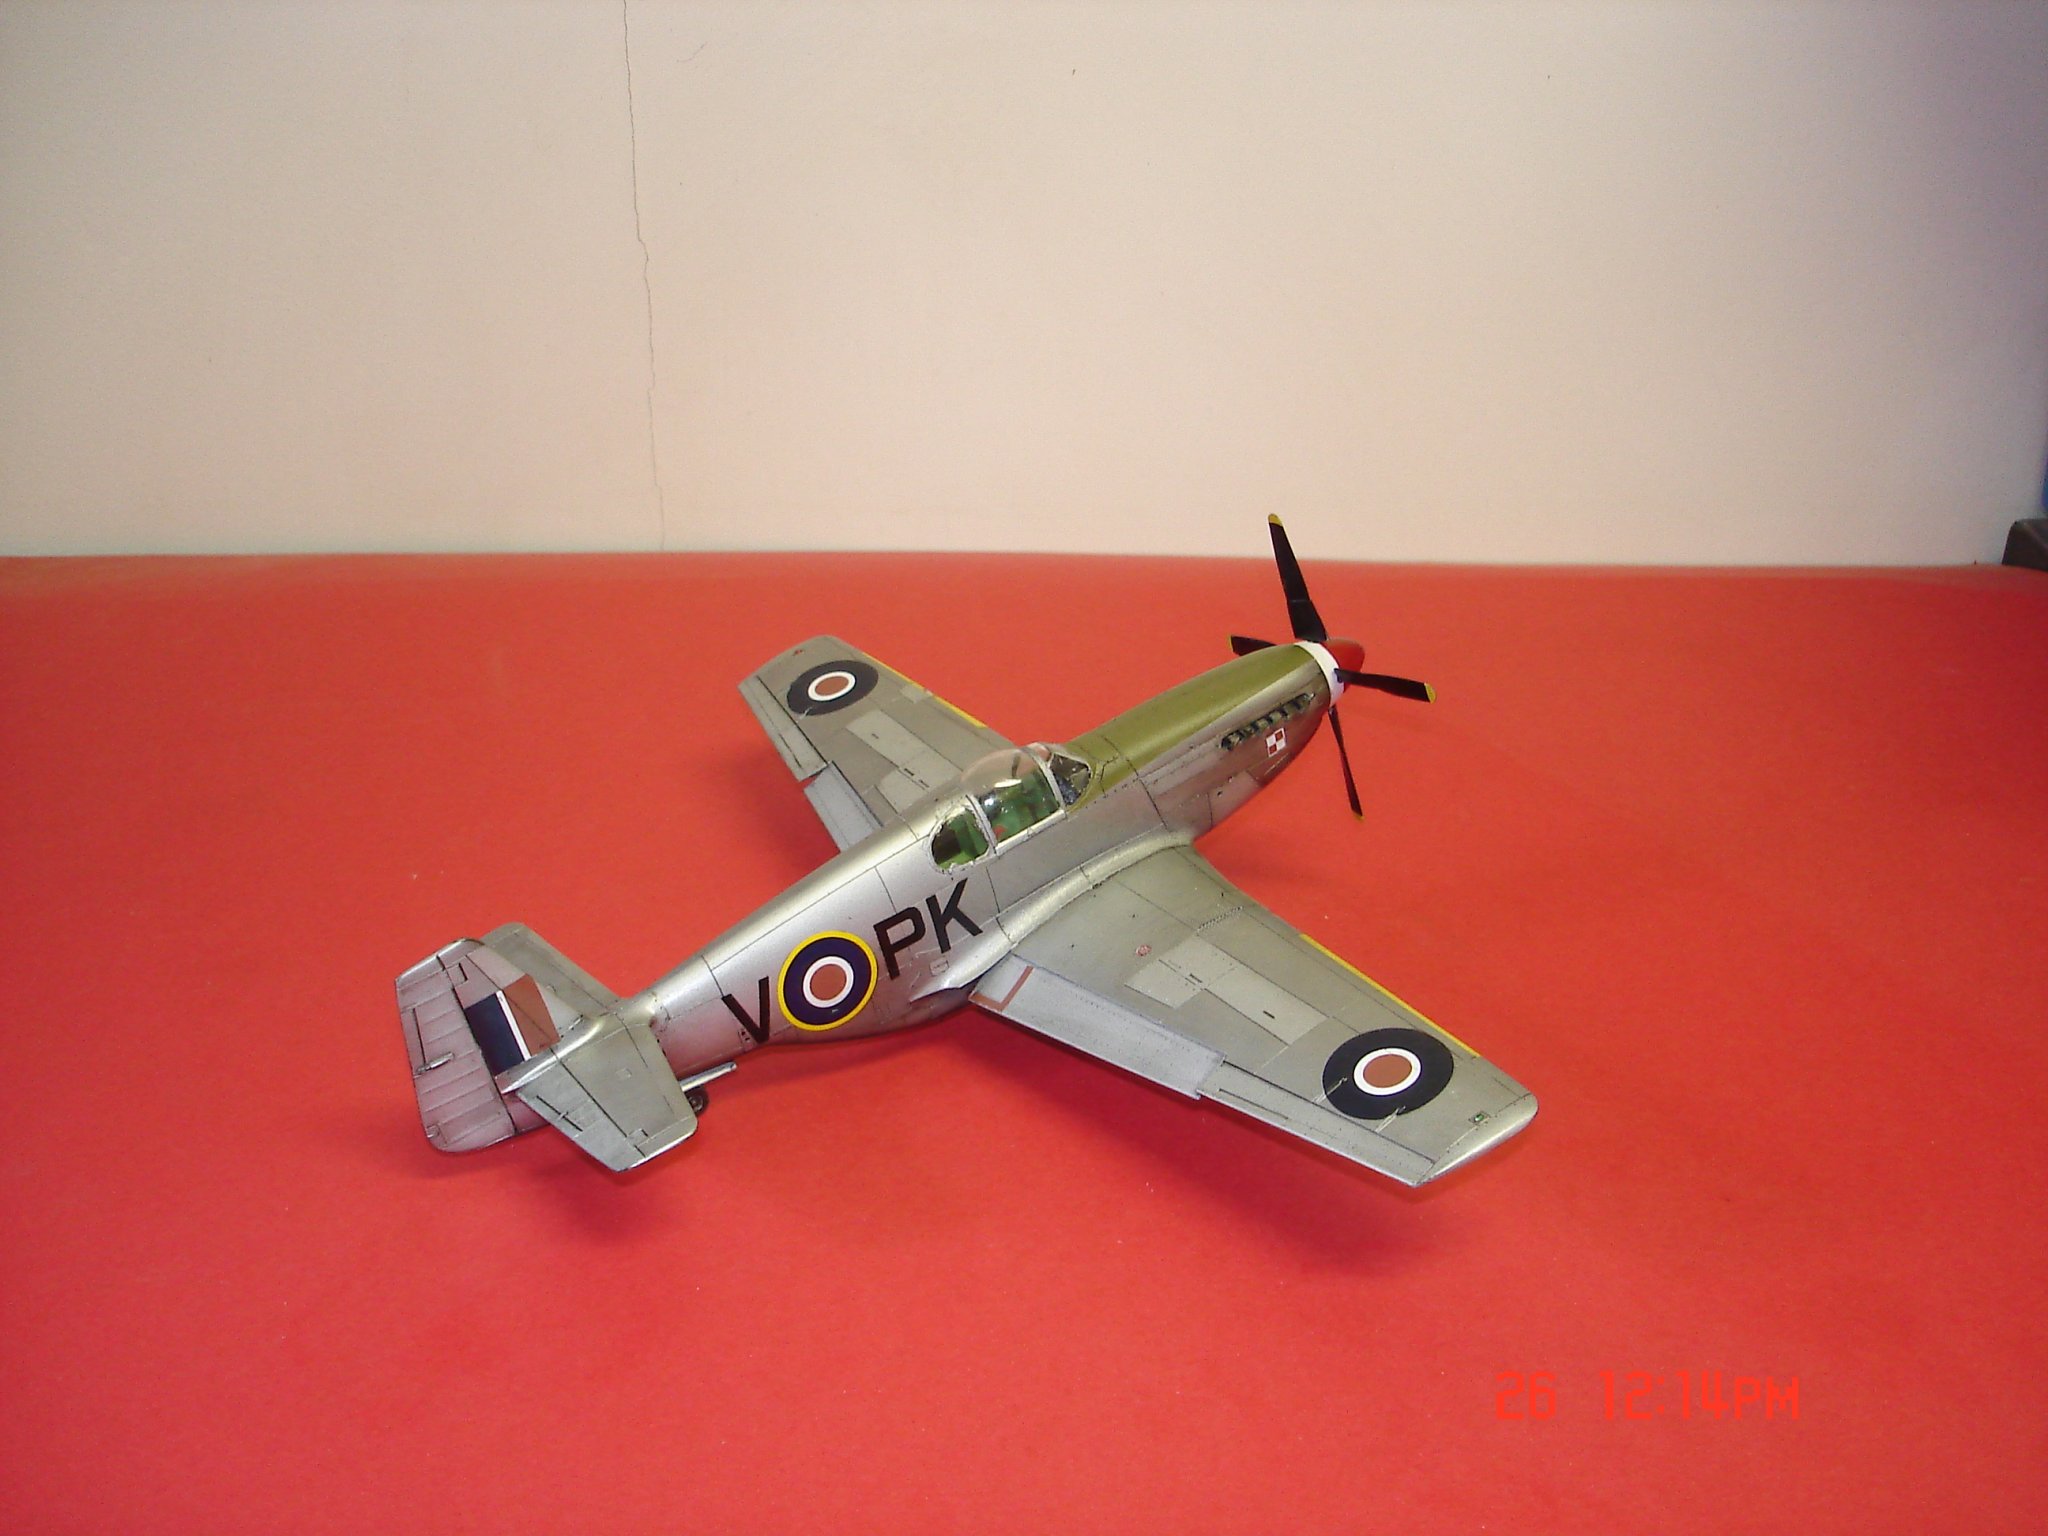
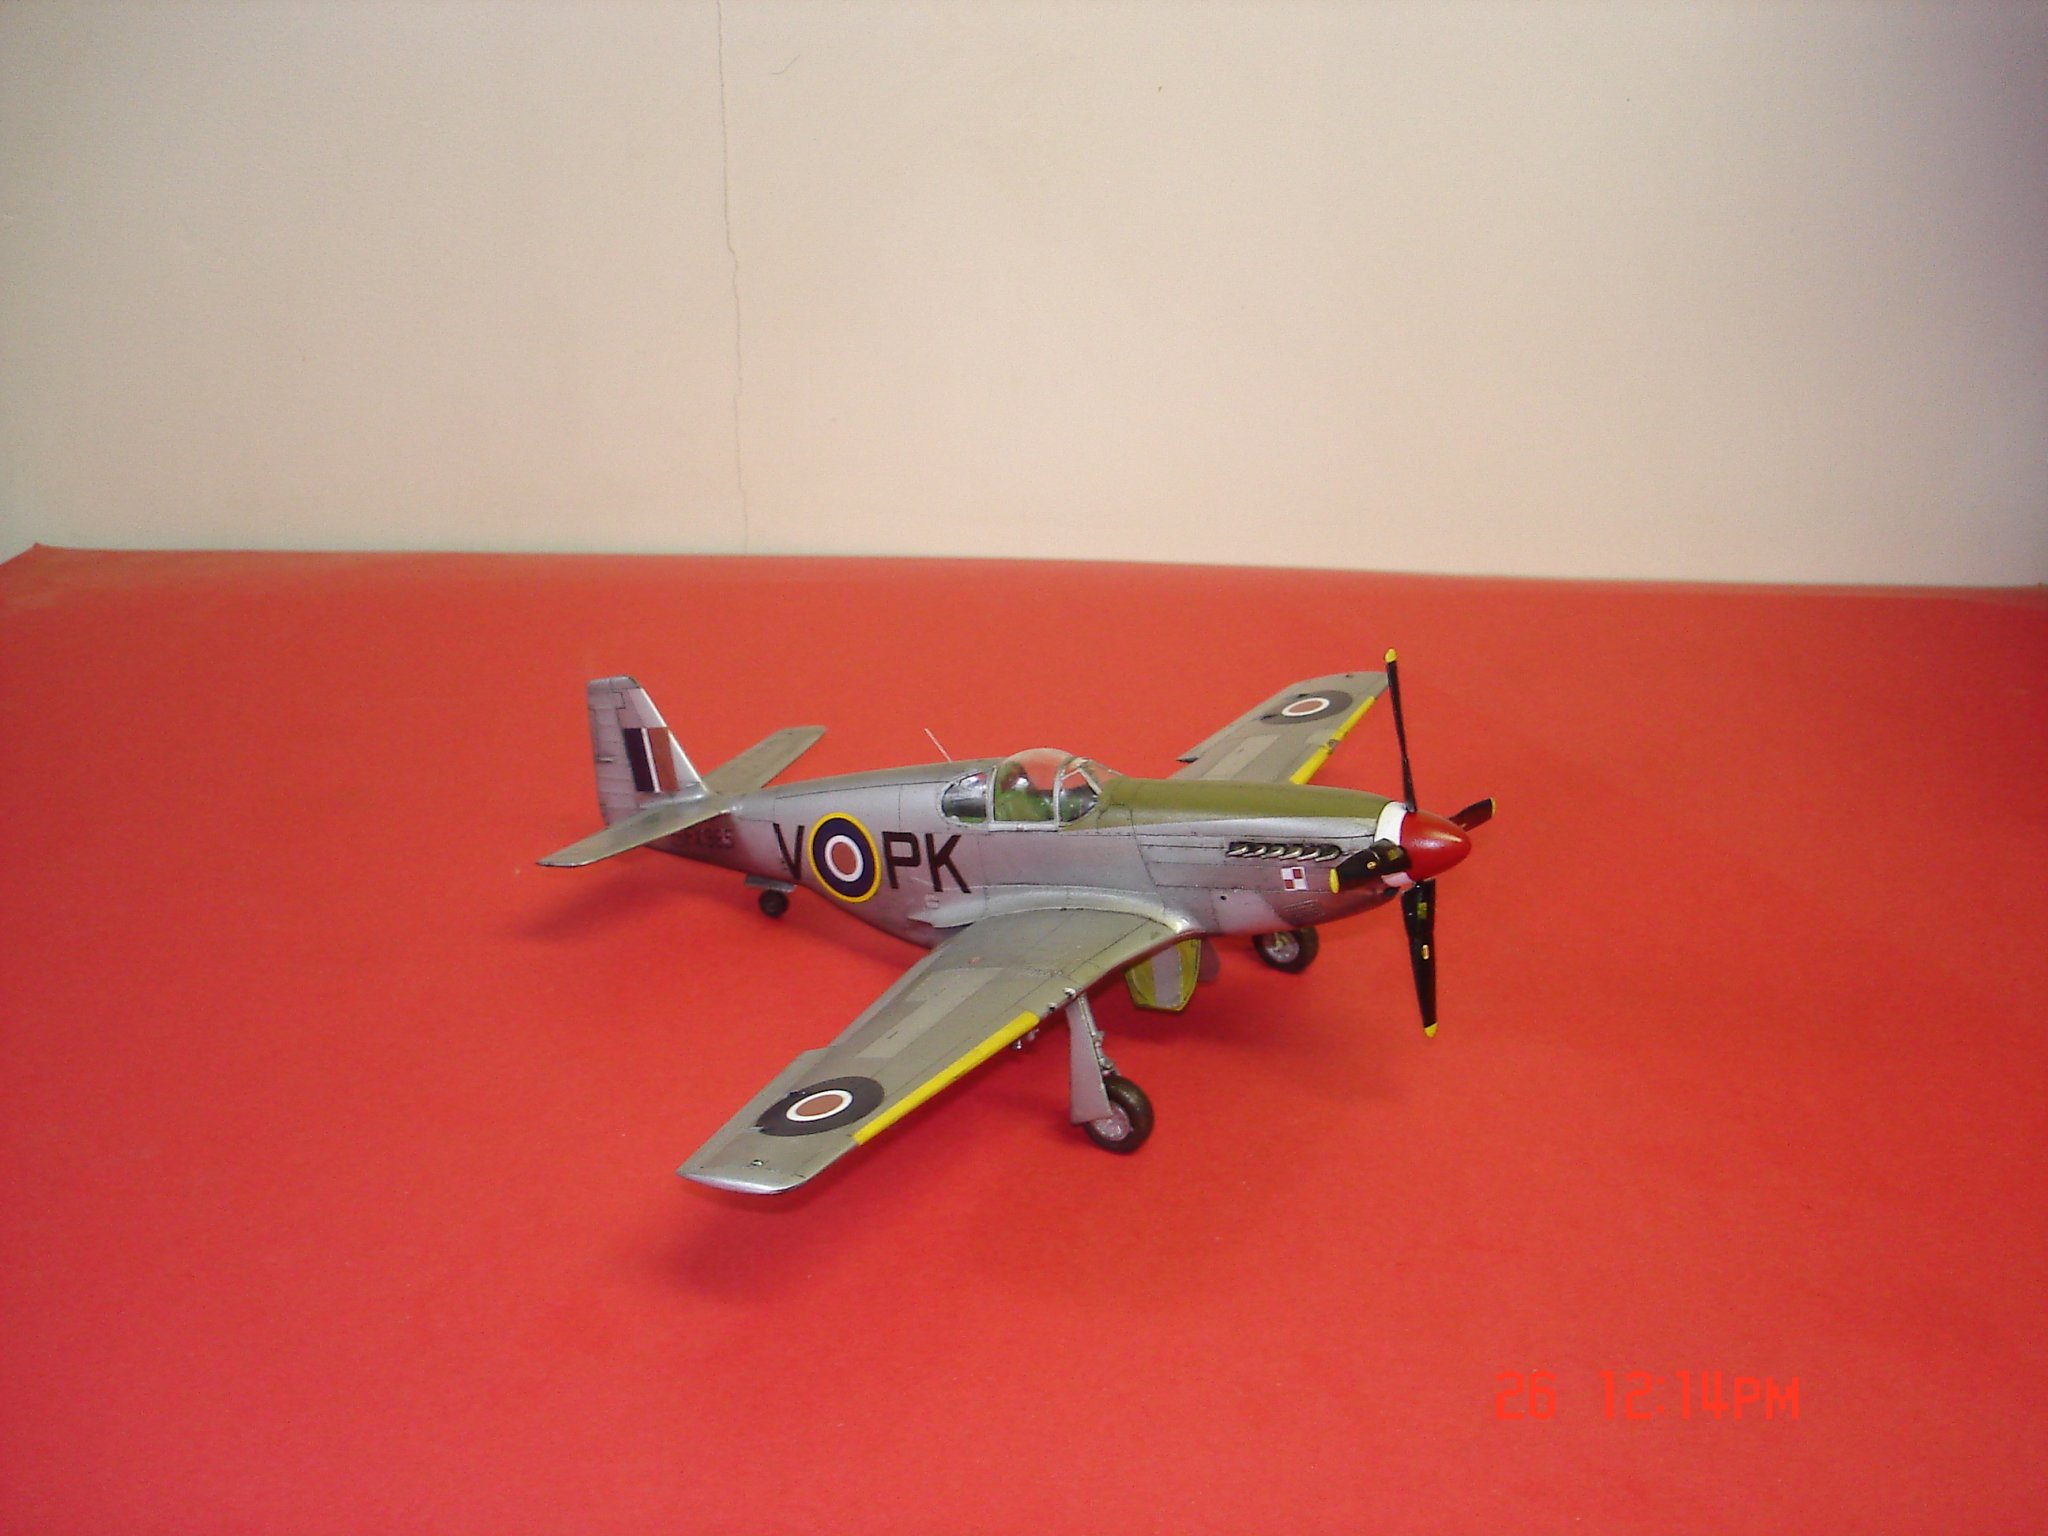
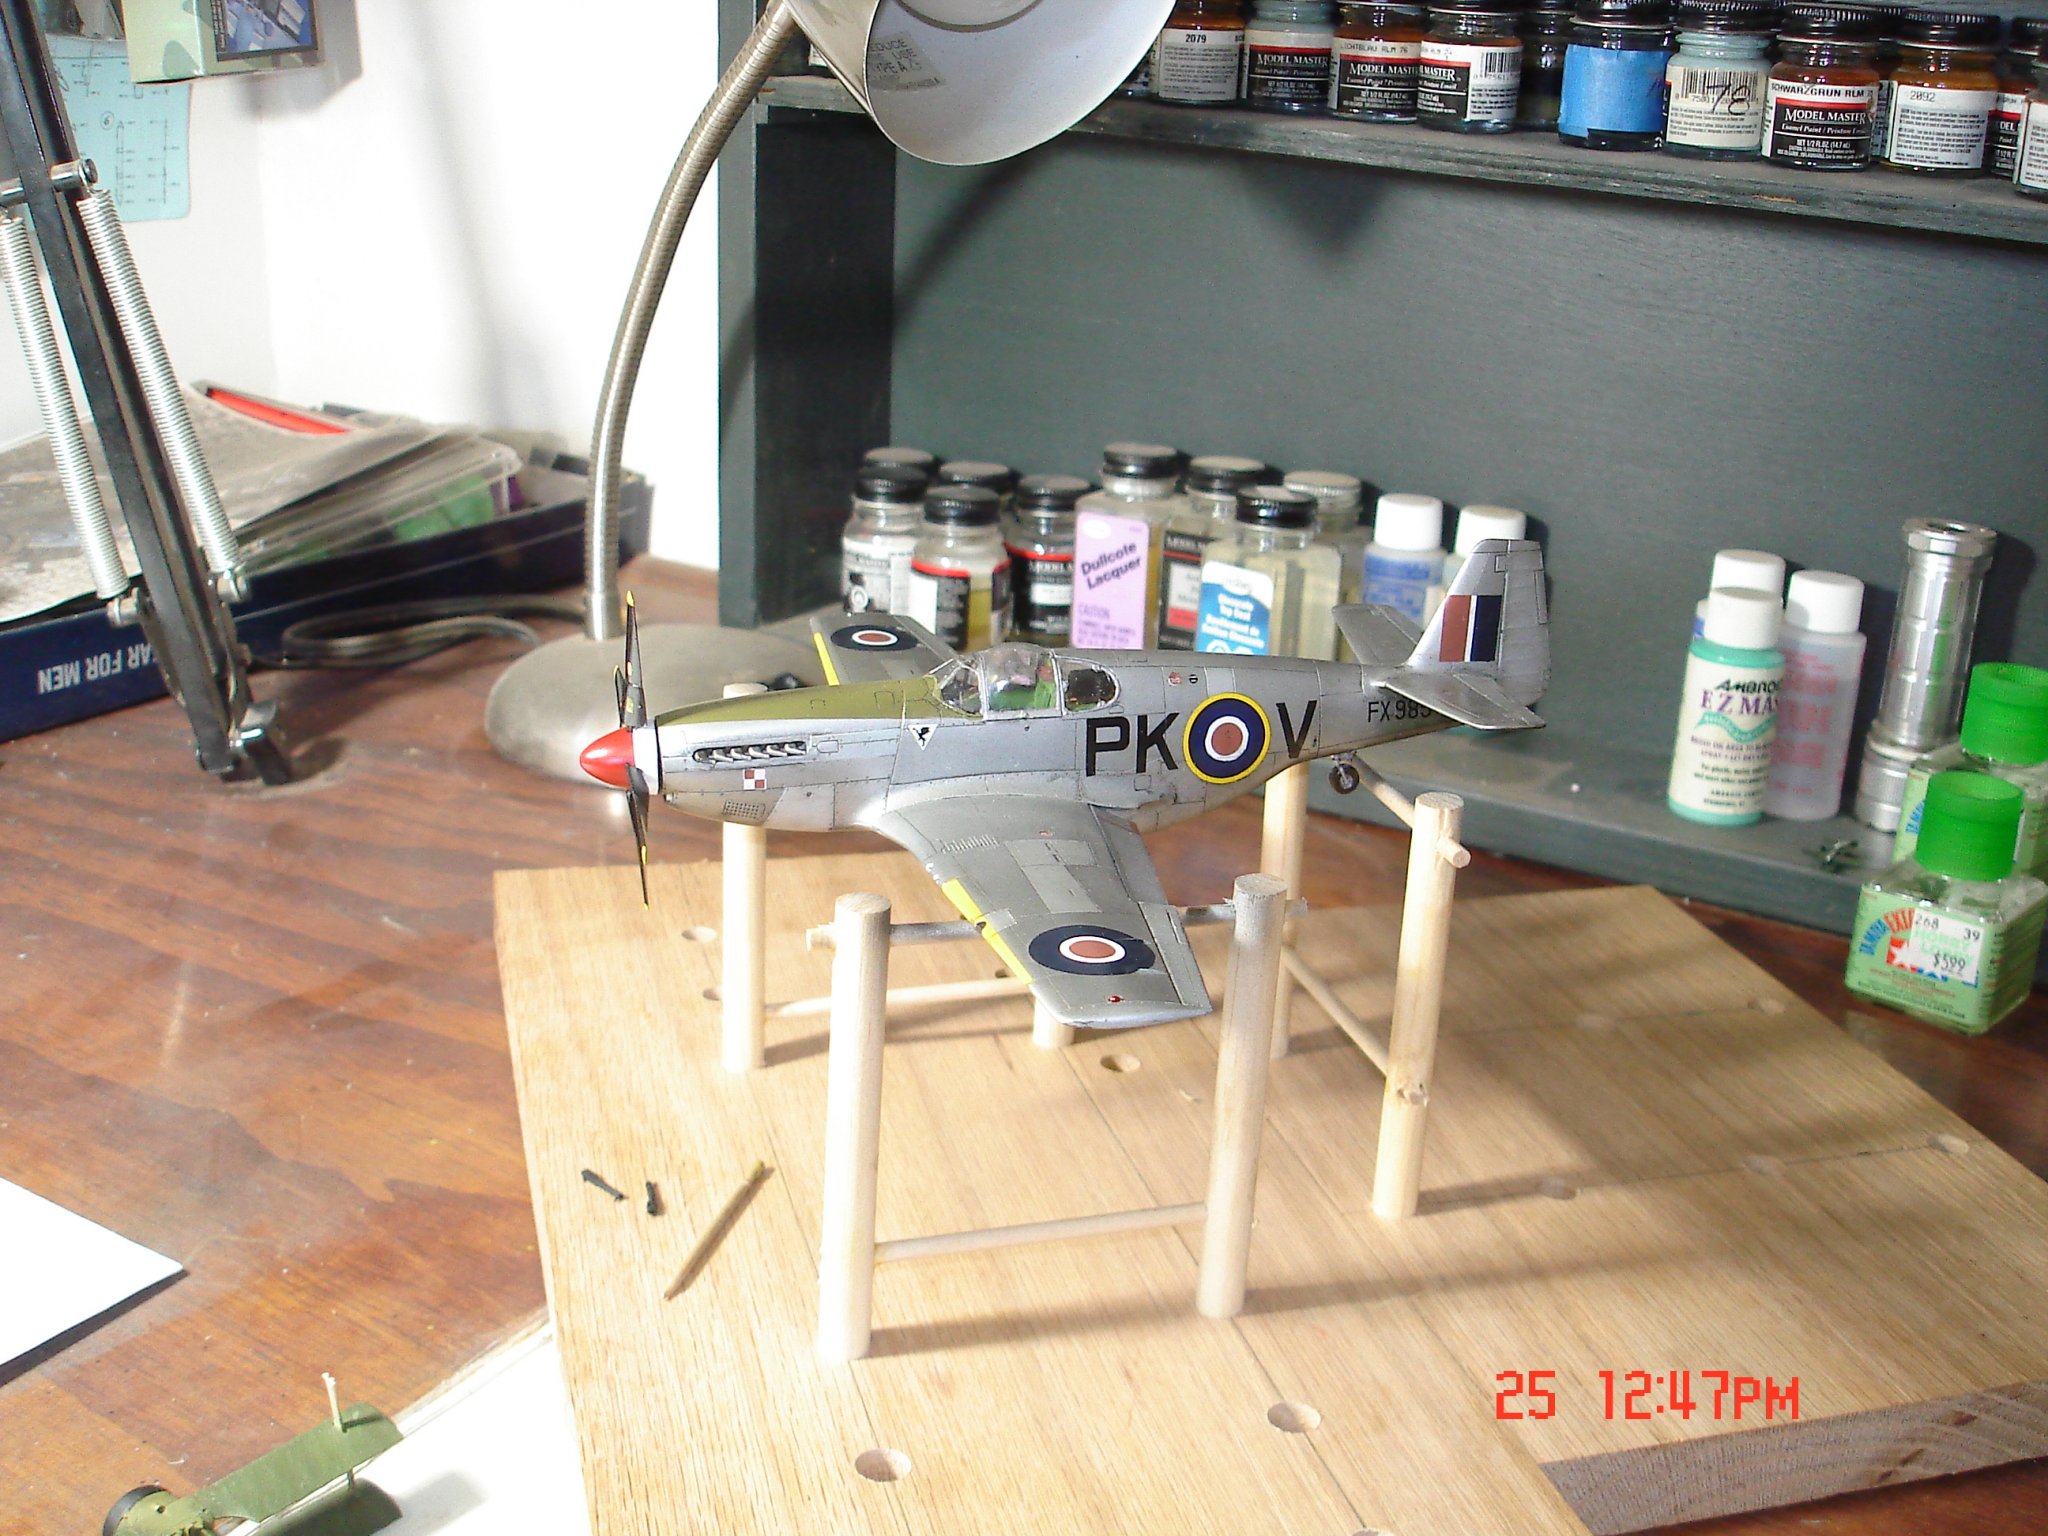
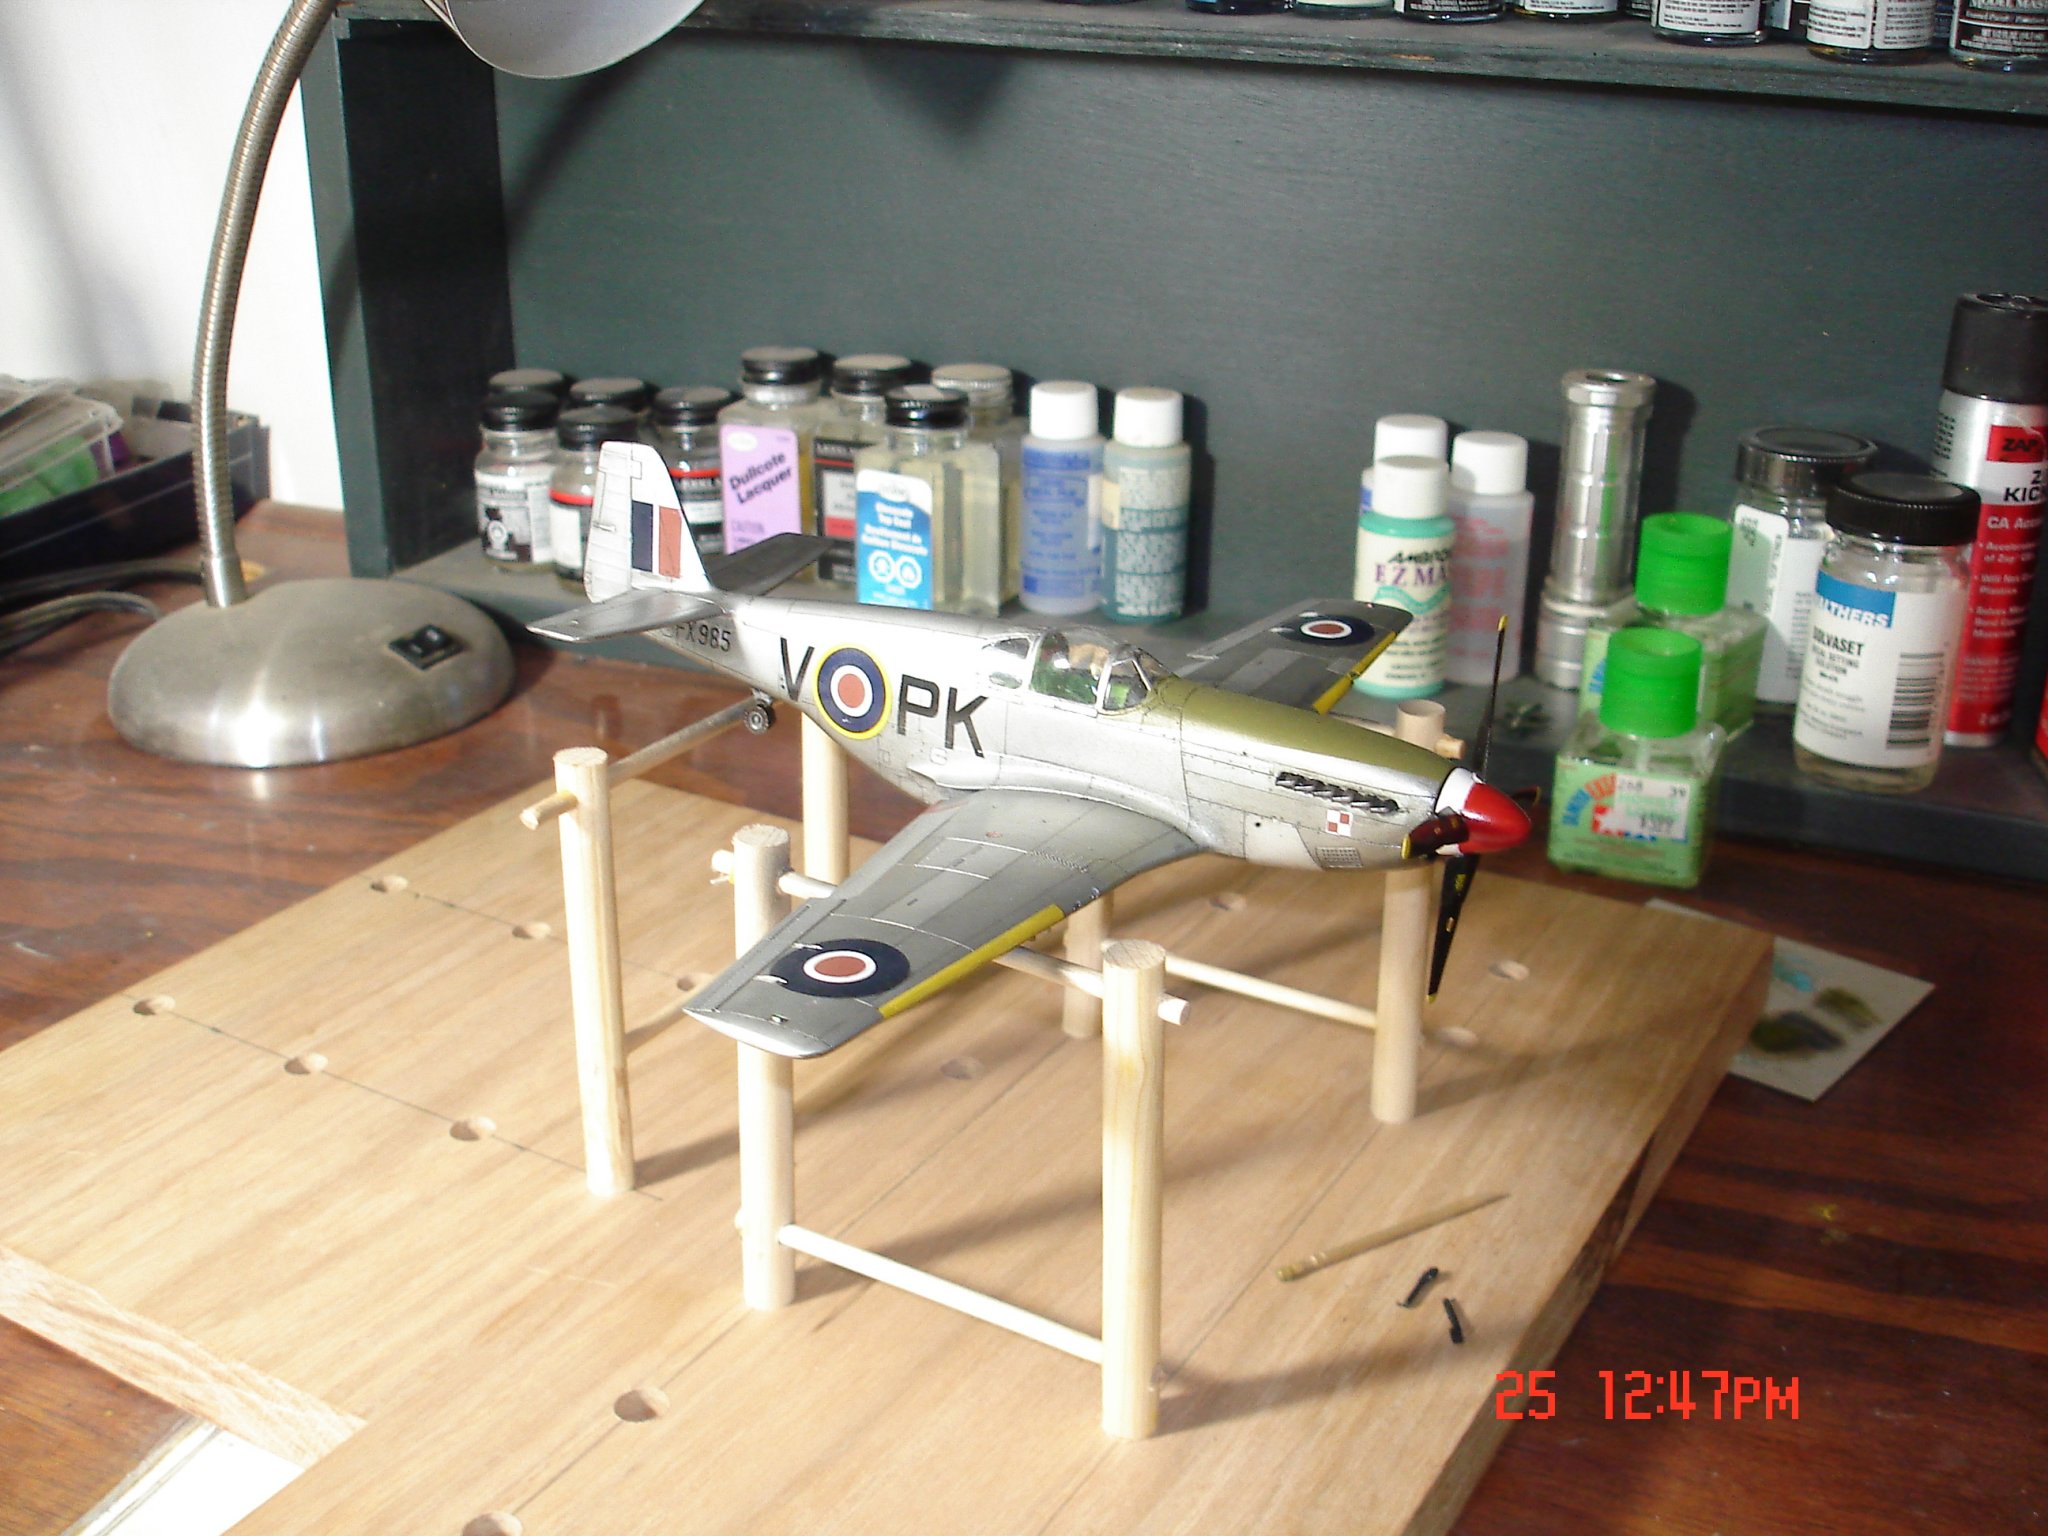
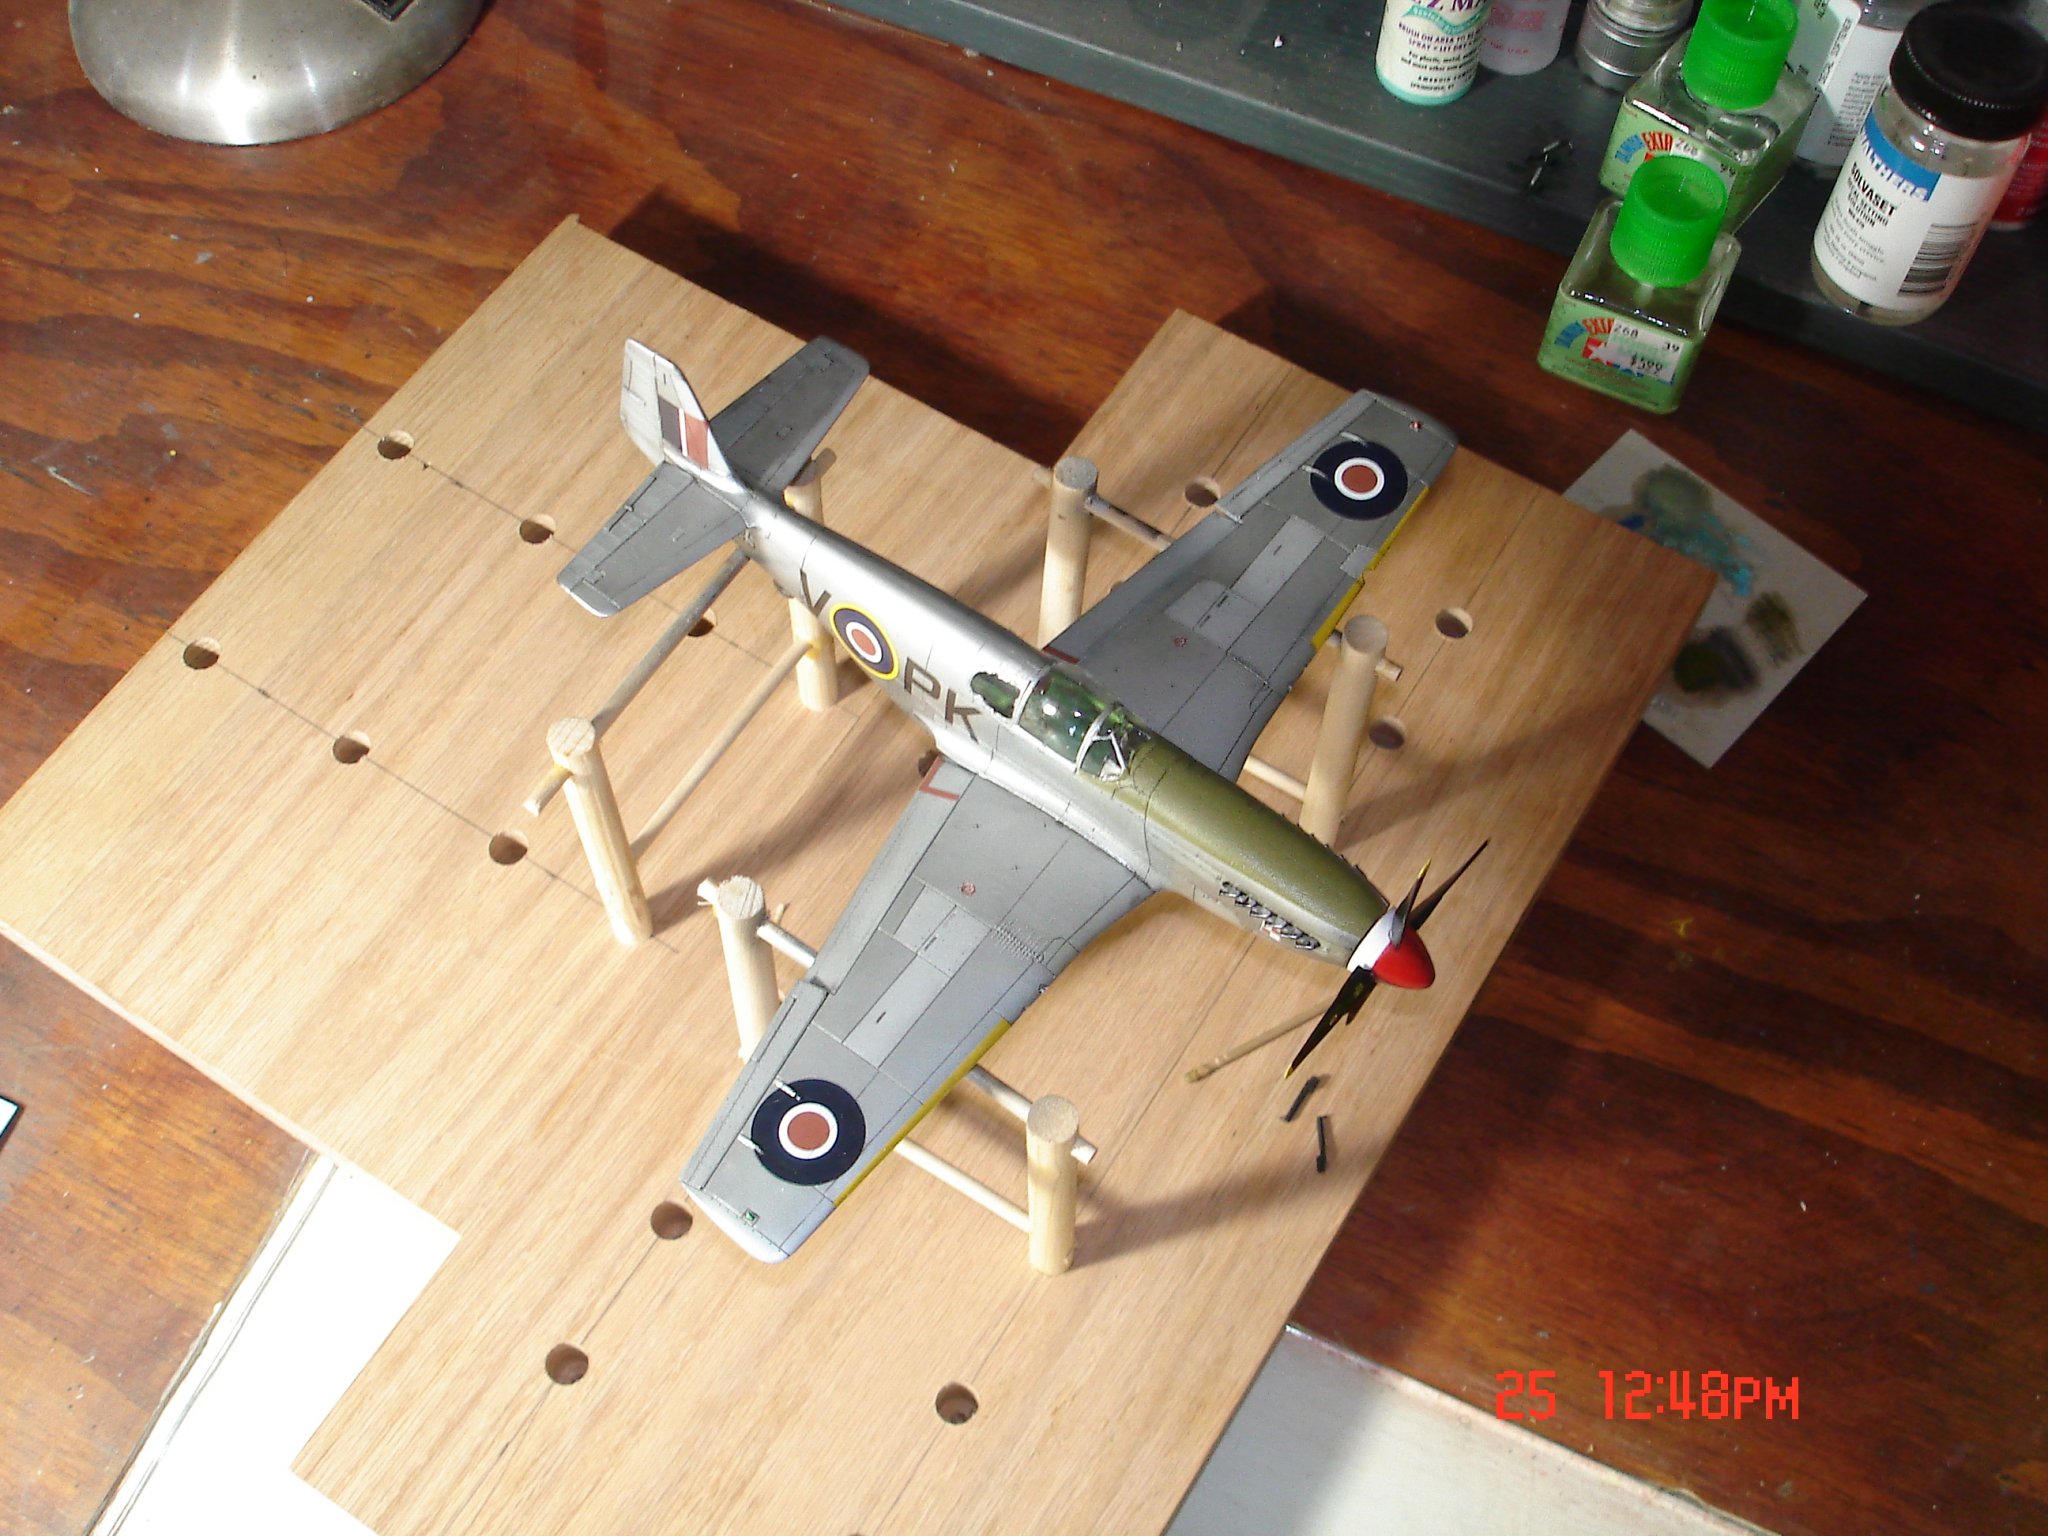
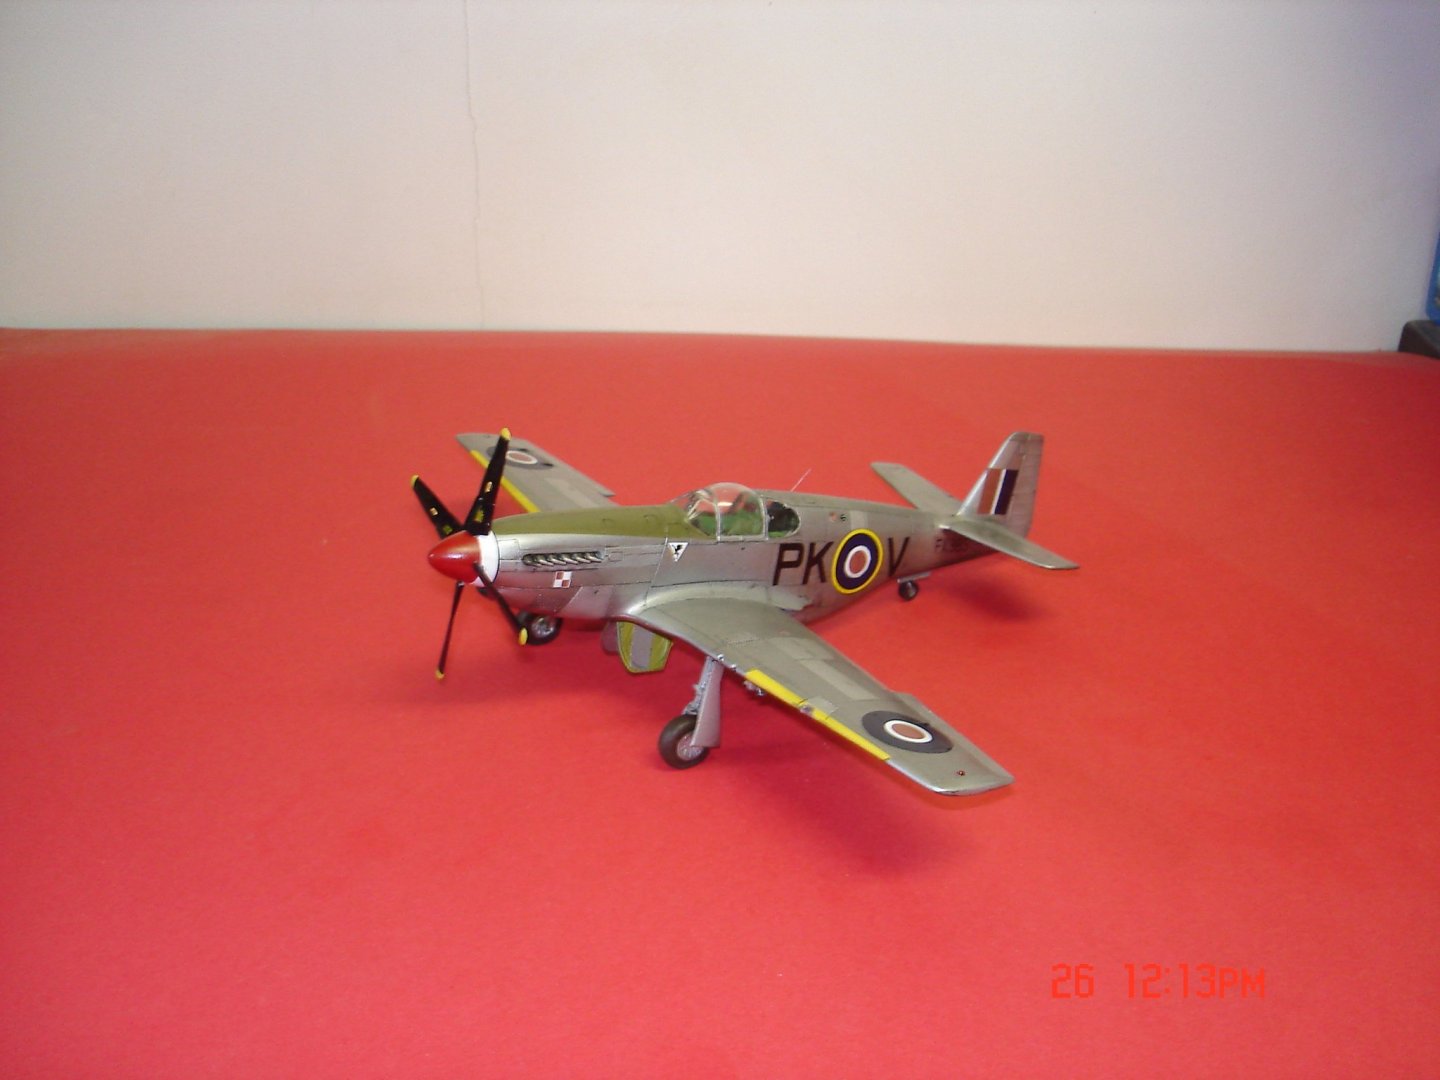
Small update to the Polish P-51


-
Thanks Gene for the compliments as to the P-26 I have one built the old Hase kit in 1/32.I ordered two of those Revell P-51's Monday in 1/32 can't have to many P-51's.I generally build from WWII since my father was in the 92nd BG but I do have some stringer's from the 30's and a few jets up into the 50/60's.

-
Goldfinch by amateur - FINISHED - Scherft - 1:1 - CARD
Javlin replied to amateur's topic in Non-ship/categorised builds
To Cool!! Kevin