Javlin
-
Posts
1,681 -
Joined
-
Last visited
Content Type
Profiles
Forums
Gallery
Events
Everything posted by Javlin
-
She's Got Leggs she knows....... Looking good Kevin
-
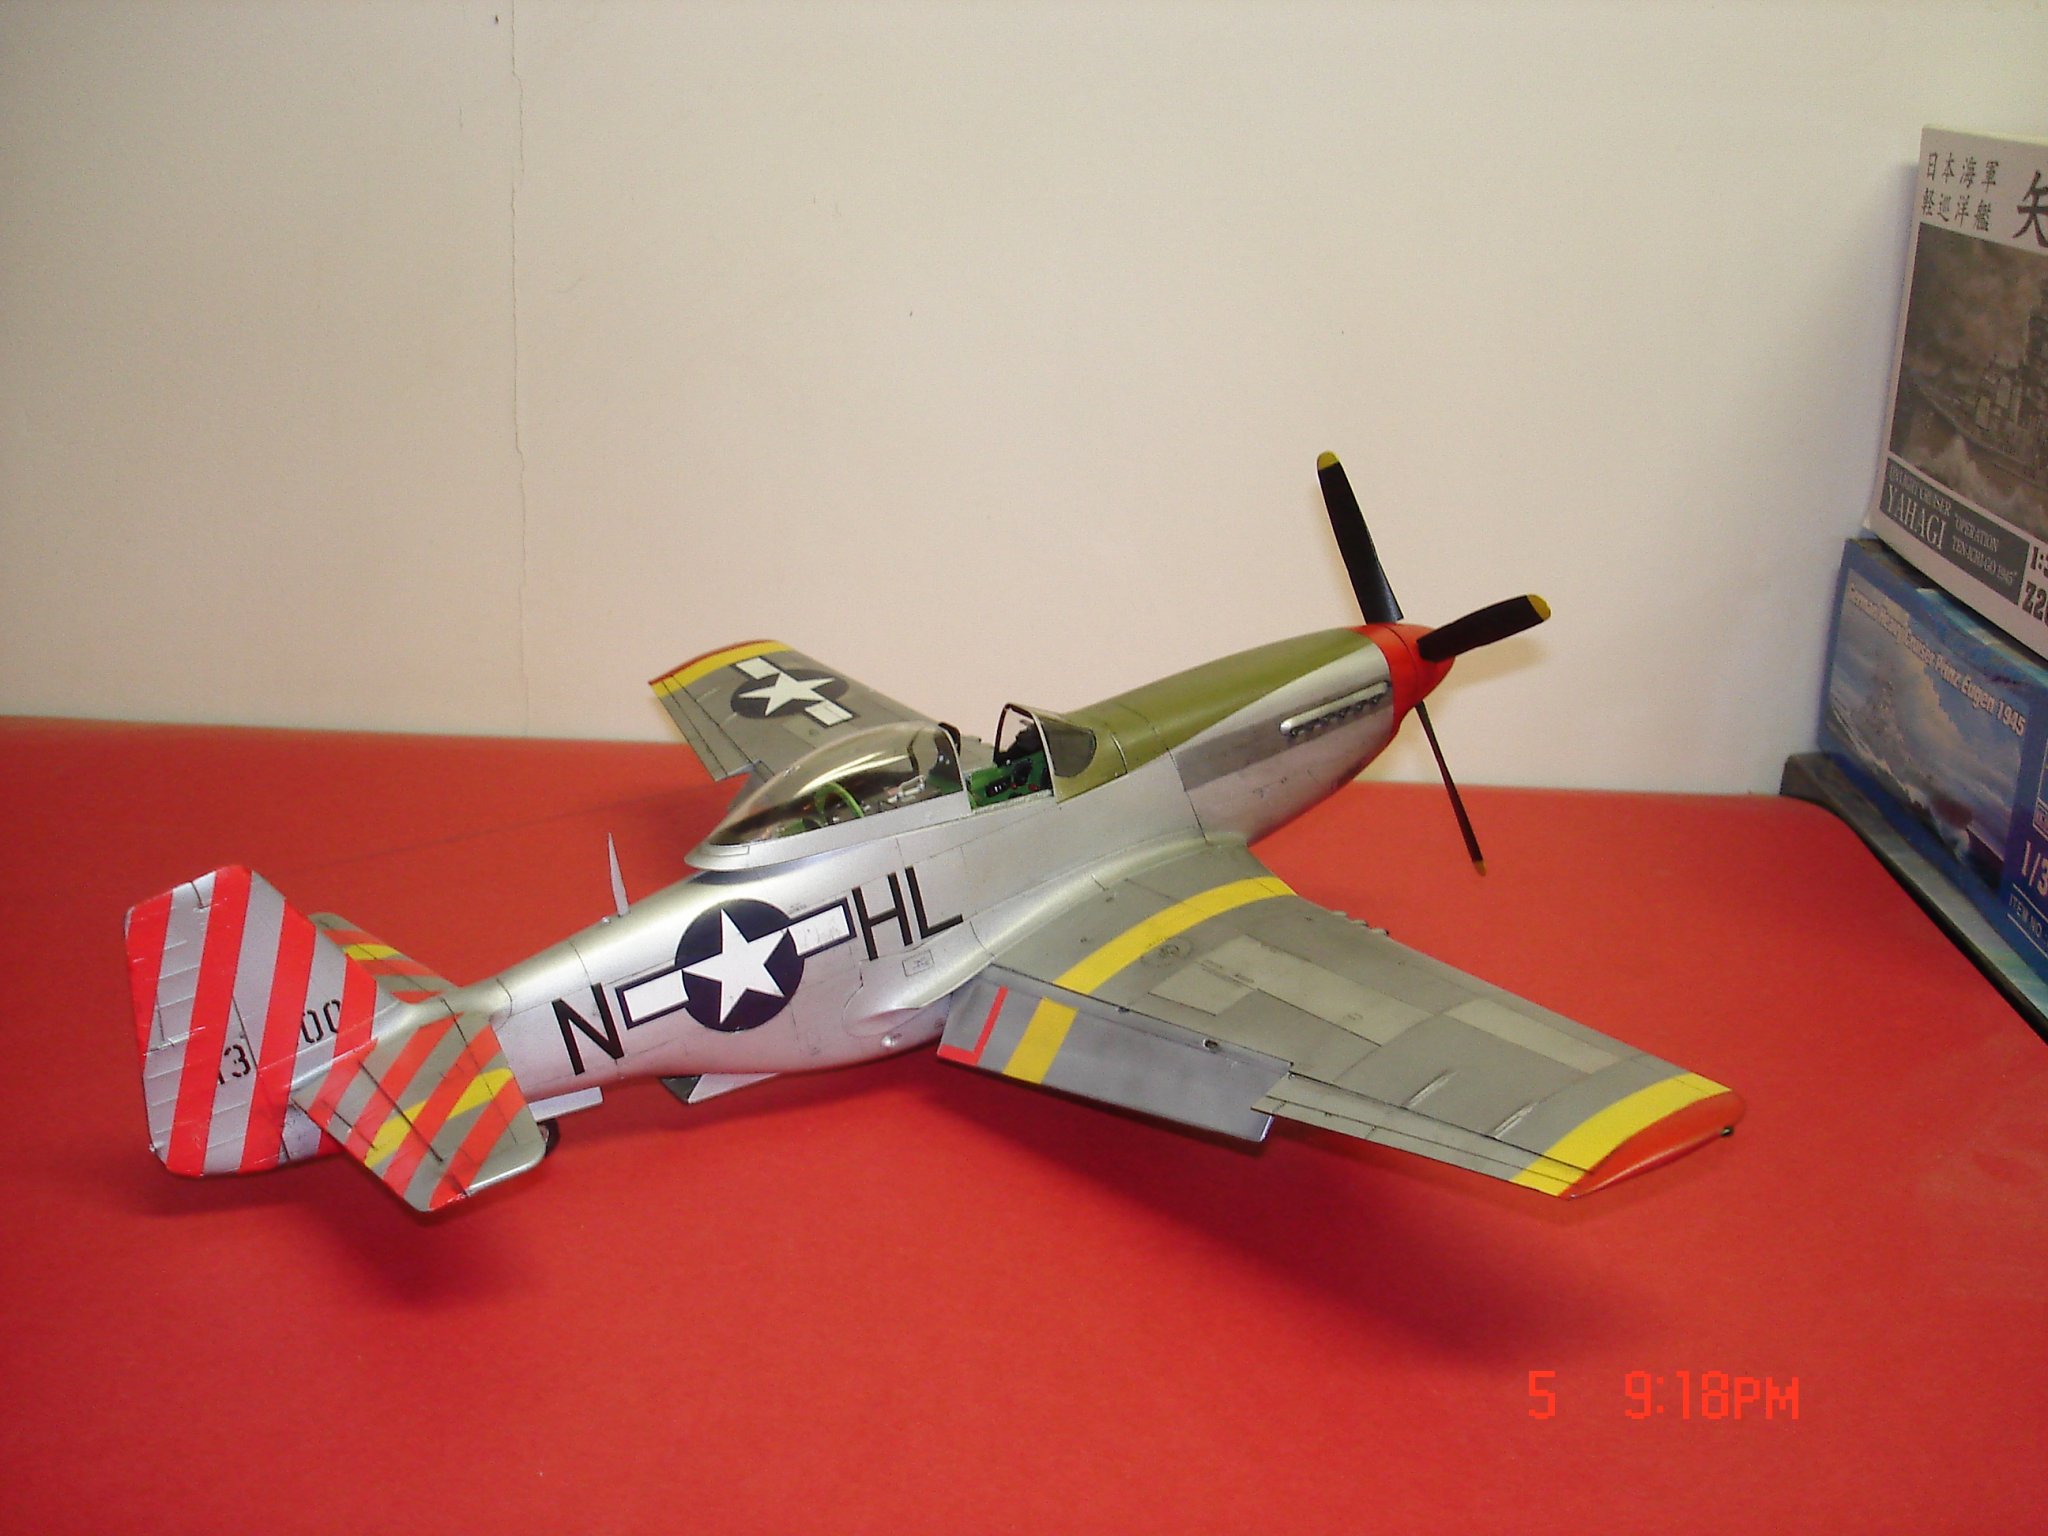
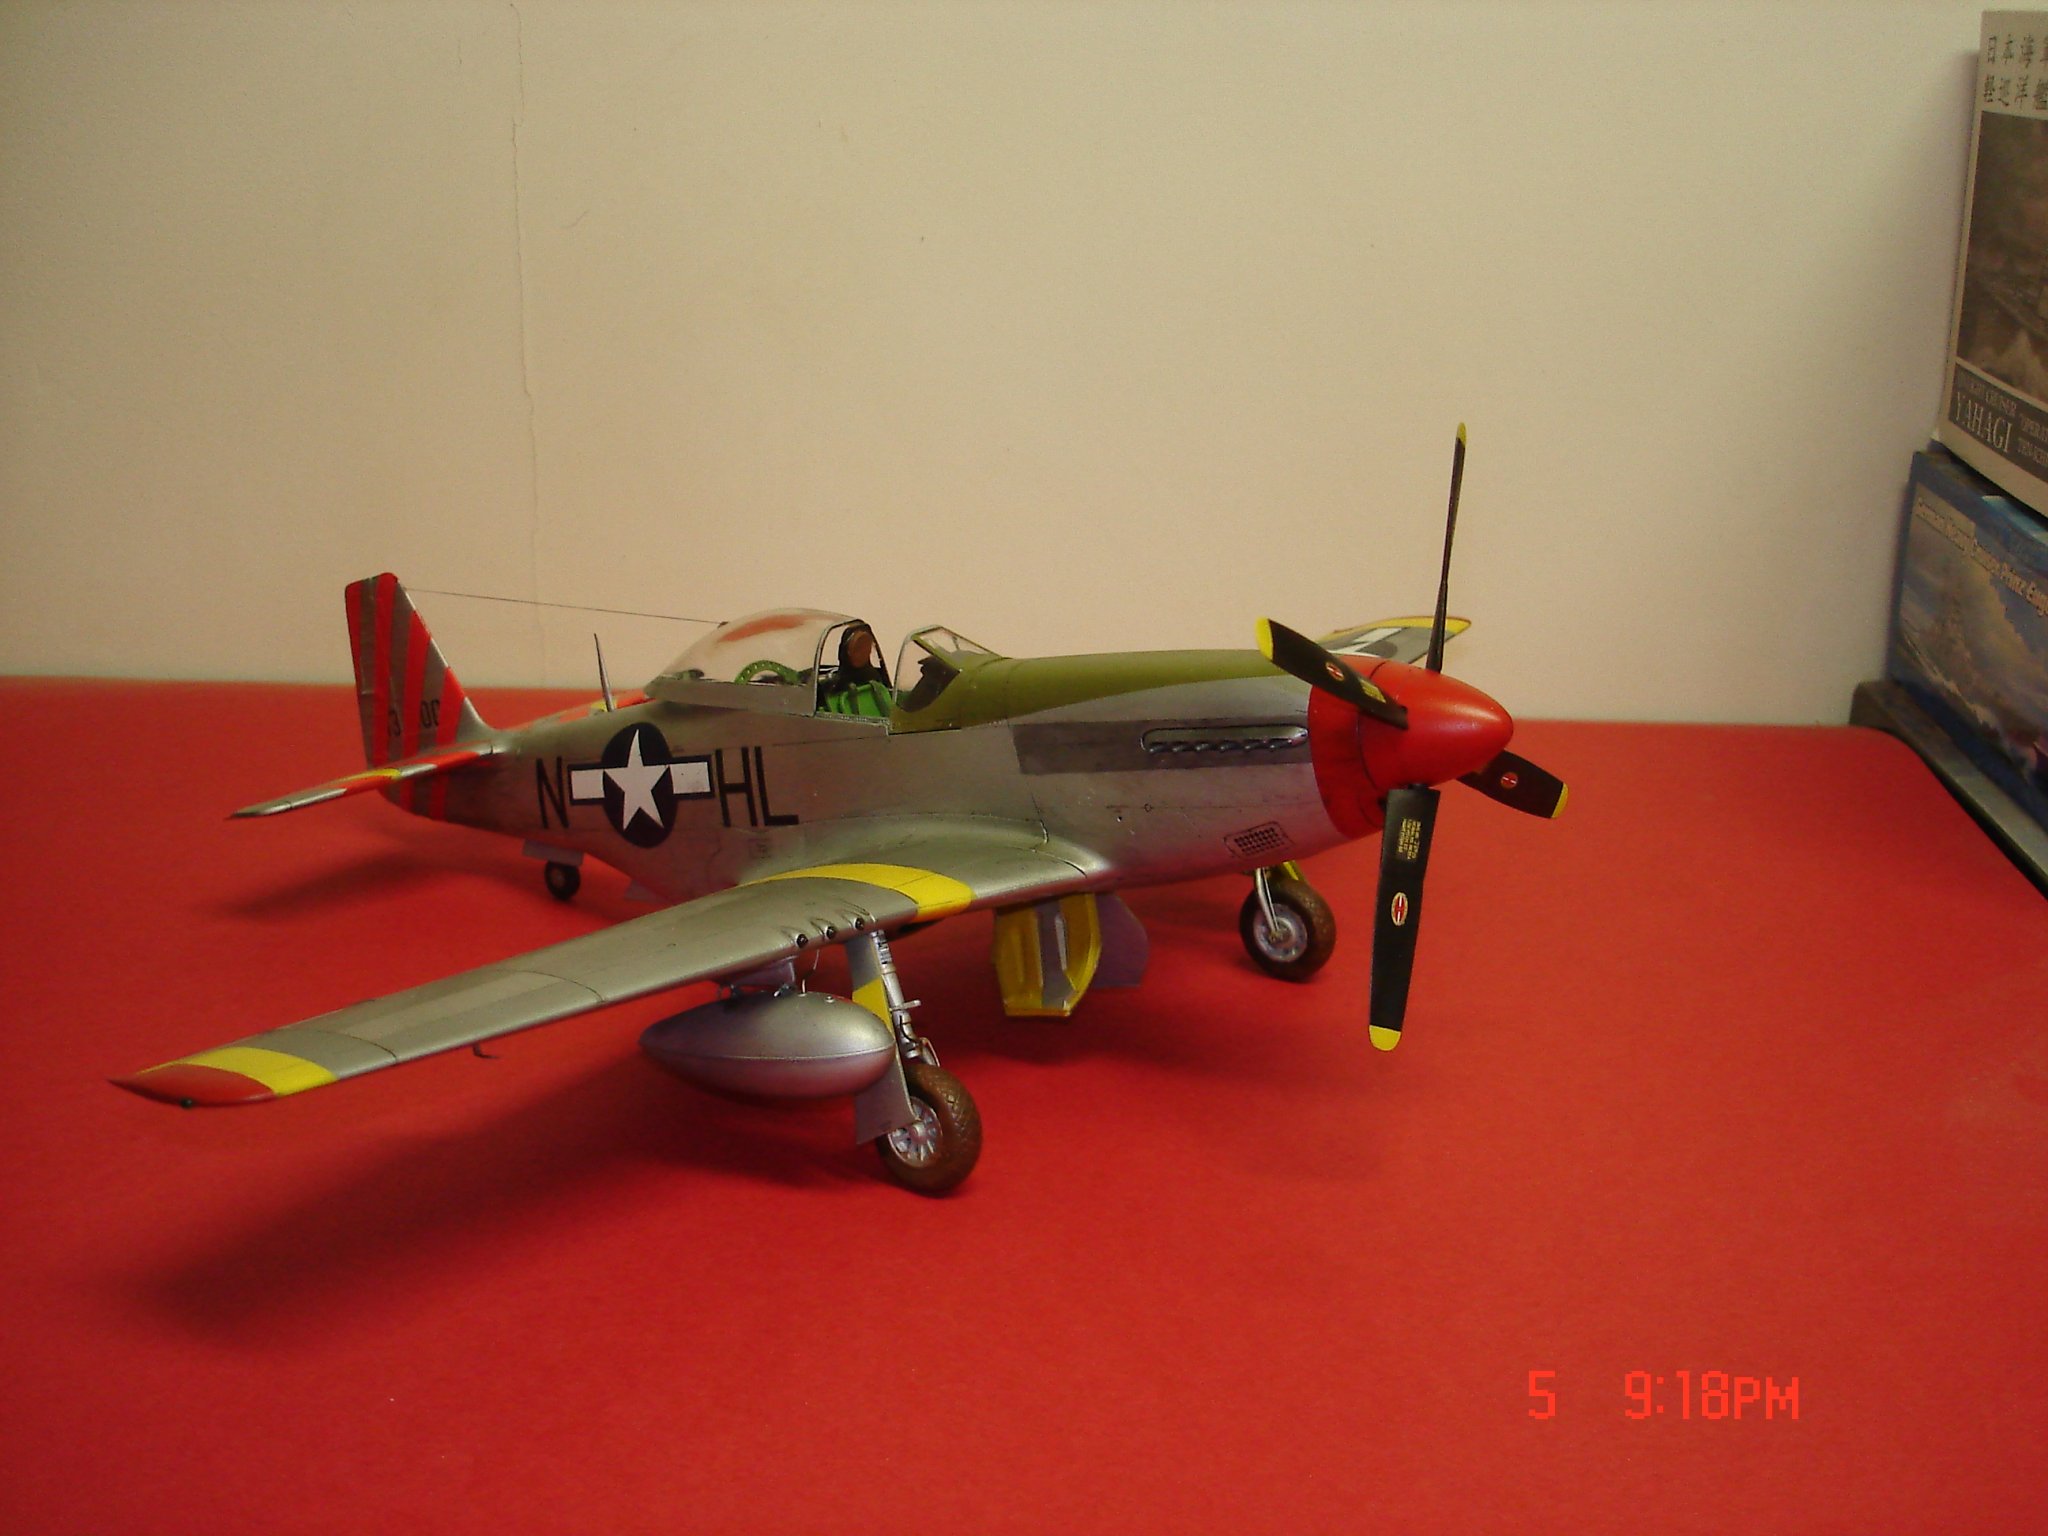
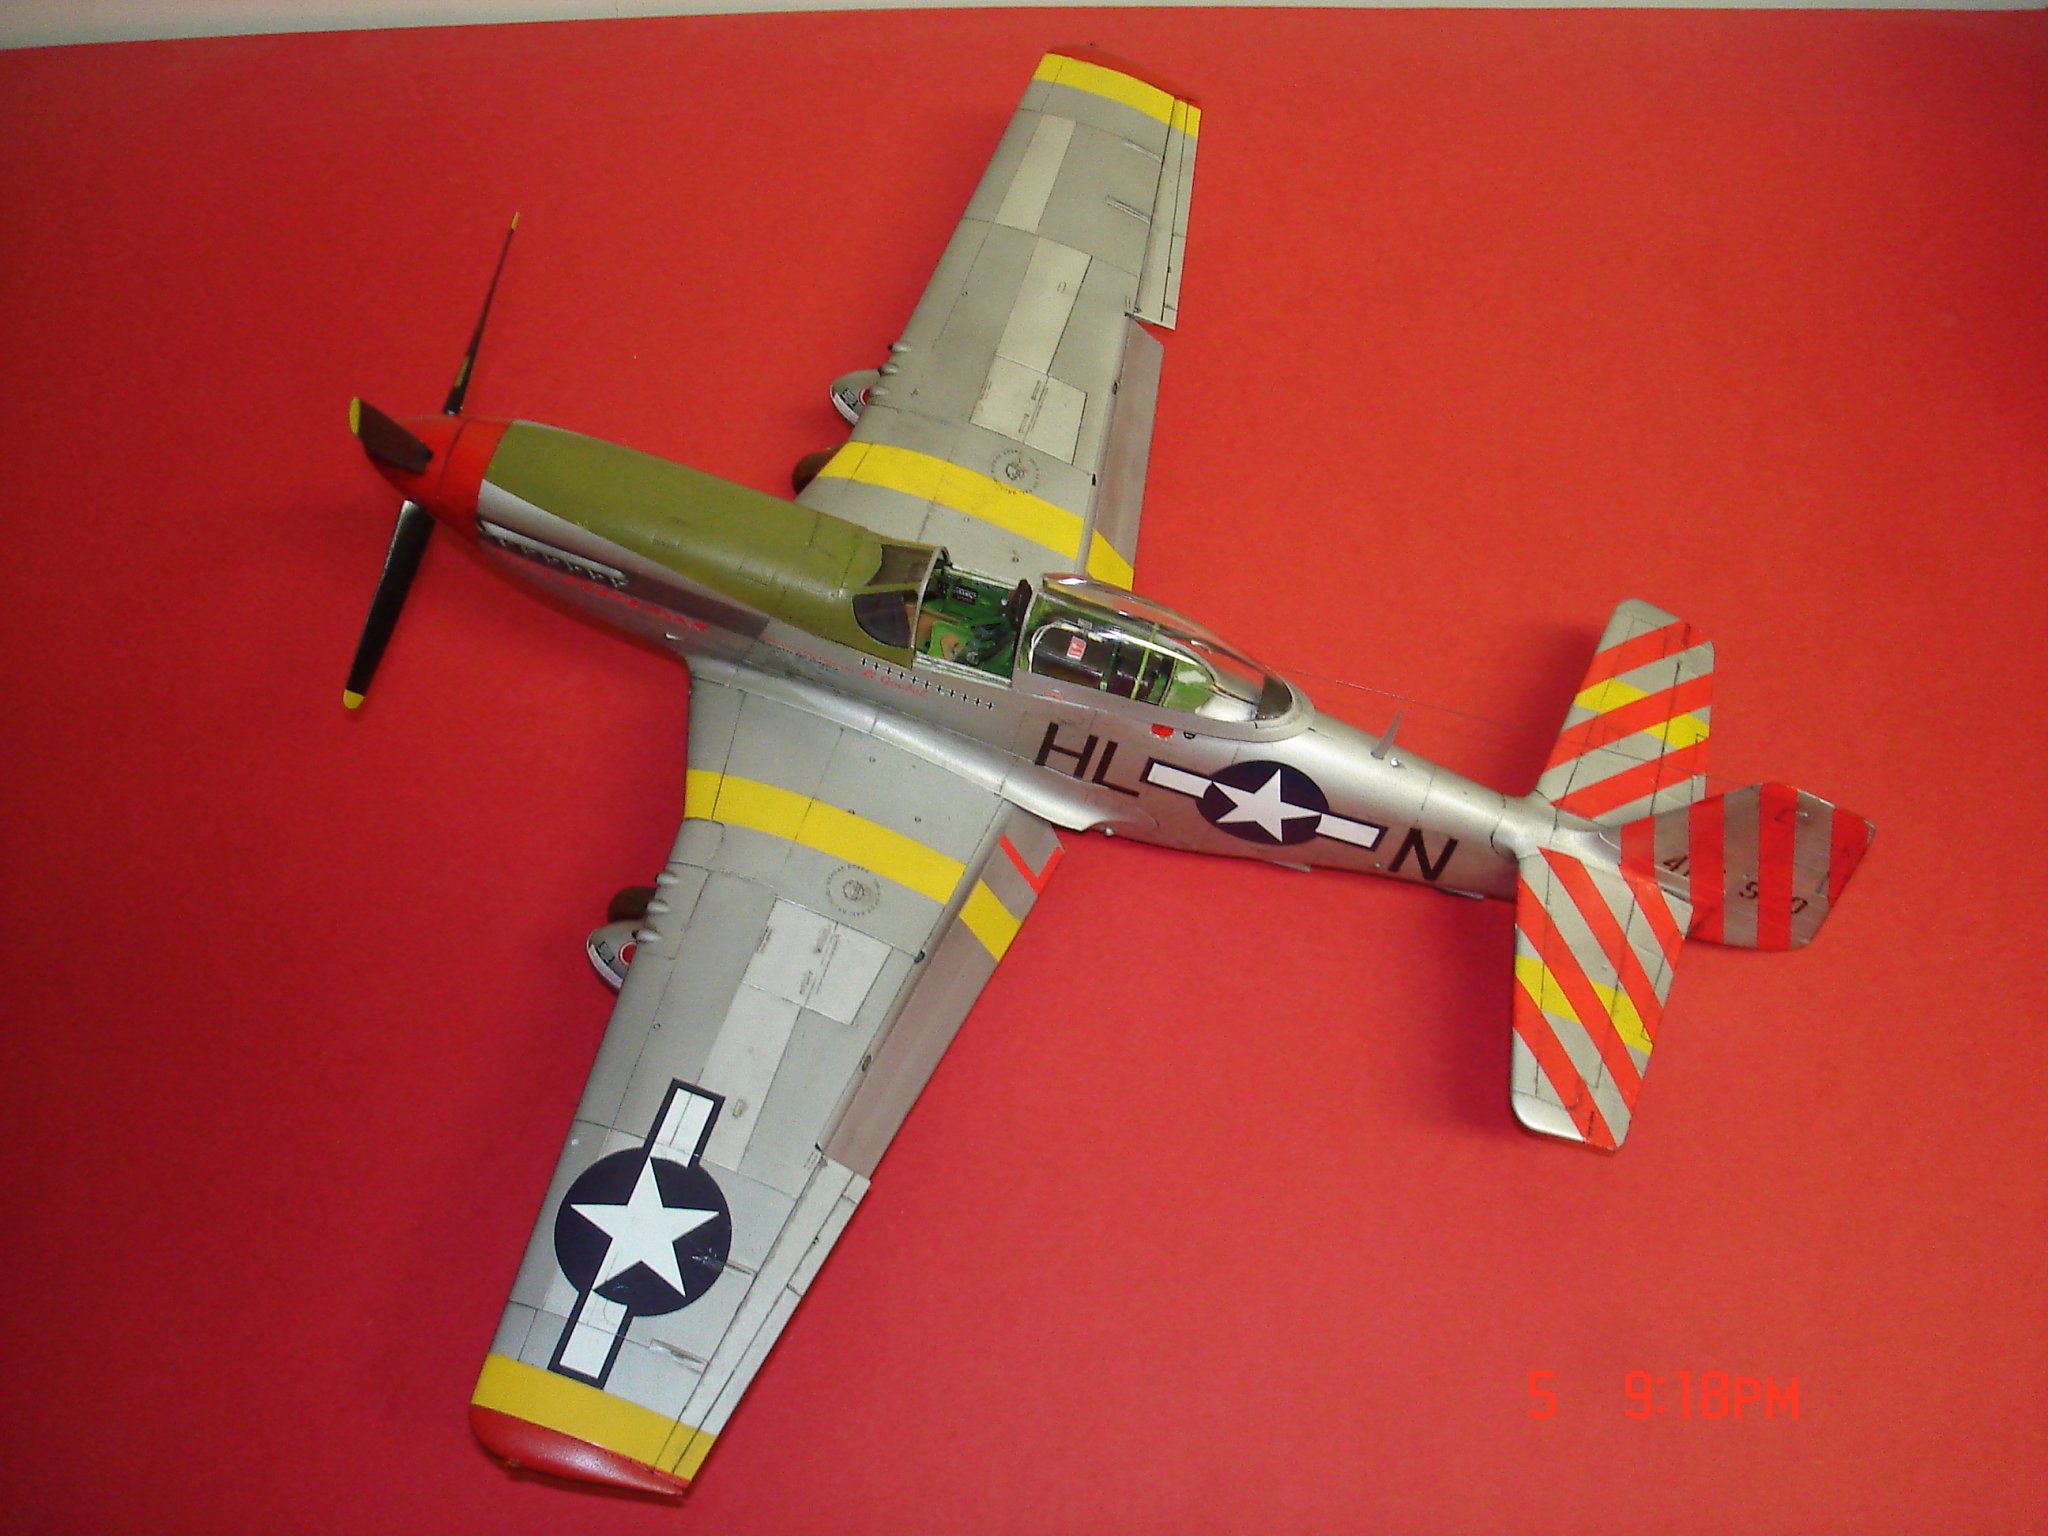
This should be a quick build with the paint being the most complicated part of the build in getting the striping to scale with oils.The copit I almost did not bother with for one will never really see once done and so small but gave it a whirl. Kevin

- 11 replies
-
- 10
-

-
Started on the wash and added yellow rings around the fuselage roundels all the rest of this squadron looked to have them. Kevin
- 79 replies
-
- 11
-
-
I've been at this hobby long enough to know better, but sometimes I get in a rush and end up paying the price for it. Luckily, using acrylic paints makes it easy to correct a bad situation just by rinsing away the paint with water before it dries. I get the same way sometimes like you been doing this for off and on for 50yrs now?What is the the thinner for AK? I have just a few of there bottles and sprayed straight like it's between a acrylic and almost enamel but that's not possible I think I used alcohol and Tamy thinner to clean the airbrush. Kevin
-
August Baumer Jasta 18,1918
.thumb.jpg.5083a78aeaf81cd3f534f16e806b6a3f.jpg)
-
Denis I actually used four shades all together sometimes they are so close you can only see it when they touch.
-
The bands added and flash.

-
Gawd!! Kevin
-
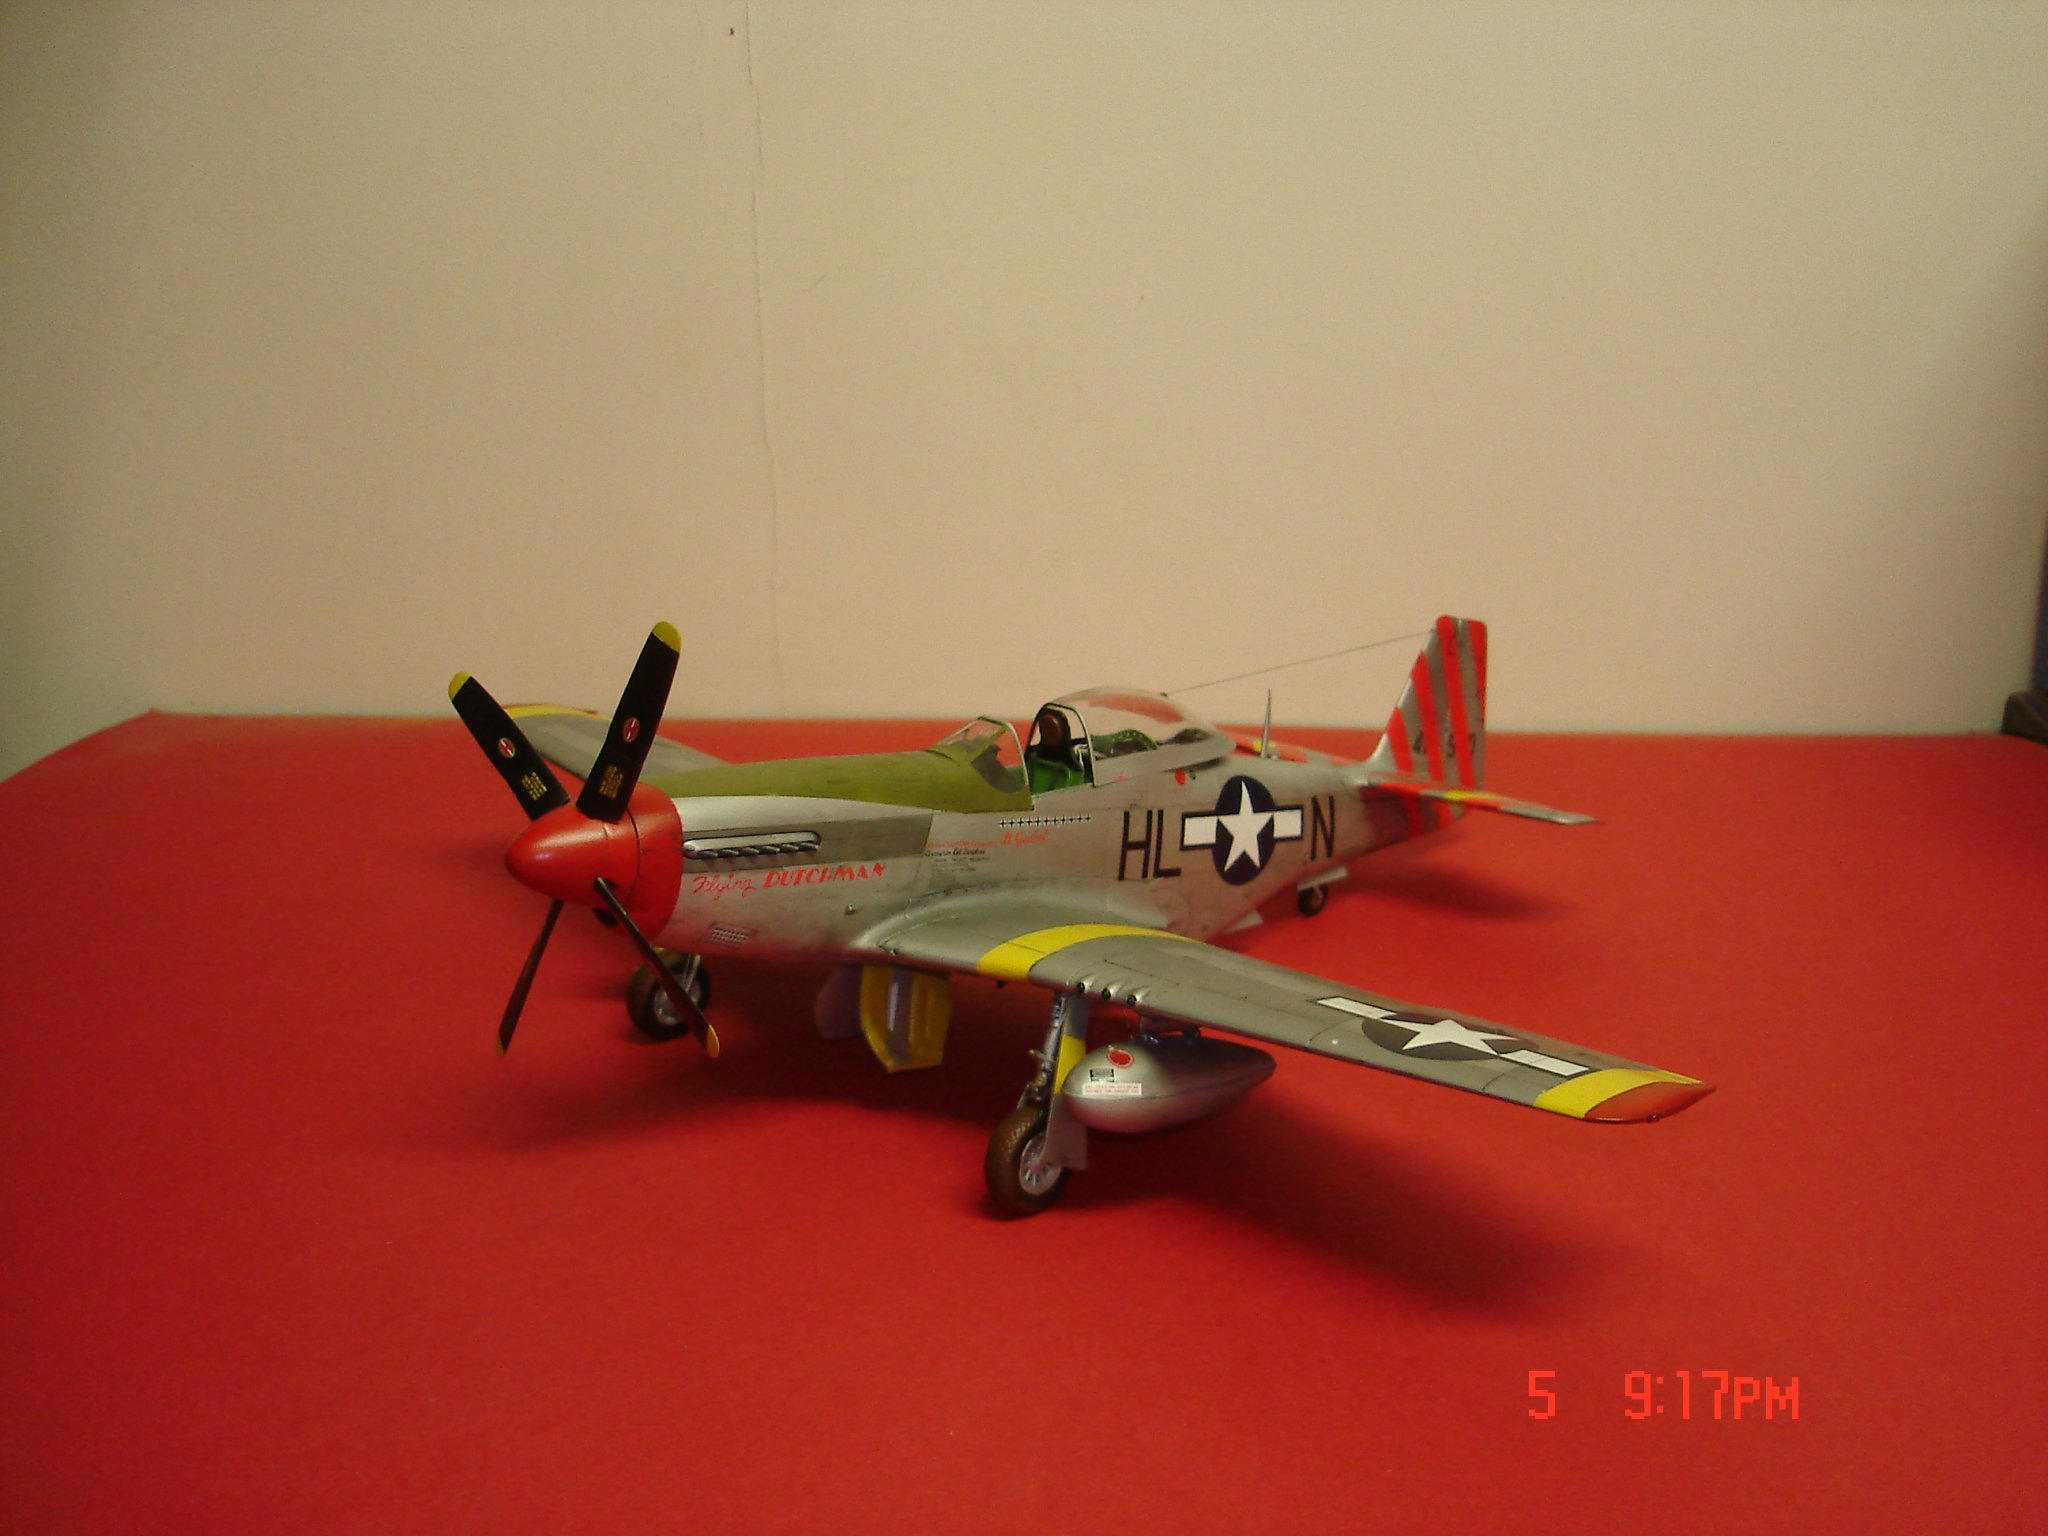
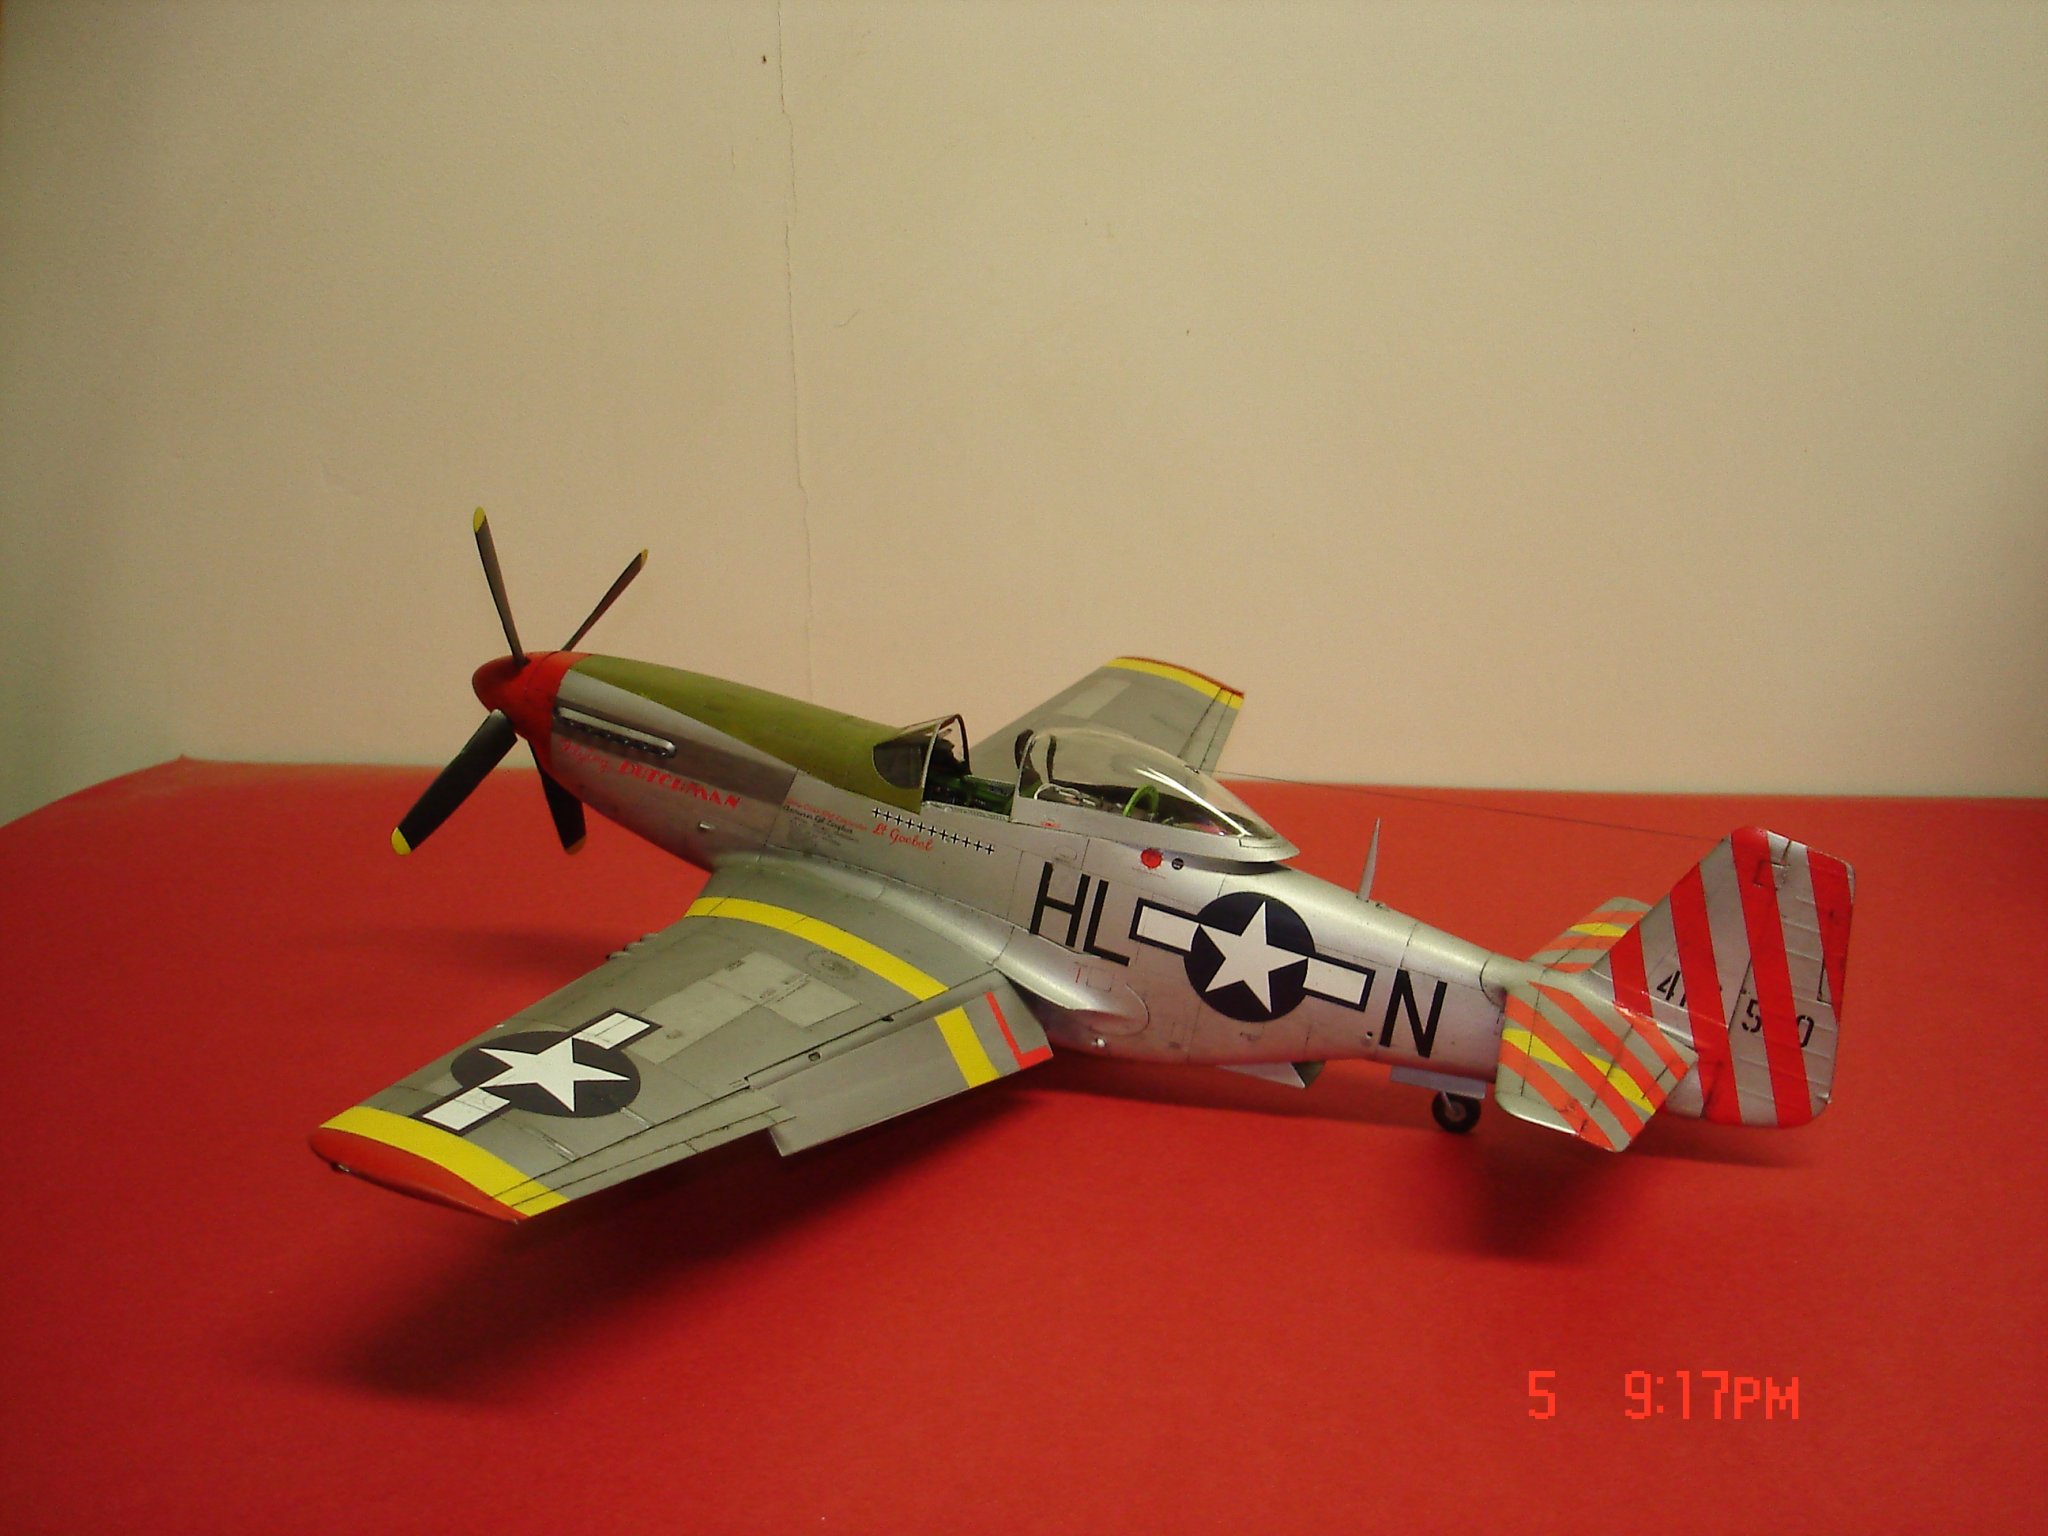
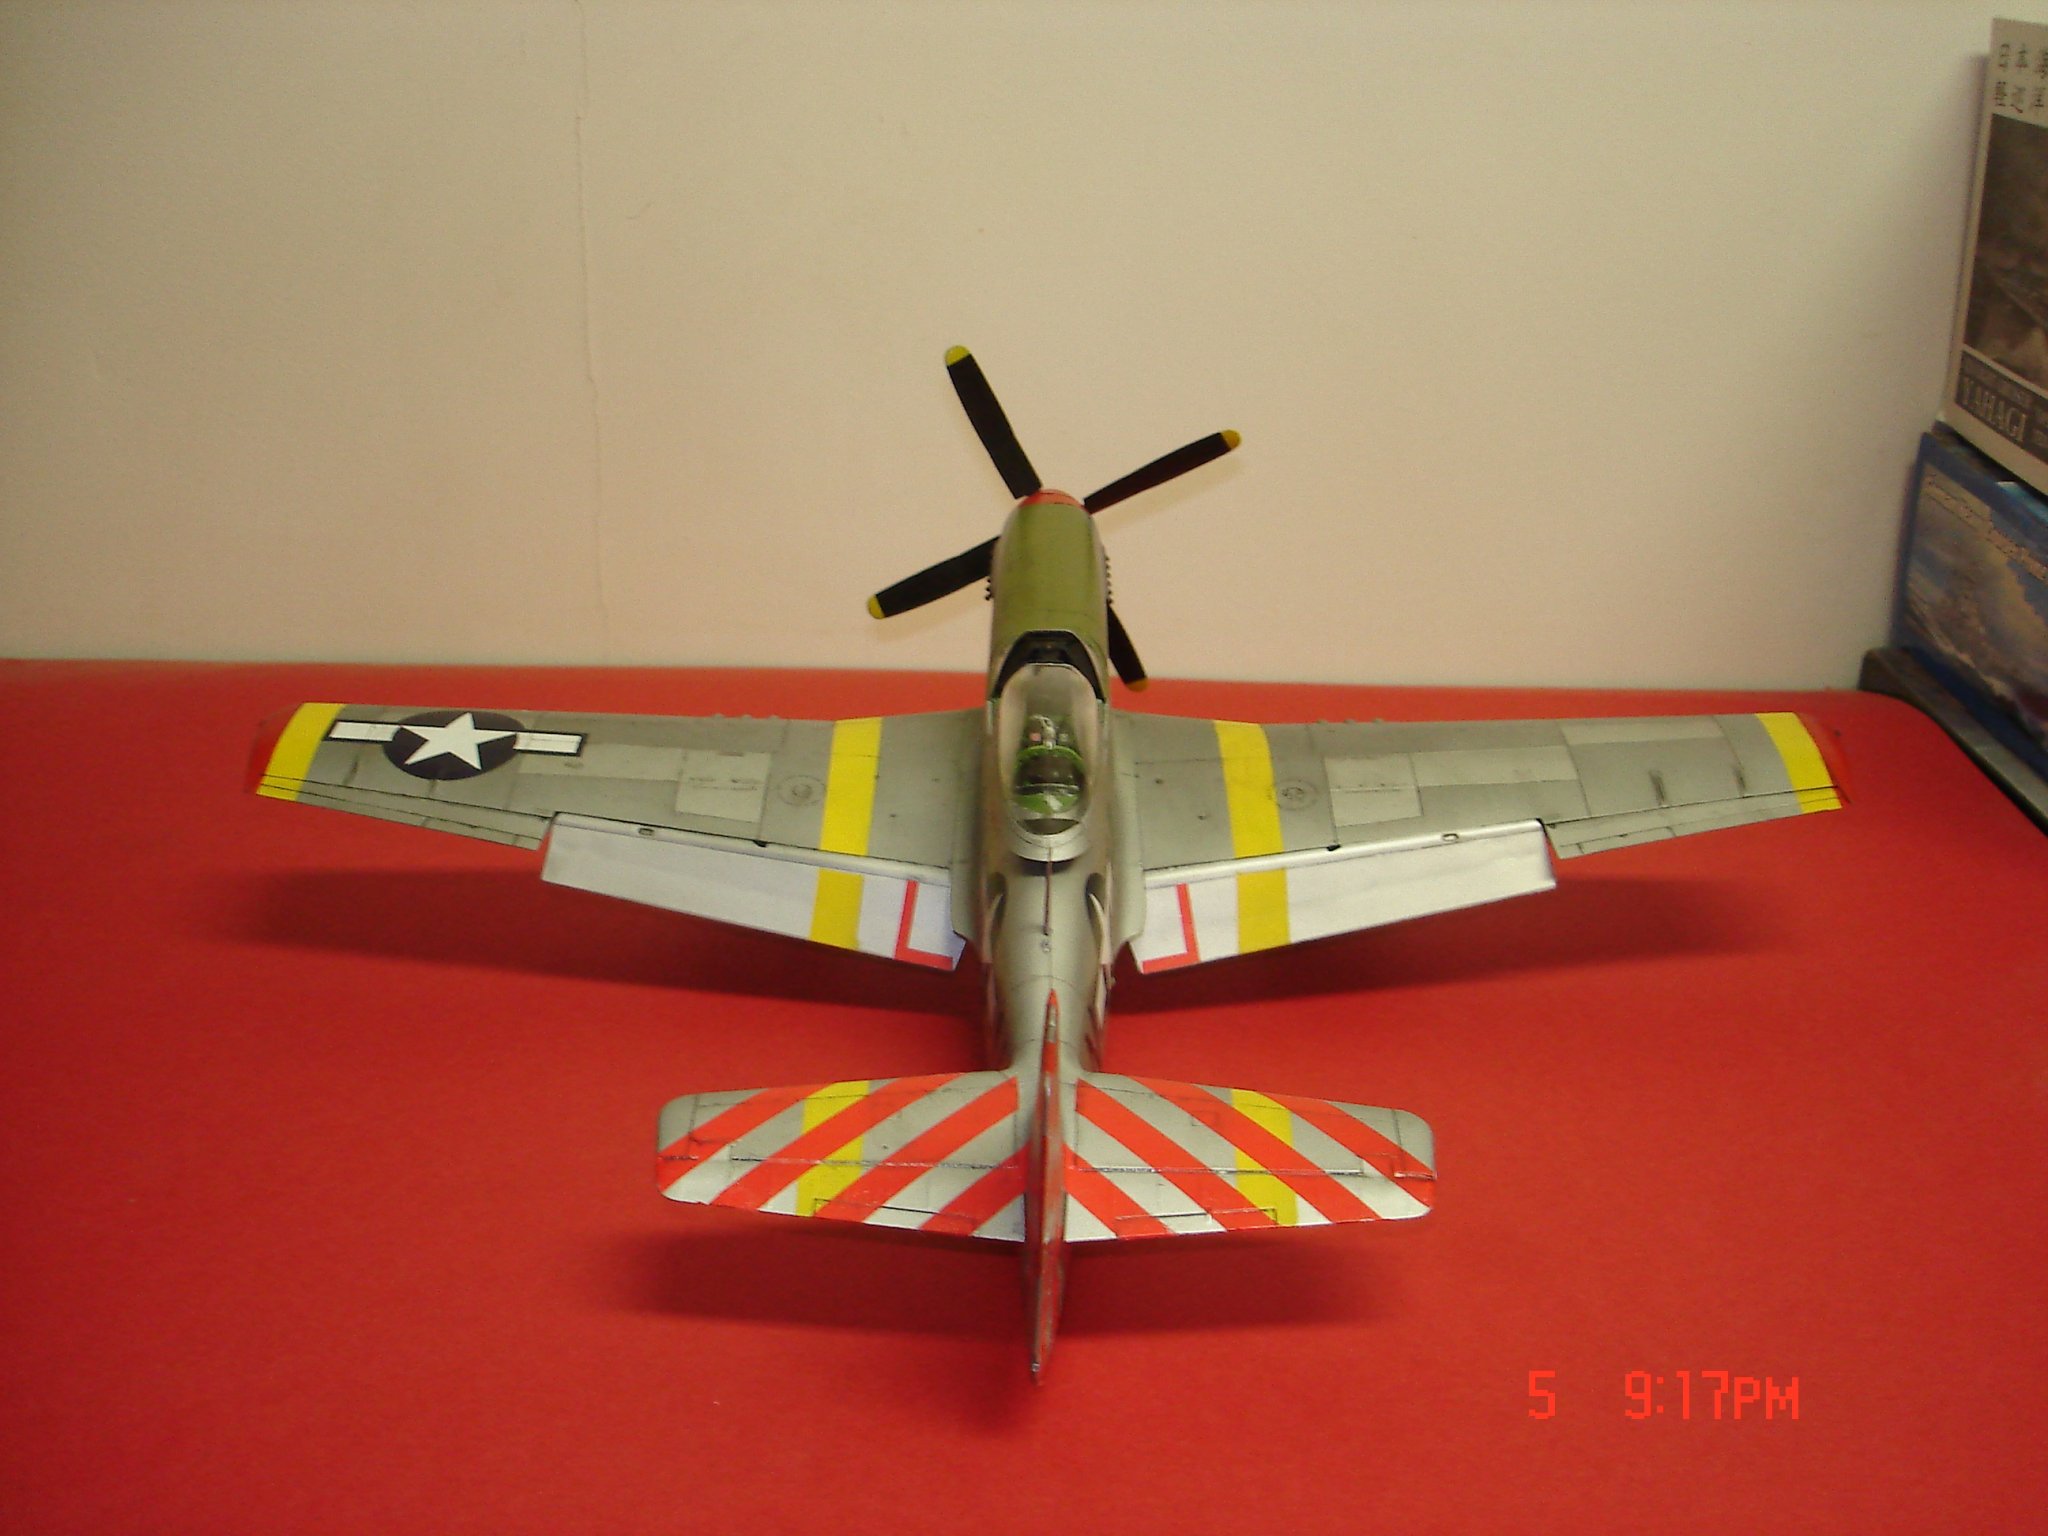
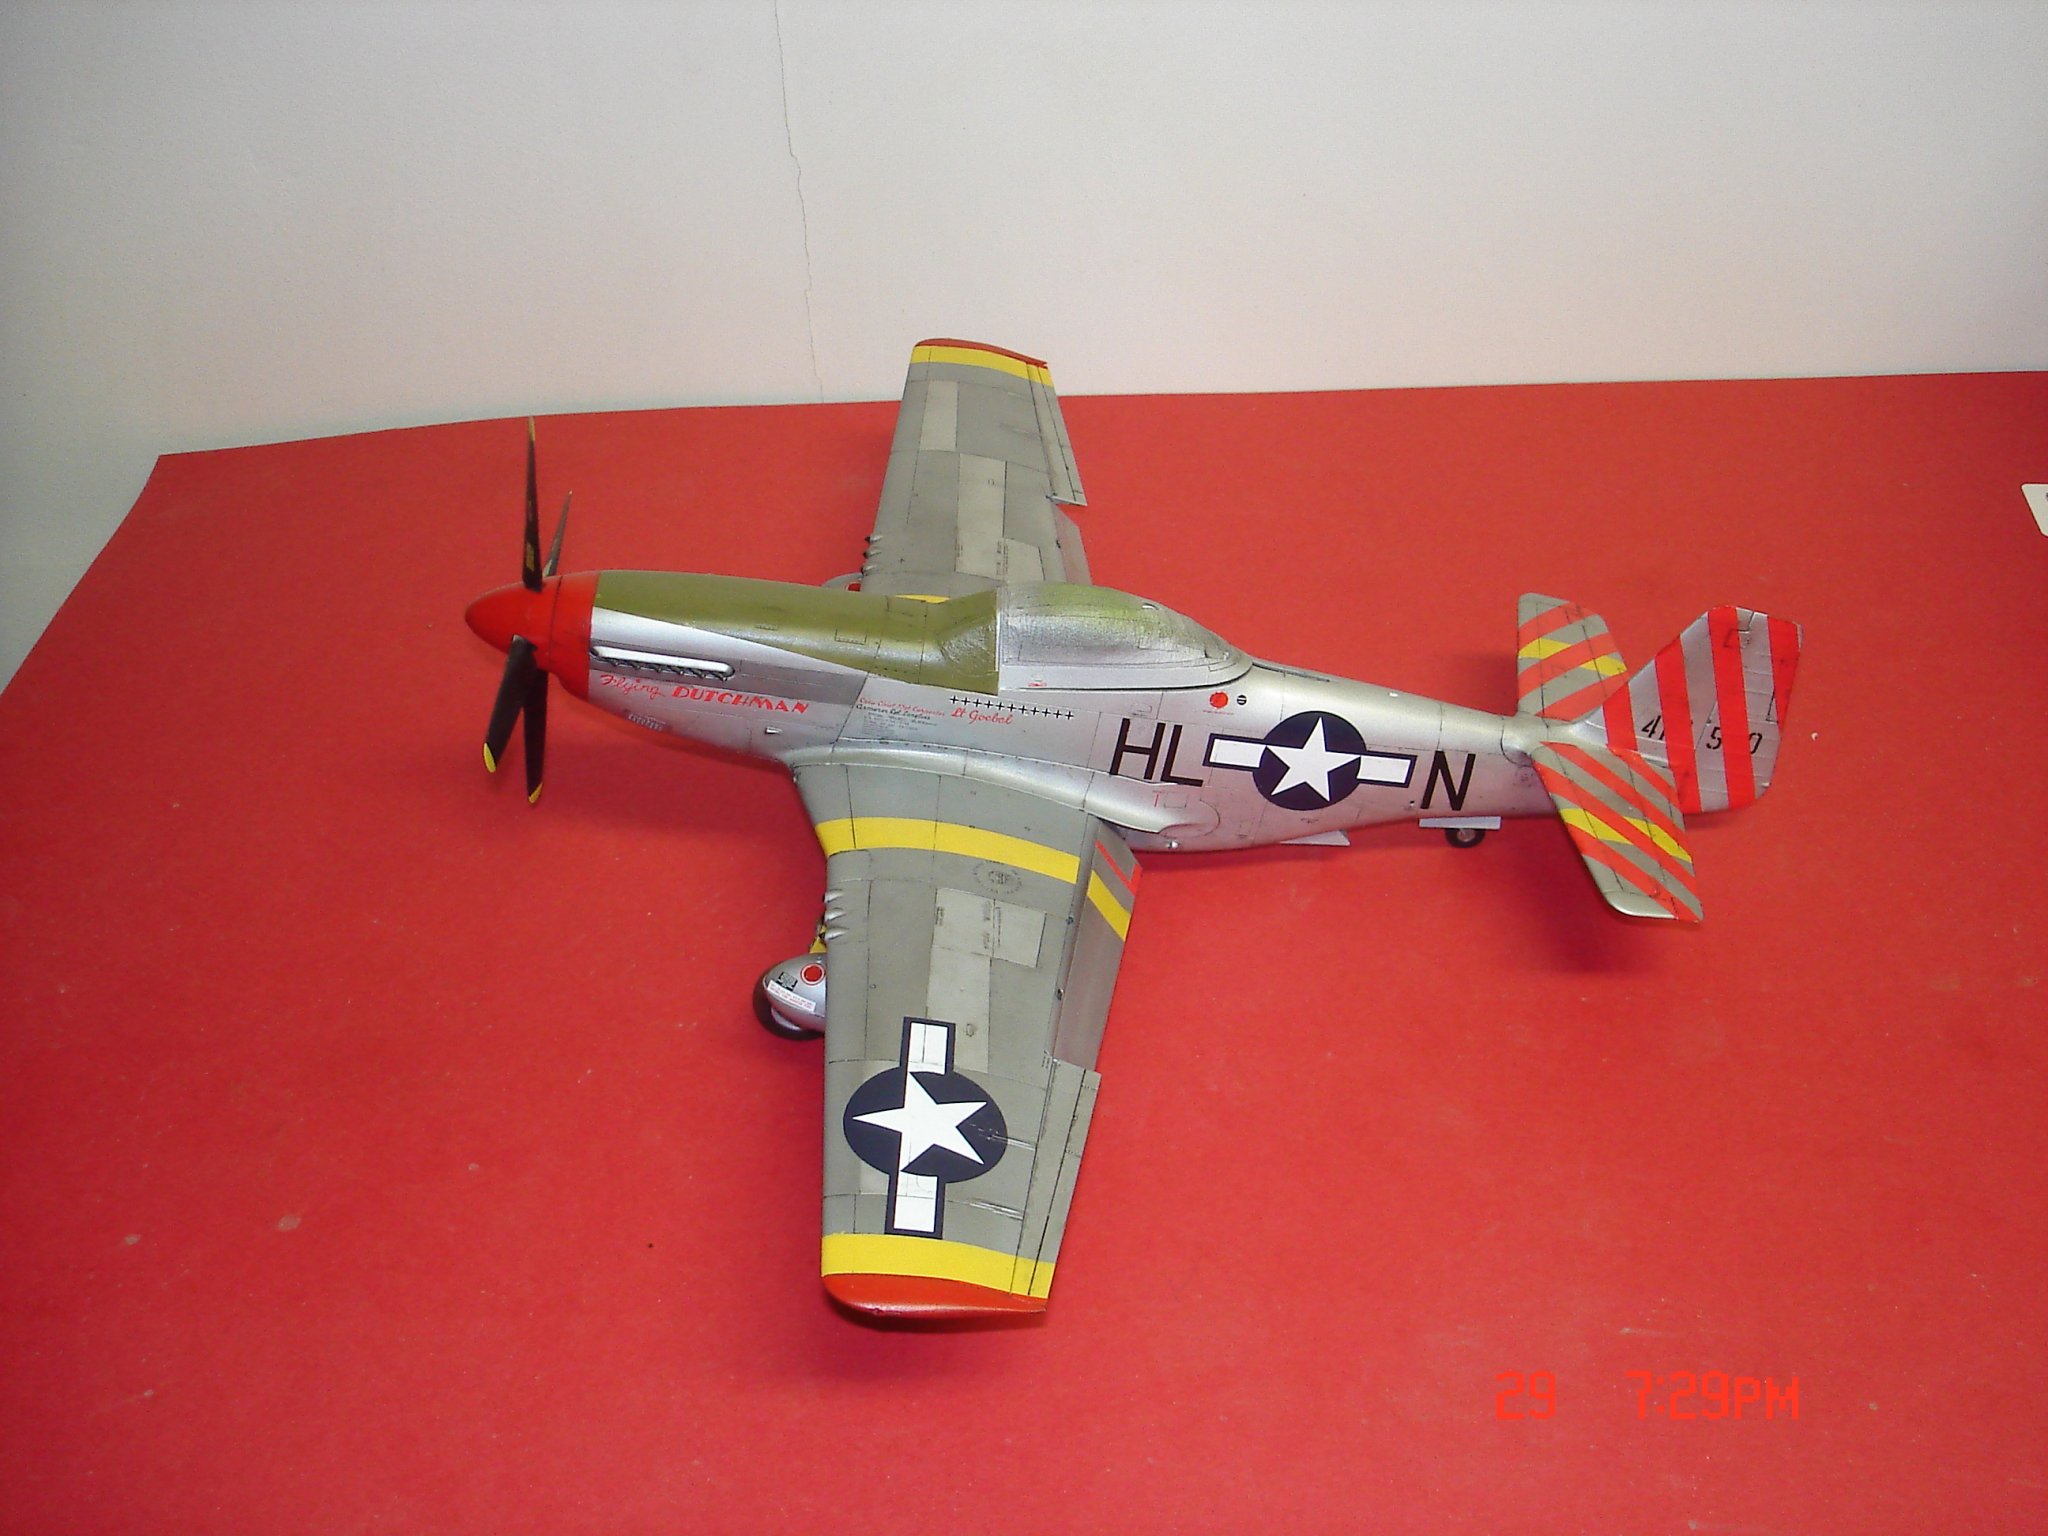
So I introduced this little version here figured I finish it here.The last coat of clear has been applied to which I still need to do the yellow leading wing bands the decals broke apart old.I believe I used the roundels that the decal sheet called for but the pic above shows the yellow outline while I can still see distance that close stuff...well?I used stainless instead of magnesium around the exhaust and an extra silver out in the field.I should a used the flash.


-
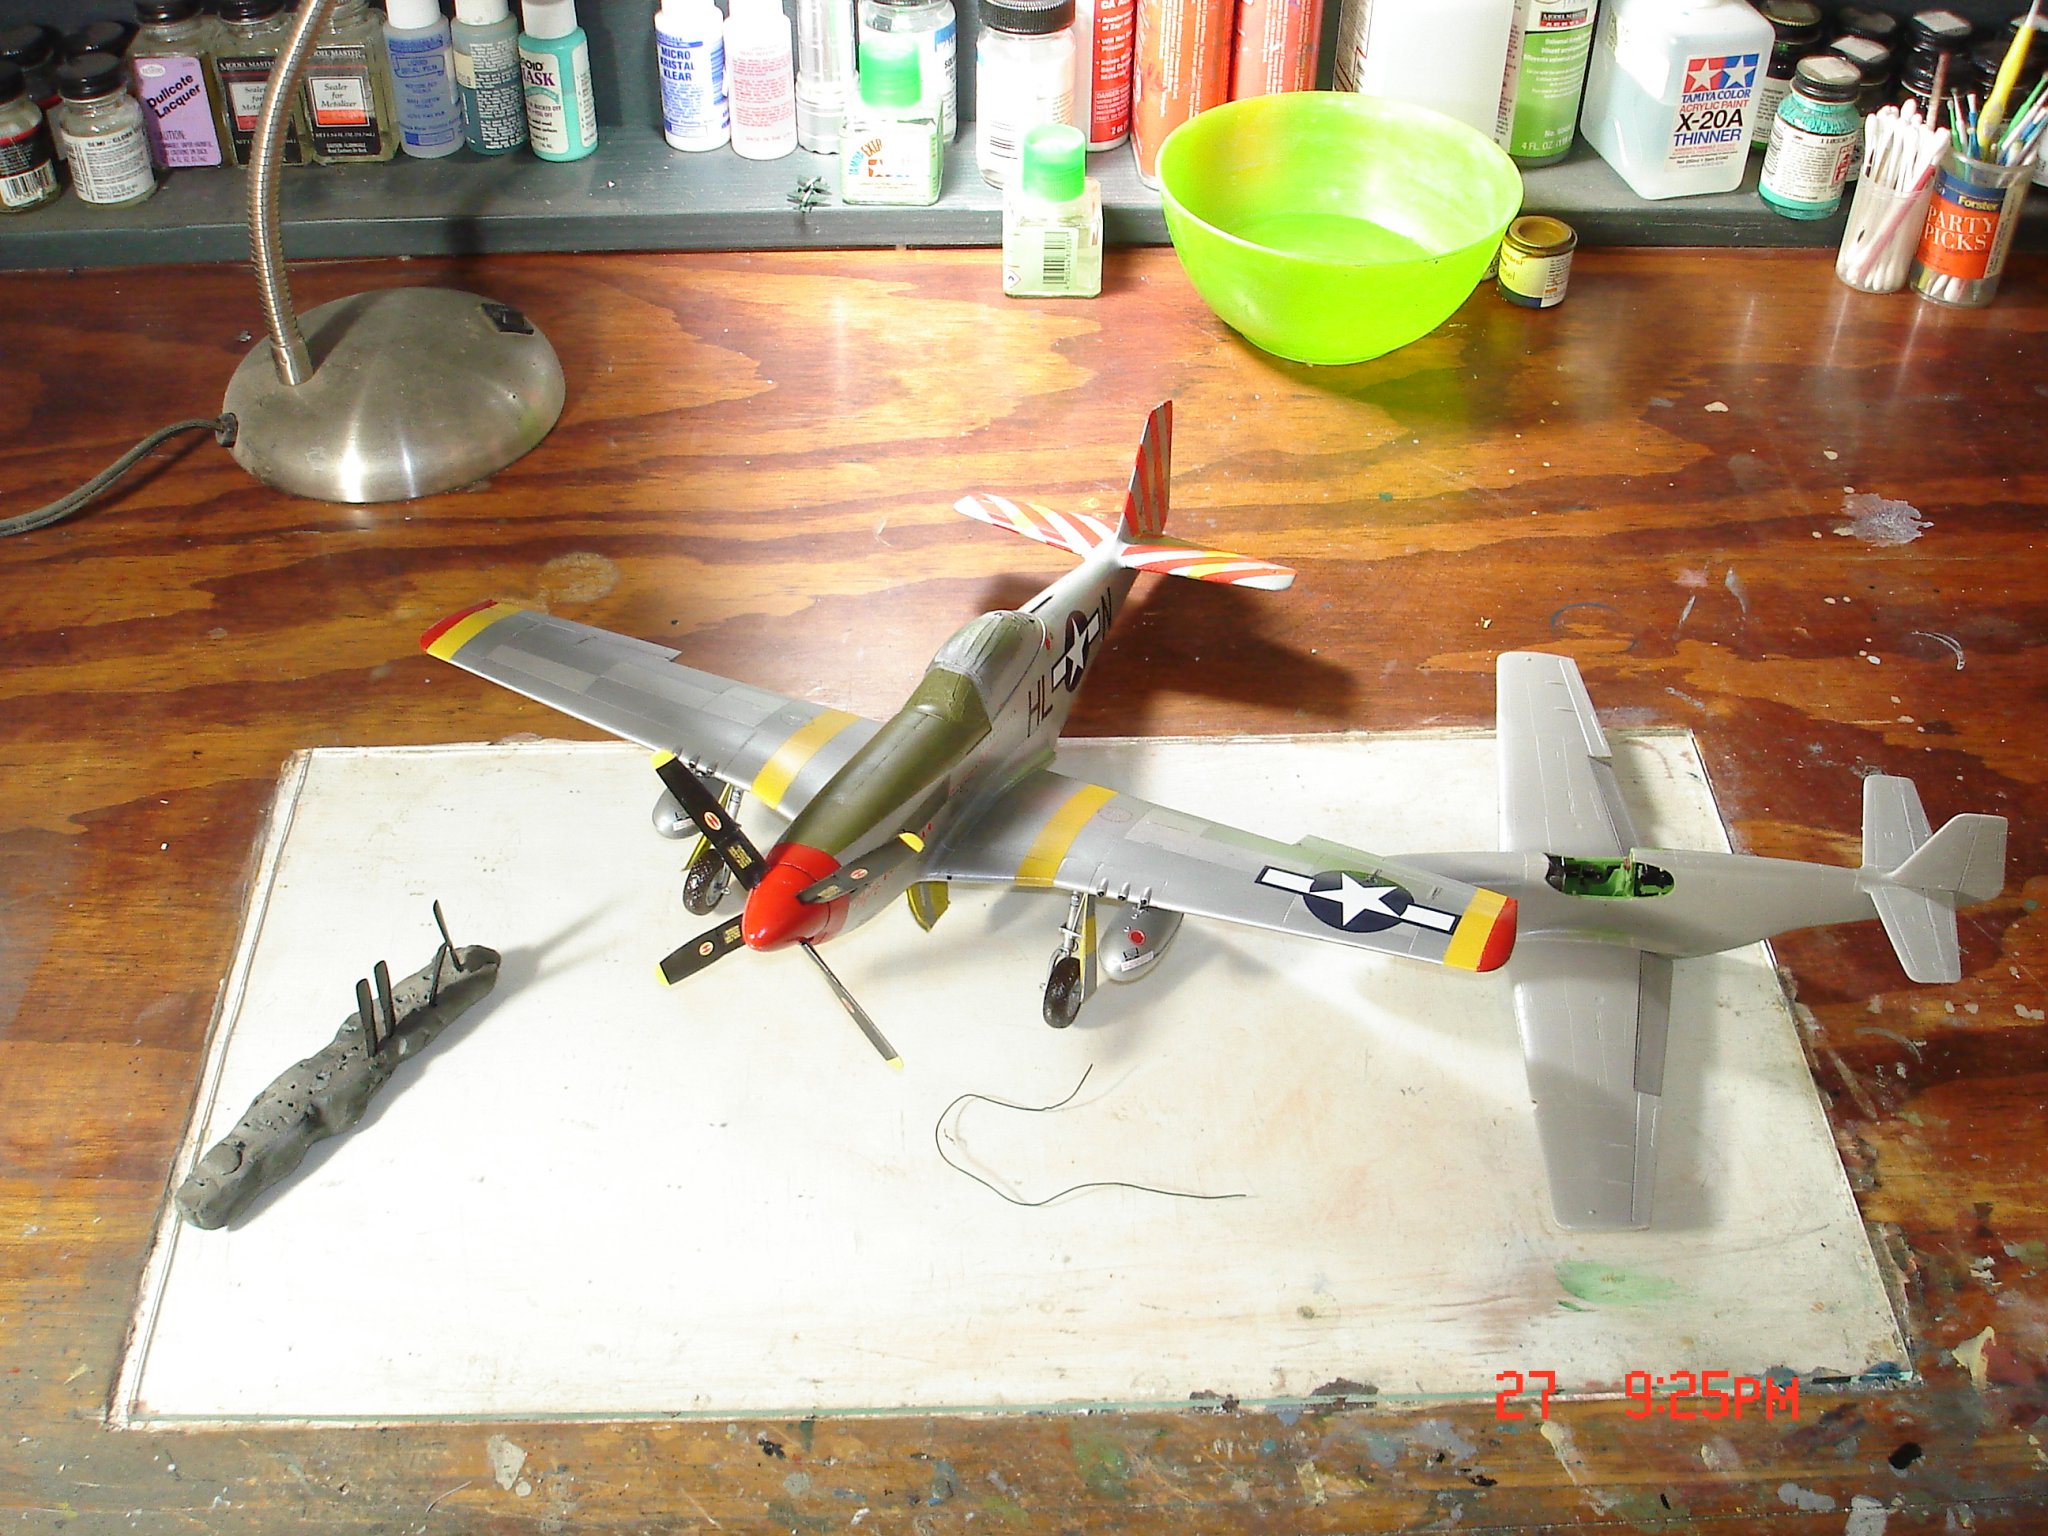
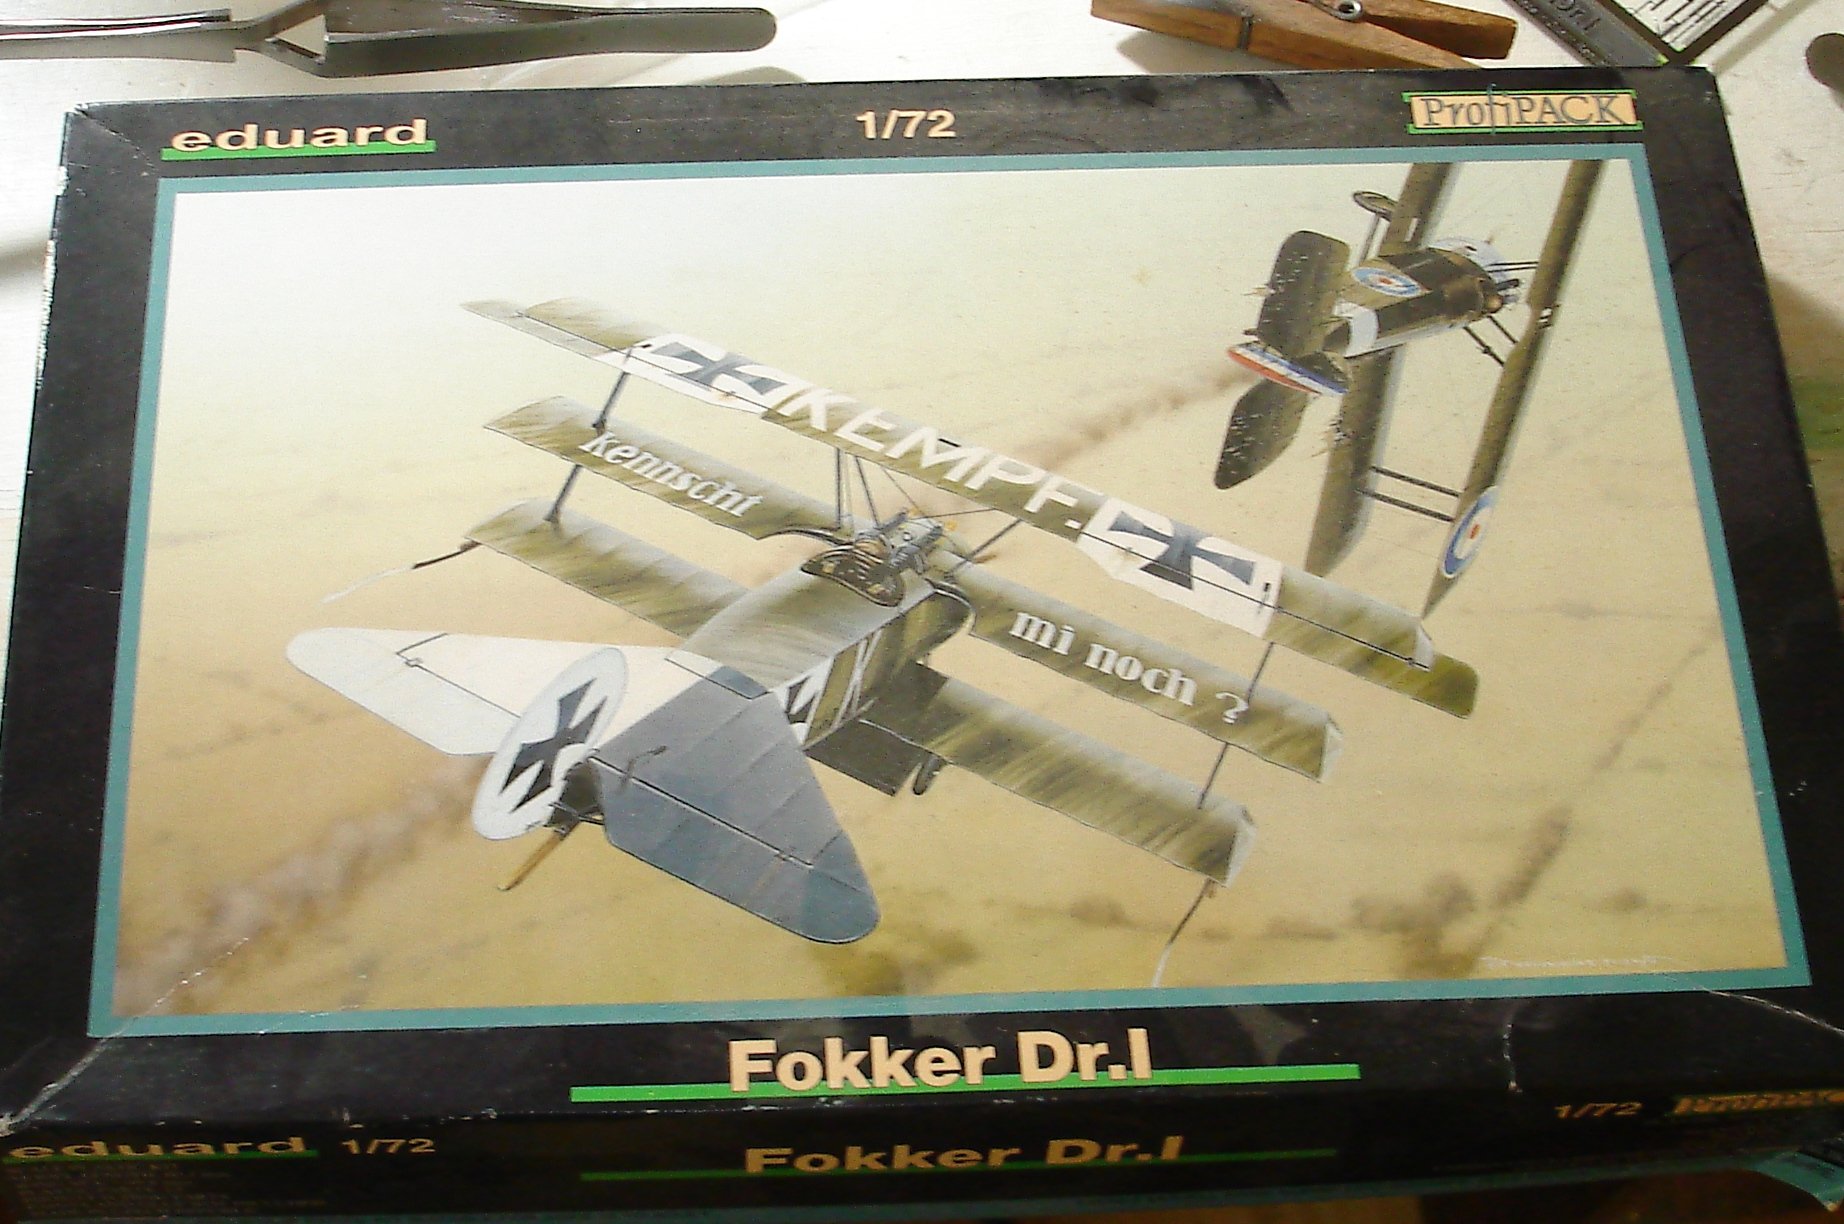
Gotta finish the P-51 B/C on the table another Revell but 1/48 but I am looking at a 1/72 Eduard Fokker Tri-Plane they have one neat scheme out of the three. Kevin
-
So Greg do you think painting the top of the lower pieces and pressing the deck while still wet would of helped?get the outline?
-
Cool! My Son is crewchief to an F-16 mainly 803 at Misawa does others also but have one about 1/2 built meaning to do it in 803 maybe this will be the spark? Kevin The video is pretty old like 2016 he made E-5 about 2/3 months ago he joined in summer of 2015 needless to say I am proud of him he's done well.I sent the link via skype about F-16 Delta.
-
I only have few of those type of challenges left in me Yves that engine looks great! Kevin
-
Greg great as usual as to the deck not fitting was that the plastic our the PE being introduced?I will have to do the Mogami one day and can see just off here could set the whole deck off to which I could see in your case cutting the deck was a great solution since you have the overlay.It's a shame all that fine work below is going to be covered up being so Beautiful! Kevin
-
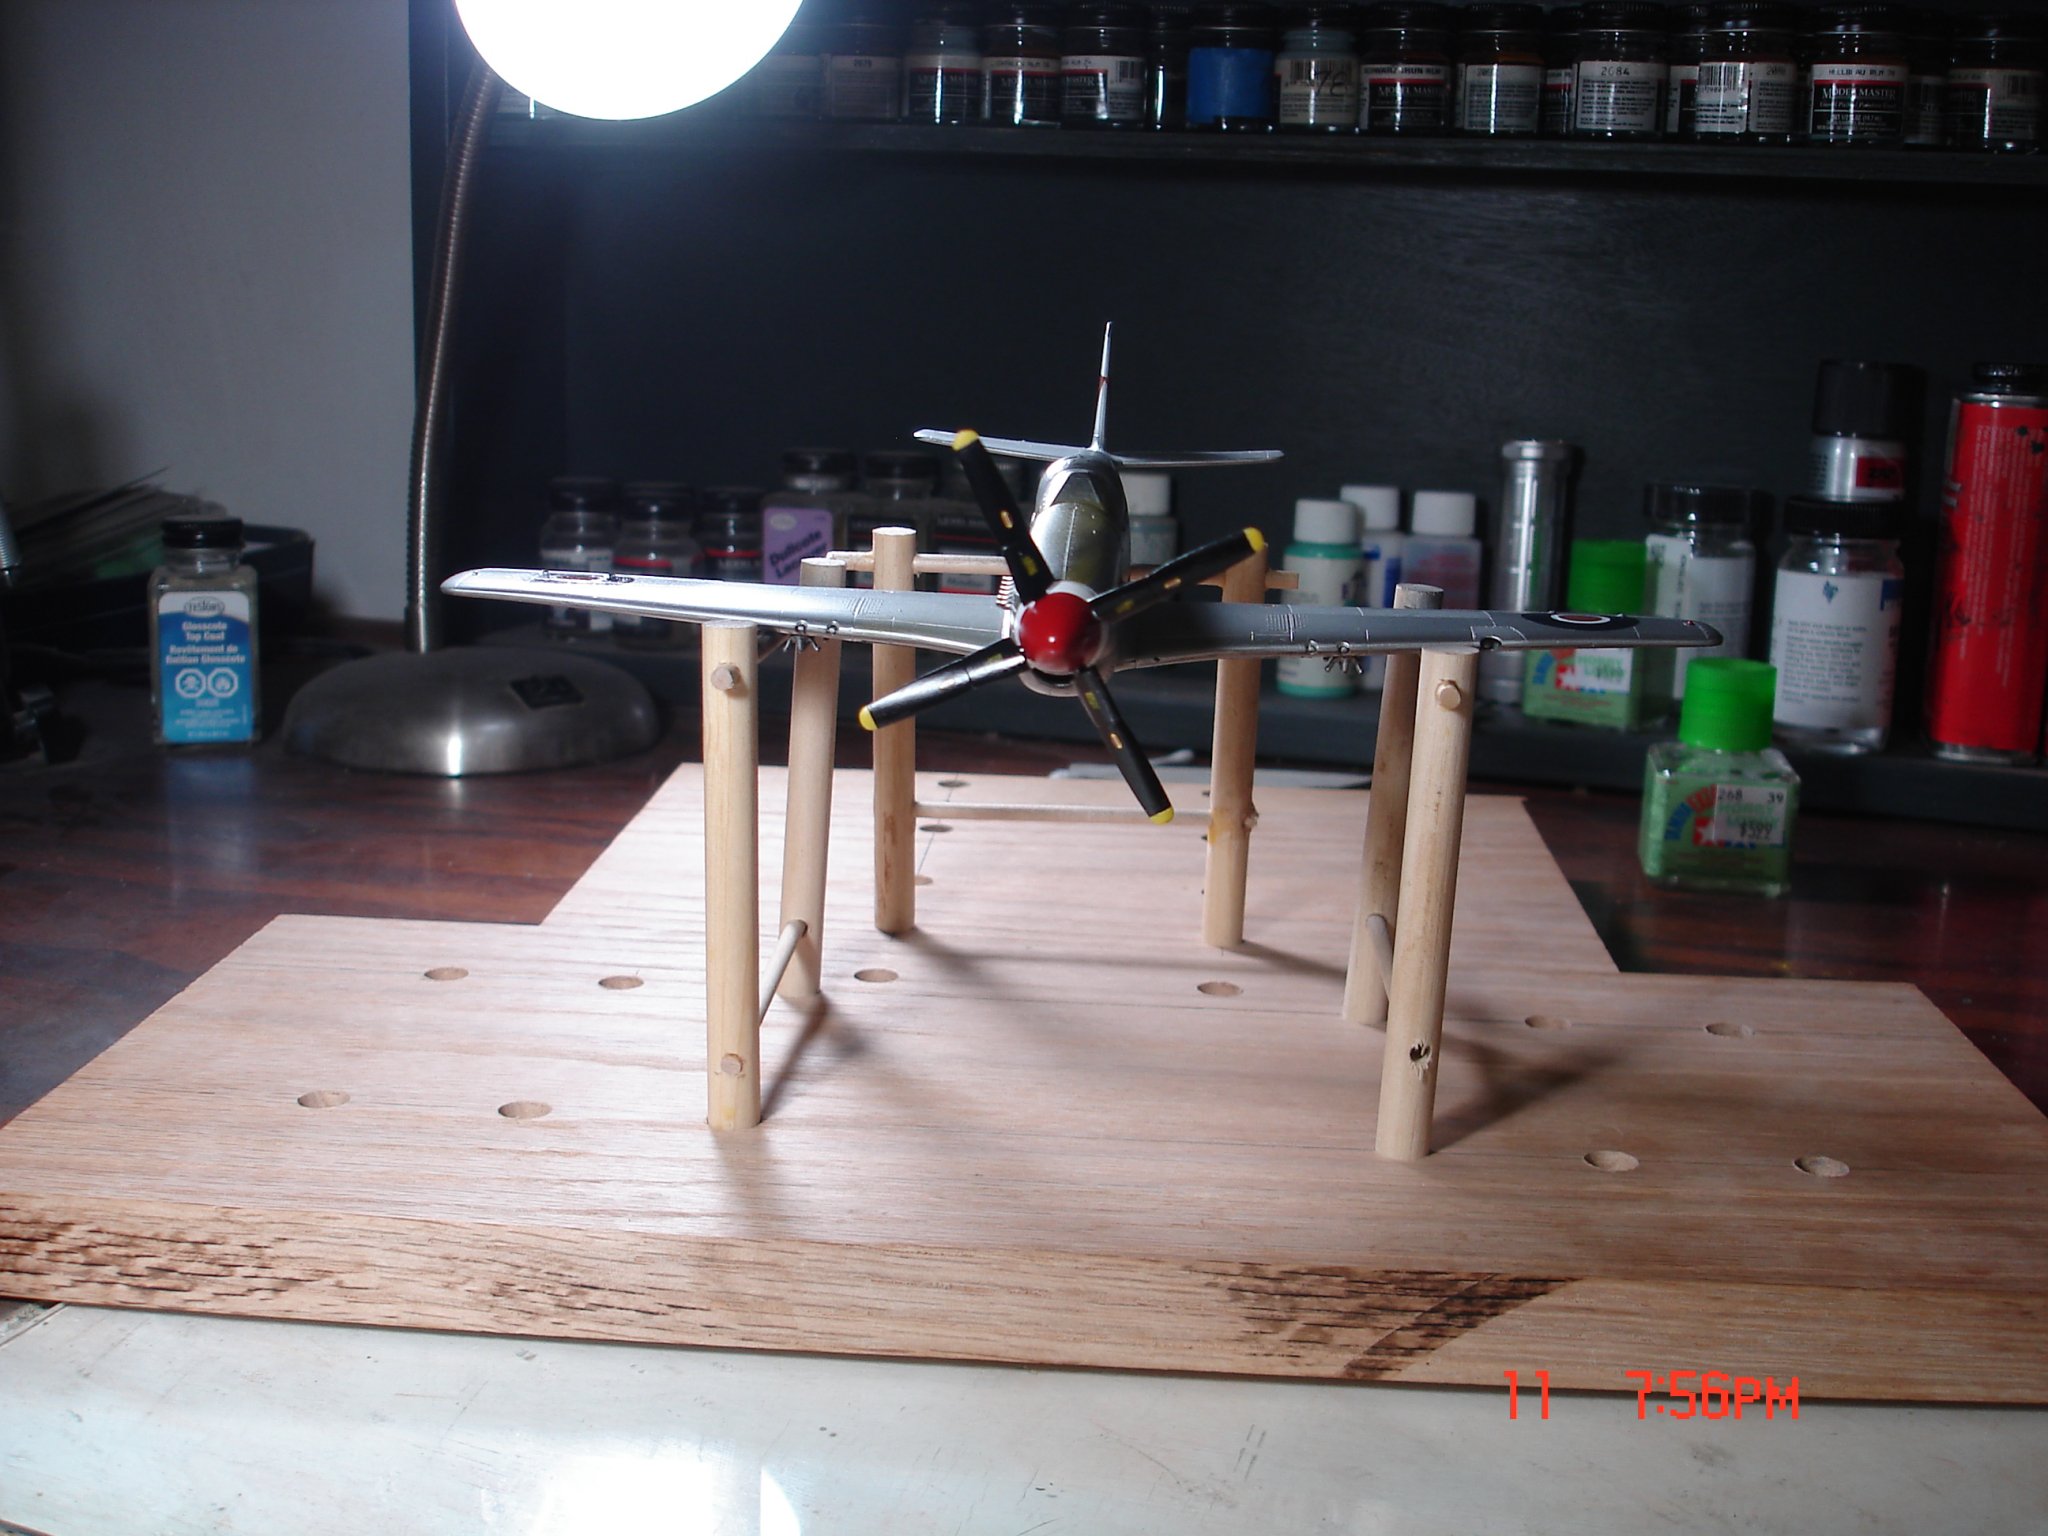
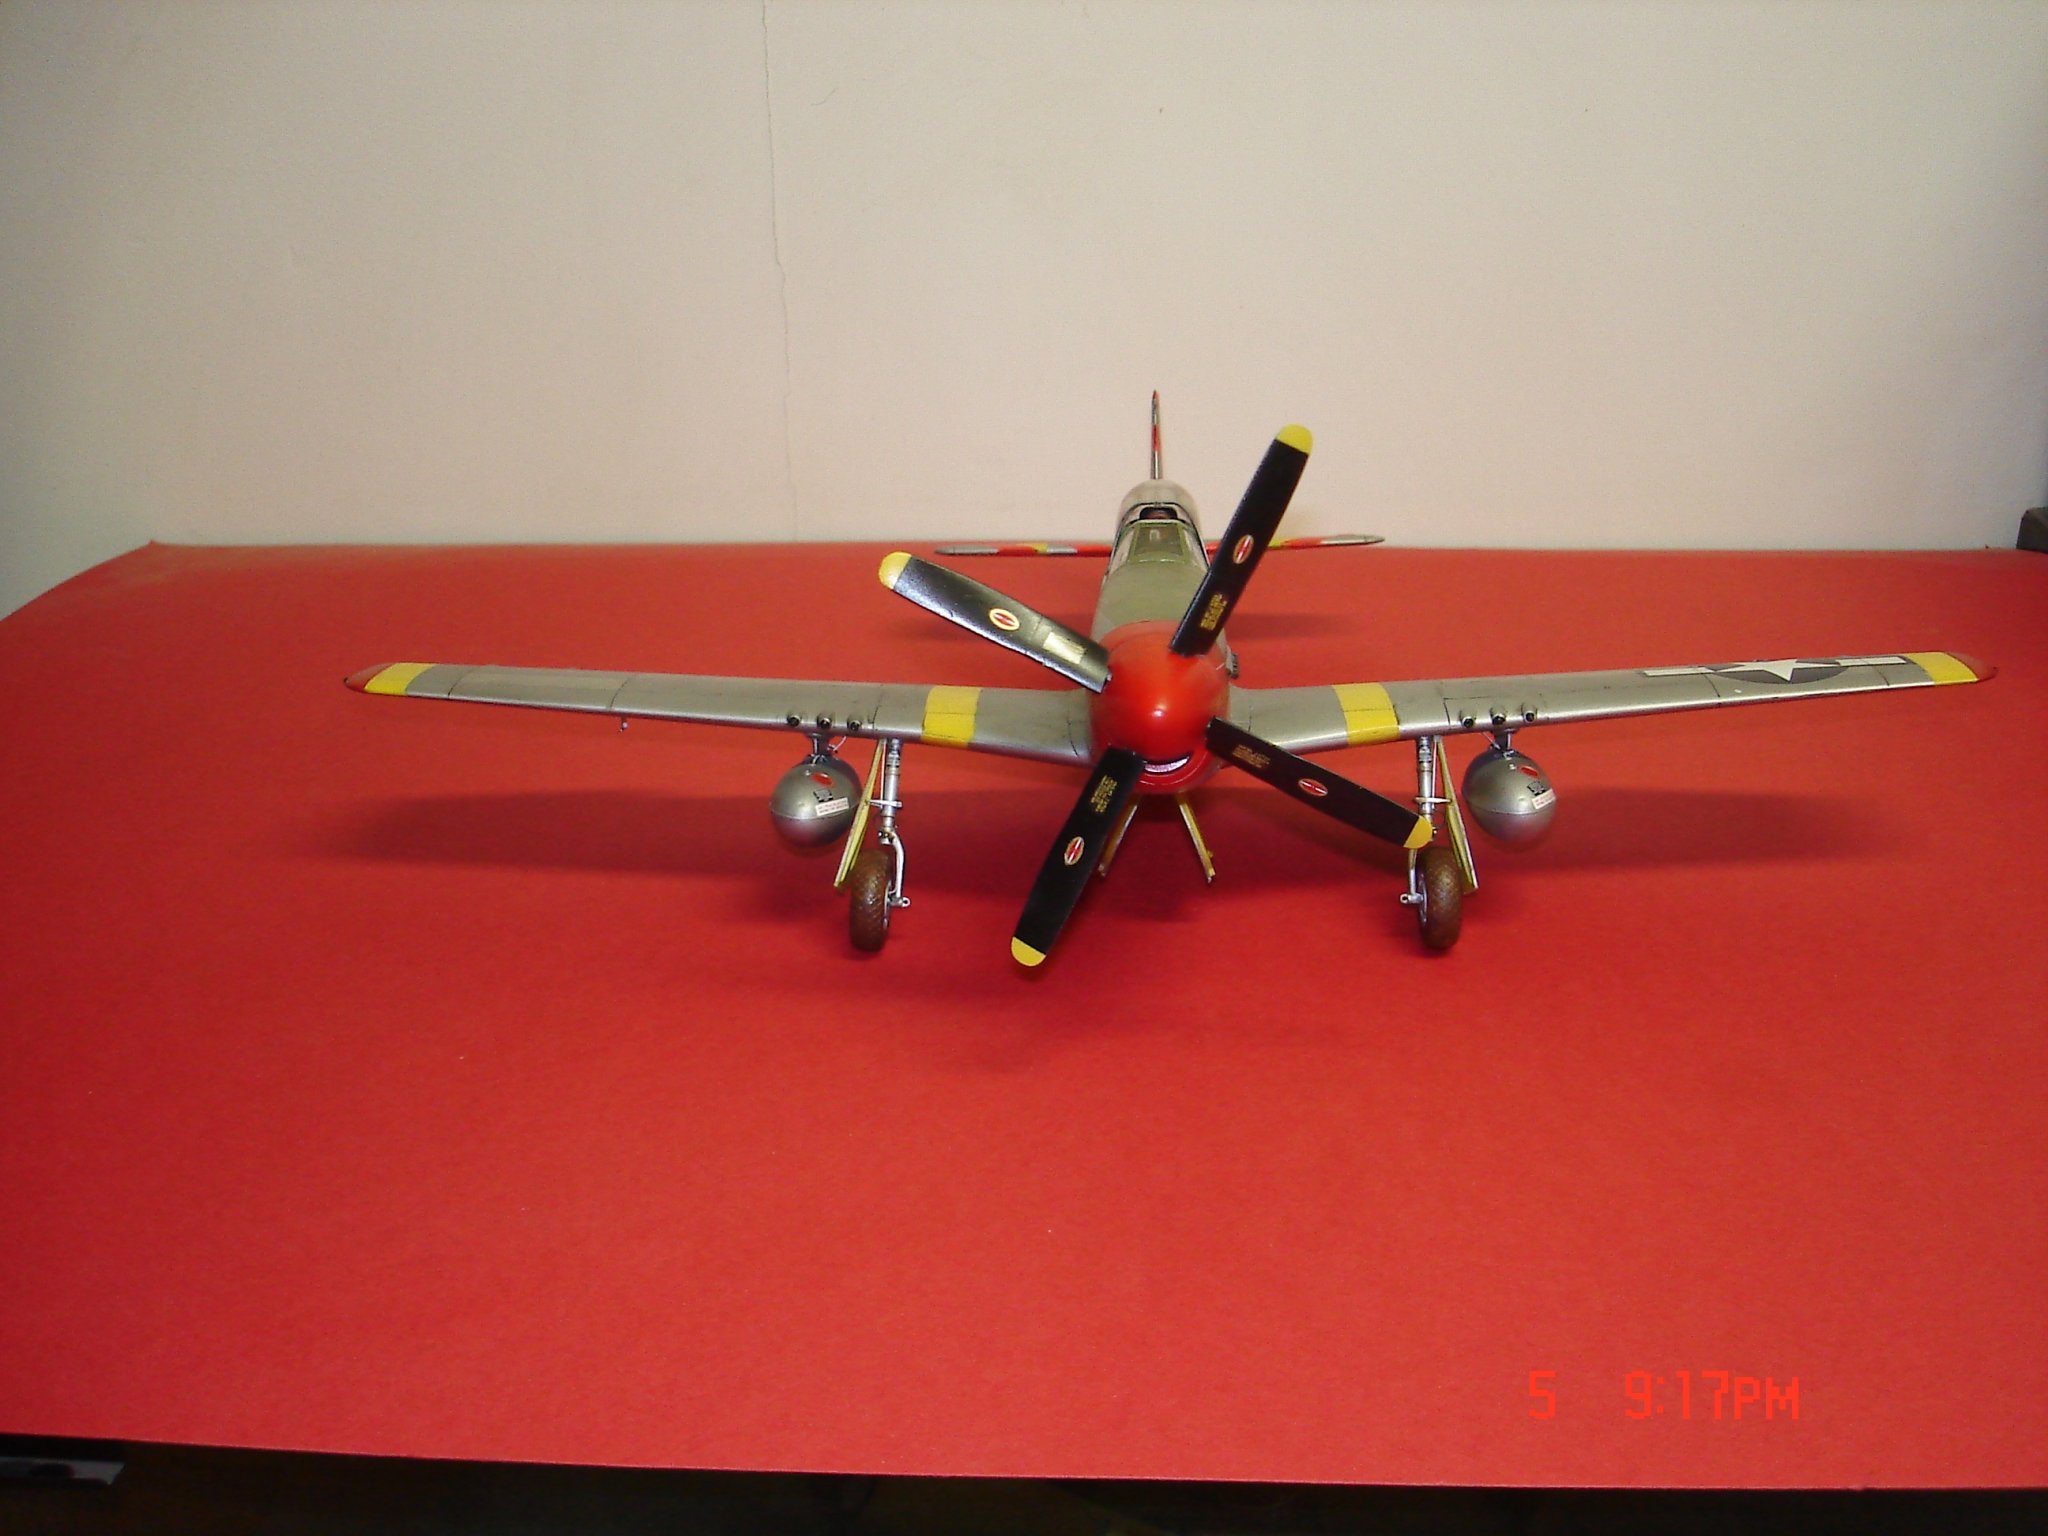
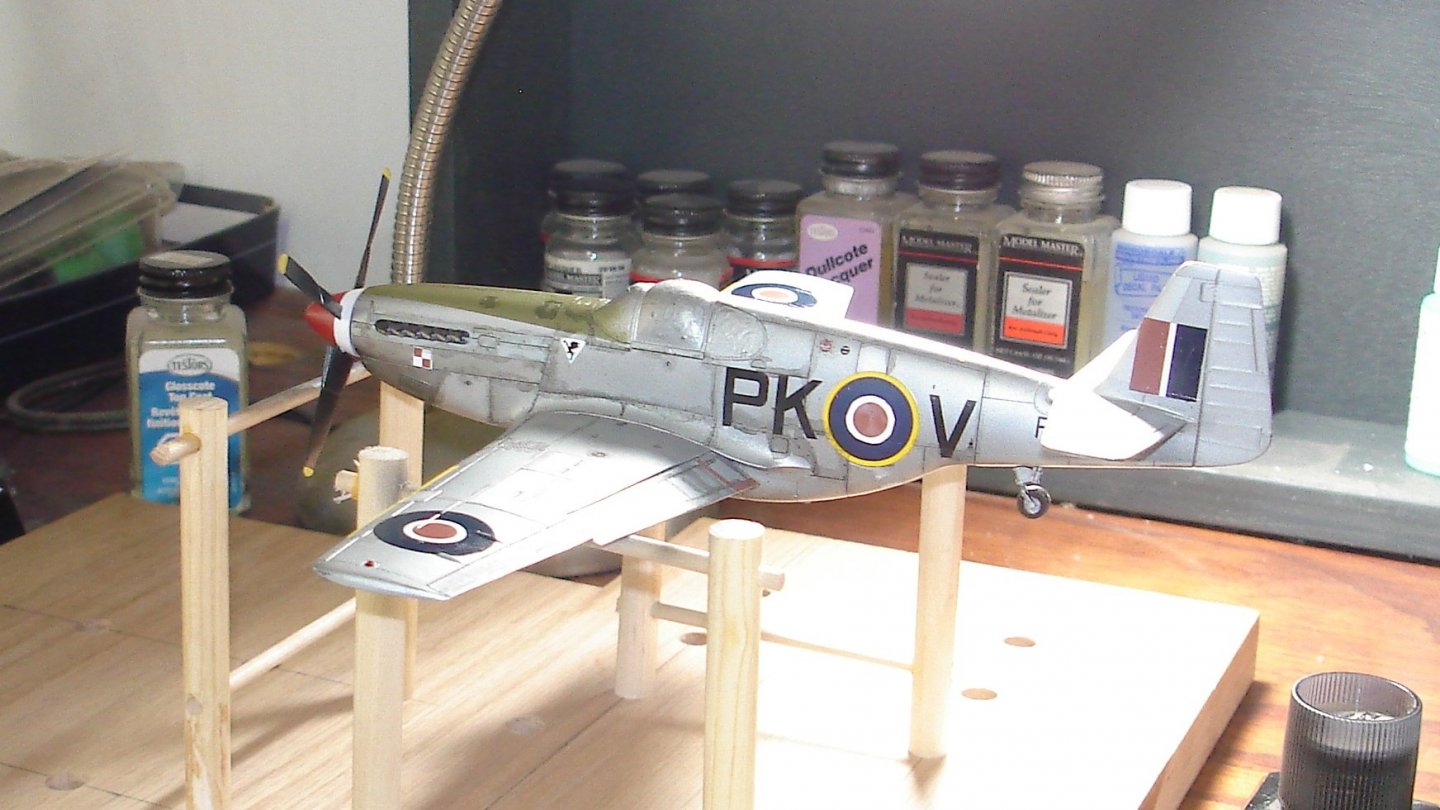
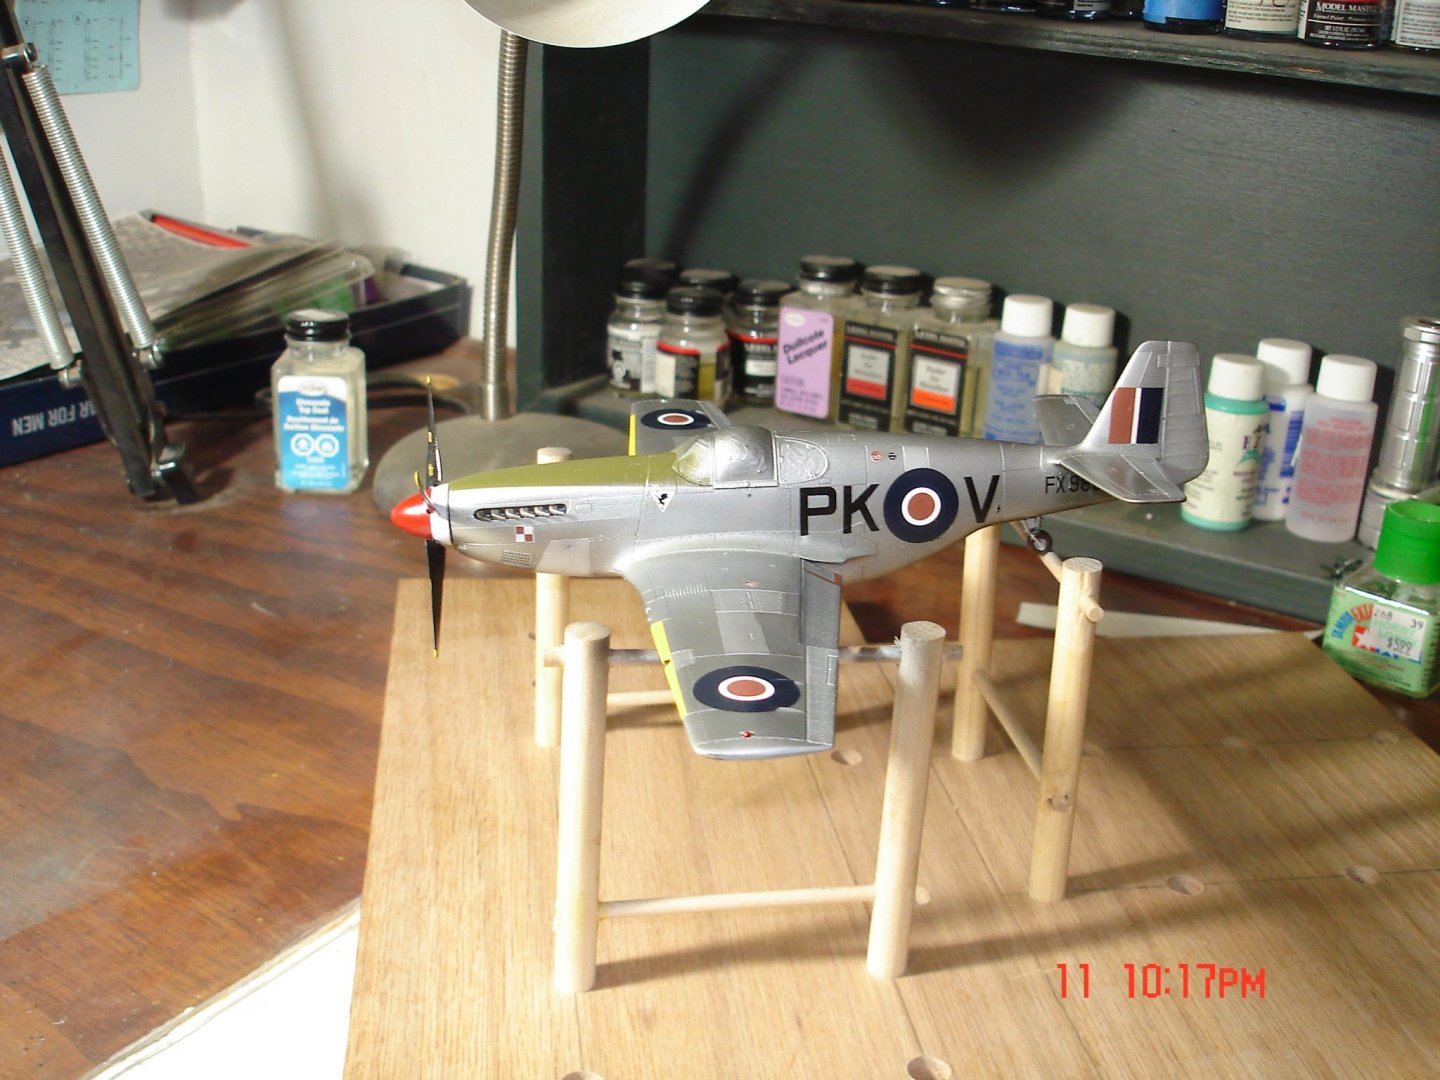
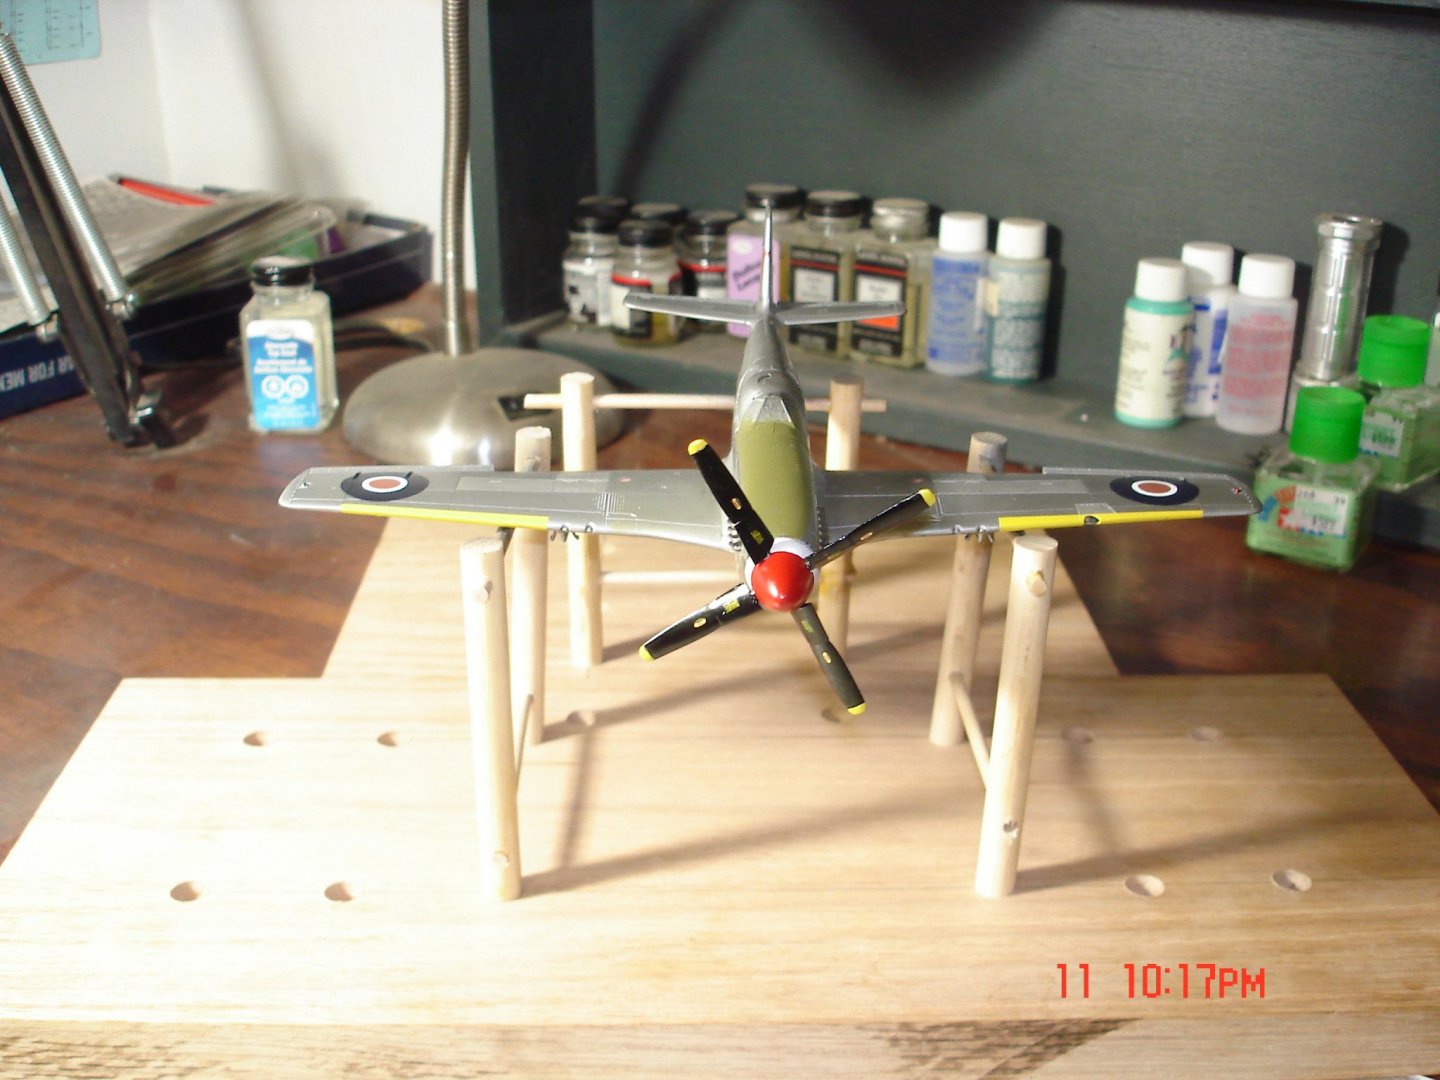
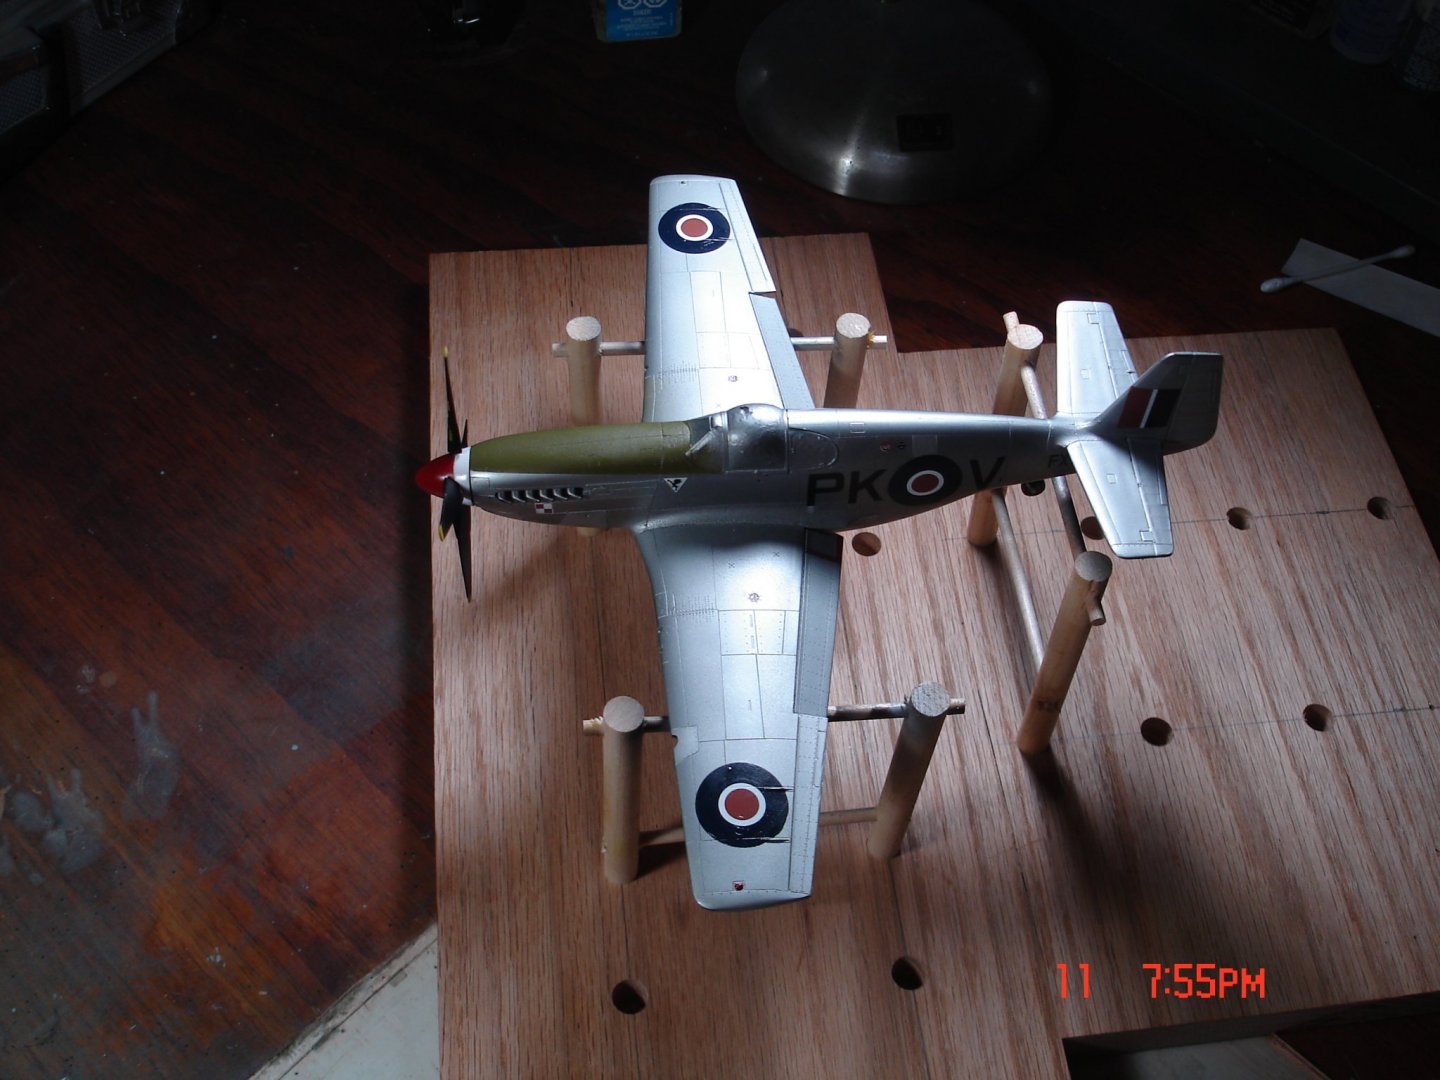
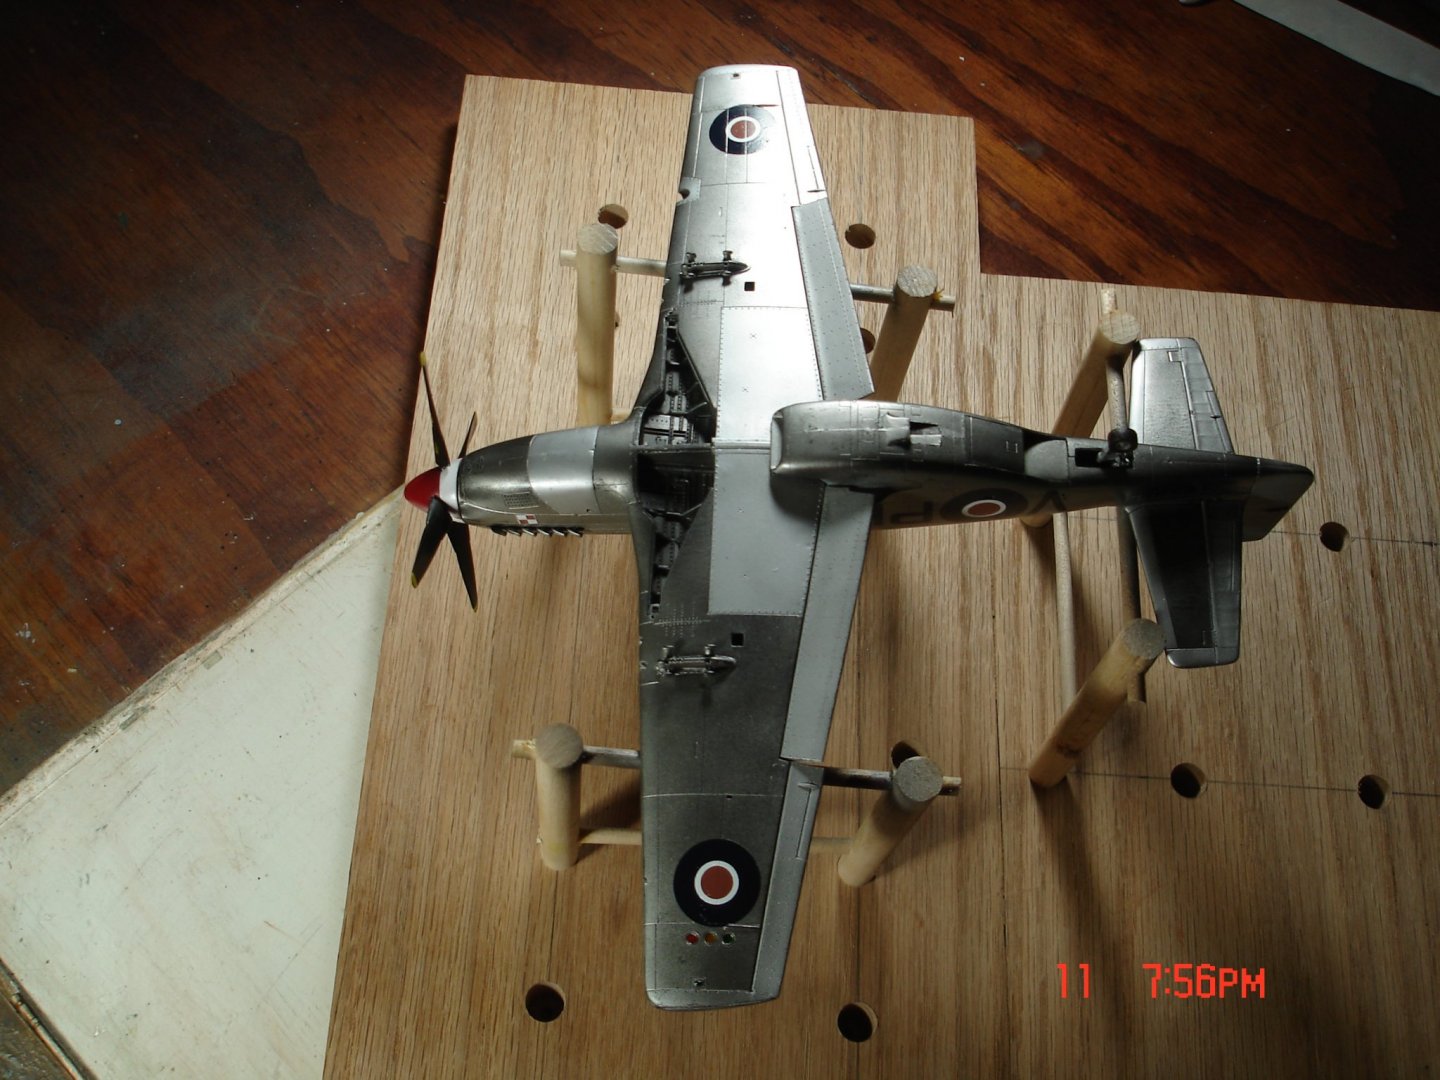
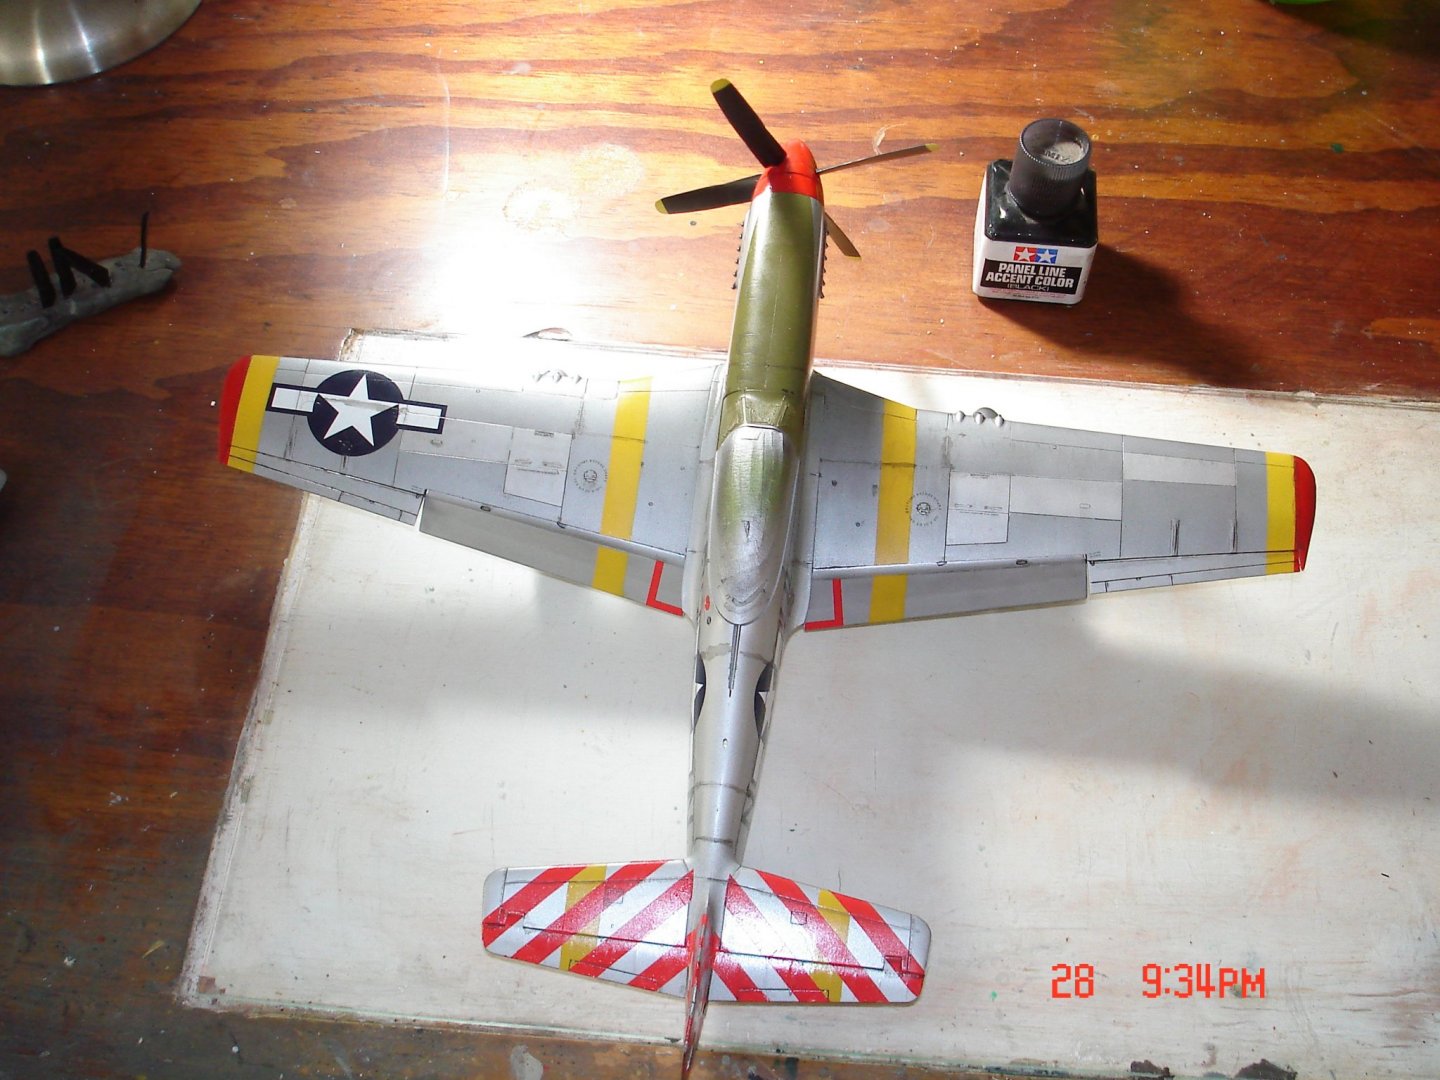
This crate is getting close to finish gunsight,canopy,front windscreen,lights and antenna.The wash is complete with a semi-gloss enamel applied I don't know if the pics you see the lines from the auxiliary tanks.The plane has some of her faults but overall I am satisfied I would like to "American Beauty" but save that for the 1/24 I have and paint the colors.The 315 bird has the silver applied I did a primer this time buffed it then shot the lacquer gloss black hit it with semi-flat AL topside and it was to flat for me it says bare metal not painted!I then hit it with Airframe AL which is usually pretty bright looks good up top but on the bottom well you will see straight on the gloss.


-
That is looking Really Nice in the long run and different to boot Kevin
-
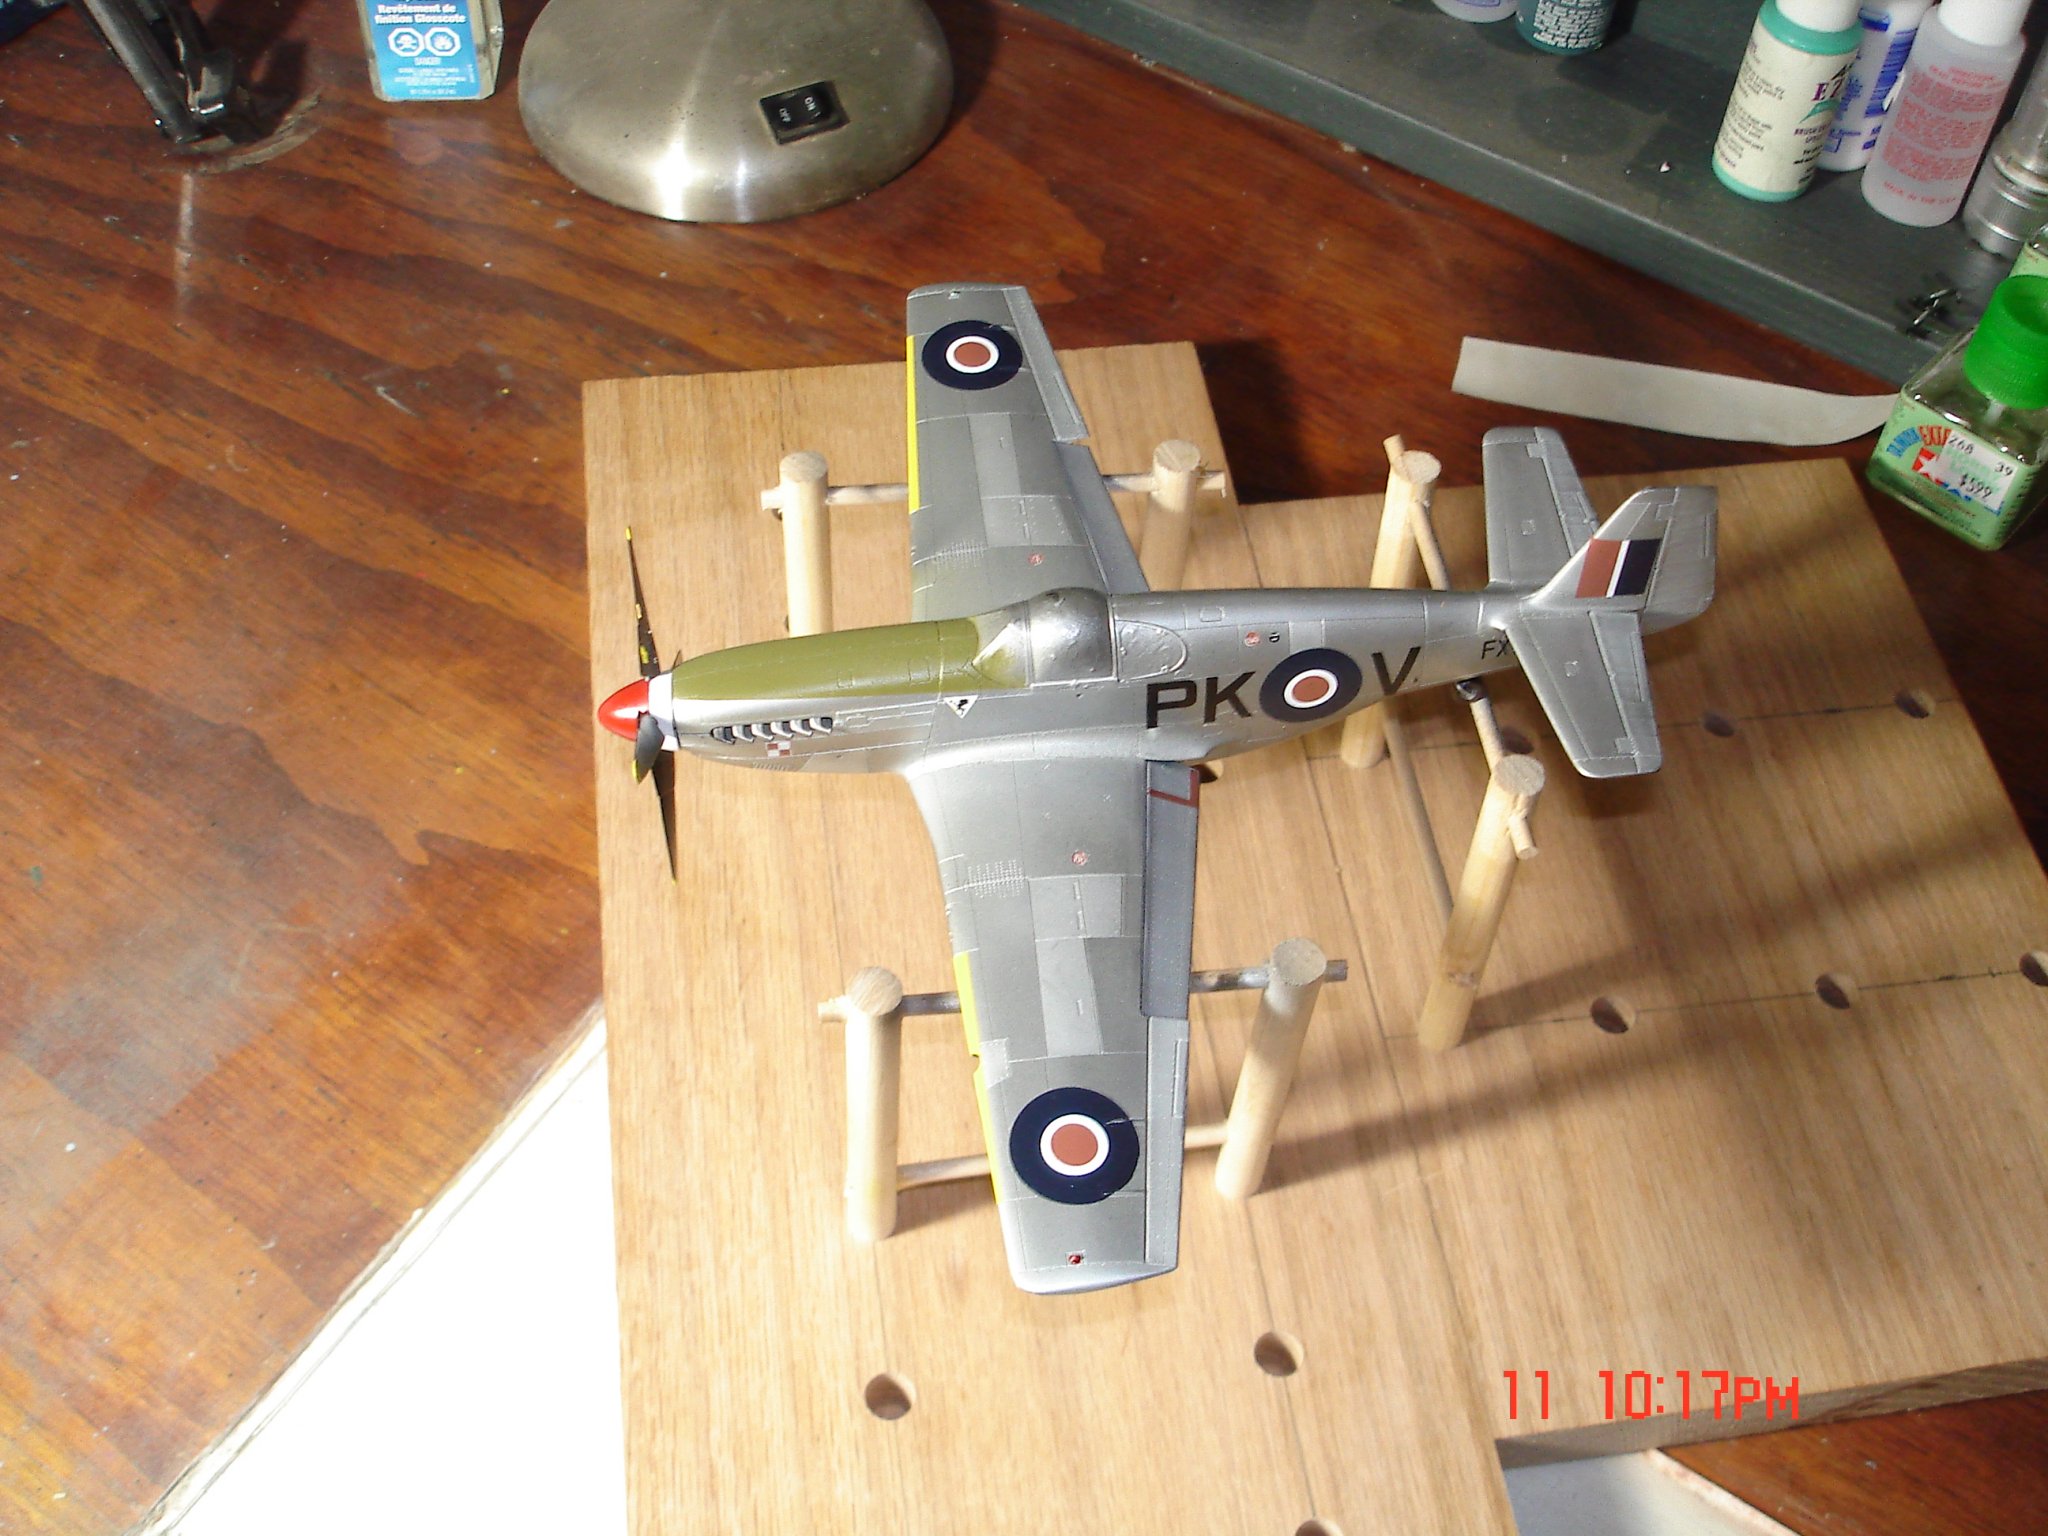
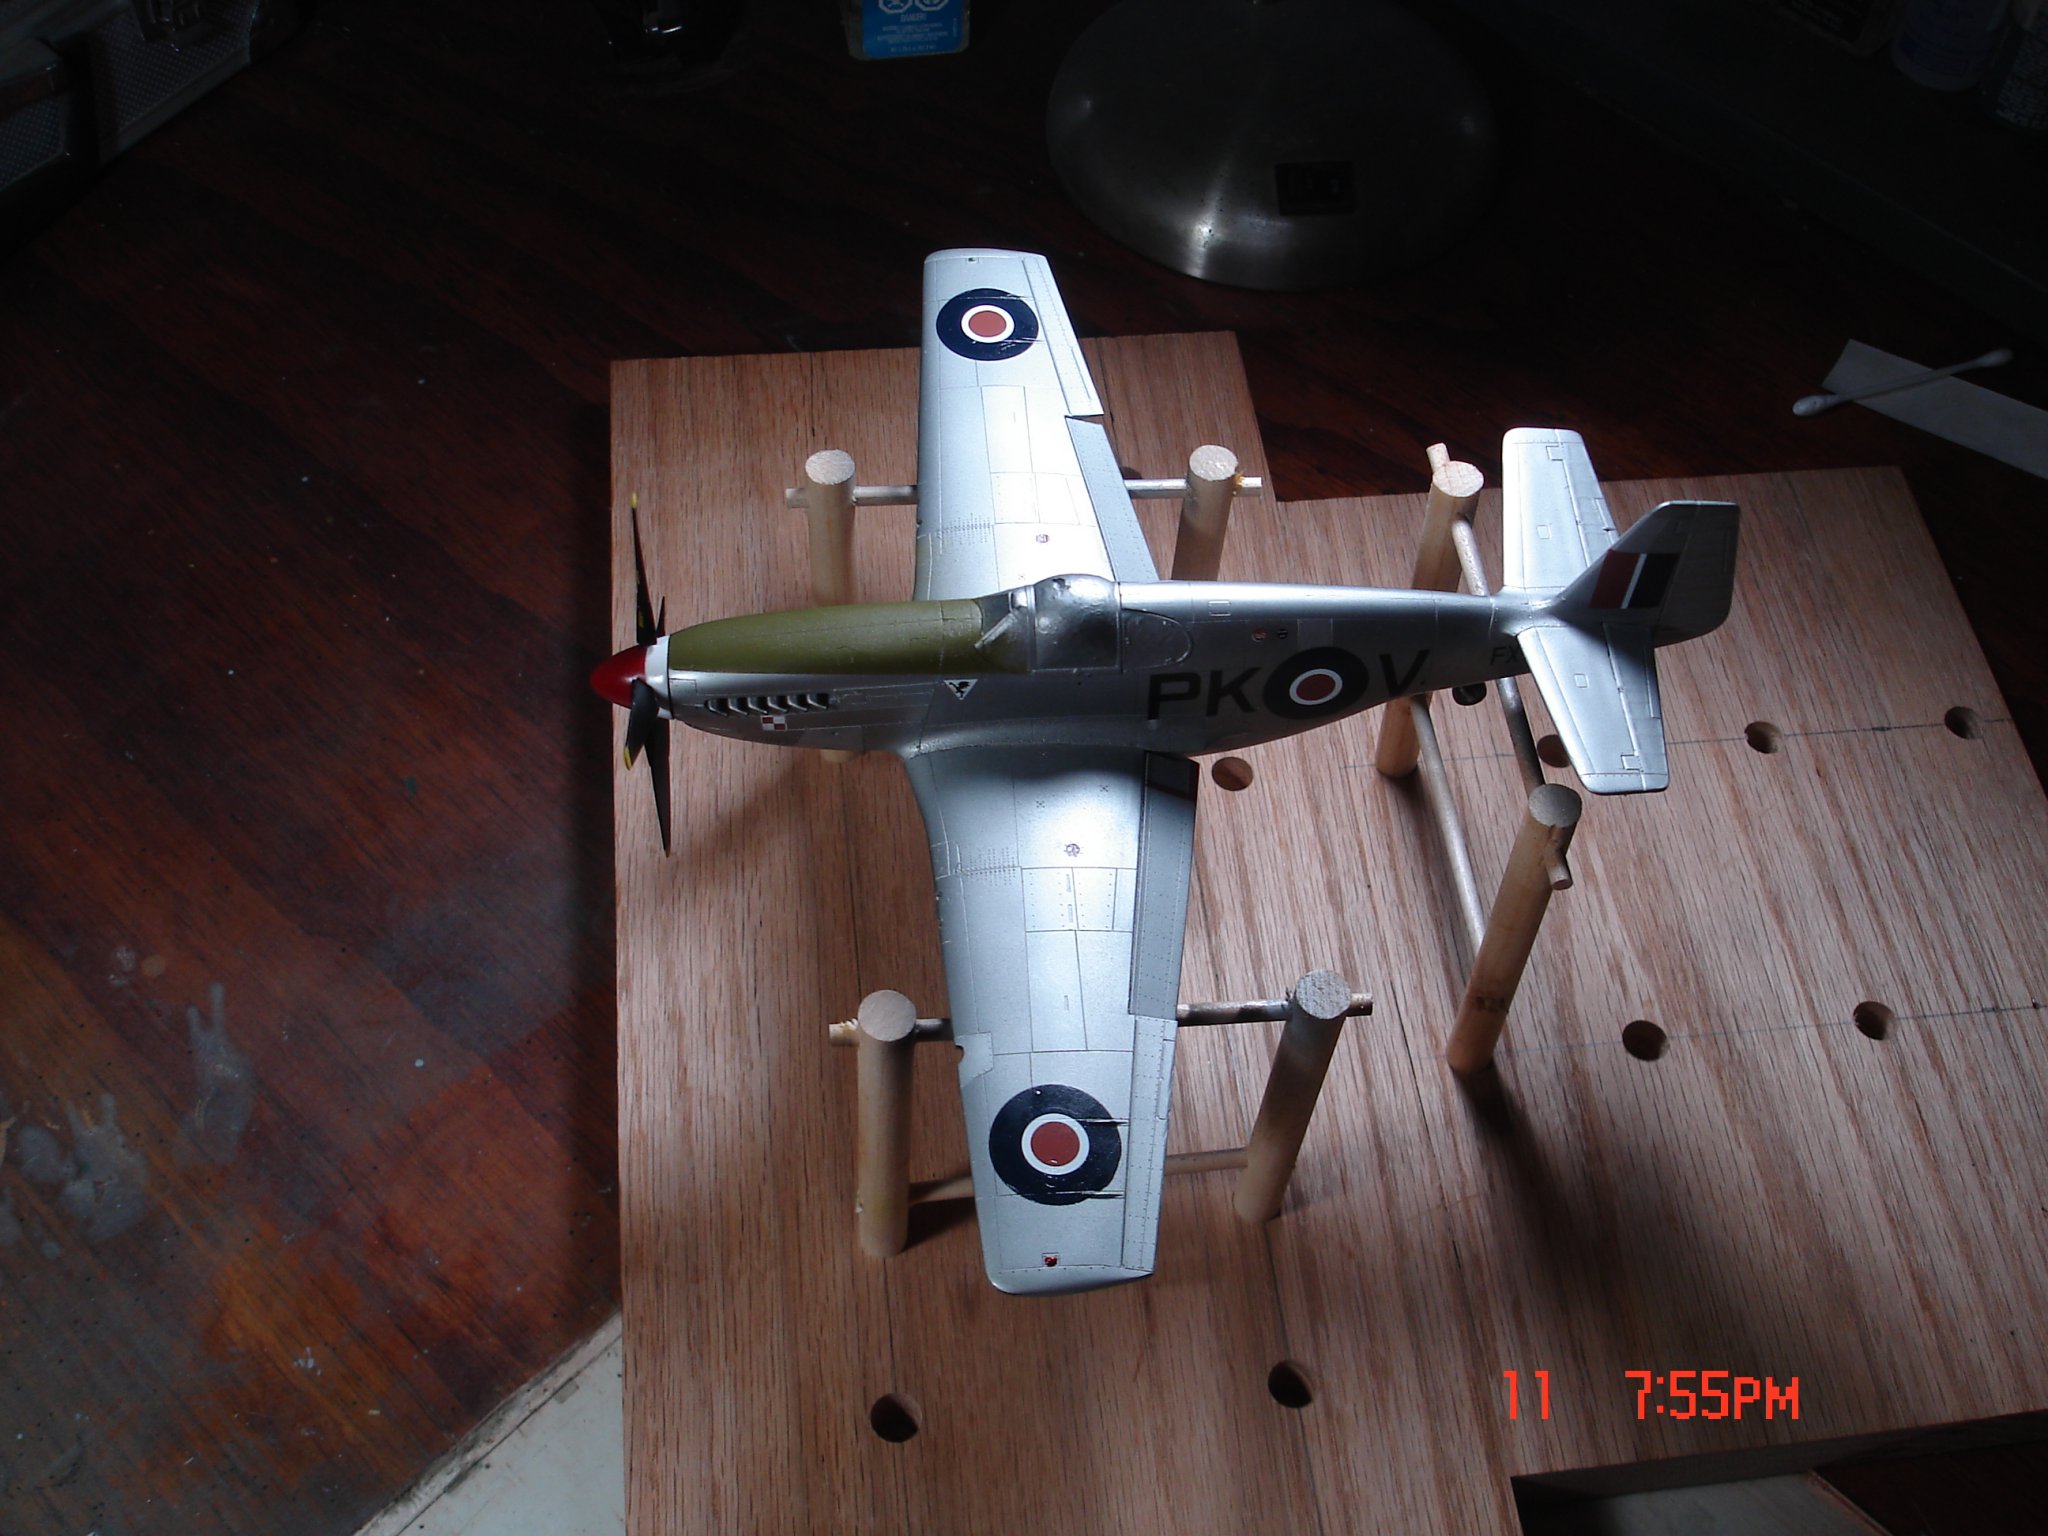
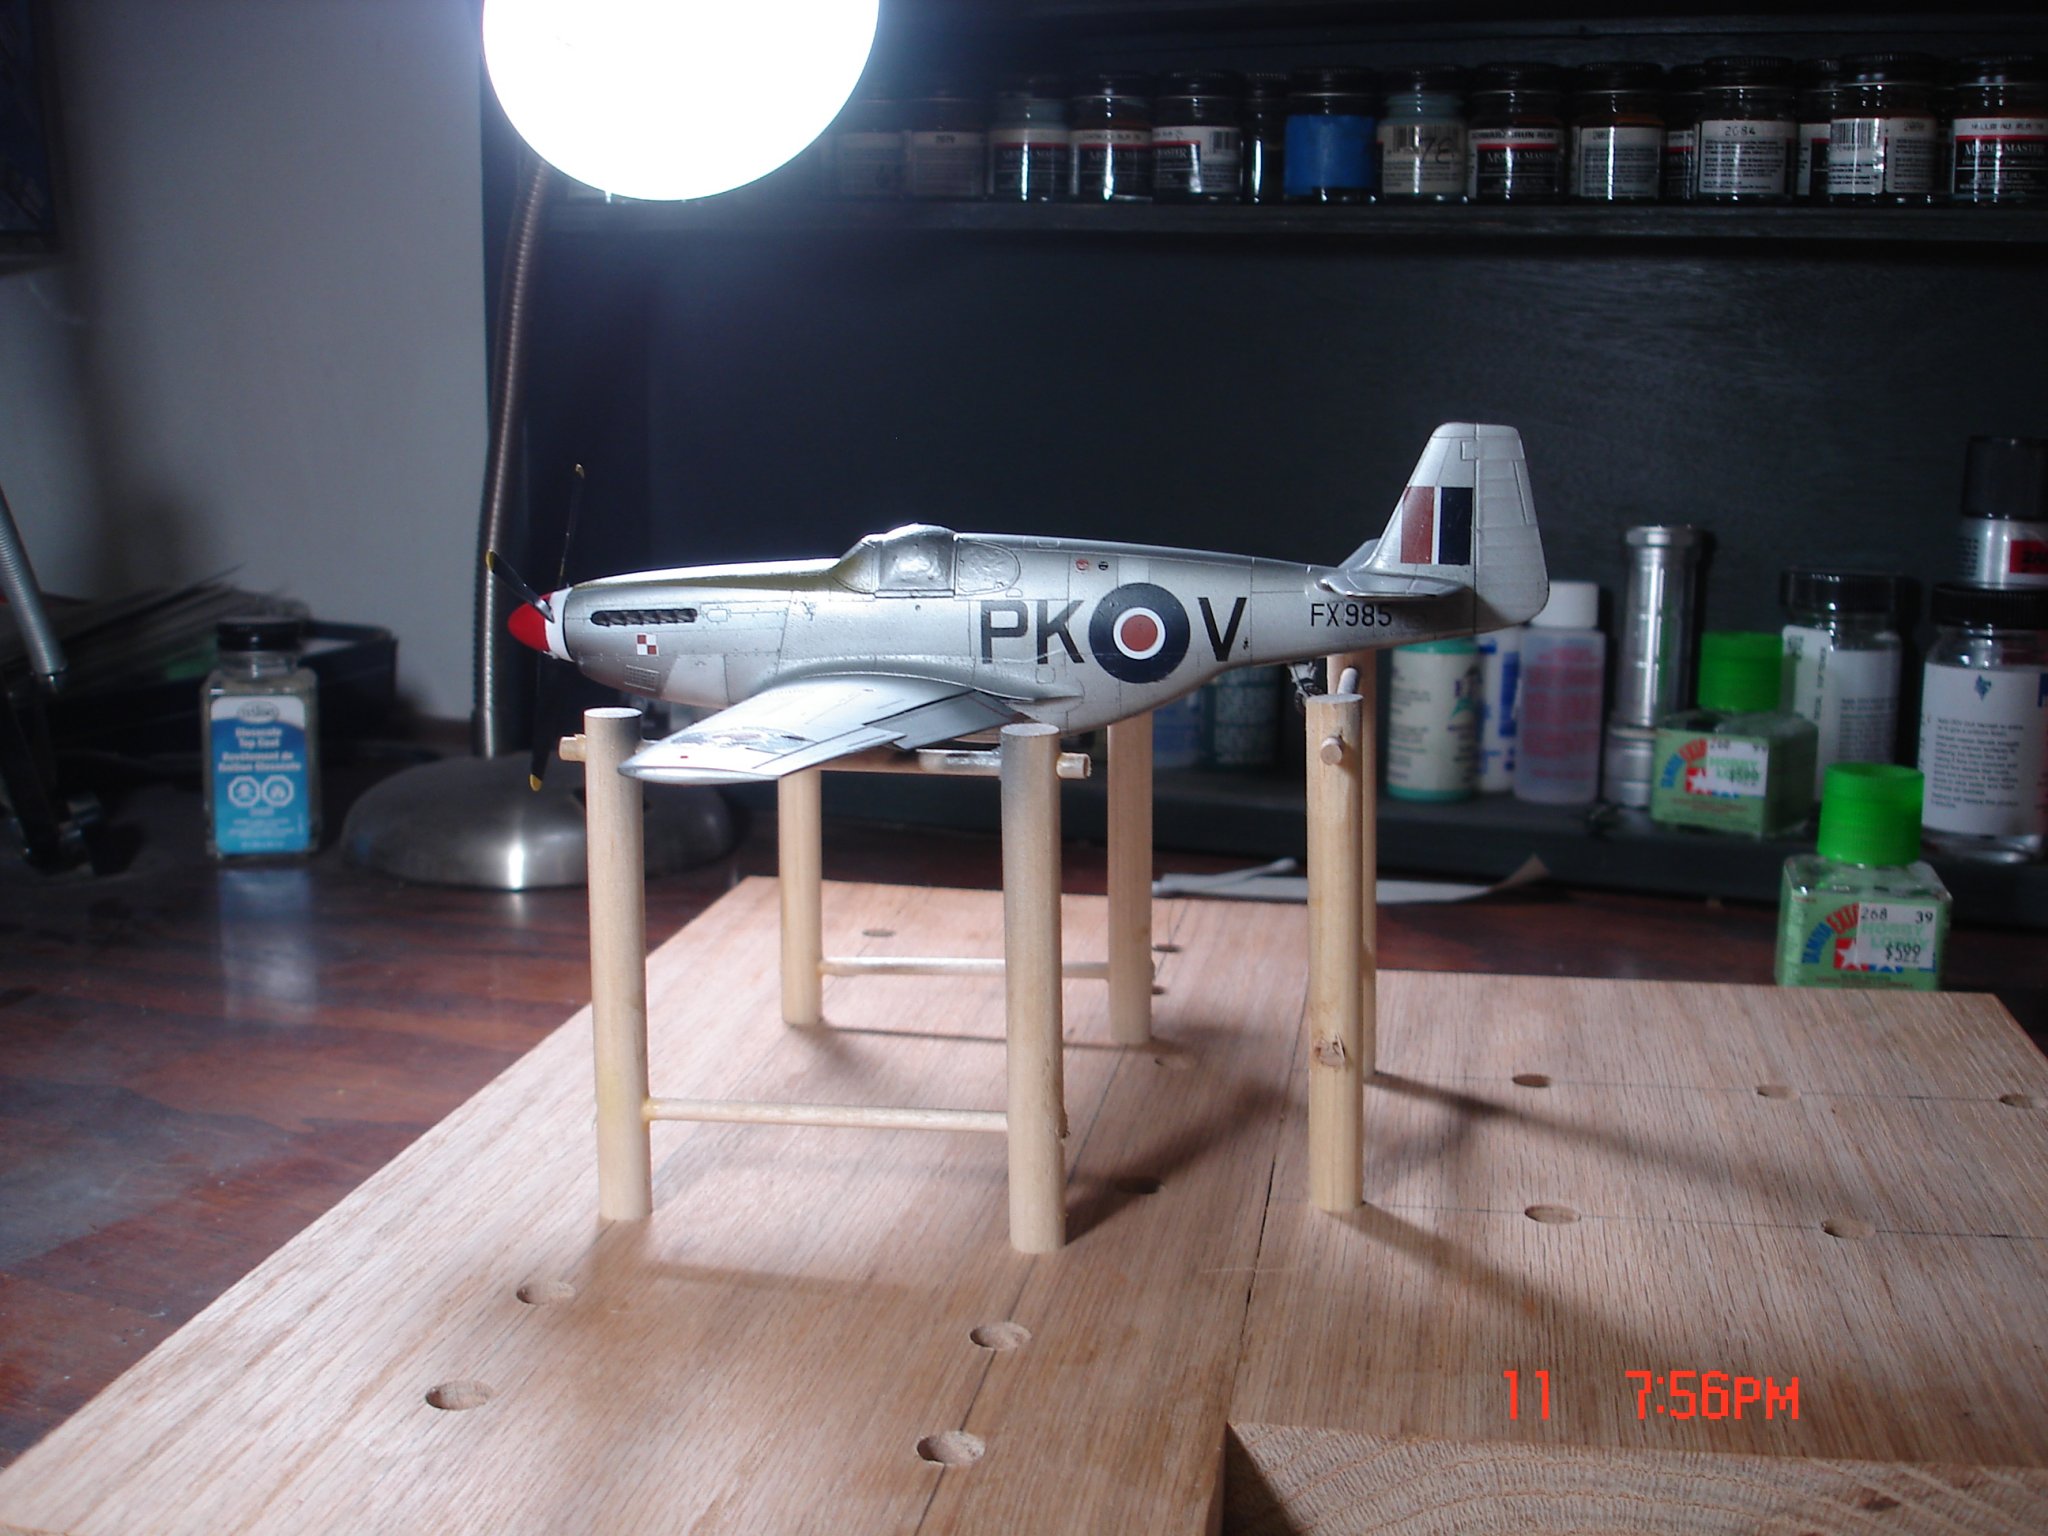
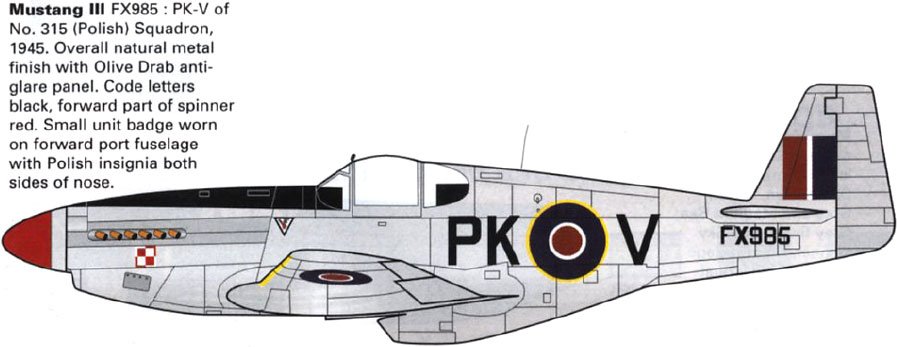
The wash has started already getting that used look about her as for the 1/48 changed scheme a NM finish Polish still FX985 315 Squadron
-
Like the looks of that one Denis came out Nice! Kevin PS: for future reference Denis the prop decals go about 1/2 the way up from the hub about.
-
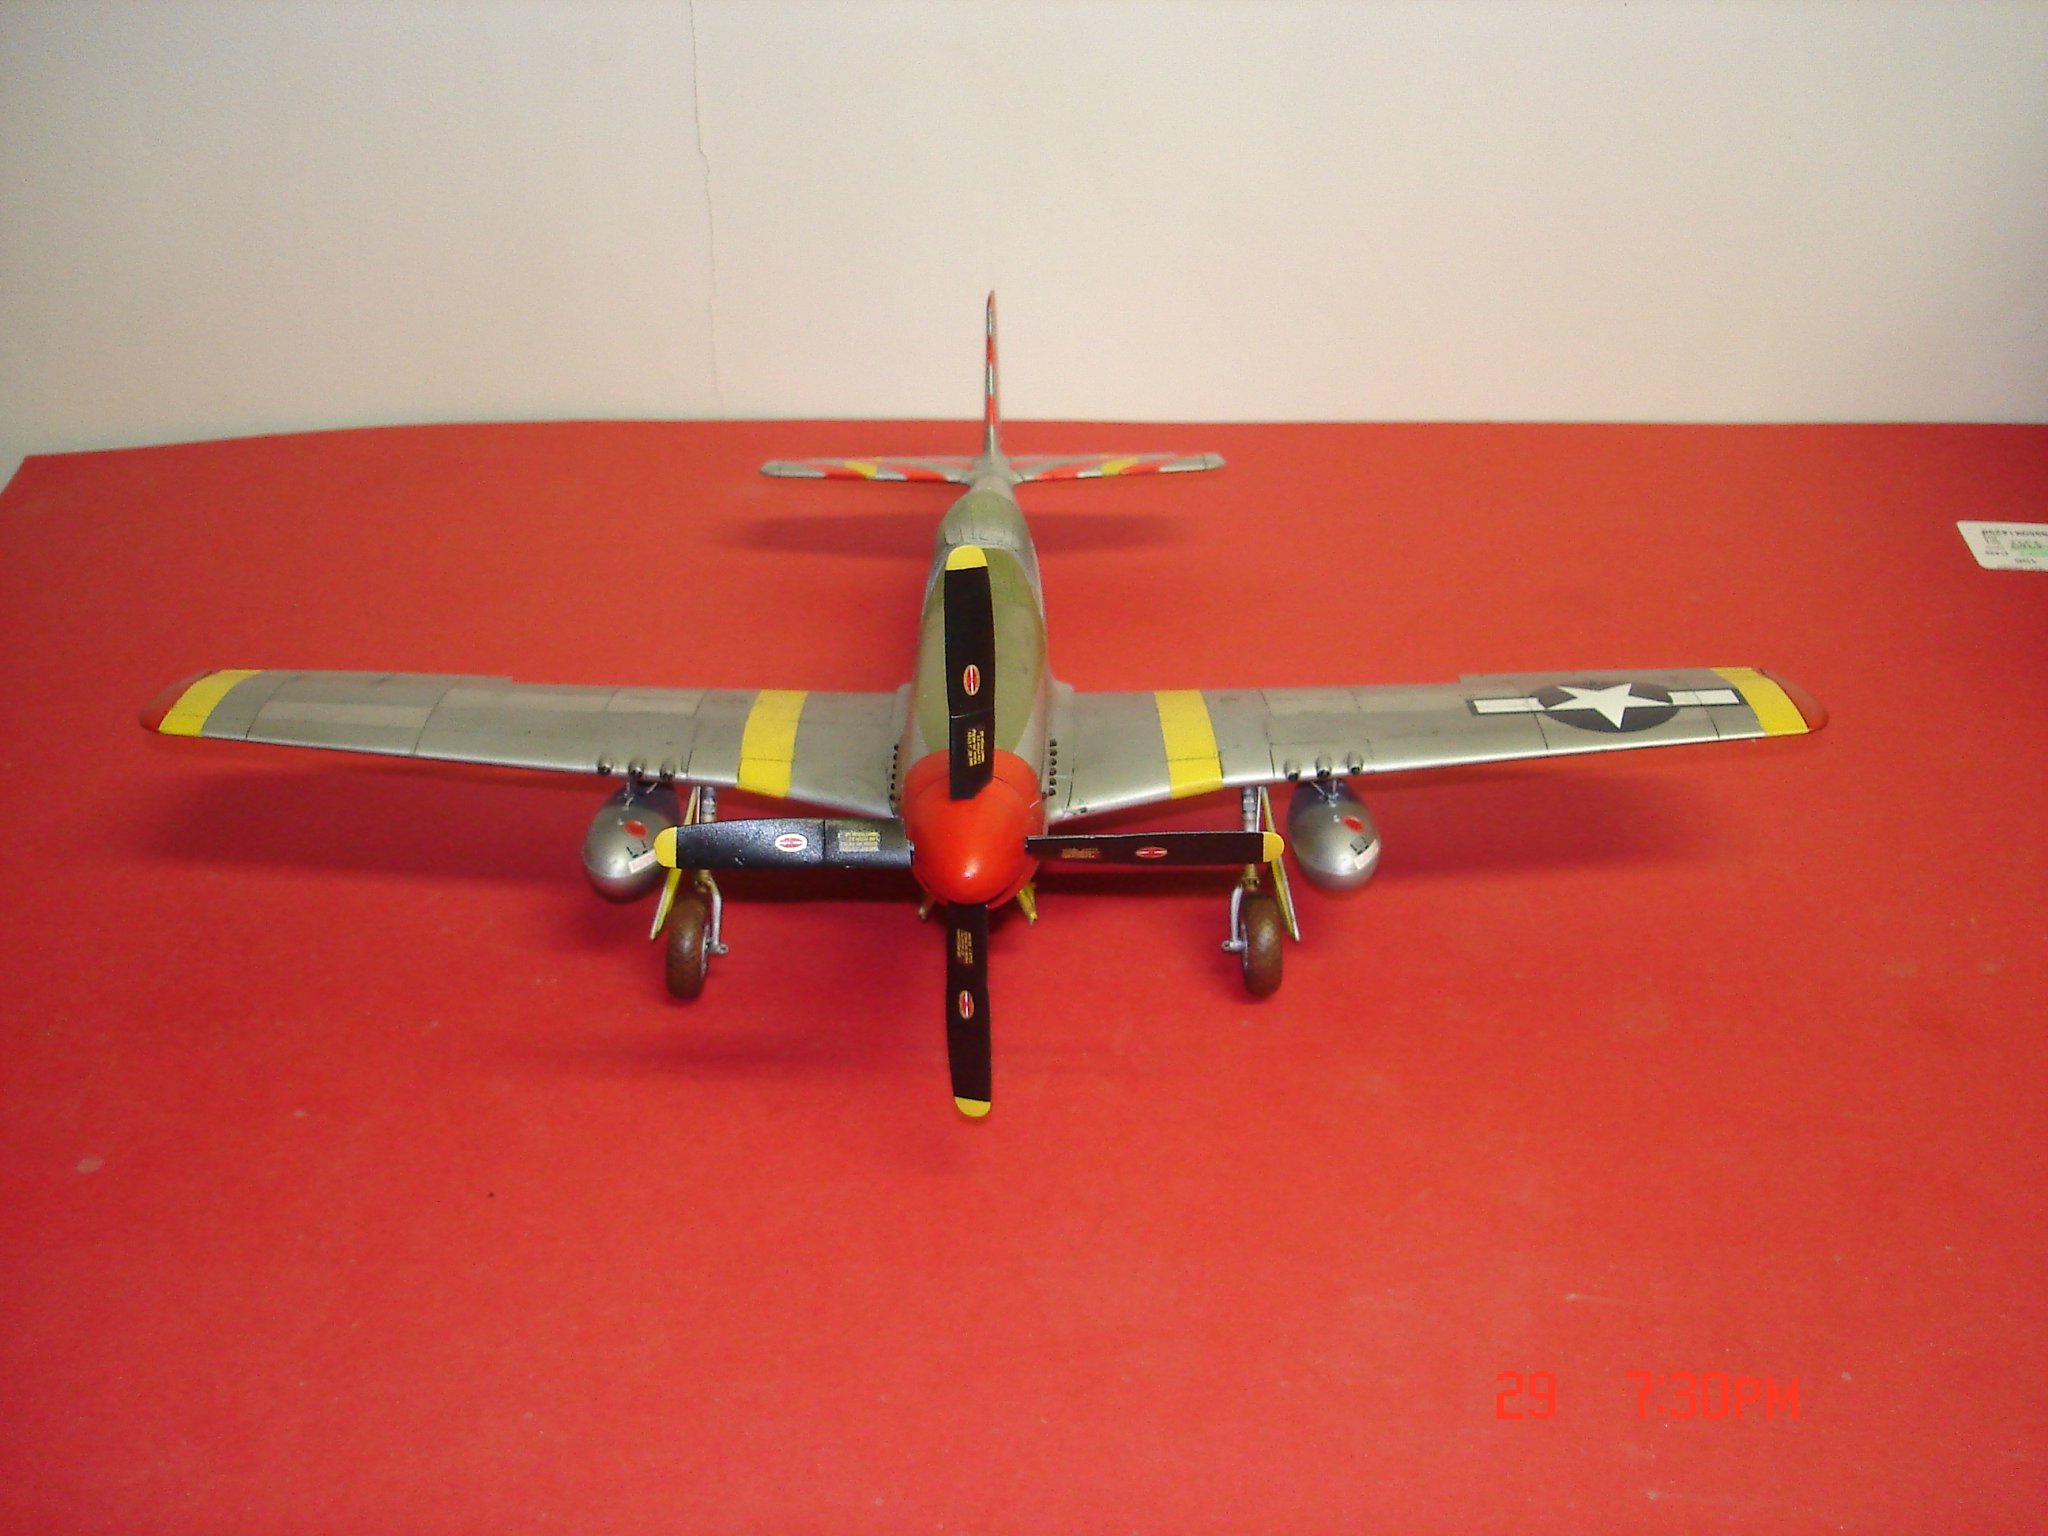
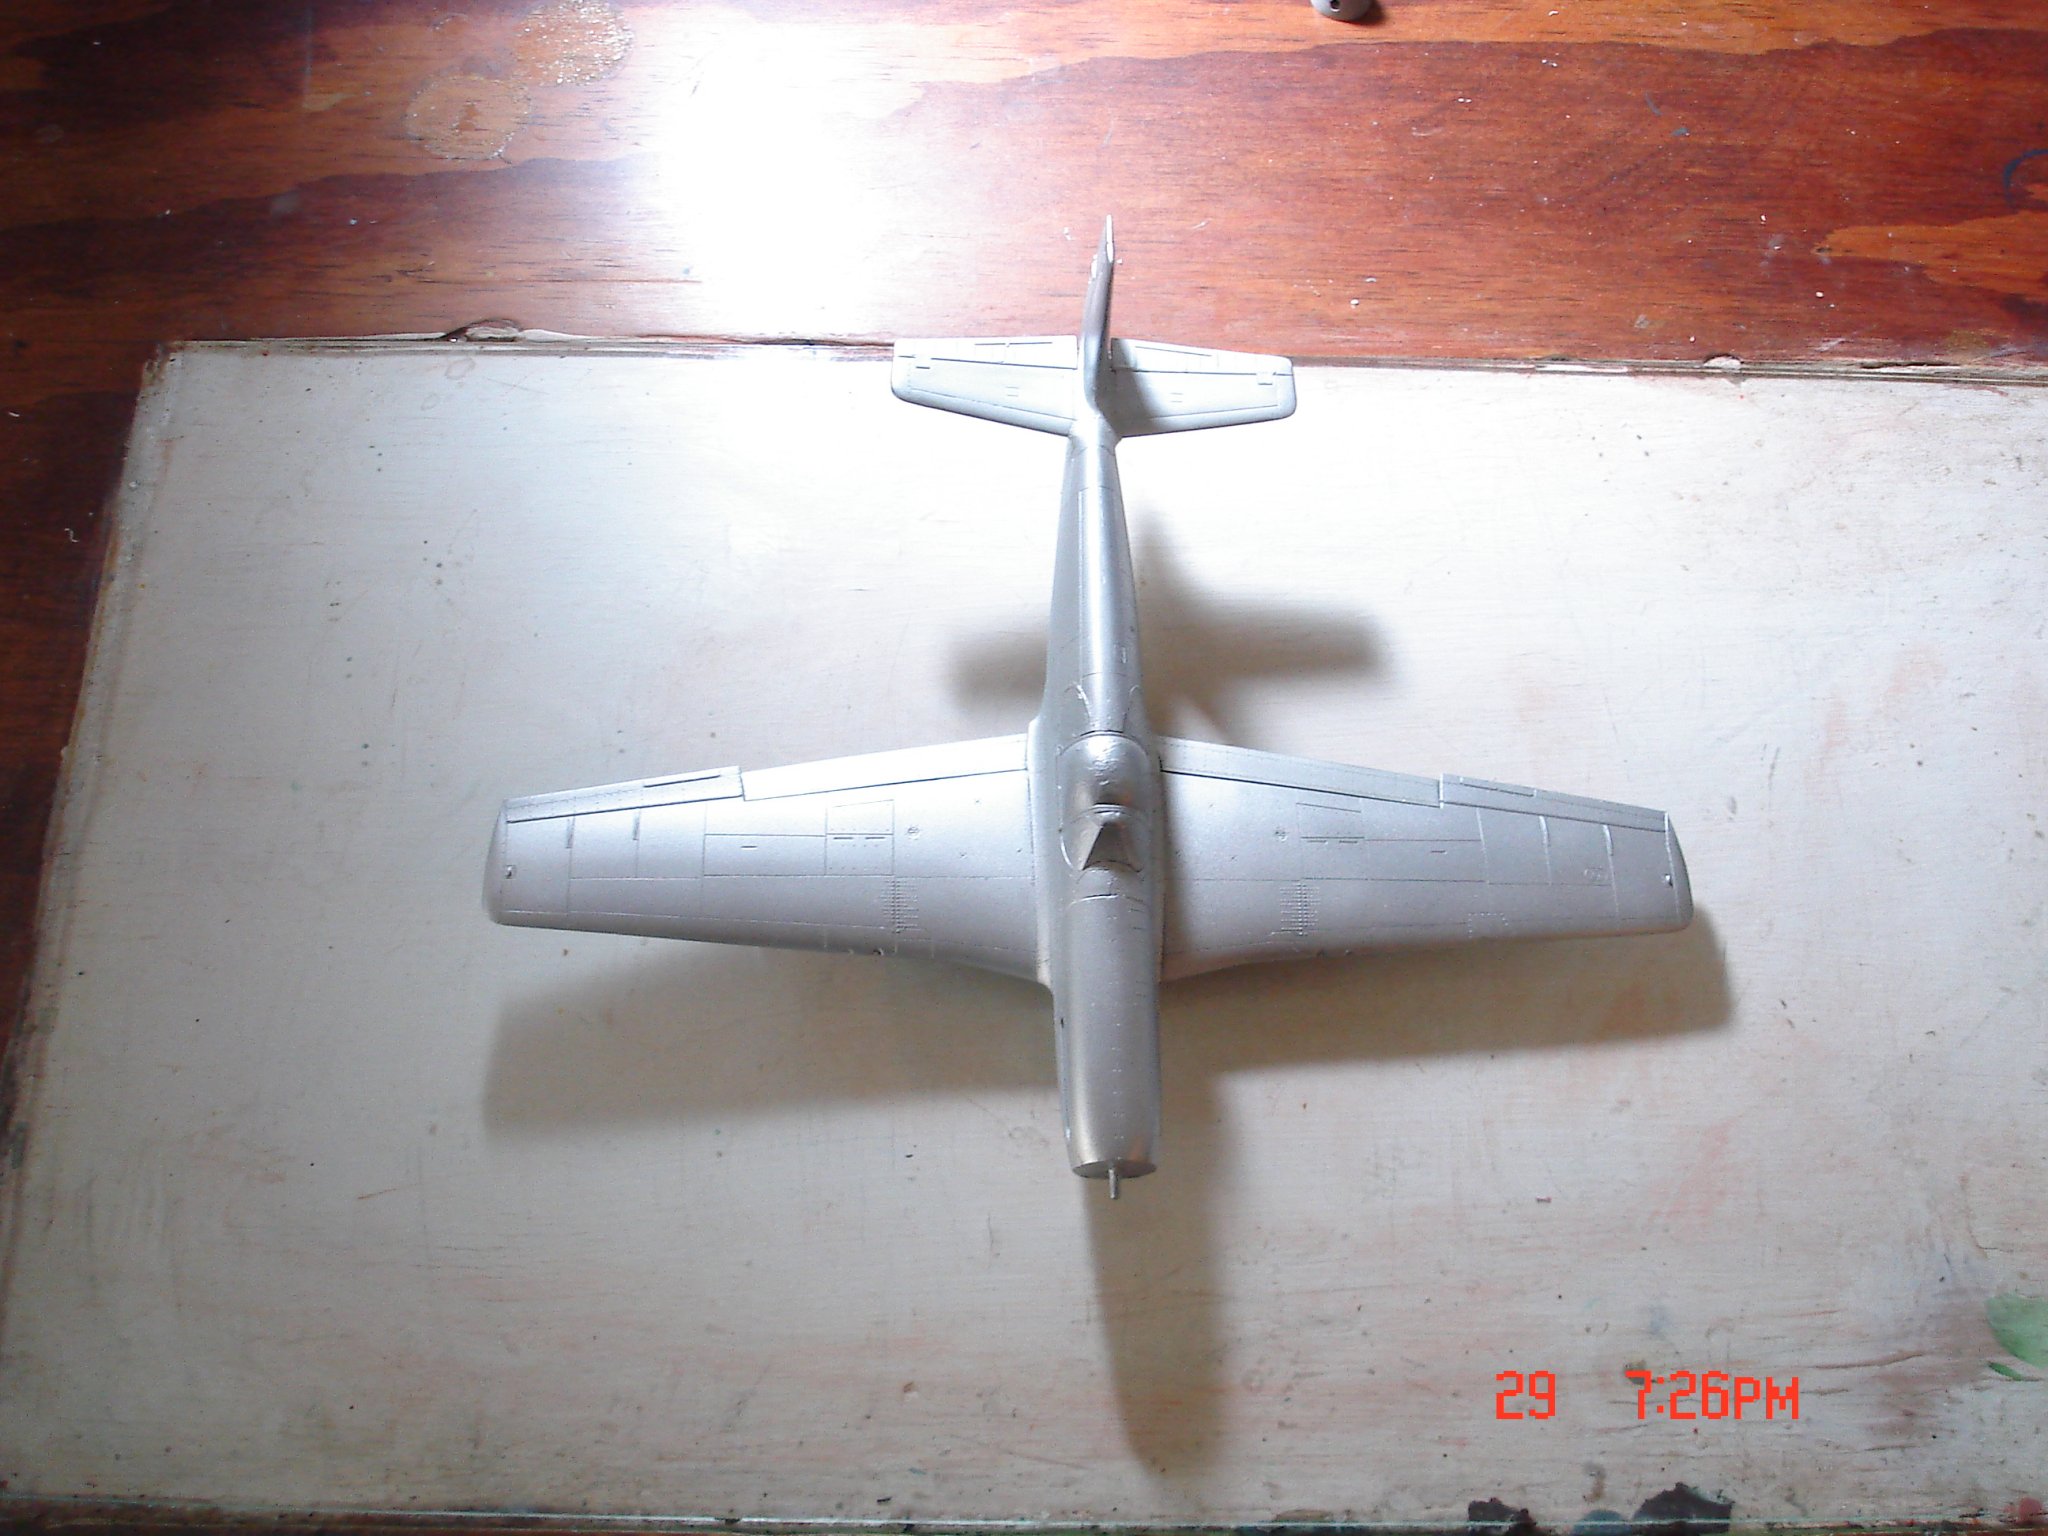
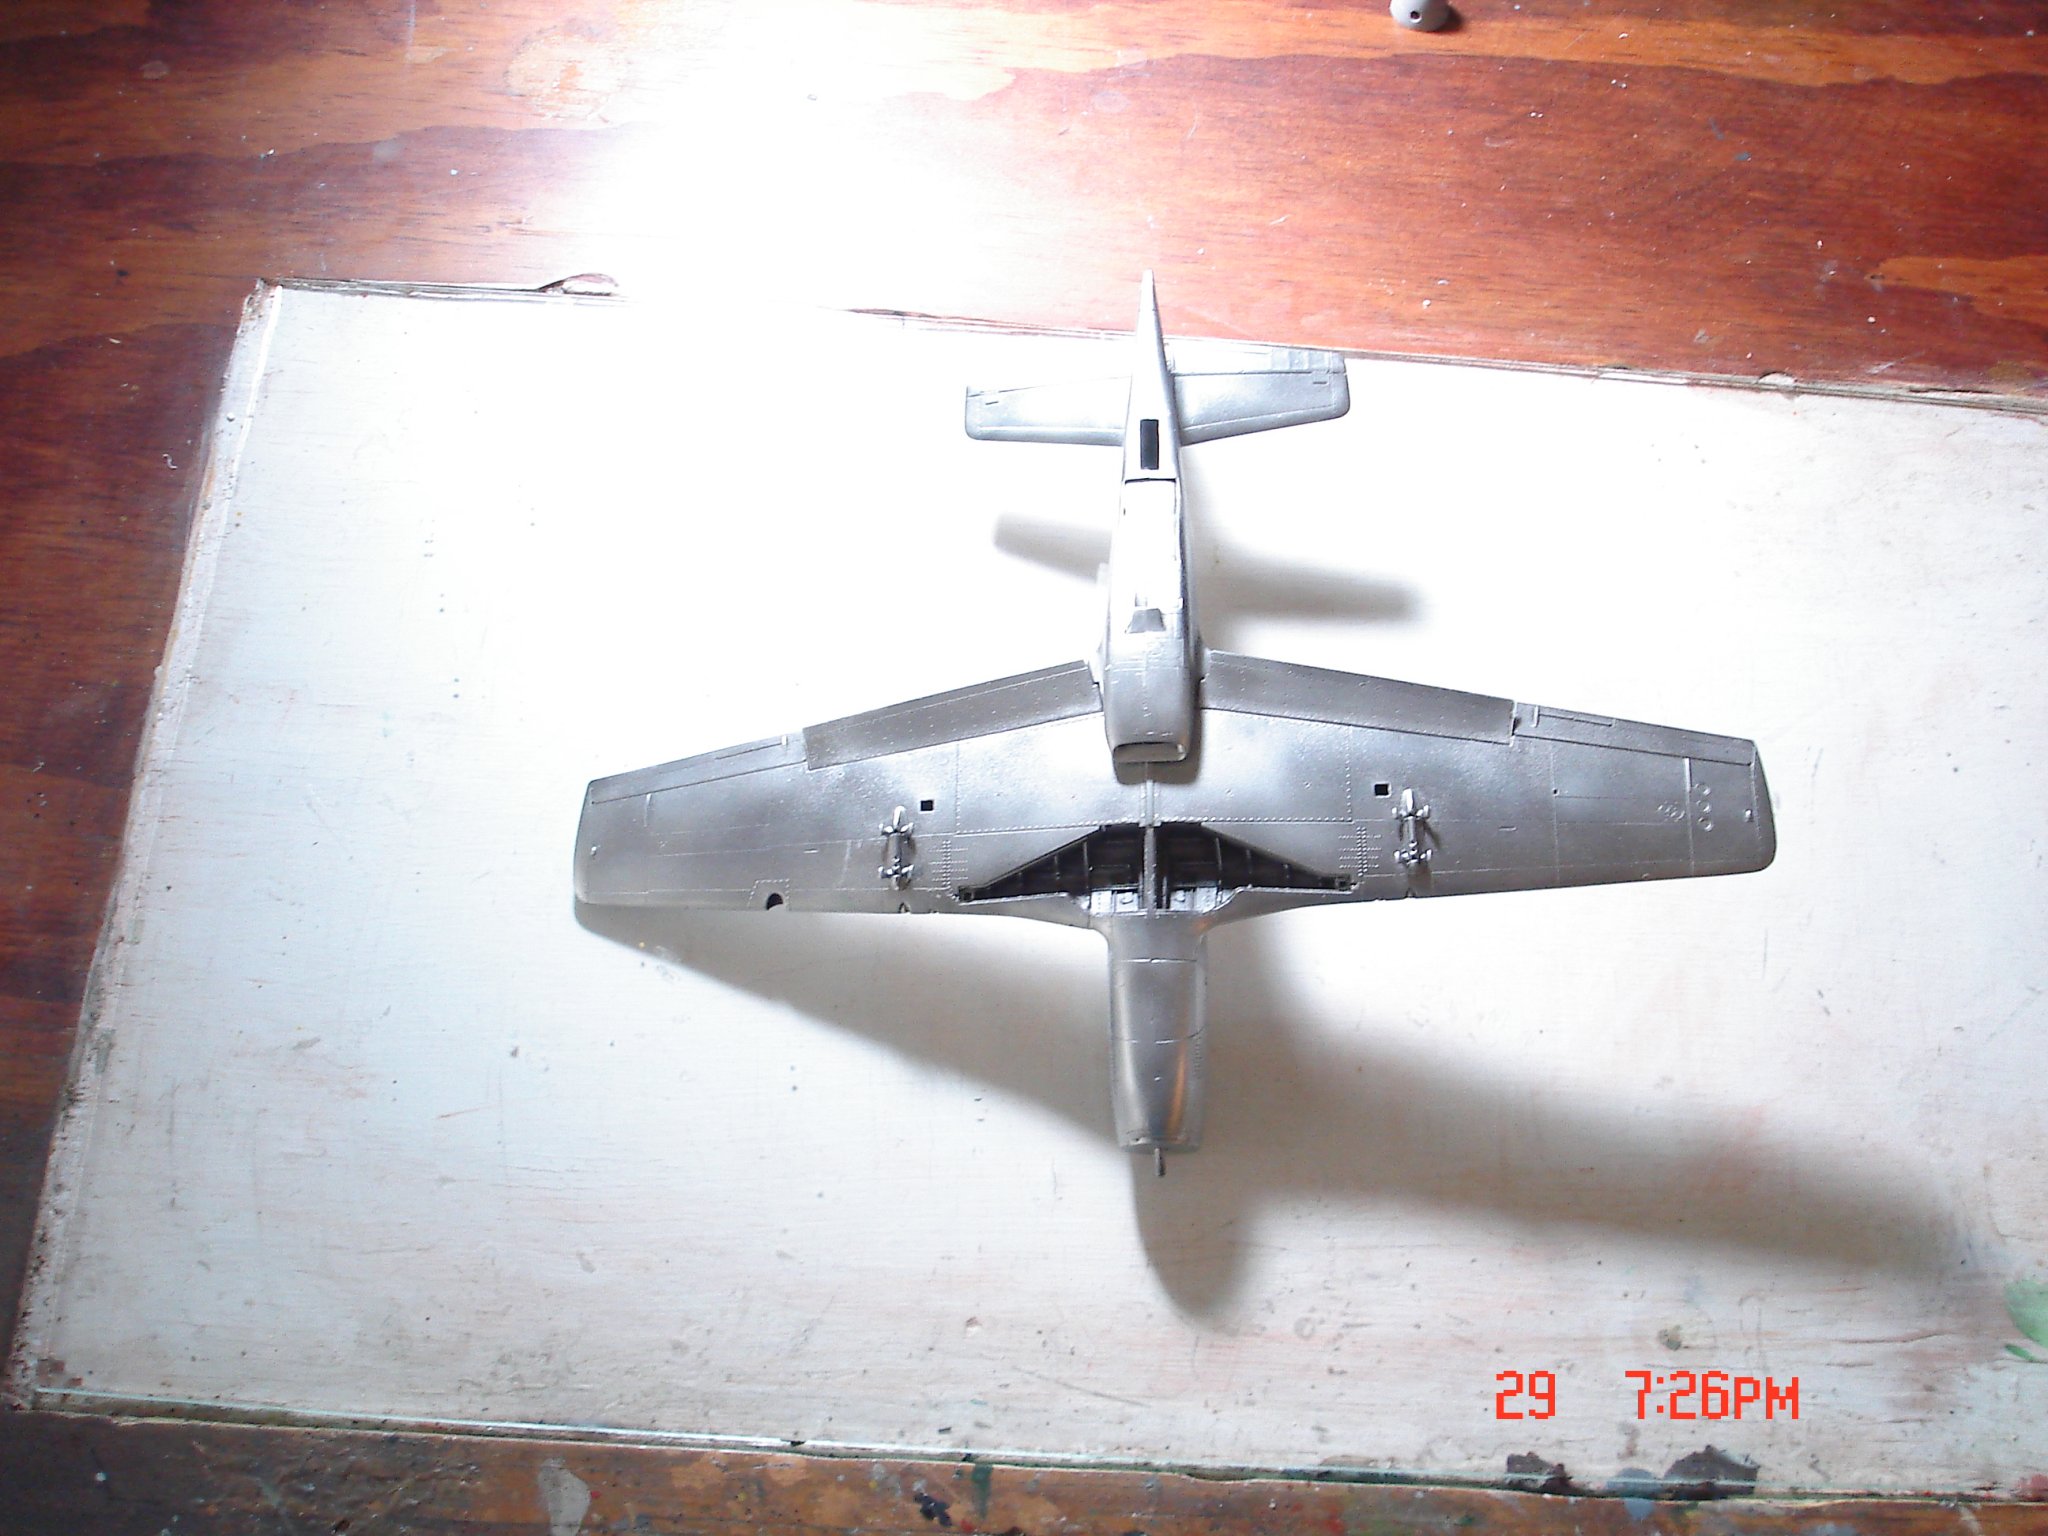
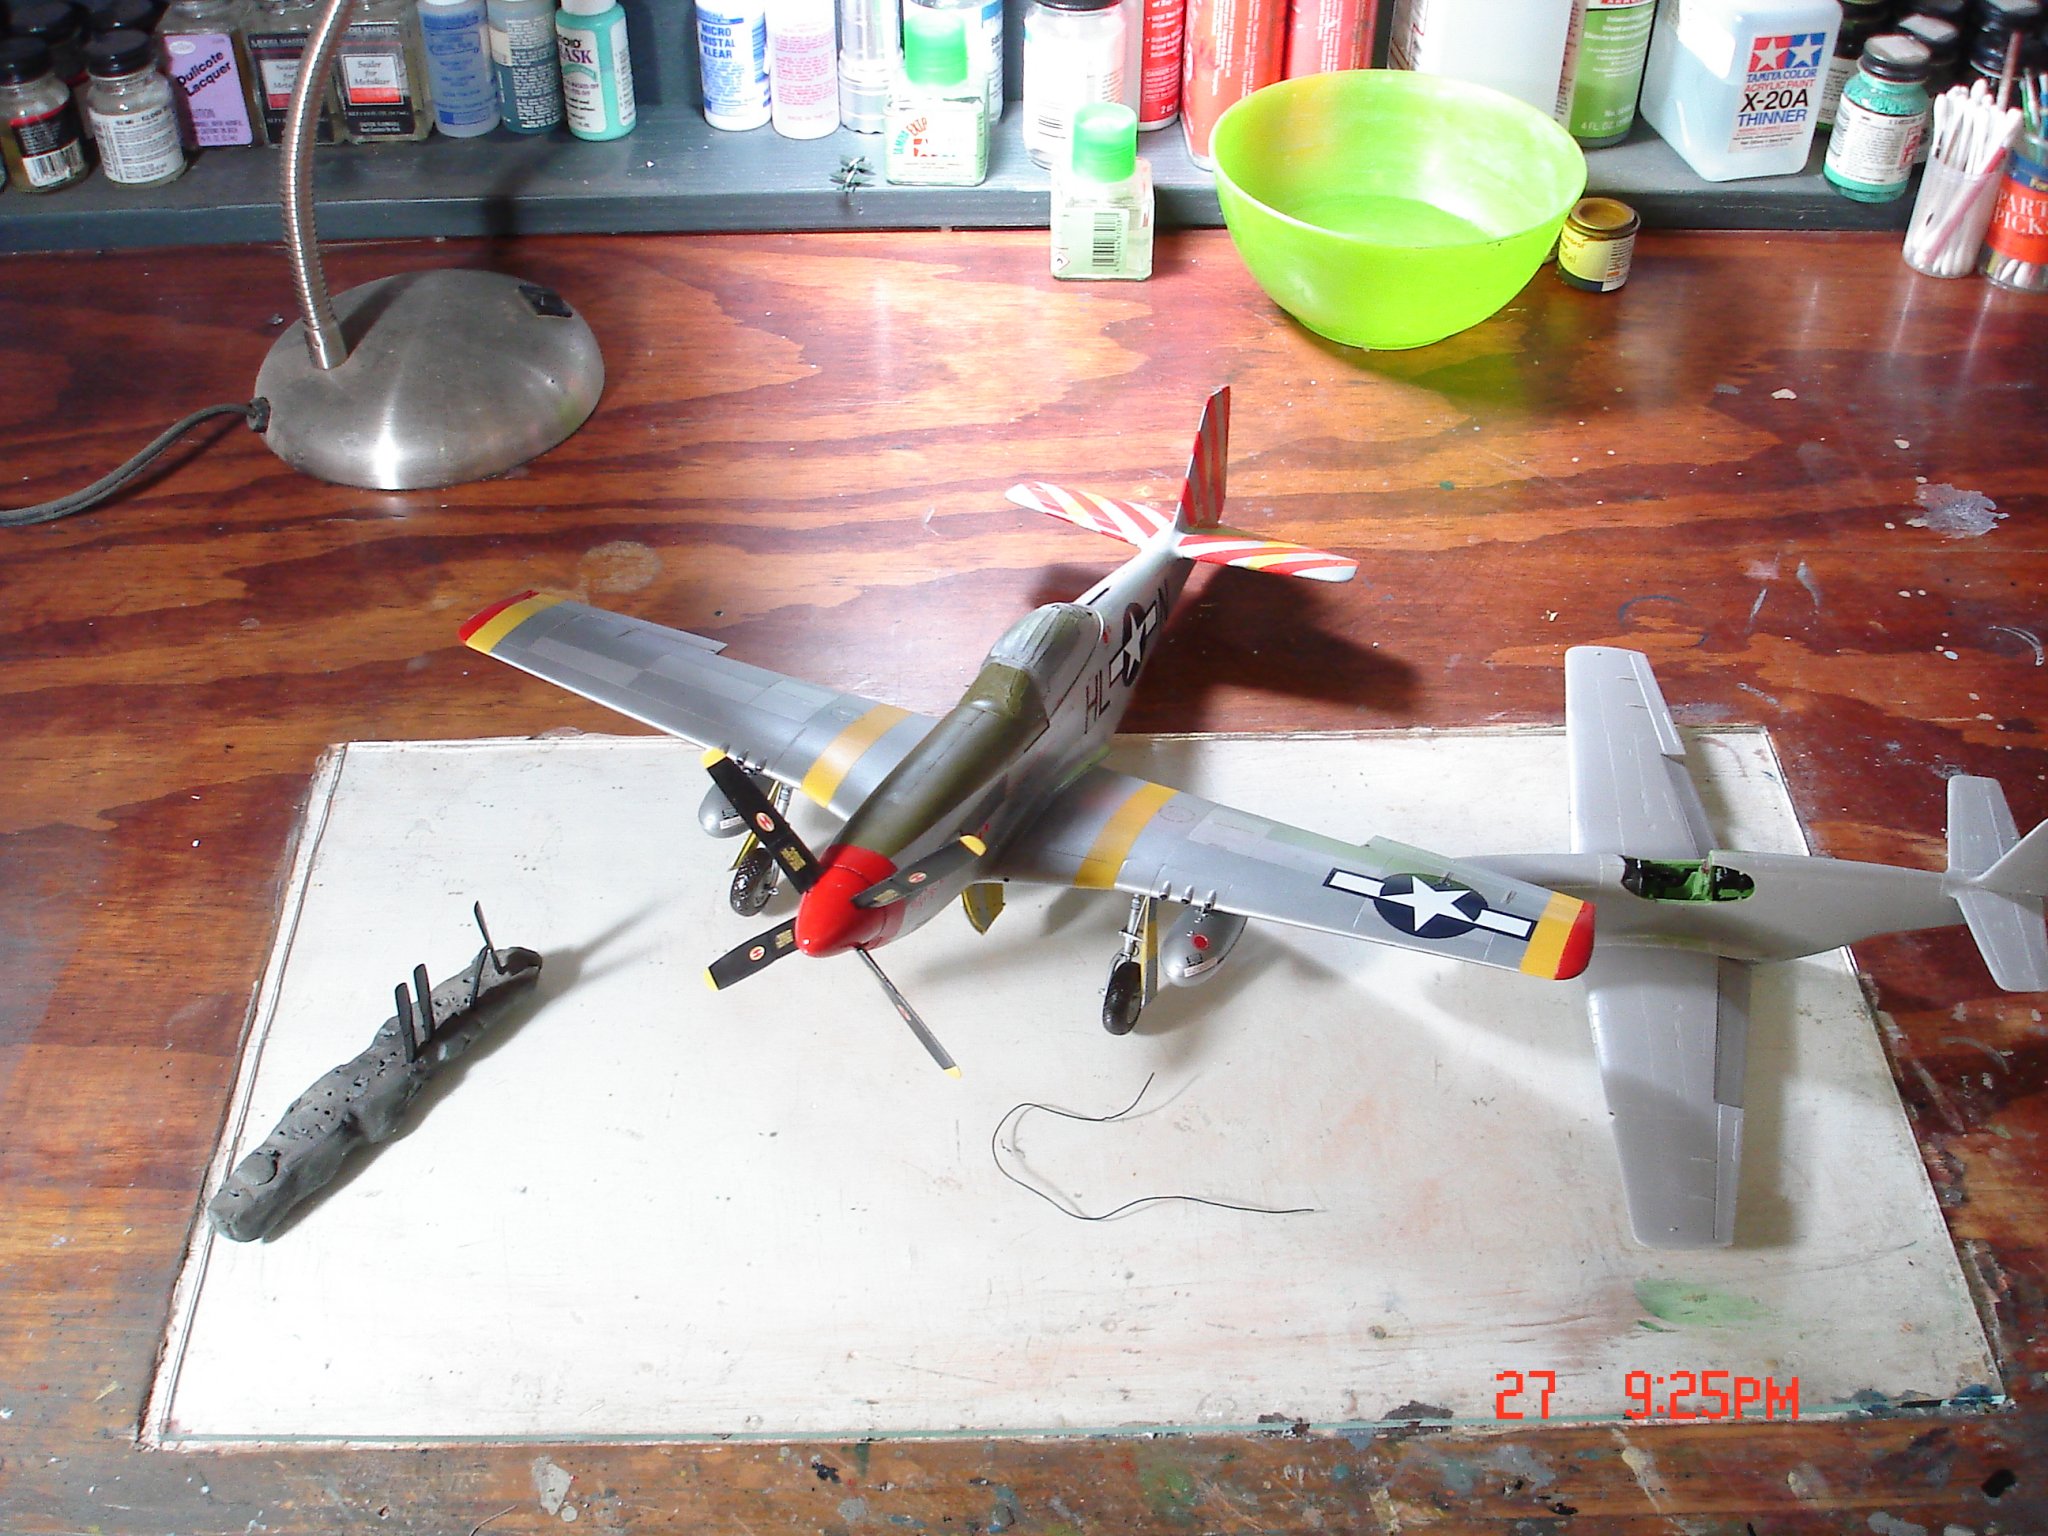
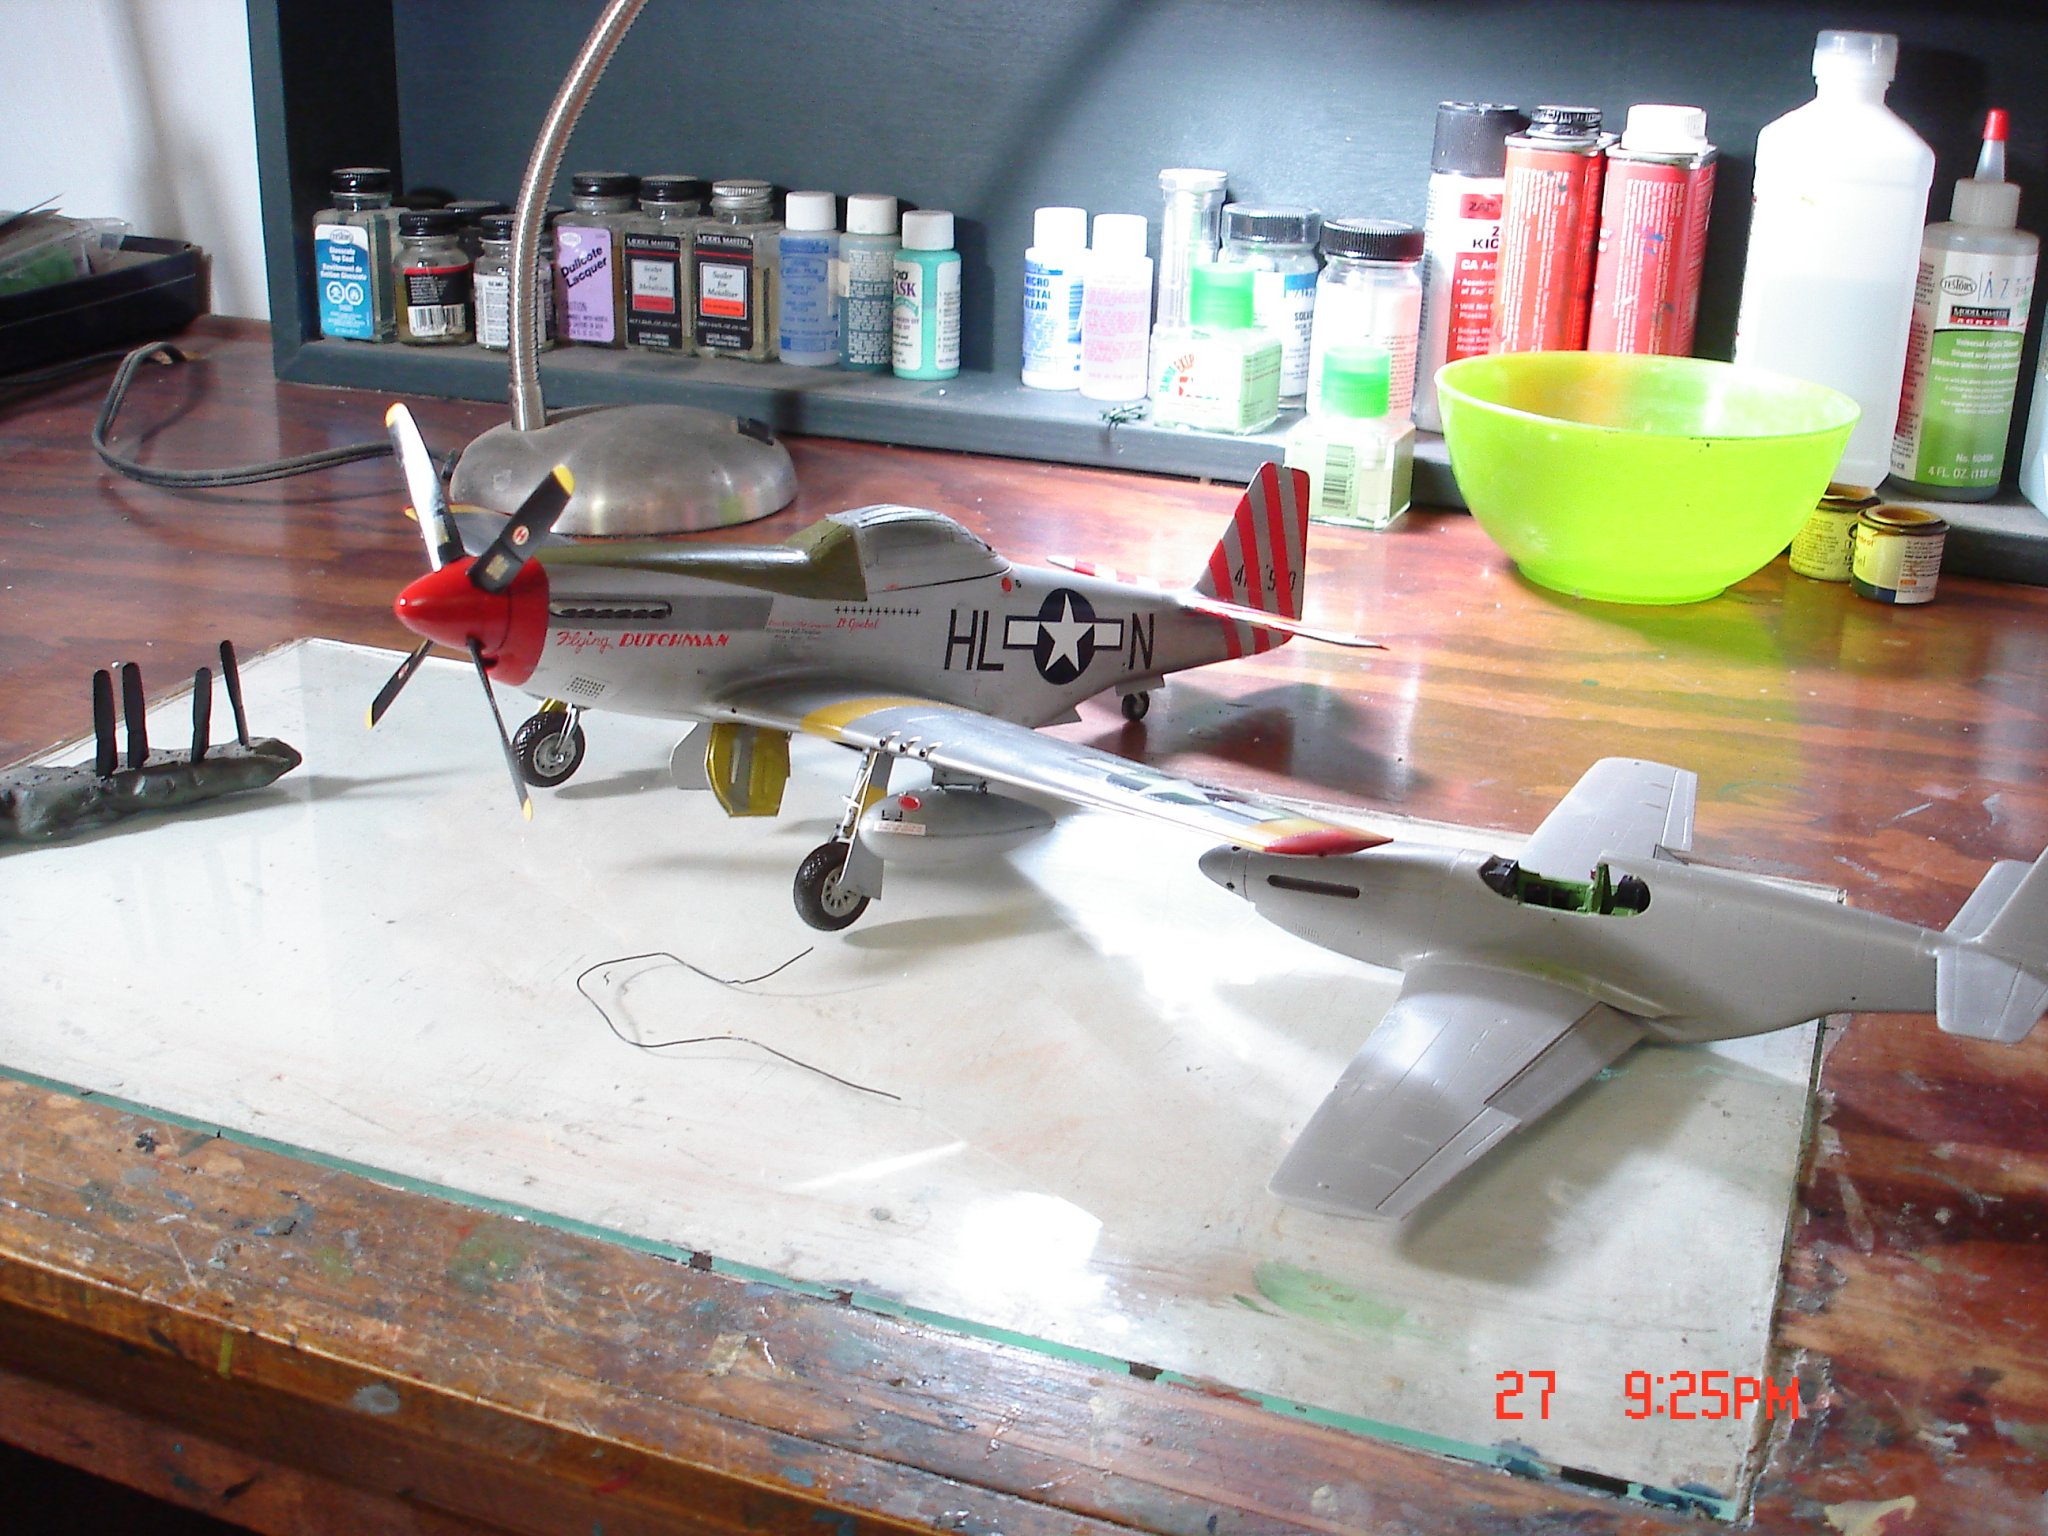
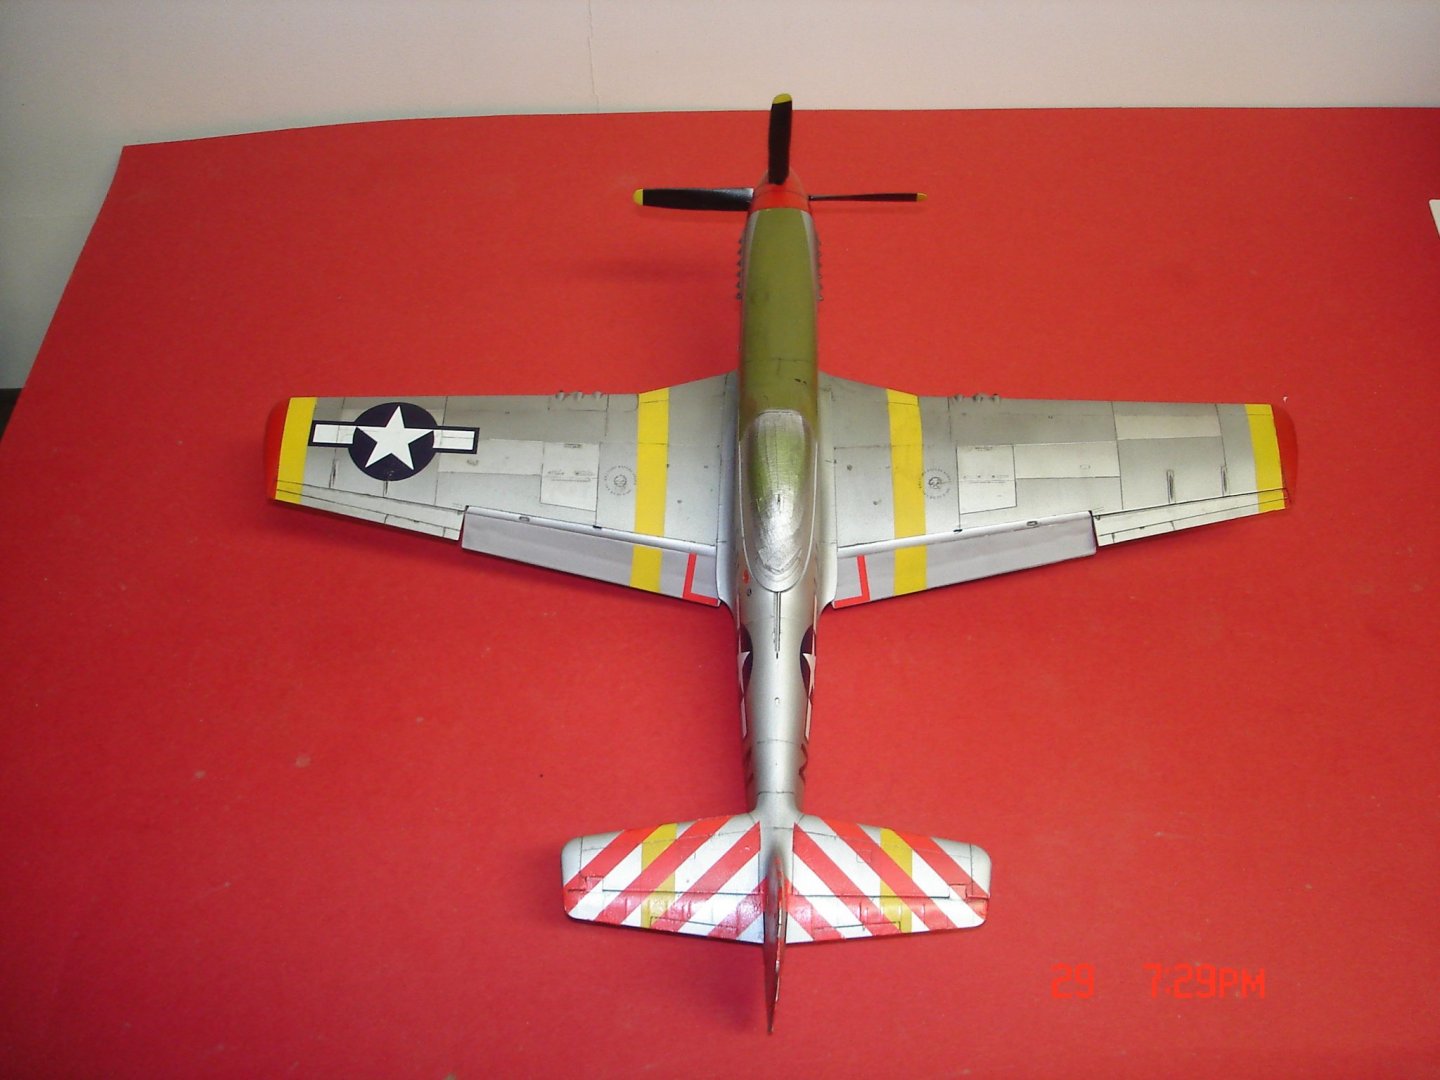
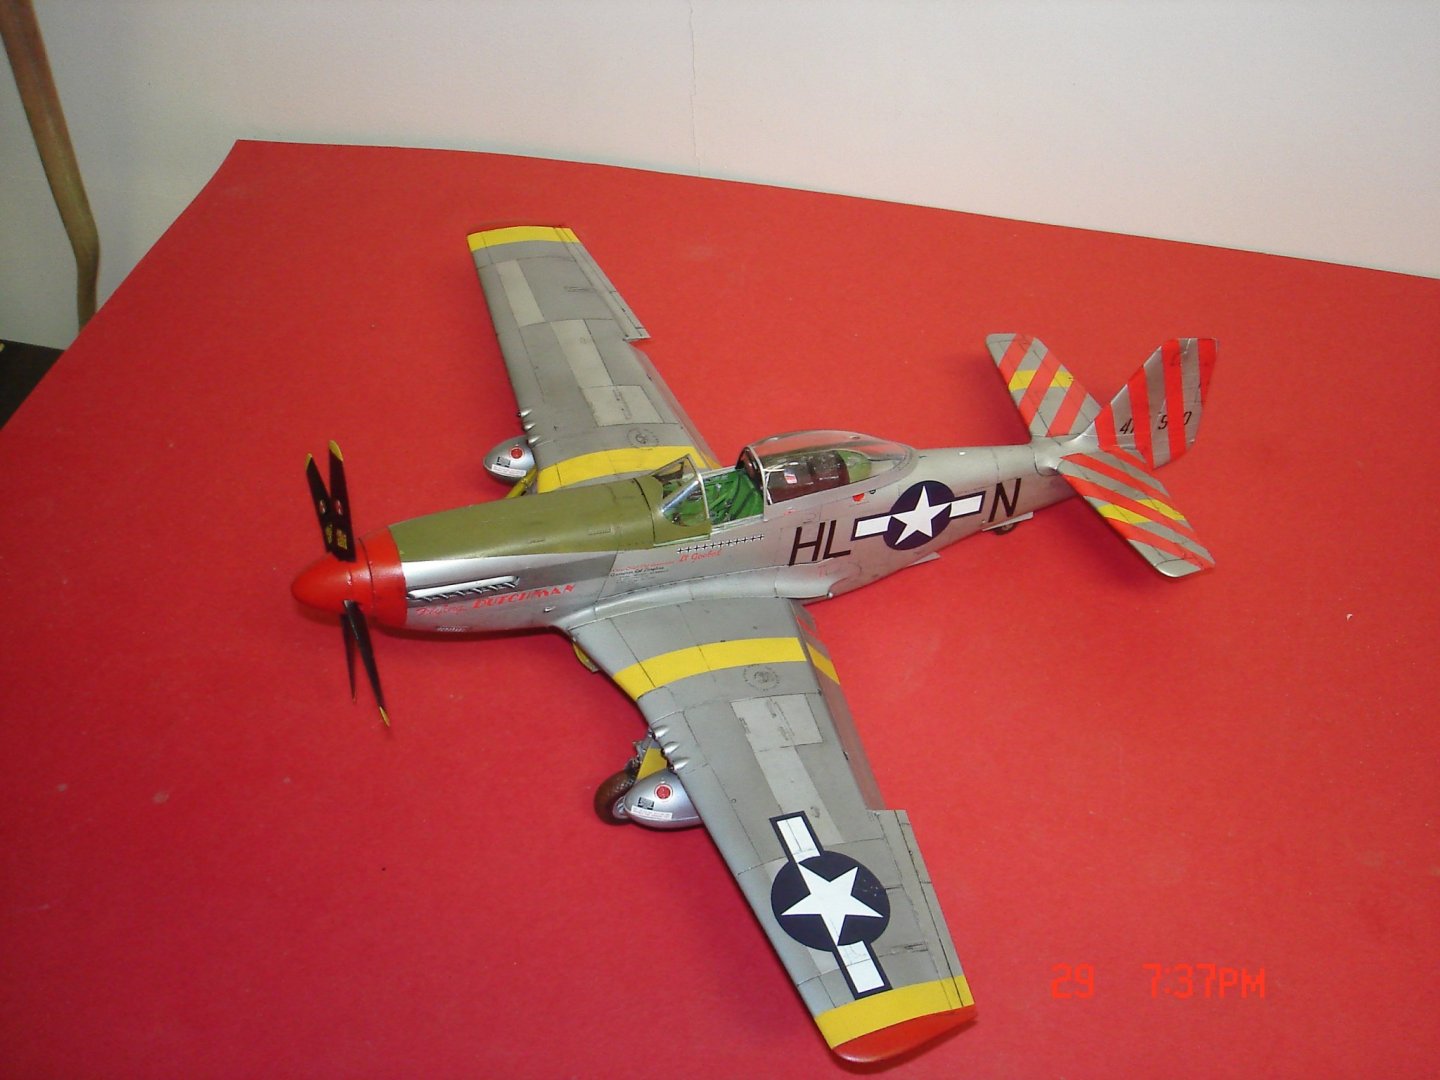
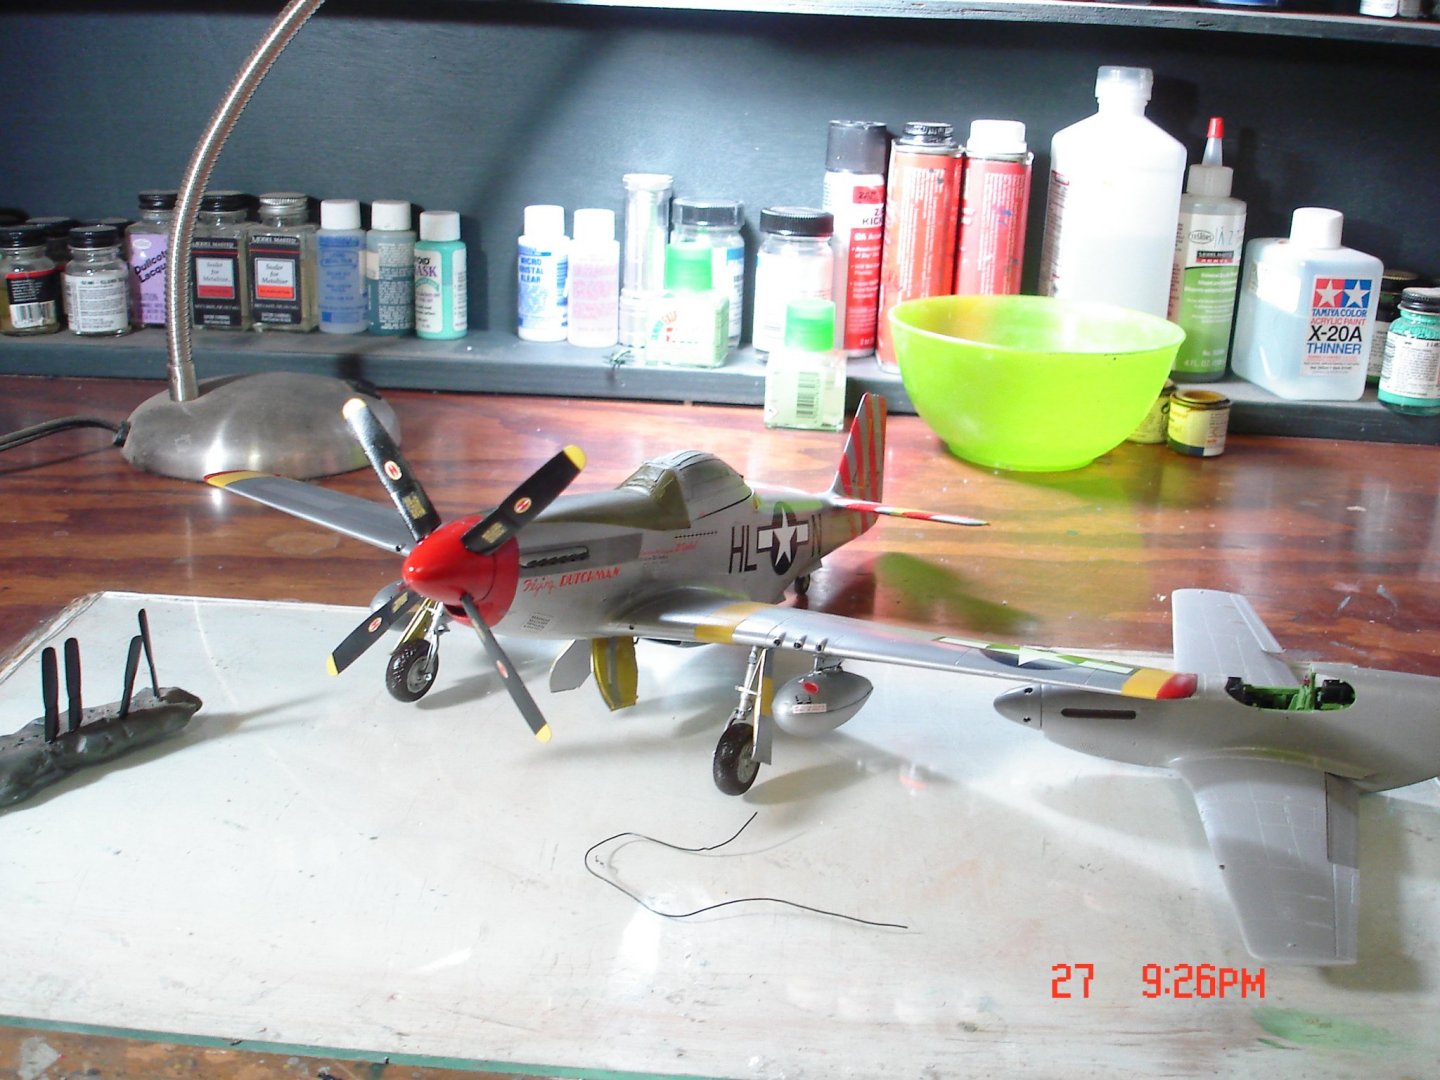
not much to add for the past week did get the Fuel Tanks added and applied about three more coats of clear.I am now thinking about adding the some lines between the tank and the wing should of thought that before hand but I'll get there.The other plane is a quick build 1/48 Revell P-51 B/C D-Day Polish will be it's markings.


-
She's looking very Nice for an old Lindberg kit Denis Kevin

.jpg.4bb87e67c449f16091d1040c88620784.jpg)