


hexnut
-
Posts
406 -
Joined
-
Last visited
Content Type
Profiles
Forums
Gallery
Events
Posts posted by hexnut
-
-
Joseph Conrad and the Otago, Allen Villiers and the Joseph Conrad?
- mtaylor, thibaultron, Canute and 1 other
-
 4
4
-
Very nice work. vaddoc! Are you using Rhino? First of all, I understand the pushback from the "ship's curves and paper" fans, but at the same time, I think part of the frustration some experience is that CAD offers a LOT more precision, and old boats simply were not that precise. Go down to the drydock on a nice, salt-spray-blowing November day in Bristol, crawl around a large hull taking measurements, dodging teams of workers doing sheathing and caulk, go back to the office and calculate the offsets by candlelight--Or during the initial build, lay out the stations with splines, ducks and chalk on the lofting floor, then have wrights rough the sections out of wood with a pit saw and broadaxe.... It's enough to give a quality assurance/risk mitigation director nightmares... I think the historian in all of us can't help but have enormous respect for primary sources, or high-profile scholars working at an earlier time (Chapelle, Longridge, et al.), but the reality is that by CAD standards, the original plans often weren't all that accurate.
One of the biggest problems in lofting a hull in 3D is getting the stations and WL's to line up and meet while being fair in both directions. I have yet to trace a vintage plan where that happens, because the original was never fully-resolved until wood started coming together. There is a bit of an 80/20 rule--what is good enough to start construction without wasting too much material? When doing it in CAD, every tiny surface imperfection is abundantly highlighted; where on the model, it's an issue that may be solved in 30 seconds with some 120 grit.
vaddoc, the truly good news is that now that you've put the work in to make a faired hull, once you make it solid you can boolean ribs and even planking out of it, setting up shiplap profiles at a station and extruding single-rail surfaces using the planking curves projected onto the hull. You can also offset the polysurfs to accommodate whatever you choose for wood thicknesses...
Great-looking hull!
- michael mott, wrkempson, mtaylor and 3 others
-
6
-
On 10/10/2019 at 12:32 PM, CDW said:
Seems so odd to see aircraft workshop manuals by Haynes. Until recently, never realized they did manuals for anything other than cars and trucks.

- thibaultron, popeye the sailor, CDW and 4 others
-
7
-
On 9/16/2019 at 8:22 PM, philo426 said:
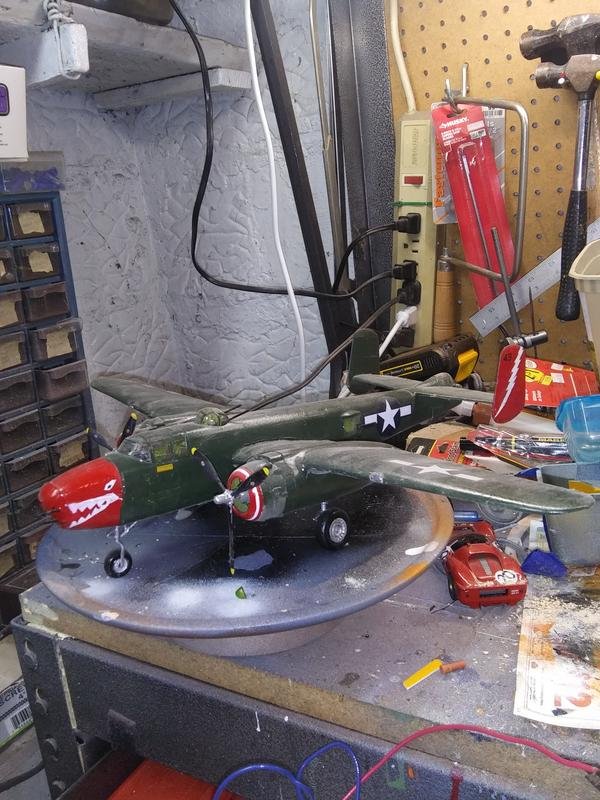
Cool! Is that a Heller P3 next to it?
-
-
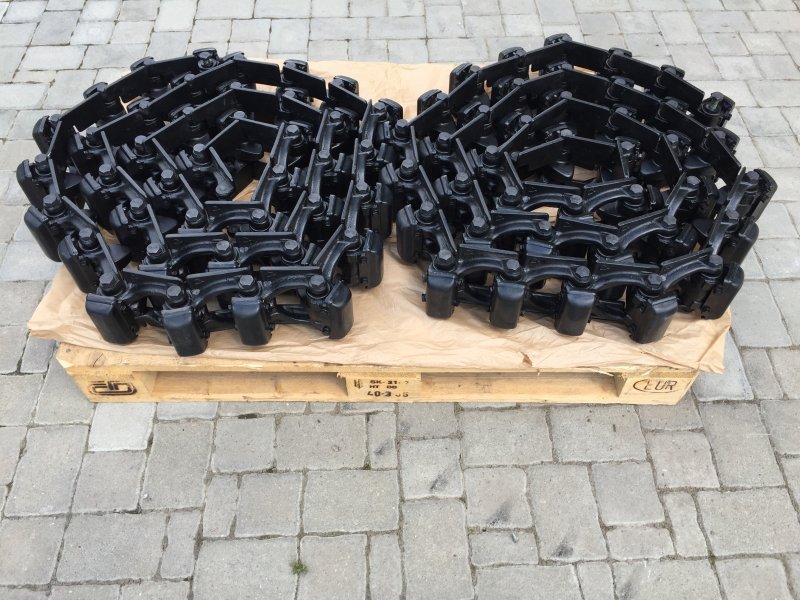
On 7/18/2019 at 8:27 AM, Beef Wellington said:
The Kettenkrad must have just chewed up the decking something rotten, guessing it was used to pull planes and dollies?
They had rubber pads on the tracks... Graf Z looks amazing!
- Canute, popeye the sailor, cog and 4 others
-
7
-
I fully endorse the Iwata/ Paasche combo, I bought mine for an illustration job in 1987, and they are still going strong...
- Landlubber Mike, mtaylor, lmagna and 2 others
-
5
-
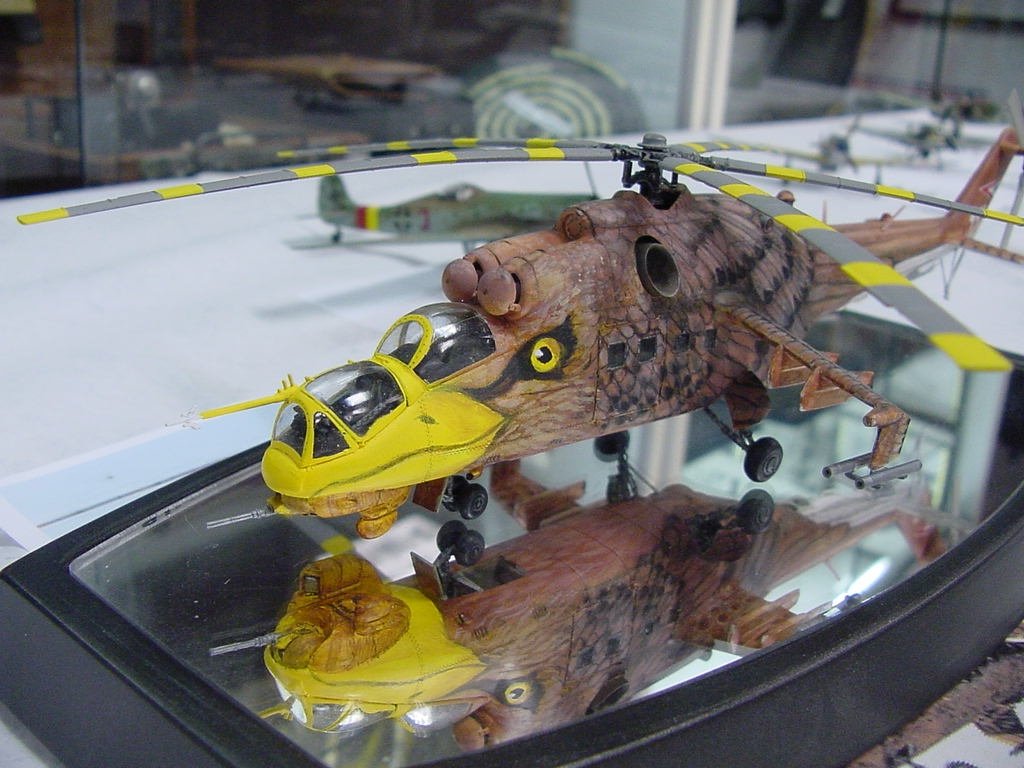
What a magnificent beast! Love the details! I remember making a little 1/72 plastic one years back in Hungarian air show display livery...
-
17 hours ago, kurtvd19 said:
I routinely use rattle can paints in my airbrushes. The trick is getting the paint into a jar w/o getting paint all over the shop. Usually a tin foil sort of closed shield can be formed around the top of the jar and the spray nozzle of the spray can. Use exam gloves and push down the nozzle through the tin foil and 90%+ gets into the jar.
I tape a cut length of plastic straw to the nozzle to decant into the airbrush...
- lmagna, mtaylor, popeye the sailor and 3 others
-
6
-
Tamiya also makes a pearl clear (TS-65) that is pretty nice--helps even out coverage... https://www.amazon.com/Tamiya-85065-TS-65-Pearl-Clear/dp/B0006SG21C
- Canute, mtaylor, popeye the sailor and 3 others
-
6
-
Great work! I've also had good luck with Vallejo paints, both w/ brush and airbrush. They go on thin enough to keep detail and permit layered glazes, but also cover well enough so that too many coats aren't needed... https://acrylicosvallejo.com/en/producto/hobby/sets/war-games-en/french-infantry-napoleonic-wars-en/
- Hubac's Historian, yancovitch and EJ_L
-
3
-
Epoxy for structural patches, but good ol' Bondo automotive filler works great for cosmetic fill/surface coating, with Nitrostan/Red Lead as a final skim coat. Additionally, cabinet scrapers and box cutter blades work well over PLA for knocking down the FDM print lines...
- fnkershner, mtaylor, lmagna and 2 others
-
5
-
-
Completely concur w/ the advice to print the barrel vertically, redesign the assy. to be 3-4 parts w/ interior lap joints (YMMV, but .3mm clearance should yield a press fit after a quick clean-up), size the i.D. so you can press fit the parts over a dowel and chuck it into a rotary tool--spin on slow speed while gently scraping w/ a blade to knock down the steps. (I use a small Olfa blade in a pinvise) --don't worry about getting too undersized--a coat of filler, primer and paint will make up the difference. If the printer has a GUI like Ultimaker Cura, it's pretty straight-forward to change the settings to slower speed/max rez. I would also turn off the auto supports and build them into the model only under the trunnion section; use about a 5mm raft under the barrel sections so everything sticks to the platform. I would also do the logo as a couple-layer flat (make a few copies) sand it to thickness and mount it to the barrel w/ epoxy...
-
-
-
Looks great! It looks like you have the figures well sorted, but a good potential source for 19th century crew in 1/48 could be Pegasus hobbies' "California Gold Miners": http://pegasushobbies.net/catalog/p113/%237007-1/48-Calif.-Gold-Miners-/-Gold-Rush/product_info.html
-
Very cool project! Are you printing with a Taz? The parts look very nice. What extruder nozzle dia. and step are you running?
-
From Wikipedia:
Reaction with cotton, wool, and other fibrous materials
Applying cyanoacrylate to some natural materials such as cotton (jeans), leather or wool (cotton swabs, cotton balls, and certain yarns or fabrics) results in a powerful, rapid exothermic reaction. This reaction also occurs with fiberglass and carbon fiber. The heat released may cause serious burns,[26] ignite the cotton product, or release irritating white smoke. Material Safety Data Sheets for cyanoacrylate instruct users not to wear cotton (jeans) or wool clothing, especially cotton gloves, when applying or handling cyanoacrylates.[27]
I also use it w/ baking soda quite a bit and I have to be really careful--I've burnt my hands before...
- Canute, thibaultron, Srodbro and 1 other
-
4
-
Looking awesome! You may be already using something like this, but for mirror finishes, I find these things: https://www.micromark.com/Soft-Touch-Sanding-and-Polishing-Pad-Set-Set-of-6?gclid=EAIaIQobChMI7Lakytmr2AIV27rACh0Jpg2qEAQYASABEgLXkfD_BwE
to be close to magic...
-
-
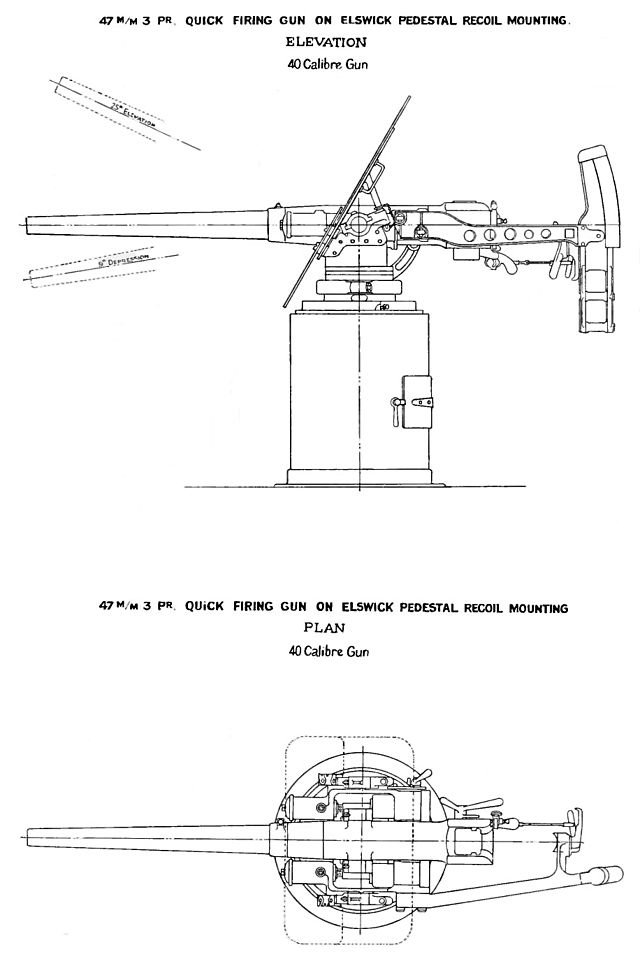
Don't know if you've already seen this, but nice image of the Hotchkiss gun: http://www.nmrn-portsmouth.org.uk/exhibits-and-collections/steam-pinnace
-
3 hours ago, shipmodel said:
Thank you all for the support and kind words. Love it though I do, there is only one thing more frustrating and rewarding than ship modeling, and that is golf.

Dan
Awesome work on Michelangelo-- golf is too frustrating for me, I stick to Highland Games...
-
THE basic textbook for tech. drawing in MHO is: Engineering Drawing and Graphic Science by French & Vierk.
https://www.amazon.com/s?ie=UTF8&page=1&rh=n%3A283155%2Cp_27%3AVierck French
HMS Victory by dafi - Heller - PLASTIC - To Victory and beyond ...
in - Kit build logs for subjects built from 1751 - 1800
Posted
I always love your hyper-detail updates. I am making the same face as all those deadeyes! 😮