


AON
-
Posts
2,772 -
Joined
-
Last visited
Content Type
Profiles
Forums
Gallery
Events
Posts posted by AON
-
-
-
Good morning Don,
Yes, the upper and lower breadth lines follow the lines of the Elephant as plotted.
I drew a spline let her lay as she would prefer as a traditional autocad spline.
There are a few very minor "wiggly" spots but at scale they are quite minor and deemed not worthy of correction.
As I said before, sanding may do more damage.
Then again the real build was perfectly imperfect!
Joining into them from below and above was somewhat the same... she went where she wanted... never argue with a woman.
Alan
-
-
-
Good morning Druxey
Yes I saw that
I was struggling with modelling it... it has to be quite easy to do which is why I cannot figure it out.
If I do I will update it... otherwise it may stay this way (maybe I should add a note so I do not forget) or I might be able to sketch it in....hmmmm...
I also thought it would be easier to build as a filler piece but this would not be true to the build.
I am going to have to chew on this a bit.
Alan
-
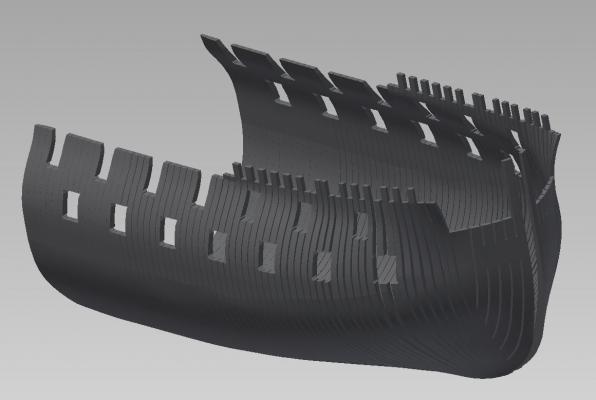
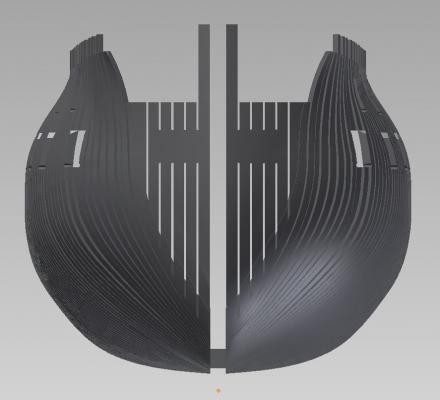
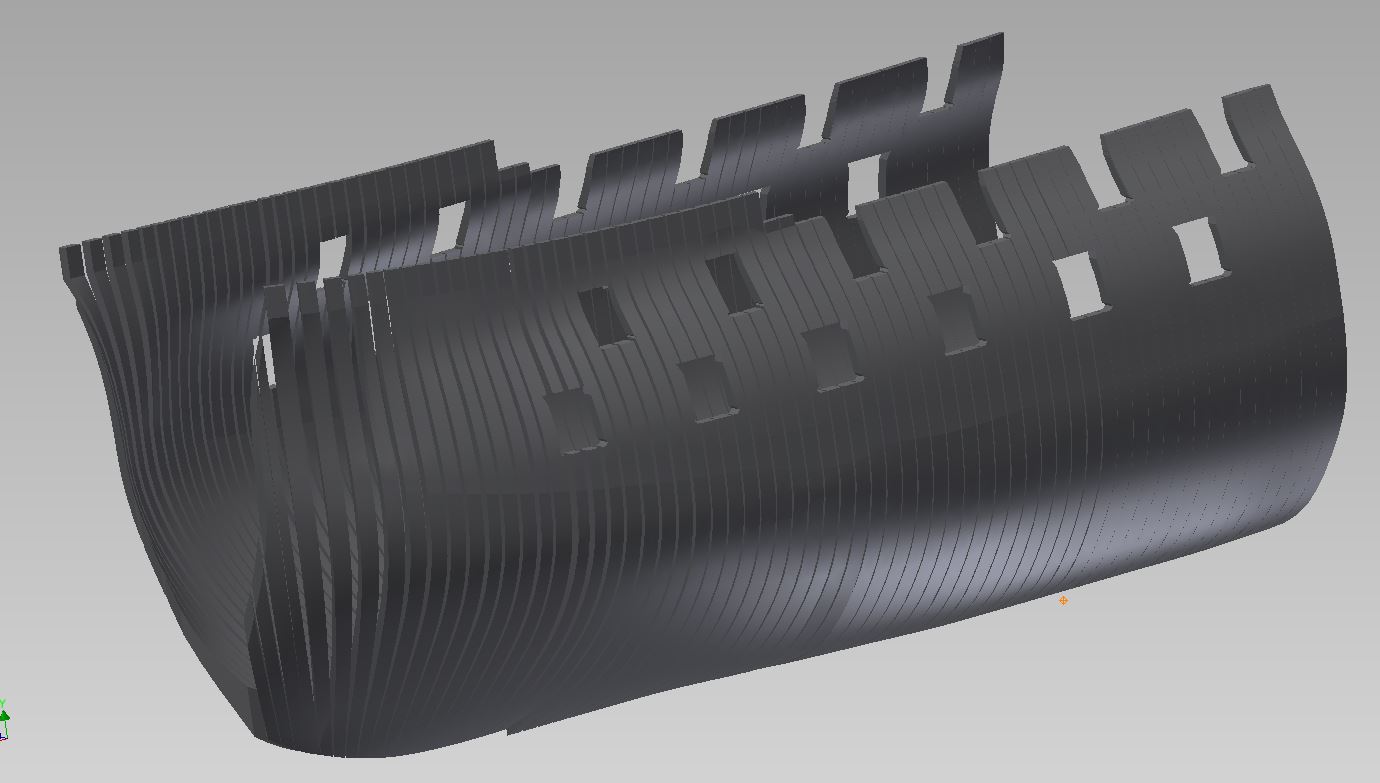
Modeling the bow was a lot more trouble for me than it should have been.... but it is done.
The hawse pieces will require filler pieces between them for the hawse holes (not shown).
I will now make the templates from H-AFT to forward of the Stem Head Frames.
Edit note:
The photos have been updated with the hawse pieces remodelled as discussed below.
- AnobiumPunctatum, popash42, ggrieco and 2 others
-
 5
5
-
Good afternoon Don,
Earlier fairing was very time consuming minor adjustments of points to smooth out the lines which probably didn't really matter much (okay, I'll take the 100 lashes with the wet noodle now) due to the reduced scale but now having used the projected geometry everything is dead nuts on (that is an actual technical term guys and gals) based on the scale projections and any minor blemishes are really very minor and un-noticeable.
I'm betting sanding will do more damage than 3D modelling.
The upper third of the framing/hull was/is a bit more of a challenge as it is only depicted in the one view.... no projecting possible.
Ah, those darn zebra stripes!
Now that brings back awful memories.
They look purty darn good now.
I am just finishing the attachment of the "pointy end" and will work on the aft half next week.
I was missing the two forward gun ports in the last image posted.
They have been added which forced me to adjust a couple frames.
Alan
-
-
-
-
I happened to have an electronic copy it here.
Screen capture of the offending joints below.
My B&W printed copy does not show the hidden lines (located extra close to the deck lines) clearly.
But (of course) you are correct!
I'll need to create an ECN and Work Request to have the drawing revised.
(after all I am at work)
speaking of which I'd better get back at 'er!
Thank you
Alan

-
-
-
-
-
luck has very little to do with it.
good things happen mostly by accident

- avsjerome2003, Dimitris71, druxey and 3 others
-
6
-
-
-
Don
Inventor allows you to project 3D geometry from two 2D views. I didn't see this option in my version of SolidWorks I was borrowing from the office.
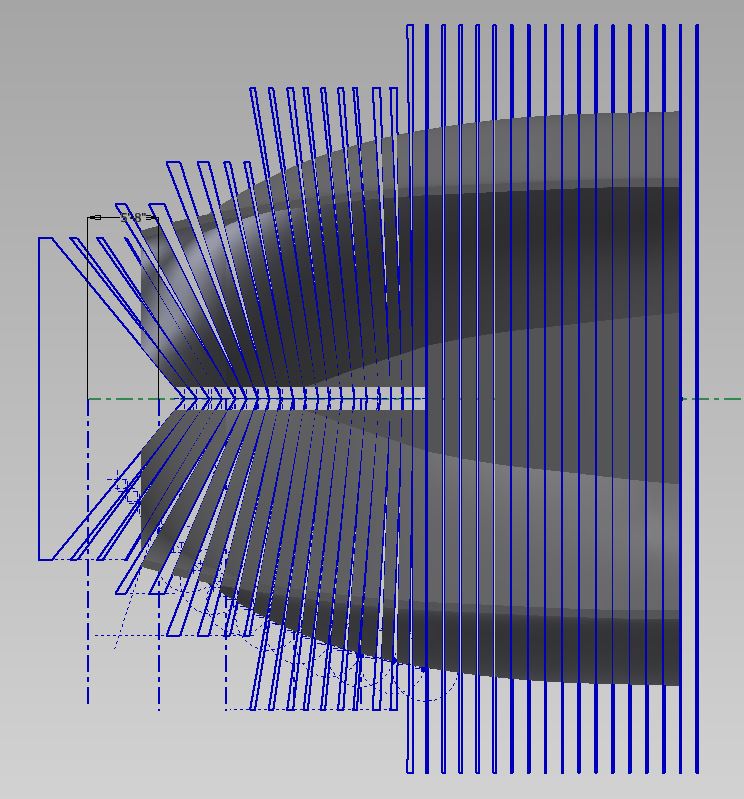
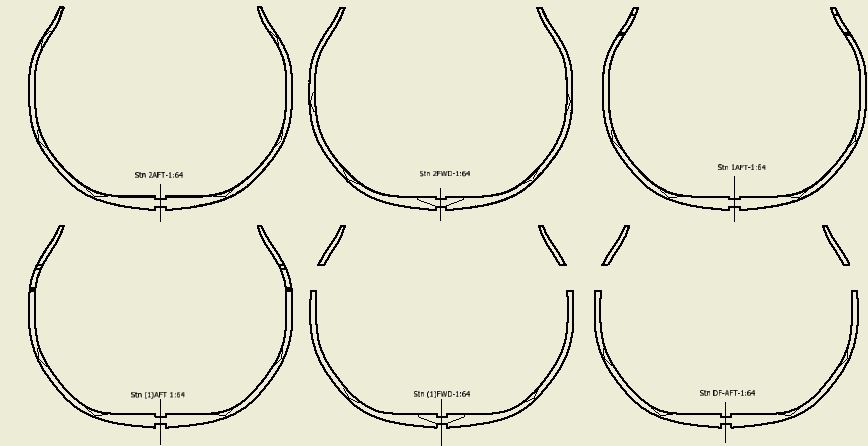
I was able to project the 3D curvature of the waterline cutting down line, top of the floor timber and top timber lines by drawing them in the Breadth and Sheer views (plans).
I then created a end view (Body plan) plane on the station lines and at the locations in which the top timber line changes elevation.
I inserted points at the intersection of these lines with the plane, projected these points onto a sketch at the station line (at the plane) and then drew in the frame.
I did however come to the conclusion that I needed to simplify the dimensions. (something I believe Druxey was trying to make me aware of)
The end of the timber at the top of the rail is 5-1/2" moulded depth (athwartships).
at 1:64 this is 0.086" thick or just over 1/16" (about 2mm)
I don't think I can make these at this thickness so I increased it to 8" (1/8" or 3mm)
Still a challenge but a wee bit better to manage.
I also massaged the thickness at the breadth of the beam from 11.8" to 12"
I gave up on tweaking all the polylines with setting the 3 handles at every point once I realized there is a traditional autocad polyline option.
The task is difficult enough without creating extra challenges.
The first, second and third futtock moulded thickness are unchanged... but I believe they will be when I have wood to sand!
I'm an old draughtsman (draughtsperson to be politically correct) and it is taking me awhile to adjust and accept what I can and cannot do at 1:64 scale.
.... and I am still learning.
I am now learning to adjust my thinking of the timber spacing due to the gun port locations. (something else Druxey gentle nudged at)
When I project the cuts from below they are straight and play havoc with the templates at the gun ports.
I realise the timbers shift.
This means cutting from the side (sheer plan) which is tons more work to draw
I am not sure the effort is needed so long as I refer to the actual timber plan I have to do the shifts.
I've modelled stations 2 through G and started the template drawing for these today.
I had planed on cutting all the scarf joints in the timbers but now realising the scale, moulded thickness, my level of talent, who will see it... I'm moving towards simple butt end joints. I may attempt scarf joints where I have break away views through the hull into the interior as you will see these joints.
I've also toyed with the idea of plexiglas timbers in these areas.
Alan
-
Good morning Don,
No, I haven't given up.
A number of things occurred to slow me down this summer.
First there was the warm inviting sunny days I hadn't seen for months.
Then extra work demanding more of my time.
Then I caught my finger on my table saw cutting stock to make a honey stick...it is healing and to my surprise the finger nail is growing back!
The end of my finger will almost look normal.
It has been an uphill battle with creating my templates, now using Autodesk Inventor. My files were huge and going backwards to work on an earlier sketch caused crashes.
Then I learnt about dirty files and dumping the temp files to clean up.
I've just refined my process and starting over yet again (4th time) but not from the very beginning!
This time I honestly believe I will have it.
Hope to start reposting again soon.
I will also remake my keel and stern post assembly.
I know I can do a better job.
It is the learning curve that is killing me.
Alan
-
I am also eager to learn the answer to your good question!
Alan
- WackoWolf, CaptainSteve, mtaylor and 1 other
-
4
-
Well, it is done and running much better now!
step 3 , find the temp folder, was easy
step 4, empty the folder was at first impossible as I wasn't allowed access
I searched online and discovered others had the same 3D modelling issue and they accessed the temp folder as follows
" open windows explorer and type in %temp% "
this opened the file and it was full of stuff!
then I typed CTRL + A to pick all
then I hit the delete key
-
Has anyone ever heard of a "dirty" model or file.
My program keeps crashing and I've been told I need to "purge" the file and "delete" the temp files to clear the mess in the memory.
The steps I was told to take are:
1. find the file in windows explorer
2. right pick and select purge
3. find the temp file folder in the program folder
4. delete the temp files within the folder
5. reopen my 3D file but DO NOT do anything with it
6. save it immediately
7. close the file
8. close the program
9. re-open the file in the program
10. should be clean and ready to use crash free until it accumulates a new mountain of stuff to clutter the memory.
Has anyone done this before?
first time for me but all my other (work/job) files are tiny compared to this (ship/model) one.
-
So then 1mm isn't enormously out of scale ,,, only slightly too large.
Is the difference that noticeable?
If it looks good to you then use what you have
If you are a purest then purchased some line a little smaller diameter, closer to scale.
For me, knowing now what they should be, I'd have to get the correct line.... even though one in hundreds of people would notice.
And since I wouldn't take a caliper to your rigging I would not be the one in hundreds.
Alan


 )
)
HMS Bellerophon 1786 by AON – scale 1:64 – 74-gun 3rd Rate Man of War - Arrogant-Class
in - Build logs for subjects built 1751 - 1800
Posted · Edited by AON
What a week!
I had the good fortune to have an angel looking over my shoulder and make me take a long hard look at my work.
There were some errors. I didn't have a proper understanding of the rising line versus the rising wood (among a few other problems)
Spent a good portion of the time reworking my models and drawings.
Reposting updates below. (I removed the earlier version)
I hope I have them correct now.
***Some minor additional work to do on sheet 2 (yet to add the scarph joints) to the forward cant frames.
And I owe someone an apology,... frame (A) was supposed to be A.
BTW yesterday was our 40th wedding anniversary and today is my birthday! (I keep referring to my darling wife as my BD present)
I believe she picked the day before my BD so I could never forget.
I would have loved to have been at the framing seminar in Atlanta this weekend (I would have learnt so much!) but these dates were to important.
NOTE (31 JAN 2016)
I have once again removed the attachments... sorry for that.
I have been making further refinements, corrections and "tweaking" and fully intend to repost a full set of templates in the next month... that is the target.