
DBorgens
-
Posts
327 -
Joined
-
Last visited
Content Type
Profiles
Forums
Gallery
Events
Posts posted by DBorgens
-
-
-
Sweet! So when is the launch and maiden voyage?
Dave B
- mtaylor, popeye the sailor and Piet
-
 3
3
-
Jeff,
Welcome to MSW! The best way to get help is to start a build log of your Lively. There are many accomplished modelers here who are happy to answer questions and make suggestions. You may also search for current or completed logs of Lively. This was a tremendous help to me with Bluenose (my first build). Enjoy.
Dave B
-
Patrick,
Catching up. You continue to amaze us with your skill at a scale we mortals can hardly imagine. Do please show the electronics, servos and motor you intend to install (this is an RC build isn’t it?). Inquiring minds want to know. HA!
Excellent work.
Dave B
- popeye the sailor, mtaylor and Piet
-
3
-
Jason, beautiful work! Your log also makes for further guidance of how to think through the build.
Dave B
-
The false frames may not hold as the soaked planks dry. You may consider some scrap supports that span
to the inboard edges of the planks and clamp to these. Each would obviously custom cut. Just a suggestion. Your planking and nibbling looks good.
I sanded the deck by hand and the a marks tended to disappear (tried to keep them as small as possible, keeping the glue to the lower edge. I expect your deck will cleanup well.
-
-
Keith, your recovery is making for a very nice rebuild. I especially like your main deck, the dark color is beautiful. Your Tennessee belongs here as much as any scratch ship model. Keep up the good work and I pray you continue to recover (and build).
- Canute and Keith Black
-
2
-
Hi Per, I am catching up as I haven’t been on MSW for a while. Bluenose is looking good! I used the blackened kit pins since this was my first large kit. I think the wood ones look best though they appear a bit short. Difficult to get the correct proportion in small wood parts.
Have a very Merry Christmas.
-
I found Bob Hunt’s practicum very helpful, especially about thinking ahead. When you start gluing the bulkheads, be sure to keep them square (I clamped Lego blocks to the bulkdead and the false keel). I also reinforced the bulkheads with diagonal braces made from scrap basswood. This makes a good, solid frame for planking. You can see then in a picture in my log. Keep making progress.
-
Dave,
You are making good progress. I did not have much trouble with the bulkheads. I recommend you clean the laser char from the edges that will be glued to the keel. I sanded them lightly and made sure to make the edges square. Laser cutting creates a sloght v-groove in the wood. This will make for stronger joints.
BTW look through this forum for Bluenose builds, you will,find many tips and see how builders worked through some of the common pitfalls with this kit. I recommend Bob Hermann’s log, he helped me quite a bit.
-
-
I have totally failed to keep this log up with my build. My apologies.
This boat was a gift to my father which I delivered this summer. He loves it (yeah). So rather than make many posts here, I will put pictures in the completed gallery. If anyone wants more detail on any aspects, please ask here.
Thanks
- thibaultron, mtaylor and Omega1234
-
3
-
-
-
Tecko, I’m also glad to see you’re back. The dock is beautiful, and makes a nice addition to the scene. Praying you will continue to heal.
- Tecko, mtaylor and John Allen
-
3
-
Patrick,
Beautiful selection for your current adventure. Suitably ambitious. Now, if you could parlay your designs into an invitation to survey firsthand (and wouldn’t that be fun) . . . just a thought.
- Omega1234, popeye the sailor, Piet and 1 other
-
4
-
Patrick,
Just caught up to your pictures. WOW!!!
-
Steve,
Beautiful work! Very clean and the paint just shines. I just pulled up a seat, as I will use your build as a guide. Mine is currently on hold but I plan to get back this summer.
- Osmosis, Tigersteve and CaptainSteve
-
3
-
Patrick,
Beautiful work! I stand amazed at your fine detail skills. Now a passenger liner would certainly be an undertaking and we would love to watch if you decide to take that on. Enjoy the shakedown cruise. 😉
- Piet, mtaylor and popeye the sailor
-
3
-
Patrick,
Our condolences for your mums passing.
- cog and popeye the sailor
-
2
-
Per, John, thank you.
- mtaylor, thibaultron and Omega1234
-
3
-
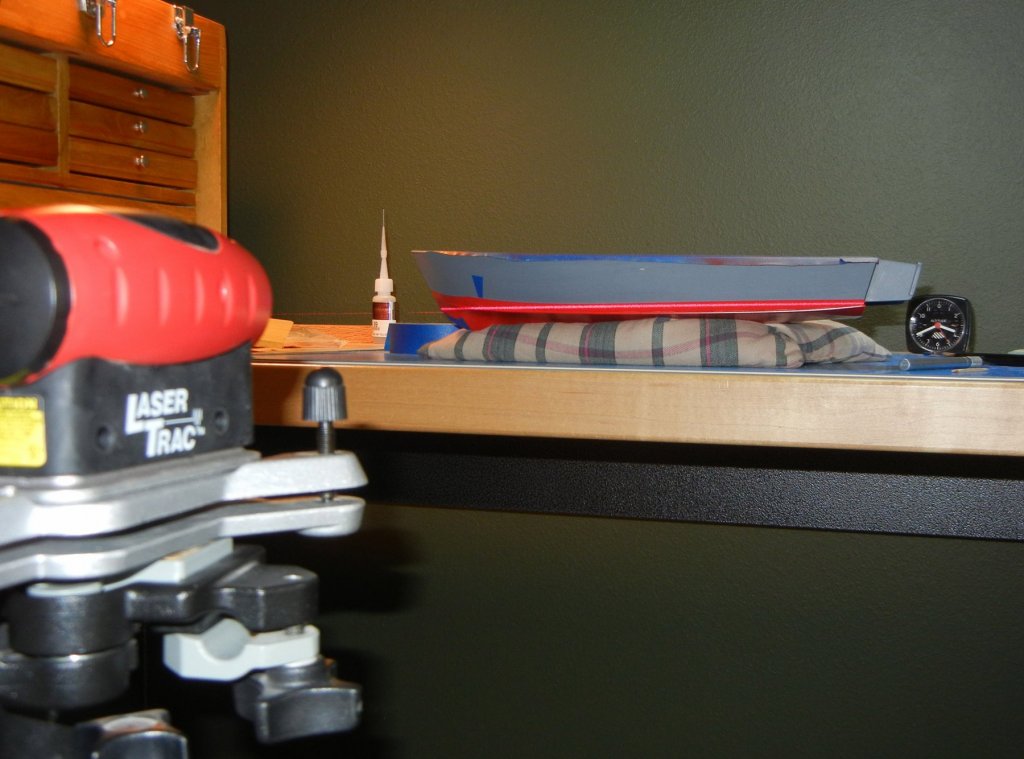
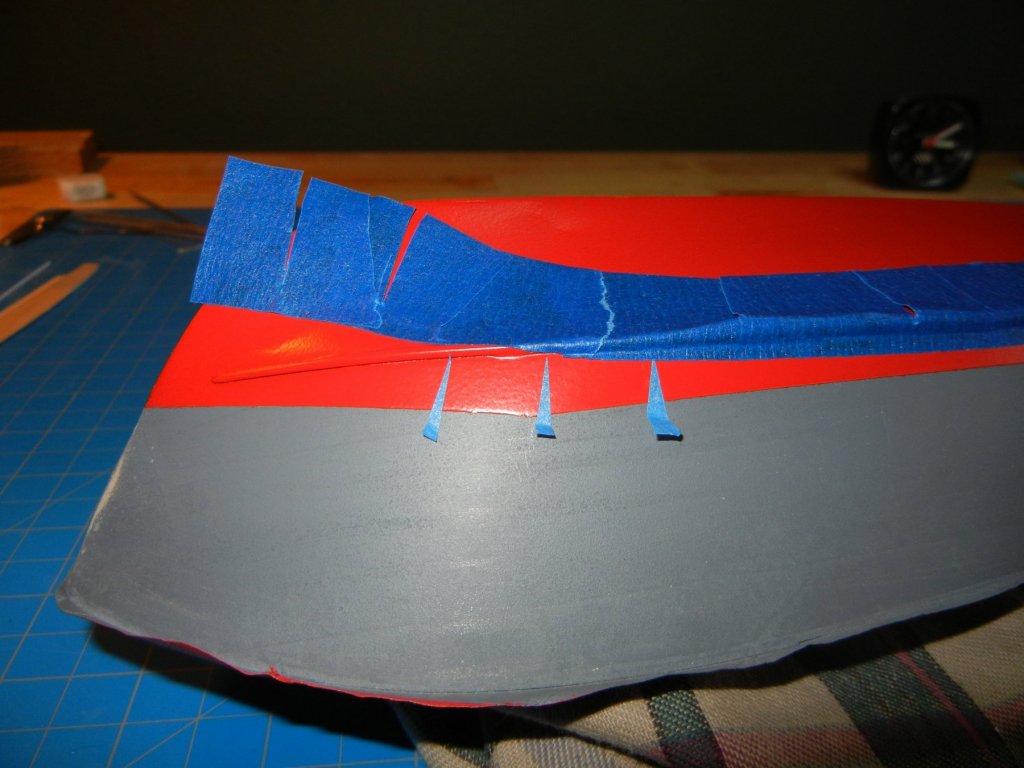
Catching up. I have finished the anti-fouling paint (actually just red, satin spray paint). Yesterday I set the waterline. I prefer the laser level method as I find it easier to see the line on curved surfaces. It worked out well on my Bluenose. You can just see the laser along the hull. I used tape pointers to identify the line and set the masking tape. In the second picture, two pointers identify where the waterline intersects the strakelet edges. I sprayed the first coat of black this morning so I am updating this log while it dries. What else would I do in a chilly, rainy Monday?
-
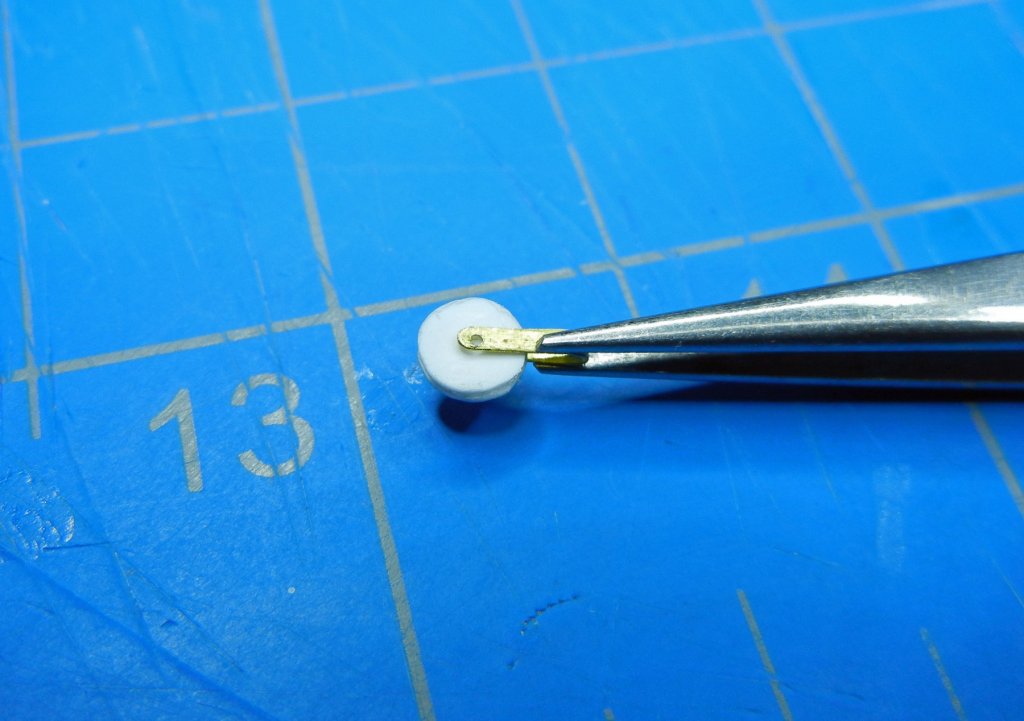
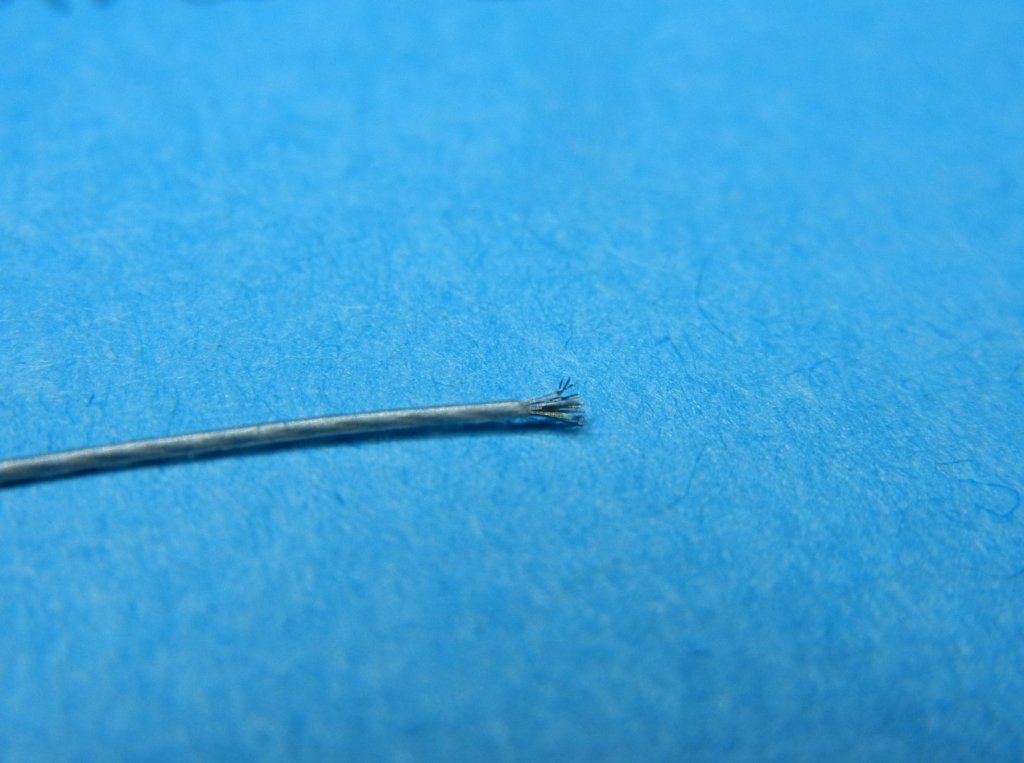
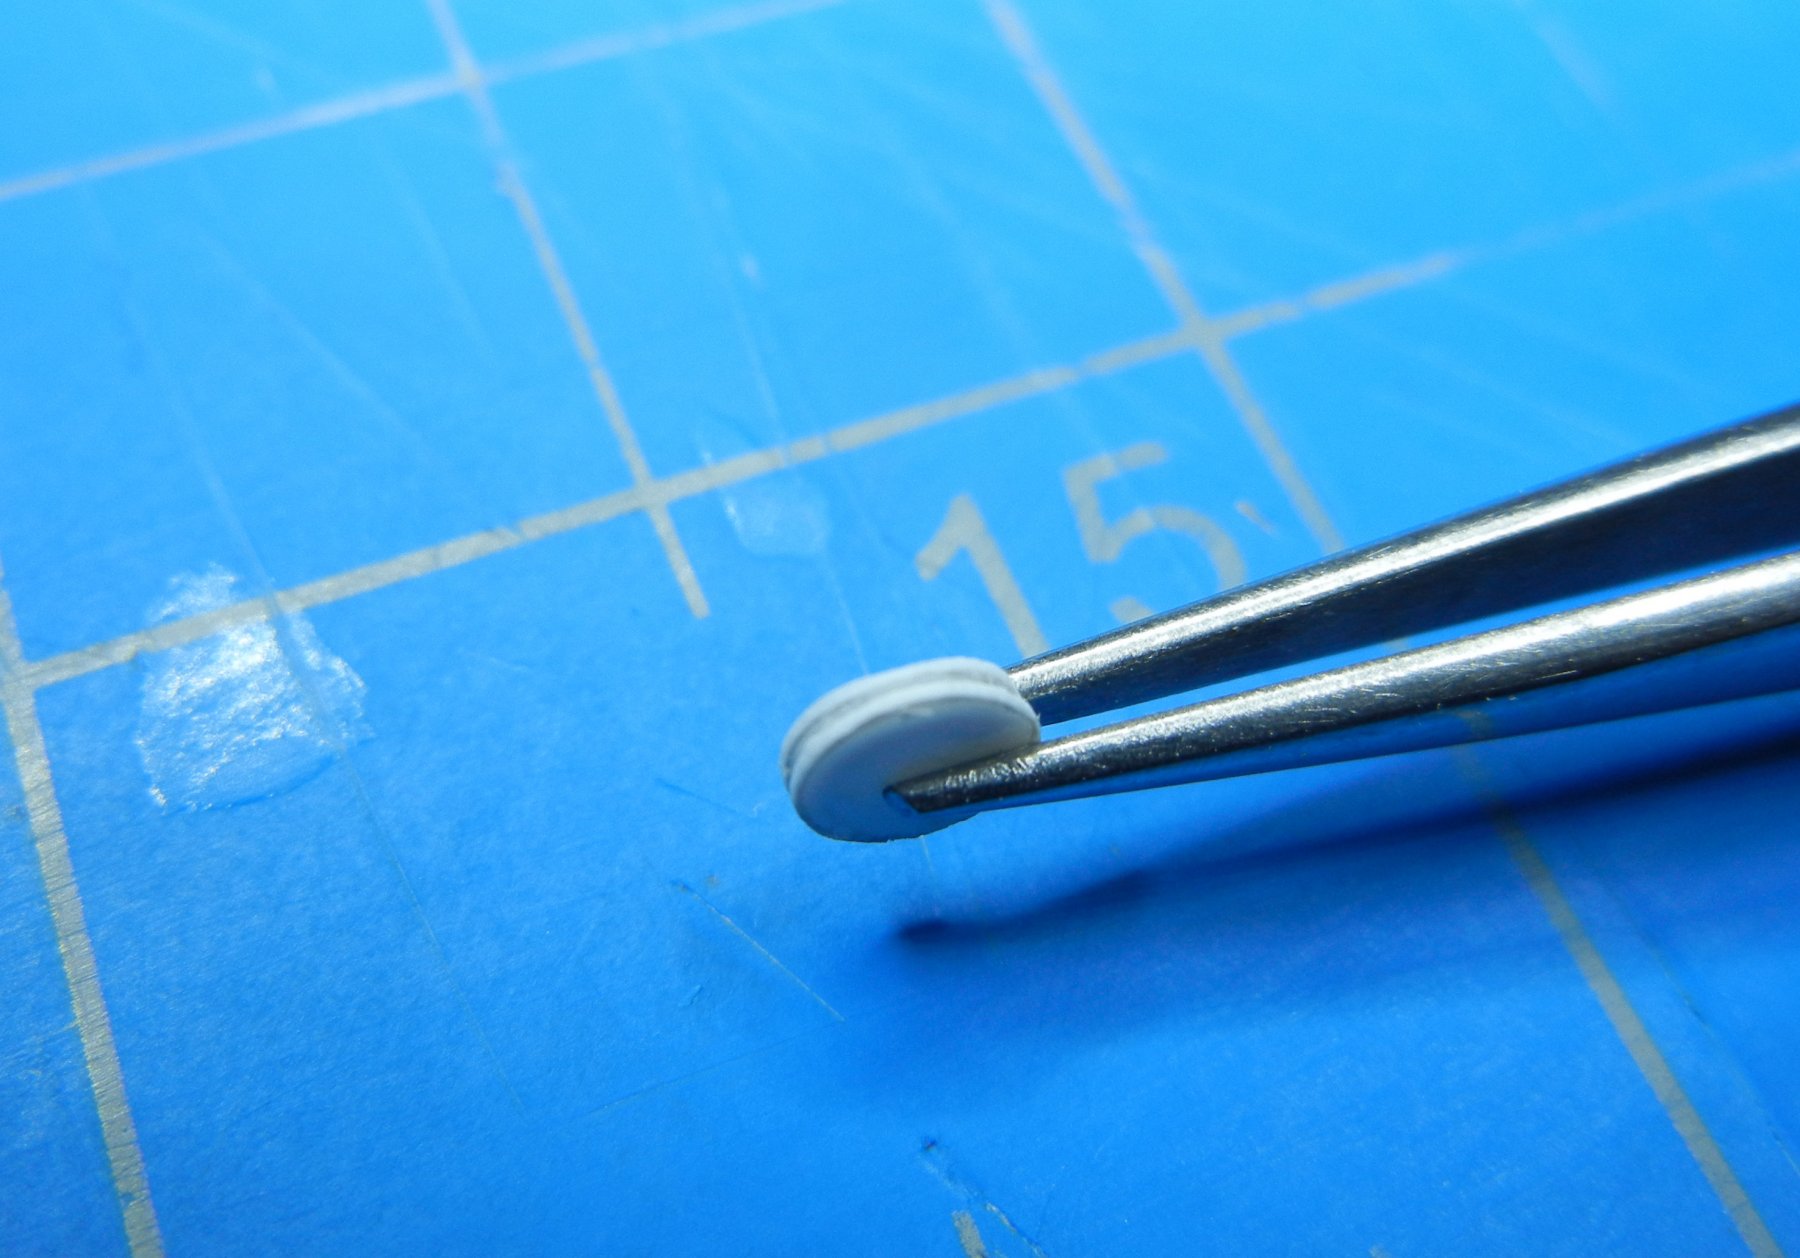
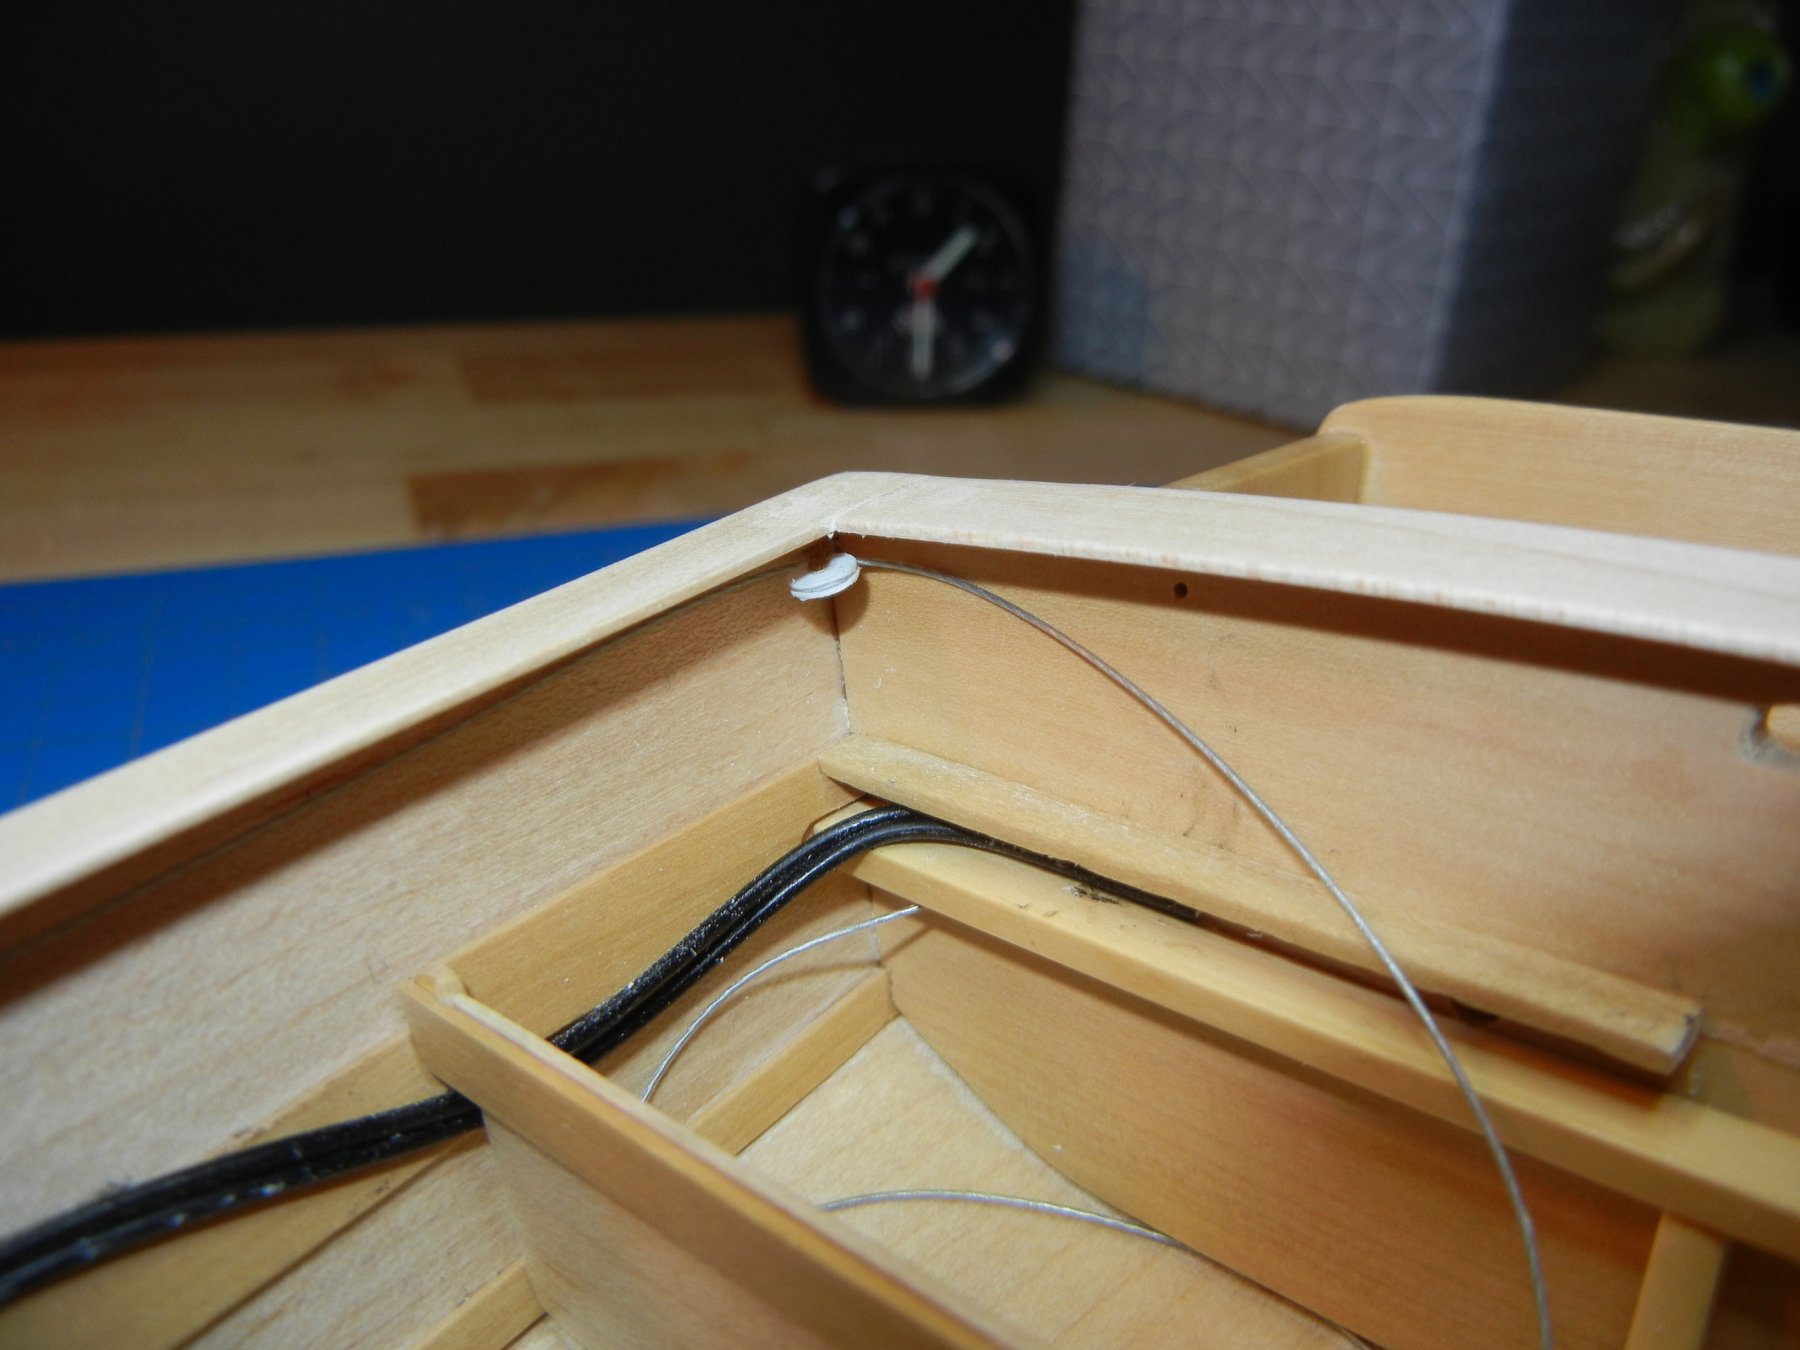
The steering pulleys are laminated thin styrene to make the groove easier. The full size pulleys are 2-1/2 inch diameter. I found some fine beading wire for the steering cable. The wire is .014 in (.36 mm) diameter, 21 strand with a clear coating. Very fine strands indeed. This is almost ¼ inch diameter in scale (the boat uses 1/8 in cable) but it looks right.

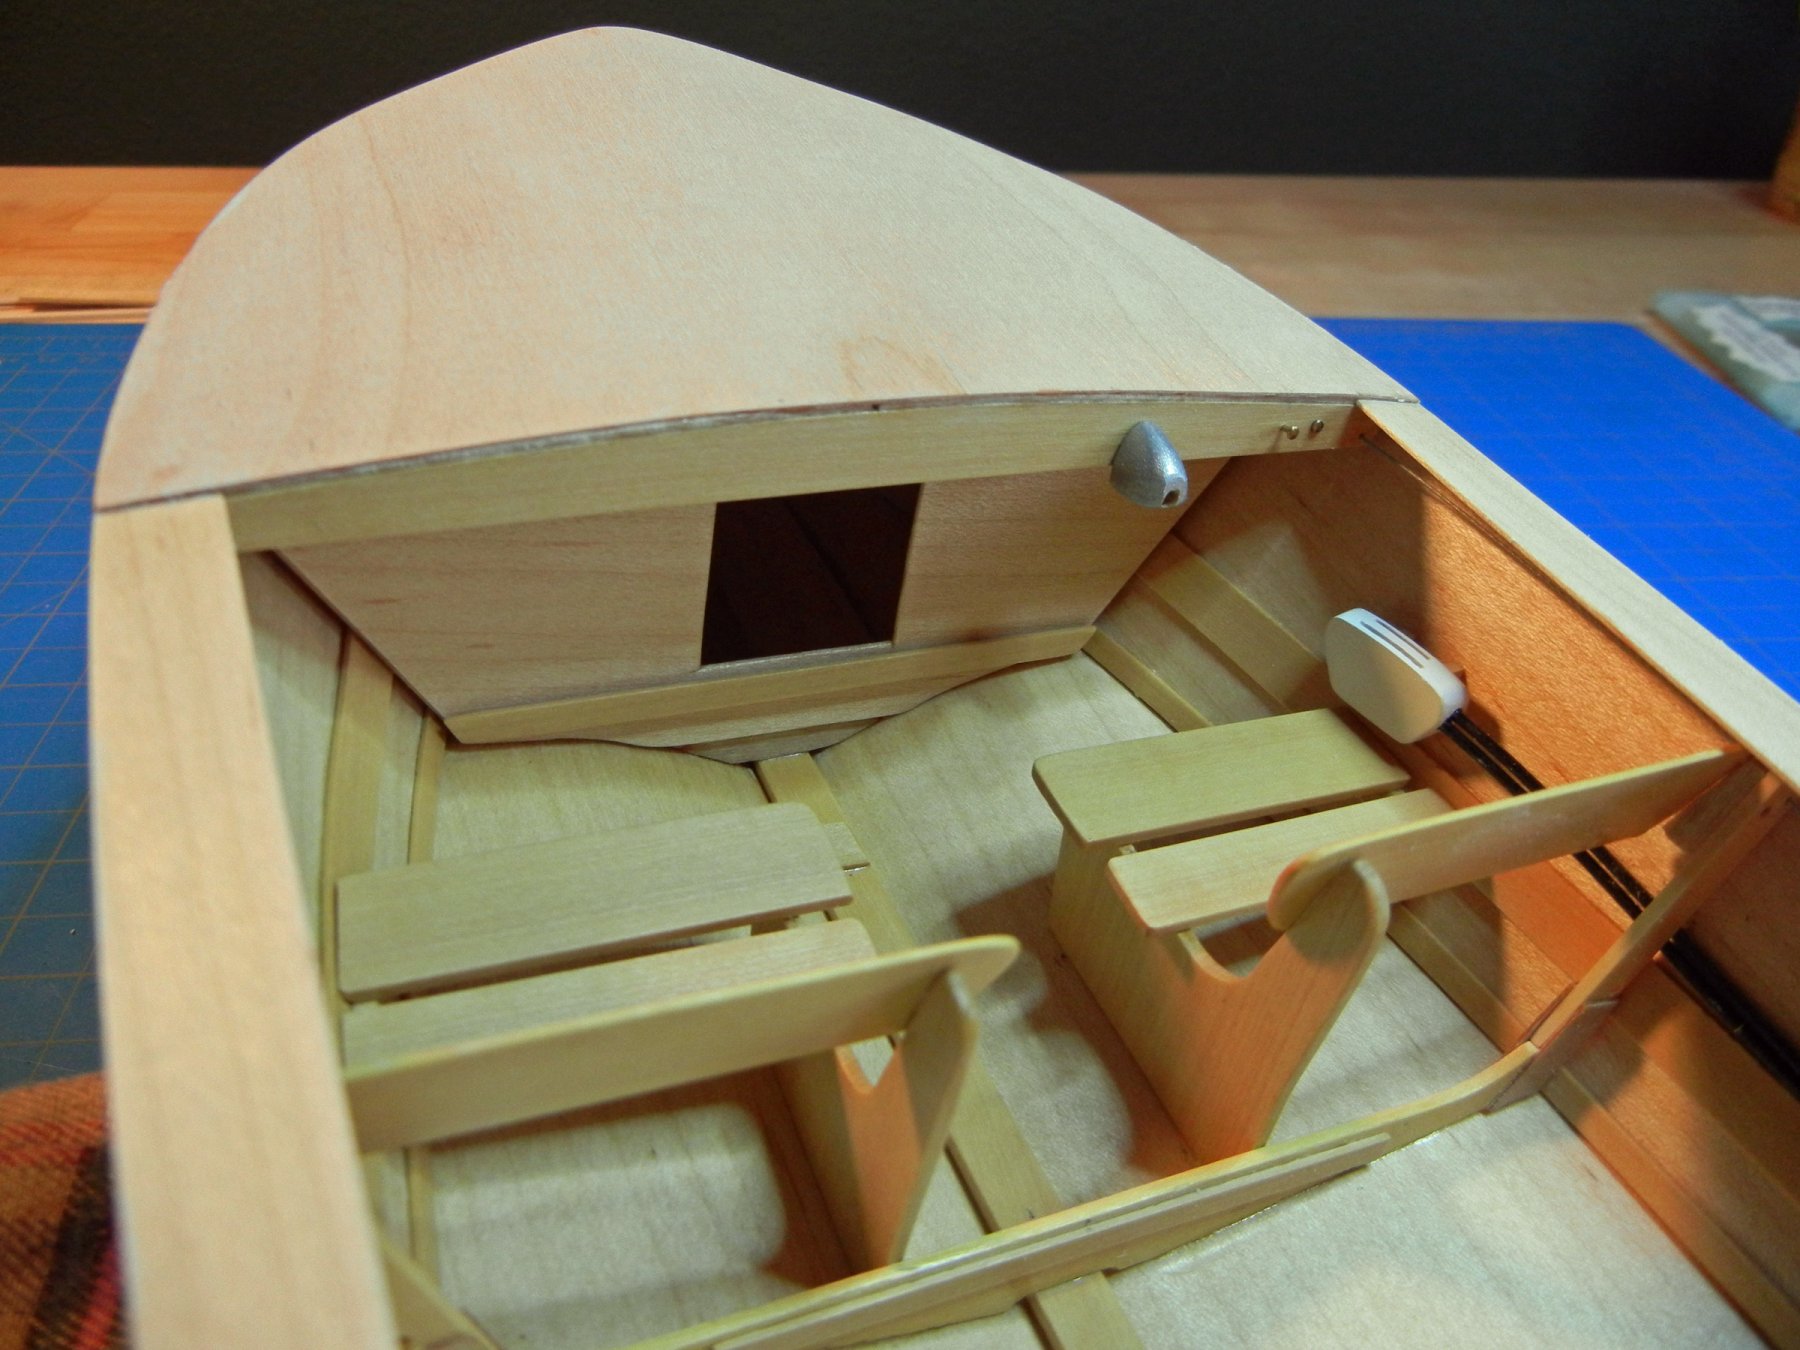
The pictures below show the deck installed along with the details added earlier. The throttle and shift cables are 1/32 styrene rod painted black. There is a small step in the deck at the corner of the windshield so I covered the foredeck with thin ply. Some filling and sanding then I can paint the hull.


- Omega1234, mtaylor, steamschooner and 5 others
-
8


HMS Pegasus by SkipW - Amati/Victory Models - Scale 1:64
in - Kit build logs for subjects built from 1751 - 1800
Posted
Skip, I just found your log and will follow (literally) your build. I started Pegasus this fall and have planked the main deck. Your hull looks great and thank you for the tips.
Dave B