Search the Community
Showing results for tags 'Plastic'.
-
 Hello all, I might as well take the plunge since receiving this model unexpectedly for my birthday. Still at a very very early stage and experimenting with many new-to-me techniques and tools. Here's where the hull is so far... The plan for this build is to be relatively out-of-box with a few improvements here and there as they become obvious, and a particular emphasis on the rigging. I'm trying to keep away from absolutely bonkers modifications principally to avoid it taking too many years to complete. But given my tendency to want to go over-the-top it'll be a constant battle to moderate the plans somewhat. For the overall look, I'm going for the no-Admiral-entrance look (i.e. as per model). Given that the vast majority of the contemporary pictures of Victory don't show it, I'm tempted to avoid it (and this wins for simplicity too). I'll not be going pink, but neither do I like the extremely bright yellows, so something in between is probably where it'll end up. Yet to be determined I guess. I have softened much of the fake wood grain, and removed the lumpy rigols and replaced them with home-made 3d printed ones, which I'm happy with at the moment. I did order some from Dafi but he appears to be on holiday at the moment so thought it would be easier to just get on with printing some. Haven't yet decided what to do about the "closed/fake" ports, nor the doorway at the stern. I have gone ahead thickening the hull around the ports on the middle gun deck but am still waiting on supplies of 4mm styrene to do the lower deck and more 1mm sheet to line the upper. First coat of primer on just to see where the imperfections are and decide whether there's still too much wood grain. It's not as bad as the photo in real life, as this is fairly ruthlessly lit from the keel.
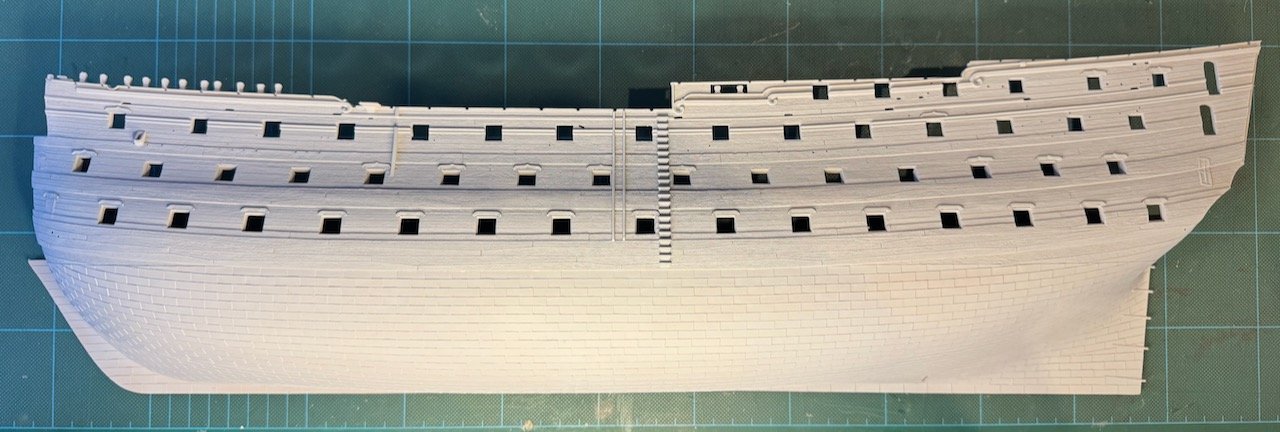
-
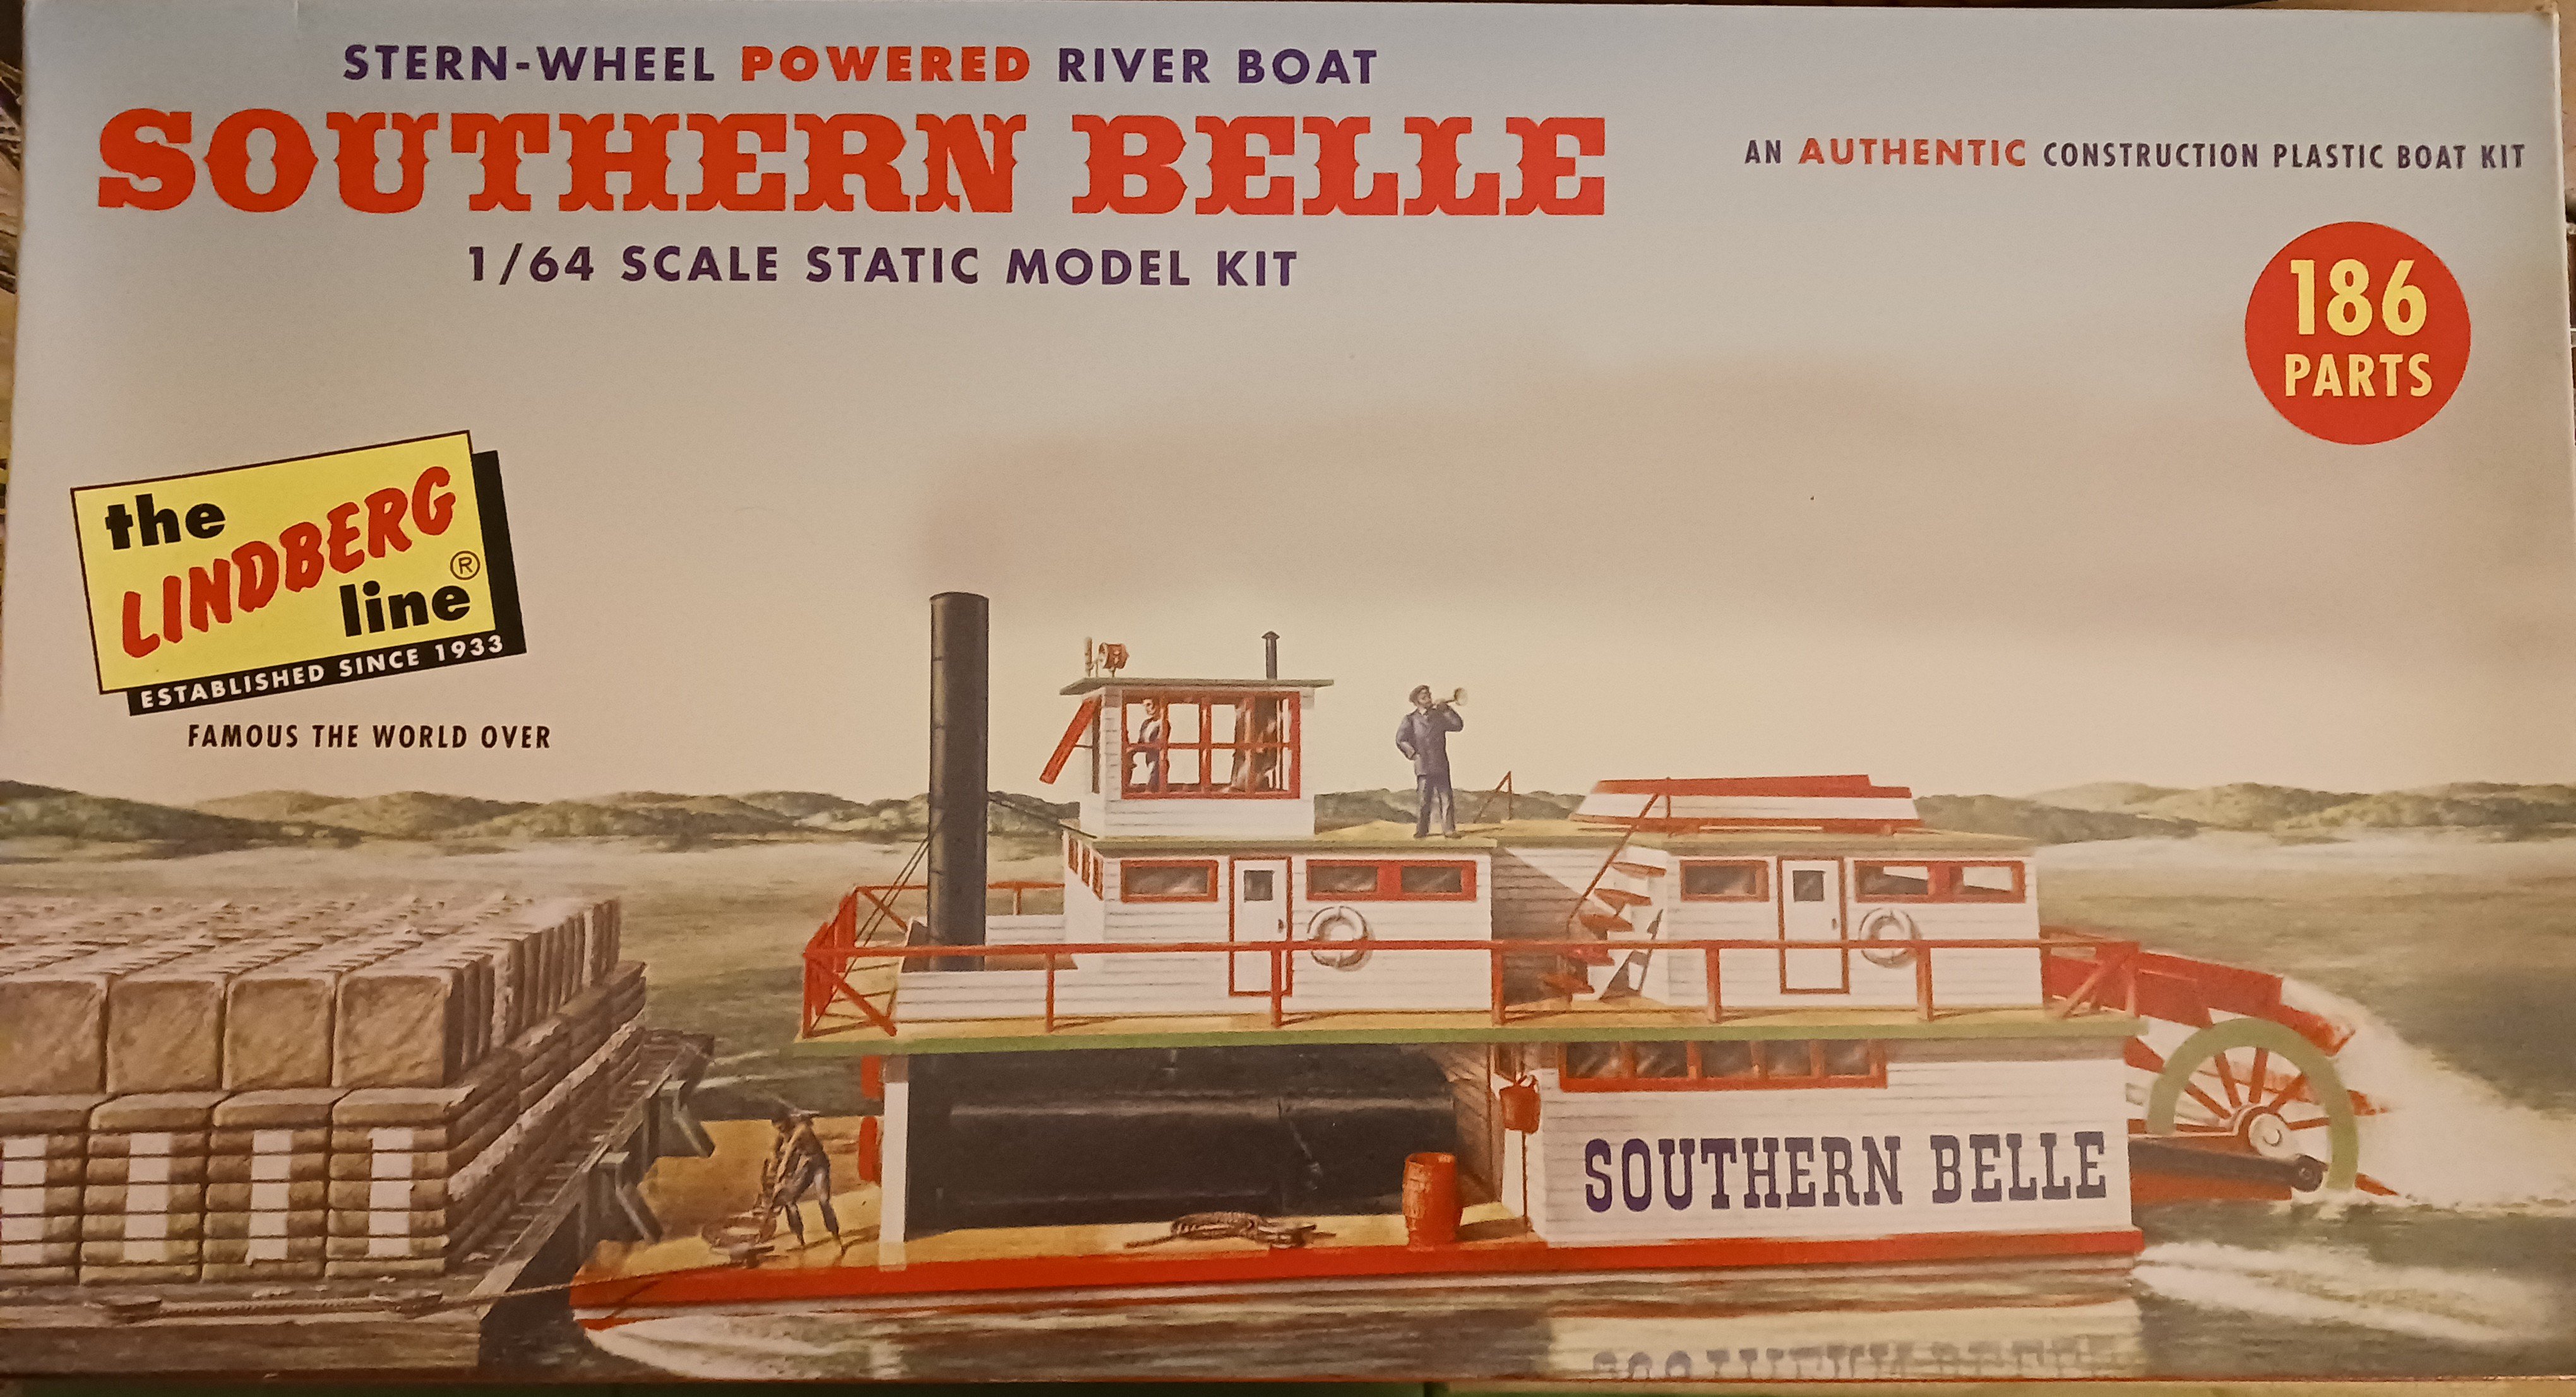
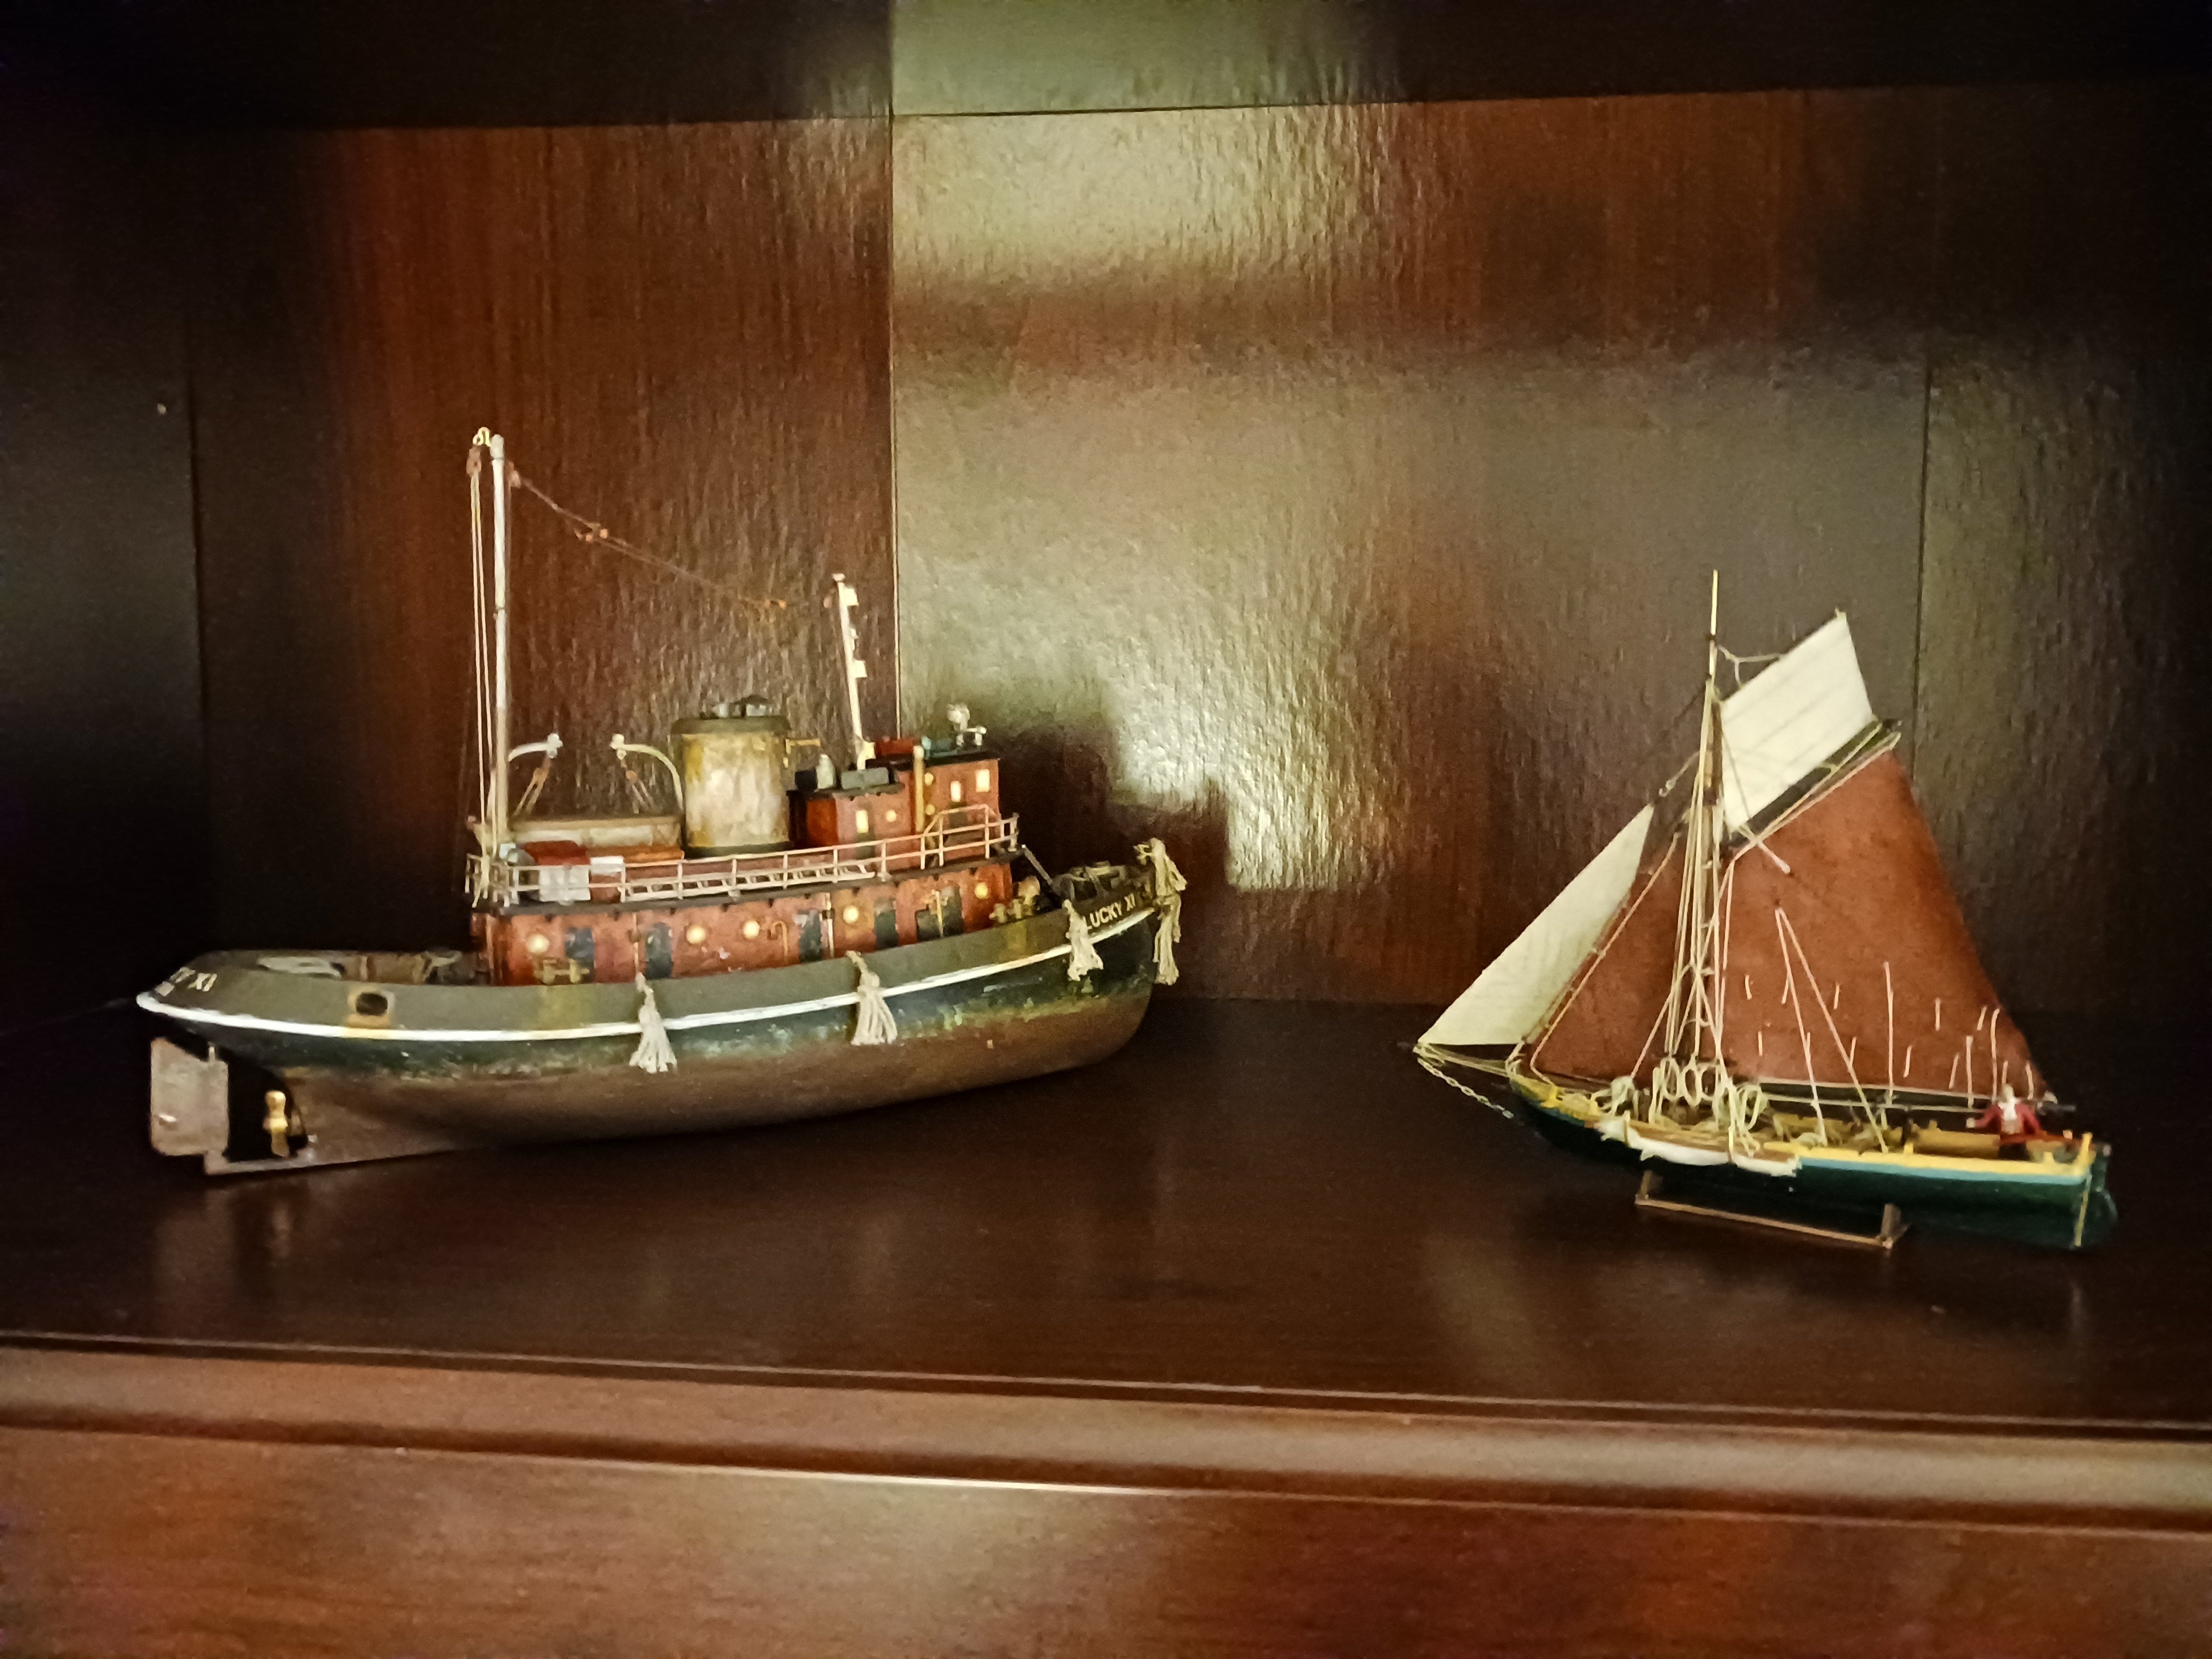
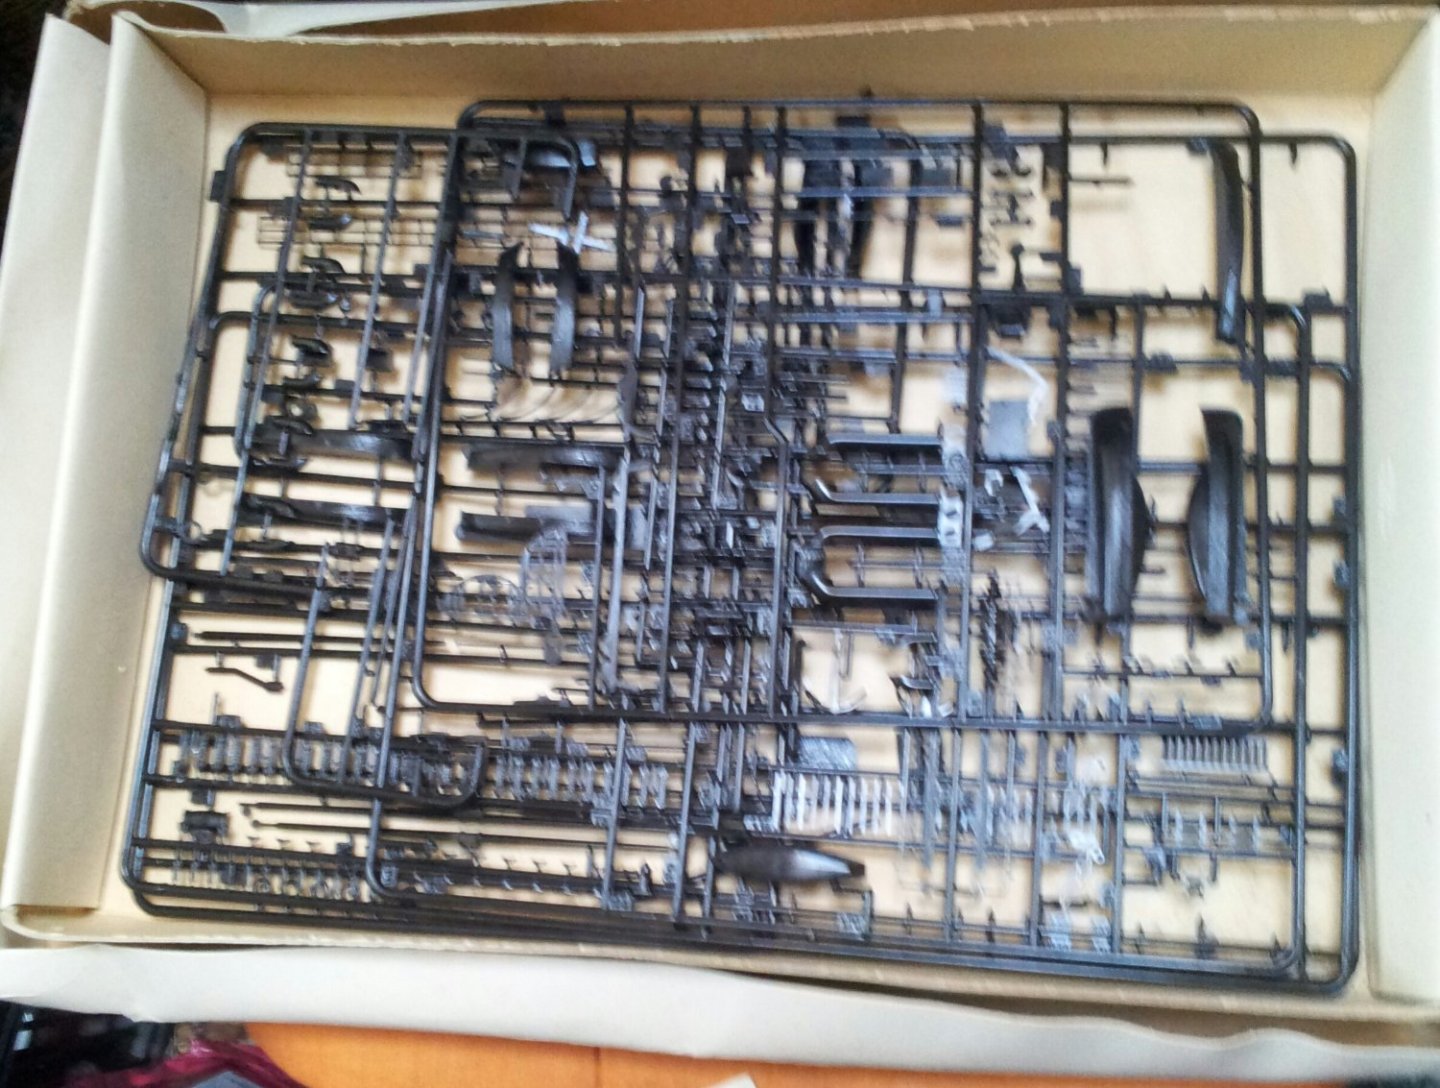
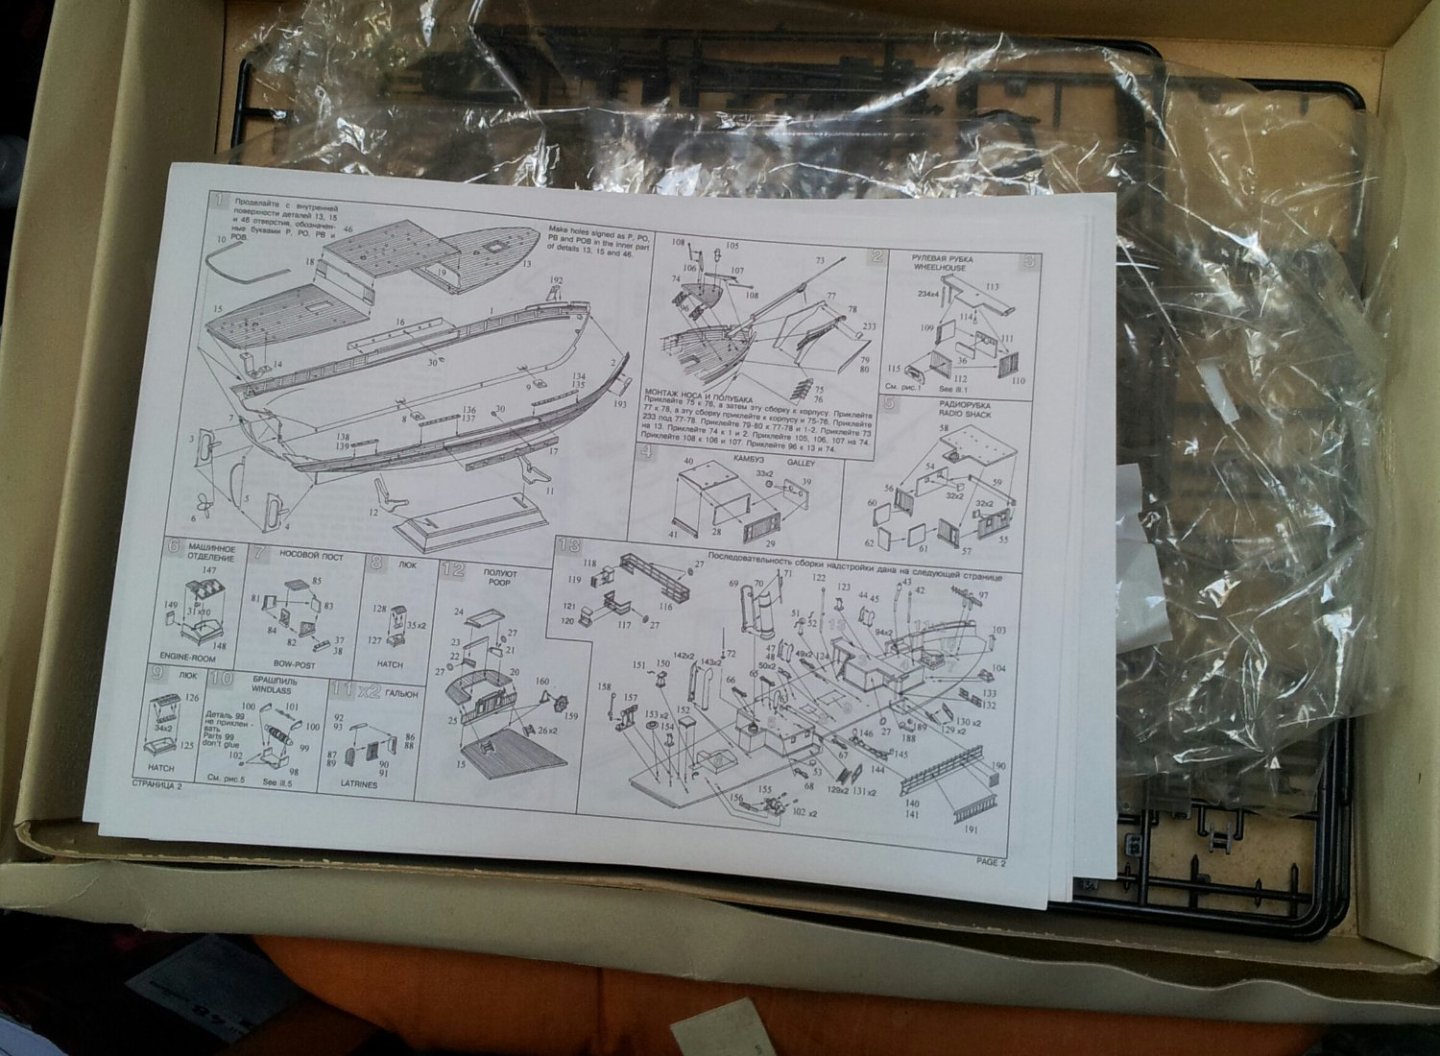
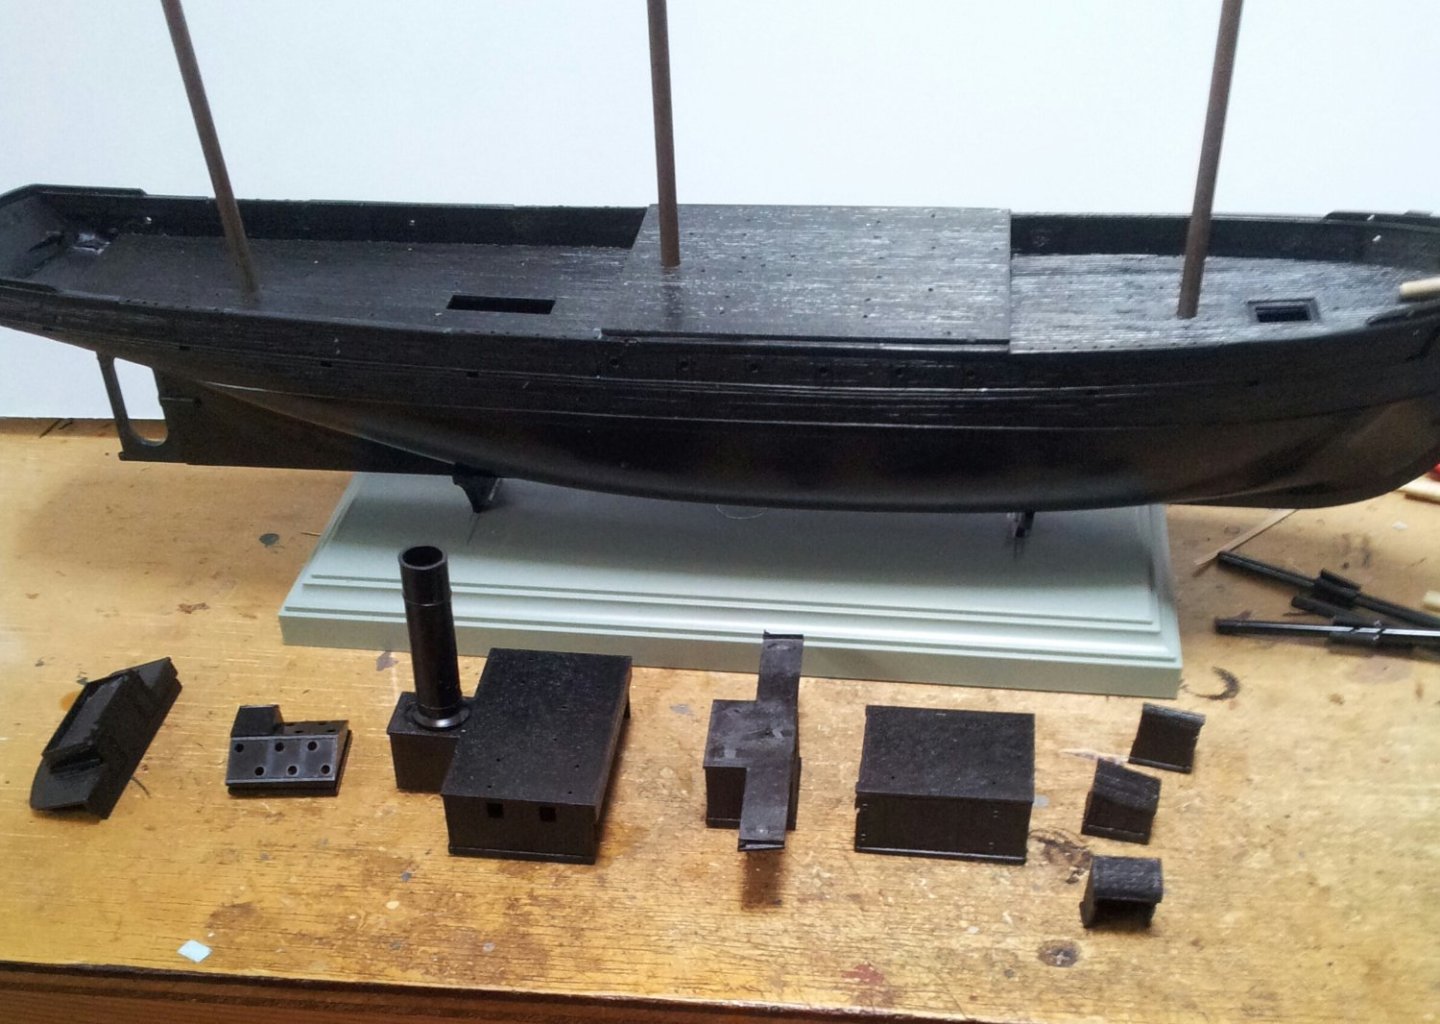
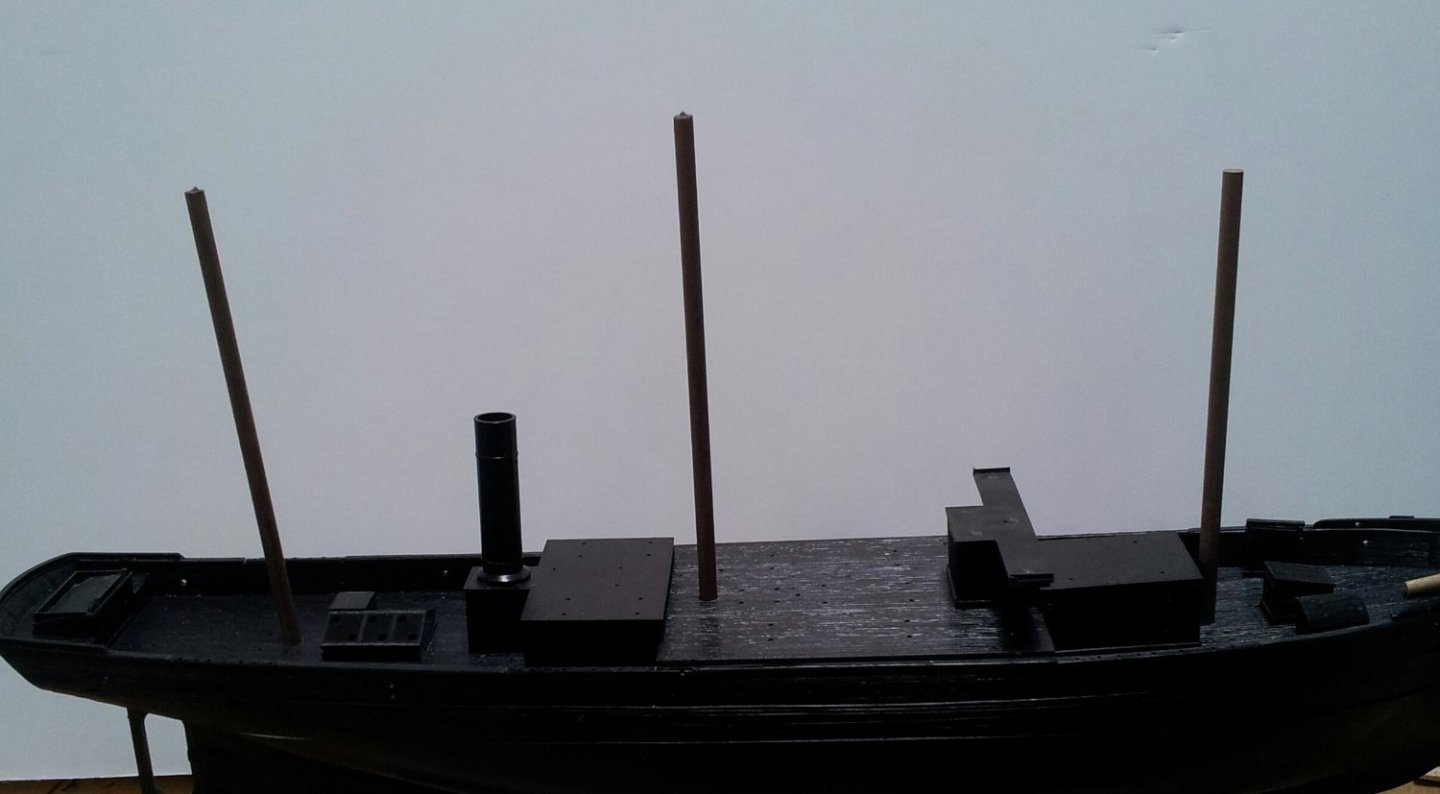
 A build log is being made for this build because I would like to get some information/do some research on Late 19th century American sternwheel paddle boats. This is Lindberg's "Southern Belle" kit, although it isn't based on any particular ship. I will still be working on the Chebec while I am building this kit, and this kit will not take long- maybe 3 weeks max. I have a few things dry-fitted so far, namely the fore deck and engine room gear. One of the things that factored into my decision to build this model is the fact that the last (and first) powered work boat I made was Revell's tug boat, which turned out pretty great. The tug, accompanied by a late-19th century fishing smack: Another element that factored into my decision to build this kit was @Keith Black's Lula, a sternwheeler intended to supply a floating piece of machinery. The only issue here is that I have never, and I mean never, seen a river boat, even a barge-pushing river boat, whose bow and Stern were completely squared off. Any information would be helpful.


- 56 replies
-
- 6
-

-
- Lindberg
- sternwheeler
- (and 1 more)
-
 I'm new to MSW and ship building. I have done a lot of modeling over the years. And I have found out that ship building is the 'meat and potatoes', if you will, of modeling. I have lost a lot of my earlier photos of the cannon being built and the hull construction. I followed pete coleman example and others to get ideas for details. Books are needed to build these ship models if you want to even try to be accurate. I'll be submitting a lot of my photos. Many of which will be rather boring but I want to preserve them somewhere other than Facebook. All comments and tips are welcome!
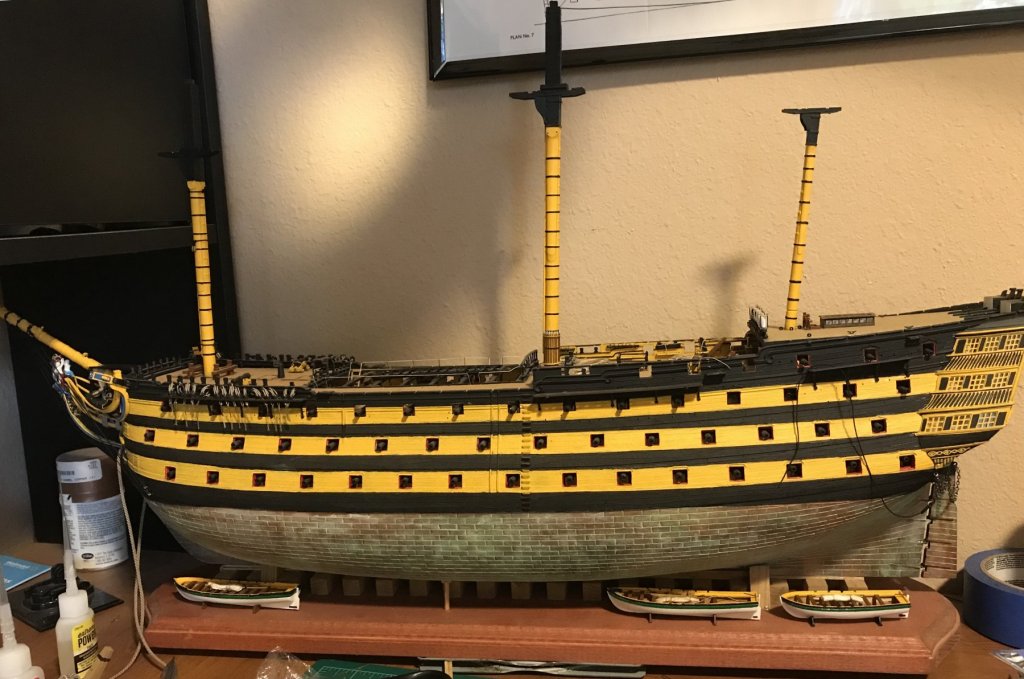
- 155 replies
-
- 10
-
-
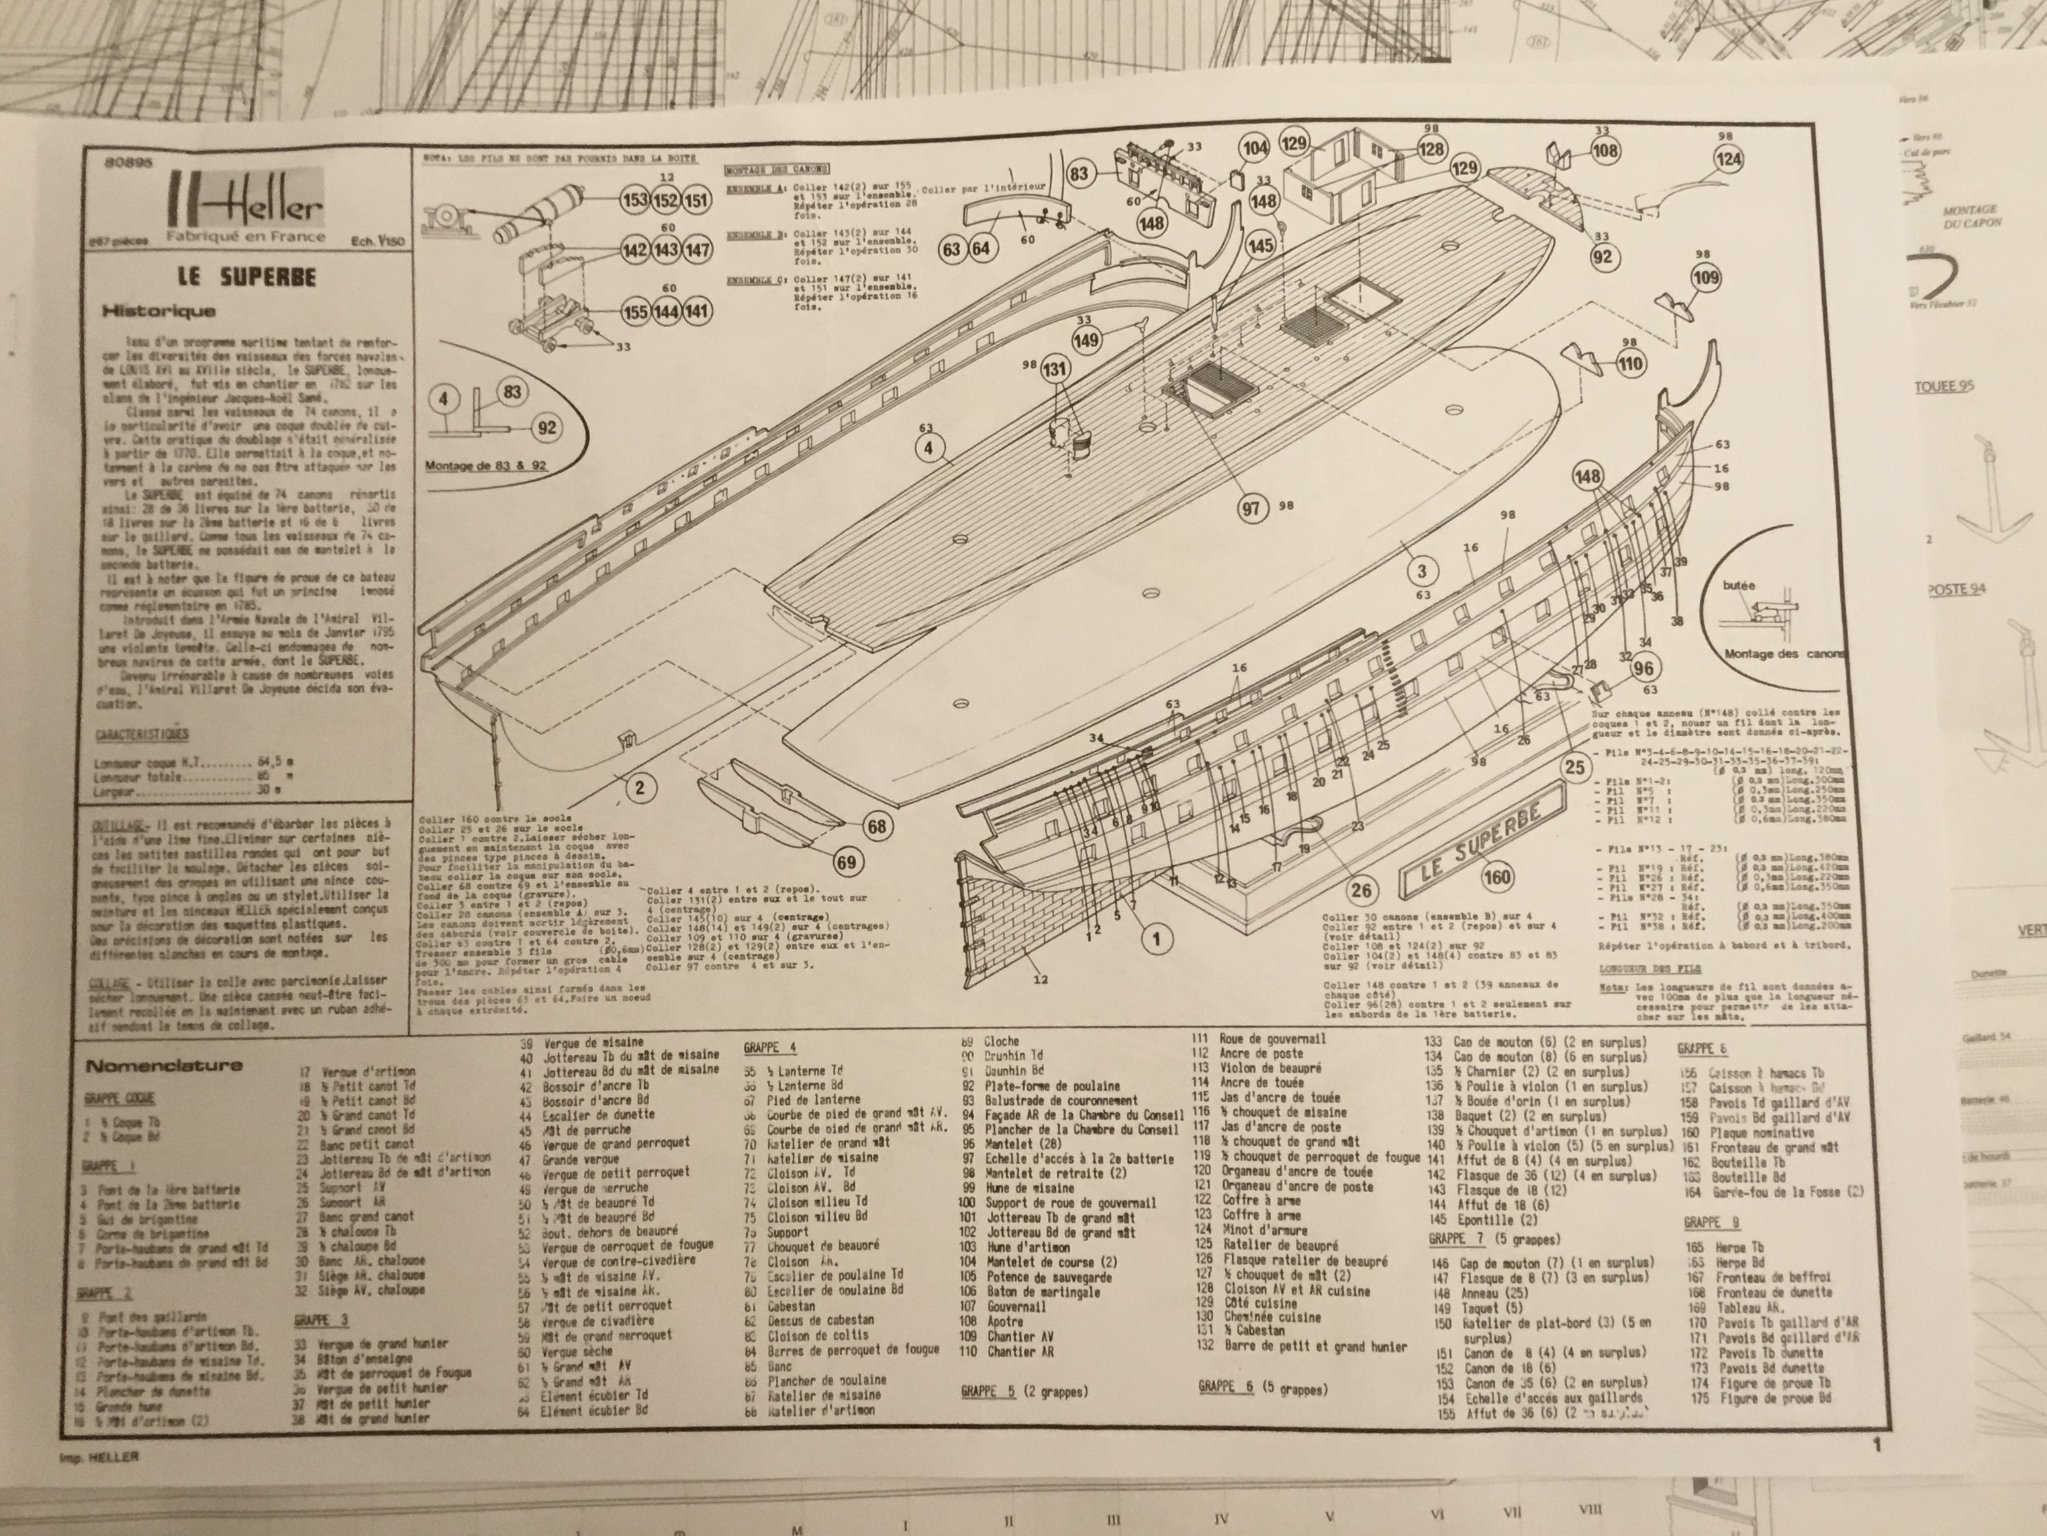
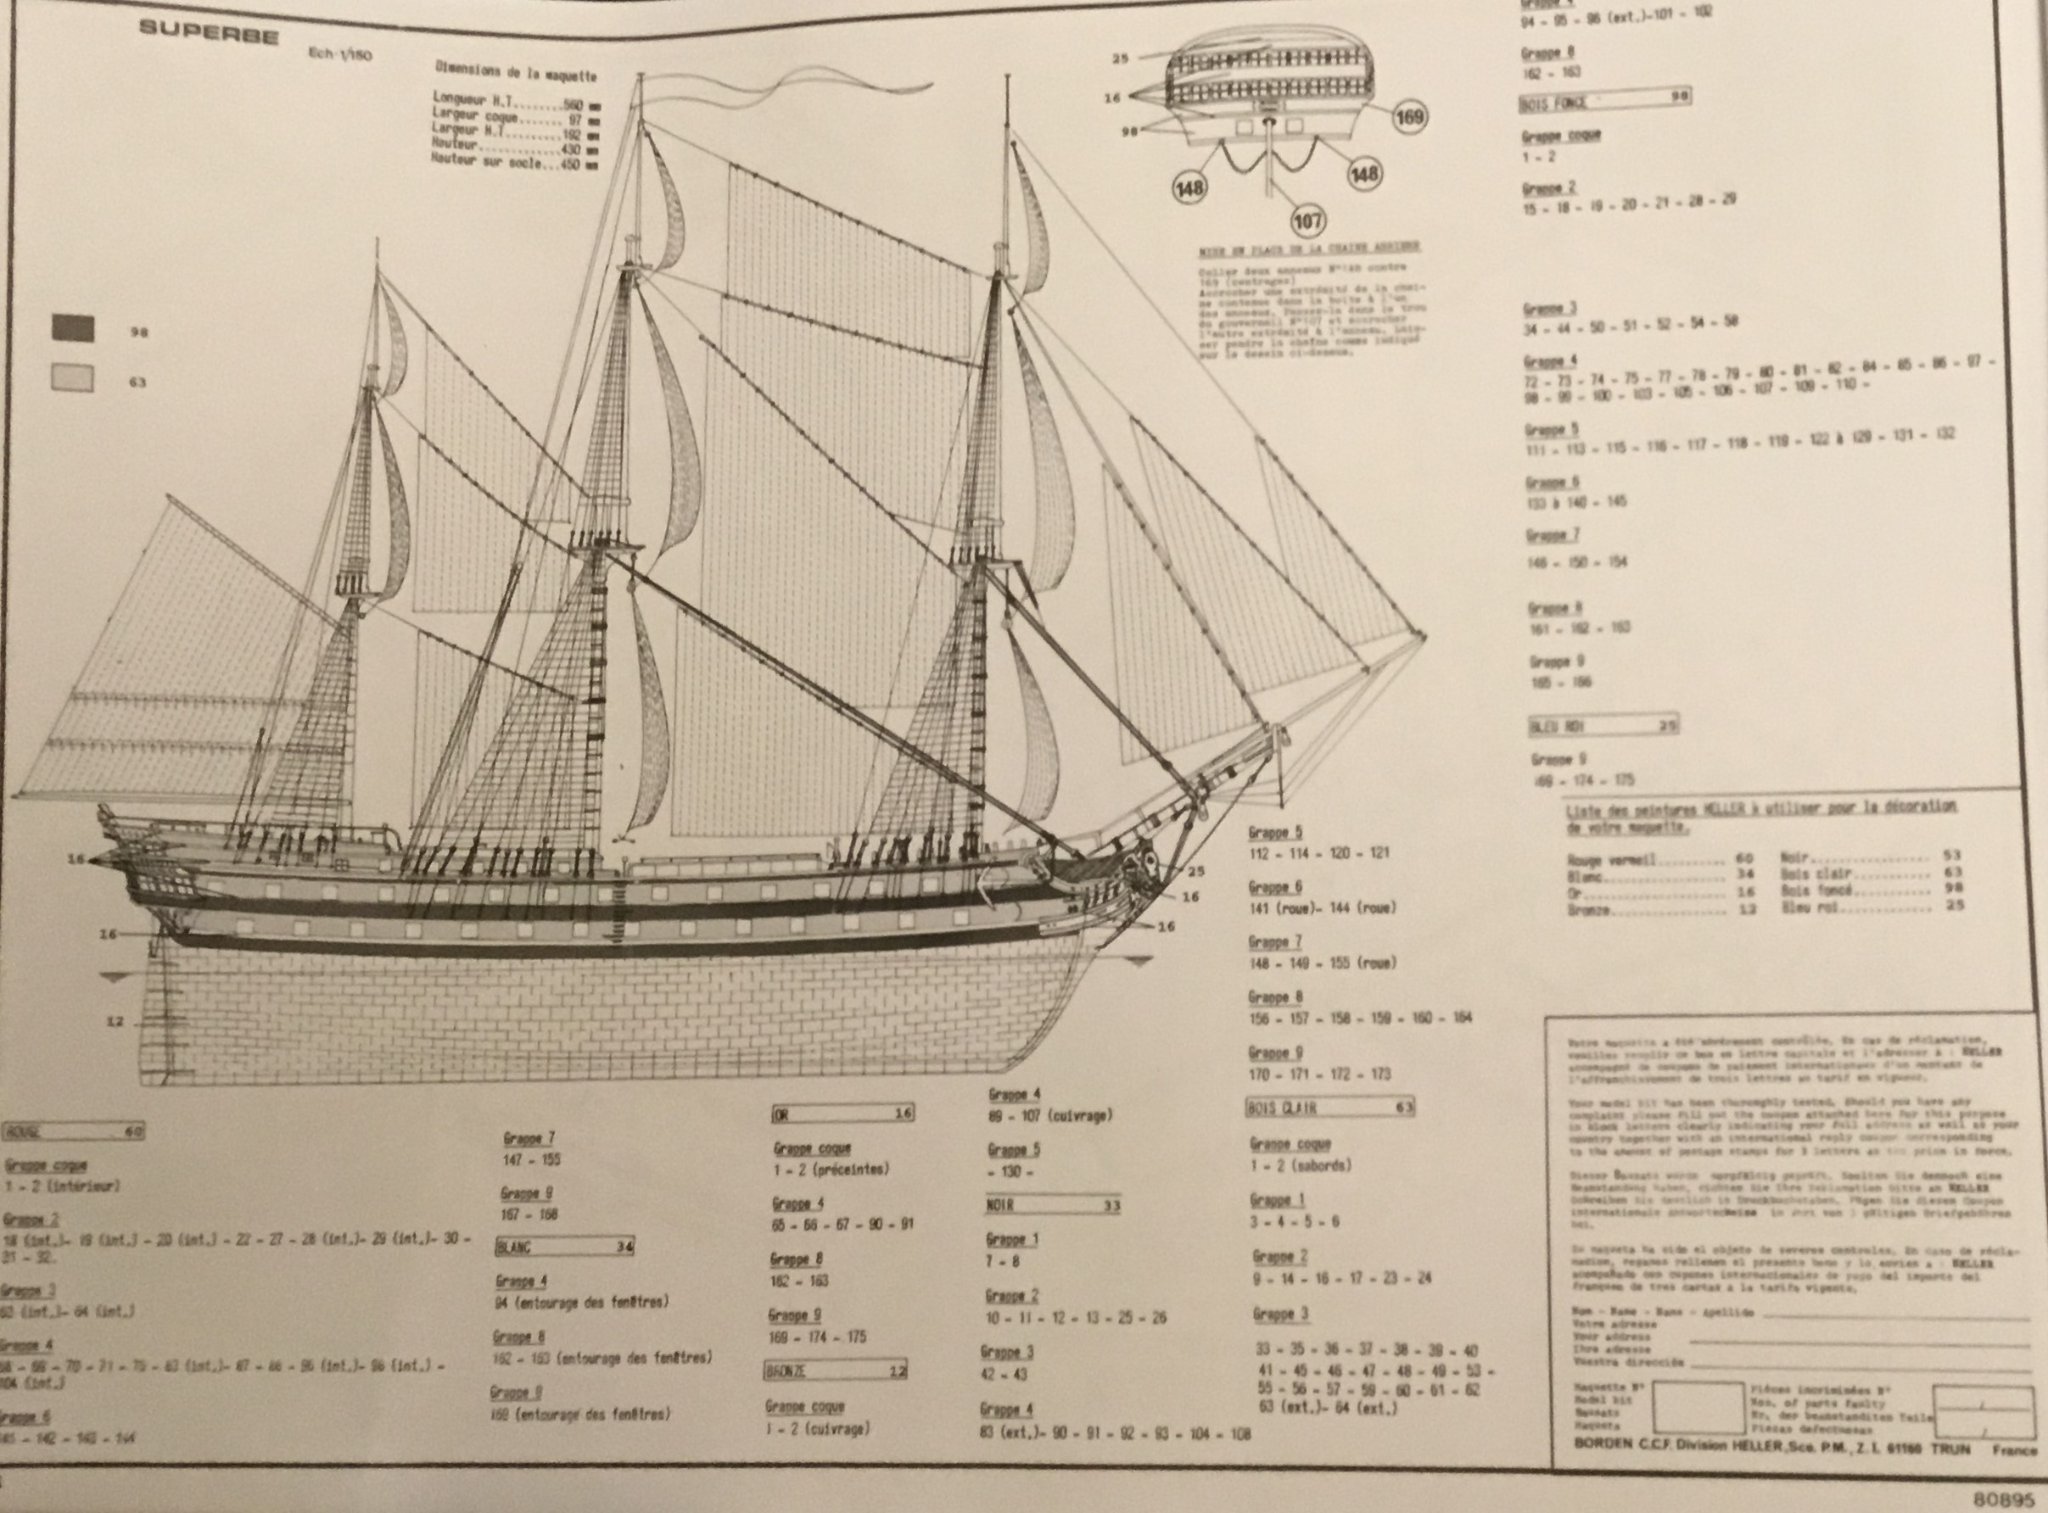
 After an 18 year paternity leave I am returning to model ships with Heller's 1/150 scale Le Superbe. I am a British-born Canuck who spent many days in the 1980s at the https://www.historicdockyard.co.uk/ waiting for the ferry to my grandparents on the Isle of Wight, and am a fan of all things RN/RCN. I will be completing the kit as HMS Spartiate as I imagine she may have looked at Trafalgar. For colours I plan to use this excellent model of HMS Vanguard, as I like the blue side railings, red on the stern, and the yellow ochre sides (rather than the orange used until recently on HMS Victory). The instructions are in French, but they have an English list at the back. Still, as a good Canadian I have a smattering of French language buried away from my university days that may prove useful. I've chosen HMS Spartiate as my goal as she was one of the approx. twenty French Téméraire-class captured by the British, but one of only two that served with Nelson at Trafalgar. She then went on to serve as British flagship to the South Atlantic squadron well into the 1830s. A good, long history of service, unlike the actual Le Superbe.
-
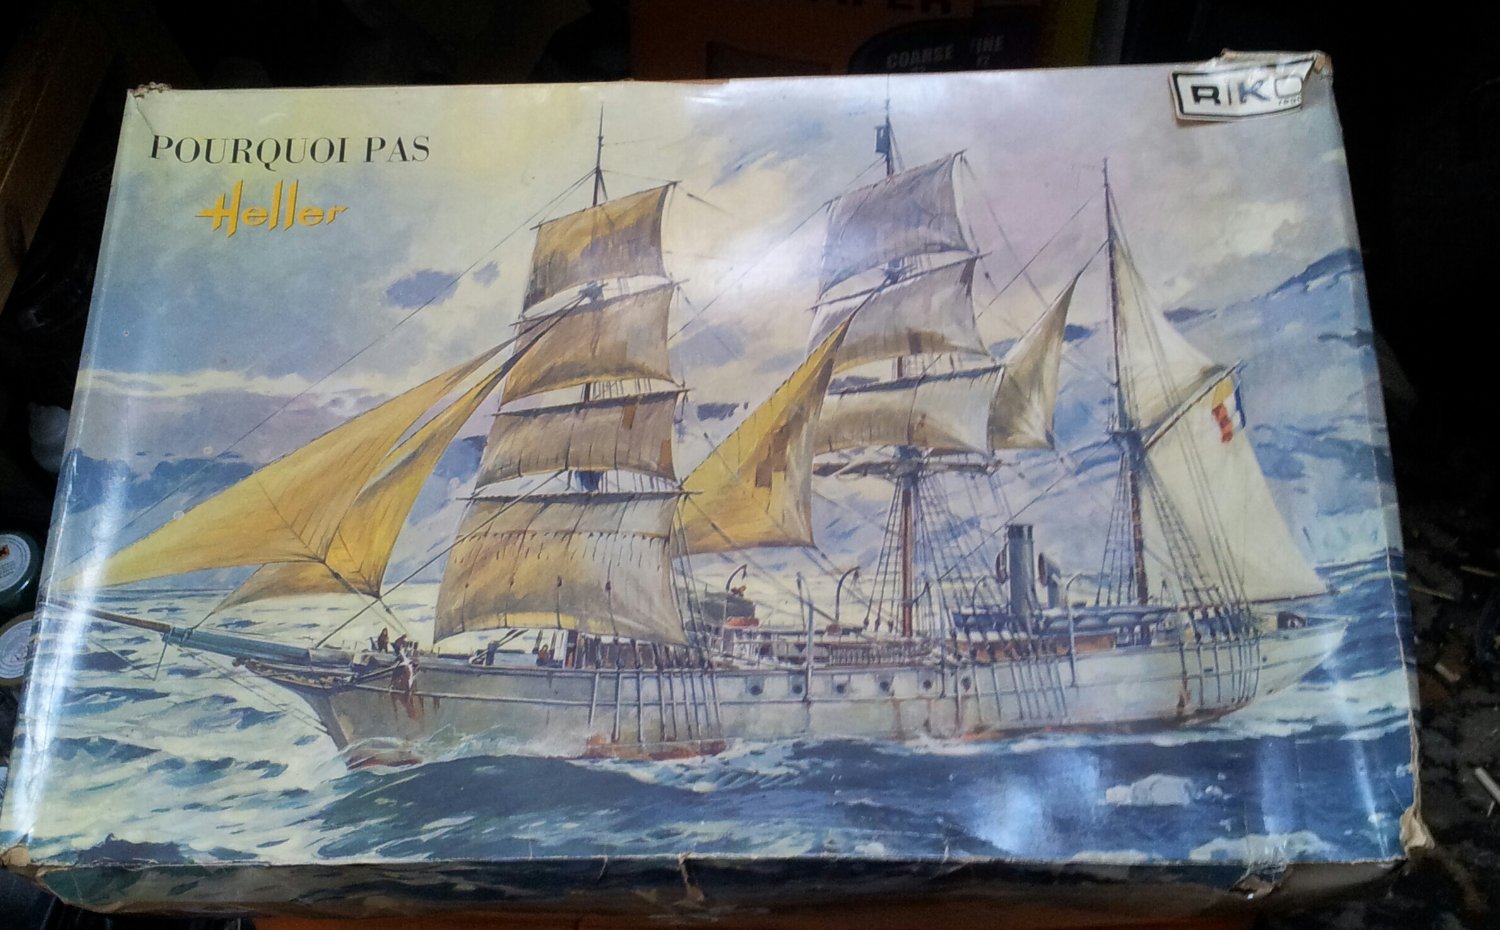
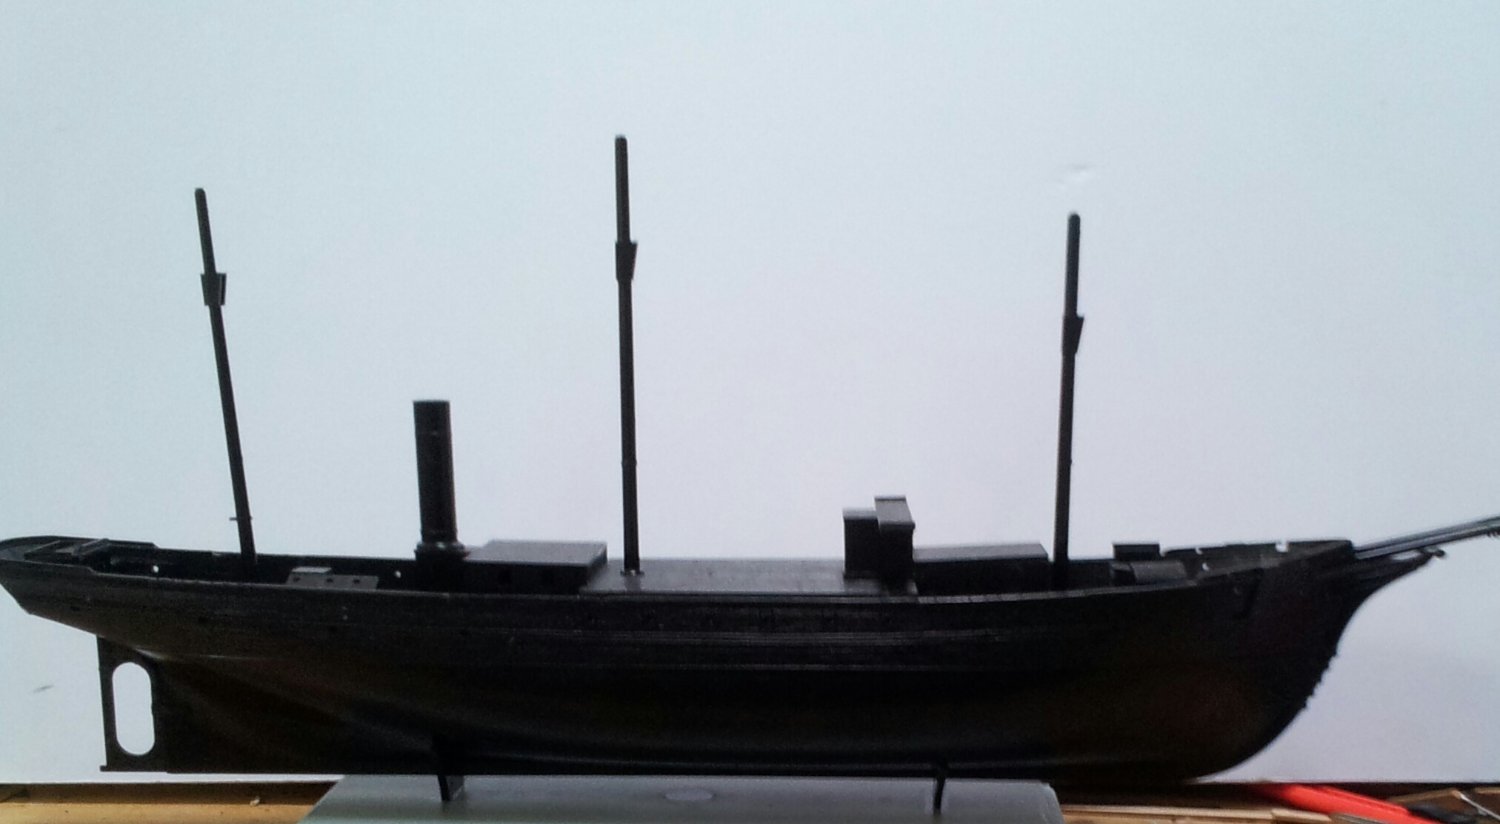
 my interest in polar exploration vessels continues! seen this on a popular auction site and couldnt resist😁. While i will be using the kits hull and superstructure i will be replacing the masts and yards with walnut dowelling and will use model aircraft tissue for the sails (first time doing this so heres hoping)! Everything was in the kit except for the stand and transfers and the seller had printed out a copy of the Zvezda instructions who took over this kit! Pic 1- box art pic 2 and 3 inside the box pic 4- progress so far and plastic kit lower masts pic 5- superstructure sub assemblies pic 6- with walnut lower masts cut to length The hull was warped and needed a lot of clamping while the glue set -probably down to where the kit was stored and the box looks like it was under a bit of weight- there are a few ejection pin marks to cure on some of the roofs but overall mouldings are good. Take care all Keith

- 20 replies
-
- 5
-
-
- Pourquois Pas
- Heller
- (and 1 more)
-
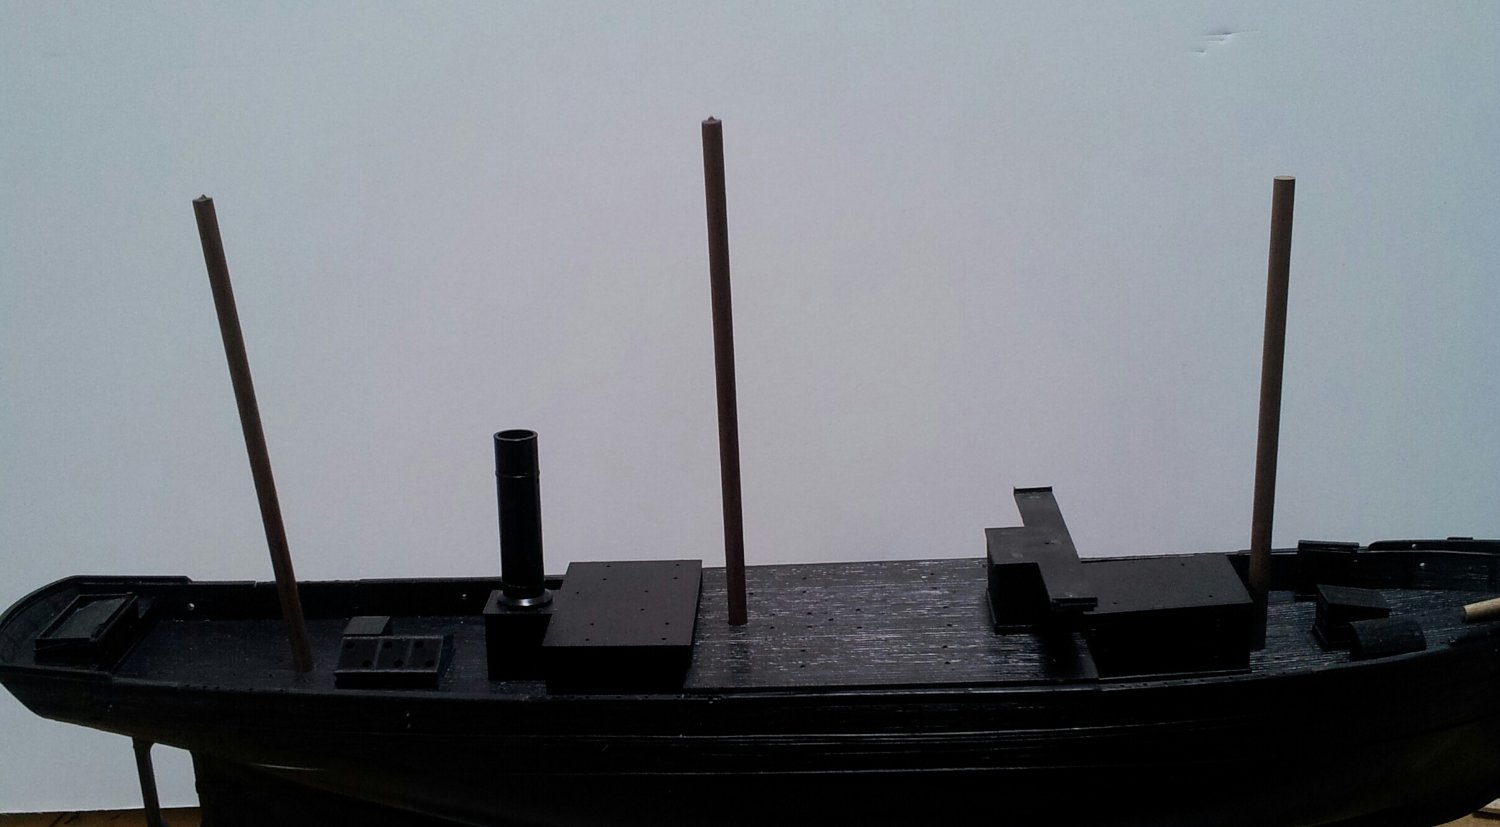
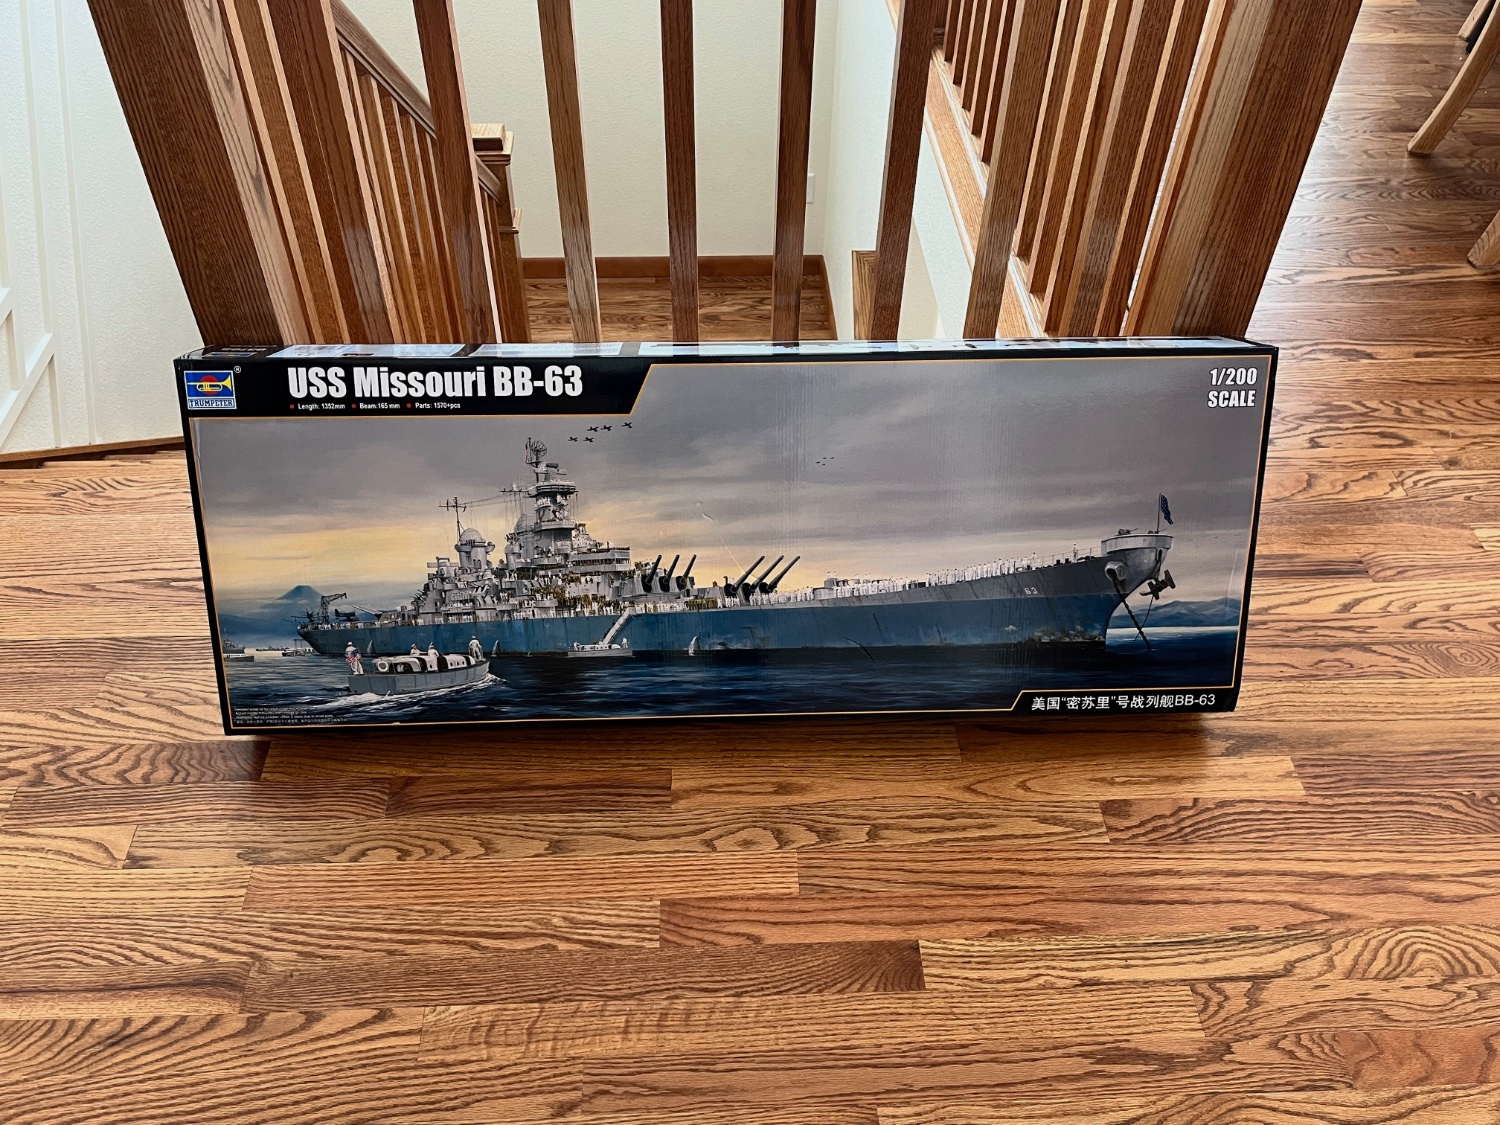
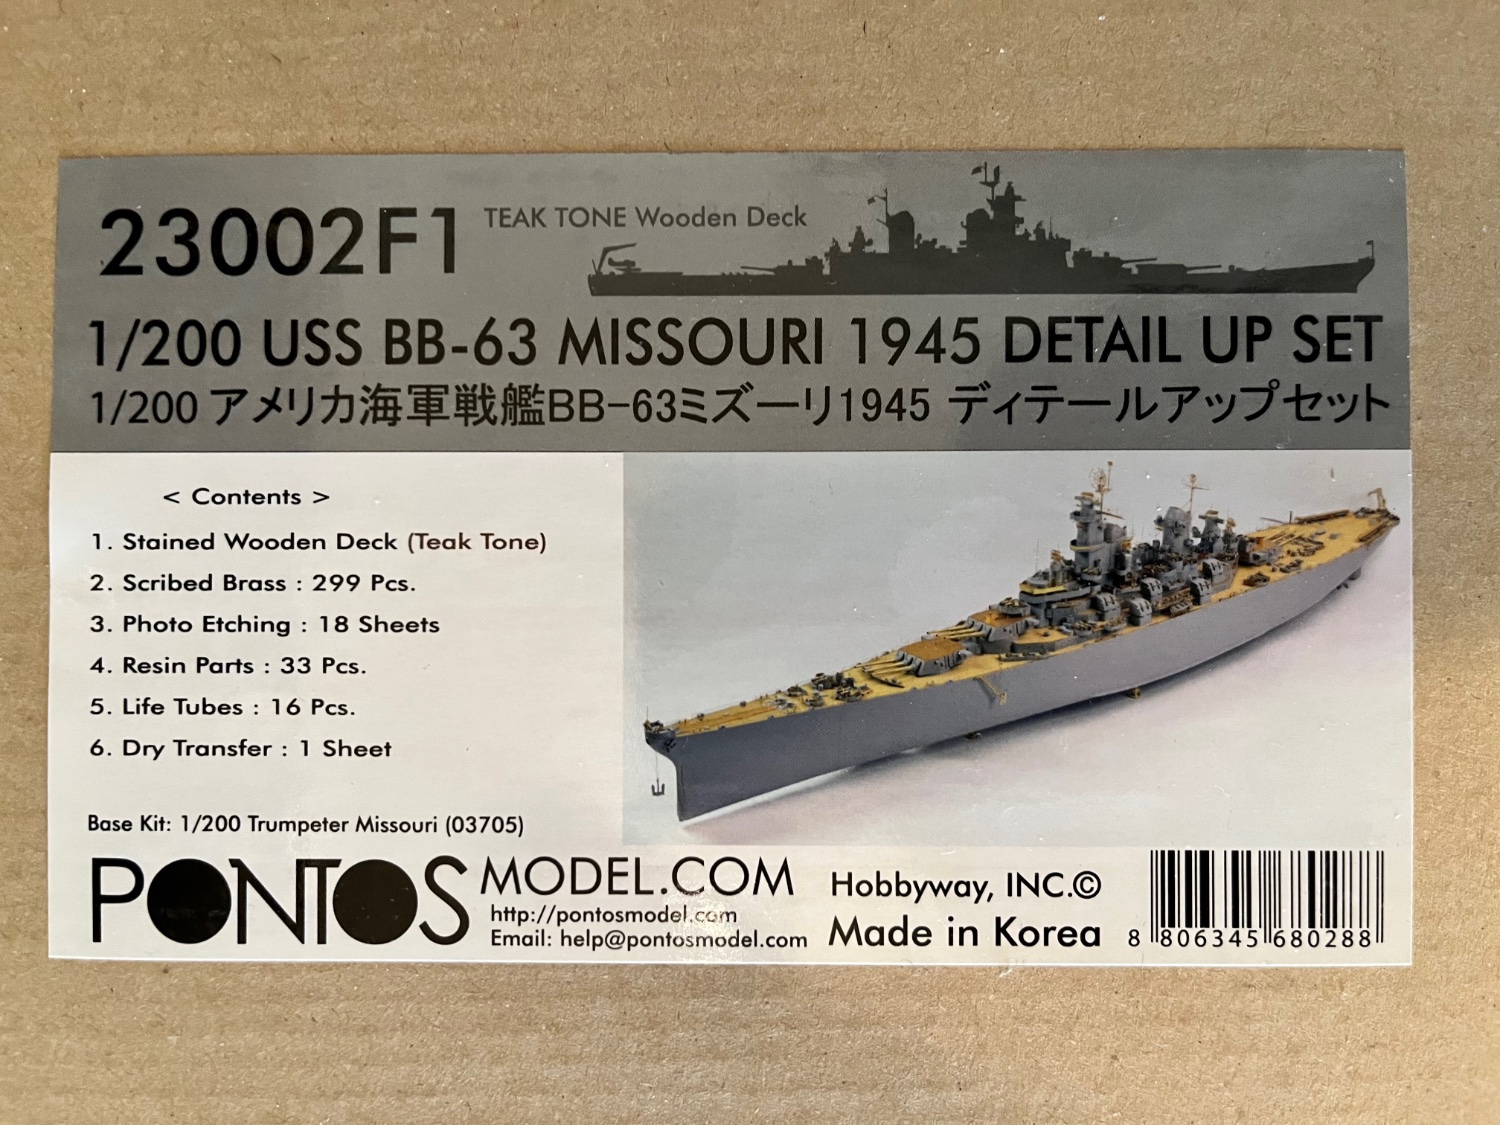
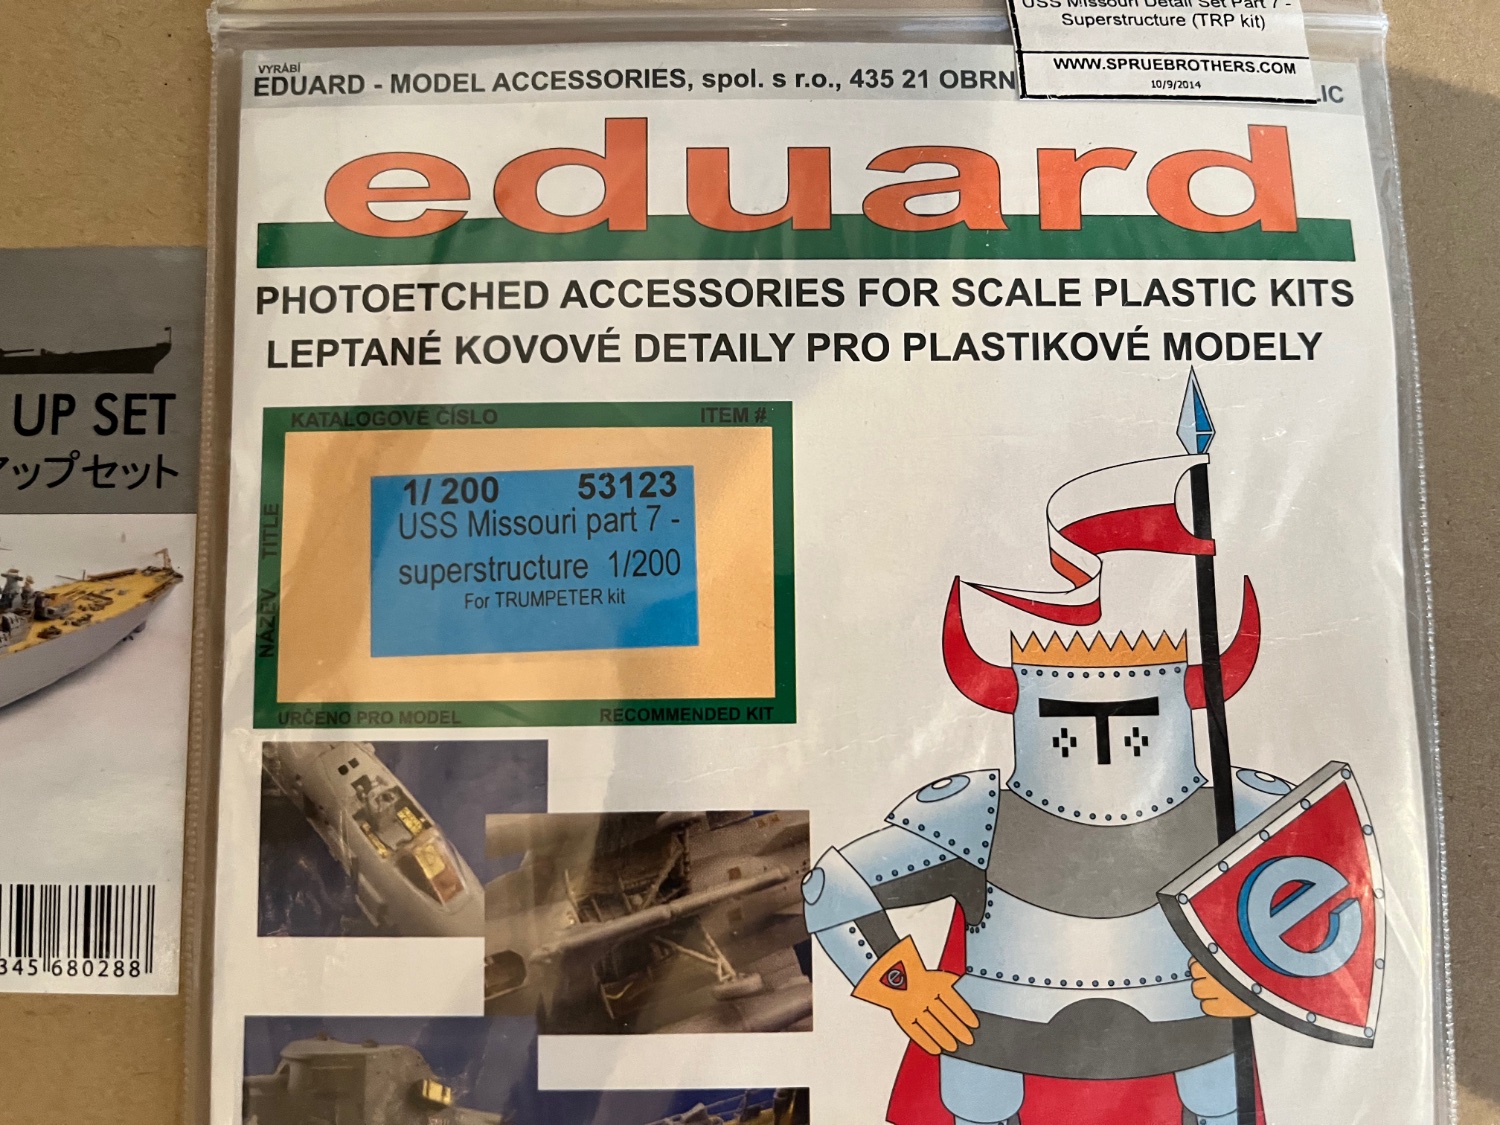
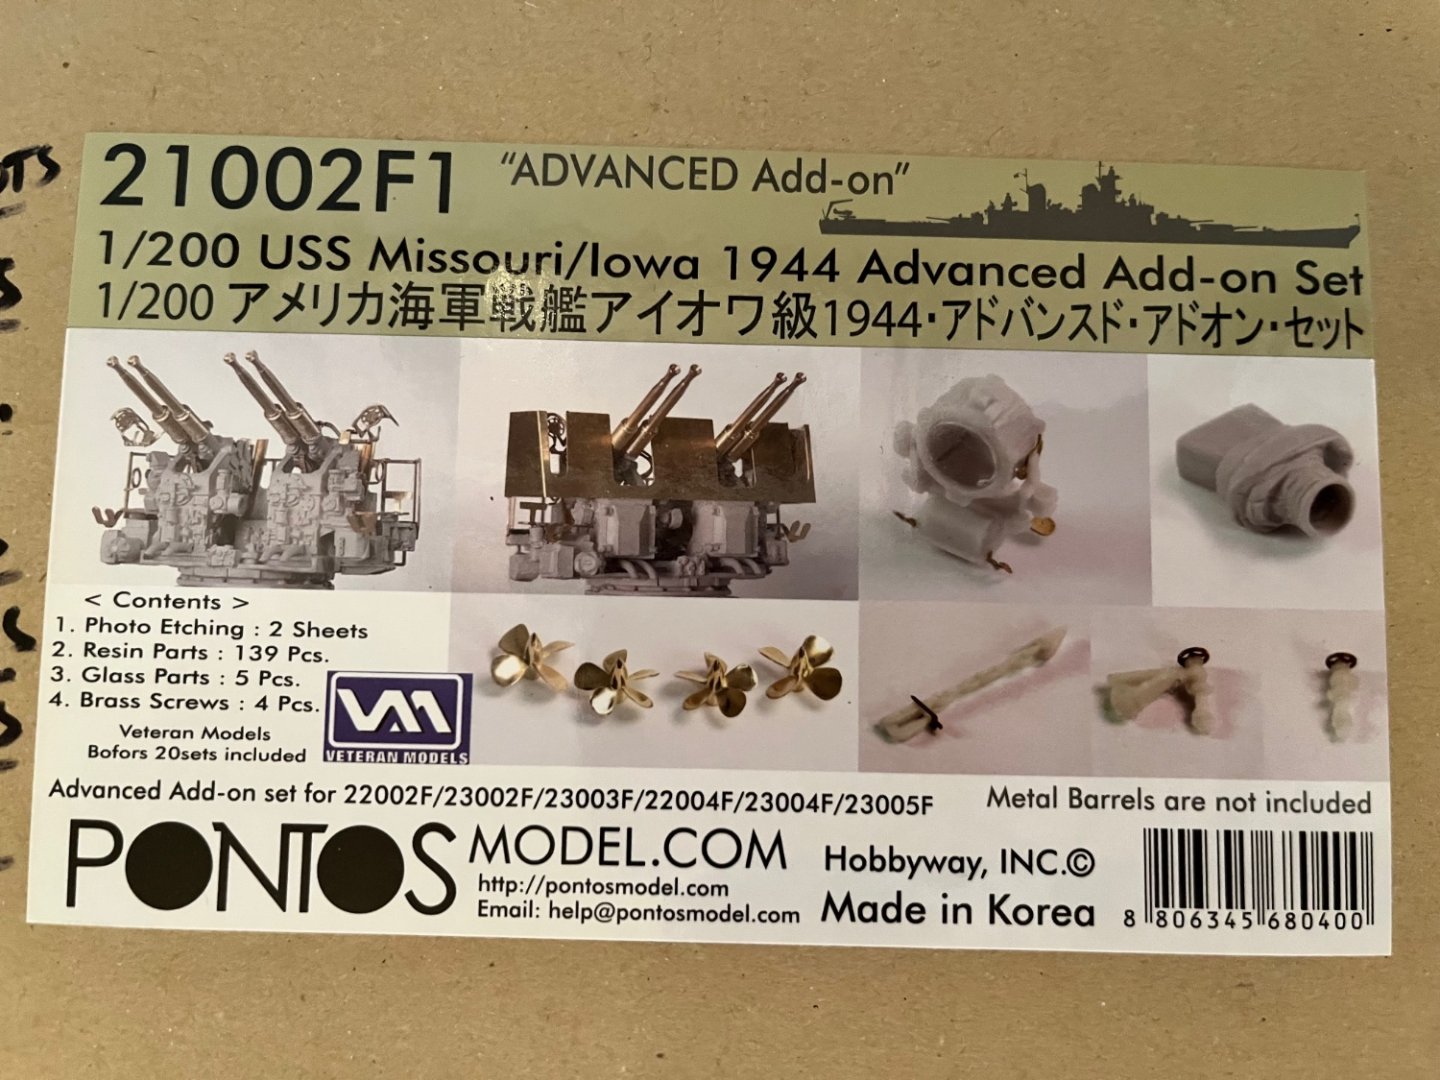
 I chose this model because I built the USS Constitution, what I consider to be one of the first US battleships and this is the last US battleship. I strive for museum quality construction so I needed a model with plenty of add-on kits and large enough to show the fine detail of the ship. In addition to purchasing the kit itself I purchased the following: 1) Pontos 23002F1 - which includes the wooden deck. 2) Pontos 21002F1 - which includes the bofor detail. 3) Eduards Part 7 - which I got specifically for the air intake grills.
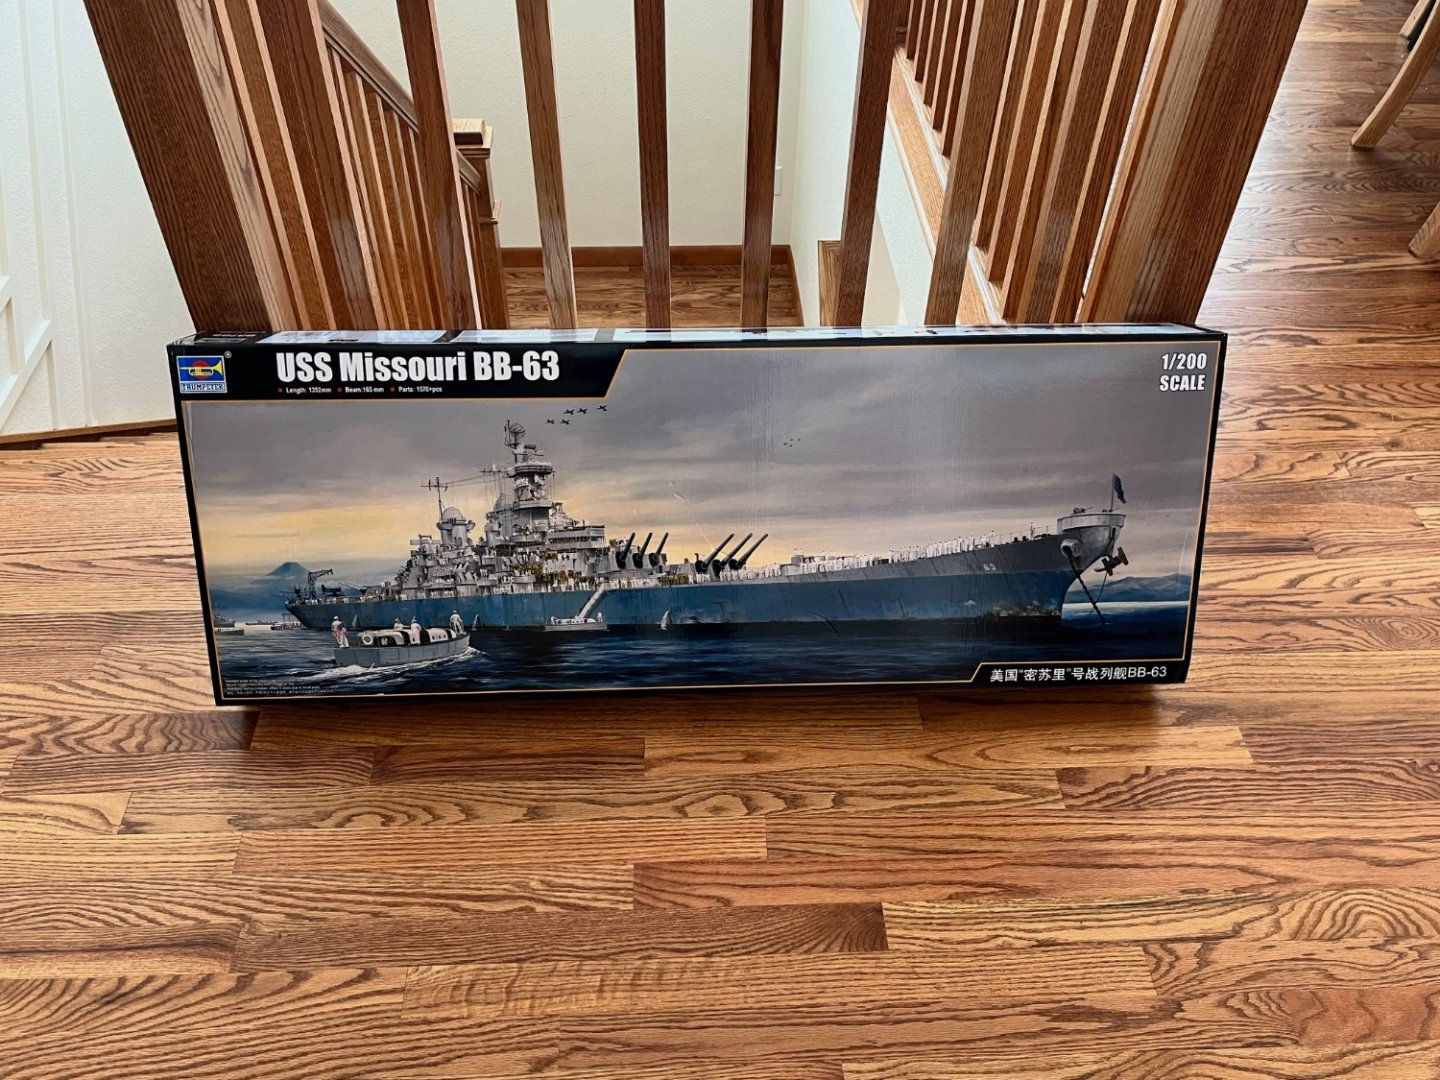


-
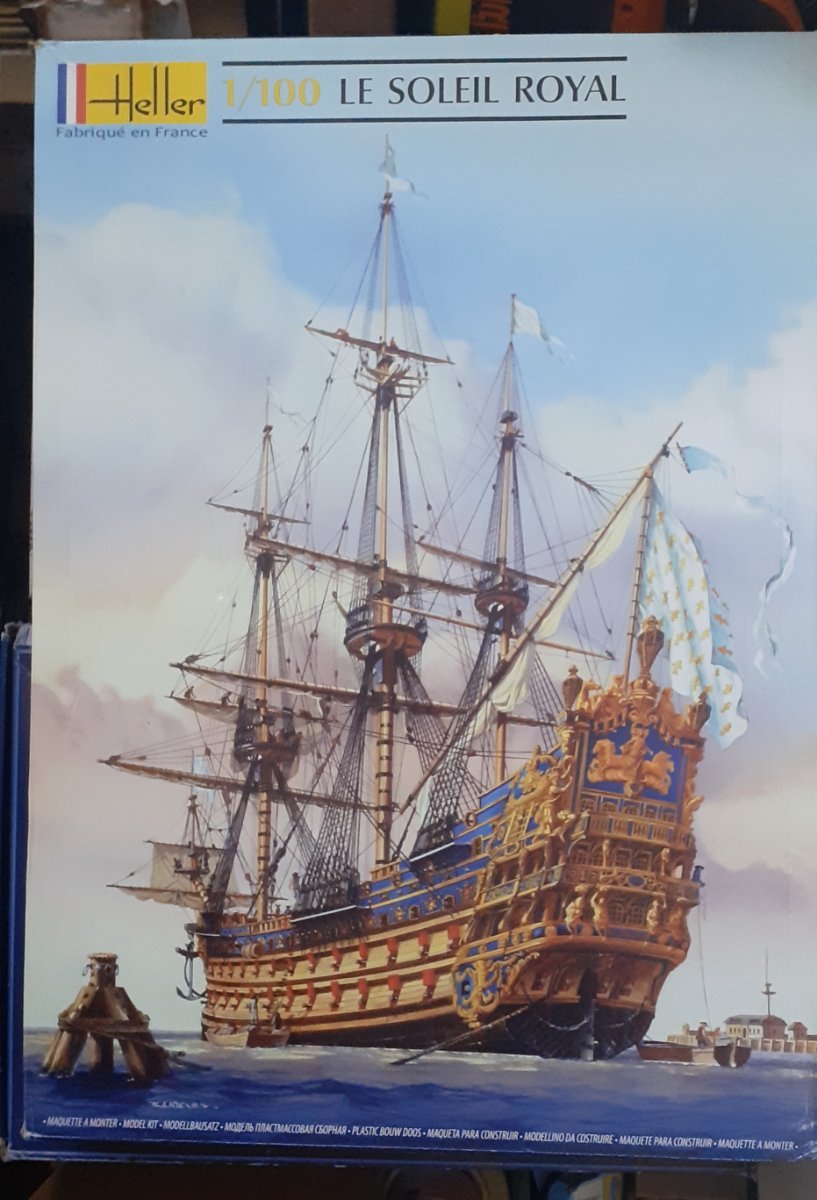
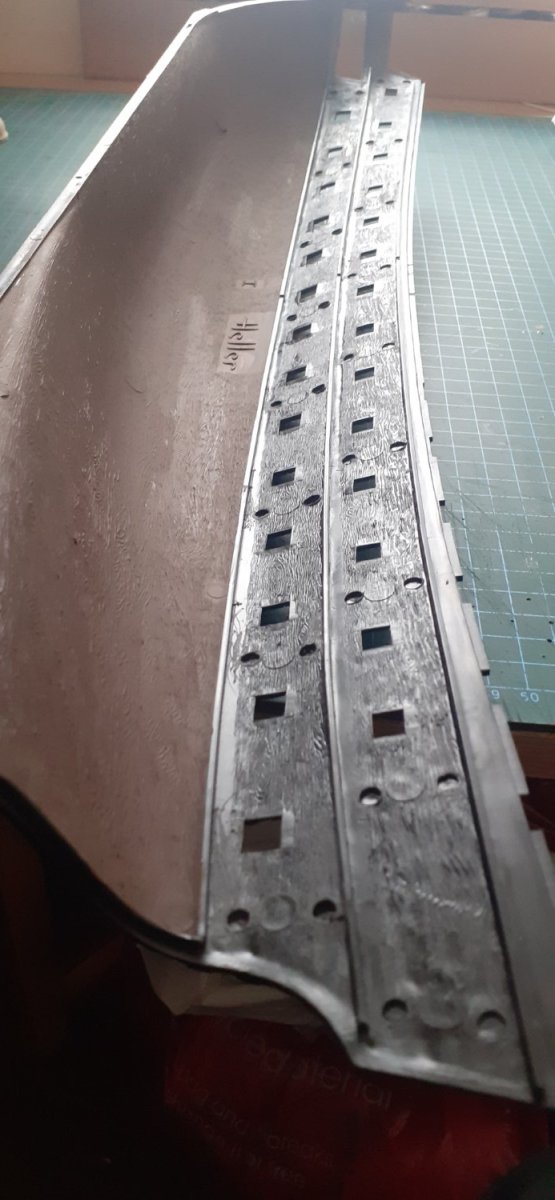
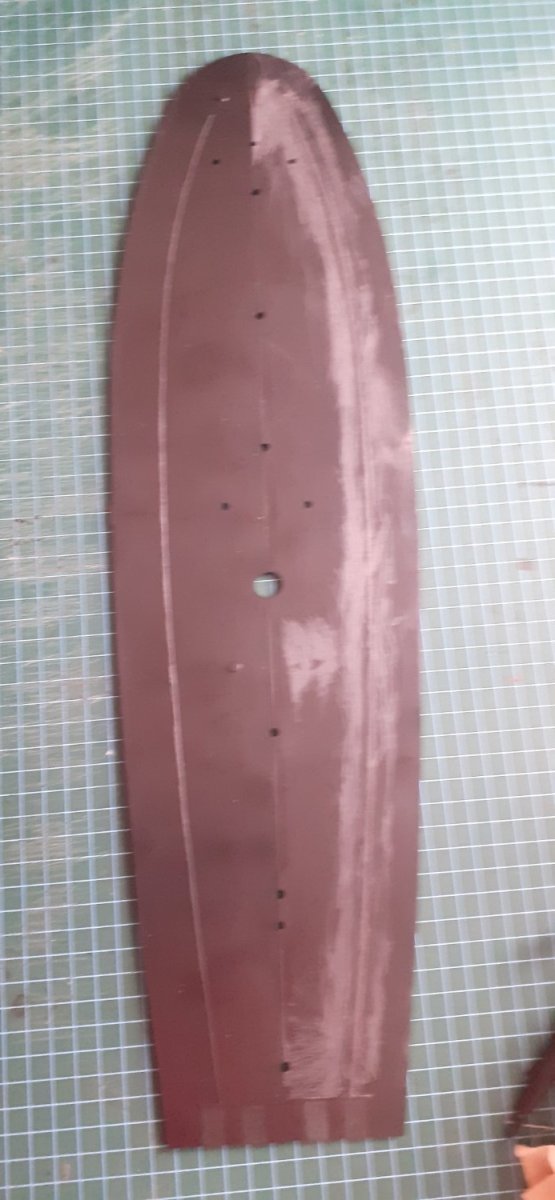
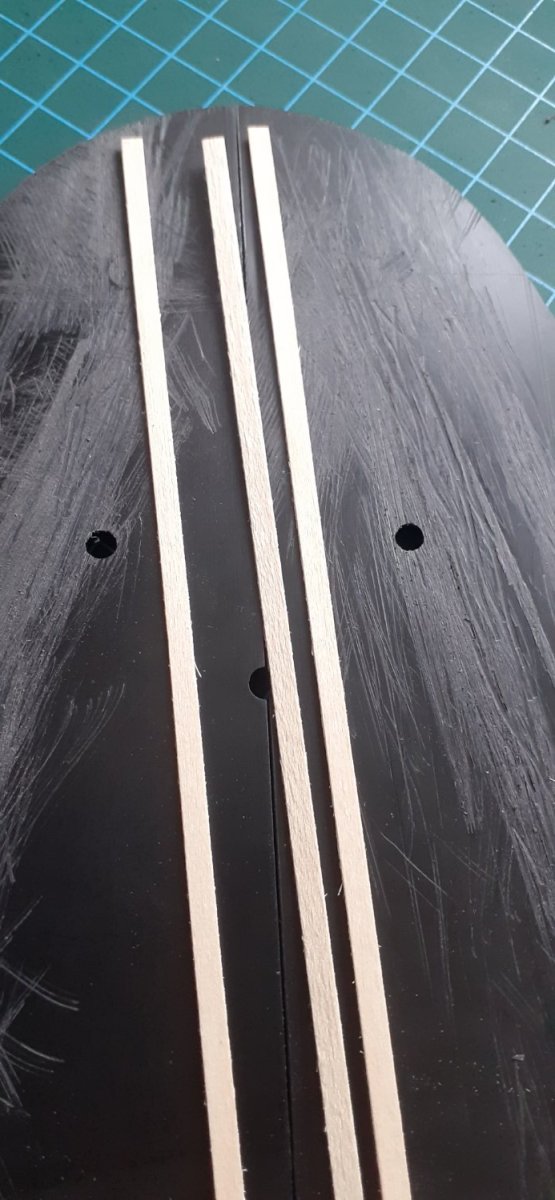
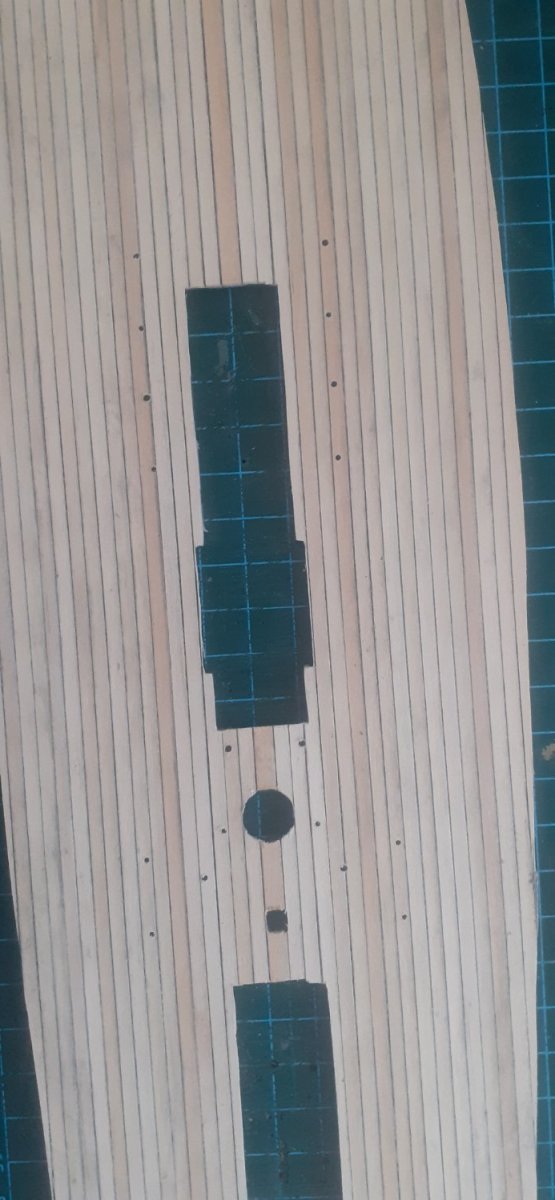
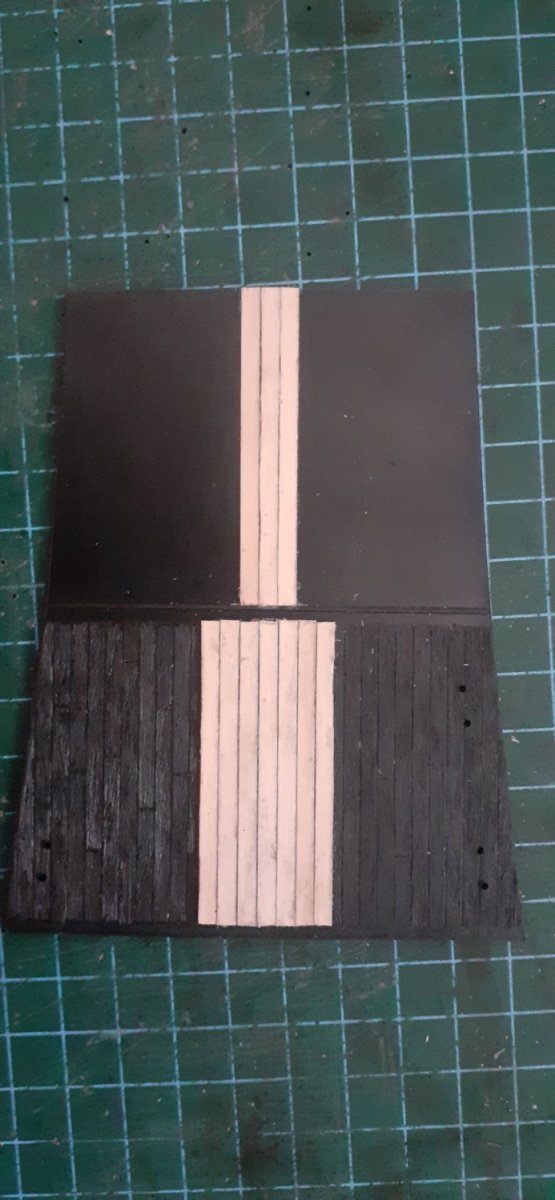
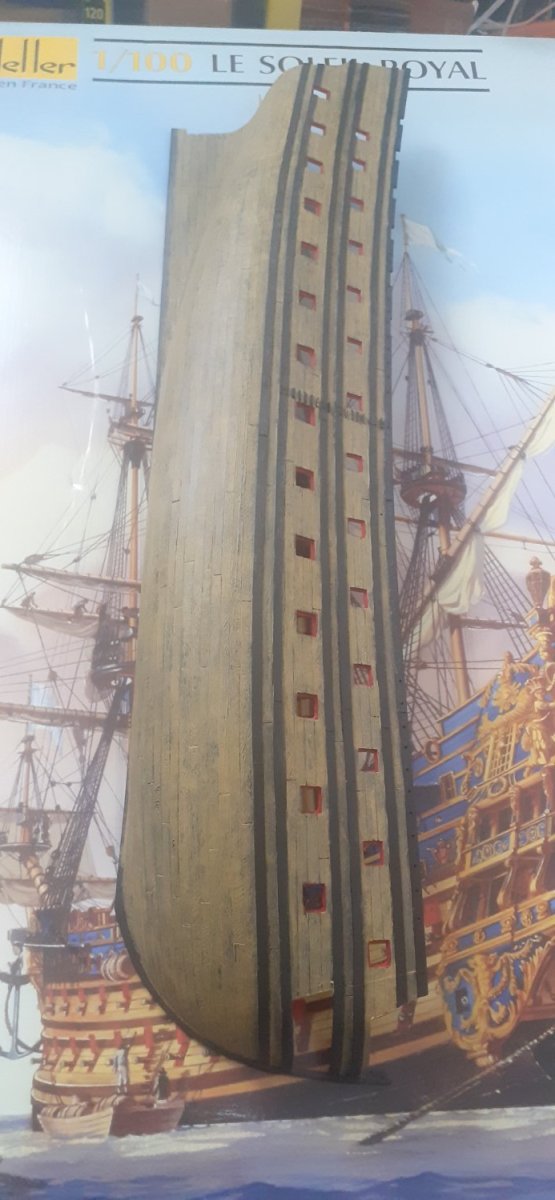
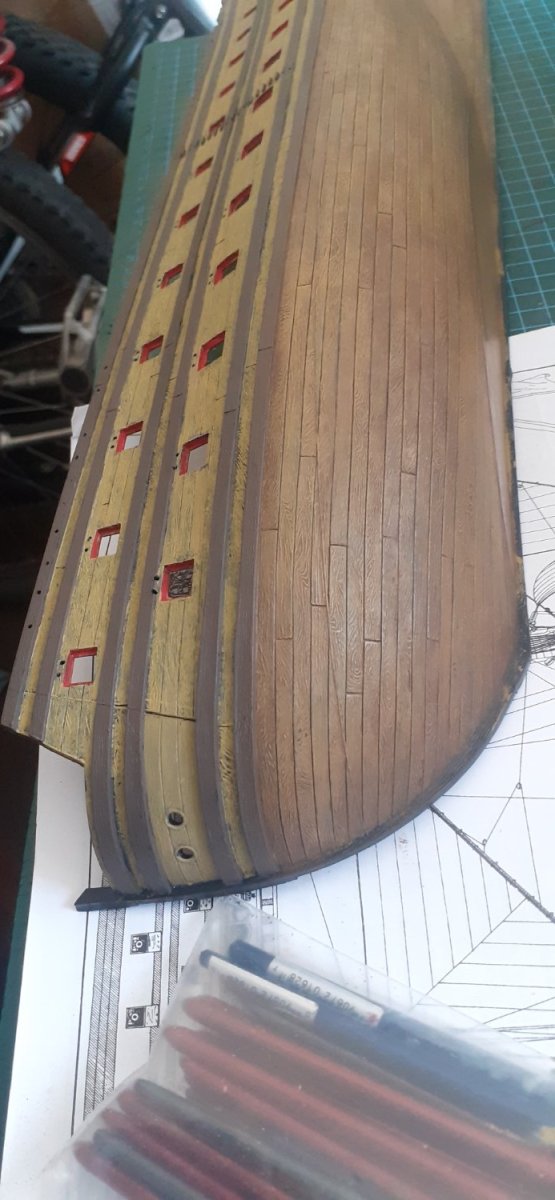
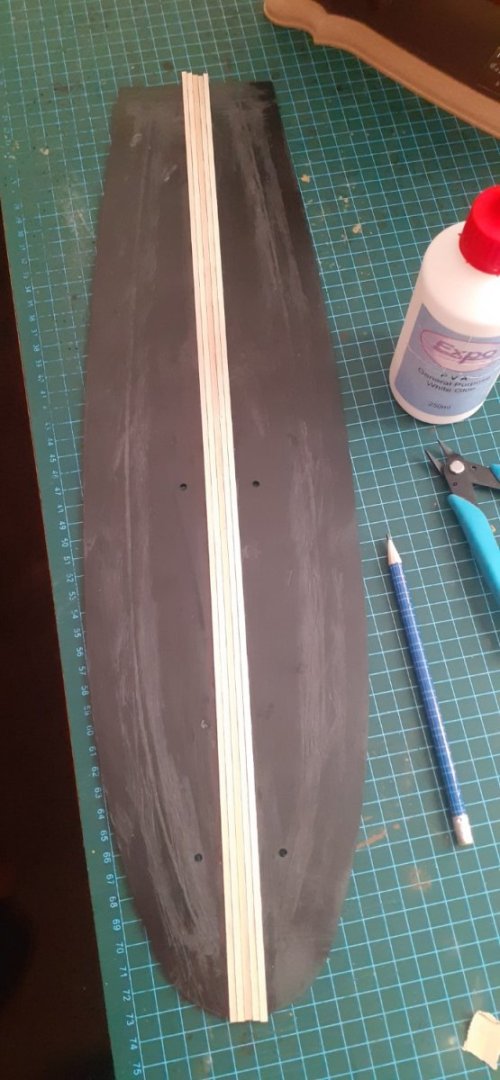
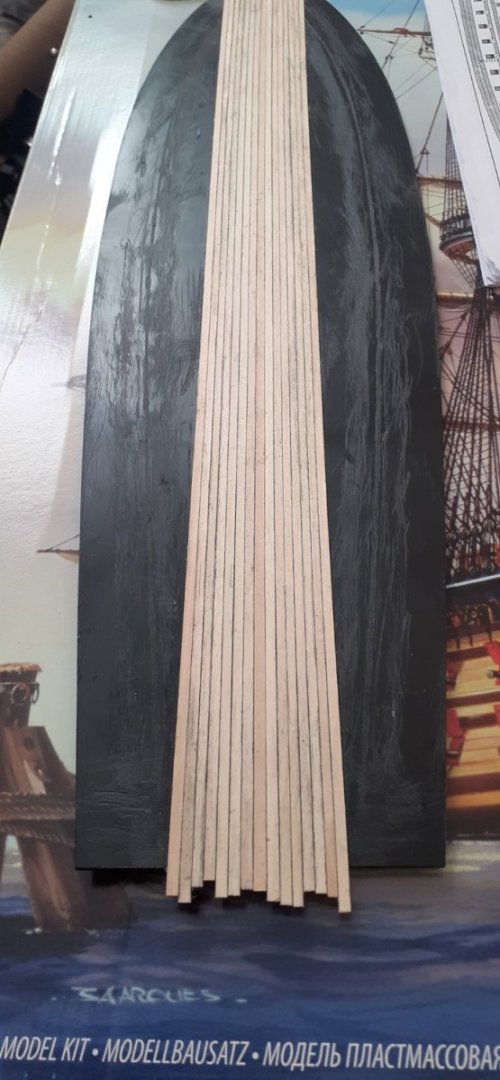
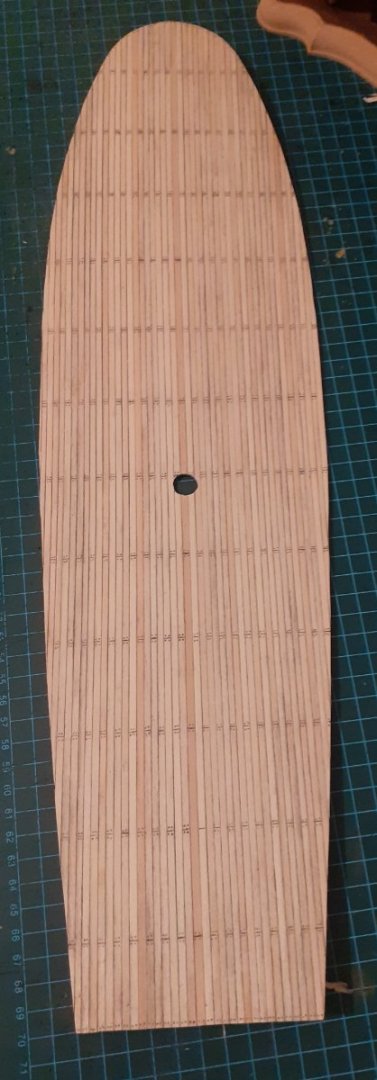
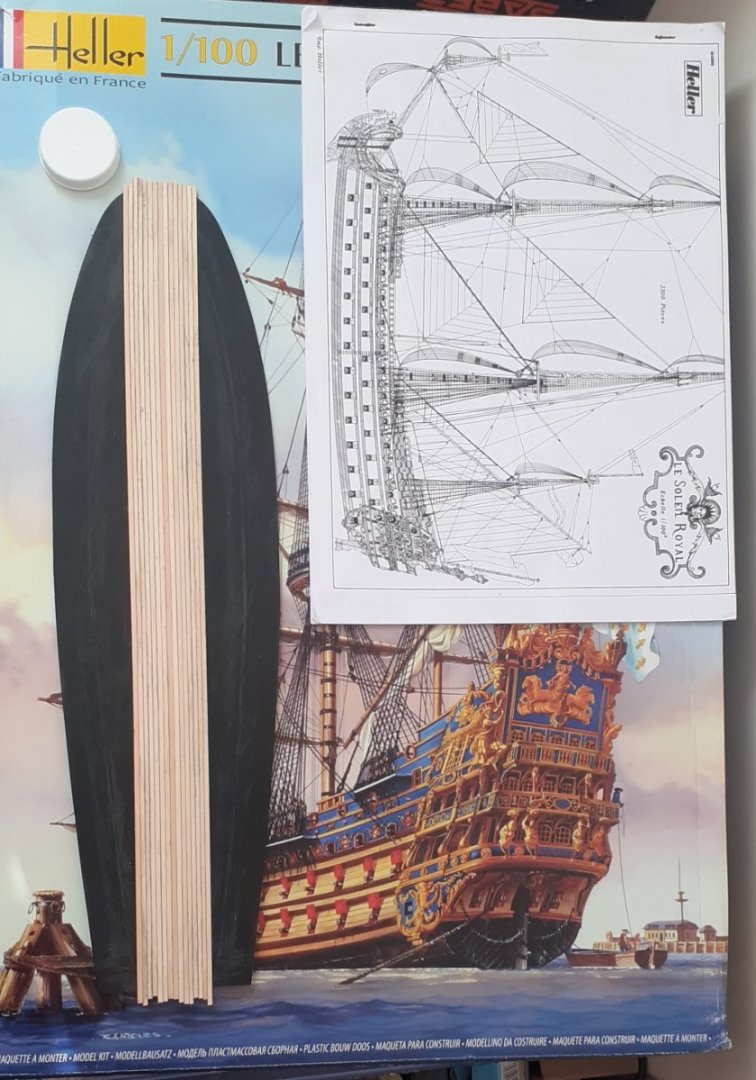
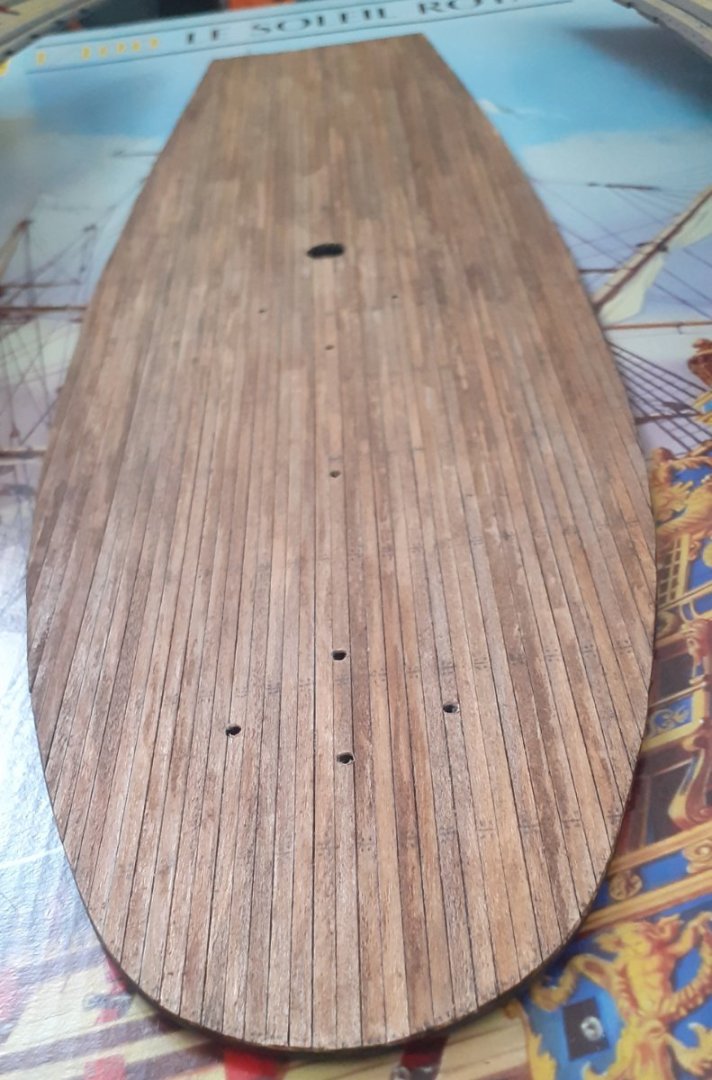
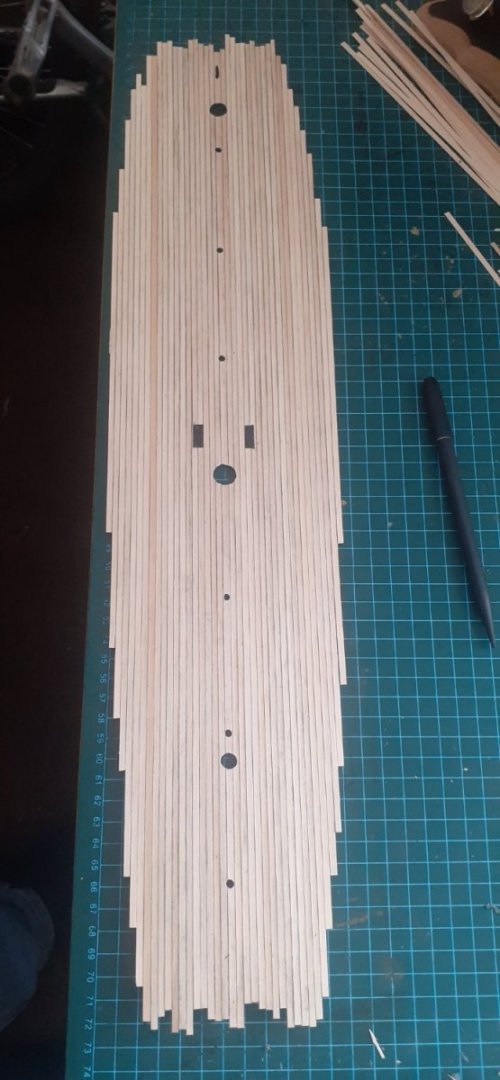
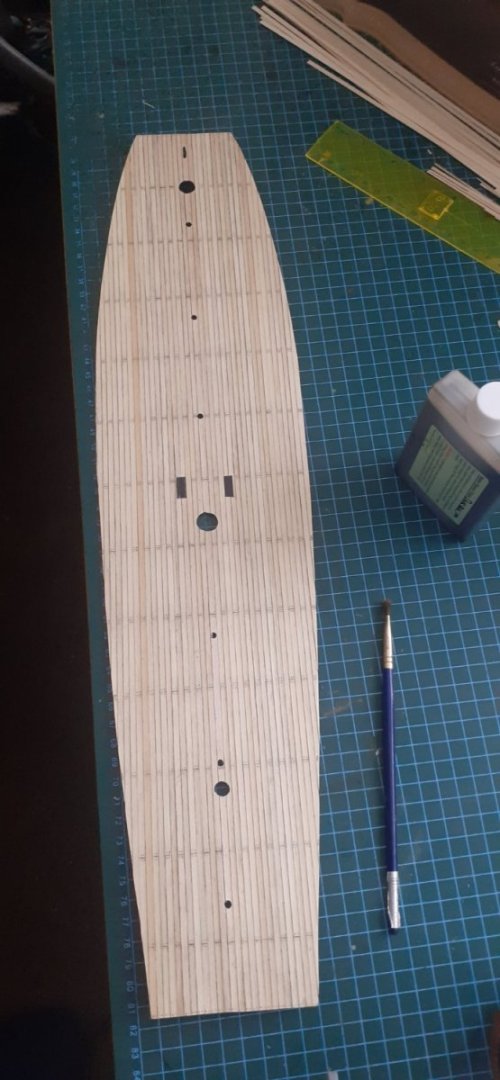
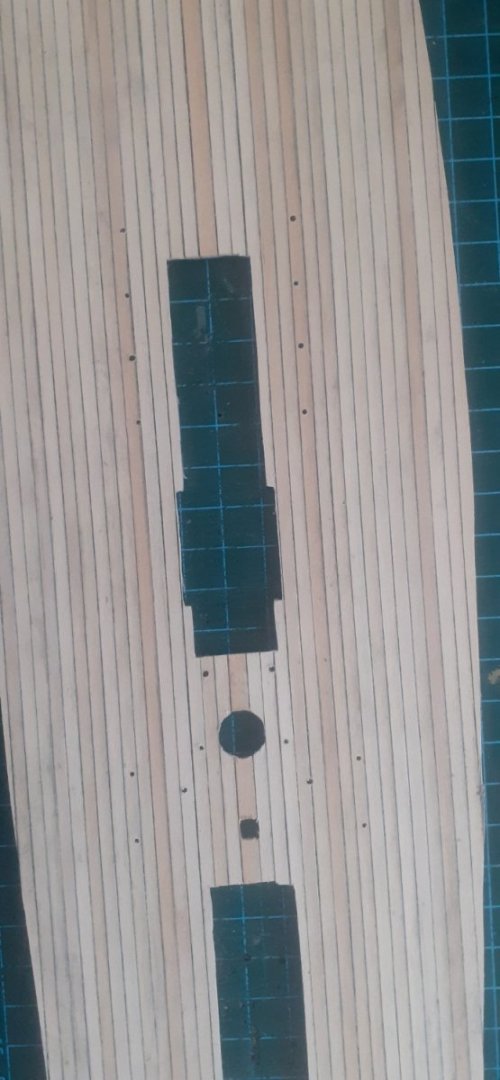
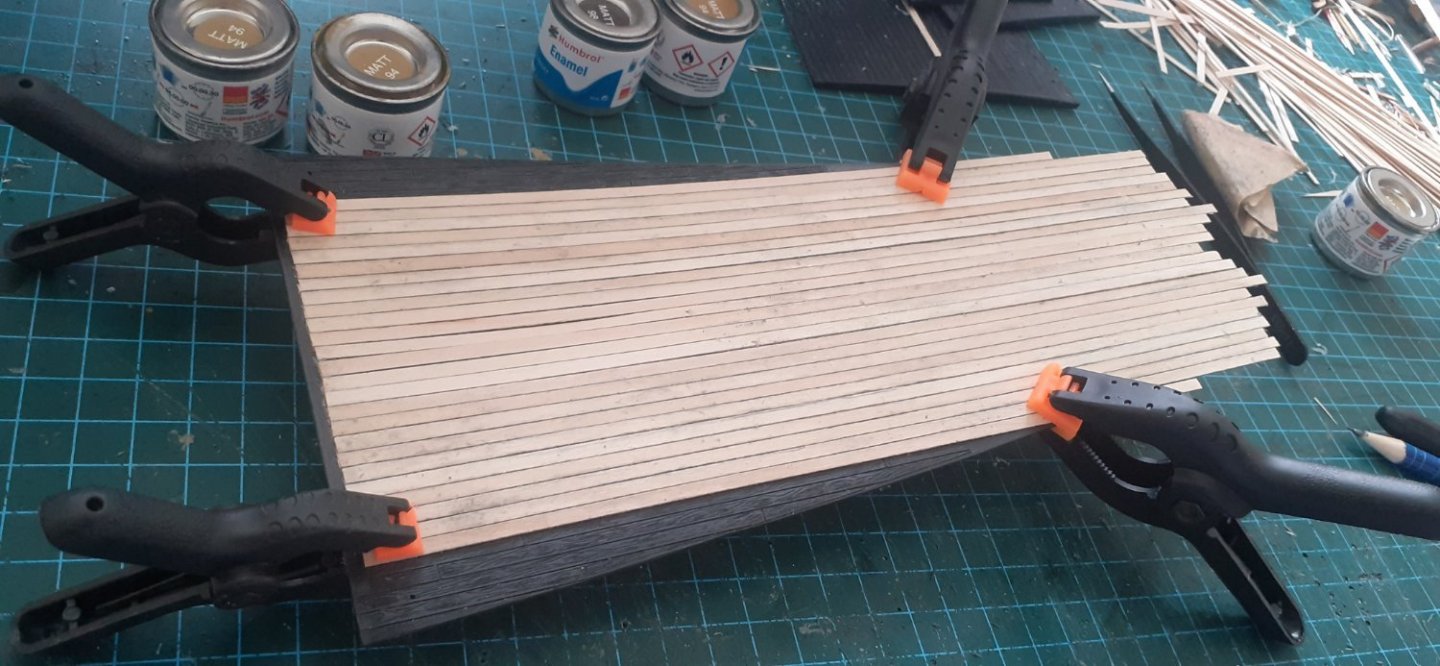
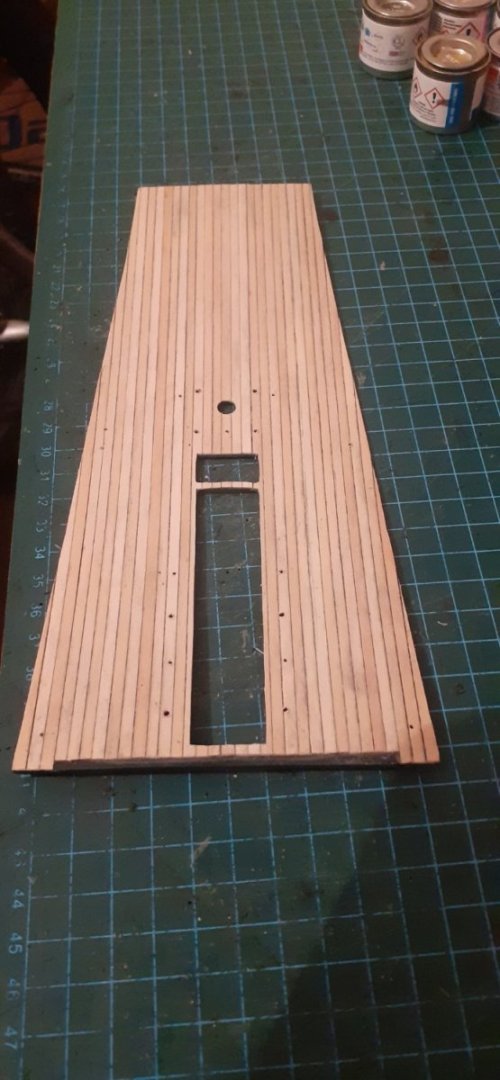
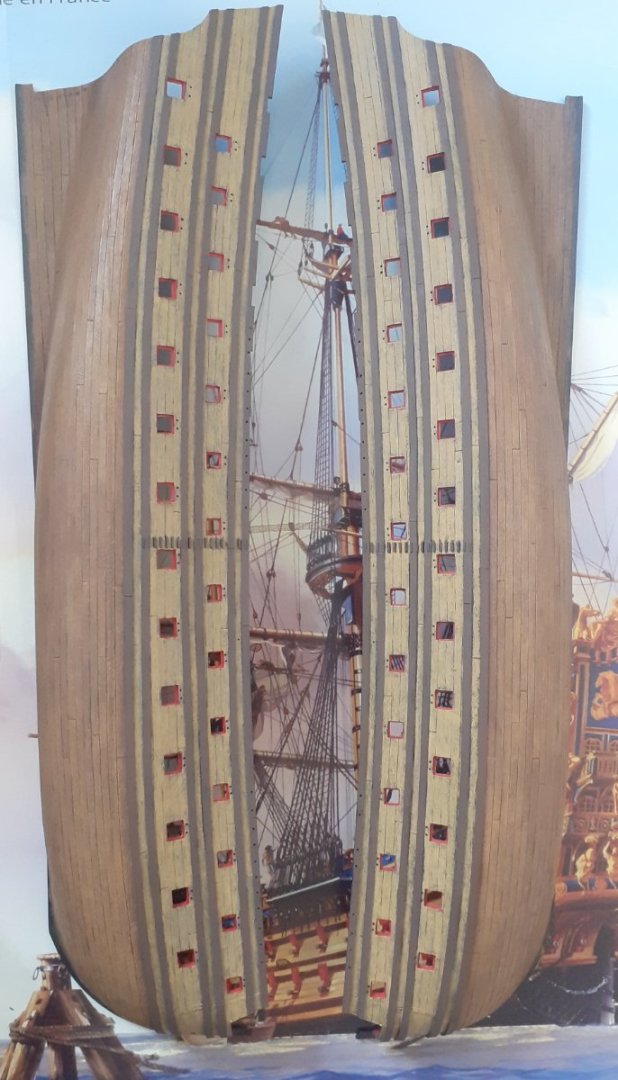
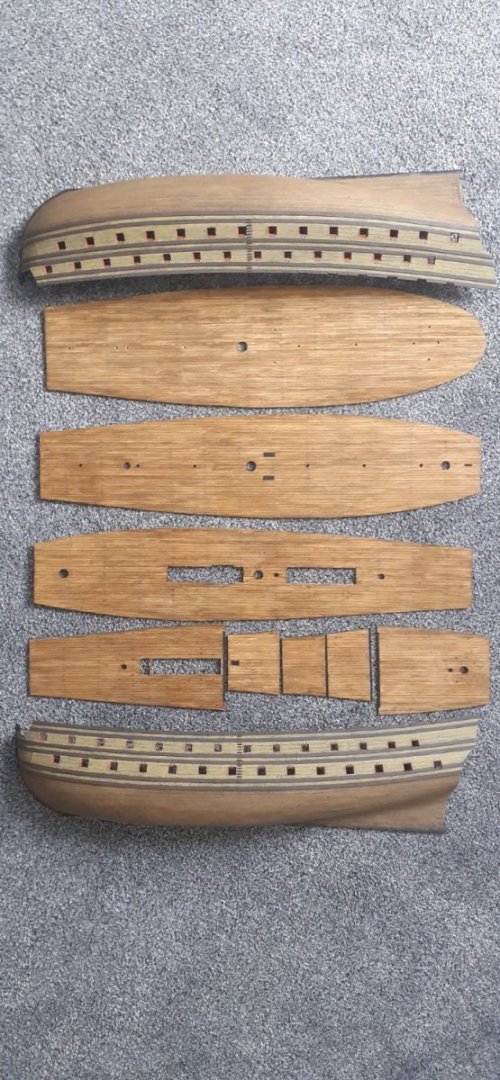
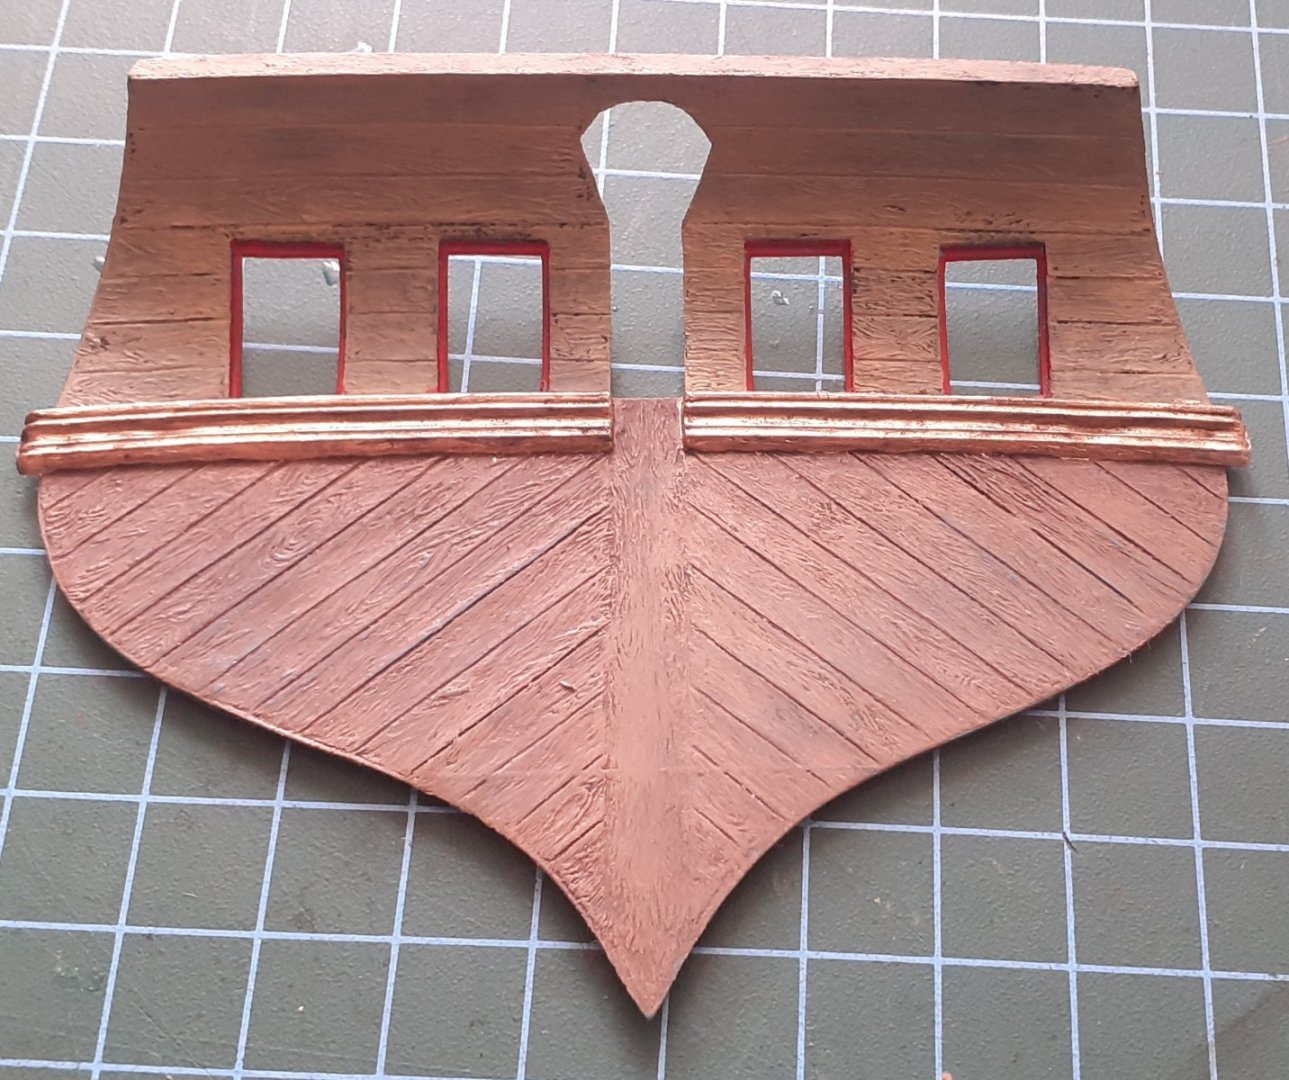
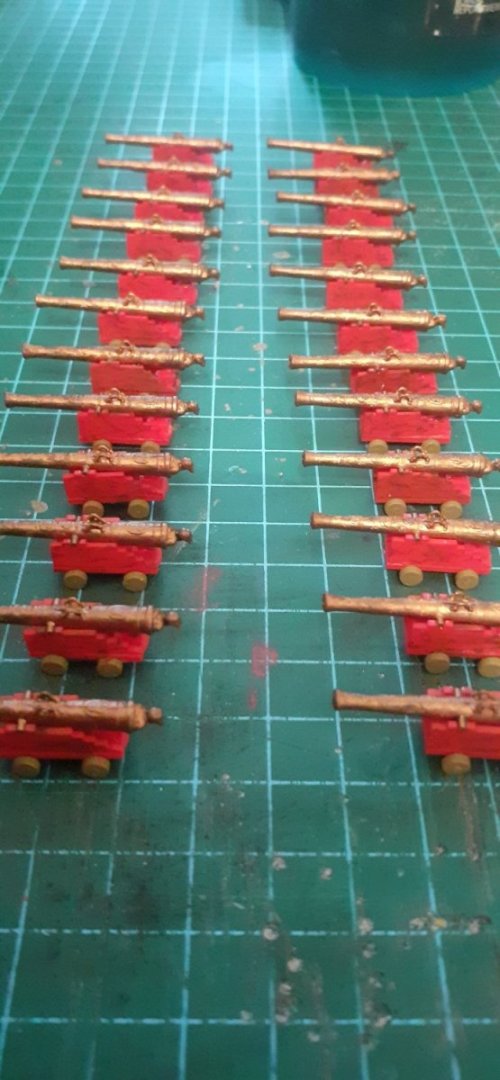
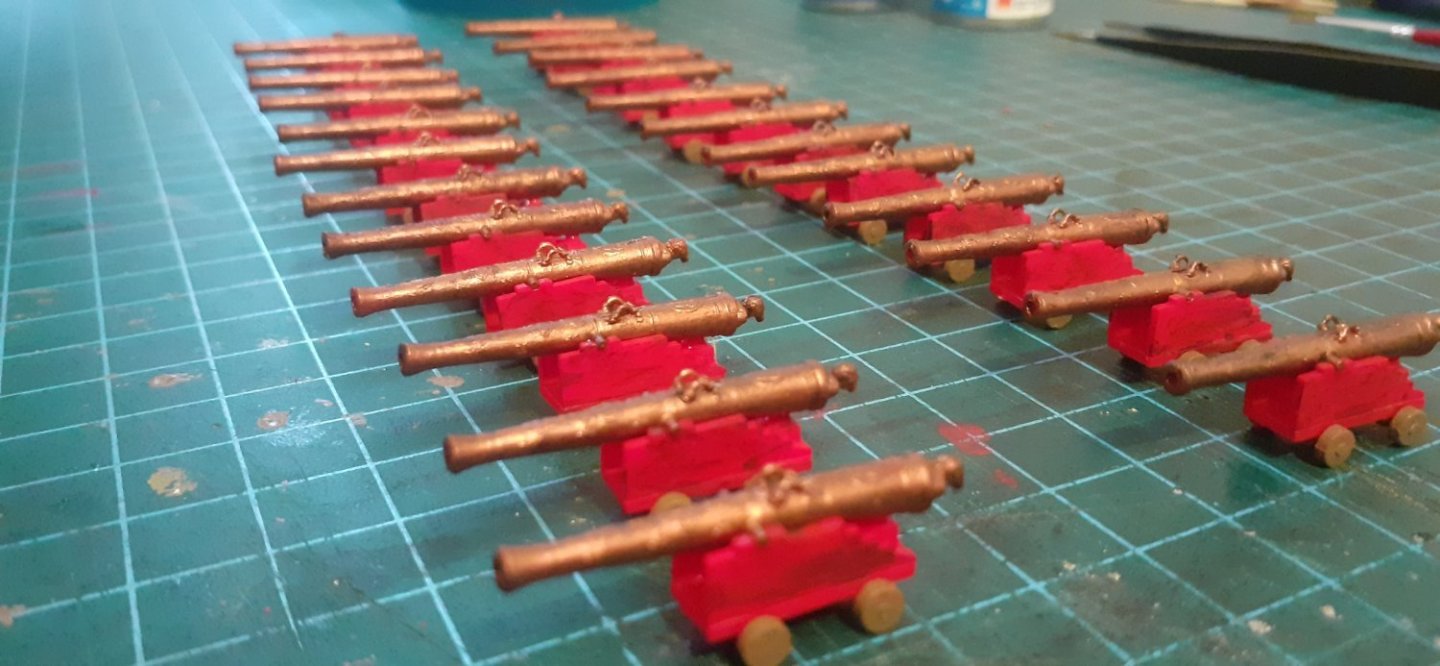
 SOLEIL ROYAL - HELLER 1/100 (side project) At the moment I am refurbishing part of the house including my humble workroom. So atm I haven't technically been doing any major construction work regards to my kit. This is a big project but A SIDE ONE for me as when my workroom and other refurbish are bk to normal I will be starting a main project in wood. I actually started this a few weeks ago but didn't want to start a build log for obvious reasons, plus the fact even now I still don't have a true picture of where I will go with this, other than the fact I will be to a certain extent heavily improvising on her, which I have started. I wanted to have wooden decks throughout so I meaured the sizes of the planking on the decks, calculated how much I needed and bought in 80 x1metre lengths 3mm x 0.5mm lime wood. The planking has gone really well and I have now finished it all, I also stained this with a Dark oak stainer. The Hulls I was unsure about but went with the kit instructions using Humbrol brown yellow and a lot of drybrushing, this came out darker than expected but realising this was because the mouldings of my kit Hulls are solid black(I used the same brown yellow on my complete Royal Louis but since that mould was in white hence the colour originally close to what it should be). That said I was quite pleased with the darker finish and it gave it more of a weathered look. I thought the bottom of the Hull needed to be slightly darker though so I used a Humbrol Dark brown wash over the brown yellow and it really came up to what I wanted. I have also drilled holes in the hull sides for the addition of pulleys for the Gunport Hatches. Atm I am now just building and painting the guns. I've finished the 24lb(x24) and have just started the 18lbers. I was originally thinking to replace them all after sales but found it well nigh impossible to get the correct type of gun and in 4 different correct sizes, so I've had to stay with the kit supplied ones. I have also bought in relevant wooden Deadeyes(triangular), cloth flags and rigging thread. Looking a bit further forward I want to replace all the masts and yards with wood other than that I don't know exactly where I will go with her, other than keep painting and weathering parts, I may well add other things like metal anchors and Rudder chain etc... Apologies for the long intro and in hindsight I probably should have posted earlier, but this will be a long drawn out build a bit like this post lol... On to the photos.....


- 38 replies
-
- 5
-
-
- soleil royal
- Heller
- (and 5 more)
-
 Well now the experience Begins- my first Build Log. This is a little retroactive. I have been working on this for a while now. The goal is to a vintage plastic kit and upgrade it using wood ship model techniques. This will include adding wood and/or parts to replace bad detail and incorrect items. Use plastic eye, bolts, “T” cleats, deadeye assemblies and chain plates. A laser cut wood deck will be applied and the top mast and upper gaffs will bs remade with wood. As I am building this to represent the America as she crossed the Atlantic, life boats will be added as well as a binnacle. Why a vintage kit. The first production runs have the best detail. Ihe plastic is strong, but brittle. You need to to use a strong liquid plastic cement to ensure a good bond.There is little flash oh the parts. Sink-holes are few and far between. The major hull seam should be backed up with epoxy. You really do not want seams springing apart when your project is finished. Old plastic is also very hard and difficult to sand. Why this subject? My research found many comments indicating that rigging was accurate and that this was a good introduction to the hobby. I built Revell’s 1:96 Cutty Sark and USS Constitution when I was a teen an relish the opportunity to do better. This is the end of installment on. More will follow soon.
- 7 replies
-
- 6
-
-
- America
- Schooner Yacht
- (and 2 more)
-
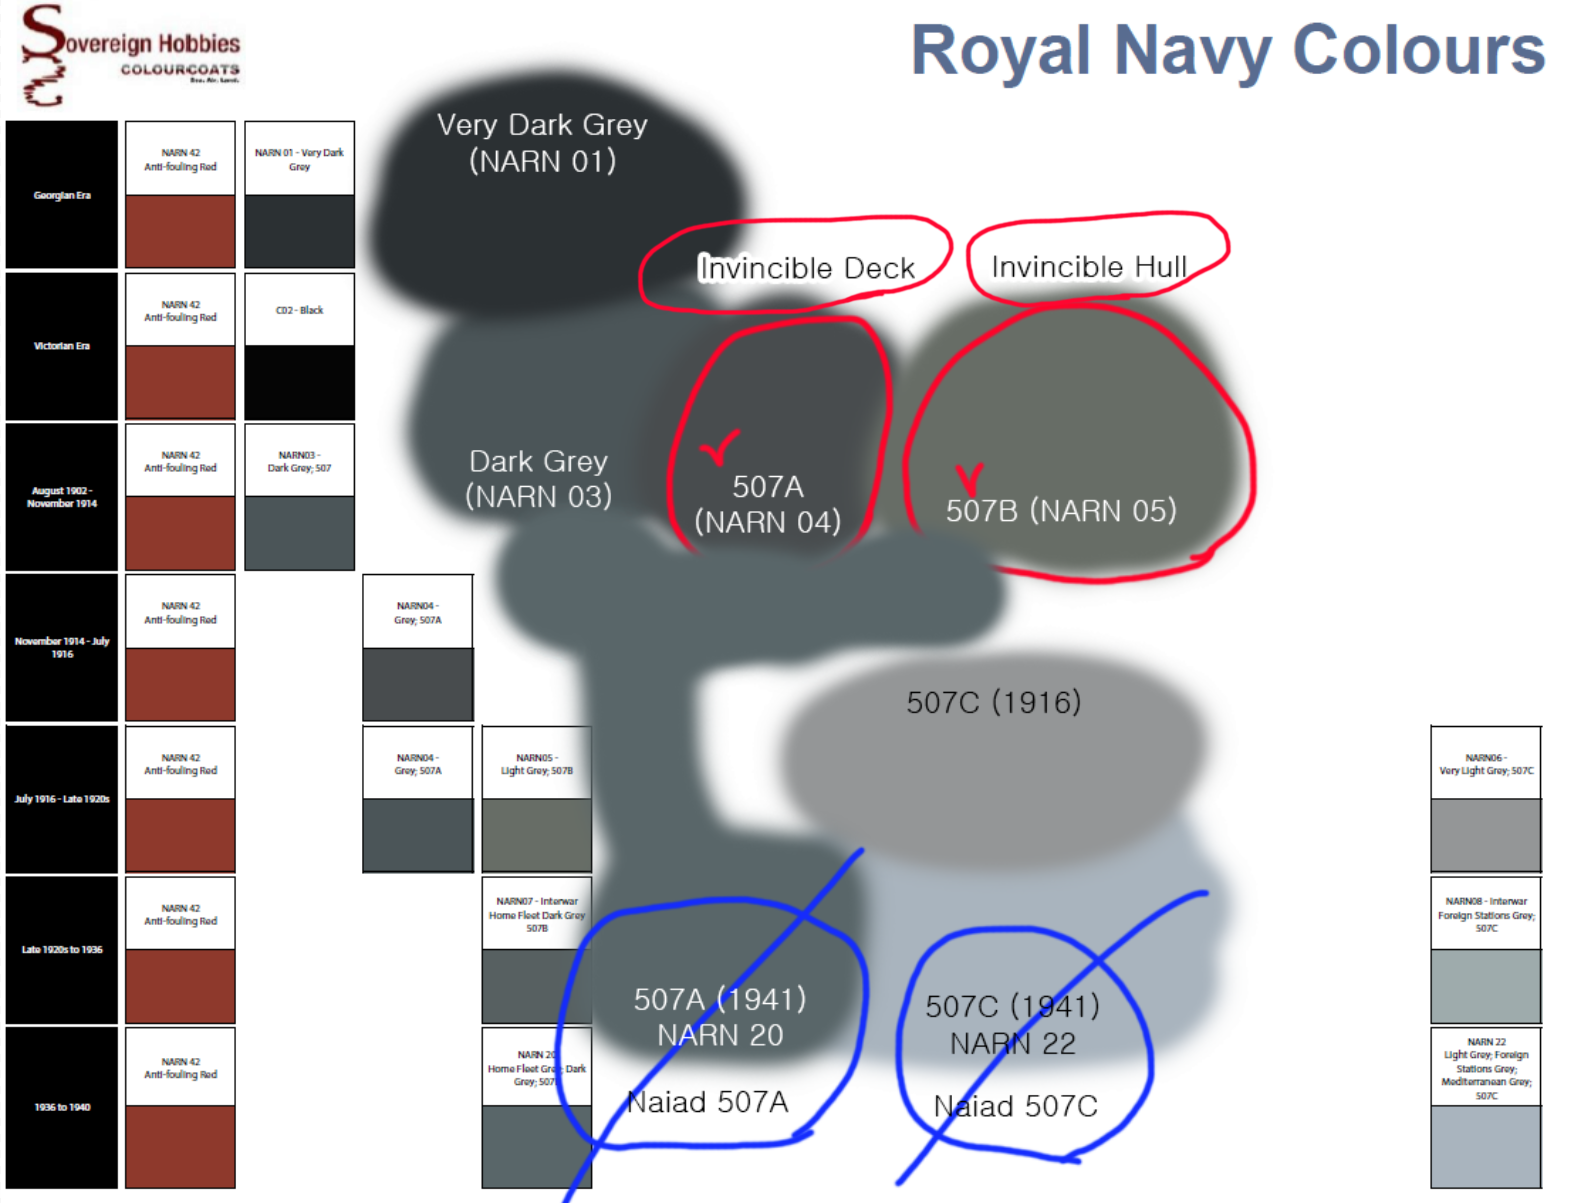
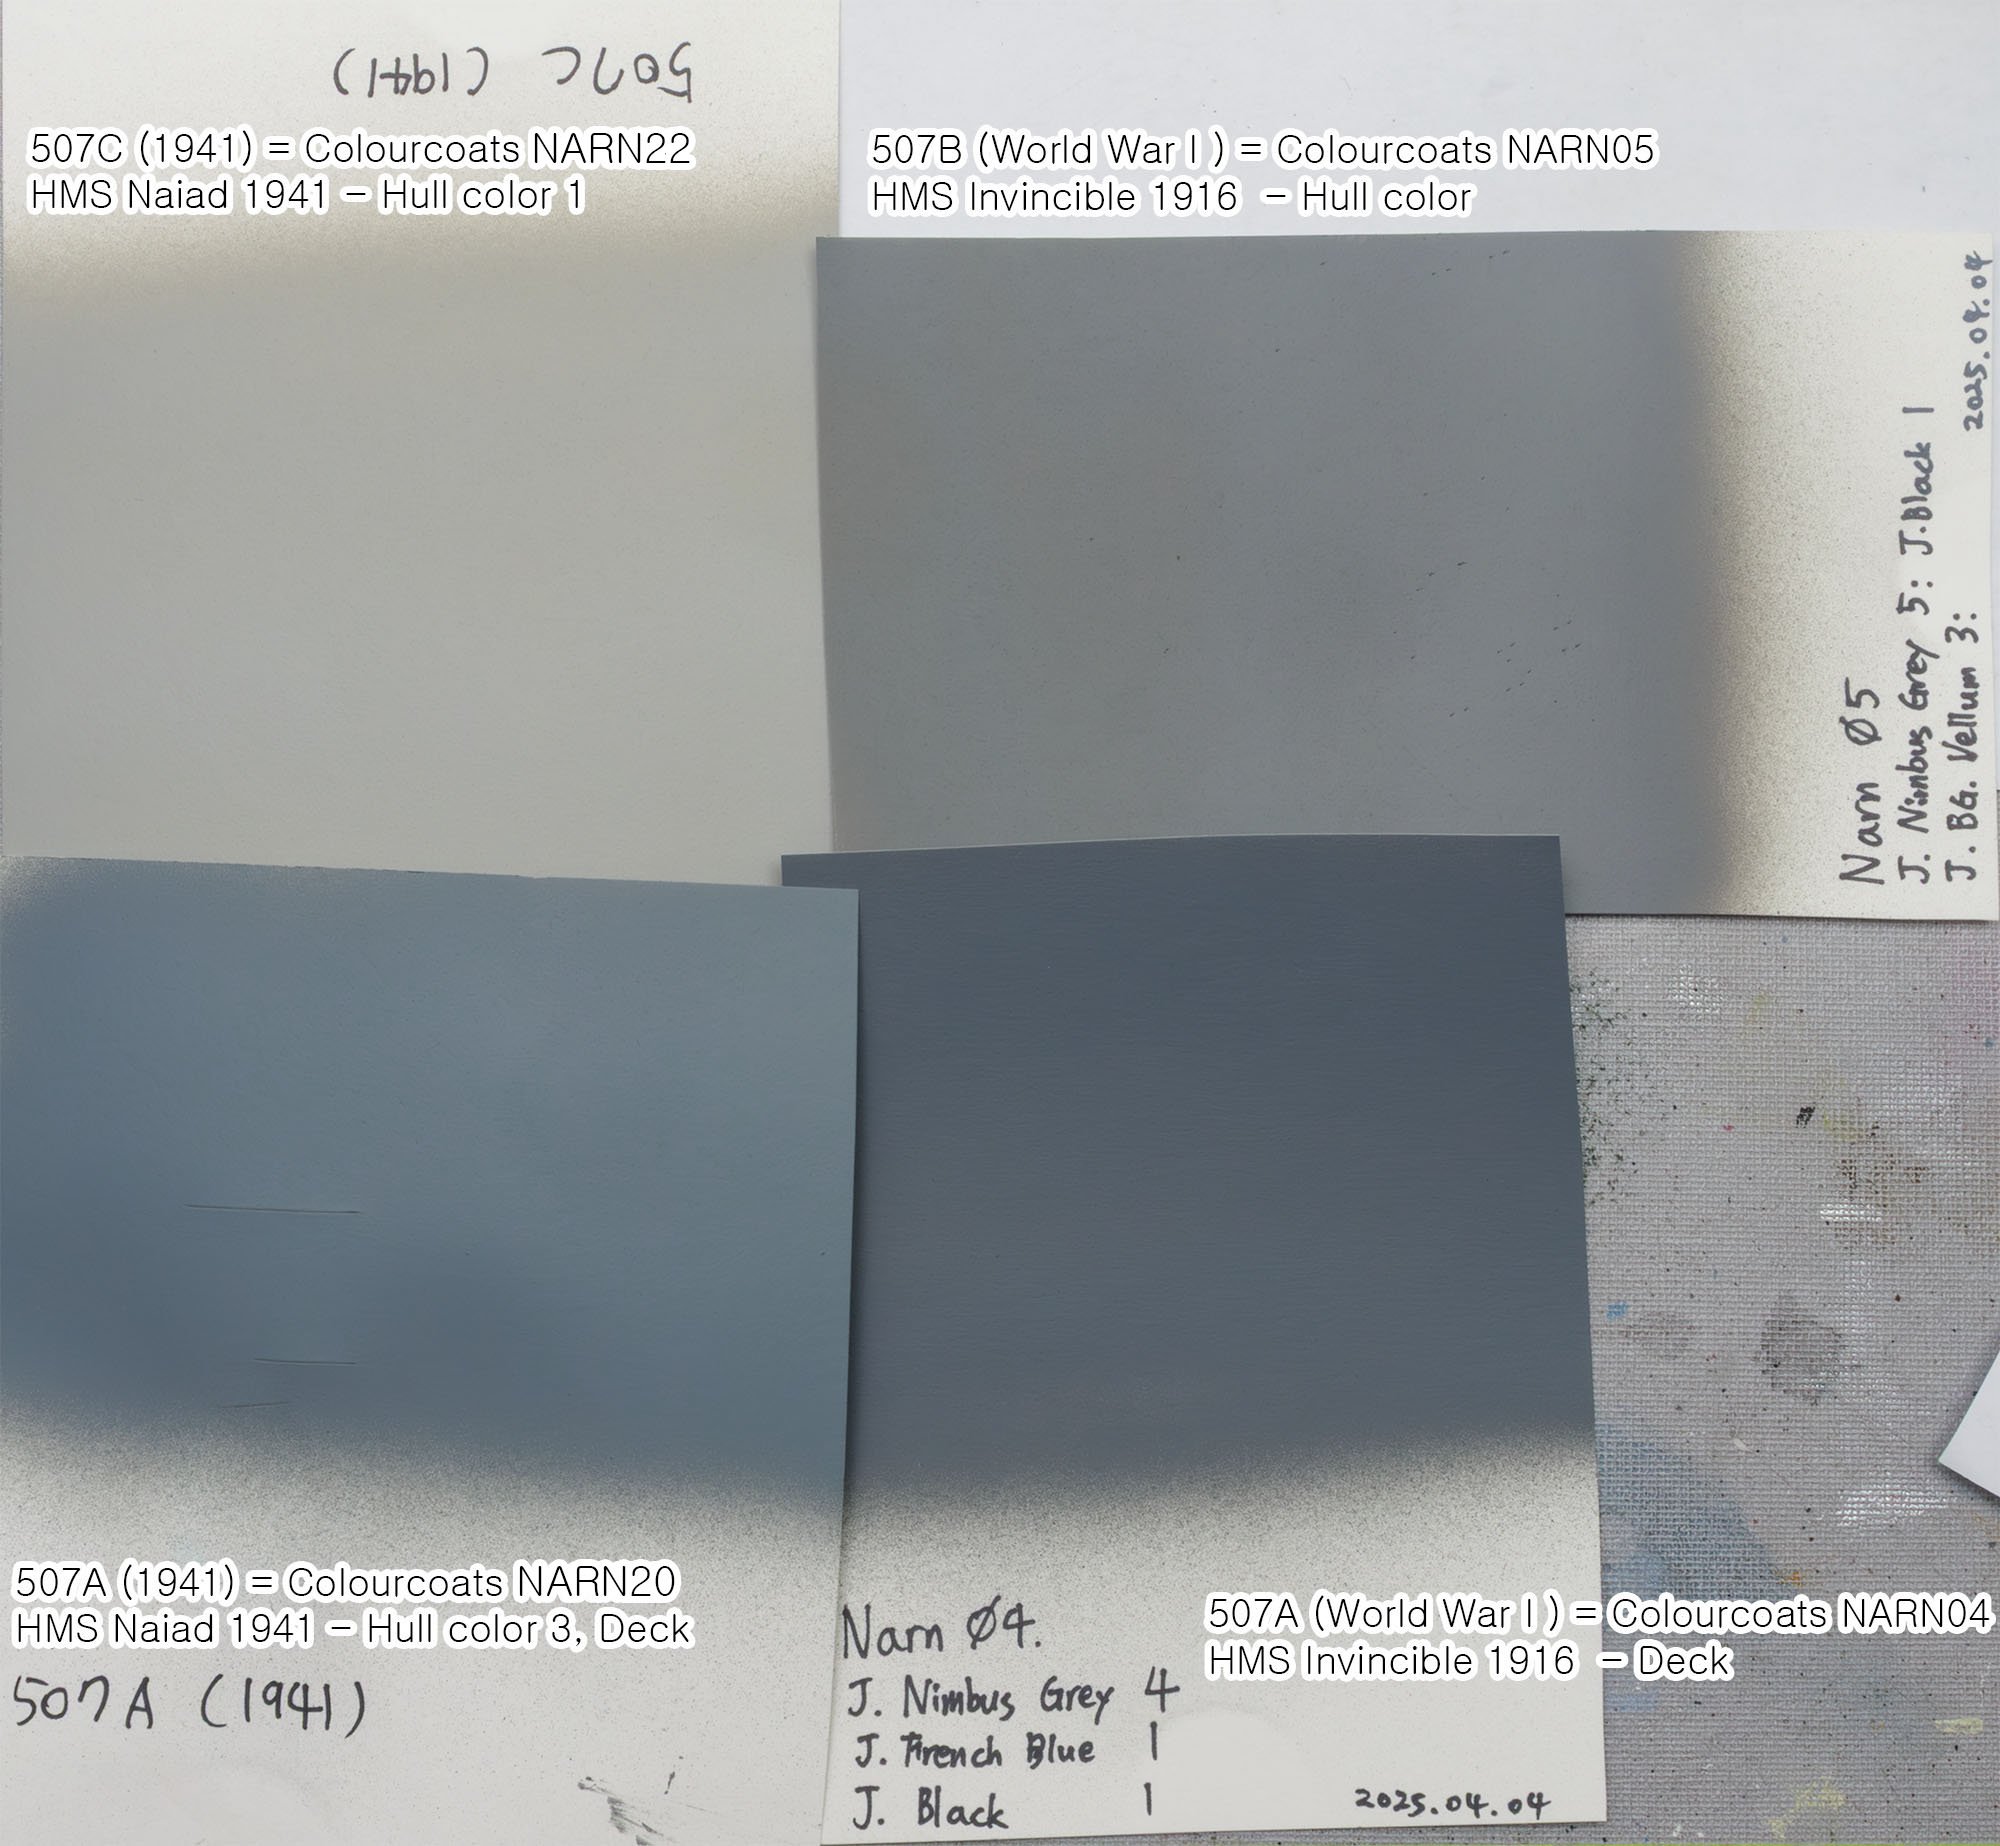
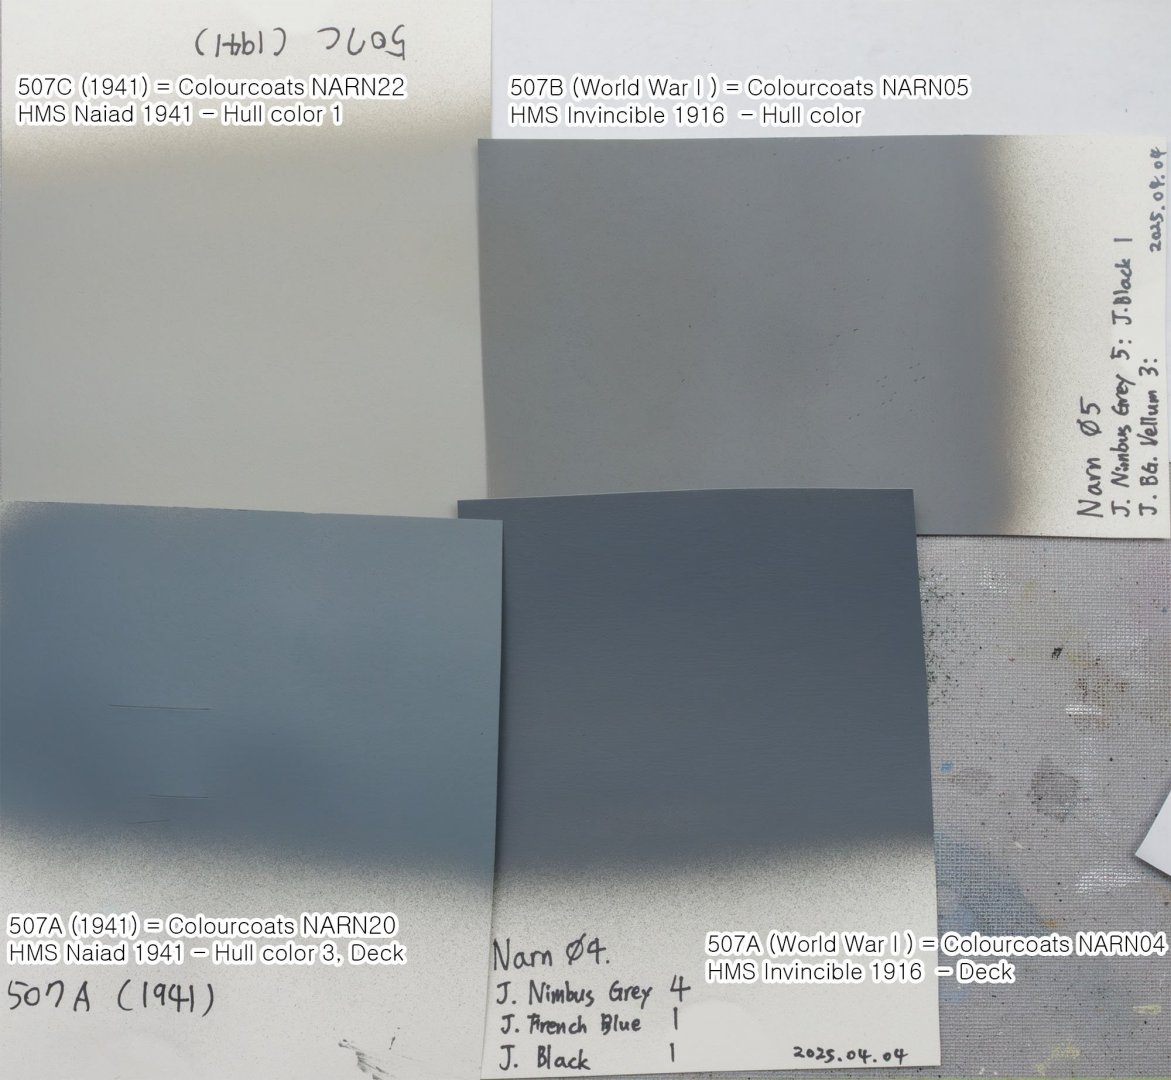
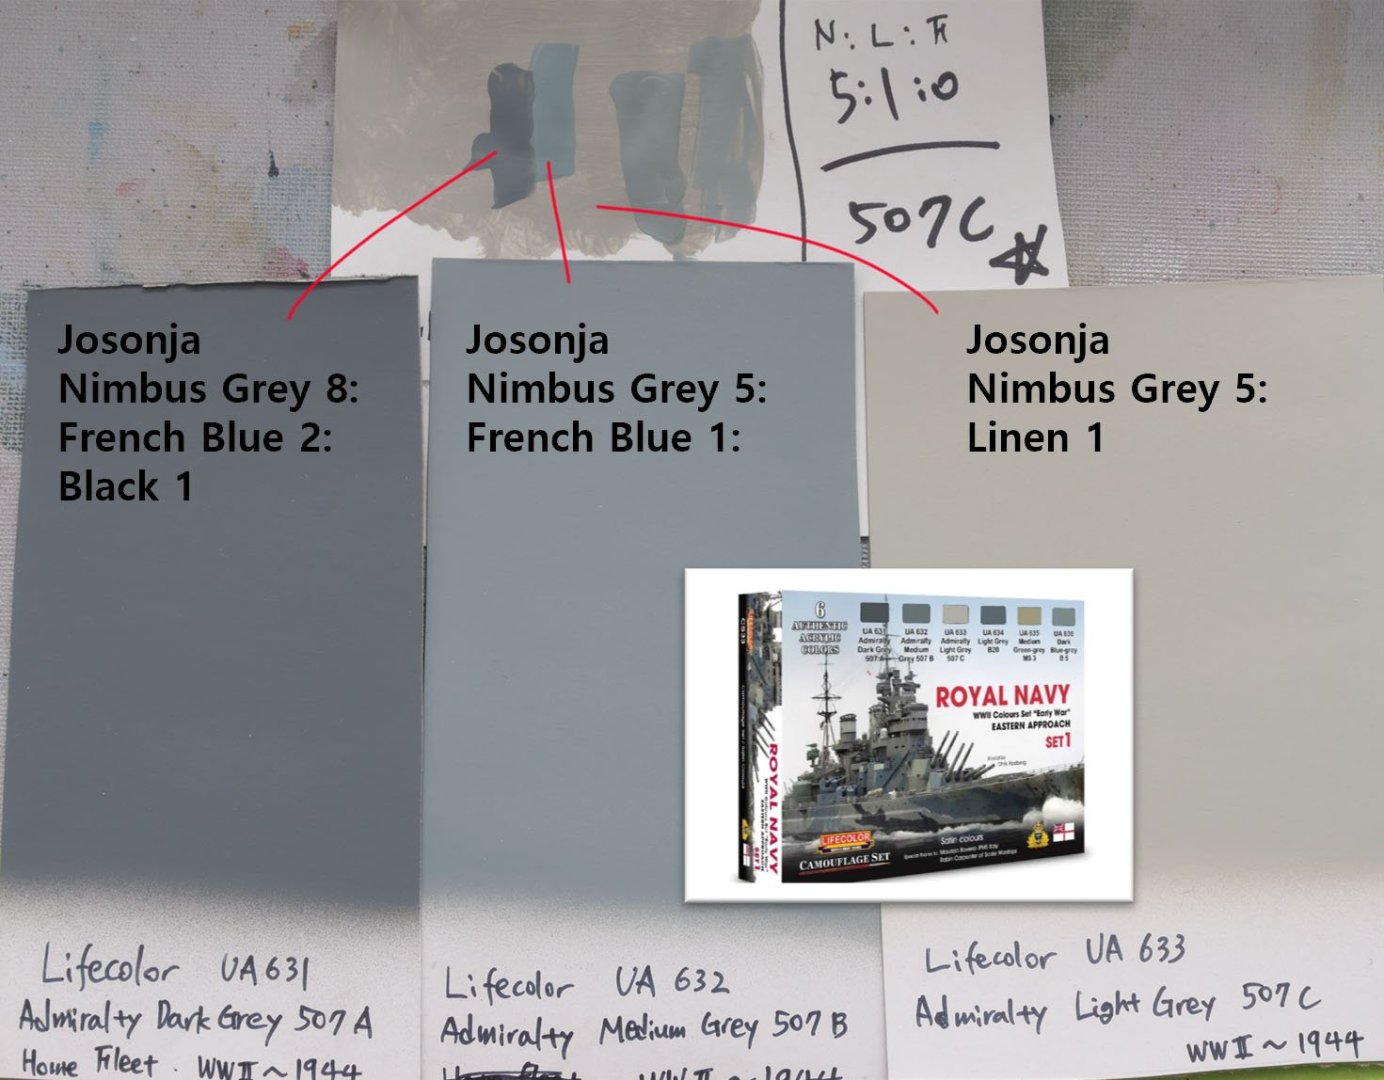
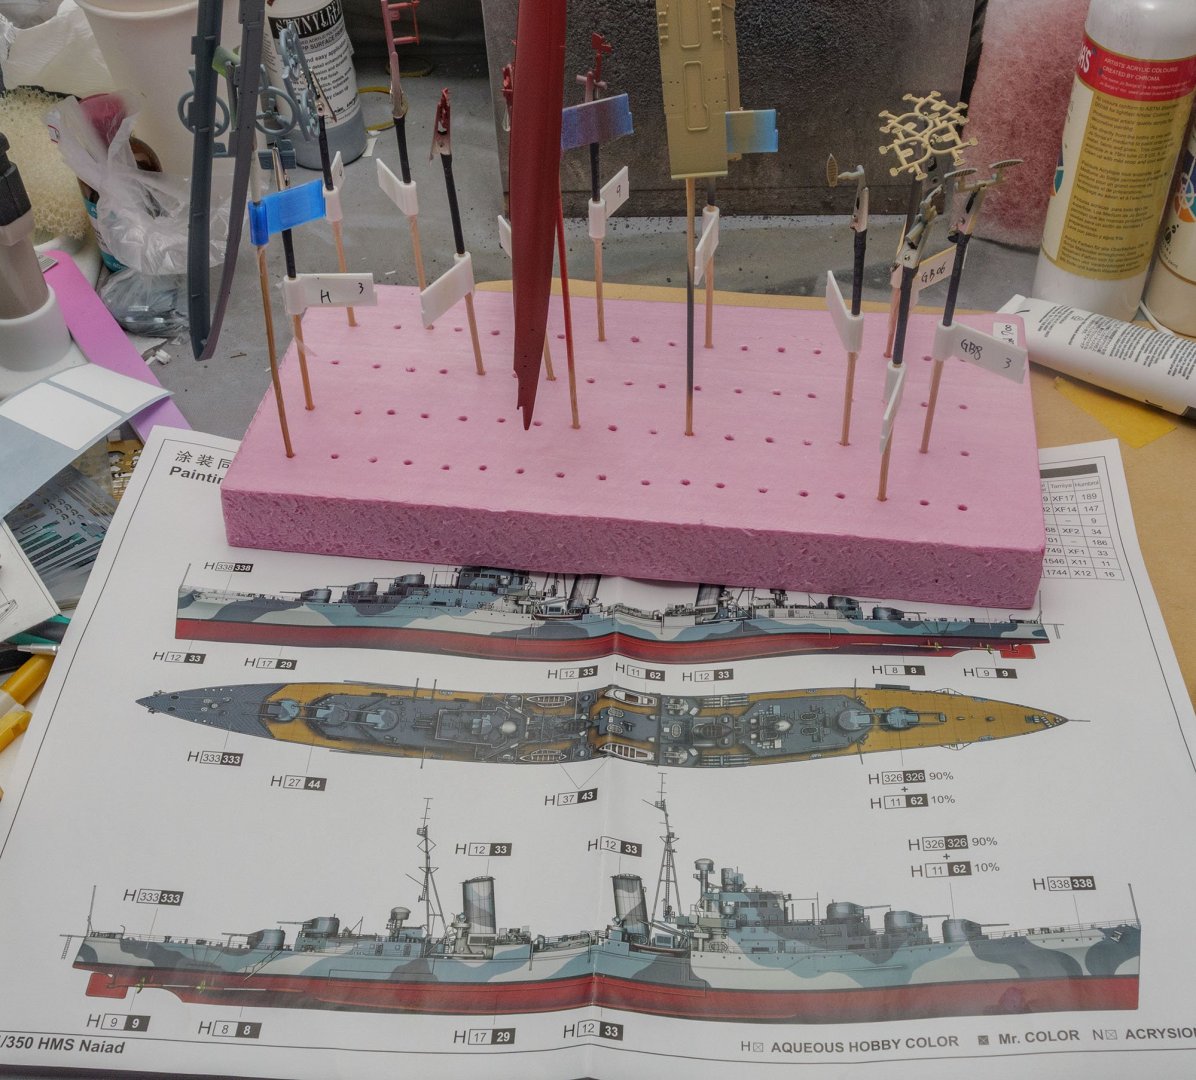
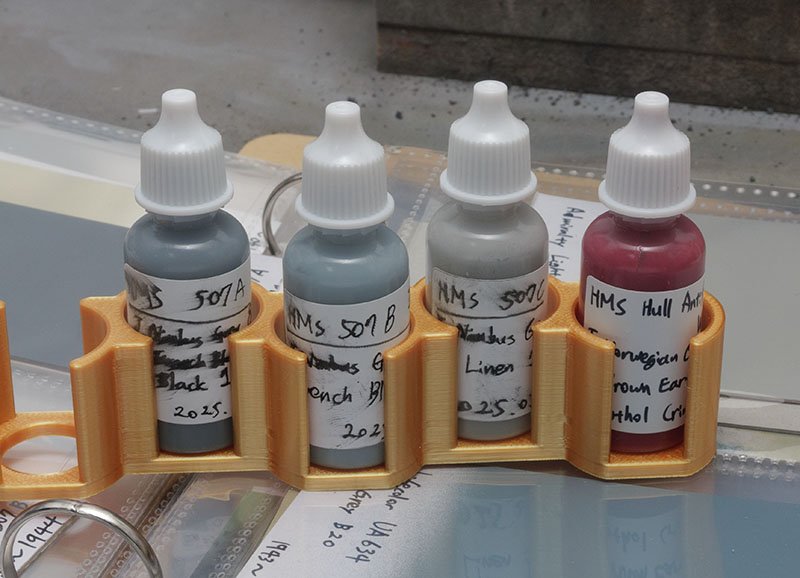
 The next project is HMS Invincible 1914 from Flyhawk. The model number is FH1311S deluxe edition. When I started this project a few months ago, I wanted to build a full rigging model. I have studied the aerial antenna spacer and tried to make a 1mm (1/16 inch) long asterisk-shaped spacer. Unfortunately, my attempts didn't work for several reasons. I admitted that I couldn't build the 1/700 antenna spacer yet. This is the reason I built the HMS Naiad without any riggings. I'll build the HMS Invincible without riggings, too. Here is my personal study about WW I RN ship colors. I simply modified the 507A I've used at the Naiad. This is a pretty rough assumption and not based on facts, so please don't mind the source of my colors. I mixed new colors from the Naiad formula. This will be a simpler project because she has no camouflage pattern. Let's build a handling dock. Very comfortable and useful. 😎
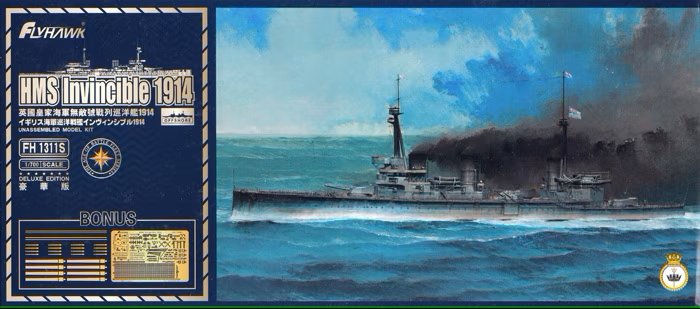


- 4 replies
-
- 7
-
-
- Invincible
- Flyhawk
- (and 2 more)
-
This is my third kit in progress. This is the current kit that I am working on at this time. I want to get the copper on the hull before I switch back to the America. This kit has good bones and it is molded well. The detail is simple and a bit heavy. The hull has no plank detail or copper plate at all. The lifeboats have no plank detail at all. There is no windlass. The kit directions would have you owe 1/16 inch cotter keys for eyebolts that are much too large. I have purchased a laser cut wood deck for the build. Missing details like the Hawse ports, railing for the fore deck, billboards for the anchors will have to be added. There are a lot of opportunities for fun in this build. I will probably buy my blocks and deadeyes from Bluejacket. More to come soon!

-
 This build log is a restoration of a model built by my mother. This model was what inspired me to pursue a lifelong hobby of model making and a fascination with tall ships and sailing. My mother is 87 and was diagnosed with Alzheimer's last summer and the past year was spent cleaning out her house and getting her affairs in order. Of the items I was entrusted with is her collection of model ships she had built back in the early 1970's. My mother was a professional artist who ran a commercial art studio and taught both fine art and life drawing. In 1975, she was commissioned to paint a series of nautical themed placards for some publication, I cannot remember what, and she started to build plastic model ships to use as reference. The first one was the Revell Thermopylae because she loved the color combinations she could use on it. The kit is not painted to represent the actual ship, but painted in a way to experiment with patina and color depth in 3D instead of on canvas. She got about as far as installing all the standing rigging before she got intimidated and frustrated with forming and tying the ratlines and moved onto a model she enjoyed building and finishing, the Revell Spanish Galleon. So for the past forty-six years, this model sat on top of a china cabinet, collecting dust, and taunting, no begging me to someday finish her. So, after moving it 2000 miles across country from her home to mine, in which the bowsprit got broken, and most of yards had fallen off, I now have it here in my studio and after washing off four decades of accumulated dust, have what I think a diamond in the rough, or a test of my sanity. A few things I will need help with and will need to consider. 1. How far do I want to go with restoring the masts? The main and mizzen lower masts are warped, from what looks like exposer to direct sunlight. Would I try to reform them, or do something I have been dying to do and try and make my own from scratch? 2. Paint restoration - This model was painted mostly with oils and I do not have access to the original paints, so I must be careful not to create any blemished I cannot touch up. 3. Originality - I am a stickler with detail and originality, so I must stay focused on restoring the model and accept many of the building defects that are in it. 4. Time - I have many other projects and things in my life going on, so I expect either this to be a fast moving project, or one that could take years. 5. I have four cats, one is still a kitten and one a teenager who is a shop cat in training. So rigging may be an adventure. Here she is after just coming home, The busted bowsprit. This is nothing new to me, I've busted the bowsprit off of both my Constitution and Alabama, so I'm quite good at repairing them. Stern end with the warped Mizzen mast. Midships and after a bath. The model is extremely well built, and the paint finish is protected with a varnish, so I put the whole model in the tub, sprayed it down with Windex, and sprayed her off. Lots and lots of dirt came off. Full view I put the bowsprit back in place. LOL The Bireme I built back when I was in High school and gave it to her for Christmas. It needed a little work from some damage during the move. And her beloved Spanish Galleon, with a lot of Artistic Licensing. I would love to here suggestions on how I should go about planning. I am a little overwhelmed at were to start. I guess systematically removing the spars and rigging. I do have the original box, all the parts, and instructions along with copious notes she took while she was building this model. Scott
- 44 replies
-
- 7
-
-
- Thermopylae
- Revell
- (and 3 more)
-
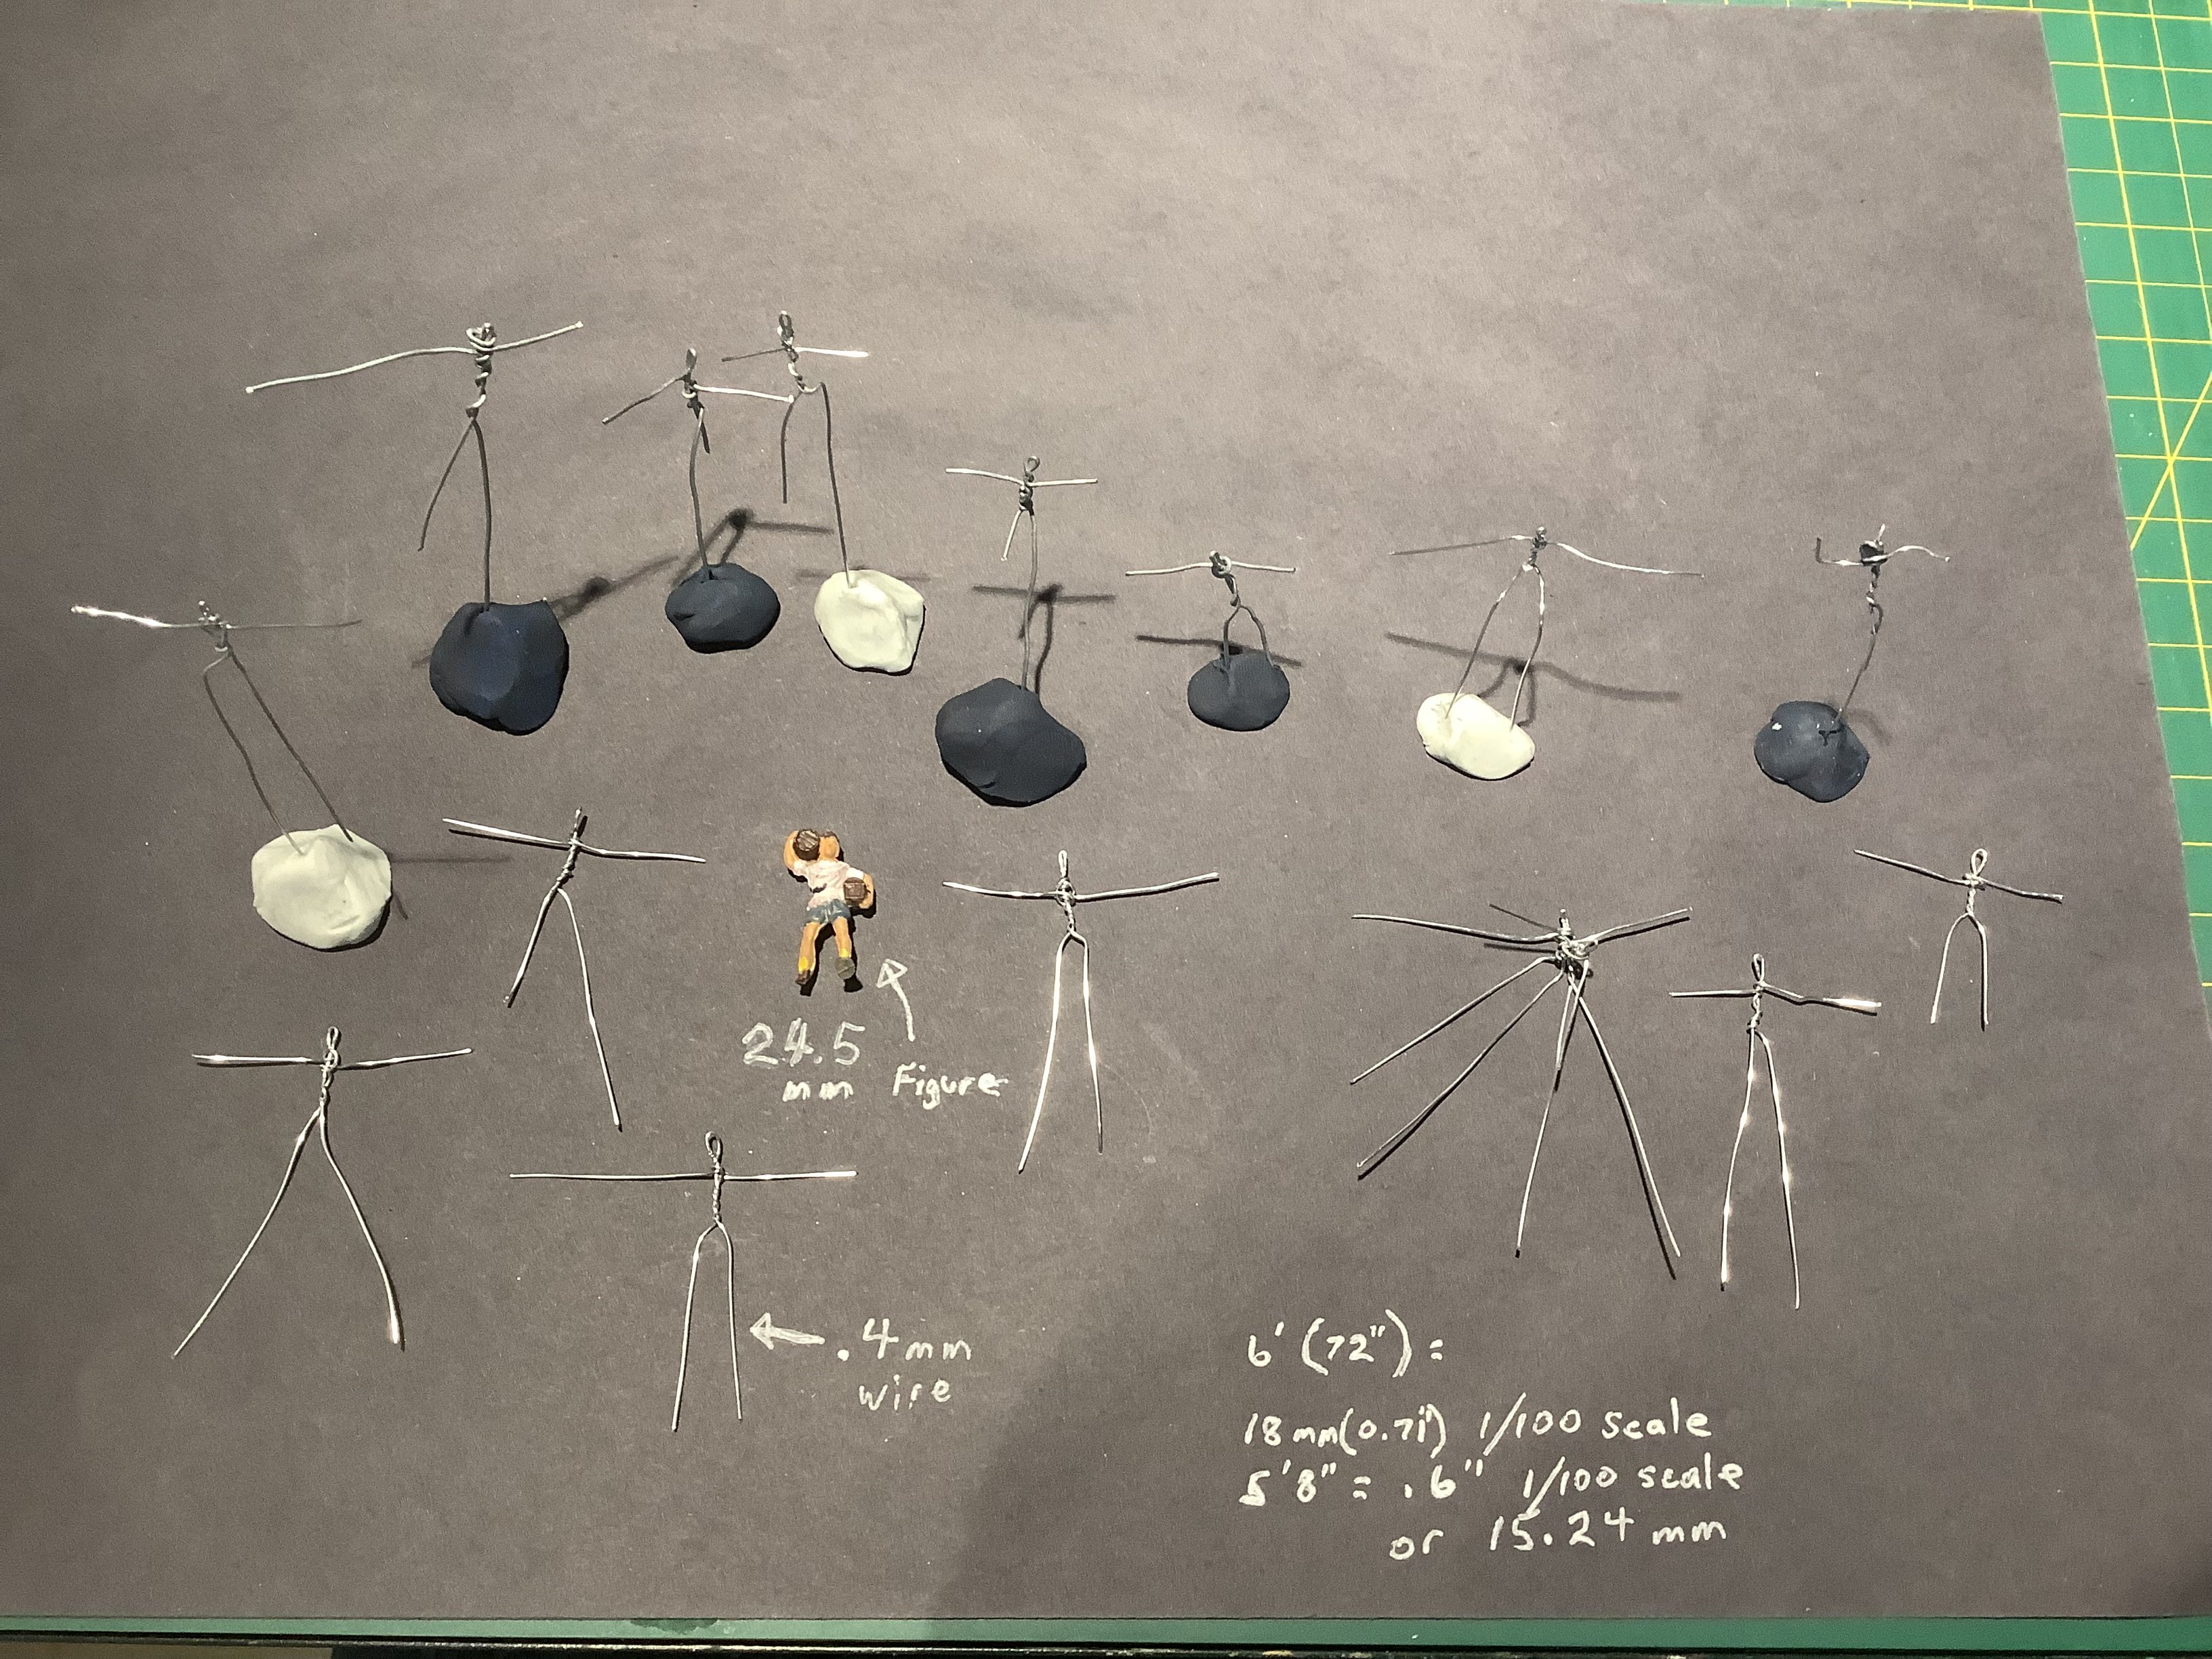
 Ordered the kit late October and was late in delivery. Now still waiting but now delayed by the Canadian Post strike. Meanwhile to kill some time I am looking to make some 1/100 ststscale crew members. First I thought of doing some 6 inch figures in soft modeling clay and twist some in different positions after scanning them. Then after transfering images to a 3D printer, print them out in 1/100 scale. But now switched thought to modeling them in scale using air dry clay I got at a craft store. DAG Modeling clay. Air-dry hardening. I have made 16 (.4 mm) wire figures and will start adding clay. I test tried one in soft clay and I feel able to do some good figures. Knock on wood. I will make 50 plus figures ranging from the head cheese, other officers, gunners both at rest, and on the guns. Powder monkeys, plus Crew members doing chores and up in the rigging with maybe a couple using the “head”. I think I have found some pictures of French Troupes de marine to do a few ship complement. Who knows maybe do a few walking the plank or a good old fashion keel hauling. I have a 25 mm figure from my old Golden Hind model but the new model of the Soleil Royal figures will need to be smaller for scale. 18 mm for 6 ft tall figures and about 15+ mm for 5’8” figures.
- 9 replies
-
- 2
-
-
- Soleil Royal
- Heller
- (and 1 more)
-
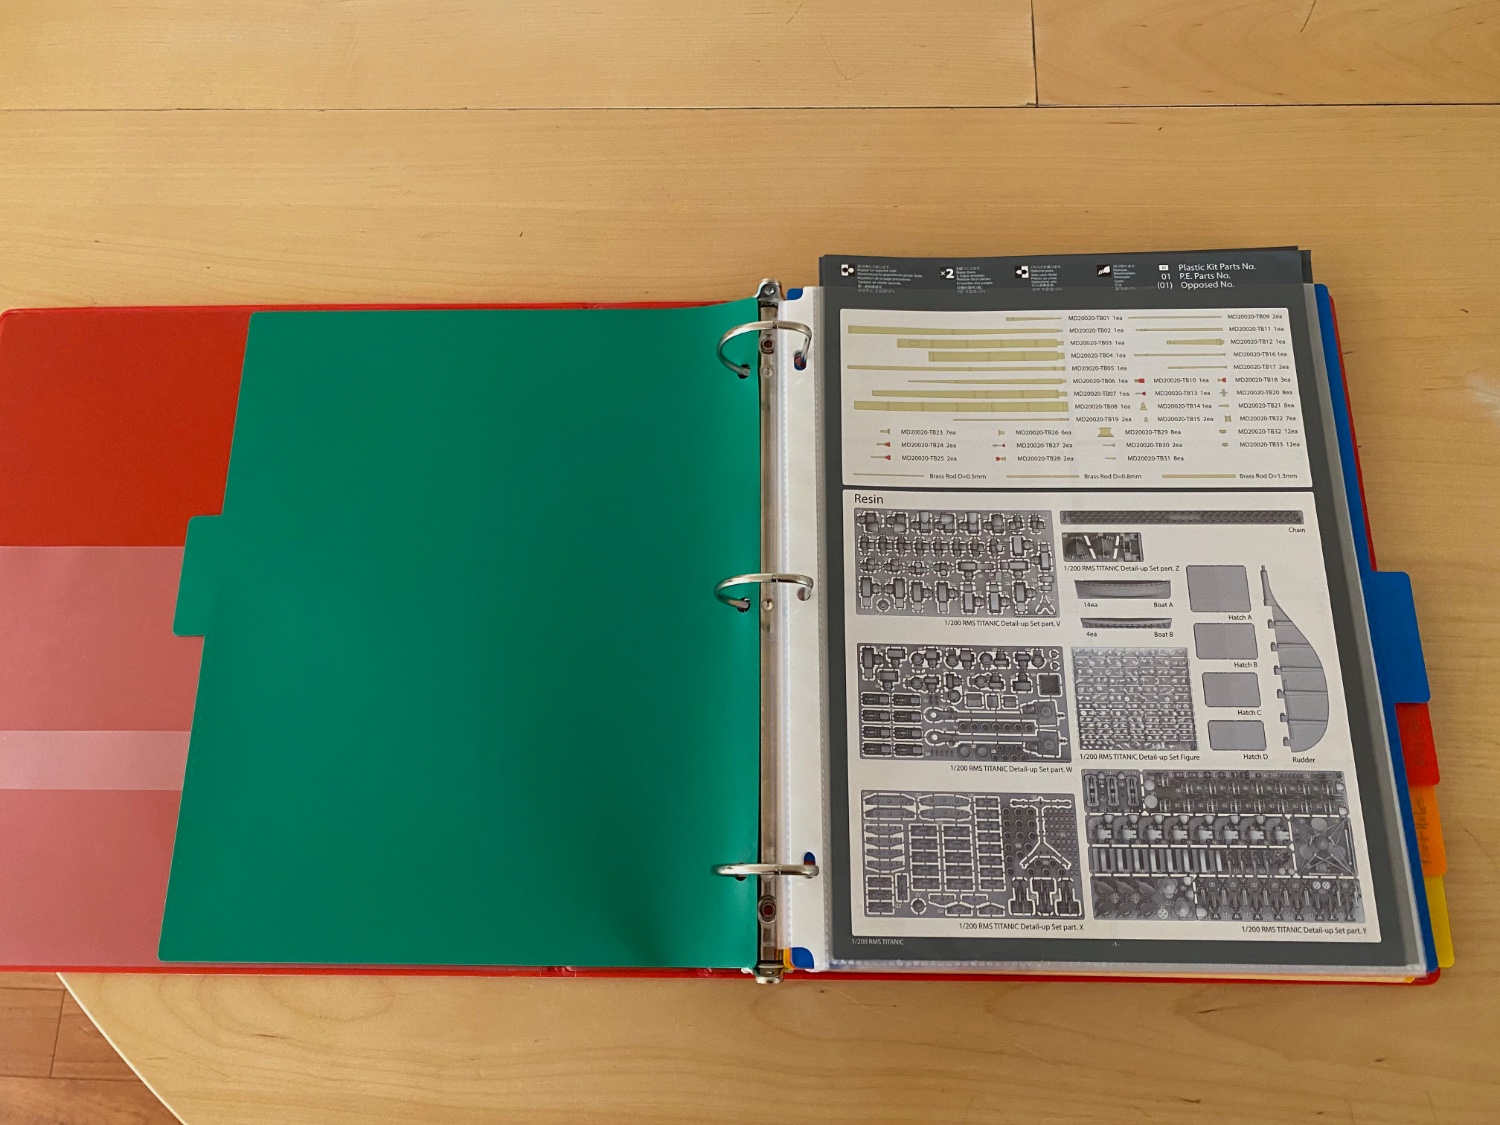
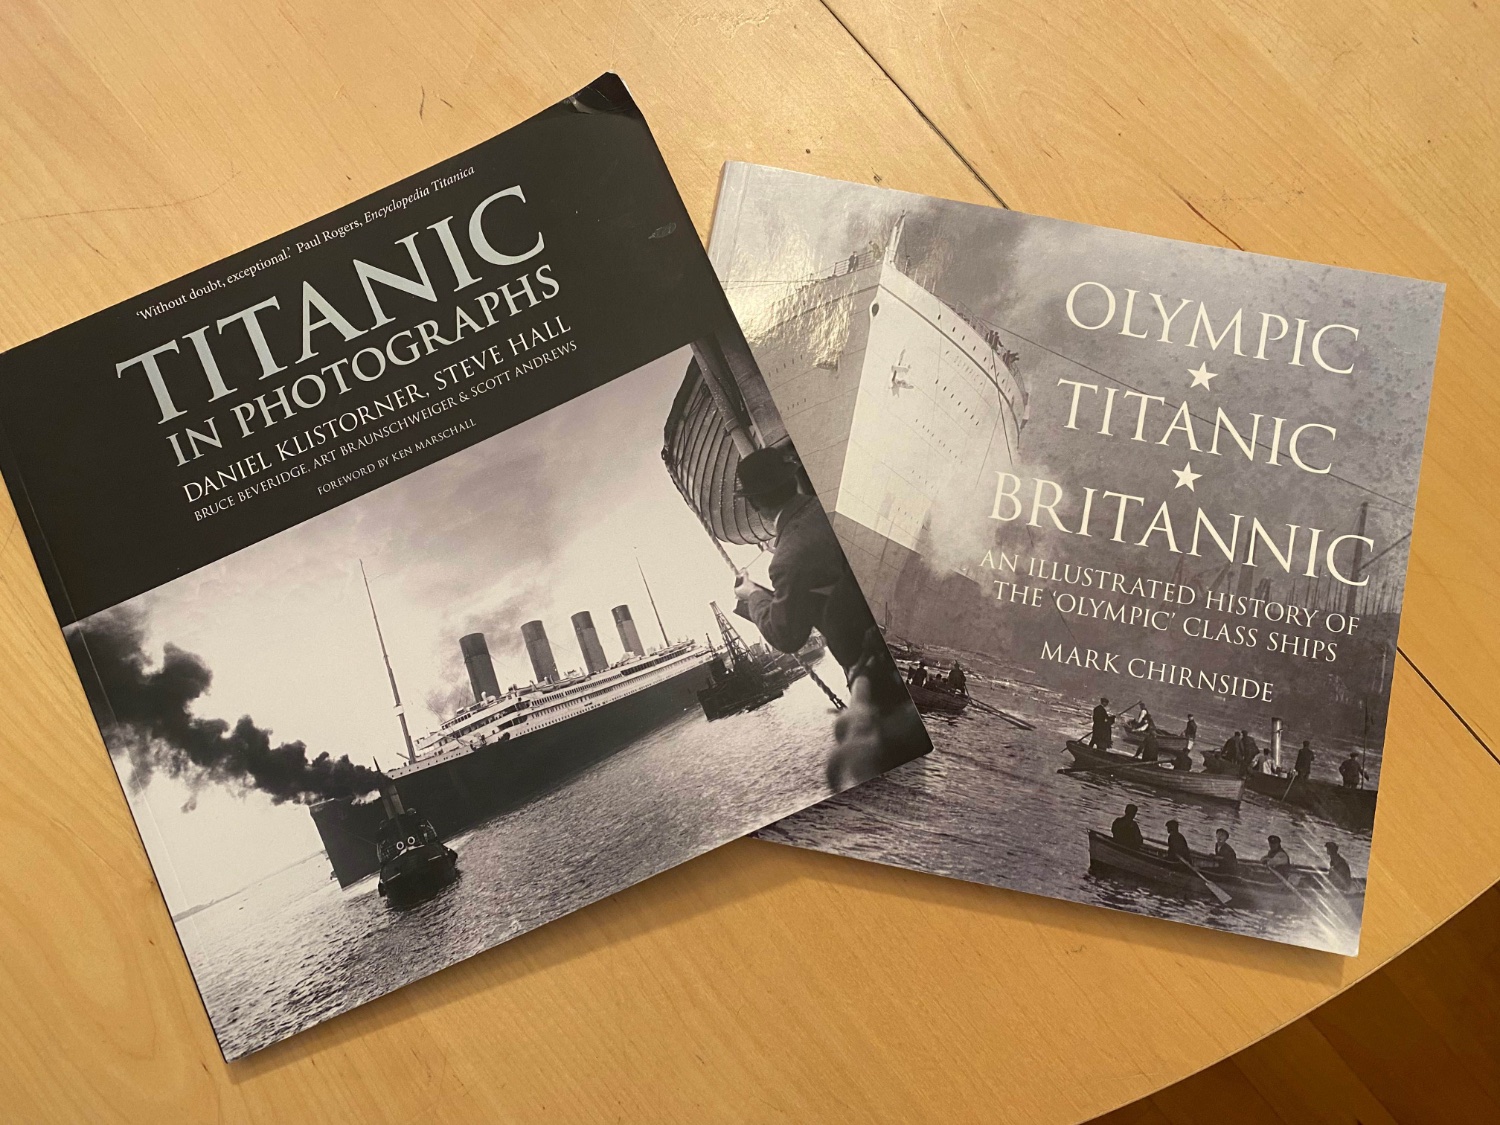
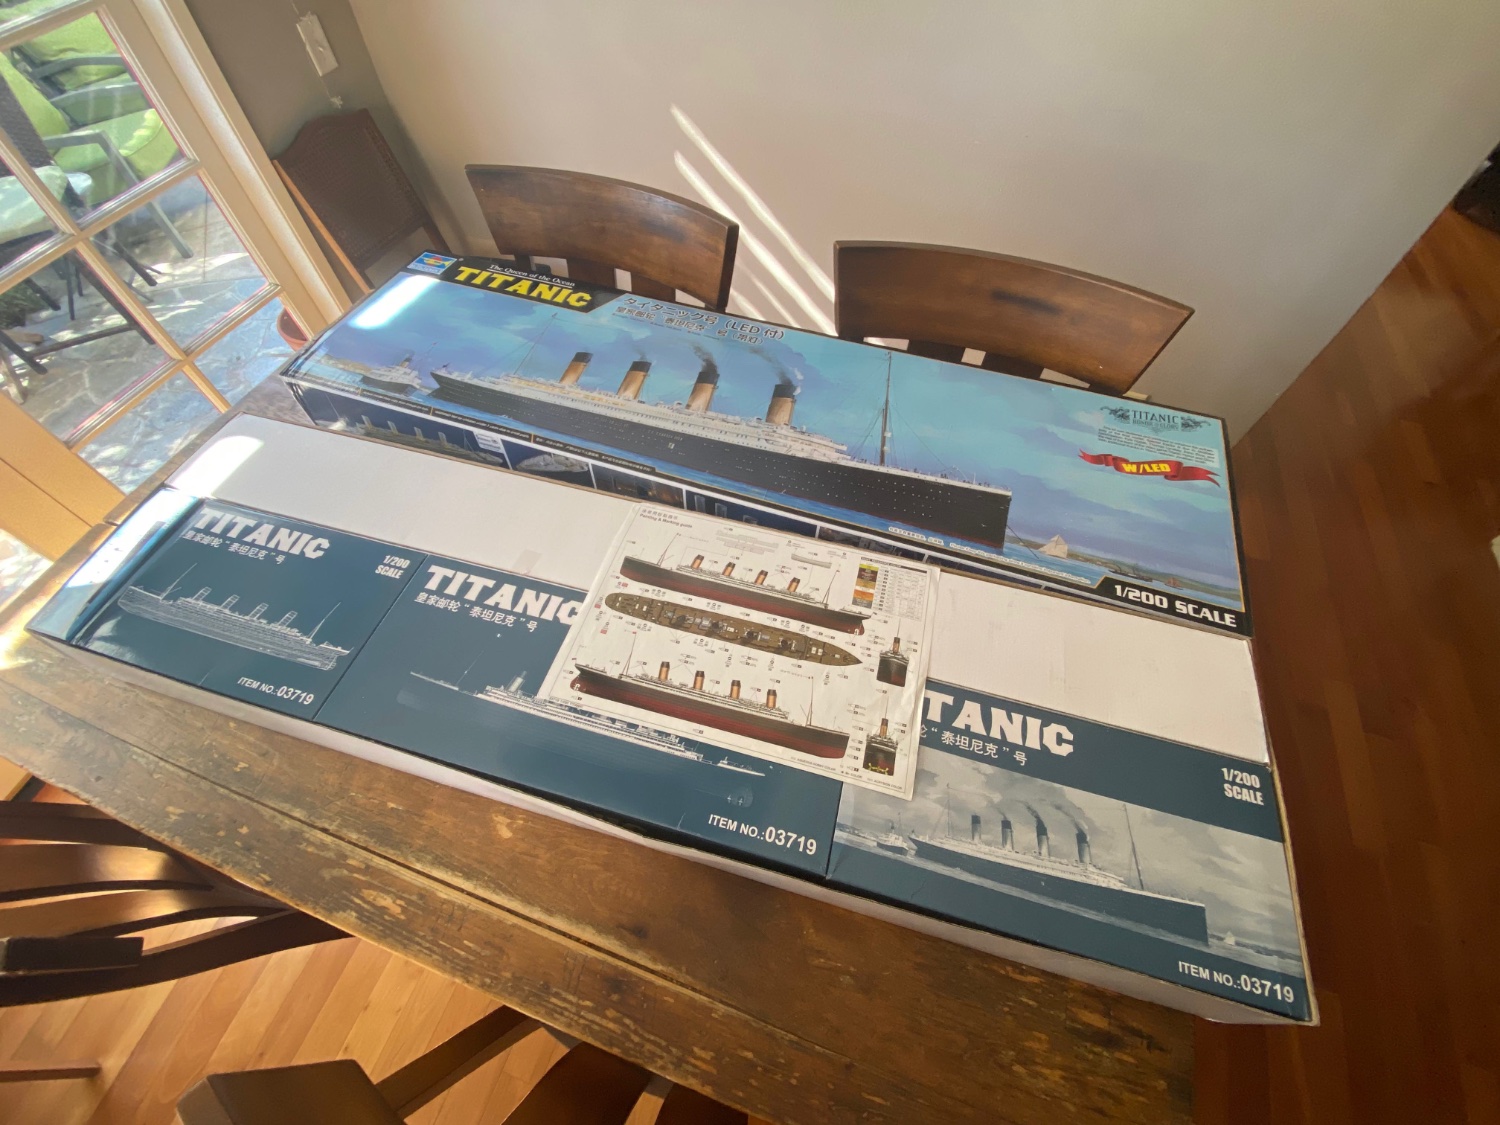
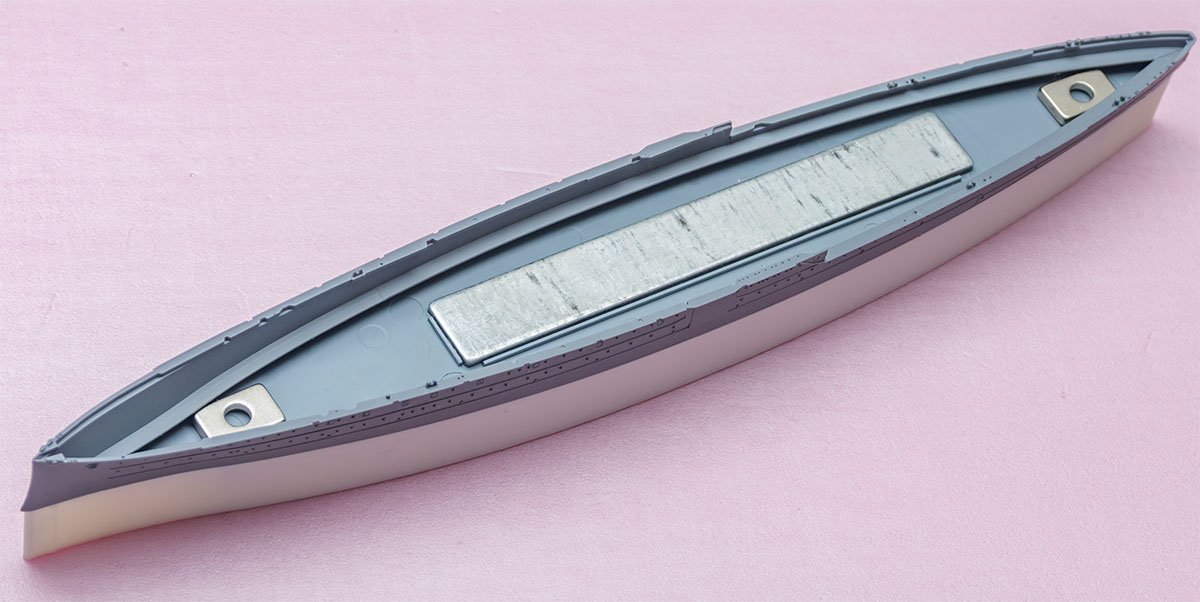
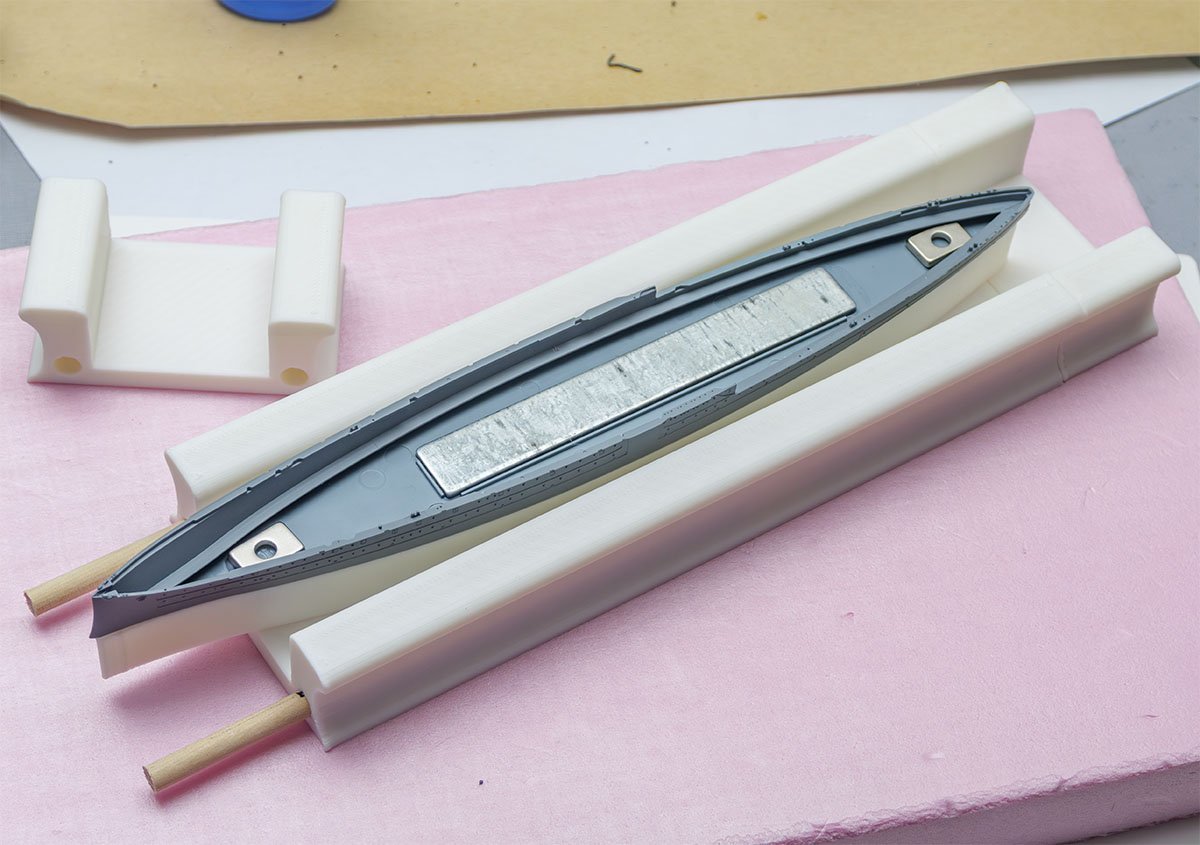
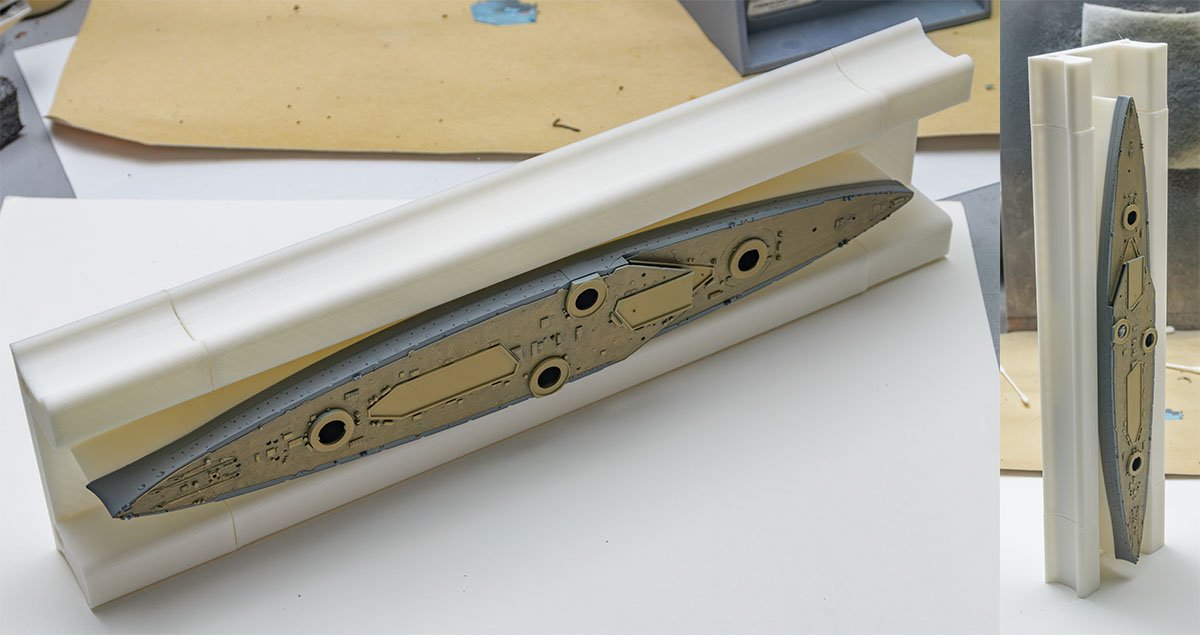
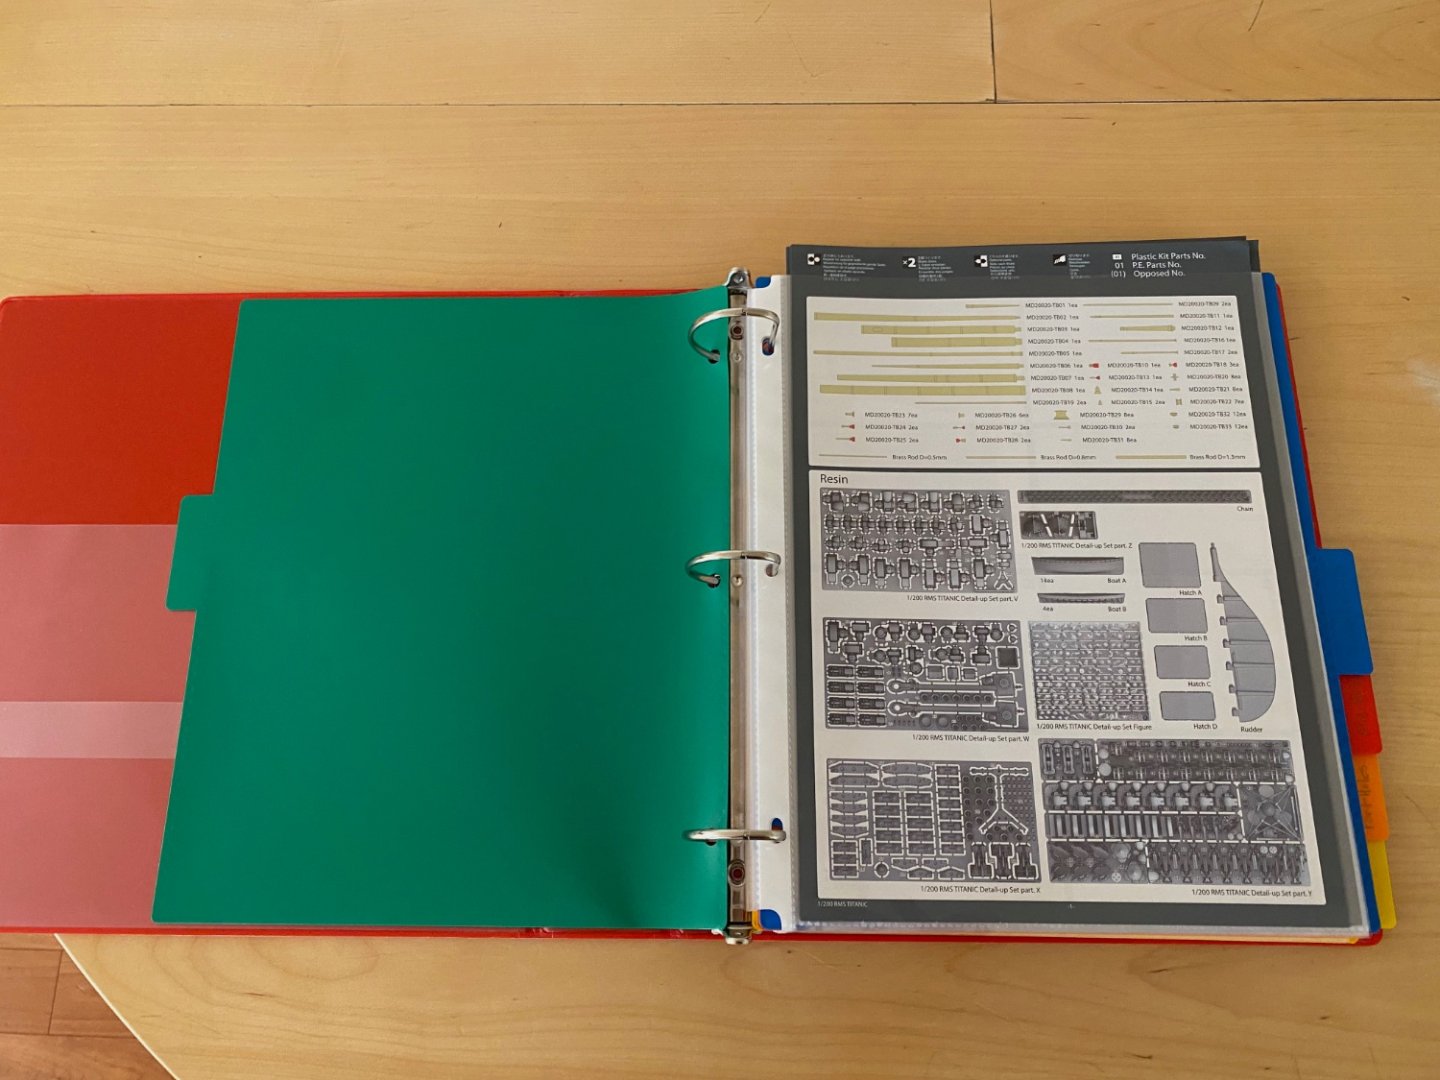
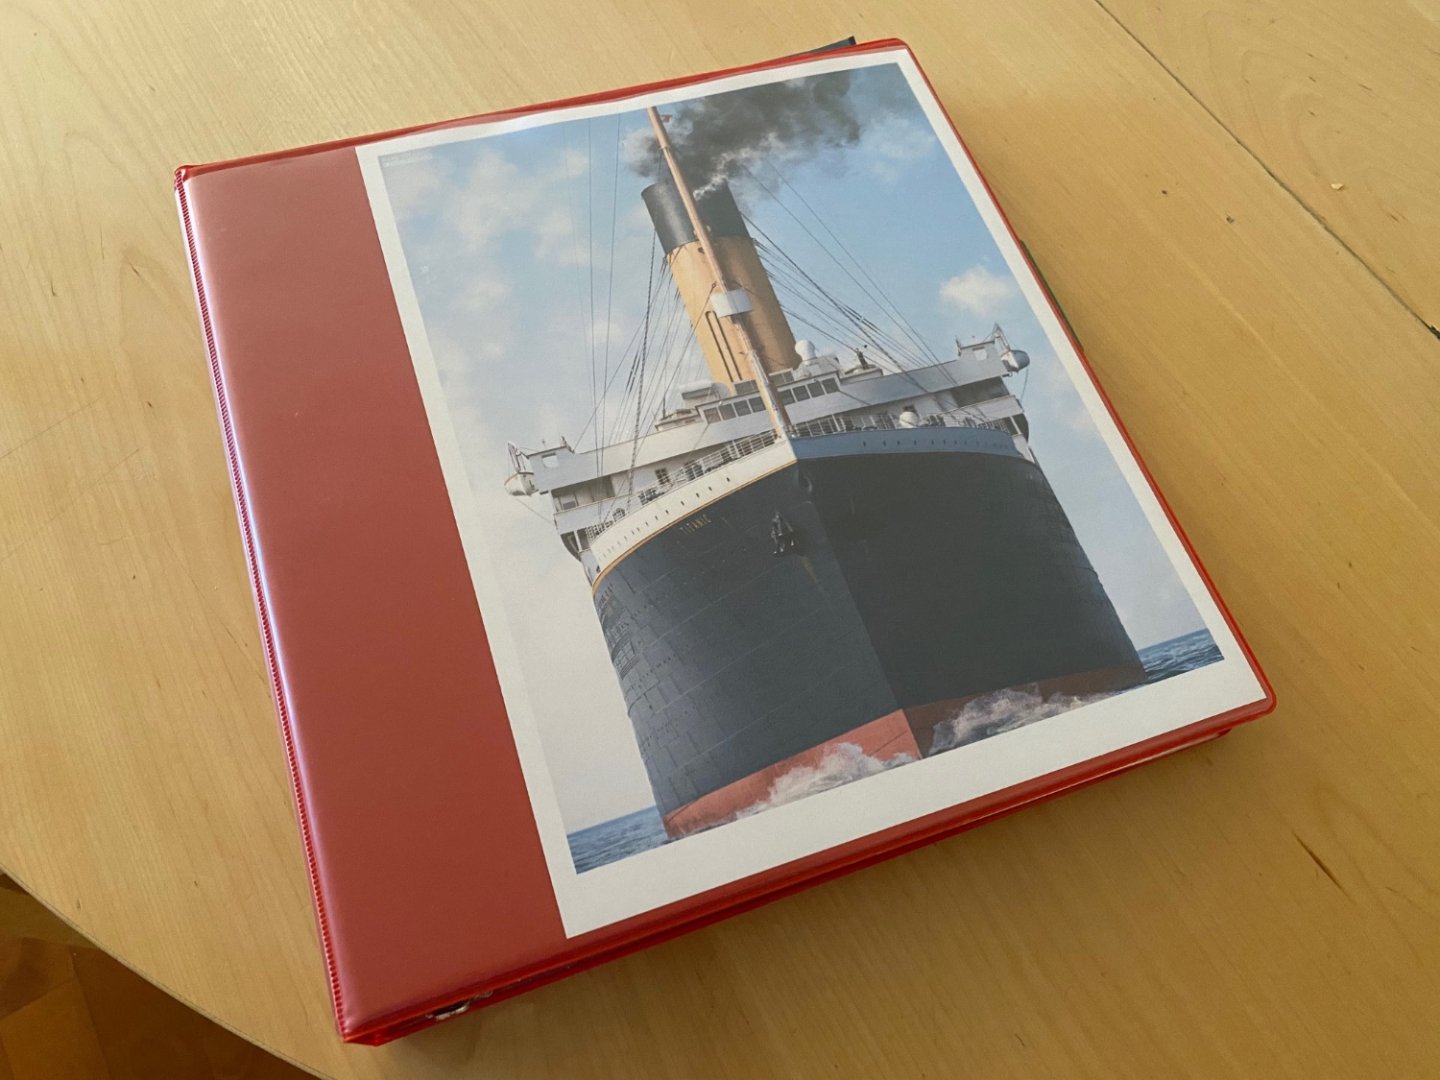
 I decided to start a build log for this project after tinkering around a bit with the kit across the past year or so. I’ve hesitated because I know that there are many passionate folks out there who scrutinize every aspect of the great ship and can be very strong minded about the myriad details in play. I will make plain my intention to do justice to Titanic but will likely fall short on complete historic exactitude… Especially considering that the ground is constantly moving as scholars and enthusiasts refine our understanding of the ship’s details. I need to confess up front that I am not a Titanic guy. The great tragedy and human folly of her demise has always pushed me away from the subject… Just too sad. Additionally, I need to confess that I have never seen the entire James Cameron movie. I went with my wife to see it in the theater back in the day, but we left halfway through – literally right after the ship struck the iceberg. I leaned over to my wife and whispered “spoiler alert – this doesn’t end well, and I couldn’t care less if all the spoiled and selfish main characters go down with the ship. Let’s get outta here and beat the crowd to the good restaurant nearby”. I’ve never seen the rest of the movie. That is not to say, however, that this project won’t be a labor of Love. I am building this for my daughter. She has been fascinated by the Titanic tragedy from a very young age. At age six she could tell you all about Captain Smith going down with the ship and nurse Jessop and her surviving multiple sinkings, etc. She made me get up in the wee hours on the exact date/time of the 100th anniversary of her sinking to ring a bell in commemoration. We’ve even toured Margaret Brown’s home in Denver (nobody called her “Molly” in her lifetime). She is more interested in the human stories than the ship itself but will very much appreciate this representation when it is finally completed. It was always a head scratcher for me that Trumpeter started their new line of 1/200 scale ships with the USS Arizona back in 2012. It seemed to me that Titanic would’ve made more sense. It was the 100th anniversary of her sinking and is clearly a very popular subject as we can see with the explosion of 3rd party add-ons and doo dads that have proliferated in the marketplace to enhance the model. There is a significant cottage industry that has since formed just around this kit. I suppose better late than never for the folks at Trumpeter. The workshop out in the garage has been reorganized and made shipshape: Hopefully you get some sense for the size of the model. It is big. I have thrown all the relevant documentation into a binder so that I can have quick access to key references. Sliding the pages into clear sleeves also allows me to overlay notes with a grease pencil or Sharpie pen. I will forego the box opening and contents review – folks can find all that in many other logs and online resources. I will however include this quick view of the Trumpeter packaging… All very neat and carefully laid out (as is the case with all their kits that I’ve got in my stash). Most modelers will splurge and invest in either the KA Models upgrade set or the one made by Pontos. Both have their pros and cons, but I have opted for the KA set. I like the extensive 3D print and resin components and the etched brass is very comprehensive. Again – I won’t lay out all the contents here… That is easily found in other logs or the KA website. I do have various other add ons including several brass sheets from Woody’s Model Works. Very nice stuff and highly recommended. (Neil Woods is in a bit of a hiatus right now as he figures out how to deal with UK VAT requirements). I’m not sure I’ll go down the LED route. Certainly, Titanic is the perfect model for LED treatment, but it generally isn’t my thing – not sure the extra time/effort will be worthwhile. Still pondering… A note about online resources. Ken Marschall has long been a great visualizer of the Titanic, but anyone who is taking this kit seriously will find their way to three key players: Robert Read – Mr. Read has a great catalog of white papers and research material that he has created and maintained on his website Titanic CAD Plans. He illuminates many fascinating details, resolves conflicts and controversies, and explains many of the inner workings of Titanic’s systems and gear. Terrific resource. Vasilije Ristovic’ – Most Titanic aficionados will know Vasilije’s work. His digital renderings of Titanic bring the great ship back to life and are breathtaking. His thoughtfully researched images shed light on many unique details and provide a terrific color guide for those of us trying to navigate our paint choices. He also has a very impressive 1/200 Titanic model of his own in progress. Cyril Codus – Mr. Codus is a gifted digital artist who has created some outstanding full-length profiles of Titanic and her sisters. He also has very detailed overhead deck views that highlight the positioning of deck equipment and rigging. Incredibly useful stuff. You can find samples on his website RMS Titanic Art Work. For those who can stomach Facebook, there are several terrific resources utilized by the Titanic community: RMS Titanic Model Research and Tech hosted by Zeno Silva and friends. You’ll find Bob Read, Cyril, and Vasilije all contributing here. Trumpeter TITANIC 1/200th model ONLY building tips and tricks hosted by Gene Davis. This is an essential meeting place for the Titanic modeler community with extensive Guides and downloadable files to facilitate enhancement of the kit. Gene shows remarkable patience and perseverance amongst the wide spectrum of modelers that post on his pages. (Although I’m sure that Gene’s head will explode if one more novice jumps in to ask about three bladed props versus four…) RMS Titanic – 3D Illustrations by Vasilije Ristovic. This is where Vasilije posts most of his incredible Titanic renderings (and offers images for sale). Visiting the Midwest Model Shop Youtube channel is also recommended. Ben and his charming wife Nora walk through every stage of their 1/200 Titanic build and give a terrific overview of their process along the way. It is refreshing to see an experienced modeler identify his own mistakes and show how he goes about correcting for them along the way. Includes terrific episodes about 3rd party upgrades – in particular the brass sheets from Neil Woods. Regarding more traditional resources I do have a small library of books with lots of photos and tech specs: I have not invested in the two-volume set TITANIC – The Ship Magnificent. I think I have other sources for most of what I would glean from those pages and the investment just seems a bit much for now. I’ll use those funds to purchase additional upgrades instead. Give me a few days and I’ll start to catch everyone up on my progress to date. Cheers Evan
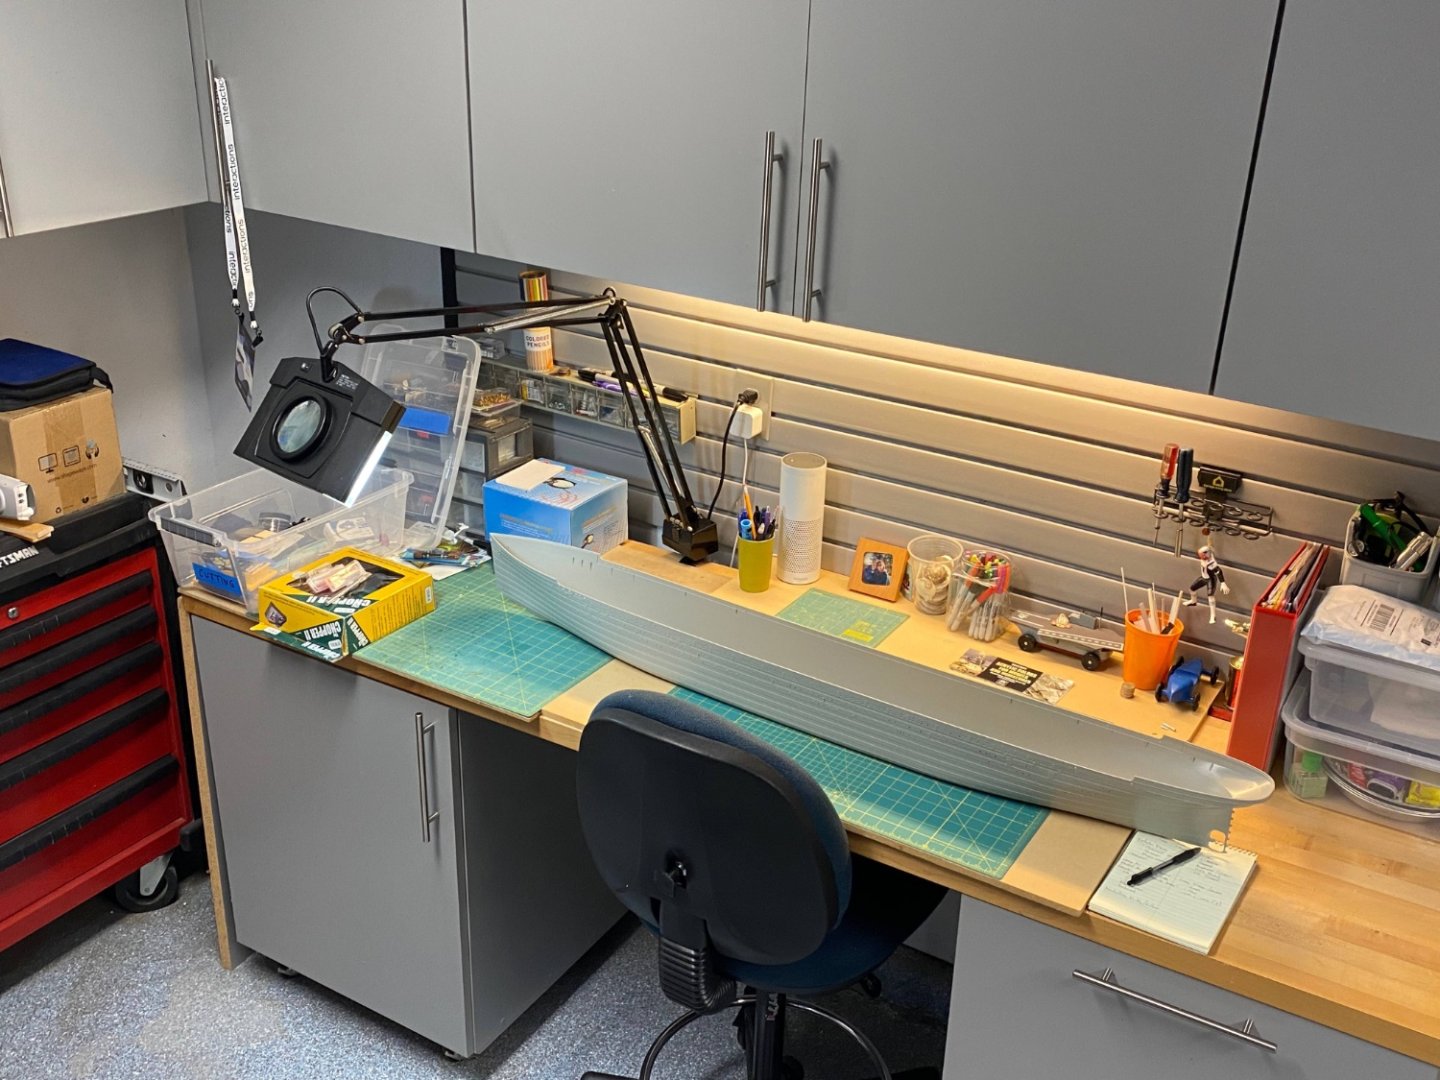


- 138 replies
-
- 16
-
-

-
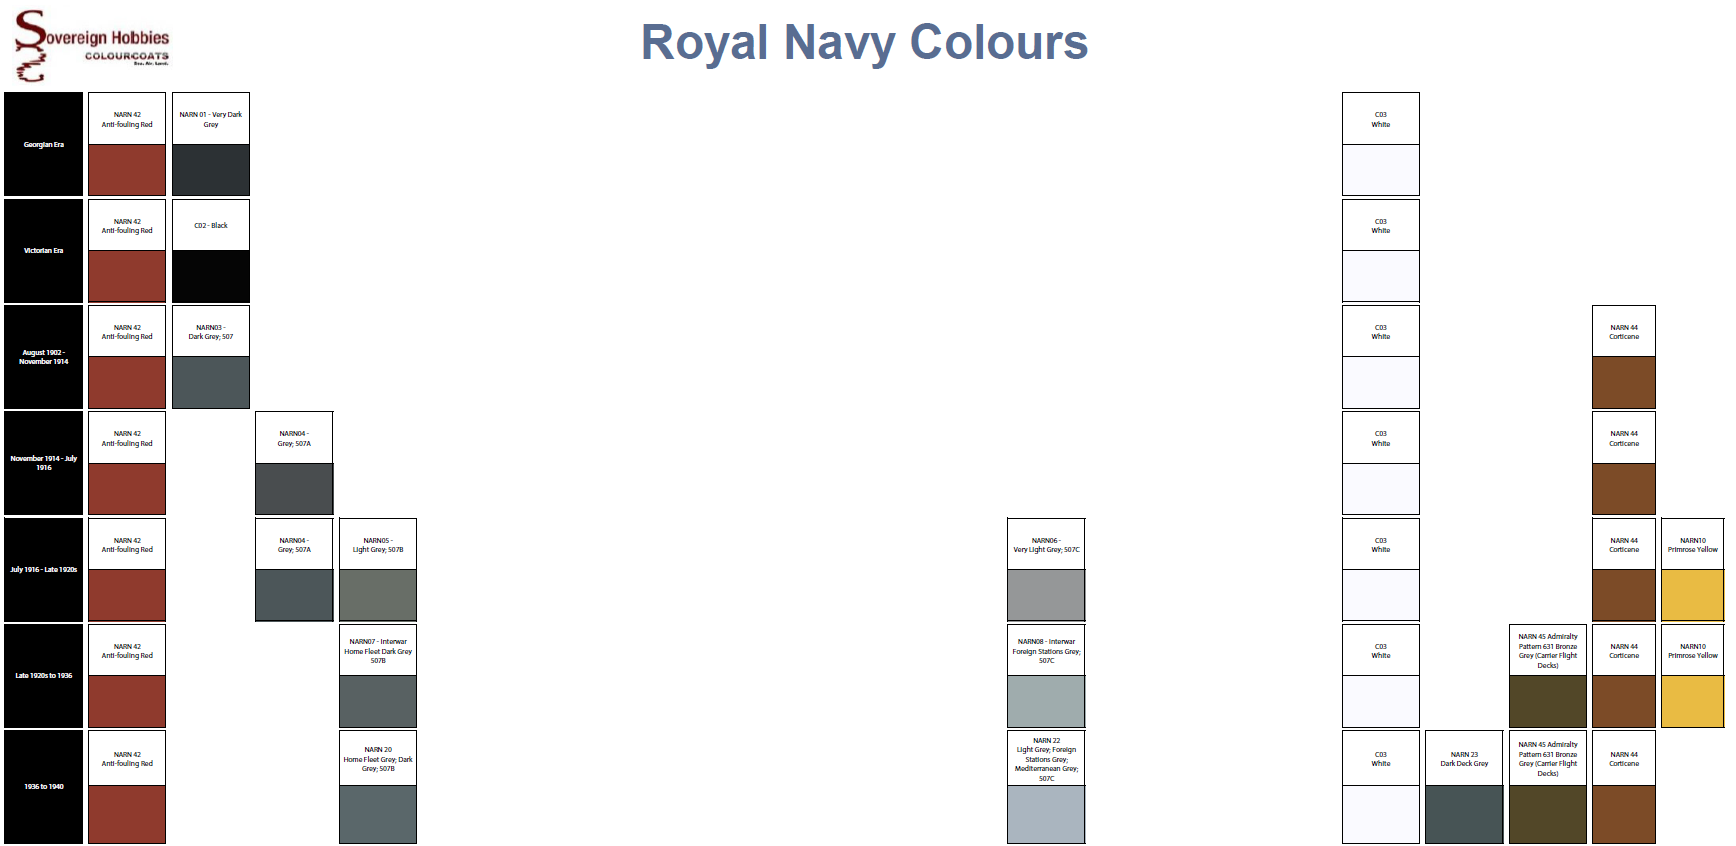
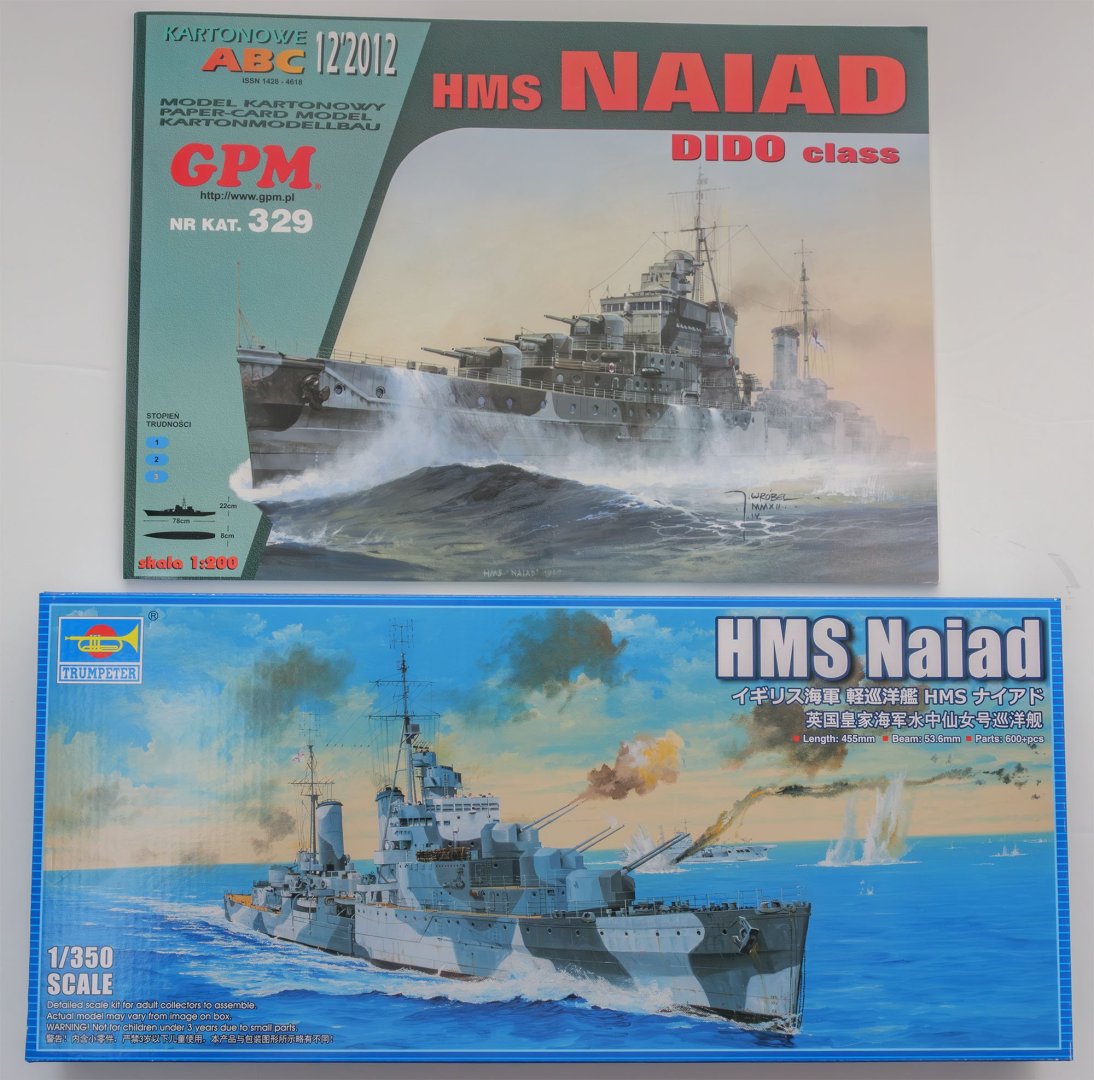
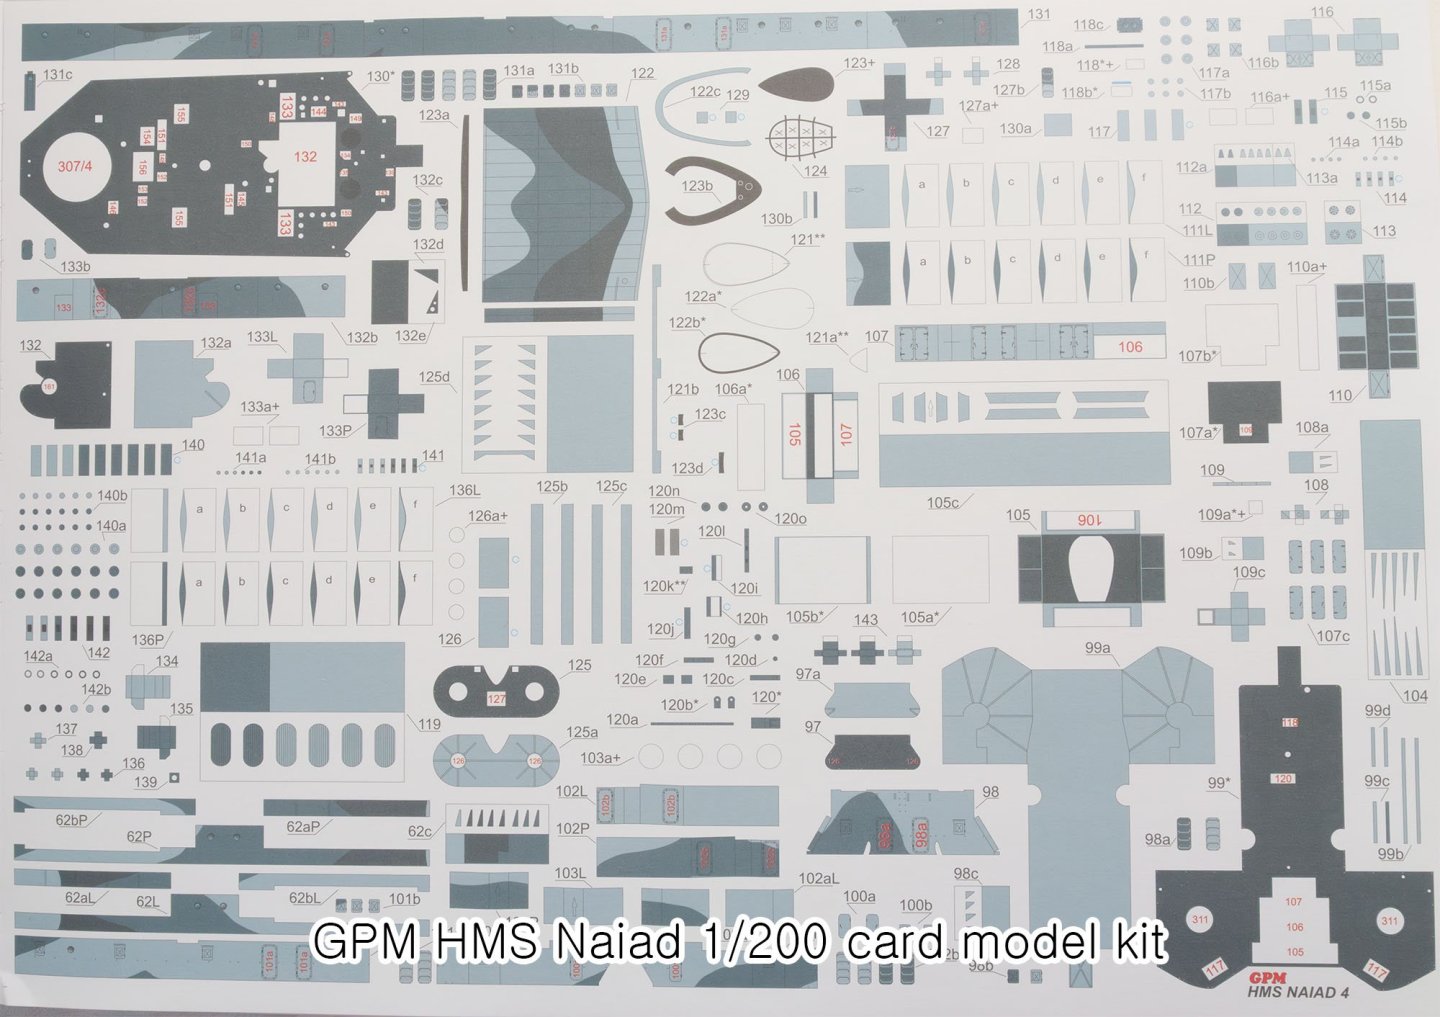
This is the first time I seriously paint the WWII RN ships. The kit is Flyhawk - HMS Naiad - 1/700 - FH1112. I used two main references to understand the camouflage patterns. The GPM 1/200 scale card model kit offers almost everything I need. Also, I mixed 90% percent accurate colors. The color reference is from Lifecolor RN set. (Source : https://web.archive.org/web/20241107004340/https://www.sovereignhobbies.co.uk/pages/royal-navy-periodic-table-of-paints ) The research pages of the Sovereign Hobby were the best of the best. I became familiar with the USS camouflage scheme at the site. Unfortunately, the Sovereign Hobby shut down last year. It is a reason I relied on the Lifecolor paint. I thank them very much. To ensure that the entire RN fleet in the future matches well, I'll use the same mixed colors for future RN kits. 😎

-
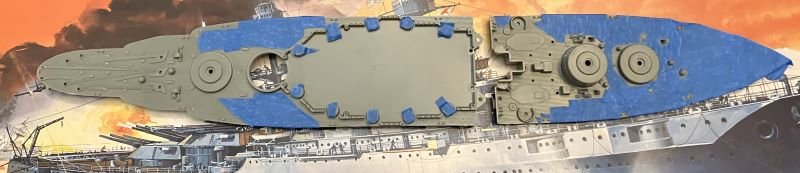
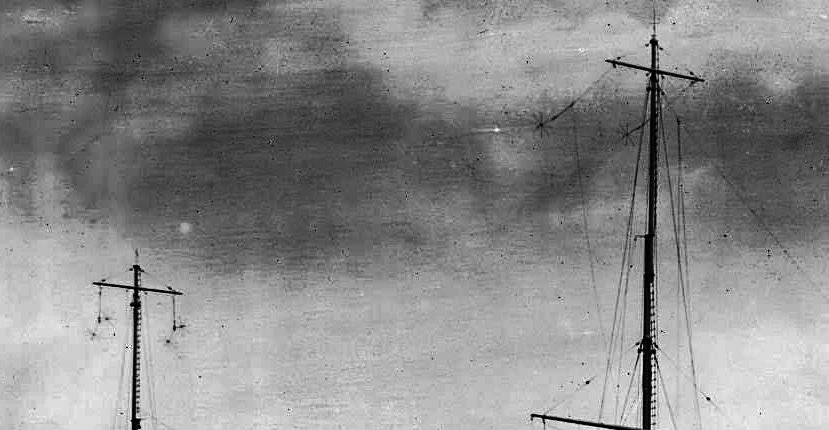
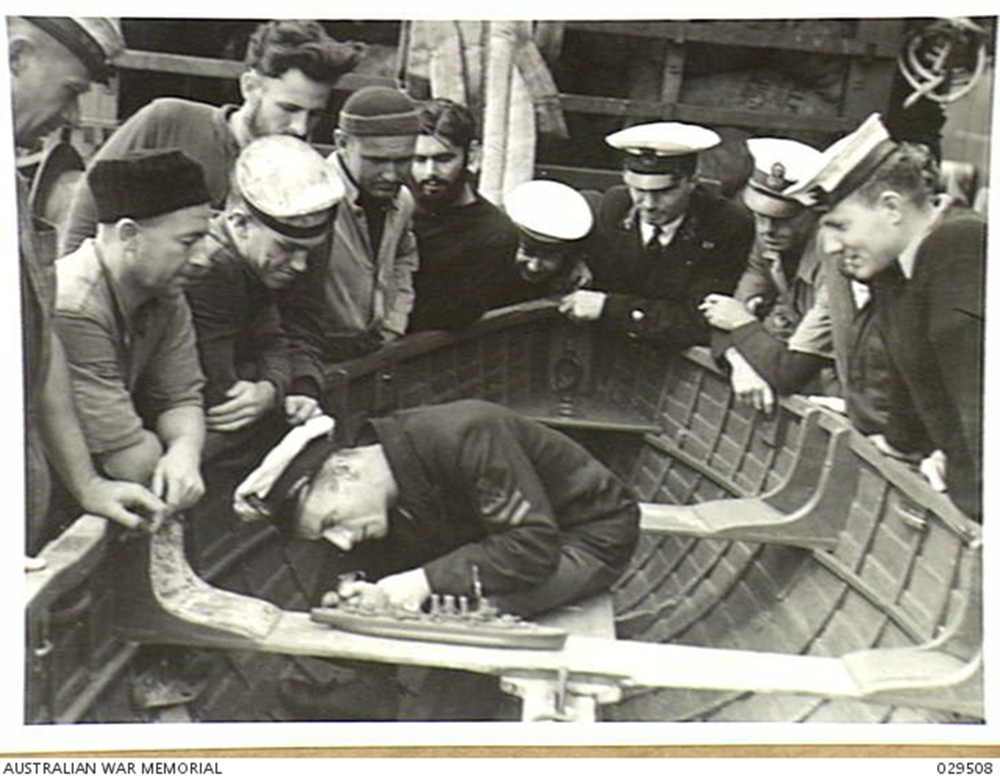
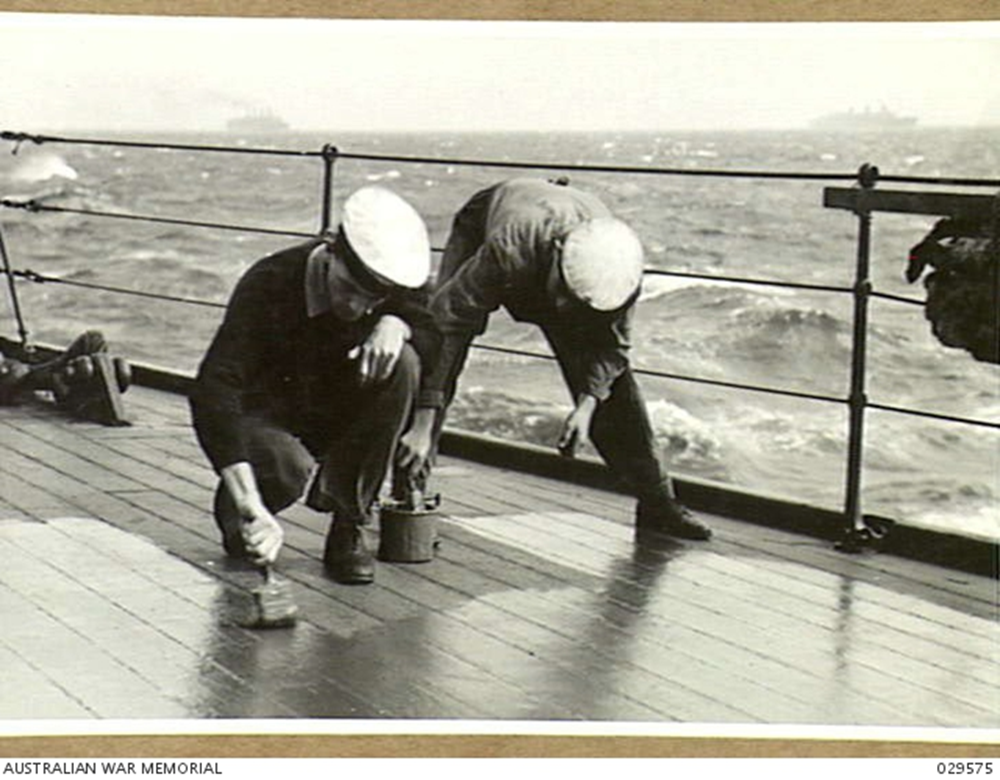
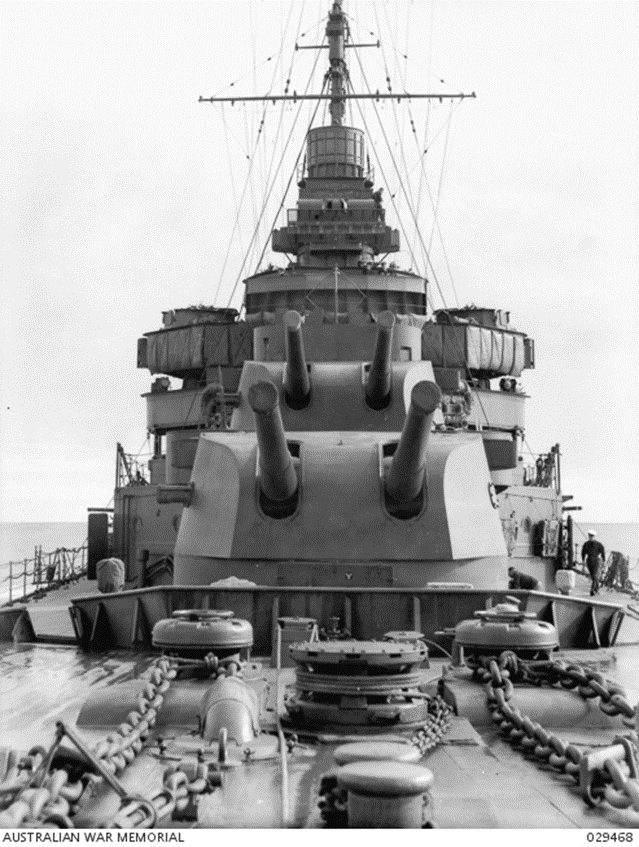
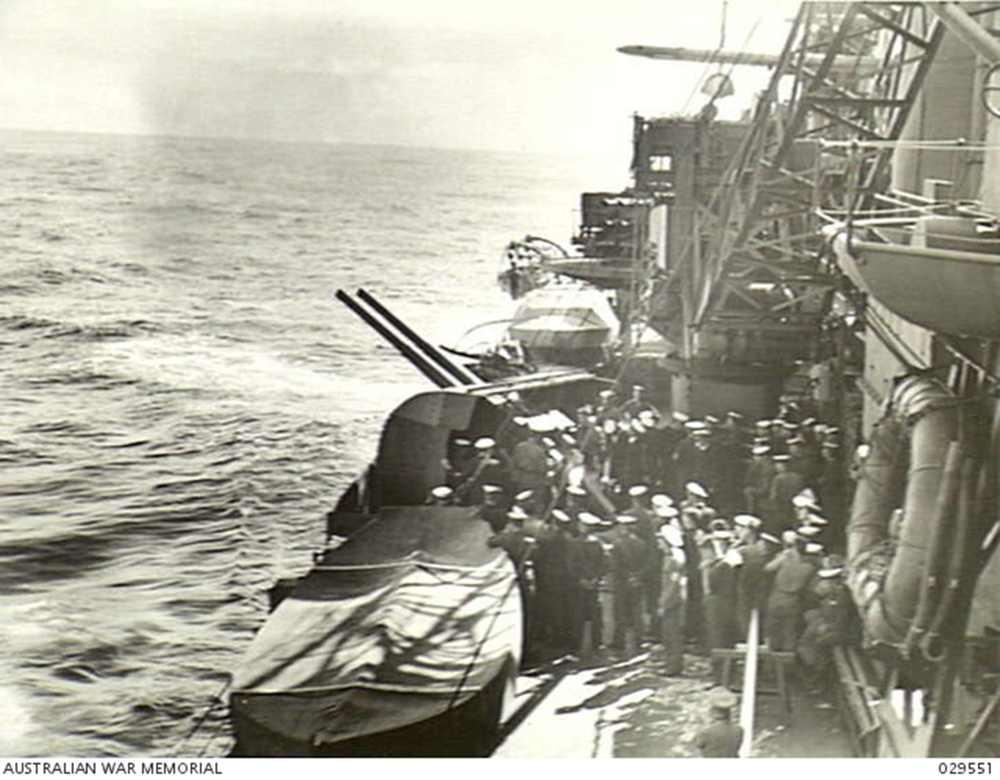
 Hi all, I've been lurking for a while now, checking out the builds from some of the magnificent gentlemen. Please allow me to open with this amazing photo from the Australian War Memorial collection. HMAS AUSTRALIA, AT SEA. 1943-02. PETTY OFFICER A.E. COSLETT, RN. PETTY OFFICER COSLETT IS A SURVIVOR FROM HMS REPULSE AND IS SHOWN SURROUNDED BY A GROUP OF SAILORS WHILE HE WORKS ON HIS SCALE MODEL OF HMAS AUSTRALIA I figure if its OK for a bone fide war hero to build model ships, I can get on board. My first pun in the forum. Apolgies. I'm going to bore you all now, justifying my existence. I also would like to preface my comments by mentioning i won't be starting my build until after i get a mystery Christmas gift, i bought for myself, so my family don't cock it up. 😅 Sorry if that a pain. I'm hoping that a few of the guys who have threatened to build Australia 2 can weigh in and give me some tips. I've been modelling most of my life, now I'm 52, and a couple of years ago a mate of mine wrote rules for a naval combat game. I helped him play test it, and surprisingly had a good time playing. Naval games hadn't ever piqued my interest. So, I started reading, and discovered that Australia had a Battlecruiser in world war, the first. I have one in a very small scale. So I decided to build HMAS Australia the Heavy Cruiser version, after reading Mike Carltons book. He describes her as a 'happy' and 'lucky' ship. She also survived the war, unlike many others from the RAN. This is important as i don't want negative energy in my house. I basically am at the research stage. I know I'm bighting off a lot, but I might be able to make a decent fist of her, without reaching the dizzying heights of much of the work I've seen here. I've decided on this as a colour scheme. It is symbolic of the transition at the time away from the RN, and towards the USN, and a level of independence more broadly in Australia's defence policy. I also know i don't need to buy wooden decks, the kit ones will do just fine. HMAS AUSTRALIA, AT SEA. 1943-02. SAILORS OF HMAS AUSTRALIA PAINTING THE QUARTERDECK GREY IN ORDER TO RENDER IT INCONSPICUOUS FROM THE AIR. NOTE SHIPS OF CONVOY ON HORIZON. And i don't need to replace the f'ocsle decking with non skid plate. Seems to be wood. I will get white ensign upgrade kit, and weapons, funnels, ships boats and other excellent bit bobs from micromaster. I have emailed Kraken about the Canberra upgrade kit, but have no response yet. I feel I might not need it? This is based on reading build logs here and on Brit modeller. Please correct me if I'm wrong I hope to take advice on how to do the conversion from Kent to Australia from someone. And any advice on parts that will make her build smooth sailing for me. My second pun. I'm on a roll. Especially moving the guns to the main deck and the removal of the upper decks. Thank you all in advance. Sean
-
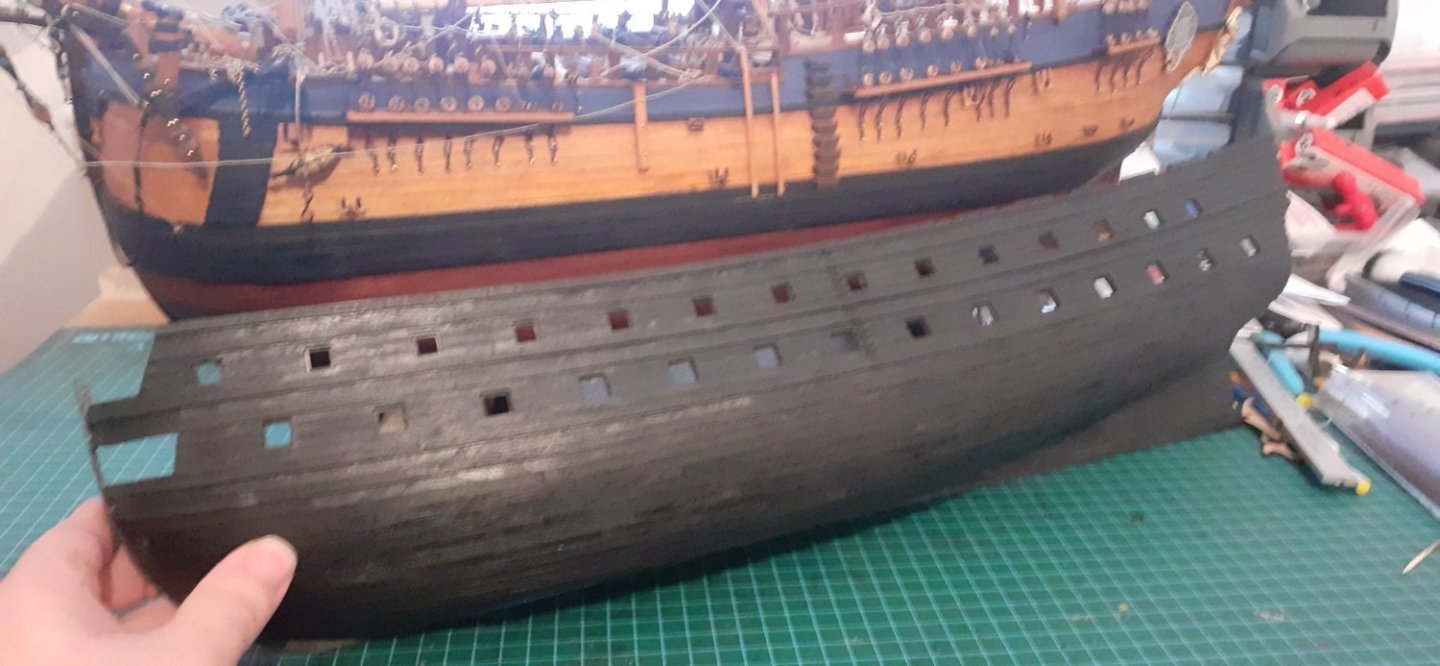
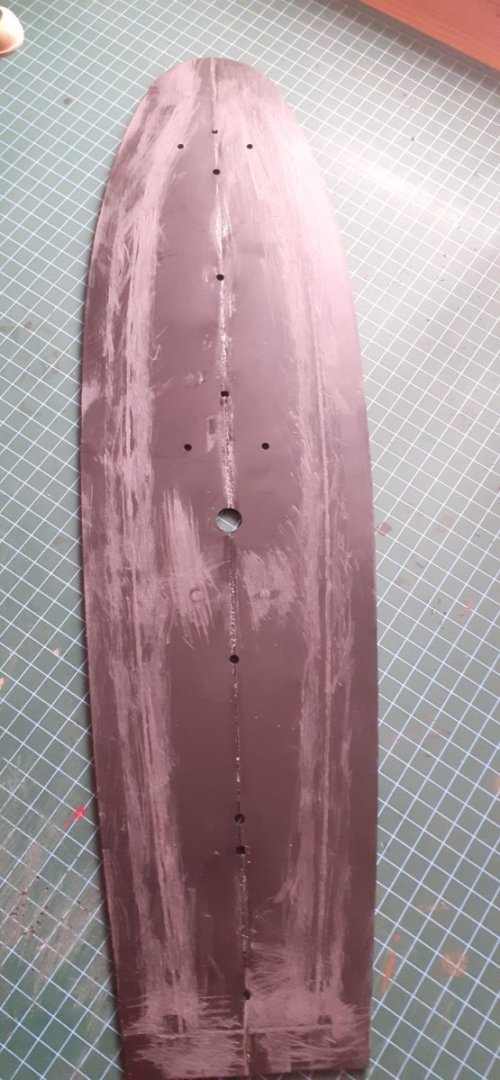
 This is my new project which is temporarily replacing my build of the Heller Soleil Royal whilst I get back into large scale scale ship modelling (large scale compared to 1:700). I have made rapid progress since I began only a couple of months ago, but this is the easy bit. I found this second hand kit at a good price. I guess the retailer hadn't realised that the box contained all the sprues for two kits; only the major hull parts were not duplicated. This is fortunate as some parts are broken and many have come detached from their sprues and so difficult to identify whilst other have become distorted. The plastic is also quite brittle. So why this ship? Partly because I made it myself over fifty years ago, but for someone else, and partly because it will make a good companion by size and comparison of change in warship design over time with my Heller Glorieux which currently has pride of place in my living room. That does mean that I hope to make it to the same standard so the first step was to cut out all the gunports and, with the help of Radimir at HisModel, replace all the plastic gunbarrels with brass ones. The photos below show where I have got to. I am awaiting delivery of the material for the standing rigging in the next few days.
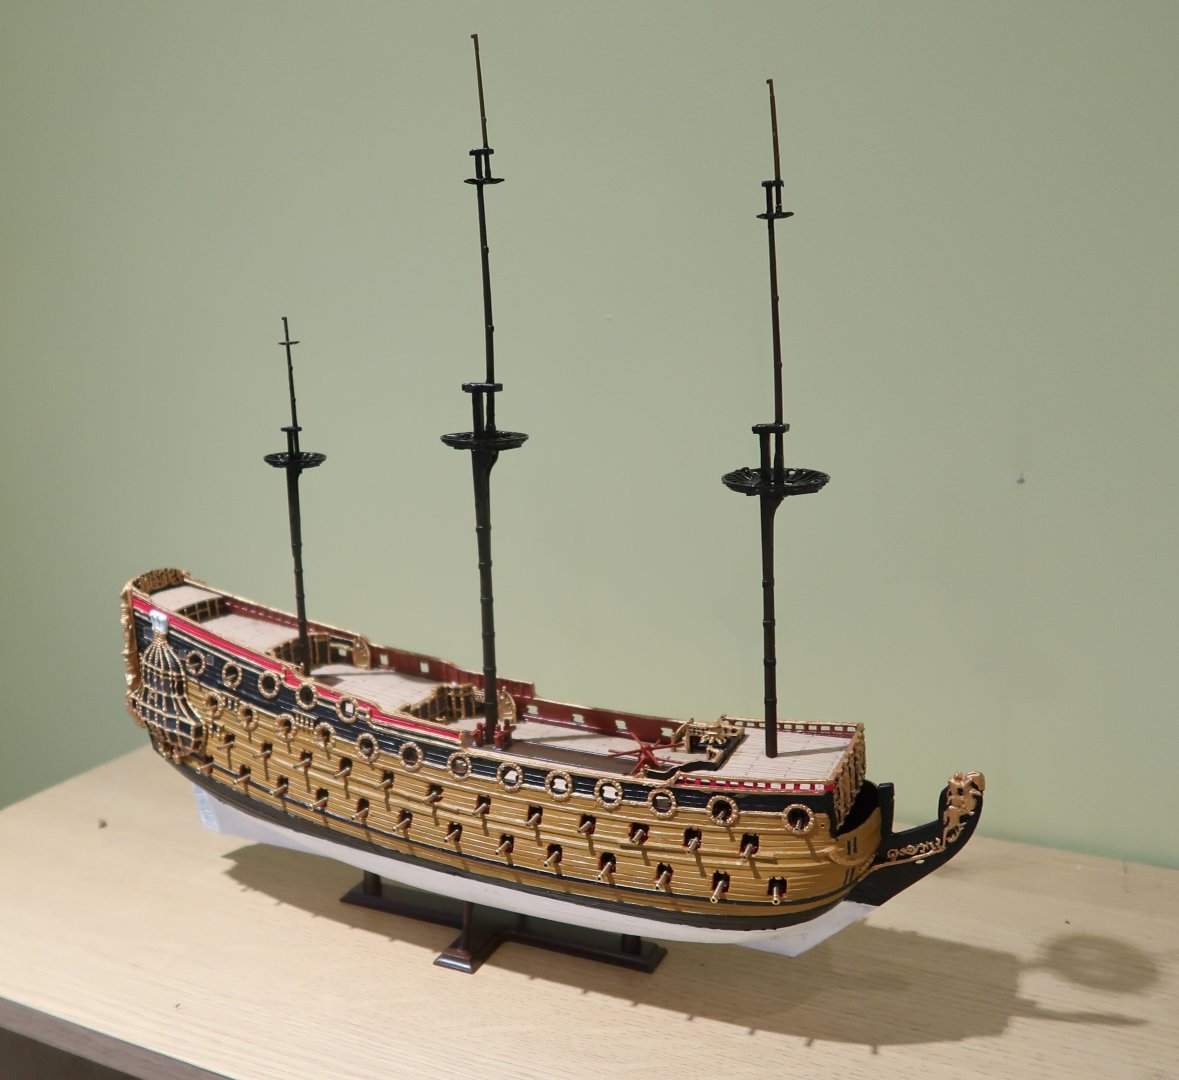

-
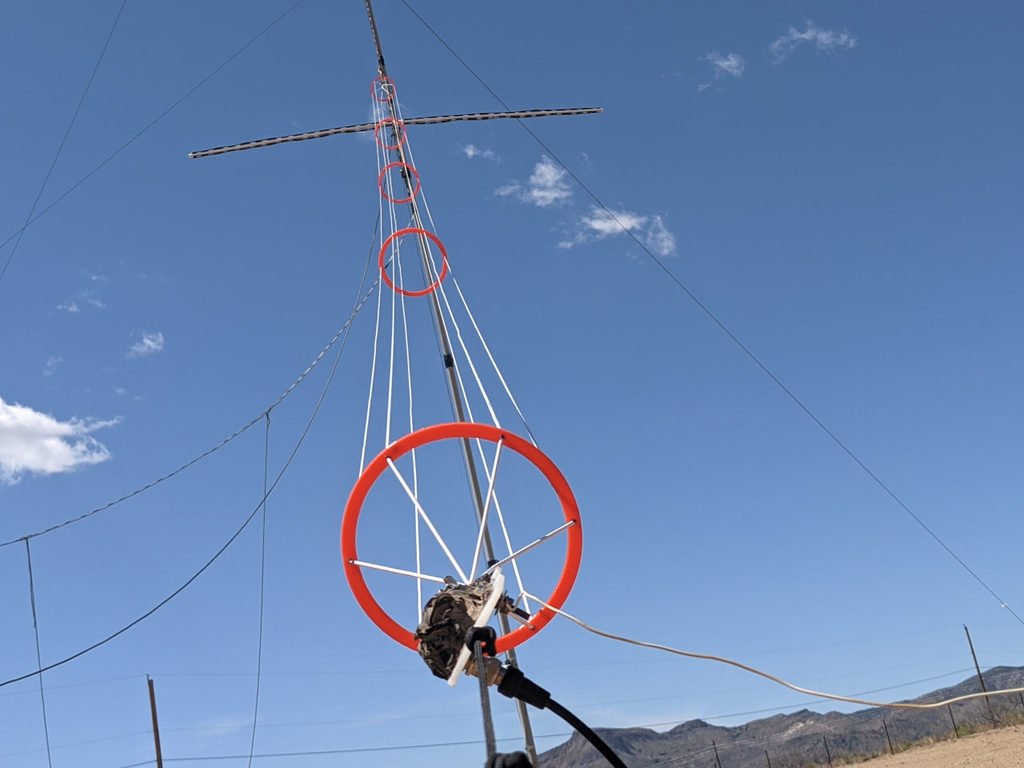
 Hi everybody, This thread is about Revell's North Sea Trawler kit in the scale of 1:142. It's actually Revell's oldest kit still in production. It came out in 1970 as the fictive 'Russian Spy Ship - Volga' and was offered as such for many, many years. But in 1973 it was also the 'Arctic Huntress' (Boyd Line / Hull), in 1980 the Grimsby 'Kandahar', in 1998 the 'Arctic Corsair' (which is now a museum ship in Hull) and since 2015 the Grimsby 'Ross Jackal'. The 'Ross Jackal's' sister ship the 'Tiger' is a museum ship in Grimsby and is the last remaining trawler of the 'Ross 'Cat Class' which were built from 1957 to 1960 there about. The ships of the 'Cat Class' were all named by children from a certain Grimsby elementary school. Alas one child thought a 'Jackal' was a cat! While another mistook the 'Zebra' as a cat! But Ross was a good sport about it all anyway and the 'Cat Class' ended up with a dog and a horse! But this model really is like the 'Arctic Corsair' which was over 50 meters long and therefore required to have a taller mast aft of her stack (international lighting requirements). She also had 4 hatch covers on deck. The 'Cat Class' trawlers were under 50 meters long so they didn't have this tall mast aft. And also they only had 3 hatch covers. But as a former Radio Engineer I love this model where I can also rig all of it's antenna systems: Medium Wave 500 KHz, Short Wave 2 to 30 MHz and by the 1960's also VHF vertical antennas also started appearing. But naturally CW was always my favorite mode as it could usually punch right through fading, noise, static crashes and atmospheric quirks whereas SSB would be most likely unintelligible. CW could also transmit 10 times further than SSB on a given power in Watts. Alas, the fishing trawler company owners wanted to save money by not employing radiomen which resulted in a huge loss of lives and trawlers. A trawler widow named Lillian Bilocca from Hull was a major activist against the companies due to this issue. Anyway, I will add material to this thread as I progress. Bye for now! UrkVisser
-
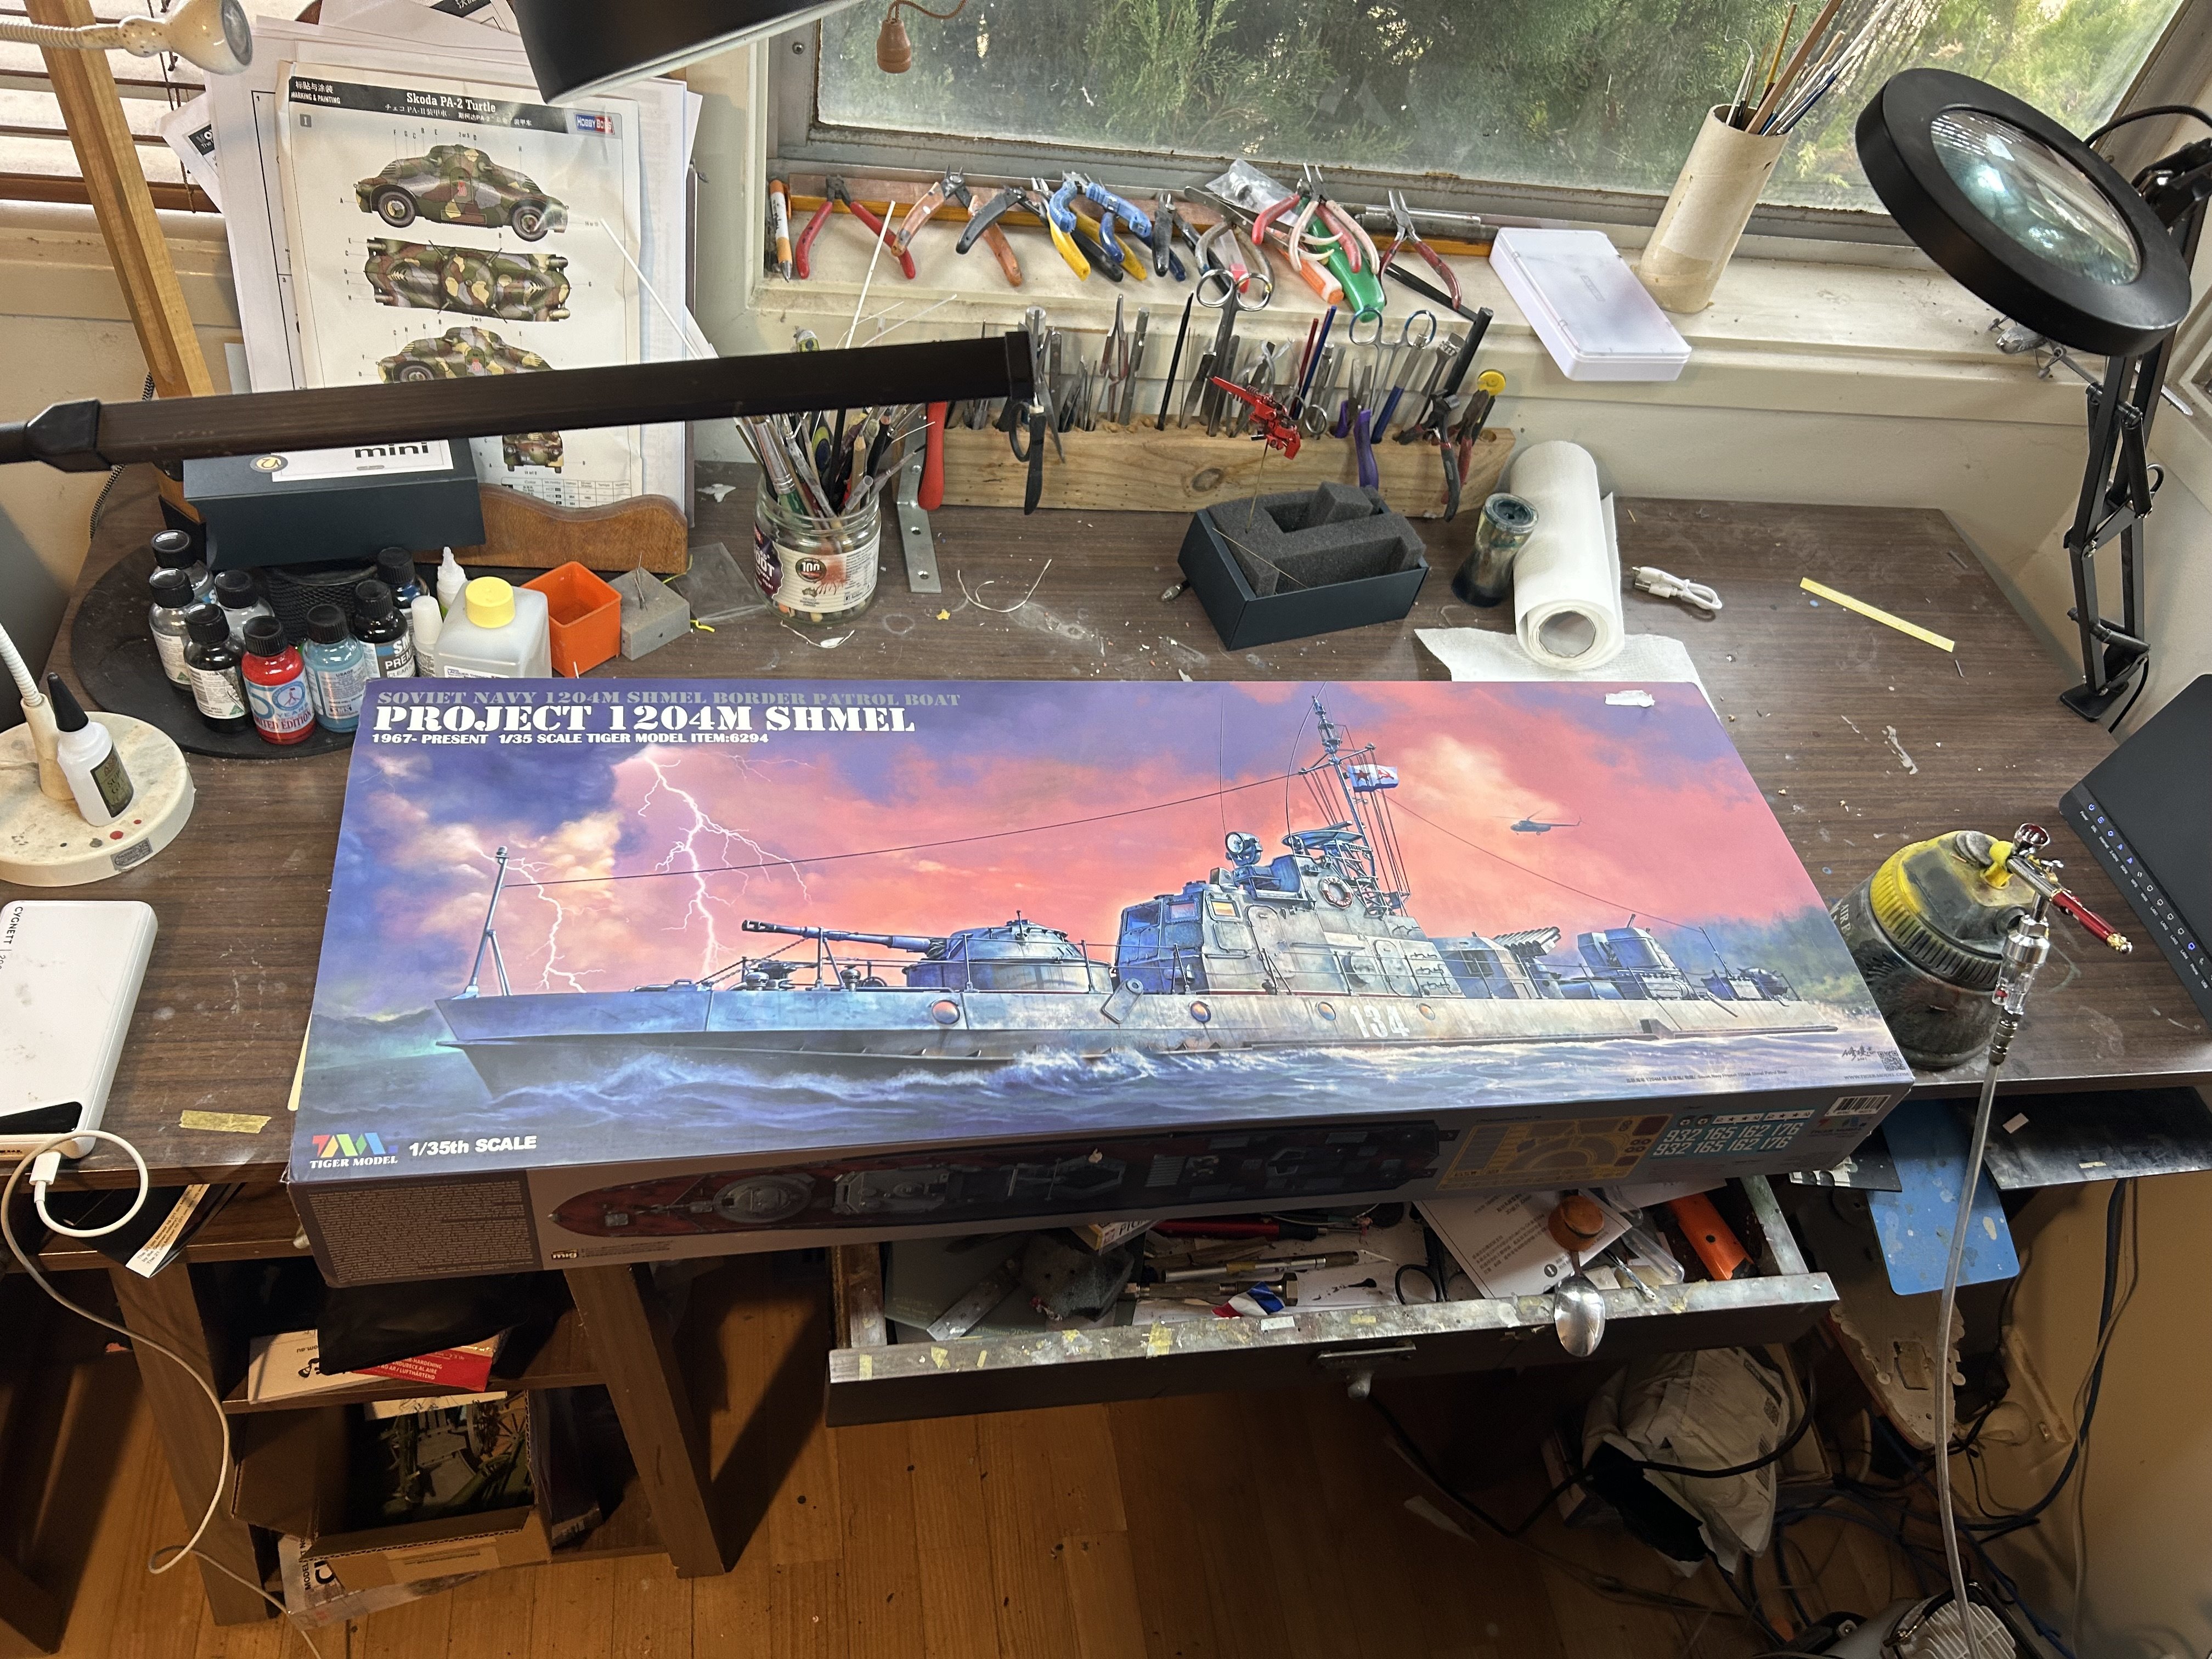
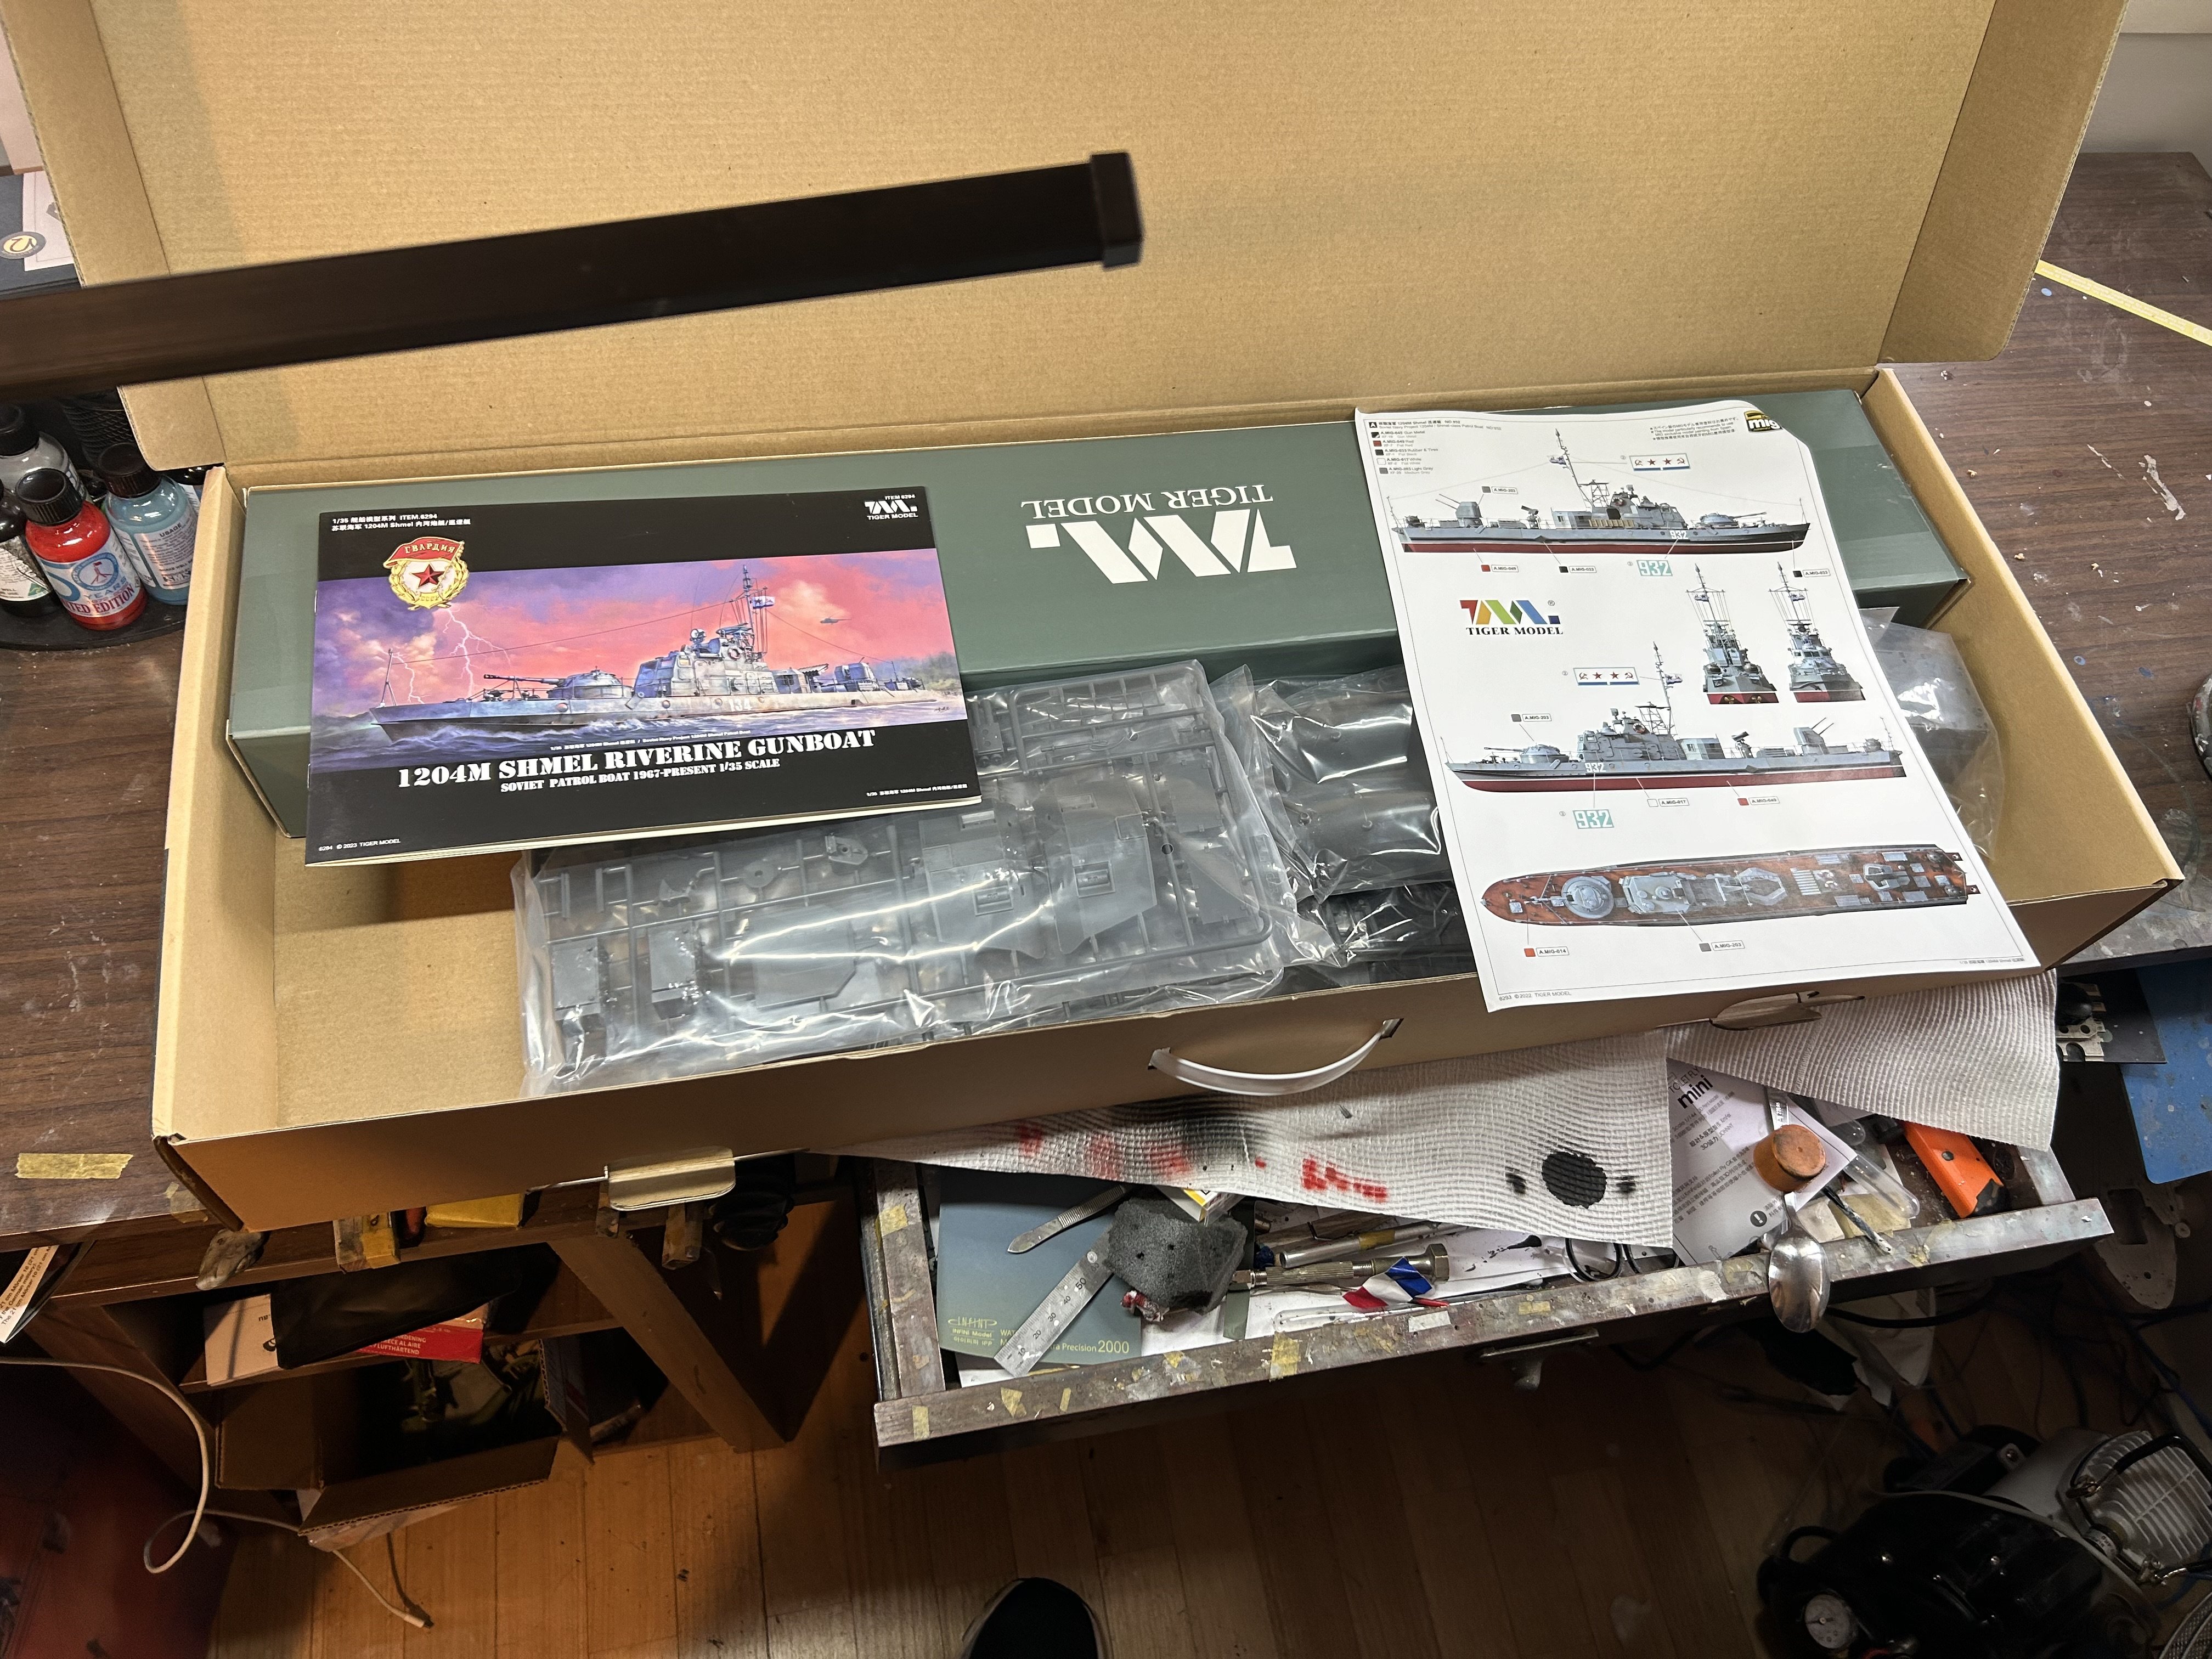
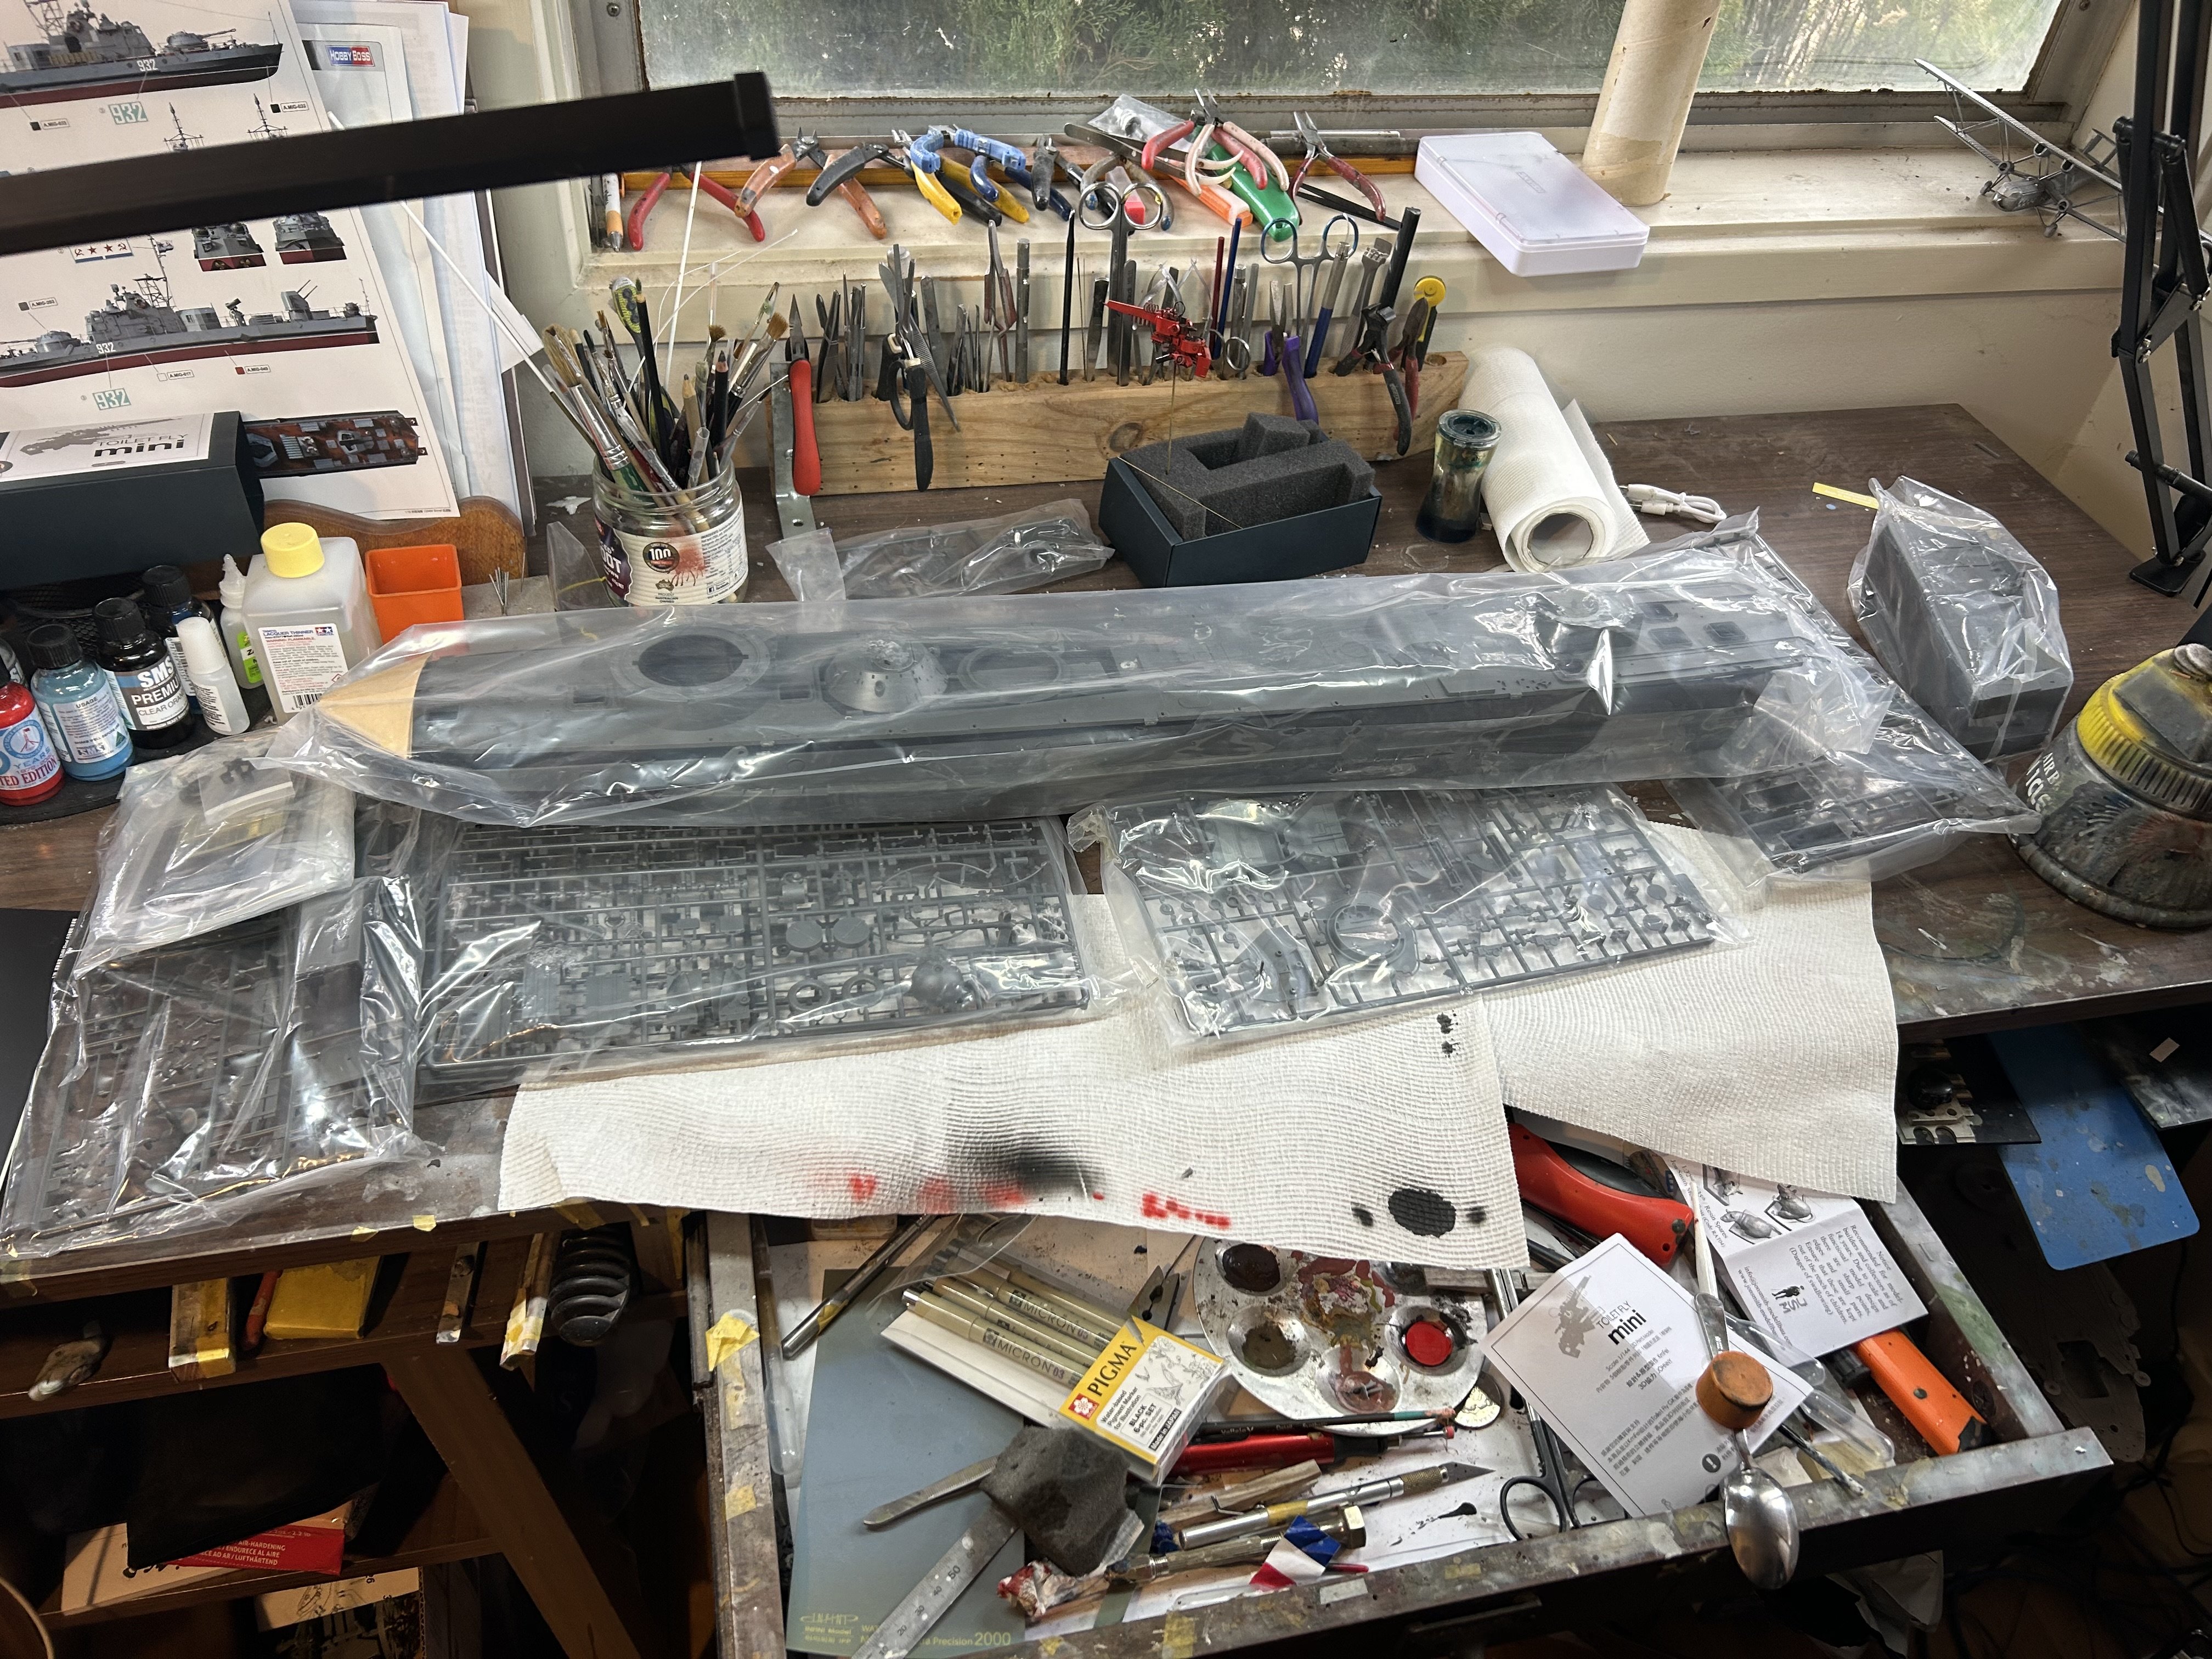
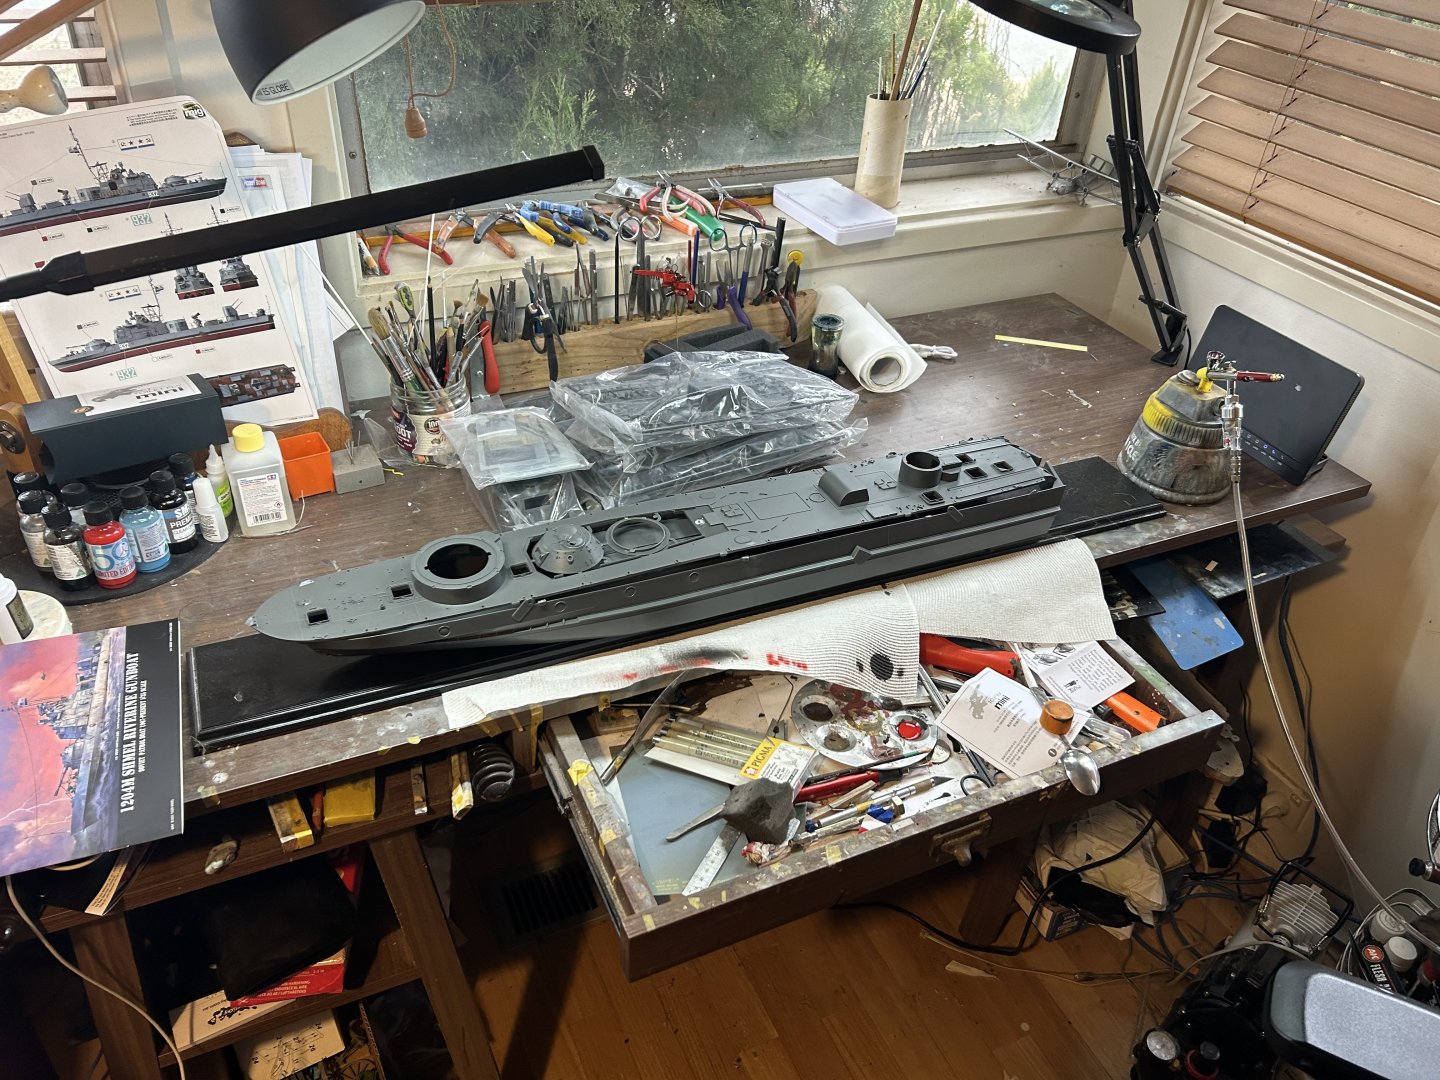
 Time to get back to ships (well boats), I bought this monster and after doing some weathered 1/35 military stuff I’m ready for this. As it’s So yet era I can weather the absolute hell out of it and add some decent size figures.


- 139 replies
-
- 13
-
-
-
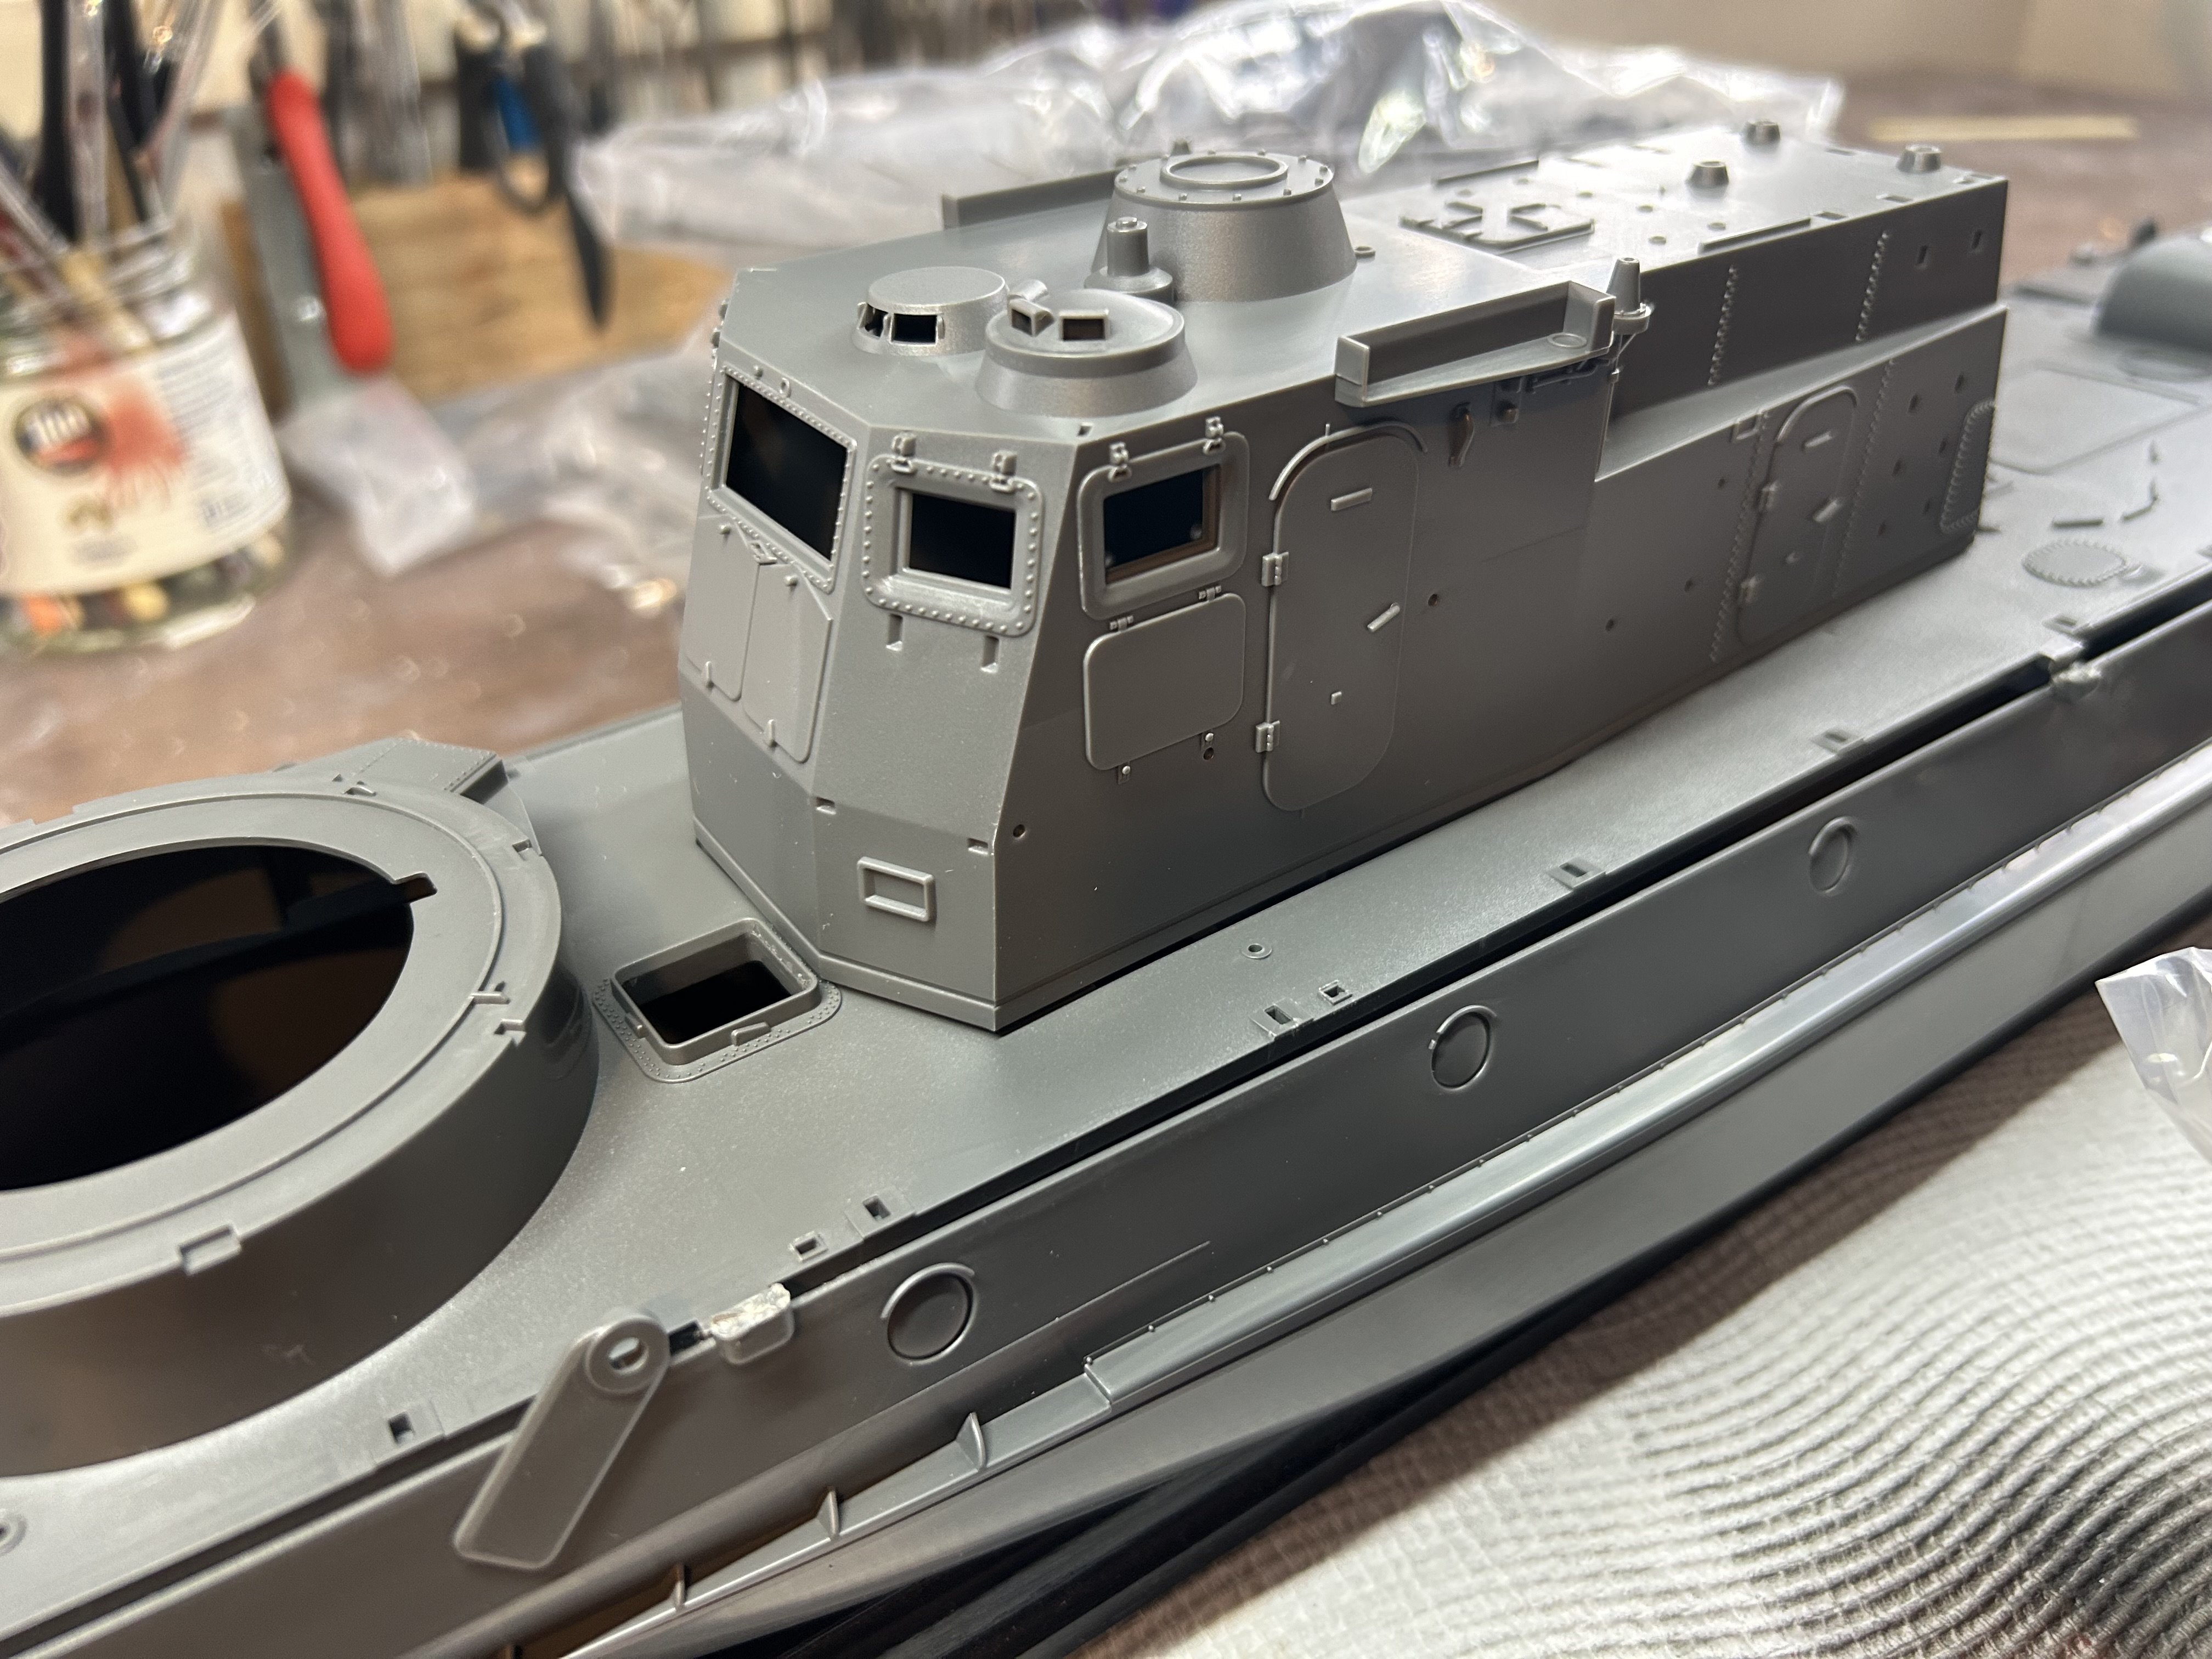
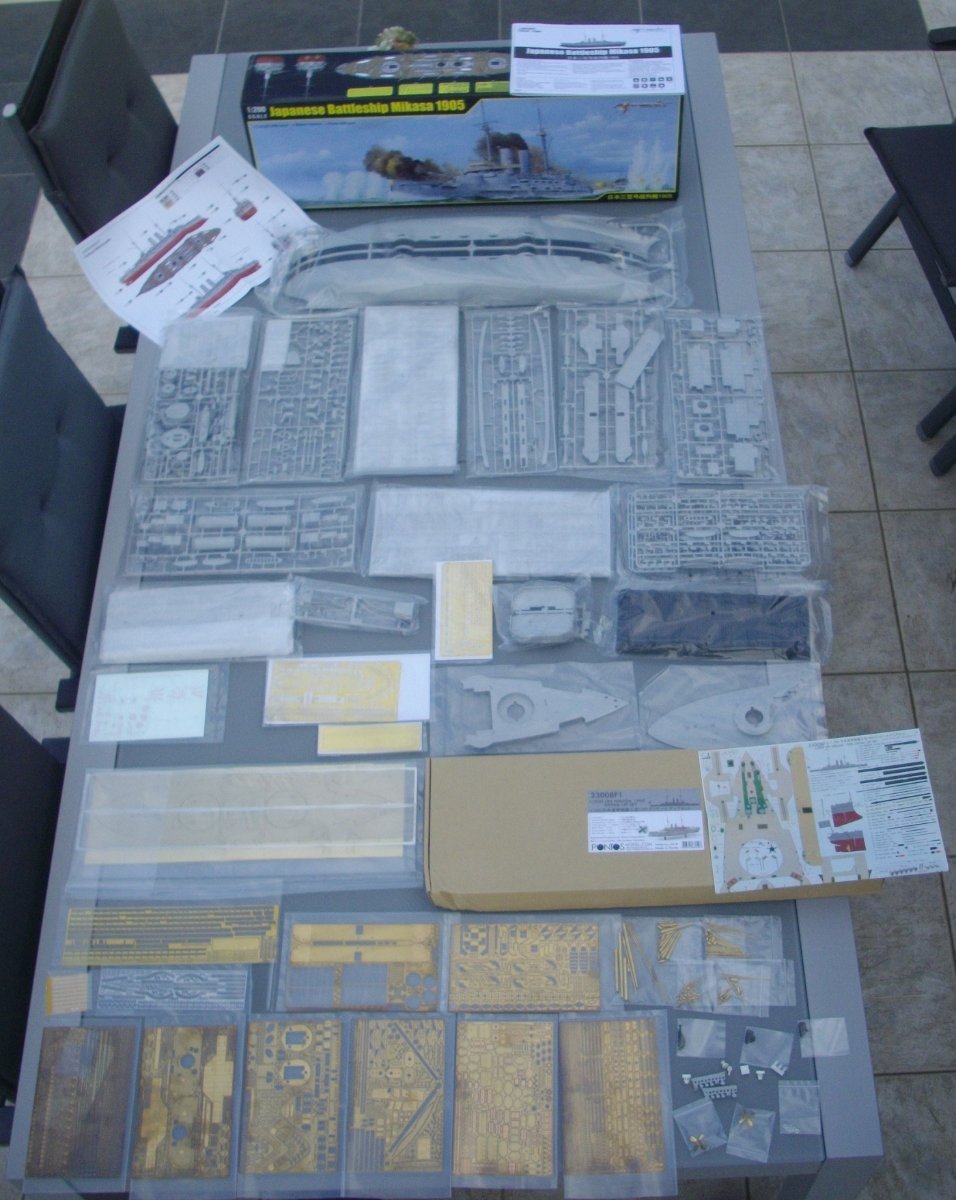
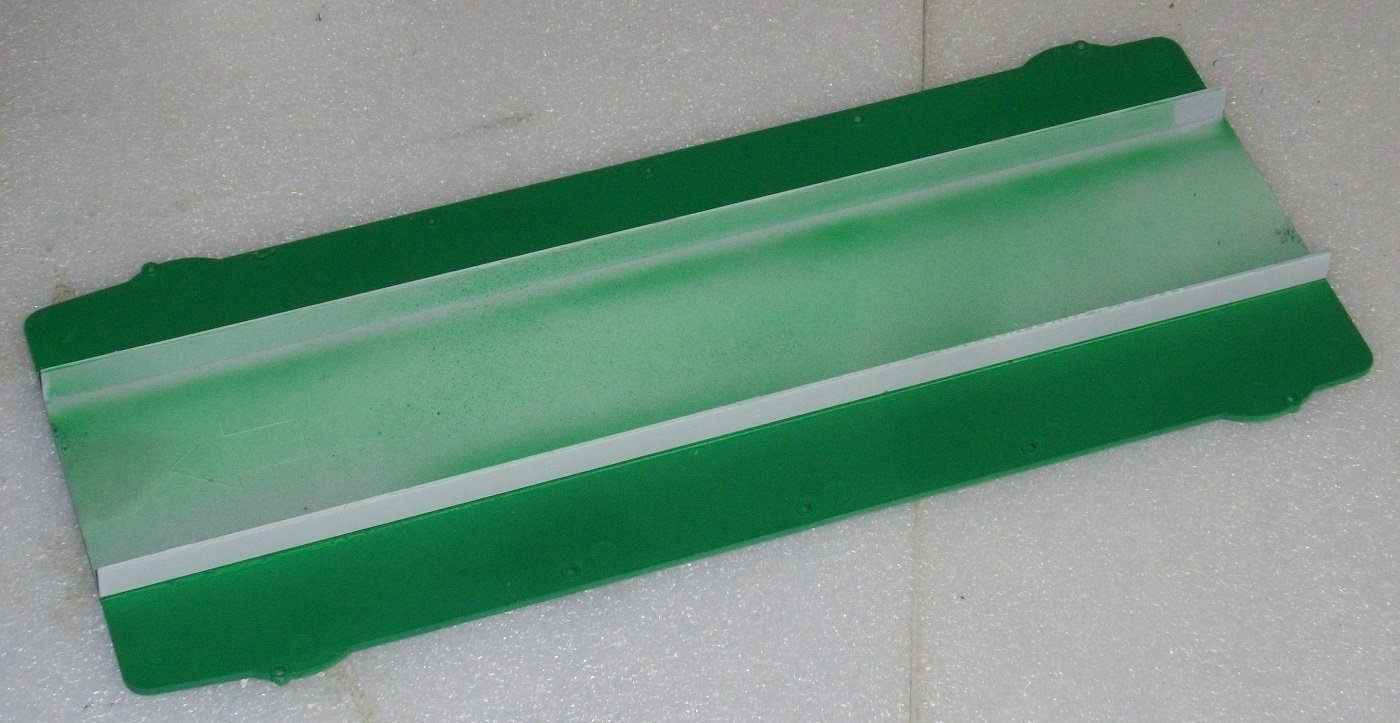
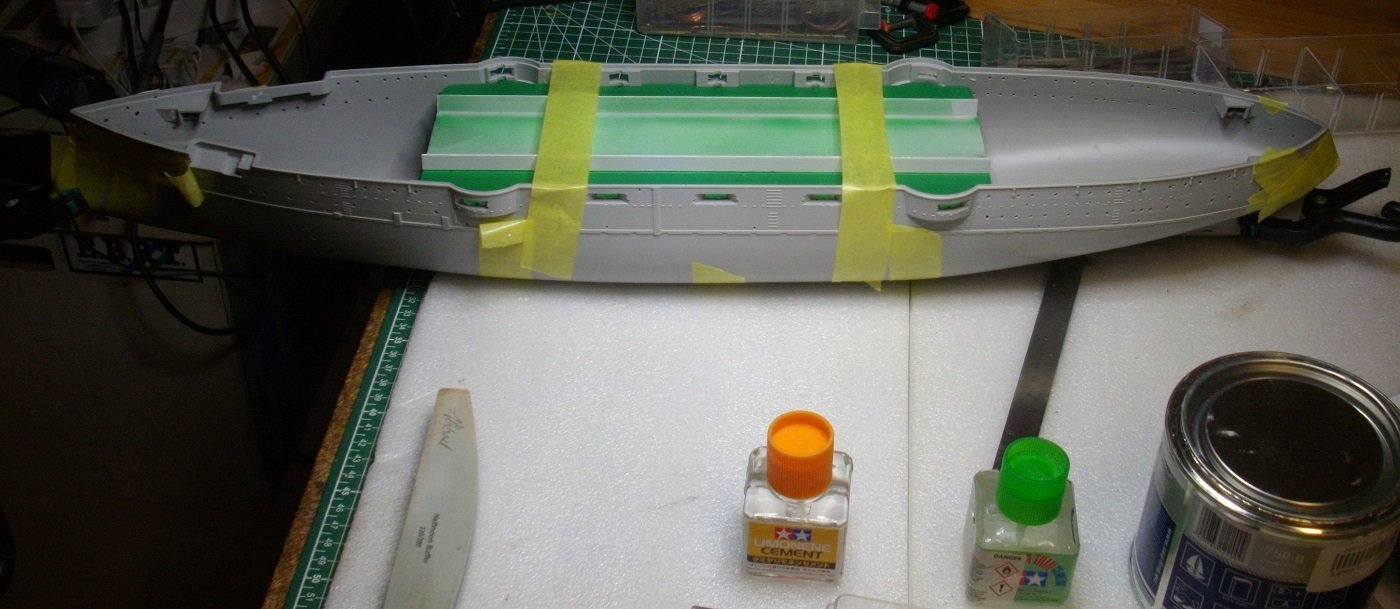
 After visiting Japan in 2019, and searching for a 1/200 plastic model of HMS Dreadnought, I discovered that the only remaining pre-dreadnought was still laying there, open to visitors. I found the kit at a reasonable price and ordered the Pontosset from Australia. The aim of building this kit is mainly to practice the extensive use of photo-etch in order to make a stunning model of the Bismarck. I finaly started this build, painting the underdeck bulckheads Insigna White and the floor Dark Green. Then joining the two hull halves, the bulckheads and underdeck together. Kind regards,
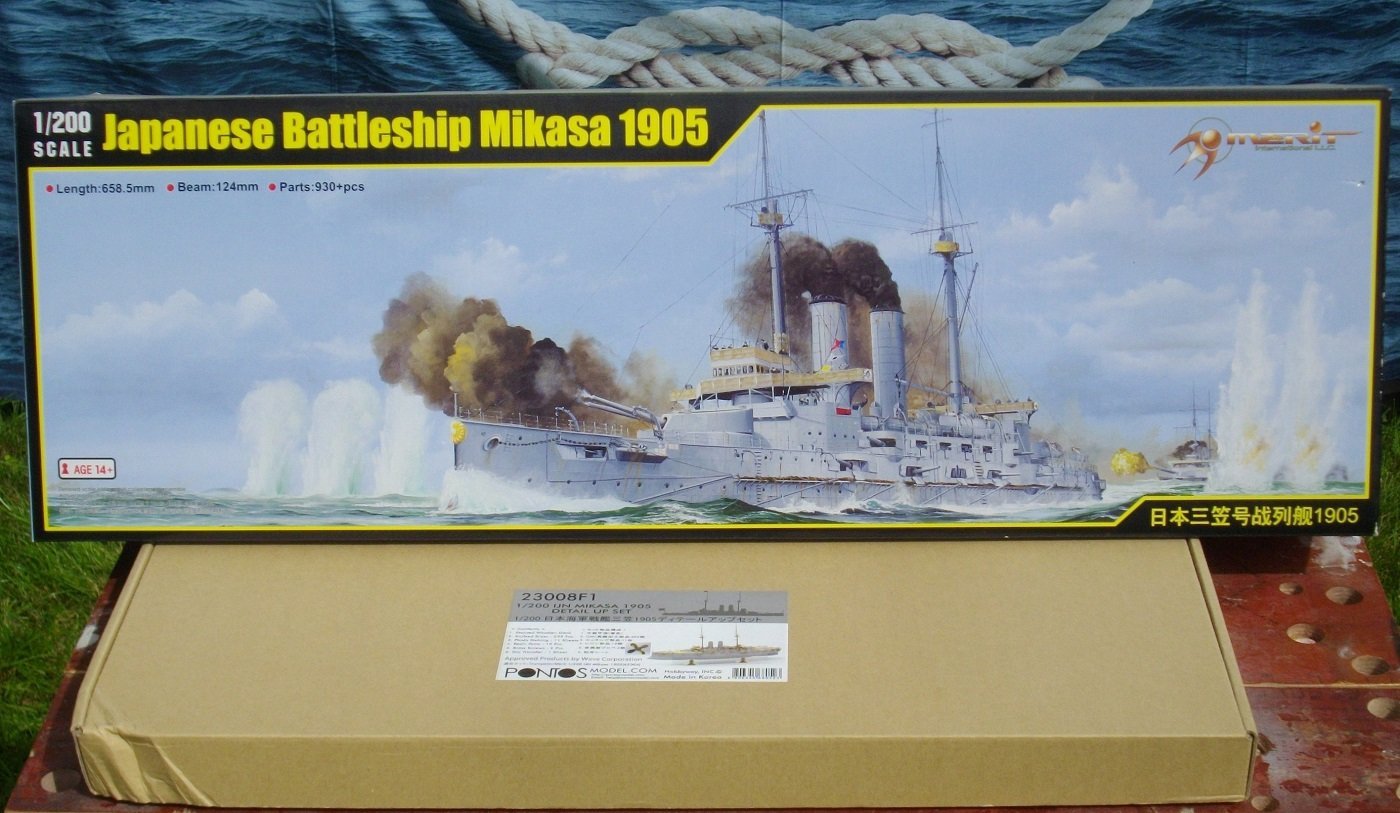

- 127 replies
-
- 11
-
-
- Mikasa
- Merit International
- (and 1 more)
-
 Question, In the instructions it shows gluing the ship to the stand early in the build. I worry that might restrict flexibility in painting. Can/should I wait until closer to installing masts etc? David
- 106 replies
-
- 2
-
-
- Cutty Sark
- plastic
- (and 3 more)
-
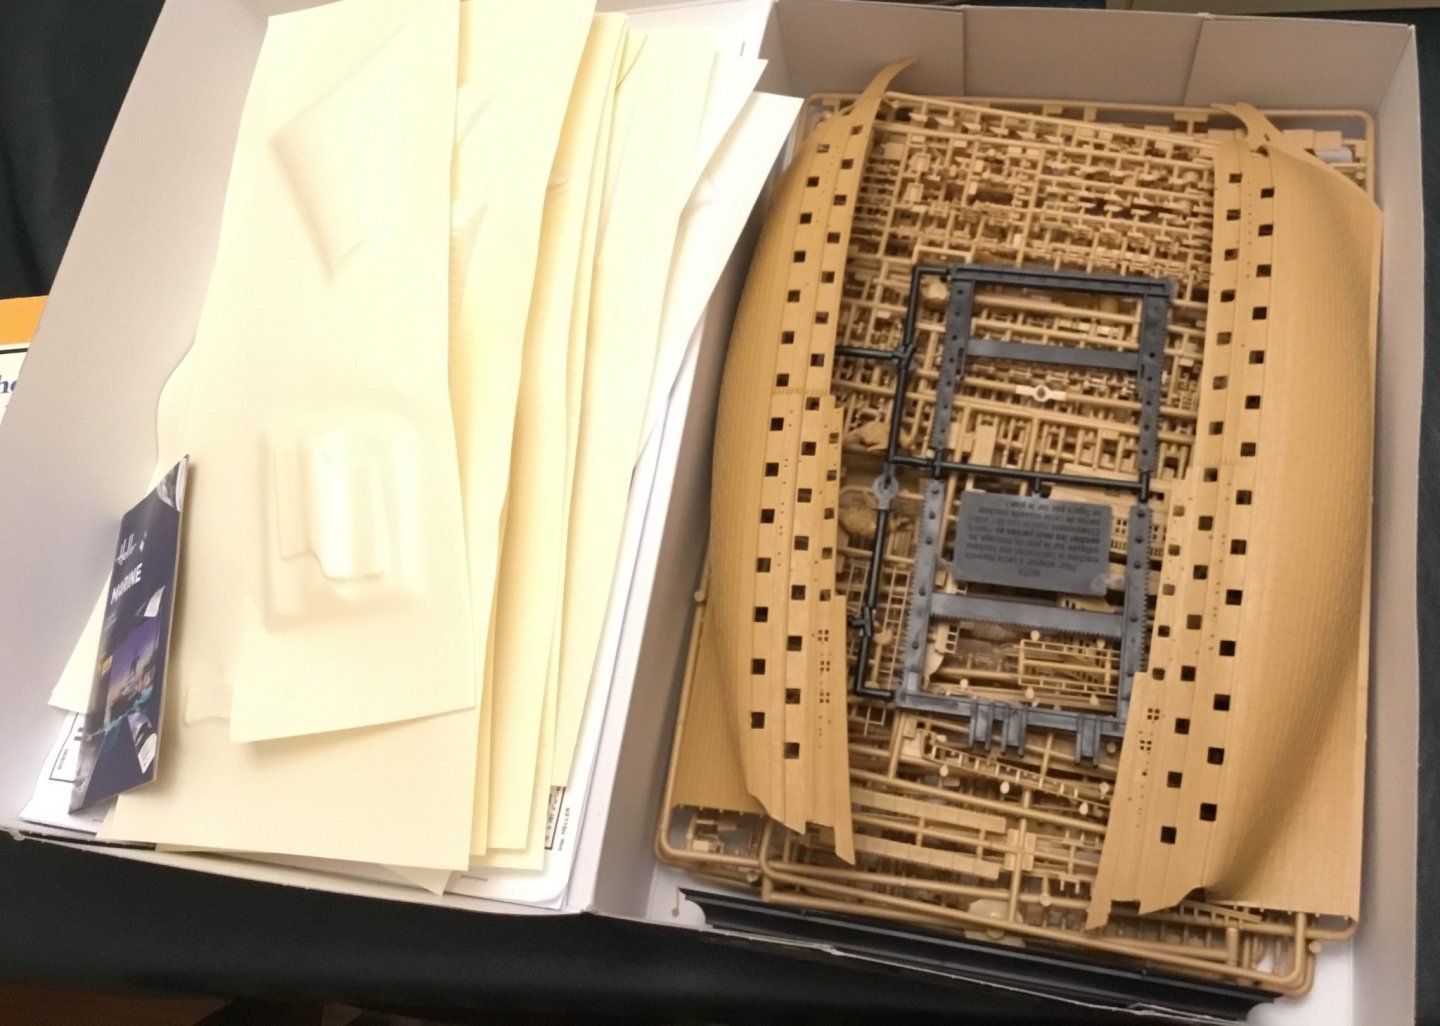
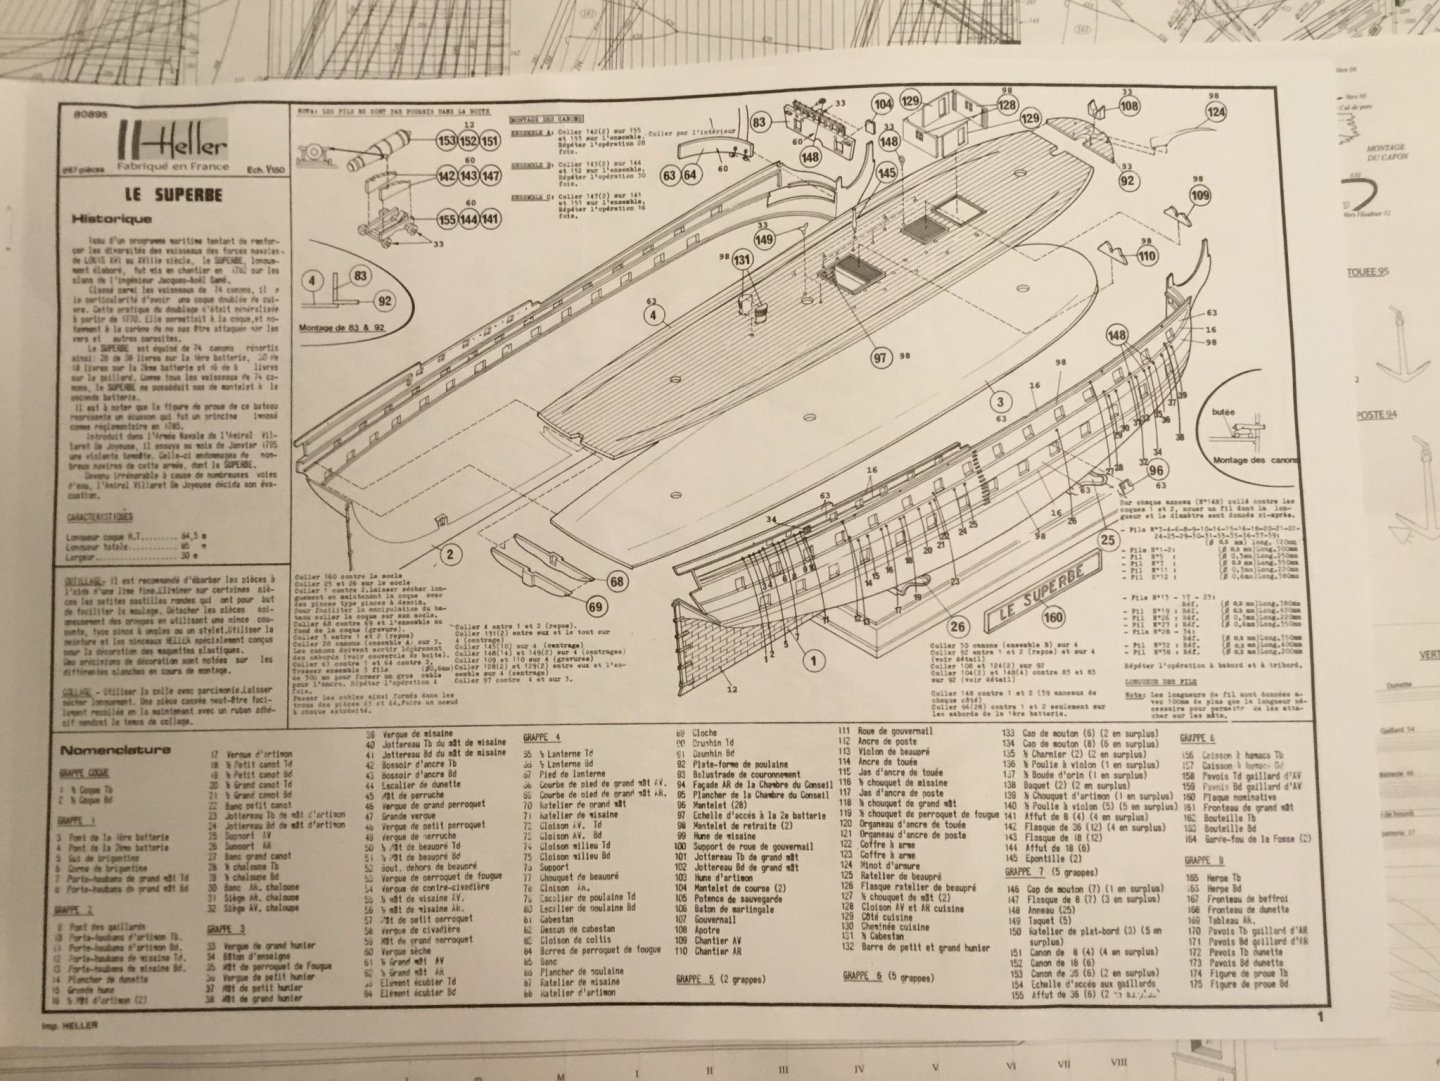
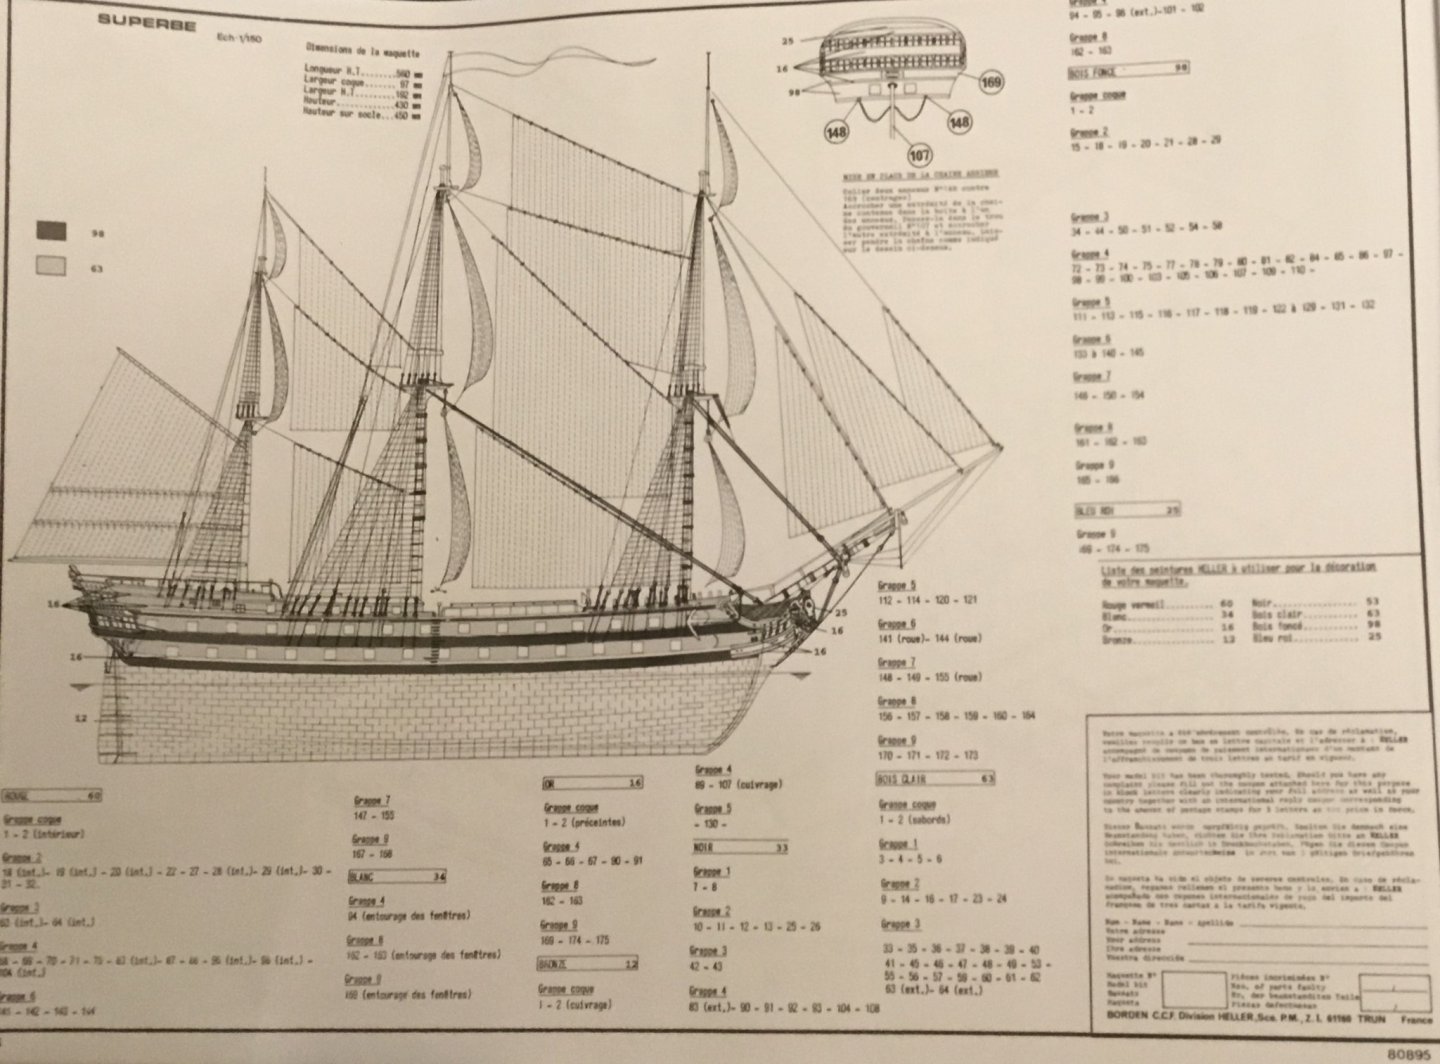
 Some time ago I received the Le Superbe kit in 1:150 scale from Heller. Since shipbuilding modeling has always intrigued me a lot, I decided to take a shot and assemble this model as best I could. While I have some experience with plastic models, I've never built a sailing ship, so I don't plan on doing a lot of modifications. This will be a very long report, assuming I have enough persistence to complete the build. As someone who lives a busy life and always in a hurry, I try to build slowly and carefully, getting as much enjoyment as possible from the process itself. Since I only build when the family is already asleep, I have a lot of quiet 🙂 However, this also causes a difficulty: I can't afford to tinker with the model as often as I would like. The man who writes the instructions for Heller should probably change profession, although just deciphering the diagrams is fun in itself. So far I'm terrified of the rigging stage, but I'm trying to solve one problem at a time. Wish me luck and persistence. I also thank you in advance for all your advice and tips. Regards, Piotr
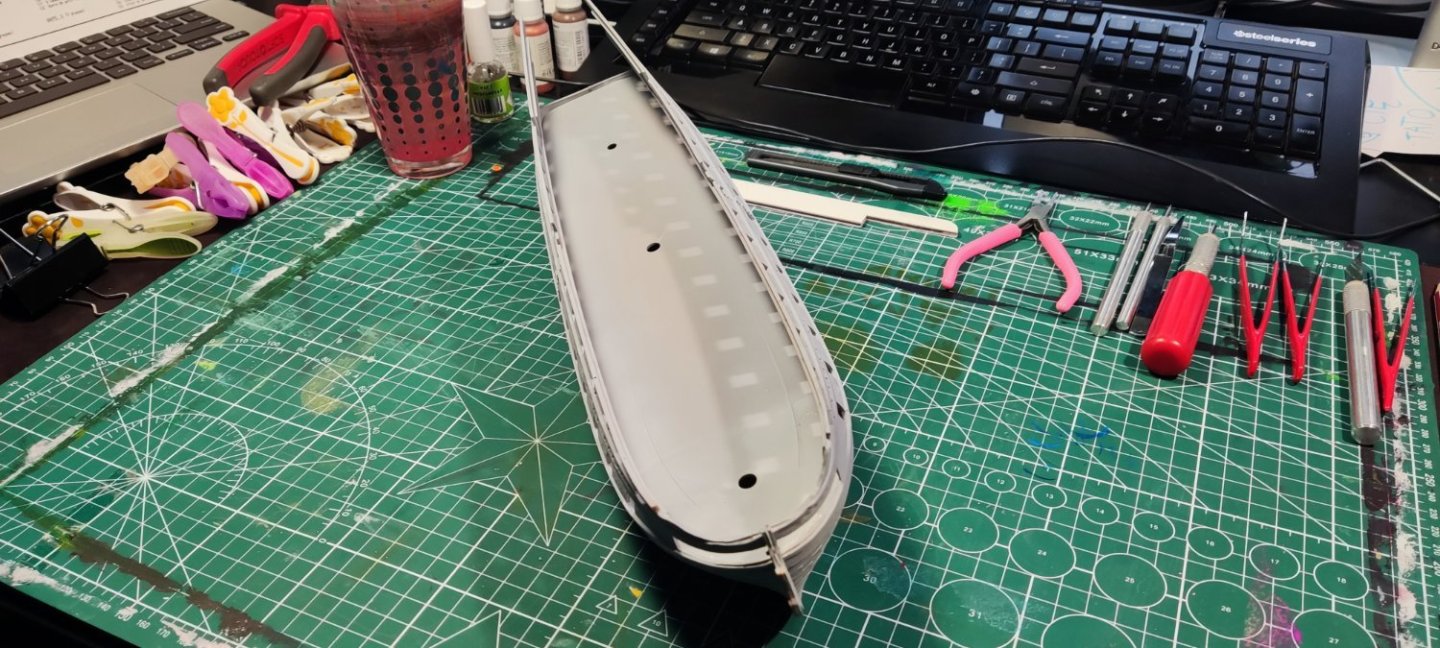


- 27 replies
-
- 2
-
-
- Le Superbe
- Heller
- (and 1 more)
-
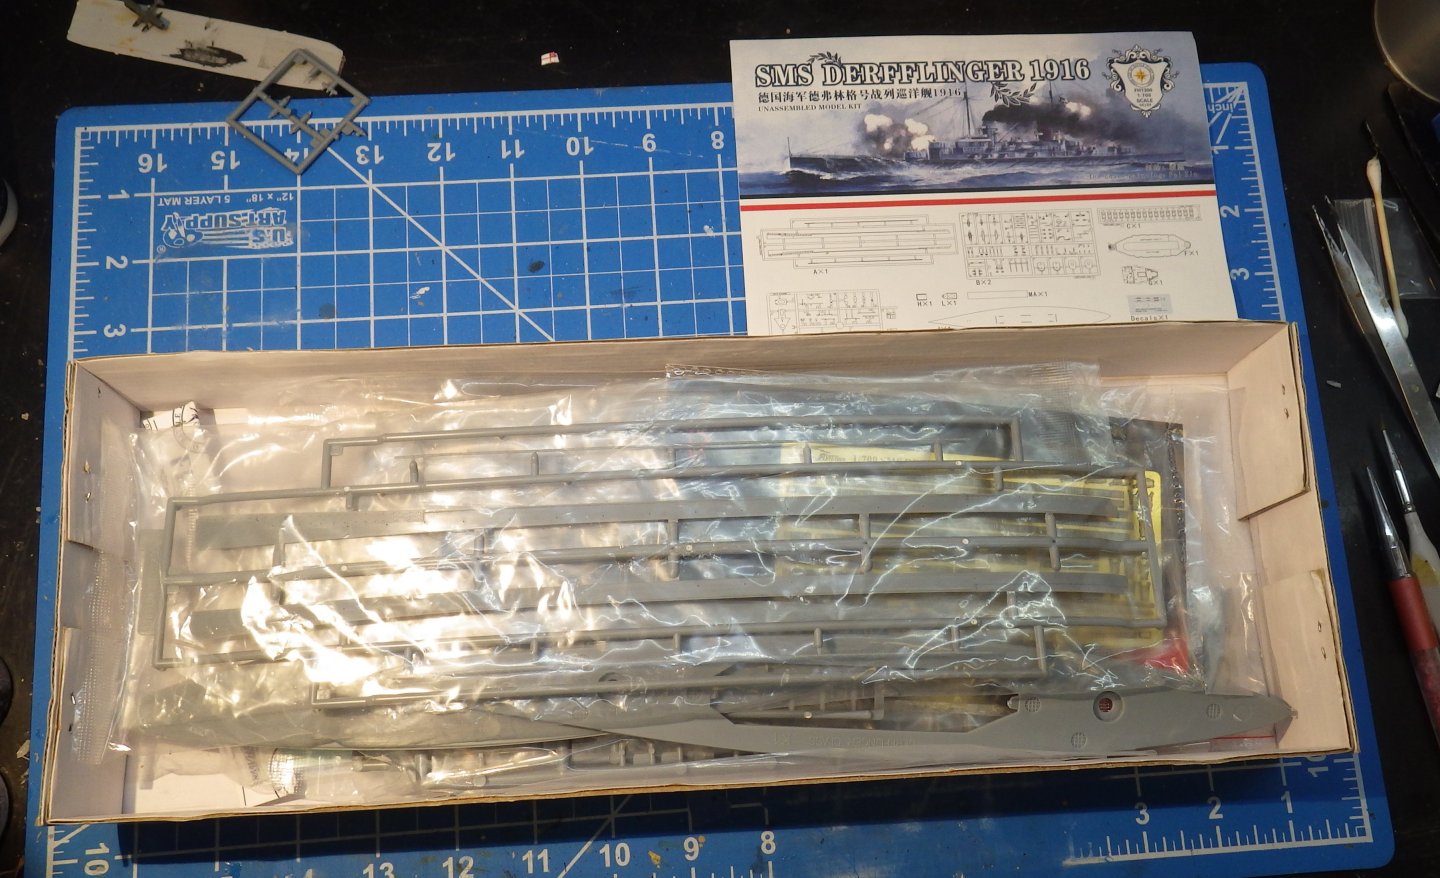
 Another Flyhawk adventure kicks off. This time the Imperial German Navy of WW1, SMS Derfflinger. No tiny biplanes, no fiddly secondary armament what could be easier? Well, it has belatedly occurred to me - the torpedo nets. I'm not sure what to do with those but anything but stowed will be a serious exercise at 1/700 - at least for me. I haven't found any upgrade sets for this apart from a wooden deck set and I think I am going to paint the decks this time. This Flyhawk kit is a little different to others I have worked on. The plastic is softer and detail is less well defined. Still quite a lot of small parts but only a small fret of PE, mostly railings and the cranes. So I think this will be built as per the box of bits. Instructions are the usual Flyhawk folding pages (that get all over the place as you try to read them. For Flyhawk the bxs is not as stuffed as usual Its a waterline kit so the two hull halves were fitted to the base plate with no problems. Everything fits nicely. The main deck well on without the need for violence. As noted earlier the detail is a bit soft by Flyhawk standards. I think I may try to drill out the portholes, something I don't usually do for 1/700 scale. And then everything goes off for a coat of Mig Ammo One Shot black primer. Thanks for looking in. I hope this will be interesting. Alan
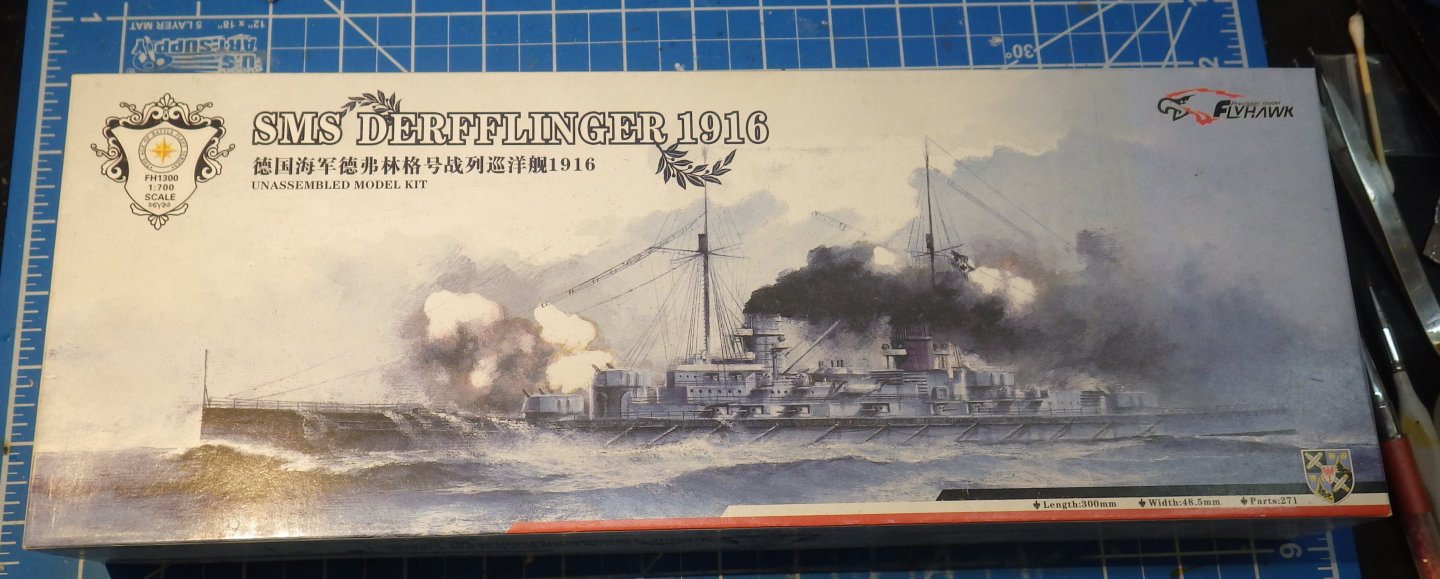

- 78 replies
-
- 8
-
-
- Derfflinger
- Flyhawk
- (and 2 more)
-
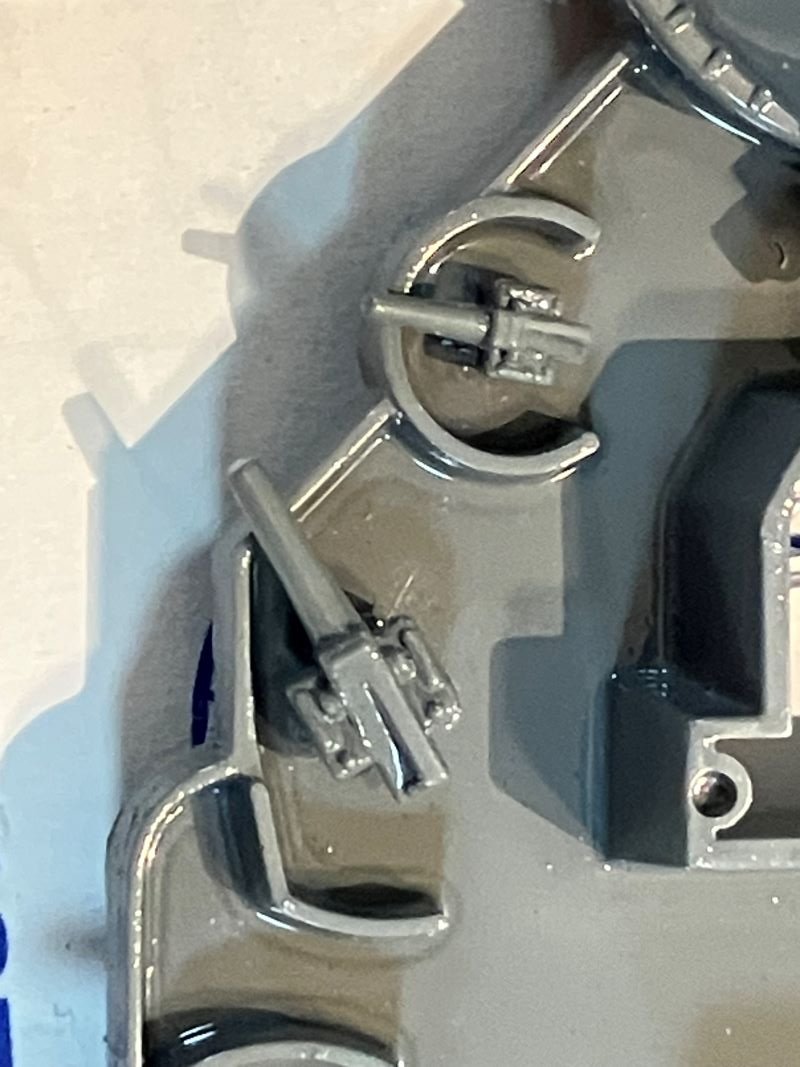
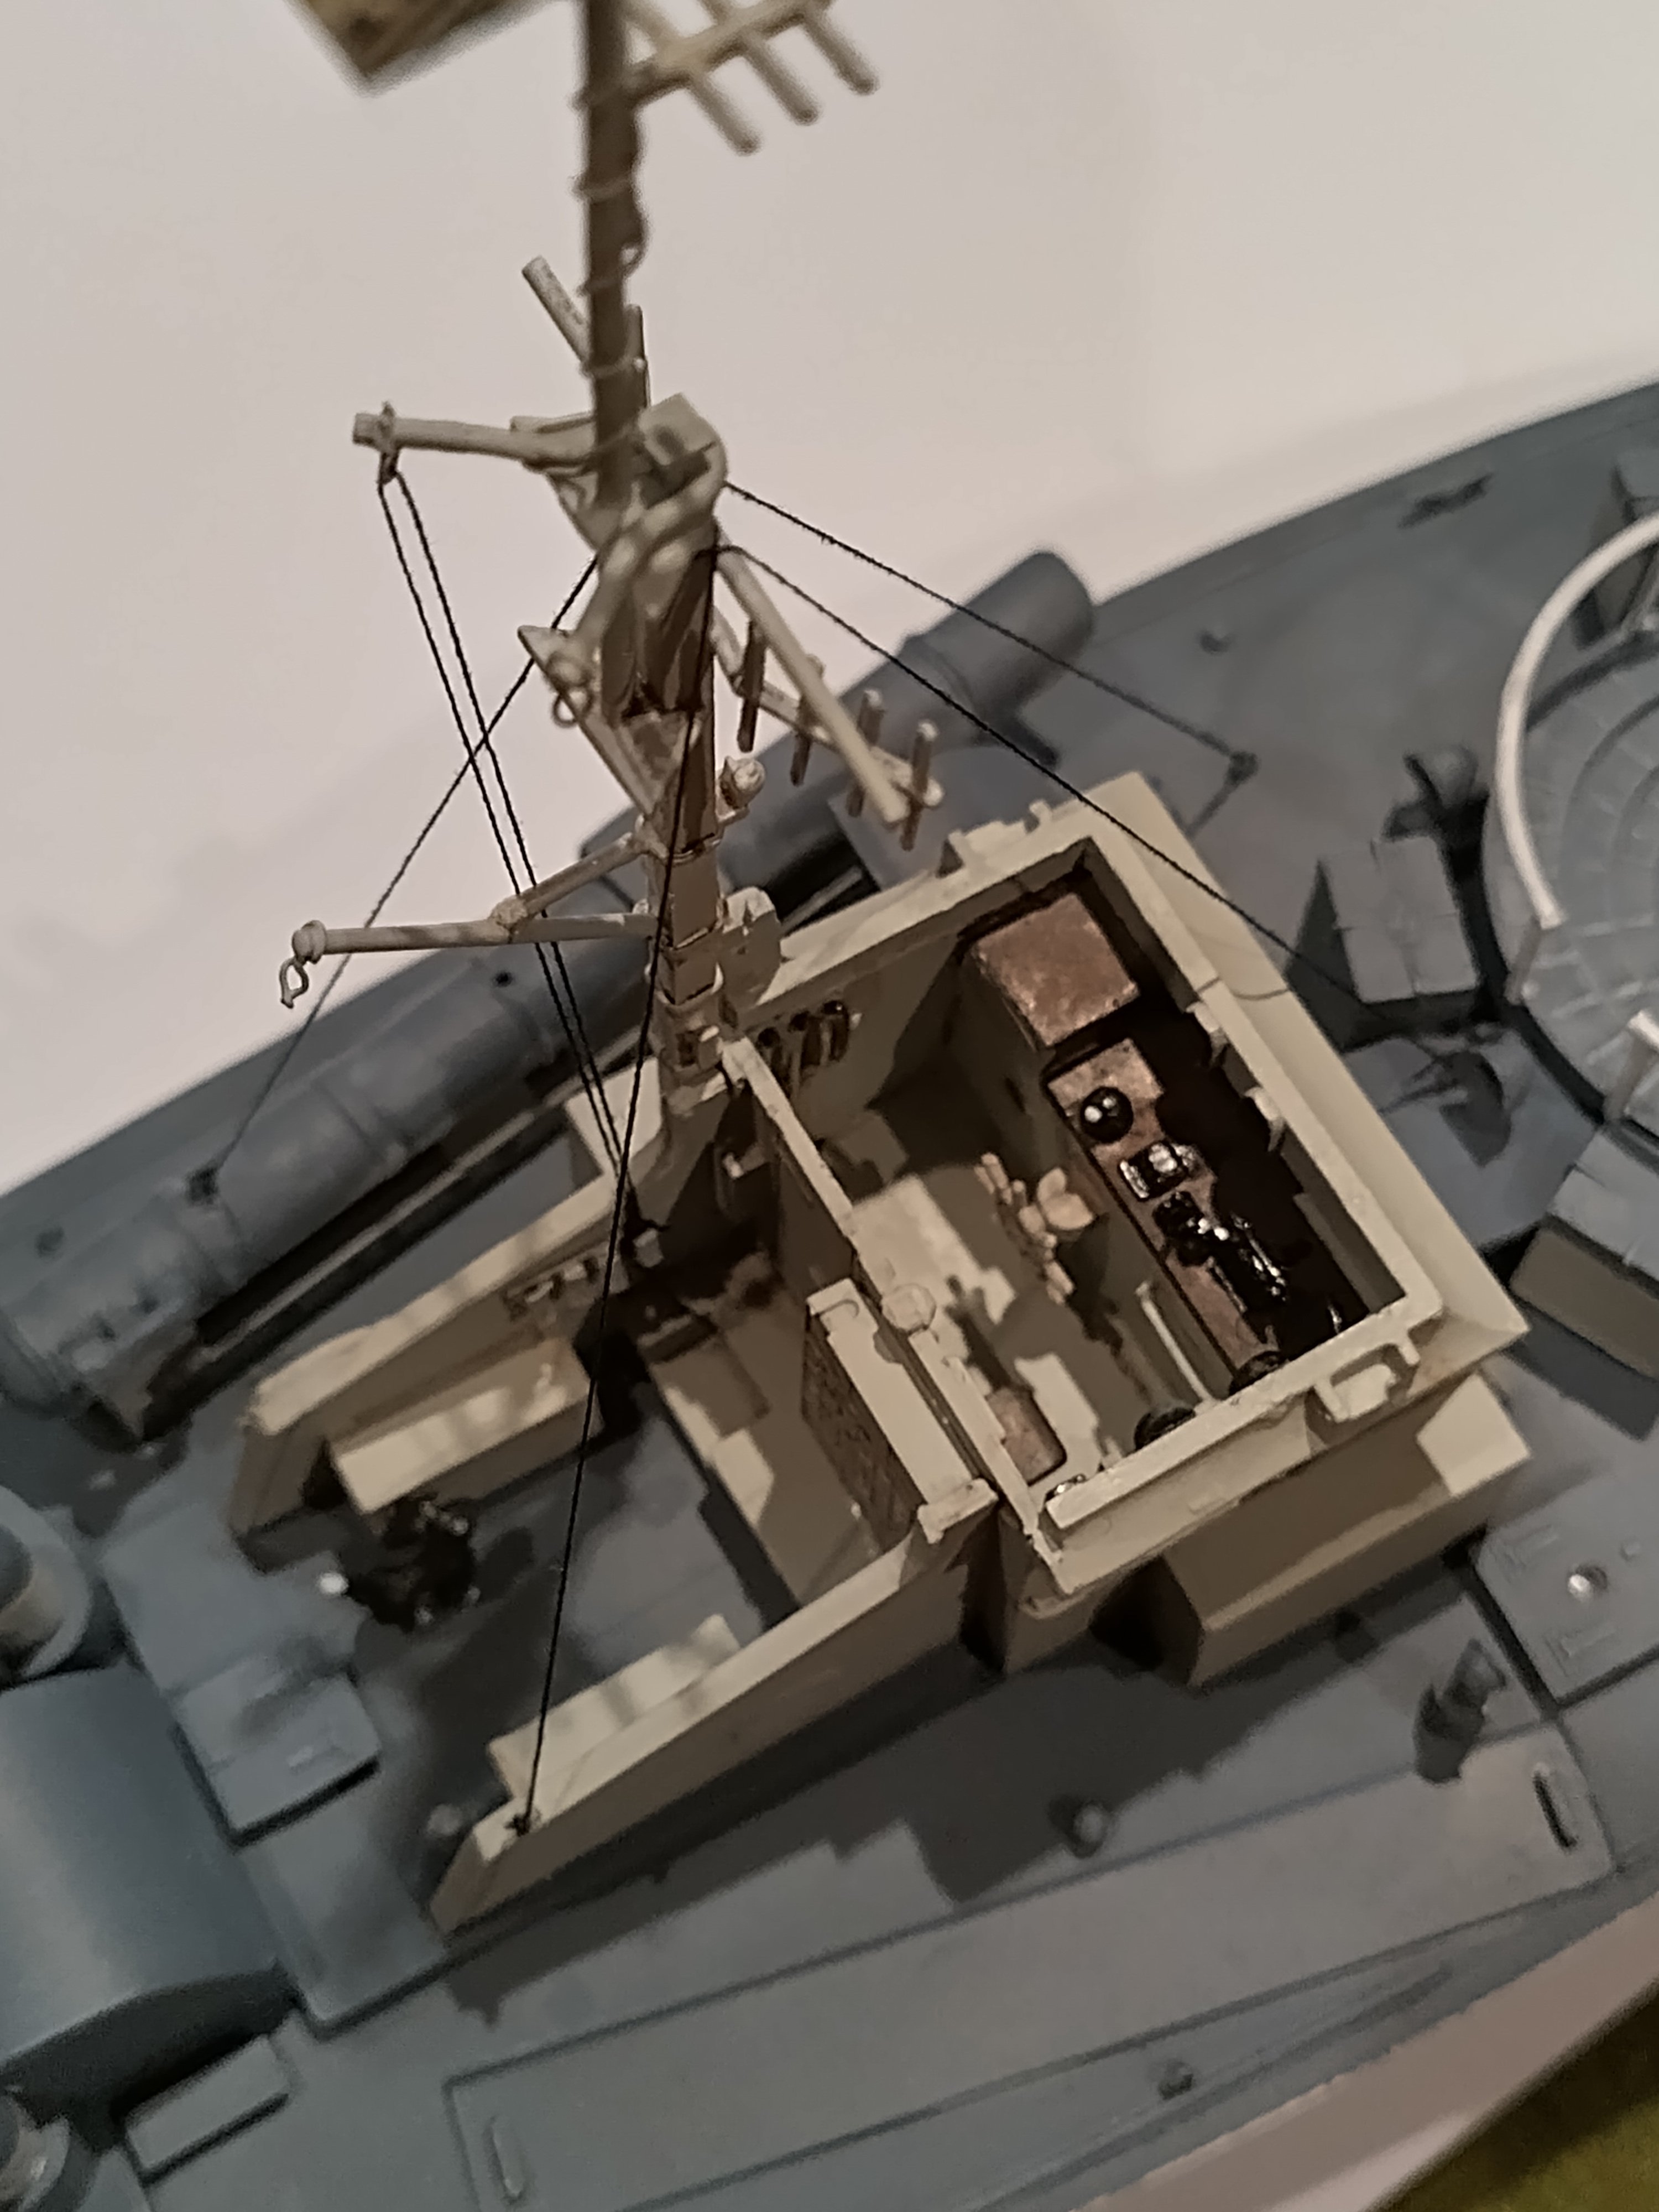
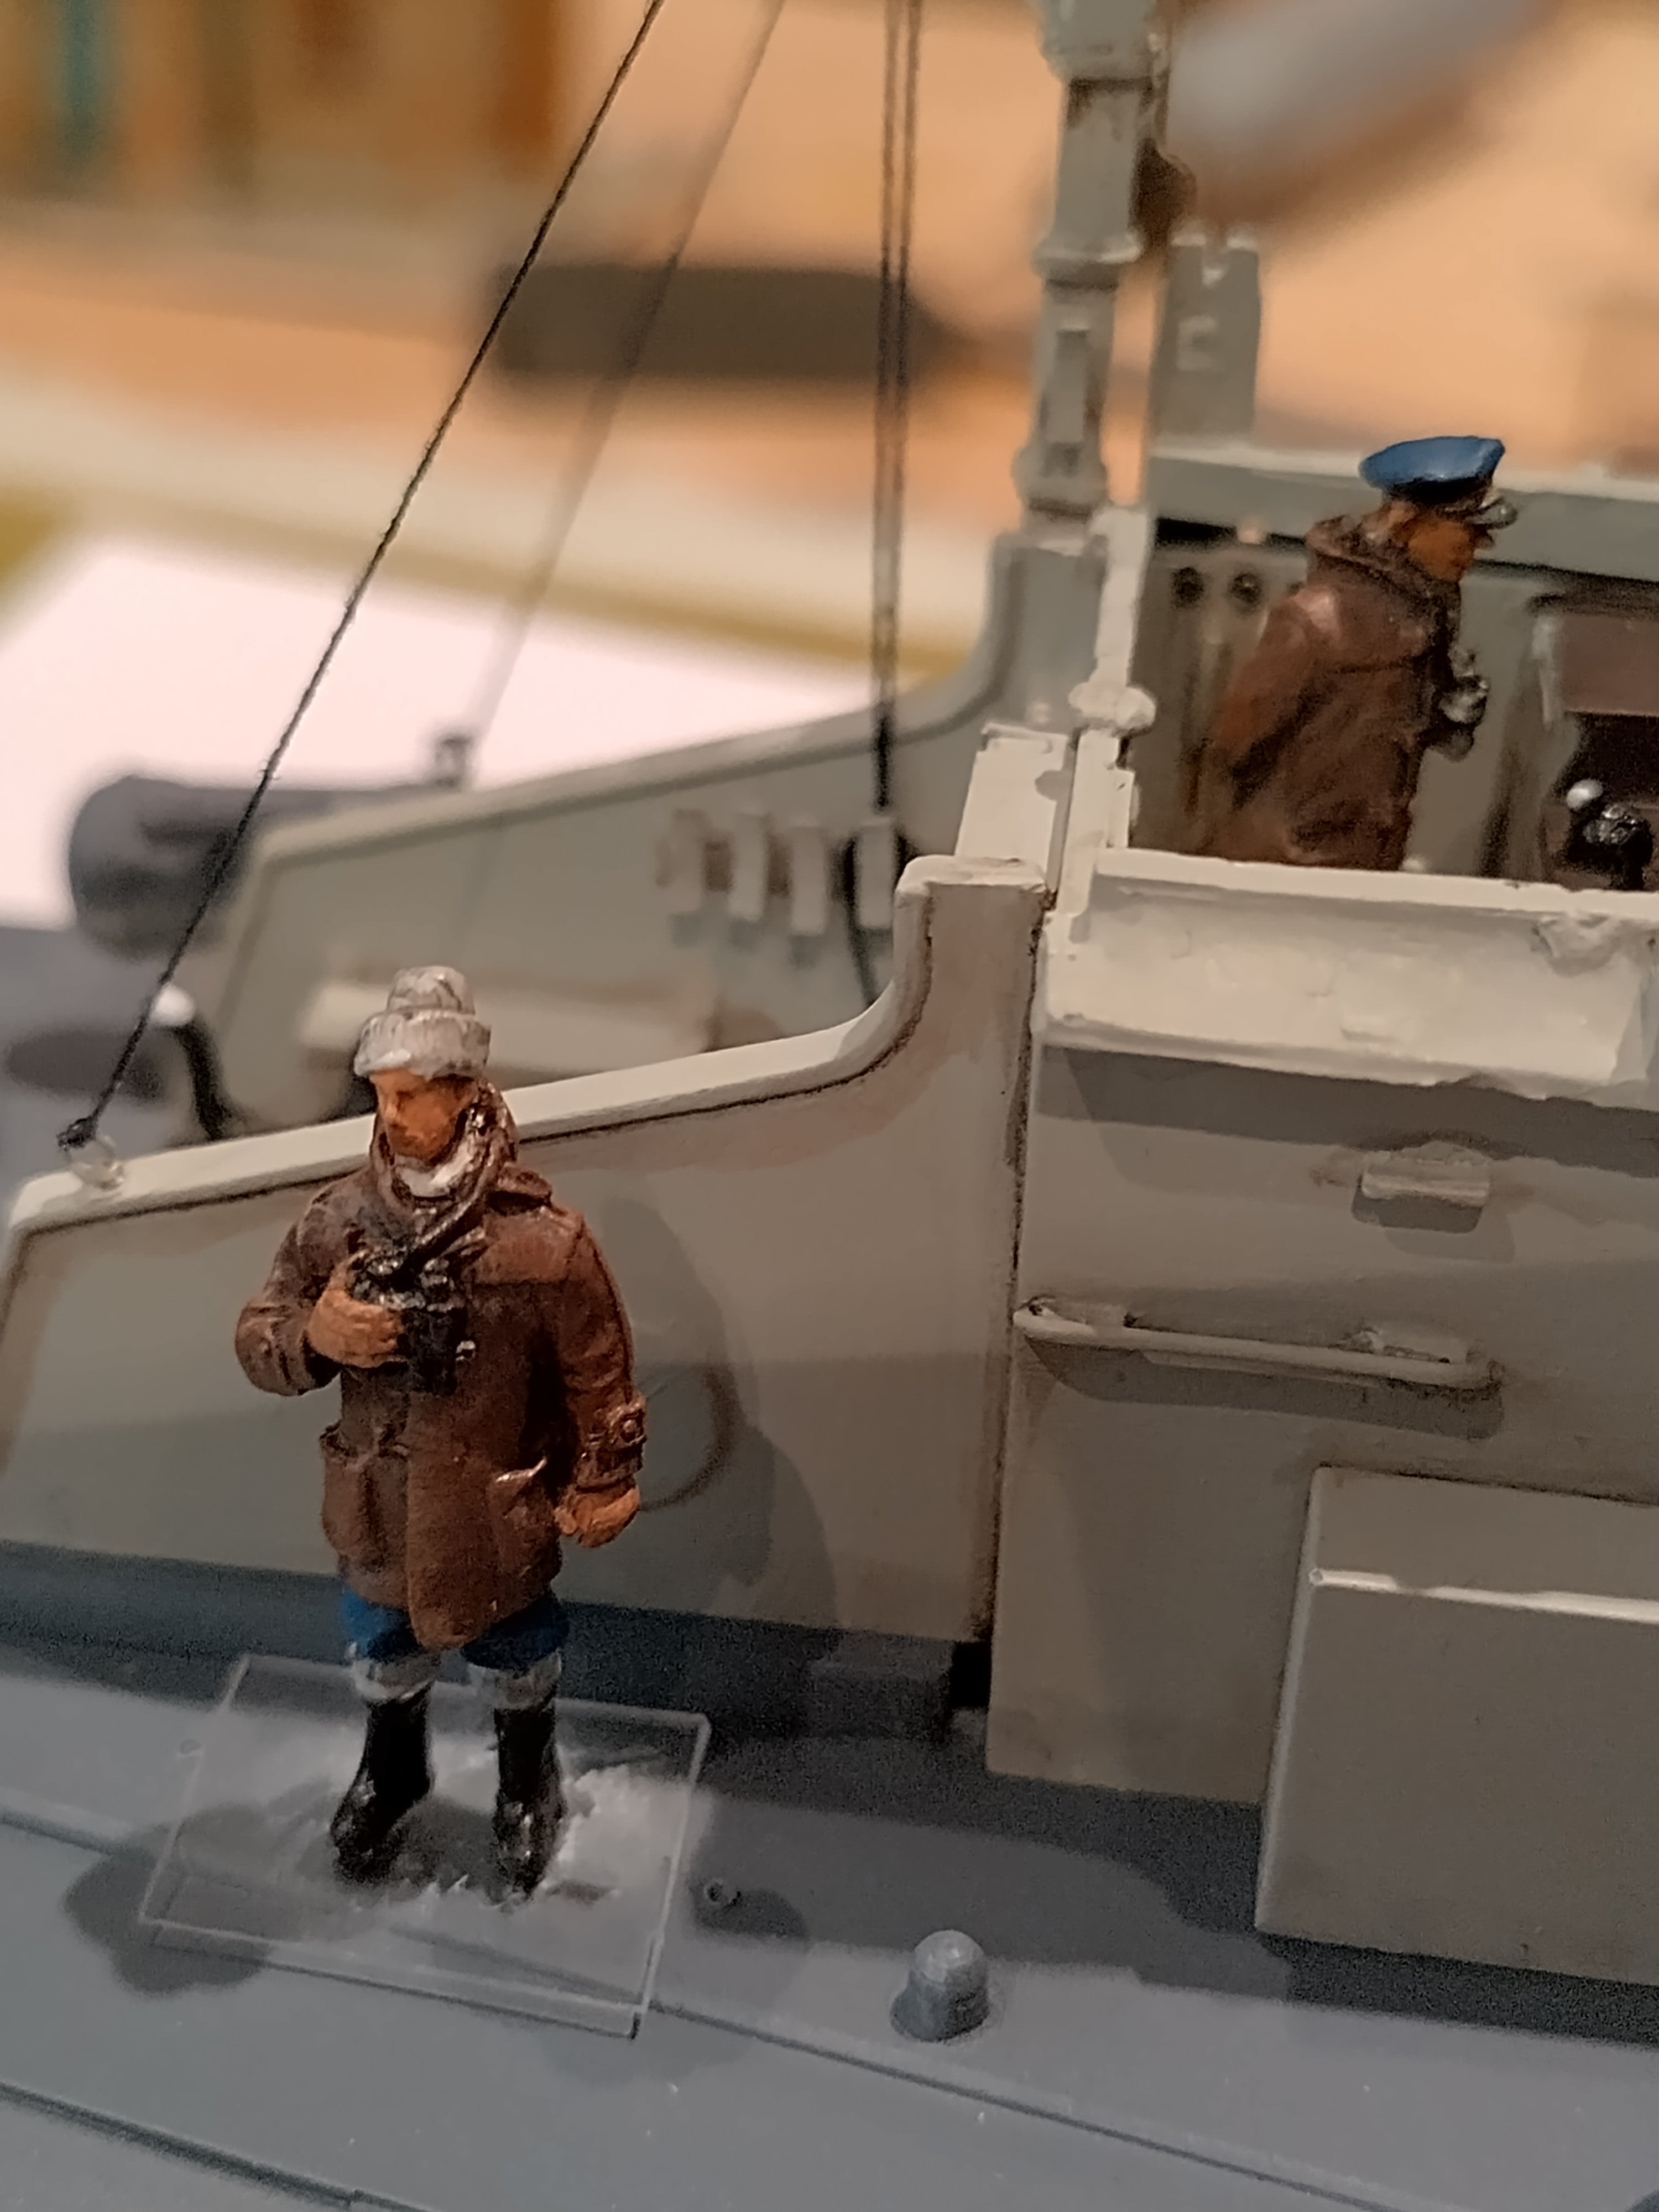
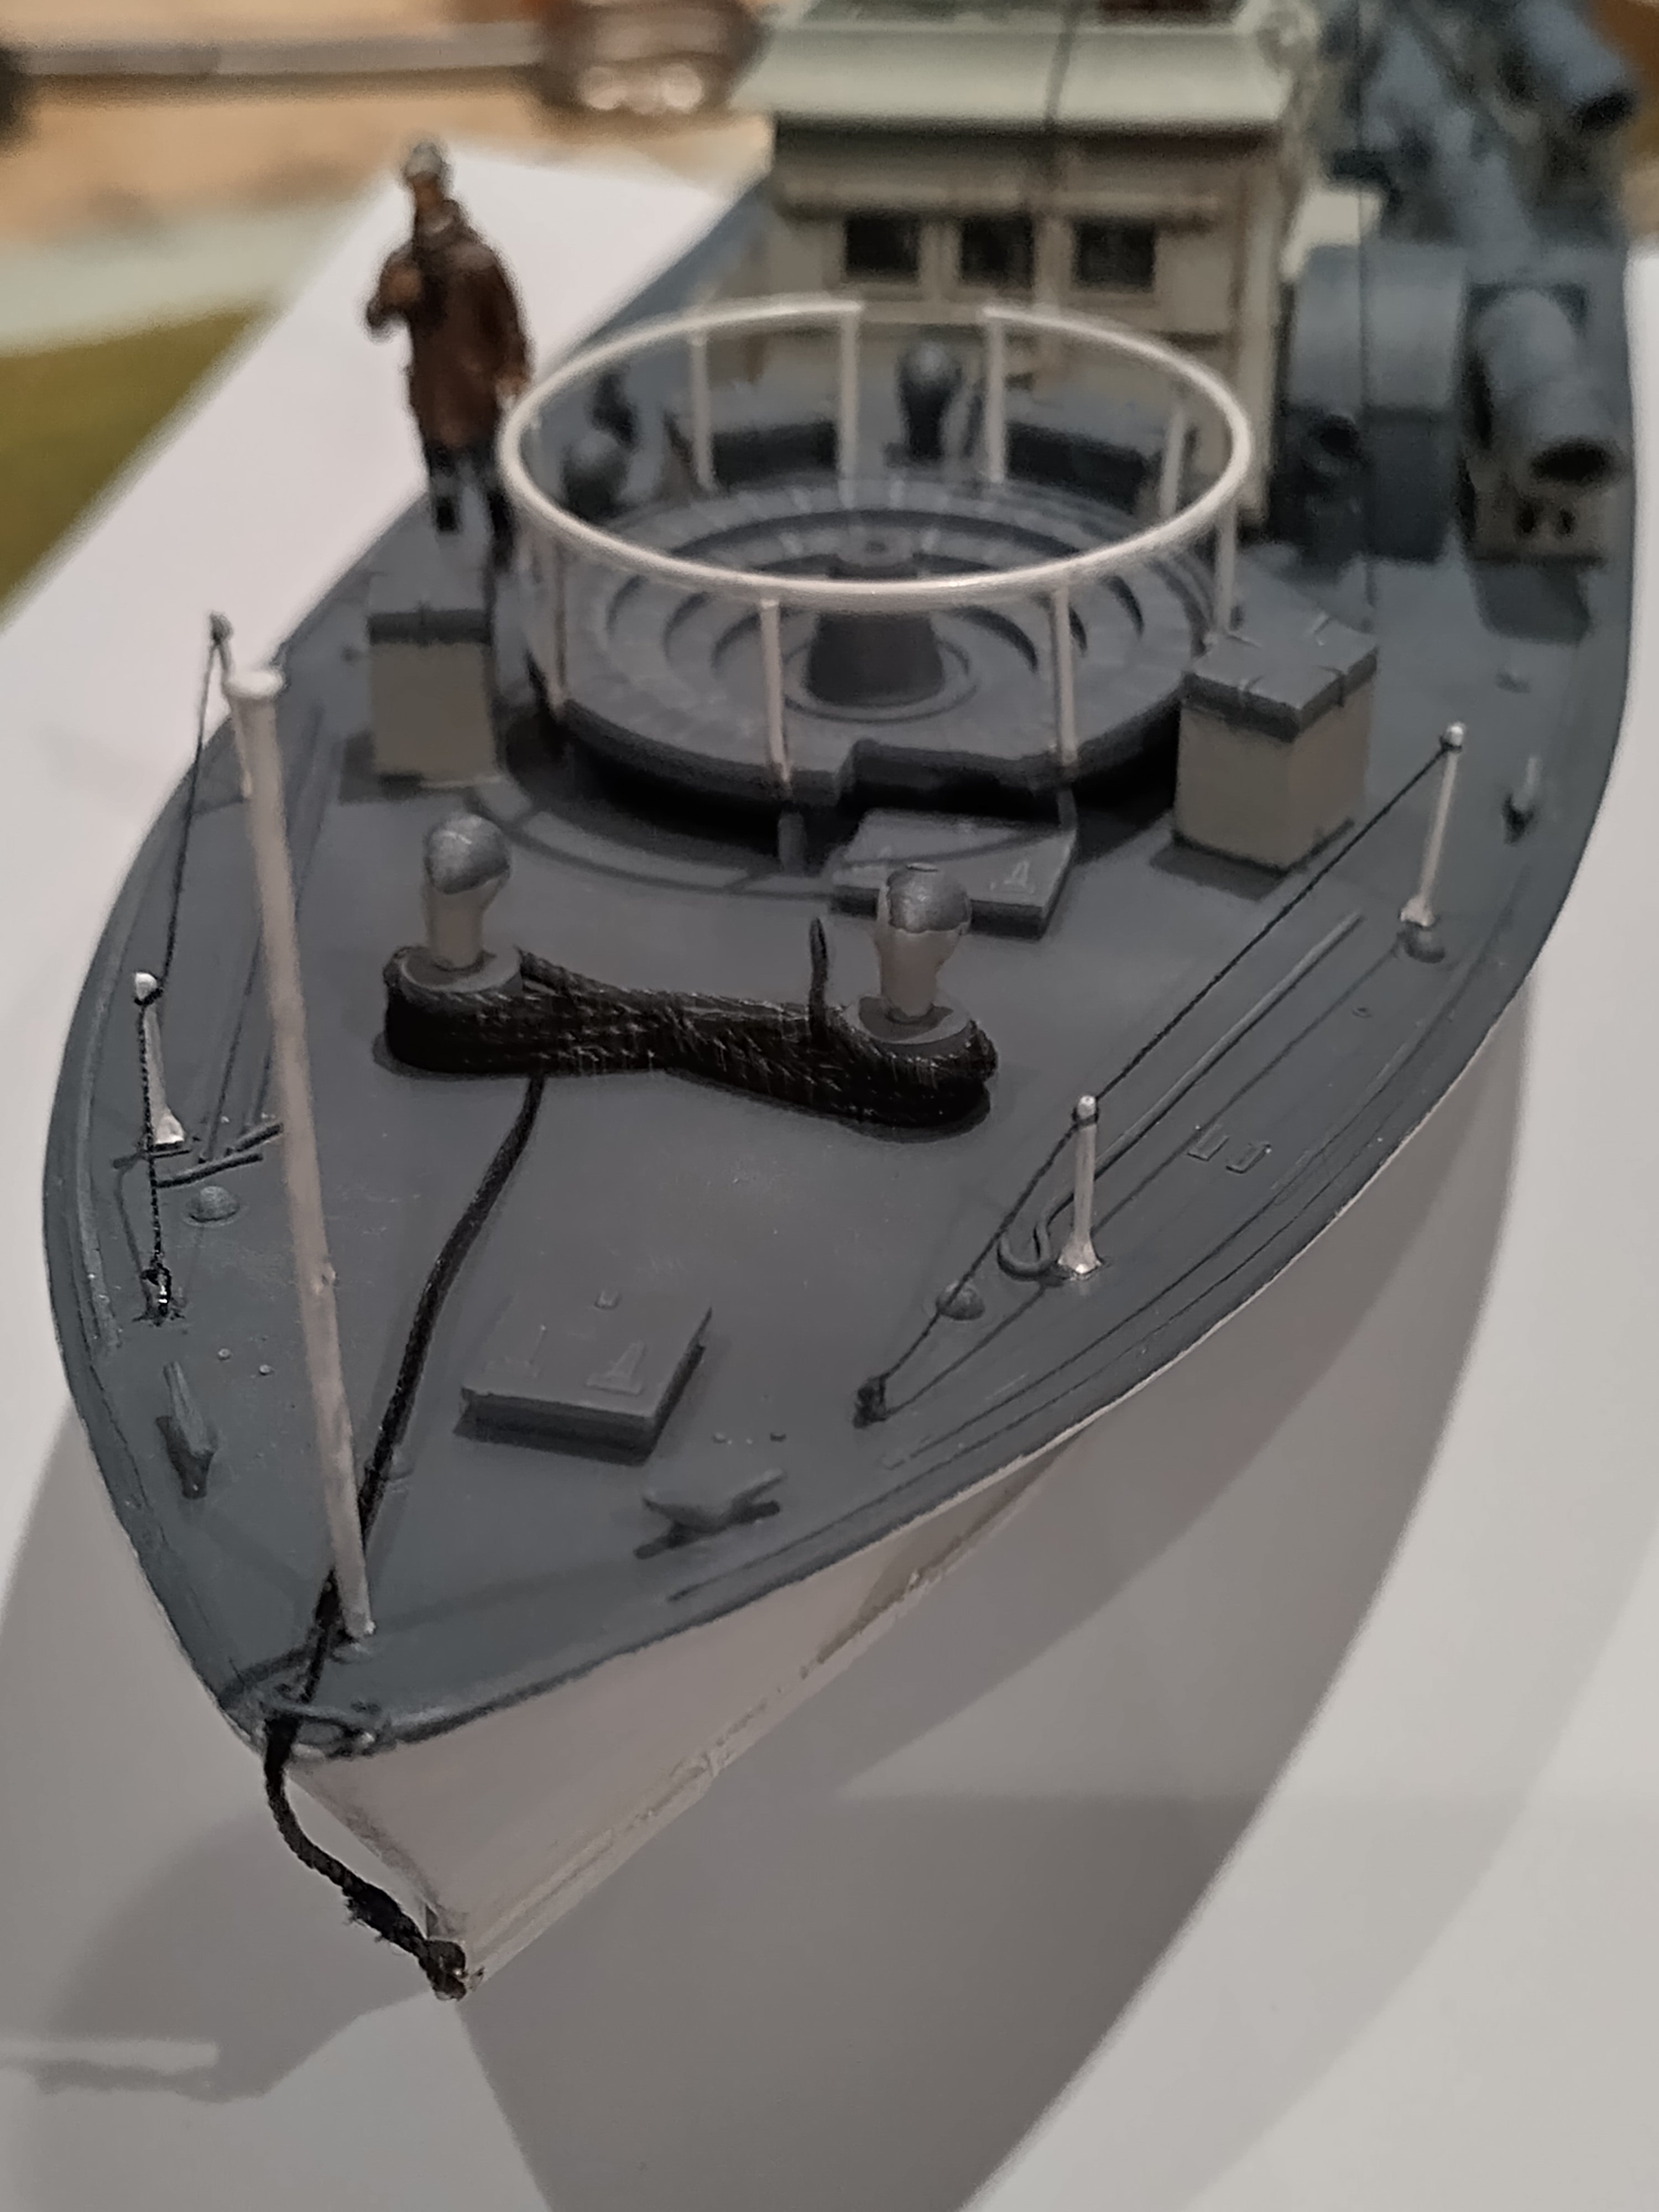
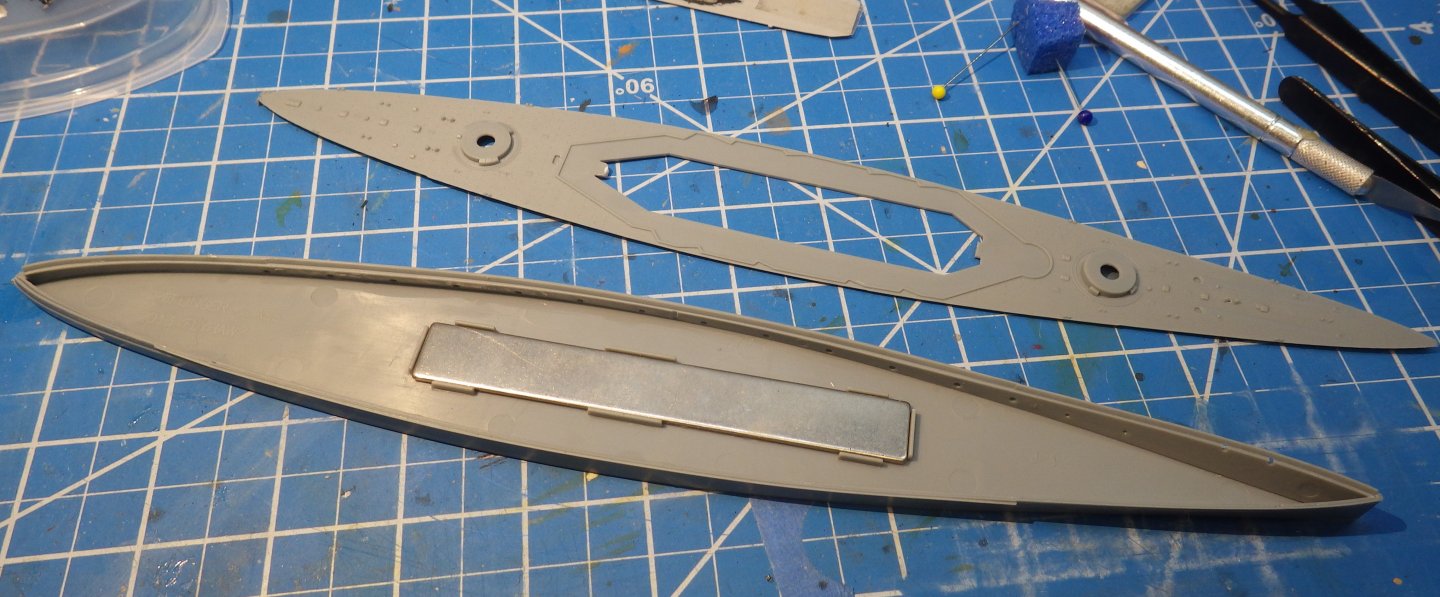
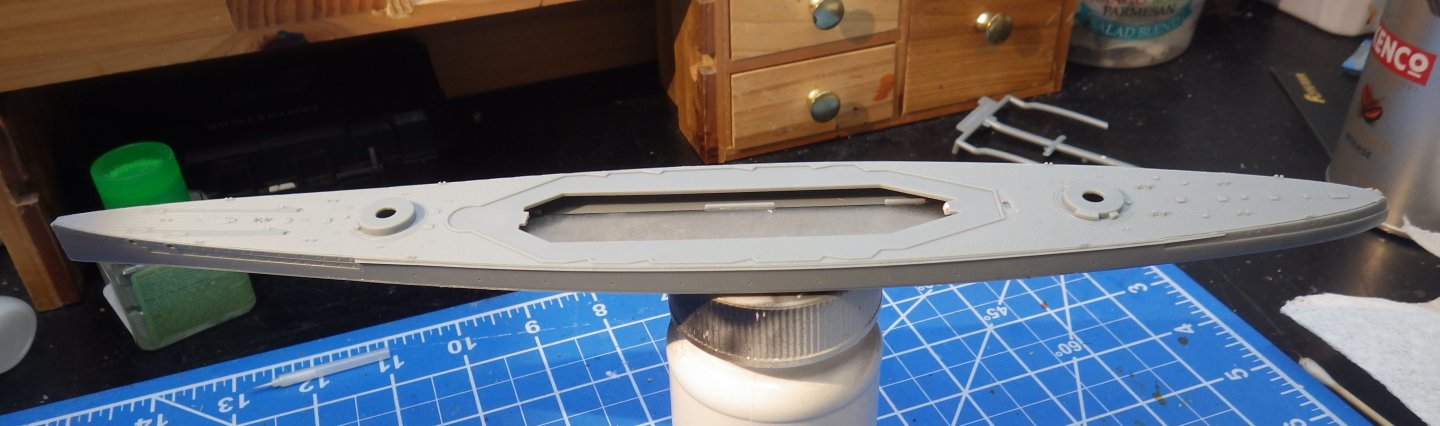
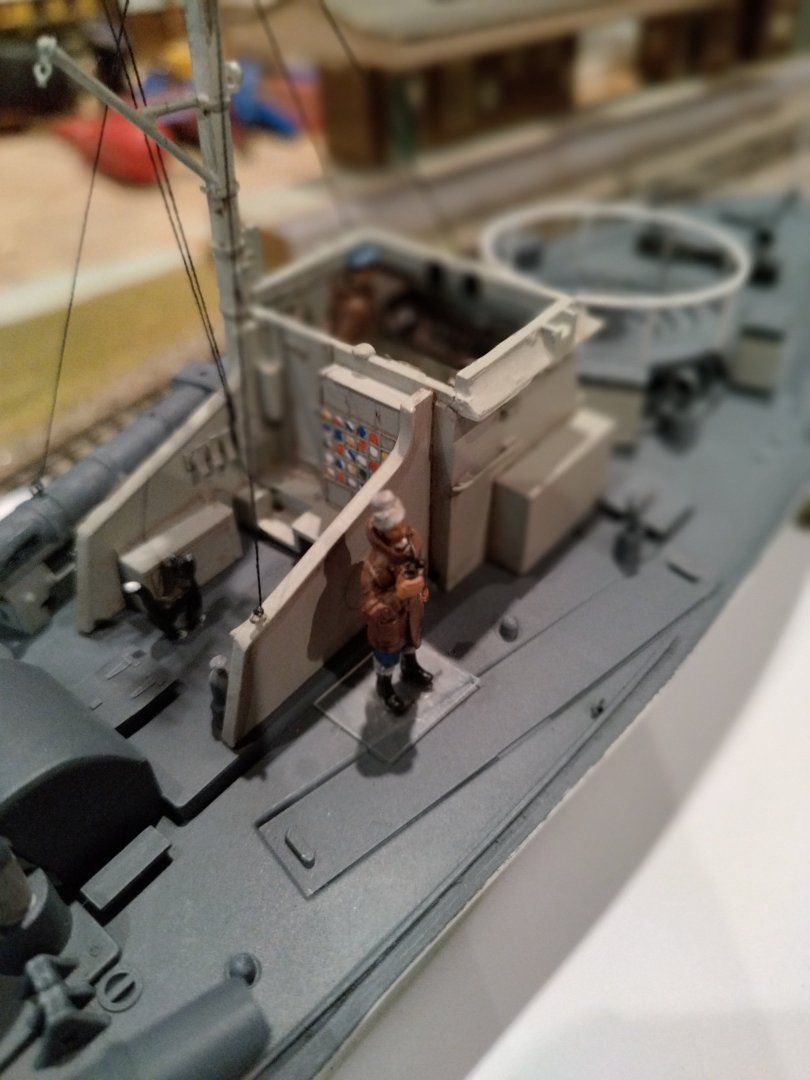
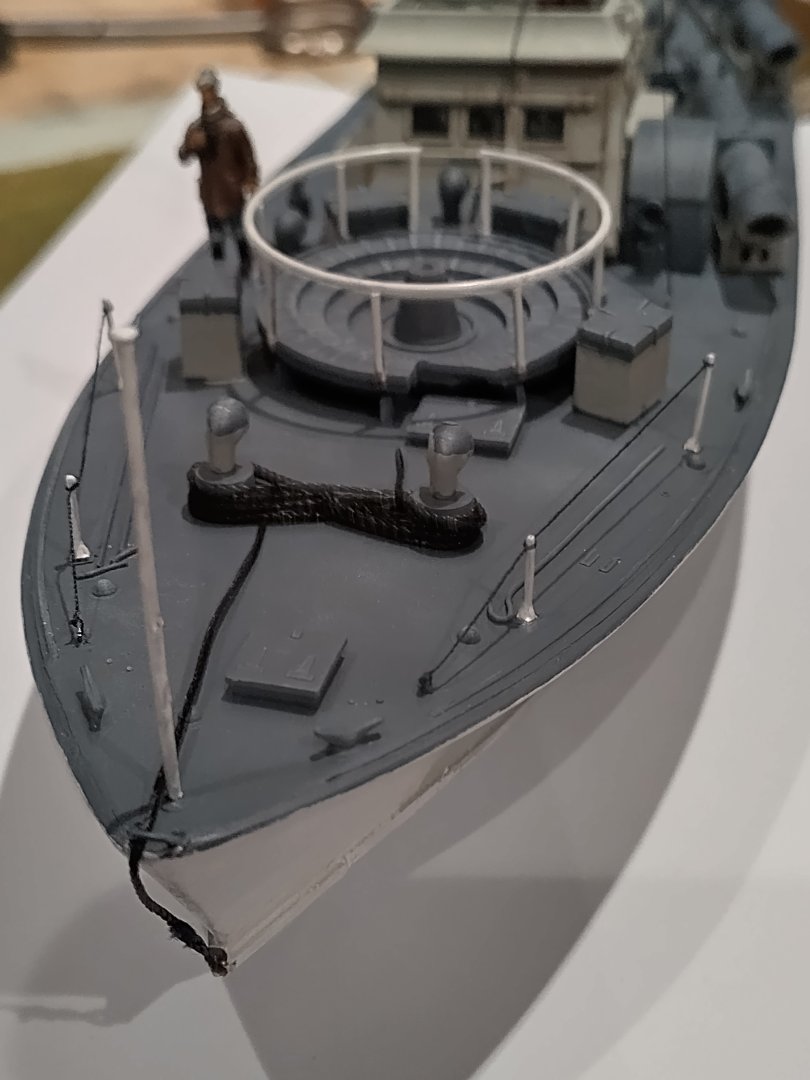
 Should be working on my Terror and finishing several other modelling and railway projects, but started this old kit, one I really wanted as a kid because my mate had it. These are work in progress pics, some rough paintwork needs sorting out but build mostly complete now. One torpedo tube off ship at the mo, all of them need some fettling around seams and will probably add some brass wire handles. Mast was rebuilt from wood and brass wire, used the original plastic aerials, might rebuild if I ever get the skills with solder, a little bit more rigging to add and an ensign, also have a spare Jolly Roger. Deck rope is black, it's what I had in the box, trying not to splash out too much on extras, then will add more weathering and staining to paintwork. Oerlikon is nearly ready, scratching new shielding and will add some splinter protection from some thick card. Might diorama this, have an idea for a harbour wall scene. Liked the Gunthwaite gentlemen and ship's cat, so added them. Helped by book references, Osprey and Squadron Signal - Warships in Action, Hichen's excellent Gunboat Command, Reeman's Prayer for the Ship along with some good build logs on other sites.

- 3 replies
-
- 9
-
-
- Vosper
- motor torpedo boat
- (and 2 more)
-
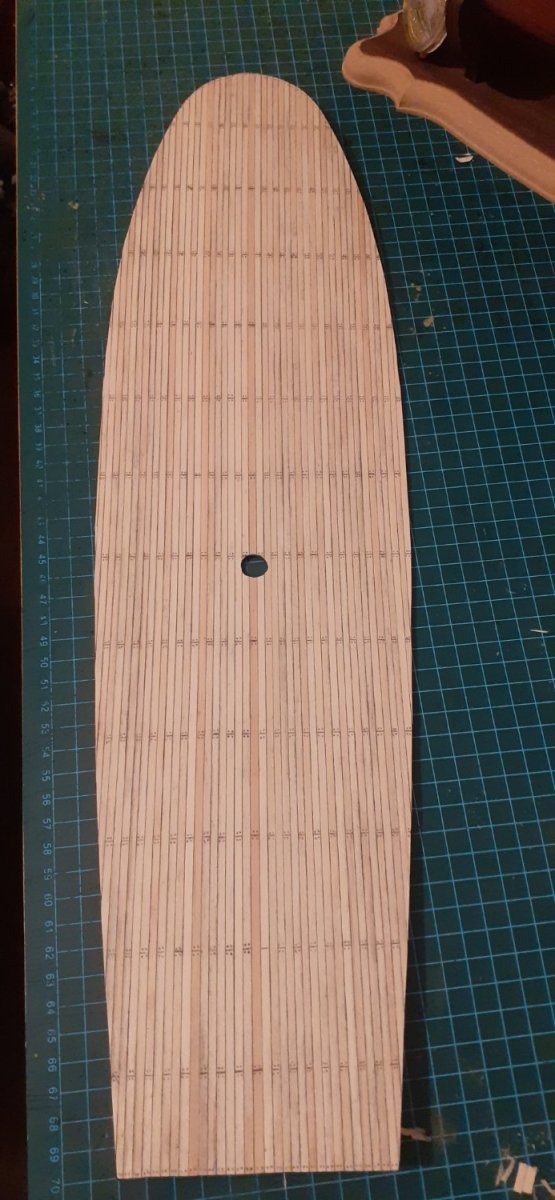
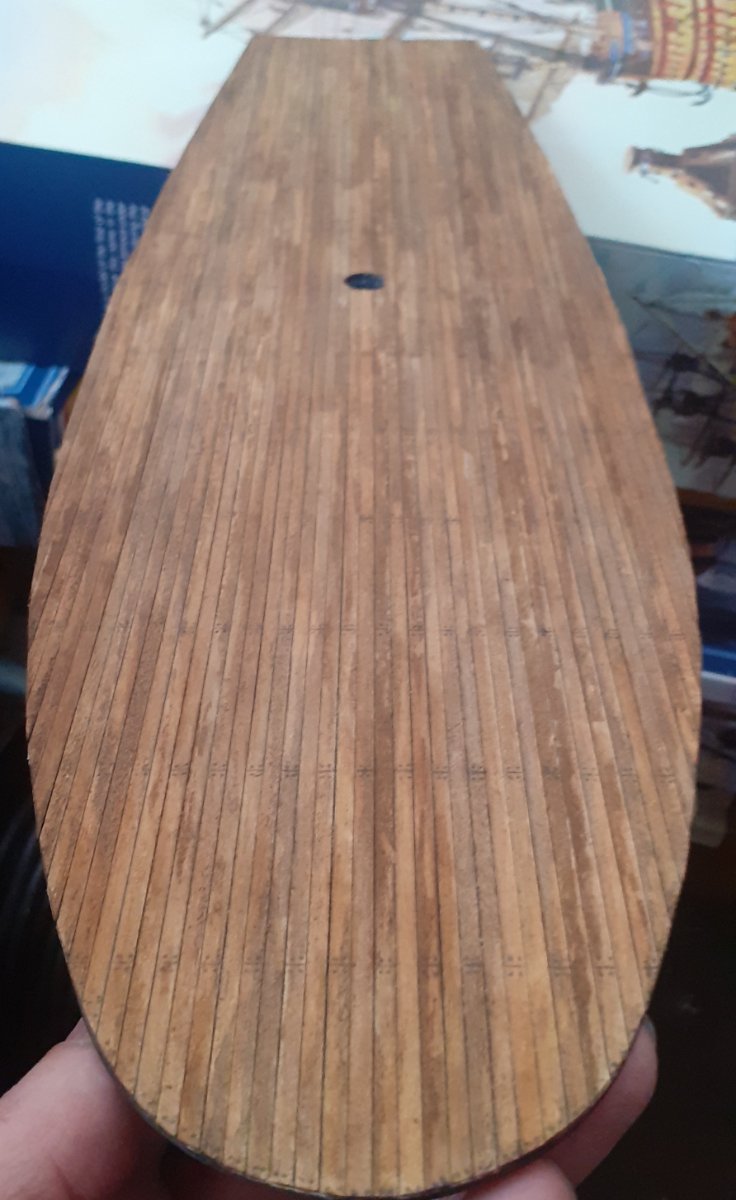
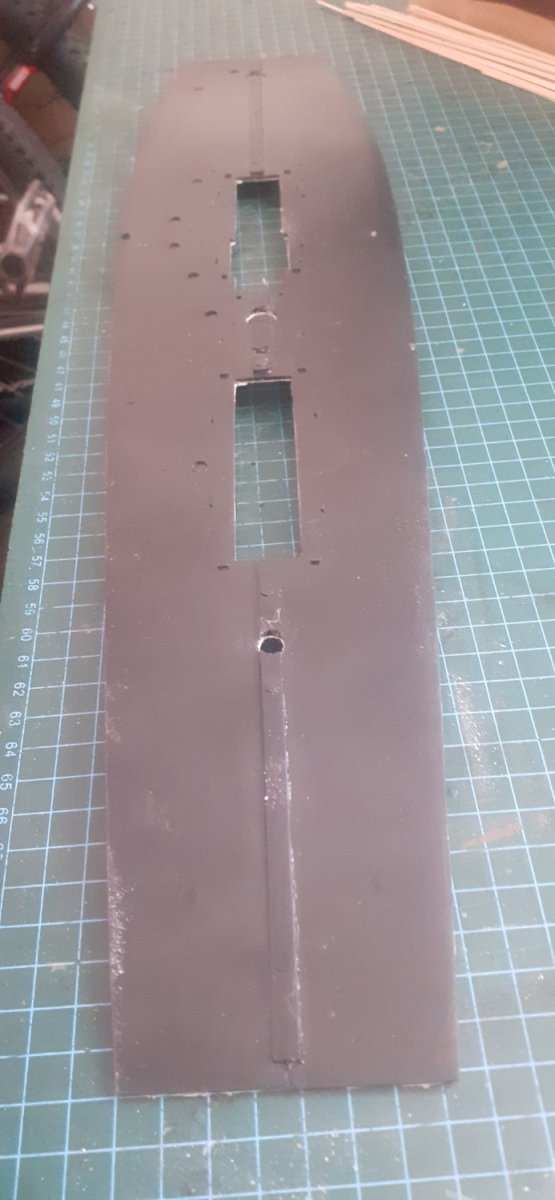
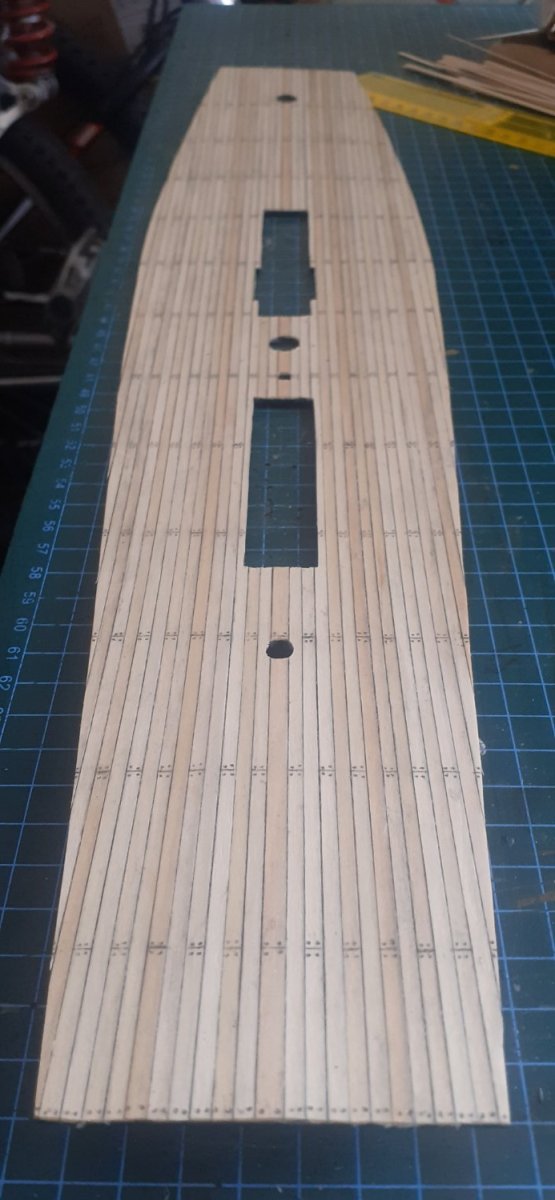
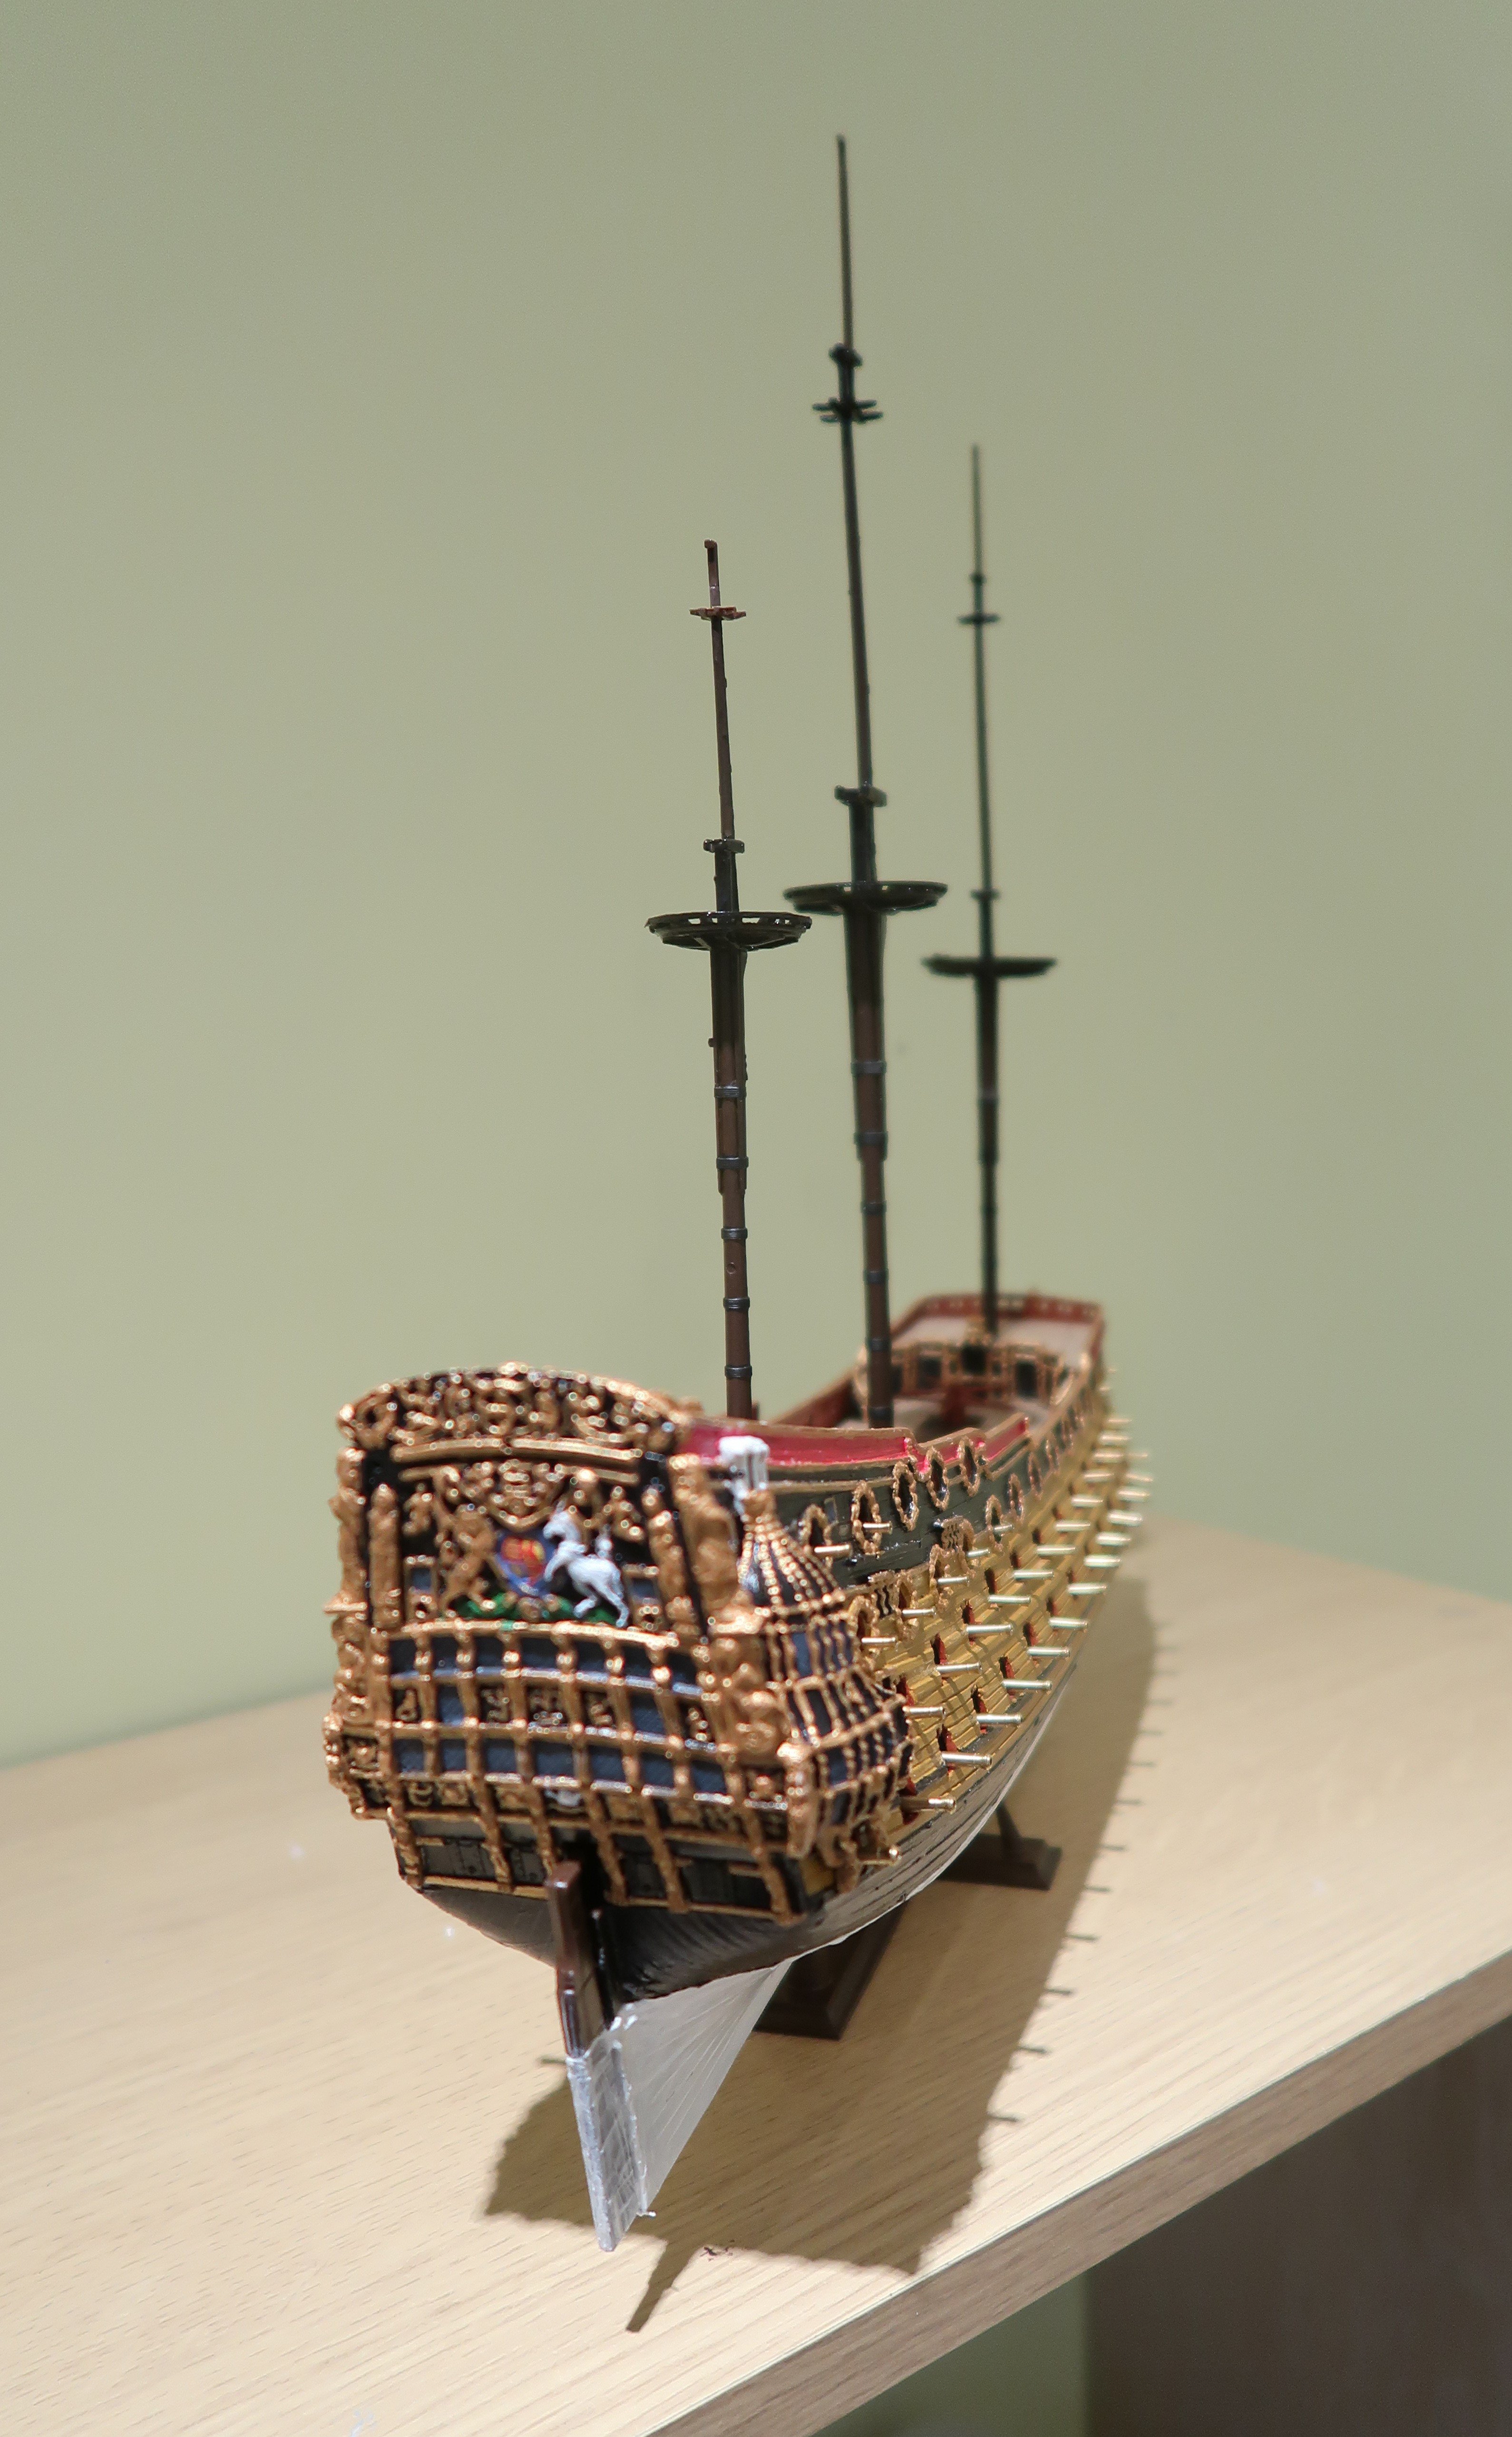
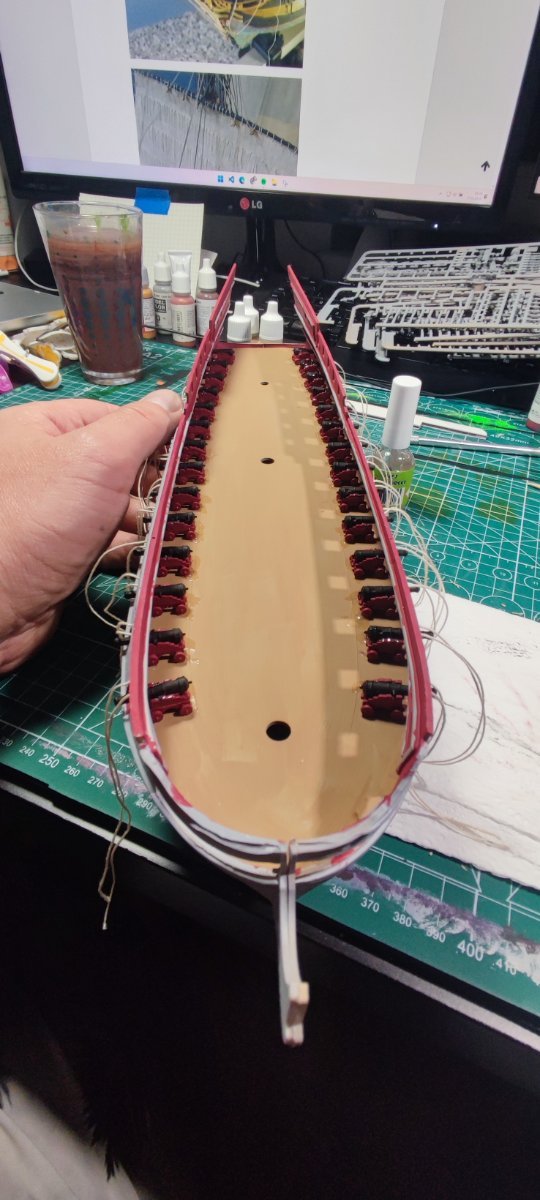
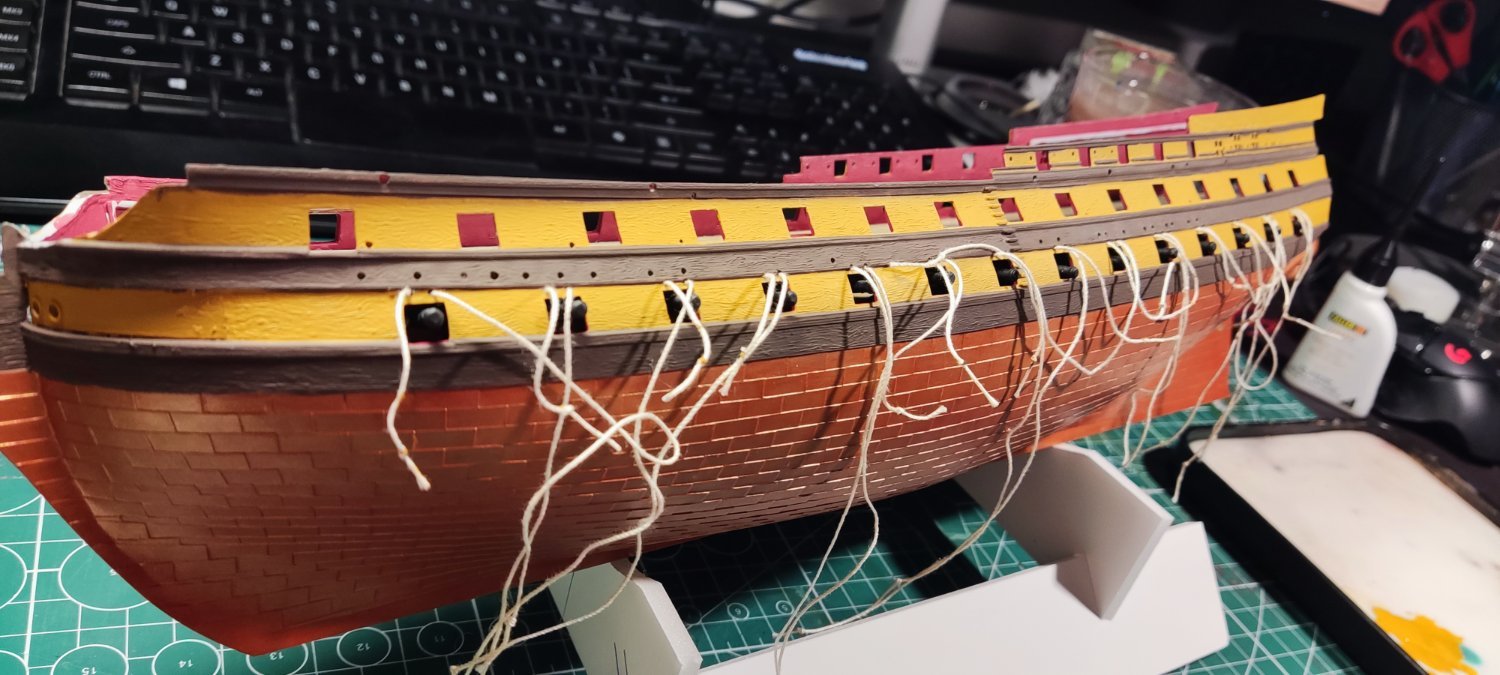
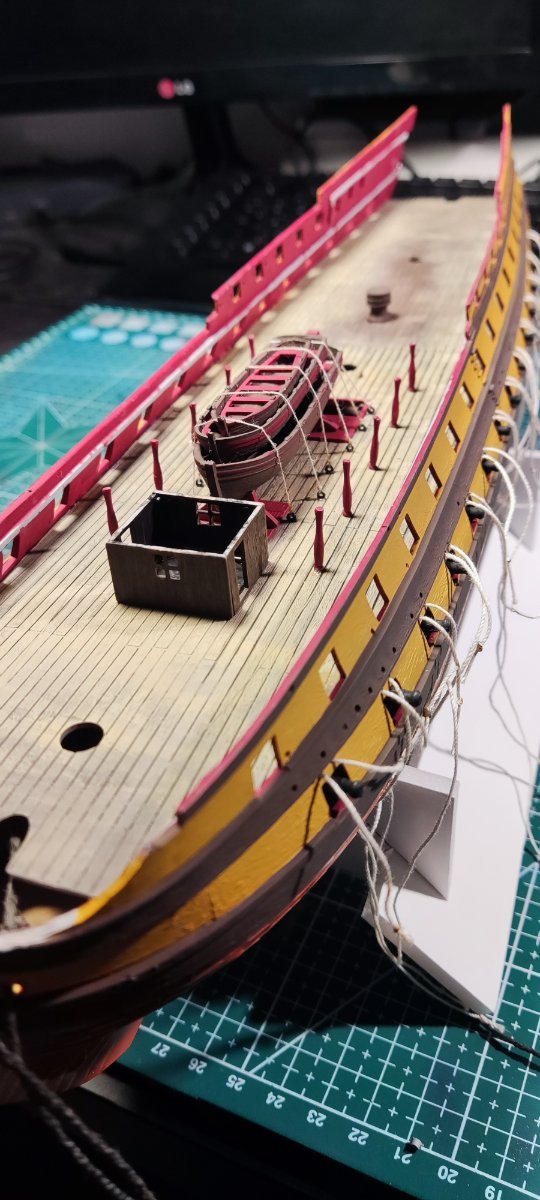
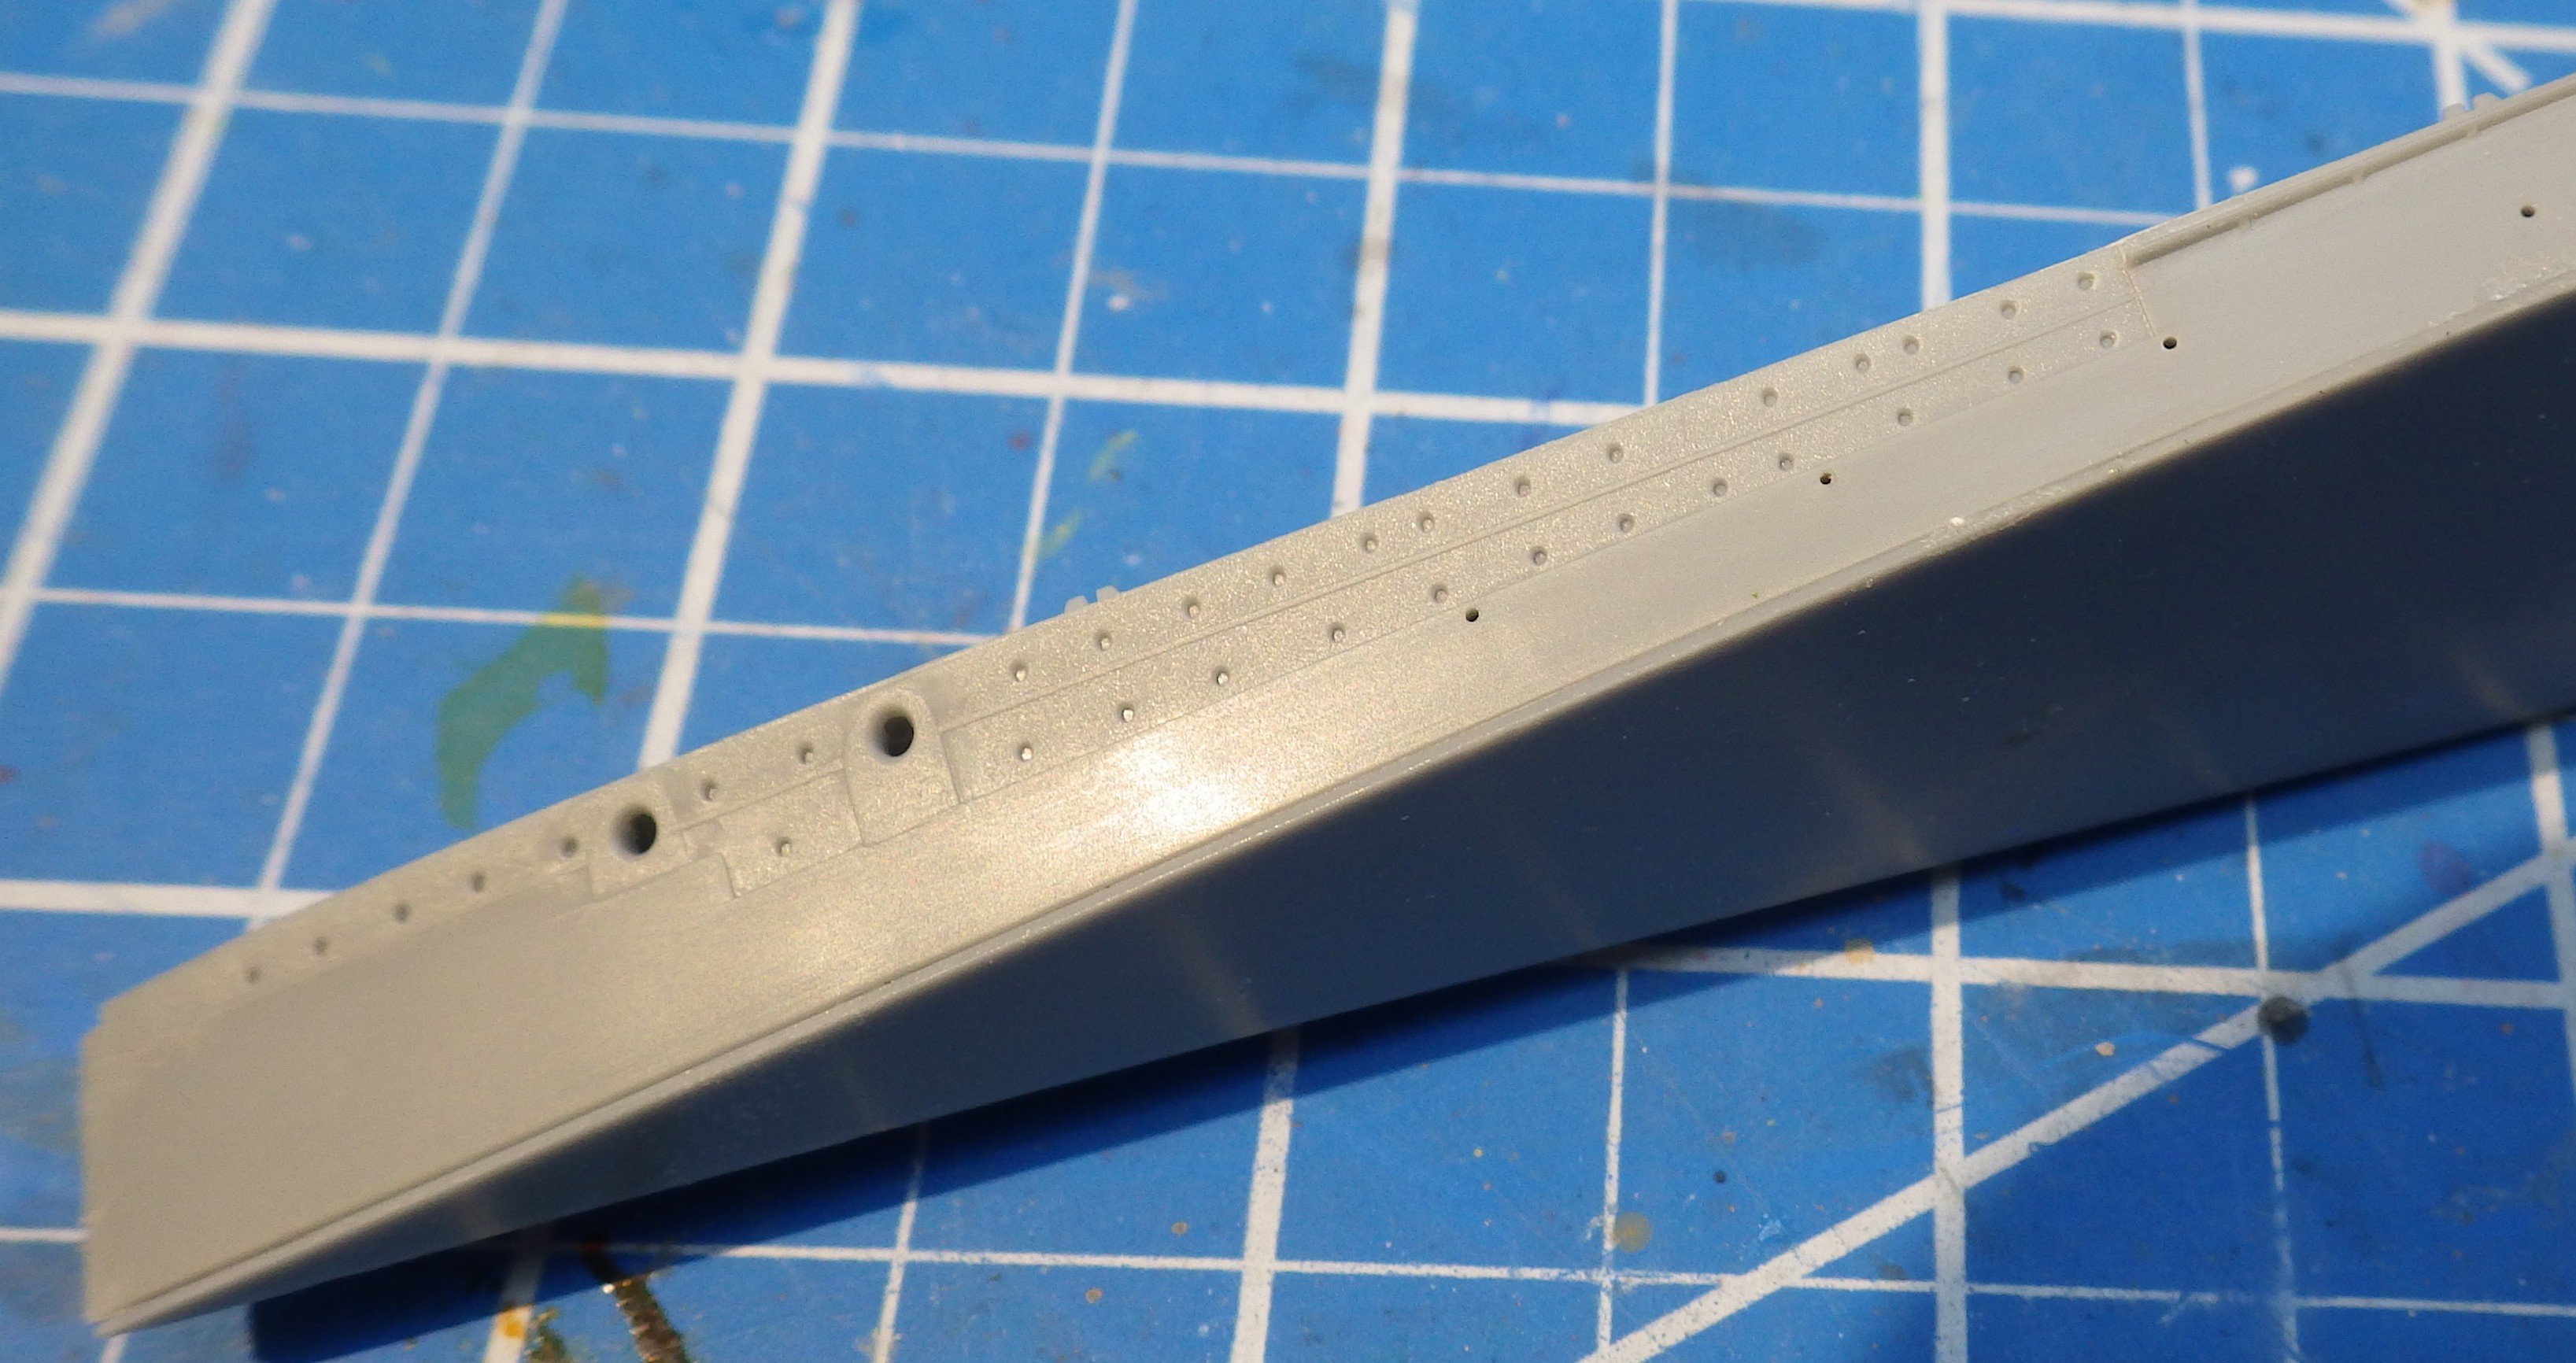
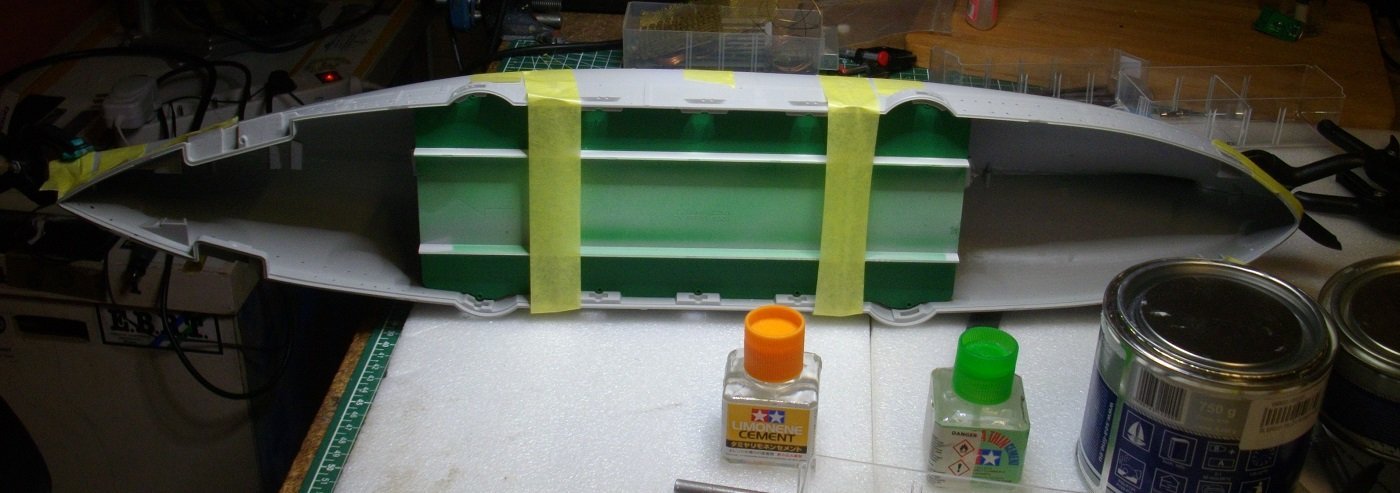
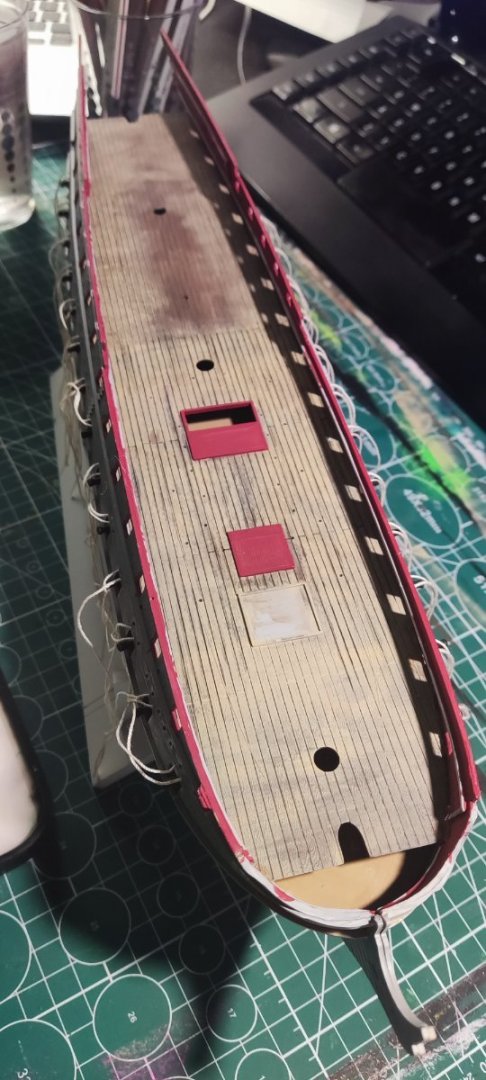
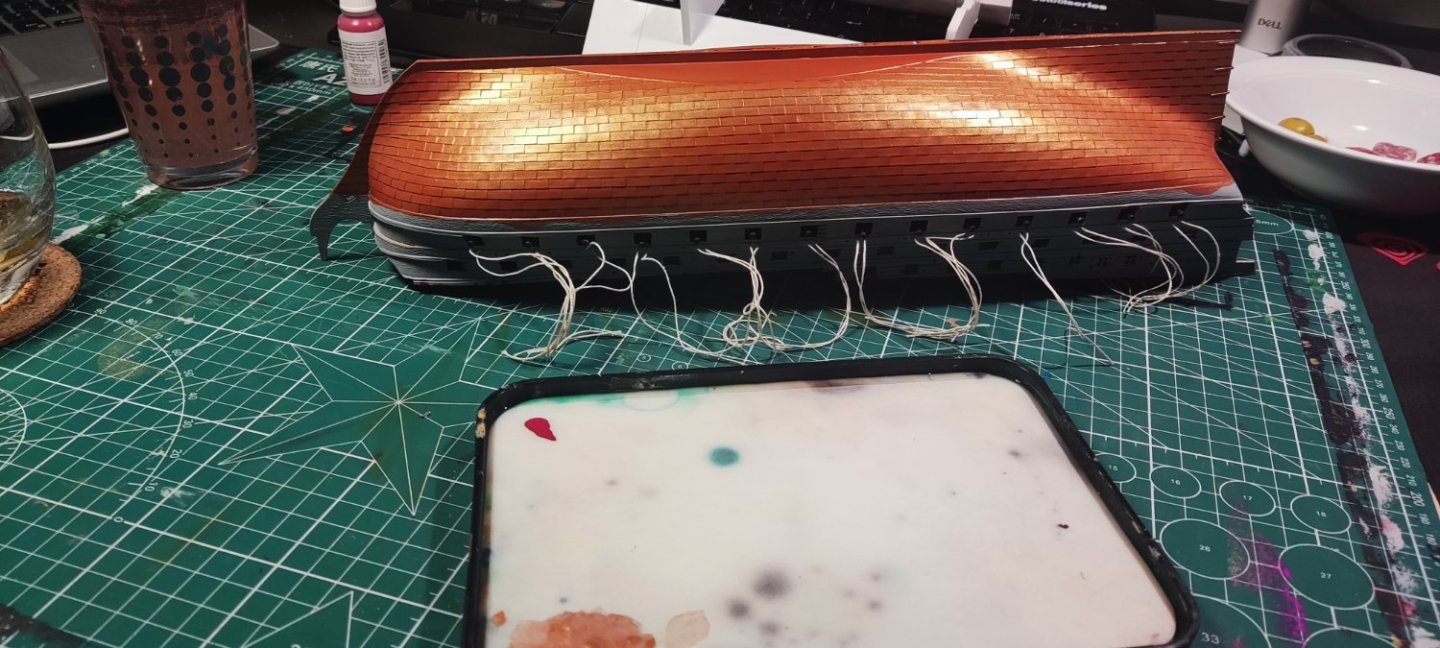
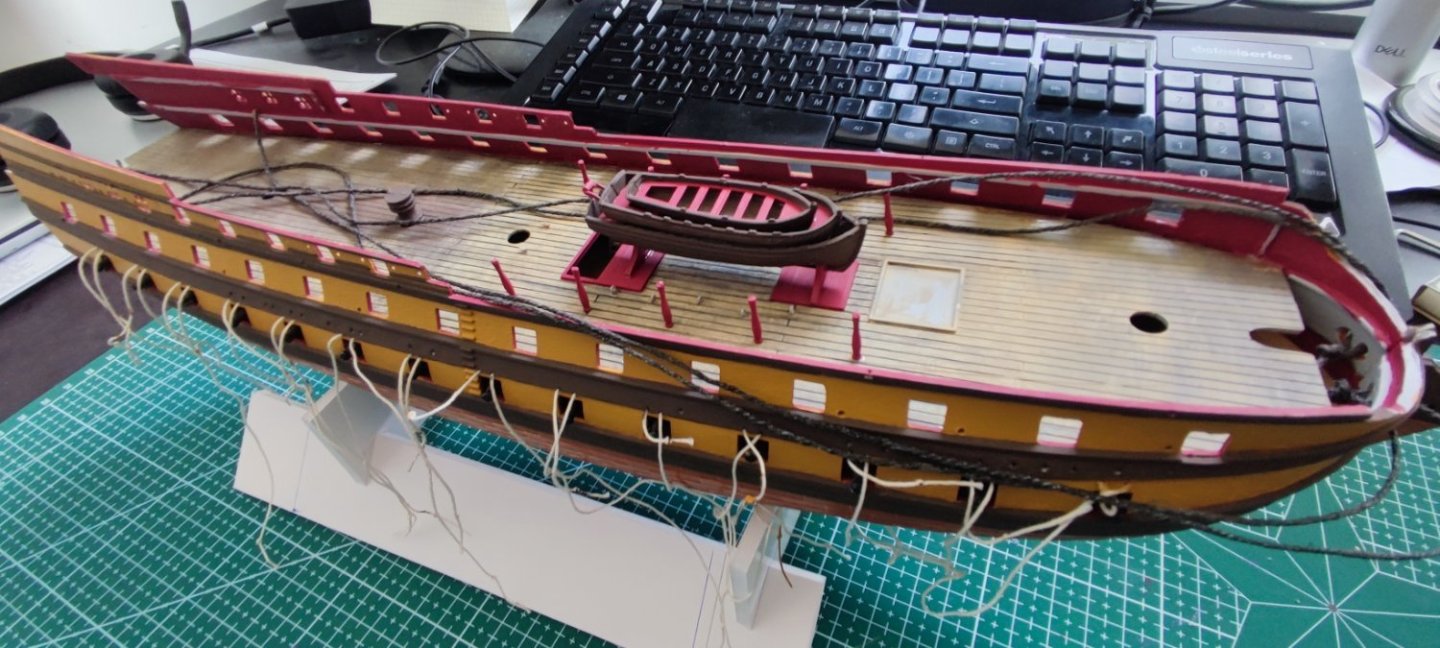
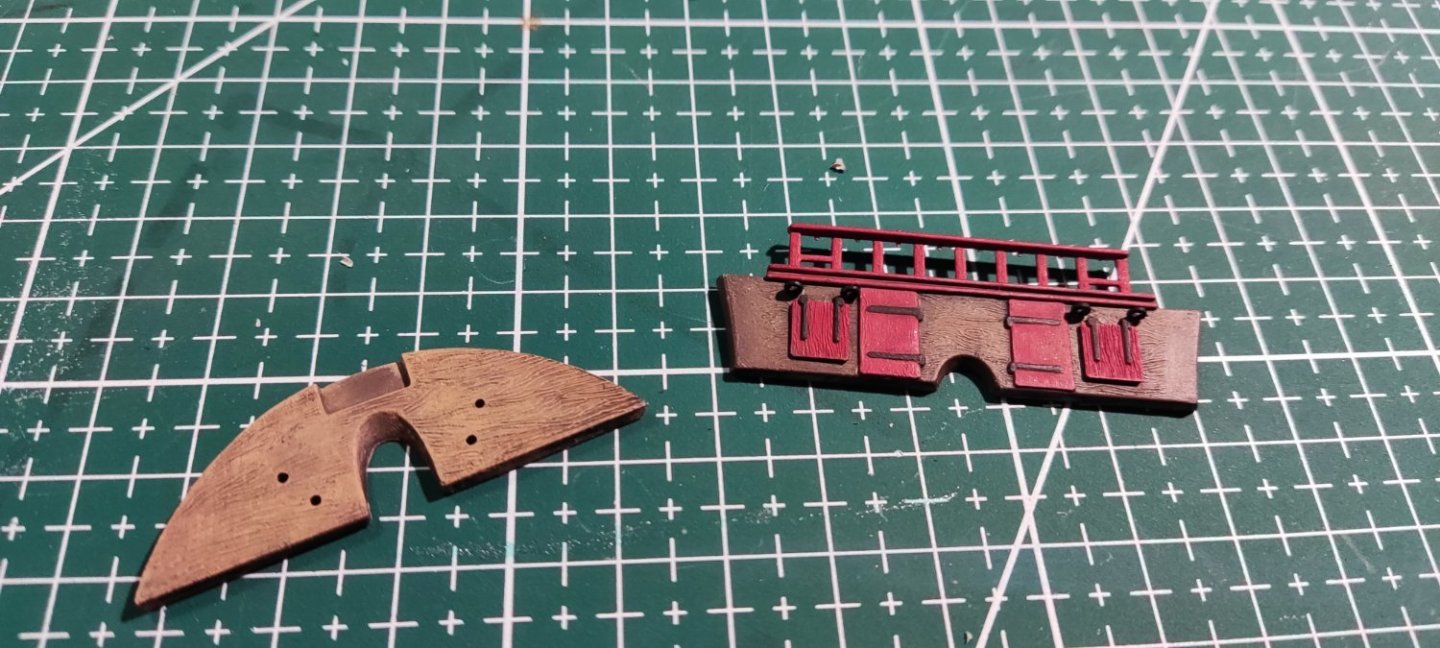
 As I move into retirement (and the peasants rejoiced) I had wanted to spend some time focusing on rigging. Well, I was given this Heller Victory with the hull pretty much done. The backstory was the gentleman had passed away and this was picked up in an estate sale for next to nothing. His work was superior and once I saw the hull I decided this was a good subject for my goal. There was the inevitable broken components but that was largely confined to the royal masts and (of course) the jibboom. The accompanying box of parts was incomplete but I have another 1.5 of these in the stash (bit of a story there). I would have done some things differently (like the deck isn't painted) but for what I was going to use if for and for actual looks that was fine. I have a friend that already has asked to have it upon completion for his library at home, which is perfect. I have dissected the plans and have defined each and every line so am over that hump. I did notice some differences to actual practice. I have a set of the plans that Longridge uses in his book (thank you Uncle Leo) and have defaulted to that presentation where practical. For example the foremast stays did not include the Breast Backstay so I am adding that. Not going crazy or over the top but where it makes sense will make those changes (for example, will use the supplied plastic blocks). I looked through my stash of 'rigging' line and have chosen to use 6 types. The Heller supplied line is white and didn't want to dye. So this morning after getting the remnants of the broken pieces removed and things prepped, went ahead and primed the necessary replacements. I am using Vallejo acrylics. It will be interesting to see how close I can get to the existing yellow shade. I should be working on this at least 2 days a week at a minimum. My first task is to scratch some open and closed hearts for the fore and main mast stays. These seem pretty iconic and need to be there but aren't included in the kit. Stay Building My Friends, Mark
.JPG.79990ac9a03ccb5863611932cf047da2.JPG)
.JPG.d202681a6ef3aee1ec9fa793cfe4a452.JPG)
.JPG.082ebe4de74ac127de97aca00a15e0c5.JPG)
.JPG.1935c3259708a5afe50dd95635322ff2.JPG)
.JPG.569333ad8409a308ff435f633ba2b67a.JPG)
.JPG.5c6fb467d3cc582a9de7ef92c1c78d54.JPG)
-
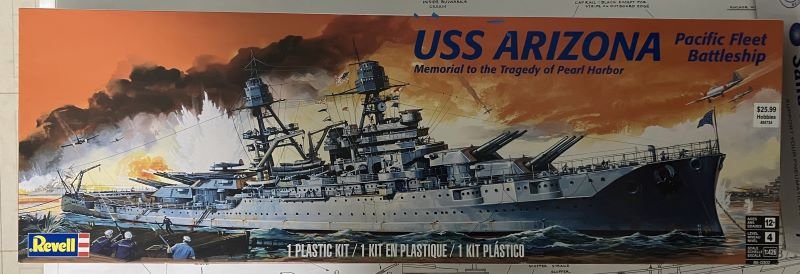
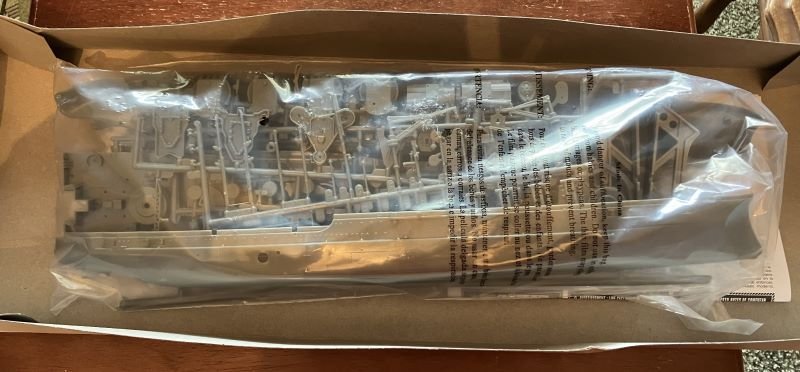
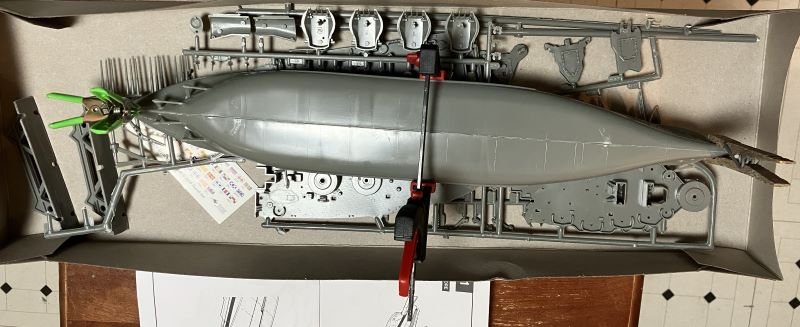
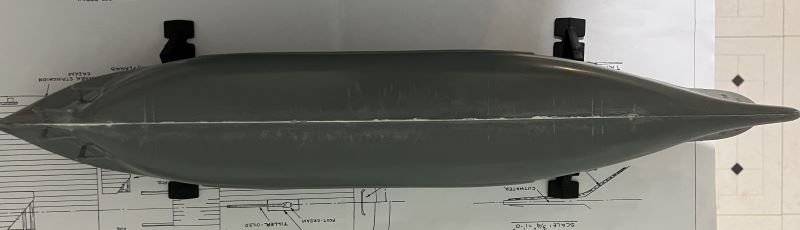
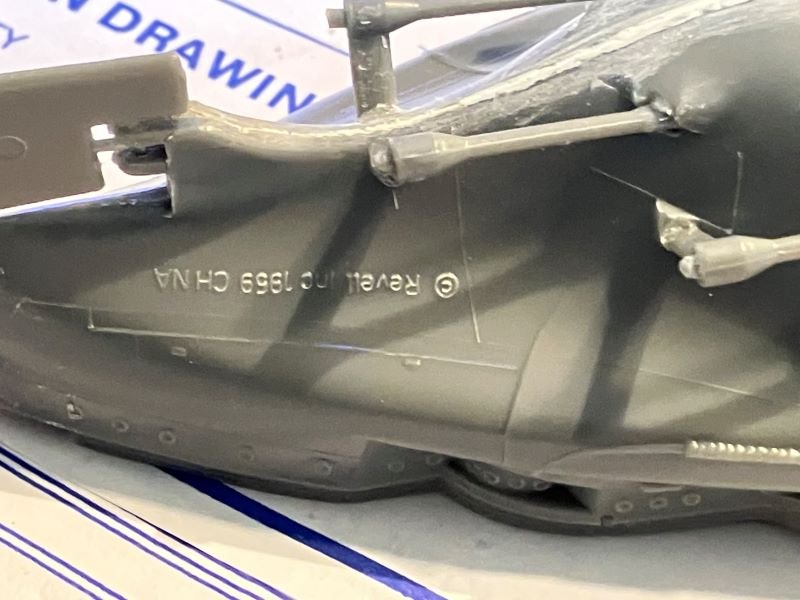
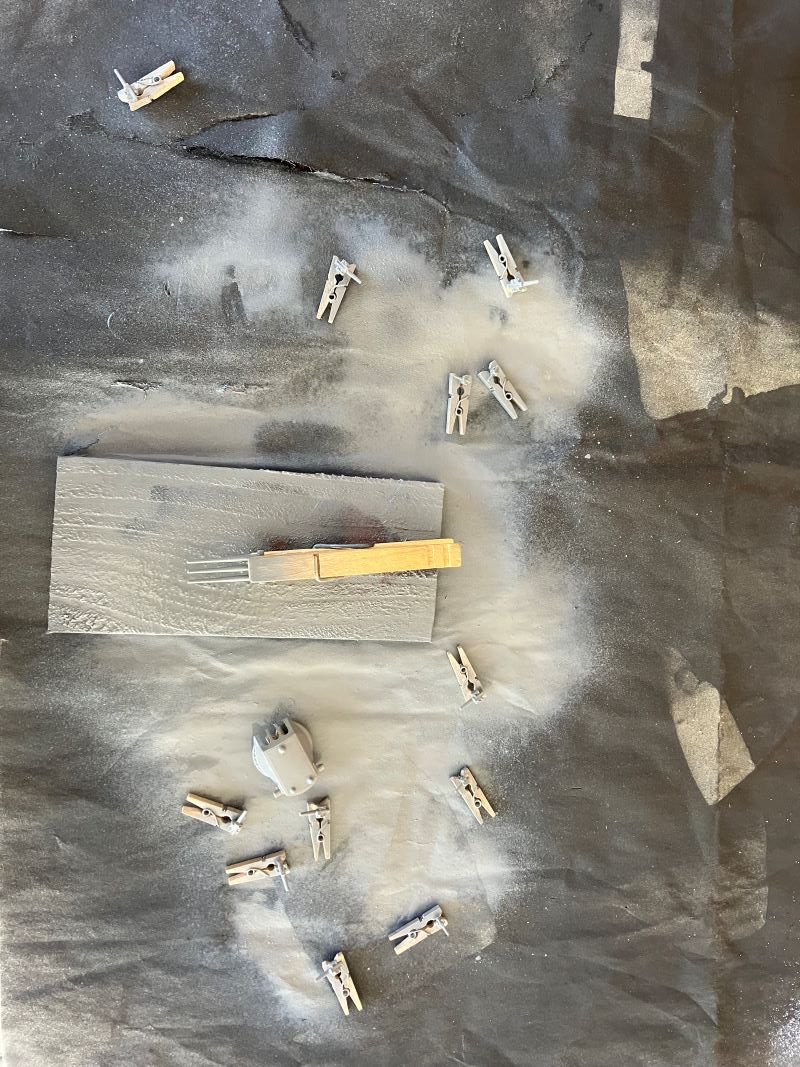
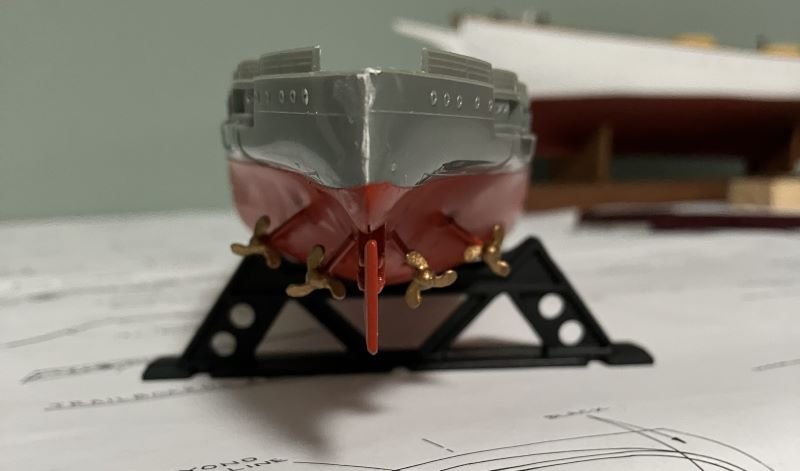
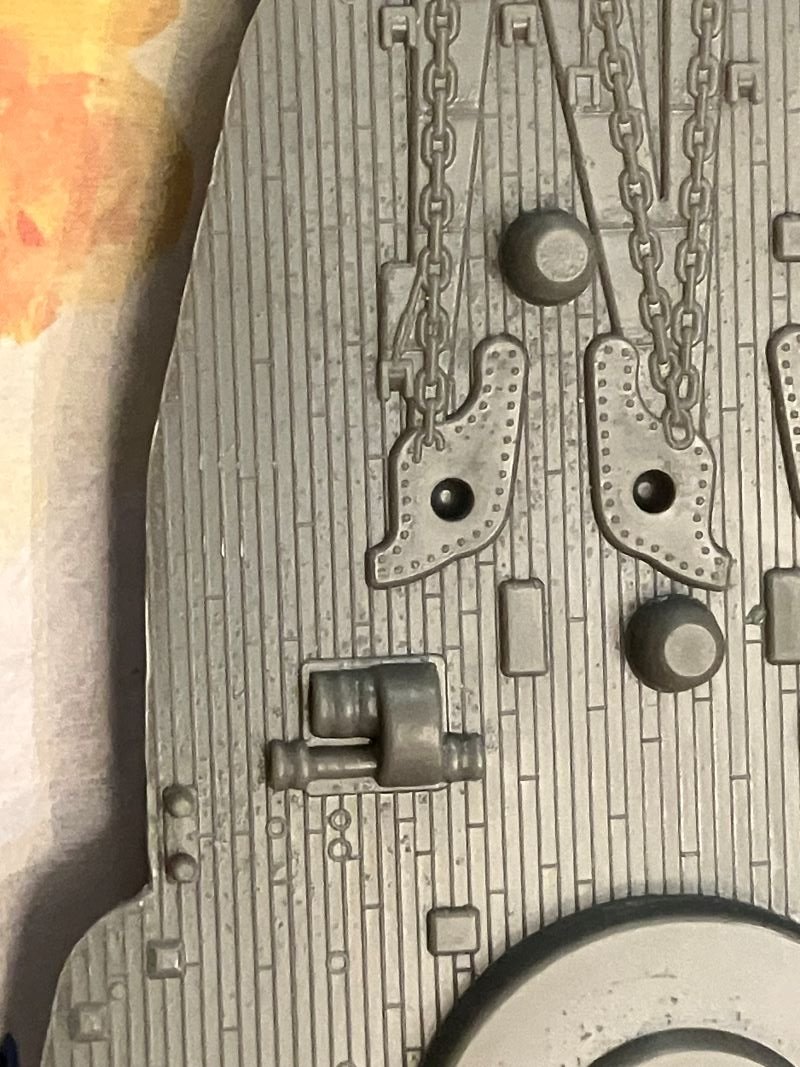
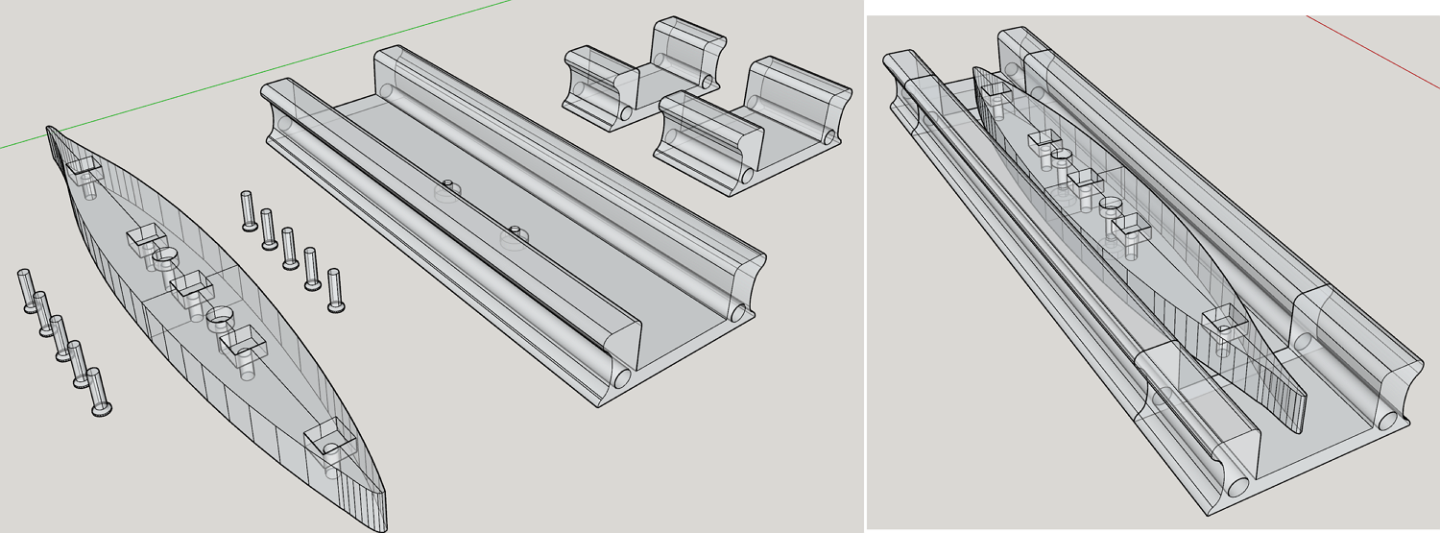
 Hello Everyone - This is the first plastic ship I've attempted in many years. As a kid we used to build all the old kits including Revell, Monogram, Lindburg Line, and of course Pyro. My son gave this to me for Christmas and I'm going to jump right on it. Cool box Everything in a sealed bag The hull halves were a little tricky to align. It took a lot of trimming So I used contour puddy The copyright stamp is not exactly subtle Small parts getting spray painted - guns I had hoped to leave the gray color of the kit, but removing the parts from the 'trees' and trimming left marks, so I used Testers gray spray paint. Parts assembled after spray painting Decent detail: deck planking, guns, and even right hand and left hand propellers I taped the hull for the bottom paint and the deck for the gray. I will spray paint the 2 deck pieces then paint the wooden decking by brush. I would just spray the entire thing but I don't want paint accumulation to cover the detail. Thanks for looking in and comments welcome - Kenneth