All Activity
- Past hour
-
 king derelict reacted to a post in a topic:
AEG G.IV - Creature of the Night by DocRob - Wingnut Wings - 1/32
king derelict reacted to a post in a topic:
AEG G.IV - Creature of the Night by DocRob - Wingnut Wings - 1/32
-
Jack12477 reacted to a post in a topic:
Nabopolassar King of Babylon and Daffadar, Skinners Horse by king derelict - Art Girona - 54 mm
-
Old Collingwood reacted to a post in a topic:
Nabopolassar King of Babylon and Daffadar, Skinners Horse by king derelict - Art Girona - 54 mm
-
Old Collingwood reacted to a post in a topic:
Nabopolassar King of Babylon and Daffadar, Skinners Horse by king derelict - Art Girona - 54 mm
-
JacquesCousteau reacted to a post in a topic:
ZULU 1916 by Ras Ambrioso - 1/48 scale - stern paddlewheeler
-
JacquesCousteau reacted to a post in a topic:
ZULU 1916 by Ras Ambrioso - 1/48 scale - stern paddlewheeler
-
Keith Black reacted to a post in a topic:
Trireme Olympias by Richard Braithwaite
-
Keith Black reacted to a post in a topic:
Trireme Olympias by Richard Braithwaite
-
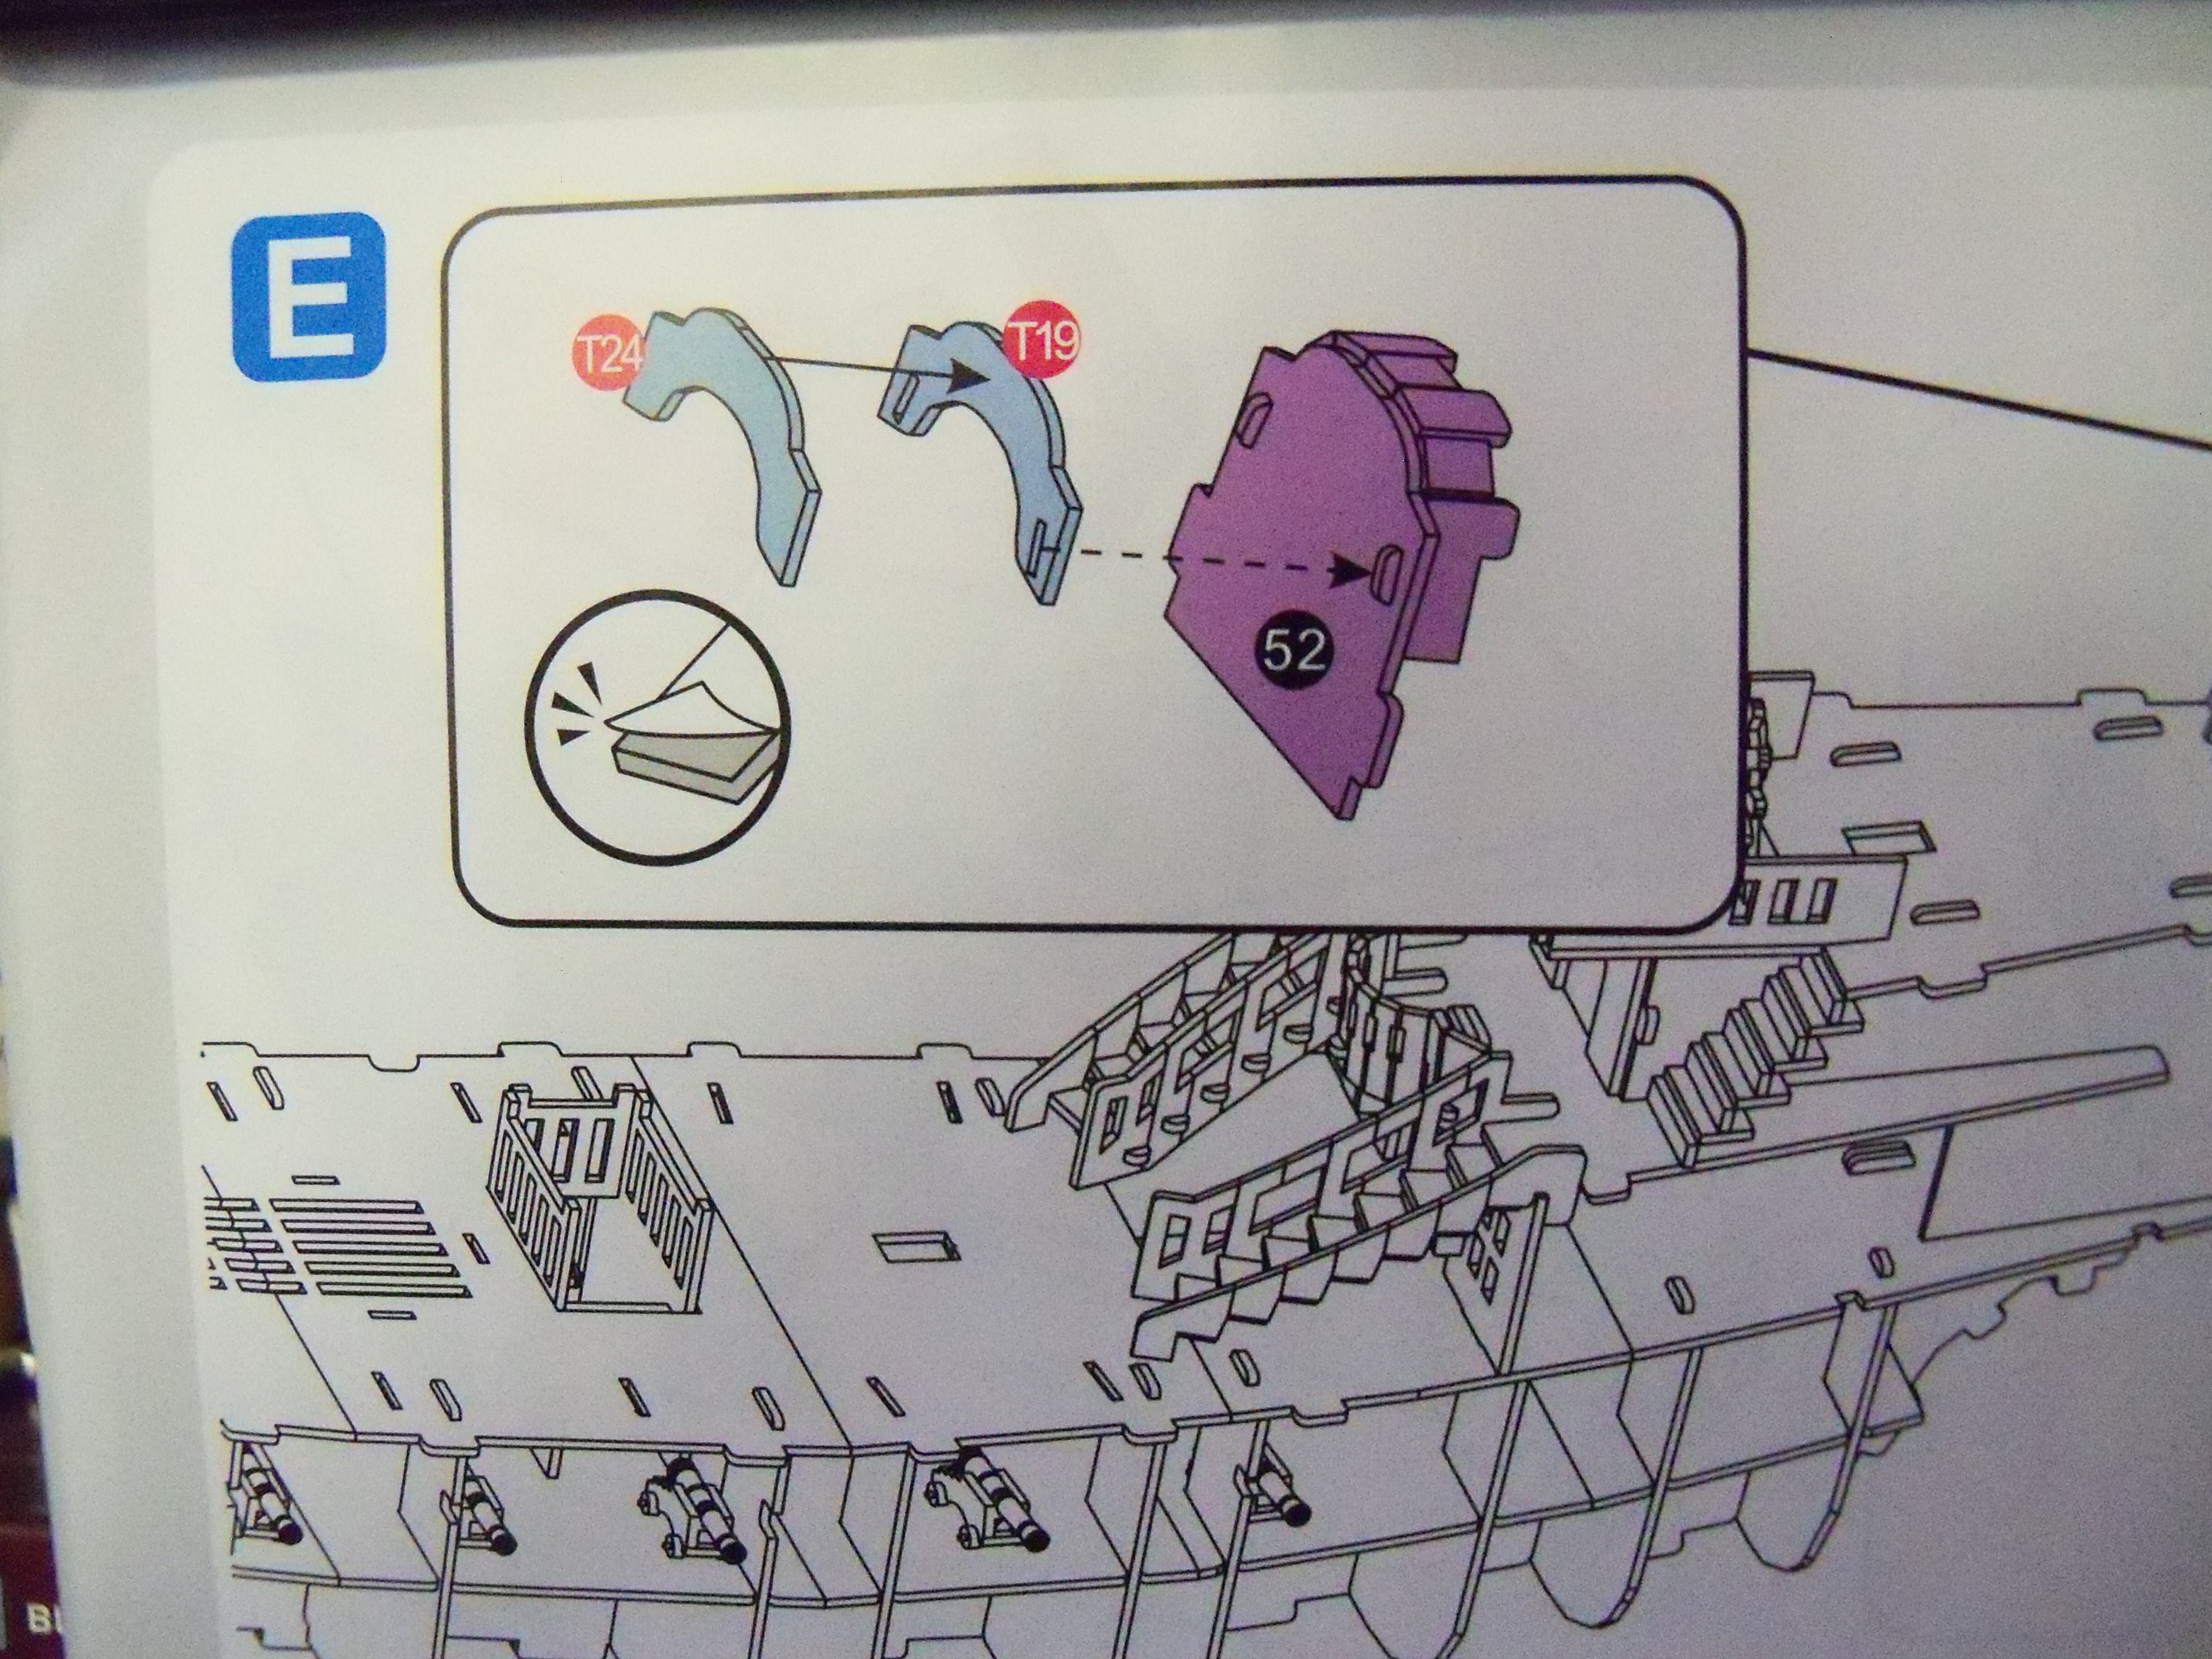
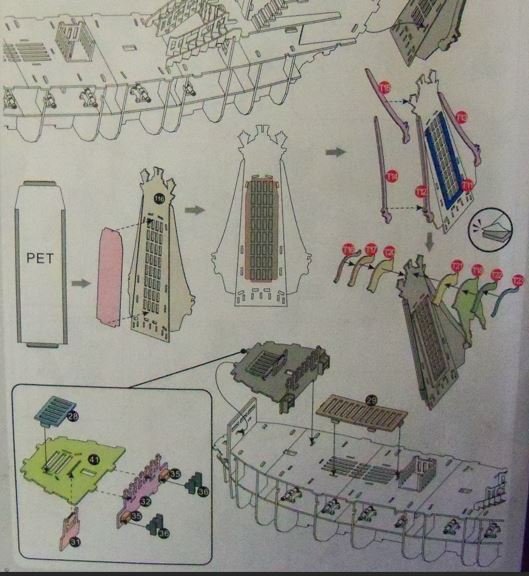
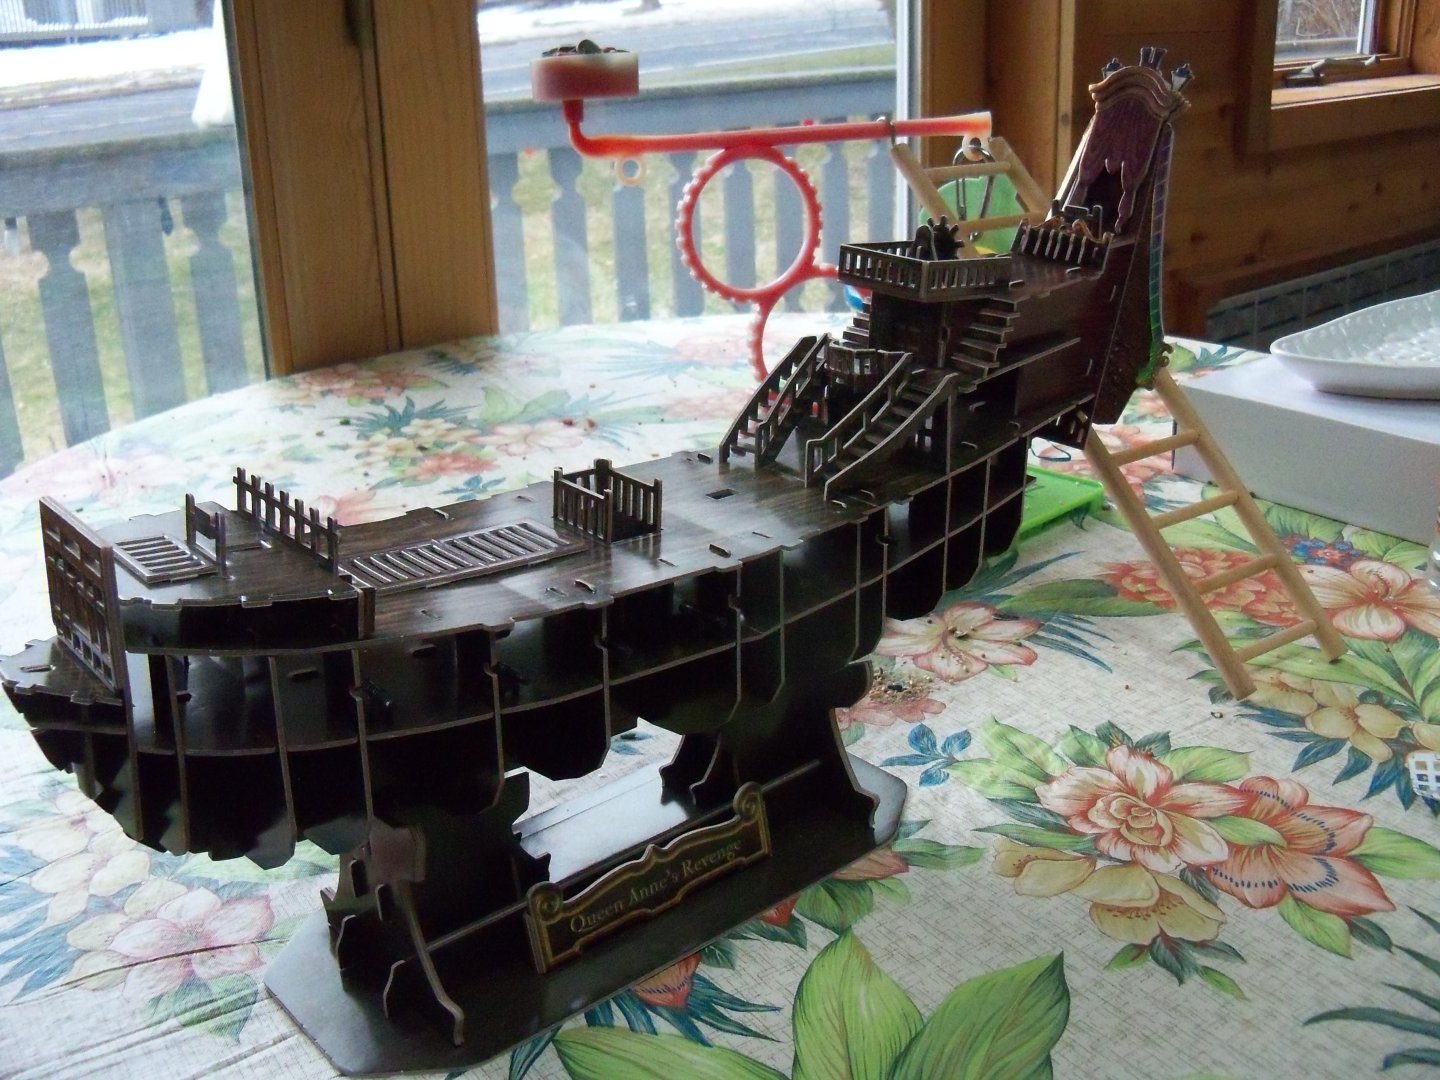
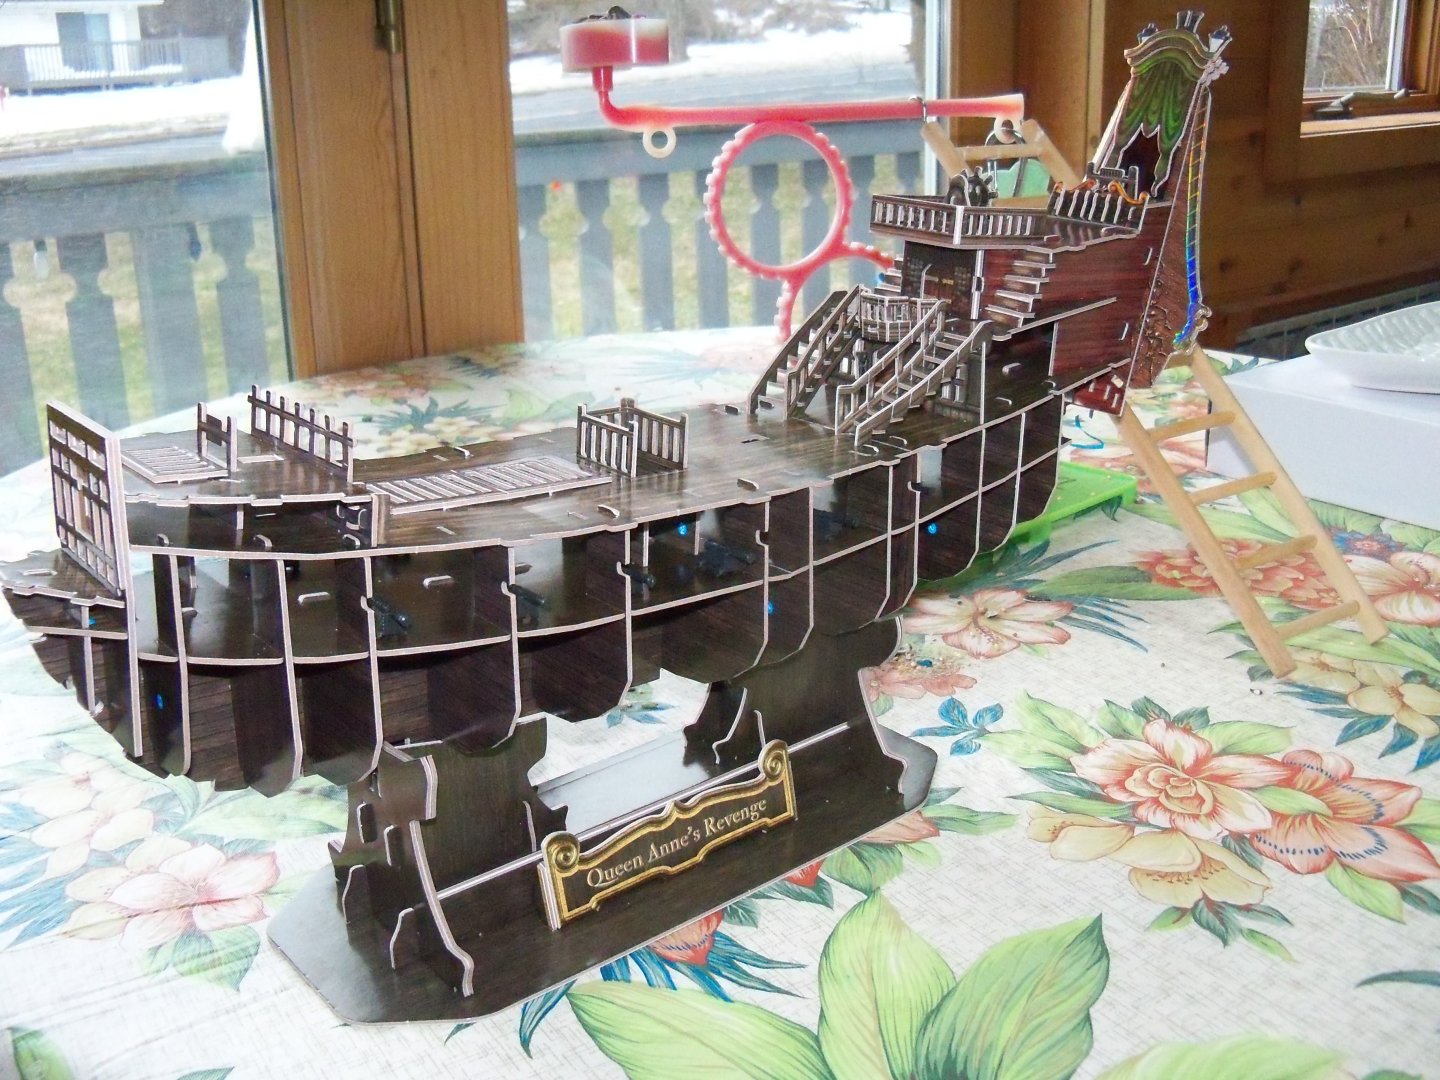
 Step E began with an unnamed subset that showed part #52 that first needed the top portion folded over, leaving the number printed on the hidden backside. The top portion was bent over and formed into a curved roof top with two tabs stuck through it that would then project into the gilded trim part #T19. Part #T24 is then added to cover T19 and complete the trim subset as shown below. Continuation of the illustration of step E as shown here. The Mylar part #T4040, representing the stain glass in the transom, needed four strips of the double faced tape applied to its edges. Once again, the alignment was critical in its placement on transom part #116 so as not to cover up the slot openings. Next, all of the gilded trim pieces T11 through T23 and the unnamed subset were added to the transom. This was followed with another unnamed subset of the forecastle below which included the deck, railing, two ladders and another fife rail that is stuck through the deck from below. The step was concluded with the application of the top cross bars of the deck gratings on decks. Here is the ship at this point. At this point in the construction I still hadn’t noticed that I had installed the first subset and the gilded transom trim on the WRONG side of the transom! More on that later.
-
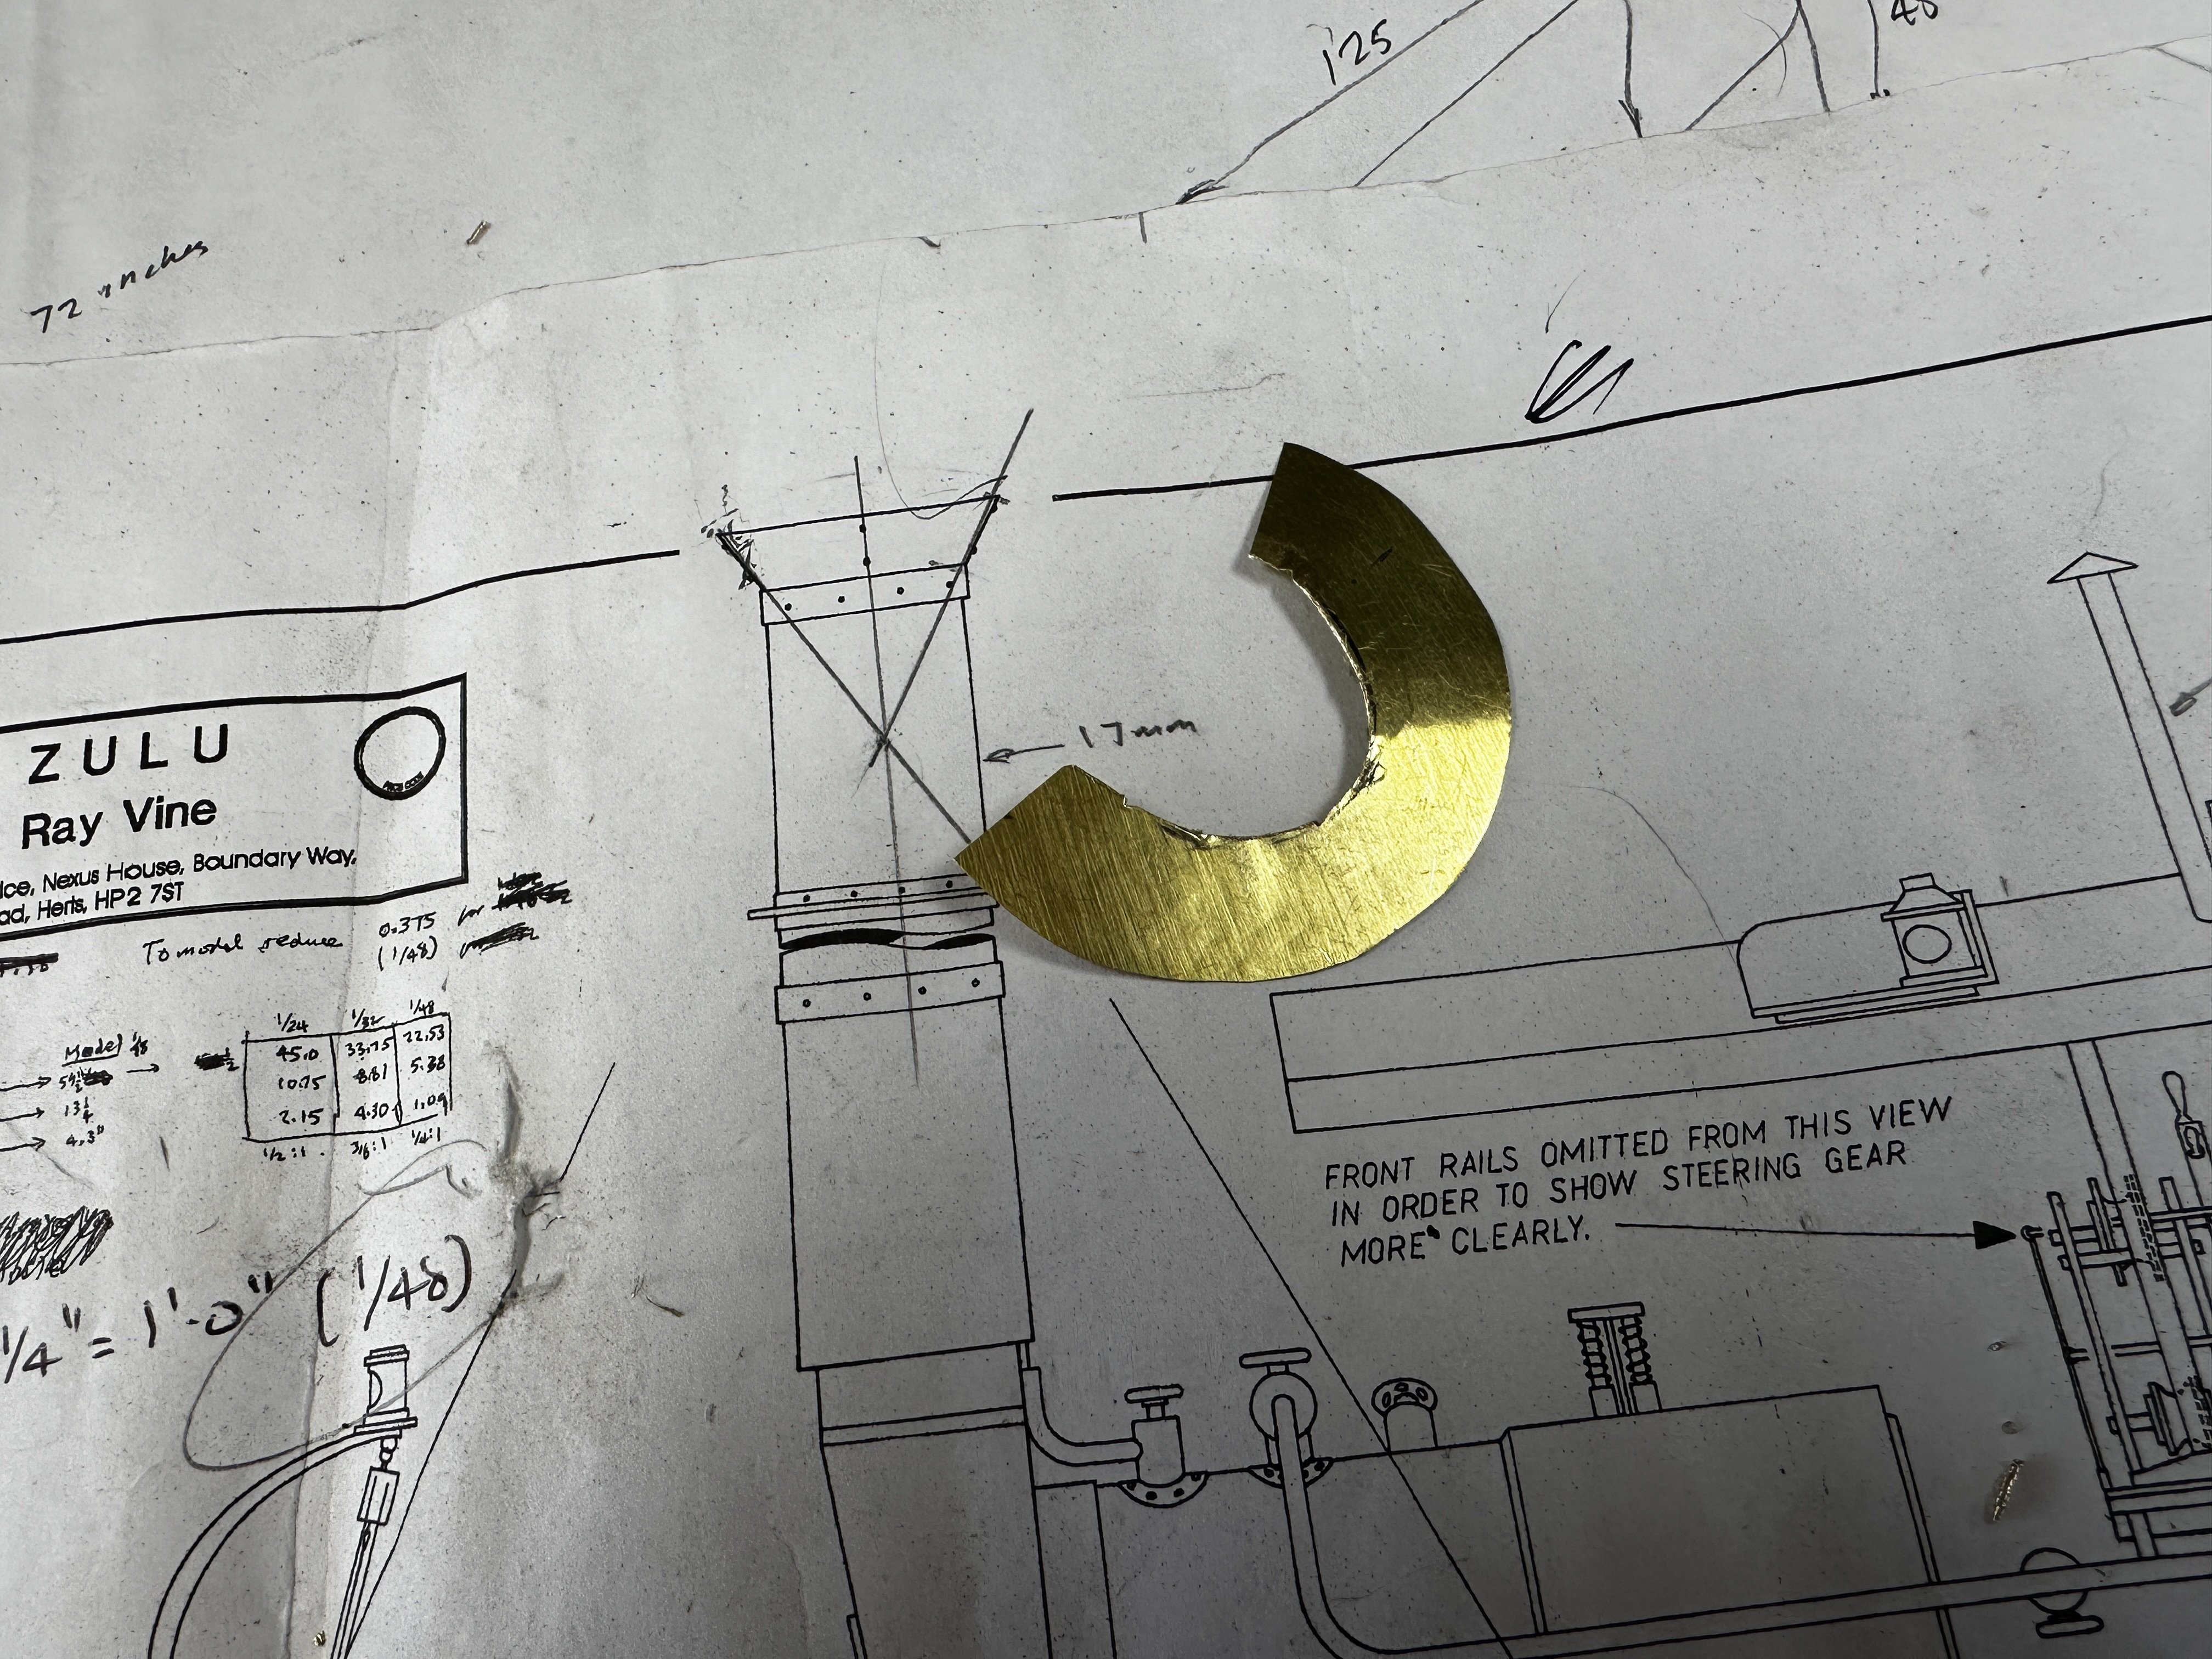
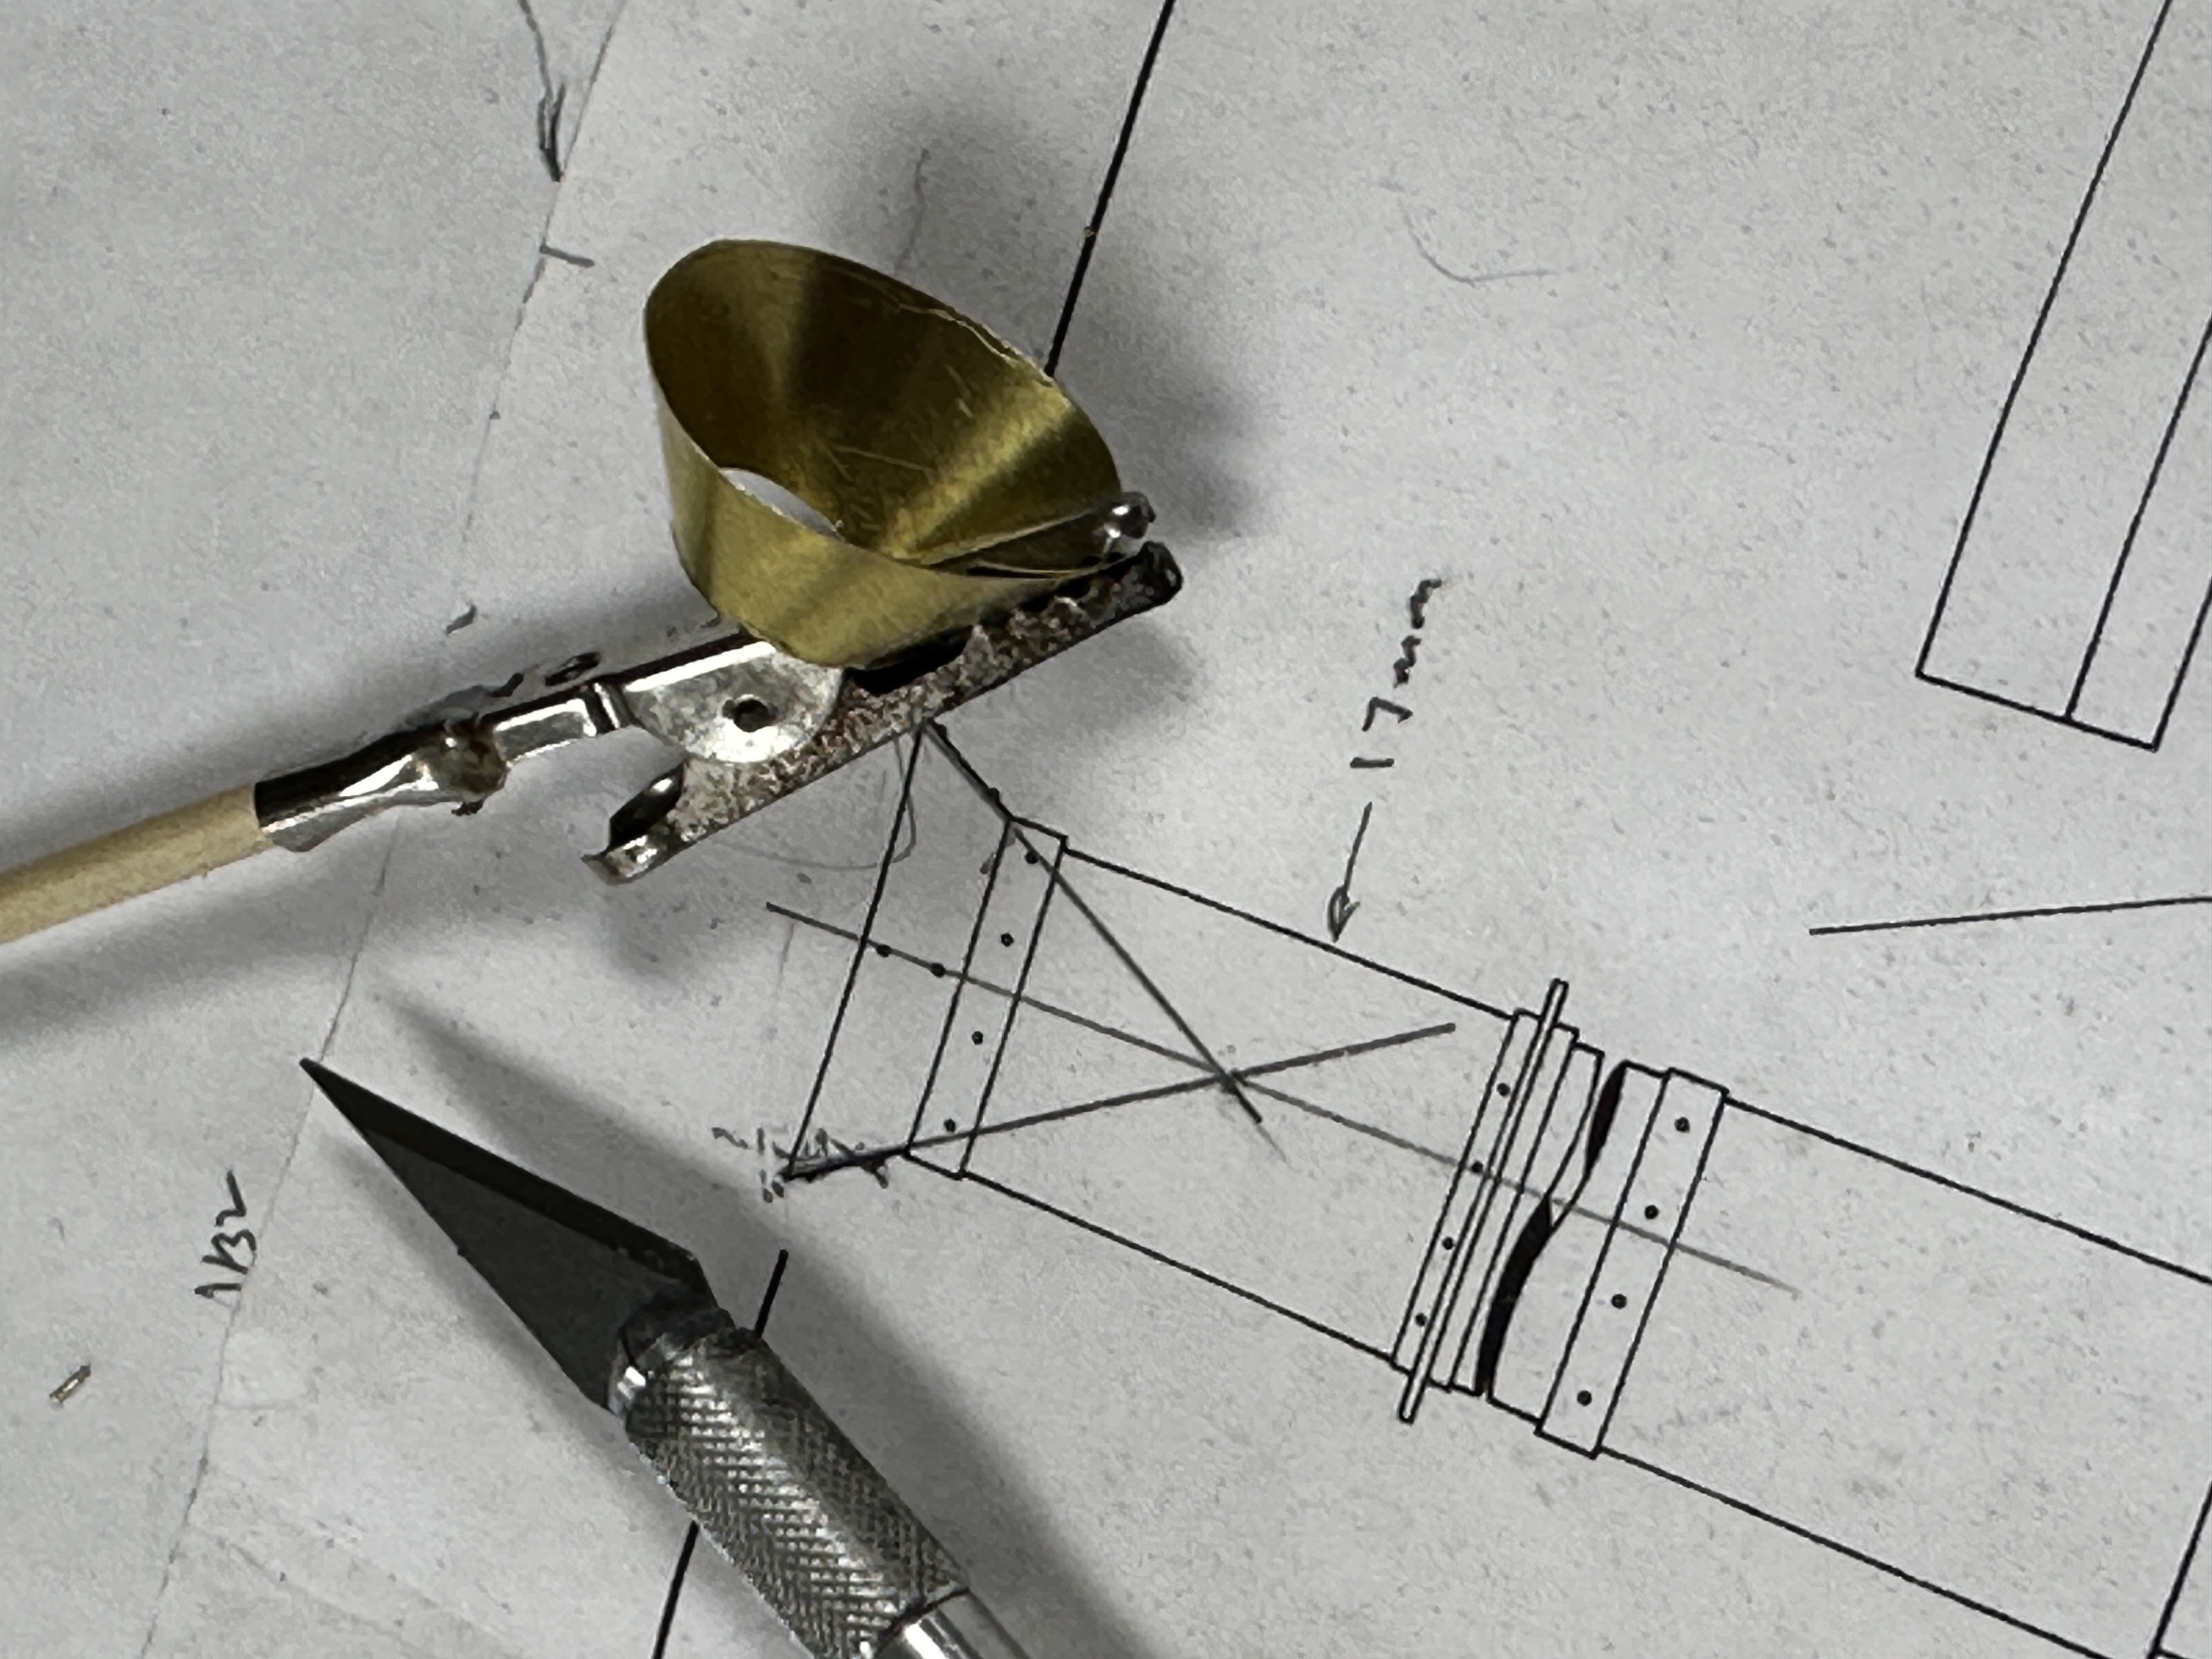
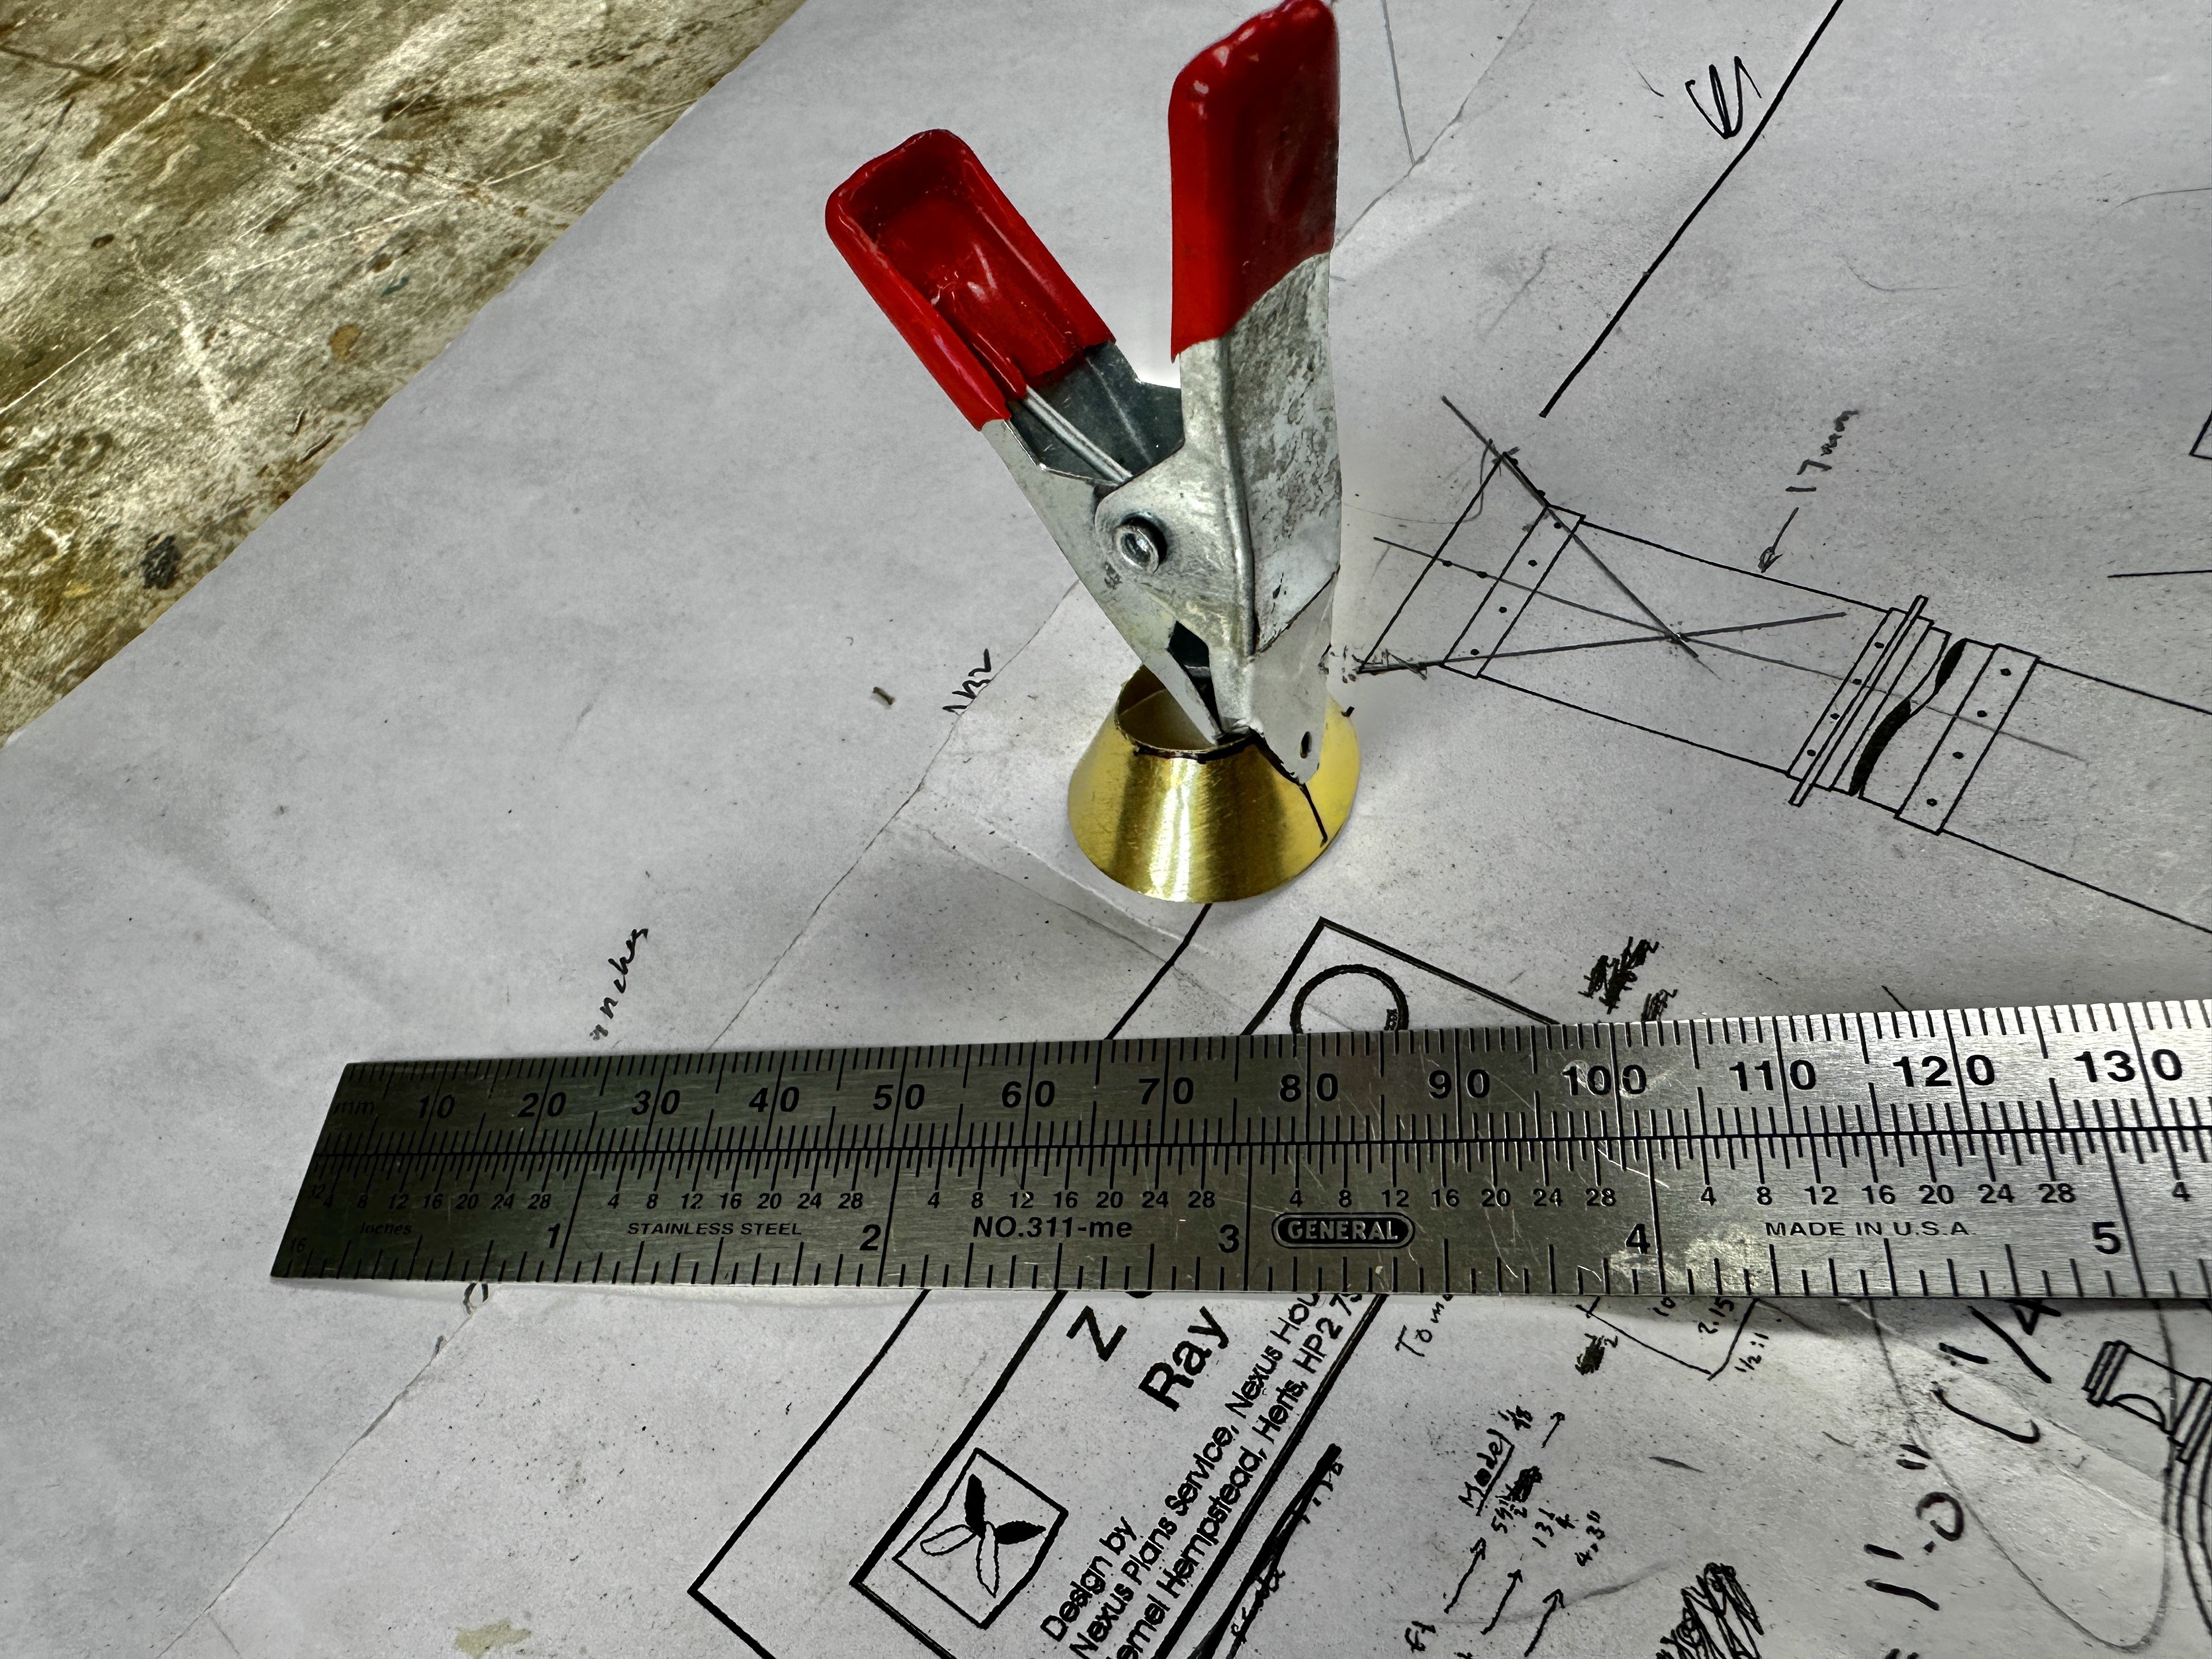
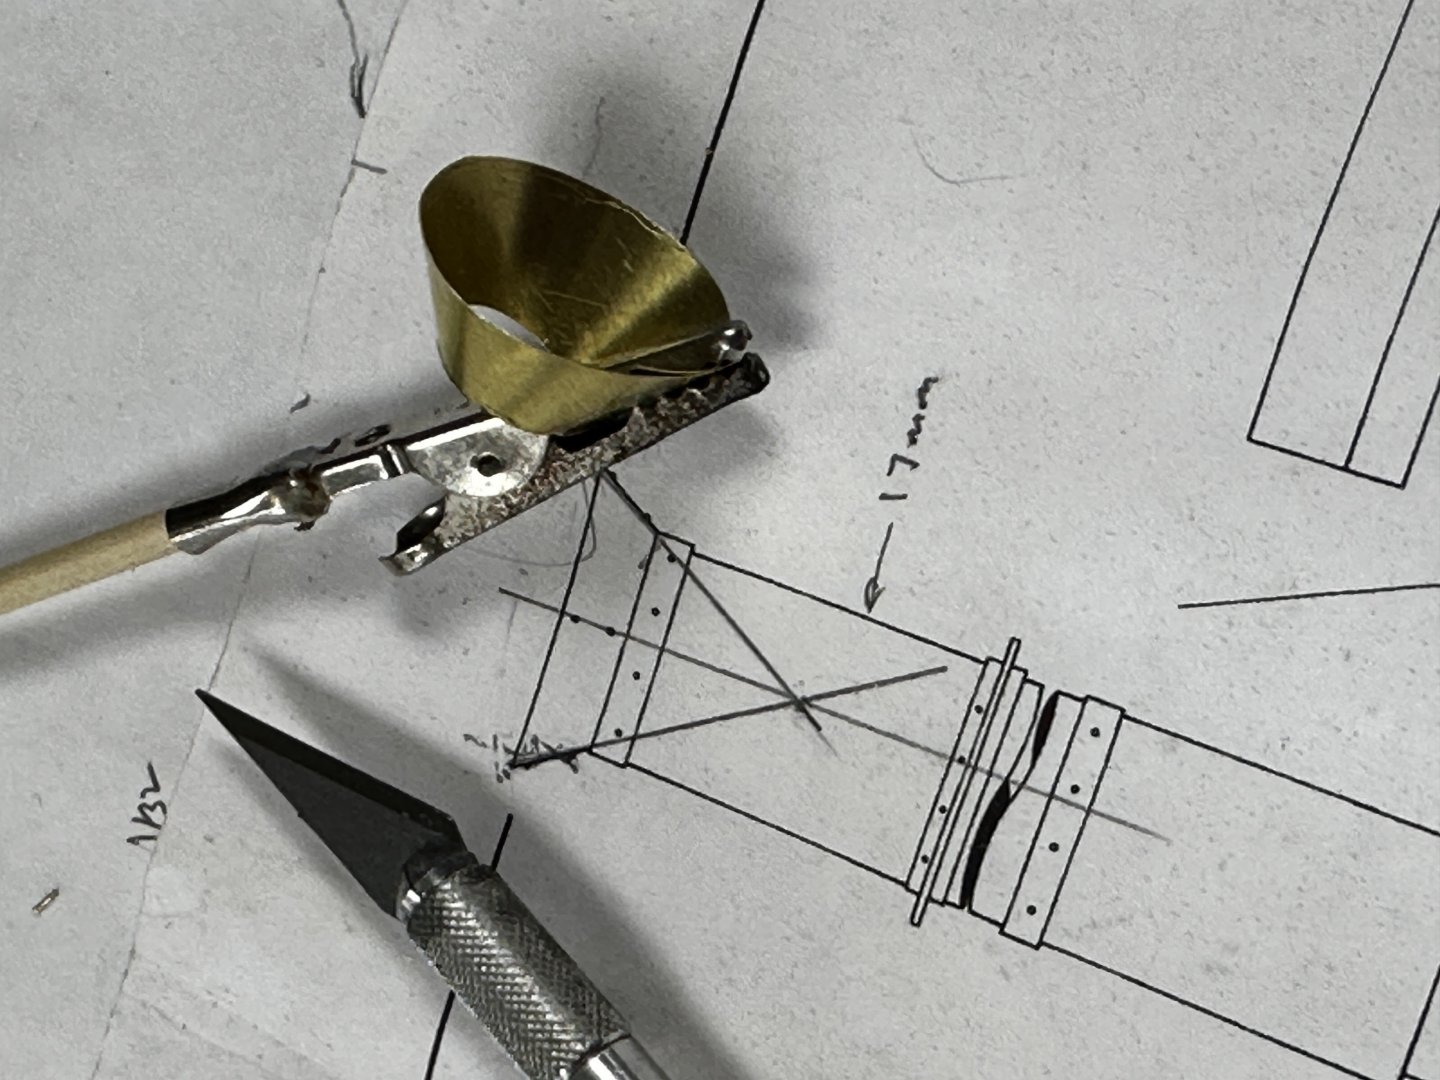
 For some time I have been experimenting on how to build the conical top of the stack. At first I tried using the bottom from a dixie cup after strengthening it with shellac ( See Post #37). The results were fair, as the cone was very fragile and I didn't find a good way of trimming the bottom. Today I decided to try my luck with brass. I used thin shim brass plate and developed the cone right on the drawing. Then I cut the plate with scissors, using the Admiral's eyelash curved scissor on the small circle and trimmed the edges with the Dremel. Bent the plate over a brass rod. And glued it together using CA. I thought about soldering it "a la Valeriy" but I wasn't to sure about the results. I promise that, when I finish this boat, I am going to practice both of my nemesis: soldering and air brush painting. And here it is my cone waiting for the glue to cure. Thanks for all the likes wows.
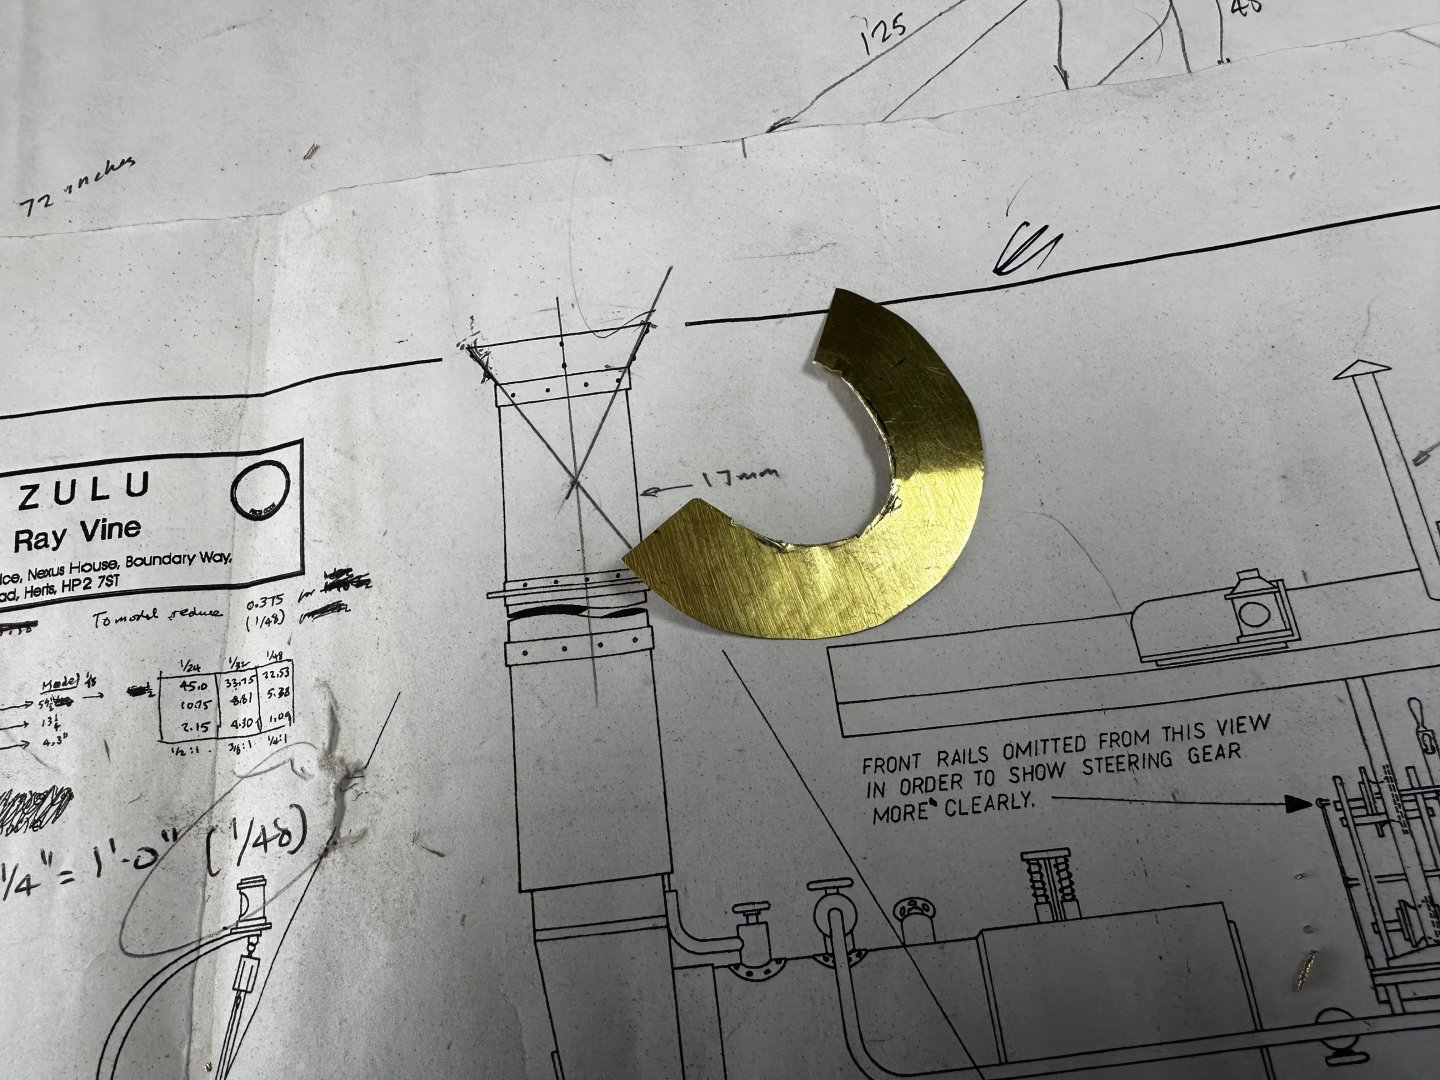

-
I have both the sherline lathe and the mill and love them. A friend of mine has the Taig and we often argued which is best. We reached the consensus you would never go wrong with purchasing either. We both tried the others mill and lathe and agreed they were both very well designed and worked great. His Mill was larger that the Sherlines but I could pick mine up and move it where I wanted (35 pounds compared to the Taig weighing in at over a 100 lbs)) The Taig mill was larger and could handle larger items compared to my Sherline. I found I wanted the ability to move mine if needed (on and off the work bench). I also found a lot more accessories for the Sherline mill and lathe than what the Taig had available. I think the Taig mill could handle larger items and harder metals that the Sherline but for model making the Sherline works great.
-
davec reacted to a post in a topic:
AMC DH9 by davec - Wingnut Wings - 1/32
-
davec reacted to a post in a topic:
AMC DH9 by davec - Wingnut Wings - 1/32
-
 GIMP is free if anyone is looking for a Photoshop alternative. And it does most of what Photoshop does.
 -
 I wear a dust mask and use a shop vac, it is a little loud but i can direct the nozzle at the location or tool I'm using and it collects most of the dust. I have a clamp that i mounted to a board that holds the hose nozzle in position. I wear ear muff style noise protection.
 -
 I wanted to start adding a bit of background to the figures seeing as they are a bit off to the left hand side as you might say. After the pre shading I will be working on the daffadar first. A daffadar is a sergeant in an Indian cavalry unit. Skinners horse were an irregular cavalry regiment raised in 1803 by James Skinner. They have a long and distinguished history with service ranging through the Boxer Rebellion where they fought alongside US troops, through Flanders and Mesopotamia in the First War and Italy in the Second. They now drive T-72s in teh Indian Army and are one of the oldest regiments. At the time represented by my figure the regiment was mainly made up of Sikhs, Jats, Rajputs and Hindustani Muslims so teh beard on the figure is entirely appropriate. Lets see how this works out Alan
 - Today
-
Thank you OC. Its going to be an interesting project. Lots of new things to master. Alan
-
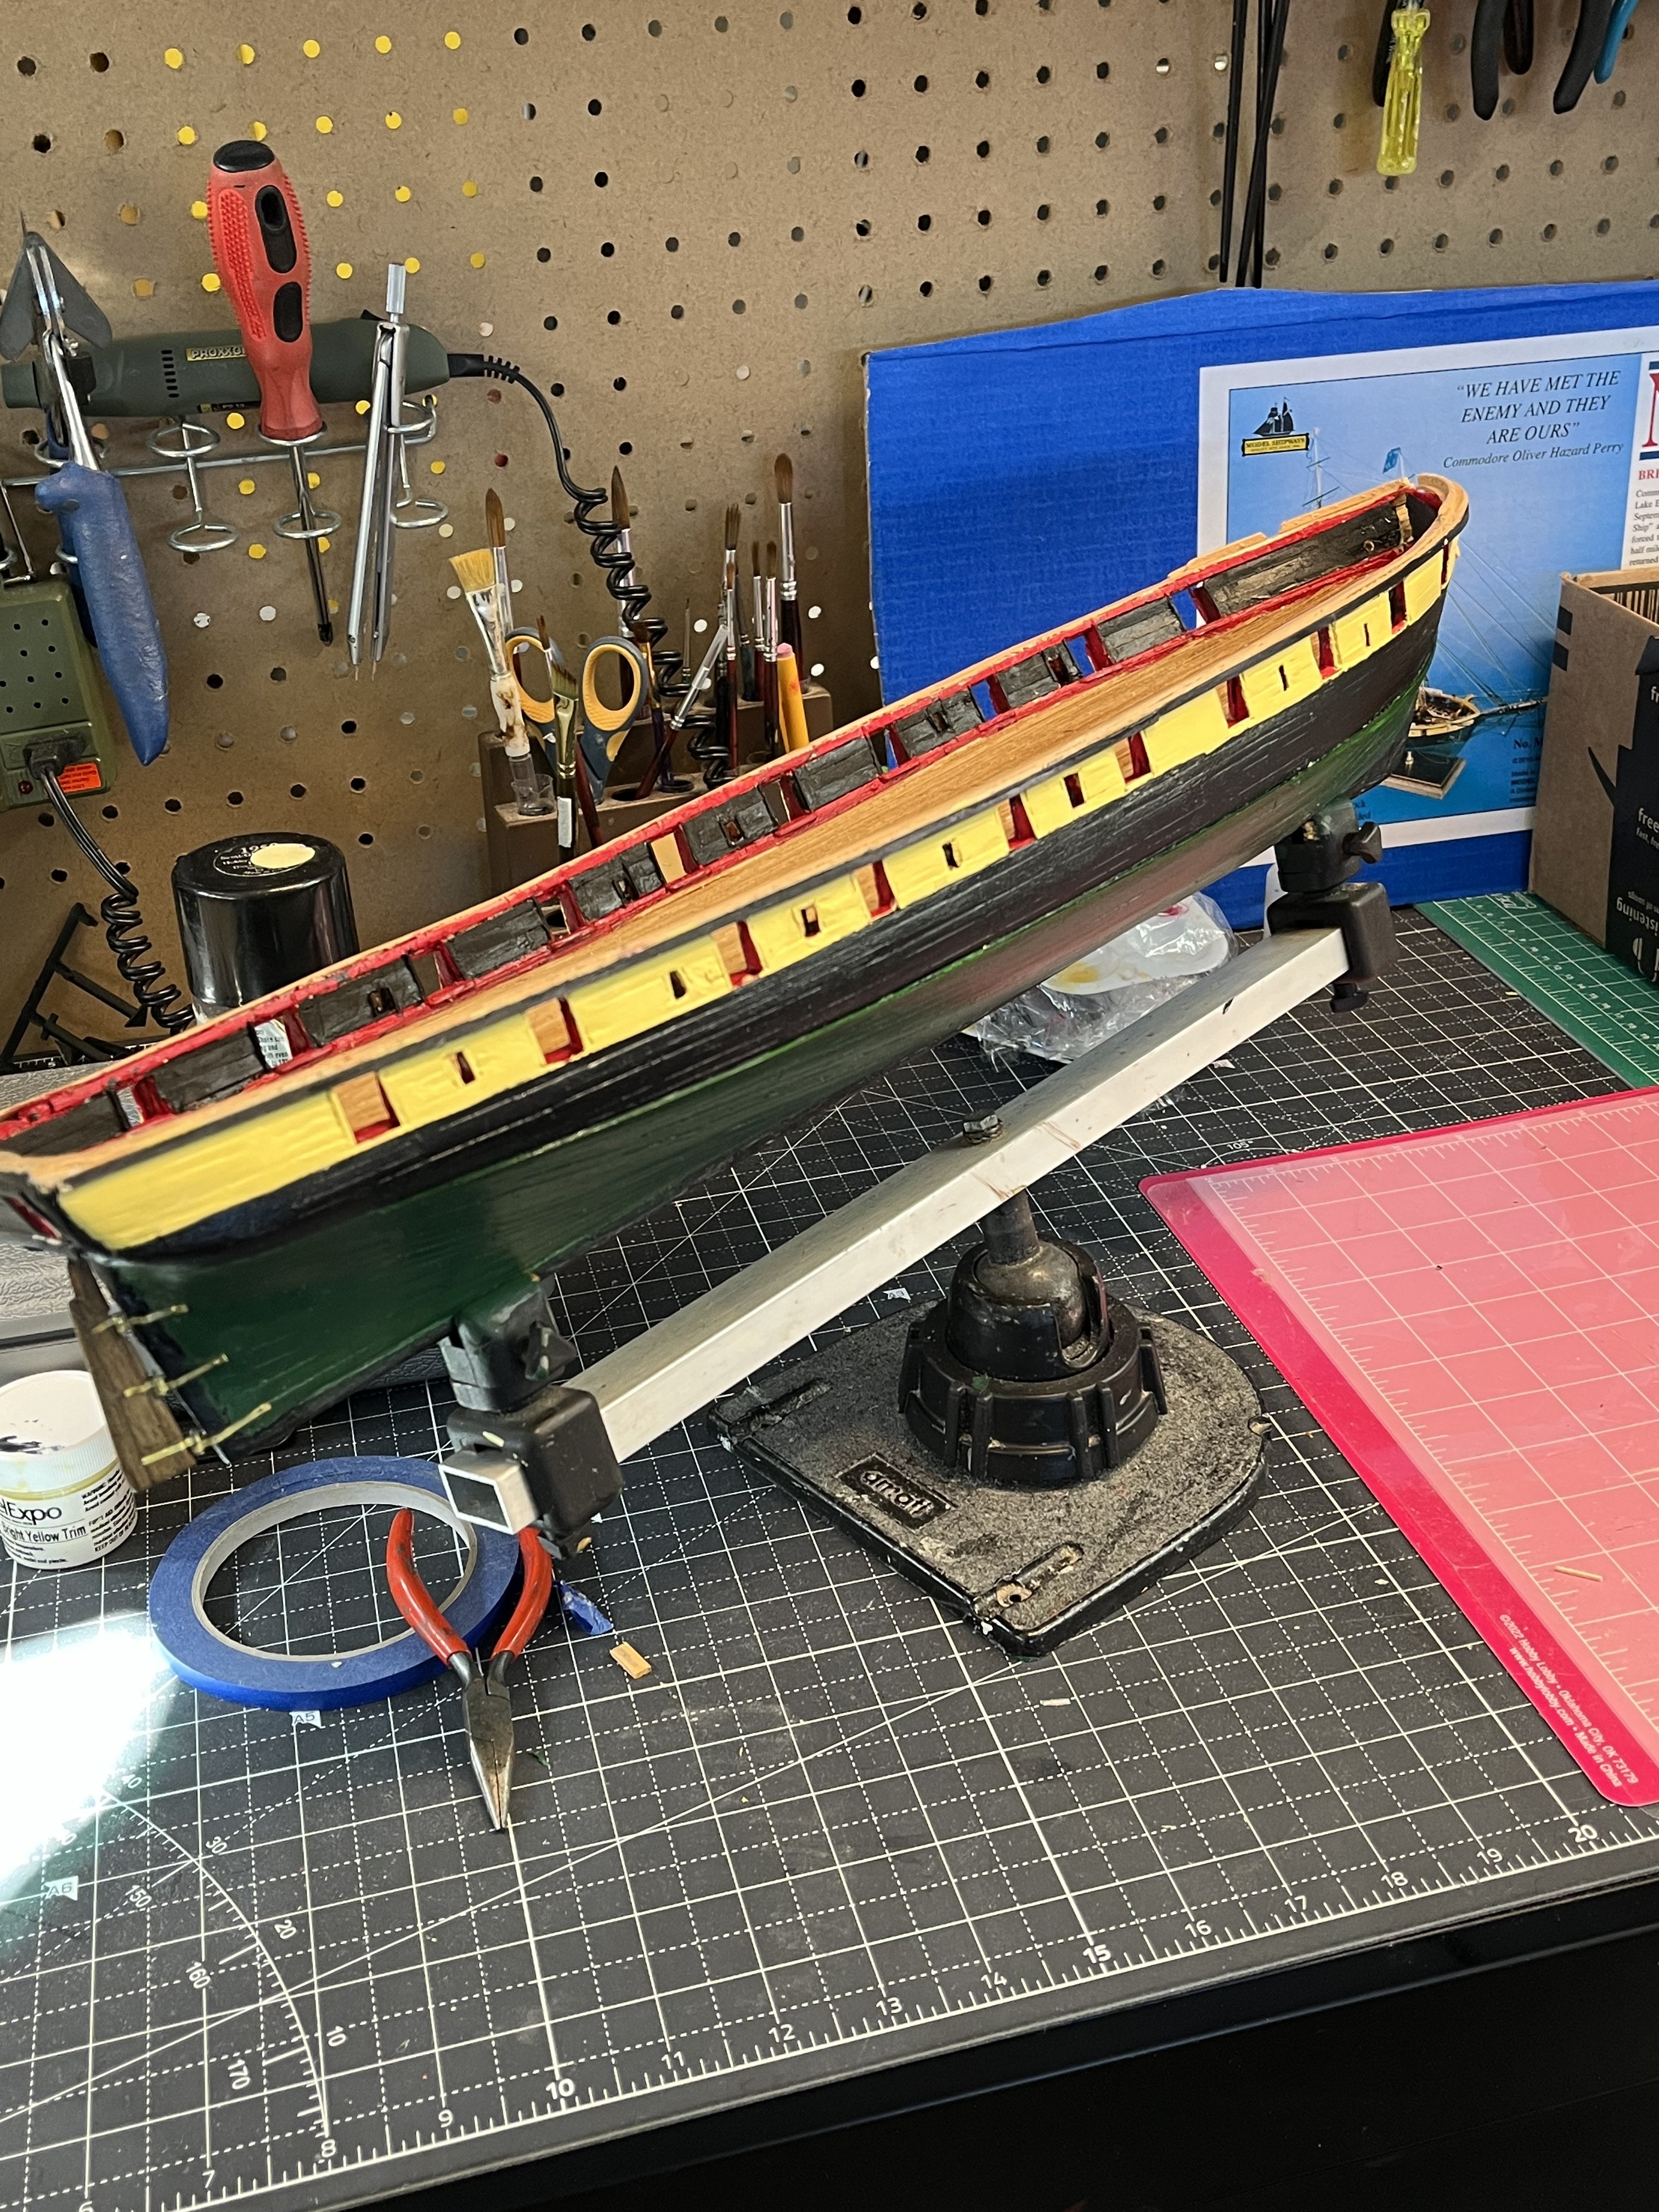
 I’ll be following your log intently when it’s time to plank. I know a lot of planking issues can be covered with sanding, wood filler and even paint - but I would like my planking to look as close to yours as possible. I know some of my rabbet (aka “terrible”) needs work. I plan to drop some bulwark fillers and I have a great wood carving tool I had forgotten about that will make a crisp deep channel. Your planking is artful and I’m thankful for your advice before I even start mine!
 -
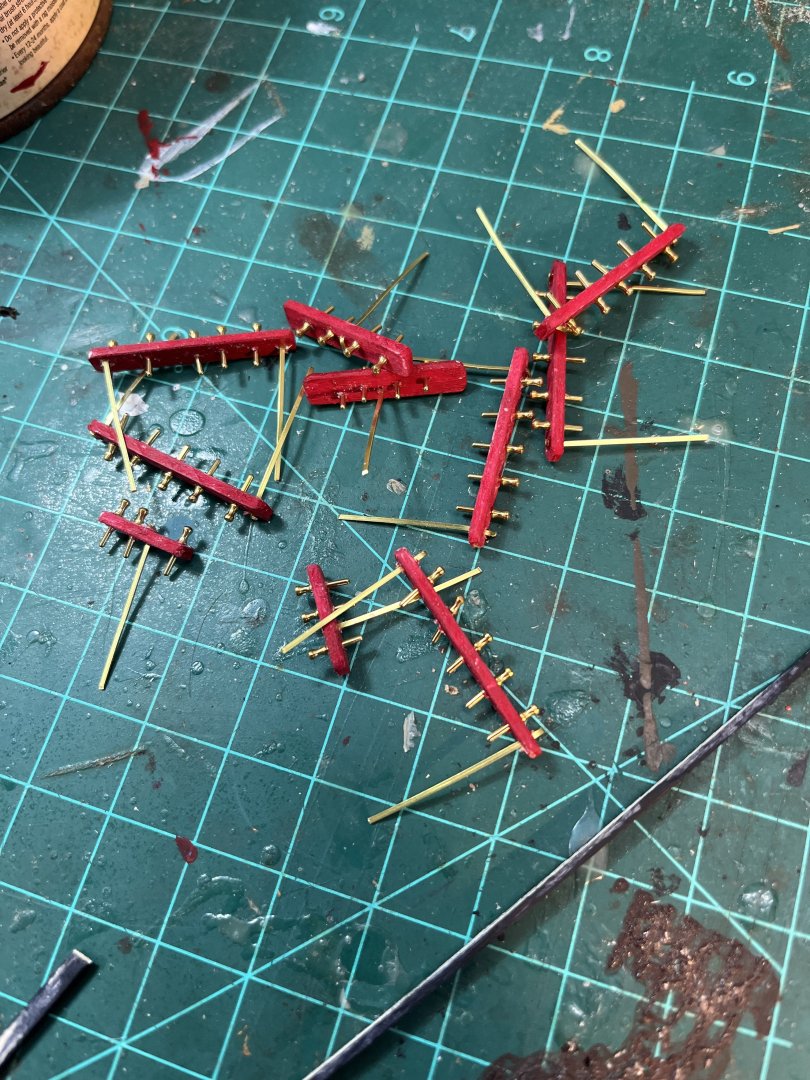
 p.s. While you are replacing stuff, have a look at the belaying pins, see what you think.
 -
Going to watch, this will be different even for a new kit. I stand to be corrected, but, I thought Vanguard uses Ropes of Scale? Though the supplied standing rigging is black in this kit, and you may want brown?
-
B-25J Mitchell by Chadwijm6 - HK Models - 1/32
king derelict replied to chadwijm6's topic in Non-ship/categorised builds
Thats a super idea and will really show the aircraft off beautifully. It looks to be a great kit. Alan -
 The text on the photos above was created in photoshop, which is the progam I use for general photo processing. There are lots of lower cost alternatives available however. Ive even found Powerpoint as quite an effective solution, particularly for lower resolution images where you can simply take a screenshot of the annotated "slide".
 -
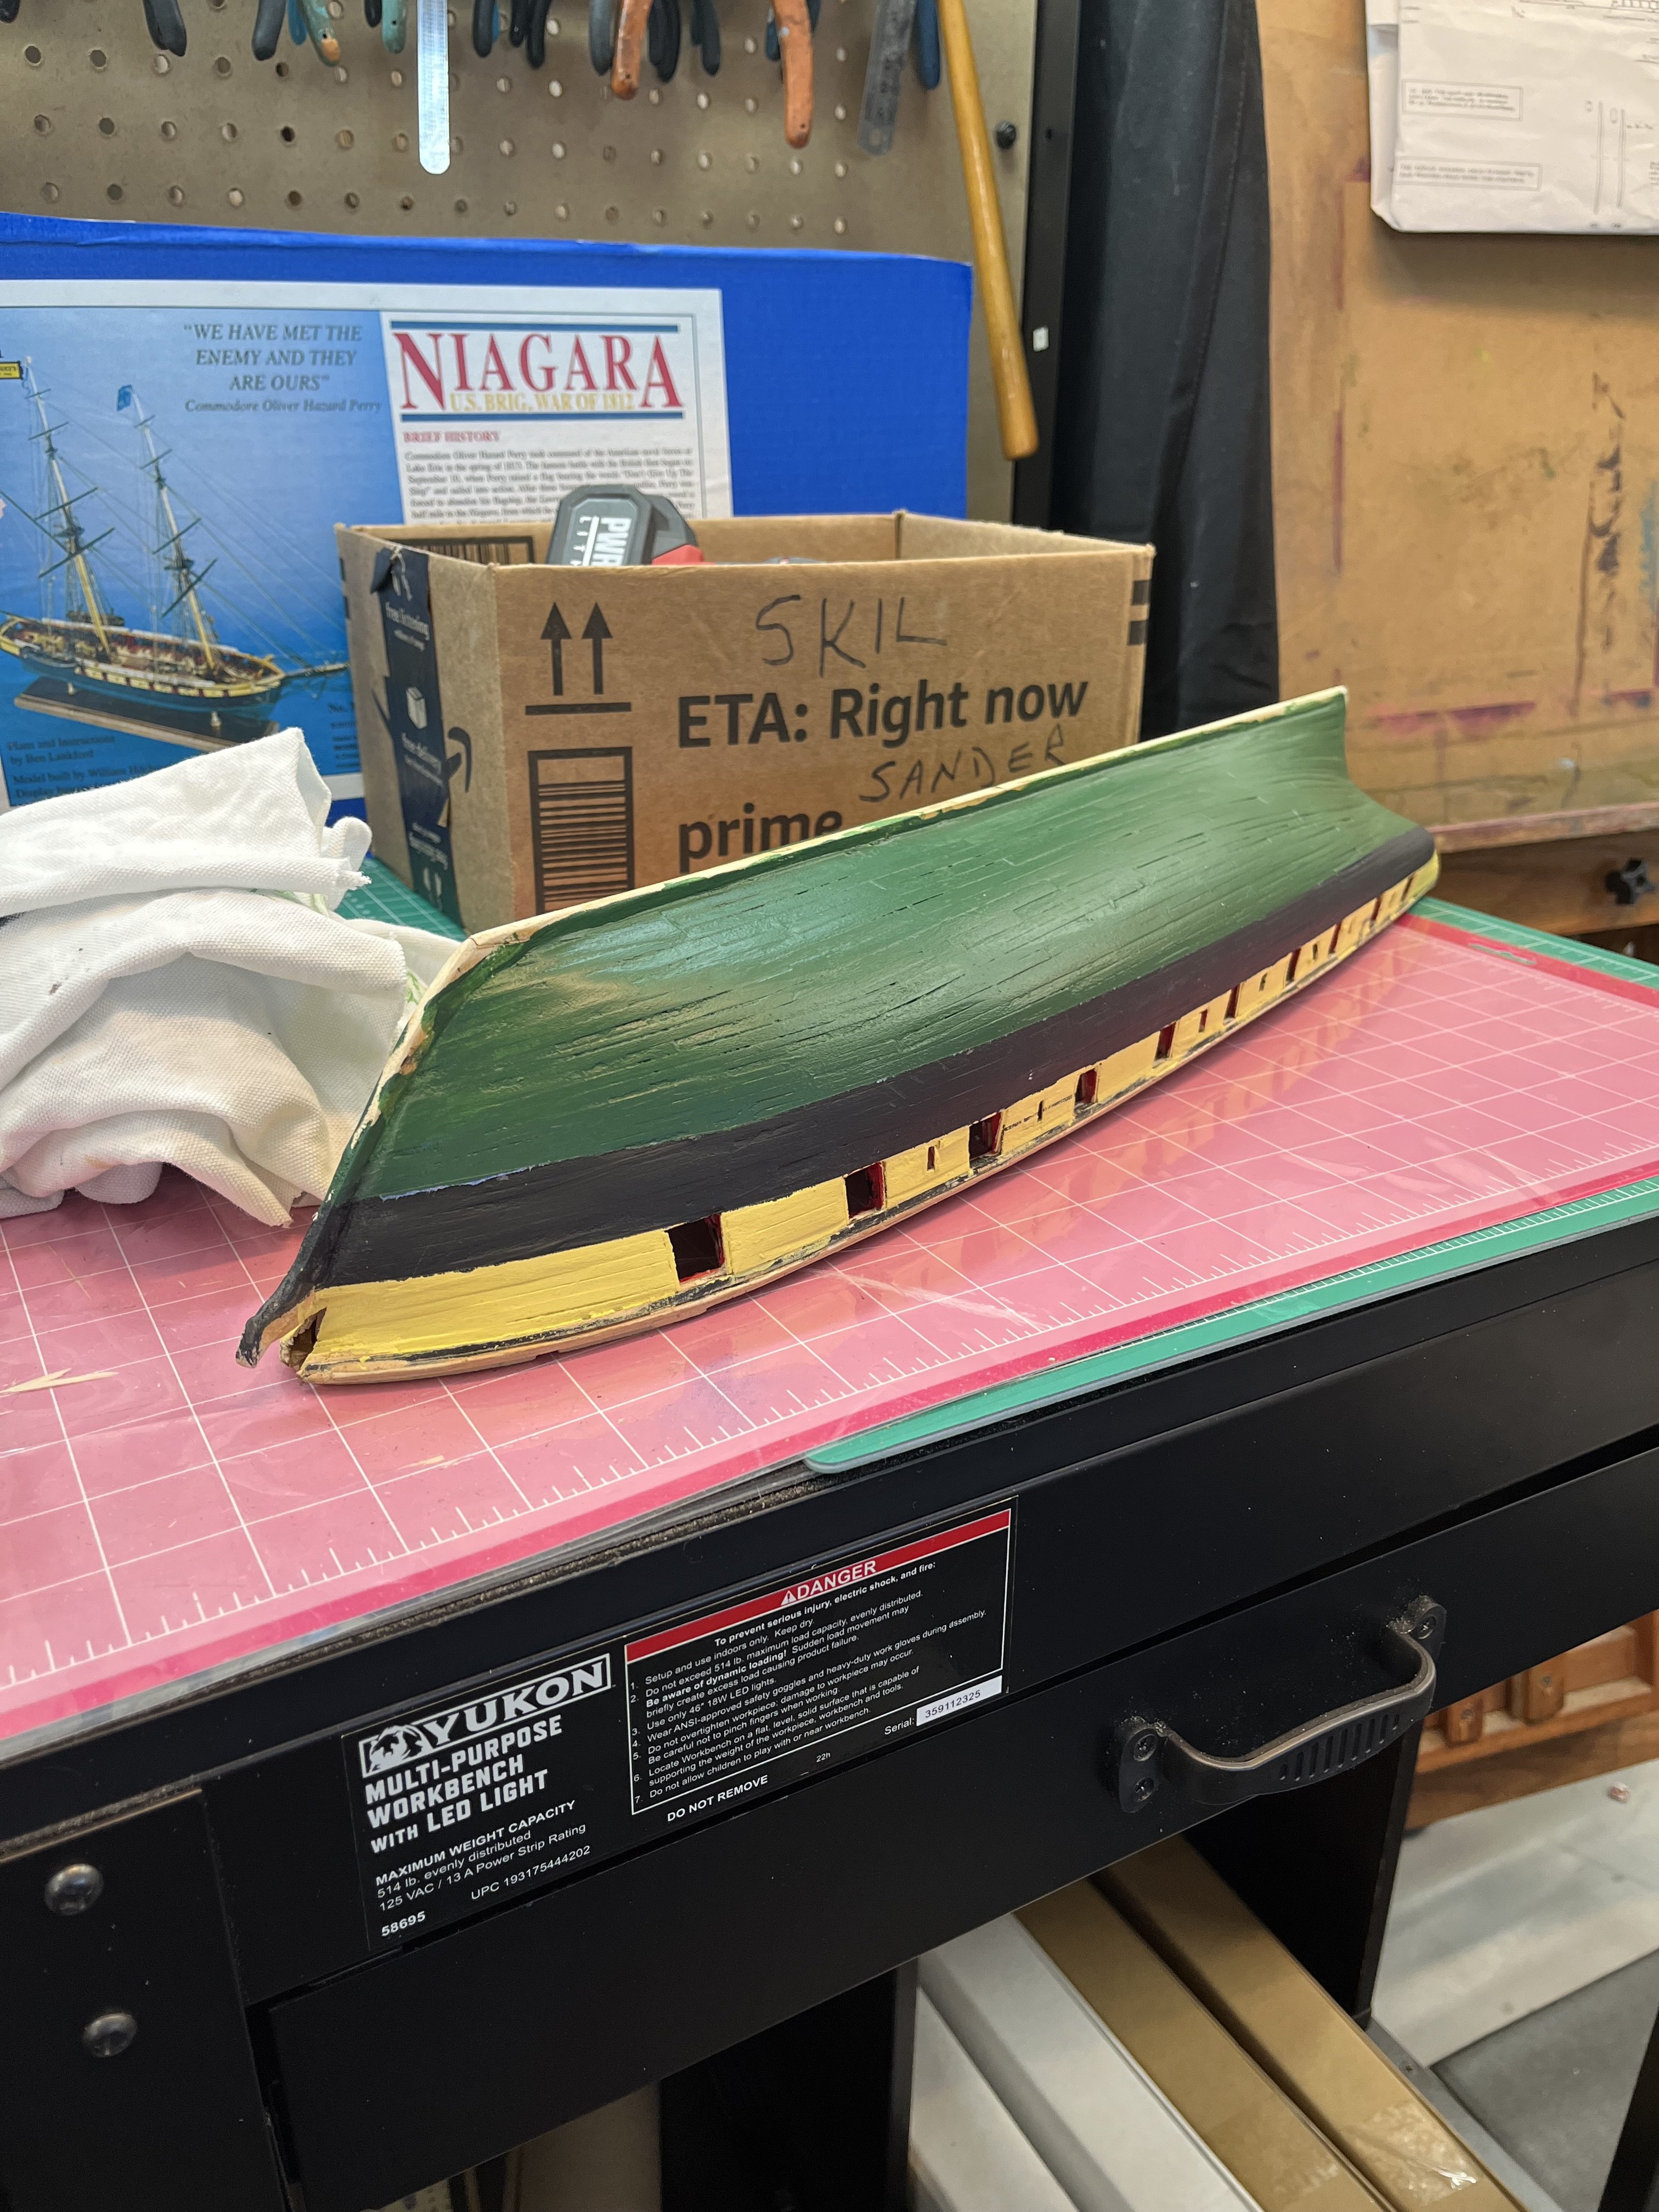
 Hello all, I'm new to this forum so probably getting things screwed up! Looking for some opinions / advice. I recently purchased the Artesania King of the Mississippi and after sotd what was bothering me - main deck beam looks too shallow. The Belle of Calhoun and similar vessels provided a clue in their main deck shear and upper deck supports; it looks to me like the King could do with 4 feet either side 'overhang' on deck beam extentions (which is what Belle of Calhoun had). This would provide the additional space for door openings, access to gangways and aft passageway, stores, particularly the cordwood stacks. I'm going to have a crack at redesigning the main deck and see what it looks like. Any suggestions? Ed.
 -
 Seamus107 changed their profile photo
 -
Thank you very much Jack. I grew up with Plasticine in the UK and have never been able to come up with the US equivalent. Its handy for a bunch of modelling activities. Off to Walmart! Alan
-
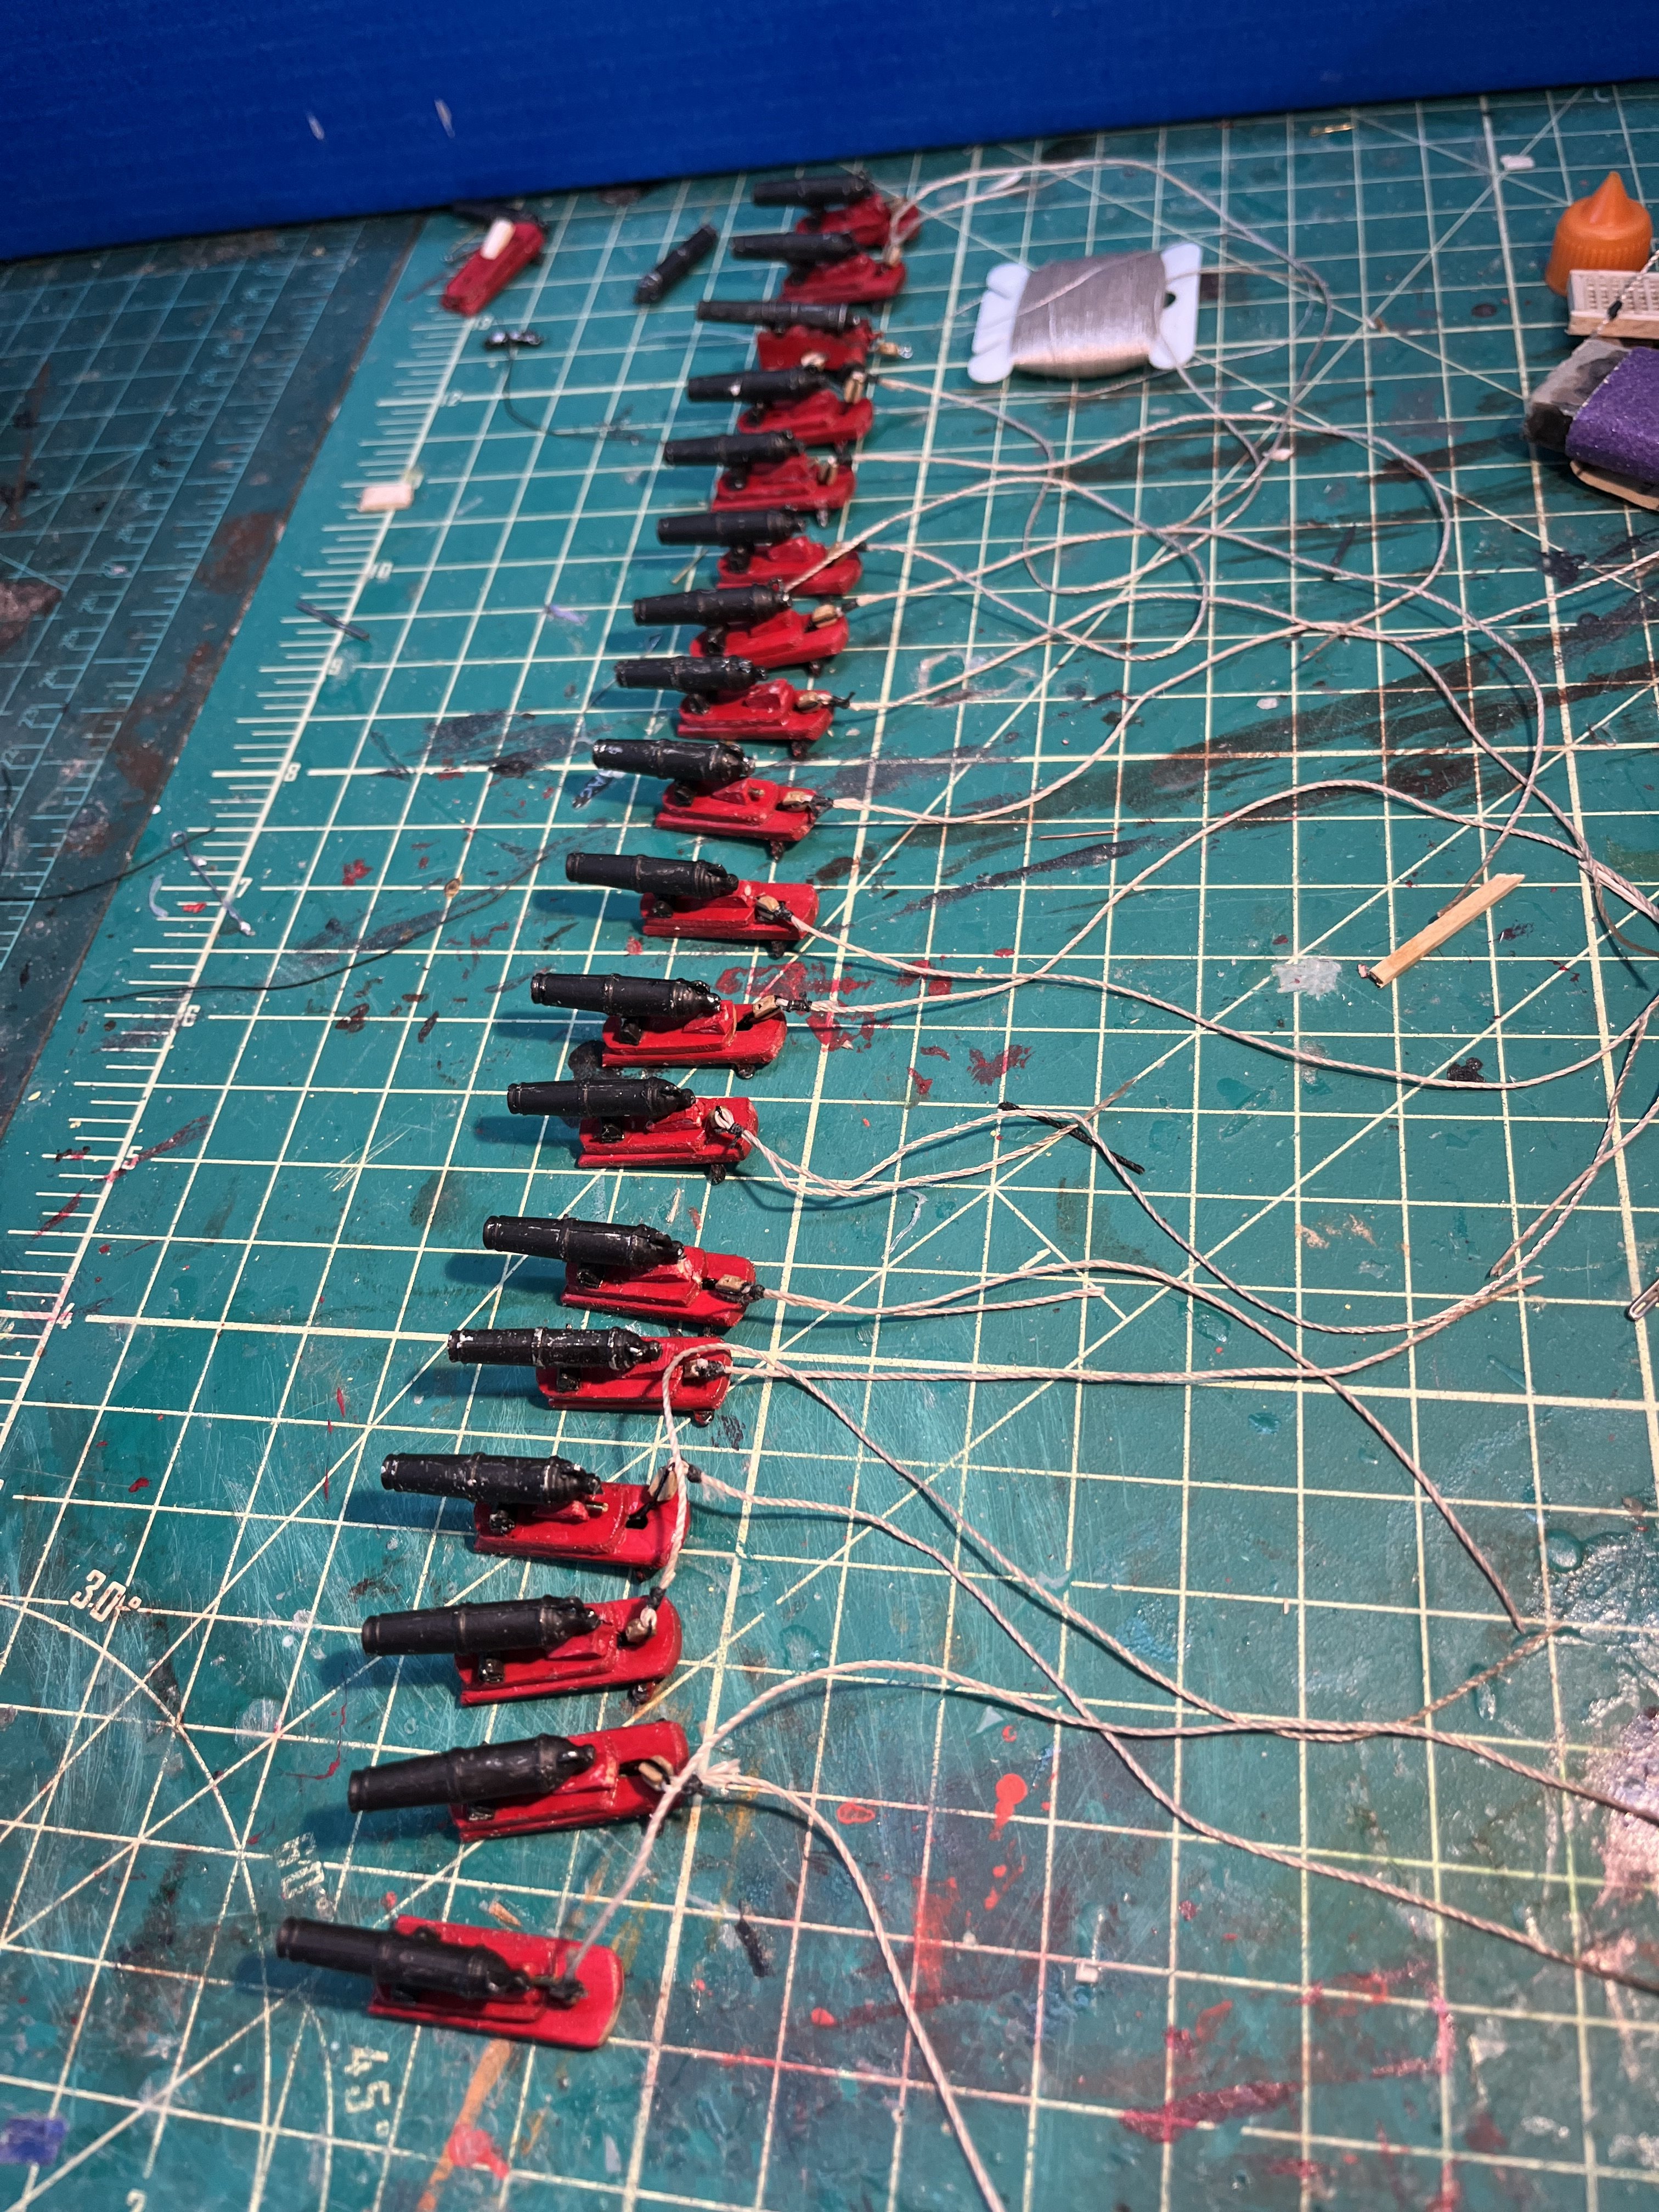
Anybody working on this ship? I’m just now getting ready to install cannonades. Need advise on cannon rigging


-
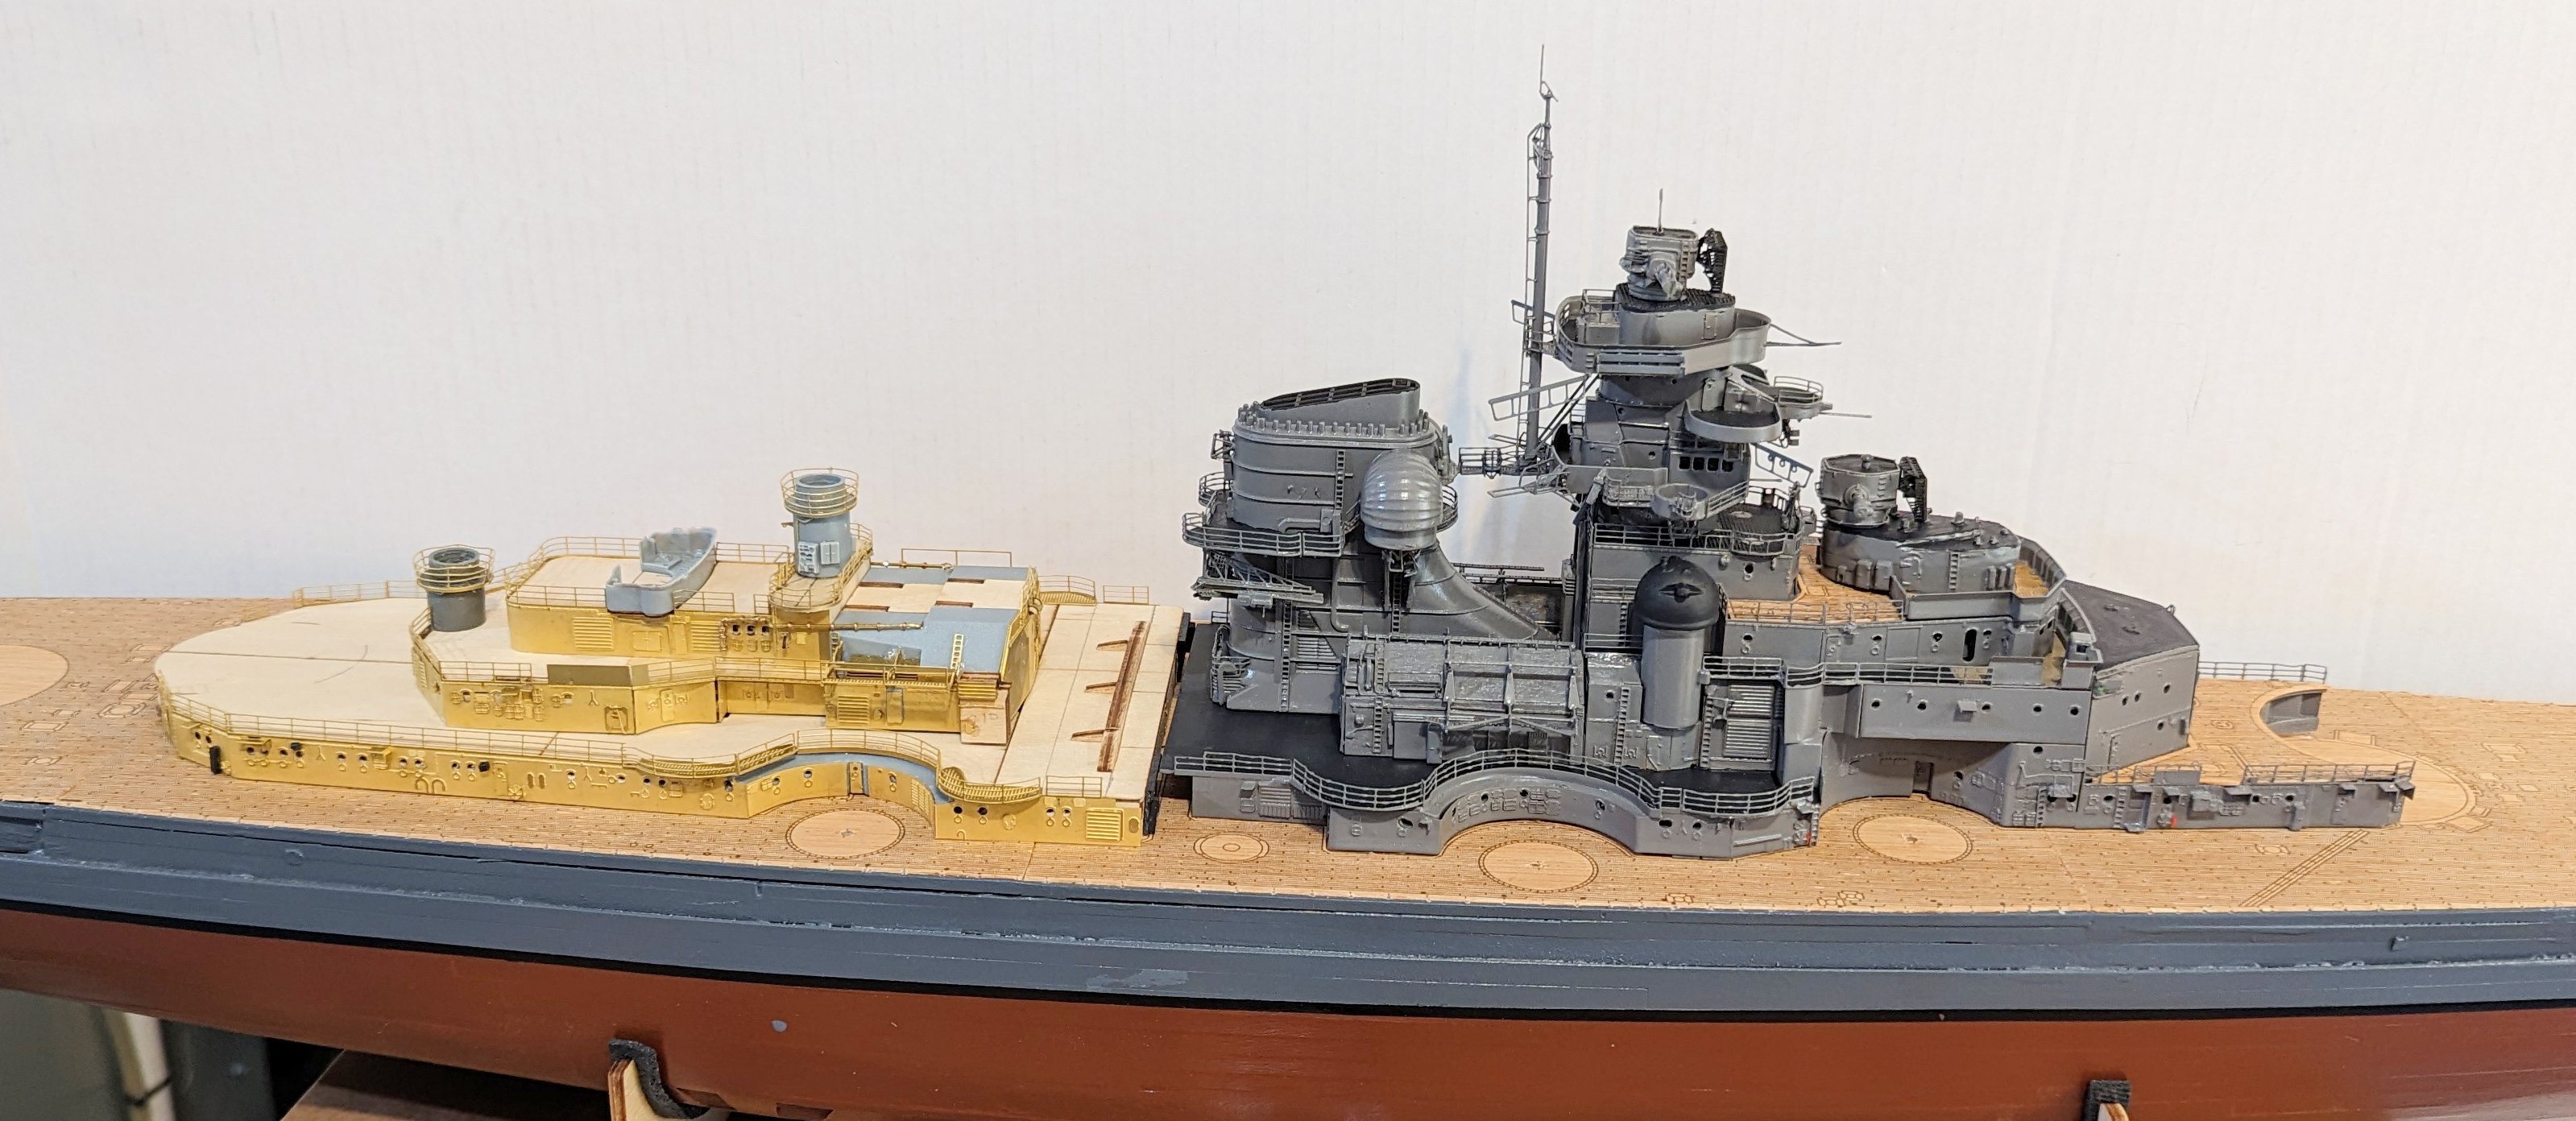
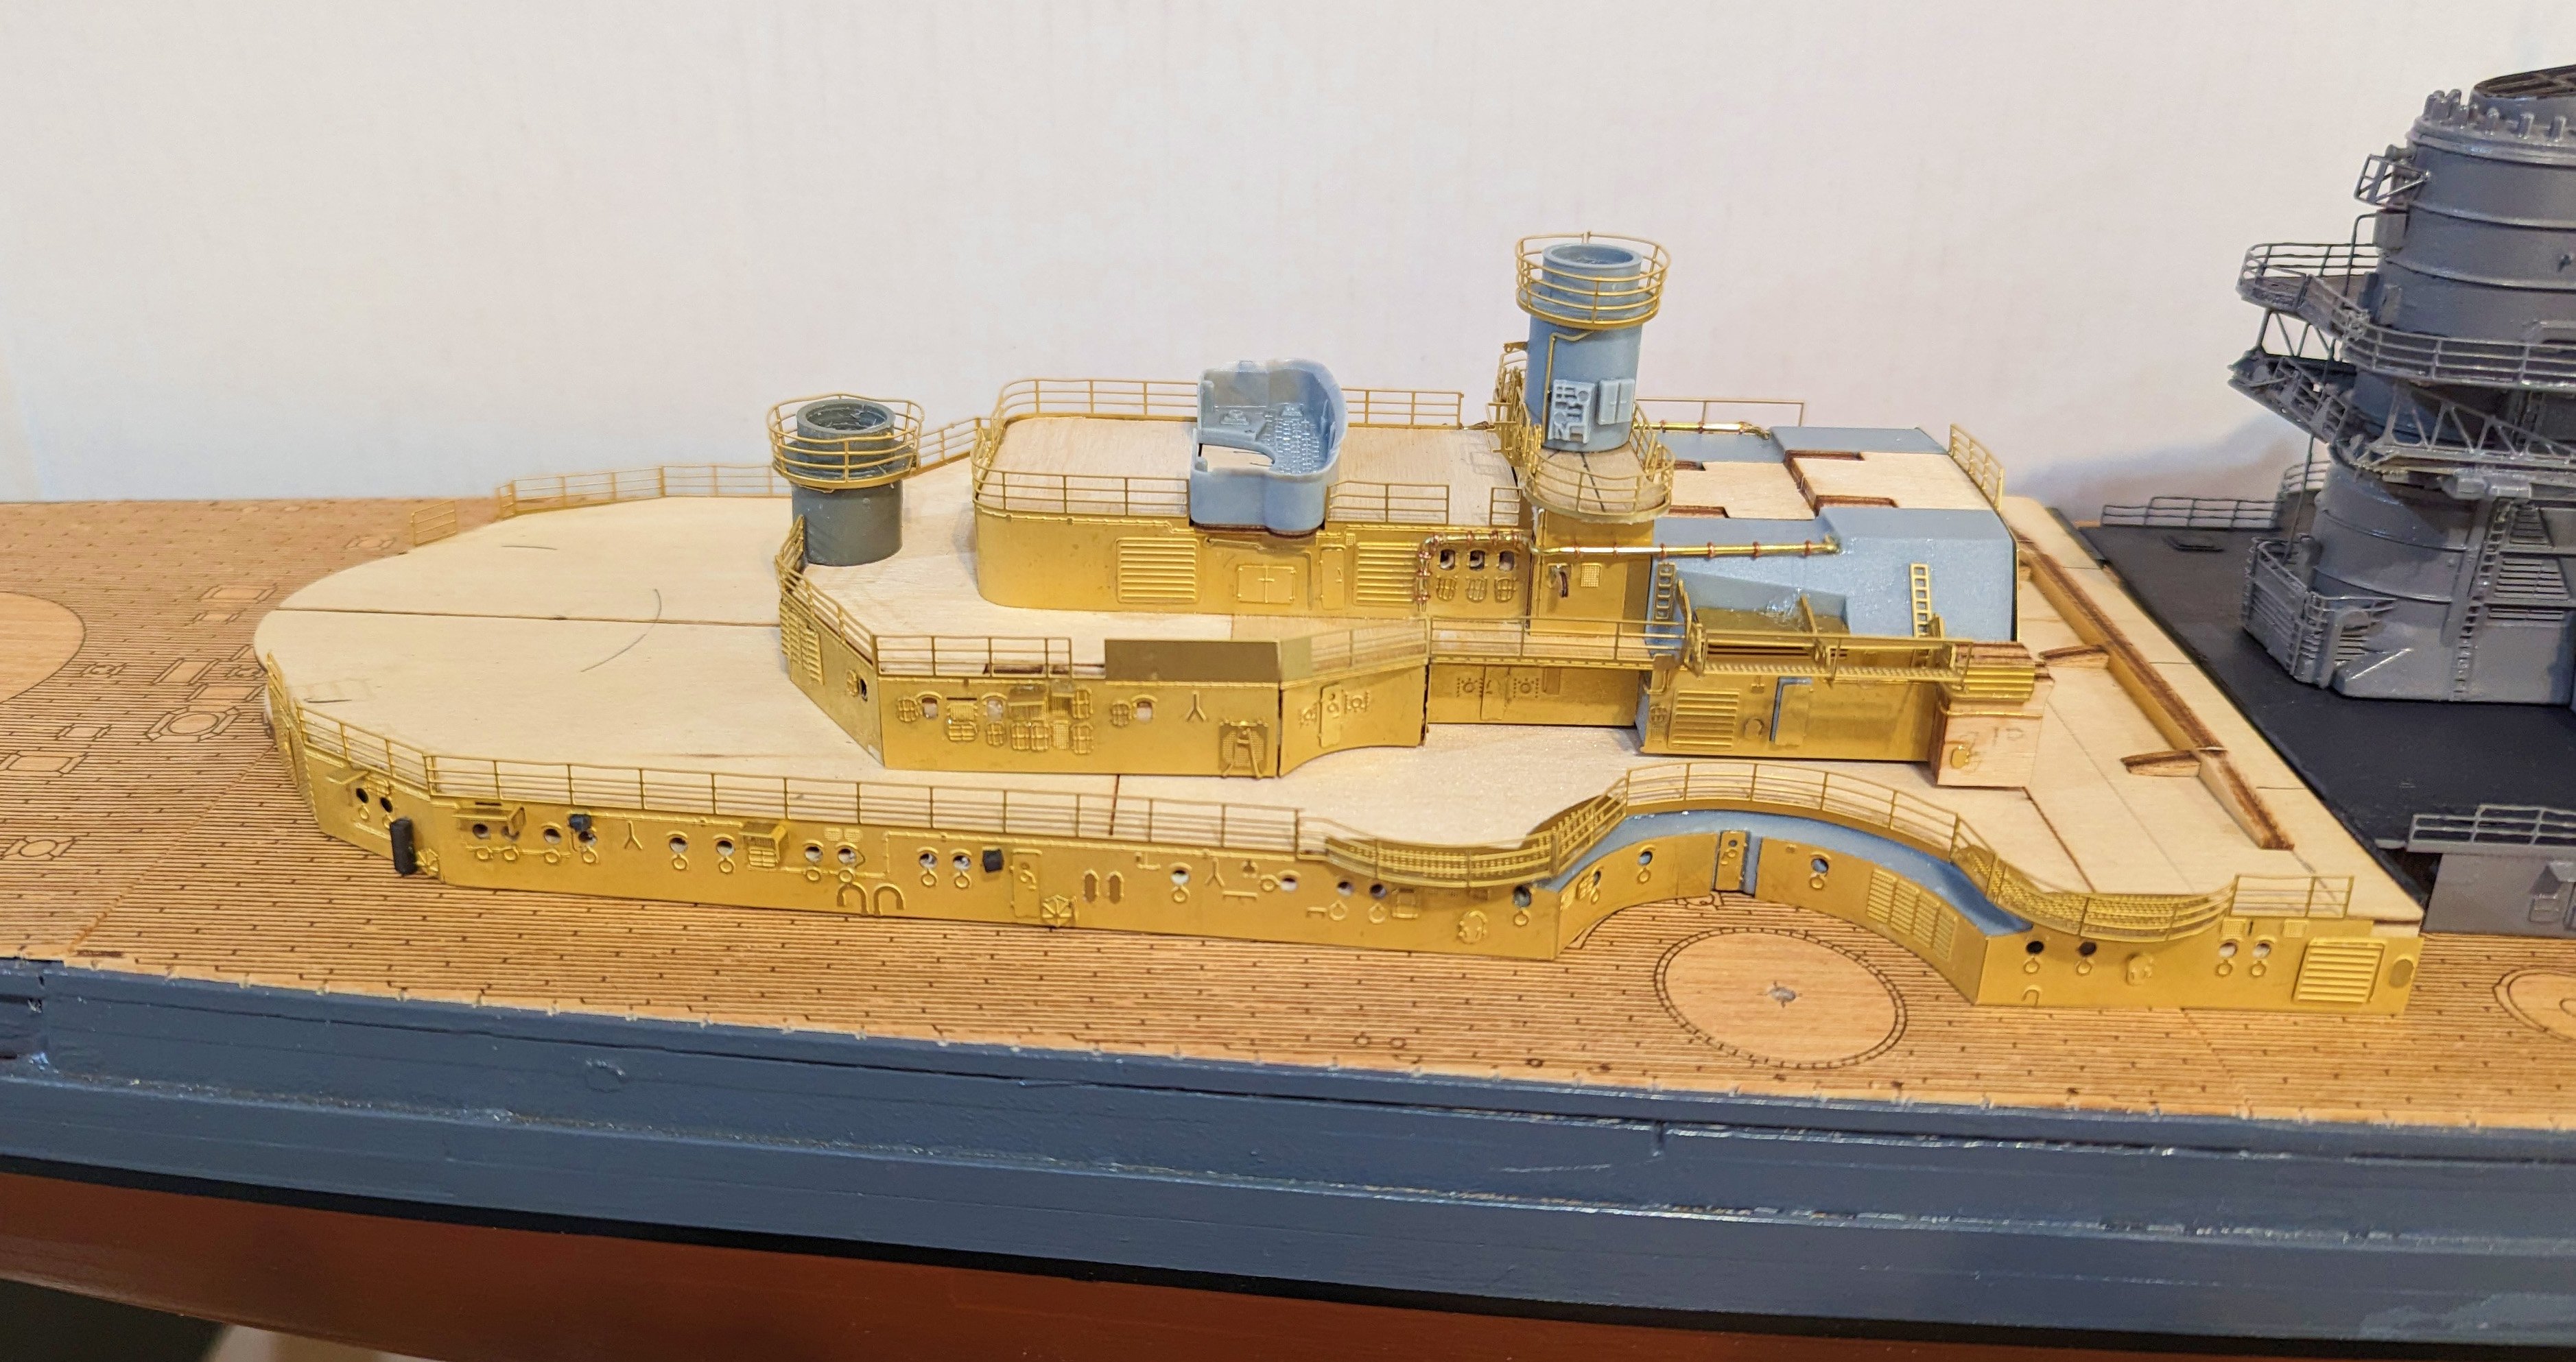
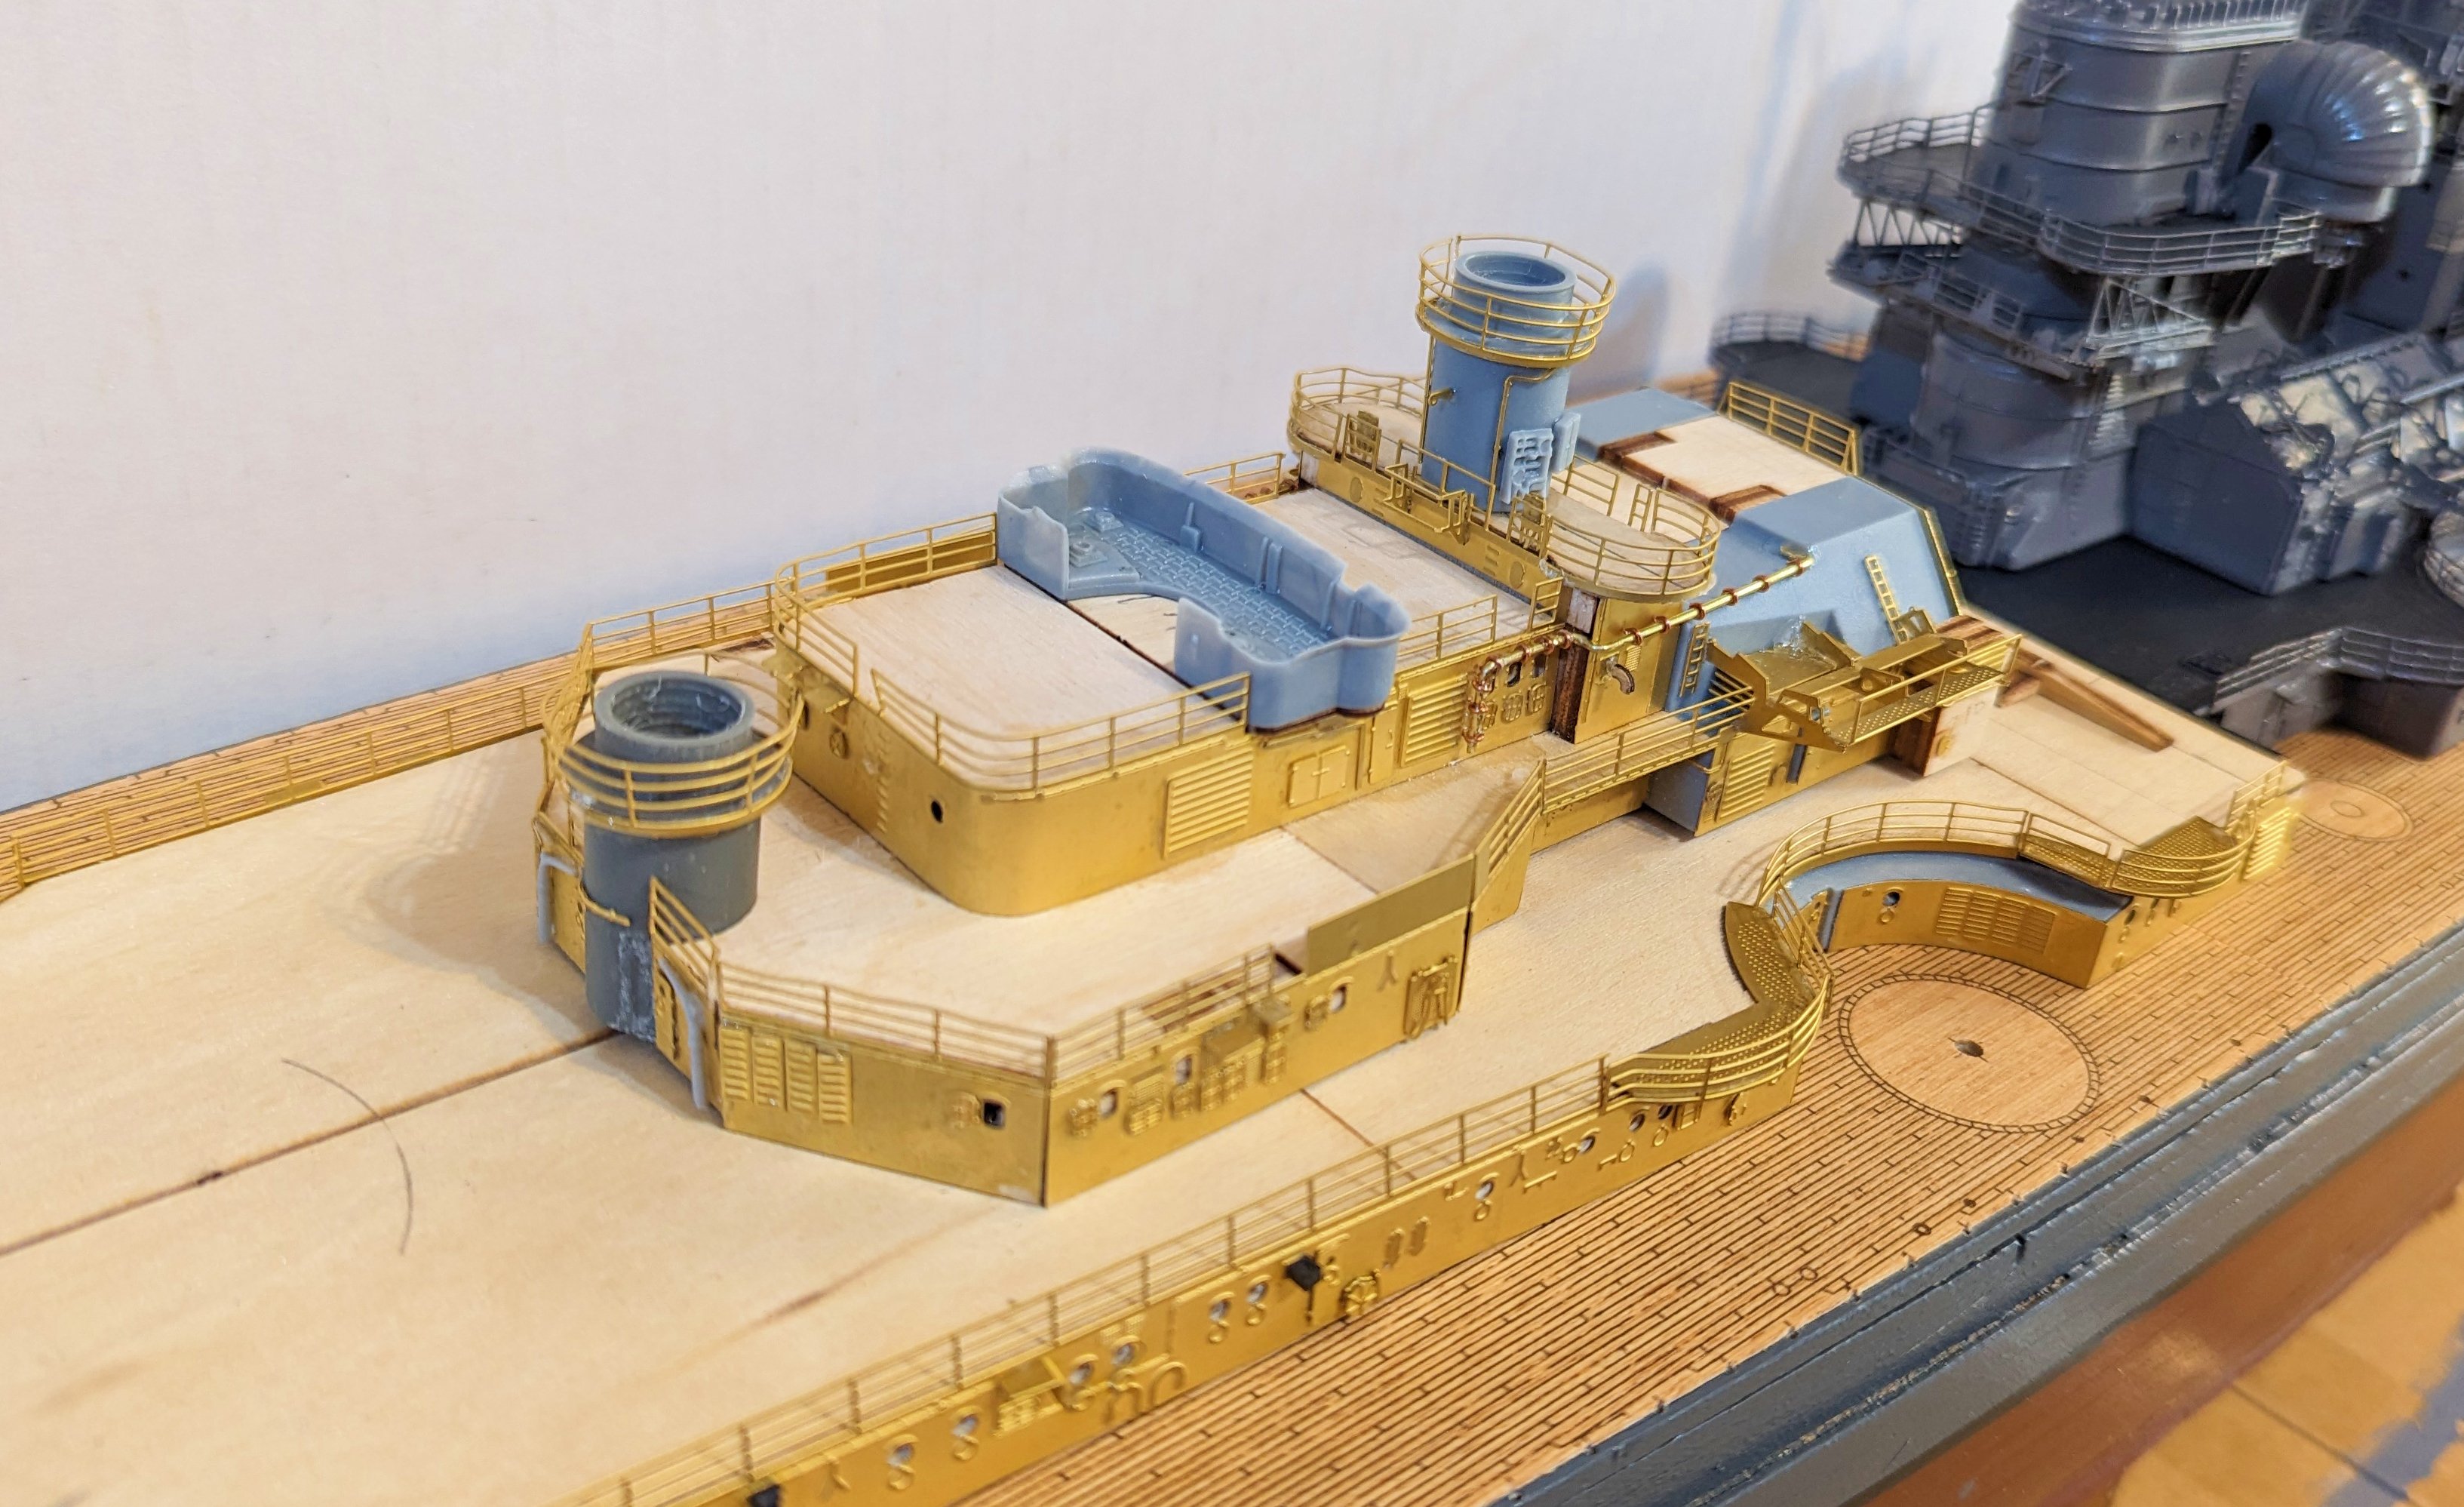
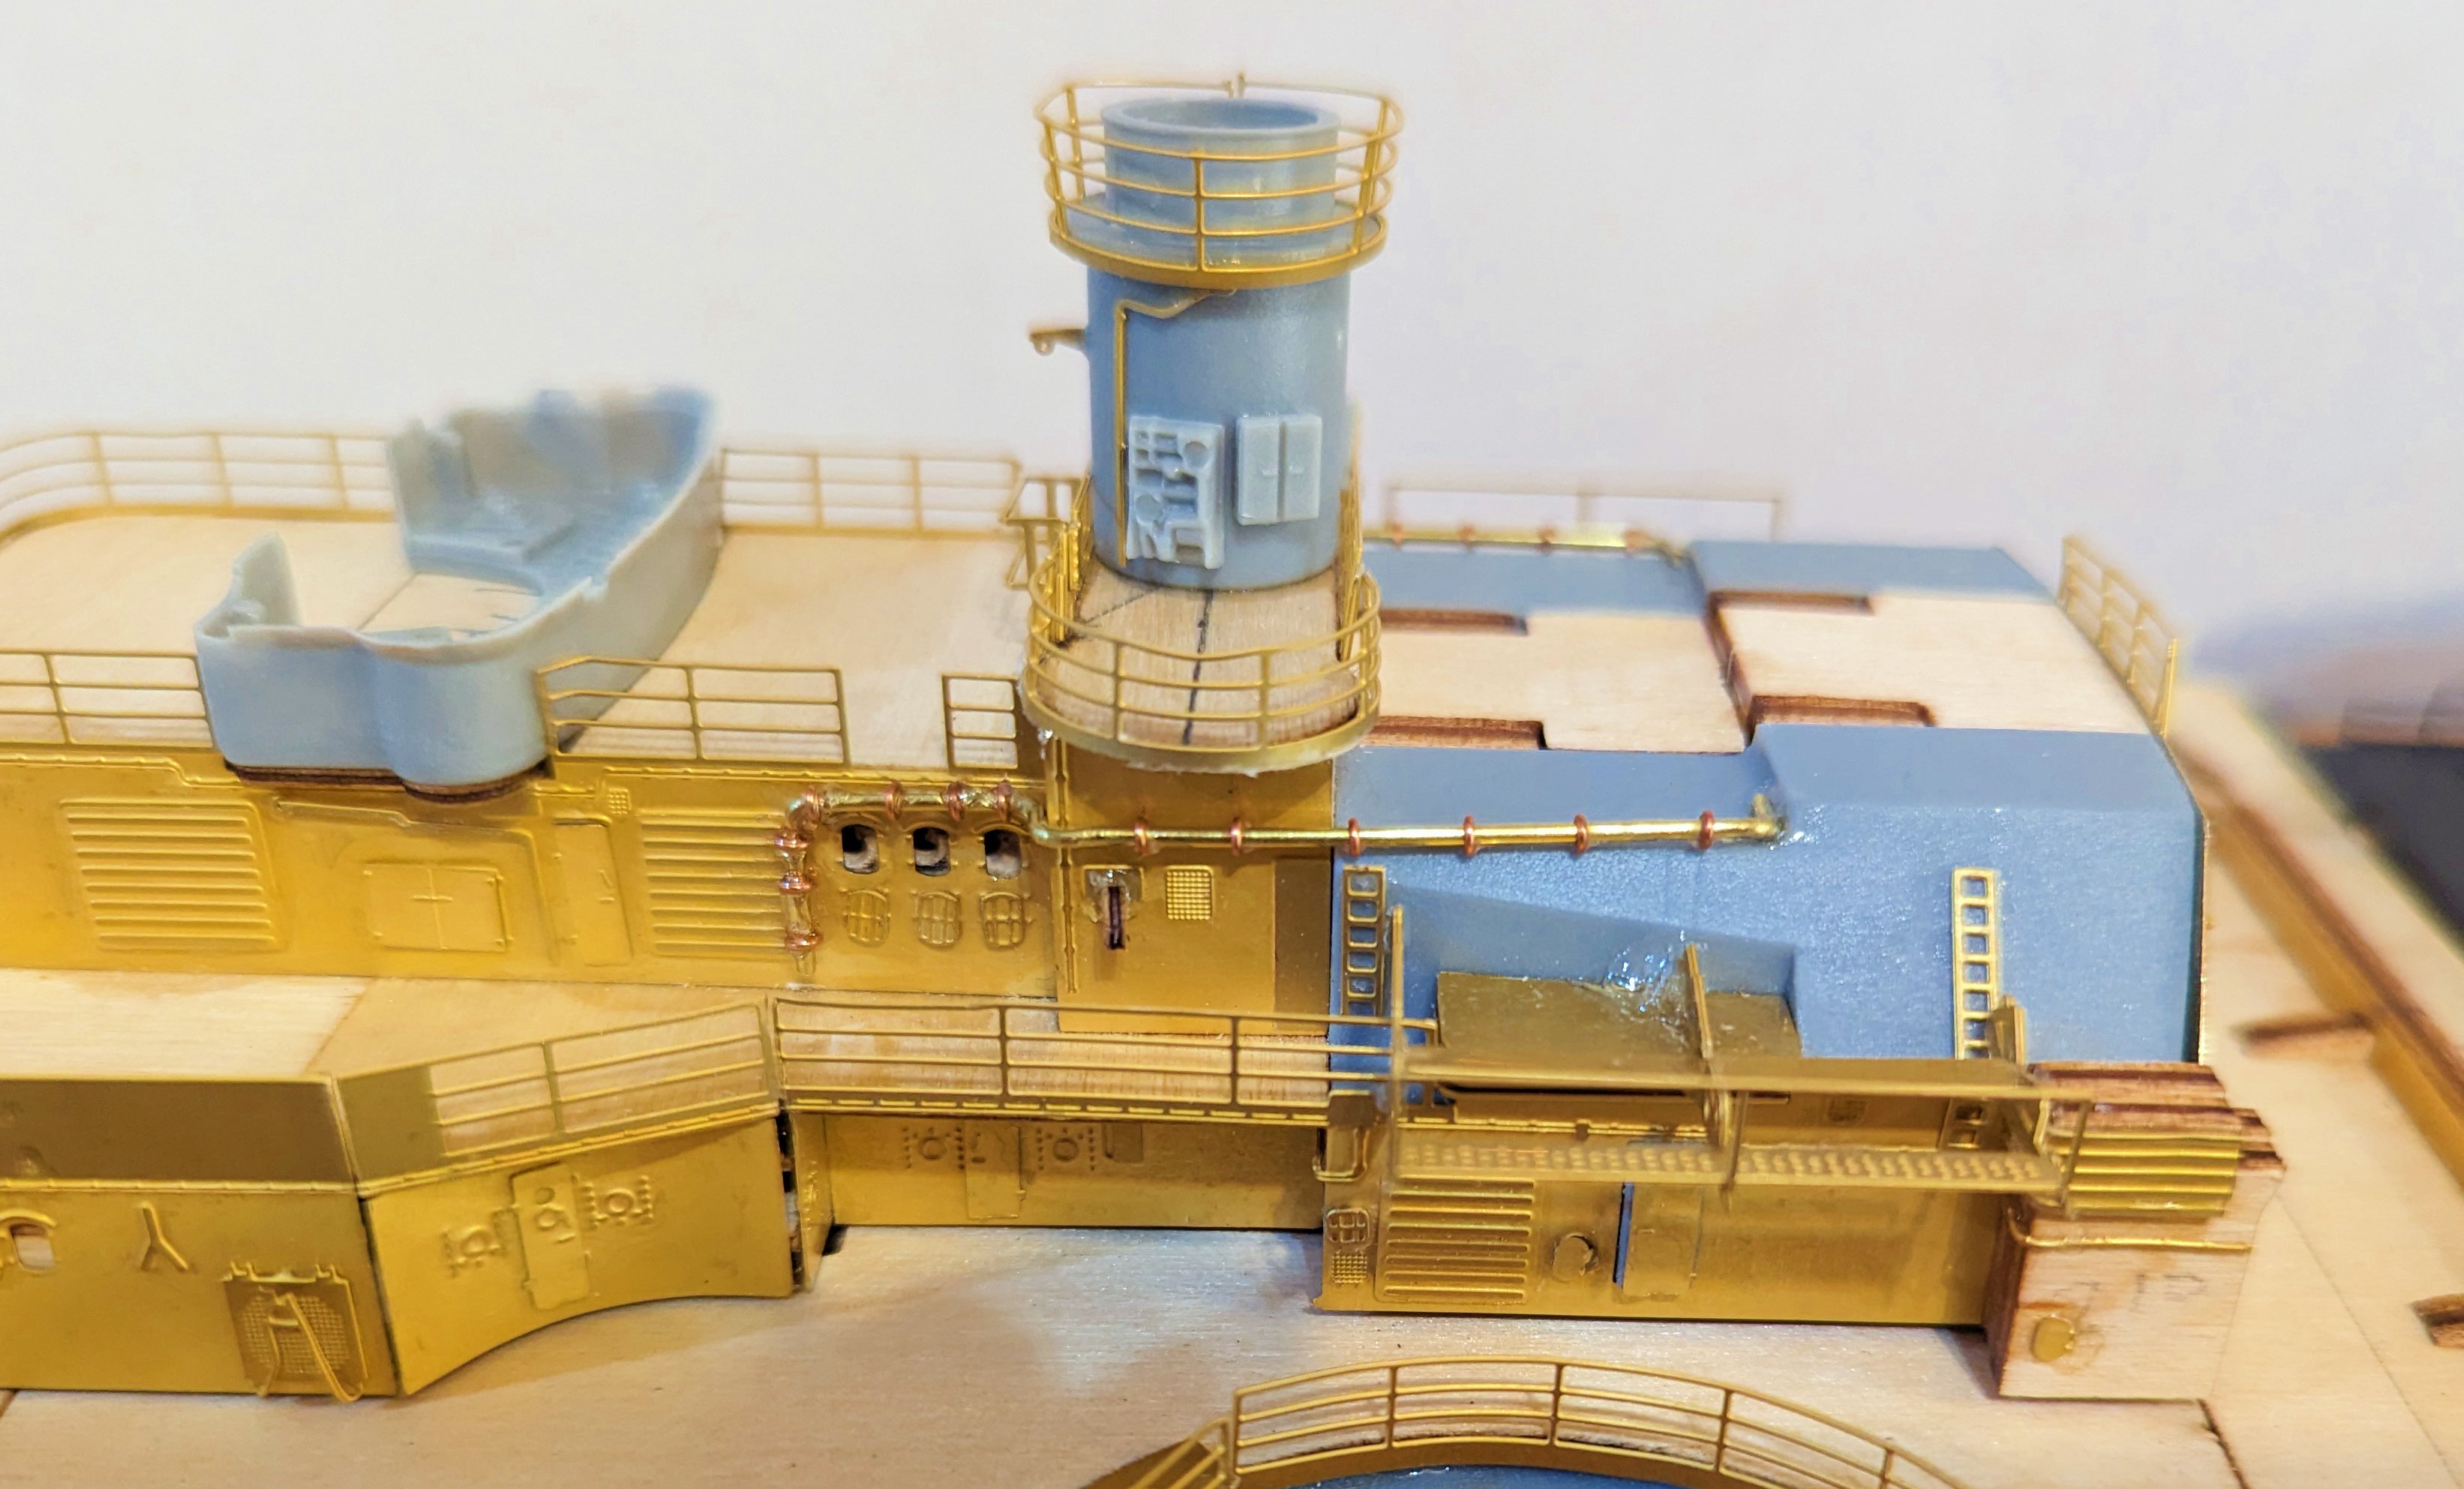
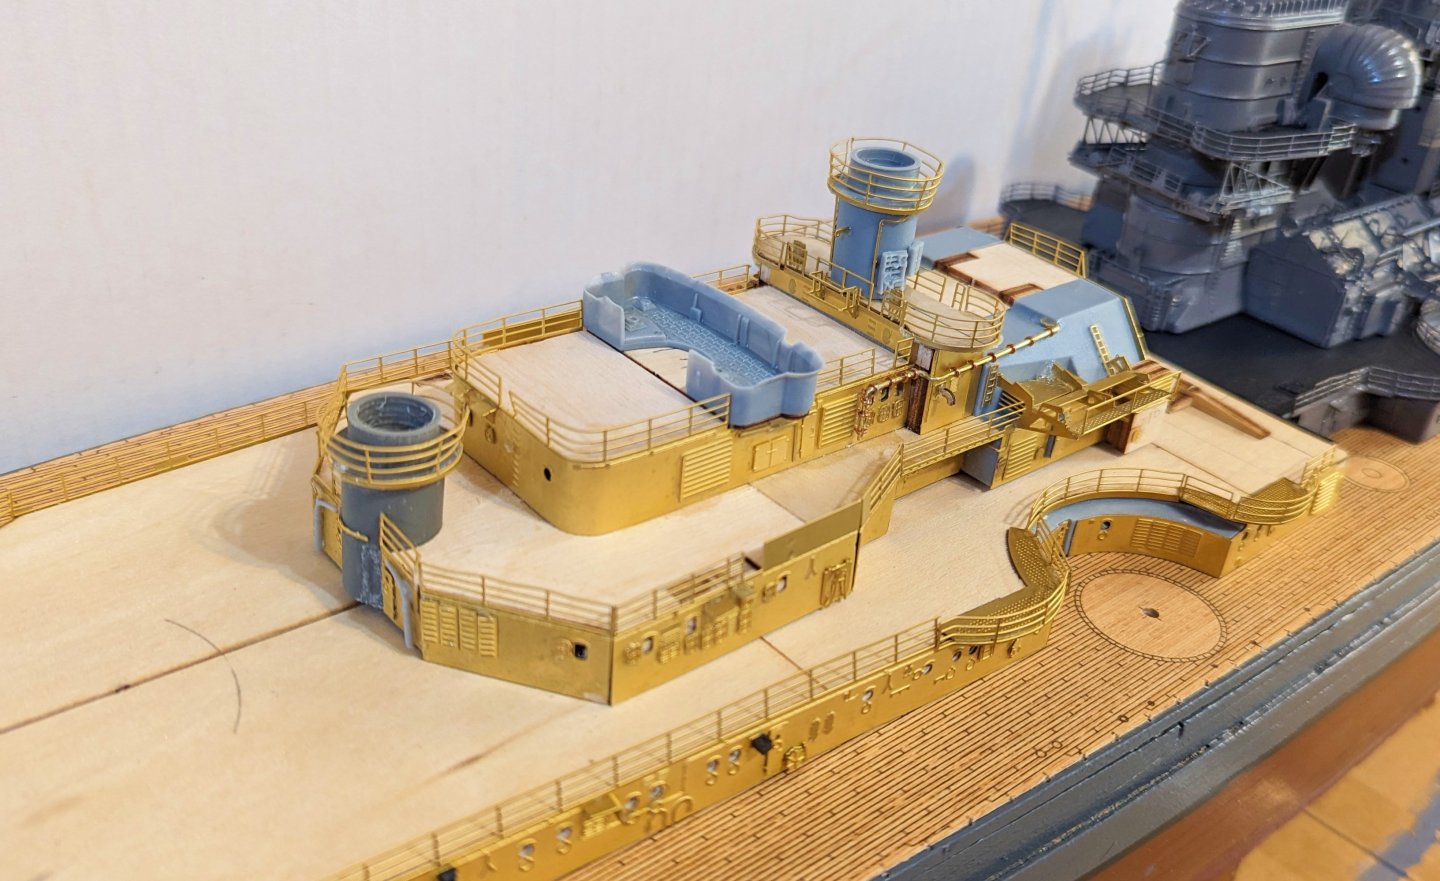
 More levels of the stern superstructure. The leftmost turret is dry fitted at this point, and the upper levels are dry fitted awaiting painting. Regards, David
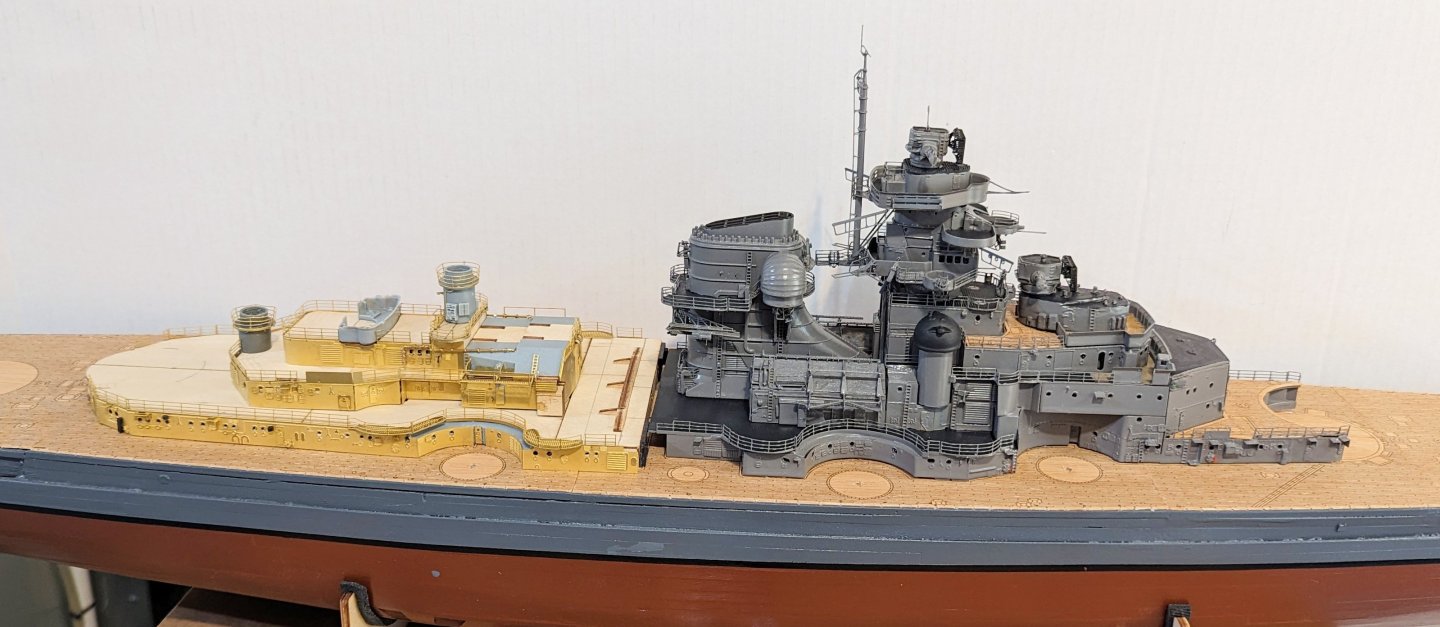


-

B-25J Mitchell by Chadwijm6 - HK Models - 1/32
Old Collingwood replied to chadwijm6's topic in Non-ship/categorised builds
That sounds like an Excellent idea - loves my dio - s. OC. -

B-25J Mitchell by Chadwijm6 - HK Models - 1/32
chadwijm6 replied to chadwijm6's topic in Non-ship/categorised builds
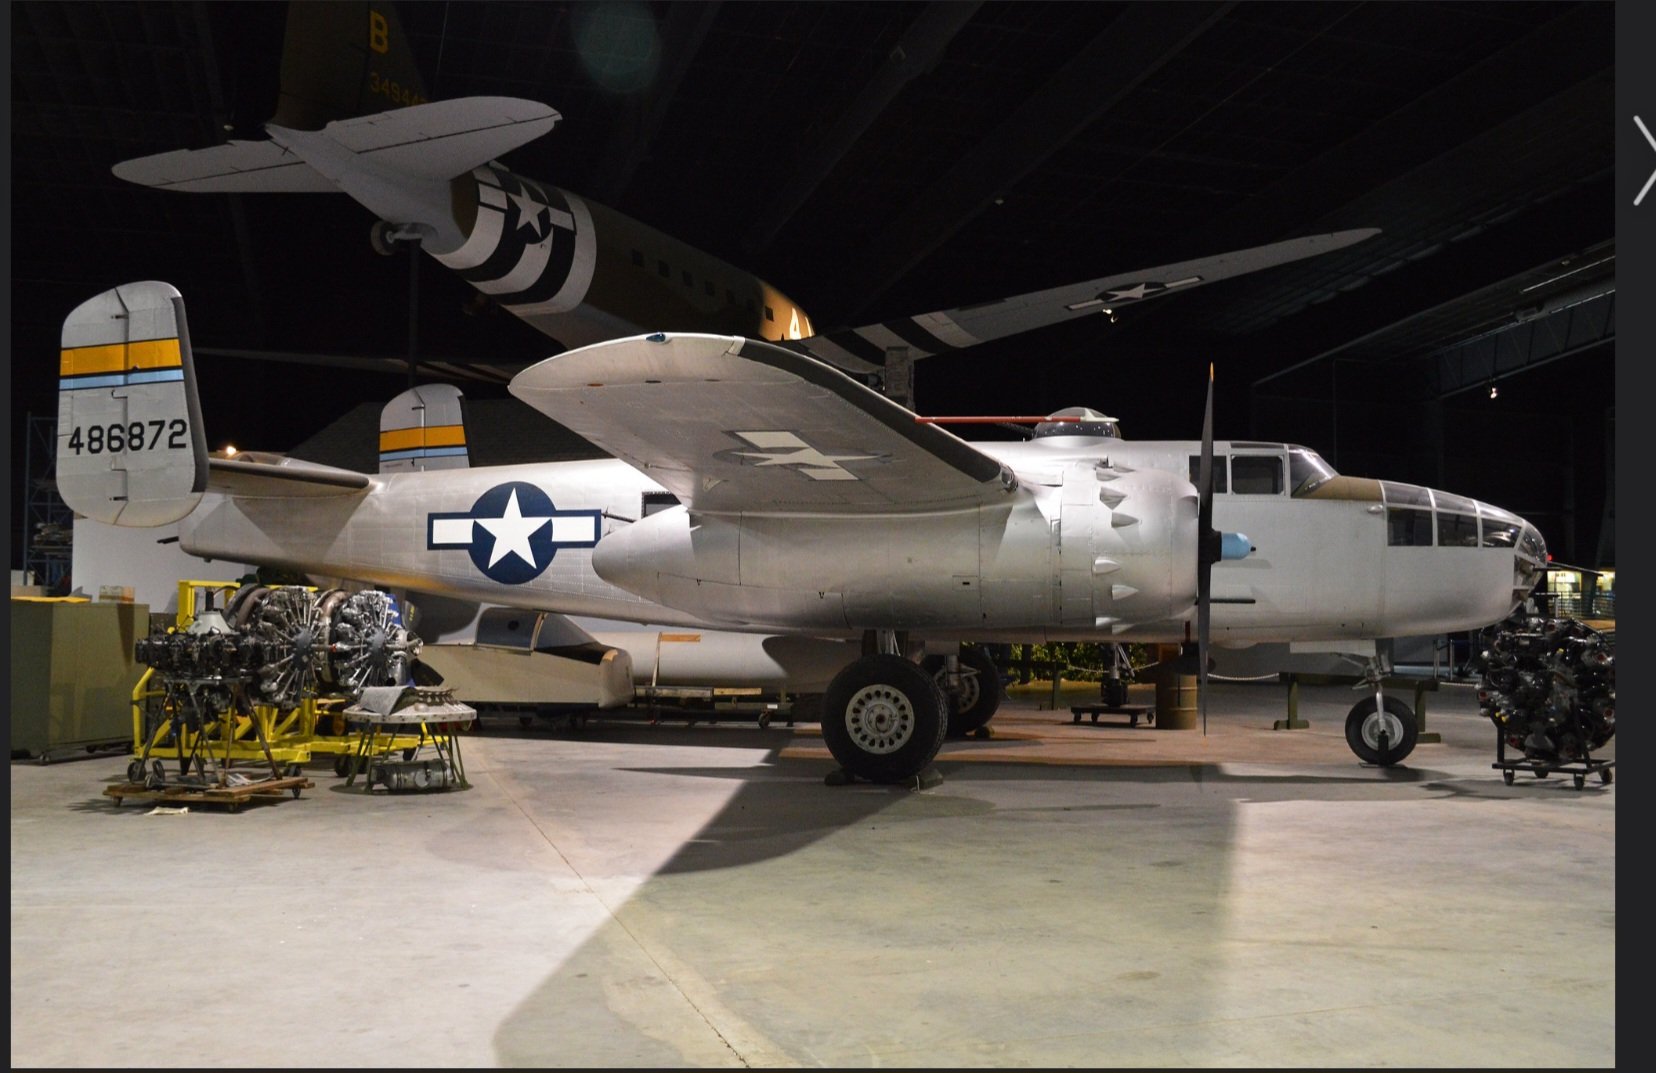
I've been thinking about a diorama for this and I think I'll have it in a museum with one of the engines on display. A bit like this. There's an awful lot of detail in the engines in this kit and it seems a shame that so much still be hidden. Not sure if it'll work but I think I'll give it a go.
-
 Very interesting, thanks for the heads up, I'll be following yours as well. Funny, I'm already thinking about such things - my wife has a craft cutter so I was just asking if it could cut wood. I have a few years experience with both 3D and 2D CAD as well. Might be handy one day. I skimmed a bit of Chucks Speedwell post and will definitely be going back, very impressive. Appreciate it.
 -
Westland Sea King HU.5 by chadwijm6 - Airfix - 1/48
chadwijm6 replied to chadwijm6's topic in Non-ship/categorised builds
Very helpful. Yours are fabulous. Thank you OC -
 Alan, you can also use kids brand modeling clay to hold your figures while spraying them. I think it was Crayola brand.
 -
Thats a Good start there Alan. OC.
-
AMC DH9 by davec - Wingnut Wings - 1/32
Old Collingwood replied to davec's topic in Non-ship/categorised builds
Striking build and paintwork - really Pops. OC. -
Good work with figures, my to go with routine is - Black primer (as it works good for shadow line detail) faces and hands with any details picked out (depends on the scale of the figure) then a wash with high lights picked out and a wee bit of slightly more pink for cheeks etc, then blocking in the main colours then fine details like belts and small details, then when fully dry after a day or Two a wash over the main body then fine details picked out - like over belts etc. Its all an illusion of shadows and high lights. Hope this helps. OC.
-
 Mick, whatever became of this build?