KingDavid
-
Posts
43 -
Joined
-
Last visited
Recent Profile Visitors
1,336 profile views


.jpg.d84ec4dad1d7791e855dca06210ab6f3.thumb.jpg.f45209242e851d4409eca1a09293165b.jpg)


-
 thibaultron reacted to a post in a topic:
Aliphatic Rapid Glue vs. CA and Tite Bond
thibaultron reacted to a post in a topic:
Aliphatic Rapid Glue vs. CA and Tite Bond
-
KingDavid reacted to a post in a topic:
Speedwell 1752 by dvm27 (Greg Herbert) - FINISHED - Ketch Rigged Sloop
-
KingDavid reacted to a post in a topic:
SS Great Eastern myths
-
KingDavid reacted to a post in a topic:
SS Great Eastern myths
-
 KingDavid reacted to a post in a topic:
Viking Ship Drakkar by End Of The Line - FINISHED - Amati - 1:50
KingDavid reacted to a post in a topic:
Viking Ship Drakkar by End Of The Line - FINISHED - Amati - 1:50
-
KingDavid reacted to a post in a topic:
Great kit and parts source
-
KingDavid reacted to a post in a topic:
Great kit and parts source
-
KingDavid reacted to a post in a topic:
Vanguard Models HM Speedy Kit
-
KingDavid reacted to a post in a topic:
Duchess of Kingston 1798 by glennard2523 - FINISHED - Vanguard Models - 1:64 - Royal Yacht by Glenn Shelton
-
KingDavid reacted to a post in a topic:
Duchess of Kingston 1798 by glennard2523 - FINISHED - Vanguard Models - 1:64 - Royal Yacht by Glenn Shelton
-
KingDavid reacted to a post in a topic:
Duchess of Kingston 1778 by rafine - Vanguard Models - 1:64
-
BobG reacted to a post in a topic:
Bon Retour by DispleasedOwl - FINISHED - Artesania Latina - model by Hugo Bosque
-
Ryland Craze reacted to a post in a topic:
Estate - Kits & Books For Sale - Harvey, Victory, Whaleboat, Constitution, and more!
-
Ryland Craze reacted to a post in a topic:
Estate - Kits & Books For Sale - Harvey, Victory, Whaleboat, Constitution, and more!
-
mtaylor reacted to a post in a topic:
Estate - Kits & Books For Sale - Harvey, Victory, Whaleboat, Constitution, and more!
-
mtaylor reacted to a post in a topic:
Estate - Kits & Books For Sale - Harvey, Victory, Whaleboat, Constitution, and more!
-
 And of course would like to know the shipping price, Thanks David
 -
hello there and thank you for your kind offer, i am possibly interested in the New Bedford Whale Boat Thanks David
-
Chuck reacted to a post in a topic:
HM Cutter Alert by Goemon - FINISHED - Vanguard Models - 1:64
-
A really exceptional work there! your skills are amazing! keep up the good work!
- 23 replies
-
- 1
-
-
- vanguard models
- alert
- (and 1 more)
-
mtaylor reacted to a post in a topic:
New from Brisbane, Australia
-
welcome! this forum is the right place for you! David
-
mtaylor reacted to a post in a topic:
Aliphatic Rapid Glue vs. CA and Tite Bond
-
So would you recommend to stick to PVA or Aliphatic Resin when second planking is concerned or would you use CA instead? i am currently thorn between the two options... I know many recommend the PVA since it's better with wood to wood surfaces, and it is also reversible ..but the CA gives a very strong and clean result It's downsides to me is that it terrible when it touch's your skin and also some stress when applying since when it cures/hardens there is no way back so every plank etc needs to be 100% in its position...hard to decide...
-
Welcome to MSW ... good luck with your first build, i am sure you are going to enjoy it!
-
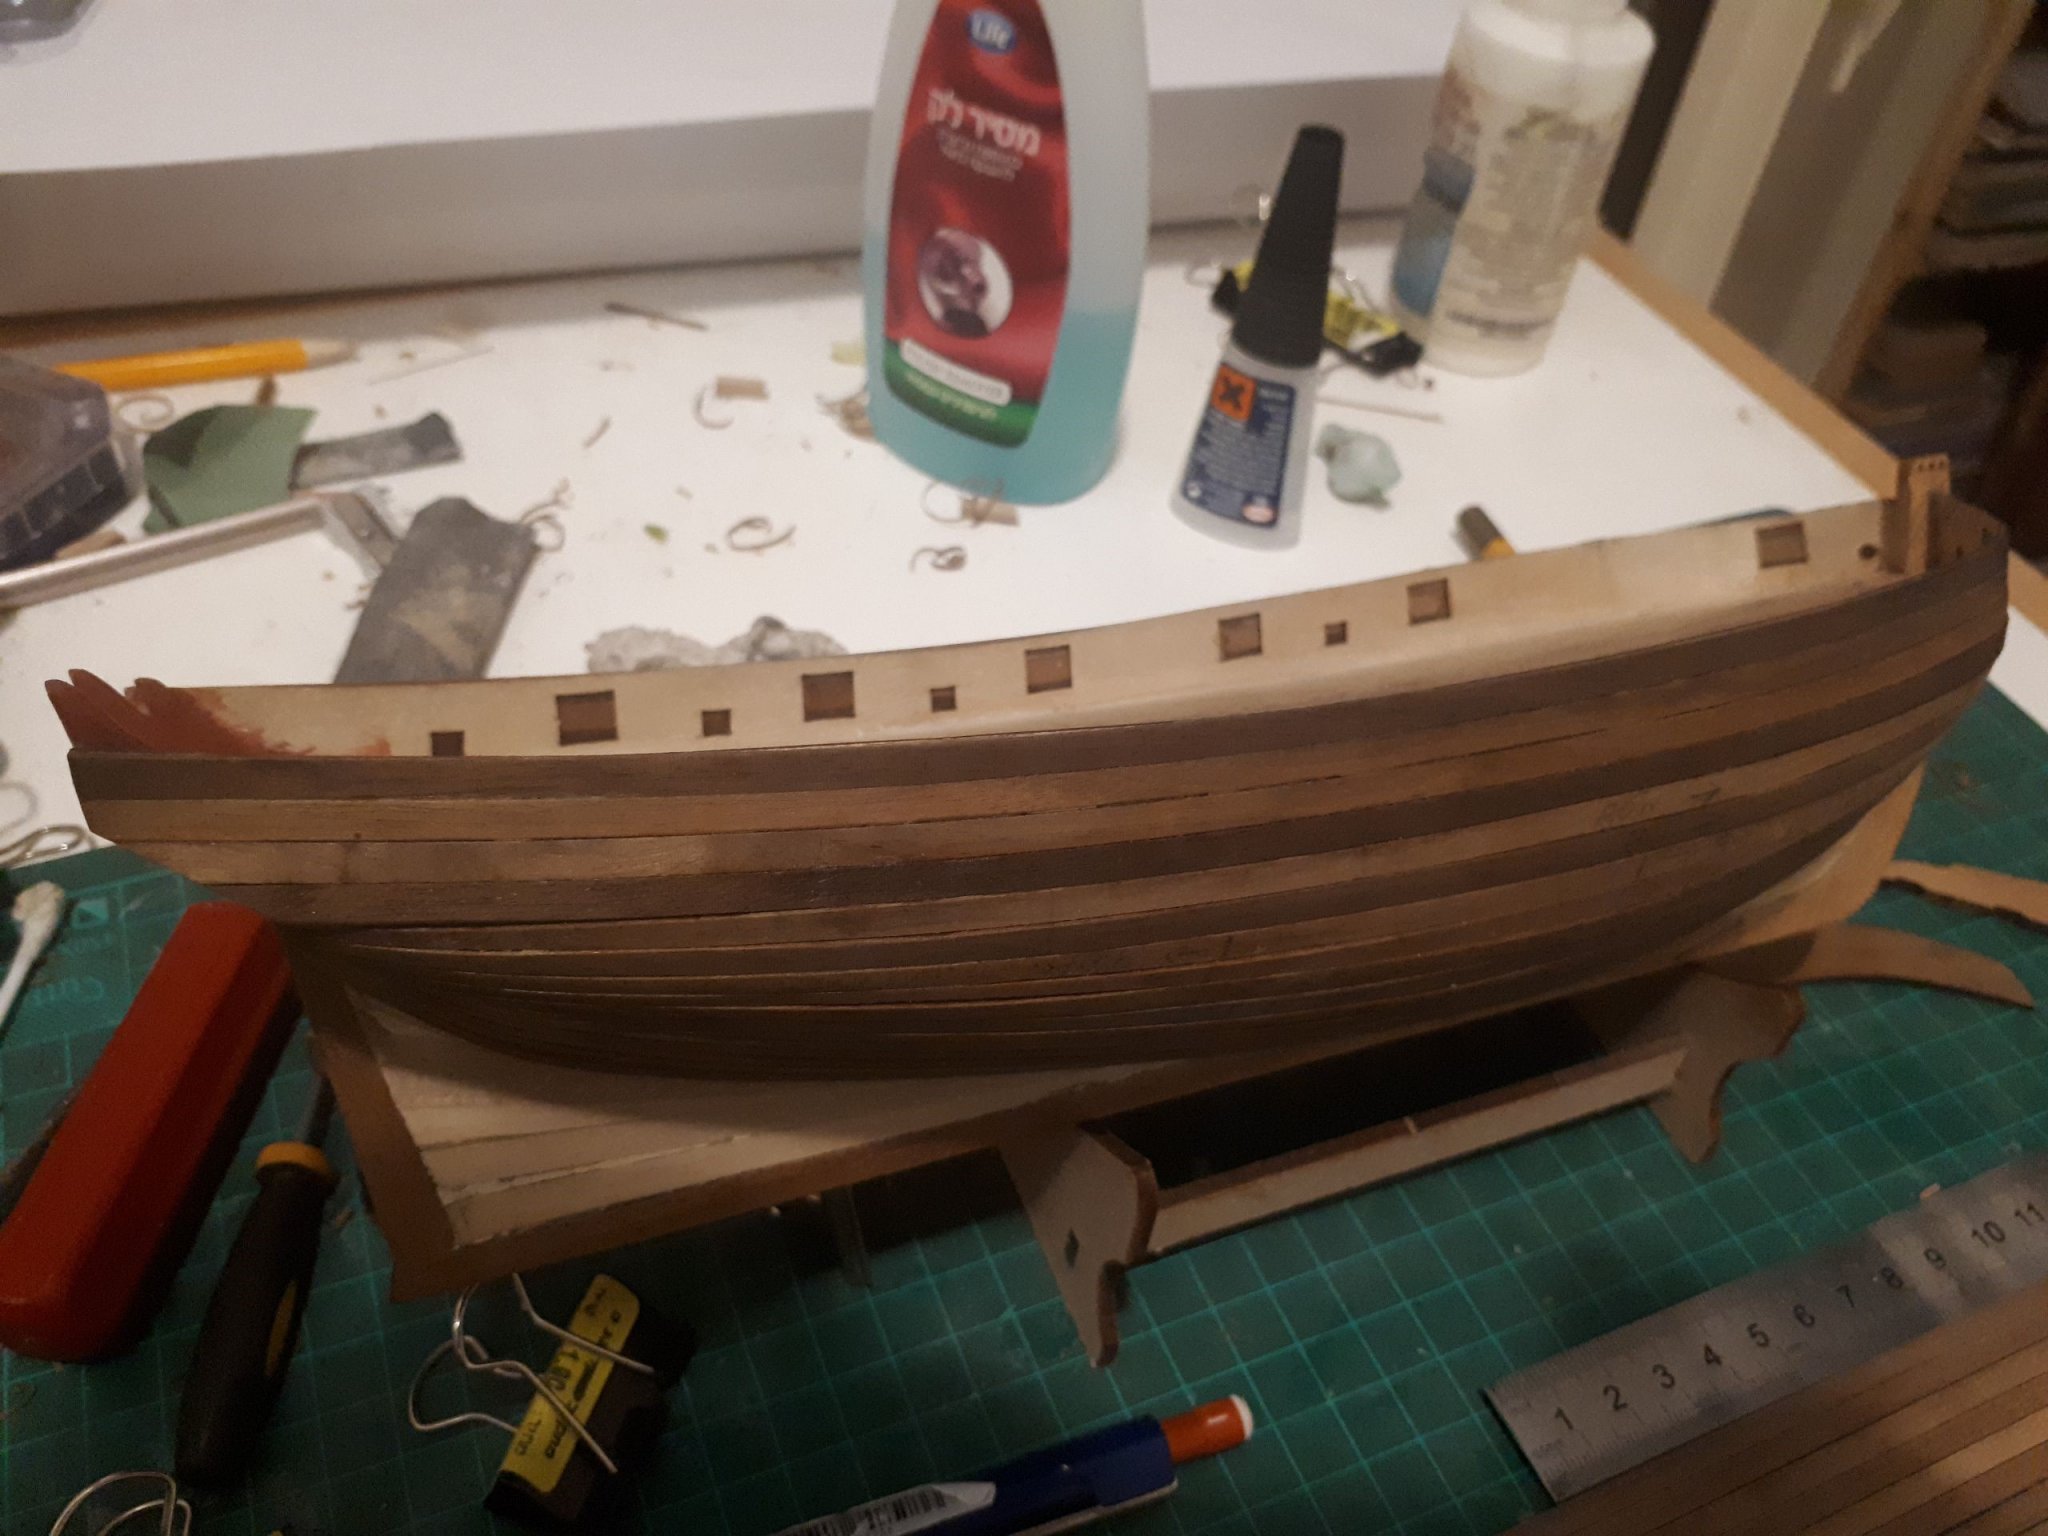
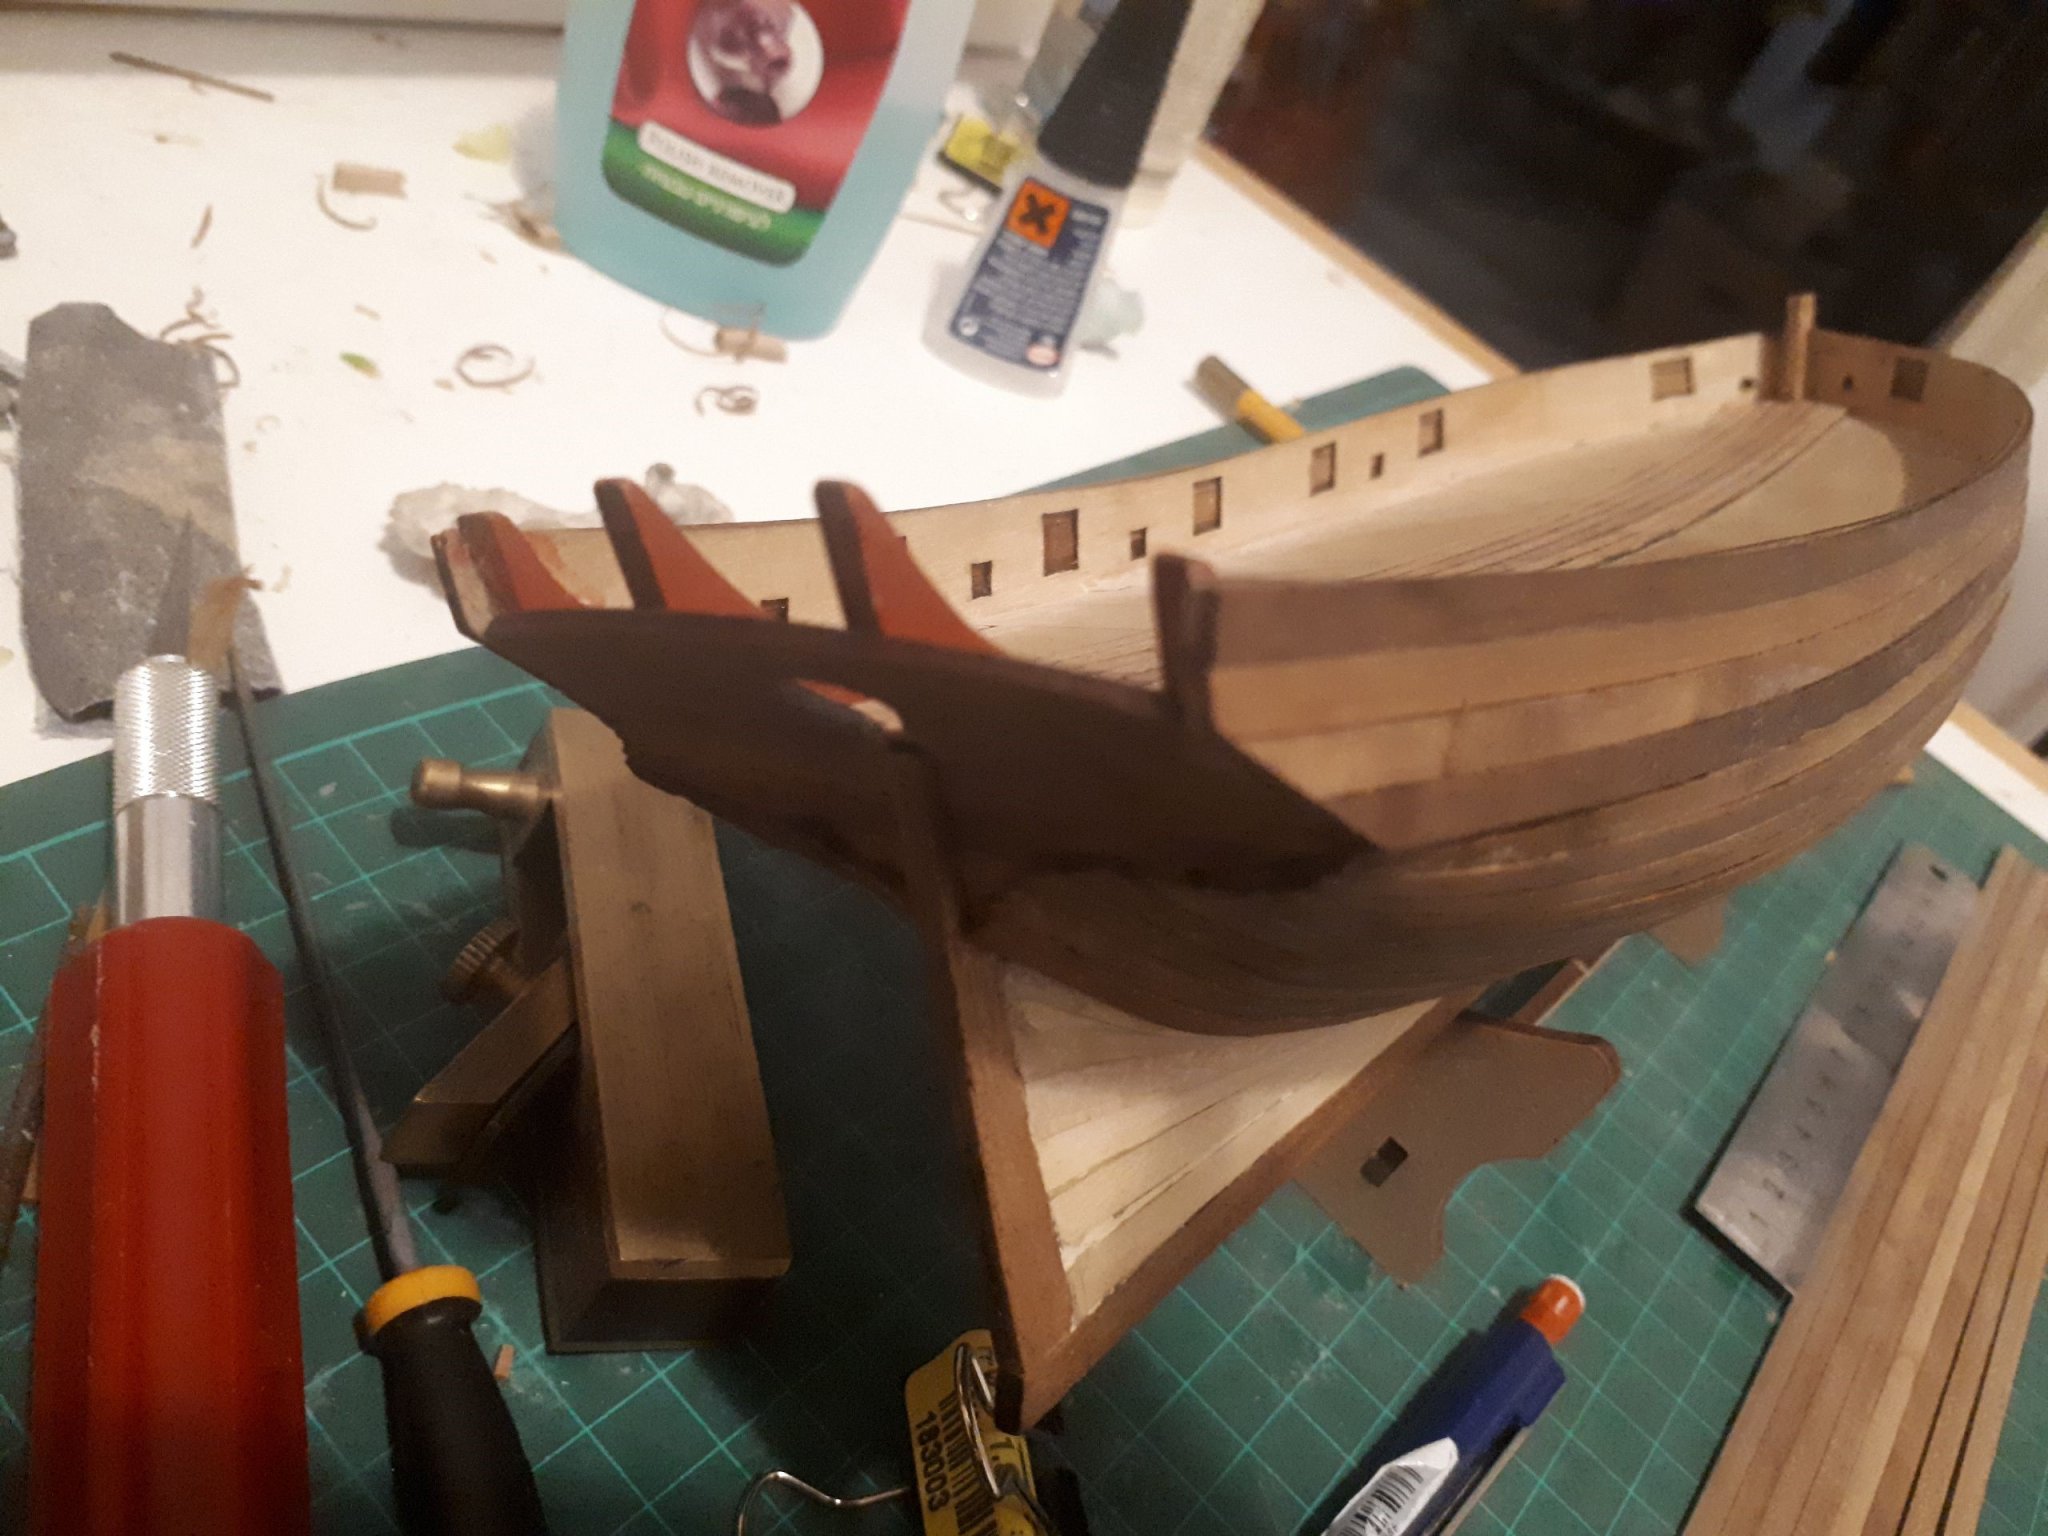
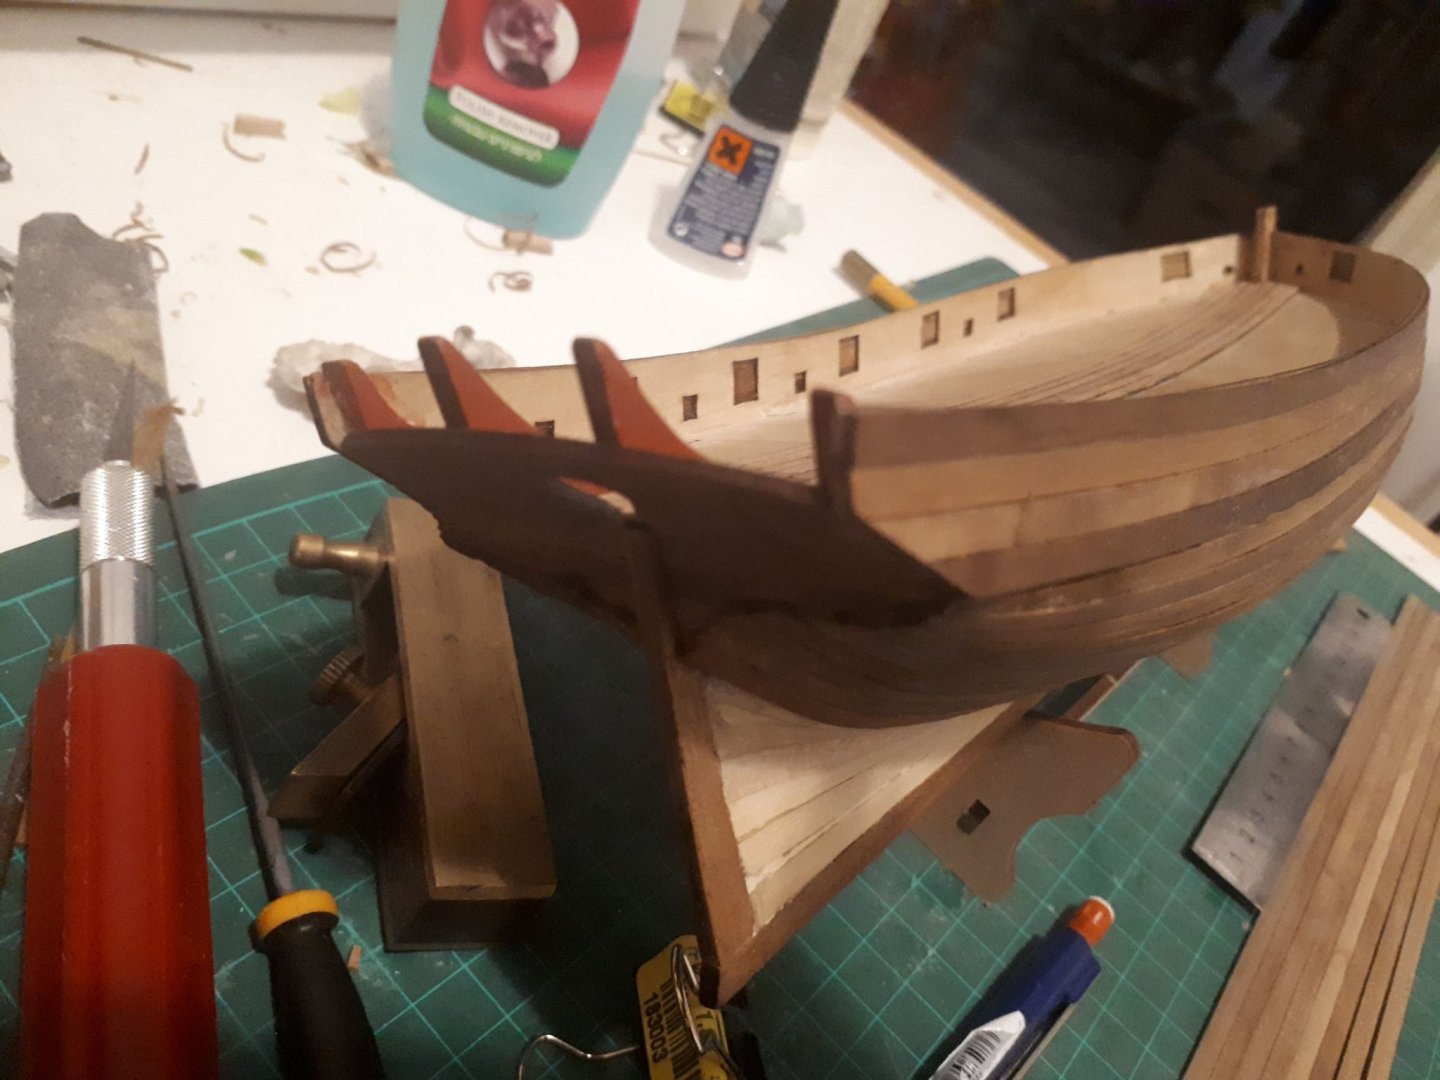
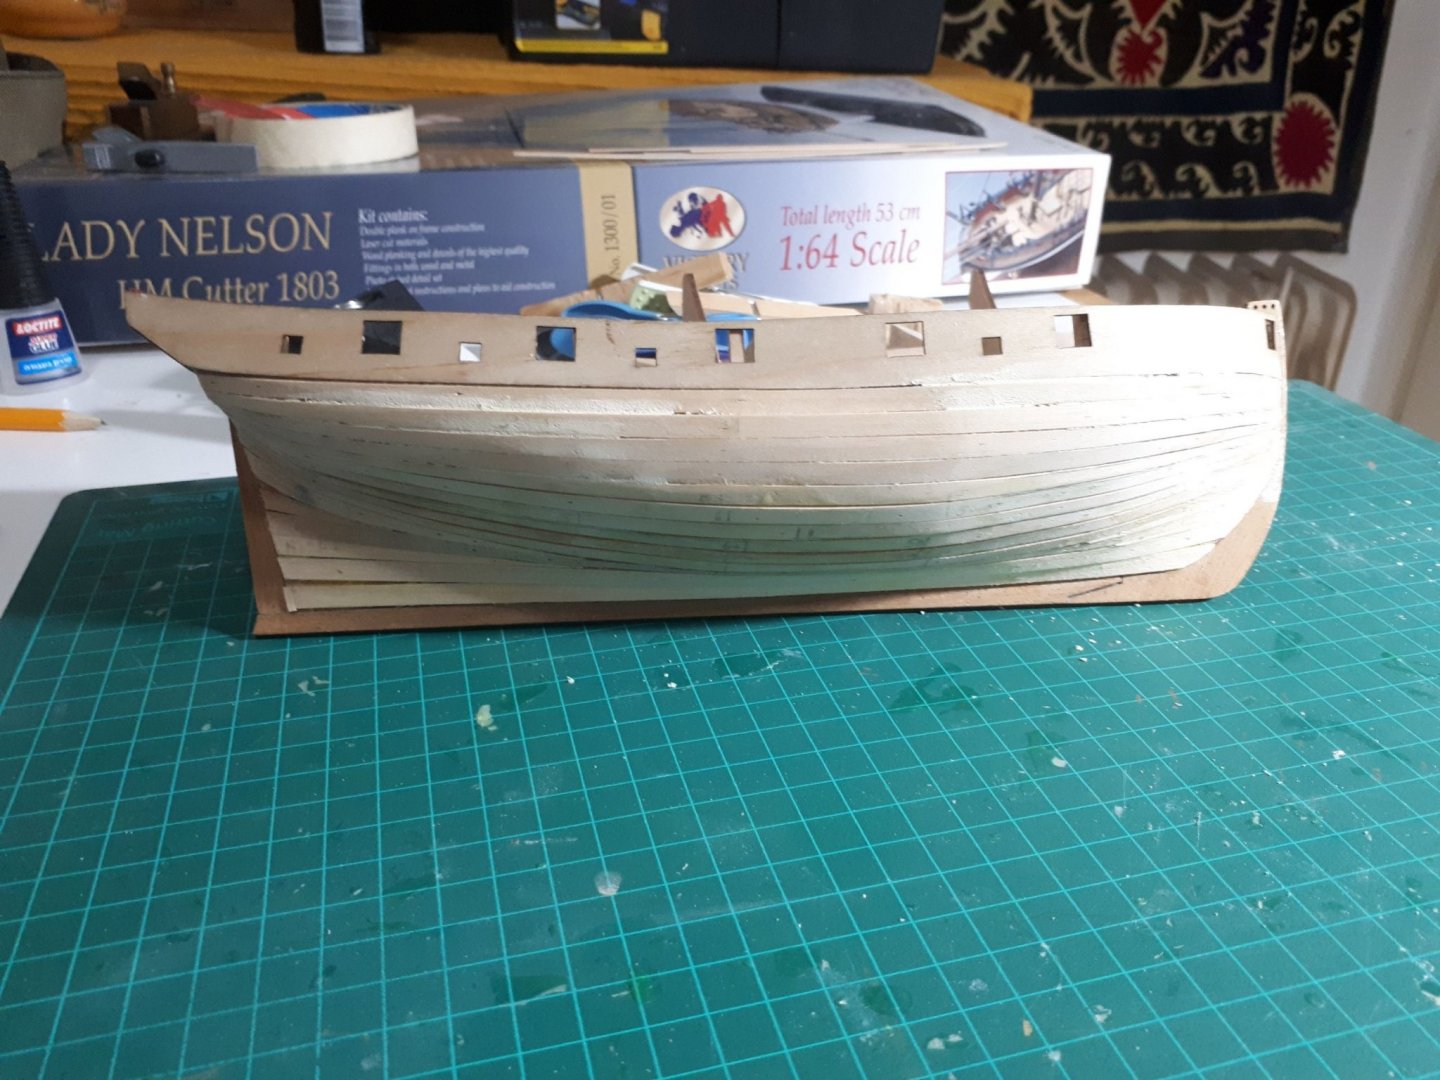
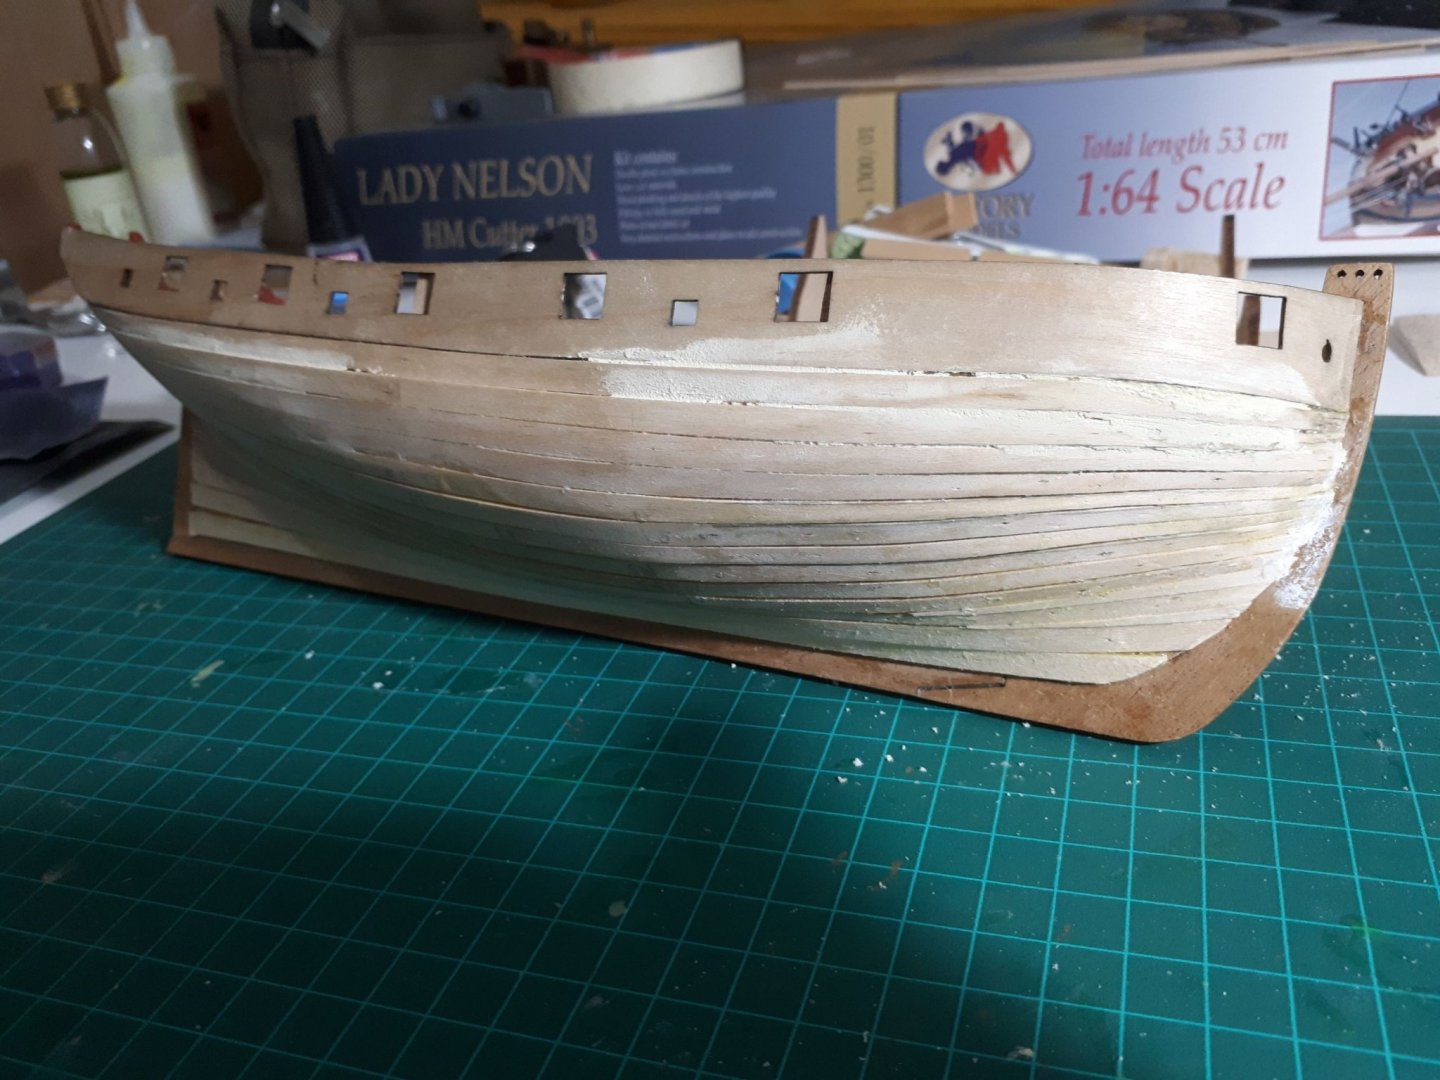
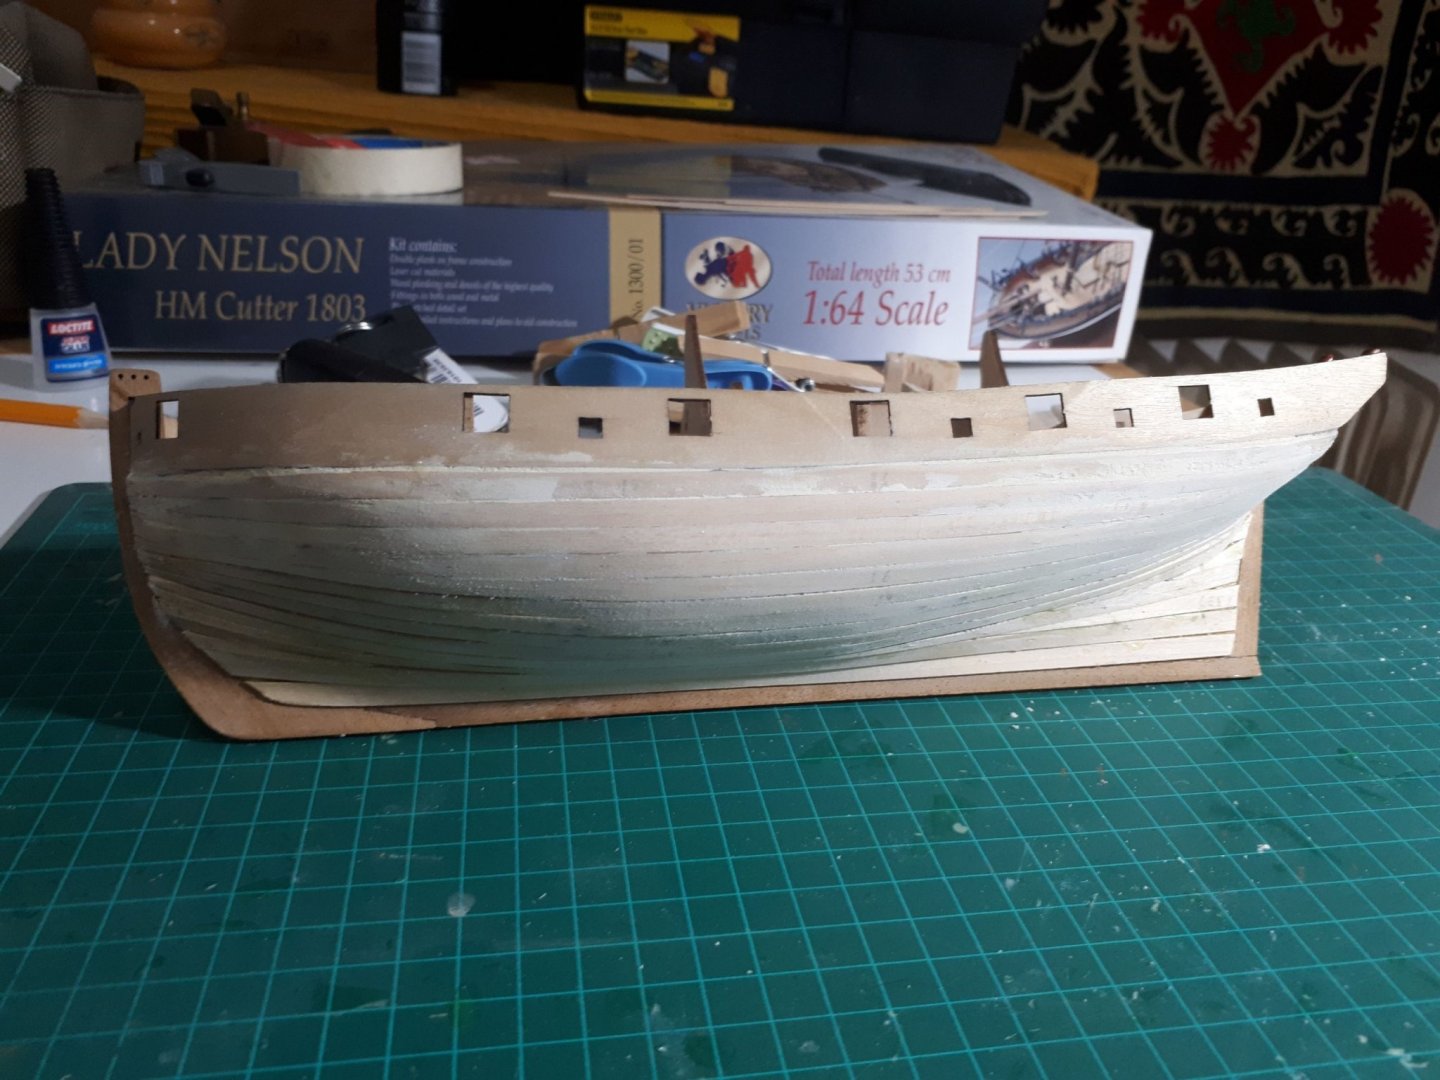
I felt a real sense of pride when i managed to finish the first planking, it is a kind of wood which surrenders easily, but as can be easily seen in the photos, there were still many gaps and some problems which i decided to solve with some filler stucco which proved to be a really good one. i sanded the hull felt really good, the future looked bright ahead- until i started the next phase-the second planking and things started to get more difficult. now that the first planking or the 'skin' was in place according to Mr Leon from modelers shipyard each plank is tapered at the pint where the bow starts to become round so bending/tapering is more according to what you see. The wood used for the second planking is of a very high quality, but it is much harder and thicker than the one for the first layer. it was a real struggle to find a way to shape it and bend it. i strated with the upper bulwark so it was more straight-forward, but below that line i had to find a way to taper,bend and glue this thing the best that i could. for bending i soaked each strip after tapering it in hot water, then clamped it to the upper bulwark and let it dry. then, i glued the tip of each plan to the right place in the bow with CA glue and then took a flat iron, rubbed the plank again with hot water, and then pressed it against the bow section where there is a kind of concave part then once the plank got the right shape i glued it to place. you can imagin how though it was, some planks resisted more but most of the problem was with the kind of glue that i used, it was to runny and dripped all over the place and caused many problems. ! so complicated it was, im surprised i didn't lose my mind and my sanity altogather. another HUGE problem was when i discovered that i didn't leave any room at the bow for the second planking which caused the entire layer to portrude and hide the front keel and caused it to look very ugly. this took like a couple of months to complete. oh well, what doesn't kill you makes you stronger...it was a very interesting phase which i'm glad i managed somehow to overcome... here are few photos from the second planking, wish i took some more..


- 7 replies
-
- 3
-
-
- lady nelson
- victory models
- (and 1 more)
-
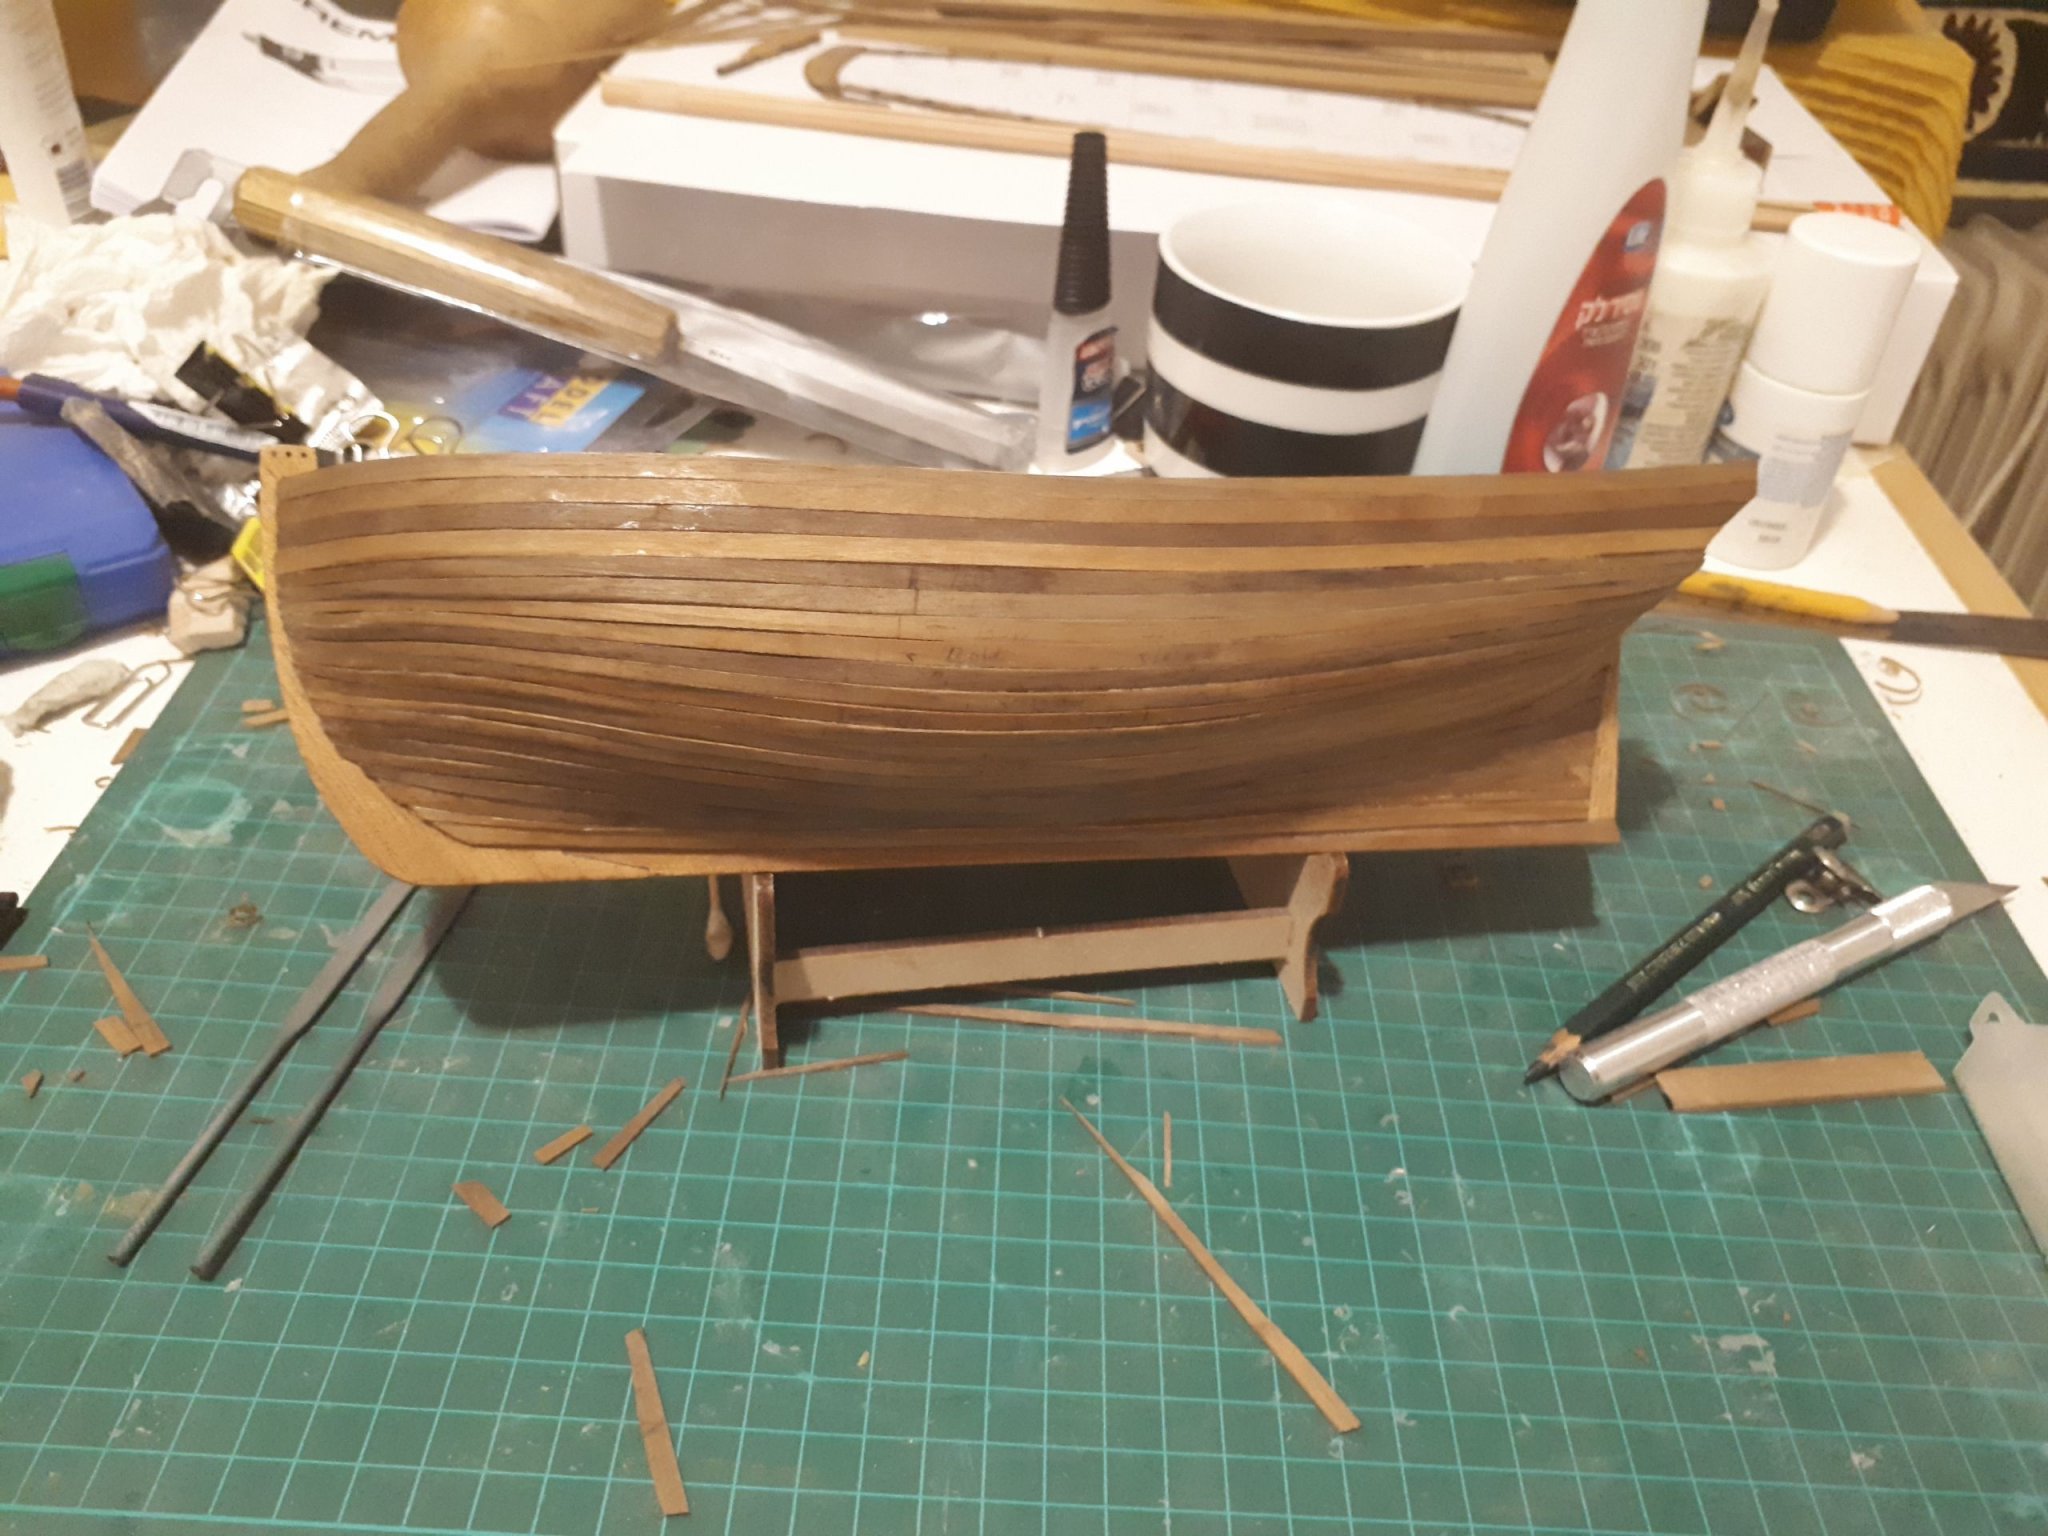
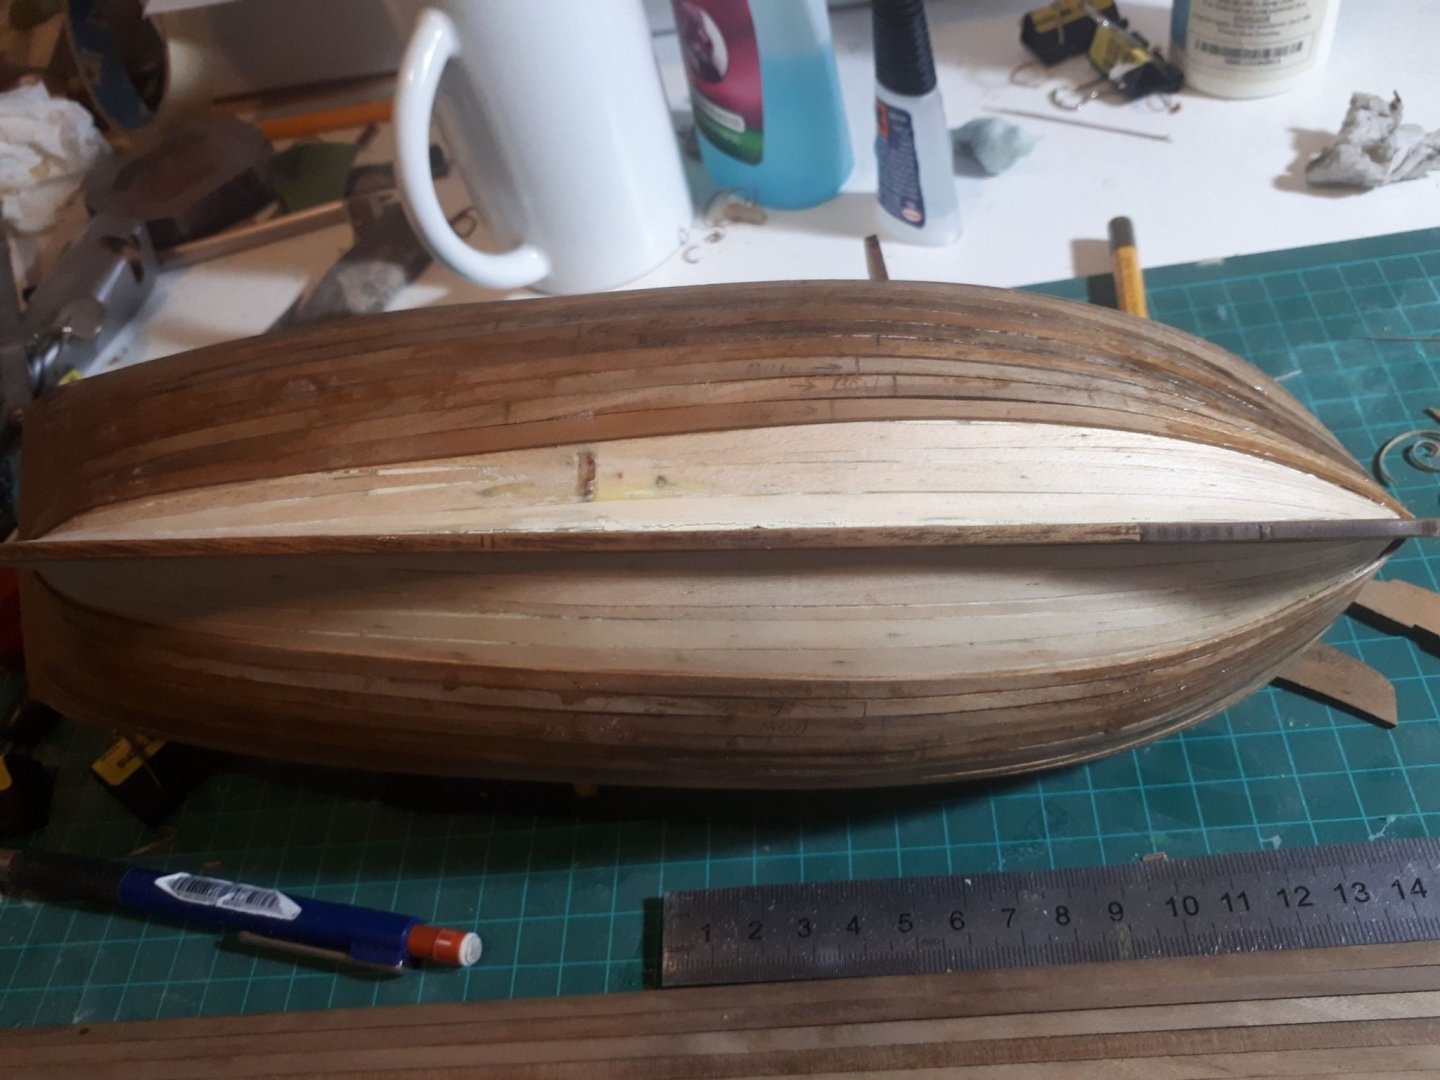
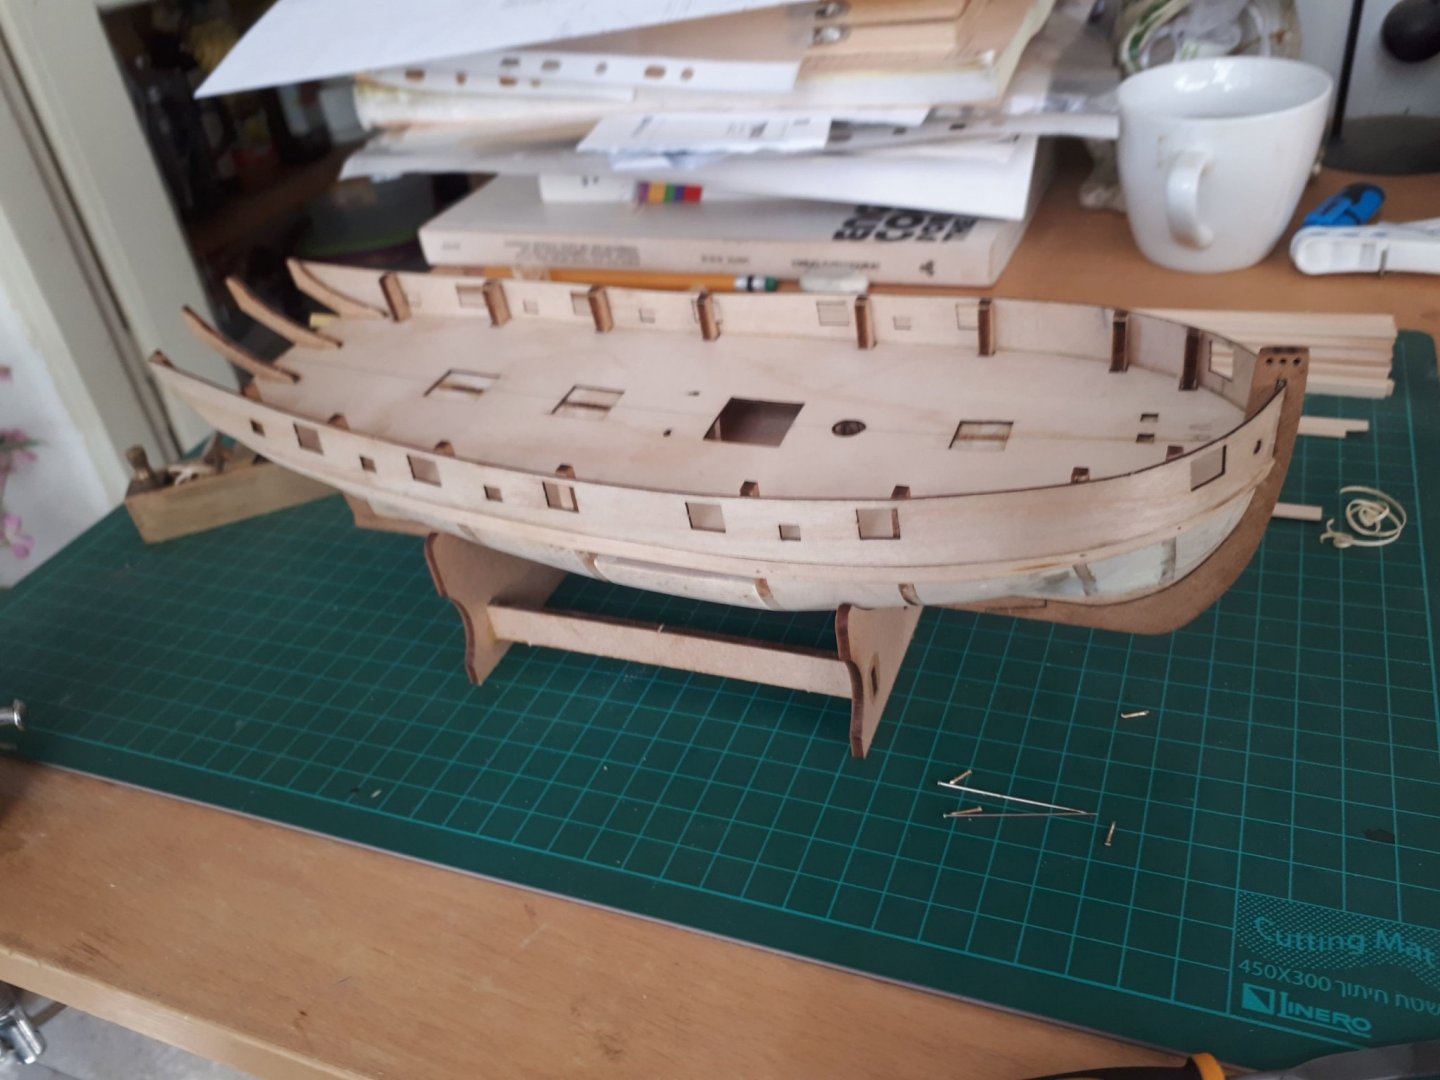
Hello again Excuse me again for the sudden intervals-sign of the times I would like to post now the rest of my build log. as you can see on my last photo i arrived to a the point where i managed to glue the gun port strips in place and well aligned as well as as theinner counter frams that eventually are supposed to be atached to the transom. but right there i encountered a problem that repeats itself in this model-something is wrong with the size and shape of the inner counter frames, and they are shorter then they should be. so i then realised that its maybe better to leave to a later stage than to cause some damage and soon after i decided to leave it as is. i didnt continue because i felt that a lot more experience and tools and much more time will be needed all of which i didn't have ( had to get back to real work) , so i just put it aside in a small box. but eventually i returned again in early 1/2019 and picked it up from where i stopped, and move to the part many of us fear of: the planking. this was a very bumpy ride let me tell you. i'm just not really gifted (or so i felt) to coplete this task. okay so i looked through many of the lady nelson shipbuild logs here on MSN but none was really the step-by-step that i needed. so finally i found such a build log on AMATI's FB page done by Leon from modelers shipyar now free of charge to everyone. he gives a kind of set of buildlog, and imo the best part of his log is the basic instruction of how to do the planking , the mathematical basis, that give some sense to this process btw, the wood provided for the first planking (lime i think) is very easy to work with, really ideal so here are a few photos from that stage which took a while, few weeks or more to complete.
- 7 replies
-
- 2
-
-
- lady nelson
- victory models
- (and 1 more)
-
Before attaching the false deck into place i left an opening, a well underneath the main hatch, i saw this practice in several posts and decided that a more authentic appearence rather then just the usual blocked one. when i glued the false deck i made sure to follow the shear and the various curves.. at that stage eventhough i mostly followed the instructions i noticed that some modelers prefare to leave the attachment of the true keel to a later stage, say after the planking, to avoid demage, i couldn't see a way out of it, since the upper bulwarks are suppose to be inserted and fixed into the slot on the bow area, so i glued the true keel into its place , followed by glueing the upper bulwarks. i bent them by immersing them in hot water and then fixed them in a pre-made dummy, basically a set of nails that i nailed into a flat piece of wood. it did work well enough. but as soon as it dried and released both bulwarks for test fitting, i noticed to my horror that the starboard side is uneven and somewhat longer, has a longer curve compared with the portside. this came as a bit of a bad surprise but was probably a result of the slight bending/wrapping of the keel....this wasn't good at all but i didn't give up- (i learned over time the a modeler needs to be resourceful at all times) i decided to cut a small piece of the plywood some 2 mm and inserted it to the slot in the bow section, and the glue the bulwarks from either side, making sure that the gun ports are parallel and aligned or else... couldn't find photos of the correction that i made, but believe me its there... David


- 7 replies
-
- 1
-
-
- lady nelson
- victory models
- (and 1 more)
-
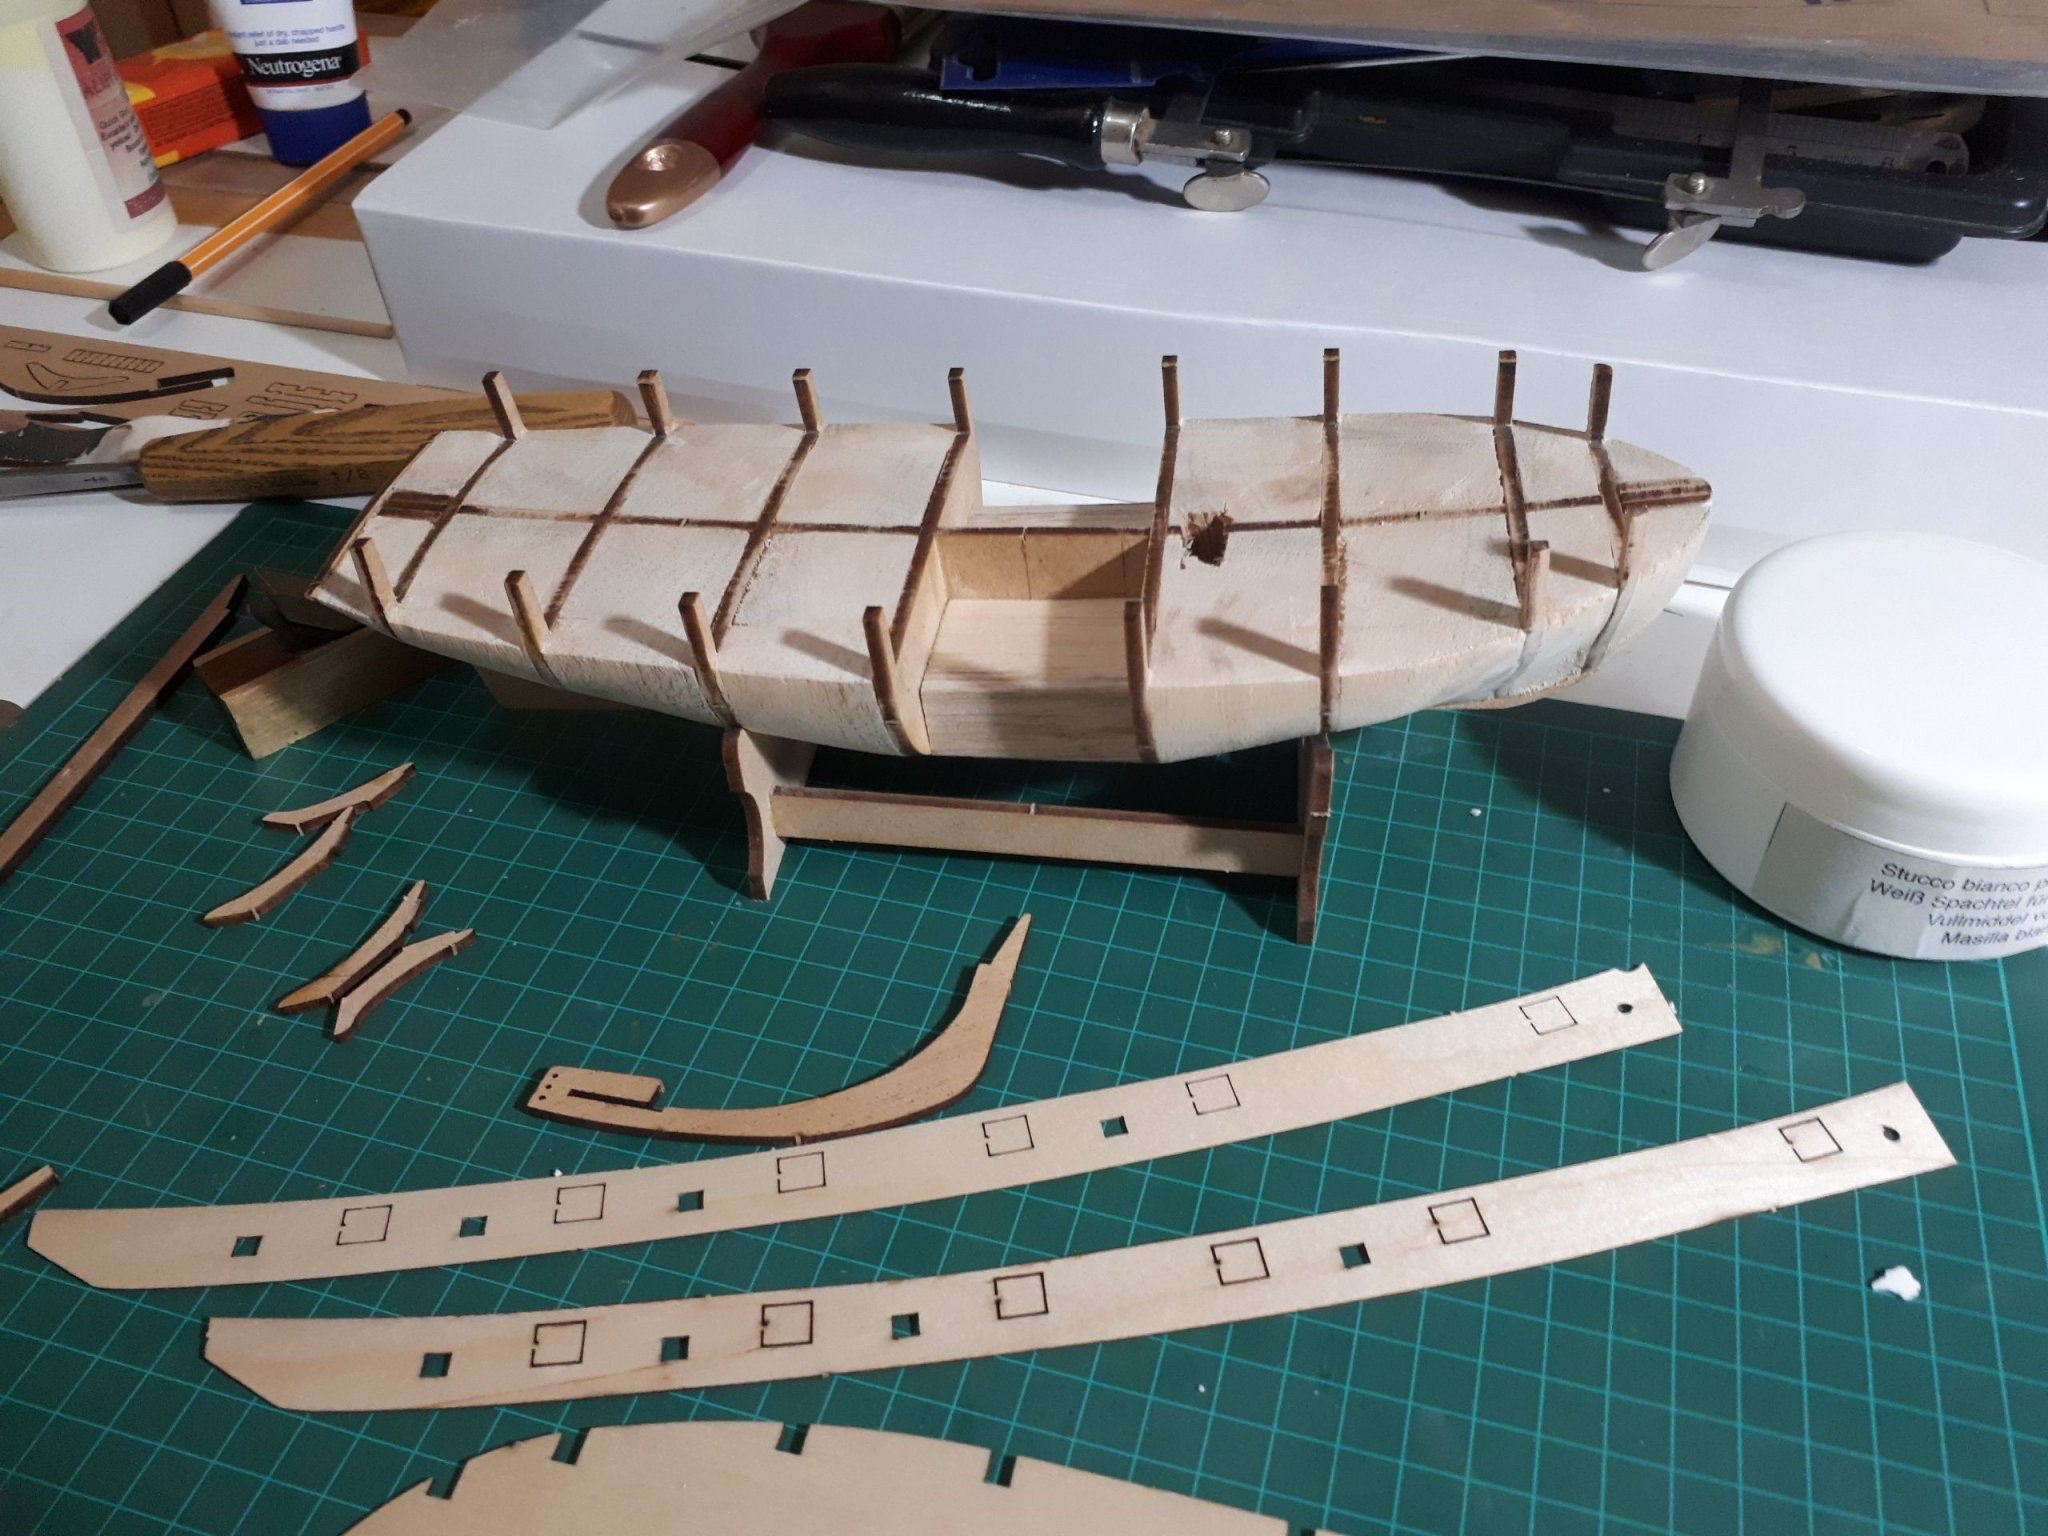
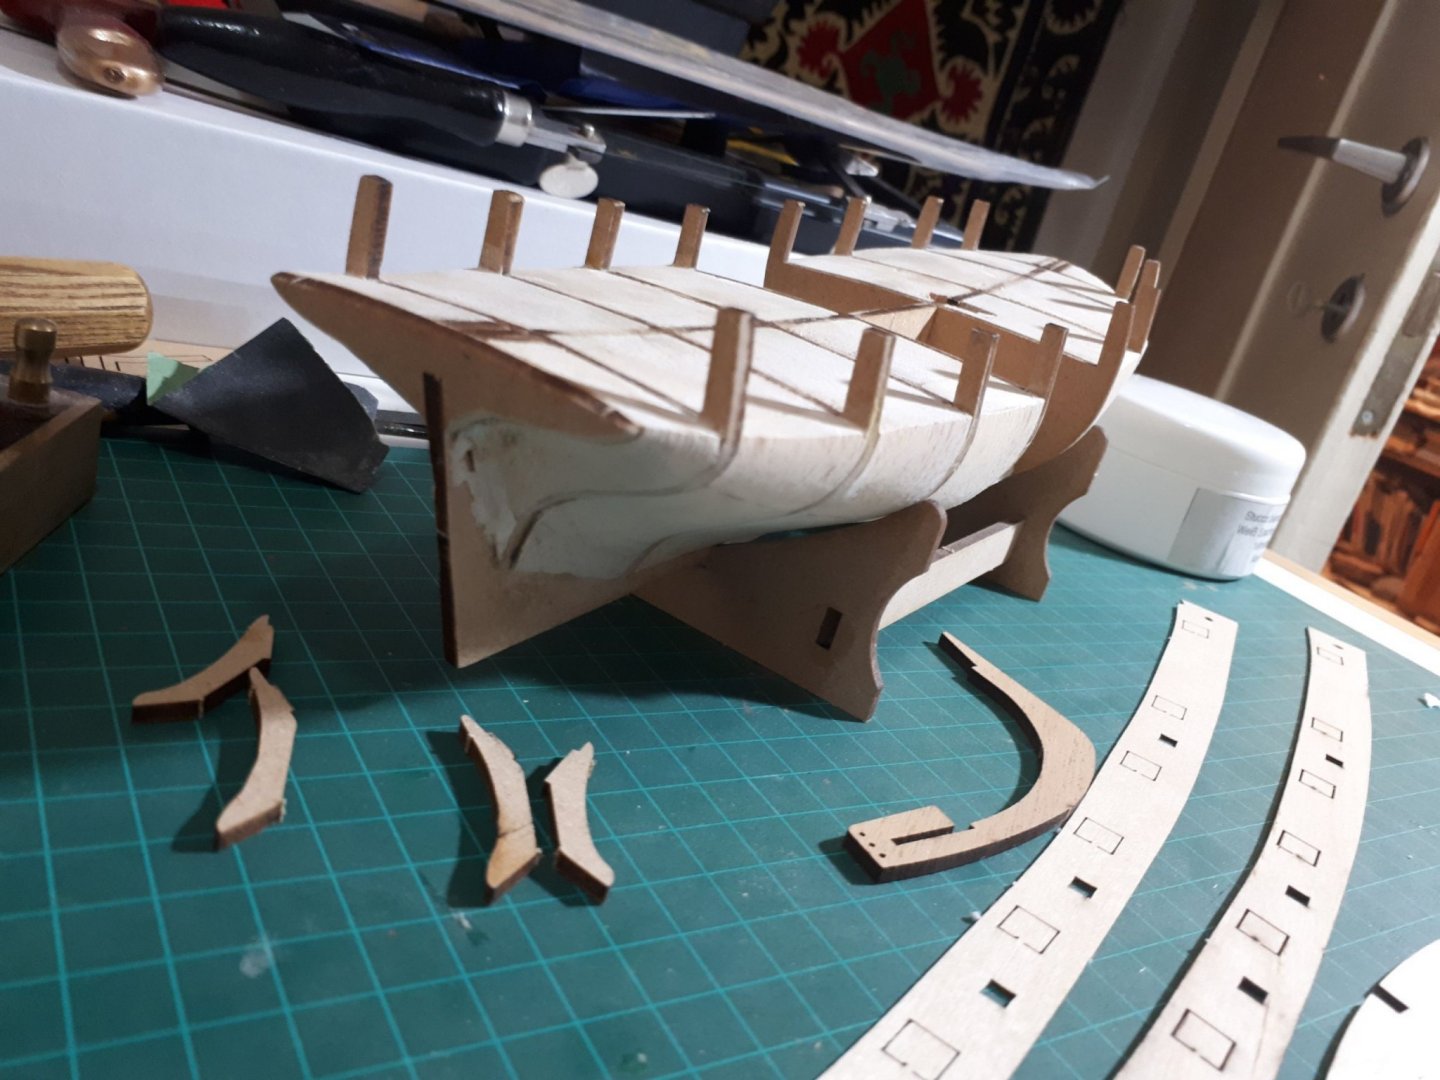
Hello all, so right after completing the somewhat complicated work in curving, sculpting and ultimatley fitting each balsa block (it turned out to be really a guessing game in order to find the real curves and lines) i was dissapointed to find that i wraped the keel sometime through the built..i discovered it when i tried put the false deck and i noticed that it is somewhat off...it wasn't too bad though, so i choped just a little bit of the dent that suppose to be inserted and hold the bow section of the true keel and just guled it in place, thinking my problems are over i put it aside to cure . conclusion: always use a metal square or something similar to make sure every bulkhead or filling is 100% square, i relayed on measurment and my eyes, tried to make sure im doing fine, but had to double check.... here are some more photos from that stage. David
- 7 replies
-
- 1
-
-
- lady nelson
- victory models
- (and 1 more)
-
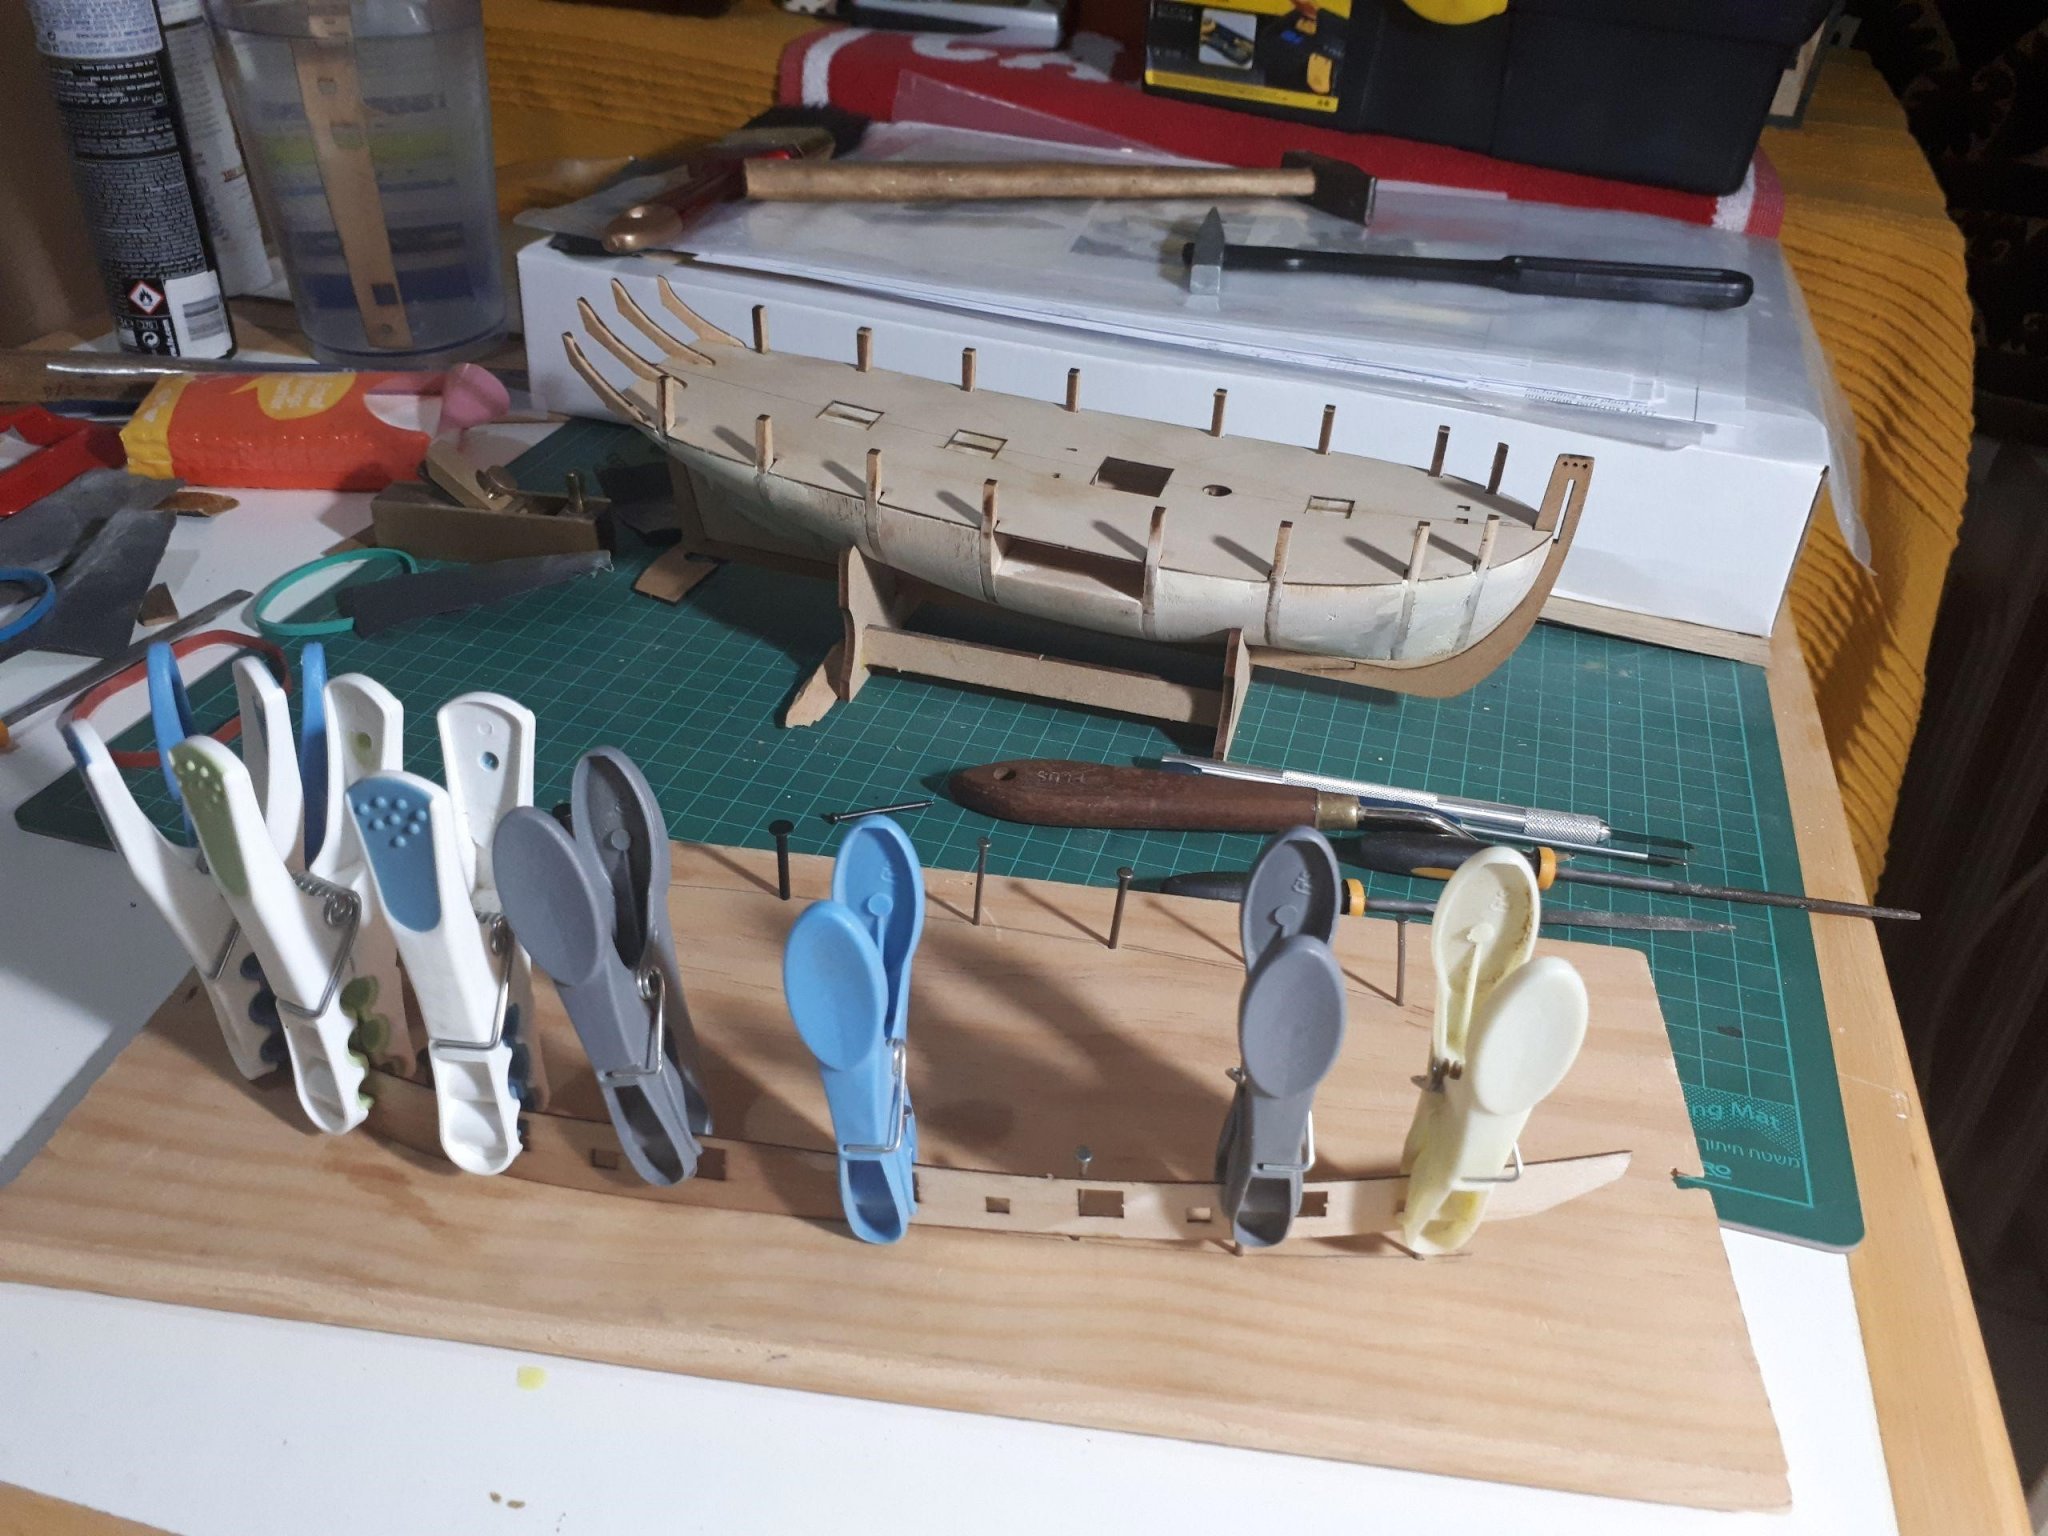
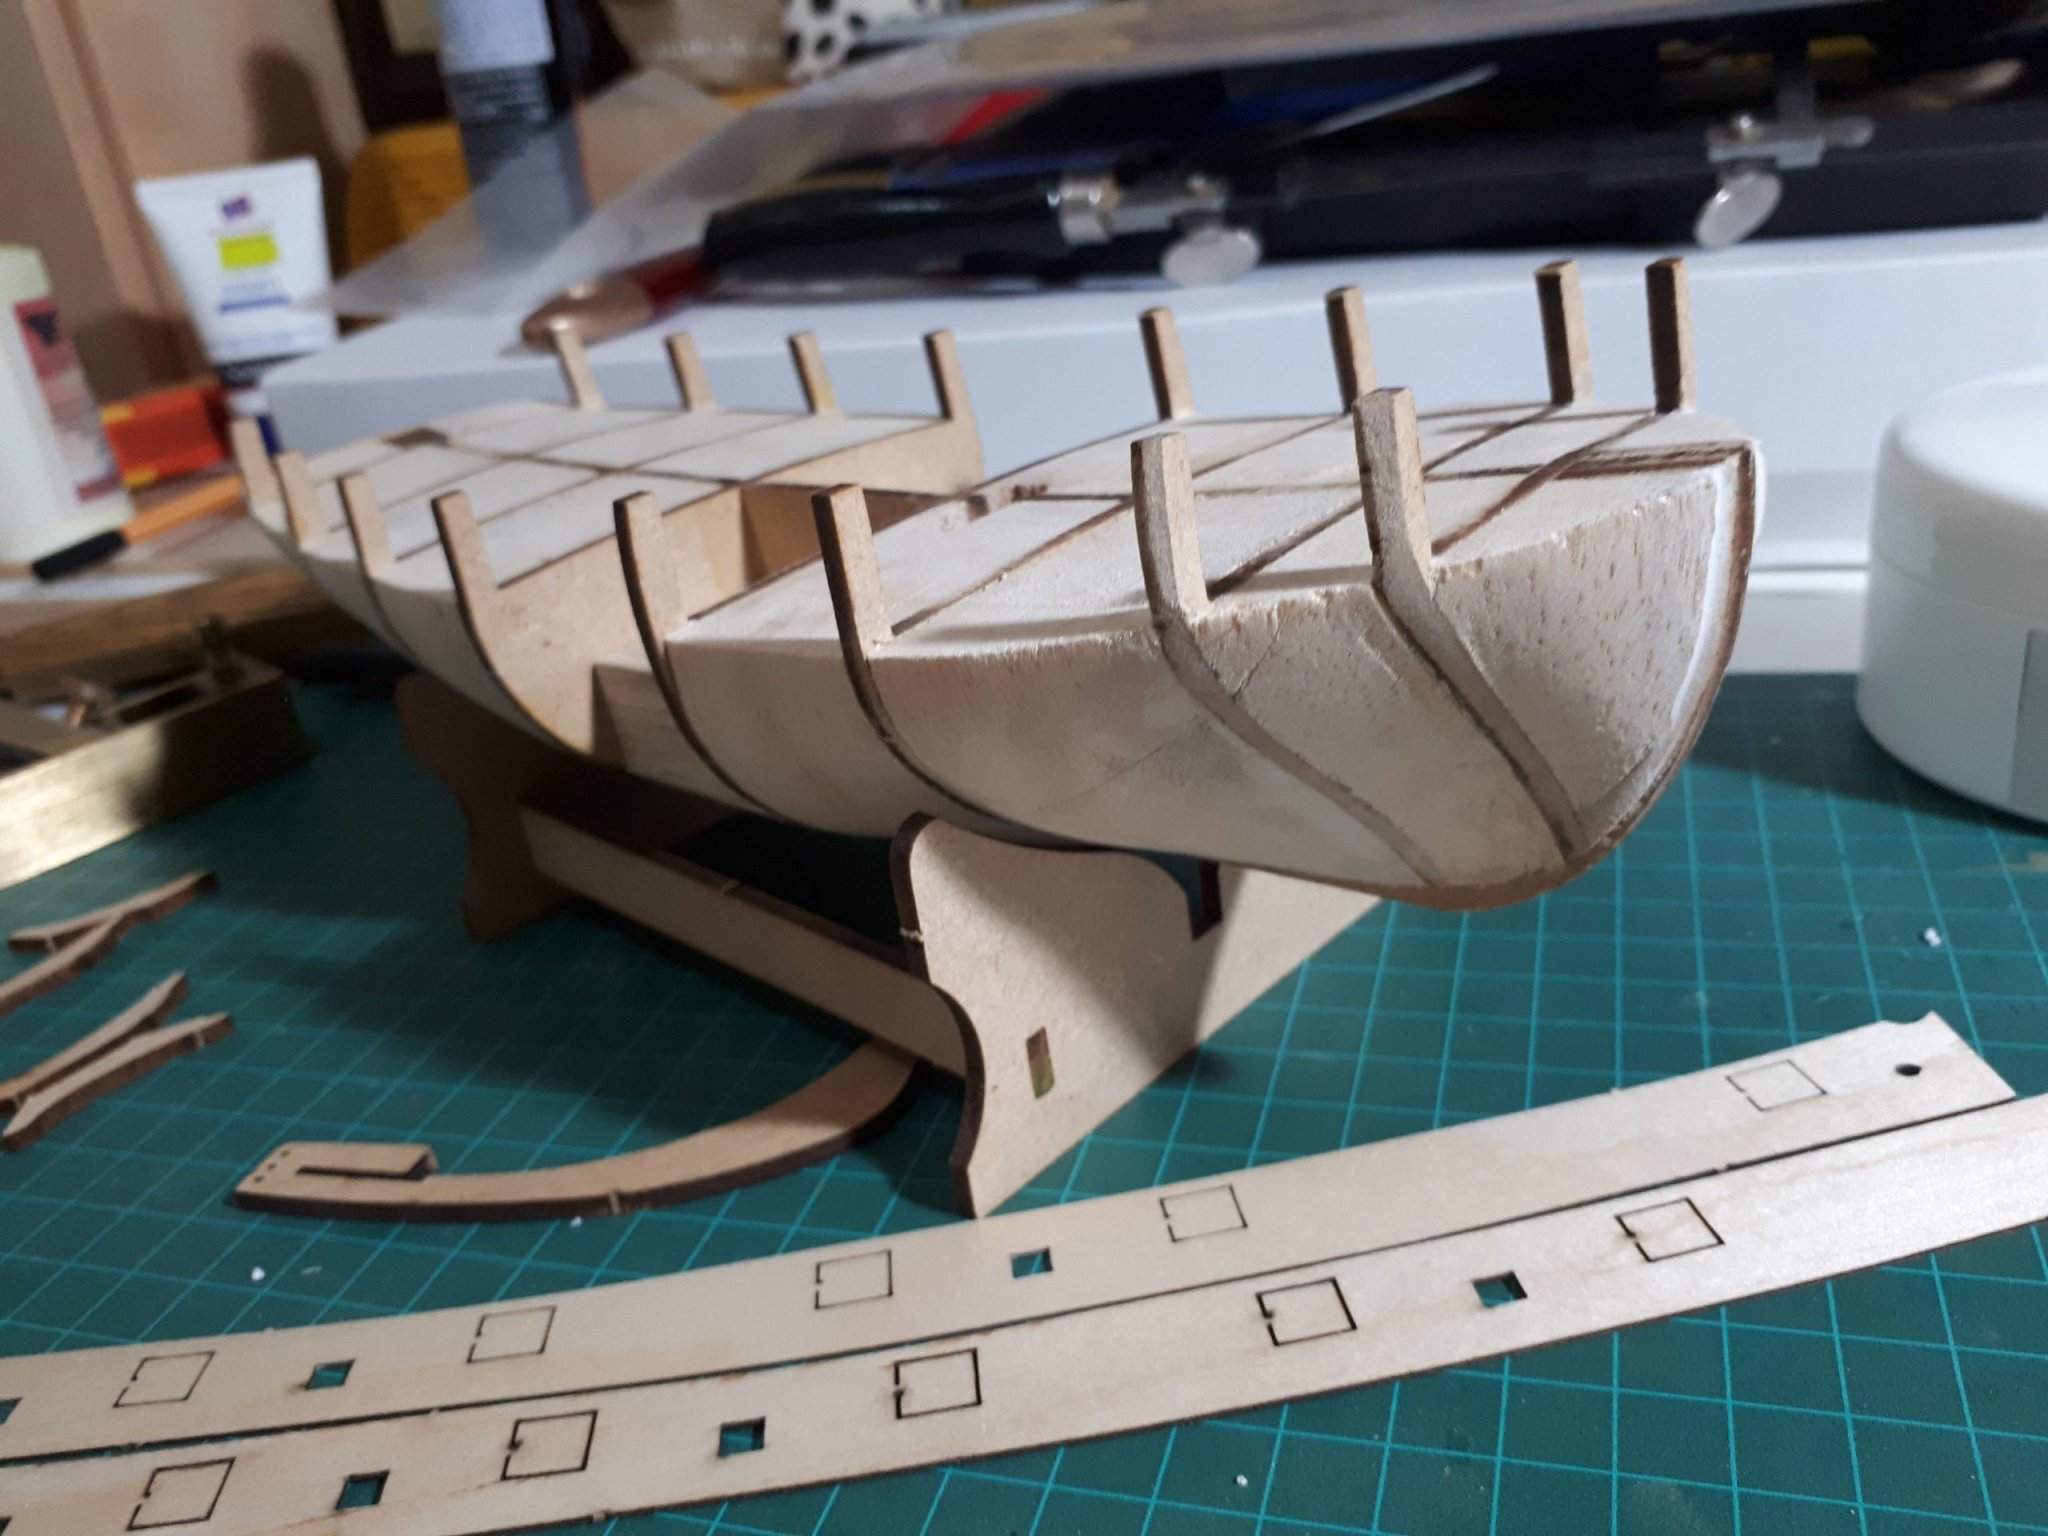
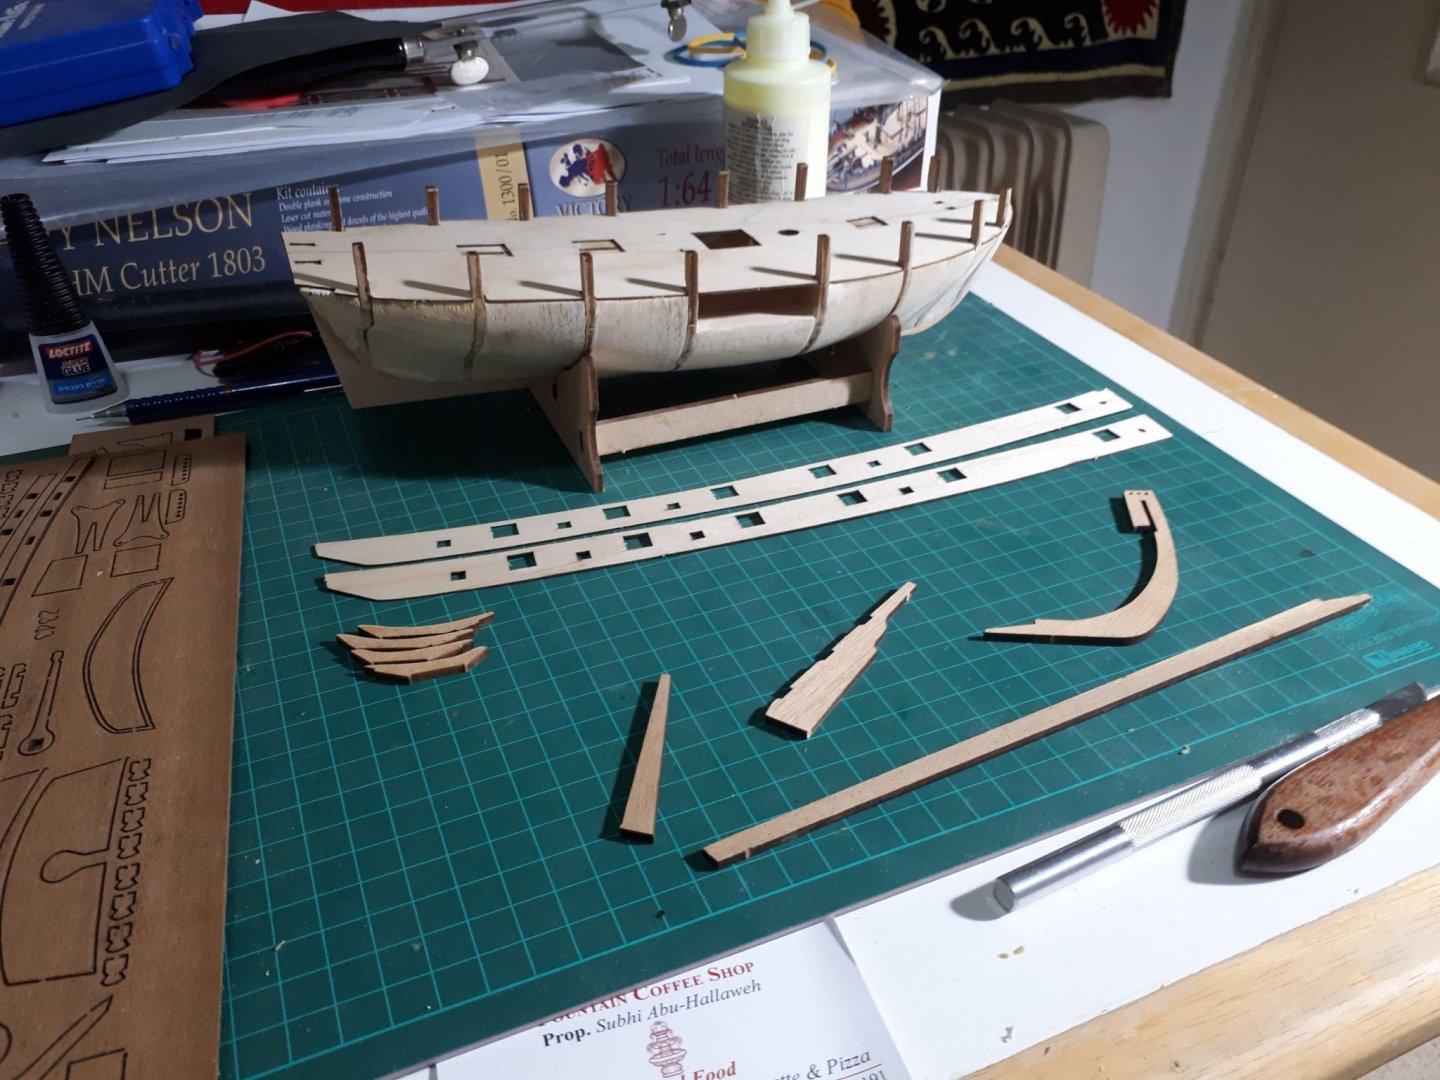
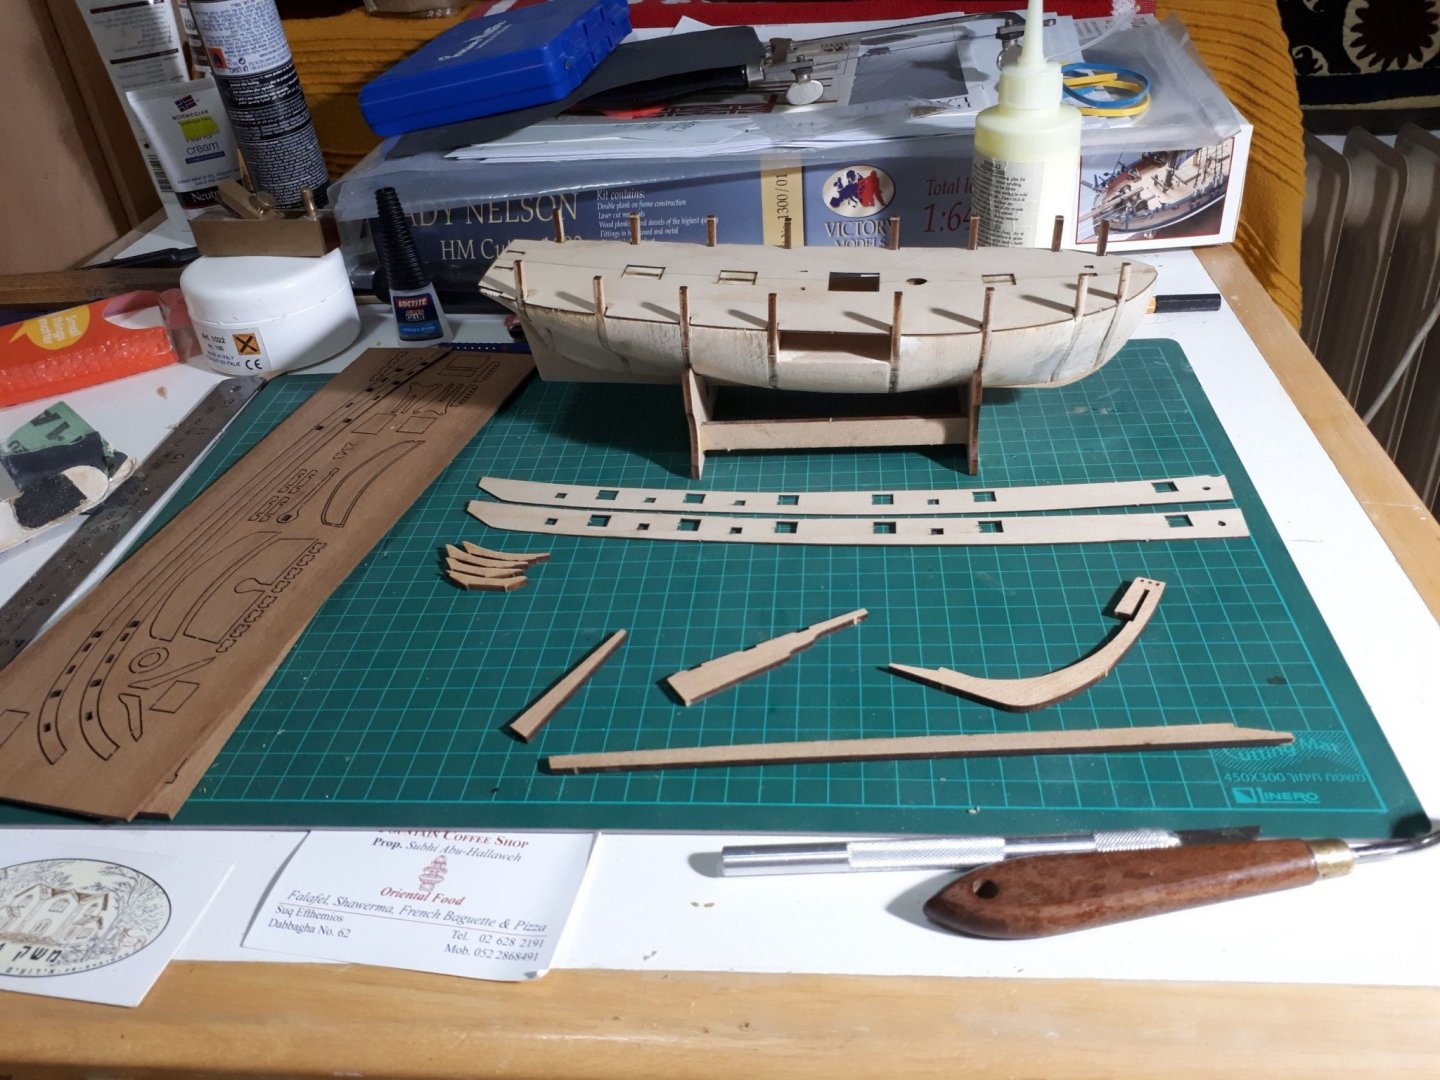
Hello fellow modelers, Please excuse me for my disappearance, i just noticed that it's been awhole month since i last posted, i was really distructed by the covid-19 events and the difficult circumstances that followed, Hoping things are getting a little better now, i decided to resume my blog, i will upload a sequence of photos i made during the built starting in 1/2018, at that point i since this ws my first built, i started following the plans/drowings but soon discovered vossiewulf wonderful lady nelson blog and started to watch closely on every step and move that he made and really help me out during the early stages of this built. so one of my decisions right after fairing the bulkheads was to fill the gaps between them with balsa wood. i chose to do that because of three main reasons: 1. to discover the boat shape and lines. 2. to add some wheight to the model, (i think its an important point) 3. and most of all, to help out with the next stage, the planking which i really feared from.. I must say that even though it took about a month of work i really enjoyed solving this puzzle which resulted in something much closer to a ship then just a frame. what i didn't like so much though, is using the balsa wood... yes i know it's cheap and easy to find, but it has the tendency to crumble and it creats too much saw dst..next time i will try a different type of wood for this mission. Anyway here are some photo from back then showing the process To be continued (soon) David P.S.Thank both Toni and Phil for your reccomandations regarding the sail plan, i will definitely check this information.


- 7 replies
-
- 1
-
-
- lady nelson
- victory models
- (and 1 more)
-
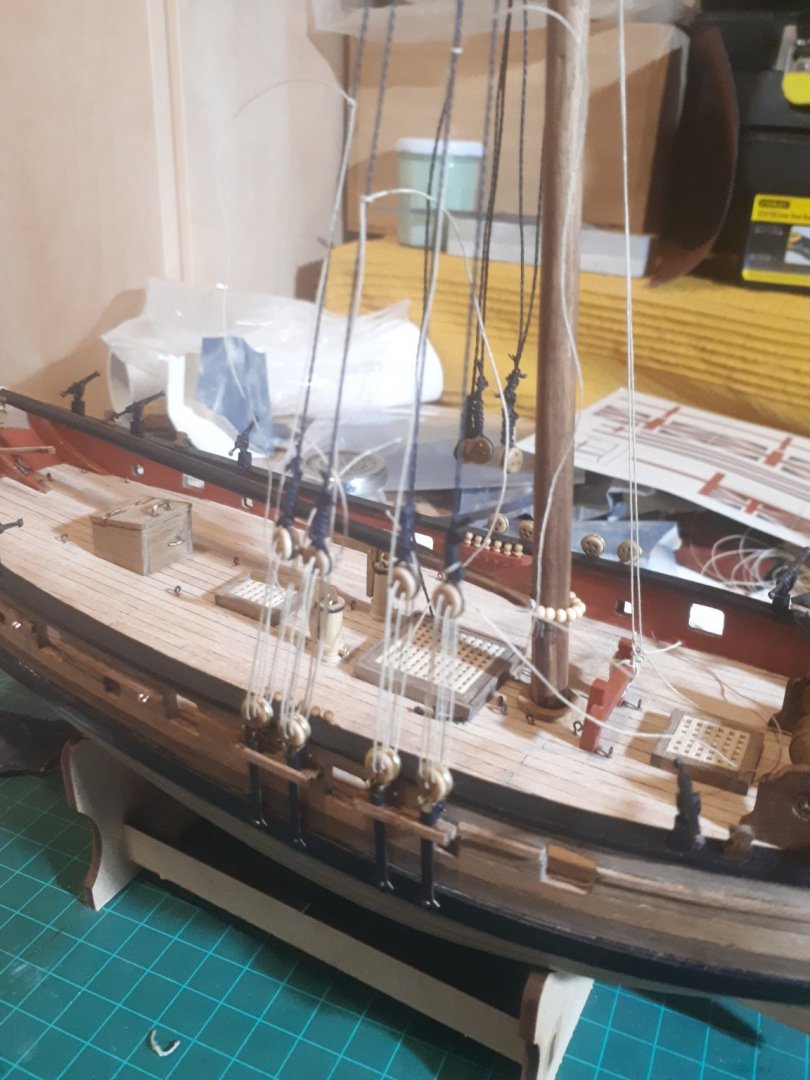
Hello Davy, yes it did look terrible so i finally decided to take the whole thing of , and do it all over again,but now in a correct way.... i will try to follow your recommendation of how to do it right from the begining but if there is some kind of a drowing somewhere that shows the whole process of siezing the shrouds that will be the best for me , hard for me just to follow instructions.... btw many thanks for the books recommendation, i took a note of those two books, looks like it's essential , i will consider buying after the covid-19 is over... David
-
Thanks Dave, now i have a scale as a referance...it seems then that i made a big mistake here calculated the spacing as 2.5 cm ....maybe i will have to do it all over again thanks David
-
Thanks davy your way looks like the best method by far! i already started siezing the shrouds as you instructed me to do, and im done, i found out hoever that the distance between the dead eyes from either side is about 2.5 cm (1 Inch) across from both sides of the mast...is it a correct distance or not to scale at all? what would be the correct one? i hope it is fine because i already sealed the knots with a bit of CA glue 😞. thanks, David