-
Posts
5,534 -
Joined
-
Last visited
Content Type
Profiles
Forums
Gallery
Events
Everything posted by James H
-
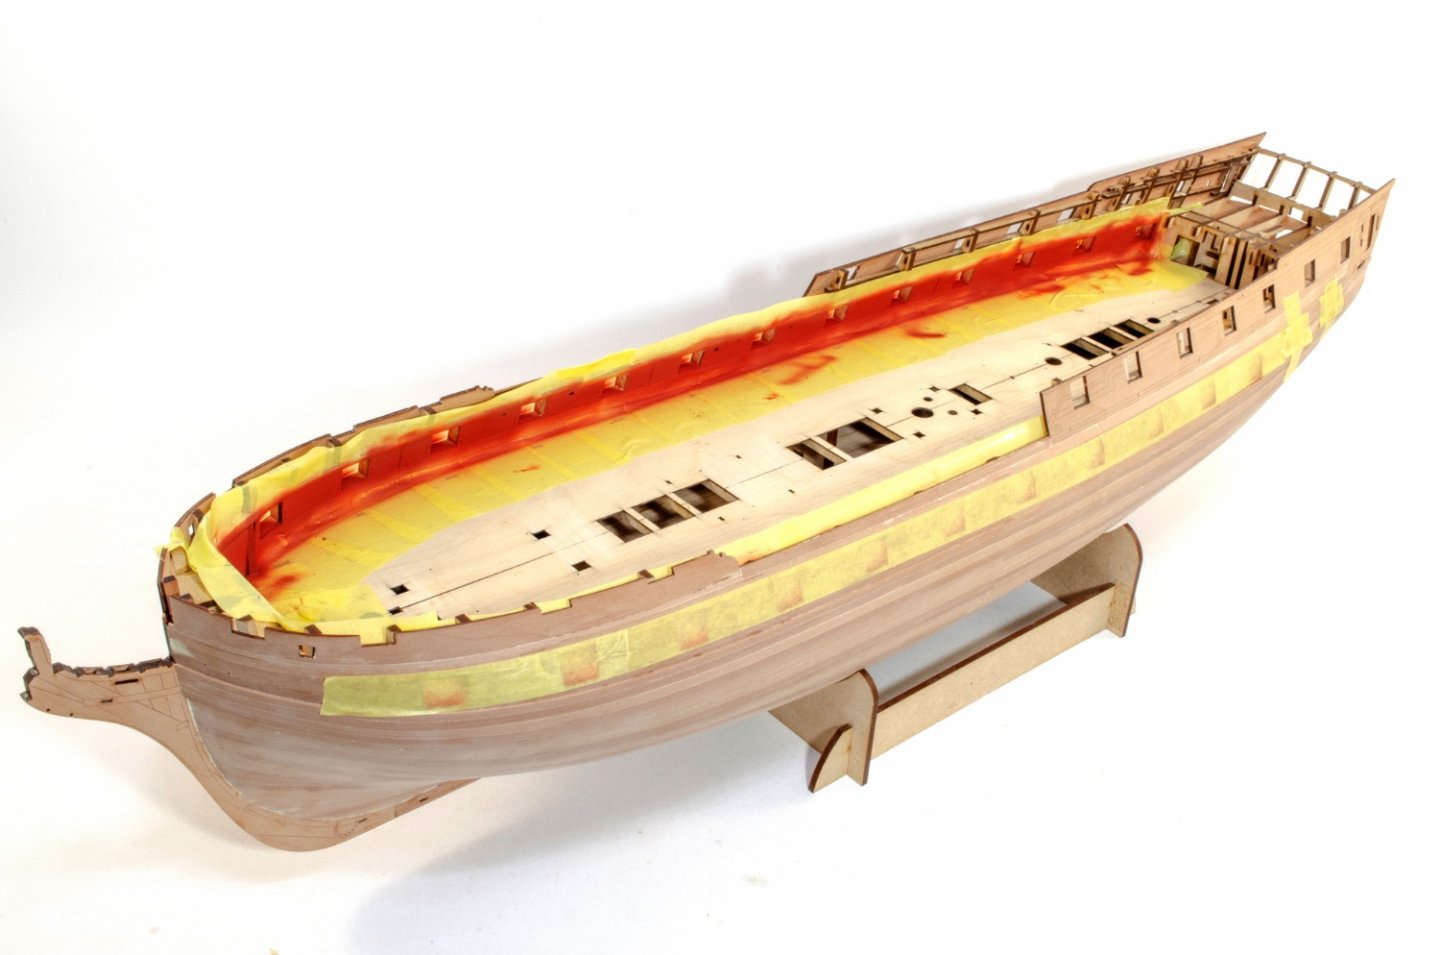
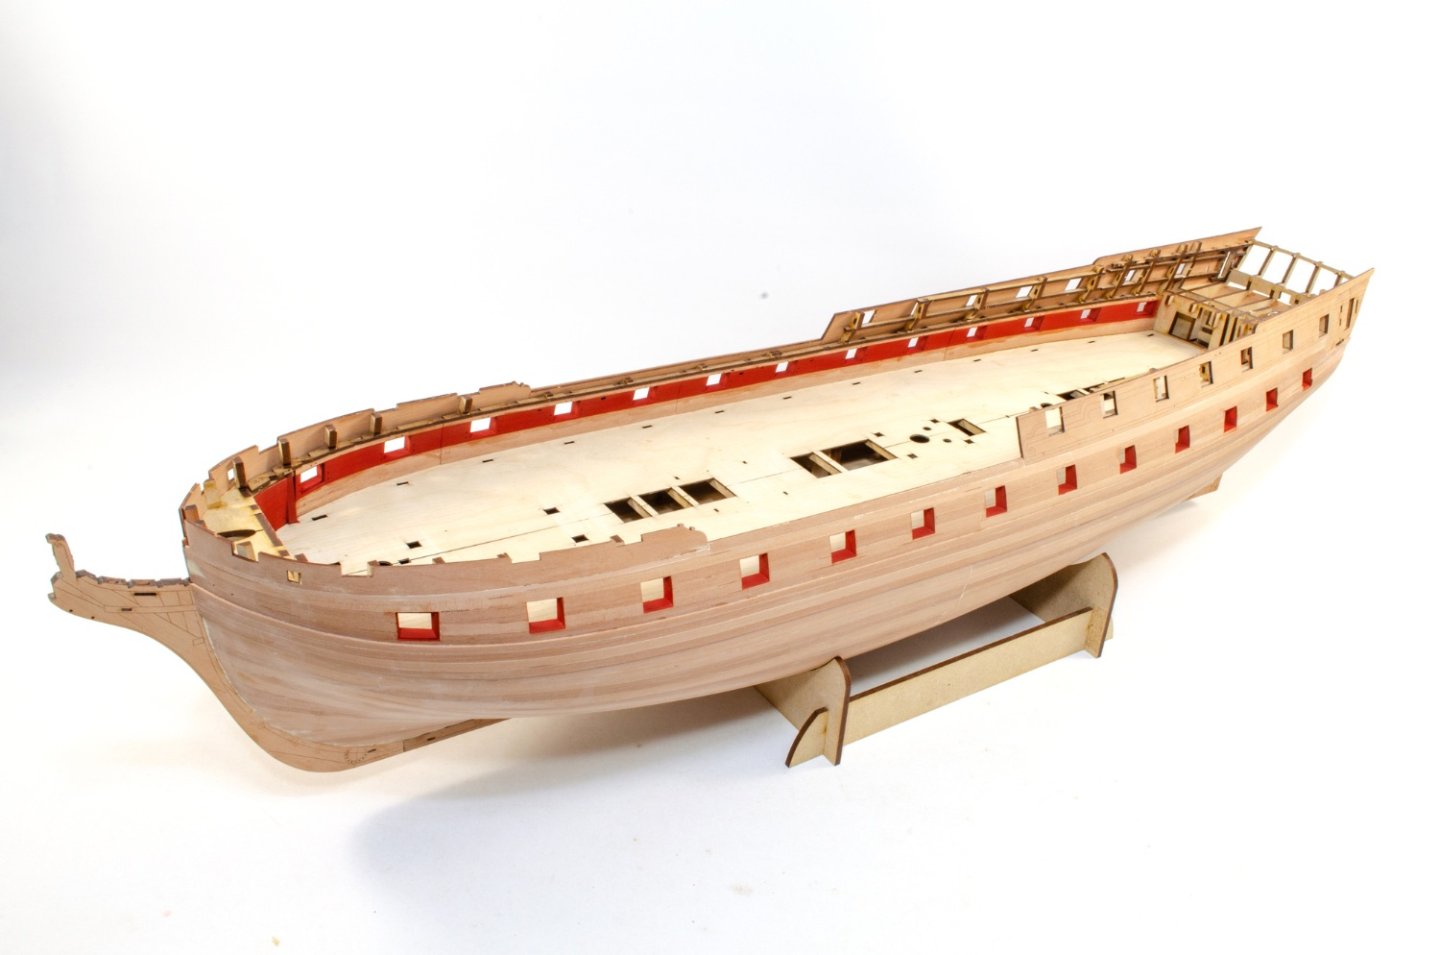
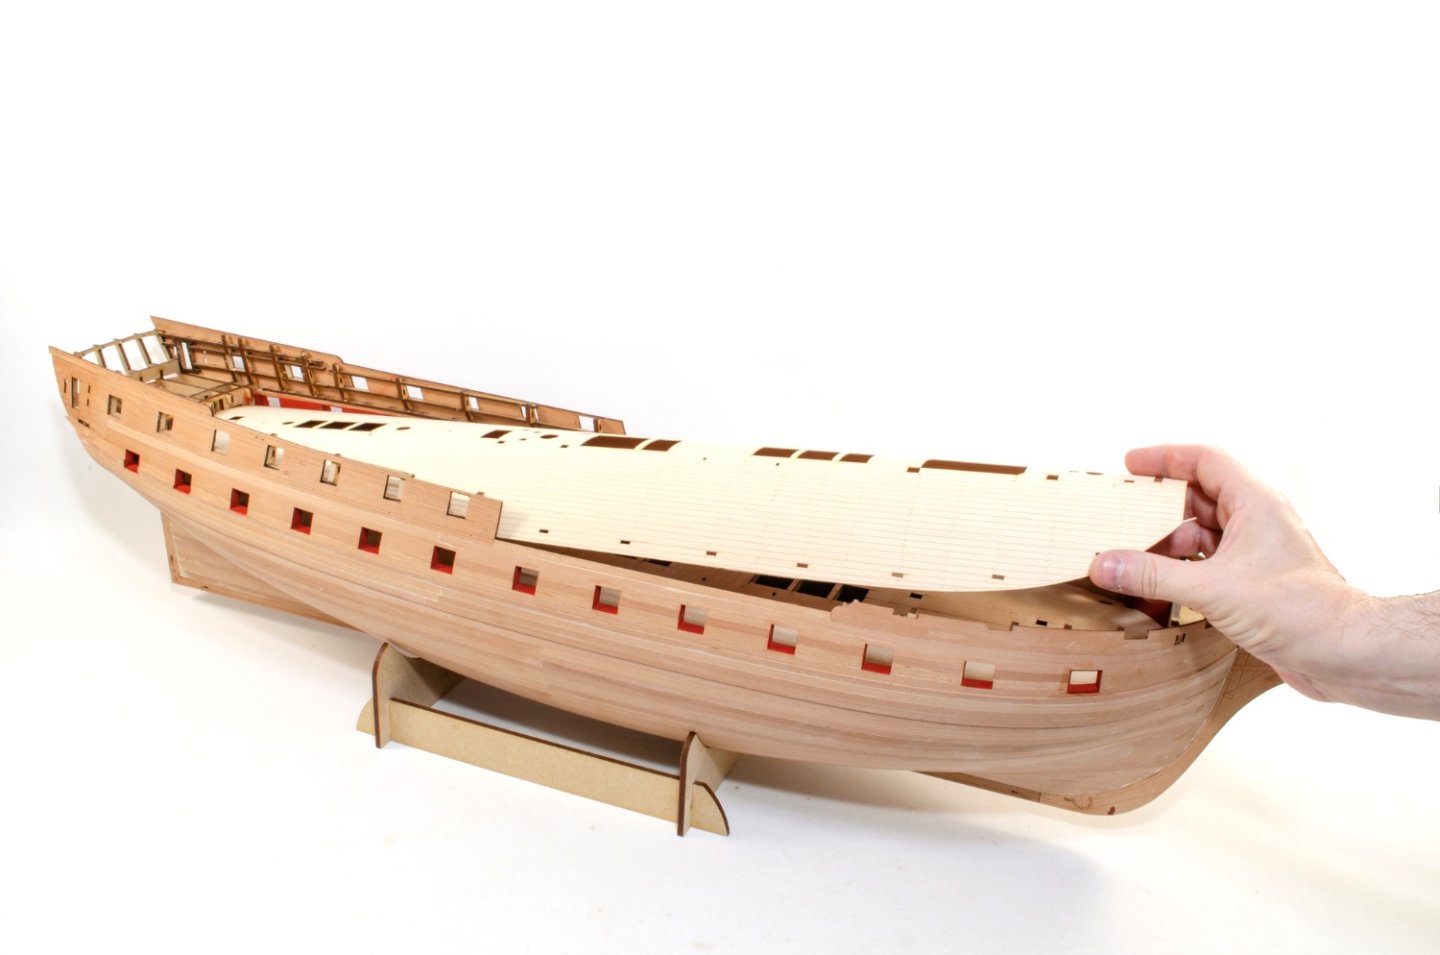
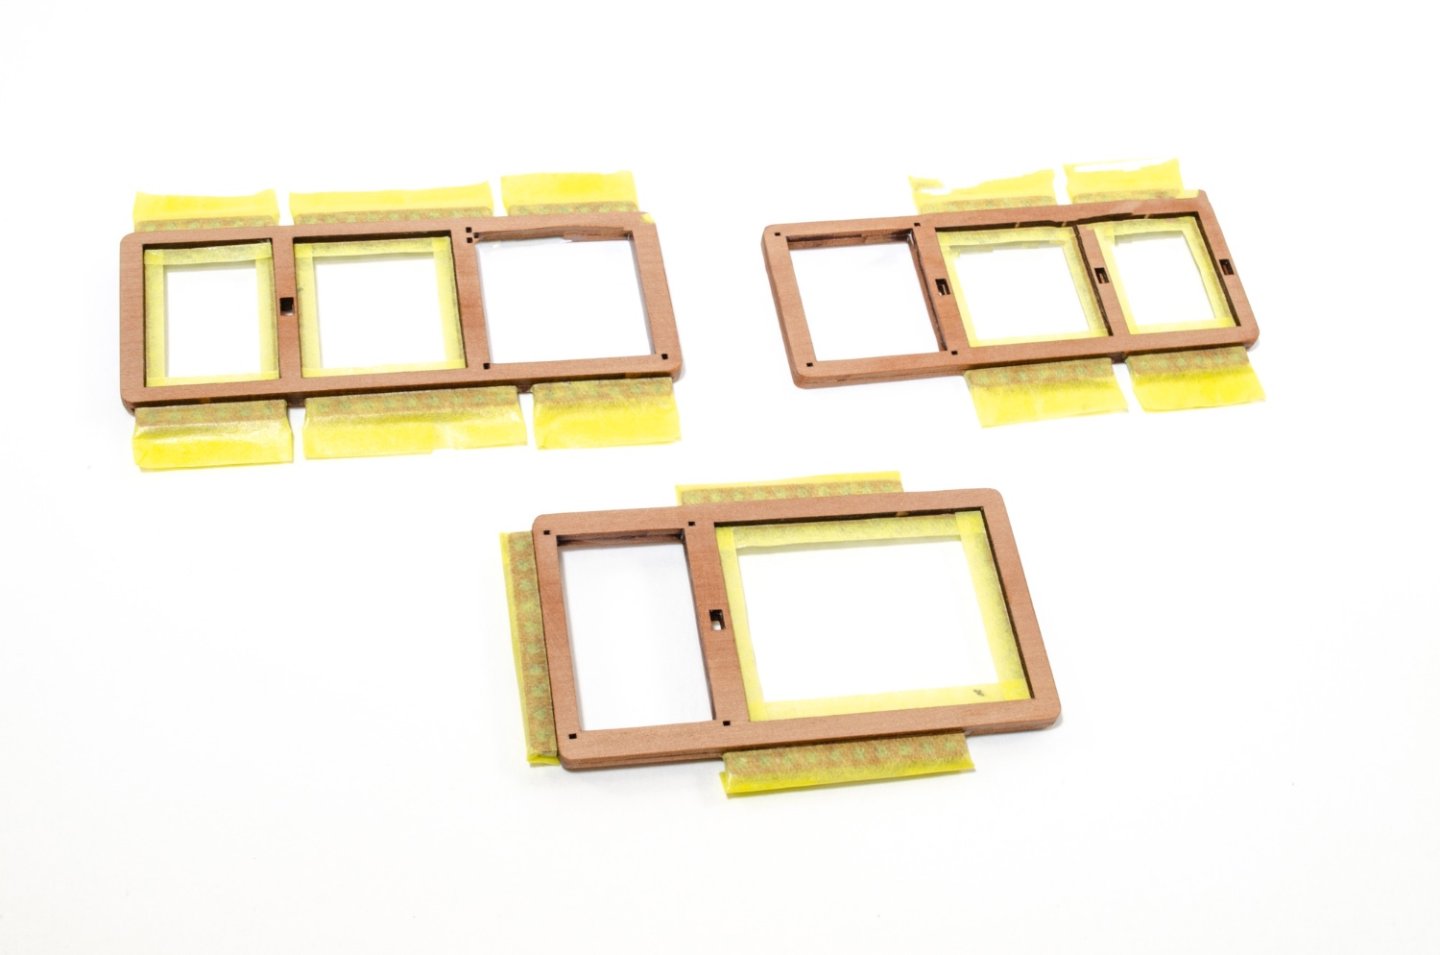
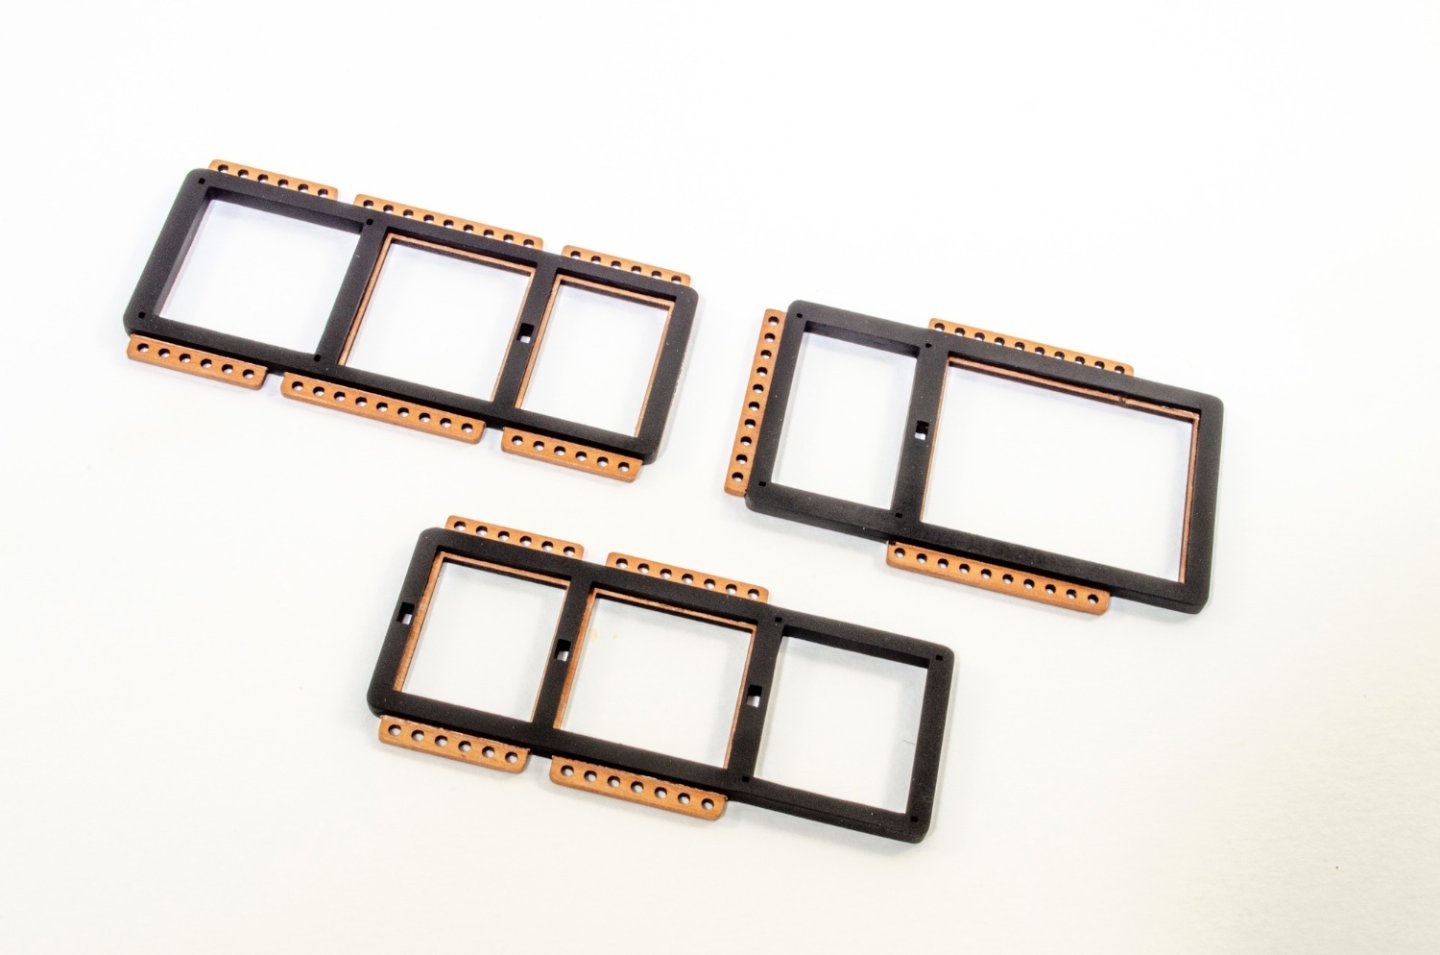
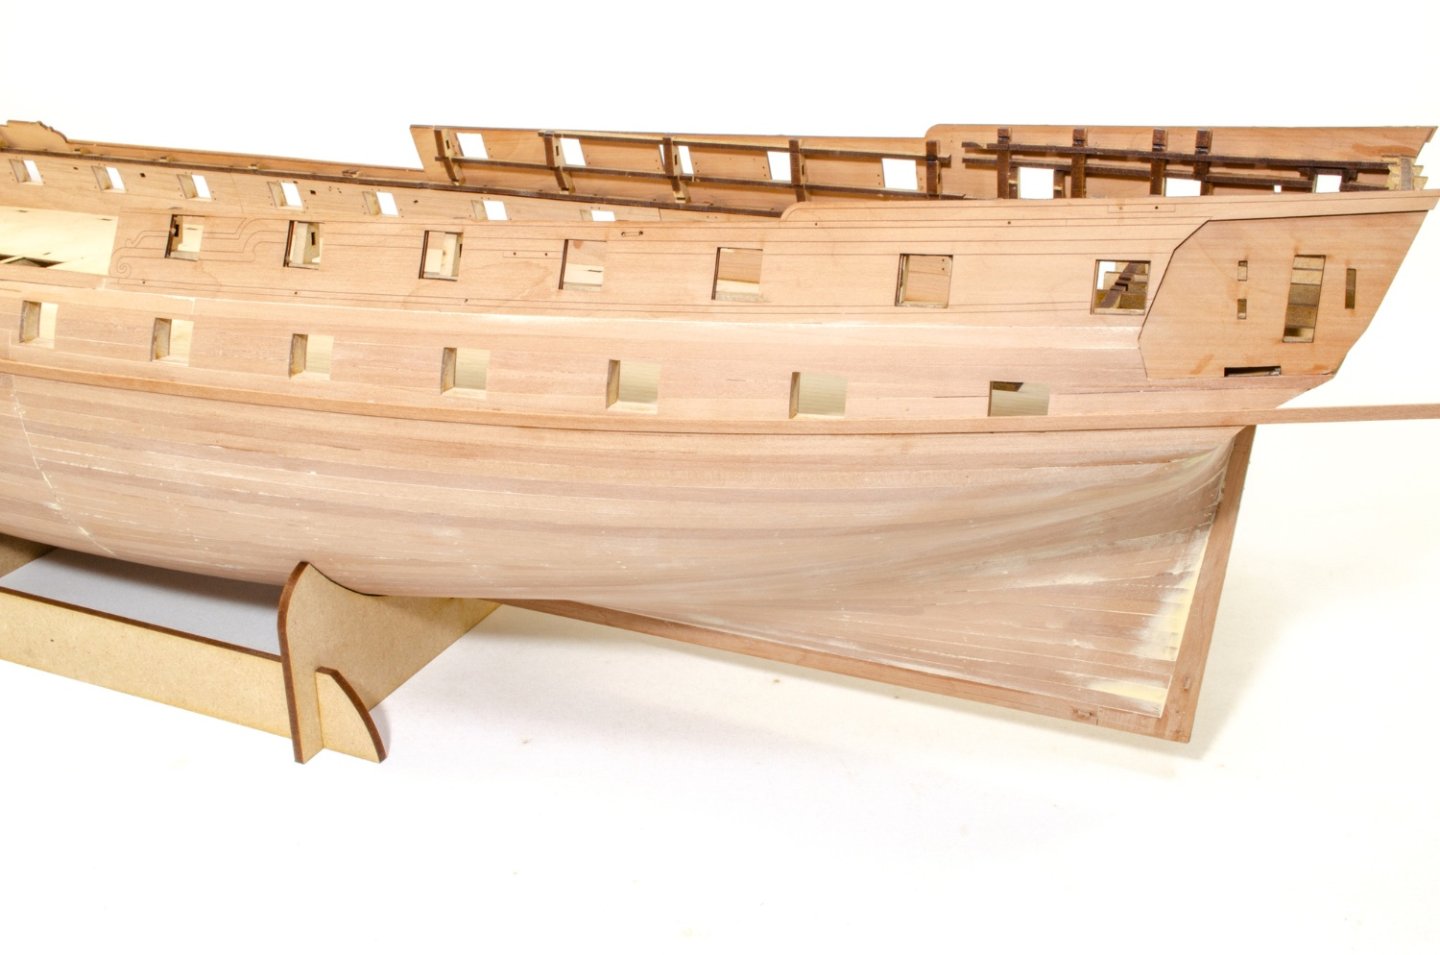
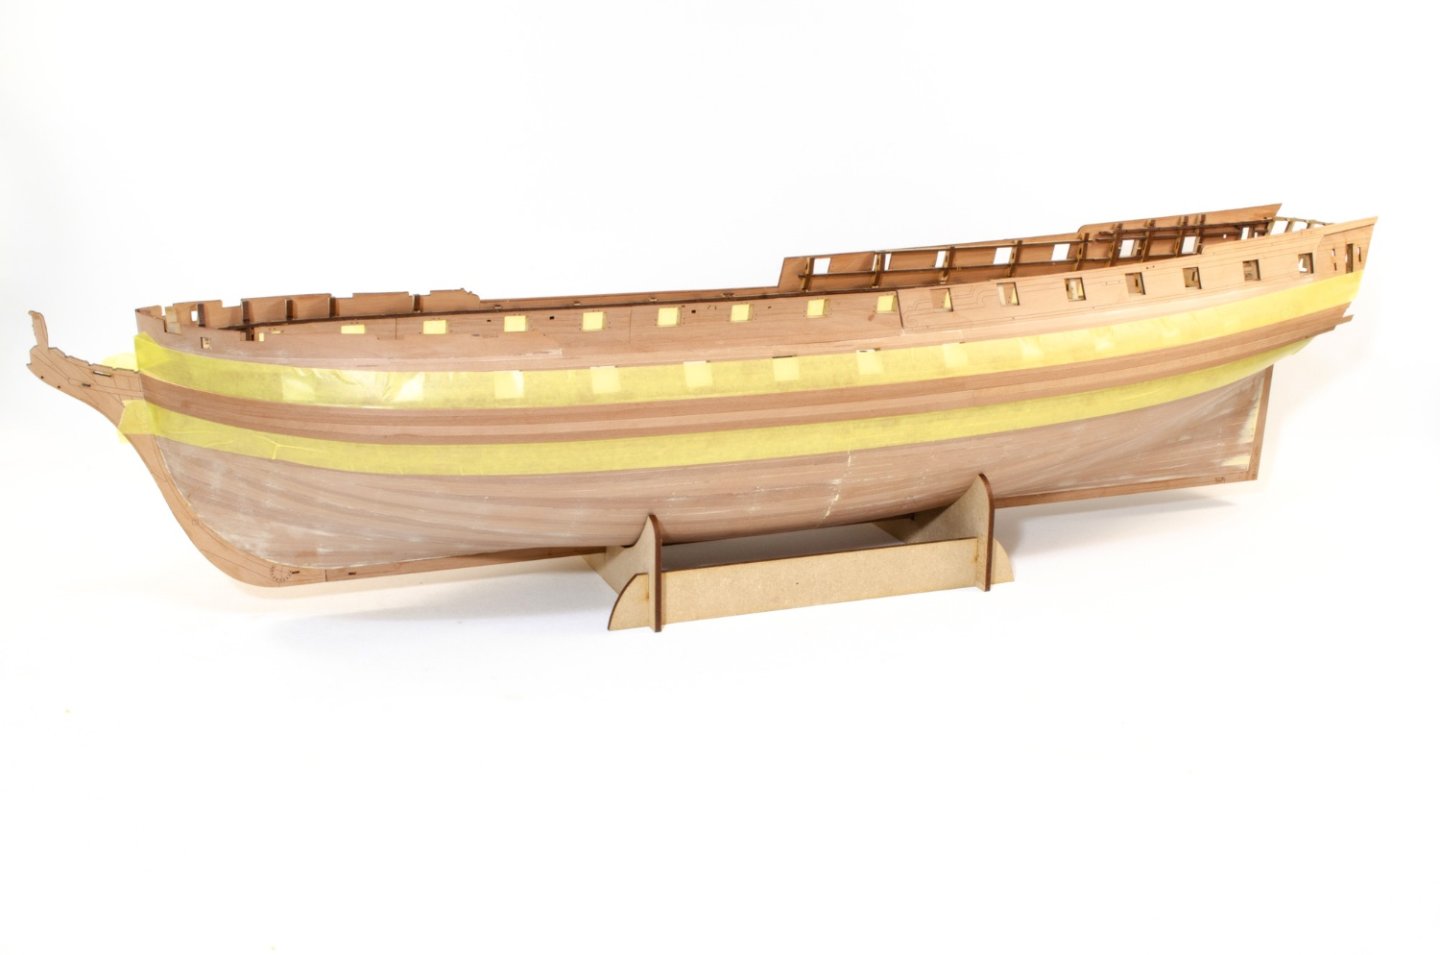
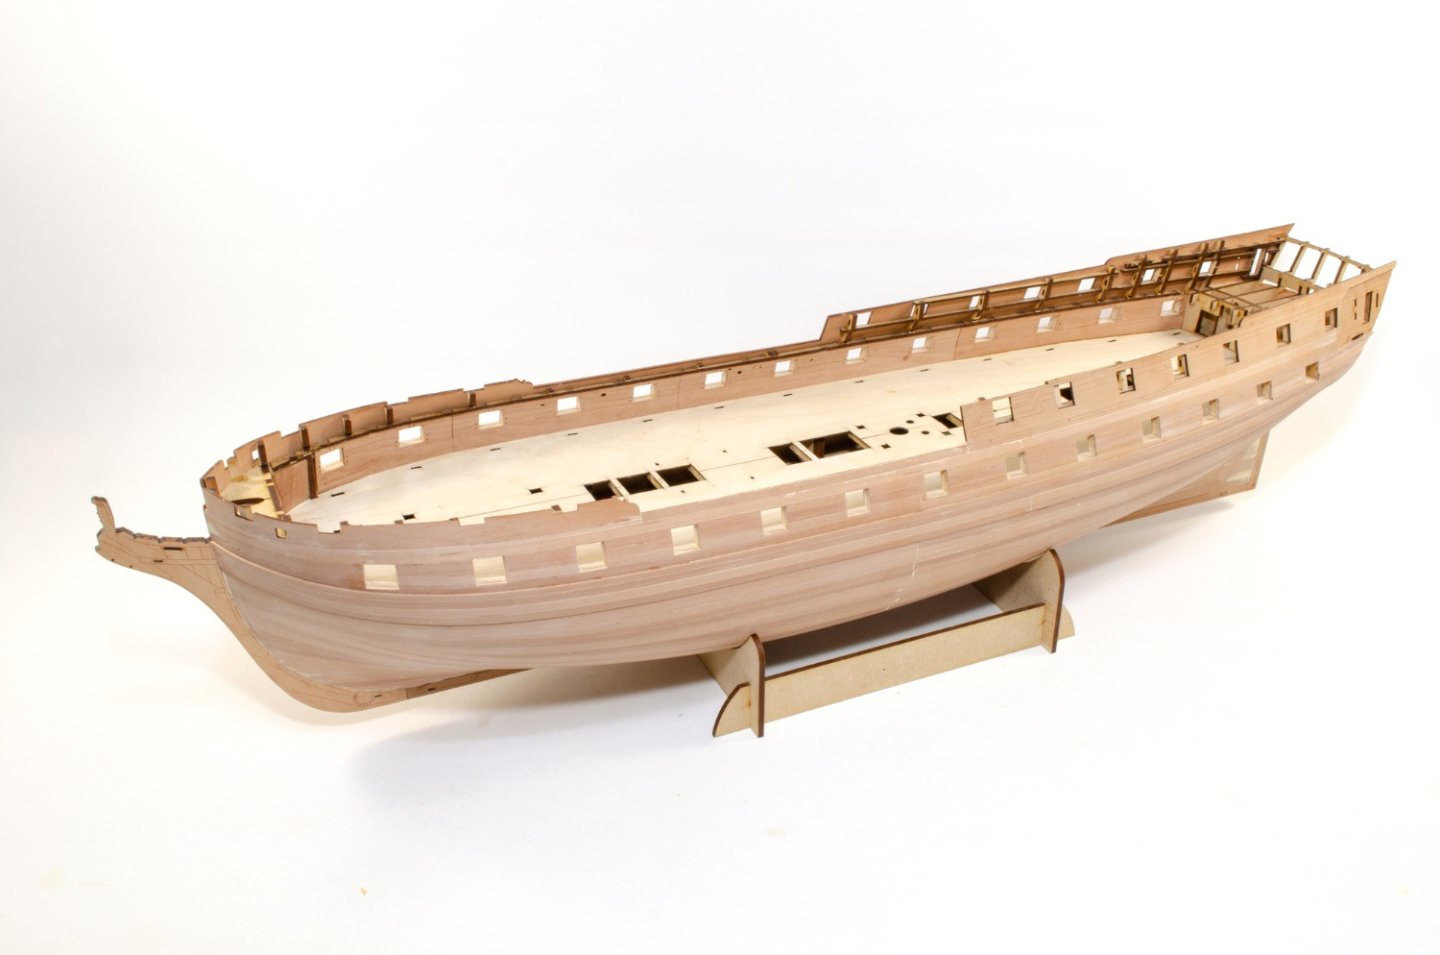
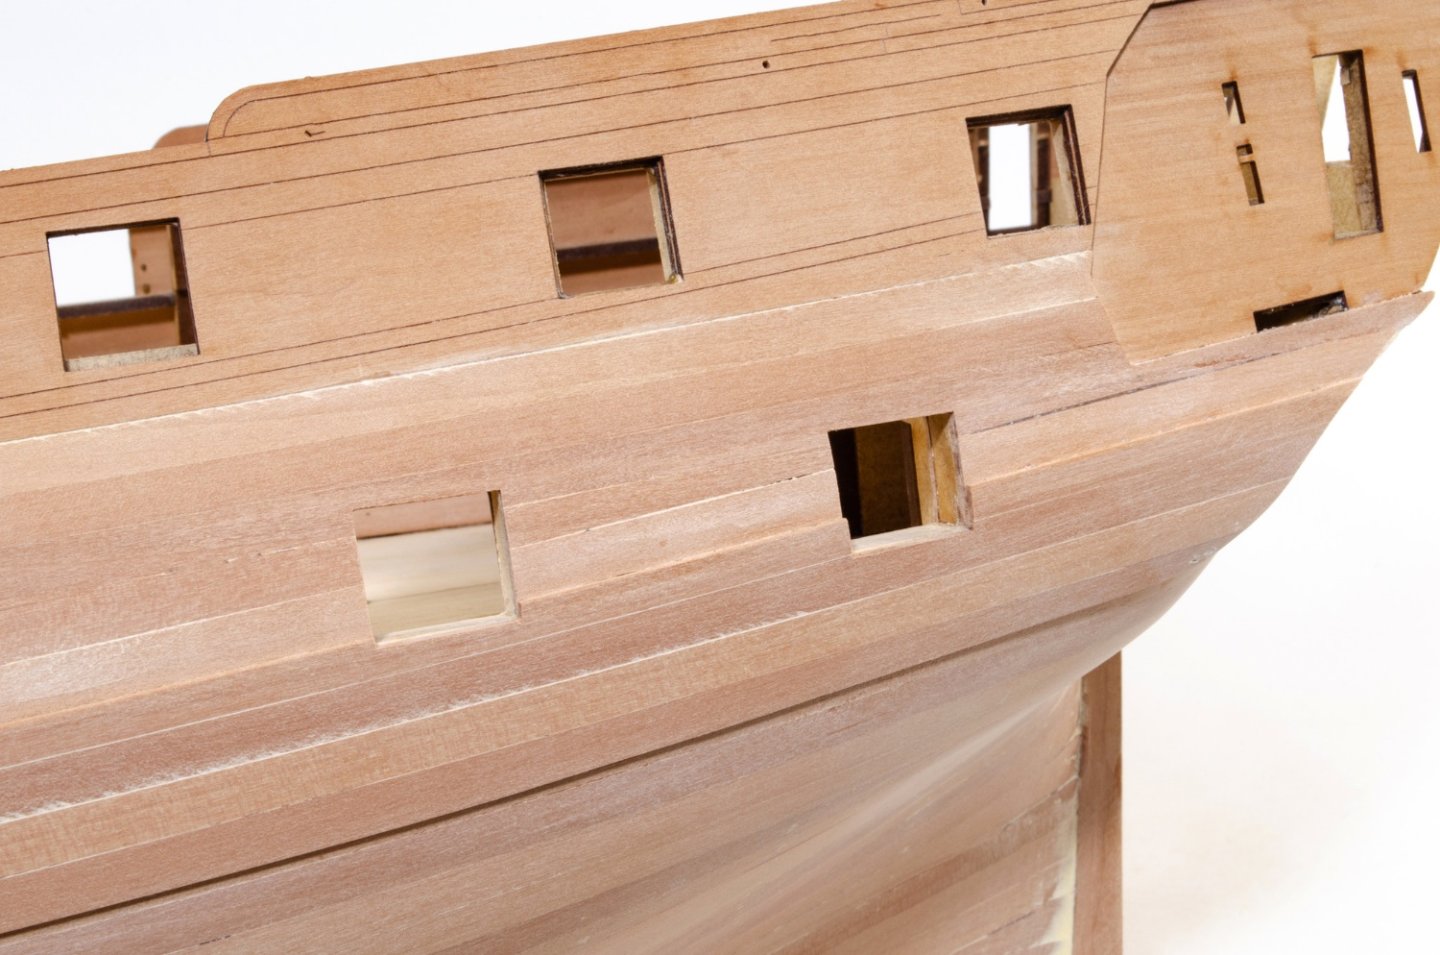
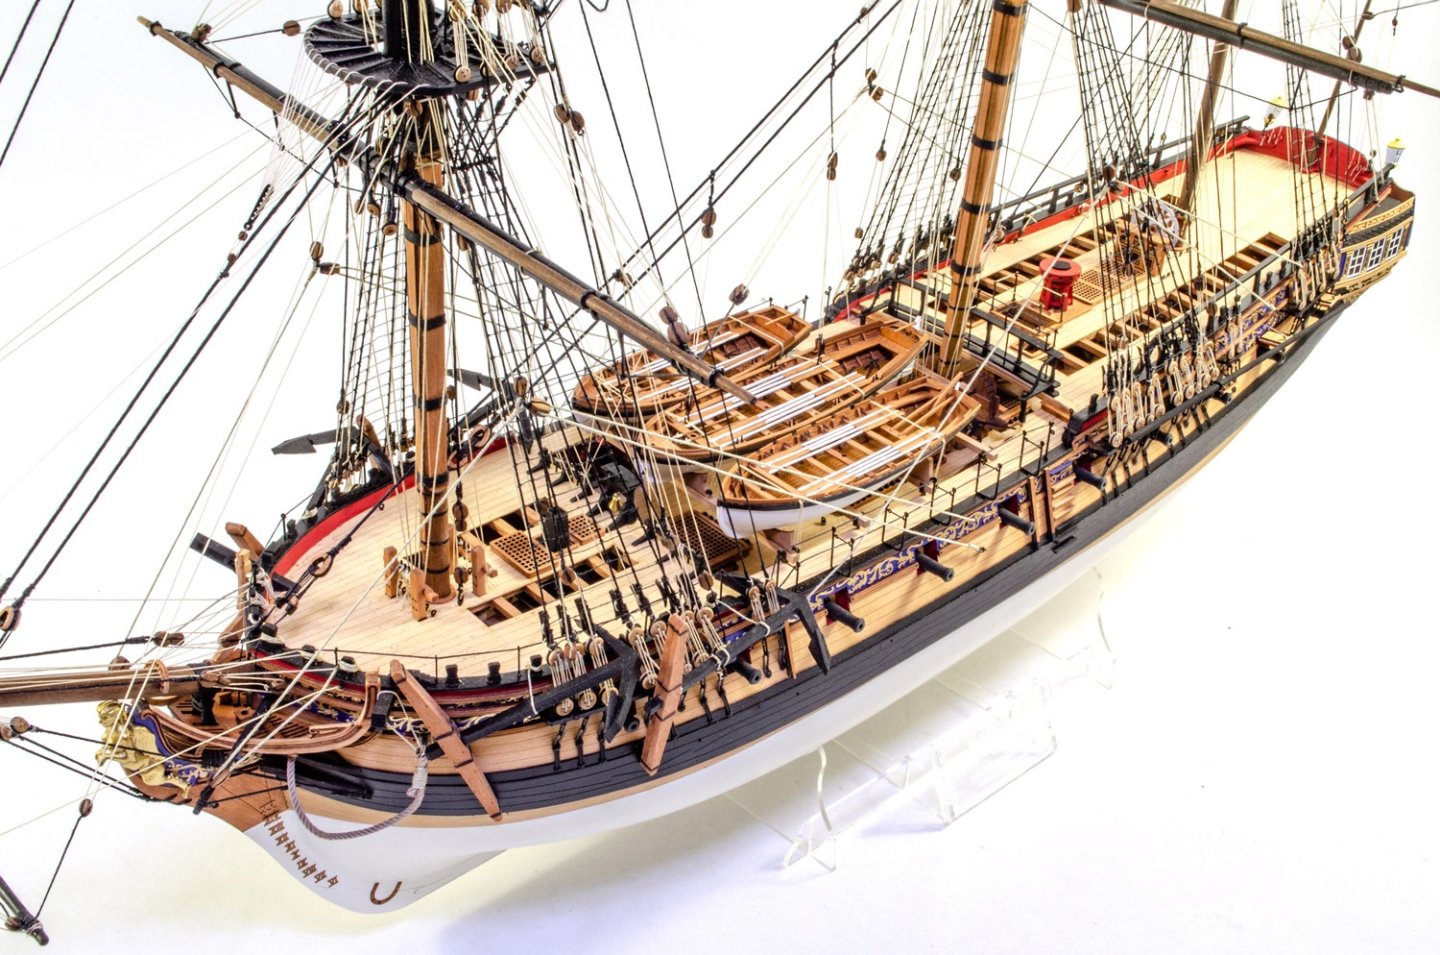
Tiny update as I am doing a few other things in other build areas of Indy too. I now have some colour on the model. I first varnished the exposed strip on the inner bulwarks and then used masking tape before I added paint. For this, I used some Plastikote Red Oxide (same as on the lower fisher hulls) and decanted it from the aerosol so I could airbrush it. The paint was left to de-gas for a few hours. That's important as it'll boil if you try to use or do anything with it when fresh from the rattle can. The paint was then thinned with mr Levelling Thinner, about 60:40 paint to thinner. When completely dry, I airbrushed Tamiya Flat Red over the red oxide. After more judicious masking (and masking the ports off from interior), I did the same paint regime for the gun ports. Once dry, everything was unmasked. The standard kit will be supplied with Red Alder for deck planking. This is a beautiful timber. However, for this, I am using an engraved maple veneer deck. There will be an option for a maple deck, but it's an actual maple deck, not veneer. Fitting the deck will be the same as for this, with a subtle flex and sliding into the rear first, underneath the stern timbers. First though, a test fit should be done and the edges sanded so it lies flat to the bulwark edges. The deck was then glued down and left to dry. In the meantime, the main gu deck coamings were masked and airbrushed in Tamiya Flat Black. The grates will be added after the coamings are fitted, so to reduce rigidity when fitting. More soon(ish)
- 473 replies
-
- Indefatigable
- Vanguard Models
-
(and 1 more)
Tagged with:
-
I'm not sure what a drover is. Also the rig plan instructions are pretty much what I followed when I rigged Sphinx for the manual. I didn't replicate every single rig item as a photo as the drawings suffice and photos of such things aren't easy to take. It'd also bloated the manual out by another 20 pages! 😁
- 73 replies
-
- Sphinx
- Vanguard Models
-
(and 1 more)
Tagged with:
-
Ok, this is derailing an excellent build log with material which is totally pointless. Let's respect what Doug is setting out to do here. If you want a topic on prow tapering, which isn't included on any commercial kit, or ever been asked for to my knowledge, then please open a topic about it ad create discussion there. Same goes for application of a ship's name to the stern, period depending.
- 102 replies
-
- Flirt
- Vanguard Models
-
(and 1 more)
Tagged with:
-
No matter how much work is put into a kit, nothing can ever be absolutely represented in the minutest of detail when the kit needs to be released without the company going bust because it's spending too much time on stuff no one will ever notice. Well, almost no one.
- 102 replies
-
- Flirt
- Vanguard Models
-
(and 1 more)
Tagged with:
-
You're right. Everywhere I've looked, it's out of stock. As it's so widespread, perhaps the kit is now. (temporarily?) out of production?
-
Oh, I also gave the underside another rigorous sanding to really smooth it up.
- 473 replies
-
- Indefatigable
- Vanguard Models
-
(and 1 more)
Tagged with:
-
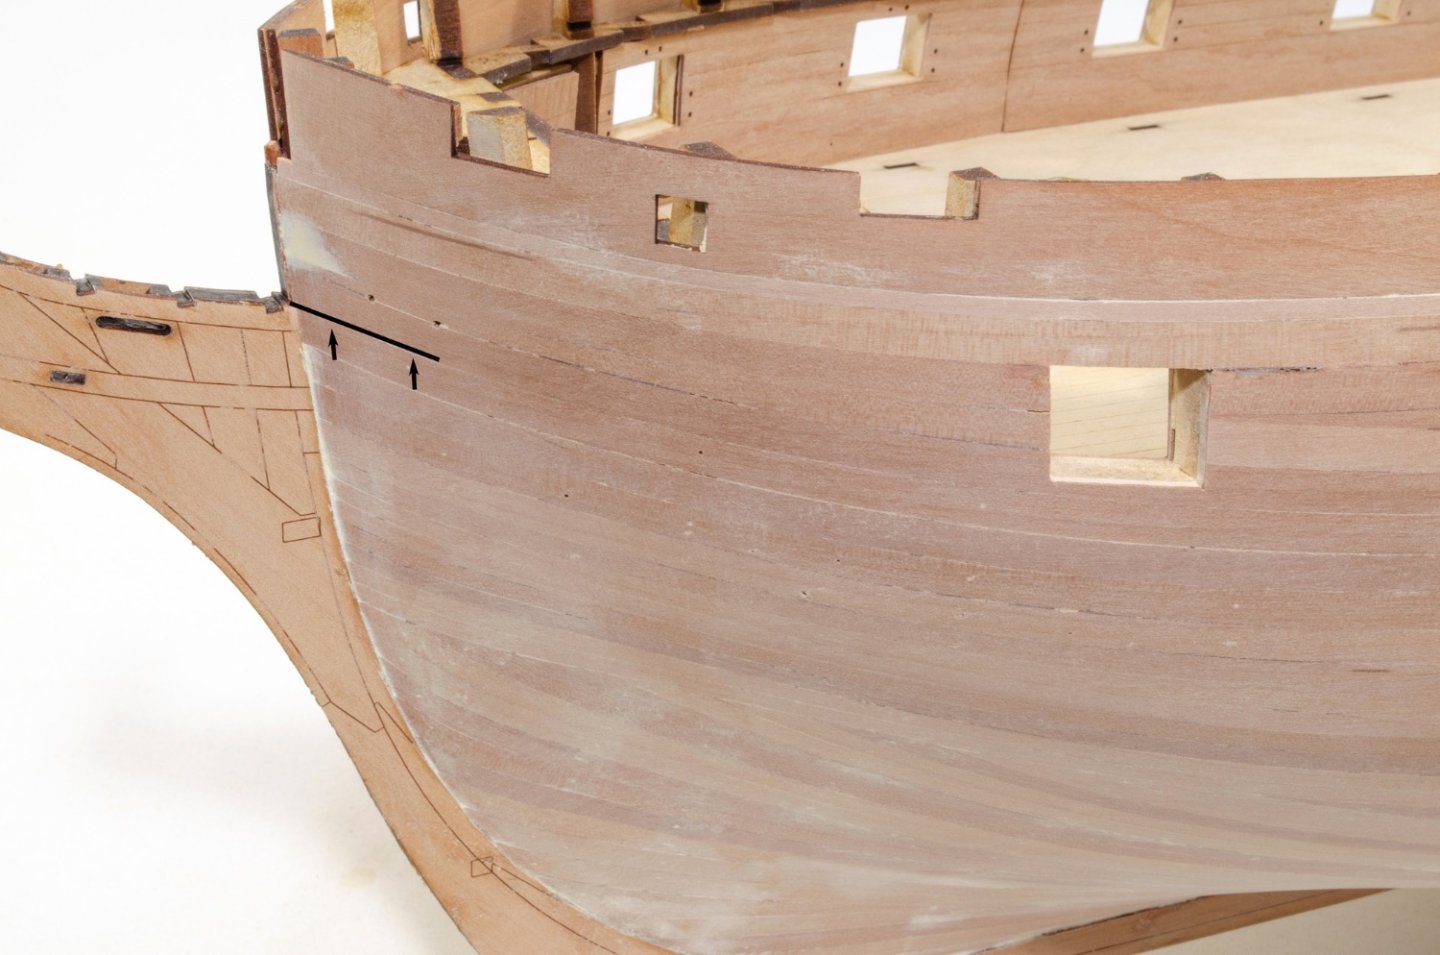
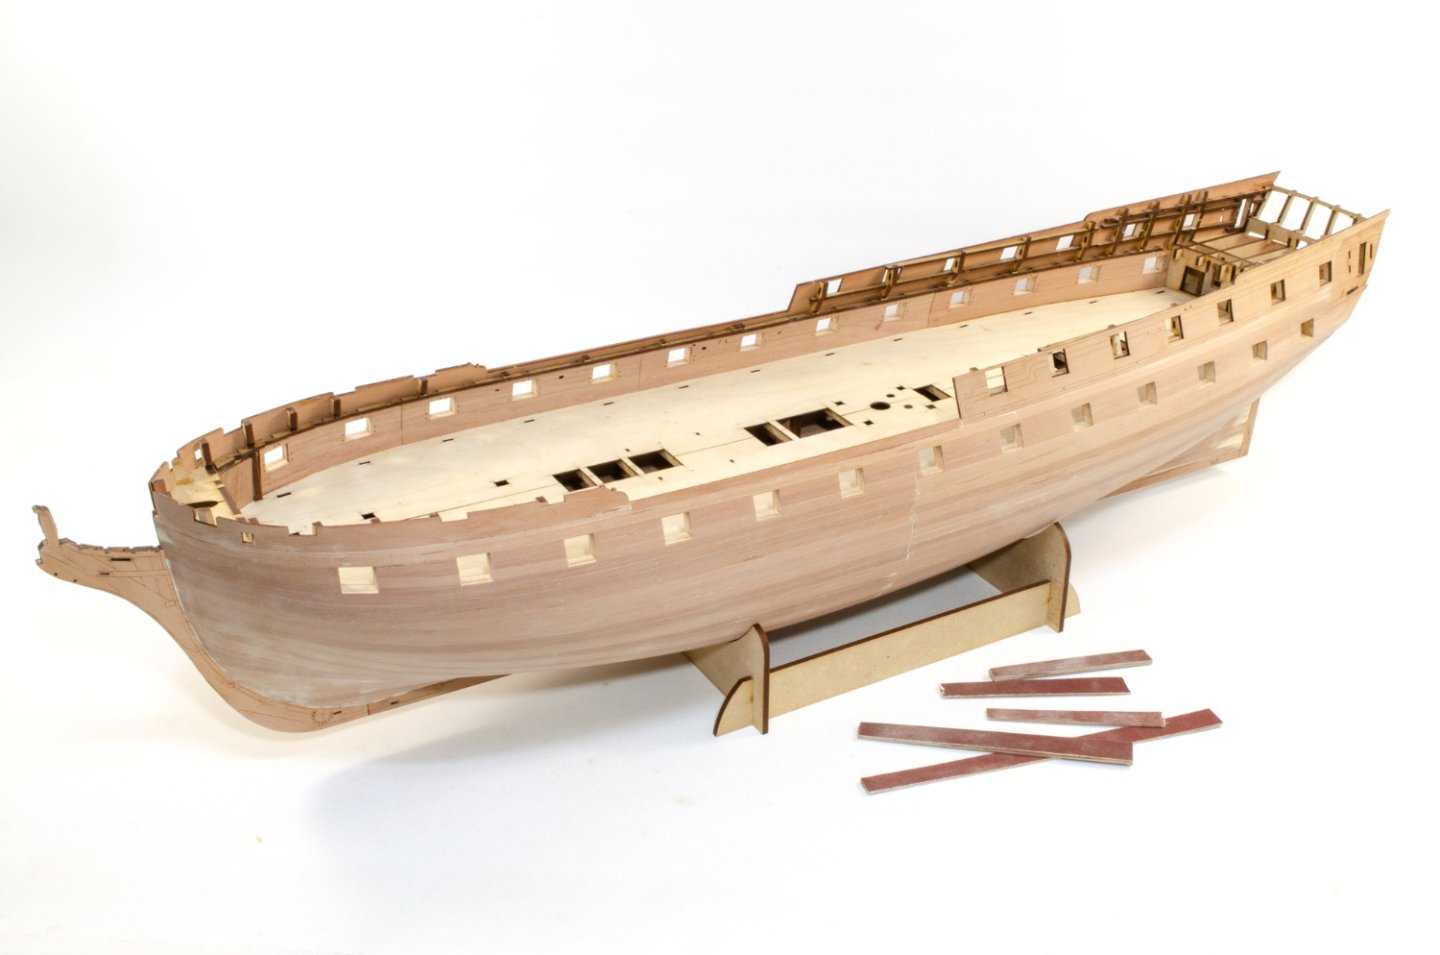
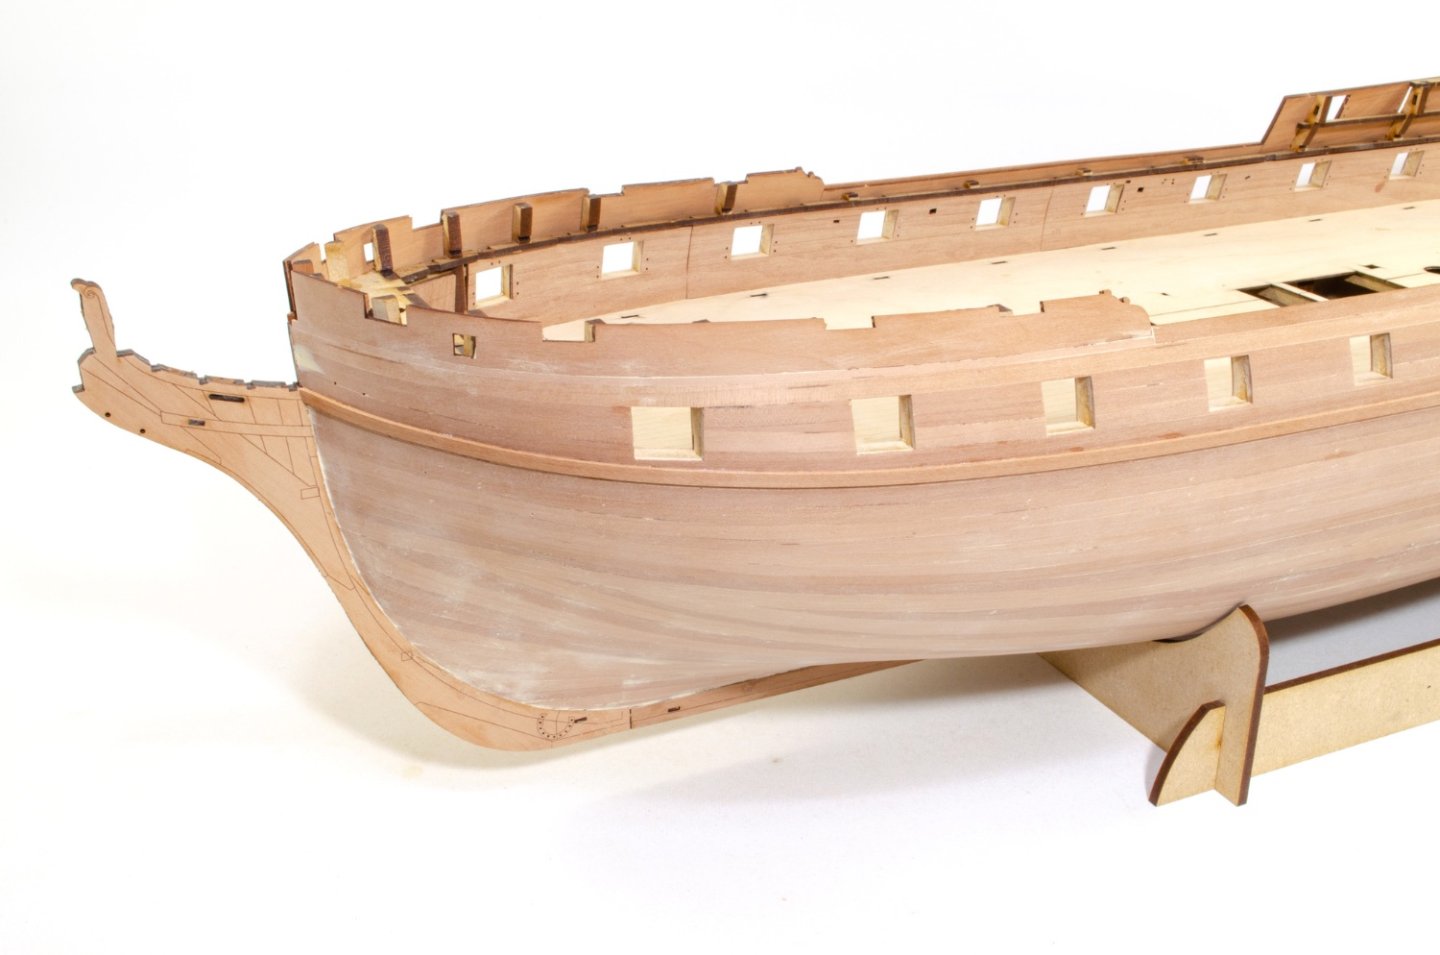
This update shows the basic external finishing of Indefatigable, and at this stage doesn't include the numerous rails etc. that make up the side bulwarks. That's for later in the build. After a LOT of sanding of the second pear planked layer, the gun ports were opened up to their correct size at last. Before using some custom-made sanding sticks for the job, the inner bulwark port openings were trimmed down more or less to the size of the port itself. The sanders were then used to finally clean them up and even out the internal areas. A sharp scalpel was then used to square up any corners properly. If you remember, the first pear plank was laid to be in the exact same position as the the upper strip of the wales. Here you can see the mark that indicates the flow of the plane at the prow. The top also aligns with the top of the prow, so that makes it easier! A 4mm wide strip of 1mm pear is now run from the prow to the stern, following that plank line. I used CA gel for this as I didn't want to use any pins on this area. I've left the plank overlong at the rear so you can see where it runs to. The last two gun ports are also partially obscured by the strip. Now, three 5mm wide pear strips of 1mm thickness are run directly underneath the 4mm strip, again with CA gel. Once in place, I masked off the area on both sides of the wales and sanded the wales smooth. You'll note that I tapered the lower two planks towards the bow, and the lower one plank at the stern. The gun ports are now cut into the wales, and the wales are finally shaped at the stern. These are shaped from the curve of the stern lower counter, and rounded into the underside of the wale. Indy now looks like this. The next update will show some internal work underway.
- 473 replies
-
- Indefatigable
- Vanguard Models
-
(and 1 more)
Tagged with:
-

11 anni di modellismo d'arsenale
James H replied to MICHELE PADOAN's topic in New member Introductions
That is mind-blowing! Thank you VERY much for sharing!! -
At the moment, I've finished the outer hull with copious sanding, cleaned up the gun ports and trimmed to the correct size (including any excess material from the inner bulwark port openings), added the wales and now in final stages of moving on from there. I'll add some pics in the next days.
- 473 replies
-
- Indefatigable
- Vanguard Models
-
(and 1 more)
Tagged with:
-

11 anni di modellismo d'arsenale
James H replied to MICHELE PADOAN's topic in New member Introductions
Outstanding! Ever thought of building a vaporetto too? 😄 I absolutely love Venice and travelling on the waters. -
All the fisher from Vanguard are designed for pure beginners. That was the premise of their design, but still to have loads of detail you wouldn't see on a beginner model. The materials are also higher quality that you normally see, with pear being standard. I can't help with the Polaris or advise it one way or the other.
-

Buying building kits in Norway (Oslo area)
James H replied to ObviousNewbie's topic in Wood ship model kits
Would you not be able to buy online and have shipped to you? I know VM have shipped to Norway with no problems. -

Buying building kits in Norway (Oslo area)
James H replied to ObviousNewbie's topic in Wood ship model kits
Moved topic to correct area. -
Not at all! I didn't take it as such. I know the bow castings for this are metal, but those could be omitted and the planking continued to a sharp point, so no need to sand down metal.
-
That does sort of leave me a little confused. So, if a modeller is aware of the error, then he/she can choose to correct it. Doing so is the simplest sort of correction that a wooden modeller can do. On the other hand, if a modeller is unaware of the error, and chooses to build it per instructions, then that is a 'fatal error'? If a modeller has built the kit as thus, and to a standard that are happy with, then that is somehow a 'fatal error'? Fatal to whom? Perhaps I'm misunderstanding the context in which you use that phrase? A reason I ask this is because I have primarily worked with plastic models, which are extremely difficult to correct if you get an error like this. I would consider that to be a 'fatal error' to a modeller who is knowledgeable about that particular subject, although not to someone ignorant of the error. I also hear some modellers decry any kit which has a flaw in shape etc. which can easily be rectified, and they call it 'unbuildable'. There seems to be a lot of rhetoric/white noise over kits which basic modelling skills can correct. Did OcCre screw up the bow? Yes they did. Is it easy to correct? Yes, very.
-
It's actually very easy to fix. Agreed, it should not have been like that and someone at OcCre dropped the ball, but a 'fatal error'? No, I don't think so.
-

Help for the Noobies
James H replied to drjeckl's topic in How to use the MSW forum - **NO MODELING CONTENT**
Just a quick note: This forum area is for talk of using MSW's software and features, and not any modelling content. -
That was noted in the review, and I also said the model would benefit from a laser engraved deck.
-

Auto login failure
James H replied to Dr PR's topic in How to use the MSW forum - **NO MODELING CONTENT**
Did you flush cache and cookies and then restart your browser? This problem lies somewhere in your browsers inability to recognise your login and sign you in automatically. That tells me some data in a cookie could be corrupt and needs to be flushed out. Did you also test your login on another browser? -
Just to let you all know, Vanguard Models has now made TEN more kits of Sphinx available. Chris is just waiting for some thin pear sheet to arrive from Germany, then he can add the last parts to these kits before a proper restock. Any Sphinx kits ordered in the next week or so will be dispatched the week commencing 29th August '22. This will let those that are thinking about buying the kit while the VM Summer Sale is still on, to get one so they don't miss out while the kit would normally be out of stock. If you're thinking about a Sphinx, time to get in there whilst there's a £70 sale reduction! https://vanguardmodels.co.uk/product/hms-sphinx-1775/
About us
Modelshipworld - Advancing Ship Modeling through Research
SSL Secured
Your security is important for us so this Website is SSL-Secured
NRG Mailing Address
Nautical Research Guild
237 South Lincoln Street
Westmont IL, 60559-1917
Model Ship World ® and the MSW logo are Registered Trademarks, and belong to the Nautical Research Guild (United States Patent and Trademark Office: No. 6,929,264 & No. 6,929,274, registered Dec. 20, 2022)
Helpful Links
About the NRG
If you enjoy building ship models that are historically accurate as well as beautiful, then The Nautical Research Guild (NRG) is just right for you.
The Guild is a non-profit educational organization whose mission is to “Advance Ship Modeling Through Research”. We provide support to our members in their efforts to raise the quality of their model ships.
The Nautical Research Guild has published our world-renowned quarterly magazine, The Nautical Research Journal, since 1955. The pages of the Journal are full of articles by accomplished ship modelers who show you how they create those exquisite details on their models, and by maritime historians who show you the correct details to build. The Journal is available in both print and digital editions. Go to the NRG web site (www.thenrg.org) to download a complimentary digital copy of the Journal. The NRG also publishes plan sets, books and compilations of back issues of the Journal and the former Ships in Scale and Model Ship Builder magazines.

