HOLIDAY DONATION DRIVE - SUPPORT MSW - DO YOUR PART TO KEEP THIS GREAT FORUM GOING! (Only 20 donations so far - C'mon guys!)
×


James H
-
Posts
6,067 -
Joined
-
Last visited
Content Type
Profiles
Forums
Gallery
Events
Everything posted by James H
-
The first prototype was built by Chris, and he was doing this as a full time job and Amati employee. For me.....I work full time in education, so my building time will be evenings, weekends and holidays, but I do promise that I will move as quickly as I can so long as I don't compromise quality.
-
Amati have so far printed the plans for me and had the PE and wood parts made. They are awaiting the return of high-pressure castings for the various fittings/cannon etc. and then this will be on its way to me. I'm thinking between 2 and 4 weeks at the moment. Some delays did creep in, but they now look sorted. From there, I have about 18 months to build the hull to completion as the masting is via drawing. I still think this is around 2yrs from release. There will be a build log here as soon as I get everything in the workshop.
-

Recommended toolkit for beginner
James H replied to Niall's topic in Modeling tools and Workshop Equipment
I think I built my first models with the following: steel rule cork sanding block and sandpaper scalpel knife 12" steel rule fine tweezers pin pusher steel set square jeweller's files toffee hammer long nose pliers small clamps pin vice and assorted small drill bits Amati plank nipper Hope that helps. -
HMS Vanguard Victory models /Amati which to buy?
James H replied to Ian B's topic in Wood ship model kits
Import duty from US is high, and for something of this value, it would be crippling. Importing from the USA to the U.K. is staggeringly expensive, not to mention the actual postage of something large and heavy (plus we pay import fees that are partially calculated on shipping), hence the reason I gave a local seller. I’ve paid £60 once on duty for a parcel costing half of that. It’s shocking. You’d easily look at adding a good £200 plus in duty alone. -
HMS Vanguard Victory models /Amati which to buy?
James H replied to Ian B's topic in Wood ship model kits
You ordering soon? Can't wait to see this one! I know Cornwall Model Boats are currently have it in stock, and it's not (relatively) too far from you 😉 -
HMS Vanguard Victory models /Amati which to buy?
James H replied to Ian B's topic in Wood ship model kits
Thanks for the correction. I definitely stand corrected on that. 😅 -
HMS Vanguard Victory models /Amati which to buy?
James H replied to Ian B's topic in Wood ship model kits
You are right. Products have various revisions, and I think the number on the kit review below (Catalogue # 1300/04) means it's the 4th revision. As this kit came directly from Amati in Turin, to me last June, it's safe to presume that is the latest revision. To be honest, any changes are usually very minor, but there's a possibility that it originally had wooden gun carriages instead of the cast things in there now. It's no biggie to fix that though. As these are high value items for shops to stock, you can assume that anything they have in won't have been sat on the shelf for too long either. I wouldn't worry too much about kit revisions at this stage when it comes to Vanguard. -
Welcome to MSW! That's quite a stash! Ok, out of those, I think you should tackle Artesania's Swift 1805. That looks more than doable for a modeller who has at least experience in another medium (plastic). It's a simple model and the rig is straightforward. You're a way off Vanguard yet. You really do need to get a few simpler but progressive projects under your belt first, but when you do opt for Vanguard, I highly recommend the Amati. We have a review here: Please crack open that Artesania kit and let our members help you through it. What tools do you have? A good start is at least a sanding block, Amati plank nipper, fine saw, nail pusher etc. We have a superb topic for you to read here: Here's another very useful topic: The moot point here is that we are here to help. MSW is the largest model ship forum in the world and the experience we have here is amazing, with members that will guide you along the way. Never feel that any question is stupid. We all start somewhere and what we want is for you to get to that holy grail you seek and accumulate the experience to get there, plus the enjoyment in doing so.
-
Wow, I've never seen that kit before! Maybe one day you'll build it here?
-
HMS Terror by Mish - OcCre - 1:65
James H replied to Mish's topic in - Kit build logs for subjects built from 1801 - 1850
Looking real good! -
HMS Terror by Mish - OcCre - 1:65
James H replied to Mish's topic in - Kit build logs for subjects built from 1801 - 1850
Nice to see you make a start on this one. Terror is a lovely kit and I'm more than sure you'll do it real justice. Looking forward to the rest of the build. Oh....and this... -
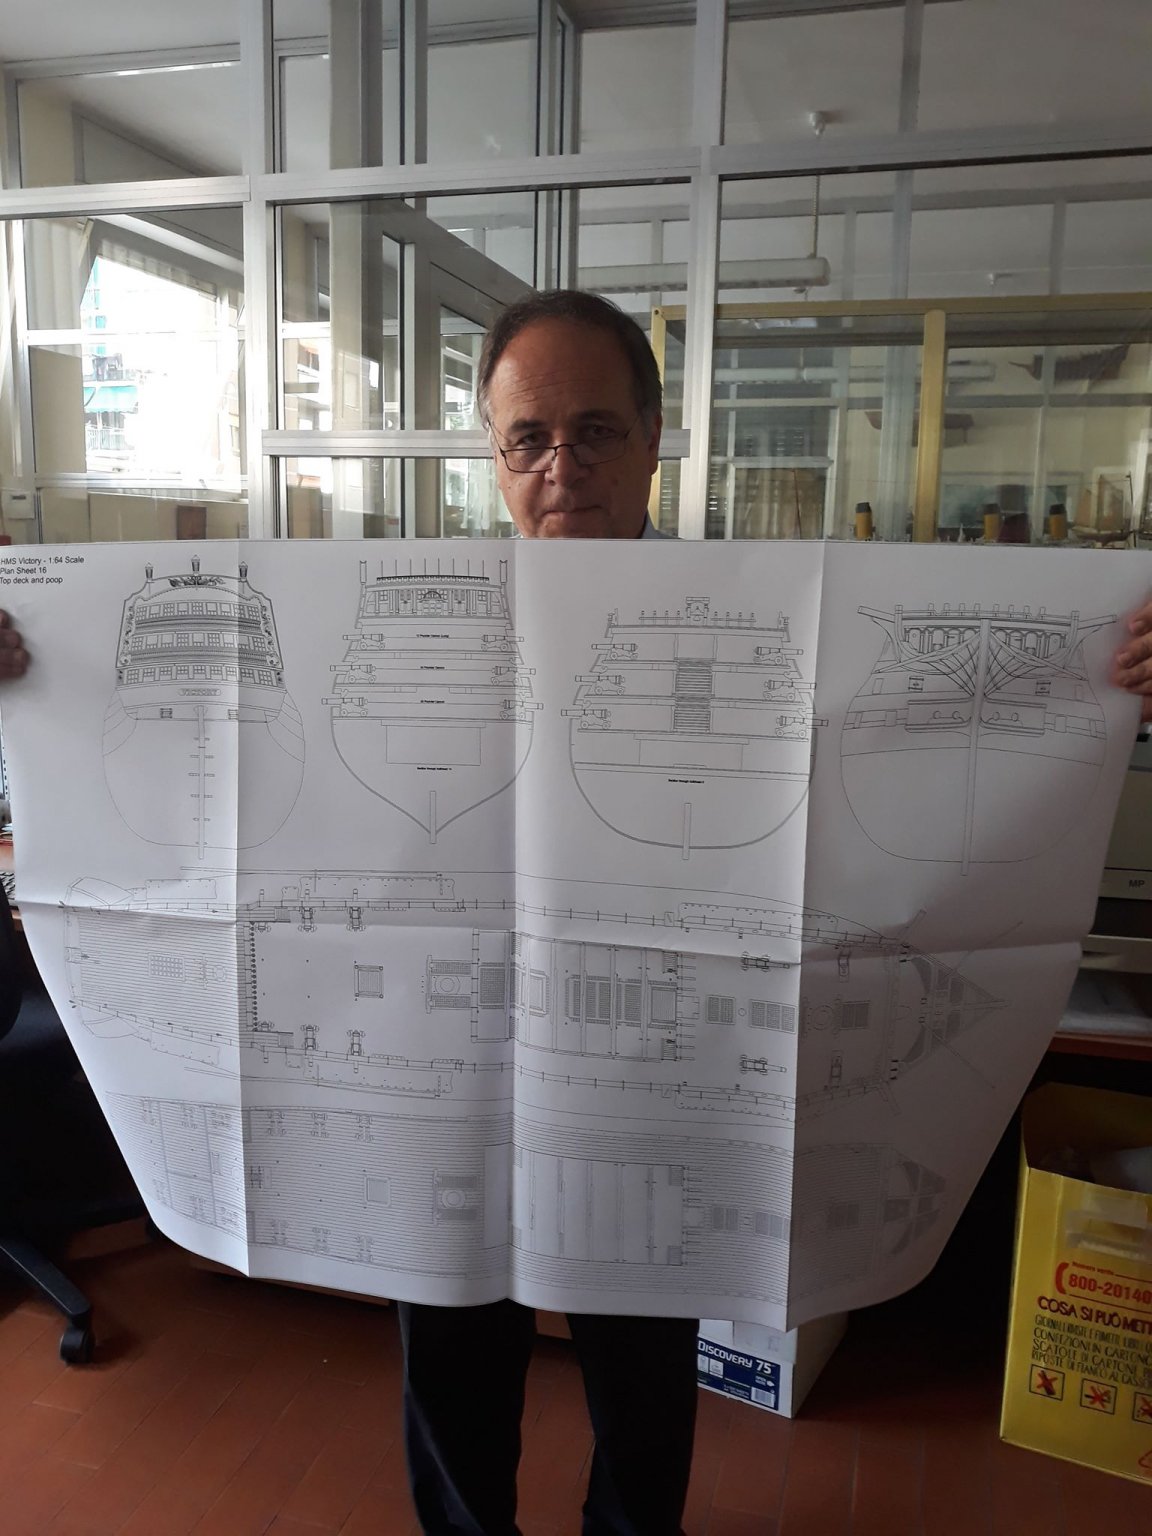
...just to prove there's movement here, here's Emilio, Amati's boss, with one of the many full-size plan sheets he's had printed for me. The timber parts will be with him very soon.

-
I believe it was an original agreement/arrangement between Amati and Model Expo, but now not in operation.
-
No waiting list, but you are looking a couple of years yet. There is a link on this topic with some build photos from Chris showing the prototype. In the next month or so, you'll be able to follow a second prototype build here on MSW as I do the Victory for their instruction manual. Stay tuned!
-
Glad my review of the Vanguard brought you here! Love to se more of your CAD.
-
Did you make any progress/drawings for the changes at all?
-
You're welcome. I look forward to seeing you tackle one of these. It's a lovely kit.
-
I'm I'm honest, Beagle is doable as a first model if you ask questions, progress slowly and also have a forward-thinking mind. If you've ever made models before, either plastic or wood, then this model is within your grasp. My first ever kit, against the advice of some folk I knew, was Artesania's San Francisco, and that turned out real well for me. It's certainly no less difficult than Beagle. I found the whole process a fantastic learning experience, plus the videos that OcCre made will help to create a pleasurable experience. Of course, we are always around to ask too!
-
My review, here at MSW:
-
Incorporating them into frames and bulkheads is genius. No templates or guesswork. An extract from Chris's original Amati Victory manual:

-
As a quick update, Amati are currently printing the full size plan-set for me and the MDF, ply and PE parts will shortly be cut and sent over. They are now sourcing the high-pressure castings for the cannon and other fittings. I now have the instruction manual that Chris Watton put together, and this will serve as the basis for building the Victory and producing a manual for them in their current format. I'm busy studying the build from the keel upwards! The manual Chris made is actually very good and very much of the style you see in his new Alert kit, but Amati want the whole lot shot against a white background in a photo-caption style format that you see in their recent kits such as the Orient Express Sleeping Car etc. These are glossy, perfect-bound books. I've had some long talks with Amati over the last months. Things are now moving along!
-
It's far better than my Norwegian! 😂 Welcome to MSW. I'm sure you'll have many happy hours here with all of our content. Looking forward to seeing Pickle too.
-
Amazing details. Absolutely blown away
-
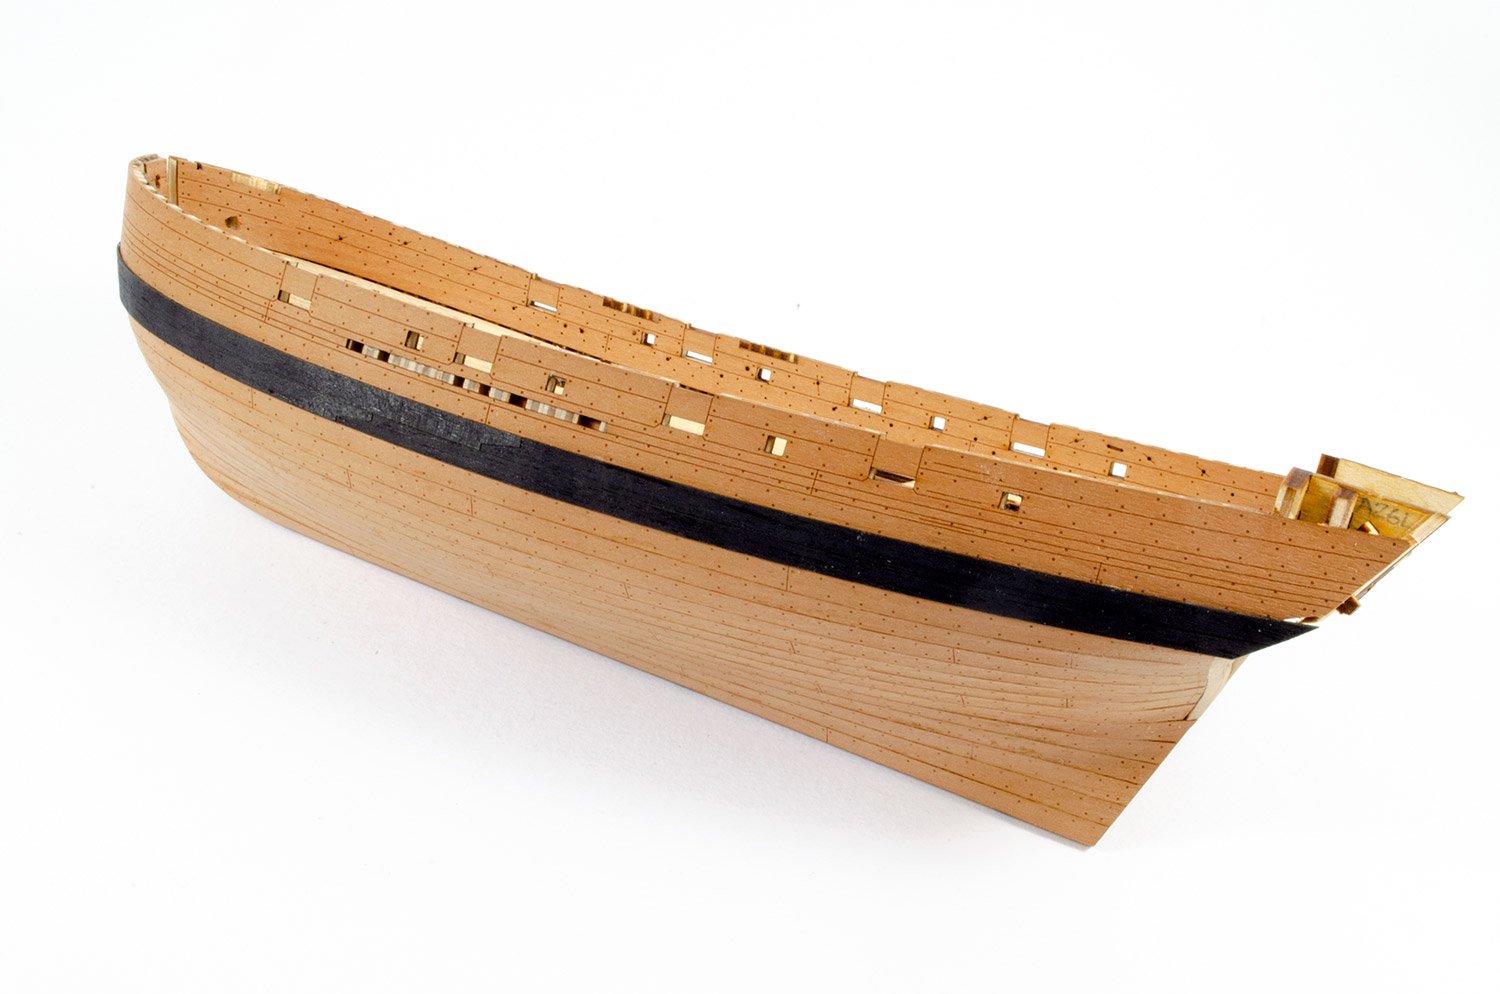
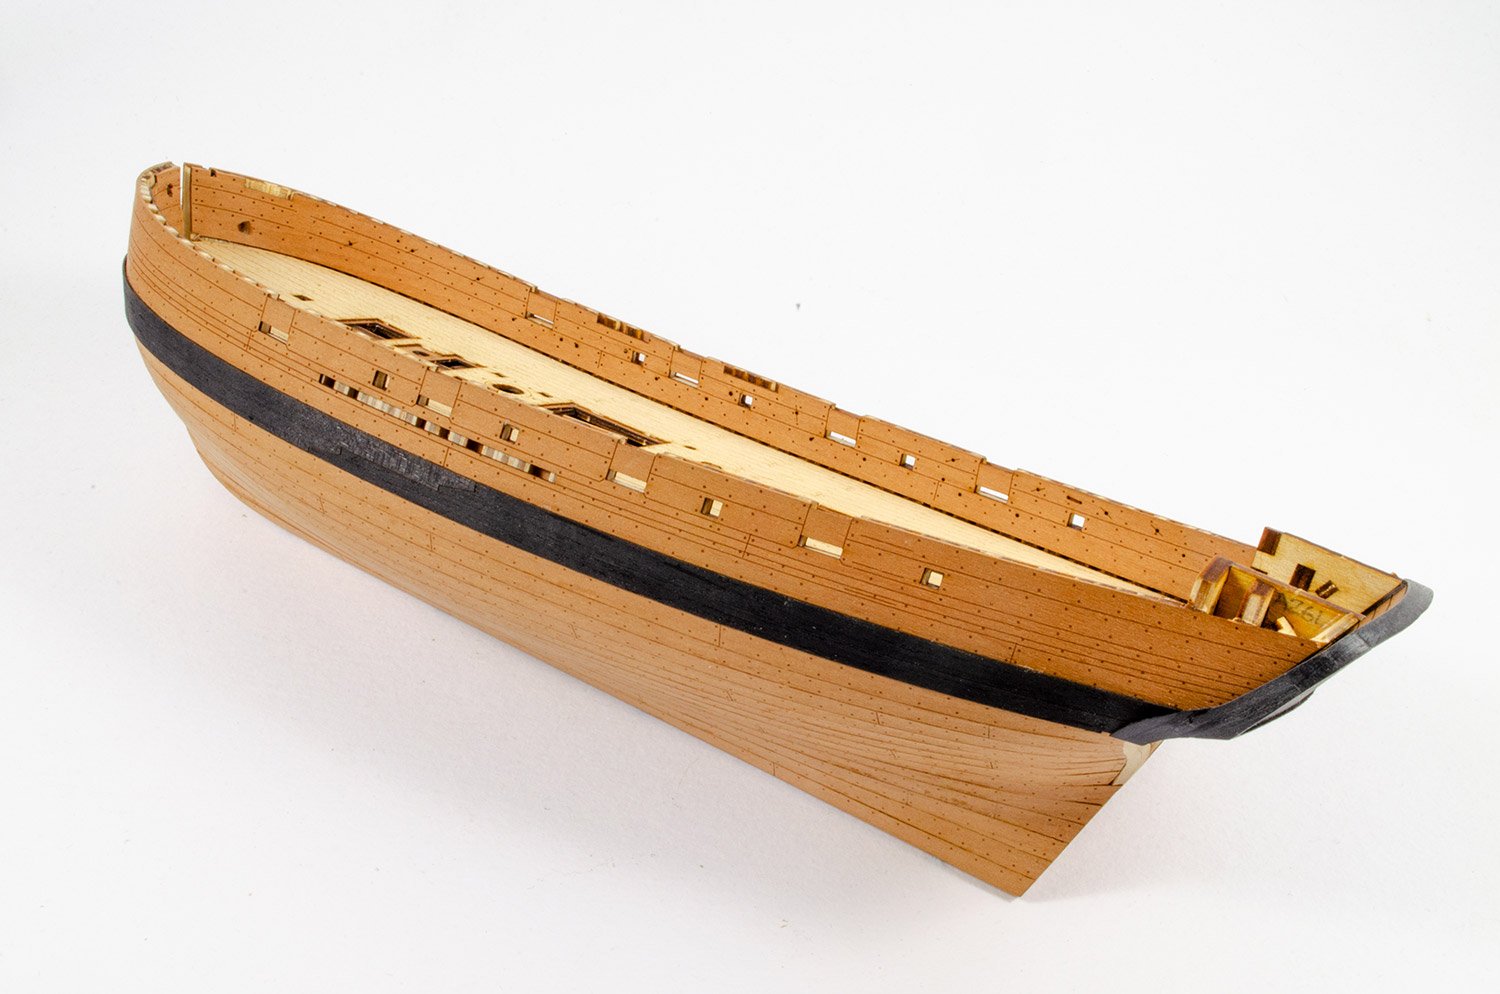
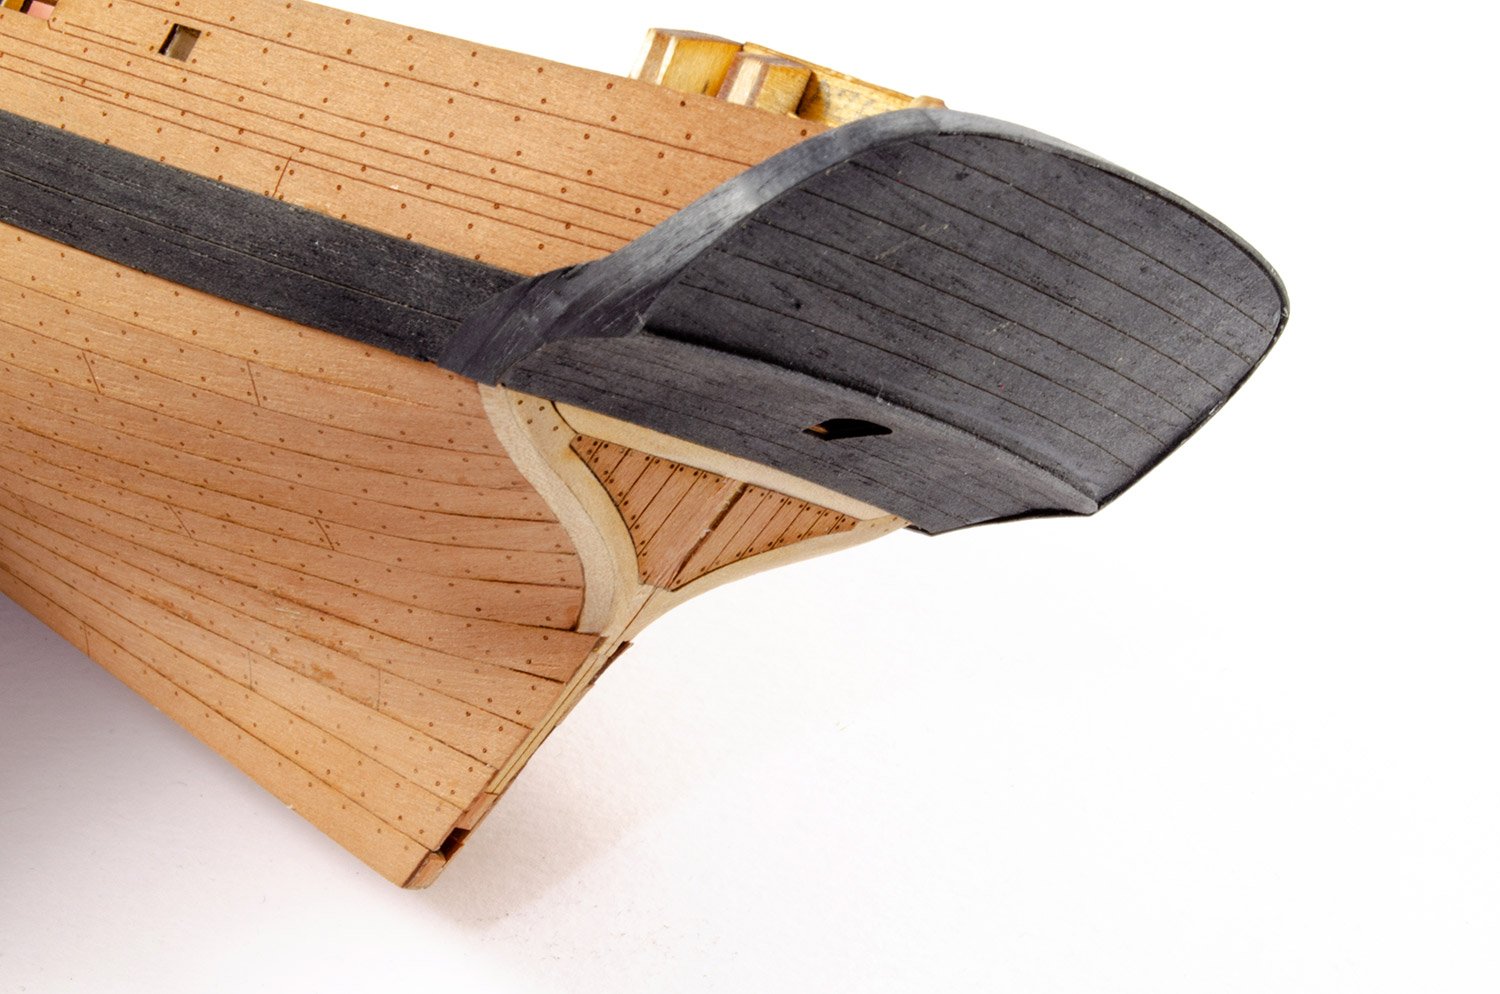
It's been over 6 weeks since I was on this model due to being hawked away for more magazine work. Got to say that I've really missed working on this little beauty, and it was good to get it back on the bench again. There's not really too much to report on at the moment except to say that I've now added the wales and a few other bits. Thee wales are pre-cut in two parts per side, perfectly interlocking along the length. They really do make a hell of a difference the appearance. I also cut out the timber from the gun ports to open them up and added the cap rail sections. These needed to be carefully aligned to allow further laser cut parts to be fitted. As a slight change in working order, I have also added the transom. This isn't shown as fitted for a few stages yet, but there's no reason why it can't be added now and the preceding hull stages then completed before the bowsprit is made. Again, I am loving this build!


- 31 replies
-
- 15
-

-
- master korabel
- avos
- (and 1 more)
-
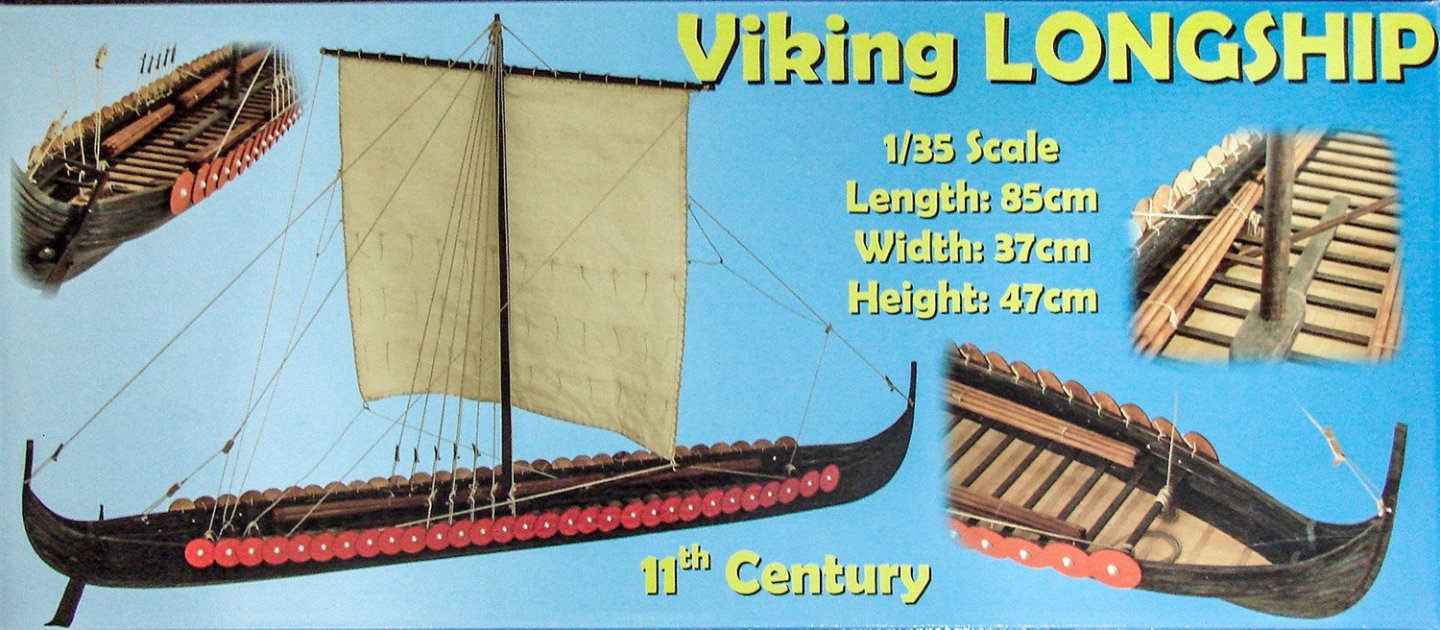
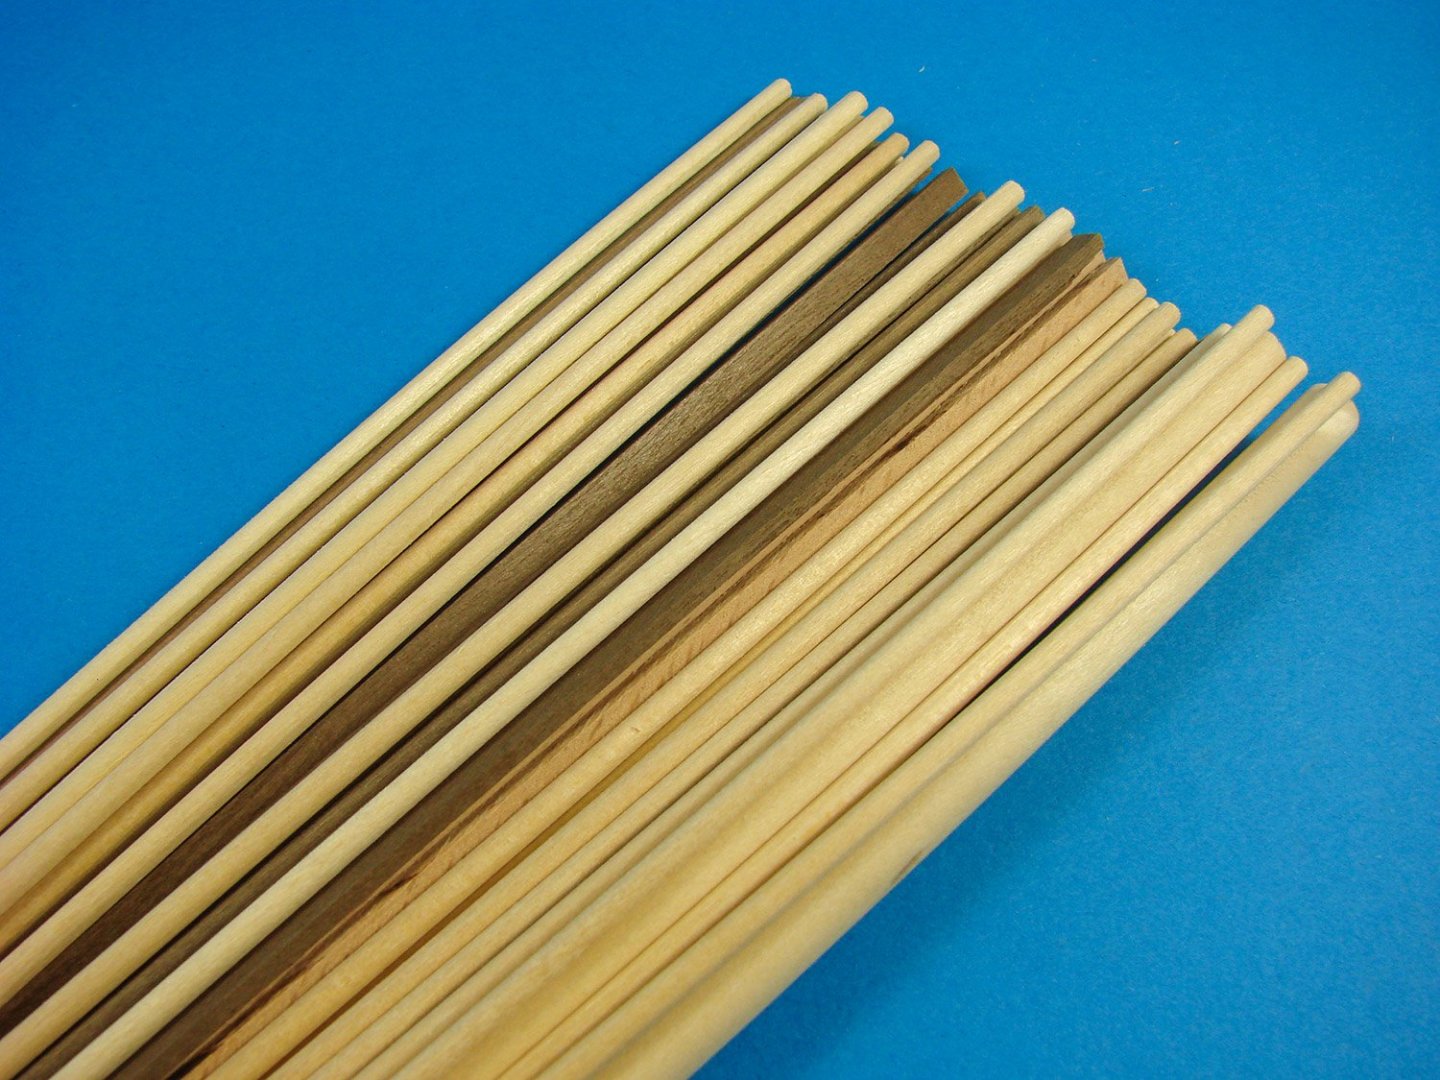
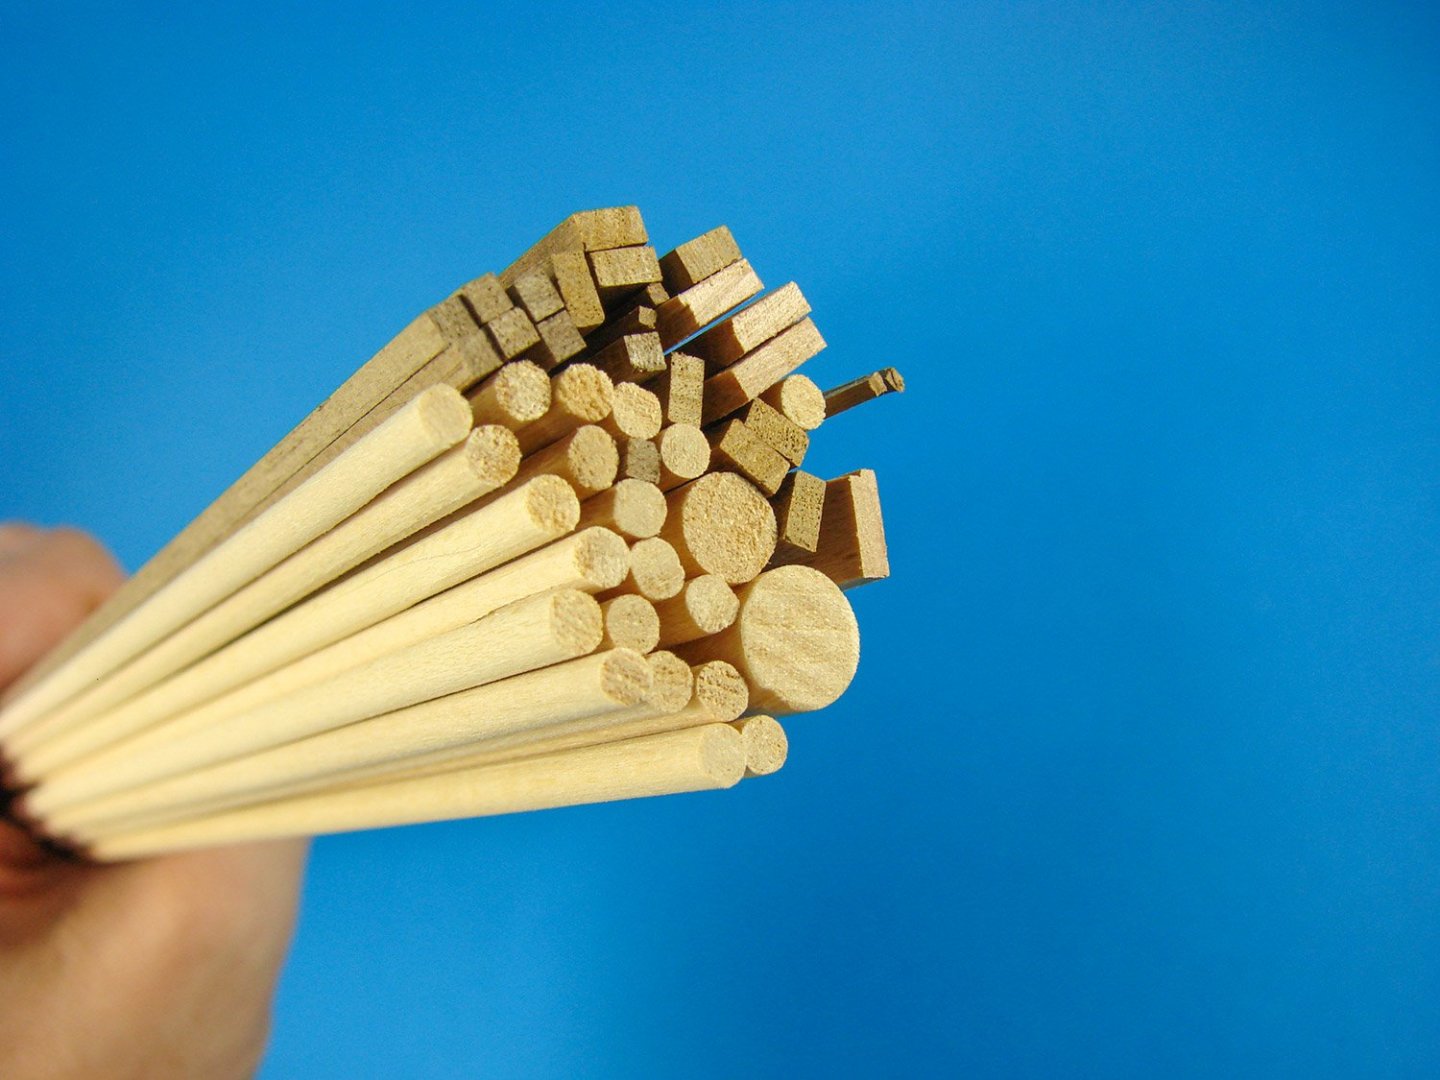
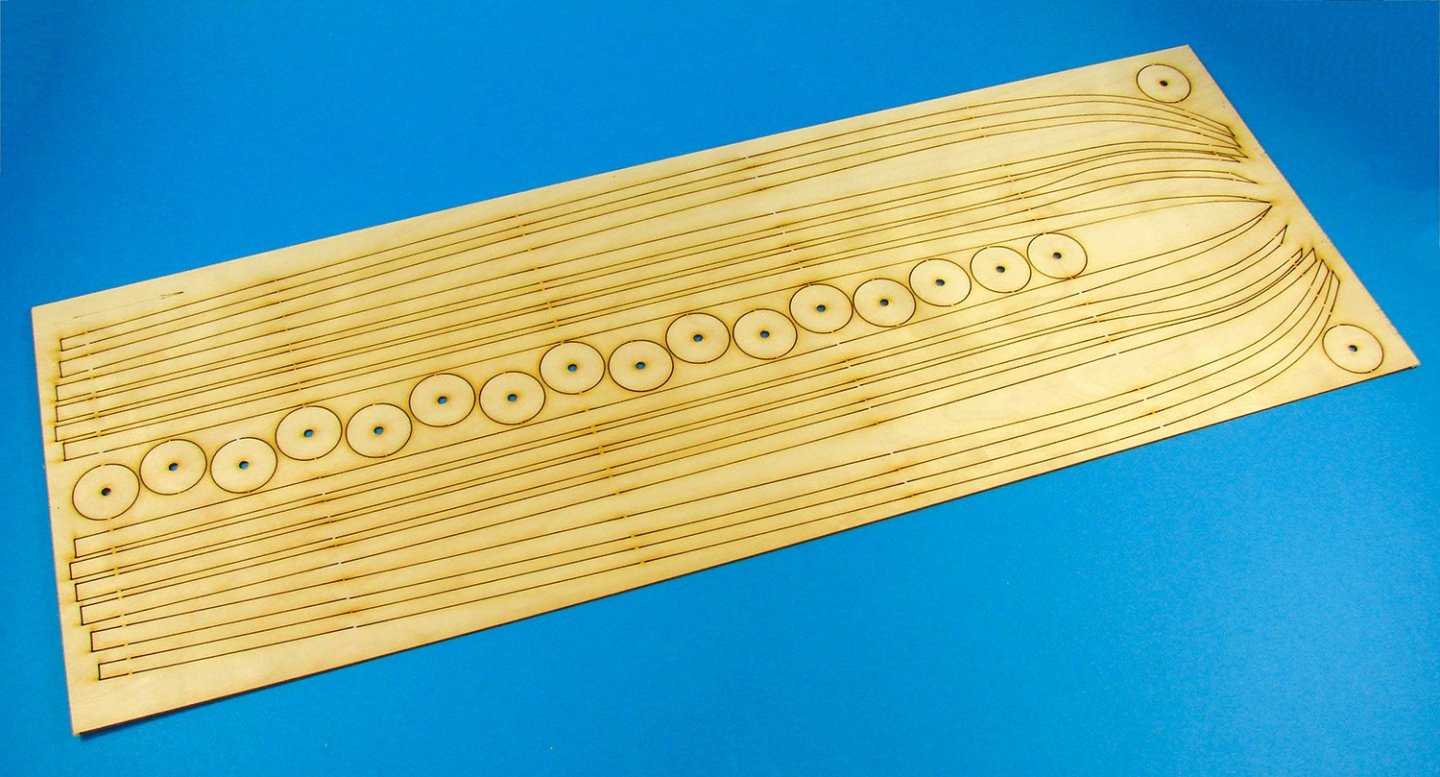
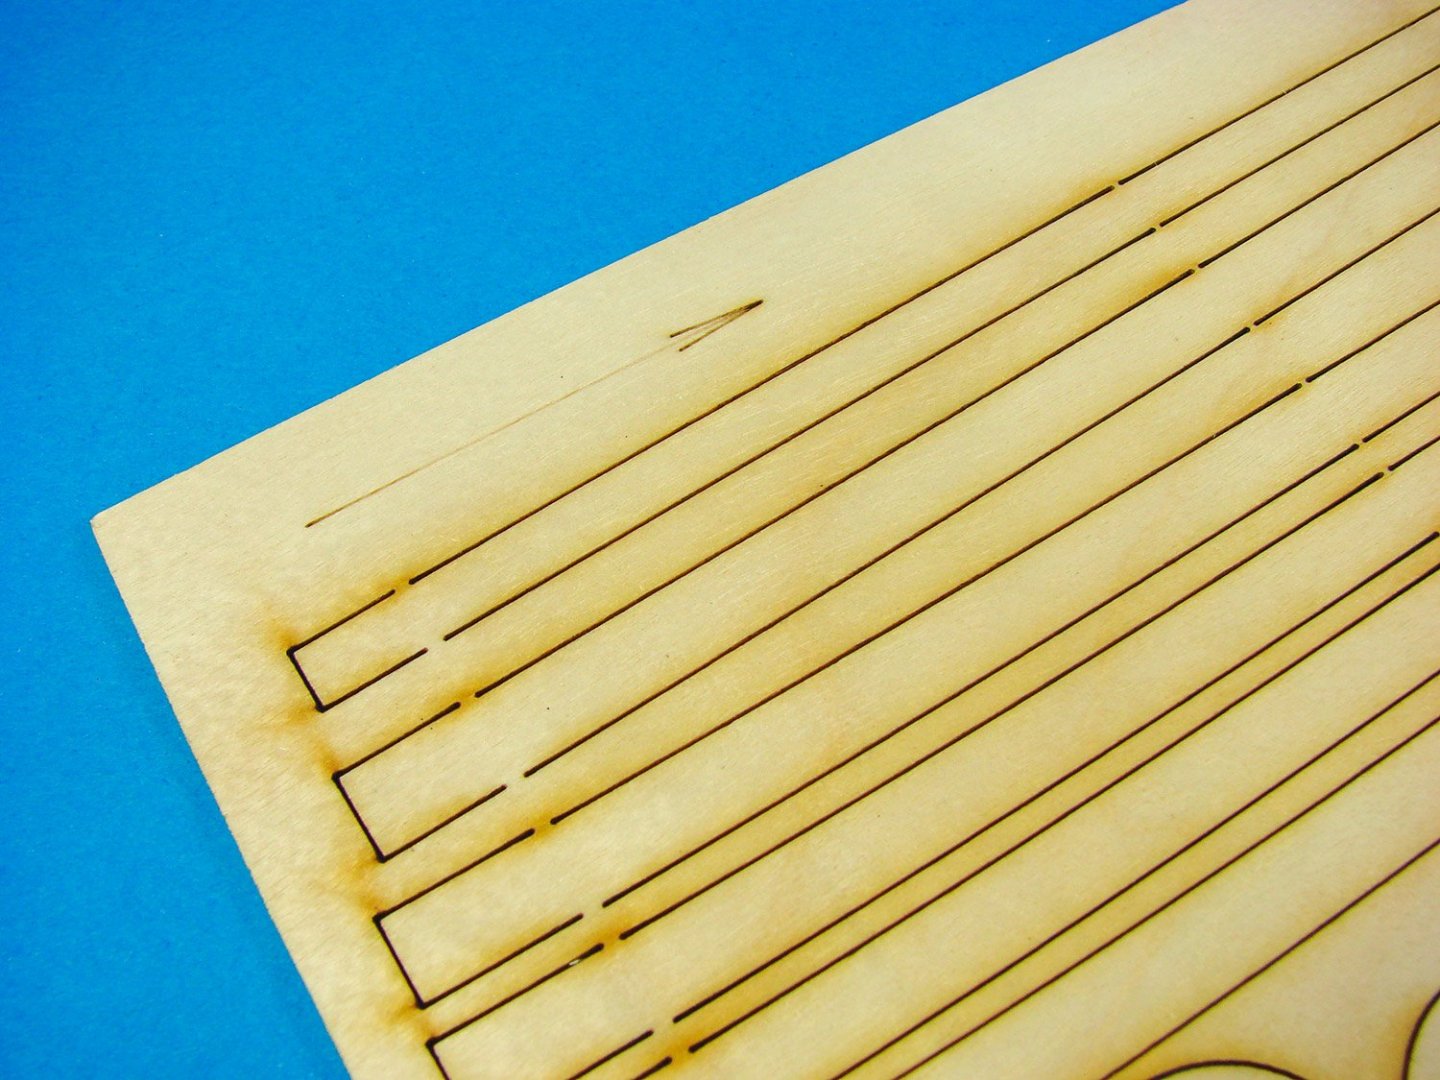
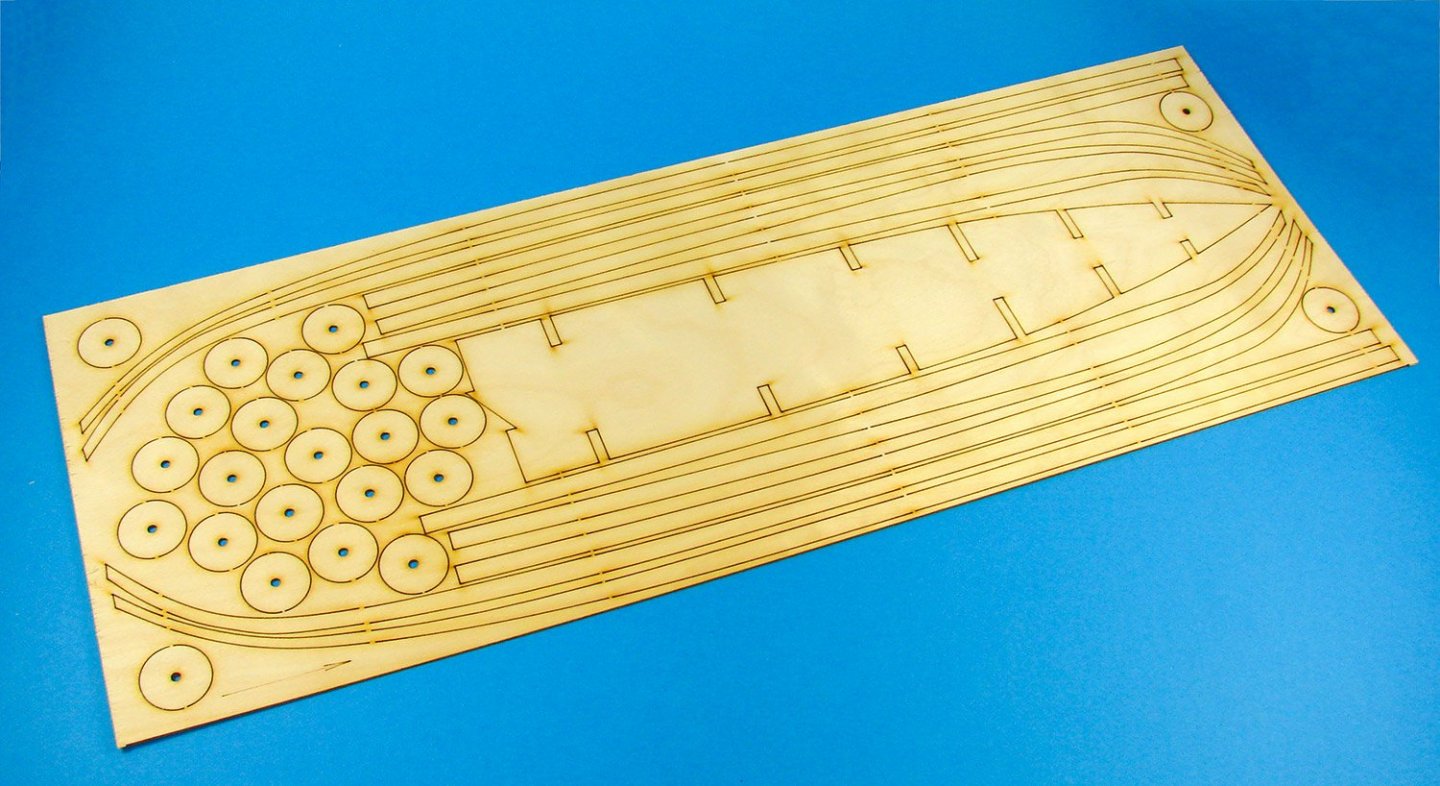
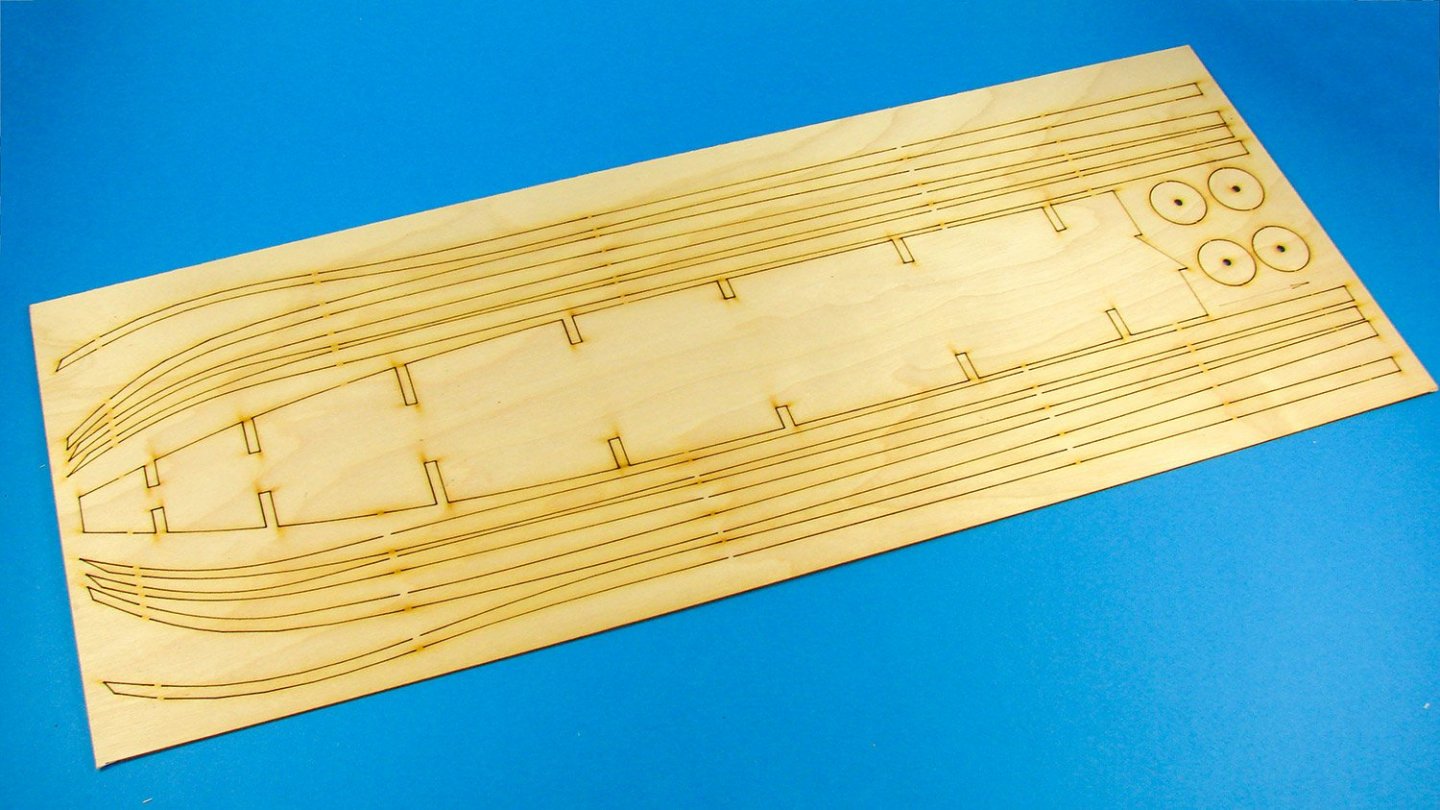
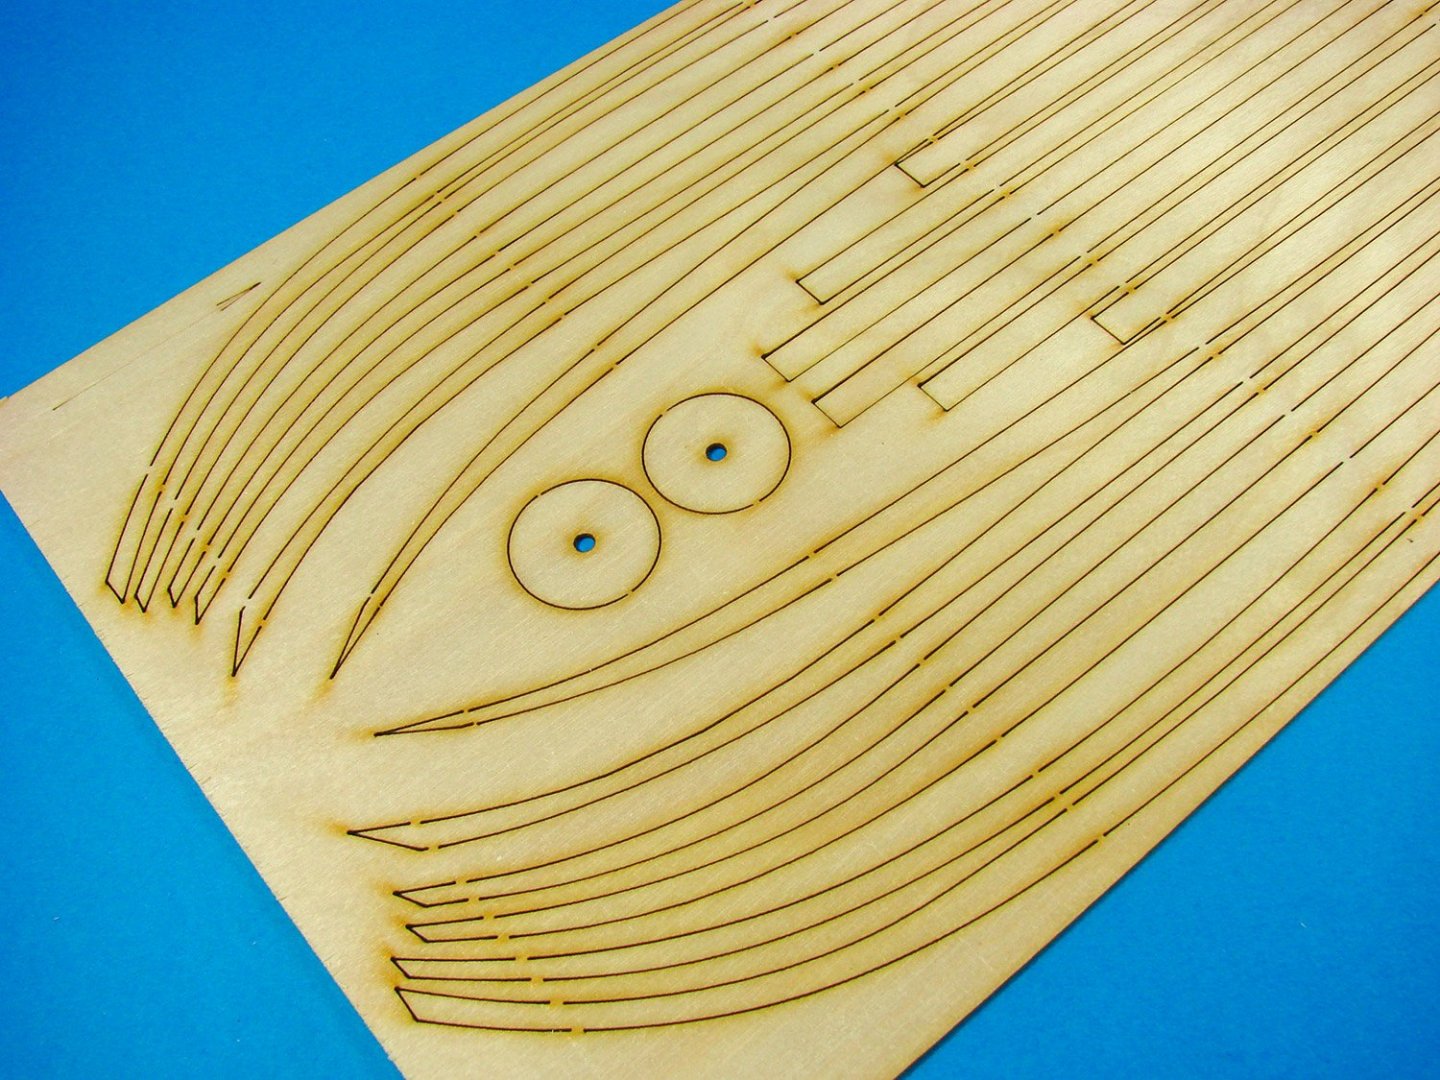
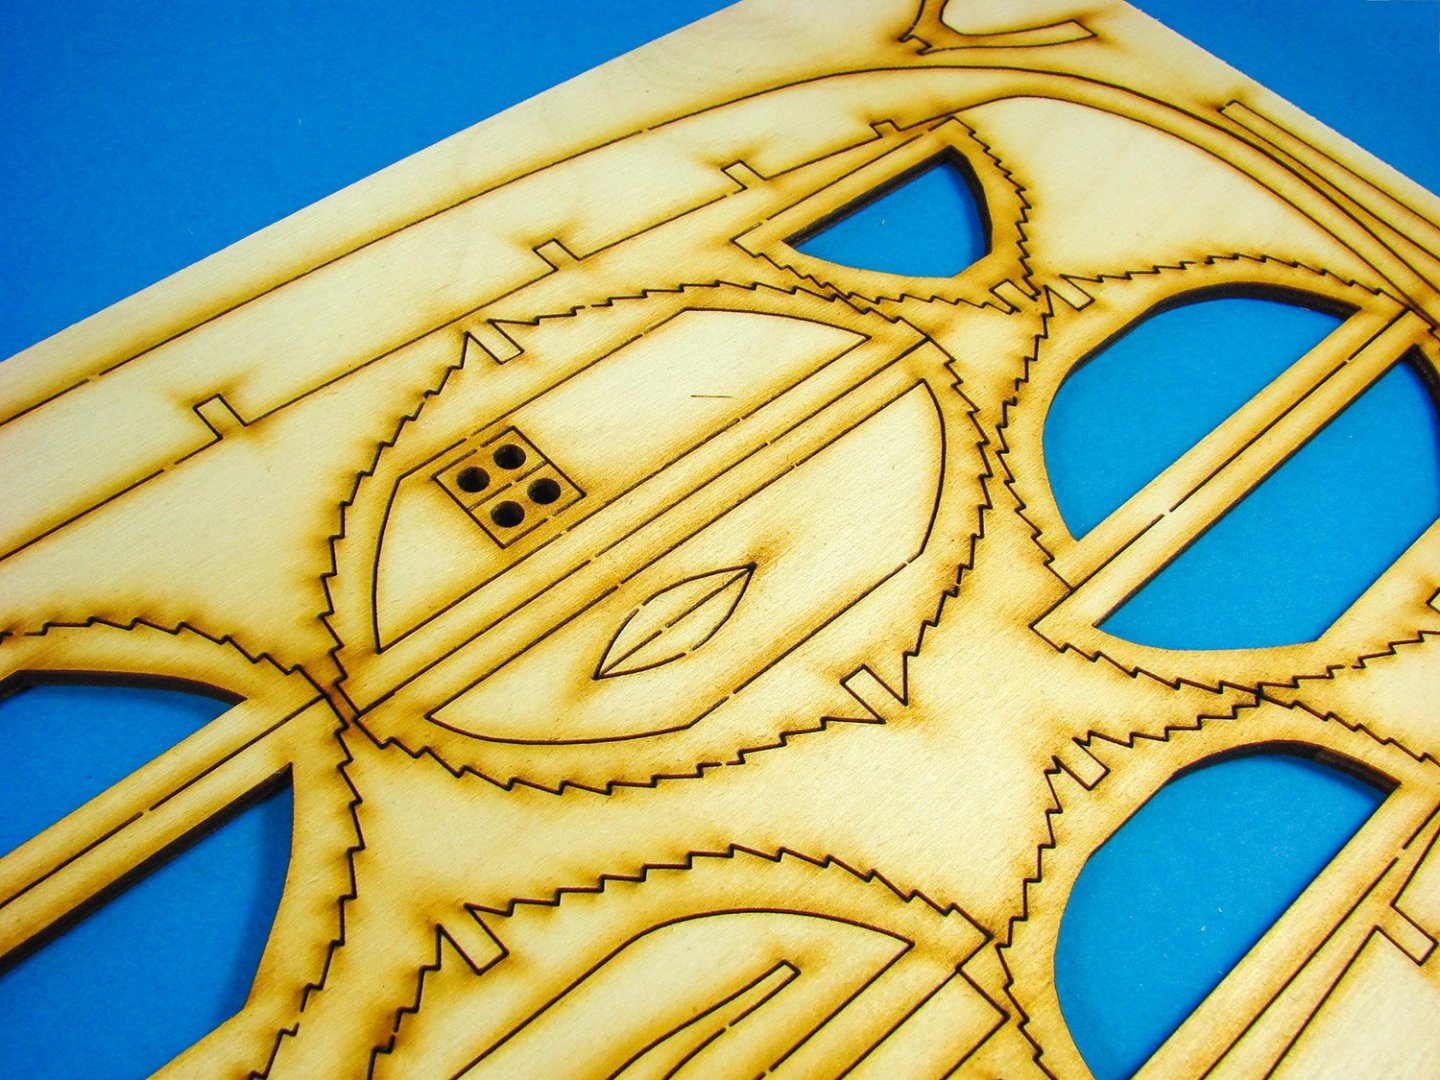
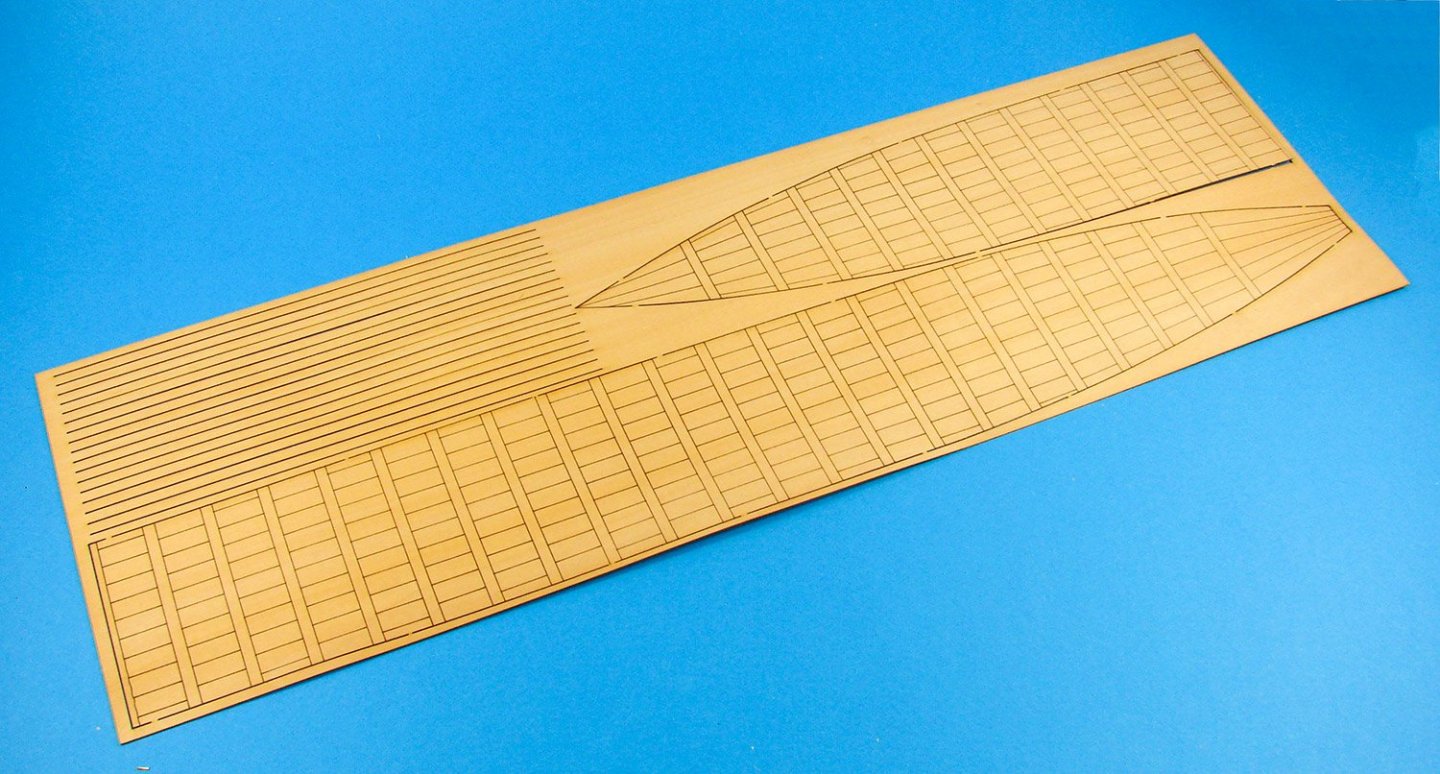
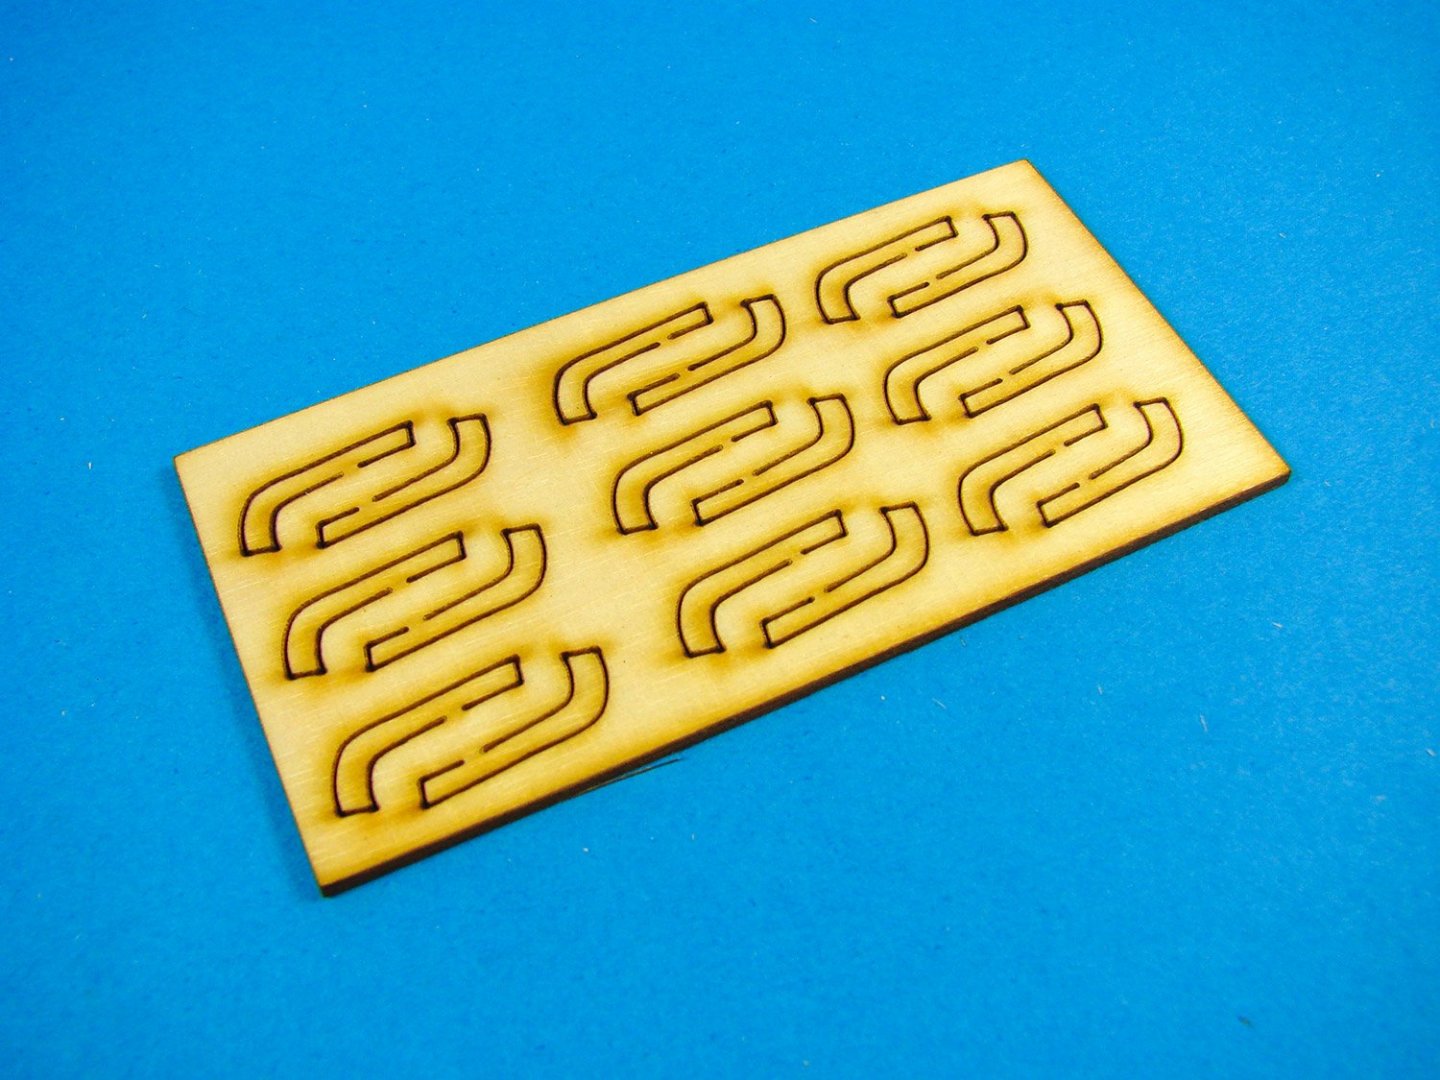
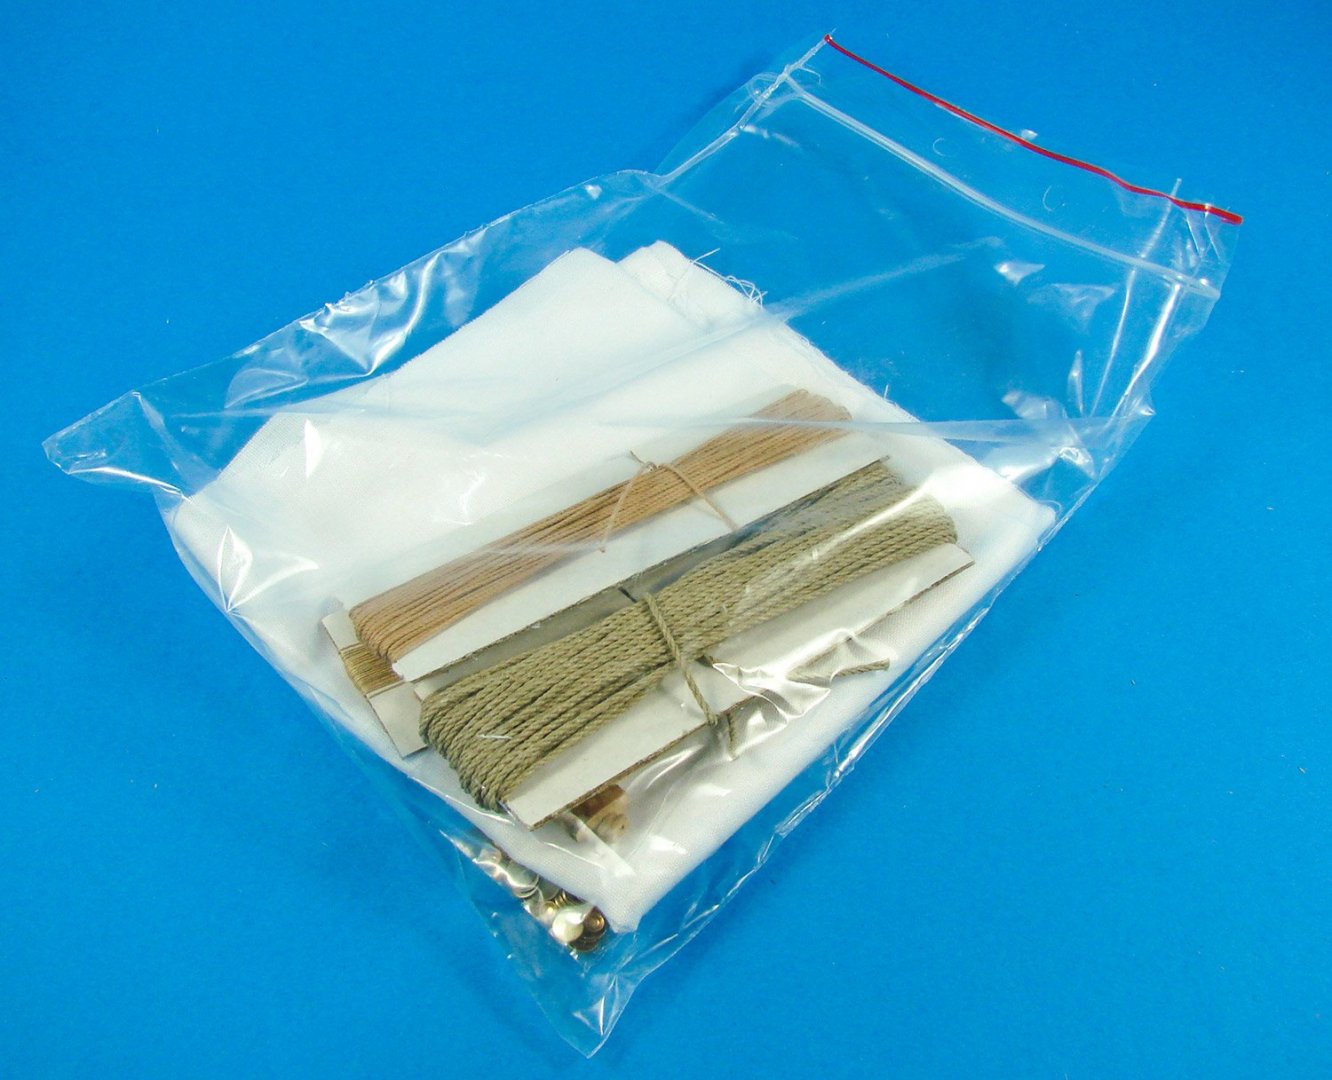
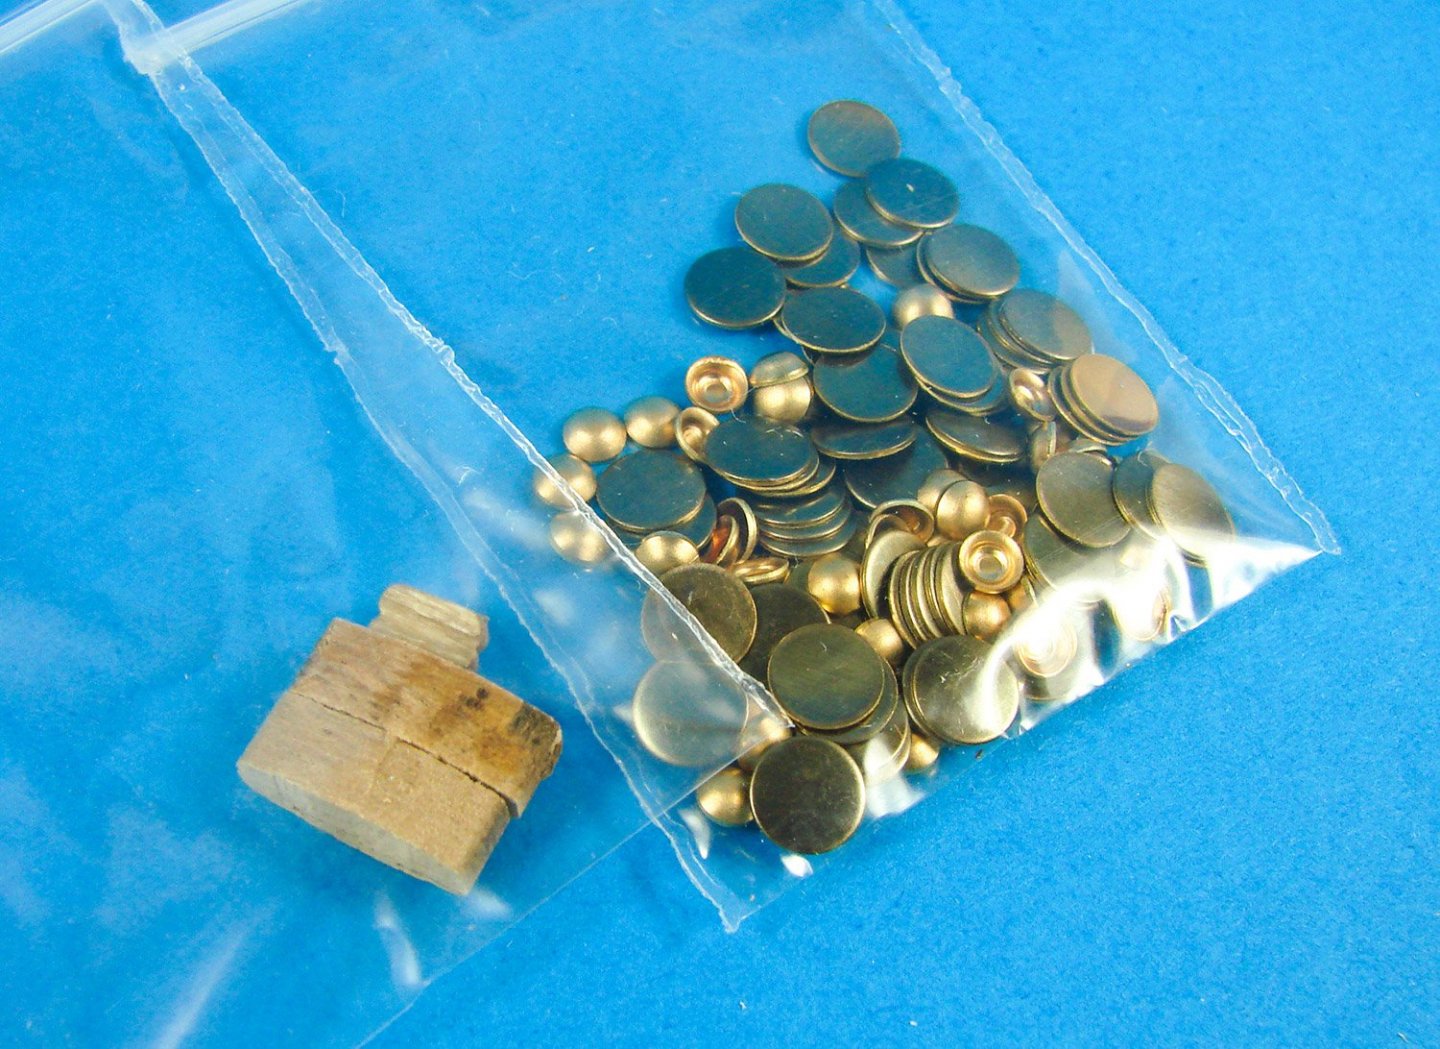
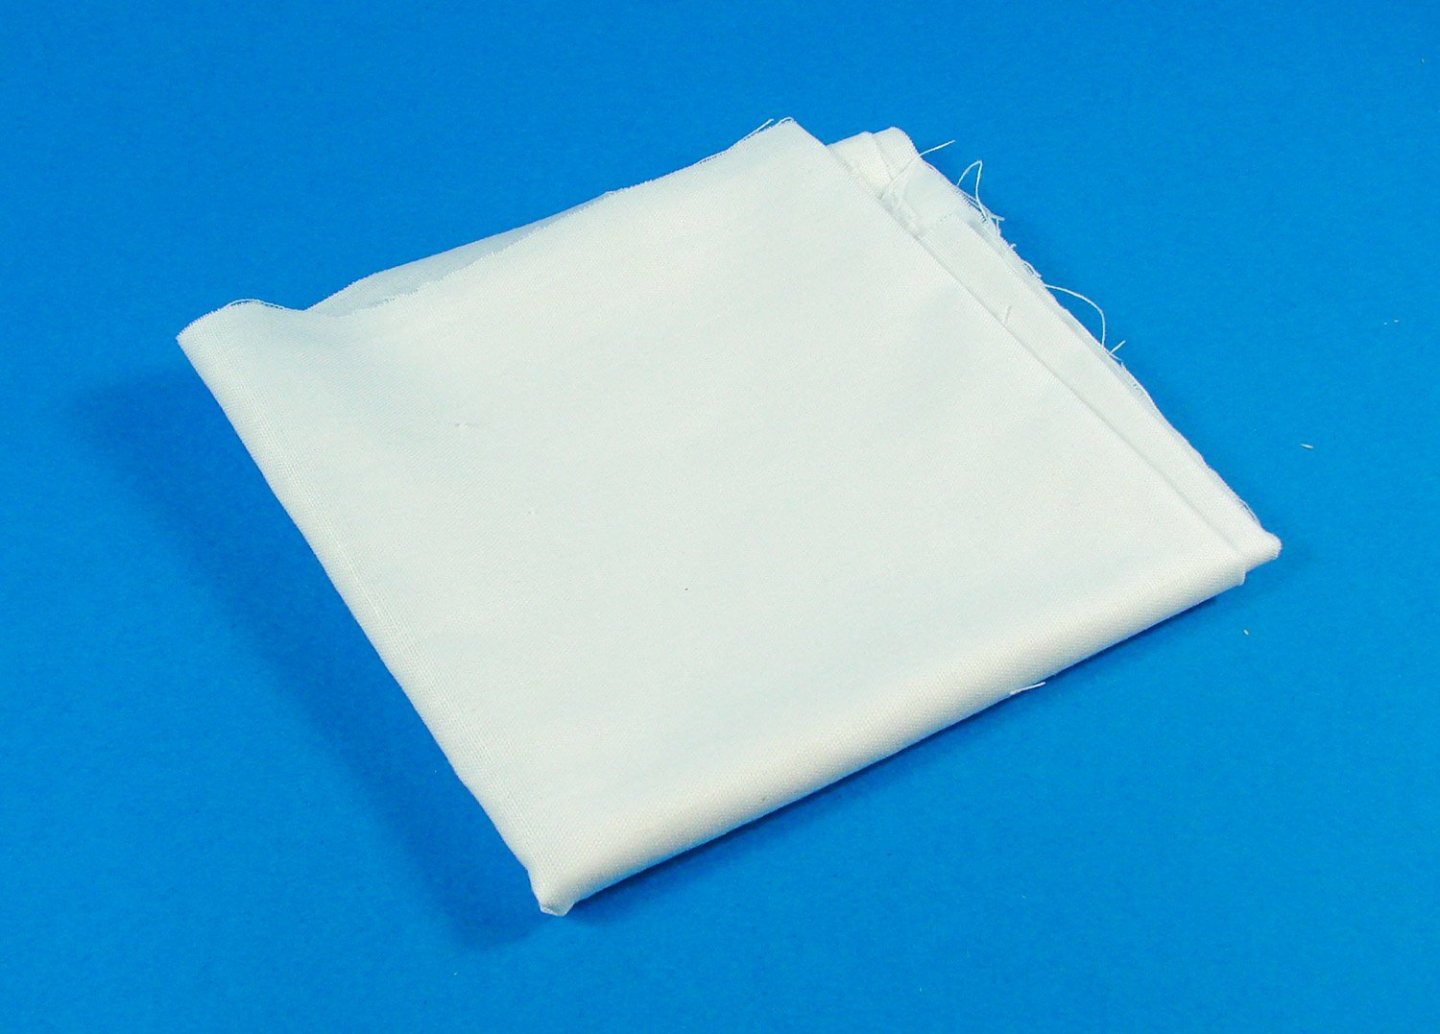
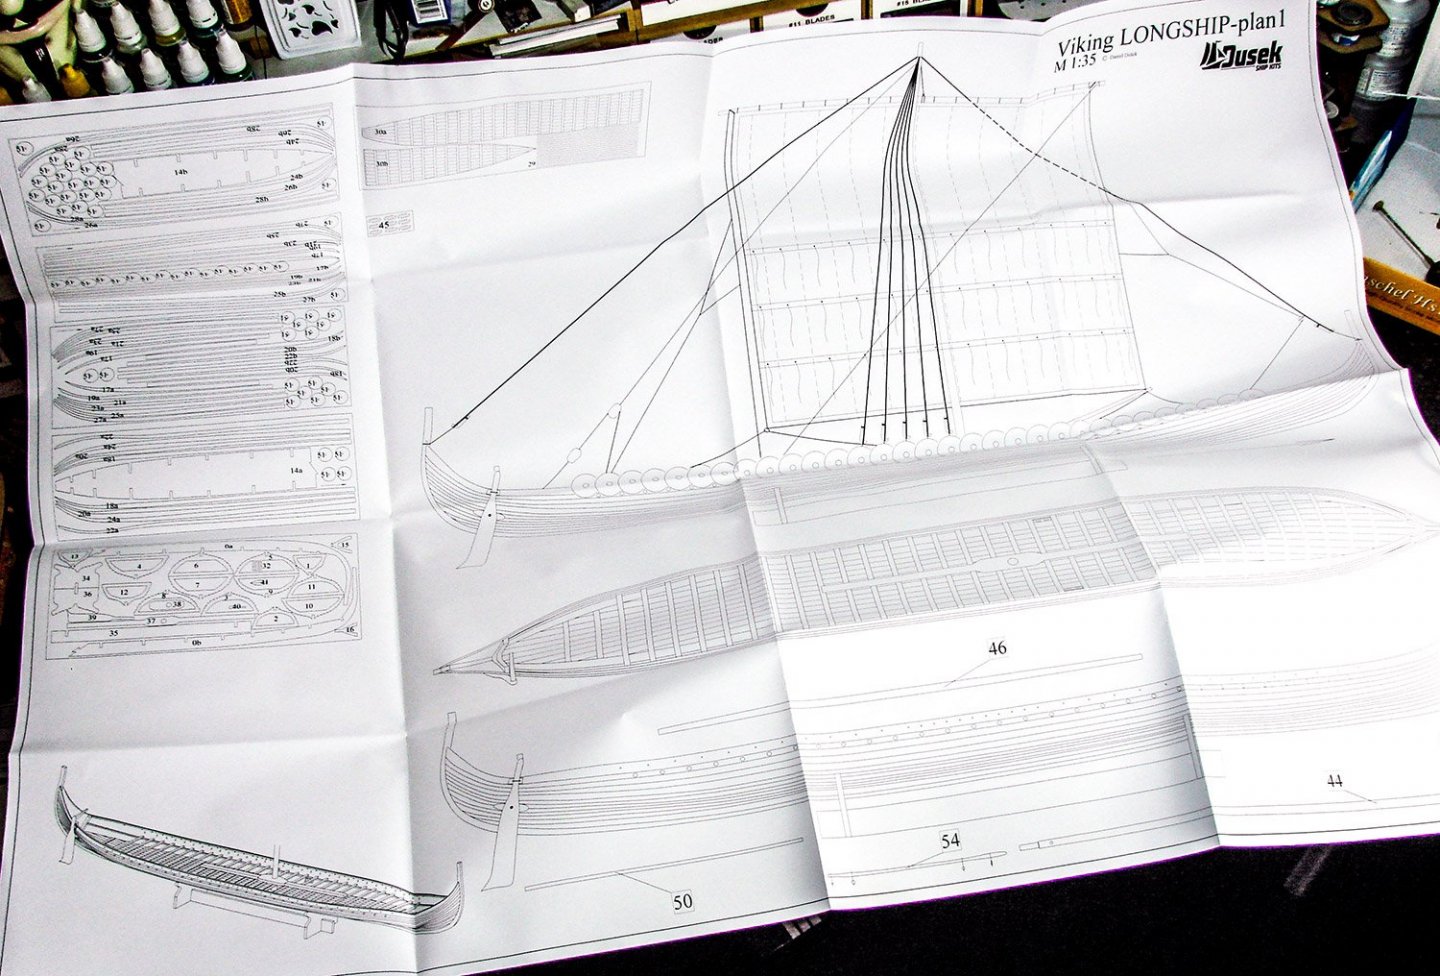
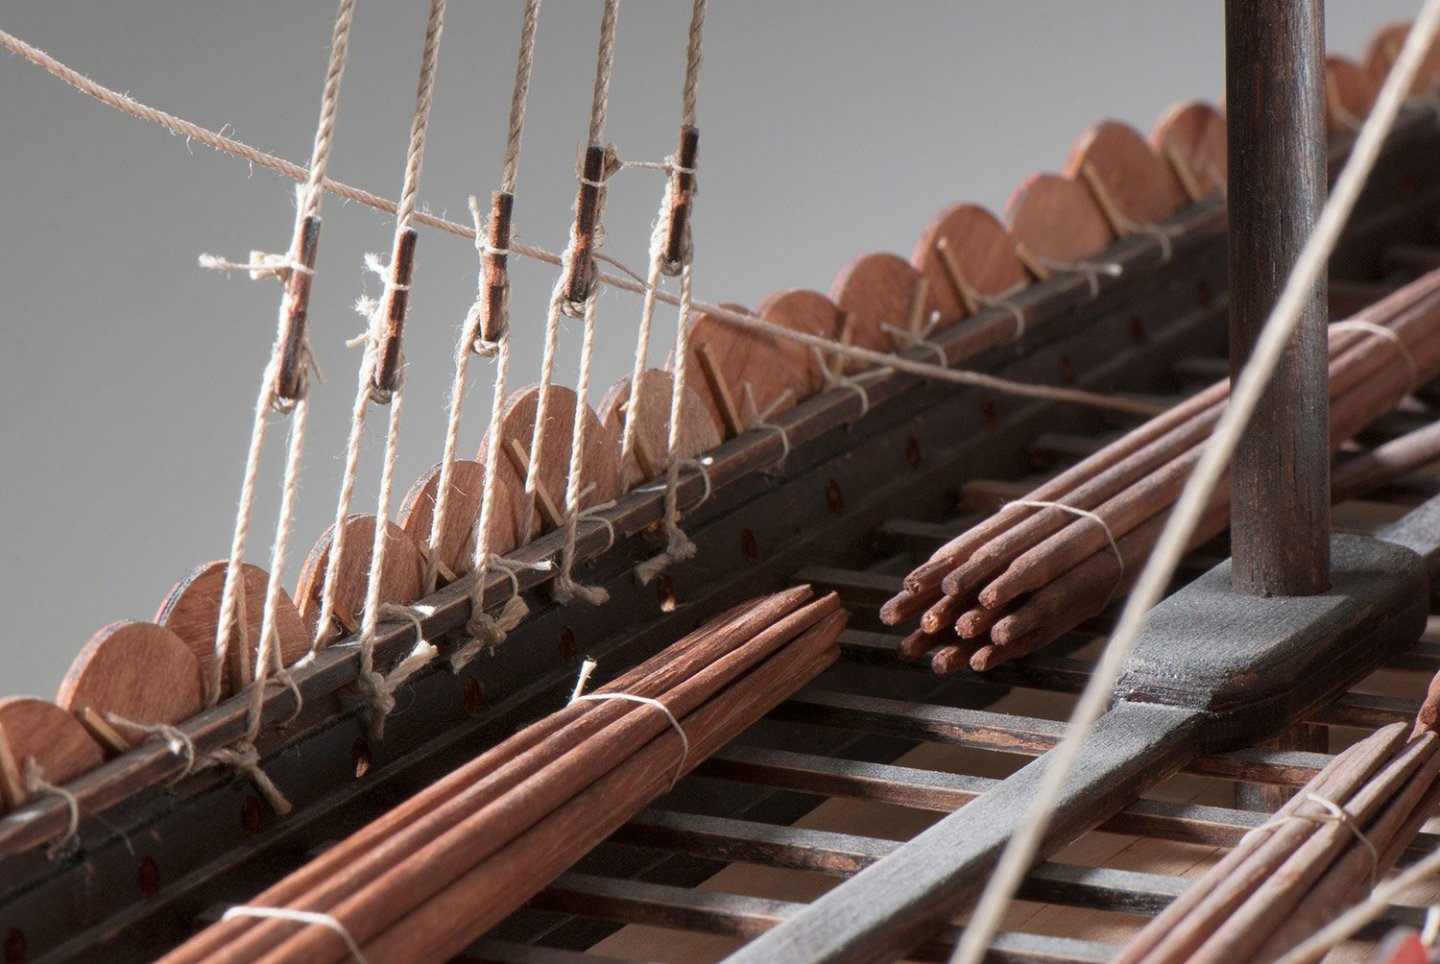
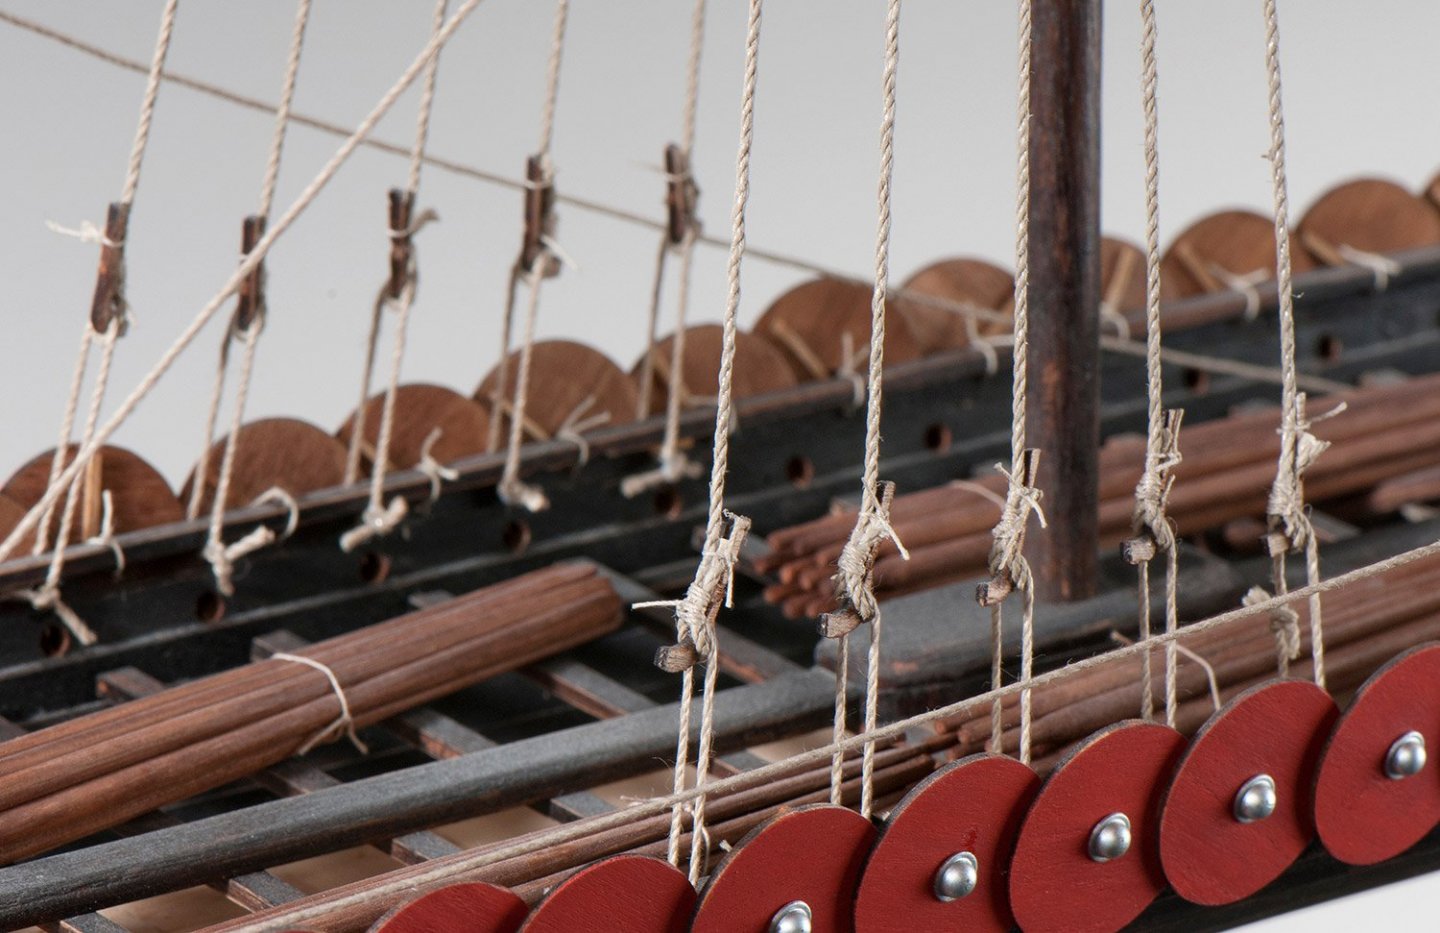
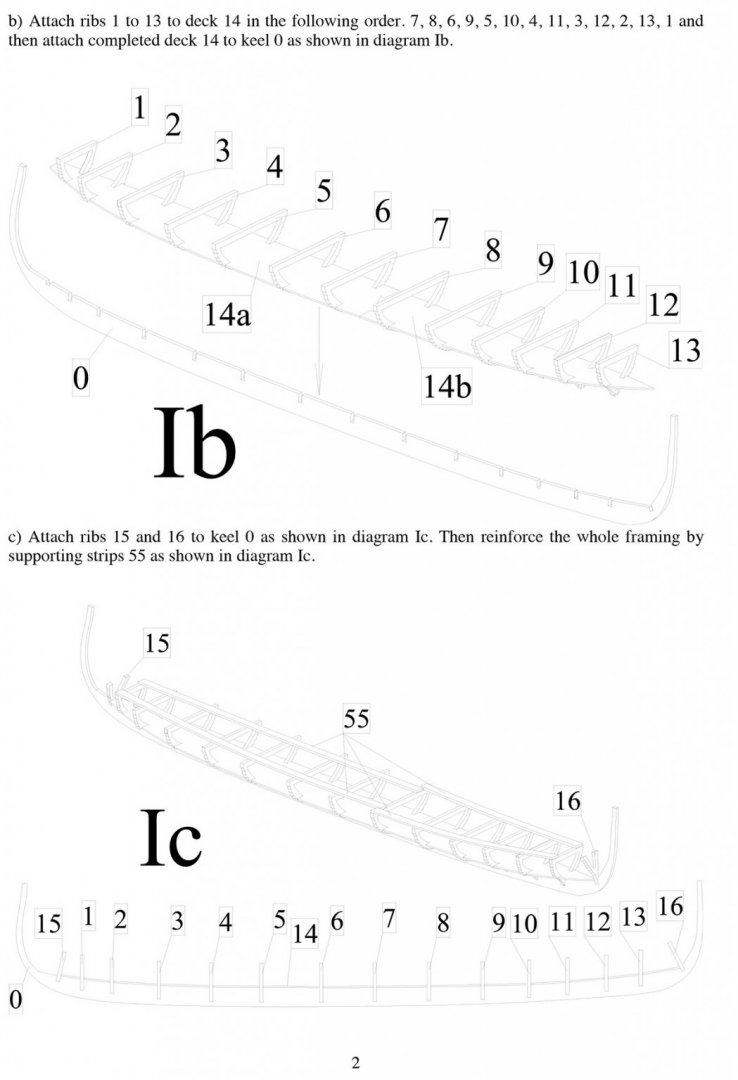
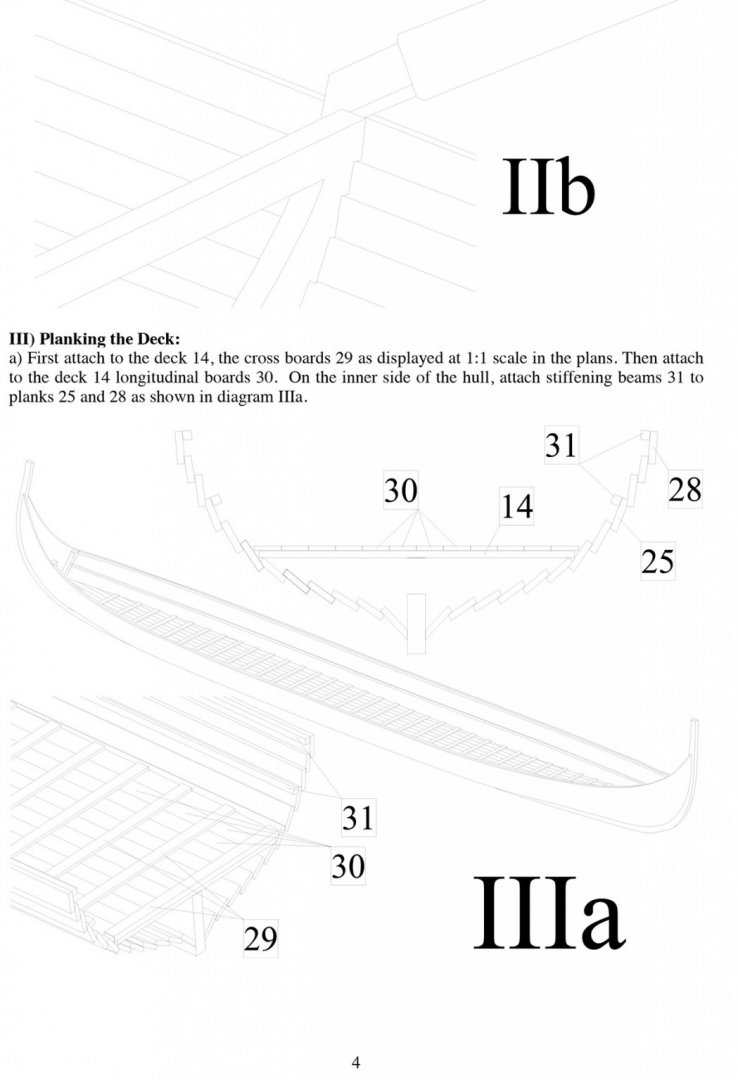
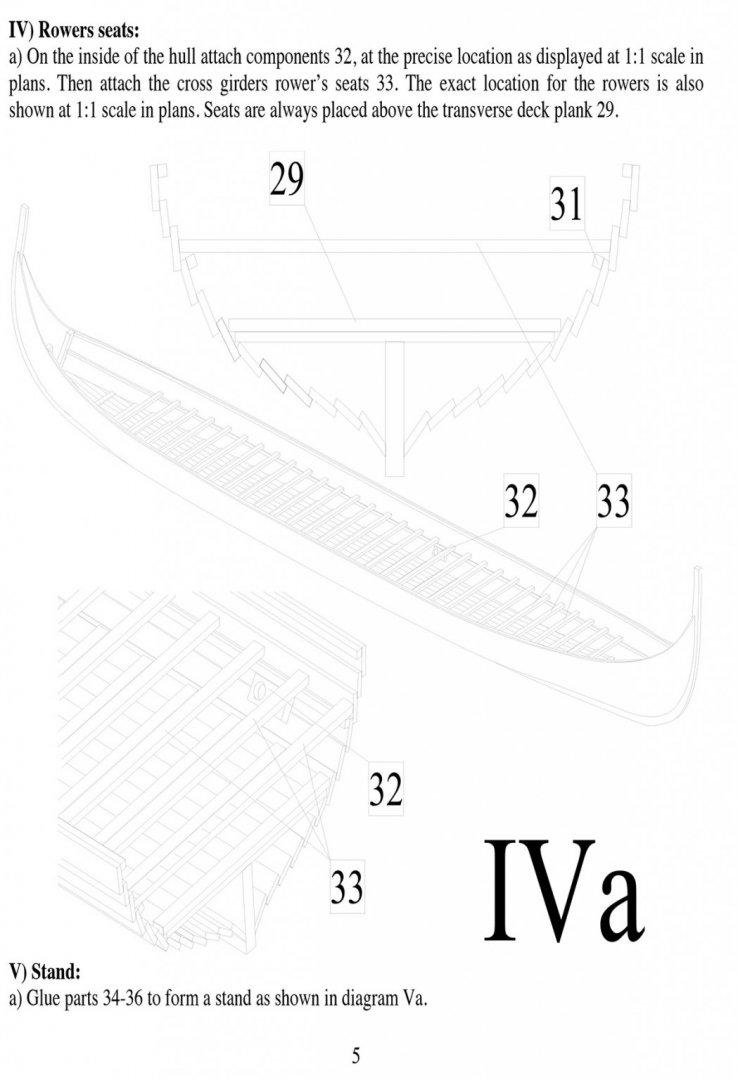
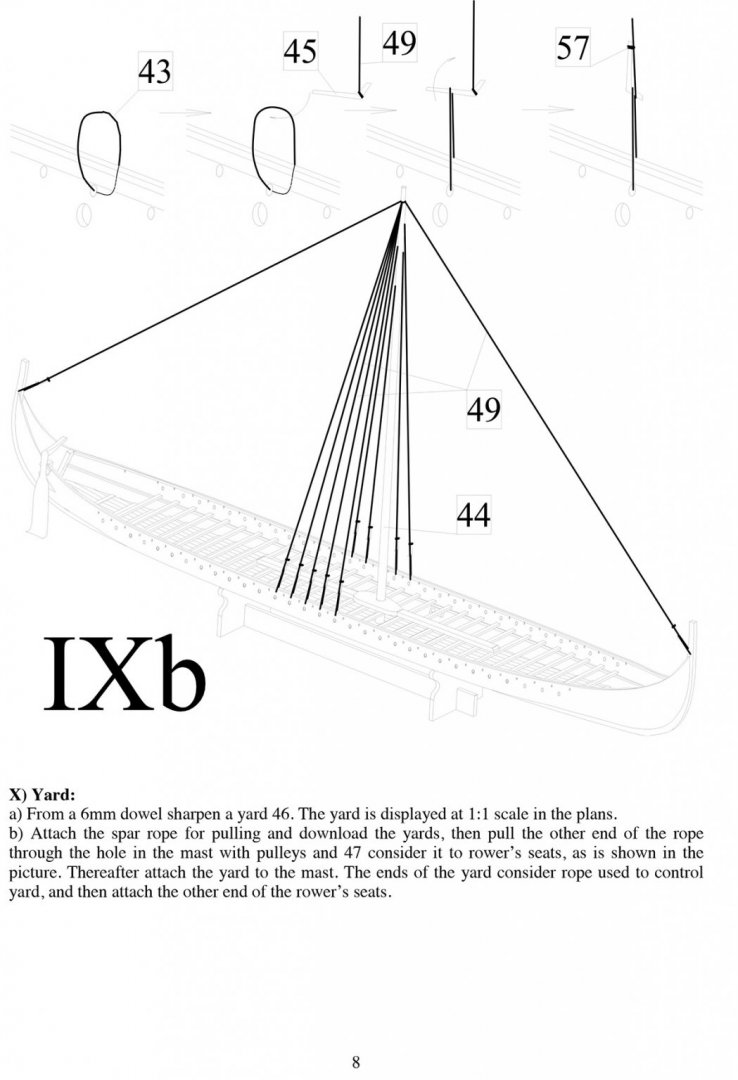
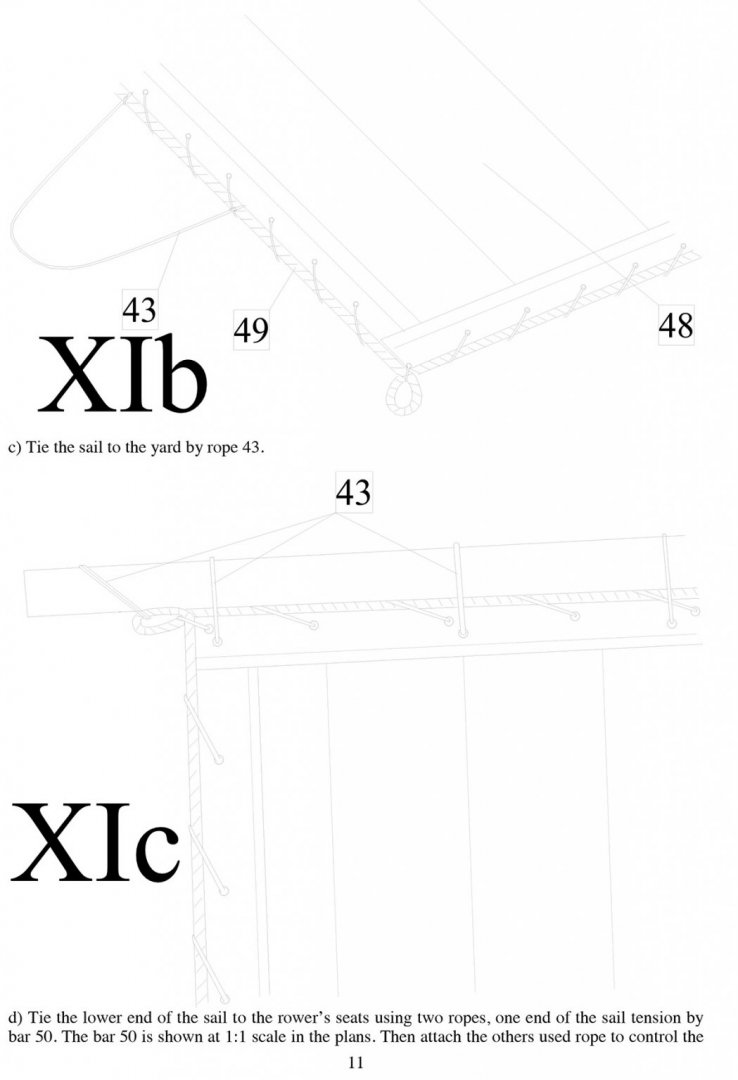
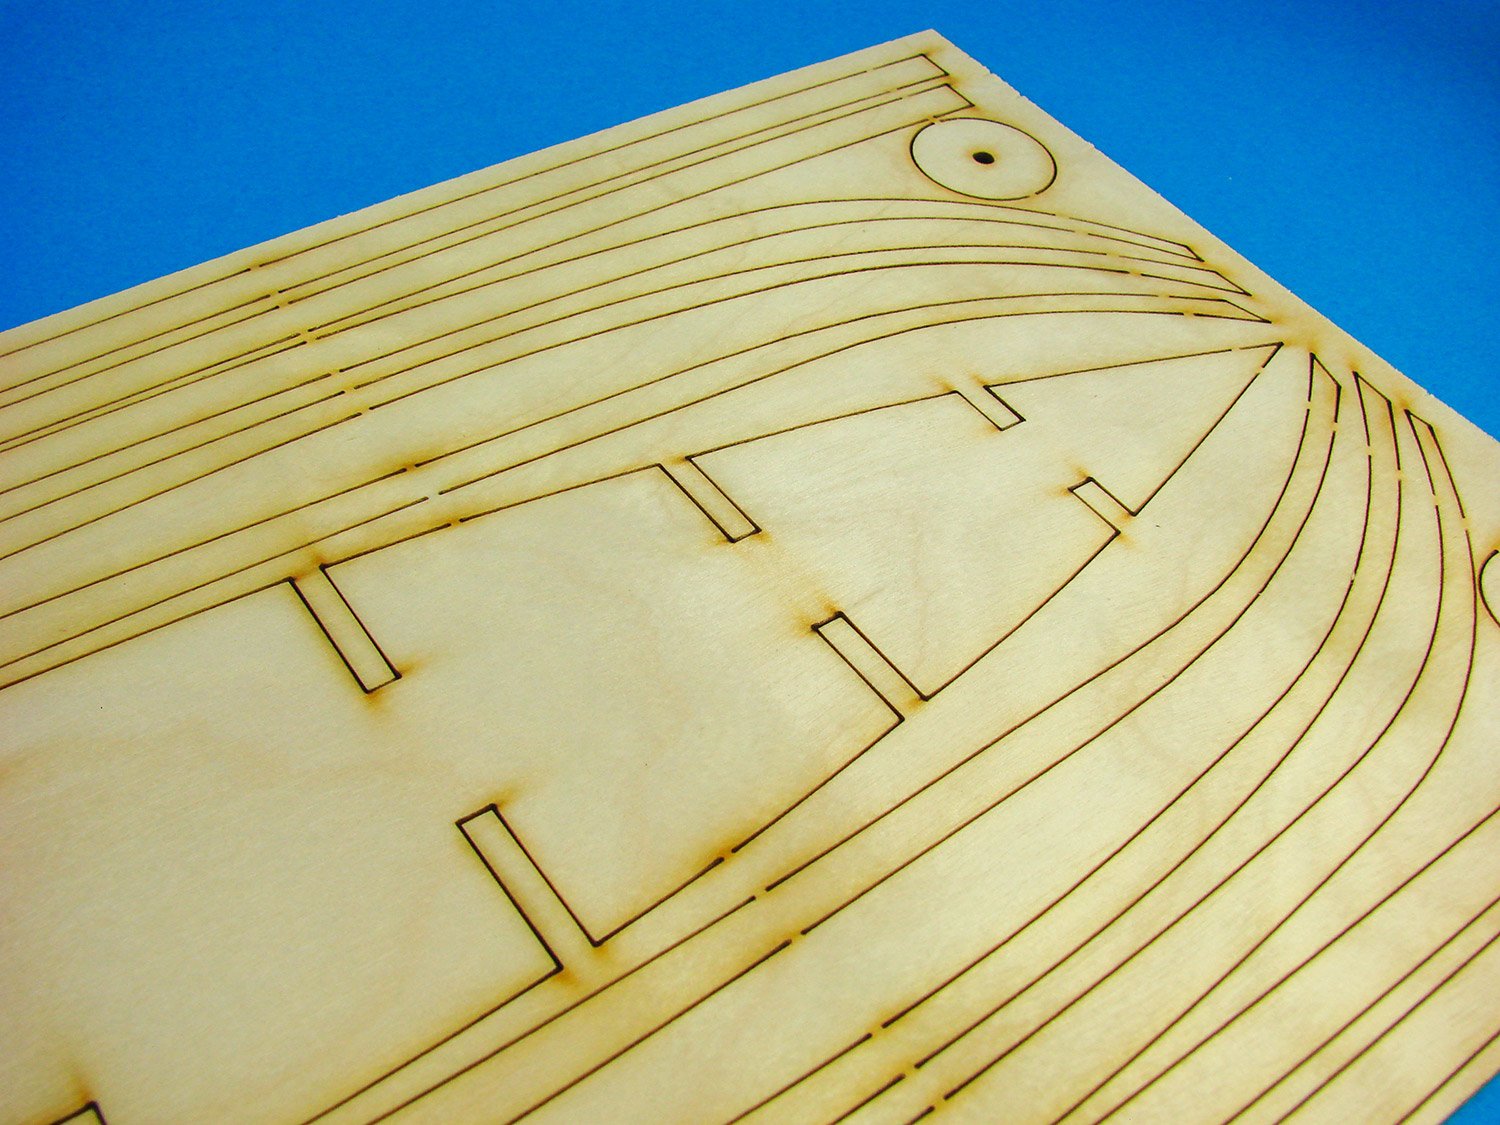
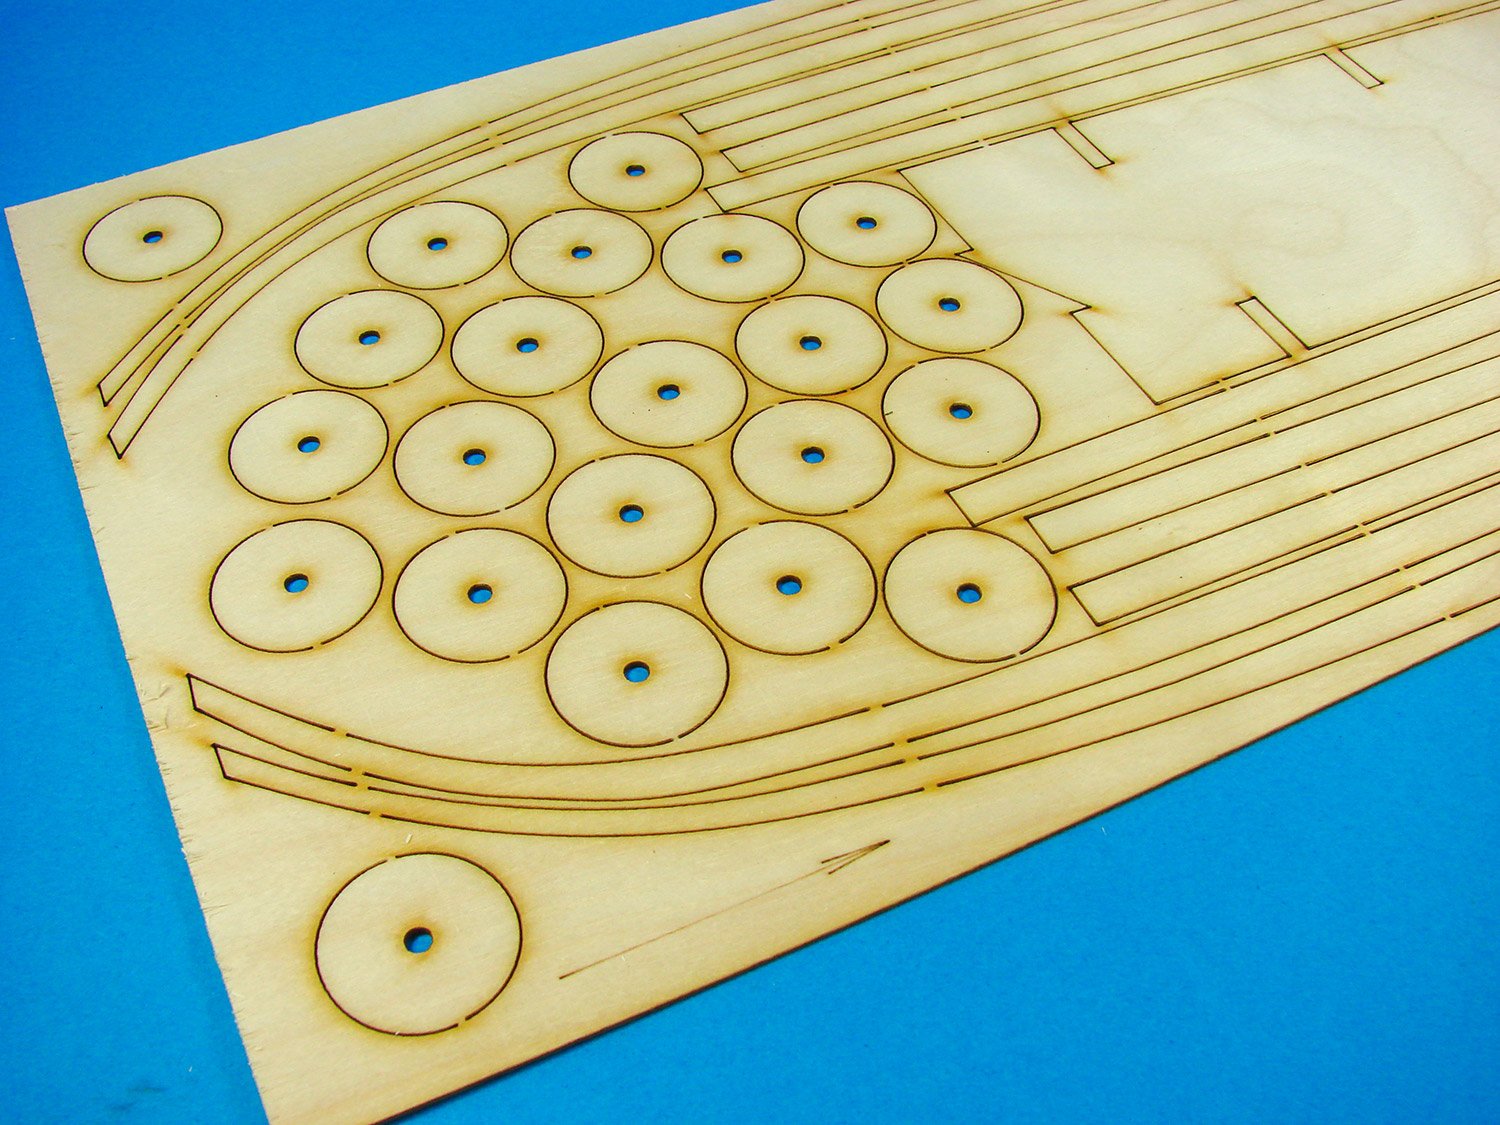
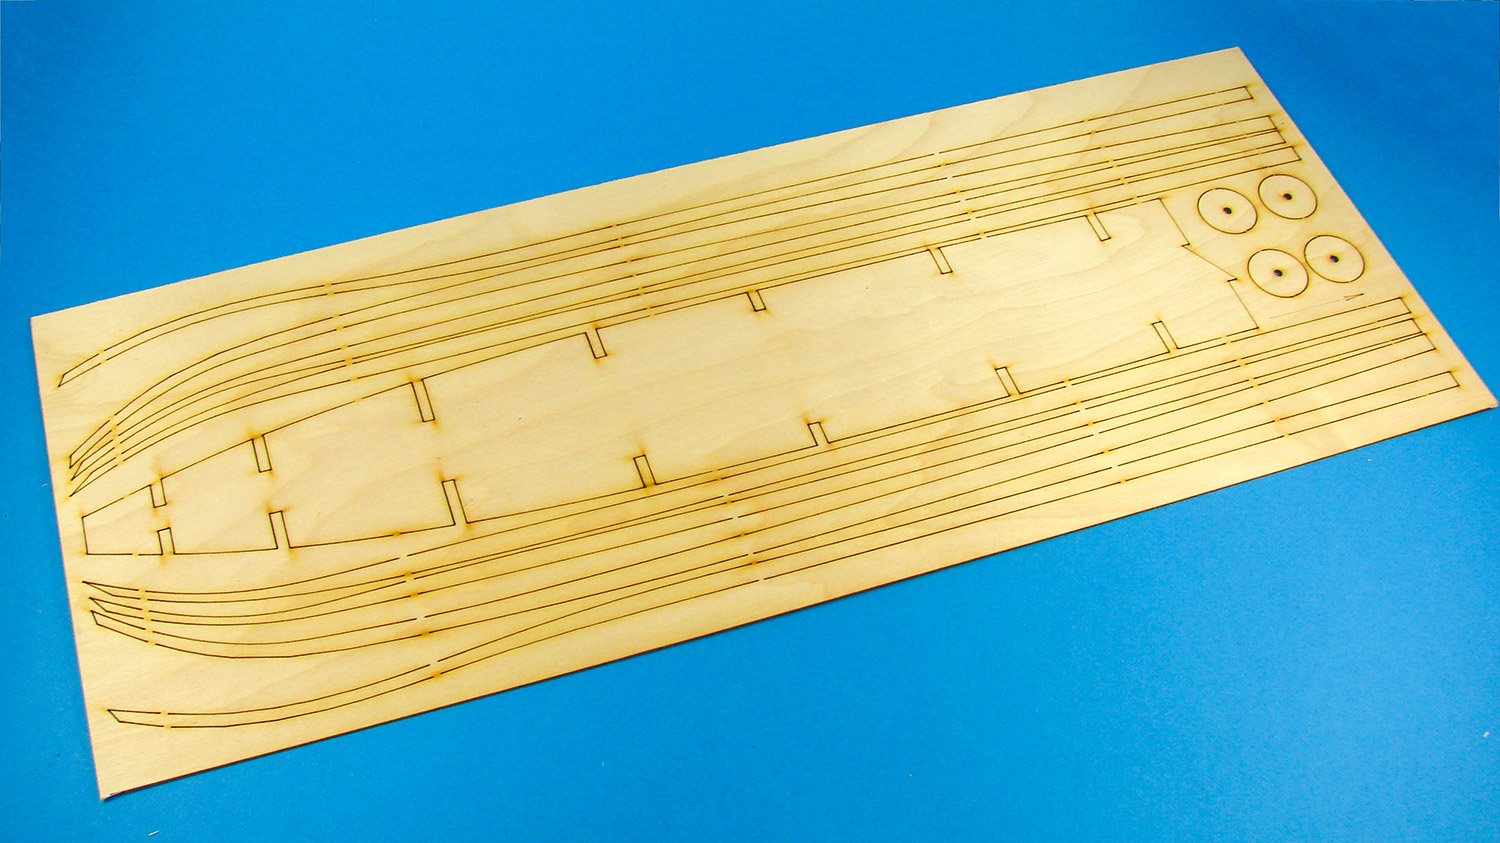
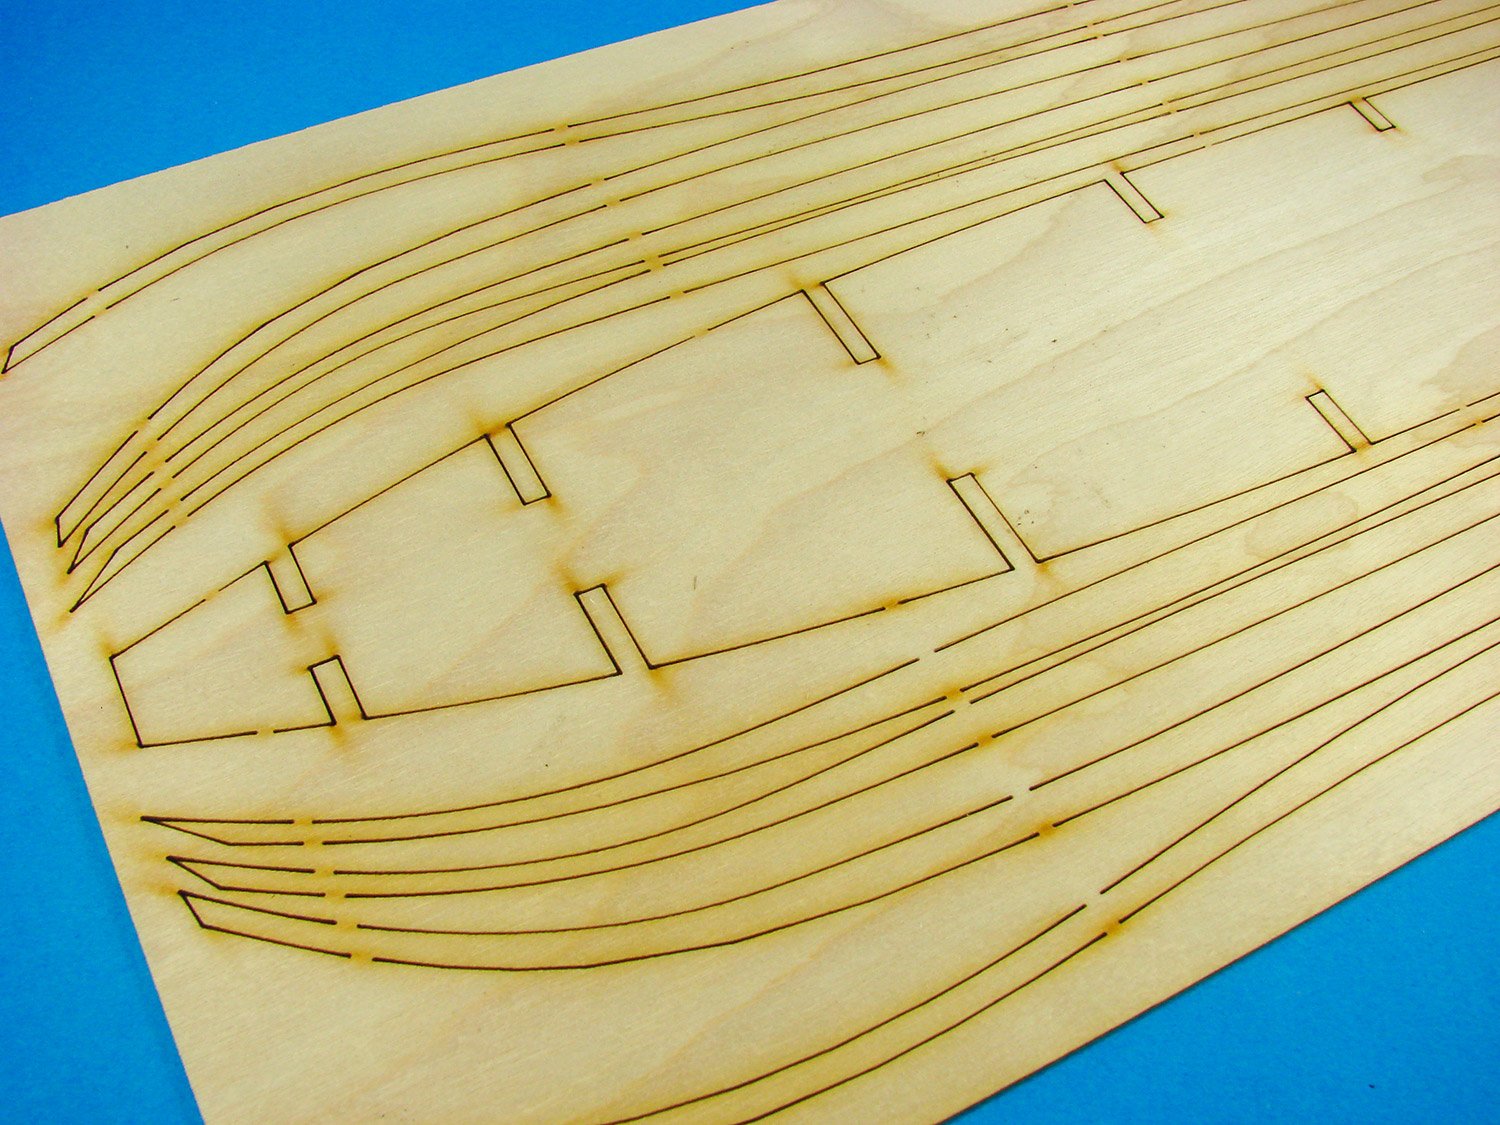
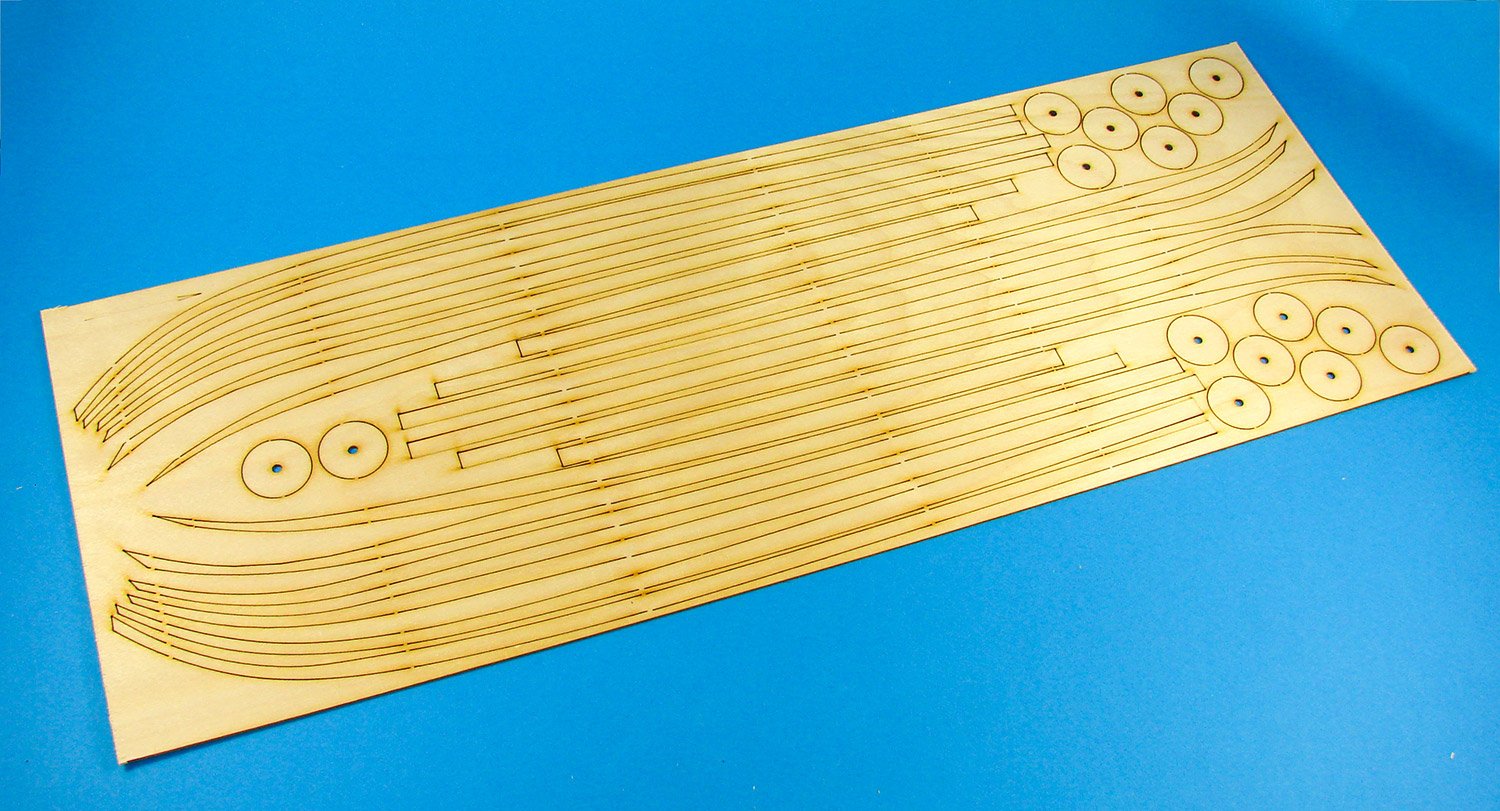
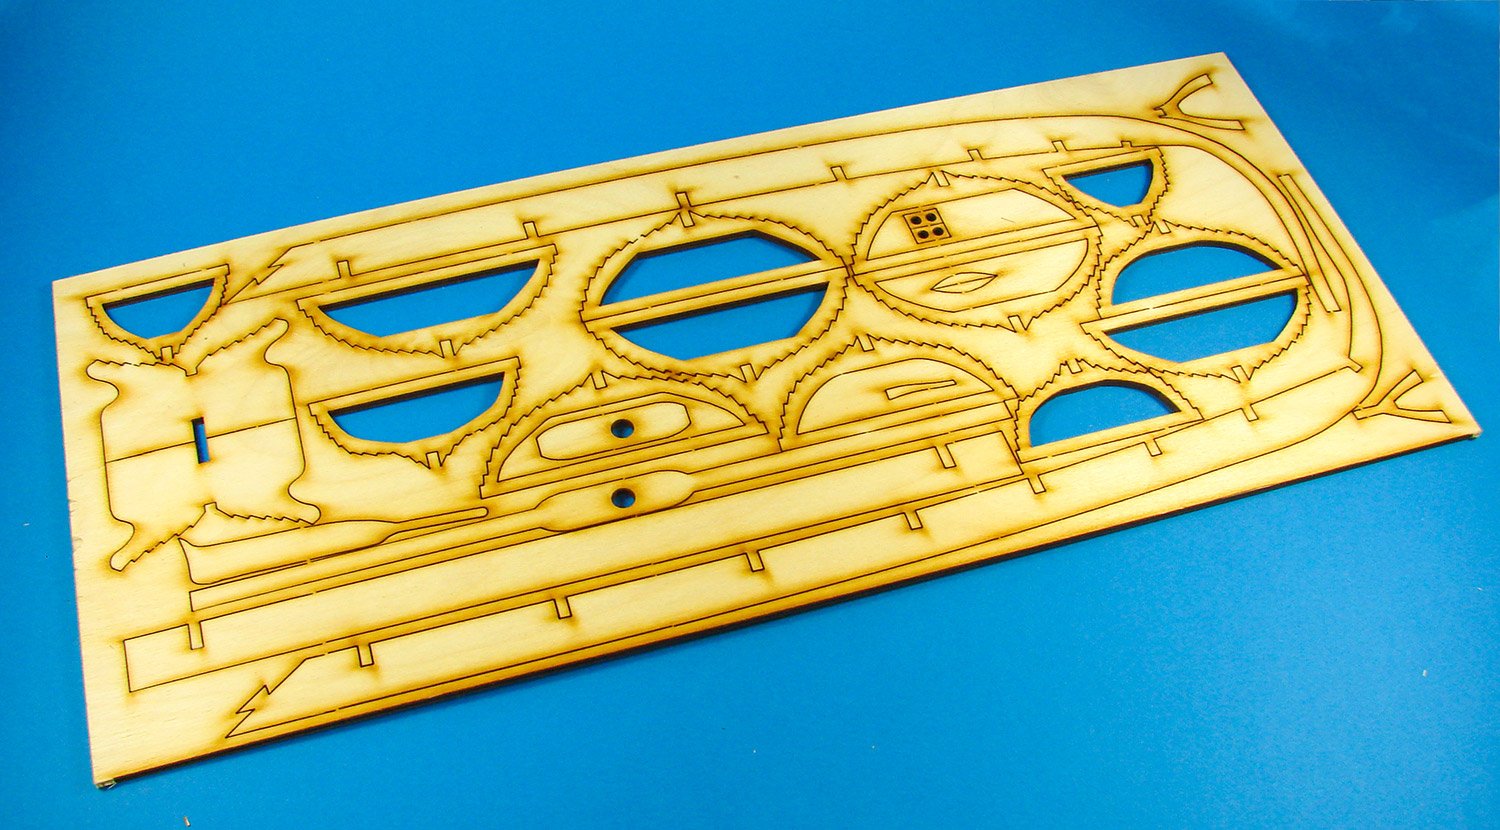
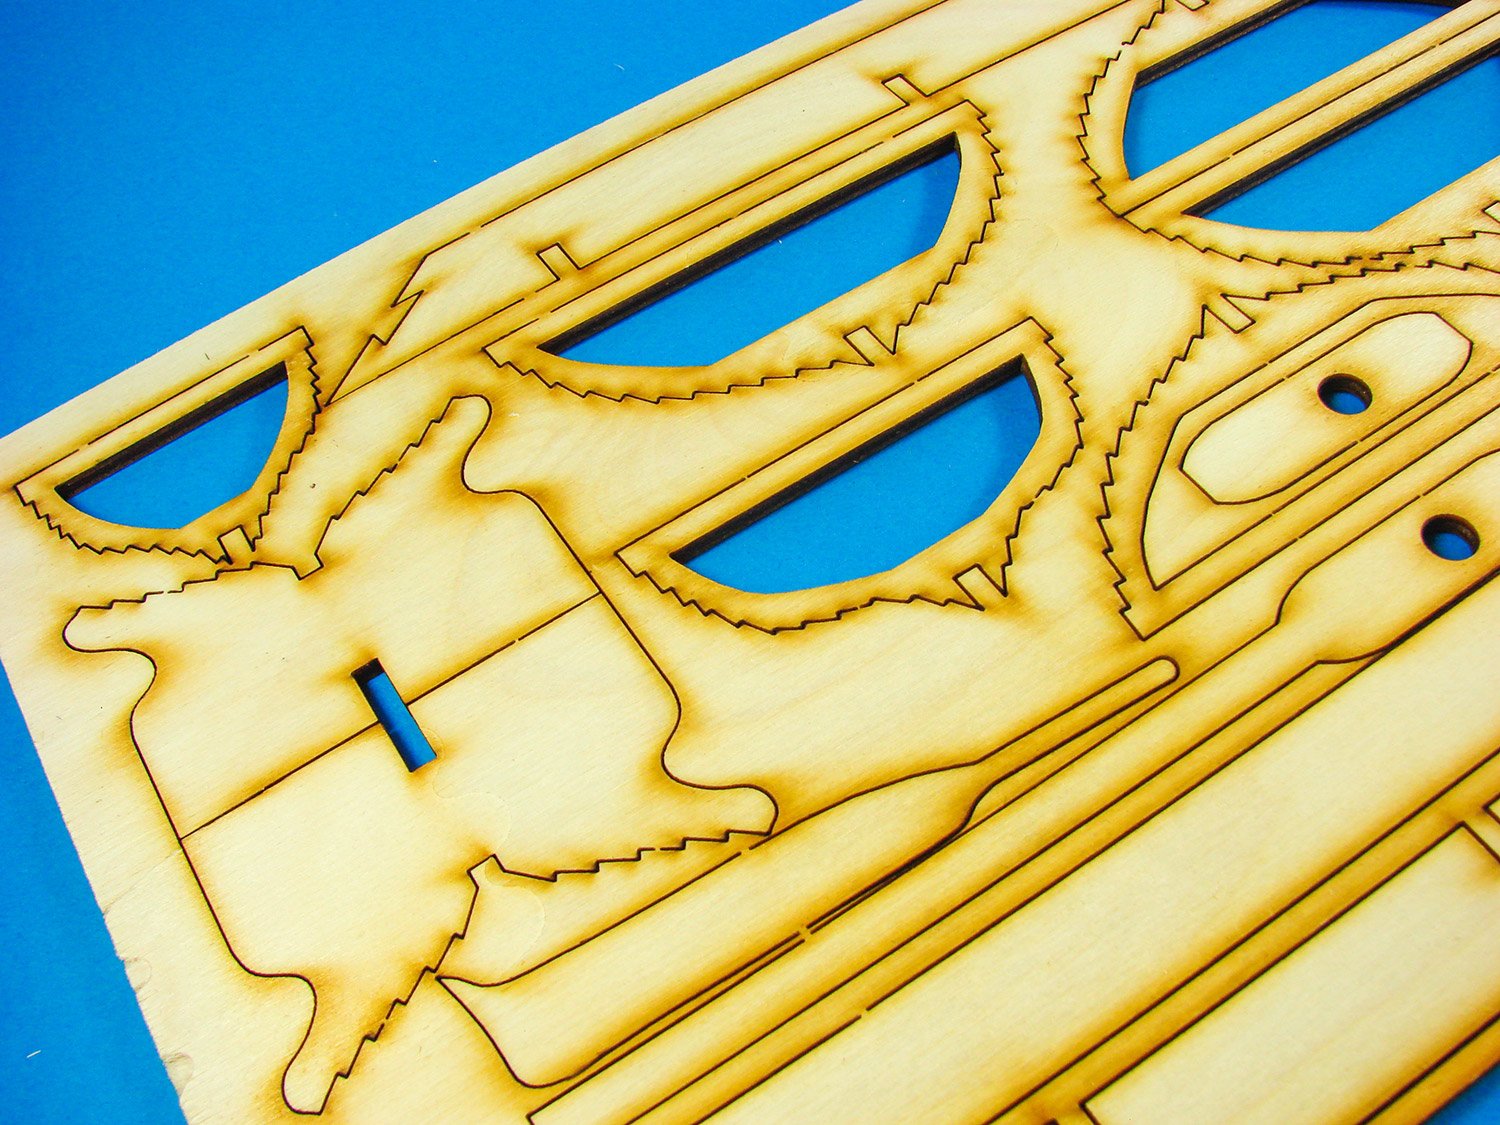
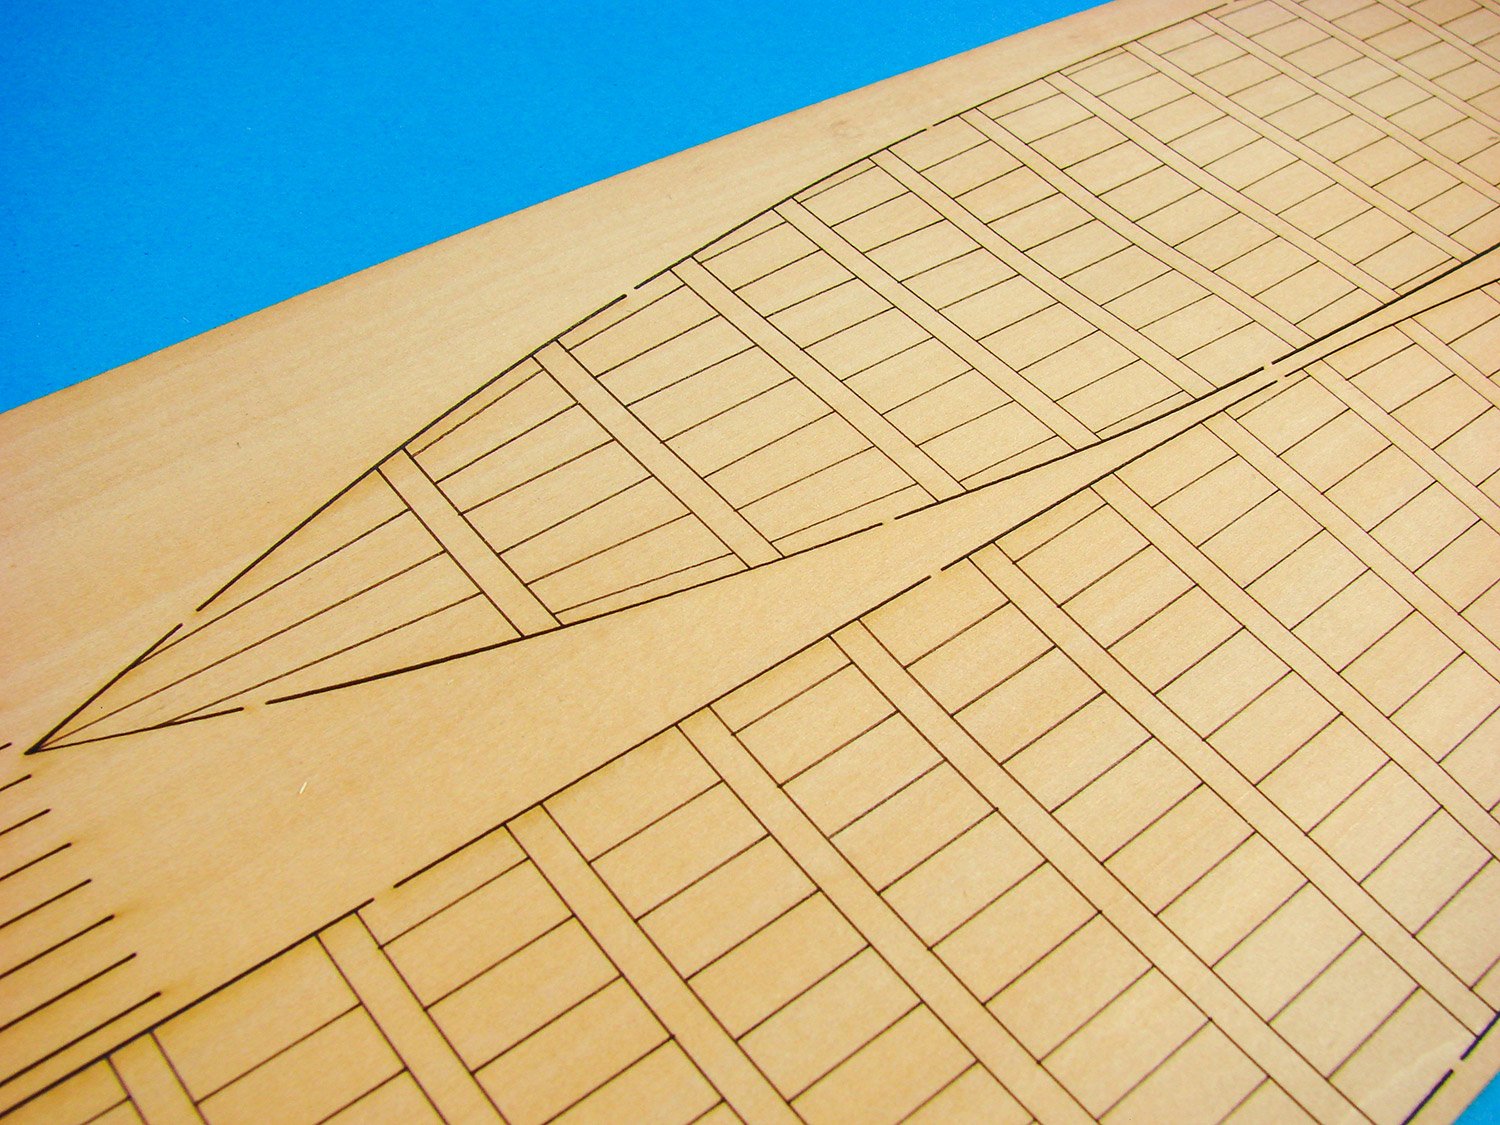
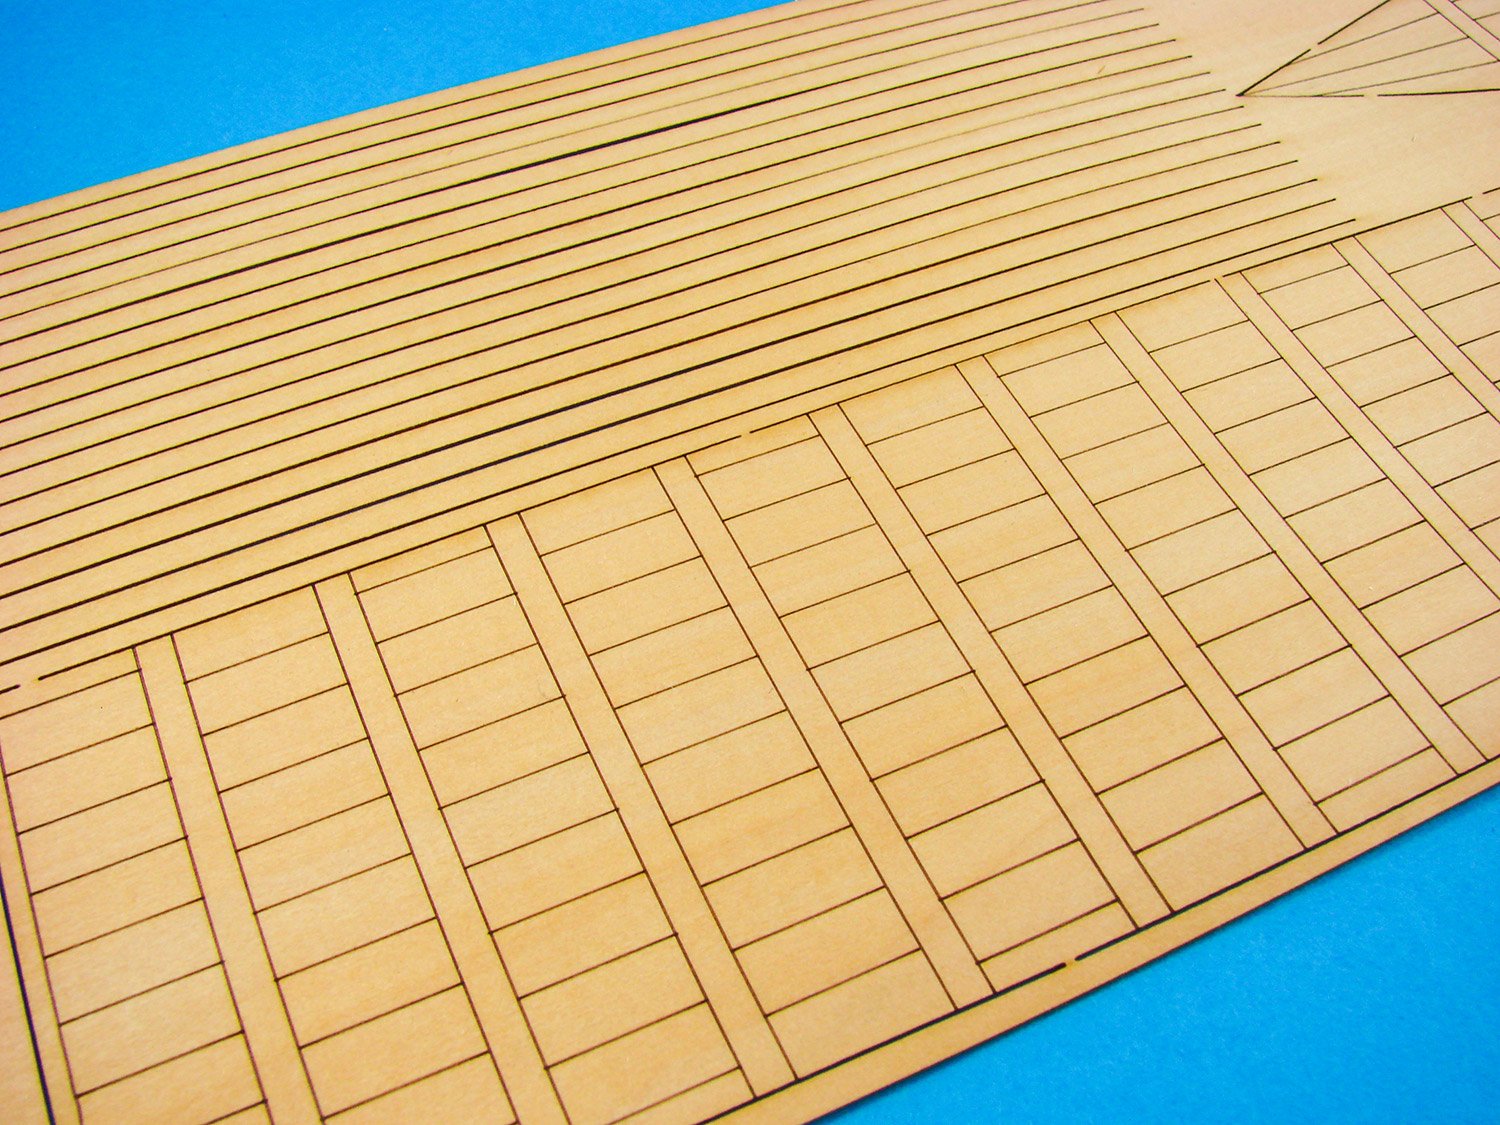
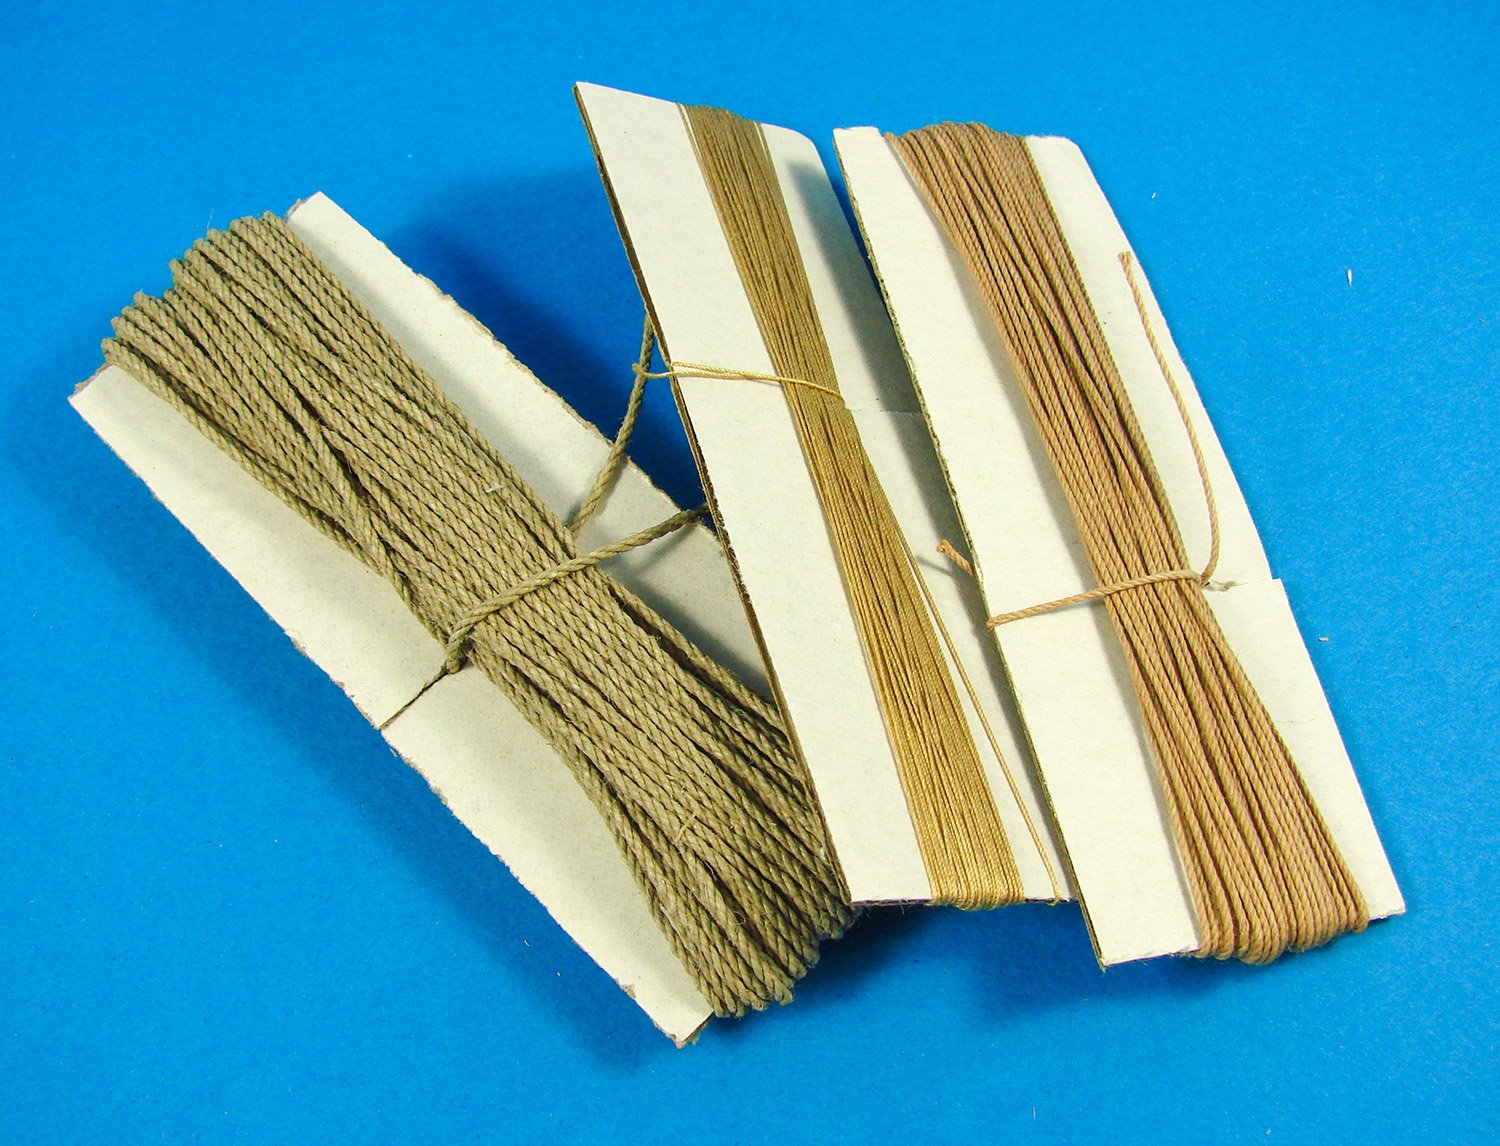
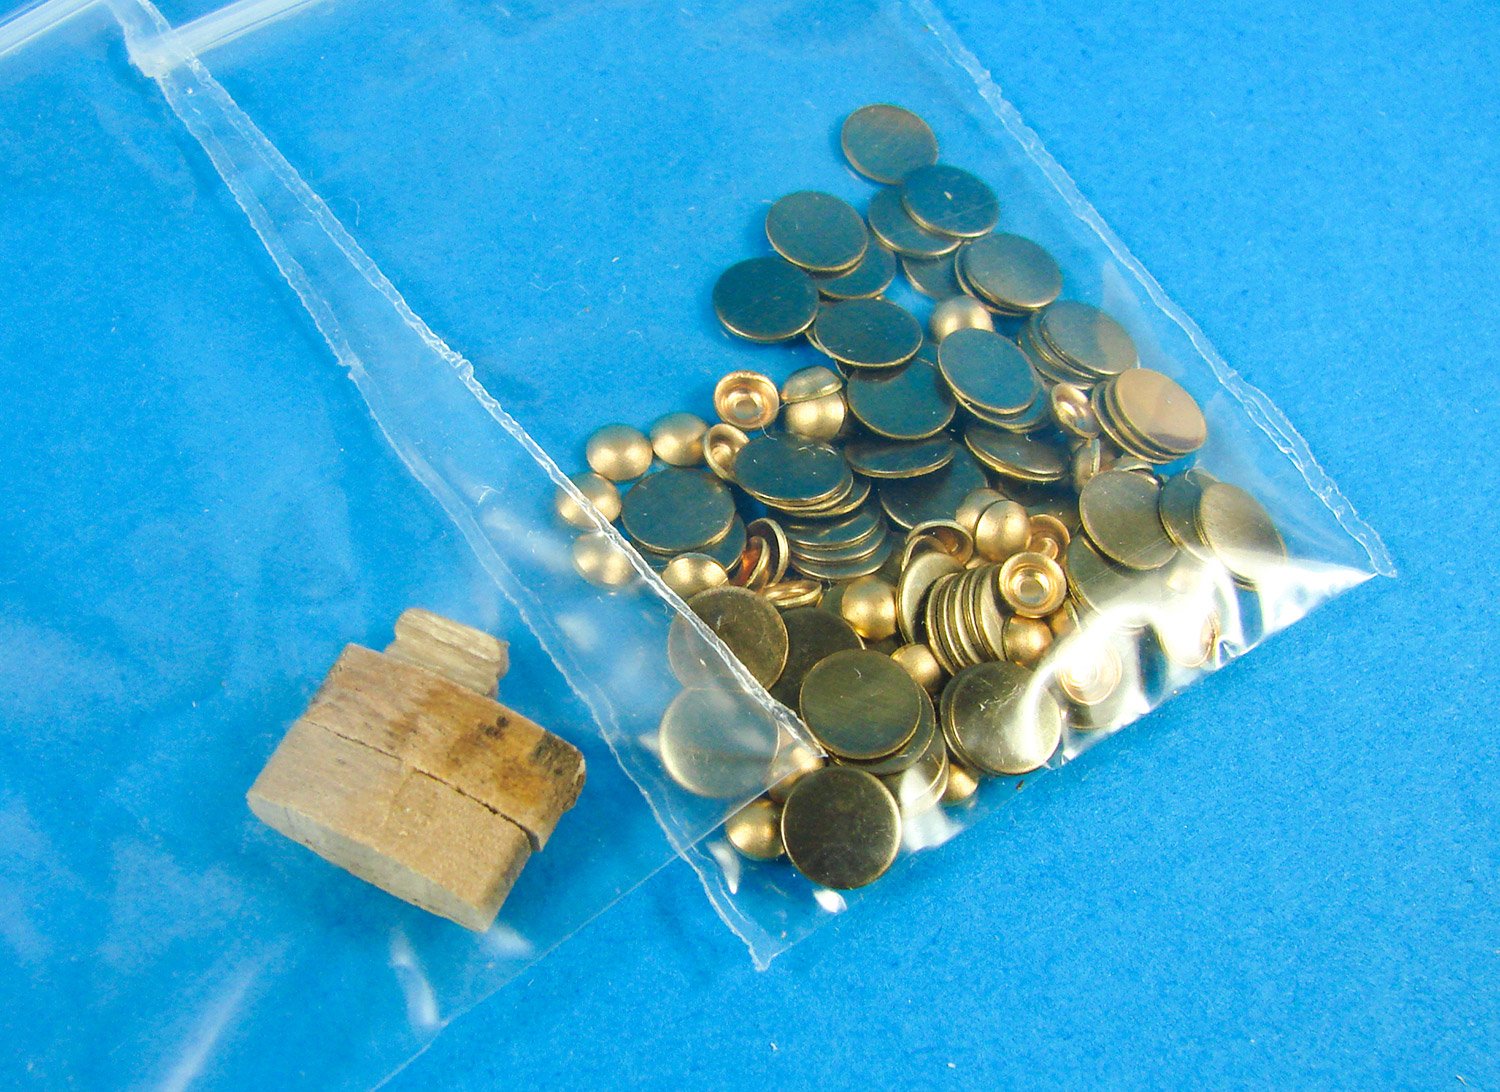
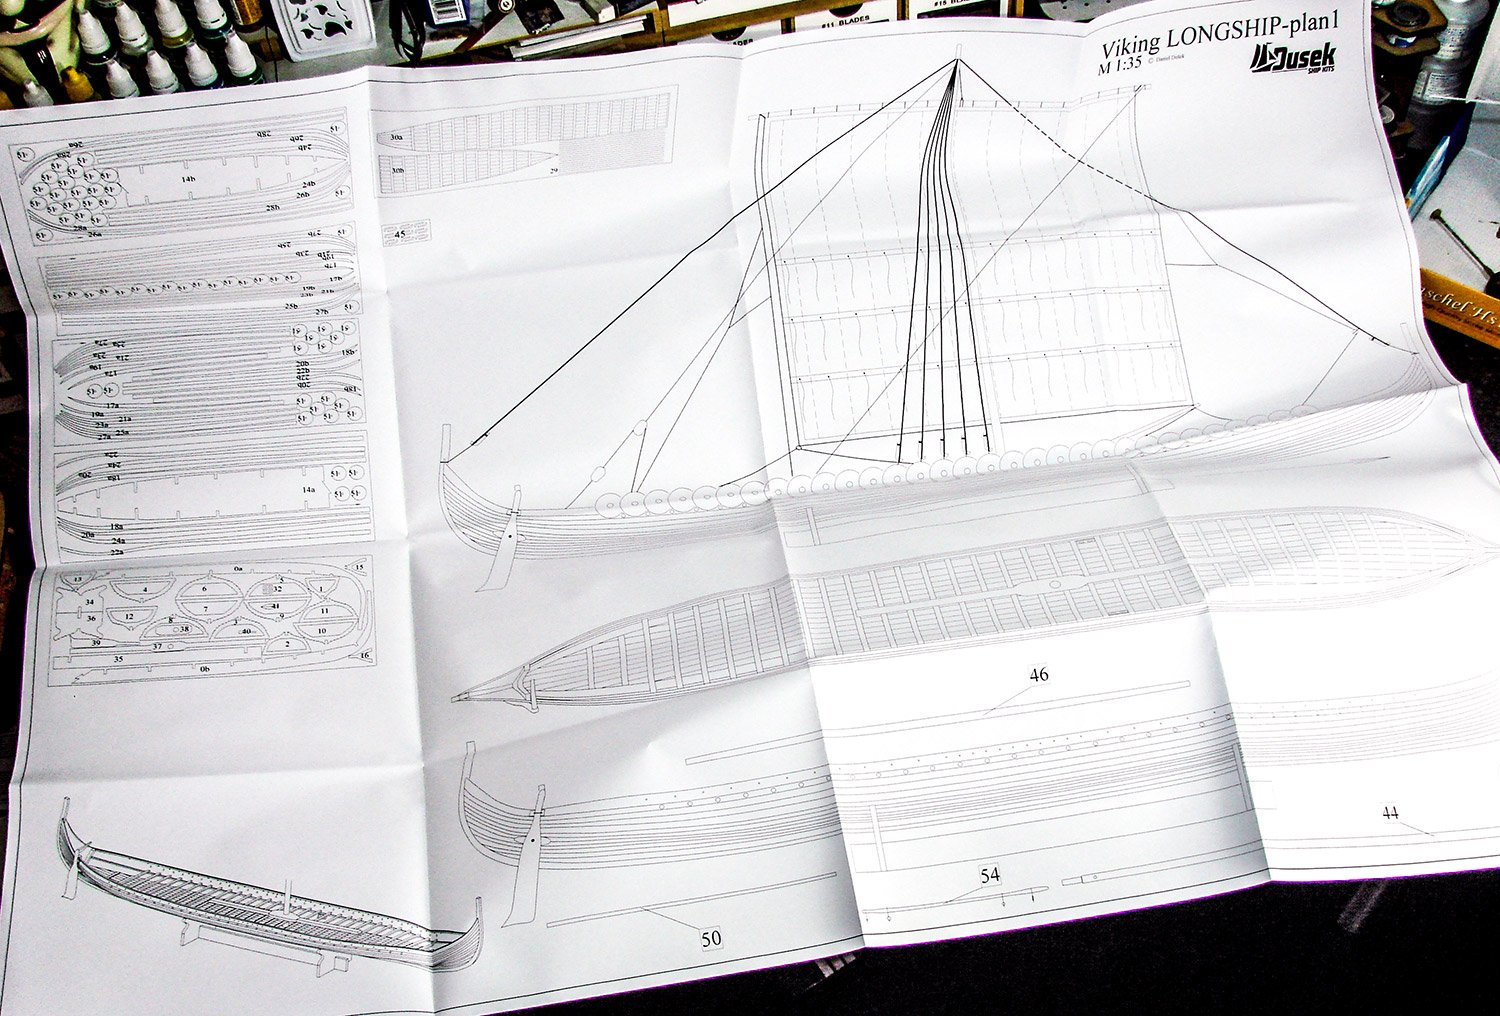
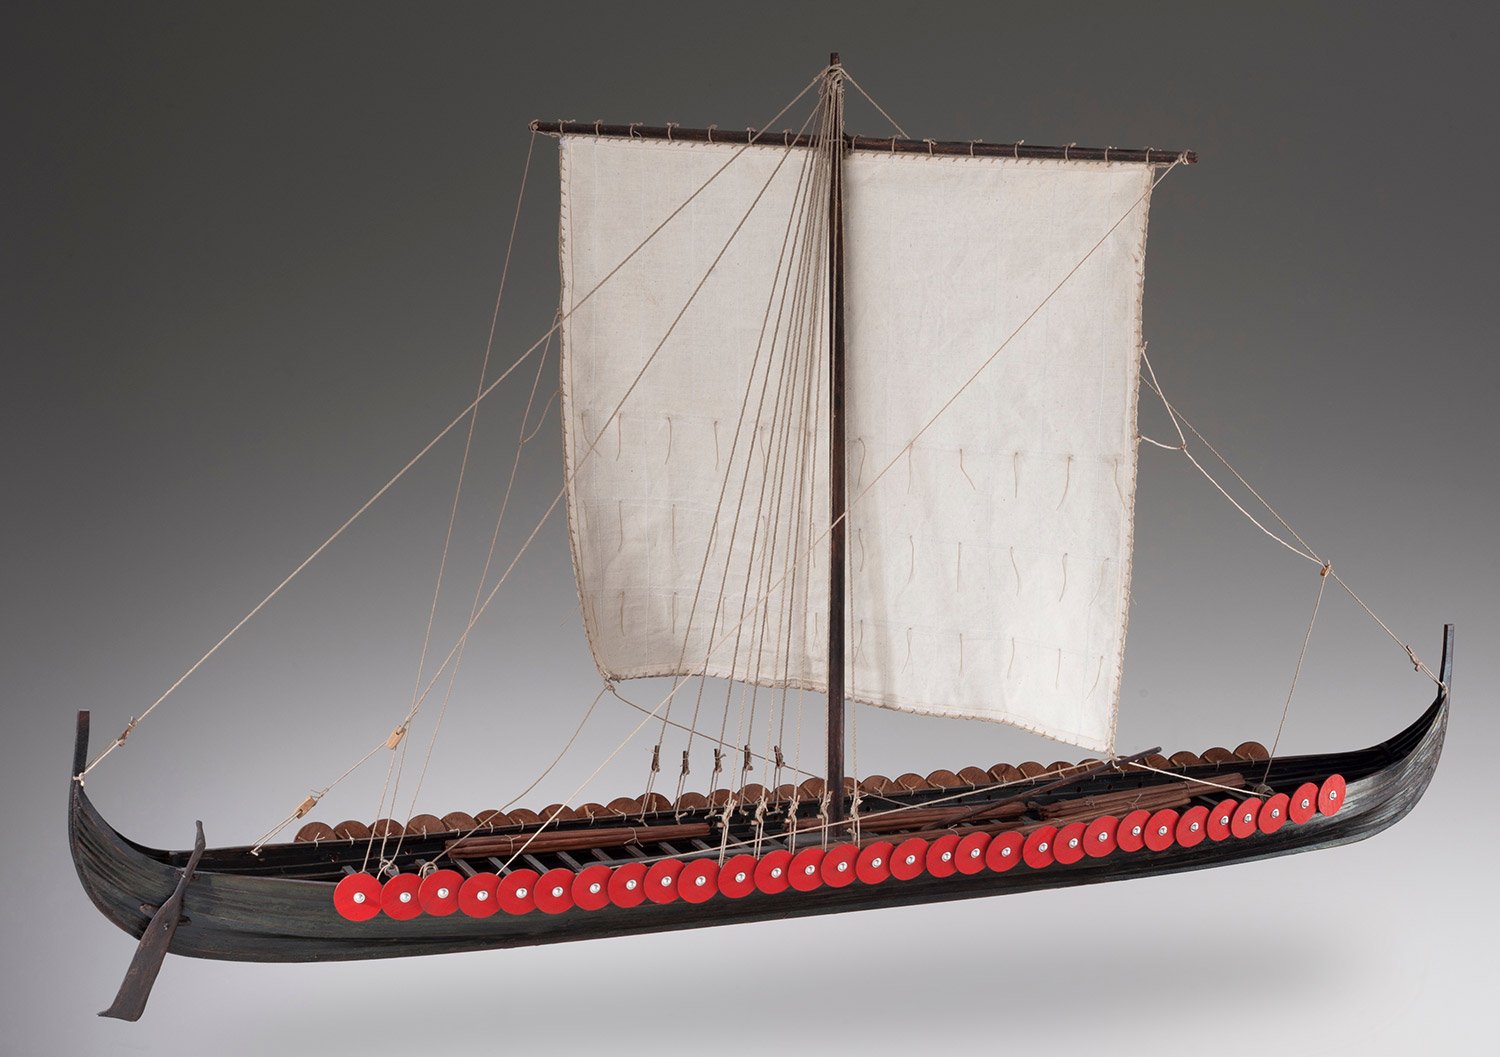
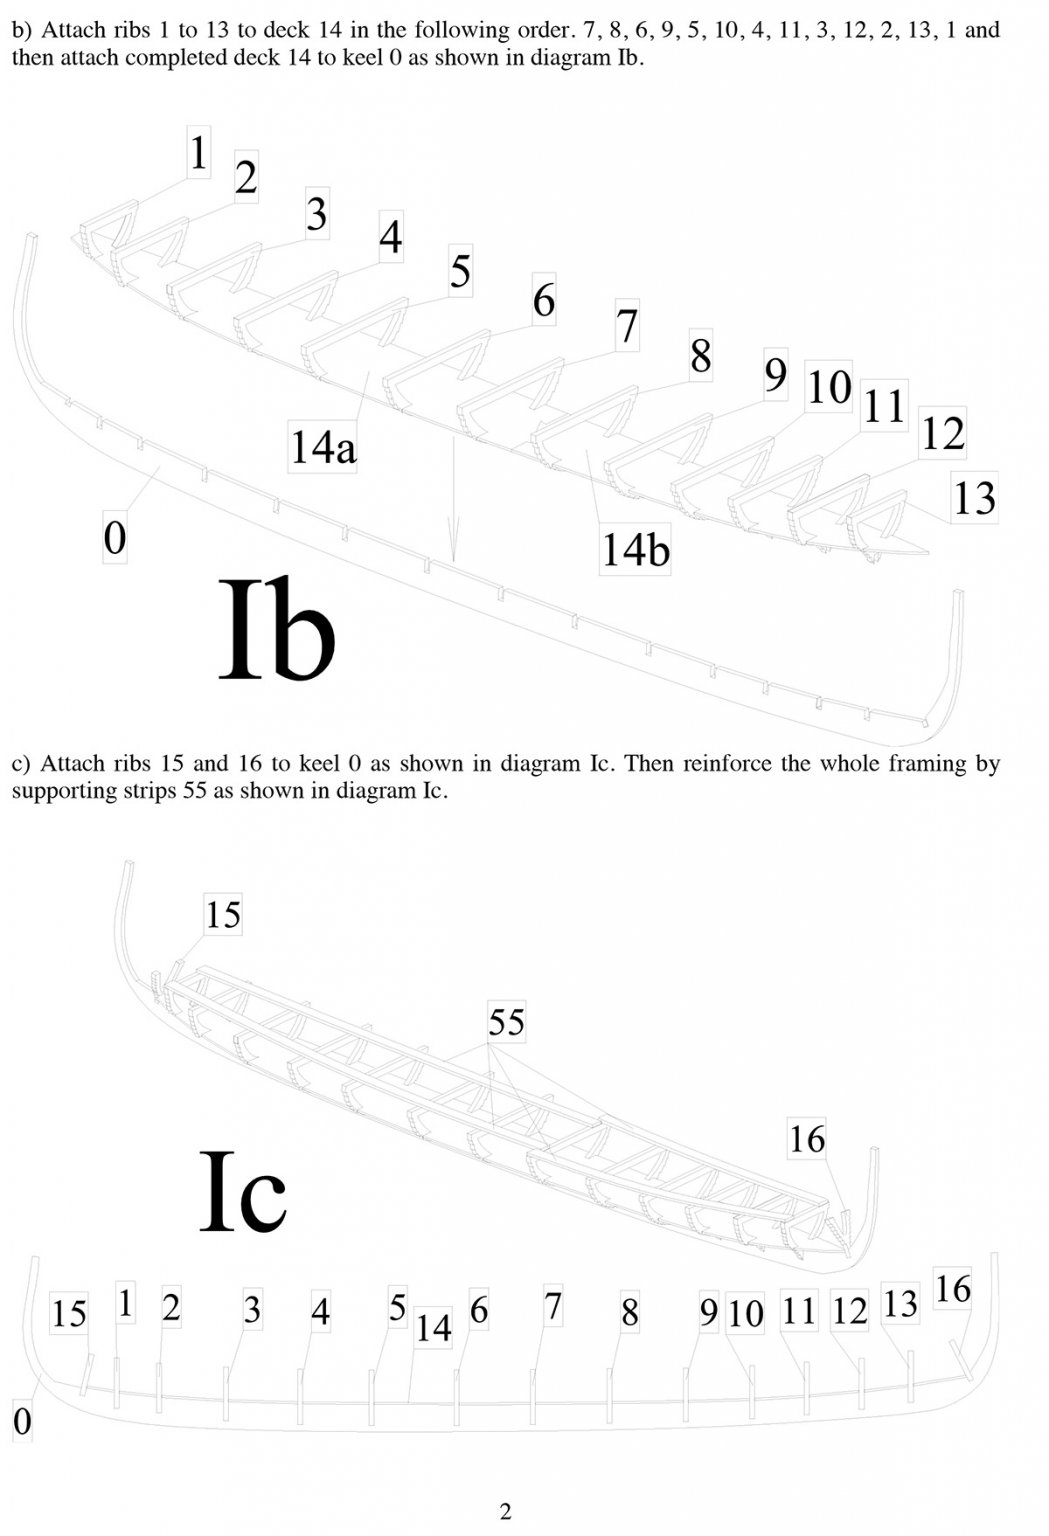
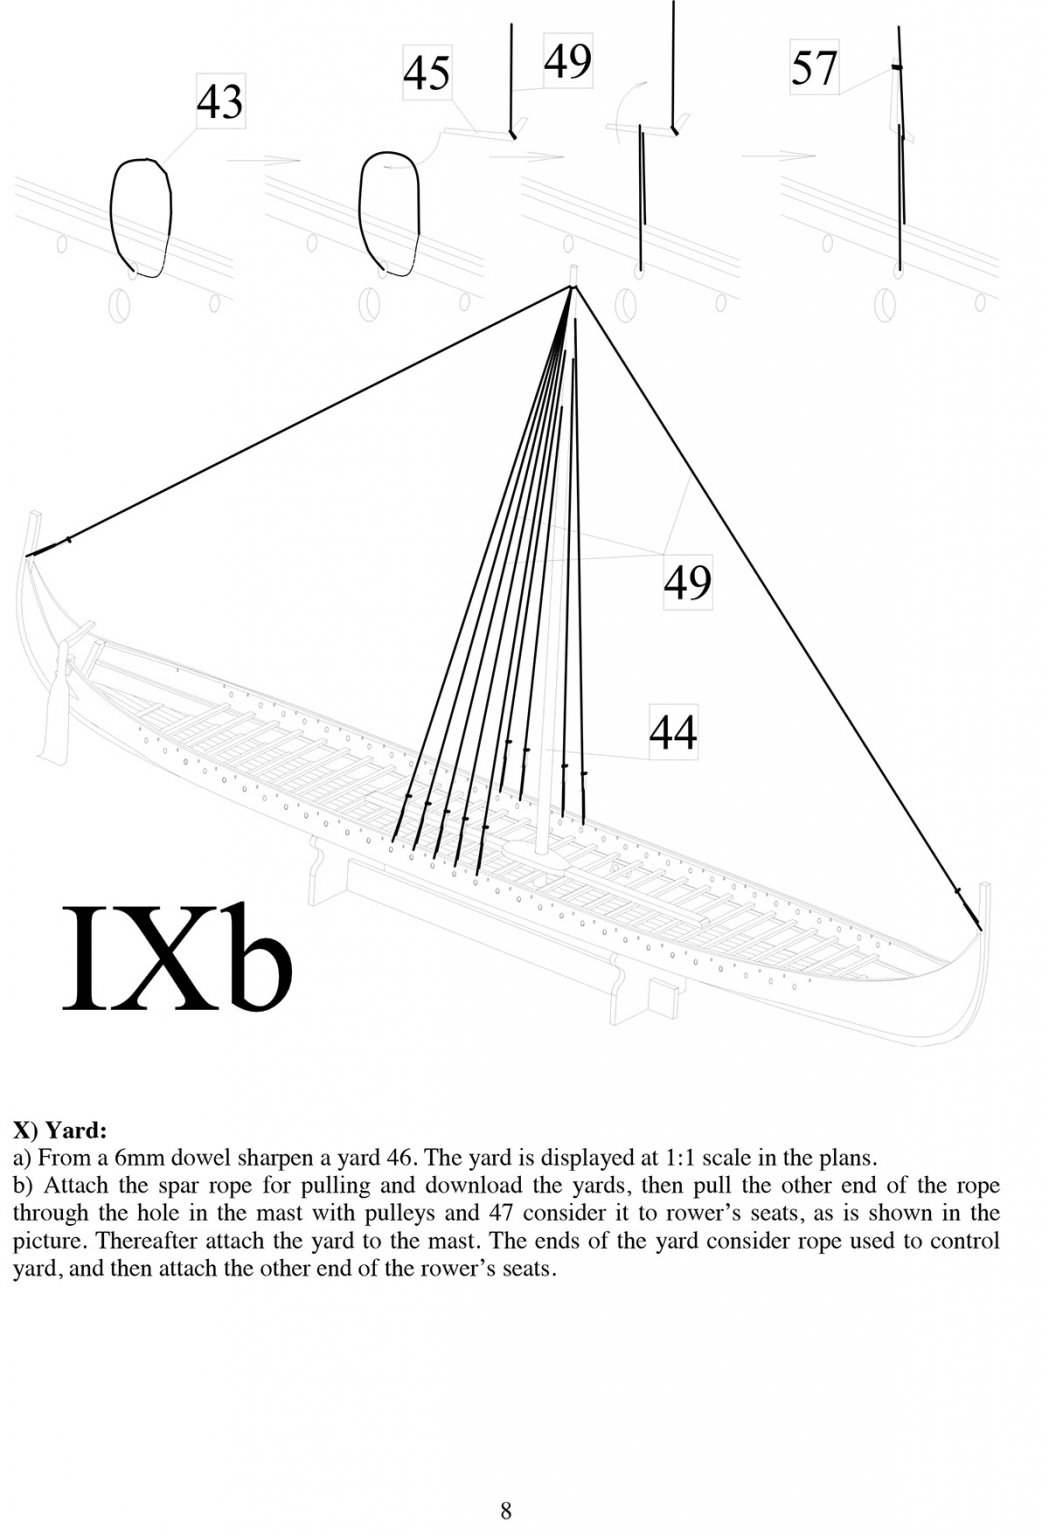
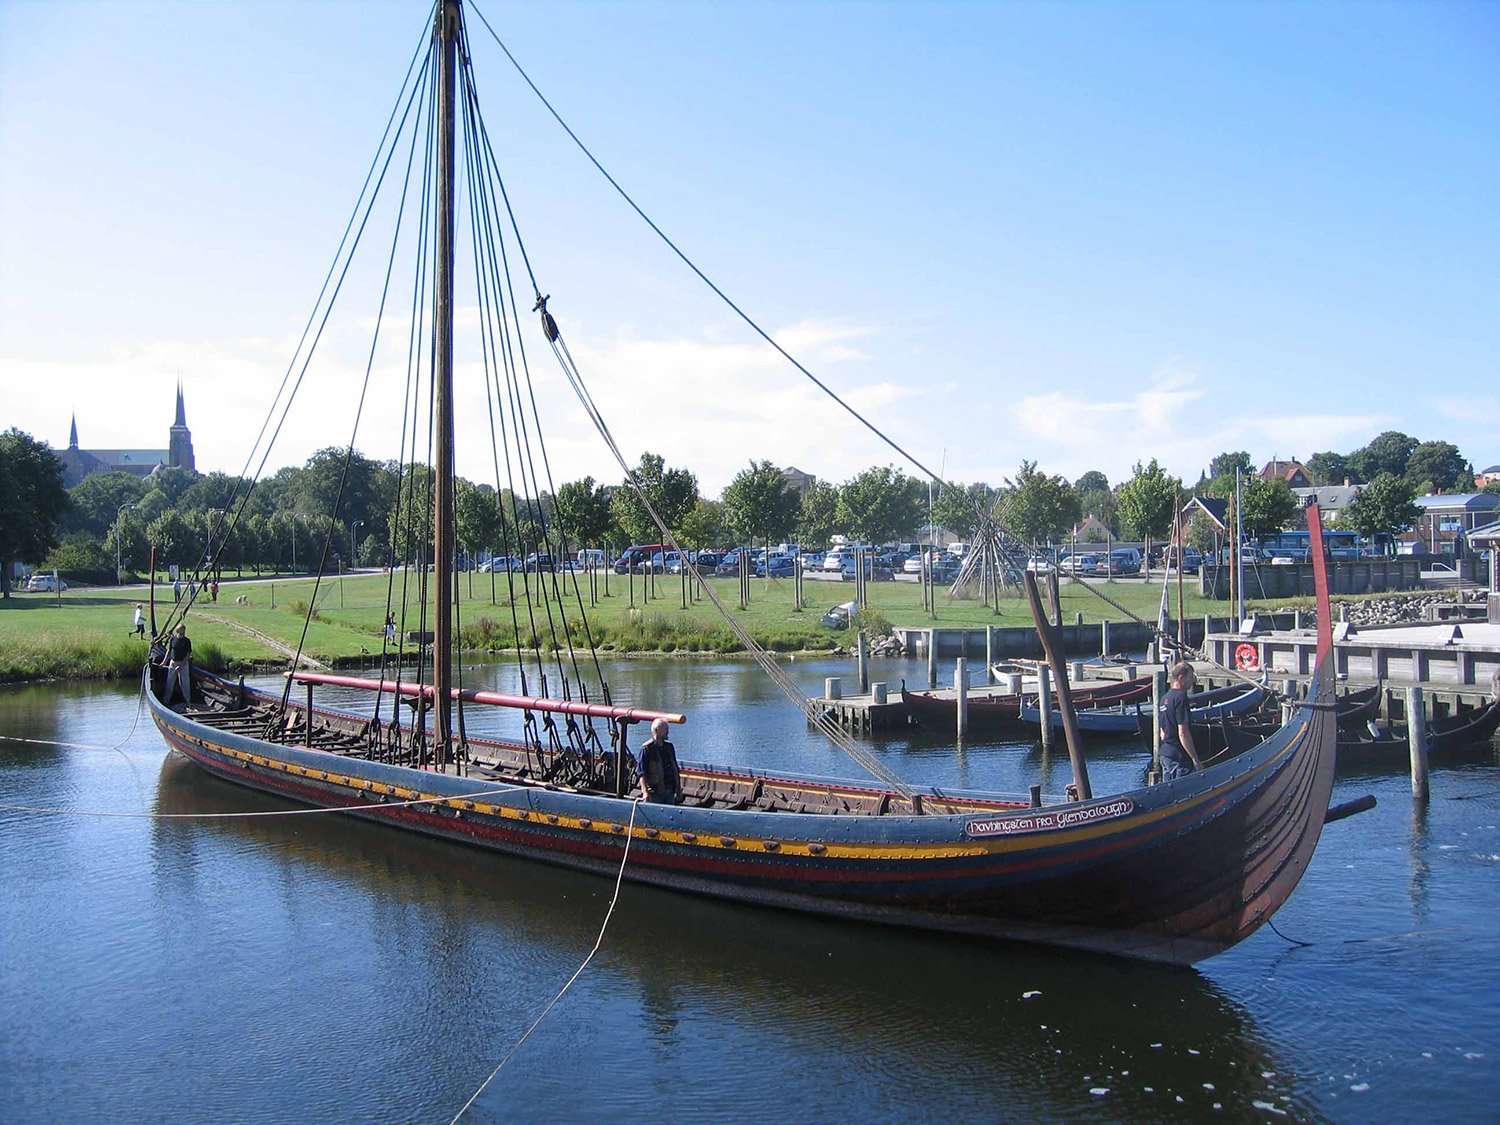
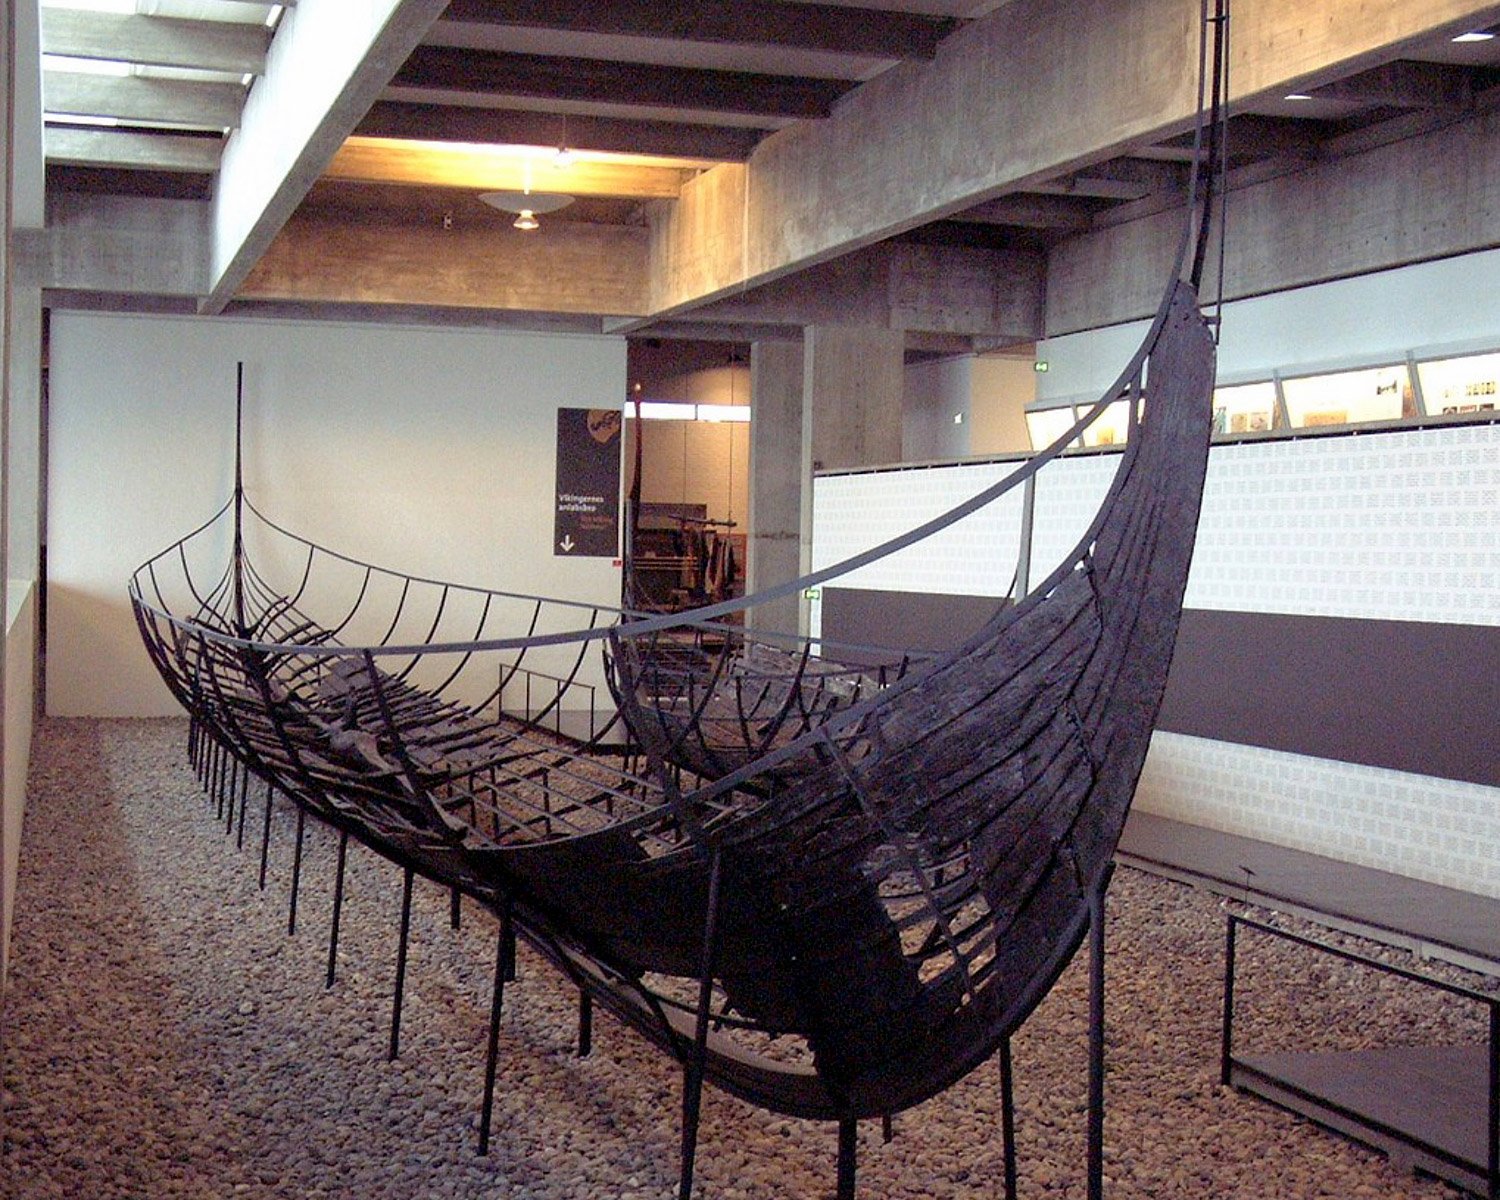
1:35 Viking Longship – 11thCentury Dusek Ship Kits Catalogue # D005 Available from Dusek Ship Kits for €149.00 Longships were naval vessels made and used by the Vikings from Scandinavia and Iceland for trade, commerce, exploration, and warfare during the Viking Age. The longship's design evolved over many years, beginning in the Stone Age with the invention of the umiak and continuing up to the 9th century with the Nydam and Kvalsund ships. The longship appeared in its complete form between the 9th and 13th centuries. The character and appearance of these ships have been reflected in Scandinavian boat-building traditions until today. The average speed of Viking ships varied from ship to ship but lay in the range of 5–10 knots and the maximal speed of a longship under favourable conditions was around 15 knots. The longship is characterized as a graceful, long, narrow, light, wooden boat with a shallow draft hull designed for speed. The ship's shallow draft allowed navigation in waters only one meter deep and permitted beach landings, while its light weight enabled it to be carried over portages. Longships were also double ended, the symmetrical bow and stern allowing the ship to reverse direction quickly without having to turn around; this trait proved particularly useful in northern latitudes where icebergs and sea ice posed hazards to navigation. Longships were fitted with oars along almost the entire length of the boat itself. Later versions sported a rectangular sail on a single mast which was used to replace or augment the effort of the rowers, particularly during long journeys. Longships can be classified into a number of different types, depending on size, construction details, and prestige. The most common way to classify longships is by the number of rowing positions on board. Types ranged from the Karvi, with 13 rowing benches, to the Busse, one of which has been found with an estimated 34 rowing positions. Longships were the epitome of Scandinavian naval power at the time and were highly valued possessions. They were often owned by coastal farmers and commissioned by the king in times of conflict, in order to build a powerful naval force. While longships were deployed by the Norse in warfare, they were mostly used for troop transports, not as warships. In the tenth century, these boats would sometimes be tied together in battle to form a steady platform for infantry warfare. Longships were called dragonships(drakushiffen) by the Franks because they had a dragon-shaped prow. The kit This model represents the similar long ship which was found near the village of Skuldelev at Denmark and which is known as Skuldelev 2. The original was constructed primarily of oak wood about the year 1060 in Dublin. The ship had a length of 30 meters and width of 3.8 meters. The ship could sail with 60-100 Viking warriors onboard and was driven by a large rectangular sheet. In the case of no wind, there were 60 oars. Always great to have a backup plan when your intention is to go raiding! Of course, oars were commonly used for inland waterways. The sight of a sea-borne ship heading inland must’ve been terrifying to those communities in Dark Ages England. In 1:35, this is a large model, and would be a perfect shelf-mate for the Dusek Knarrthat we reviewed about a month ago. As with that vessel, this also represents an 11thCentury incarnation of this iconic legend. Dusek give the dimensions as thus: Length: 850mm Width: 370mm Height: 475mm As with the Knarr, this kit is packaged into the same style, extremely robust box with a glossy lid depicting several images of the completed model, fully rigged and at sail. Inside the box, we are presented with numerous timber sheets which are wrapped in clear clingfilm, a bundle of dowel and strip wood, a bag of parts including rigging cord and sailcloth, and finally the instructions manual and plan. I really do have to say that I like the dowel and strip material that Dusek supply in their kits. Thee material here is finely grained, consistent, die-straight and sharply cut, with no fuzziness. Timber itself looks like walnut, Ramin, and maybe lime. Not too sure, but the colours are of course natural, unlike some of the stained timbers we see in legacy kits. Dowel is of course supplied for the mast and the multitude of oars that you’ll need to make. Numerous sheets of high-quality, thin ply are included, with all parts sharply laser-cut. Where planks are included, you will note a laser-engraved arrow on the timber that points towards the longship’s bow. Remember too that these vessels were also clinker-plank, and you will start at the garboard plank and work your way upwards. On this particular sheet, you also get the basic shield shapes too. In a short while I’ll explain how these are embellished. On these four sheets, we have more planks. Remember that this model is very long, and you will need to join the plank lengths together when running each strake. This might seem a pain in the backside, but it’s no different to any other model ship, in that respect. The model will also be finished in a dark brown colour to represent the tarred appearance of each ship. The Vikings were experts in tar production, although their methods aren’t entirely clear. It does appear that tar was made by burning resinous pine logs over a buried fire pit. Very much an industrial-sized process! That’s enough history. Also note the deck sections here, and more shields. Where we now diverge from the previous sheets is with this thicker ply sheet. Here you will find the thirteen bulkheads used along the length. The edges of these are channelled out so that the planks will sit snugly into them. You will need to bevel these slightly, but due to the sheer length of the vessel and how narrow it is, the bevelling should be quite minimal. Looking at the sheet, you will also see the two-part false keel, mast foot, steering oar and also a very welcome stand on which to sit your finished model. As with the bulkheads, this is also channelled out so that your clinker-build hull will sit neatly upon it. Now for something a little different. The last large laser-cut sheet is supplied in beautiful pearwood. This very thin sheet contains the single-like planks for the decks. I do believe that in some cases, these could be lifted, and stowage placed underneath. The strips you see are the transverse plank strips. For the last little ply sheet, we are given a series of shroud pins. Now onto the bagged components. In this large, clear sleeve can be found the rest of the parts for this model. Three different sorts of rigging cords in a very natural looking colour. These are wrapped around pieces of card to prevent them from getting tangled. The thick rope is the only one of these with any fuzzy ends, and still these are few and far between. It certainly looks like Viking rope should do! This next photo shows the three rigging blocks. These are in two different sizes and remember, these shouldn’t be the pristine items we see on later vessels. Instead, they would have been quite crude. To the right of the blocks is a bag containing the embellishments for the many shields. These consist of two-part hubs (base disc and central hub). To be honest, I’d have liked to have seen more to these shields, but the kit parts give a great basis from which to work. Sail cloth is supplied, and you will need to work with the drawings to make your own sails, including the stitching of a boltrope around the edge. Vikings sometimes also tarred their sails, but you should at least seriously age them and perhaps decorate with the same motif you would use on the shields, indicating the loyalty to a specific king or earl. A single plan sheet is included which shows the various views of the finished model, including rigging. This is more of a reference as the building itself can be more or less done via the manual. On the left of the plan is a parts map. Instructions are supplied on a 16-page A5 manual, simply printed and stapled. These are clearly printed and easy to follow with their simple line drawings and very good English text. The end of the manual has a parts list and reference names for the various elements. Conclusion There are a few options out there for a modeller who wants to build a Viking longship, and this is certainly a worthy contender, being a more traditional vessel without the dragon’s head or other embellishments we see in Hollywood movies. These ships were generally tarred too, giving them a dark brown, almost black appearance, so the extensive use of plywood in this kit isn’t really an issue, as you’ll need to finish the inside and outside of the hull to suit. This is a large model too and should actually look quite imposing with the shields on display. I really do love these ships of antiquity and what they achieved in terms of exploration and settlement. In all, this is a great quality kit which is easy to build. It also won’t damage the bank balance too much either. If you’ve any interest in this period of history, or want a change from your usual type of model, this kit would prove to be ideal. My sincere thanks to Dusek Ship Kits for the sample seen here in this review. To purchase directly, click the link at the top of the article.