d'brat
-
Posts
24 -
Joined
-
Last visited
Content Type
Profiles
Forums
Gallery
Events
Everything posted by d'brat
-
 Holy cow. That has more pieces than my Lego Titanic. And the instruction manual(s) will probably be as long. Absolutely amazing.
- 488 replies
-
- 6
-

-
- Indefatigable
- Vanguard Models
- (and 1 more)
-
Maybe a few things that could apply to a variety of ships from many manufacturers at a variety of skill levels like: Are all of the wood pieces and fittings there? Missing parts can ruin a Badger builder's day as well as a Victory's Quality of the wood? Planking material smoothness, grain, flexibility, no knots. Sheet parts solid with few missing plys Quality of the laser or die cut parts like bulkheads? Warped, twisted, not cut through. Quality of fittings? rough lumps or precise detail. Completeness of assembly instructions? Step-by-step good photos or just a plan sheet in an unreadable language. Experts won't care as much but a high quality kit might have these even if they are geared towards advanced builders Clarity of rigging diagrams? Every line or just a rough drawing Overall appearance of a completed build? Very subjective but you know a model just looks out of proportion or has odd lines even if it is assembled exactly according to instructions I'm a relative beginner but knowing even those things would help me pick my next project. A manufacturer with lots of low results in areas I care about could be avoided. . Everyone could apply relative scoring weights based on their own interests. Can you tell I'm one of those guys that makes lists?
-
Thank you for the reminder. I did not do a full count of the little bits even though I knew that I should. I've not been building for a couple of months but I will definitely do the count when I get back to it (hopefully) soon. When you were short where did you order the replacements? My kit came from a local hobby shop so I don't have a mail-order distributor to use.
-
Thank you. Your build looks great. I have not been able to work on my for a while but hope to be back at the "shipyard" soon. I'm sure I will have a lot of questions then. One questions that I already have is how you tapered the bow before planking. Did you shape it to a vee first then planked it and then squared it off to glue on the final stem piece or did you glue the stem piece on before planking and then notched it to accept the planks? Not sure if I'm describing it clearly but I know the instructions do not cover that.
-
You make planking look like a piece o' cake. Very impressive.
-
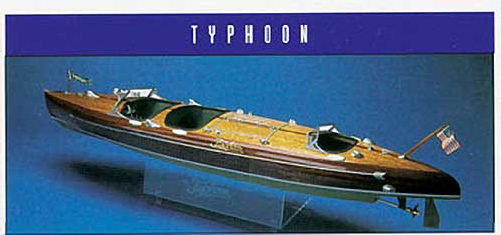
How about a Dumas Typhoon - beautiful non-sailing-ship
- 1 reply
-
- 1
-
-
Does anyone else look at this topic first thing to see what's new and inspirational? And are you disappointed like me if the update is just a non-informational comment like this one? My stash is building up for the day when Chris' newest design hits the market.
-
I had to go back twice to see the date you started. You make planking look fast and easy. You even mastered the bluff bow. Is every plank nailed?
-
This looks like it will be a very impressive model. The original ship is rusting away in Philly harbor waiting for a rich angel to save it. I've been on it several times and have thought about building the plastic kit that is available. The limited production nature of your project will provide you something very exclusive when you are done. Good luck with the hul shape and deck.
-
You dig a great job with it for a first time. The veneer looks so fragile. I would probably have had a very costly wad of wood at the end.
-
Very impressive. Everywhere you look there is more detail. Did you have many "Oh, Drat" moments attaching the wood veneer to the deck? It looks totally smooth.
-
Very impressive kit. Are you planning on leaving the acre of wood planking just varnished or are you painting the hull?
- 80 replies
-
- 1
-
-
- Americas Cup
- Endeavour
- (and 1 more)
-
Even after all those months lurking I never knew about clicking on the photo. Thank you. Now I'm even more impressed with the details of the PE on this build.
-
Hi Jack You are moving fast but after two full careers you certainly deserve the leisure time. Should we tell the rest of the forum about our weather today in AZ? Other than the trimming you mentioned did you try to loosen the fit of the frames on the keel at all so you could adjust the squareness with the Lego blocks or did you rely on the pre-cut snug fit of the pieces? How well is the keep clamp working for you?
-
Do you have to warm the paint can to get the finest spray or does just the shaking prevent any splatters. You must have a verrrry steady hand to draw lines around the tiny bits. Do0 you have any before and after close ups of the detailiing effect?
-
What's your painting technique to keep the minute detail crisp? It looks great in the pictures.
-
Lots of natural wood planking and no rigging. Sounds like a winner to me. This one or a Dumas Chris Craft is on my long list. I will follow closely.
-
Your log is definitely inspiring me to keep moving forward on the Bluenose that I started recently. If you don't mind I will be going over all of your older pages as well as the newer ones to try to keep me from going down the rabbit hole of trying to figure everything out for myself. The AL kit that I have is different in supplied pieces but I will be trying to get the details right just like you did.
-
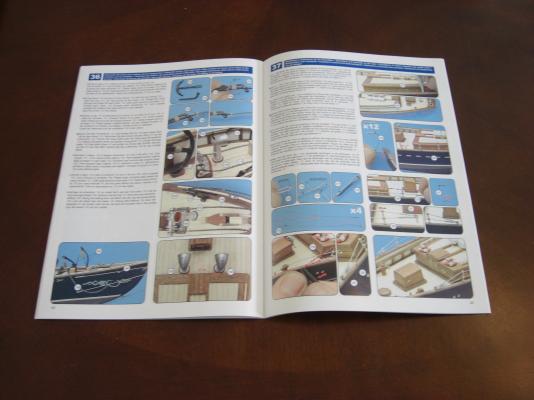
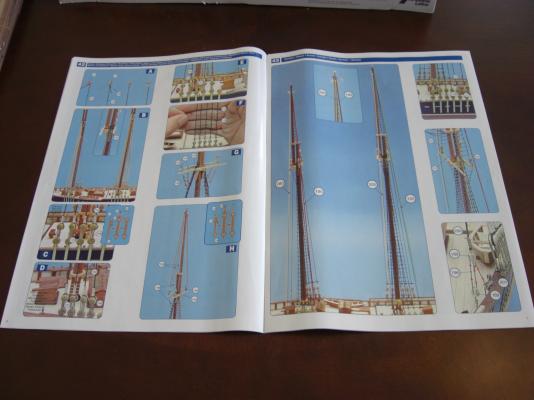
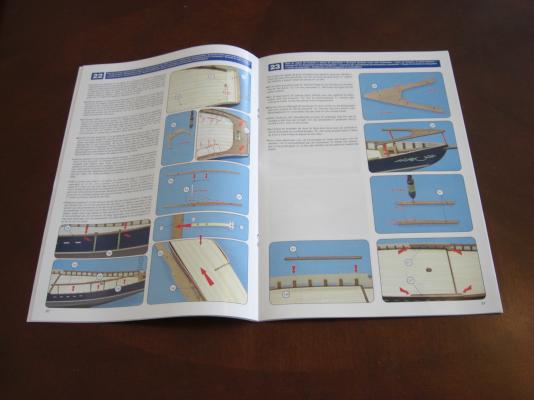
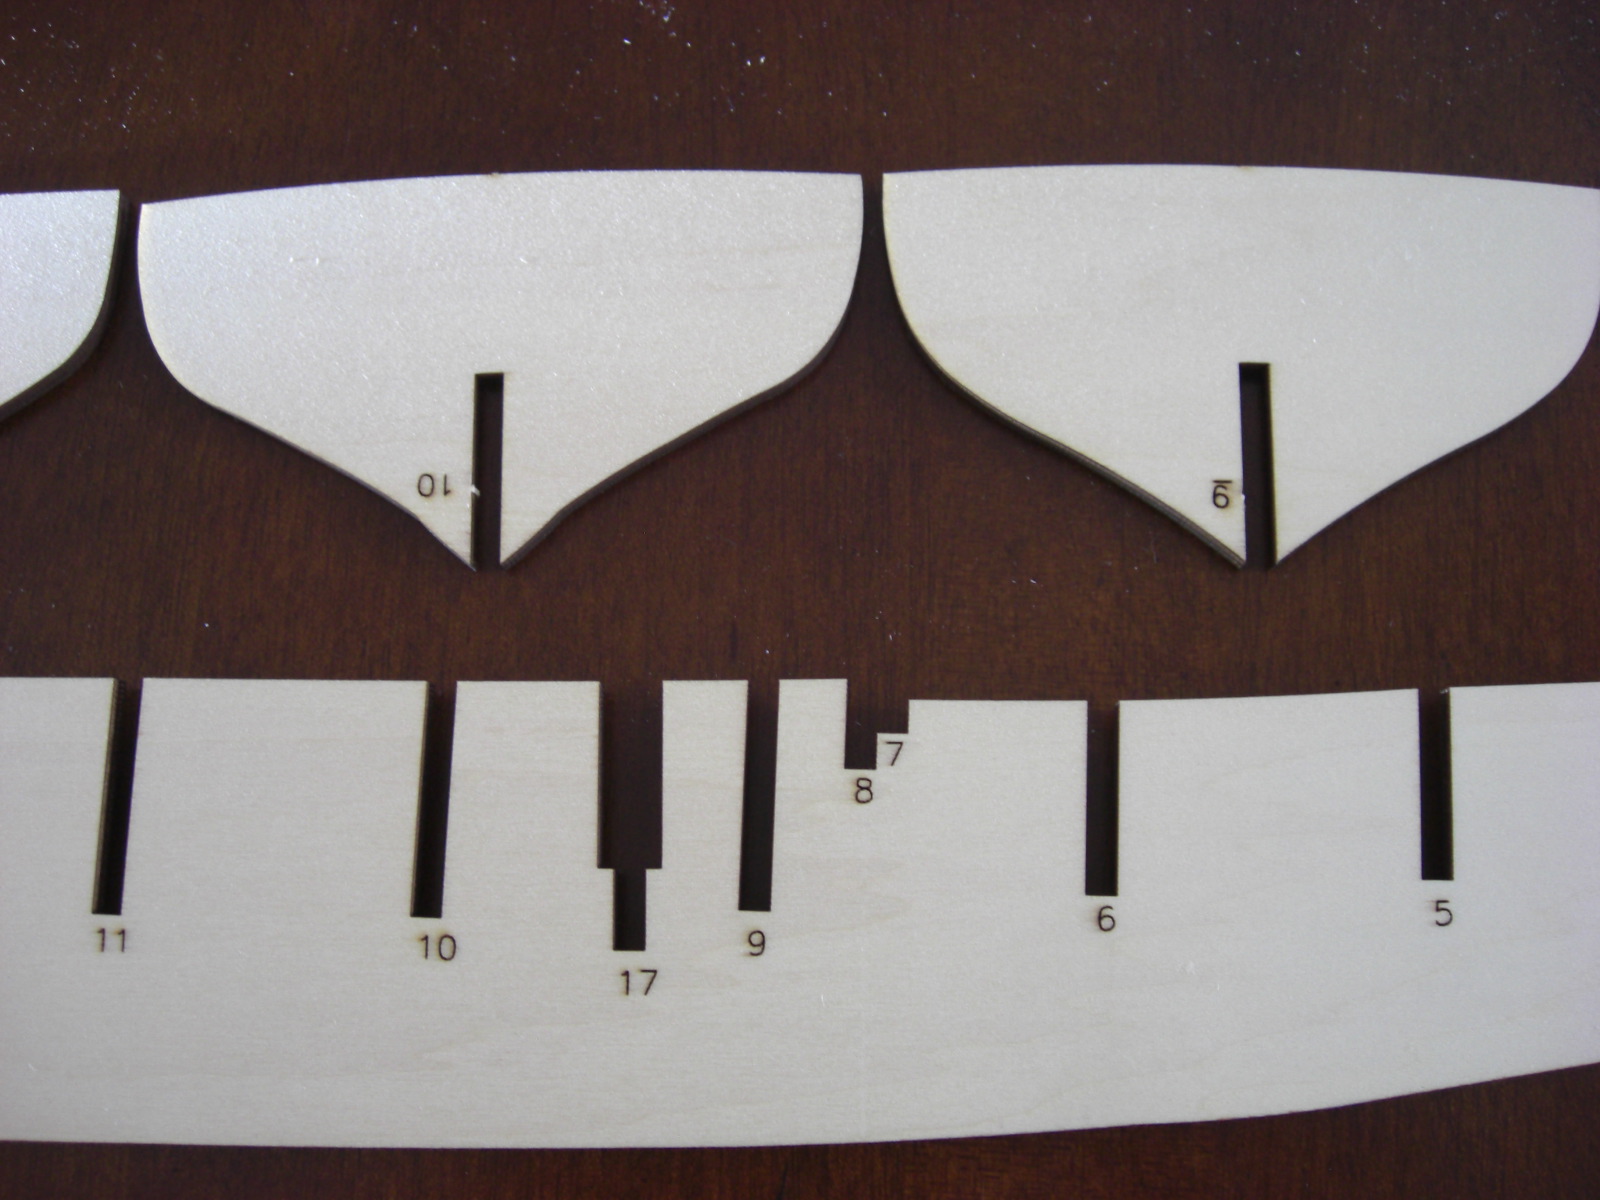
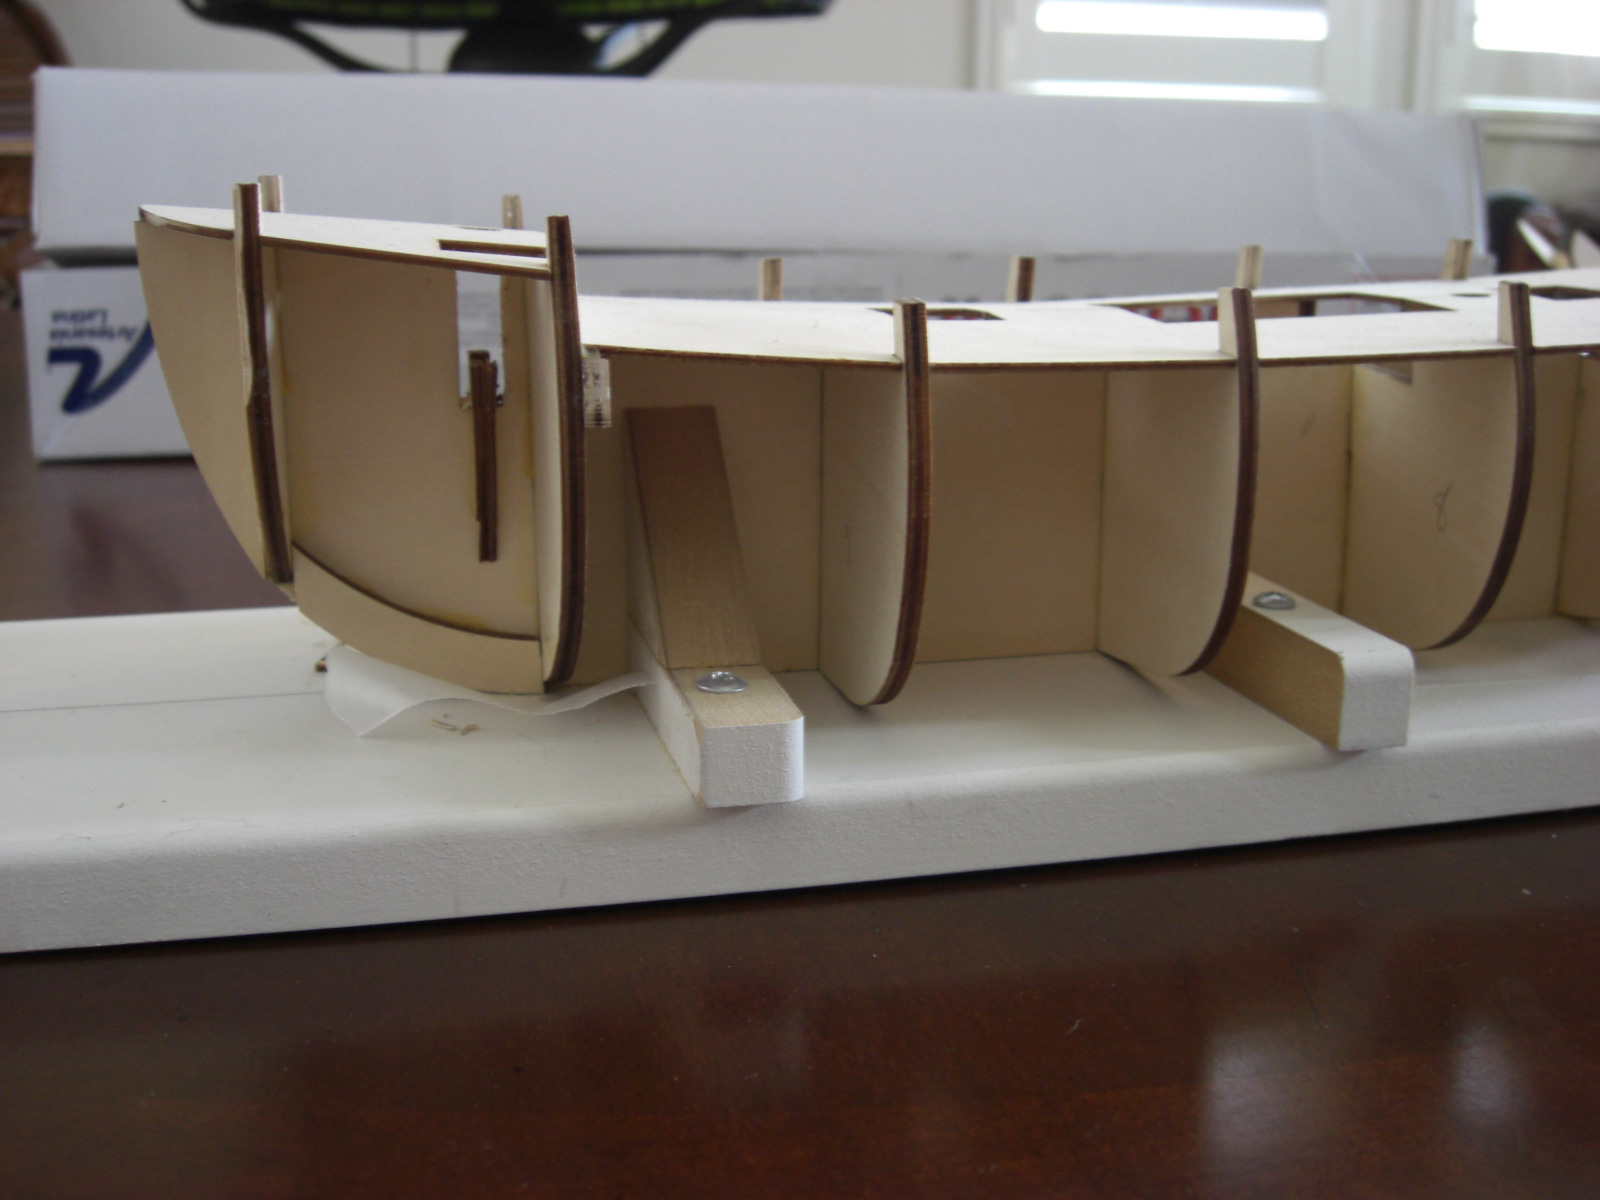
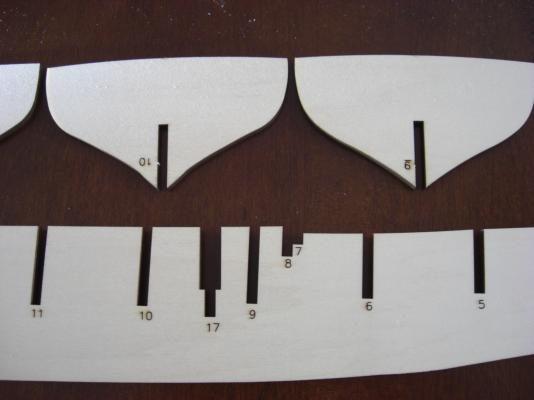
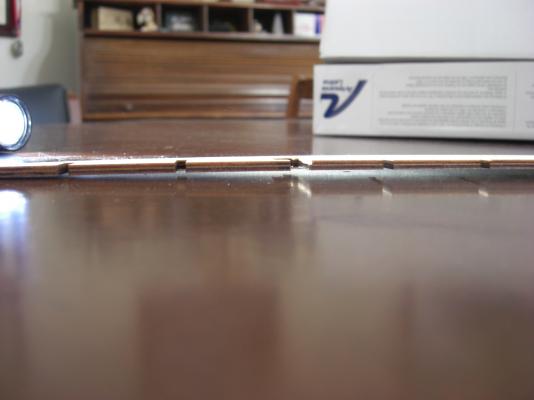
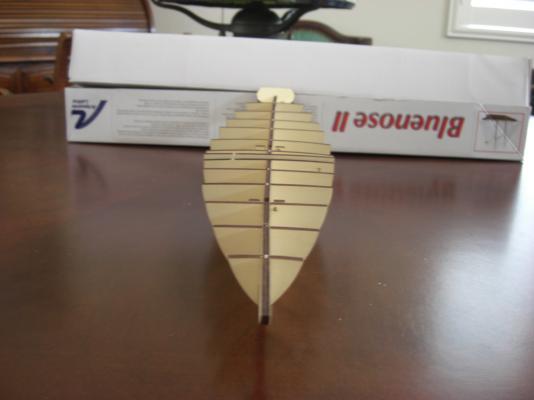
After reading the manuals a few times I finally started on the actual assembly. The laser cut framing was very cleanly done and only took a few pushes with the knife to cut the little tabs that held the pieces to the large sheet. I particularly like that every piece is numbered and the false keel is numbered where each piece goes. That makes assembly almost foolproof. We'll see how far "almost" goes in the future. The central false keep does have a curve in it but does not seem to have a twist. That piece was both curved and twisted on my HMS Supply kit so I built up a little support from scrap MDF to hold it straight during frame and deck gluing and the initial planking. When the pieces are dry-fitted the curve is still there so I think i will make up another holder before I start gluing. The other Bluenose logs on the site are not the Artesania Latina versions but I will be going over them as I plod along and read everyone's helpful suggestions. If I come across anything that seems unique to the AL kit I will call for help Now off to work on the weekend honey-do list.

-
This site has many photos of the original schooner taken in 1940 during its declining years. After I finish building the hull these shots will help me decide what to change on the kit of the II. Or, more likely, if my modeling skills have declined too much I will just have to work with what I have in the box. http://novascotia.ca/nsarm/virtual/bluenose/ Sorry if this has shown up on someone's build log before but I'm still a newbie at this.
-
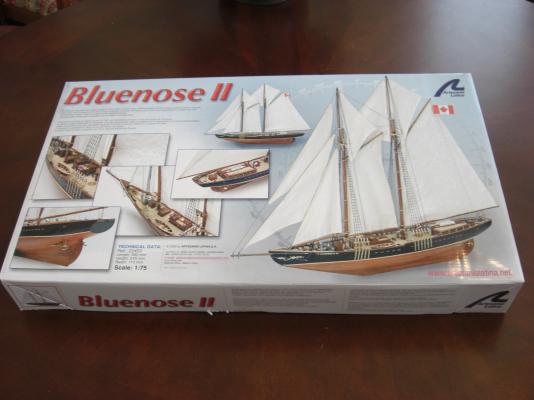
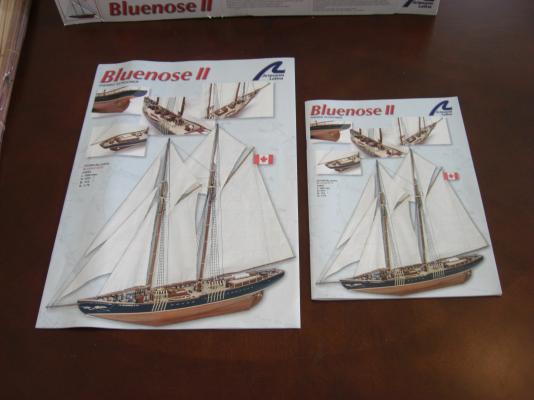
The actual Bluenose II is the replica built in 1963 of the original 1921 Bluenose so the II kit has all of the updates that are on the new version including double propshafts and different deck fittings. I was planning on leaving off the shafts and props since they look out of place on the sleek hull. I may also change fittings to look closer to the original schooner to my untrained eye.
-
The case changes it from a ship model to a museum piece. Looks great.
-
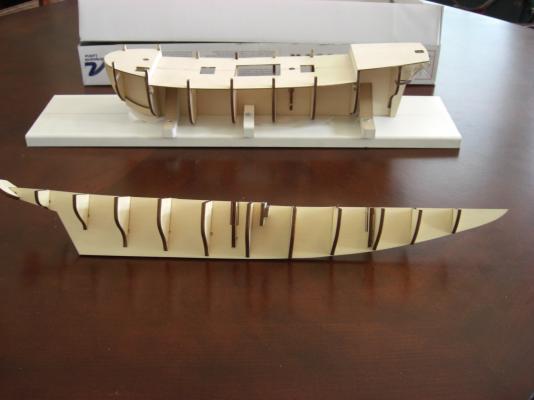
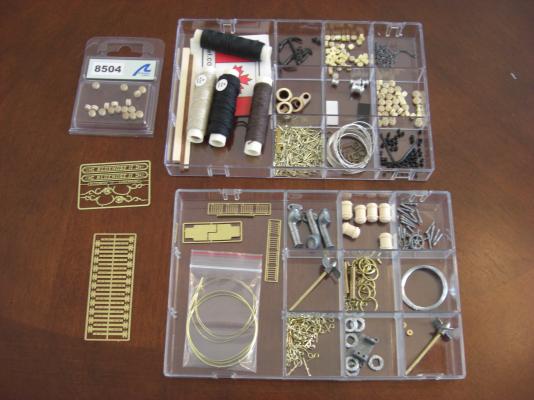
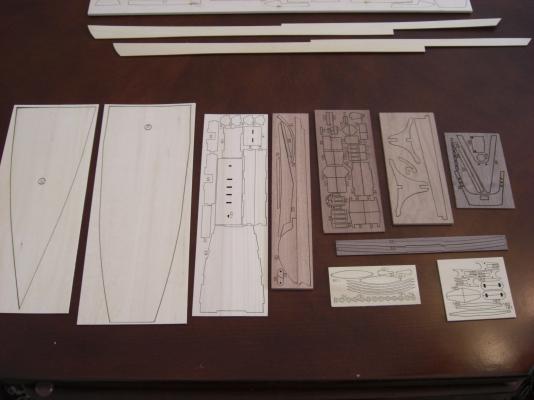
Can't judge to quality of the wood until I start the build but the contents of the box along with the detail of the fittings seems to be very complete for an intermediate level kit. It looks like there is a slight bend to the backbone but an assembly jig will set that straight through framing and decking.


-
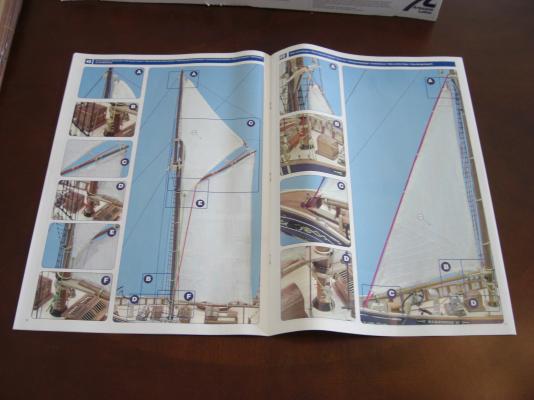
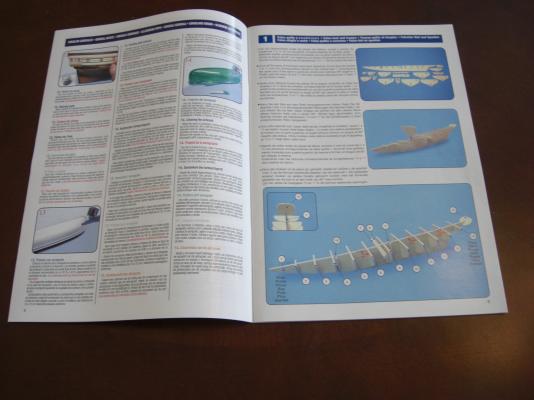
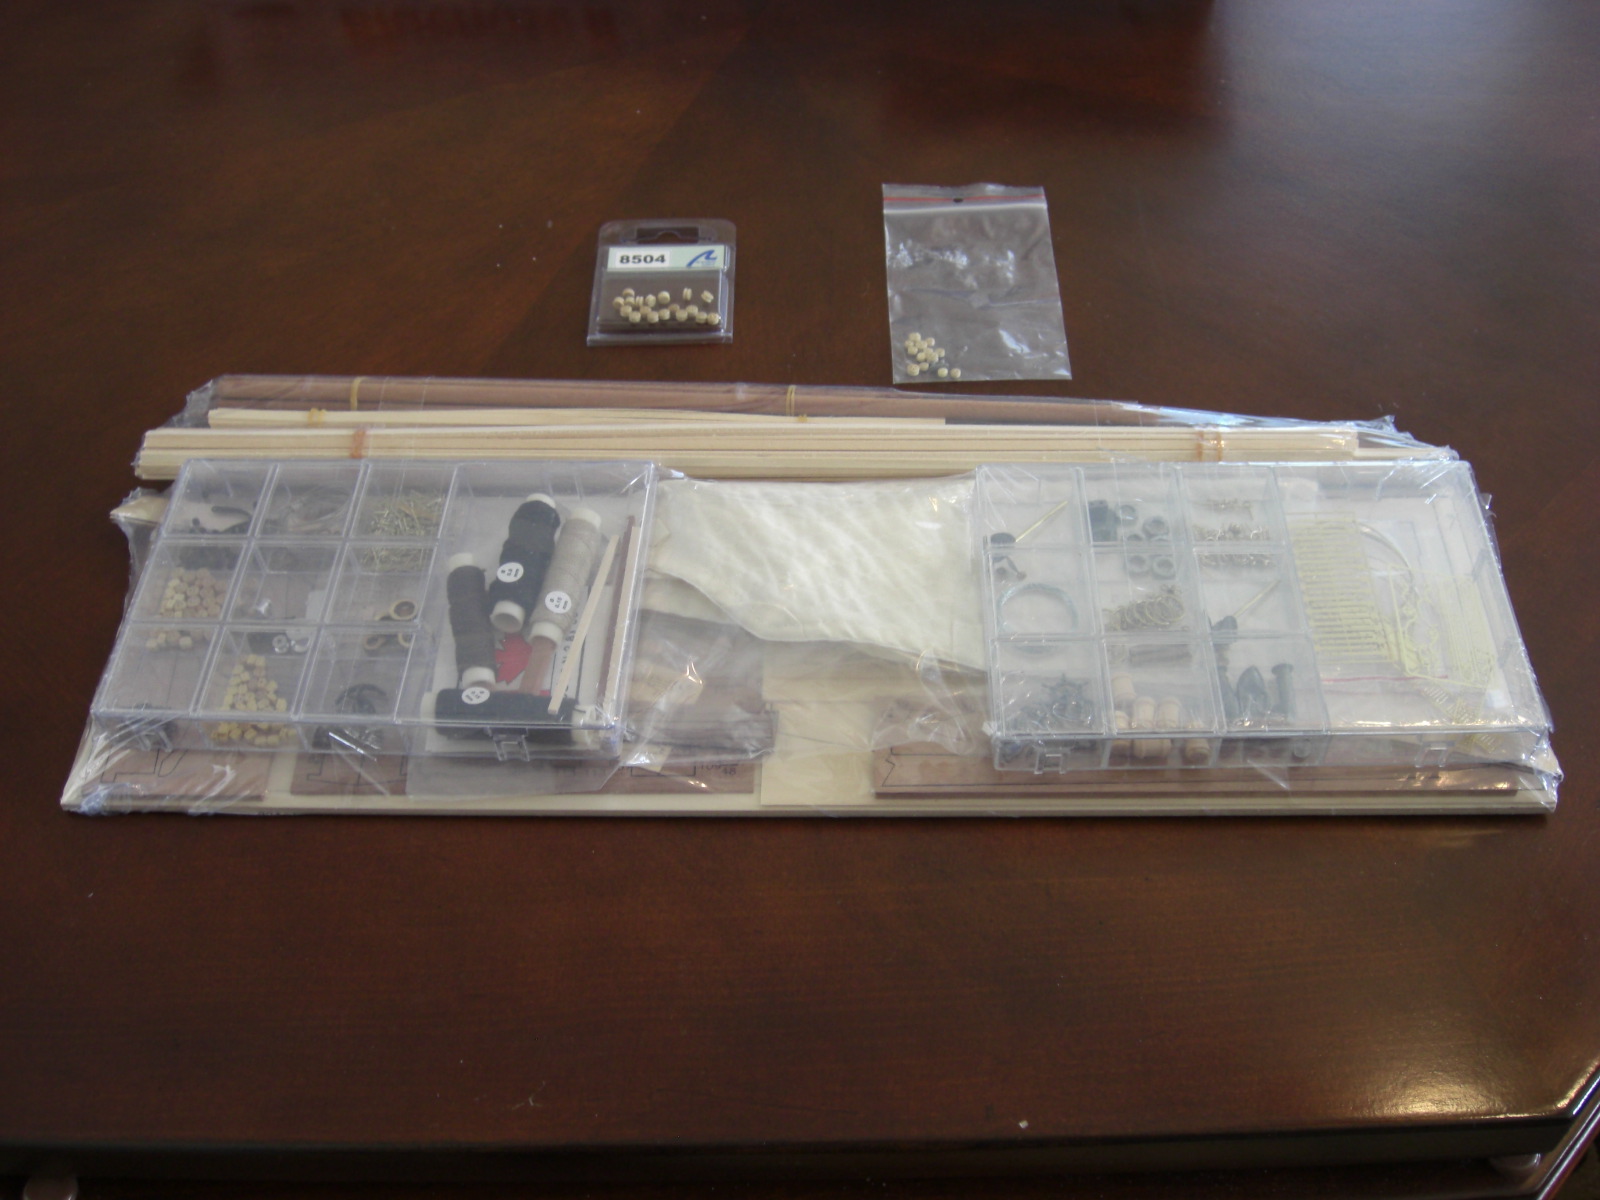
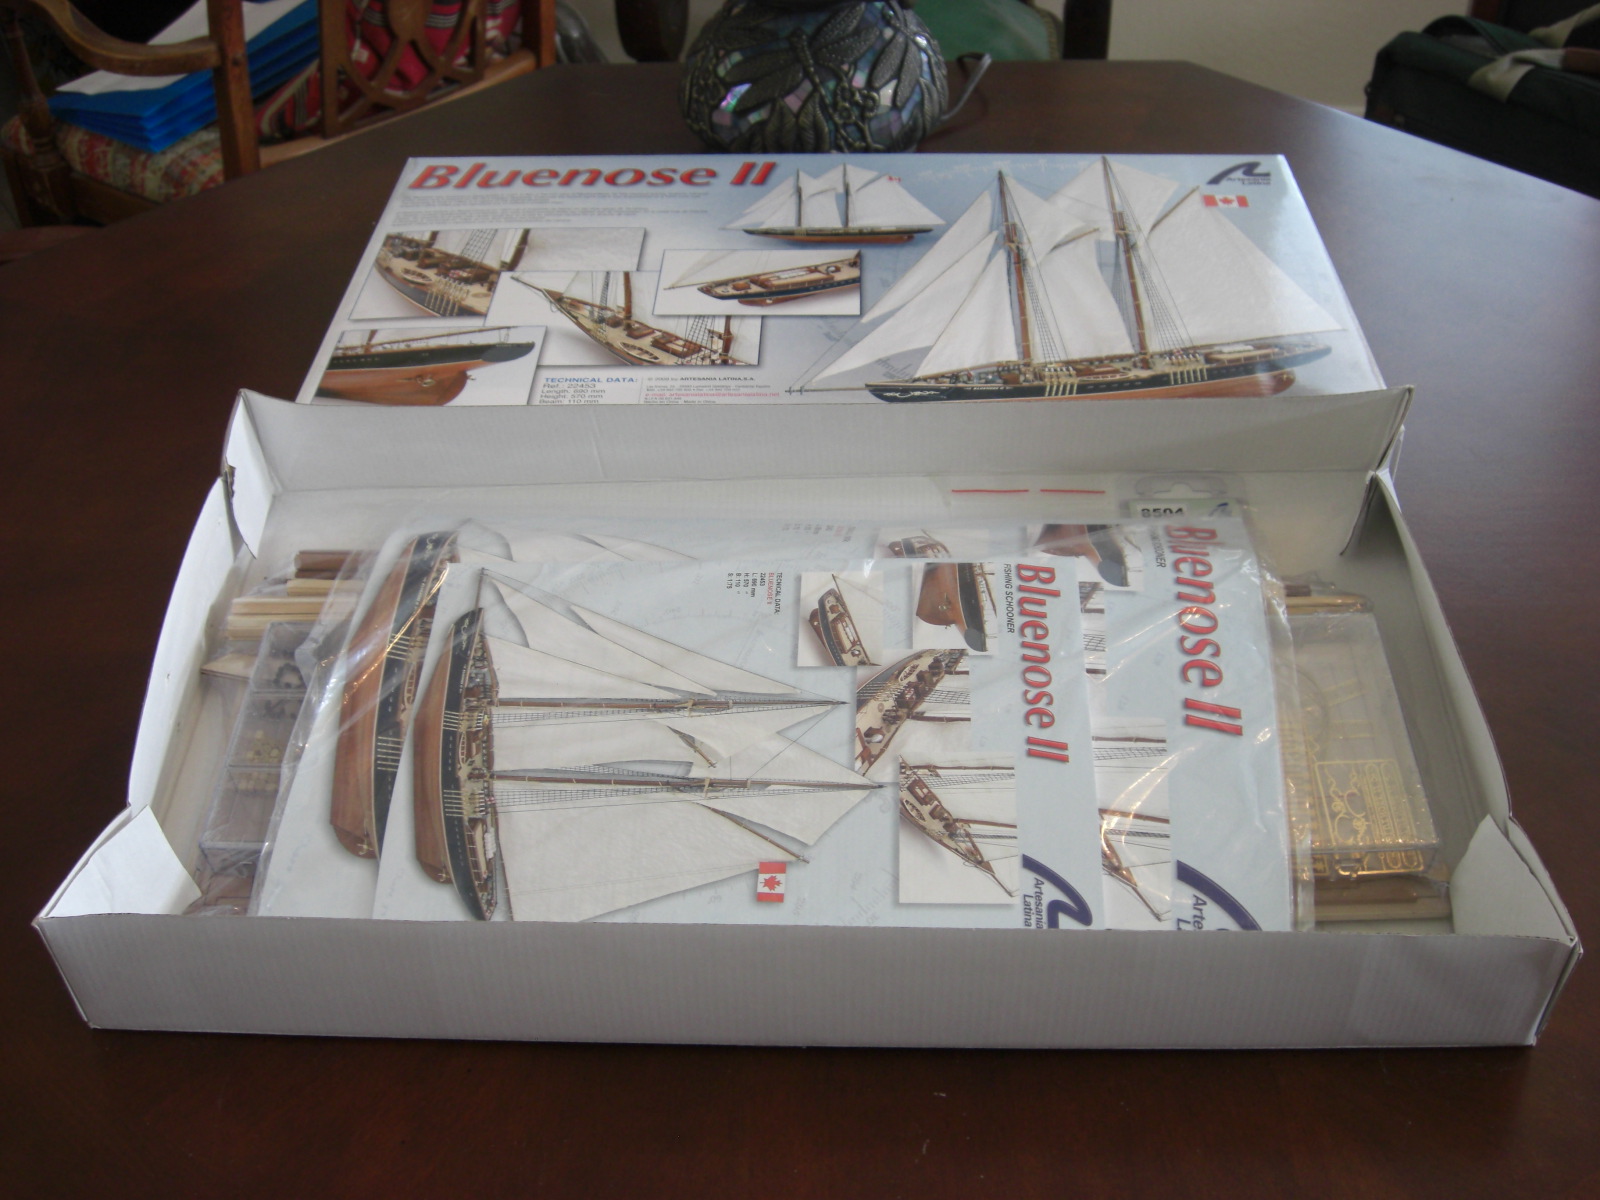
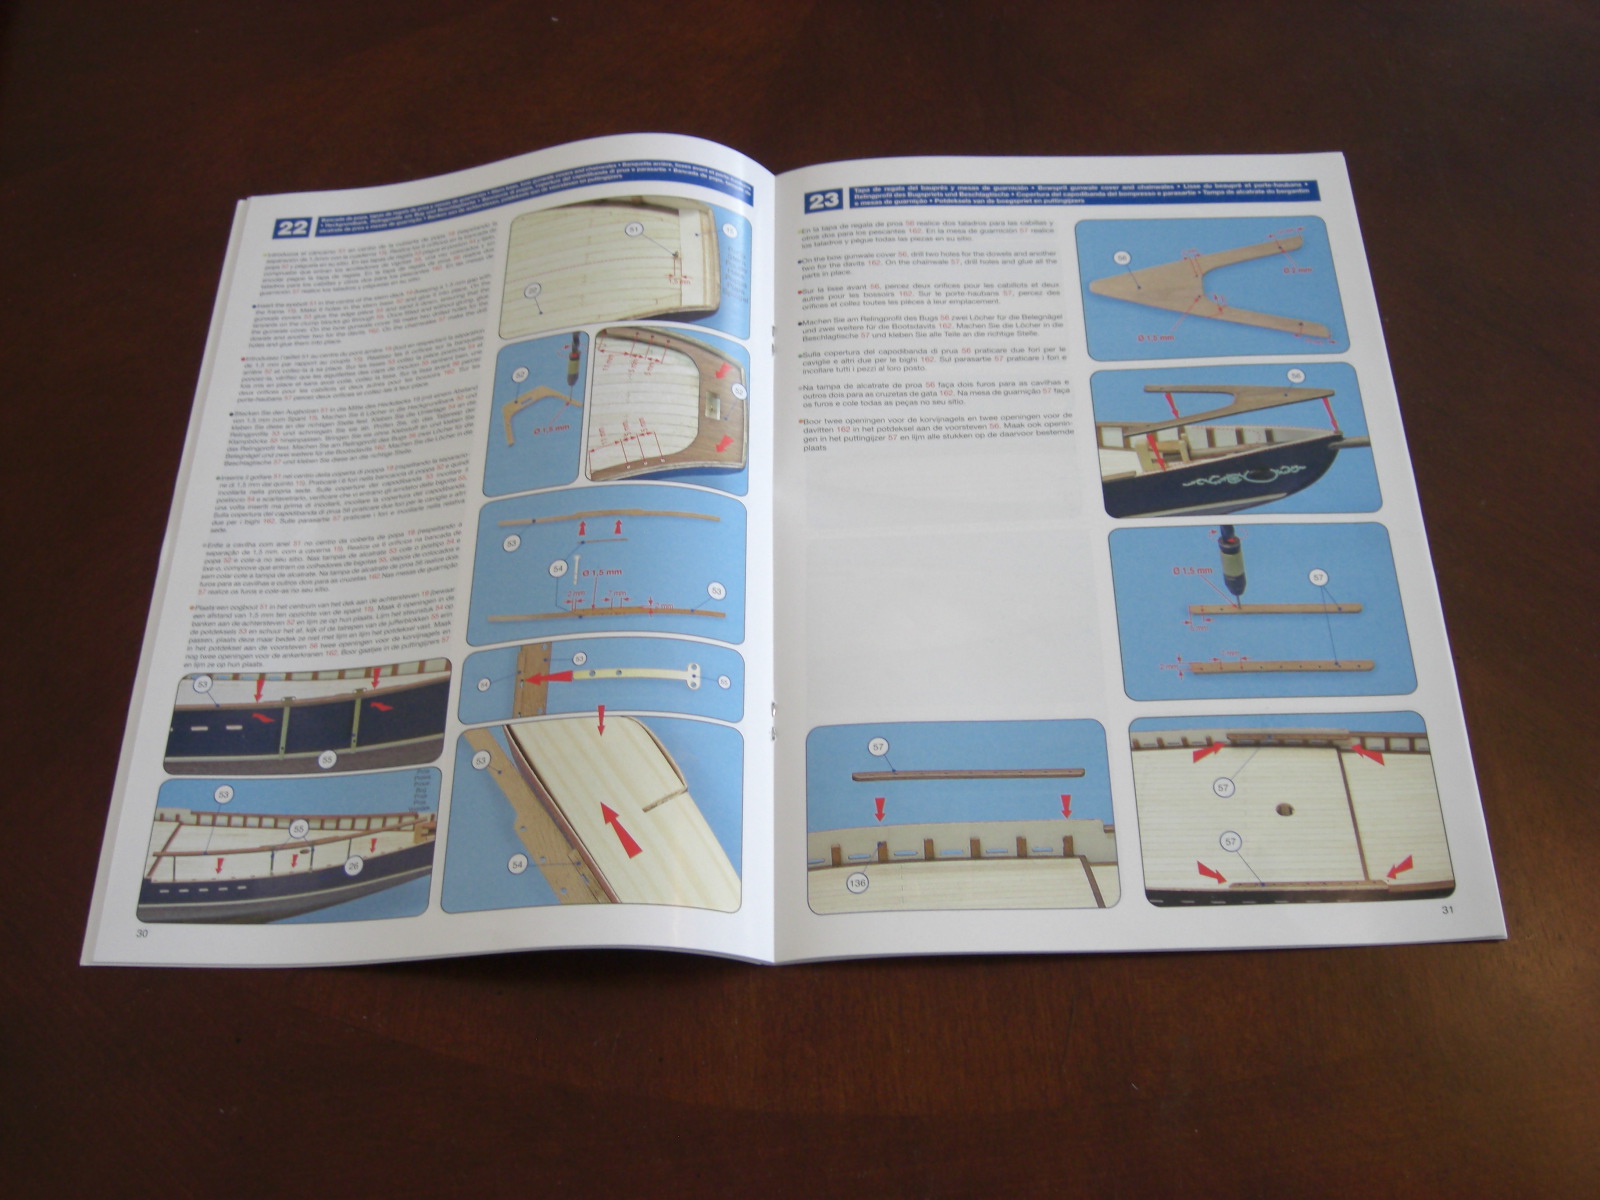
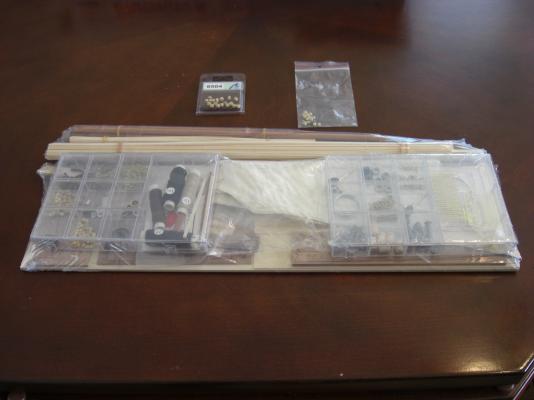
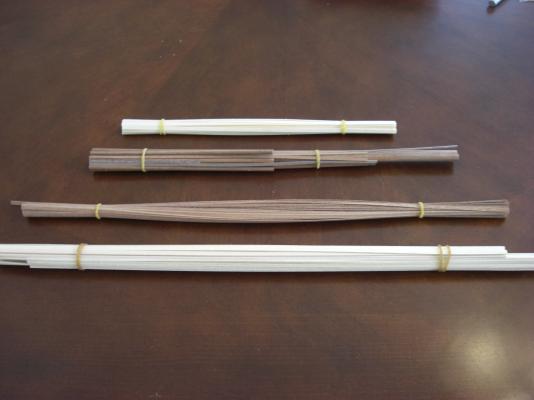
After months of lurking it's time to jump in. My lovely bride gave me this model for my birthday even though I had not gotten very far on the one she had given me the prior year (HMS Supply/1788 aldo AL). Posting progress here will, hopefully, keep me from being sidetracked so often onto other projects. Two instruction manuals - 56 pages (in 7 languages) for the hull and a large format, 22 page one for the masts and rigging. Too bad I can't read all 7 languages to see if they are different.